

Page 1

3-223-637-11 (1)
Remote Commander
Operating Instructions
Bedienungsanleitung
GB
DE
RM-VZ950T
© 2000 Sony Corporation
Page 2

Table of Contents
Features ................................................................................................... 4
Getting Started
Installing the Batteries ............................................................................ 5
When to replace the batteries ....................................................................... 5
Location of Controls ................................................................................ 6
About the LCD display ................................................................................. 7
How to use the Jog dial ................................................................................. 7
Basic Operations
Setting the Component Codes ................................................................. 8
Setting by entering the code number .......................................................... 8
Setting by searching ...................................................................................... 11
Operating Your Components with the Remote Commander ................. 13
Operating a component .............................................................................. 13
Controlling the volume ............................................................................... 15
Operating Non-Preset Components — Learning Function .................... 15
Programming a component signal ............................................................ 15
For accurate Learning .................................................................................. 18
Programming the input select for the amplifier ...................................... 19
Changing or erasing the function of a “learned” button ....................... 21
Advanced Features
Changing the Component Selection Order (MOVE) ............................... 24
Changing the Name of the Component (NAME) .................................... 26
Erasing All Memorised Settings (DELETE).............................................. 30
Erasing all memorised settings from a Setting position number .......... 30
Erasing all memorised settings from the Commander
— Factory Reset ......................................................................................... 31
Turning Off the LCD (DISP) ..................................................................... 33
Setting the time for the LCD to turn off .................................................... 33
Additional Information
Precautions ............................................................................................ 35
Specifications......................................................................................... 35
Troubleshooting ..................................................................................... 36
GB
2
Page 3

Appendix
Table of Preset Functions ....................................................................... 38
TV ................................................................................................................... 38
SAT ................................................................................................................. 39
VCR ................................................................................................................ 39
DVD ............................................................................................................... 40
CD .................................................................................................................. 40
MD.................................................................................................................. 41
TAPE .............................................................................................................. 41
AMP ............................................................................................................... 41
Index ...................................................................................................... 42
GB
GB
3
Page 4

Features
The RM-VZ950T Remote Commander provides centralised control of all
your AV components from a single remote commander and saves the
trouble of operating different AV components with different remote
control devices. The following are its main features.
Centralised control of Sony AV components with this one remote
commander
This Commander is preset at the factory to operate Sony brand
components, so you can use it out of the box as a control centre for your
Sony AV components.
Remote control signals for non-Sony components are also preset
This Commander is preset for most major brands components including
Sony. You can remote control your components by setting their code
numbers (page 8).
Learning function for programming other remote control signals
you need
This Commander has a Learning function, to “learn” remote control
signals to operate non-preset components or functions (page 15).
In addition, the Commander can “learn” remote control signals (infrared
signals only) of non-Audio Visual components such as air-conditioners,
lights, etc. (some specific appliances or functions may not be available)
(page 18).
Reassigning new components
You can assign Setting position numbers to freely operate other
components. This is useful when you have more than two of the same
kind of AV components (page 8).
LCD display and Jog dial for easy monitoring and operation
This Commander has an LCD display that shows the current component
to operate, or the current status during setup (page 7). With the Jog dial,
you can easily select a function to operate, or confirm a setting at various
setup procedures (page 7).
Customisable function display
You can freely change the names of components as you would want to
call them on the display (page 26).
Universal remote commander of high-quality design and material
We carefully designed this universal Commander so that it coordinates
with your living room interior.
The CE mark on the unit is valid only for products marketed
in the European Union.
GB
4
Page 5
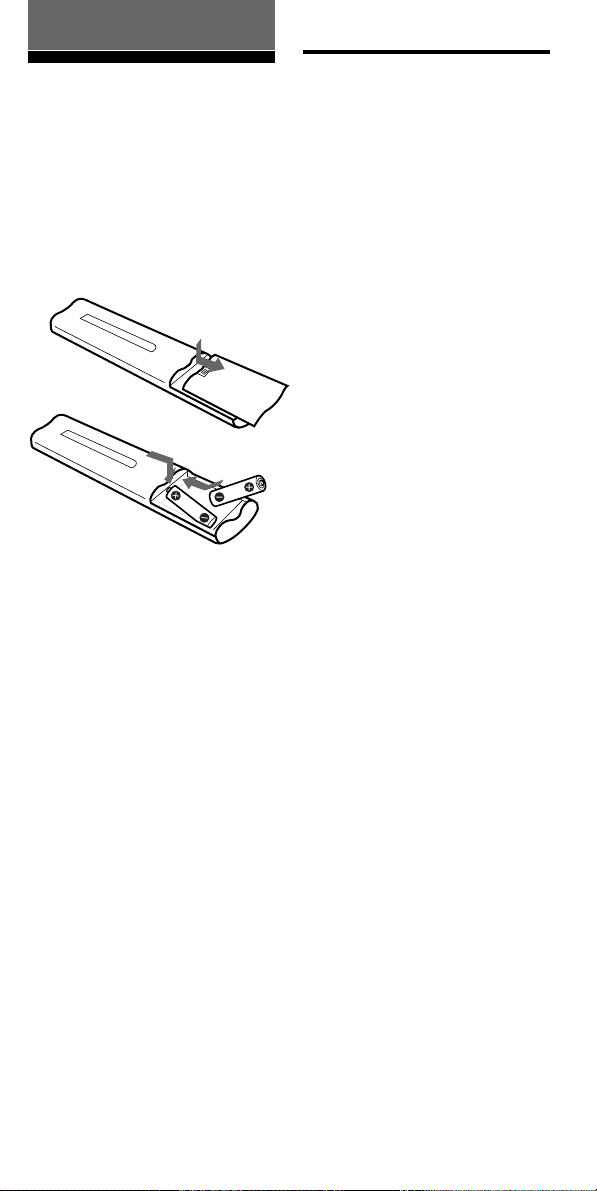
Getting Started
Installing the
Batteries
Slide open the battery
compartment lid and insert two
R6 (size AA) alkaline batteries (not
supplied). Be sure to match the +
and – ends on the batteries to the
diagram inside the battery
compartment.
Insert the negative (–) end first,
then push in and down until the
positive (+) end clicks into
position. When you close the
compartment lid, make sure to fix
its position first.
When to replace the
batteries
Under normal conditions, the
batteries will last up to three
months. When the batteries are
worn out, the LCD display turns
off about ten seconds after you
press any control button. When
you press a button, the LCD
display turns on, and “BATT”
appears in the display. When this
happens, replace the batteries with
new ones.
If you want to save the
batteries
The LCD display of this
Commander usually displays the
last used component name. To
save the batteries, you can also set
the display to turn off while the
Commander is not in use. See
“Turning Off the LCD (DISP)” on
page 33 for details.
Notes on batteries
• Do not mix old batteries with new
ones or mix different types of
batteries together.
• If the electrolyte inside the battery
should leak, wipe the contaminated
area of the battery compartment with
a cloth and replace the old batteries
with new ones. To prevent the
electrolyte from leaking, remove the
batteries when you plan not to use
the Commander for a long period of
time.
• The Commander still holds the
memorised settings even after you
change the batteries. To erase the
memory, see “Erasing All Memorised
Settings (DELETE)” on page 30.
GB
5
Page 6

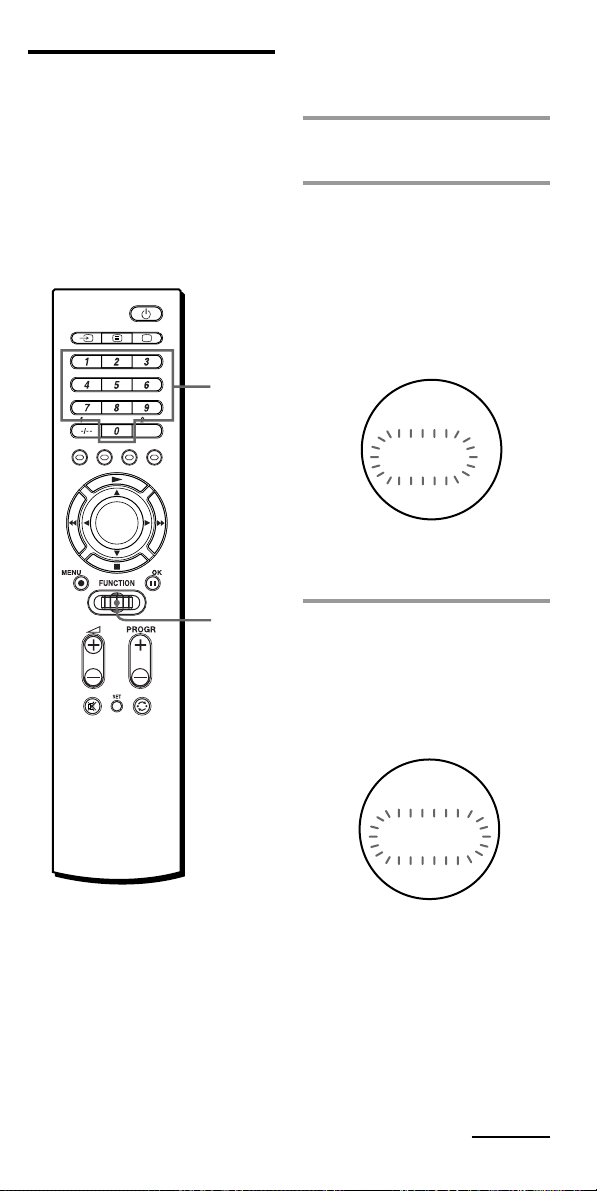
Location of Controls
1 / (Text) button
2 t (Input) button
3 Number buttons
4 -/-- (1-) button
5 Colour buttons
(Red, Green, Yellow, Blue)
6 LCD display
7 MENU z button
8 Jog dial
9 2 (Volume) +/– buttons*
0 (Mute) button*
qa SET button
PRESET
LEARN
MOVE
EXIT
DELETE
DISP.
qs 1 (Power) button
qd a (TV) button
qf 2- button
qg b/B/v/V (Cursor) buttons or
N/x/m/M (Player
control) buttons
qh OK X button
qj PROGR (Programme) +/–
buttons
qk (Recall) button
NAME
* Note on the 2 +/– and
buttons
The Commander controls or mutes
the TV’s volume when you select a
visual component. The Commander
controls or mutes the amplifier’s
volume when you select an audio
component.
Note
The function of control buttons vary
depending on settings/operating
modes.
“Table of Preset Functions” (page 38)
shows how the Commander generally
operates for each component at preset
mode.
These settings can be changed, and
some buttons are used specifically in
the setup procedure as described in the
following pages.
GB
6
Page 7
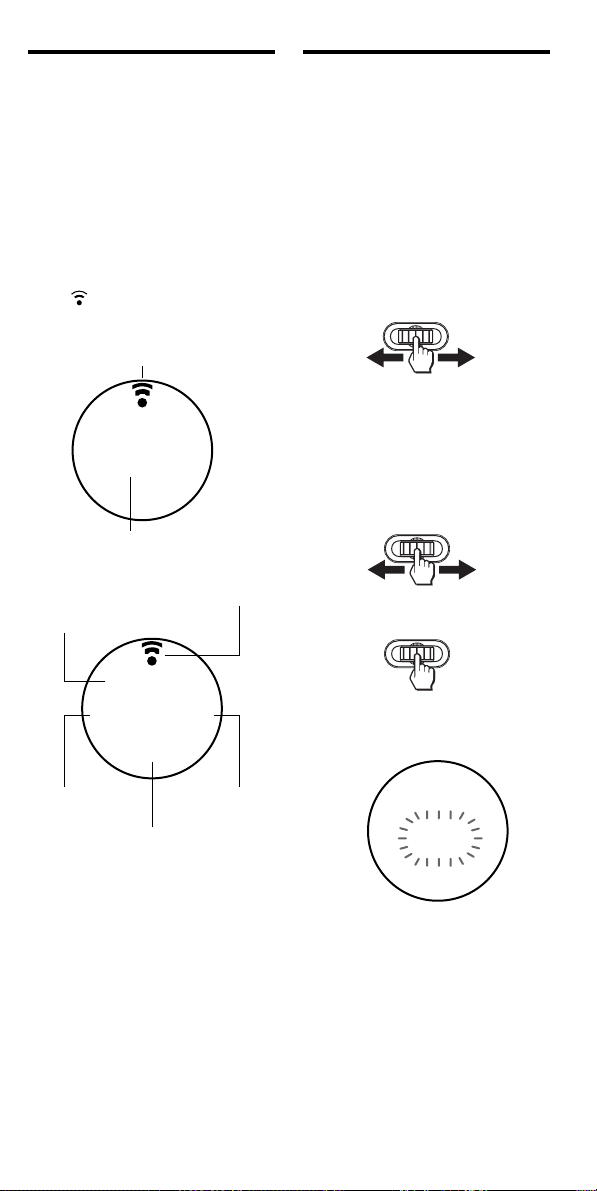
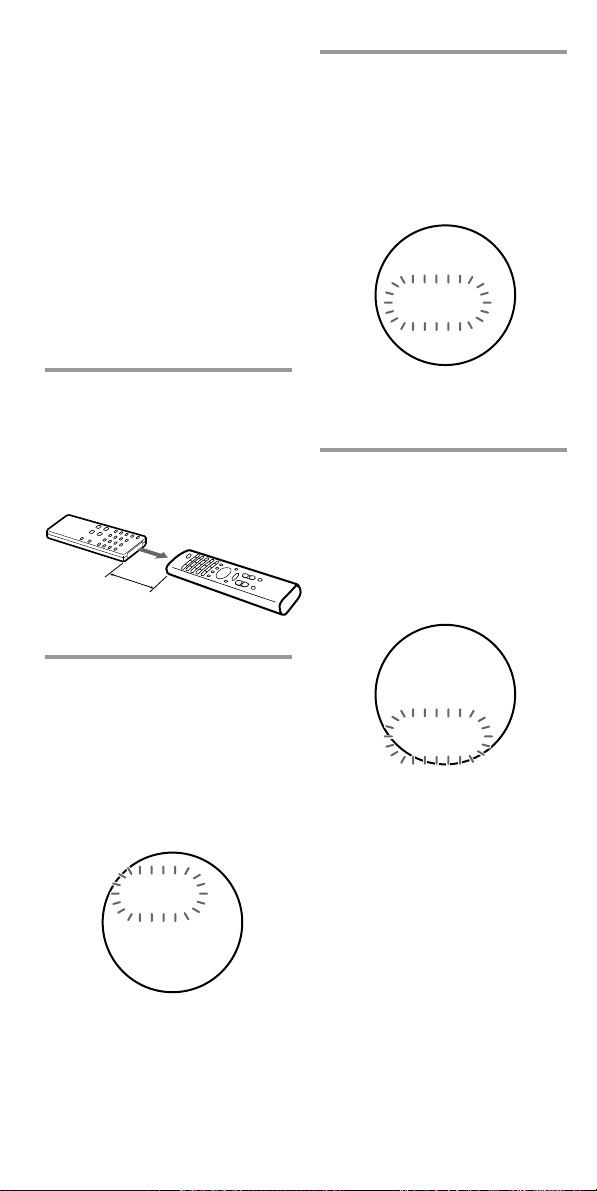
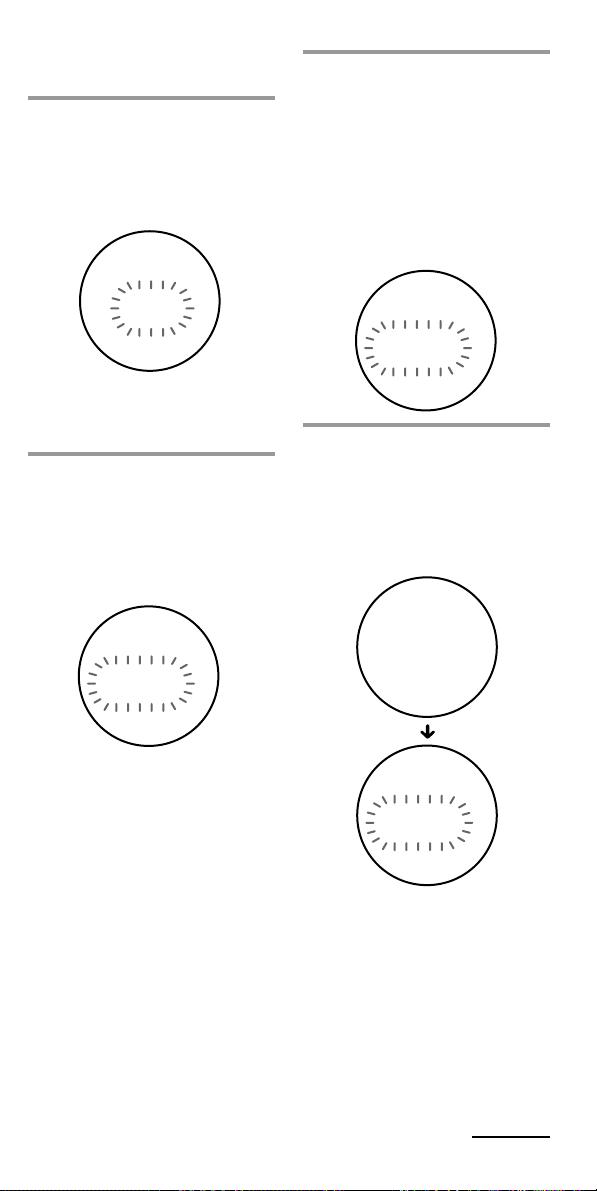
About the LCD display
How to use the Jog dial
The LCD (Liquid Crystal Display)
displays the component in
operation or the current status of
the Commander as shown below.
It also has a backlight that lights
up when you turn or push the Jog
dial during component operations
(does not light up at SET modes).
When a remote control signal is
sent, appears in the display.
Example: At normal mode
Remote control signal indicator
RCV
Current Component
Example: At SET mode
Remote control signal indicator
Setting position number*
-1S
¢
VT¢1
ESETPR
The Jog dial can be used to
perform various operations at the
setup procedure, as well as
selecting the components to
operate.
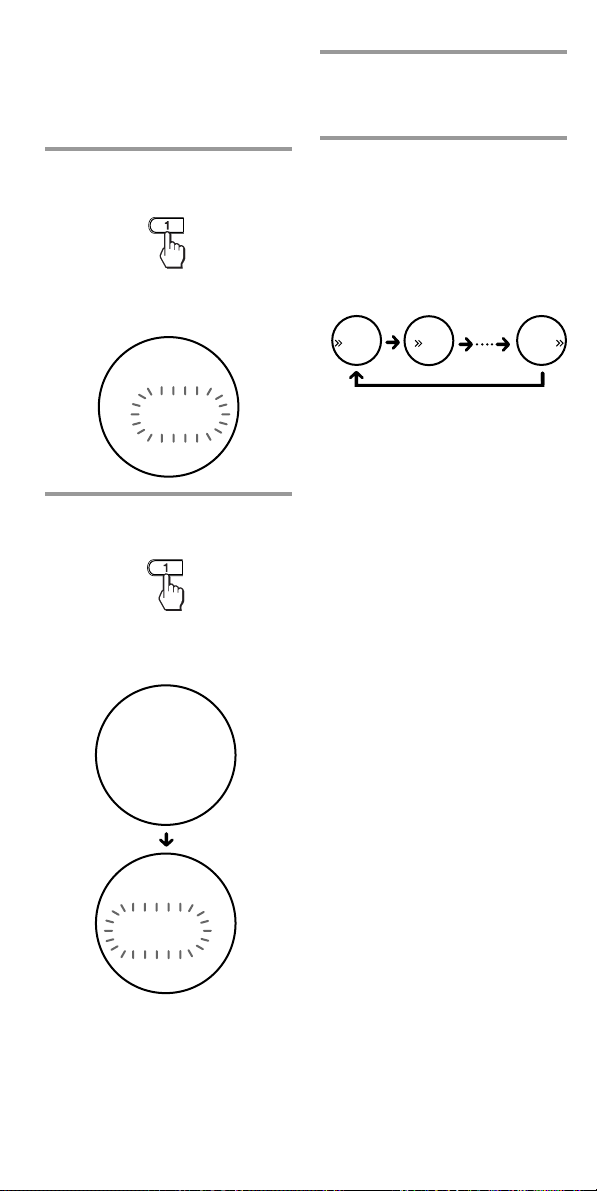
Example: At normal mode
1 Turn the Jog dial to select the
component you want to
operate.
2 Press the button for the desired
function.
Example: At SET mode
1 Turn the Jog dial to select the
Setting position number (“S-1”
to “S-8”).
2 Press to enter.
The component name flashes in
the display.
Component Component
Setting mode
* You can control up to 8 components,
each of which are preset at Setting
position numbers “S-1” to “S-8.”
Note
At normal conditions, the LCD display
shows the last selected component
name. When the batteries are low of
charge, “BATT” appears in the display
after you press a control button.
code number
-1S
VT
ESETPR
Tip
You can also press b/B instead of
turning the Jog dial to the left/right
(except for when you select a character
at the NAME mode).
You can also press OK instead of
pressing the Jog dial.
7
GB
Page 8
Basic Operations
Setting the
Component Codes
The Commander is preset at the
factory to operate Sony brand AV
components (see the table below).
You can use the Commander with
other preset AV components also.
If you are using the Commander
with a factory-set Sony
component, skip the following
procedures.
To use with other AV components,
you need to follow the procedures
to set the correct codes for each
component.
You can set 8 different
components to 8 Setting position
numbers (S-1 to S-8).
Setting
position
number
S-1
S-2
S-3
S-4
S-5
S-6
Display
TV
SAT
(Satellite tuner)
VCR
(Video player)
DVD
CD
MD
Factory setting
Sony TV
Sony SAT
Sony VHS
VCR
Sony DVD
player
Sony CD
player
Sony MD deck
Setting by entering the
code number
7
Jog
dial
2
S-7
S-8
TAPE
(Cassette
deck*)
AMP
(Amplifier)
* Analog audio compact cassette deck
Note
See “Table of Preset Functions” (page
38) for the functions of buttons as for
each component.
GB
8
Sony cassette
deck
Sony amplifier
Tip
You can also press b/B instead of
turning the Jog dial to the left/right.
You can also press OK instead of
pressing the Jog dial.
Page 9
Example: To set up a Philips’ TV
at “S-1/TV”
1 See the tables in the
supplied “Component
Code Numbers,” and find
the three-digit code number
for the desired component.
If more than one code number
is listed, use the number that is
listed first.
For example, to set up a
Philips’ TV, you would use the
code number 086.
2 Press SET.
“PRESET” flashes in the
display, and the Commander
changes to SET mode.
ES
RPET
TSE
3 Press the Jog dial.
The Setting position number
flashes, and the component
name appears in the display.
The Commander changes to
the Component PRESET mode.
-1S
VT
ESETPR
Note
If you have changed the name of
the component (page 26) that name
is displayed.
4 Turn the Jog dial to select
the Setting position number
(“S-1” to “S-8”).
Each time you turn the Jog dial,
the display changes as follows.
S-1
S-2 S-3
TV SAT VCR
EXIT
Notes
• If you have changed the names of
the components (page 26) those
names are displayed.
• If you press the Jog dial at “EXIT,”
the Commander returns to the top
of SET mode (Step 2).
S-8
AMP
S-4
DVD
S-7
TAPE
5 Press the Jog dial.
The component name flashes
in the display.
-1S
¢
VT¢1
ESETPR
Note
The component names displayed at
this point represent the type of the
component to operate. These names
cannot be changed.
If you want to set a different
component to this Setting
position number, turn the Jog
dial to select the desired
component. The display
changes as shown below.
TV SAT VCR DVD CD
EXIT AMP TAPE MD
S-5
CD
S-6
MD
Continued
GB
9
Page 10
Setting the Component Codes
(continued)
Notes
• You cannot set “AMP” at “S-1” to
“S-7.” You can set “AMP” only at
“S-8.”
• If you press the Jog dial at “EXIT,”
the Commander returns to the top
of the Component PRESET mode
(Step 3).
6 Press the Jog dial.
The three-digit code number
next to the component name
flashes in the display.
-1S
¢
VT¢1
ESETPR
Tips
• You can also press PROGR +/– to
go to the next/previous code
number.
• It is useful that you take a note of
the code number.
8 Press the Jog dial.
“OK” appears in the display.
The code number is set, and
the Commander returns to the
Component PRESET mode.
-1S
KO
ESETPR
-1S
7 Press the Number buttons
to enter the three-digit
component code number.
As you press a button, the
number appears from the right
side of the flashing numbers,
and moves to the left when you
press another button.
In this example:
Press 0, 8, 6.
When you set the code
number to “000”
The component set at this Setting
position number does not appear in
the display at normal mode, and
you cannot operate the component.
This is useful when you want to
skip unused components.
To put it back to the display, set the
code number to match your
component.
VT
ESETPR
If “NG” flashes twice and the
three-digit component code
number flashes again after you
press the Jog dial, it means that
the setup is incomplete. Check
the component code number,
and try setting again from Step
7.
If you want to set a code for
another component, repeat
from Steps 4 to 8.
9 Select “EXIT,” then press
the Jog dial to finish setting.
To cancel setup
Press SET.
10
GB
Page 11
Note
If you don’t input anything into the
Commander for over 30 seconds
between each step, the Commander
exits SET mode.
Tips
• If you press the Jog dial at “EXIT” on
each menu, the Commander returns
to the top of the previous mode.
• If you press SET at any point during
this operation, the settings to which
“OK” have been displayed to this
point are saved, and the setup
procedure is cancelled. Start over
from Step 2.
Setting by searching
You can find a code number
available for a component that
doesn’t have one in the supplied
“Component Code Numbers.”
Before starting to search
Set each component to the
following status so that the Search
function works effectively.
TV: Power-on
SAT, VCR, DVD, AMP: Power-off
CD, MD, TAPE: Power-on with a
playback source (disc, cassette
tape, etc.)
2
Jog
dial
2
Tip
You can also press b/B instead of
turning the Jog dial to the left/right.
You can also press OK instead of
pressing the Jog dial.
Continued
11
GB
Page 12
Setting the Component Codes
(continued)
1 Follow Steps 2 to 6 on
pages 9 and 10 to go to the
PRESET mode.
3 Press the Jog dial.
“OK” appears in the display.
The code number is set, and
the Commander returns to the
Component PRESET mode.
2 Aim the Commander at the
component, and press
PROGR + or PROGR – and
1 in turn until the
component reacts as
described in the following.
Powers off: TV
Powers on: VCR, SAT, DVD,
AMP
Plays back: CD, MD, TAPE
Press PROGR + to go to the
next code number.
Press PROGR – to go back to
the previous code number.
After the numbers have
reached the highest limit, they
will start over from “000.”
Each time a remote control
signal is sent, appears in the
display.
-1S
Tip
It is useful that you take a note of
the code number.
-1S
KO
ESETPR
-1S
VT
ESETPR
If you want to set a code for
another component, repeat
from Step 1 to 3.
4 Select “EXIT,” then press
the Jog dial to finish setting.
To cancel setup
Press SET.
Note
If you don’t input anything into the
Commander for over 30 seconds
between each step, the Commander
exits SET mode.
Tips
• If you press the Jog dial at “EXIT” on
each menu, the Commander returns
to the top of the previous mode.
• If you press SET at any point during
this operation, the setup procedure
will be cancelled. Start over from
Step 1.
12
GB
Page 13
Operating Your
Components with the
Remote Commander
When you operate a non-Sony
component, make sure you set the
component code number first
(page 8).
Operating a component
1 Turn the Jog dial to select
the component you want to
operate.
At the factory, the selection
order is preset as follows.
TV SAT VCR DVD
AMP TAPE MD
Notes
• If you have changed the name of
the component (page 26) that
name is displayed.
• You can change the selection
order also (page 24).
CD
2 Press the button for the
desired function.
See “Table of Preset Functions”
(page 38) for the functions of
buttons for each component.
When a remote control signal is
sent, appears in the display.
Jog
dial
VT
Tip
You can skip an unused component
from the selection menu by entering
“000” to the code number (page 10). To
put it back on the display, set the code
number to match your component.
Note
The remote control signals may be
different for some components or
functions. In this case, program the
remote control signals with the
Learning function (see page 15).
Continued
13
GB
Page 14
Operating Your Components
TAPE
VIDEO2VIDEO1
PHONO
INPUT
AUX
TUNER
DVD CDTV
with the Remote Commander
(continued)
Note on buttons that have
already “learned” remote
control signals
If another signal has already been
programmed on that button using
the Learning function (page 15),
that “learned” signal will work
even after you set the component
code number. To use it as a preset
function button, first erase its
“learned” signal (page 21).
When you use a double cassette
deck
1 If the remote control for your
deck has a Deck A/B select
control, the (recall) button on
your Commander has the
corresponding function.
2 If you cannot select Deck A/B
with the (recall) button, first
set the number code for either
one of the decks, and
•set the function controls for
the other deck to other free
buttons (for example, the
Number buttons) using the
Learning function (page 15),
or
•assign the other deck to
another Setting position
number (page 8).
When you select the input
source to the amplifier
1 Turn the Jog dial to select
“AMP,” then press the Jog
dial.
Note
If you have changed the name of
the amplifier (page 26), that name is
displayed.
2 Turn the Jog dial to select
the desired component.
The selection order is as
follows.
Notes
• If the preset amplifier does not
have an input select function, or
you have not “learned” any
functions to the buttons (page 15),
no names are displayed.
• The names and numbers of input
sources vary depending on the
component’s code number,
“learned” functions, or if you
changed the names using the
NAME function (page 26).
3 Press the Jog dial.
appears in the display. The
input source is set, and “AMP”
appears in the display again.
Note
If the input select does not function
properly, you can setup the
Commander using the Learning
function (page 15).
Tip
It is convenient if you program
frequently used input sources to the
Number buttons or Colour buttons
using the Learning function (page 15).
14
GB
Page 15

Controlling the volume
To control the volume of an
audio component (CD, MD, TAPE)
Press 2 +/– to control the
volume, and to mute on the
amplifier.
Example
When you press 2 +/– at “CD,”
you can control the volume of the
amplifier.
You can change this setting also
(page 15).
To control the volume of a
visual component (SAT, VCR,
DVD)
Press 2 +/– to control the
volume, and to mute on the TV.
Example
When you press 2 +/– at “VCR,”
you can control the volume of the
TV.
You can change this setting also
(page 15).
Note
If you have programmed any signal on
the 2 +/– or
“AMP” using the Learning function
(page 15), that signal will not be
transmitted when you control other
components. To use “learned” signals,
you need to program the 2 +/– or
buttons for each component using the
Learning function.
button for “TV” or
Operating Non-Preset
Components
— Learning Function
To operate non-preset components
or functions, use the following
Learning procedure to “teach” any
of the programmable buttons to
operate the functions of another
remote control. You can also use
the Learning function to change
the signals of individual buttons
after setting the component code
number.
It is recommended that you make
a note of the “learned” function
controls.
Note
Some specific remote control signals
may not be “learned.”
Programming a component
signal
Jog
dial
2
Continued
GB
15
Page 16
Operating Non-Preset
Components
— Learning Function (continued)
Tip
You can also press b/B instead of
turning the Jog dial to the left/right.
You can also press OK instead of
pressing the Jog dial.
Example: To program the N
(Play) signal of your component
to the VCR N (Play) button of
the Commander
You can “teach” to “AMP” only at
“S-8.” See also page 18.
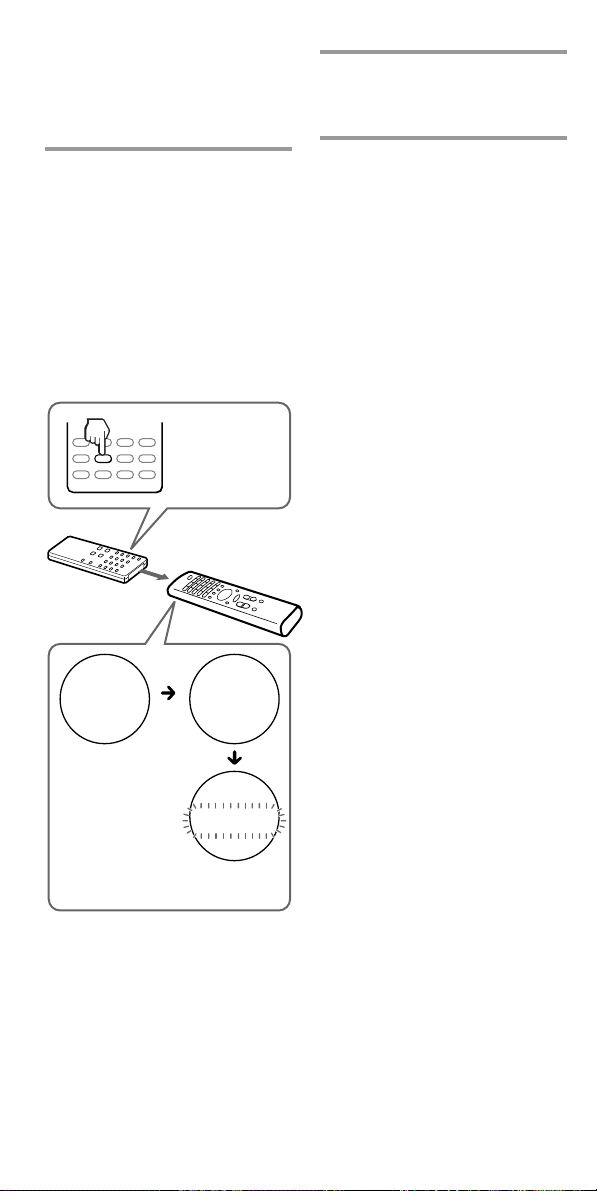
1 Place the RM-VZ950T head
to head with your
component’s remote
control.
Remote control for
your component
about 5 – 10 cm
(2 – 4 inches) away
RM-VZ950T
3 Turn the Jog dial to select
the Setting position number
(“S-1” to “S-8”) of the
component you want to set
up. Then press the Jog dial.
The component name flashes
in the display.
-3S
CV
R
ARNLE
Note
If you have changed the name of
the component (page 26), that name
is displayed.
4 Press the button on the
Commander you want to
“teach.”
The component name stops
flashing, and “LEARN” flashes
rapidly in the display
(Learning function standby).
2 Press SET, turn the Jog dial
to select “LEARN,” then
press the Jog dial.
The Setting position number
flashes, and the component
name appears in the display.
The Commander changes to
the LEARN mode.
-1S
VT
ARNLE
Note
If you have changed the name of
the component (page 26), that name
is displayed.
GB
16
-3S
CV
R
ARNLE
If another signal has already
been “learned” by that
button
“NG” flashes twice, and the
component name flashes again.
Either “teach” to another free
button, or erase the already
“learned” function (page 21)
and start over from the
beginning.
Page 17

5 Press and hold the button
on the other remote control,
until “OK” appears in the
display.
During data transfer, “LEARN”
stops flashing.
After data transfer is complete,
“OK” appears in the display.
Then, the Commander returns
to its state in Step 3.
remote control
of component
-3S
R
CV
ARNLE
during data
transfer
-3S
O
K
ARNLE
-3S
R
CV
ARNLE
data transfer
complete
If “NG” flashes twice, and
the component name
flashes again
Learning was unsuccessful. Try
again from Step 4.
6 Repeat Steps 4 and 5 to
“teach” functions to other
buttons.
7 Select “EXIT,” then press
the Jog dial to finish
Learning.
To cancel Learning
Press SET.
Notes
• If you do not perform Learning steps
within 30 seconds at any point during
the process, the LEARN mode ends.
• If you do not perform Step 5 within
10 seconds after Step 4, the
Commander returns to its state in
Step 3.
• You cannot teach to the Jog dial and
the SET button.
• If the memory of the commander is
full, “OVER” flashes, and the
Commander returns to its state in
Step 3. Erase the already “learned”
function (page 21) and start over from
the beginning.
If the Commander does not
seem to be working
If the “learned” button does not
operate properly, “teach” once again.
(For example, if the volume becomes
very loud after pressing 2 + only
once, noise may have interfered during
the Learning procedure.)
If you set a component code
after “learning” a signal
If you have programmed any signal on
a button by the Learning function, that
signal will work even after you set a
component code.
Note on the REC z signal
You can only “teach” to one button at a
time. Therefore you cannot teach a
sequential button operation (for
example REC z + N) to a single
button on your Commander.
Continued
GB
17
Page 18

Operating Non-Preset
Components
— Learning Function (continued)
When you “teach” signals to the
2 +/– or
If you have programmed any
signal on the 2 +/– or button
for “TV” or “AMP” using the
Learning function, that signal will
not be transmitted. To use
“learned” signals, you need to
program the 2 +/– or buttons
for each component using the
Learning function.
When you “teach” the signals
for an air-conditioner or
illumination
If you have unused components or
unused control buttons on your
Commander, you can “teach” the
signals for non-Audio Visual
components such as an air
conditioner.
Note
If you are “teaching” signals for an air
conditioner, you may need to perform
Learning anew every season.
When you “teach” the signals
for the amplifier
At Step 3 (page 16), the display
changes as shown below after
pressing the Jog dial.
buttons
MPA
PU
NIT
ARNLE
Proceed “learning” from Step 4 to
7.
You can also “teach” the input
select (page 19).
For accurate Learning
•Do not move the remote units
during the Learning procedure.
•Be sure to keep holding down
the “learning” button until your
Commander reacts as described.
•Use fresh batteries in both
remote units.
•Avoid Learning in places under
direct sunlight or a strong
fluorescent light.
•The remote control detector area
may differ depending on each
remote unit. If Learning does not
work, try changing the positions
of the two remote control units.
•When you “teach” signals of an
interactive signal exchange
system remote control unit
(supplied with some of Sony’s
receivers and amplifiers) to the
Commander, the response signal
of the main unit may interfere
with the Learning of the
Commander. In such a case,
move to a place where the
signals will not reach the main
unit (e.g. other rooms, etc.).
IMPORTANT
Be sure to place the
Commander out of the reach of
small children or pets.
Components such as air
conditioners, heaters, electric
appliances, and electric
shutters or curtains receiving
an infrared signal can be
dangerous if misused.
Note
For details on the learnable remote
control signals, see
“Specifications” on page 35.
18
GB
Page 19
Programming the input
select for the amplifier
If you cannot select the input
source even after setting the code
number (page 8), you can “teach”
the function directly from the
amplifier’s remote commander.
Note
You can operate the amplifier only at
“S-8.”
Jog
dial
1 Follow Step 1 to 2 on page
16 to go to the LEARN
mode.
2 Turn the Jog dial to select
“S-8,” Then press the Jog
dial.
“AMP” appears and
“VIDEO1” flashes in the
display.
MPA
DE
IVO1
ARNLE
Continued
GB
19
Page 20
Operating Non-Preset
Components
— Learning Function (continued)
4 Select “EXIT,” then press
the Jog dial to finish
Learning.
3 Press and hold the input
select button (e.g. VIDEO or
CD etc.) on your amplifier’s
remote control, until “OK”
appears in the display.
During data transfer, “LEARN”
stops flashing.
After data transfer is complete,
“OK” appears in the display.
Then, the Commander returns
to its state in Step 2.
remote control
of amplifier
MPA
K
O
ARNLE
MPA
IV
DEO1
ARNLE
VIDEO
To cancel Learning
Press SET.
during data
transfer
IV
data transfer
complete
If “NG” flashes twice, and
the component name
flashes again
Learning was unsuccessful. Try
again from this Step.
GB
20
MPA
DEO1
ARNLE
Page 21
Changing or erasing the
function of a “learned”
button
To change the “learned” function,
erase it first and perform Learning
again.
To erase the “learned” function
of a single button
4,5
Jog
dial
Example: To erase the “learned”
function from the VCR Number
button 1
1 Follow Step 2 on page 16 to
go to the LEARN mode.
2 Turn the Jog dial to select
the Setting position number
(“S-1” to “S-8”) of the
component you want to
erase. Then press the Jog
dial.
The component name flashes
in the display.
-3S
R
CV
ARNLE
Note
If you have changed the name of
the component (page 26) that name
is displayed.
3 Turn the Jog dial to select
“DEL,” then press the Jog
dial.
“DEL” appears in the first row,
and “KEY?” flashes in the
display.
Tip
You can also press b/B instead of
turning the Jog dial to the left/right.
You can also press OK instead of
pressing the Jog dial (except for the
following Steps 4 and 5).
ELD
EY
K?
ARNLE
Continued
21
GB
Page 22
Operating Non-Preset
Components
— Learning Function (continued)
6 Select “EXIT,” then press
the Jog dial to finish
erasing.
4 Press the button you want
to erase.
“OK?” flashes rapidly in the
display.
ELD
OK
?
ARNLE
5 Press the same button
again.
“OK” stops flashing, and the
component name flashes again.
ELD
Notes
• If you exit SET mode by pressing SET,
nothing is erased.
• It may take a few seconds to finish
erasing depending on the amount of
memory to be erased. In this case, a
processing indicator appears in the
display. Wait until this indicator
disappears.
OK
ARNLE
-3S
R
CV
ARNLE
If you want to erase the
“learned” function from
another button, repeat from
Step 3 to 5.
GB
22
Page 23
To erase all function signals
“learned” for a specific
component
Jog
dial
Example: To erase all functions
“learned” by the “VCR” mode
1 Follow Steps 1 to 3 on page
21. Then turn the Jog dial
until the component name
flashes rapidly in the
display.
ELD
R
CV
ARNLE
Note
If you have changed the name of
the component (page 26) that name
is displayed.
2 Press the Jog dial.
“OK?” flashes rapidly in the
display.
ELD
OK
?
ARNLE
Tip
You can also press b/B instead of
turning the Jog dial to the left/right.
You can also press OK instead of
pressing the Jog dial.
Continued
GB
23
Page 24
Operating Non-Preset
Components
— Learning Function (continued)
3 Press the Jog dial again.
“DEL OK” appears in the
display, and the component
name flashes again.
Advanced Features
Changing the
Component Selection
Order (MOVE)
At the factory, the Commander is
preset to change the component in
the following order. However, you
can change the order as you like.
TV
SAT
VCR
DVD
ELD
OK
ARNLE
-3S
R
CV
ARNLE
Note
In some cases, a processing
indicator (see Notes on page 22)
might appear in the display. Wait
until this indicator disappears.
4 Select “EXIT,” then press
the Jog dial to finish
erasing.
To exit SET mode, press SET.
AMP
TAPE
MD
CD
Jog
dial
1
24
GB
Tip
You can also press b/B instead of
turning the Jog dial to the left/right.
You can also press OK instead of
pressing the Jog dial.
Page 25
Example: To move “VCR”
between “TAPE” and “AMP”
1 Press SET, turn the Jog dial
to select “MOVE,” then
press the Jog dial.
The Commander changes to
the MOVE mode.
VT
VEMO
Note
If you have changed the name of
the component (page 26) that name
is displayed.
2 Turn the Jog dial to select
the desired component you
want to move, then press
the Jog dial.
The selected component name
flashes rapidly.
3 Turn the Jog dial to select a
component in front of
where you want to set the
selected component.
While you scroll through the
menu, all other component
names also flash rapidly.
In this example:
Select “AMP.”
P
MA
VEMO
4 Press the Jog dial.
“OK” appears in the display
for one second. The component
selection order is fixed, and the
previously selected component
name flashes again.
OK
R
CV
VEMO
VEMO
R
CV
VEMO
Continued
GB
25
Page 26
Changing the Component
Selection Order (MOVE)
(continued)
The component selection order
is changed as follows.
VCR AMP TV SAT
TAPE MD CD
If you want to move the
position again, repeat Steps 3
and 4.
DVD
5 Select “EXIT,” then press
the Jog dial to finish setting.
To cancel setup
Press SET.
Note
If you have set the code number “000”
for a component (page 10), it is not
displayed.
Tip
You can also skip an unused
component by setting its code number
to “000” (page 10).
Changing the Name
of the Component
(NAME)
You can change the name of the
component to operate. This is
convenient when you are using
more than one of the same
component.
You can write up to six characters
for the component name.
5
26
GB
Jog
dial
1,7
Tip
You can also press b/B instead of
turning the Jog dial to the left/right
(except for when you select a character
to write a name).
You can also press OK instead of
pressing the Jog dial.
Page 27

Example: To change “VCR” to
“SONYDV”
1 Press SET, turn the Jog dial
to select “NAME,” then
press the Jog dial.
The Setting position number
flashes, and the component
name appears in the display.
The Commander changes to
the NAME mode.
If you want to change the name
of the amplifier’s input source,
press the Jog dial again.
The input source name flashes
in the display.
MPA
DE
IVO1
MENA
-1S
VT
MENA
Note
If you already have changed the
name of the component, that name
is displayed.
Tips
• It is recommended that you look
at your note on the component
code list when write the names.
• If you press the Jog dial at
“EXIT”at any point during
operation, the Commander
returns to the previous mode.
2 Turn the Jog dial to select
the component name you
want to change, then press
the Jog dial.
The component name flashes
in the display.
-3S
R
CV
MENA
3 Press the Jog dial.
A cursor flashes on the first
character of the component
name.
-3S
R
CV
MENA
4 Turn the Jog dial to select a
desired character.
The selected character and the
cursor flash in turn.
-3S
CR
VS
MENA
Continued
GB
27
Page 28

Changing the Name of the
Component (NAME) (continued)
Each time you turn the Jog dial,
the characters change as listed
below:
Capital letters of the English
alphabet.
Small letters of the English
alphabet.
Numbers 0 to 9
Symbols –, . (dot), /, ?, :
(colon), @, <<, >>, (space)
After you finish entering the
sixth character, “EXIT” flashes
in the display.
IT
XE
MENA
6 Press the Jog dial.
The component name of the
next Setting position number
flashes in the display.
Tip
It is useful that you take a note of
the names.
5 Press the Jog dial to move
to the next character field,
and enter the next
character.
You can enter up to six
characters.
You can freely change a
character by pressing b or B to
move the cursor to the desired
character field.
-3S
R
CS
MENA
Note
If you press SET during this
procedure, the name written thus
far is saved as the new name.
-4S
D
VD
MENA
If you want to change the name
for another component, repeat
from Step 3.
7 Press SET.
The newly written component
name appears in the display.
NYOSDV
28
GB
Page 29

To reset the name of the
component back to the initial
factory preset
Jog
dial
Example: To reset the changed
name at “S-3” to the factory
preset
1 Follow Steps 1 to 2 on page
27. Then turn the Jog dial to
select “INIT.”
“INIT.” flashes in the display.
-3S
IT
NI.
MENA
2 Press the Jog dial.
The factory preset component
name of the selected Setting
position number flashes in the
display.
-3S
R
CV
MENA
Tip
You can also press b/B instead of
turning the Jog dial to the left/right.
You can also press OK instead of
pressing the Jog dial.
If you want to reset the names
for other Setting position
numbers, turn the Jog dial to
select “EXIT,” press the Jog
dial, and repeat from Steps 1 to
2.
3 Select “EXIT,” then press
the Jog dial to finish setting.
29
GB
Page 30

Erasing All
Memorised Settings
(DELETE)
You can erase the memorised
settings, such as component code
numbers or names, or “learned”
settings to a Setting position
number, or all memorised settings
and reset the Commander to the
initial factory settings.
Erasing all memorised
settings from a Setting
position number
Tip
You can also press b/B instead of
turning the Jog dial to the left/right.
You can also press OK instead of
pressing the Jog dial.
1 Press SET, and turn the Jog
dial to select “DELETE.”
“DELETE” flashes in the
display.
LE
EDTE
TSE
2 Press the Jog dial.
The Setting position number
flashes, and the component
name appears in the display.
The Commander changes to
the DELETE mode.
-1S
30
GB
Jog
dial
1
VT
LDE
Note
If you have changed the name of
the component (page 26) that name
is displayed.
3 Turn the Jog dial to select
the desired component,
then press the Jog dial.
“OK?” flashes rapidly in the
display.
-1S
OK
?
LDE
Page 31

4 Press the Jog dial.
“OK” appears in the display
for one second. All settings to
the selected Setting position
number are deleted. The
Setting position number
flashes, and the original
component name appears in
the display.
-1S
OK
LDE
Erasing all memorised
settings from the
Commander
— Factory Reset
-1S
VT
LDE
If you want to delete the
memorised setting from
another Setting position
number, repeat from Step 3.
5 Select “EXIT,” then press
the Jog dial to finish
erasing.
Jog
dial
Tip
You can also press b/B instead of
turning the Jog dial to the left/right.
You can also press OK instead of
pressing the Jog dial.
Continued
GB
31
Page 32

Erasing all Memorized Settings
(DELETE) (continued)
1 Follow Steps 1 to 2 on page
30 to go to the DELETE
mode.
2 Turn the Jog dial to select
“ALL.”
“ALL” flashes in the display.
LL
A
LDE
3 Press the Jog dial.
“ALL OK?” flashes rapidly in
the display.
LLA
OK
?
LDE
Note
Through this operation, all
“learned” functions as well as the
component code numbers, the
names of the components, and the
component selection order are reset
to the factory setting.
4 Press the Jog dial.
“ALL OK” appears, and “DEL”
flashes in the display.
LLA
OK
LDE
All settings are erased, and the
Commander returns to the
factory preset.
GB
32
Page 33

Turning Off the LCD
(DISP)
You can turn off the LCD display
when the Commander is not in
use to save the batteries. You can
set the time for the display to turn
off at 10 to 240 seconds (4 minutes)
in increments of 1 second. By
setting the LCD to turn off, you
can increase the battery life from 1
to 3 times longer than at normal
use.
Setting the time for the
LCD to turn off
4
Tip
You can also press b/B instead of
turning the Jog dial to the left/right.
You can also press OK instead of
pressing the Jog dial.
Example: To set the LCD to turn
off after 30 seconds
1 Press SET, and turn the Jog
dial to select “DISP.”
“DISP.” flashes in the display.
SP
ID.
TSE
2 Press the Jog dial.
“ON” flashes in the display.
The Commander changes to
the DISP mode.
N
O
SDI P.
Jog
dial
4
1
Note
The battery life varies depending
on how you use the Commander
and the time for the LCD to turn
off.
3 Turn the Jog dial to select
“OFF.”
The time for the LCD to turn
off flashes in the display.
FFO
1¢
s
SPD.I
Continued
33
GB
Page 34

Turning Off the LCD (DISP)
(continued)
6 Select “EXIT,” then press
the Jog dial to finish setting.
4 Press the Number buttons
to enter the time for the
LCD to turn off.
In this example:
Press 3, 0
You can also press PROGR + or
PROGR – to enter the time.
5 Press the Jog dial.
“OK” appears in the display
for one second. The time for
the LCD to turn off is set, and
the Commander returns to the
top of SET mode.
FFO
OK
SDI P.
To cancel setup
Press SET.
SP
ID.
TSE
If “NG” flashes twice
The input time is not effective. Try
again from Step 4.
GB
34
Page 35

Additional Information
Precautions
•Do not drop the unit or give a
shock to the unit, or it may cause
a malfunction.
•Do not leave the unit in a
location hear heat sources, or in
a place subject to direct sunlight,
excessive dust or sand, moisture,
rain or mechanical shock.
•Do not put foreign objects into
the unit. Should any liquid or
solid object fall into the unit,
have it checked by qualified
personnel before operating the
unit any further.
•Do not expose the remote control
detectors of your components to
direct sunlight or other strong
illumination. Too much light
there can interfere with remote
control operations.
•Be sure to place the Commander
out of the reach of small children
or pets. Components such as air
conditioners, heaters, electric
appliances, and electric shutters
or curtains receiving an infrared
signal can be dangerous if
misused.
Specifications
Operating distance
Approx. 10 m (32.8 ft.) (varies
depending on components of
different manufacturers)
Power requirements
Two R6 (size AA) alkaline batteries
(not supplied)
Battery life
Approx. 3 months (varies depending
on frequency of use)
Dimensions
Approx. 49 × 230 × 25 mm (1 15/16 × 9
1
/8 × 1 in.) (w × h × d)
Mass
210 g (7 oz) (including alkaline
batteries)
Learnable signals*
Capacity per signal: up to 250 bit
Signal frequency range: up to 500
kHz
Signal interval: up to 400 ms
Number of learnable keys: up to 260
keys (varies depending on learned
signals)
* Some signals cannot be learned by
the Commander, even though the
signals comply with these
specifications.
Design and specifications are subject to
change without notice.
35
GB
Page 36

Troubleshooting
If you have problems setting up or using the Remote Commander, first
check the batteries (page 5), then check the items below.
Symptom
You cannot operate the
components.
You cannot control the
volume.
You cannot operate the
components even after
setting the component
code numbers.
The Commander fails to
learn the remote control
signals.
Remedy
• Go closer to the component. The maximum operating
distance is approximately 10 m (32.8 ft.).
• Aim the Commander directly at the component, and make
sure there are no obstructions between the Commander and
the component.
• Power on the components first, if necessary.
• Make sure you have selected the correct component.
• Check that the component has infrared remote capability. For
example, if your component didn’t come with a remote
commander, it probably isn’t capable of being controlled by a
remote commander.
• The component name in the display does not correspond to
the component in operation. Check the component assigned
to that Setting position number and the component code.
• If your visual components are connected to an audio system,
select “AMP” on your Commander to control the volume.
You can also “teach” the amplifier’s singal to the 2 +/–
buttons for each of your visual components on your
Commander.
• If you have programmed any signal on the 2 +/– button for
“TV” or “AMP” using the Learning function (page 15), that
signal will not be transmitted when you control other
components. To use “learned” signals, you need to program
the 2 +/– buttons for each component using the Learning
function.
• Set the component code correctly. If the code that is listed first
for your component doesn’t work, try all the codes for your
component in the order in which they are listed in the
supplied “Component Code Numbers”.
• Some features may not be preset. If some or all of the buttons
do not function correctly even after you have set the
component codes, then use the Learning function to program
the remote control signals for the component (page 15).
• The component may be operated with a code number that is
not listed in the “Component Code Numbers”. See “Setting
by searching” (page 11) and try setting a code number again.
• When you “teach” signals of an interactive signal exchange
system remote control unit (supplied with some of Sony’s
receivers and amplifiers) to the Commander, the response
signal of the main unit may interfere with the learning of the
Commander. In such a case, move to a place where the
signals will not reach the main unit (e.g. other rooms, etc.).
36
GB
Page 37

Symptom
You cannot operate a
component even after
you programmed the
remote control signals
with the Learning
function.
“NG” flashes twice.
“OVER” flashes twice.
“DEL” does not work at
the LEARN mode.
You cannot enter SET
mode.
SET mode is cancelled.
The display shows
wrong names.
Remedy
• Make sure that the Remote Commander has “learned” the
correct signals. If not, see “For accurate Learning” (page 18)
and try the Learning procedure again (page 15).
• You can “teach” to a component whose code number is set to
“000,” but the component does not appear at normal mode.
To use the “learned” function, you must set the component
code to an other number than “000.” (The “learned” function
will not be erased.)
• The button has already “learned” a function. Either try
Learning to another button, or erase the “learned” function
and try Learning again (page 15).
• Learning has not succeeded. See “For accurate Learning”
(page 18) and try the Learning procedure again (page 15).
• The component codes cannot be set. See the supplied
“Component Code Numbers” and try setting the component
codes again (page 8).
• The memory of the Commander is full. Clear infrequently
used Learned functions (page 21), then carry out learning
operations.
• Select “EXIT” with the Jog dial to exit the current mode.
• Replace the batteries with new ones, and try operating again.
• If you don’t input anything into the Commander for over 30
seconds, the Commander exits SET mode. Proceed to the next
Step within 30 seconds.
• If you have changed the name of the component, that name
appears.
If you have changed the component selection order, the
components are selected in the changed sequence.
To change the component selection order or component
names, see “Changing the Component Selection Order
(MOVE)” on page 24, or “Changing the Name of the
Component (NAME)” on page 26.
To reset the Commander to the initial factory preset, see
“Erasing all memorised settings from the Commander—
Factory Reset” on page 31.
If none of the above have solved your problems, try resetting the Commander to the
factory setting (page 31) before contacting any Customer Support.
37
GB
Page 38

Appendix
Table of Preset
Functions
Note
There may be some components or
functions that cannot be operated with
this Commander.
Using Fastext
With Fastext you can access pages with
a press on a button. When a Fastext
page is broadcast, a colour-coded menu
appears at the bottom of the screen.
The colours of this menu correspond to
the RED, GREEN, YELLOW, BLUE
buttons on the Commander.
Press the button which corresponds to
the colour-coded menu. The page will
be displayed after some seconds.
TV
KEY
qa1
31 – 9, 0
4-/--, 1-
qd2-
5RED,
GREEN,
YELLOW,
BLUE
1/
qsa
2t
7MENU
6v
6V
6B
6b
qfOK
qgPROGR +/–
qh
92 +/–
q;
FUNCTION
To turn the power on/
off.
To change the
programme.
Also to turn on.
To select double-digit
numbers.
Works in the same way
as the TV’s commander.
To select a number
between 20 and 29.
Fastext buttons
To switch to teletext.
To turn on. To return
from teletext to TV.
To change the input
mode.
To call up the MENU
display.
To move the cursor
upward.
To move the cursor
downward.
To move the cursor to
the right.
To move the cursor to
the left.
To enter the selection of
the MENU display.
Programme up: +
Programme down: –
To operate JUMP,
FLASHBACK or
PROGRAMME
RETURN function on
the TV depending on the
setting of the TV’s
manufacturer.
Volume up: +
Volume down: –
To mute the volume on
the TV. Press again to
turn muting off.
38
GB
Page 39

SAT
KEY
qa1
31 – 9, 0
4-/--
5RED,
GREEN,
YELLOW,
BLUE
2t
qsa (EPG)
1/ (GUIDE)
qd2- (EXIT)
7MENU
6v
6V
6B
6b
qfOK
qgPROGR +/–
qh
* When you connect a TV cable or
antenna to the SAT, the output
switches between the TV and SAT
programme.
FUNCTION
To turn the power on/
off.
To change the
programme.
Also to turn on.
To select double-digit
numbers.
Works in the same way
as the TV’s commander.
Fastext buttons
To switch the output of
the SAT receiver to the
TV*.
To turn the EPG display
on/off .
To bring up Master
Guide.
To exit the mode.
To call up the MENU
display.
To move the cursor
upward.
To move the cursor
downward.
To move the cursor to
the right.
To move the cursor to
the left.
To bring up the Station
Index when a program
guide is not displayed.
To select the programme
that is highlighted.
Channel up: +
Channel down: –
To operate JUMP,
FLASHBACK or
PROGRAMME
RETURN function on
the SAT depending on
the setting of the SAT’s
manufacturer.
VCR
KEY
qa1
31 – 9, 0
2t
6m
6N
6M
7z
6x
qfX
qgPROGR +/–
qd2-
4-/--, 1-
**You can assign this operation to a
single button (z) using the Learning
function (page 15).
FUNCTION
To turn the power on/
off.
To change the
programme.
Also to turn on.
To select the input
source. The source
changes each time you
press the button.
To rewind.
To play.
To fast-forward.
To record, press N
while pressing z**. First
release N, then release
z.
To stop.
To pause.
Programme up: +
Programme down: –
To select a number
between 20 and 29.
To select double-digit
numbers.
Works in the same way
as the VCR’s
commander.
Continued
GB
39
Page 40

Table of Preset Functions
(continued)
DVD
KEY
qa1
31 – 9, 0
41- , -/-- (+10)
qd2- (ENTER)
2t (AUDIO)
qsa
(DISPLAY)
1/ (TITLE)
7MENU
6v
6V
6B
6b
qfOK
5RED (m)
5GREEN (x)
5YELLOW
(N)
5BLUE (M)
qgPROGR +
(FF (AMS))
qgPROGR –
(REW (AMS))
FUNCTION
To turn the power on/
off.
Number buttons: To set
items selected from the
screen.
To select numbers 10
and above.
To enter the setting. To
set items selected from
the screen.
To change the sound.
To show the current play
status on the screen.
To display the title
menu.
To display the DVD
menu.
To move the cursor
upward.
To move the cursor
downward.
To move the cursor to
the right.
To move the cursor to
the left.
To execute items
selected from the screen.
To rewind.
To stop.
To play.
To fast-forward.
To proceed to the next
location or song.
To proceed to the
previous location or
song.
CD
KEY
qa1
31 – 9, 0
41-, -/-- (+10)
qh (D.SKIP)
6m
6N
6M
6x
qfX
FUNCTION
To turn the power on/
off.
To select the track
number. 0 selects track
10.
To select numbers 10
and above.
To select next disk.
To select the previous
track.
To play.
To select the next track.
To stop.
To pause.
40
GB
Page 41

MD
KEY
qa1
31 – 9, 0
41-, -/-- (+10)
qh (D.SKIP)
6m
6N
6M
7z
6x
qfX
* You can assign this operation to a
single button (z) using the Learning
function (page 15).
FUNCTION
To turn the power on/
off.
To select the track
number. 0 selects track
10.
To select numbers 10
and above.
To select the next disc.
To select the previous
track.
To play.
To select the next track.
To record, press N
while pressing z*. First
release N, then release
z.
To stop.
To pause.
TAPE
KEY
30 (REV PB)
qh (A/B)
6m
6N
6M
7z
6x
qfX
* You can assign this operation to a
single button (z) using the Learning
function (page 15).
**If you cannot select deck A/B, see
page 14.
FUNCTION
To play in reverse mode.
To select deck A/B**.
To rewind.
To play.
To fast-forward.
To record, press N
while pressing z*. First
release N, then release
z.
To stop.
To pause.
AMP
KEY
qa1
8 Jog dial
qgPROGR +/–
(BAND +/–)
qh (SHIFT)
92 +/–
q;
**If the input source does not have
remote control signals (preset or
“learned”), it is not displayed.
FUNCTION
To turn the power on/
off.
To select the input
source**: Changes every
time the Jog dial is
pressed.
• VIDEO 1
• VIDEO 2
• AUX
• TUNER
•CD
• TAPE
• DVD
•TV
• PHONO
• INPUT
Presetting or tuning
frequency up: +
Presetting or tuning
frequency down: –
To shift band or
presetting select.
Volume up: +
Volume down: –
To mute the volume on
the AMP. Press again to
turn muting off.
41
GB
Page 42

Index
A, B
Batteries 5
C
Changing
component selection order
(MOVE) 24
learned signal 21
name of the components (NAME)
26
Code number 8
Component signal 15
D
Display 7
E
Erasing
learned signal 21
memorised settings (DELETE) 30
F, G, H
Factory setting 8, 29, 31
I
Input select 14, 19
J, K
Jog dial 7
L, M
LCD display
See “Display”
Learning Function 15
N, O
Normal mode 7
Number buttons 10
P, Q, R
Preset components 8
S
Searching
Code number 11
SET mode
Changing the component
selection order (MOVE) 24
Changing the name of the
component (NAME) 26
Erasing all memorised settings
(DELETE) 30
Learning function 15
Setting the component codes 8
Turning off the LCD (DISP) 33
Setting position number 7
T, U
Table of Preset Functions 38
AMP 41
CD 40
DVD 40
MD 41
SAT 39
TAPE 41
TV 38
VCR 39
Troubleshooting 36
V, W, X, Y, Z
Volume Control 15
42
GB
Page 43

43
GB
Page 44

Inhalt
Merkmale und Funktionen ....................................................................... 4
Vorbereitungen
Einlegen der Batterien ............................................................................. 5
Wann müssen die Batterien ausgetauscht werden? ................................... 5
Lage und Funktion der Teile und Bedienelemente .................................. 6
Das LCD-Display ............................................................................................ 7
Der Jog-Dial ..................................................................................................... 7
Grundfunktionen
Einstellen der Gerätecodes ...................................................................... 8
Einstellen durch Eingeben der Codenummer ............................................ 8
Einstellen eines Gerätecodes mit der Suchfunktion ................................ 11
Steuern der Geräte mit der Fernbedienung .......................................... 13
Steuern eines Geräts ..................................................................................... 13
Einstellen der Lautstärke ............................................................................. 15
Bedienen nicht vorprogrammierter Geräte — Lernfunktion................. 15
Programmieren eines Signals ......................................................................15
Für eine erfolgreiche Programmierung ..................................................... 18
Programmieren der Eingangswahl am Verstärker ...................................19
Ändern oder Löschen einer programmierten Tastenfunktion ...............21
Weitere Funktionen
Ändern der Geräteauswahlfolge (MOVE) .............................................. 24
Ändern eines Gerätenamens (NAME) .................................................... 26
Löschen aller gespeicherten Einstellungen (DELETE) ............................ 30
Löschen aller gespeicherten Einstellungen für eine
Einstellnummer ..........................................................................................30
Löschen aller gespeicherten Einstellungen in der Fernbedienung
— Zurücksetzen auf die werkseitigen Werte .........................................31
Ausschalten des LCD-Displays (DISP)..................................................... 33
Einstellen der Zeitspanne, bis sich das LCD-Display ausschaltet ......... 33
Weitere Informationen
Sicherheitsmaßnahmen ......................................................................... 35
Technische Daten ................................................................................... 35
Störungsbehebung................................................................................. 36
DE
2
Page 45

Anhang
Tabelle der vorprogrammierten Funktionen .......................................... 38
TV (Fernsehgerät) .........................................................................................38
SAT (Satelliten-Tuner) ..................................................................................39
VCR (Videorecorder) .................................................................................... 39
DVD (DVD-Player) .......................................................................................40
CD (CD-Player) ............................................................................................. 40
MD (MD-Player) ........................................................................................... 41
TAPE (Kassettendeck) ..................................................................................41
AMP (Verstärker) ..........................................................................................41
Index ...................................................................... Hintere Umschlagseite
DE
DE
3
Page 46

Merkmale und Funktionen
Die Fernbedienung RM-VZ950T ermöglicht die zentrale Bedienung aller
Ihrer AV-Geräte. Sie brauchen also nicht mehr eine Vielzahl
verschiedener Fernbedienungen für Ihre AV-Geräte bereitzuhalten. Im
Folgenden finden Sie eine Übersicht über die Merkmale und Funktionen
der RM-VZ950T.
Zentrale Bedienung verschiedener AV-Geräte von Sony mit dieser
Fernbedienung
Diese Fernbedienung ist werkseitig so eingestellt, dass Sie damit
verschiedene Geräte von Sony steuern können. Das heißt, Sie brauchen
die Fernbedienung nur auszupacken und schon können Sie sie als
„Steuerzentrale“ für alle Ihre Sony-Geräte verwenden.
Werkseitig voreingestellte Fernbedienungssignale für Geräte
anderer Hersteller
Diese Fernbedienung ist werkseitig auch auf Geräte anderer Hersteller
als Sony eingestellt. Um solche Geräte steuern zu können, müssen Sie die
entsprechenden Codenummern eingeben (Seite 8).
Lernfunktion zum Programmieren anderer Fernbedienungssignale
Diese Fernbedienung ist mit einer Lernfunktion ausgestattet. Das heißt,
Sie können Fernbedienungssignale für nicht voreingestellte Geräte oder
Funktionen programmieren (Seite 15).
Darüber hinaus können Sie in dieser Fernbedienung auch
Fernbedienungssignale (nur Infrarotsignale) für Nicht-AV-Geräte
programmieren, zum Beispiel für Klimaanlagen, Beleuchtungsanlagen
usw., wobei allerdings nicht alle Geräte bzw. Funktionen mit dieser
Fernbedienung gesteuert werden können (Seite 18).
Zuordnen anderer Geräte
Sie können Ihren AV-Geräten Einstellnummern zuordnen und diese dann
mithilfe der entsprechenden Nummern auswählen. Dies ist zum Beispiel
dann sehr nützlich, wenn Sie zwei AV-Geräte der gleichen Art besitzen
(Seite 8).
Übersichtlich und leicht bedienbar dank LCD-Display und Jog-Dial
Die Fernbedienung ist mit einem LCD-Display ausgestattet, in dem
angezeigt wird, welches Gerät Sie gerade bedienen können, oder in
welchem Status sich das Gerät bei der Programmierung befindet (Seite 7).
Mit dem Jog-Dial können Sie mühelos Funktionen auswählen oder bei
der Programmierung Einstellungen bestätigen (Seite 7).
Individuell einstellbare Funktionsanzeige
Sie können die Bezeichnungen für einzelne Geräte nach Belieben ändern,
je nachdem, wie sie im Display angezeigt werden sollen (Seite 26).
Universalfernbedienung von hoher Qualität in anspruchsvollem
Design, gefertigt aus hochwertigen Materialien
Dank ihrer ästhetischen Gestaltung ist diese Universalfernbedienung eine
Bereicherung für jeden Wohnstil.
Die CE-Markierung auf dem Gerät gilt nur für Produkte, die
innerhalb der Europäischen Union verkauft werden.
DE
4
Page 47

Vorbereitungen
Einlegen der
Batterien
Schieben Sie den Deckel des
Batteriefachs auf. Legen Sie zwei
R6-Alkalibatterien der Größe AA
(nicht mitgeliefert) ein. Richten Sie
den Pluspol (+) und den Minuspol
(–) der Batterien so aus, wie mit
den Kennzeichnungen im
Batteriefach angegeben.
Setzen Sie die Batterien mit dem
negativen Pol (–) zuerst ein und
drücken Sie sie dann nach unten,
bis der positive Pol (+) mit einem
Klicken einrastet. Wenn Sie das
Batteriefach schließen, achten Sie
darauf, den Deckel richtig
anzusetzen.
Wann müssen die Batterien
ausgetauscht werden?
Unter normalen Bedingungen
halten die Batterien etwa drei
Monate. Wenn die Batterien
erschöpft sind, schaltet sich das
LCD-Display etwa 10 Sekunden
nach dem Drücken einer
Steuertaste aus. Wenn Sie eine
Taste drücken, schaltet sich das
LCD-Display ein und „BATT“
wird darin angezeigt. Tauschen
Sie die Batterien in diesem Fall
gegen neue aus.
Wenn die Batterien geschont
werden sollen
Im LCD-Display dieser
Fernbedienung erscheint in der
Regel der Name des zuletzt
bedienten Geräts. Um die
Batterien zu schonen, können Sie
das Display auch so einstellen,
dass es sich ausschaltet, wenn Sie
die Fernbedienung nicht
benutzen. Näheres dazu finden Sie
unter „Ausschalten des LCDDisplays (DISP)“ auf Seite 33.
Hinweise zu Batterien
• Verwenden Sie alte Batterien nicht
zusammen mit neuen. Verwenden Sie
auch keine unterschiedlichen
Batterietypen zusammen.
• Sollte Batterieflüssigkeit auslaufen,
säubern Sie das Batteriefach mit
einem Tuch. Ersetzen Sie dann die
alten Batterien durch neue. Wenn Sie
die Fernbedienung längere Zeit nicht
benutzen wollen, nehmen Sie die
Batterien heraus, um Schäden durch
eventuell auslaufende
Batterieflüssigkeit zu vermeiden.
• Auch bei einem Batteriewechsel
bleiben die Einstellungen der
Fernbedienung weiterhin gespeichert.
Wenn Sie den Speicher löschen
wollen, schlagen Sie bitte unter
„Löschen aller gespeicherten
Einstellungen (DELETE)“ auf Seite 30
nach.
DE
5
Page 48

Lage und Funktion der Teile und
Bedienelemente
1 Taste
2 Taste
3 Zahlentasten
4 Taste -/-- (1-)
5 Farbige Tasten
6 LCD-Display
7 Taste MENU z
8 Jog-Dial
9 Tasten
0 Taste (Stummschaltung)*
qa Taste SET
qs Netztaste
qd Taste
qf Taste 2-
qg Cursortasten b/B/v/V oder
qh Taste OK X
qj Tasten PROGR (Programm)
qk Taste (Erneut aufrufen)
//
/ (Text)
//
tt
t (Eingang)
tt
(Rot, Grün, Gelb, Blau)
22
2 (Lautstärke) +/–*
22
PRESET
EXIT
DELETE
aa
a (TV)
aa
Player-Tasten N/x/m/M
+/–
LEARN
DISP.
11
1
11
MOVE
NAME
* Hinweis zu den Tasten
und
Wenn Sie eine Videokomponente
ausgewählt haben, reguliert die
Fernbedienung die Lautstärke des
Fernsehgeräts bzw. schaltet den Ton
am Fernsehgerät stumm. Wenn Sie
eine Audiokomponente ausgewählt
haben, reguliert die Fernbedienung
die Lautstärke des Verstärkers bzw.
schaltet den Ton am Verstärker
stumm.
Hinweis
Die Funktion der Steuertasten hängt
von den Einstellungen bzw. den
Betriebsmodi ab.
In der „Tabelle der vorprogrammierten
Funktionen“ (Seite 38) finden Sie eine
Liste der vorprogrammierten
Standardtastenfunktionen für die
einzelnen steuerbaren Geräte.
Diese Einstellungen können Sie ändern.
Einige Tasten haben bei der
Programmierung spezielle Funktionen.
Eine Erläuterung dazu finden Sie auf
den folgenden Seiten.
DE
6
22
2 +/–
22
Page 49

Das LCD-Display
Im LCD-Display (Liquid Crystal
Display = Flüssigkristallanzeige)
wird angezeigt, welches Gerät
gerade bedient werden kann oder
in welchem Status sich die
Fernbedienung gerade befindet
(siehe Beispiele unten). Das LCDDisplay verfügt über eine
Hintergrundbeleuchtung, die
aufleuchtet, wenn Sie den Jog-Dial
drehen oder drücken, um ein AVGerät zu bedienen. Im Modus SET
leuchtet das LCD-Display nicht.
Wenn das Gerät ein
Fernbedienungssignal sendet,
wird im Display angezeigt.
Beispiel: Im normalen Modus
Fernbedienungssignalanzeige
RCV
Der Jog-Dial
Mit dem Jog-Dial lassen sich
verschiedene Funktionen im
Rahmen der Programmierung
ausführen. Außerdem dient der
Jog-Dial zur Auswahl der Geräte,
die bedient werden sollen.
Beispiel: Im normalen Modus
1 Wählen Sie durch Drehen des
Jog-Dial das Gerät aus, das Sie
bedienen möchten.
2 Drücken Sie die Taste für die
gewünschte Funktion.
Beispiel: Im Modus SET
1 Wählen Sie durch Drehen des
Jog-Dial die Einstellnummer
(„S-1“ bis „S-8“).
Gerade bedienbares Gerät
Beispiel: Im Modus SET
Fernbedienungssignalanzeige
Einstellnummer*
-1S
¢
VT¢1
ESETPR
Gerät
Einstellmodus
* Mit dieser Fernbedienung können Sie
bis zu 8 Geräte steuern. Dazu müssen
diese Geräte den Einstellnummern
„S-1“ bis „S-8“ zugeordnet werden.
Hinweis
Normalerweise wird im LCD-Display
der Name des zuletzt ausgewählten
Geräts angezeigt. Wenn jedoch die
Batterien erschöpft sind, erscheint statt
dessen „BATT“ im LCD-Display, wenn
Sie eine Steuertaste drücken.
Gerätecode
2 Drücken Sie zur Bestätigung
den Jog-Dial.
Der Name des Geräts blinkt im
Display.
-1S
VT
ESETPR
Tipp
Statt den Jog-Dial nach links/rechts zu
drehen, können Sie auch die Taste b/B
drücken, außer wenn Sie im Modus
NAME ein Zeichen auswählen.
Statt den Jog-Dial zu drücken, können
Sie auch die Taste OK drücken.
7
DE
Page 50

Grundfunktionen
Einstellen der
Gerätecodes
Die Fernbedienung ist werkseitig
so eingestellt, dass Sie damit AVGeräte von Sony bedienen können
(siehe Tabelle unten). Sie können
die Fernbedienung aber auch für
AV-Geräte anderer Hersteller
programmieren.
Wenn Sie mit der Fernbedienung
Geräte von Sony steuern wollen,
brauchen Sie das folgende
Verfahren nicht auszuführen.
Um andere AV-Geräte mit dieser
Fernbedienung steuern zu
können, müssen Sie anhand des
folgenden Verfahrens die richtigen
Codes für die einzelnen Geräte
einstellen.
Sie können die acht
Einstellnummern (S-1 bis S-8) mit
acht verschiedenen Geräten
belegen.
Einstellnummer
S-1
S-2
S-3
S-4
S-5
S-6
S-7
S-8
Display
TV
SAT
(SatellitenTuner)
VCR
(Videorecorder)
DVD
CD
MD
TAPE
(Kassettendeck*)
AMP
(Verstärker)
* Kassettendeck für analoge
Audiokompaktkassetten
Werkseitige
Einstellung
Fernsehgerät
von Sony
SatellitenTuner von
Sony
VHSVideorecorder
von Sony
DVD-Player
von Sony
CD-Player von
Sony
MD-Deck von
Sony
Kassettendeck
von Sony
Verstärker von
Sony
Einstellen durch Eingeben
der Codenummer
7
JogDial
2
Tipp
Statt den Jog-Dial nach links/rechts zu
drehen, können Sie auch b/B drücken.
Statt den Jog-Dial zu drücken, können
Sie auch die Taste OK drücken.
Hinweis
In der „Tabelle der vorprogrammierten
Funktionen“ (Seite 38) finden Sie eine
Liste der Tastenfunktionen für die
einzelnen steuerbaren Geräte.
DE
8
Page 51

Beispiel: So programmieren Sie
ein Fernsehgerät von Philips
unter „S-1/TV“
1 In der mitgelieferten
Tabelle der
„Gerätecodenummern“
finden Sie die dreistellige
Codenummer für das
gewünschte Gerät.
Sind mehrere Codenummern
aufgelistet, verwenden Sie die
zuerst aufgelistete Nummer.
Wollen Sie das Gerät zum
Beispiel zum Steuern eines
Fernsehgeräts von Philips
programmieren, wählen Sie die
Codenummer 086.
2 Drücken Sie SET.
„PRESET“ blinkt im Display
und die Fernbedienung
wechselt in den Modus SET.
ES
RPET
TSE
3 Drücken Sie den Jog-Dial.
Die Einstellnummer blinkt und
der Gerätename erscheint im
Display.
Die Fernbedienung schaltet in
den Geräteeinstellmodus
PRESET.
-1S
VT
ESETPR
Hinweis
Wenn Sie den Namen eines Geräts
geändert haben (Seite 26), erscheint
im Display der neue Name.
4 Wählen Sie durch Drehen
des Jog-Dial die
Einstellnummer („S-1“ bis
„S-8“).
Beim Drehen des Jog-Dial
wechselt die Anzeige
folgendermaßen:
S-1
S-2 S-3
TV SAT VCR
EXIT
Hinweise
• Wenn Sie den Namen eines Geräts
geändert haben (Seite 26),
erscheint im Display der neue
Name.
• Wenn Sie den Jog-Dial bei „EXIT“
drücken, schaltet die
Fernbedienung zurück an den
Anfang des Modus SET (Schritt
2).
S-8
AMP
S-4
DVD
S-7
TAPE
5 Drücken Sie den Jog-Dial.
Der Name des Geräts blinkt im
Display.
-1S
¢
VT¢1
ESETPR
Hinweis
Die Gerätenamen, die bei diesem
Schritt angezeigt werden, geben die
Art des Geräts an, das bedient
werden soll. Diese Namen können
Sie nicht ändern.
Wenn Sie dieser
Eisntellnummer ein anderes
Gerät zuordnen möchten,
wählen Sie das gewünschte
Gerät durch Drehen des JogDial aus. Die Anzeige im
Display wechselt wie unten
gezeigt.
TV SAT VCR DVD CD
EXIT AMP TAPE MD
S-5
CD
S-6
MD
Fortsetzung
DE
9
Page 52

Einstellen der Gerätecodes
(Fortsetzung)
Hinweise
• Sie können „AMP“ nicht „S-1“ bis
„S-7“ zuordnen. „AMP“ kann nur
„S-8“ zugeordnet werden.
• Wenn Sie den Jog-Dial bei „EXIT“
drücken, schaltet die
Fernbedienung zurück an den
Anfang des Modus PRESET
(Schritt 3).
6 Drücken Sie den Jog-Dial.
Die dreistellige Codenummer
neben dem Gerätenamen blinkt
im Display.
-1S
¢
VT¢1
ESETPR
Tipps
• Die nächste/vorhergehende
Codenummer können Sie auch
mit PROGR +/– aufrufen.
• Die Codenummer sollten Sie sich
notieren.
8 Drücken Sie den Jog-Dial.
„OK“ erscheint im Display.
Damit ist die Codenummer
eingestellt. Die Fernbedienung
schaltet zurück in den Modus
PRESET.
-1S
KO
ESETPR
-1S
7 Geben Sie mit den
Zahlentasten den
dreistelligen Gerätecode
ein.
Wenn Sie eine Taste drücken,
erscheint die Zahl als rechte
der blinkenden Ziffern. Sie
bewegt sich nach links, sobald
Sie die nächste Taste drücken.
In diesem Beispiel:
Drücken Sie 0, 8, 6.
Wenn Sie als Codenummer
„000“ einstellen
Ein Gerät mit dieser
Einstellnummer erscheint im
normalen Modus nicht im Display,
so dass Sie es auch nicht bedienen
können. Sie können dies nutzen,
um zu erreichen, dass nicht
verwendete Geräte auch nicht
angezeigt werden.
Soll ein solches Gerät wieder
angezeigt werden, stellen Sie für
das Gerät eine geeignete
Codenummer ein.
VT
ESETPR
Wenn „NG“ zweimal blinkt
und die dreistellige
Codenummer erneut blinkt,
nachdem Sie den Jog-Dial
gedrückt haben, ist die
Programmierung
fehlgeschlagen. Überprüfen Sie
in diesem Fall, ob Sie die
richtige Codenummer
eingegeben haben und
versuchen Sie es noch einmal
ab Schritt 7.
Wollen Sie den Code für ein
weiteres Gerät eingeben, gehen
Sie wie in Schritt 4 bis 8
erläutert vor.
9 Wählen Sie „EXIT“ und
drücken Sie den Jog-Dial,
um das Einstellen
abzuschließen.
So brechen Sie die
Programmierung ab
Drücken Sie SET.
10
DE
Page 53

Hinweis
Wenn Sie zwischen den einzelnen
Schritten mehr als 30 Sekunden lang
nichts eingeben, wird der Modus SET
beendet.
Tipps
• Wenn Sie den Jog-Dial in den
einzelnen Menüs bei „EXIT“ drücken,
schaltet die Fernbedienung zurück an
den Anfang des vorherigen Modus.
• Wenn Sie während des Vorgangs
irgendwann SET drücken, werden die
Einstellungen, für die bereits „OK“
angezeigt wurde, gespeichert und die
Programmierung wird beendet.
Beginnen Sie nochmals bei Schritt 2.
Einstellen eines
Gerätecodes mit der
Suchfunktion
Sie können eine Codenummer für
ein Gerät suchen, für das in der
Tabelle „Gerätecodenummern“
keine angegeben ist.
Vor dem Suchen
Um eine effiziente Suche zu
ermöglichen, schalten Sie die
Geräte in den folgenden Status.
TV (Fernsehgerät): Eingeschaltet
SAT (Satelliten-Tuner), VCR
(Videorecorder), DVD (DVDPlayer), AMP (Verstärker):
Ausgeschaltet
CD (CD-Player), MD (MD-Player),
TAPE (Kassettendeck):
Eingeschaltet, Wiedergabemedium
vorhanden (CD, MD, Kassette
usw.)
2
JogDial
2
Tipp
Statt den Jog-Dial nach links/rechts zu
drehen, können Sie auch b/B drücken.
Statt den Jog-Dial zu drücken, können
Sie auch die Taste OK drücken.
Fortsetzung
11
DE
Page 54

Einstellen der Gerätecodes
(Fortsetzung)
1 Schalten Sie die
Fernbedienung wie in
Schritt 2 bis 6 auf Seite 9
und 10 erläutert in den
Modus PRESET.
2 Richten Sie die
Fernbedienung auf das
jeweilige Gerät und
drücken Sie nacheinander
PROGR + oder PROGR –
und 1, bis das Gerät wie
unten angegeben reagiert.
Schaltet sich aus: TV
(Fernsehgerät)
Schaltet sich ein: VCR
(Videorecorder), SAT
(Satelliten-Tuner), DVD (DVDPlayer), AMP (Verstärker)
Startet die Wiedergabe: CD
(CD-Player), MD (MD-Player),
TAPE (Kassettendeck)
3 Drücken Sie den Jog-Dial.
„OK“ erscheint im Display.
Damit ist die Codenummer
eingestellt. Die Fernbedienung
schaltet zurück in den Modus
PRESET.
-1S
KO
ESETPR
-1S
VT
ESETPR
Wollen Sie den Code für ein
weiteres Gerät eingeben, gehen
Sie wie in Schritt 1 bis 3
erläutert vor.
Mit PROGR + schalten Sie
weiter zur nächsten
Codenummer.
Mit PROGR – schalten Sie
zurück zur vorhergehenden
Codenummer.
Wenn die höchste Nummer
erreicht ist, beginnen die
Nummern wieder bei „000“.
Wenn das Gerät ein
Fernbedienungssignal sendet,
wird im Display angezeigt.
-1S
Tipp
Die Codenummer sollten Sie sich
notieren.
DE
12
4 Wählen Sie „EXIT“ und
drücken Sie den Jog-Dial,
um das Einstellen
abzuschließen.
So brechen Sie die
Programmierung ab
Drücken Sie SET.
Hinweis
Wenn Sie zwischen den einzelnen
Schritten mehr als 30 Sekunden lang
nichts eingeben, wird der Modus SET
beendet.
Tipps
• Wenn Sie den Jog-Dial in den
einzelnen Menüs bei „EXIT“ drücken,
schaltet die Fernbedienung zurück an
den Anfang des vorherigen Modus.
• Wenn Sie während des Vorgangs
irgendwann SET drücken, wird die
Programmierung beendet. Beginnen
Sie in diesem Fall wieder bei Schritt 1.
Page 55

Steuern der Geräte
mit der
Fernbedienung
Wenn Sie ein Gerät bedienen
wollen, das nicht von Sony
stammt, müssen Sie erst den
Gerätecode einstellen (Seite 8).
Steuern eines Geräts
1 Wählen Sie durch Drehen
des Jog-Dial das Gerät aus,
das Sie bedienen möchten.
Werkseitig ist die angegebene
Geräteauswahlfolge eingestellt.
TV SAT VCR DVD
AMP TAPE MD
Hinweise
• Wenn Sie den Namen eines Geräts
geändert haben (Seite 26), erscheint
im Display der neue Name.
• Sie können auch die Geräteauswahlfolge ändern (Seite 24).
CD
2 Drücken Sie die Taste für
die gewünschte Funktion.
In der „Tabelle der
vorprogrammierten Funktionen“
(Seite 38) finden Sie eine Liste der
Tastenfunktionen für die
einzelnen steuerbaren Geräte.
Wenn das Gerät ein
Fernbedienungssignal sendet,
wird im Display angezeigt.
JogDial
VT
Tipp
Sie können ein Gerät, das Sie nicht
verwenden, aus dem Auswahlmenü
ausblenden, indem Sie als
Codenummer für dieses Gerät „000“
eingeben (Seite 10). Soll ein solches
Gerät wieder angezeigt werden, stellen
Sie für das Gerät eine geeignete
Codenummer ein.
Hinweis
Die Fernbedienungssignale können für
bestimmte Geräte oder Funktionen
anders sein. Programmieren Sie die
Fernbedienung in diesem Fall mithilfe
der Lernfunktion (siehe Seite 15).
Fortsetzung
13
DE
Page 56

Steuern der Geräte mit der
TAPE
VIDEO2VIDEO1
PHONO
INPUT
AUX
TUNER
DVD CDTV
Fernbedienung (Fortsetzung)
So wählen Sie die
Eingangsquelle für den
Verstärker
Hinweis zu Tasten, für die
bereits mit der Lernfunktion
Fernbedienungssignale
programmiert wurden
Wenn Sie mithilfe der
Lernfunktion eine Taste bereits mit
einem Fernbedienungssignal
belegt haben (Seite 15),
funktioniert dieses „gelernte“
Signal auch noch nach dem
Einstellen der Gerätecodenummer.
Wollen Sie diese Taste anderweitig
als Funktionstaste verwenden,
müssen Sie zuerst das „gelernte“
Signal löschen (Seite 21).
Doppelkassettendecks
1 Wenn die Fernbedienung Ihres
Kassettendecks einen
Wählschalter für Deck A/B hat,
dann übernimmt die Taste
(Erneut aufrufen) an dieser
Fernbedienung die
entsprechende Funktion.
2 Wenn Sie Deck A/B nicht mit
der Taste (Erneut aufrufen)
auswählen können, stellen Sie
erst die Codenummer für das
eine Deck ein.
•Legen Sie dann mithilfe der
Lernfunktion die
Funktionstasten für das
andere Deck auf andere freie
Tasten, zum Beispiel die
Zahlentasten (Seite 15),
oder
•weisen Sie dem anderen Deck
eine andere Einstellnummer
zu (Seite 8).
1 Drehen Sie den Jog-Dial,
um „AMP“ auszuwählen,
und drücken Sie dann den
Jog-Dial.
Hinweis
Wenn Sie den Namen des
Verstärkers geändert haben (Seite
26), erscheint im Display der neue
Name.
2 Wählen Sie durch Drehen
des Jog-Dial das
gewünschte Gerät aus.
Es gilt folgende Auswahlfolge:
Hinweise
• Wenn der einprogrammierte
Verstärker keine
Eingangswahlfunktion hat oder
wenn Sie die Tasten nicht mithilfe
der Lernfunktion mit Funktionen
belegt haben (Seite 15), werden
keine Namen angezeigt.
• Je nach dem Gerätecode bzw. je
nach mit der Lernfunktion
programmierten Funktionen oder
nach einer Namensänderung mit
der Funktion NAME erscheinen
für die Eingangsquellen im
Display unter Umständen andere
Namen und Nummern (Seite 26).
3 Drücken Sie den Jog-Dial.
erscheint im Display. Die
Eingangsquelle wird eingestellt
und „AMP“ erscheint erneut
im Display.
14
DE
Hinweis
Wenn die Eingangswahl nicht
ordnungsgemäß funktioniert, können
Sie die Fernbedienung mithilfe der
Lernfunktion programmieren (Seite 15).
Tipp
Sie können sich die Bedienung
vereinfachen, wenn Sie für häufig
verwendete Eingangsquellen mit der
Lernfunktion (Seite 15) Zahlentasten
oder farbige Tasten programmieren.
Page 57

Einstellen der Lautstärke
So stellen Sie die Lautstärke
einer Audiokomponente ein (CD,
MD, TAPE)
Mit den Tasten 2 +/– können Sie
die Lautstärke am Verstärker
regulieren, mit der Taste den
Verstärker stummschalten.
Beispiel
Wenn Sie bei „CD“ die Taste
2 +/– drücken, können Sie die
Lautstärke am Verstärker
einstellen.
Diese Einstellung können Sie
ändern (Seite 15).
So stellen Sie die Lautstärke
einer Videokomponente ein
(SAT, VCR, DVD)
Mit den Tasten 2 +/– können Sie
die Lautstärke am Fernsehgerät
regulieren, mit der Taste das
Fernsehgerät stummschalten.
Beispiel
Wenn Sie bei „VCR“ die Taste
2 +/– drücken, können Sie die
Lautstärke am Fernsehgerät
einstellen.
Diese Einstellung können Sie
ändern (Seite 15).
Hinweis
Wenn Sie mit der Lernfunktion (Seite
15) die Taste 2 +/– oder
oder „AMP“ mit einem Signal belegt
haben, wird dieses Signal nicht
übertragen, wenn Sie ein anderes Gerät
bedienen. Wenn Sie ein
programmiertes Signal verwenden
wollen, müssen Sie die Taste 2 +/–
für die entsprechenden Geräte
oder
mithilfe der Lernfunktion
programmieren.
für „TV“
Bedienen nicht
vorprogrammierter
Geräte
— Lernfunktion
Für nicht vorprogrammierte Geräte
oder Funktionen steht die
Lernfunktion zur Verfügung.
Damit können Sie die
programmierbaren Tasten dieser
Fernbedienung mit den
Funktionen anderer Fernbedienungen belegen. Darüber
hinaus können Sie mit der
Lernfunktion die Signale einzelner
Tasten nach dem Einstellen der
Gerätecodenummer ändern.
Die programmierten Tastenfunktionen sollten Sie sich notieren.
Hinweis
Es gibt einige Fernbedienungssignale,
die Sie bei dieser Fernbedienung nicht
einstellen können.
Programmieren eines
Signals
JogDial
2
Fortsetzung
DE
15
Page 58

Bedienen nicht
vorprogrammierter Geräte
— Lernfunktion (Fortsetzung)
Tipp
Statt den Jog-Dial nach links/rechts zu
drehen, können Sie auch b/B drücken.
Statt den Jog-Dial zu drücken, können
Sie auch die Taste OK drücken.
Beispiel: So belegen Sie die
VCR-Taste N (Wiedergabe)
dieser Fernbedienung mit dem
Wiedergabesignal N eines
bestimmten Geräts
„AMP“ können Sie mit der
Lernfunktion nur „S-8“ zuordnen.
Näheres dazu finden Sie auf Seite 18.
1 Legen Sie die RM-VZ950T
und die Fernbedienung des
entsprechenden Geräts so
hin, dass die Vorderkanten
beider Fernbedienungen
aufeinander zeigen.
Andere
Fernbedienung
ca. 5 - 10 cm
auseinander
RM-VZ950T
2 Drücken Sie SET, drehen Sie
den Jog-Dial, um „LEARN“
auszuwählen, und drücken
Sie den Jog-Dial.
Die Einstellnummer blinkt und
der Gerätename erscheint im
Display.
Die Fernbedienung schaltet in
den Modus LEARN.
-1S
VT
ARNLE
Hinweis
Wenn Sie den Namen des Geräts
geändert haben (Seite 26), erscheint
im Display der neue Name.
3 Wählen Sie durch Drehen
des Jog-Dial die
Einstellnummer („S-1“ bis
„S-8“) des Geräts, für das
Sie die Fernbedienung
programmieren wollen.
Drücken Sie anschließend
den Jog-Dial.
Der Name des Geräts blinkt im
Display.
-3S
CV
R
ARNLE
Hinweis
Wenn Sie den Namen des Geräts
geändert haben (Seite 26), erscheint
im Display der neue Name.
4 Drücken Sie auf dieser
Fernbedienung die Taste,
die Sie programmieren
wollen.
Der Name des Gerät hört auf
zu blinken und im Display
blinkt rasch die Anzeige
„LEARN“ (Bereitschaftsmodus
der Lernfunktion).
-3S
CV
R
ARNLE
Wenn für diese Taste bereits
ein anderes Signal
programmiert wurde
„NG“ blinkt zweimal und der
Name des Geräts blinkt erneut.
Legen Sie die gewünschte
Funktion entweder auf eine
freie Taste oder löschen Sie die
zuvor programmierte Funktion
(Seite 21). Beginnen Sie dann
noch einmal von vorn.
16
DE
Page 59

5 Halten Sie die Taste auf der
anderen Fernbedienung
gedrückt, bis „OK“ im
Display erscheint.
Während der
Datenübertragung hört
„LEARN“ auf zu blinken.
Nach der Datenübertragung
erscheint „OK“ im Display.
Danach schaltet die
Fernbedienung wieder in den
Status in Schritt 3 zurück.
Andere
Fernbedienung
-3S
CV
R
ARNLE
Datenübertragung
läuft
-3S
K
O
ARNLE
-3S
CV
R
ARNLE
Datenübertragung
abgeschlossen
Wenn „NG“ zweimal blinkt
und der Name des Geräts
erneut blinkt
Die Lernfunktion ist
fehlgeschlagen. Beginnen Sie
noch einmal ab Schritt 4.
6 Weitere Tasten können Sie
wie in Schritt 4 und 5
erläutert mit Funktionen
belegen.
7 Wählen Sie „EXIT“ und
drücken Sie den Jog-Dial,
um die Programmierung
mit der Lernfunktion
abzuschließen.
So brechen Sie die Lernfunktion
ab
Drücken Sie SET.
Hinweise
• Wenn Sie während der
Programmierung 30 Sekunden lang
keine Funktion ausführen, wird der
Modus LEARN beendet.
• Wenn Sie Schritt 5 nicht innerhalb
von 10 Sekunden nach Schritt 4
ausführen, schaltet die
Fernbedienung zurück in den Status
in Schritt 3.
• Für den Jog-Dial und die Taste SET
können Sie keine Funktionen
programmieren.
• Wenn der Speicher der Fernbedienung
voll ist, blinkt „OVER“. Die
Fernbedienung schaltet zurück in den
Status in Schritt 3. Löschen Sie eine
zuvor programmierte Funktion (Seite
21) und beginnen Sie wieder von vorn.
Wenn die Fernbedienung nicht
funktioniert
Wenn die programmierte Taste nicht
korrekt funktioniert, wiederholen Sie
die Programmierung. (Wenn der Ton
zum Beispiel schon nach einmaligem
Drücken der Taste 2 + sehr laut wird,
ist es bei der Programmierung
möglicherweise zu Störungen
gekommen.)
Wenn Sie nach dem
Programmieren eines Signals
einen Gerätecode einstellen
Wenn Sie mithilfe der Lernfunktion
eine Taste mit einem Signal belegt
haben, funktioniert dieses Signal, auch
wenn Sie danach einen Gerätecode
einstellen.
Hinweis zum Signal REC z
Sie können immer nur eine Taste auf
einmal programmieren. Daher ist es
nicht möglich, eine Tastenfolge (zum
Beispiel REC z + N) auf eine einzelne
Taste dieser Fernbedienung zu legen.
Fortsetzung
DE
17
Page 60

Bedienen nicht
vorprogrammierter Geräte
— Lernfunktion (Fortsetzung)
Wenn Sie die Tasten
mit Signalen belegen
Wenn Sie mit der Lernfunktion die
Taste 2 +/– oder für „TV“ oder
„AMP“ mit einem Signal belegt
haben, wird dieses Signal nicht
übertragen. Wenn Sie ein
programmiertes Signal verwenden
wollen, müssen Sie die Taste
2 +/– oder für die
entsprechenden Geräte mithilfe der
Lernfunktion programmieren.
Wenn Sie Signale für eine
Klima- oder Beleuchtungsanlage
programmieren
Wenn Tasten auf dieser
Fernbedienung nicht belegt sind
oder Geräte nicht benötigt
werden, können Sie Signale
programmieren, um Nicht-AVGeräte, zum Beispiel eine
Klimaanlage, zu bedienen.
Hinweis
Wenn Sie Signale für eine Klimaanalge
programmieren, müssen Sie die
Funktionen gegebenenfalls je nach
Jahreszeit neu programmieren.
Wenn Sie Signale für einen
Verstärker programmieren
In Schritt 3 (Seite 16) ändert sich
das Display, wie unten gezeigt,
wenn Sie den Jog-Dial drücken.
22
2 +/– oder
22
MPA
PU
NIT
ARNLE
Führen Sie die Programmierung
durch, wie in Schritt 4 bis 7
erläutert.
Sie können auch die Funktion
„Eingangswahl“ programmieren
(Seite 19).
DE
18
Für eine erfolgreiche
Programmierung
• Bewegen Sie die beiden
Fernbedienungen während der
Datenübertragung nicht.
• Halten Sie die Taste, die Sie gerade
programmieren, unbedingt so lange
gedrückt, bis diese Fernbedienung
wie beschrieben reagiert.
• Verwenden Sie in beiden
Fernbedienungen neue Batterien.
• Versuchen Sie die Programmierung
nicht in direktem Sonnenlicht oder
unter dem Licht starker
Leuchtstoffröhren.
• Der Sensorbereich ist von
Fernbedienung zu Fernbedienung
unterschiedlich. Wenn die
Programmierung nicht funktioniert,
ändern Sie die Position der beiden
Fernbedienungen und versuchen es
dann noch einmal.
• Wenn Sie Signale von einer
Fernbedienung mit interaktivem
Signalaustauschsystem (solche
Fernbedienungen gehören zu
einigen der Receiver und Verstärker
von Sony) in dieser Fernbedienung
programmieren, kann es zu
Interferenzen zwischen dem
Antwortsignal des Hauptgeräts und
der Lernfunktion dieser
Fernbedienung kommen. Nehmen
Sie die Programmierung in einem
solchen Fall an einem Ort vor, an
dem die Signale das Hauptgerät
nicht erreichen können. Gehen Sie
zum Beispiel in ein anderes Zimmer.
WICHTIG
Halten Sie diese
Fernbedienung von kleinen
Kindern und Haustieren fern.
Geräte wie Klimaanlagen,
Heizkörper, Elektrogeräte,
elektrisch betriebene Rollläden
oder Vorhänge können bei
falscher oder unabsichtlicher
Bedienung eine Gefahrenquelle
darstellen.
Hinweis
Erläuterungen zu den
programmierbaren
Fernbedienungssignalen finden Sie
unter „Technische Daten“ auf Seite 35.
Page 61

Programmieren der
Eingangswahl am
Verstärker
Wenn sich die Eingangsquelle
auch nach dem Einstellen der
Codenummer (Seite 8) nicht
auswählen lässt, können Sie diese
Funktion direkt von der
Fernbedienung des Verstärkers in
diese Fernbedienung
einprogrammieren.
Hinweis
Für den Verstärker steht nur „S-8“ zur
Verfügung.
1 Schalten Sie die
Fernbedienung wie in
Schritt 1 und 2 auf Seite 16
erläutert in den Modus
LEARN.
2 Drehen Sie den Jog-Dial,
um „S-8“ auszuwählen,
und drücken Sie den JogDial.
„AMP“ erscheint und
„VIDEO1“ blinkt im Display.
MPA
DE
IVO1
ARNLE
JogDial
Fortsetzung
DE
19
Page 62

Bedienen nicht
vorprogrammierter Geräte
— Lernfunktion (Fortsetzung)
3 Halten Sie die
Eingangswahltaste an der
Fernbedienung des
Verstärkers (z. B. VIDEO
oder CD) gedrückt, bis im
Display dieser
Fernbedienung „OK“
angezeigt wird.
Während der
Datenübertragung hört
„LEARN“ auf zu blinken.
Nach der Datenübertragung
erscheint „OK“ im Display.
Danach schaltet die
Fernbedienung wieder in den
Status in Schritt 2 zurück.
4 Wählen Sie „EXIT“ und
drücken Sie den Jog-Dial,
um die Programmierung
mit der Lernfunktion
abzuschließen.
So brechen Sie die Lernfunktion
ab
Drücken Sie SET.
VIDEO
MPA
DEO1
IV
ARNLE
Datenübertragung
läuft
Fernbedienung
des Verstärkers
MPA
O
ARNLE
MPA
DEO1
IV
ARNLE
Datenübertragung
abgeschlossen
Wenn „NG“ zweimal blinkt
und der Name des Geräts
erneut blinkt
Die Lernfunktion ist
fehlgeschlagen. Beginnen Sie noch
einmal mit diesem Schritt.
K
20
DE
Page 63

Ändern oder Löschen einer
programmierten
Tastenfunktion
Wollen Sie eine programmierte
Tastenfunktion ändern, löschen
Sie sie zunächst und
programmieren die Taste dann
neu.
So löschen Sie die
programmierte Funktion einer
einzelnen Taste
4,5
JogDial
Beispiel: So löschen Sie eine
programmierte Funktion von
der Zahlentaste 1 im Modus VCR
1 Schalten Sie die
Fernbedienung wie in
Schritt 2 auf Seite 16
erläutert in den Modus
LEARN.
2 Wählen Sie durch Drehen
des Jog-Dial die
Einstellnummer („S-1“ bis
„S-8“) des Geräts, für das
Sie eine Funktion löschen
wollen. Drücken Sie
anschließend den Jog-Dial.
Der Name des Geräts blinkt im
Display.
-3S
R
CV
ARNLE
Hinweis
Wenn Sie den Namen eines Geräts
geändert haben (Seite 26), erscheint
im Display der neue Name.
3 Wählen Sie mit dem Jog-
Dial „DEL“ und drücken
Sie dann den Jog-Dial.
„DEL“ erscheint in der ersten
Zeile und „KEY?“ blinkt im
Display.
Tipp
Statt den Jog-Dial nach links/rechts zu
drehen, können Sie auch b/B drücken.
Statt den Jog-Dial zu drücken, können
Sie auch die Taste OK drücken (außer
im Folgenden für Schritt 4 und 5).
ELD
EY
K?
ARNLE
Fortsetzung
21
DE
Page 64

Bedienen nicht
vorprogrammierter Geräte
— Lernfunktion (Fortsetzung)
4 Drücken Sie die Taste, die
Sie löschen wollen.
„OK?“ blinkt schnell im
Display.
ELD
OK
?
ARNLE
5 Drücken Sie erneut die
gleiche Taste.
6 Wählen Sie „EXIT“ und
drücken Sie den Jog-Dial,
um das Löschen
abzuschließen.
Hinweise
• Wenn Sie den Modus SET beenden,
indem Sie SET drücken, wird nichts
gelöscht.
• Je nachdem, wie viel Speicherinhalt
gelöscht werden muss, kann es ein
paar Sekunden dauern, bis das
Löschen beendet ist. In diesem Fall
erscheint eine Verarbeitungsanzeige
im Display. Warten Sie, bis diese
Anzeige ausgeblendet wird.
„OK“ hört zu blinken auf und
der Name des Geräts blinkt
erneut.
ELD
OK
ARNLE
-3S
R
CV
ARNLE
Wenn Sie die programmierte
Funktion von einer anderen
Taste löschen wollen, gehen Sie
wie in Schritt 3 bis 5 erläutert
vor.
DE
22
Page 65

So löschen Sie alle
programmierten
Tastenfunktionen für ein Gerät
JogDial
Beispiel: So löschen Sie alle
programmierten Funktionen für
VCR
1 Gehen Sie wie in Schritt 1
bis 3 auf Seite 21 erläutert
vor. Drehen Sie dann den
Jog-Dial, bis der
Gerätename schnell im
Display blinkt.
ELD
R
CV
ARNLE
Hinweis
Wenn Sie den Namen eines Geräts
geändert haben (Seite 26), erscheint
im Display der neue Name.
2 Drücken Sie den Jog-Dial.
„OK?“ blinkt schnell im
Display.
ELD
Tipp
Statt den Jog-Dial nach links/rechts zu
drehen, können Sie auch b/B drücken.
Statt den Jog-Dial zu drücken, können
Sie auch die Taste OK drücken.
OK
ARNLE
?
Fortsetzung
23
DE
Page 66

Bedienen nicht
vorprogrammierter Geräte
— Lernfunktion (Fortsetzung)
3 Drücken Sie den Jog-Dial
nochmals.
„DEL OK“ erscheint im
Display und der Gerätename
blinkt erneut.
Weitere Funktionen
Ändern der
Geräteauswahlfolge
(MOVE)
Werkseitig ist in der
Fernbedienung folgende
Geräteauswahlfolge eingestellt.
Diese Folge können Sie jedoch
nach Belieben ändern.
TV
SAT
VCR
DVD
ELD
OK
ARNLE
-3S
R
CV
ARNLE
Hinweis
In manchen Fällen erscheint eine
Verarbeitungsanzeige im Display
(siehe „Hinweise“ auf Seite 22).
Warten Sie, bis diese Anzeige
ausgeblendet wird.
4 Wählen Sie „EXIT“ und
drücken Sie den Jog-Dial,
um das Löschen
abzuschließen.
Um den Modus SET zu beenden,
drücken Sie SET.
AMP
TAPE
MD
CD
JogDial
1
24
DE
Tipp
Statt den Jog-Dial nach links/rechts zu
drehen, können Sie auch b/B drücken.
Statt den Jog-Dial zu drücken, können
Sie auch die Taste OK drücken.
Page 67

Beispiel: So verschieben Sie
„VCR“ an die Stelle zwischen
„TAPE“ und „AMP“
1 Drücken Sie SET, drehen
Sie den Jog-Dial, um
„MOVE“ auszuwählen,
und drücken Sie den JogDial.
Die Fernbedienung schaltet in
den Modus MOVE.
3 Wählen Sie durch Drehen
des Jog-Dial ein Gerät aus,
das sich vor der Position
befindet, an die Sie das zu
verschiebende Gerät setzen
wollen.
Während Sie im Menü blättern,
blinken auch alle anderen
Gerätenamen schnell.
In diesem Beispiel:
Wählen Sie „AMP“.
VT
VEMO
Hinweis
Wenn Sie den Namen eines Geräts
geändert haben (Seite 26), erscheint
im Display der neue Name.
2 Wählen Sie durch Drehen
des Jog-Dial das Gerät aus,
das Sie verschieben wollen,
und drücken Sie dann den
Jog-Dial.
Der Name des ausgewählten
Geräts blinkt schnell.
R
CV
VEMO
P
MA
VEMO
4 Drücken Sie den Jog-Dial.
„OK“ erscheint eine Sekunde
lang im Display. Die neue
Geräteauswahlfolge wird
festgelegt und der Name des
zuvor ausgewählten Geräts
blinkt erneut.
OK
VEMO
R
CV
VEMO
Fortsetzung
DE
25
Page 68

Ändern der Geräteauswahlfolge
(MOVE)
(Fortsetzung)
Nun gilt folgende neue
Auswahlfolge:
VCR AMP TV SAT
TAPE MD CD
Wenn Sie eine weitere
Geräteposition ändern wollen,
gehen Sie wie in Schritt 3 und 4
erläutert vor.
DVD
5 Wählen Sie „EXIT“ und
drücken Sie den Jog-Dial,
um das Einstellen
abzuschließen.
So brechen Sie die
Programmierung ab
Drücken Sie SET.
Hinweis
Wenn Sie für ein Gerät die
Codenummer „000“ festgelegt haben
(Seite 10), wird dieses Gerät nicht
angezeigt.
Tipp
Sie können dafür sorgen, dass ein
Gerät, das Sie nicht verwenden, nicht
angezeigt wird, indem Sie als
Gerätecode dafür „000“ festgelegen
(Seite 10).
Ändern eines
Gerätenamens
(NAME)
Sie können den Namen von
Geräten, die Sie mit dieser
Fernbedienung steuern wollen,
ändern. Das ist sehr praktisch,
wenn Sie mehrere gleichartige
Geräte verwenden.
Ein Gerätename kann bis zu 6
Zeichen lang sein.
5
JogDial
26
DE
1,7
Tipp
Statt den Jog-Dial nach links/rechts zu
drehen, können Sie auch die Taste b/B
drücken, außer wenn Sie gerade ein
Zeichen für einen Gerätenamen
auswählen.
Statt den Jog-Dial zu drücken, können
Sie auch die Taste OK drücken.
Page 69

Beispiel: So ändern Sie „VCR“ in
„SONYDV“
1 Drücken Sie SET, drehen
Sie den Jog-Dial, um
„NAME“ auszuwählen,
und drücken Sie den JogDial.
Die Einstellnummer blinkt und
der Gerätename erscheint im
Display.
Die Fernbedienung schaltet in
den Modus NAME.
-1S
VT
MENA
Wollen Sie den Namen der
Verstärkereingangsquelle
ändern, drücken Sie den JogDial nochmals.
Der Name der Eingangsquelle
blinkt im Display.
MPA
DE
IVO1
MENA
3 Drücken Sie den Jog-Dial.
An der Stelle des ersten
Zeichens im Gerätenamen
blinkt ein Cursor.
Hinweis
Wenn Sie den Namen eines Geräts
geändert haben, erscheint im
Display der neue Name.
Tipps
• Wenn Sie neue Namen vergeben,
empfiehlt es sich, in der Liste der
Gerätecodenummern
nachzusehen, sofern Sie sich
entsprechende Notizen gemacht
haben.
• Wenn Sie den Jog-Dial während
des Umbenennens bei „EXIT“
drücken, schaltet die
Fernbedienung zurück in den
vorigen Modus.
2 Wählen Sie durch Drehen
des Jog-Dial das Gerät aus,
dessen Namen Sie ändern
wollen, und drücken Sie
dann den Jog-Dial.
Der Name des Geräts blinkt im
Display.
-3S
R
CV
MENA
-3S
R
CV
MENA
4 Drehen Sie den Jog-Dial,
um das gewünschte
Zeichen auszuwählen.
Das ausgewählte Zeichen und
der Cursor blinken
abwechselnd.
-3S
CR
VS
MENA
Fortsetzung
DE
27
Page 70

Ändern eines Gerätenamens
(NAME) (Fortsetzung)
Jedes Mal, wenn Sie den JogDial drehen, wechseln die
Zeichen folgendermaßen:
Großbuchstaben des
englischen Alphabets
Kleinbuchstaben des
englischen Alphabets
Ziffern (0 bis 9)
Symbole –, . (Punkt), /, ?, :
(Doppelpunkt), @, <<, >>,
(Leerzeichen)
Tipp
Die Namen sollten Sie sich notieren.
5 Drücken Sie den Jog-Dial,
so dass der Cursor ins
nächste Zeichenfeld
wechselt, und geben Sie das
nächste Zeichen ein.
Sie können bis zu 6 Zeichen
eingeben.
Sie können jedes beliebige
Zeichen ändern, in dem Sie den
Cursor mit der Taste b oder B
in das entsprechende
Zeichenfeld stellen.
Wenn Sie das sechste Zeichen
eingegeben haben, blinkt
„EXIT“ im Display.
IT
XE
MENA
6 Drücken Sie den Jog-Dial.
Der Gerätename für die
nächste Einstellnummer blinkt
im Display.
-4S
D
VD
MENA
Wollen Sie den Namen eines
weiteren Geräts ändern,
beginnen Sie wieder mit Schritt
3.
7 Drücken Sie SET.
Der neue Gerätename erscheint
im Display.
-3S
R
CS
MENA
Hinweis
Wenn Sie während dieses
Verfahrens SET drücken, werden
die Zeichen, die Sie bis dahin
eingegeben haben, als neuer Name
gespeichert.
DE
28
NYOSDV
Page 71

So setzen Sie einen
Gerätenamen auf den
werkseitigen Wert zurück
Beispiel: So setzen Sie einen
geänderten Gerätenamen an
„S-3“ auf den werkseitigen
Wert zurück
1 Gehen Sie wie in Schritt 1
bis 2 auf Seite 27 erläutert
vor. Wählen Sie dann durch
Drehen des Jog-Dial
„INIT.“ aus.
„INIT.“ blinkt im Display.
-3S
IT
NI.
MENA
JogDial
Tipp
Statt den Jog-Dial nach links/rechts zu
drehen, können Sie auch b/B drücken.
Statt den Jog-Dial zu drücken, können
Sie auch die Taste OK drücken.
2 Drücken Sie den Jog-Dial.
Der werkseitige Name für das
Gerät an der ausgewählten
Einstellnummer blinkt im
Display.
-3S
R
CV
MENA
Wenn Sie weitere Namen an
anderen Einstellnummern
zurücksetzen wollen, wählen
Sie durch Drehen des Jog-Dial
„EXIT“, drücken den Jog-Dial
und gehen wie in Schritt 1 bis 2
erläutert vor.
3 Wählen Sie „EXIT“ und
drücken Sie den Jog-Dial,
um das Einstellen
abzuschließen.
29
DE
Page 72

Löschen aller
gespeicherten
Einstellungen
(DELETE)
Sie können programmierte
Einstellungen, zum Beispiel
Gerätecodes oder Gerätenamen,
oder die Einstellungen, die Sie für
eine Einstellnummer
programmiert haben, oder
sämtliche programmierten
Einstellungen löschen und die
Fernbedienung auf die werkseitig
eingestellten Werte zurücksetzen.
Tipp
Statt den Jog-Dial nach links/rechts zu
drehen, können Sie auch b/B drücken.
Statt den Jog-Dial zu drücken, können
Sie auch die Taste OK drücken.
1 Drücken Sie SET und
wählen Sie durch Drehen
des Jog-Dial „DELETE“
aus.
„DELETE“ blinkt im Display.
LE
EDTE
TSE
Löschen aller gespeicherten
Einstellungen für eine
Einstellnummer
JogDial
1
2 Drücken Sie den Jog-Dial.
Die Einstellnummer blinkt und
der Gerätename erscheint im
Display.
Die Fernbedienung schaltet in
den Modus DELETE.
-1S
VT
LDE
Hinweis
Wenn Sie den Namen eines Geräts
geändert haben (Seite 26), erscheint
im Display der neue Name.
3 Wählen Sie mit dem Jog-
Dial das gewünschte Gerät
und drücken Sie dann den
Jog-Dial.
„OK?“ blinkt schnell im
Display.
-1S
30
DE
OK
LDE
?
Page 73

4 Drücken Sie den Jog-Dial.
„OK“ erscheint eine Sekunde
lang im Display. Alle
Einstellungen der
ausgewählten Einstellnummer
werden gelöscht. Die
Einstellnummer blinkt und der
ursprüngliche Gerätename
erscheint im Display.
-1S
OK
LDE
-1S
VT
LDE
Wenn Sie die programmierten
Einstellungen für eine weitere
Einstellnummer löschen
wollen, beginnen Sie wieder
mit Schritt 3.
Löschen aller gespeicherten
Einstellungen in der
Fernbedienung
— Zurücksetzen auf die
werkseitigen Werte
JogDial
5 Wählen Sie „EXIT“ und
drücken Sie den Jog-Dial,
um das Löschen
abzuschließen.
Tipp
Statt den Jog-Dial nach links/rechts zu
drehen, können Sie auch b/B drücken.
Statt den Jog-Dial zu drücken, können
Sie auch die Taste OK drücken.
Fortsetzung
31
DE
Page 74

Löschen aller gespeicherten
Einstellungen (DELETE)
(Fortsetzung)
1 Schalten Sie die
Fernbedienung wie in
Schritt 1 und 2 auf Seite 30
erläutert in den Modus
DELETE.
2 Wählen Sie durch Drehen
des Jog-Dial „ALL“ aus.
„ALL“ blinkt im Display.
LL
A
LDE
3 Drücken Sie den Jog-Dial.
„ALL OK?“ blinkt schnell im
Display.
Hinweis
Bei diesem Vorgang werden alle mit
der Lernfunktion programmierten
Funktionen sowie die
Gerätecodenummern, die Namen
der Geräte und die
Geräteauswahlfolge wieder auf die
werkseitigen Einstellungen
zurückgesetzt.
LLA
OK
?
LDE
4 Drücken Sie den Jog-Dial.
„ALL OK“ erscheint und
„DEL“ blinkt im Display.
LLA
OK
LDE
Alle Programmierungen
werden gelöscht. Die
Fernbedienung wird wieder
auf die werkseitigen
Einstellungen zurückgesetzt.
DE
32
Page 75

Ausschalten des LCDDisplays (DISP)
Um die Batterien zu schonen,
können Sie das LCD-Display so
einstellen, dass es sich ausschaltet,
wenn Sie die Fernbedienung nicht
benutzen. Die Zeitspanne, bis sich
das Display ausschaltet, können
Sie auf 10 bis 240 Sekunden (4
Minuten) einstellen, und zwar in
Schritten von je 1 Sekunde. Wenn
Sie das LCD-Display so einstellen,
dass es sich ausschaltet, können
Sie die Lebensdauer der Batterien
auf das 1- bis 3-fache der
Lebensdauer bei normaler
Verwendung verlängern.
Einstellen der Zeitspanne,
bis sich das LCD-Display
ausschaltet
Tipp
Statt den Jog-Dial nach links/rechts zu
drehen, können Sie auch b/B drücken.
Statt den Jog-Dial zu drücken, können
Sie auch die Taste OK drücken.
Beispiel: So stellen Sie das LCDDisplay so ein, dass es sich nach
30 Sekunden ausschaltet
1 Drücken Sie SET und
wählen Sie durch Drehen
des Jog-Dial „DISP.“ aus.
„DISP.“ blinkt im Display.
SP
ID.
TSE
2 Drücken Sie den Jog-Dial.
„ON“ blinkt im Display.
Die Fernbedienung schaltet in
den Modus DISP.
4
JogDial
4
1
N
O
SDI P.
Hinweis
Die Lebendauer der Batterien hängt
davon ab, wie Sie die
Fernbedienung verwenden und
nach welcher Zeit sich das LCDDisplay ausschaltet.
3 Drehen Sie den Jog-Dial,
um „OFF“ auszuwählen.
Die Zeitspanne, bis sich das
LCD-Display ausschaltet,
blinkt im Display.
FFO
1¢
s
SPD.I
Fortsetzung
33
DE
Page 76

Ausschalten des LCD-Displays
(DISP) (Fortsetzung)
4 Geben Sie mit den
Zahlentasten die
Zeitspanne ein, nach der
sich das LCD-Display
ausschalten soll.
In diesem Beispiel:
Drücken Sie 3 und dann 0.
Sie können die Zeitspanne
auch mit PROGR + oder
PROGR – eingeben.
5 Drücken Sie den Jog-Dial.
„OK“ erscheint eine Sekunde
lang im Display. Damit ist die
Zeitspanne, nach der sich das
LCD-Display ausschaltet,
eingestellt. Die Fernbedienung
schaltet zurück an den Anfang
des Modus SET.
6 Wählen Sie „EXIT“ und
drücken Sie den Jog-Dial,
um das Einstellen
abzuschließen.
So brechen Sie die
Programmierung ab
Drücken Sie SET.
FFO
OK
SDI P.
SP
ID.
TSE
Wenn „NG“ zweimal blinkt
Die eingegebene Zeitspanne gilt
nicht. Beginnen Sie noch einmal ab
Schritt 4.
DE
34
Page 77

Weitere Informationen
Sicherheitsmaßnahmen
•Lassen Sie das Gerät nicht fallen
und schützen Sie es vor Stößen.
Andernfalls kann es zu
Fehlfunktionen kommen.
•Lassen Sie das Gerät nicht in der
Nähe von Wärmequellen oder
an Orten liegen, an denen es
direktem Sonnenlicht,
außergewöhnlich viel Staub oder
Sand, Feuchtigkeit oder
mechanischen Stößen ausgesetzt
ist.
•Achten Sie darauf, dass keine
Fremdkörper in das Gerät
geraten. Sollten Fremdkörper
oder Flüssigkeiten in das Gerät
gelangen, lassen Sie es von
qualifiziertem Fachpersonal
überprüfen, bevor Sie es wieder
benutzen.
•Setzen Sie die Fernbedienung
und die Geräte, die Sie damit
steuern wollen, keinem direkten
Sonnenlicht oder sonstigem
starken Licht aus. Ein zu helles
Umgebungslicht kann die
Funktionsfähigkeit der
Fernbedienung beeinträchtigen.
•Halten Sie diese Fernbedienung
von kleinen Kindern und
Haustieren fern. Geräte wie
Klimaanlagen, Heizkörper,
Elektrogeräte, elektrisch
betriebene Rollläden oder
Vorhänge können bei falscher
oder unabsichtlicher Bedienung
eine Gefahrenquelle darstellen.
Technische Daten
Reichweite
ca. 10 m (variiert bei Geräten
unterschiedlicher Hersteller)
Stromversorgung
Zwei R6-Alkalibatterien der Größe
AA (nicht mitgeliefert)
Lebensdauer der Batterien
ca. 3 Monate (je nach Nutzung)
Abmessungen
ca. 49 x 230 x 25 mm (B/H/T)
Gewicht
210 g (einschließlich Alkalibatterien)
Programmierbare Signale*
Kapazität pro Signal: bis zu 250 Bit
Signalfrequenzbereich: bis zu 500
kHz
Signalintervall: bis zu 400 ms
Anzahl der programmierbaren
Tasten: bis zu 260 Tasten (abhängig
von den programmierten Signalen)
* Es gibt Signale, die nicht in dieser
Fernbedienung programmiert
werden können, obwohl sie diesen
Spezifikationen entsprechen.
Änderungen, die dem technischen
Fortschritt dienen, bleiben vorbehalten.
35
DE
Page 78

Störungsbehebung
Wenn es beim Einstellen oder bei der Verwendung der Fernbedienung zu
Problemen kommt, überprüfen Sie zunächst die Batterien (Seite 5) und
lesen Sie dann in der folgenden Tabelle nach.
Symptom
Die Geräte lassen sich
nicht mit der
Fernbedienung steuern.
Die Lautstärke lässt sich
nicht einstellen.
Die Geräte lassen sich
auch nach dem Einstellen
der Gerätecodenummern
nicht mit der
Fernbedienung steuern.
Bestimmte
Fernbedienungssignale
lassen sich nicht in dieser
Fernbedienung
programmieren.
Abhilfemaßnahmen
• Gehen Sie näher an das Gerät heran. Die maximale
Reichweite der Fernbedienung beträgt etwa 10 m.
• Richten Sie die Fernbedienung direkt auf das Gerät. Achten
sich darauf, dass sich zwischen Fernbedienung und Gerät
keine Hindernisse befinden.
• Schalten Sie die Geräte, wenn nötig, zunächst ein.
• Vergewissern Sie sich, dass Sie das richtige Gerät gewählt
haben.
• Überprüfen Sie, ob das Gerät per Infrarotstrahlen gesteuert
werden kann. Wenn zu dem Gerät zum Beispiel keine eigene
Fernbedienung gehört, kann es in der Regel auch nicht mit
dieser Fernbedienung gesteuert werden.
• Der Gerätenamen im Display entspricht nicht dem Gerät, das
durch die Fernbedienung gesteuert wird. Überprüfen Sie,
welches Gerät der betreffenden Einstellnummer zugeordnet
ist, und den Gerätecode.
• Wenn Ihre Videokomponenten an ein Audiosystem
angeschlosen sind, wählen Sie an der Fernbedienung „AMP“,
um die Lautstärke einzustellen. Sie können das Signal für den
Verstärker auch auf die Tasten 2 +/– für die einzelnen
Videokomponenten legen, die Sie mit der Fernbedienung
steuern möchten.
• Wenn Sie mit der Lernfunktion (Seite 15) die Taste 2 +/– für
„TV“ oder „AMP“ mit einem Signal belegt haben, wird dieses
Signal nicht übertragen, wenn Sie ein anderes Gerät bedienen.
Wenn Sie ein programmiertes Signal verwenden wollen,
müssen Sie die Taste 2 +/– für die entsprechenden Geräte
mithilfe der Lernfunktion programmieren.
• Stellen Sie den Gerätecode ordnungsgemäß ein. Wenn der
erste Code, der für Ihr Gerät aufgelistet ist, nicht funktioniert,
probieren Sie die anderen Codes für dieses Gerät aus, und
zwar am besten in der Reihenfolge, in der sie in der
mitgelieferten Tabelle „Gerätecodenummern“ aufgelistet
sind.
• Es stehen nicht immer alle Funktionen zur Verfügung. Wenn
einige oder alle Tasten auch nach dem Einstellen der
Gerätecodes nicht ordnungsgemäß funktionieren, dann
programmieren Sie die Fernbedienungssignale für das Gerät
mit der Lernfunktion (Seite 15).
• Möglicherweise kann das Gerät mit einer Codenummer
gesteuert werden, die nicht in der Tabelle
„Gerätecodenummern“ aufgelistet ist. Schlagen Sie unter
„Einstellen eines Gerätecodes mit der Suchfunktion“ (Seite
11) nach, und versuchen Sie erneut, eine Codenummer
einzustellen.
• Wenn Sie Signale von einer Fernbedienung mit interaktivem
Signalaustauschsystem (solche Fernbedienungen gehören zu
einigen der Receiver und Verstärker von Sony) in dieser
Fernbedienung programmieren, kann es zu Interferenzen
zwischen dem Antwortsignal des Hauptgeräts und der
Lernfunktion dieser Fernbedienung kommen. Nehmen Sie
die Programmierung in einem solchen Fall an einem Ort vor,
an dem die Signale das Hauptgerät nicht erreichen können.
Gehen Sie zum Beispiel in ein anderes Zimmer.
36
DE
Page 79

Symptom
Ein Gerät lässt sich nicht
steuern, nachdem Sie mit
der Lernfunktion
Fernbedienungssignale
programmiert haben.
„NG“ blinkt zweimal.
„OVER“ blinkt zweimal.
„DEL“ funktioniert im
Modus LEARN nicht.
Ein Wechsel in den
Modus SET ist nicht
möglich.
Der Modus SET wird
abgebrochen.
Im Display erscheinen
falsche Gerätenamen.
Abhilfemaßnahmen
• Vergewissern Sie sich, dass in der Fernbedienung die
richtigen Signale programmiert sind. Wenn nicht, schlagen Sie
unter „Für eine erfolgreiche Programmierung“ (Seite 18) nach
und programmieren Sie sie noch einmal mit der Lernfunktion
(Seite 15).
• Sie können für ein Gerät, dessen Codenummer auf „000“
gesetzt wurde, mit der Lernfunktion ein Signal
programmieren, aber das Gerät wird im normalen Modus
nicht angezeigt. Wenn Sie die programmierte Funktion
verwenden wollen, müssen Sie als Gerätecode eine andere
Nummer als „000“ angeben. Die programmierte Funktion
wird dabei nicht gelöscht.
• Für die Taste ist bereits eine Funktion programmiert.
Programmieren Sie die Funktion für eine andere Taste oder
löschen Sie die bereits programmierte Funktion und
versuchen es dann noch einmal (Seite 15).
• Die Lernfunktion ist fehlgeschlagen. Schlagen Sie unter „Für
eine erfolgreiche Programmierung“ (Seite 18) nach und
programmieren Sie die gewünschte(n) Funktion(en) noch
einmal mit der Lernfunktion (Seite 15).
• Die Gerätecodes lassen sich nicht einstellen. Schlagen Sie in
der mitgelieferten Tabelle „Gerätecodenummern“ nach und
versuchen Sie, die Gerätecodes noch einmal einzustellen
(Seite 8).
• Der Speicher der Fernbedienung ist voll. Löschen Sie
programmierte Tastenfunktionen, die Sie nicht häufig
benutzen (Seite 21), und führen Sie dann die Lernfunktion
nochmals aus.
• Wählen Sie mit dem Jog-Dial „EXIT“ aus, um den aktuellen
Modus zu beenden.
• Tauschen Sie die Batterien gegen neue aus und versuchen Sie
es nochmals.
• Wenn Sie mehr als 30 Sekunden lang nichts in die
Fernbedienung eingeben, wird der Modus SET beendet.
Fahren Sie innerhalb von 30 Sekunden mit dem nächsten
Schritt fort.
• Wenn Sie den Namen eines Geräts geändert haben, erscheint
im Display der neue Name.
Wenn Sie die Geräteauswahlfolge geändert haben, werden die
Gerätenamen in der neuen Reihenfolge angezeigt.
Erläuterungen zum Ändern von Gerätenamen oder der
Geräteauswahlfolge finden Sie unter „Ändern der
Geräteauswahlfolge (MOVE)“ auf Seite 24 bzw. „Ändern
eines Gerätenamens (NAME)“ auf Seite 26.
Wollen Sie die Fernbedienung wieder auf die werkseitigen
Einstellungen zurücksetzen, lesen Sie bitte „Löschen aller
gespeicherten Einstellungen in der Fernbedienung“ auf Seite
31.
Wenn Sie mit den oben genannten Maßnahmen ein Problem nicht lösen können,
versuchen Sie, die Fernbedienung auf die werkseitigen Einstellungen
zurückzusetzen (Seite 31), bevor Sie sich an den Kundendienst wenden.
37
DE
Page 80

Anhang
Tabelle der
vorprogrammierten
Funktionen
Hinweis
Nicht alle Geräte oder Funktionen
lassen sich mit dieser Fernbedienung
steuern.
TOPText
Mit TOPText können Sie mit einem
einzigen Tastendruck auf Seiten
zugreifen. Wenn TOPtext ausgestrahlt
wird, erscheint am unteren Rand des
Fernsehschirms ein farbcodiertes
Menü. Die Farben des Menüs
entsprechen der ROTEN, GRÜNEN,
GELBEN und BLAUEN Taste auf der
Fernbedienung.
Drücken Sie die farbige Taste, die dem
farbcodierten Menü entspricht. Die
Seite wird nach einigen Sekunden
angezeigt.
TV (Fernsehgerät)
TASTENANZEIGE
qa1
31 – 9, 0
4-/--, 1-
qd2-
5ROT, GRÜN,
GELB, BLAU
1/
qsa
2t
7MENU
6v
6V
6B
6b
qfOK
qgPROGR +/–
qh
92 +/–
q;
FUNKTION
Ein- und Ausschalten
Wechseln des
Programms.
Auch Einschalten.
Auswählen zweistelliger
Nummern.
Funktioniert wie die
Fernbedienung des
Fernsehgeräts.
Auswählen einer
Nummer zwischen 20
und 29
TOPText-Tasten
Wechseln zum Videotext
Einschalten.
Zurückschalten vom
Videotext zum
Fernsehprogramm.
Wechseln des
Eingangsmodus
Aufrufen der
Menüanzeige
Bewegen des Cursors
nach oben
Bewegen des Cursors
nach unten
Bewegen des Cursors
nach rechts
Bewegen des Cursors
nach links
Eingeben einer Auswahl
in der Menüanzeige
Höhere
Programmnummer: +
Niedrigere
Programmnummer: –
Auslösen der Funktion
JUMP, FLASHBACK
oder PROGRAMME
RETURN am
Fernsehgerät, je nach
werkseitiger Einstellung
des Fernsehgeräts
Erhöhen der Lautstärke:
+
Verringern der
Lautstärke: –
Stummschalten des
Fernsehgeräts. Drücken
Sie die Taste erneut, um
den Ton wieder
einzuschalten.
38
DE
Page 81

SAT (Satelliten-Tuner)
TASTENANZEIGE
qa1
31 – 9, 0
4-/--
5ROT, GRÜN,
GELB, BLAU
2t
qsa (EPG)
1/ (GUIDE)
qd2- (EXIT)
7MENU
6v
6V
6B
6b
qfOK
qgPROGR +/–
qh
* Wenn Sie ein Fernsehkabel oder eine
Antenne an den SAT-Empfänger
anschließen, wechselt die Ausgabe
zwischen Fernseh- und
Satellitenprogramm.
FUNKTION
Ein- und Ausschalten
Wechseln des
Programms.
Auch Einschalten.
Auswählen zweistelliger
Nummern.
Funktioniert wie die
Fernbedienung des
Fernsehgeräts.
TOPText-Tasten
Umschalten der
Ausgabe des SATEmpfängers zum
Fernsehprogramm*
Ein-/Ausschalten der
EPG-Anzeige
Aufrufen des Master
Guide
Beenden des Modus
Aufrufen der
Menüanzeige
Bewegen des Cursors
nach oben
Bewegen des Cursors
nach unten
Bewegen des Cursors
nach rechts
Bewegen des Cursors
nach links
Aufrufen des
Senderindex, wenn
keine
Programmübersicht
angezeigt wird.
Auswählen des
hervorgehobenen
Programms.
Höhere Kanalnummer: +
Niedrigere
Kanalnummer: –
Auslösen der Funktion
JUMP, FLASHBACK
oder PROGRAMME
RETURN am SatellitenTuner, je nach
werkseitiger Einstellung
des Satelliten-Tuners.
VCR (Videorecorder)
TASTENANZEIGE
qa1
31 – 9, 0
2t
6m
6N
6M
7z
6x
qfX
qgPROGR +/–
qd2-
4-/--, 1-
**Sie können diese Funktion jedoch
mithilfe der Lernfunktion auf eine
einzige Taste (z) legen (Seite 15).
FUNKTION
Ein- und Ausschalten
Wechseln des
Programms.
Auch Einschalten.
Auswählen der
Eingangsquelle. Mit
jedem Tastendruck
wechselt die
Eingangsquelle.
Zurückspulen
Wiedergeben
Vorwärtsspulen
Zum Aufnehmen halten
Sie z gedrückt und
drücken N**. Lassen
Sie erst N und dann z
los.
Stoppen
Pause
Höhere
Programmnummer: +
Niedrigere
Programmnummer: –
Auswählen einer
Nummer zwischen 20
und 29
Auswählen einer
zweistelligen Nummer.
Funktioniert wie die
Fernbedienung des
Videorecorders.
Fortsetzung
DE
39
Page 82

Tabelle der vorprogrammierten
Funktionen (Fortsetzung)
DVD (DVD-Player)
TASTENANZEIGE
qa1
31 – 9, 0
41- , -/-- (+10)
qd2- (ENTER)
2t (AUDIO)
qsa
(DISPLAY)
1/ (TITLE)
7MENU
6v
6V
6B
6b
qfOK
5ROT (m)
5GRÜN (x)
5GELB (N)
5BLAU (M)
qgPROGR +
(FF (AMS))
qgPROGR –
(REW (AMS))
FUNKTION
Ein- und Ausschalten
Zahlentasten: zum
Einstellen von am
Bildschirm
ausgewählten Optionen
Auswählen der
Nummer 10 und höher
Eingeben der
Einstellung. Einstellen
von am Bildschirm
ausgewählten Optionen.
Wechseln der Tonspur
Anzeigen des aktuellen
Wiedergabestatus am
Bildschirm
Anzeigen des
Titelmenüs
Anzeigen des DVDMenüs
Bewegen des Cursors
nach oben
Bewegen des Cursors
nach unten
Bewegen des Cursors
nach rechts
Bewegen des Cursors
nach links
Ausführen von am
Bildschirm
ausgewählten Optionen
Zurückschalten
Stoppen
Wiedergeben
Vorwärtsschalten
Weiterschalten zur
nächsten Stelle oder zum
nächsten Titel
Zurückschalten zur
vorhergehenden Stelle
oder zum
vorhergehenden Titel
CD (CD-Player)
TASTENANZEIGE
qa1
31 – 9, 0
41-, -/-- (+10)
qh (D.SKIP)
6m
6N
6M
6x
qfX
FUNKTION
Ein- und Ausschalten
Auswählen der
Titelnummer. Mit 0
wählen Sie Titel 10 aus.
Auswählen der
Nummer 10 und höher
Auswählen der nächsten
CD
Auswählen des
vorhergehenden Titels
Wiedergeben
Auswählen des nächsten
Titels
Stoppen
Pause
40
DE
Page 83

MD (MD-Player)
TASTENANZEIGE
qa1
31 – 9, 0
41-, -/-- (+10)
qh (D.SKIP)
6m
6N
6M
7z
6x
qfX
* Sie können diese Funktion jedoch
mithilfe der Lernfunktion auf eine
einzige Taste (z) legen (Seite 15).
FUNKTION
Ein- und Ausschalten
Auswählen der
Titelnummer. Mit 0
wählen Sie Titel 10 aus.
Auswählen der
Nummer 10 und höher
Auswählen der nächsten
MD
Auswählen des
vorhergehenden Titels.
Wiedergeben
Auswählen des nächsten
Titels.
Zum Aufnehmen halten
Sie z gedrückt und
drücken N*. Lassen Sie
erst N und dann z los.
Stoppen
Pause
TAPE (Kassettendeck)
TASTENANZEIGE
30 (REV PB)
qh (A/B)
6m
6N
6M
7z
6x
qfX
* Sie können diese Funktion jedoch
mithilfe der Lernfunktion auf eine
einzige Taste (z) legen (Seite 15).
**Wenn sich Deck A/B nicht auswählen
lässt, schlagen Sie auf Seite 14 nach.
FUNKTION
Wiedergeben der
Rückseite
Auswählen von Deck A
oder B**.
Zurückspulen
Wiedergeben
Vorwärtsspulen
Zum Aufnehmen halten
Sie z gedrückt und
drücken N*. Lassen Sie
erst N und dann z los.
Stoppen
Pause
AMP (Verstärker)
TASTENANZEIGE
qa1
8 Jog-Dial
qgPROGR +/–
(BAND +/–)
qh (SHIFT)
92 +/–
q;
**Wenn für eine Eingangsquelle keine
Fernbedienungssignale vorhanden
sind (voreingestellt oder mit der
Lernfunktion programmiert), wird sie
nicht angezeigt.
FUNKTION
Ein- und Ausschalten
Auswählen der
Eingangsquelle**:
Wechselt mit jedem
Druck auf den Jog-Dial.
• VIDEO 1
• VIDEO 2
• AUX
• TUNER
•CD
• TAPE
• DVD
•TV
• PHONO
• INPUT
Programmieren oder
Einstellen eines Senders
mit höherer Frequenz: +
Programmieren oder
Einstellen eines Senders
mit niedrigerer
Frequenz: –
Wechseln des
Frequenzbands oder
Auswählen eines
gespeicherten Senders.
Erhöhen der Lautstärke:
+
Verringern der
Lautstärke: –
Stummschalten am
Verstärker. Drücken Sie
die Taste erneut, um den
Ton wieder
einzuschalten.
41
DE
Page 84

Index
A
Ändern
Geräteauswahlfolge (MOVE) 24
Gerätenamen (NAME) 26
programmierte Signale 21
B
Batterien 5
C
Codenummer 8
D
Display 7
E, F
Eingangswahl 14, 19
Einstellnummer 7
G, H, I
Gerätesignal 15
J, K
Jog-Dial 7
L
Lautstärkeregelung 15
LCD-Display
siehe "Display"
Lernfunktion 15
Löschen
alle gespeicherten Einstellungen
(DELETE) 30
programmierte Signale 21
M
Modus SET
Ändern der Geräteauswahlfolge
(MOVE) 24
Ändern eines Gerätenamens
(NAME) 26
Ausschalten des LCD-Displays
(DISP) 33
Einstellen der Gerätecodes 8
Lernfunktion 15
Löschen aller gespeicherten
Einstellungen (DELETE) 30
N, O, P, Q, R
Normalen Modus 7
S
Störungsbehebung 36
Suchen
Codenummer 11
T, U
Tabelle der vorprogrammierten
Funktionen 38
AMP 41
CD 40
DVD 40
MD 41
SAT 39
TAPE 41
TV 38
VCR 39
V, W, X, Y
Werkseitig eingestellte Geräte 8
Werkseitige Einstellungen 8, 29, 31
Z
Zahlentasten 10
Sony Corporation Printed in Japan
DE
42
 Loading...