

Page 1
LCD Multi
Function Display
2-345-278-01(1)
Quick Setup Guide
Setup . . . . . . . . . . . . . . . . . . . . . . . . . . . . . . . . . . . . . . . . . . . . 3 (US)
Troubleshooting / Specifications . . . . . . . . . . . . . . . . . . . . . . 12 (US)
Guide de configuration rapide
Installation . . . . . . . . . . . . . . . . . . . . . . . . . . . . . . . . . . . . . . . . 3 (FR)
Dépannage / Spécifications . . . . . . . . . . . . . . . . . . . . . . . . . 13 (FR)
Guía de instalación rápida
Instalación . . . . . . . . . . . . . . . . . . . . . . . . . . . . . . . . . . . . . . . . 3 (ES)
Solución de problemas / Especificaciones . . . . . . . . . . . . . . 12 (ES)
DO NOT RETURN TO PLACE OF PURCHASE
NE PAS RETOURNER AU MAGASIN
US
FR
ES
If you believe the product purchased in the U.S. is
defective, call Sony for assistance or Advance Exchange.
For assistance in the U.S. call: 1-866-357-SONY (7669)
For assistance in Canada call: 1-800-961-SONY (7669)
Si vous croyez que le produit acheté aux E.-U. est defectueux, communiquer
avec Sony pour obtenir de l’aide ou un remplacement.
Pour obtenir de l’aide aux E.-U., composer le : 1-866-357-SONY (7669)
Pour obtenir de l’aide au Canada, composer le :1-800-961-SONY (7669)
http://www.sony.com/displays/support
MFM-HT75W
MFM-HT95
© 2004 Sony Corporation
Page 2
WARNING
To prevent fire or shock hazard, do not expose the
unit to rain or moisture.
Dangerously high voltages are present inside the
unit. Do not open the cabinet. Refer servicing to
qualified personnel only.
• To reduce the risk of fire or electric shock, do not expose this
Apparatus to rain or moisture.
• Apparatus shall not be exposed to dripping or splashing and no
objects filled with liquids, such as vases, shall be placed on the
apparatus.
• To prevent fire, keep inflammable objects or naked lights (e.g.
candles) away from the unit.
• Do not place the unit near or over a radiator or heat register, or
where it is exposed to direct sunlight.
Precautions
Warning on power connections
• Use the supplied power cord. If you use a different power cord,
be sure that it is compatible with your local power supply.
For the customers in the U.S.A.
If you do not use the appropriate cord, this display will not
conform to mandatory FCC standards.
For the customers in the UK
If you use the display in the UK, be sure to use the appropriate
UK power cord.
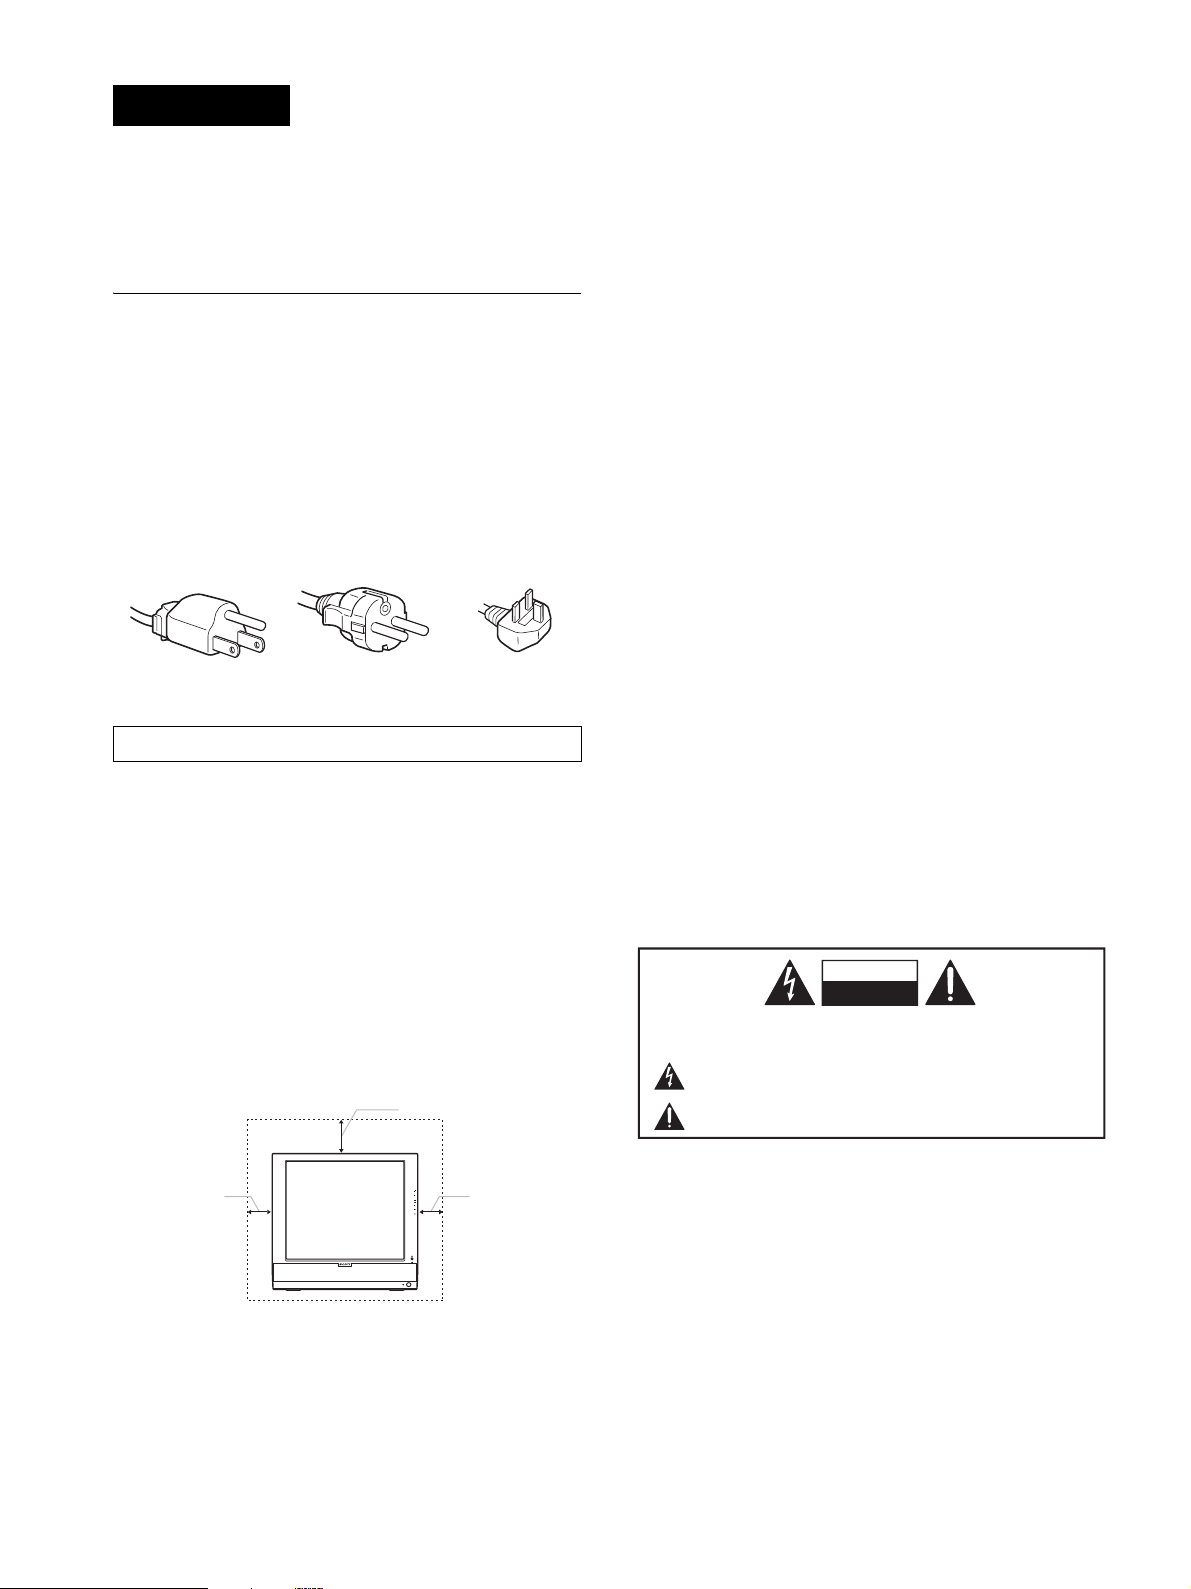
Example of plug types
for 100 to 120 V AC for 200 to 240 V AC for 240 V AC only
The equipment should be installed near an easily accessible outlet.
Installation
Do not install or leave the display:
• In places subject to extreme temperatures, for example near a
radiator, heating vent, or in direct sunlight. Subjecting the
display to extreme temperatures, such as in an automobile
parked in direct sunlight or near a heating vent, could cause
deformations of the casing or malfunctions.
• In places subject to mechanical vibration or shock.
• The ventilation should not be impeded by covering the
ventilation openings with items, such as newspapers, tablecloths, curtains, etc.
• Leave some space around the unit. Otherwise, adequate aircirculation may be blocked causing overheating and cause fire
or damage the unit.
20 cm
Note on the LCD (Liquid Crystal Display)
Please note that the LCD screen is made with high-precision
technology. However, black points or bright points of light (red,
blue, or green) may appear constantly on the LCD screen, and
irregular colored stripes or brightness may appear on the LCD
screen. This is not malfunction.
(Effective dots: more than 99.99%)
About the built-in stereo speakers
Be sure to keep magnetic recording equipment, tapes, and floppy
discs away from the speaker’s opening as the speakers generate a
magnetic field. This magnetic field may affect data stored on
magnetic tapes and discs.
Transportation
• Disconnect all cables from the display, and grasp both side of
the LCD display firmly taking care not to scratch the screen
when transporting. If you drop the display, you may be injured
or the display may be damaged.
• When you transport this display for repair or shipment, use the
original carton and packing materials.
Disposal of used batteries
To preserve our environment, dispose the used batteries
according to your local laws or regulations.
Installation on a wall or a mounting arm
If you intend to install the display on a wall or a mounting arm, be
sure to consult qualified personnel.
CAUTION
RISK OF ELECTRIC SHOCK
DO NOT OPEN
WARNING:
TO REDUCE THE RISK OF ELECTRIC SHOCK DO NOT REMOVE COVER (OR BACK). NO USER
SERVICEABLE PARTS INSIDE. REFER TO QUALIFIED SERVICE PERSONNEL.
The lightning flash with arrowhead symbol, within an equilateral triangle, is intended to alert the user to
the presence of uninsulated “dangerous voltage” within the product’s enclosure that may be of sufficient magnitude to constitute a risk of electric shock to persons.
The exclamation point within an equilateral triangle is intended to alert the user to the presence of
important operating and maintenance (servicing) instructions in the literature accompanying the appliance.
10 cm
10 cm
• Near any equipment that generates a strong magnetic field,
such as a TV or various other household appliances.
• In places subject to inordinate amounts of dust, dirt, or sand, for
example near an open window or an outdoor exit. If setting up
temporarily in an outdoor environment, be sure to take
adequate precautions against airborne dust and dirt. Otherwise
irreparable malfunctions could occur.
2 (US)
Page 3
To view the Operating Instructions
on the CD-ROM
Note
To view the Operating Instructions on the CD-ROM,
Macromedia Shockwave Player and Adobe Acrobat Reader
(version 6.0 or later) must be installed on your computer. The
“installs” folder on the CD-ROM contains the installation
programs for them.
If you want to install those programs, open the “My
Computer” and right-click on the CD-ROM drive, then select
“Explore” and open the “installs” folder. (for Windows only)
If you are using a Macintosh computer:
Double-click on the CD-ROM icon to open the window, then
double-click on the “MONITOR” icon.
To view the Operating Instructions
The Operating Instructions files are included in the supplied CD-ROM.
Load the supplied CD-ROM into the CD-ROM drive of your computer.
After a while, the introductory page of the CD-ROM will open
automatically.
If the introducto ry page does not appear automatica lly, open the Operating
Instruction file directly. (for Windows only)
1 Open the “My Computer.”
2 Right-click the “CD-ROM” drive, and select “Explore.”
3 Open the “manuals” folder.
4 Open the “HT” folder.
5 Open the “UC” folder.
6 Select and open the “HT_75W_95_**.pdf.”
(“**” in the file name stands for the language in which each PDF file
is written. For example, HT_75W_95_US.pdf is written in the US
English.)
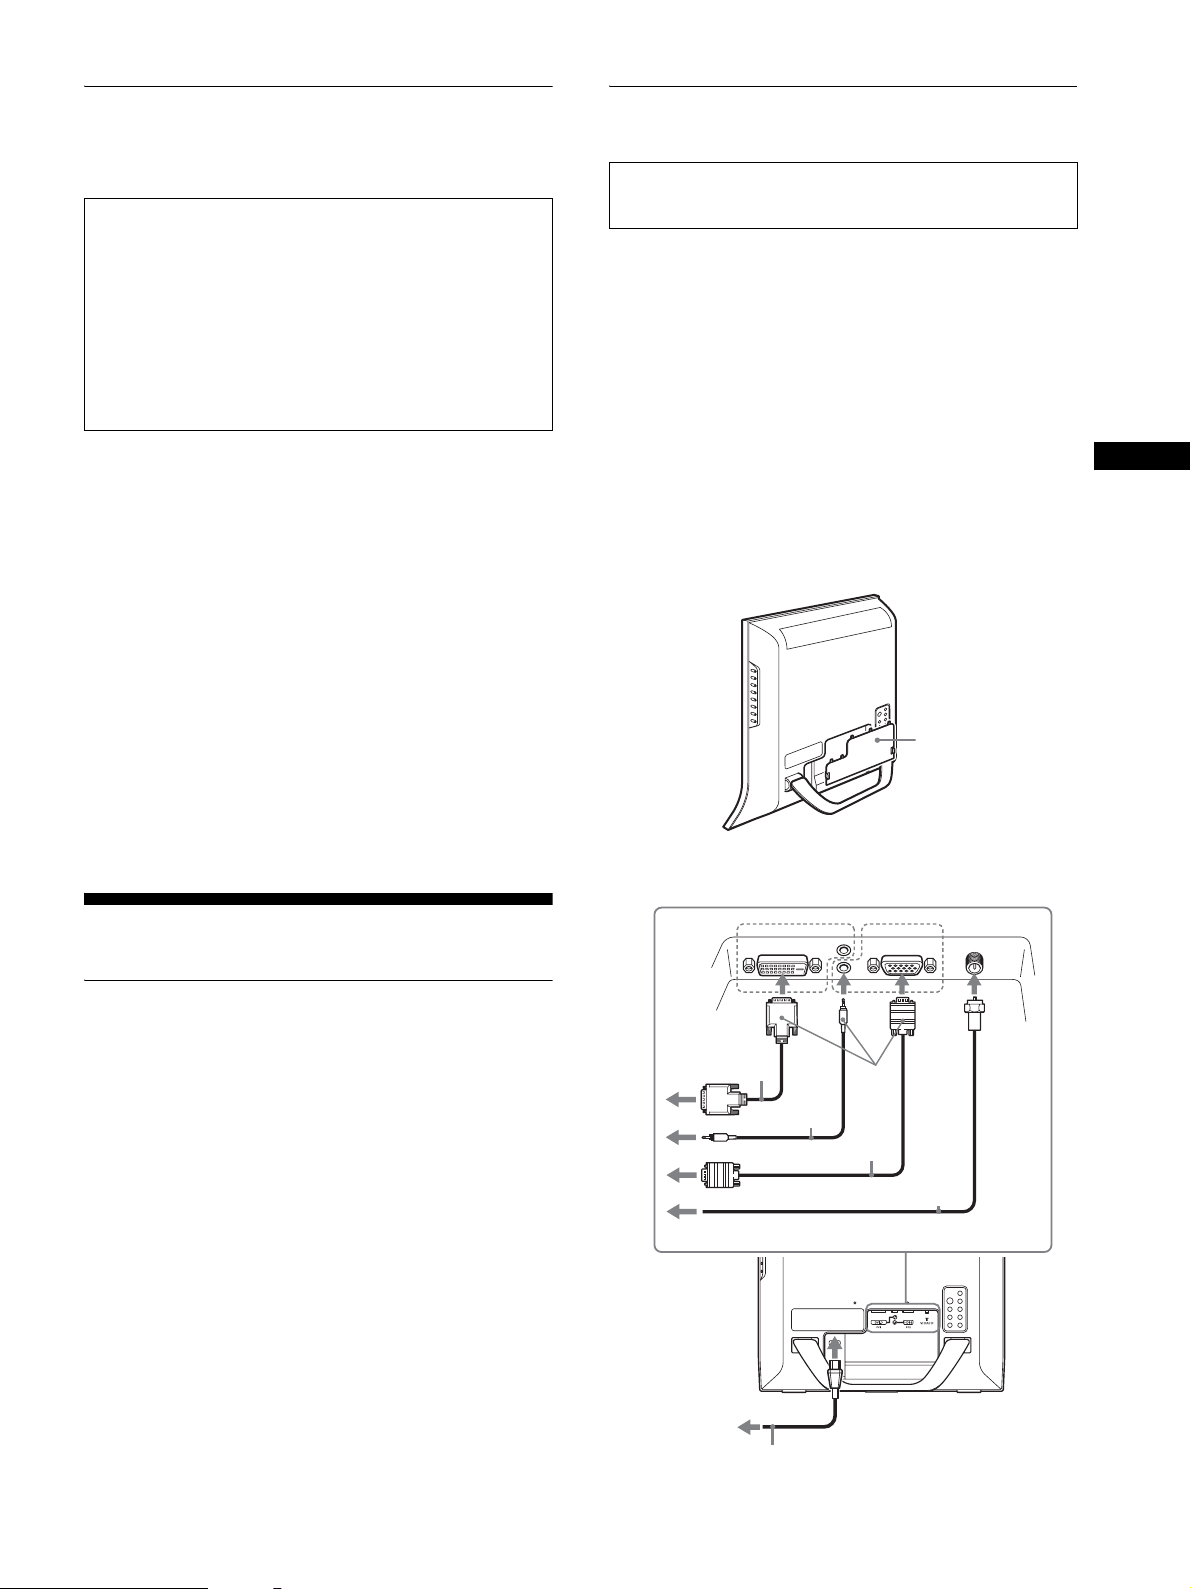
Connecting your display
Connect your display to a computer or other video equipment.
• Turn off the display, computer, and any other
equipment before connecting them.
• Do not touch the pins of the video signal cable plug.
1 Open the stand.
2 Remove the connector cover.
3 Connect your display to a computer or other video
equipment.
Connecting a Macintosh computer
Connect the supplied video signal cable to a video output connector
on the computer. If necessary, use an adapter (not supplied). Connect
the adapter to the computer before connecting the video signal cable.
4 Connect your display to an antenna using the 75-
ohm coaxial cable (supplied), if necessary.
5 Connect the supplied power cord securely to the
display’s AC IN connector.
6 Connect the other end securely to a power outlet.
2
connector cover
US
To exit from the CD-ROM
Click “EXIT/CD-ROM.”
Setup
Unpacking
Make sure your carton contains everything listed below.
•LCD display
• Remote control
• Size AAA batteries (2)
• Power cord
• HD15-HD15 video signal cable (analog RGB)
• DVI-D video signal cable (digital RGB)
• Audio cord (stereo miniplug)
• 75-ohm coaxial cable
• CD-ROM (utility software for Windows/Macintosh, Operating
Instructions, etc.)
• Warranty card
• This Quick Setup Guide
For PC 1/PC 2
DVI-D video signal
cable (supplied)
to power outlet
Audio
DVI-D
DVI-D HD15
3
audio cord
(supplied)
HD15-HD15 video signal
cable (supplied)
75-ohm coaxial cable (supplied)
5
to AC IN
HD15
VHF/UHF
4
6
power cord (supplied)
3 (US)
Page 4
For VIDEO 1/VIDEO 2
The input signal will change each time you press the button.
S video cable (not supplied)
component video cable
(not supplied)
3
audio cord (not supplied)
video and audio cable (not supplied)
5
to AC IN
to power outlet
to VHF/
UHF
4
6
power cord (supplied)
Note
When you connect video equipment to both composite video
input and S video input jacks, the signal from the S video jack
is displayed.
Turning on the display and other
equipment
75-ohm coaxial cable (supplied)
On-screen message Input signal configuration
DVI-D: PC 1 DVI-D input connector (digital
RGB) for PC 1
HD15: PC 2 HD15 input connector
(analog RGB) for PC 2
TV Channels TV
: VIDEO 1
or : VIDEO 2
Note
When using the PIP function, if you switch the input using the button
or input select buttons, the PIP function may be released. If it happens, the
input source that you have selected fills the entire screen. To use the PIP
function again, set the “PIP Setting” menu to “PIP On” using the menu
system or select “PIP On” by pressing the button.
Tips
• You can also select the inputs using the input select buttons on the
remote control.
• When you select the TV input, the number of the selected channel is
displayed in the upper right corner of the screen.
• When using the PIP function, use “Sub” in the “PIP” menu in the
“Option” menu to select the input source for sub picture. If the TV input
is selected for sub picture, you can change the channel using the CH +/
– buttons.
Y/P
input jacks for VIDEO 1
Composite/S video input jacks
for VIDEO 2
Component Video
B/PR
Setting up the remote control
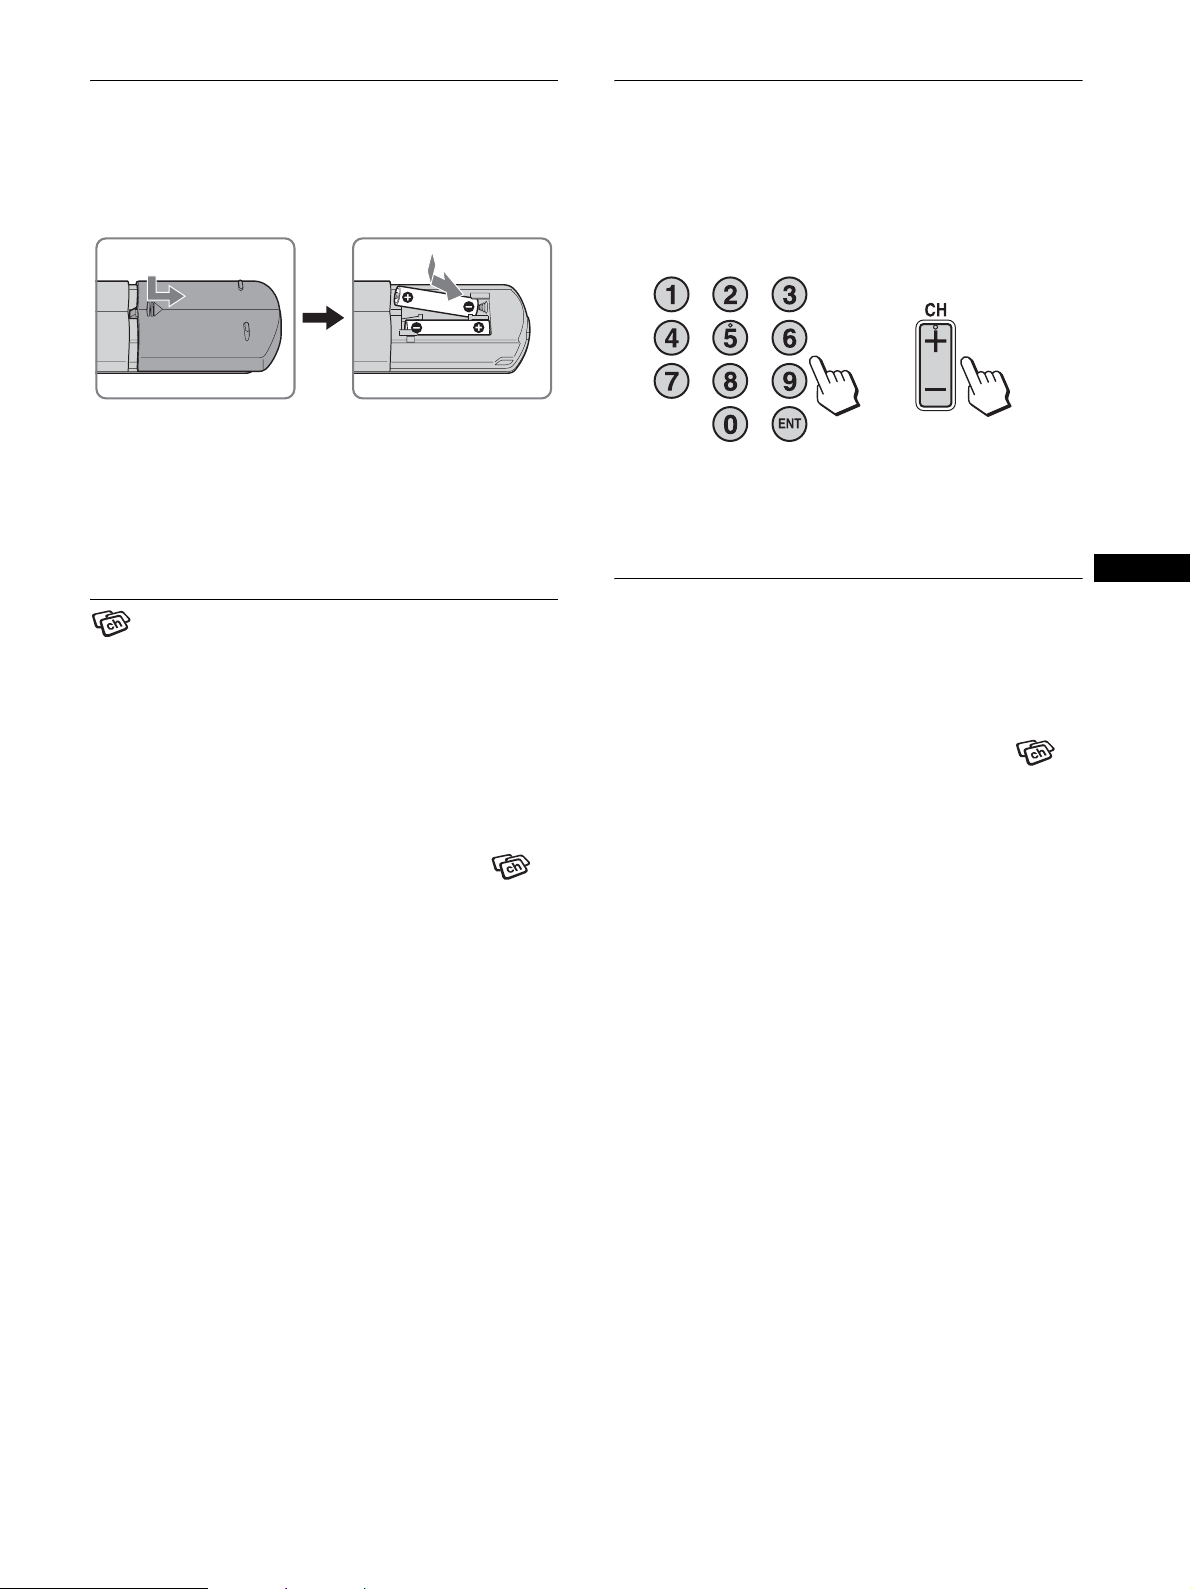
Insert two size AAA batteries (supplied) by matching
the + and – marks on the batteries to the diagram inside
the remote control’s battery compartment.
Turn on your display first, then a computer or other video
equipment.
1 Press the 1 (power) switch on the front of the
display.
The 1 (power) indicator lights up in green.
2 Turn on the computer or other video equipment.
3 Press the button to select the desired input
signal.
3
CH
lights in green
1
Notes
• Remove the batteries to avoid damage from possible battery leakage
whenever you anticipate that the remote control will not be used for an
extended period.
• Handle the remote control with care. Avoid dropping it, getting it wet,
or placing it in direct sunlight, near a heater or where the humidity is
high.
4 (US)
Page 5
Setting the TV channels
Skipping unnecessary channels
To watch TV programs, you need to run “Auto Program” to set up
your channels.
Perform the following “Auto Program” procedure before you
watch TV programs for the first time.
For details on the use of the menu and buttons, refer to the
Operating Instructions on the supplied CD-ROM.
1 Press the MENU button.
2 Press the M/m buttons to select (Channel) and
press the OK button.
The “Channel” menu appears on the screen.
3 Press the M/m buttons to select “Auto Program”
and press the OK button.
The “Auto Program” menu appears on the screen.
4 Press the M/m buttons to select “OK” and press the
OK button.
The display starts scanning and preparing channels
automatically.
Channel number and on-screen message appear.
5 Press the MENU button to exit the menu screen after
“Auto Program” is completed.
Changing the TV channel
You can skip unnecessary channels when selecting channels
using the CH +/– button.
1 Press the MENU button.
2 Press the M/m buttons to select (Channel) and
press the OK button.
The “Channel” menu appears on the screen.
3 Press the M/m buttons to select “Channel Skip/
Add” and press the OK button.
The “Channel Skip/Add” menu appears on the screen.
4 Press the M/m buttons to select the channel you
want to skip and press the OK button.
Tip
To scroll through the list, press and hold the M/m buttons.
5 Press the M/m buttons to select “Skip” and press
the OK button.
If you want to restore skipped channel, select “Add.”
6 Press the MENU button to exit the menu screen.
Choosing between cable and UHF/
VHF
US
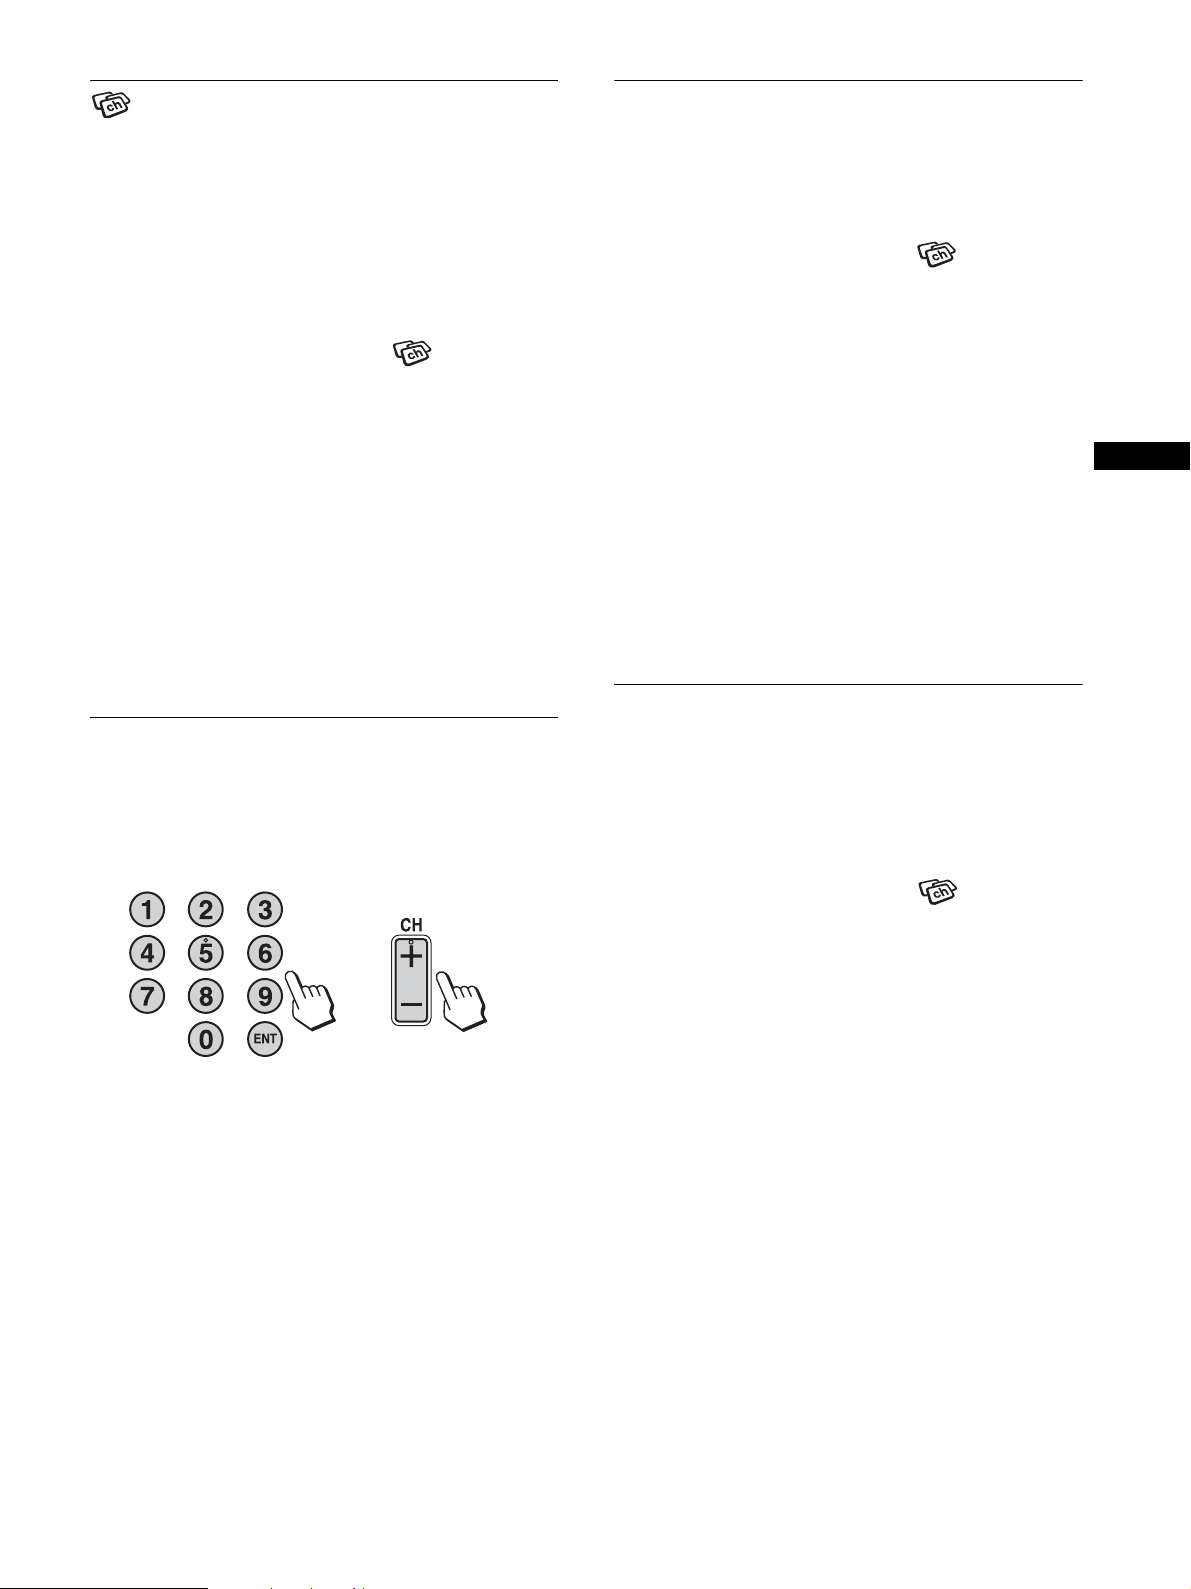
Press the 0-9 buttons to input a channel number.
The channel changes after 3 seconds. Press the ENT (enter) button
to select immediately.
Use the CH +/– buttons to scan through the channels.
or
Tip
When you press and hold the CH + or – button, the channel number will
change rapidly.
To set the UHF/VHF channels, you need to set the “Cable” menu
to “Off” by following the instructions below.
1 Press the MENU button.
2 Press the M/m buttons to select (Channel) and
press the OK button.
The “Channel” menu appears on the screen.
3 Press the M/m buttons to select “Cable” and press
the OK button.
The “Cable” menu appears on the screen.
4 Press the M/ms buttons to select the desired mode
and press the OK button.
• On: The cable TV channels can be set.
• Off: The UHF/VHF channels can be set.
Note
You cannot set and receive cable TV channels and UHF/VHF channels at
the same time.
5 (US)
Page 6
Using other features
Parent menu
You can also use the following TV features.
x Watching TV programs with closed captions
Set “Caption Vision” in the “Option” menu to “On.”
x Using the Parental Control feature
Select control options in the “Parent” menu.
Button operations (remote control)
Press To
MUTING Turn off the sound. Press it again or press VOL+
to restore sound.
DISPLAY Display the current channel number. Press it
again to turn the display off.
JUMP Jump back and forth between two channels. The
display alternates between the current channel
and the last.
SLEEP Turn off the display automatically after a
specified period of time.
Switch the Picture Mode.
Switch the “PIP” setting. Each time you press
this button, the setting changes as follows.
PIP On t PIP Off t PIP On...
Switch the “Zoom” setting. Each time you press
this button, the setting changes as follows.
MFM-HT75W: Normal t Full t Wide Zoom
t Zoom t Normal...
MFM-HT95: Normal t Full t 16:9 t
Normal...
TV programs and movies shown on TV are given a rating signal
based on the following rating systems.
In the U.S.A.: U.S. Television Parental Guidelines to rate
television programs (U.S. TV ratings), and Motion Picture
Association of America (MPAA) Guidelines to rate movies
including those shown on TV (movie ratings).
In Canada: Canadian English Language ratings to rate television
programs in English, and Canadian French Language ratings to
rate those in French.
To block programs you feel unsuitable for your children, you need
to set the display for the desired rating systems. Sony’s
predetermined ratings are also available. See page 9 (US) for a
description of the ratings.
The TV’s Parental Control feature functions by receiving the
rating signal from your local broadcasting station or cable service
provider.
x Activating the Parental Control feature
1 Press the MENU button.
2 Press the M/m buttons to select (Parent) and
press the OK button.
Parent
Enter password
using 0 - 9 buttons
----
: TV
Tip
The and buttons are also available on the display.
MENU
OK
Set Exit
Select
3 Enter a four-digit password using the 0-9 buttons.
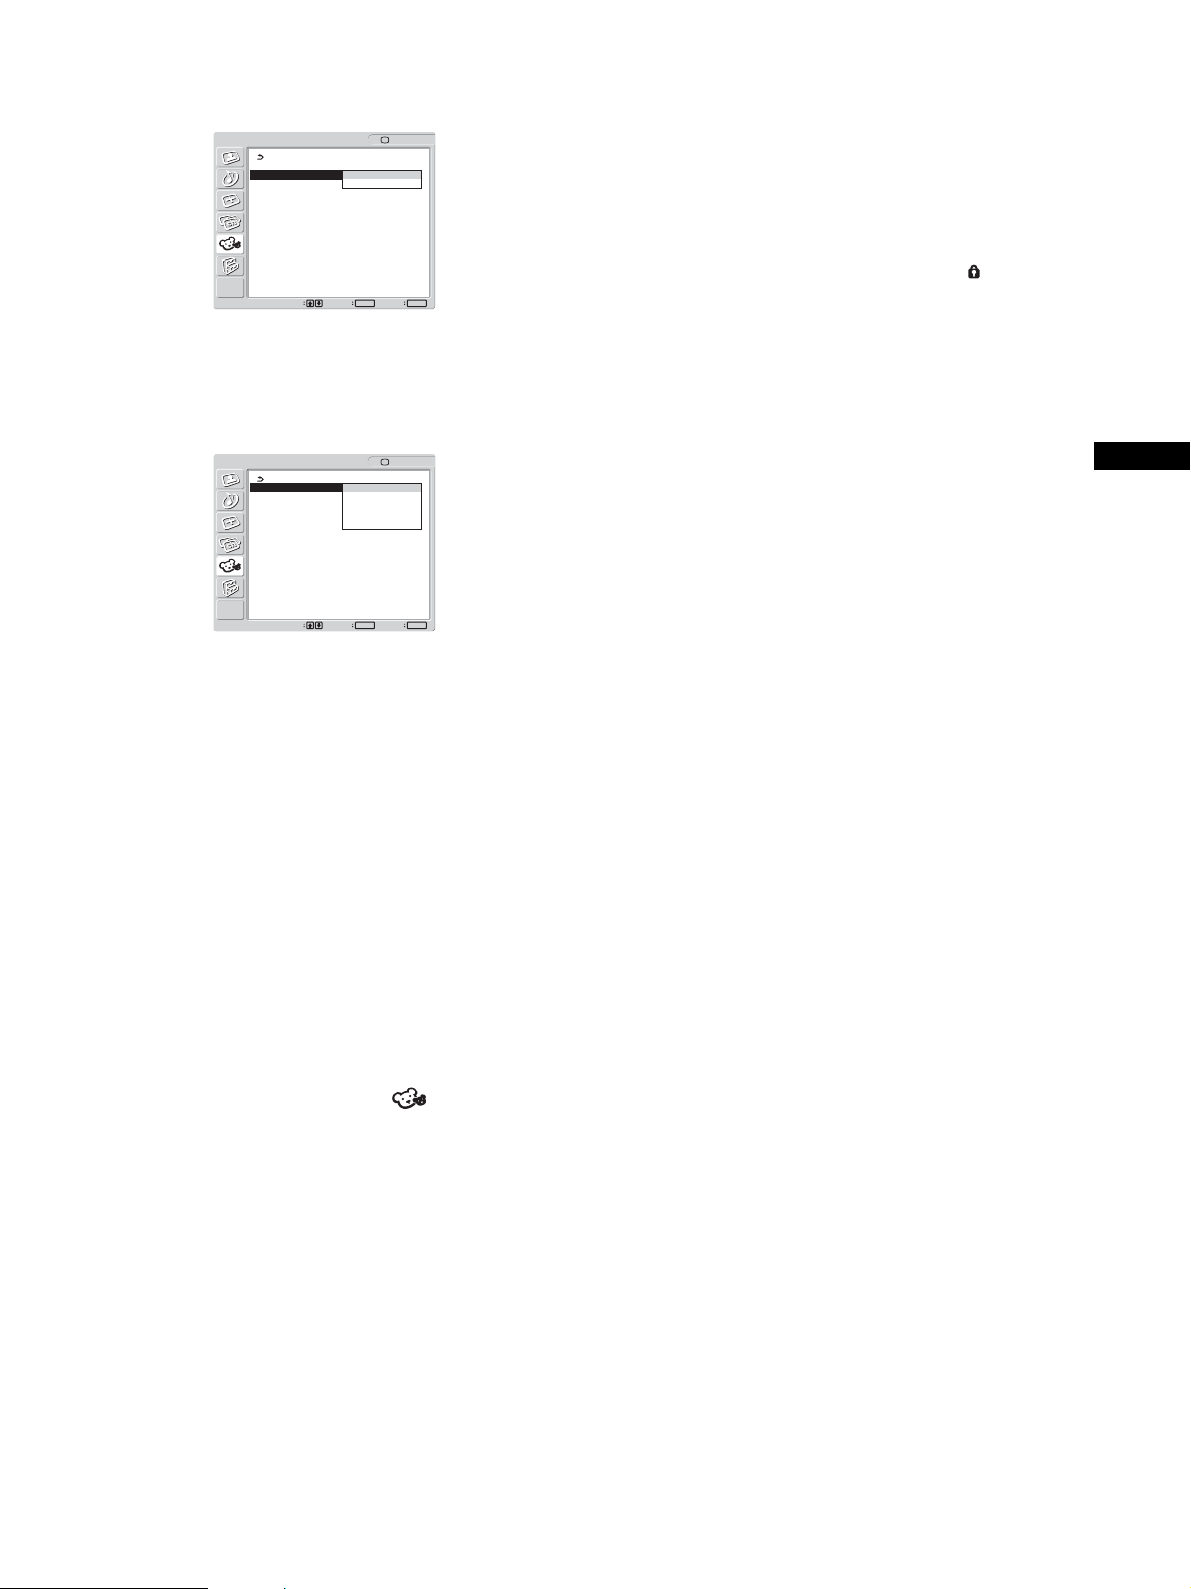
The “Parent” menu appears on the screen.
OK
Set Exit
: TV
MENU
Parent
Lock: Off
Select Country: U.S.A.
Change Password
Select
If you access the “Parent” menu for the first time, you are
requested to enter the password again for confirmation.
Note
Do not enter “4357” corresponding to “HELP” on a phone number
pad (see page 7 (US)).
Tips
• You need to enter the password here for any further access to the
“Parent” menu. If you lose your password, see “Tip” on page 7
(US).
• If you want to change the password, see page 7 (US).
6 (US)
Page 7
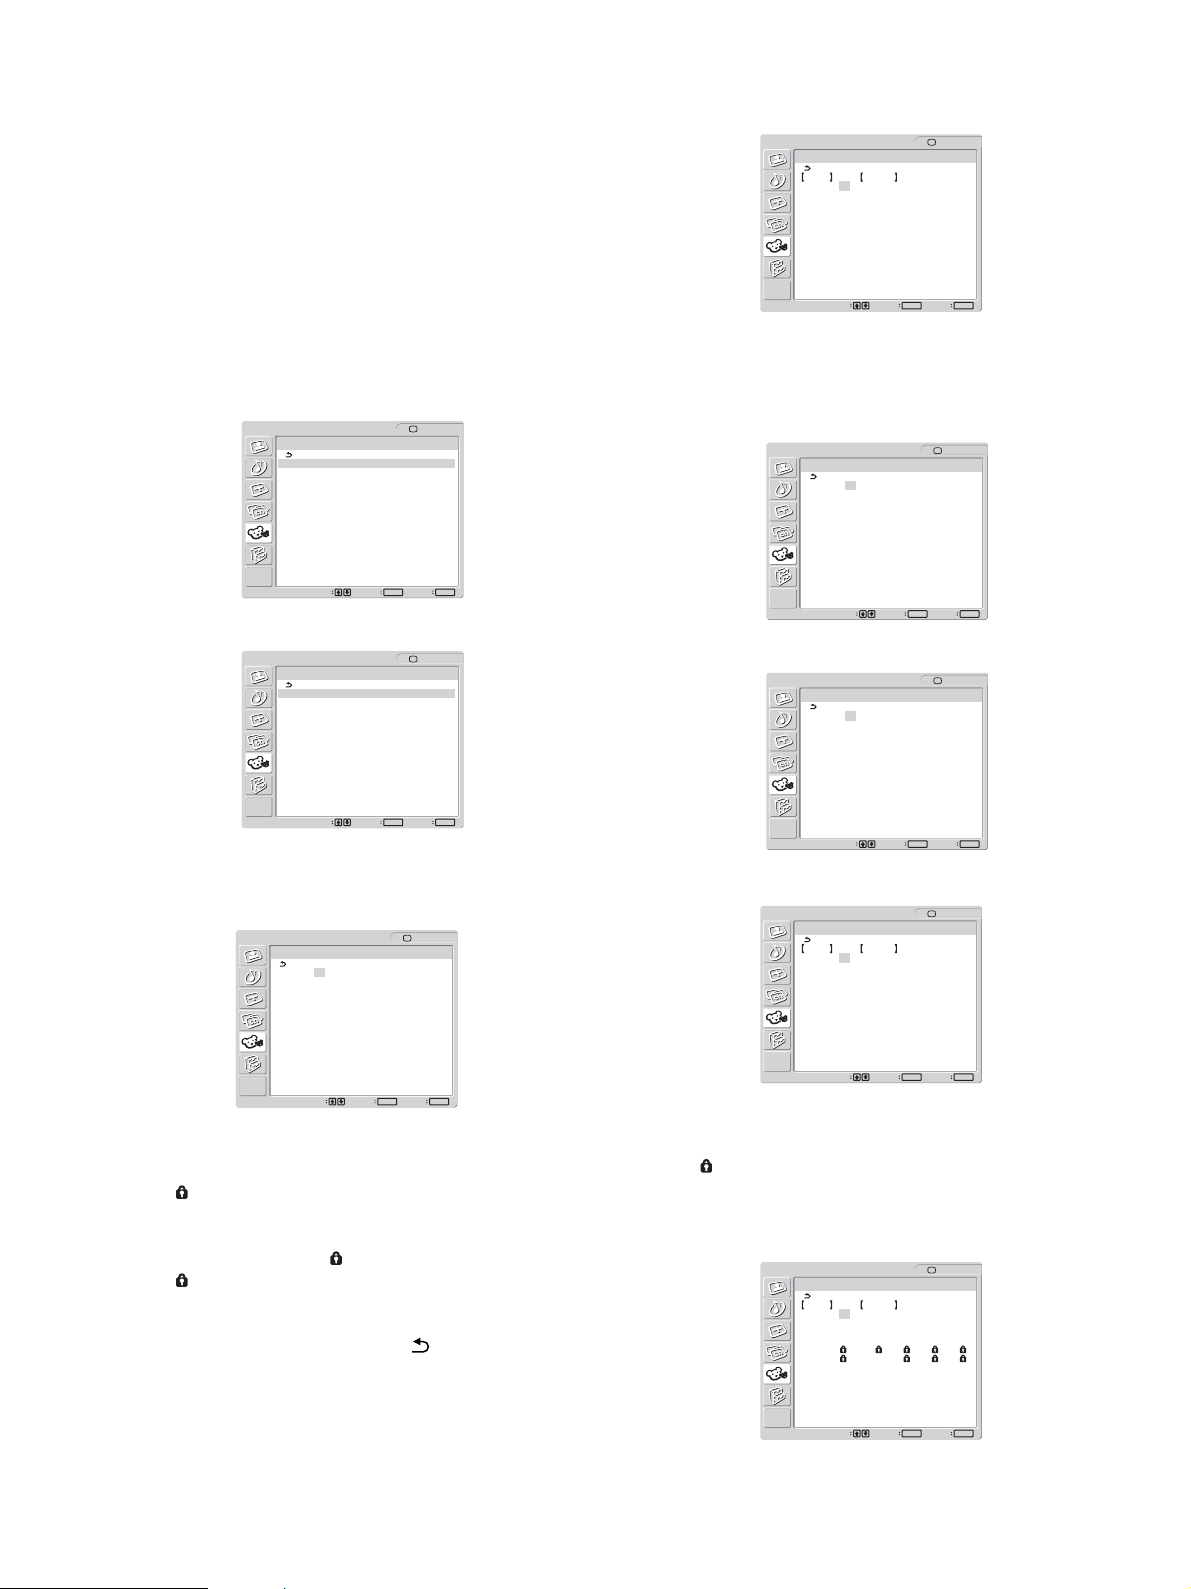
4 Press the M/m buttons to select “Select Country”
and press the OK button.
OK
Set Exit
: TV
MENU
Parent
Lock: Off
Select Country: U.S.A .
Change Password Canada
Select
5 Press the M/m buttons to select your country/
region (U.S.A. or Canada) and press the OK button.
6 Press the M/m buttons to select “Lock” and press
the OK button.
OK
Set Exit
: TV
MENU
Parent
Lock: Off
Select Country: Child
Change Password Youth
Y.Adult
Custom
Select
7 Press the M/m buttons to select a desired rating and
press the OK button.
If you select “Child,” “Youth,” or “Y.Adult” (Young Adult),
the level of Parental Control is activated automatically.
Tip
If you have forgotten your password, enter the master password “4357”
(corresponding to “HELP” on a phone number pad) in step 3. You can
then store a new password.
Notes
• If you entered “4357” as your password for the first time, you cannot
store a new password (see step 3 of “Activating the Parental Control
feature” on page 6 (US)).
• When you select a Parental Control program and the indicator is
displayed on the screen, you cannot view that program even if you enter
“4357.”
US
Tip
If you are not familiar with the Parental Guideline rating system, you
should select “Child,” “Youth,” or “Y.Adult” to help simplify the
rating selection. To set more restrictive ratings, select “Custom” (see
“Selecting a Custom Rating” on page 8 (US)).
8 Press the MENU button to exit the menu screen.
To deactivate the Parental Control feature
Set “Lock” to “Off” in the “Parent” menu.
To change the password
1 Press the MENU button.
2 Press the M/m buttons to select (Parent) and
press the OK button.
3 Enter your four-digit password using the 0-9
buttons.
The “Parent” menu appears on the screen.
4 Press the M/m buttons to select “Change
Password” then press the OK button.
5 Enter a new four-digit password using the 0-9
buttons.
6 Enter the password set in step 5 again to confirm.
7 Press the MENU button to exit the menu screen.
7 (US)
Page 8
x Selecting a Custom Rating
If you want to select the ratings to be blocked from “Custom”
once you have activated the Parental Control feature (page 6
(US)), follow the procedure below.
For a detailed description of each rating, see “What the Ratings
Mean” on page 9 (US).
1 Perform steps 1 to 6 in “Activating the Parental
Control feature” on page 6 (US) to display the
“Lock” menu.
Press the M/m buttons to select “TV Rating” and press the
OK button.
OK
Set Exit
: TV
MENU
Parent
TV Rating
Rating Content
TV-Y: –
TV-Y7: – FV: –
TV-G: –
TV-PG: – D:– L: – S: – V: –
TV-14: – D:– L: – S: – V: –
TV-MA: – L: – S: – V: –
Select
2 Press the M/m buttons to select “Custom” and
press the OK button.
In the U.S.A.
OK
Set Exit
: TV
MENU
Parent
Custom
Movie Rating
TV Rating
Unrated : Allow
Select
In Canada
OK
Set Exit
: TV
MENU
Parent
Custom
English Rating
French Rating
U.S.A Rating
Select
To select a rating in Canada, go to step 6.
3 Press the M/m buttons to select “Movie Rating” and
press the OK button.
Parent
Movie Rating
G: –
PG: –
PG-13: –
R: –
NC-17: –
X: –
: TV
To select a TV rating in Canada:
Press the M/m buttons to select “English Rating,” “French
Rating,” or “U.S.A. Rating” and press the OK button.
English Rating
OK
Set Exit
OK
Set Exit
: TV
: TV
MENU
: TV
MENU
French Rating
U.S.A. Rating
Parent
English Rating
C: –
C8+: –
G: –
PG: –
14+: –
18+: –
Select
Parent
French Rating
G: –
8ans+: –
13ans+: –
16ans+: –
18ans+: –
Select
Parent
U.S.A. Rating
Rating Content
TV-Y: –
TV-Y7: – FV: –
TV-G: –
TV-PG: – D:– L: – S: – V: –
TV-14: – D:– L: – S: – V: –
TV-MA: – L: – S: – V: –
MENU
OK
Set Exit
Select
4 Press the M/m buttons to select the rating to be
blocked and press the OK button.
The indicator automatically appears beside the selected
rating and all ratings below it, indicating that the programs
that match the ratings will be blocked.
To unlock a rating, select and press the OK button.
The indicator changes to “–” and all ratings above it are
unlocked.
5 Press the M/m buttons to select and press the OK
button.
6 To select a TV rating in the U.S.A.:
8 (US)
MENU
OK
Set Exit
Select
7 Press the M/m buttons to select the TV rating to be
blocked and press the OK button.
The indicator automatically appears beside the selected
rating and all ratings below it, indicating that the programs
that match the ratings will be blocked.
Example: TV rating in the U.S.A.
OK
Set Exit
: TV
MENU
Parent
TV Rating
Rating Content
TV-Y: –
TV-Y7: – FV: –
TV-G: –
TV-PG: – D:– L: – S: – V: –
TV-14: D: L: S: V:
TV-MA: L: S: V:
Select
Page 9

To unlock a rating, select and press the OK button.
The indicator changes to “–” and all ratings above it are
unlocked.
x What the Ratings Mean
Ratings in the U.S.A.
Some U.S. TV ratings have additional content ratings called
“extenders.”
The extenders are defined as follows:
D (sexually suggestive Dialogue), FV (Fantasy Violence), L
(coarse Language), S (Sexual situations) and V (Violence).
By setting the extenders, you can define additional viewing
limits.
For more details of extenders, see page 10 (US).
All of the extenders included in the selected ratings will be
blocked. If you want to allow any of them to be viewed, go to
step 8. Otherwise, go to step 10.
8 Press the M/m buttons to select the extender to be
viewed and press the OK button.
“–” appears beside the selected extender, indicating that the
programs that match the extender can be viewed.
To relock the canceled extender, select .
The indicator appears to show that the programs that match
the extender will be blocked again.
9 Repeat step 8 for other extenders.
All programs that match the ratings you select and higher,
except for the extenders that were canceled, will be blocked.
10 Press the MENU button to exit the menu screen.
To block programs or movies broadcast without a
rating
The unrated option allows you to block programs or movies that
are broadcast without a rating.
The unrated option is available only when you have selected
“U.S.A.” as your country/region.
1 Perform steps 1 and 2 of “Selecting a Custom
Rating” on page 8 (US).
2 Press the M/m buttons to select “Unrated” and
press the OK button.
3 Press the M/m buttons to select “Block” and press
the OK button.
Option Description
Allow Allows programs and movies that are
broadcast without a rating.
Block Blocks all programs and movies that
are broadcast without a rating.
4 Press the MENU button to exit the menu screen.
Note
If you choose to block unrated TV programs, be aware that the following
types of programs may be blocked: programs broadcast from another
country/region, emergency broadcasts, political programs, sports, news,
public service announcements, religious programs, and weather.
Sony’s predetermined ratings
These are original ratings that Sony has predetermined based on
the viewer’s age. Each rating allows you to view certain
programs, as follows:
Option Description
Child Suitable for children under the age of 7.
Viewable U.S. movie ratings: G, NR, and N/A
Viewable U.S. TV ratings: TV-Y, TV-G, and
TV-NR
Youth Suitable for children aged 7 and older.
Viewable U.S. movie ratings: G, PG, NR, and
N/A
Viewable U.S. TV ratings: TV-Y, TV-Y7, TVG, TV-PG, and TV-NR
Y.Adult
(Young Adult)
For descriptions of Child, Youth, and Y.Adult (Young Adult)
ratings, see the following custom rating options.
U.S. movie ratings
U.S. movie ratings are for movies (including those shown on TV)
rated according to the Motion Picture Association of America
(MPAA) Guidelines.
Option Description
G (General Audiences
– All Ages Admitted)
PG (Parental
Guidance Suggested –
Some Material May
Not Be Suitable For
Children)
PG-13 (Parents
Strongly Cautioned –
Some Material May
Be Inappropriate For
Children Under 13)
R (Restricted – Under
17 Requires
Accompanying Parent
Or Adult Guardian)
NC-17 or X (No One
17 And Under
Admitted)
Suitable for children aged 13 and older.
Viewable U.S. movie ratings: G, PG, PG-13,
NR, and N/A
Viewable U.S. TV ratings: TV-Y, TV-Y7, TVG, TV-PG, TV-14, and TV-NR
In G-rated films no strong words are
used, the violence is at a minimum,
nudity and sex scenes are not present,
nor is there any drug use.
This is a film which may need to be
monitored first by parents.
Parents are alerted to be very careful
about the attendance of their underteenage children when viewing films
with this rating.
This film includes hard language,
tough violence, nudity, drug abuse or
other elements of concern.
This is a film that most parents would
consider not suitable for children aged
17 and under.
There may be violence, sex, abhorrent
behavior, drug abuse or other elements
of concern.
US
9 (US)
Page 10

U.S. TV ratings
U.S. TV ratings are for TV programs rated according to the U.S.
Television Parental Guidelines.
Option Description
TV-Y (All
Children)
TV-Y7
(Directed to
Older
Children)
TV-G
(General
Audience)
TV-PG
(Parental
Guidance
Suggested)
TV-14
(Parents
Strongly
Cautioned)
TV-MA
(Mature
Audience
Only)
This program is designed for young children
aged 2 – 6 and is appropriate for all children.
This program is designed for children aged 7
and older. Themes and elements in this
program may include mild fantasy violence or
slapstick violence, or may frighten children
under the age of 7.
Most parents would find this program suitable
for all ages. It contains little or no violence, no
strong language and little or no sexual
dialogue or situations.
This program contains some material that
parents may find unsuitable for younger
children.
This program contains some material that
many parents would find unsuitable for
children under the age of 14.
This program is specifically designed to be
viewed by adults and therefore may be
unsuitable for children under the age of 17.
Ratings in Canada
Sony’s predetermined ratings
These are original ratings that Sony has predetermined based on
the viewer’s age. Each rating allows you to view certain
programs, as follows:
Option Description
Child Suitable for children under the age of 8.
Viewable Canadian English Language ratings:
C and G
Viewable Canadian French Language ratings:
G
Viewable U.S. TV ratings: TV-Y, TV-G, and
TV-NR
Youth Suitable for children aged 8 and older.
Viewable Canadian English Language ratings:
C, G, C8+, and PG
Viewable Canadian French Language ratings:
G and 8 ans+
Viewable U.S. TV ratings: TV-Y, TV-Y7, TVG, TV-PG, and TV-NR
Y.Adult
(Young Adult)
Suitable for children aged 14 and older.
Viewable Canadian English Language ratings:
C, G, C8+, PG, and 14+
Viewable Canadian French Language ratings:
G, 8 ans+, and 13 ans+
Viewable U.S. TV ratings: TV-Y, TV-Y7, TVG, TV-PG, TV-14, and TV-NR
About the extenders of U.S. TV ratings
TV-Y7, TV-PG, TV-14 and TV-MA ratings have additional
content ratings called “extenders” to define additional viewing
limits. The extenders are defined as follows:
Option Description
FV (Fantasy Violence) Programs containing cartoon violence
occurring in TV-Y7 programs only.
D (sexually suggestive
Dialogue)
L (coarse Language) Programs containing coarse language.
S (Sexual situations) Programs containing sexual content.
V (Violence) Programs containing violence.
Programs containing suggestive
dialogue, or sexual innuendo.
There may be some profanity, violence
or brief nudity in these programs.
For descriptions of Child, Youth, and Y.Adult (Young Adult)
ratings, see the following custom rating options.
Canadian English Language ratings
The Canadian English Language ratings are for TV programs in
English broadcast in Canada.
Option Description
C (Programming
intended for children
under the age of 8)
C8+ (Programming
generally considered
acceptable for children
aged 8 and older to
watch on their own)
G (General Audience) Will contain very little violence, either
PG (Parental
Guidance)
There will be no realistic scenes of
violence or no offensive language,
nudity or sexual content. Careful
attention is paid to themes, which
could threaten children’s sense of
security and well-being.
Violence will not be portrayed as the
preferred, acceptable, or only way to
resolve conflict; or children will not be
encouraged to imitate dangerous acts
which they may see on television.
There will be no profanity, nudity or
sexual content.
physical or verbal or emotional. There
may be some inoffensive slang, no
profanity and no nudity.
Programming intended for a general
audience but which may not be
suitable for younger children. Parents
may consider some content
inappropriate for unsupervised
viewing by children aged 8 – 13.
10 (US)
Page 11

Option Description
14+ (Programming
contains themes or
content which may not
be suitable for viewers
under the age of 14)
18+ (Adult) May contain violence integral to the
Canadian French Language ratings
The Canadian French Language ratings are for TV programs in
French broadcast in Canada.
Option Description
G (General) Programming intended for audiences
8 ans+ (8+ General –
Not recommended for
young children)
13 ans+
(Programming may
not be suitable for
children under the age
of 13)
16 ans+
(Programming is not
suitable for children
under the age of 16)
18 ans+
(Programming
restricted to adults)
Parents are strongly cautioned to
exercise discretion in permitting
viewing by pre-teens and early teens.
development of the plot, character or
theme, intended for adult audiences.
May contain graphic language and
explicit portrayals of nudity and/or
sex.
of all ages. Contains no violence, or
the violence it contains is minimal or is
depicted appropriately with humor or
caricature or in an unrealistic manner.
Programming intended for a broad
audience but contains light or
occasional violence that could disturb
young children. Viewing with an adult
is recommended for young children
(under the age of 8).
Viewing with an adult is strongly
recommended for children under the
age of 13.
Contains frequent scenes of violence
or intense violence.
Contains constant violence or scenes
of extreme violence.
US
11 (US)
Page 12

Troubleshooting
Trouble symptoms and remedies
If you are experiencing difficulties not listed below, refer to the Operating Instructions on the supplied CD-ROM. For problems caused by
a computer or other equipment, refer to the user’s manuals supplied with the respective items.
For PC 1/PC 2
Symptom Check these items
No picture.
If the 1 (power) indicator is not lit,
or if the 1 (power) indicator will not
light up when the 1 (power) switch
is pressed,
If “Cable Disconnected” appears on
the screen,
If “No Input Signal” appears on the
screen, or the 1 (power) indicator is
orange,
If “Out of Range” appears on the
screen,
If you are using Windows and
replaced an old display with this
display,
If using a Macintosh system, • When connecting a Macintosh computer, use an adapter (not supplied) if necessary.
• Check that the power cord is properly connected.
• Check that the video signal cable is properly connected and all plugs are firmly seated in
their sockets (page 3 (US)).
• Check that the video input connector’s pins are not bent or pushed in.
• Check that the input select setting is correct (For details, refer to the Operating
Instructions on the supplied CD-ROM).
• A non-supplied video signal cable is connected. If you connect a non-supplied video
signal cable, “Cable Disconnected” may appear on the screen. This is not a malfunction.
• Check that the video signal cable is properly connected and all plugs are firmly seated in
their sockets (page 3 (US)).
• Check that the video input connector’s pins are not bent or pushed in.
• Check that the input select setting is correct (For details, refer to the Operating
Instructions on the supplied CD-ROM).
x Problem caused by a computer or other equipment connected, and not
caused by the display
• The computer is in the power saving mode. Try pressing any key on the keyboard or
moving the mouse.
• Check that your graphics board is installed properly.
• Check that the computer’s power is on.
• Restart the computer.
x Problem caused by a computer or other equipment connected, and not
caused by the display
• Check that the video frequency range is within that specified for the display. If you
replaced an old display with this display, reconnect the old display and adjust the
computer’s graphics board within the following ranges:
MFM-HT75W
Horizontal frequency: 28–69 kHz (Analog RGB), 28–48 kHz (Digital RGB)
Vertical frequency: 48–85 Hz (Analog RGB), 60 Hz (Digital RGB)
Resolution: 1280 × 768 or less
MFM-HT95
Horizontal frequency: 28–86 kHz (Analog RGB), 28–64 kHz (Digital RGB)
Vertical frequency: 48–85 Hz (Analog RGB, resolution<1280 × 1024), 48–75 Hz (Analog
RGB, resolution=1280 × 1024), 60 Hz (Digital RGB)
Resolution:1280 × 1024 or less
For the MFM-HT75W only
SXGA picture is displayed with Safe Display Mode but it may be fuzzy. Set the resolution
to 1280 × 768 on your computer.
• If you replaced an old display with this display, reconnect the old display and do the
following. Select “SONY” from the “Manufacturers” list and select “MFM-HT75W or
MFM-HT95” from the “Models” list on the Windows device selection screen. If “MFMHT75W or MFM-HT95” does not appear in the “Models” list, try “Plug & Play.”
Connect the adapter to the computer before connecting the video signal cable.
12 (US)
Page 13
For TV/VIDEO 1/VIDEO 2
Symptom Check these items
No picture.
Cannot receive any channels. • Make sure the power cord is connected securely.
• Turn on the power of the display.
• Check antenna cable connections.
No sound./Noisy sound.
Good picture, no sound. • Check audio cable connections.
• Check the volume control.
• Press the MUTING or VOL + button so that “Muting” disappears from the screen (For
details, refer to the Operating Instructions on the supplied CD-ROM).
• Disconnect your headphones.
Remote control does not operate. • The batteries could be weak. Replace the batteries.
• Check the polarity of the batteries.
• If the 1 (power) indicator on the display does not light in orange, press the 1 (power)
switch on the display.
• If you intend to operate the TV functions, check the TV input is selected.
• If you intend to operate the TV functions with the “PIP” function, check the TV input is
selected for sub picture.
Lost password. • Select the (Parent) menu on the menu screen, then enter the following master
password: 4357. The master password clears your previous password and allows you to
enter a new password (For details, refer to the Operating Instructions on the supplied CDROM).
Noisy picture when viewing a TV
channel.
• Set the “NR” menu to “On” to reduce the noise on the picture (For details, refer to the
Operating Instructions on the supplied CD-ROM).
• Decrease the setting value for the “Sharpness” menu (For details, refer to the Operating
Instructions on the supplied CD-ROM).
US
Displaying information for this
display
While the display is receiving a video signal, press and
hold the MENU button for more than 5 seconds until the
information box appears.
Press the MENU button again to make the box disappear.
Example
INFORMATION
Model : MFM-HT75W
Ser.No. : 1234567
Manufactured : 2005-##
If any problem persists, call your authorized Sony dealer and give
the following information:
• Model name: MFM-HT75W or MFM-HT95
• Serial number
• Detailed description of the problem
• Date of purchase
• Name and specifications of your computer and graphics board
• Type of input signals (PC 1/PC 2/TV/VIDEO 1/VIDEO 2)
Model
name
Serial
number
Week and
year of
manufacture
13 (US)
Page 14

Specifications
LCD panel
Panel type: a-Si TFT Active Matrix
Screen size:
17 inch (43 cm) (MFM-HT75W)
19 inch (48 cm) (MFM-HT95)
Display resolution:
MFM-HT75W
Horizontal: Max. 1280 dots
Vertical: Max. 768 lines
MFM-HT95
Horizontal: Max. 1280 dots
Vertical: Max. 1024 lines
Signal input
PC 1
Signal format:
Digital RGB (DVI-D) (TMDS Single link)
Operating frequency:
MFM-HT75W
Horizontal: 28–48 kHz
Vertical: 60 Hz
MFM-HT95
Horizontal: 28–64 kHz
Vertical: 60 Hz
Audio:
Stereo mini jack, 500 mVrms (100% modulation)
PC 2
Signal format:
Analog RGB (HD-15D-sub)
Operating frequency:
MFM-HT75W
Horizontal: 28–69 kHz
Vertical: 48–85 Hz
MFM-HT95
Horizontal: 28–86 kHz
Vertical: 48–85 Hz (resolution<1280 × 1024)
48–75 Hz (resolution=1280 × 1024)
Signal levels:
RGB signal: 0.7 Vp-p, 75 Ω, positive
SYNC signal:
TTL level, 2.2 kΩ, positive or negative (Separate
horizontal and vertical, or composite sync)
0.3 Vp-p, 75 Ω, negative (Sync on green)
Audio:
Stereo mini jack, 500 mVrms (100% modulation)
TV
TV system:
American TV standard (NTSC)
Channel coverage:
VHF: 2 to 13
UHF: 14 to 69
CATV: 1 to 125
Antenna:
75-ohm external terminal for VHF/UHF
VIDEO 1
Signal standard:
Component video (Y, P
jack))
Y: 1.0 Vp-p, 75-ohm unbalanced, sync negative
: 0.7 Vp-p, 75 Ω
P
B
: 0.7 Vp-p, 75 Ω
P
Signal format:
Audio:
VIDEO 2
Signal standard:
Video format: NTSC, PAL, SECAM
Audio:
Plug & Play
VESA, DDC2B
Speaker output
Max. 3 W × 2 +5 W
Headphones output
Stereo minijack
Power requirements
100–240 V AC, 50–60 Hz
Max. 1.3 A (MFM-HT75W)
Max. 1.4 A (MFM-HT95)
Power consumption
In use (Max.): 68 W (MFM-HT75W)/74 W (MFM-HT95)
In standby (Max.): 1.2 W
Operating temperature
0–35
Dimensions (width/height/depth)
Display (upright):
MFM-HT75W
MFM-HT95
Mass
MFM-HT75W
MFM-HT95
Accessories
See page 3.
Design and specifications are subject to change without notice.
R
480i (525i), 480p (525p), 576i (625i), 576p (625p),
720p (750p), 1080i (1125i)
RCA jack (Phono jack) (stereo), 500 mVrms (100%
modulation)
S-Video (4-pin mini DIN)
Y: 1.0 Vp-p, 75-ohm unbalanced, sync negative
C: 0.286 Vp-p (Burst signal), 75 Ω
Composite video (RCA jack (Phono jack))
1.0 Vp-p, 75-ohm unbalanced, sync negative
RCA jack (Phono jack) (stereo), 500 mVrms (100%
modulation)
°C
Approx. 450.2 × 353.5 × 176 mm
17 3/4 ×
14
×
7
17 1/
inches)
4
×
(
Approx. 466.6 × 437 × 185 mm
18 3/8 ×
(
Approx. 6.3 kg (13 lb. 14 oz.)
Approx. 7.8 kg (17 lb. 3 oz.)
, PR) (RCA jack (Phono
B
7 3/8 inches)
14 (US)
Page 15

Page 16

AVERTISSEMENT
Pour prévenir tout risque d’incendie ou
d’électrocution, n’exposez jamais l’appareil à la
pluie ou à l’humidité.
Des tensions extrêmement élevées sont
présentes à l’intérieur de l’appareil. N’ouvrez
jamais le boîtier de l’appareil. Confiez l’entretien à
un technicien qualifié uniquement.
surchauffe et provoquer un incendie ou des dommages à
l’appareil.
20 cm
10 cm
10 cm
Précautions
Avertissement sur les raccordements
d’alimentation
• Utilisez le cordon d’alimentation fourni. Si vous utilisez un
cordon d’alimentation différent, assurez-vous qu’il est
compatible avec le système électrique local.
Pour les clients aux États-Unis
Si vous n’utilisez pas le cordon approprié, cet écran ne sera pas
conforme aux normes FCC obligatoires.
Pour les clients au Royaume-Uni
Si vous utilisez cet écran au Royaume-Uni, veillez à utiliser le
cordon d’alimentation adapté aux prises électriques du
Royaume-Uni.
Exemples de types de fiches
pour 100 à 120 V CA pour 200 à 240 V CA pour 240 V CA
L’appareil doit être installé à proximité d’une prise de courant
facile d’accès.
Installation
N’installez pas et ne laissez pas l’écran :
• À des endroits exposés à des températures extrêmes, par
exemple à proximité d’un radiateur ou d’un conduit de
chauffage, ou exposés aux rayons directs du soleil.
L’exposition de l’écran à des températures extrêmes, comme
dans l’habitacle d’un véhicule garé en plein soleil ou à
proximité d’un conduit de chauffage, risque d’entraîner des
déformations du boîtier ou des problèmes de fonctionnement.
• À des endroits soumis à des vibrations mécaniques ou à des
chocs.
• N’empêchez pas la circulation de l’air en bloquant les orifices
de ventilation avec des objets tels que des journaux, une nappe,
des rideaux, etc.
• Laissez un espace suffisant autour de l’appareil. Sinon, la
circulation de l’air peut être empêchée, ce qui peut causer la
uniquement
• À proximité d’appareils générant de puissants champs
magnétiques, comme un téléviseur ou d’autres appareils
électroménagers.
• À des endroits soumis à des quantités inhabituelles de
poussière, de saleté ou de sable, par exemple à côté d’une
fenêtre ouverte ou d’une porte donnant sur l’extérieur. En cas
d’installation temporaire à l’extérieur, veillez à prendre les
précautions requises contre la poussière et la saleté en
suspension dans l’air. Sinon, des dommages irréparables
risquent de se produire.
• Pour réduire les risques d’incendie ou d’électrocution,
n’exposez jamais cet appareil à la pluie ou à l’humidité.
• Ne pas exposer l’appareil aux éclaboussures ou aux liquides de
toute sorte et ne pas poser de récipients remplis de liquide, tels
qu’un vase, sur l’appareil.
• Pour éviter les risques d’incendie, tenez les objets
inflammables et la flamme nue (p. ex. les bougies) à distance de
l’appareil.
• Ne placez pas l’appareil à proximité ou sur le dessus d’un
radiateur ou d’un conduit de chauffage, ou à un endroit exposé
aux rayons directs du soleil.
Remarque sur l’affichage à cristaux liquides
(ACL)
Veuillez noter que cet écran ACL est issu d’une technologie de
haute précision. Toutefois, il est possible que des points noirs ou
des points brillants colorés (rouges, bleus ou verts) apparaissent
constamment sur l’écran LCD, ainsi que des bandes de couleurs
ou des zones de luminosité irrégulières. Il ne s’agit pas d’un
problème de fonctionnement.
(Points effectifs : supérieurs à 99,99%)
À propos des haut-parleurs stéréo intégrés
Assurez-vous de tenir vos équipements d’enregistrement
magnétique, vos cassettes et vos disquettes à l’écart des
ouvertures des haut-parleurs, qui génèrent un champ magnétique.
Ce champ magnétique pourrait effacer ou endommager les
données stockées sur des cassettes ou des disquettes.
Transport
• Débranchez tous les câbles de l’écran, puis saisissez fermement
les deux côtés de l’écran ACL en prenant soin de ne pas
l’égratigner pendant le transport. Si vous laissez tomber
l’écran, vous risquez de vous blesser ou de l’endommager.
• Pour transporter cet écran en vue d’une réparation ou de
l’expédition, utilisez la boîte et les matériaux d’emballage
d’origine.
2 (FR)
Page 17

Mise au rebut des batteries usées
Pour protéger l’environnement, faites la mise au rebut des
batteries usées suivant les lois et règlements locaux.
Installation sur un mur ou un bras de montage
Si vous comptez installer l’écran sur un mur ou un bras de
montage, veillez à consulter un technicien qualifié.
Raccordement de l’écran
Raccordez l’écran à un ordinateur et à d’autres appareils vidéo.
• Éteignez l’écran, l’ordinateur et tout autre appareil
avant d’effectuer le raccordement.
• Ne touchez pas les broches de la fiche du câble de signal
vidéo.
Pour consulter le mode d’emploi
fourni sur CD-ROM
Remarque
Pour consulter le mode d’emploi fourni sur CD-ROM, les
logiciels Adobe Acrobat Reader (version 6.0 ou ultérieure) et
Macromedia Shockwave Player doivent être installés sur votre
ordinateur. Le dossier « Installs » (Installation) du CD-ROM
contient les programmes d’installation pour ces logiciels.
Pour installer ces logiciels, ouvrez « My Computer » (Poste de
travail) et cliquez avec le bouton de droite de la souris sur le
lecteur de CD-ROM, puis sélectionnez « Explore » (Explorer)
et ouvrez le dossier « Installs » (Installation). (Windows
seulement)
Si vous utilisez un ordinateur Macintosh :
Double-cliquez sur l’icône du CD-ROM pour ouvrir la fenêtre,
puis double-cliquez sur l’icône du moniteur.
Pour consulter le mode d’emploi
Les fichiers du mode d’emploi sont inclus sur le CD-ROM fourni.
Introduisez le CD-ROM fourni dans le lecteur de CD-ROM de votre
ordinateur. Après quelques instants, la page d’introduction du CD-ROM
s’affiche automatiquement.
Si la page d’introduction ne s’ouvre pas automatiquement, ouvrez le
fichier du mode d’emploi directement. (Windows seulement)
1 Ouvrez « My Computer » (Poste de travail).
2 Cliquez avec le bouton de droite de la souris sur le lecteur de
CD-ROM, puis sélectionnez « Explore » (Explorer).
3 Ouvrez le dossier « Manuals » (Manuels).
4 Ouvrez le dossier « HT ».
5 Ouvrez le dossier « UC ».
6 Sélectionnez et ouvrez le fichier « HT_75W_95_FRU.pdf ».
1 Dépliez le support.
2 Retirez le couvercle des connecteurs.
3 Raccordez l’écran à un ordinateur et à d’autres
appareils vidéo.
Raccordement d’un ordinateur Macintosh
Raccordez le câble de signal vidéo fourni à un connecteur de sortie
vidéo de l’ordinateur. Si nécessaire, utilisez un adaptateur (non
fourni). Raccordez l’adaptateur à l’ordinateur avant de raccorder le
câble de signal vidéo.
4 Si nécessaire, raccordez l’écran à une antenne avec
un câble coaxial de 75 ohms (fourni).
FR
5 Raccordez solidement le cordon d’alimentation
fourni au connecteur AC IN de l’écran.
6 Branchez solidement l’autre extrémité du cordon
dans une prise de courant.
2
Couvercle des
connecteurs
Pour quitter le CD-ROM.
Cliquez sur « EXIT/CD-ROM ».
Installation
Déballage
Assurez-vous que la boîte contient tous les éléments ci-dessous.
• Écran ACL
• Télécommande
• Piles AAA (2)
• Cordon d’alimentation
• Câble de signal vidéo HD15-HD15 (RVB analogique)
• Câble de signal vidéo DVI-D (RVB numérique)
• Câble audio (minifiche stéréo)
• Câble coaxial de 75 ohms
• CD-ROM (logiciel utilitaire pour Windows et Macintosh,
mode d’emploi, etc.)
• Carte de garantie
• Le présent Guide de configuration rapide
3 (FR)
Page 18

Pour PC 1/PC 2
Audio
DVI-D
DVI-D HD15
HD15
VHF/UHF
4
Câble de signal
vidéo DVI-D (fourni)
3
Câble audio
(fourni)
Câble de signal vidéo
HD15-HD15 (fourni)
Câble coaxial de 75 ohms (fourni)
5
Vers AC IN
Vers la prise de
courant
6
Cordon d’alimentation (fourni)
Pour VIDEO 1/VIDEO 2
Câble S-vidéo (non fourni)
Câble vidéo composant
(non fourni)
3
Câble audio (non fourni)
Câble vidéo et audio (non fourni)
Vers
VHF/UHF
4
Vers la prise de
courant
5
Vers AC IN
6
Cordon d’alimentation (fourni)
Remarque
Lorsque des appareils vidéo sont raccordés aux prises vidéo
composantes et S-vidéo simultanément, le signal de la prise
S-vidéo s’affiche.
Câble coaxial de 75 ohms (fourni)
Mise sous tension de l’écran et des
autres appareils
Allumez d’abord cet écran, puis allumez l’ordinateur et les autres
appareils vidéo.
1 Appuyez sur l’interrupteur 1 (alimentation) situé à
l’avant de l’écran.
Le témoin 1 (alimentation) s’allume en vert.
2 Allumez l’ordinateur et les autres appareils vidéo.
3 Appuyez sur la touche pour sélectionner la
source de signal souhaitée.
3
CH
S’allume en vert
La source du signal en entrée change chaque fois que vous
appuyez sur la touche .
Message à l’écran Configuration du signal
d’entrée
DVI-D : PC 1 Connecteur d’entrée DVI-D
(RVB numérique) pour PC 1
HD15 : PC 2 Connecteur d’entrée HD15
(RVB analogique) pour PC 2
Canaux de télévision TV
: VIDEO 1
ou : VIDEO 2
Remarque
Lorsque vous utilisez la fonction PIP, si vous commutez la source d'entrée
avec la touche ou les touches de sélection de la source, il se peut que
la fonction PIP soit interrompue. Dans ce cas, l’image de la source
d'entrée sélectionnée remplit l'écran. Pour réactiver la fonction PIP, réglez
« Réglage PIP » à « PIP activé » en passant par le menu ou sélectionnez
« PIP activé » avec la touche .
Conseils
• Vous pouvez également sélectionner le signal en entrée à l’aide des
touches de sélection d’entrée de la télécommande.
• Lorsque vous sélectionnez l’entrée TV (télévision), le numéro du canal
sélectionné s’affiche dans le coin supérieur droit de l’écran.
• Lorsque vous utilisez la fonction PIP, utilisez « Inferieur » dans le sousmenu « PIP » du menu « Option » pour régler la source d’entrée pour
l’image secondaire. Si l’entrée TV est sélectionnée pour l’image
secondaire, vous pouvez changer le canal à l’aide des touches CH +/-.
Y/P
composantes pour VIDEO 1
Prises d’entrée composantes/
S-vidéo pour VIDEO 2
Prises d’entrée
B/PR
1
4 (FR)
Page 19
Préparation de la télécommande
Changer le canal de télévision
Insérez les deux piles AAA (fournies) en faisant
correspondre les pôles + et – des piles avec les
inscriptions à l’intérieur du logement des piles de la
télécommande.
Remarques
• Si vous prévoyez de ne pas utiliser la télécommande pendant une
période prolongée, retirez-en les piles pour éviter toute fuite
d’électrolyte pouvant l’endommager.
• Manipulez la télécommande avec soin. Évitez de la laisser tomber, de
la mouiller et de la placer directement au soleil, à proximité d’un
appareil de chauffage ou dans un endroit très humide.
Régler les canaux de télévision
Pour regarder des programmes télévisés, vous devez exécuter la
fonction « Auto programmation » afin de programmer les canaux.
Suivez la procédure « Auto programmation » ci-dessous avant de
regarder des programmes télévisés pour la première fois.
Pour plus de détails sur l’utilisation du menu et des touches,
reportez-vous au mode d’emploi sur le CD-ROM fourni.
1 Appuyez sur la touche MENU.
2 Utilisez les touches M/m pour sélectionner
(Canal), puis appuyez sur la touche OK.
Le menu « Canal » apparaît à l’écran.
3 Utilisez les touches M/m pour sélectionner « Auto
programmation », puis appuyez sur la touche OK.
Le menu « Auto programmation » apparaît à l’écran.
4 Utilisez les touches M/m pour sélectionner « OK »,
puis appuyez sur la touche OK.
L’écran commence automatiquement à rechercher et à
préparer les canaux.
Le nombre de canaux et un message s’affichent à l’écran.
5 Utilisez la touche MENU pour quitter le menu une
fois la programmation automatique terminée.
Appuyez sur les touches 0 – 9 pour entrer un numéro
de canal.
Le canal change après 3 secondes. Appuyez sur la touche ENT
(entrée) pour le sélectionner immédiatement.
Appuyez sur les touches CH +/– pour balayer les canaux.
ou
Conseil
Maintenez enfoncée la touche CH + ou – pour changer rapidement le
numéro de canal.
FR
Saut des canaux non désirés
Cette fonction vous permet de sauter les canaux non désirés
lorsque vous sélectionnez les canaux à l’aide de la touche CH +/–.
1 Appuyez sur la touche MENU.
2 Utilisez les touches M/m pour sélectionner
(Canal), puis appuyez sur la touche OK.
Le menu « Canal » apparaît à l’écran.
3 Utilisez les touches M/m pour sélectionner « Saut./
ajout. canal », puis appuyez sur la touche OK.
Le menu « Saut./ajout. canal » apparaît à l’écran.
4 Utilisez les touches M/m pour sélectionner le canal
à sauter, puis appuyez sur la touche OK.
Conseil
Pour faire défiler la liste, appuyez sans relâcher sur les touches M/m .
5 Utilisez les touches M/m pour sélectionner « Saut »,
puis appuyez sur la touche OK.
Pour rétablir un canal sauté, sélectionnez « Ajout ».
6 Appuyez sur la touche MENU pour quitter le menu.
5 (FR)
Page 20

Choisir la câblodistribution ou la
Autres fonctions
réception UHF/VHF
Pour régler les canaux UHF/VHF, réglez le menu « Câble » à «
Non » comme suit.
1 Appuyez sur la touche MENU.
2 Utilisez les touches M/m pour sélectionner
(Canal), puis appuyez sur la touche OK.
Le menu « Canal » apparaît à l’écran.
3 Utilisez les touches M/m pour sélectionner
« Câble », puis appuyez sur la touche OK.
Le menu « Câble » apparaît à l’écran.
4 Utilisez les touches M/m pour sélectionner le mode
souhaité, puis appuyez sur la touche OK.
• Oui : Les canaux du câble peuvent être réglés.
• Non : Les canaux UHF/VHF peuvent être réglés.
Remarque
Vous ne pouvez pas régler et recevoir simultanément les canaux de la
câblodistribution et les canaux UHF/VHF.
Les fonctions de télévision suivantes sont également disponibles.
x Écoute de programmes de télévision sous-
titrés
Réglez « Caption Vision » à « Oui » dans le menu « Option ».
x Fonction de contrôle parental
Sélectionnez les options voulues dans le menu « Parent ».
Touches de commande (télécommande)
Appuyez
sur
MUTING Désactiver le son. Appuyez de nouveau sur cette
DISPLAY Afficher le numéro du canal en cours. Appuyez
JUMP Alterner entre deux canaux. L’écran alterne entre
SLEEP Éteindre automatiquement l’écran après la durée
Pour
touche ou appuyez sur VOL + pour rétablir le
son.
de nouveau sur cette touche pour désactiver
l’affichage.
le canal en cours et le dernier canal sélectionné.
indiquée.
Changer de mode image.
Changer le réglage « PIP » (image dans l’image).
À chaque pression sur la touche, le réglage
change comme suit.
PIP activé t PIP désactivé t PIP activé....
Changer le réglage « Zoom ». À chaque pression
sur la touche, le réglage change comme suit.
MFM-HT75W : Normal t Plein écran t
Grand zoom t Zoom t Normal...
MFM-HT95 : Normal t Plein écran t 16:9
t Normal...
6 (FR)
Conseil
Les touches et sont aussi présentes sur l’écran.
Page 21

Menu Parent
Les programmes et films diffusés à la télévision comportent une
cote de classement transmise avec le signal et basée sur les
systèmes suivants.
Aux États-Unis : Les directives « U.S. Television Parental
Guidelines » pour les émissions de télévision et « Motion Picture
Association of America (MPAA) » pour les films, y compris ceux
qui sont diffusés à la télévision.
Au Canada : Un système de classement canadien pour les
émissions de télévision en français et un autre pour les émissions
de télévision en anglais.
Afin de bloquer les émissions qui ne conviennent pas à vos
enfants, réglez l’écran selon le système de classement souhaité.
Le classement prédéterminé de Sony est également disponible.
Voir la page 10 (FR) pour une description complète des systèmes
de classement.
La fonction de contrôle parental de l’écran reçoit le signal de cote
de classement de la station de diffusion locale ou du
câblodistributeur.
x Activation de la fonction de contrôle
parental
Conseils
• Vous devez entrer le mot de passe à cette étape pour avoir accès au
reste du menu « Parent ». Si vous oubliez votre mot de passe, voir
« Conseil » à la page 8 (FR).
• Pour changer le mot de passe, voir page 8 (FR).
4 Utilisez les touches M/m pour sélectionner « Pays »,
puis appuyez sur la touche OK.
OK
Régl Fin
: TV
MENU
Parent
Blocage: Non
Pays: U.S.A.
Changer le mot de pas Canada
Sél
5 Utilisez les touches M/m pour sélectionner votre
pays (U.S.A. ou Canada), puis appuyez sur la touche
OK.
6 Utilisez les touches M/m pour sélectionner
« Blocage », puis appuyez sur la touche OK.
Parent
Blocage: Non
Pays: Enfant
Changer le mot de pas Jeune
Adolescent
Spécifique
: TV
FR
1 Appuyez sur la touche MENU.
2 Utilisez les touches M/m pour sélectionner
(Parent), puis appuyez sur la touche OK.
OK
Régl Fin
: TV
MENU
Parent
Entrez le mot de passe
----
Sél
3 Saisissez un mot de passe à quatre chiffres avec les
touches de 0 à 9.
Le menu « Parent » apparaît à l’écran.
OK
Régl Fin
: TV
MENU
Parent
Blocage: Non
Pays: U. S.A.
Changer le mot de passe
Sél
Lorsque vous accédez au menu « Parent » pour la première
fois, le menu vous invite à entrer le mot de passe de nouveau
pour le confirmer.
MENU
OK
Régl Fin
Sél
7 Utilisez les touches M/m pour sélectionner le
classement souhaité, puis appuyez sur la touche
OK.
Lorsque vous sélectionnez « Enfant », « Jeune » ou
« Adolescent », le niveau de contrôle parental est activé
automatiquement.
Conseil
Si vous ne connaissez pas le système de classement des émissions,
sélectionnez « Enf ant », « Jeune » ou « Adolesce nt » afin de simplifier
la sélection du classement. Pour régler un contrôle plus strict,
sélectionnez « Spécifique » (voir « Sélection d’un classement
spécifique » à la page 8 (FR)).
8 Appuyez sur la touche MENU pour quitter le menu.
Désactivation de la fonction de contrôle parental
Réglez « Blocage » à « Non » dans le menu « Parent ».
Remarque
N’utilisez pas « 4357 », qui correspond à « HELP » sur le clavier d’un
téléphone (voir page 8 (FR)).
7 (FR)
Page 22

Pour changer le mot de passe
1 Appuyez sur la touche MENU.
2 Utilisez les touches M/m pour sélectionner
(Parent), puis appuyez sur la touche OK.
x Sélection d’un classement spécifique
Pour sélectionner les cotes de classement à bloquer dans le
réglage « Spécifique » une fois que vous aurez activé la fonction
de contrôle parental (page 7 (FR)), faites comme suit.
Pour une description complète des cotes de classement,
voir « Signification des classements » à la page 10 (FR).
3 Saisissez votre mot de passe à quatre chiffres avec
les touches de 0 à 9.
Le menu « Parent » apparaît à l’écran.
4 Utilisez les touches M/m pour sélectionner
« Changer le mot de passe », puis appuyez sur la
touche OK.
5 Saisissez un nouveau mot de passe à quatre
chiffres avec les touches de 0 à 9.
6 Entrez de nouveau le mot de passe de l’étape 5 pour
le confirmer.
7 Appuyez sur la touche MENU pour quitter le menu.
Conseil
Si vous avez oublié votre mot de passe, entrez le mot de passe maître, soit
« 4357 » (qui correspond à « HELP » sur le clavier d’un téléphone) à
l’étape 3. Vous pouvez ensuite régler un nouveau mot de passe.
Remarques
• Si vous avez saisi « 4357 » comme premier mot de passe, vous ne
pouvez pas saisir un nouveau mot de passe (voir l’étape 3 de la section
« Activation de la fonction de contrôle parental » à la page 7 (FR)).
• Si vous avez sélectionné un programme bloqué par le contrôle parental
et que l’indicateur s’affiche à l’écran, vous ne pouvez pas regarder
ce programme, même si vous entrez « 4357 ».
1 Suivez les étapes 1 à 6 de la section « Activation de
la fonction de contrôle parental » à la page 7 (FR)
pour afficher le menu « Blocage ».
2 Utilisez les touches M/m pour sélectionner
« Spécifique », puis appuyez sur la touche OK.
Aux États-Unis
OK
Régl Fin
: TV
MENU
Parent
Spécifique
Classement des films
Classement de télé
Non-classé: Permettre
Sél
Au Canada
OK
Régl Fin
: TV
MENU
Parent
Spécifique
Classement Anglais
Classement Français
Classement U.S.A.
Sél
Pour sélectionner un classement au Canada, passez à
l’étape 6.
3 Utilisez les touches M/m pour sélectionner
« Classement des films », puis appuyez sur la
touche OK.
OK
Régl Fin
: TV
MENU
Parent
Classement des films
G: –
PG: –
PG-13: –
R: –
NC-17: –
X: –
Sél
4 Utilisez les touches M/m pour sélectionner le
classement à bloquer, puis appuyez sur la touche
OK.
L’indicateur s’affiche automatiquement à côté du
classement sélectionné et de tous les classements suivants,
indiquant que les programmes correspondant à ces
classements sont bloqués.
Pour débloquer un classement, sélectionnez , puis appuyez
sur la touche OK.
L’indicateur est remplacé par le signe « – », et tous les
classements au-dessus sont aussi débloqués.
8 (FR)
Page 23

5 Utilisez les touches M/m pour sélectionner , puis
appuyez sur la touche OK.
6 Pour sélectionner un classement de télévision aux
États-Unis :
Utilisez les touches M/m pour sélectionner « Classement de
télé », puis appuyez sur la touche OK.
OK
Régl Fin
: TV
MENU
Parent
Classement de télé
Classes Contenu
TV-Y: –
TV-Y7: – FV: –
TV-G: –
TV-PG: – D:– L: – S: – V: –
TV-14: – D:– L: – S: – V: –
TV-MA: – L: – S: – V: –
Sél
Exemple : classement de
télévision aux États-Unis
OK
Régl Fin
: TV
MENU
Parent
Classement de télé
Classes Contenu
TV-Y: –
TV-Y7: – FV: –
TV-G: –
TV-PG: – D:– L: – S: – V: –
TV-14: D: L: S: V:
TV-MA: L: S: V:
Sél
Pour débloquer un classement, sélectionnez , puis appuyez
sur la touche OK.
L’indicateur est remplacé par le signe « – », et tous les
classements au-dessus sont aussi débloqués.
Pour sélectionner un classement de télévision au
Canada :
Utilisez les touches M/m pour sélectionner « Classement
anglais », « Classement français » ou « Classement U.S.A. »,
puis appuyez sur la touche OK.
Classement anglais
OK
Régl Fin
: TV
MENU
Parent
Classement Anglais
C: –
C8+: –
G: –
PG: –
14+: –
18+: –
Sél
Classement français
OK
Régl Fin
: TV
MENU
Parent
Classement Français
G: –
8ans+: –
13ans+: –
16ans+: –
18ans+: –
Sél
Classement U.S.A.
OK
Régl Fin
: TV
MENU
Parent
Classement U.S.A.
Classes Contenu
TV-Y: –
TV-Y7: – FV: –
TV-G: –
TV-PG: – D:– L: – S: – V: –
TV-14: – D:– L: – S: – V: –
TV-MA: – L: – S: – V: –
Sél
7 Utilisez les touches M/m pour sélectionner le
classement de télévision à bloquer, puis appuyez
sur la touche OK.
L’indicateur s’affiche automatiquement à côté du
classement sélectionné et de tous les classements suivants,
indiquant que les programmes correspondant à ces
classements sont bloqués.
Certains classements de télévision aux États-Unis ont des
classements supplémentaires appelés « extenseurs ».
Les extenseurs sont définis comme suit :
D (dialogue sexuellement suggestif), FV (violence fictive), L
(langage vulgaire), S (situations sexuelles) et V (violence).
En réglant les extenseurs, vous pouvez définir des limites de
blocage supplémentaires.
Pour plus de détails sur les extenseurs, voir page 11 (FR).
Tous les extenseurs compris dans le classement sélectionné
sont bloqués. Pour débloquer certains d’entre eux, allez à
l’étape 8. Sinon, rendez-vous à l’étape 10.
8 Utilisez les touches M/m pour sélectionner
l’extenseur à débloquer, puis appuyez sur la touche
OK.
« – » s’affiche à côté de l’extenseur sélectionné, indiquant que
les programmes correspondant à cet extenseur peuvent être
visionnés.
Pour rebloquer l’extenseur annulé, sélectionnez .
L’indicateur s’affiche, indiquant que les programmes
correspondant à cet extenseur sont de nouveau bloqués.
9 Répétez l’étape 8 pour d’autres extenseurs.
Tous les programmes correspondant au classement
sélectionné et les classements au-dessus sont bloqués, sauf les
extenseurs annulés.
10 Appuyez sur la touche MENU pour quitter le menu.
Pour bloquer les programmes ou films sans
classement
L’option « Non-classé » permet de bloquer les programmes ou
films qui sont diffusés sans porter de classement.
L’option « Non-classé » est disponible uniquement lorsque vous
avez sélectionné le pays « U.S.A. ».
1 Suivez les étapes 1 et 2 de la section « Sélection
d’un classement spécifique » à la page 8 (FR).
2 Utilisez les touches M/m pour sélectionner « Non-
classé », puis appuyez sur la touche OK.
FR
9 (FR)
Page 24

3 Utilisez les touches M/m pour sélectionner
« Blocage », puis appuyez sur la touche OK.
Option Description
Permettre Permet le visionnement des
programmes et films diffusés sans
classement.
Bloquer Bloque tous les programmes et films
diffusés sans classement.
4 Appuyez sur la touche MENU pour quitter le menu.
Remarque
Si vous choisissez de bloquer les programmes de télévision sans
classement, notez que les types de programmes suivants peuvent être
bloqués : émissions diffusées à partir d’un autre pays ou d’une autre
région ; diffusions d’urgence; émissions politiques ; sports ; nouvelles ;
météo ; avis publics ; programmes religieux.
x Signification des classements
Classement aux États-Unis
Classement prédéterminé de Sony
Ces classements originaux ont été établis par Sony selon l’âge des
téléspectateurs. Chaque cote permet de regarder certains
programmes, comme suit :
Option Description
Enfant Approprié pour les enfants de moins de 7 ans.
Classement des États-Unis pour les films : G,
NR et N/A
Classement des États-Unis pour la télévision :
TV-Y, TV-G et TV-NR
Jeune Approprié pour les enfants de 7 ans et plus.
Classement des États-Unis pour les films : G,
PG, NR et N/A
Classement des États-Unis pour la télévision :
TV-Y, TV-Y7, TV-G, TV-PG et TV-NR
Adolescent Approprié pour les enfants de plus de 13 ans.
Classement des États-Unis pour les films : G,
PG, PG-13, NR et N/A
Classement des États-Unis pour la télévision :
TV-Y, TV-Y7, TV-G, TV-PG, TV-14 et TV-NR
Pour une description des catégories « Enfant », « Jeune » et
« Adolescent », voir les options de classement spécifiques cidessous.
Classement des États-Unis pour les films
Le classement des États-Unis pour les films (y compris ceux qui
sont diffusés à la télévision) se base sur les directives de la
« Motion Picture Association of America (MPAA) ».
Option Description
G (grand public : tous
âges)
Dans les films classés G, aucun
langage grossier n’est utilisé, la
violence est minimale et la nudité et
les situations sexuelles sont absentes,
de même que l’utilisation de drogues.
Option Description
PG (supervision
parentale
Ce type de film devrait être d’abord
visionné par les parents.
recommandée :
certaines scènes
peuvent ne pas
convenir aux enfants)
PG (supervision
parentale fortement
recommandée :
Les parents sont avisés d’évaluer
sérieusement le visionnement de ces
films par des enfants pré-adolescents.
certaines scènes
peuvent ne pas
convenir aux enfants
de moins de 13 ans)
R (adultes : les enfants
de moins de 17 ans
doivent être
accompagnés d’un
Ce type de film contient du langage
vulgaire, de la violence explicite, de la
nudité et représente l’utilisation de
drogues ou d’autres sujets délicats.
adulte)
NC-17 ou X (18 ans et
plus)
Ce type de film est considéré par la
plupart des parents comme étant
inapproprié pour des mineurs.
Ce type de film peut contenir des
situations sexuelles et de la violence et
représenter des comportements
aberrants, l’utilisation de drogues ou
d’autres sujets délicats.
Classement des États-Unis pour la télévision
Le classement des États-Unis pour les programmes de télévision
se base sur les directives « U.S. Television Parental Guidelines ».
Option Description
TV-Y (tous les
enfants)
Ces programmes sont conçus pour les enfants
de 2 à 6 ans et conviennent pour tous les
enfants.
TV-Y7
(conçus pour
les enfants de
plus de 6 ans)
Ces programmes sont appropriés pour les
enfants de 7 ans et plus. Ces programmes
peuvent inclure de la violence fictive légère ou
de la violence de comédie ou peuvent effrayer
les enfants de moins de 7 ans.
TV-G (grand
public)
La plupart des parents considéreraient ces
programmes appropriés pour tous les âges. Ils
contiennent peu de violence ou aucune et pas
de langage grossier ni de dialogues ou de
situations sexuellement explicites.
TV-PG
(supervision
parentale
Ces programmes contiennent des éléments que
les parents peuvent considérer inappropriés
pour les jeunes enfants.
recommandée)
TV-14
(supervision
parentale
Ces programmes contiennent des éléments que
les parents peuvent considérer inappropriés
pour les enfants de moins de 14 ans.
fortement
recommandée)
TV-MA
(adultes
seulement)
Ces programmes sont conçus pour les adultes
et peuvent être inappropriés pour les enfants de
moins de 17 ans.
10 (FR)
Page 25

À propos des extenseurs du classement des États-Unis
pour la télévision
Les classements TV-Y7, TV-PG, TV-14 et TV-MA comportent
des classements supplémentaires appelés « extenseurs »
permettant de préciser les limites de visionnement. Les extenseurs
sont définis comme suit :
Option Description
FV (violence fictive) Programmes contenant de la violence
de comédie présente dans les
programmes TV-Y7 uniquement.
D (dialogues à
connotation sexuelle)
L (langage vulgaire) Programmes contenant du langage
S (situations
sexuelles)
V (violence) Programmes contenant de la violence.
Classement au Canada
Classement prédéterminé de Sony
Ces classements originaux ont été établis par Sony selon l’âge des
téléspectateurs. Chaque cote permet de regarder certains
programmes, comme suit :
Option Description
Enfant Approprié pour les enfants de moins de 8 ans.
Jeune Approprié pour les enfants de plus de 8 ans.
Adolescent Approprié pour les enfants de 14 ans et plus.
Programmes contenant des dialogues
suggestifs ou de l’humour à
connotation sexuelle.
vulgaire.
Programmes contenant des situations
sexuelles.
Ces programmes peuvent contenir du
langage grossier, de la violence ou de
brèves scènes de nudité.
Classement du Canada pour les programmes
de langue anglaise : C et G
Classement du Canada pour les programmes
de langue française : G
Classement des États-Unis pour la télévision :
TV-Y, TV-G et TV-NR
Classement du Canada pour les programmes
de langue anglaise : C, G, C8+ et PG
Classement du Canada pour les programmes
de langue française : G et 8 ans+
Classement des États-Unis pour la télévision :
TV-Y, TV-Y7, TV-G, TV-PG et TV-NR
Classement du Canada pour les programmes
de langue anglaise : C, G, C8+, PG et 14+
Classement du Canada pour les programmes
de langue française : G, 8 ans+ et 13 ans+
Classement des États-Unis pour la télévision :
TV-Y, TV-Y7, TV-G, TV-PG, TV-14 et TV-NR
Classement du Canada pour les programmes de langue
anglaise
Le classement canadien pour les programmes de langue anglaise
s’applique aux programmes de télévision diffusés en anglais au
Canada.
Option Description
C (programmes
conçus pour les
enfants de moins de 8
ans)
C8+ (programmes
appropriés pour les
enfants de 8 ans et
plus sans supervision)
G (grand public) Ces programmes contiennent très peu
PG (supervision
parentale
recommandée)
14+ (programmes
contenant des
éléments qui peuvent
être inappropriés pour
les enfants de moins
de 14 ans)
18+ (adulte) Ces programmes peuvent contenir de
Ces programmes ne contiennent pas de
scènes de violence réaliste, de langage
vulgaire, de nudité ni de contenu
sexuel. Une attention particulière est
portée aux sujets traités qui pourraient
porter atteinte au bien-être et au
sentiment de sécurité des enfants.
Dans ces programmes, la violence
n’est pas représentée comme le moyen
privilégié, acceptable ou unique de
résoudre les conflits ; les enfants ne
sont pas encouragés à imiter des actes
dangereux. Ces programmes ne
contiennent pas de langage grossier, de
violence ni de contenu sexuel.
de violence, qu’elle soit physique,
verbale ou émotionnelle. Ils peuvent
contenir du langage familier, mais pas
de langage vulgaire ni de nudité.
Programmes conçus pour le grand
public, mais qui peuvent ne pas être
appropriés pour les jeunes enfants. Les
parents peuvent considérer que
certaines scènes ne sont pas
appropriées pour les enfants de moins
de 8 à 13 ans sans supervision.
Il est fortement recommandé aux
parents de faire preuve de
discernement pour le visionnement par
les enfants et les jeunes adolescents.
la violence en tant que partie
intégrante du récit, des personnages ou
du sujet traité ; ils sont conçus pour un
public adulte. Ils peuvent contenir du
langage grossier et des scènes de
nudité et sexuelles explicites.
FR
Pour une description des catégories « Enfant », « Jeune » et
« Adolescent », voir les options de classement spécifiques cidessous.
11 (FR)
Page 26

Classement du Canada pour les programmes de langue
française
Le classement canadien pour les programmes de langue française
s’applique aux programmes de télévision diffusés en français au
Canada.
Option Description
G (général) Programmes visant le public de tous
âges. Ne contient aucune violence ou
une violence représentée avec humour,
ou sous forme de caricature, de façon
non réaliste.
8 ans+ (général 8 ans
et plus ; non
recommandé pour les
jeunes enfants)
13 ans+ (ces
programmes peuvent
ne pas convenir aux
enfants de moins de 13
ans)
16 ans+ (programmes
inappropriés pour les
enfants de moins de 16
ans)
18+ (programmes
réservés aux adultes)
Programmes conçus pour le grand
public, mais qui contiennent de la
violence légère ou occasionnelle qui
pourrait perturber les jeunes enfants.
La supervision par un adulte est
recommandée pour les jeunes enfants
(moins de 8 ans).
La supervision par un adulte est
fortement recommandée pour les
enfants de moins de 13 ans.
Programmes contenant des scènes de
violence fréquentes ou intenses.
Programmes contenant des scènes de
violence constantes ou extrêmes.
12 (FR)
Page 27

Dépannage
Symptômes et solutions
Si vous éprouvez des difficultés non répertoriées ci-dessous, reportez-vous au mode d’emploi sur le CD-ROM fourni. Pour les problèmes
causés par un ordinateur ou un autre appareil raccordé, reportez-vous au mode d’emploi fourni avec l’appareil en question.
Pour PC 1/PC 2
Symptôme Vérifiez ces éléments
Aucune image.
Si l’indicateur 1 (alimentation)
n’est pas allumé ou si l’indicateur
1 (alimentation) ne s’allume pas
lorsque vous appuyez sur le
commutateur 1 (alimentation),
Si le message « Câble non
connecté » s’affiche à l’écran,
Si le message « Pas d’entrée vidéo
» apparaît à l’écran ou le témoin
1 (alimentation) est orange,
Si le message « Hors plage
fréquences » s’affiche à l’écran,
Si vous utilisez Windows et que
vous avez remplacé votre ancien
écran par cet écran,
Si vous utilisez un système
Macintosh,
• Vérifiez que le cordon d’alimentation est correctement raccordé.
• Vérifiez que le câble de signal vidéo est correctement raccordé et que toutes les fiches sont
correctement branchées dans leur prise (page 3 (FR)).
• Vérifiez que les broches du connecteur d’entrée vidéo ne sont pas pliées ou enfoncées.
• Vérifiez que le réglage du signal en entrée est correct (pour plus de détails, reportez-vous au
mode d’emploi sur le CD-ROM fourni).
• Un câble de signal vidéo non fourni est raccordé. Si vous raccordez un câble vidéo autre que
ceux fournis, il se peut que le message « Câble non connecté » apparaisse à l’écran. Ceci
n’est pas un problème de fonctionnement.
• Vérifiez que le câble de signal vidéo est correctement raccordé et que toutes les fiches sont
correctement branchées dans leur prise (page 3 (FR)).
• Vérifiez que les broches du connecteur d’entrée vidéo ne sont pas pliées ou enfoncées.
• Vérifiez que le réglage du signal en entrée est correct (pour plus de détails, reportez-vous au
mode d’emploi sur le CD-ROM fourni).
x Problème causé par un ordinateur ou un autre appareil raccordé et non par
l’écran
• L’ordinateur est en mode d’économie d’énergie. Appuyez sur n’importe quelle touche du
clavier ou déplacez la souris.
• Vérifiez que votre carte graphique est correctement installée.
• Vérifiez que l’alimentation de l’ordinateur est activée.
• Redémarrez l’ordinateur.
x Problème causé par un ordinateur ou un autre appareil raccordé et non par
l’écran
• Vérifiez que la plage de fréquence vidéo est comprise dans les spécifications de l’écran. Si
vous avez remplacé un ancien écran par cet écran, rebranchez l’ancien écran, puis ajustez la
carte graphique de l’ordinateur dans les plages suivantes :
MFM-HT75W
Fréquence horizontale : 28 – 69 kHz (RVB analogique), 28 – 48 kHz (RVB numérique)
Fréquence verticale : 48 – 85 Hz (RVB analogique), 60 Hz (RVB numérique)
Résolution : 1 280 × 768 ou moins
MFM-HT95
Fréquence horizontale : 28 – 86 kHz (RVB analogique), 28 – 64 kHz (RVB numérique)
Fréquence verticale : 48 – 85 Hz (RVB analogique, résolution <1 280 × 1 024), 48 – 75 Hz
(RVB analogique, résolution = 1 280 × 1 024), 60 Hz (RVB numérique)
Résolution : 1 280 × 1 024 ou moins
Pour le modèle MFM-HT75W uniquement
L’image SXGA s’affiche en mode sans échec, mais elle peut être floue. Réglez la résolution à
1 280 × 768 à partir de votre ordinateur.
• Si vous avez remplacé votre ancien écran par cet écran, rebranchez l’ancien écran et suivez
la procédure ci-dessous. Sélectionnez « SONY » dans la liste « Manufacturers » (Fabricants)
et sélectionnez « MFM-HT75W or MFM-HT95 » dans la liste « Models » (Modèles) dans
l’écran de sélection de périphériques Windows. Si « MFM-HT75W or MFM-HT95 »
n’apparaît pas dans la liste « Models » (Modèles), essayez « Plug and Play ».
• En cas de raccordement d’un ordinateur Macintosh, utilisez si nécessaire un adaptateur (non
fourni). Raccordez l’adaptateur à l’ordinateur avant de raccorder le câble de signal vidéo.
FR
13 (FR)
Page 28
Pour TV/VIDEO 1/VIDEO 2
Symptôme Vérifiez ces éléments
Aucune image.
L’écran ne reçoit aucun canal. • Vérifiez que le cordon d’alimentation est solidement raccordé.
• Mettez l’écran sous tension.
• Vérifiez le raccordement du câble d’antenne.
Le son comporte des parasites ou
aucun son n’est émis.
L’image est bonne, mais il n’y a pas
de son.
La télécommande ne fonctionne
pas.
Mot de passe perdu. • Sélectionnez le menu (Parent) dans le menu à l’écran, puis saisissez le mot de passe
L’image comporte des parasites
lors de la réception d’une image
de télévision.
• Vérifiez le raccordement des câbles audio.
• Vérifiez le réglage du niveau de volume.
• Appuyez sur la touche MUTING ou VOL +/– pour que « Muting » disparaisse de l’écran
(pour plus de détails, reportez-vous au mode d’emploi sur le CD-ROM fourni).
• Débranchez votre casque d’écoute.
• Les piles sont peut-être faibles. Remplacez les piles.
• Vérifiez la polarité des piles.
• Si le témoin 1 (alimentation) de l’écran n’est pas allumé en orange, appuyez sur
l’interrupteur 1 (alimentation) de l’écran.
• Si vous comptez utiliser les fonctions du téléviseur, vérifiez que l’entrée TV est
sélectionnée.
• Si vous comptez utiliser les fonctions du téléviseur avec la fonction « PIP », vérifiez que
l’entrée TV est sélectionnée pour l’image secondaire.
maître 4357. Le mot de passe maître efface le mot de passe précédent et vous permet de
saisir un nouveau mot de passe (pour plus de détails, reportez-vous au mode d’emploi sur
le CD-ROM fourni).
• Réglez le menu « Réduc.de bruit » à « Oui » pour réduire les parasites de l’image (pour
plus de détails, reportez-vous au mode d’emploi sur le CD-ROM fourni).
• Réduisez la valeur de réglage du menu « Netteté » (pour plus de détails, reportez-vous au
mode d’emploi sur le CD-ROM fourni).
Affichage des informations de
l’écran
Pendant que l’écran reçoit un signal vidéo, appuyez sur
la touche MENU et tenez-la enfoncée pendant plus de 5
secondes, jusqu’à ce que la boîte d’information
s’affiche.
Appuyez de nouveau sur la touche MENU pour faire disparaître
la boîte de dialogue.
Exemple
INFORMATION
Model : MFM-HT75W
Ser.No. : 1234567
Manufactured : 2005-##
Si le problème persiste, communiquez avec votre détaillant Sony
agréé et fournissez-lui les informations suivantes :
• Modèle : MFM-HT75W ou MFM-HT95
• Numéro de série
• Description détaillée du problème
• Date d’achat
• Nom et spécifications de votre ordinateur et de votre carte
graphique
• Type de signaux d’entrée (PC 1/PC 2/TV/VIDEO 1/VIDEO 2)
Modèle
nom
Numéro
de série
Semaine et
année de
fabrication
14 (FR)
Page 29

Spécifications
Panneau ACL
Type de panneau : TFT a-Si à matrice active
Taille de l'écran :
17 po (43 cm) (MFM-HT75W)
19 po (48 cm) (MFM-HT95)
Résolution :
MFM-HT75W
Horizontale : Max. 1 280 points
Verticale : Max. 768 lignes
MFM-HT95
Horizontale : Max. 1 280 points
Verticale : Max. 1 024 lignes
Entrée du signal
PC 1
Format du signal :
RVB numérique (DVI-D) (TMDS lien simple)
Fréquence de fonctionnement :
MFM-HT75W
Horizontale : 28 à 48 kHz
Verticale : 60 Hz
MFM-HT95
Horizontale : 28 à 64 kHz
Verticale : 60 Hz
Audio :
Mini-prise stéréo, 500 mV eff. (modulation 100%)
PC 2
Format du signal :
RVB analogique (HD-15D-secondaire)
Fréquence de fonctionnement :
MFM-HT75W
Horizontale : 28 à 69 kHz
Verticale : 48 à 85 Hz
MFM-HT95
Horizontale : 28 à 86 kHz
Verticale : 48 à 85 Hz
(résolution < 1 280
48 à 75 Hz (résolution = 1 280
Puissances de signal :
Signal RVB : 0,7 Vc-c, 75 Ω, positif
Signal SYNC :
Niveau TTL, 2,2 kΩ, positif ou négatif
(horizontal et vertical séparés, ou
sync composant)
0,3 Vc-c, 75 Ω, négatif (sync sur vert)
Audio :
Mini-prise stéréo, 500 mV eff. (modulation
100%)
TV
Système couleur :
Norme américaine (NTSC)
Couverture des canaux :
VHF : 2 à 13
UHF : 14 à 69
Câble : 1 à 125
Antenne :
Borne externe 75 ohms pour UHF et VHF
VIDEO 1
Norme du signal :
Vidéo composant (Y, P
, PR) (prise RCA)
B
×
1 024)
×
1 024)
Y : 1,0 Vc-c, 75 ohms non équilibré, sync négatif
: 0,7 Vc-c, 75 Ω
P
B
P
: 0,7 Vc-c, 75 Ω
Format du signal :
Audio :
VIDEO 2
Norme du signal :
Formats vidéo : NTSC, PAL, SECAM
Audio :
Plug & Play
VESA, DDC2B
Sortie des haut-parleurs
Max. 3 W
Sortie pour casque d’écoute
Mini-prise stéréo
Alimentation requise
100-240 V CA, 50-60 Hz
Max. 1,3 A (MFM-HT75W)
Max. 1,4 A (MFM-HT95)
Consommation électrique
En fonctionnement (max.): 68 W (MFM-HT75W)/74 W
En mode de veille (max.): 1,2 W
Température de fonctionnement
°C
0-35
Dimensions (largeur/hauteur/profondeur)
Écran (à la verticale) :
MFM-HT75W
Environ 450,2 × 353,5 × 176,0 mm
(
17 3/4 ×
MFM-HT95
Environ. 466,6 × 437,0 × 185,0 mm
(
18 3/8 ×
Poids
MFM-HT75W
Environ 6,3 kg (13 lb 14 oz)
MFM-HT95
Environ 7,8 kg (17 lb 3 oz)
Accessoires
Voir page 3
La conception et les spécifications sont sujettes à modifications
sans préavis.
R
480i (525i), 480p (525p), 576i (625i), 576p (625p),
720p (750p), 1 080i (1 125i)
Prise RCA (stéréo), 500 mV eff. (modulation 100%)
S-vidéo (mini DIN à 4 broches)
Y : 1,0 Vc-c, 75 ohms non équilibré, sync négatif
C : 0,286 Vc-c (signal de salve), 75 Ω
Vidéo composant (prise RCA)
1,0 Vc-c, 75 ohms non équilibré, sync négatif
Prise RCA (stéréo), 500 mV eff. (modulation 100%)
×
2 +5 W
(MFM-HT95)
14
×
7
po)
17 1/
4
×
7 3/8 po)
FR
15 (FR)
Page 30

ADVERTENCIA
Para evitar el riesgo de incendios o de
electrocución, no exponga la unidad a la lluvia ni
a la humedad.
La tensión existente dentro de la unidad es muy
elevada y puede resultar peligrosa. No abra el
aparato. Solicite asistencia técnica únicamente a
personal cualificado.
Precauciones
Advertencia sobre la conexión de la alimentación
• Utilice el cable de alimentación suministrado. En caso de
utilizar un cable de alimentación distinto, asegúrese de que sea
compatible con el suministro eléctrico local.
Para los clientes en EE.UU.
Si no utiliza el cable adecuado, esta pantalla no cumplirá con
las normas obligatorias de la FCC.
Para los clientes en el Reino Unido
Si utiliza la pantalla en el Reino Unido, asegúrese de utilizar el
cable de alimentación adecuado para esta región.
Ejemplo de tipos de enchufe
para ca de 100 a 120 V para ca de 200 a 240 V sólo para ca de
240 V
• Cerca de equipos que generan un campo magnético intenso,
como un televisor o demás electrodomésticos.
• En lugares expuestos a grandes cantidades de polvo, suciedad o
arena, como cerca de una ventana abierta o de una salida al
exterior. Si la coloca temporalmente en el exterior, asegúrese de
tomar las precauciones adecuadas contra el polvo y la suciedad,
ya que de lo contrario podrían producirse fallas irreparables en
el funcionamiento.
• Para reducir el riesgo de incendio o descarga eléctrica, no
exponga este aparato a la lluvia ni a la humedad.
• No exponga el aparato a salpicaduras o goteos ni coloque sobre
él jarrones u otros objetos llenos de líquido.
• Para evitar el riesgo de incendio, mantenga los objetos
inflamables o las luces sin protección (por ejemplo, velas) lejos
de la unidad.
• No coloque la unidad cerca ni encima de un radiador o registro
de calor, ni donde pueda verse expuesta a luz solar directa.
Nota sobre la pantalla LCD (de cristal líquido)
Tenga en cuenta que la pantalla LCD está fabricada con
tecnología de alta precisión. No obstante, es posible que
aparezcan puntos negros o brillantes de luz (rojos, azules o
verdes) de forma constante y ocasionalmente brillos o rayas de
color irregular. No se trata de una falla en el funcionamiento.
(Puntos efectivos: más del 99,99%)
Acerca del altavoz estéreo incorporado
Asegúrese de mantener alejados de la apertura del altavoz
disquetes, cintas y equipos magnéticos de grabación, ya que los
altavoces generan un campo magnético. Dicho campo puede
afectar a los datos almacenados en discos y cintas magnéticas.
El equipo debe instalarse cerca de una toma de corriente de
fácil acceso.
Instalación
No instale ni deje la pantalla:
• En lugares expuestos a temperaturas extremas, por ejemplo
cerca de un radiador, una salida de aire caliente o bajo la luz
solar directa. Si la expone a temperaturas extremas, como en un
automóvil bajo la luz solar directa o cerca de una salida de aire
caliente, pueden producirse deformaciones del exterior o fallas
de funcionamiento.
• En lugares expuestos a vibraciones mecánicas o golpes.
• No debería impedirse la ventilación cubriendo las aberturas de
ventilación con objetos tales como periódicos, manteles,
cortinas, etc.
• Deje algo de espacio alrededor de la unidad. De lo contrario,
podría bloquearse la circulación adecuada de aire causando un
sobrecalentamiento, lo que podría provocar un incendio o dañar
la unidad.
20 cm
10 cm10 cm
Transporte
• Desconecte todos los cables de la pantalla LCD y sujétela
firmemente por ambos lados procurando no rayarla durante el
transporte. Si la deja caer, puede lesionarse o dañar la pantalla.
• Cuando transporte la pantalla para su reparación o
desplazamiento, utilice la caja de cartón y los materiales de
embalaje originales.
Desecho de las baterías usadas
Para conservar el medioambiente, deshágase de las baterías
usadas siguiendo la normativa o las regulaciones locales.
Instalación en una pared o en un soporte
Si su intención es instalar la pantalla en una pared o en un soporte,
asegúrese de consultar con personal cualificado.
2 (ES)
Page 31

Manual de instrucciones del
CD-ROM
1 Abrir el soporte.
2 Retire la cubierta del conector.
Nota
Para ver el manual de instrucciones del CD-ROM, debe tener
instalado Macromedia Shockwave Player y Adobe Acrobat
Reader (versión 6.0 o posterior) en el PC. La carpeta “installs”
del CD-ROM contiene los programas de instalación
necesarios.
Si desea instalarlos, vaya a “Mi PC”, haga clic con el botón
derecho del ratón en la unidad de CD-ROM, seleccione
“Explorar” y abra la carpeta “installs” (sólo para Windows).
Si utiliza un computador Macintosh:
Haga doble clic en el icono del CD-ROM para abrir la ventana
y, a continuación, en el icono “MONITOR”.
Manual de instrucciones
Los archivos del manual de instrucciones se incluyen en el CD-ROM
suministrado. Cárguelo en la unidad de CD-RO M del PC. A continuación,
la página de introducción del CD-ROM se abrirá automáticamente.
Si no aparece automáticamente, abra el archivo del manual de
instrucciones directamente (sólo para Windows).
1 Abra “Mi PC”.
2 Haga clic con el botón derecho del ratón en la unidad de CD-ROM y
seleccione “Explorar”.
3 Abra la carpeta “manuals”.
4 Abra la carpeta “HT”.
5 Abra la carpeta “UC”.
6 Seleccione y abra el archivo “HT_75W_95_ESU.pdf”.
3 Conecte la pantalla a un PC u otro equipo de video.
Conexión de un computador Macintosh
Conecte el cable de señal de video suministrado al conector de salida
de video del computador. Si es necesario, utilice un adaptador (no
suministrado). Conecte el adaptador al equipo antes de conectar el
cable de señal de video.
4 Si es necesario, conecte la pantalla a una antena
con un cable coaxial de 75 ohm (suministrado).
5 Conecte firmemente el cable de alimentación
suministrado al conector AC IN de la pantalla.
6 Conecte firmemente el otro extremo a una toma de
corriente.
2
cubierta del conector
ES
Para salir del CD-ROM
Haga clic en “EXIT/CD-ROM”.
Instalación
Desembalaje
Compruebe que la caja contiene todos los elementos que se
enumeran a continuación.
• Pantalla LCD
• Control remoto
• Pilas de tamaño AAA (2)
• Cable de alimentación
• Cable de señal de video HD15-HD15 (RGB analógico)
• Cable de señal de video DVI-D (RGB digital)
• Cable de audio (minitoma estéreo)
• Cable coaxial de 75 ohm
• CD-ROM (software de utilidades para Windows/Macintosh,
Manual de instrucciones, etc.)
• Tarjeta de garantía
• Esta Guía de instalación rápida
Conexión de la pantalla
Conecte la pantalla a un PC u otro equipo de video.
• Apague la pantalla, el PC y el resto de equipos antes de
conectarlos.
• No toque los terminales de la clavija del cable de señal de
video.
Para PC 1/PC 2
cable de señal de
video DVI-D
(suministrado)
a la toma de corriente
6
cable de alimentación (suministrado)
Audio
DVI-D
DVI-D HD15
HD15
3
cable de audio
(suministrado)
cable de señal de video
HD15-HD15 (suministrado)
cable coaxial de 75 ohm (suministrado)
5
a AC IN
VHF/UHF
4
3 (ES)
Page 32

Para VIDEO 1/VIDEO 2
cable de S video (no suministrado)
cable de video componente
(no suministrado)
3
cable de audio (no suministrado)
cable de video y audio (no suministrado)
a VHF/
UHF
4
a la toma de
corriente
5
a AC IN
6
cable de alimentación
(suministrado)
Nota
Al conectar equipos de video a las dos tomas de entrada de
video compuesto y de S video, se muestra la señal de la toma
de S video.
cable coaxial de 75 ohm
(suministrado)
La señal de entrada cambia cada vez que se presiona el botón
.
Mensaje en pantalla Configuración de la señal de
entrada
DVI-D: PC 1 Conector de entrada DVI-D
(RGB digital) para PC 1
HD15: PC 2 Conector de entrada HD15
(RGB analógico) para PC 2
Canales de televisión televisor
: VIDEO 1
o : VIDEO 2
Nota
Al utilizar la función PIP, si cambia la entrada mediante el botón
los botones de selección de entrada, es posible que dicha función se
desactive. En este caso, la fuente de entrada que seleccionó ocupa toda la
pantalla. Para utilizar de nuevo la función PIP, ajuste el menú “Ajuste del
PIP” en “PIP activado” utilizando el sistema de menús o seleccione “PIP
activado” pulsando el botón .
Sugerencias
• Las entradas también se pueden seleccionar con los botones de
selección de entrada en el control remoto.
• Al seleccionar la entrada de televisión, el número del canal
seleccionado aparecerá en la esquina superior derecha de la pantalla.
• Al utilizar la función PIP, utilice la opción “Inferior” en el menú “PIP”
del menú “Opción” para seleccionar la fuente de entrada de la imagen
secundaria. Si seleccionó la entrada del televisor para la imagen
secundaria, podrá cambiar el canal mediante los botones CH +/–.
Tomas de entrada de video
componente Y/P
VIDEO 1
Tomas de entrada de video
compuesto/S video para
VIDEO 2
B/PR
para
o
Encendido de la pantalla y de otros
equipos
Encienda la pantalla y, a continuación, un PC u otro equipo de
video.
1 Presione el interruptor 1 (alimentación) de la parte
frontal de la pantalla.
El indicador 1 (alimentación) se ilumina en verde.
2 Encienda el PC u otros equipos de video.
3 Presione el botón para seleccionar la señal de
entrada deseada.
3
CH
se ilumina en
verde
1
Configuración del control remoto
Inserte dos pilas de tamaño AAA (suministradas),
haciendo coincidir las marcas + y – de las pilas con el
diagrama en el interior del compartimiento de pilas del
control remoto.
Notas
• Para evitar daños provocados por la posible fuga de las pilas,
extráigalas cuando crea que el control remoto no se utilizará durante un
tiempo prolongado.
• Tenga cuidado al manipular el control remoto. Procure no dejar que se
caiga, moje o que se coloque en la luz solar directa, cerca de una fuente
de calor o en lugares con mucha humedad.
4 (ES)
Page 33
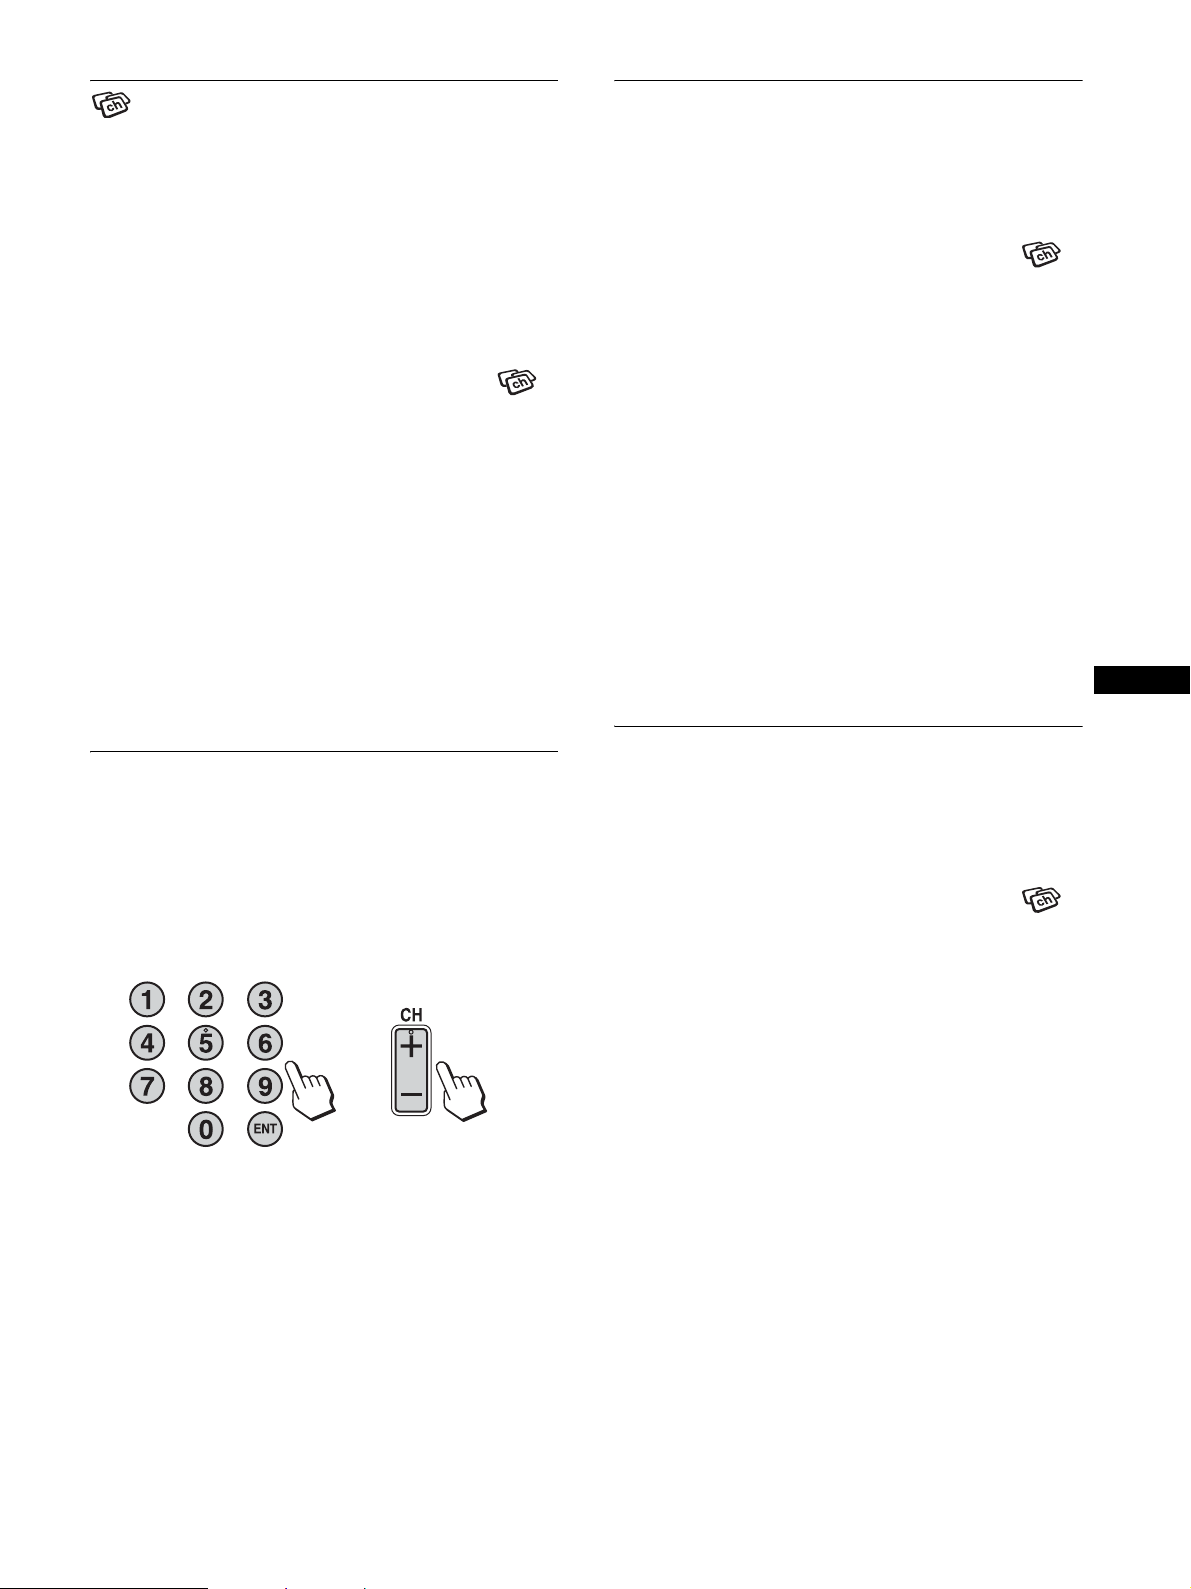
Configuración de los canales de
Omisión de canales no necesarios
televisión
Para mirar programas de televisión, deberá ejecutar
“Autoprogramación” para definir los canales.
Antes de mirar programas de televisión por primera vez, realice el
procedimiento de “Autoprogramación” siguiente.
Para obtener información sobre el uso del menú y los botones,
consulte el manual de instrucciones del CD-ROM suministrado.
1 Presione el botón MENU.
2 Presione los botones M/m para seleccionar
(canal) y presione el botón OK.
Aparece el menú “Canal” en la pantalla.
3 Presione los botones M/m para seleccionar
“Autoprogramación” y presione el botón OK.
Aparece el menú “Autoprogramación” en la pantalla.
4 Presione los botones M/m para seleccionar
“Aceptar” y presione el botón OK.
La pantalla comienza la exploración y la preparación
automática de los canales.
Aparecen el número de canal y un mensaje en pantalla.
5 Presione el botón MENU para salir de la pantalla de
menús una vez finalizada la autoprogramación.
Al seleccionar canales, se pueden omitir los canales que no se
necesitan mediante el botón CH +/–.
1 Presione el botón MENU.
2 Presione los botones M/m para seleccionar
(canal) y presione el botón OK.
Aparece el menú “Canal” en la pantalla.
3 Presione los botones M/m para seleccionar “Omitir/
Añadir canal” y presione el botón OK.
Aparece el menú “Omitir/Añadir canal” en la pantalla.
4 Presione los botones M/m para seleccionar el canal
que desee omitir y presione el botón OK.
Sugerencia
Para desplazarse por la lista, presione y mantenga presionado los
botones M/m.
5 Presione los botones M/m para seleccionar
“Omitir” y presione el botón OK.
Si desea recuperar un canal omitido, seleccione “Añadir”.
6 Presione el botón MENU para salir de la pantalla de
menú.
ES
Cambio de los canales de
televisión
Presione los botones de 0 a 9 para introducir un
número de canal.
El canal cambia transcurrido tres segundos. Presione el botón
ENT (introducir) para seleccionar dicho canal inmediatamente.
Utilice los botones CH +/– para explorar los canales.
o
bien
Sugerencia
Si mantiene presionado el botón CH + o –, el número de canal cambiará
rápidamente.
Selección entre el cable y UHF/VHF
Para establecer los canales UHF/VHF, realice el procedimiento
siguiente para establecer el menú “Cable” en “No”.
1 Presione el botón MENU.
2 Presione los botones M/m para seleccionar
(canal) y presione el botón OK.
Aparece el menú “Canal” en la pantalla.
3 Presione los botones M/m para seleccionar “Cable”
y presione el botón OK.
Aparece el menú “Cable” en la pantalla.
4 Presione los botones M/m para seleccionar el modo
deseado y presione el botón OK.
• Si: se pueden definir los canales de televisión por cable.
• No: se pueden definir los canales UHF/VHF.
Nota
No es posible establecer y recibir canales de televisión por cable y canales
UHF/VHF al mismo tiempo.
5 (ES)
Page 34

Uso de otras funciones
Menú Bloqueo
También es posible utilizar las funciones del televisor siguientes.
x Para ver programas de televisión con
subtítulos
Establezca la opción “Caption Vision” del menú “Opción” en
“Si”.
x Uso de la función de control de bloqueo
Seleccione las opciones de control en el menú “Bloqueo”.
Funcionamiento de los botones (control remoto)
Presione Para
MUTING Desactivar el sonido. Presiónelo de nuevo o
presione VOL+ para recuperar el sonido.
DISPLAY Mostrar el número de canal actual. Presiónelo de
nuevo para apagar la pantalla.
JUMP Alternar entre dos canales. La pantalla alterna el
canal actual y el último canal.
SLEEP Apagar la pantalla automáticamente después de
un período de tiempo definido.
Cambiar al Modo imagen.
Cambiar el ajuste “PIP”. Cada vez que presione
este botón, el ajuste cambia de la manera
siguiente.
PIP activado t PIP desactiv. t PIP activado…
Cambiar el ajuste “Acercamiento”. Cada vez que
presione este botón, el ajuste cambia de la
manera siguiente.
MFM-HT75W: Normal t Completa t
Panorám. t Acercamiento t Normal...
MFM-HT95: Normal t Completa t 16:9 t
Normal...
Sugerencia
Los botones y también están disponibles en la pantalla.
Los programas de televisión y películas que se muestran por
televisión contienen una señal de clasificación basada en los
sistemas de clasificación siguientes.
En EE.UU.: U.S. Television Parental Guidelines para la
clasificación de programas de televisión (clasificaciones de
televisión estadounidenses) y Motion Picture Association of
America (MPAA) Guidelines para la clasificación de películas,
incluso aquellas que se transmiten por televisión (clasificación de
películas).
En Canadá: clasificaciones Canadian English Language para la
clasificación de programas de televisión en inglés, y
clasificaciones Canadian French Language para la clasificación
de los programas en francés.
Para bloquear programas que no considere adecuados para sus
hijos, debe establecer la pantalla en los sistemas de clasificación
deseados. También están disponibles las clasificaciones
predeterminadas de Sony. Consulte la página 9 (ES) para obtener
una descripción de las clasificaciones.
Las características de bloqueo del televisor funcionan al recibir la
señal de clasificación desde la emisora televisiva local o del
proveedor de televisión por cable.
x Activación de la función de control de
bloqueo
1 Presione el botón MENU.
2 Presione los botones M/m para seleccionar
(bloqueo) y presione el botón OK.
Bloqueo
Ingrese la contraseña
con los botones del 0 a 9
----
: TV
6 (ES)
MENU
OK
Conf Fin
Sel
3 Introduzca una contraseña de cuatro dígitos con los
botones 0 a 9.
Aparece el menú “Bloqueo” en la pantalla.
OK
Conf Fin
: TV
MENU
Bloqueo
Bloqueo: No
País: EE.UU.
Cambiar la Contraseña
Sel
Si accede al menú “Bloqueo” por primera vez, se le pedirá que
introduzca de nuevo la contraseña para confirmarla.
Nota
No introduzca “4357”, lo que corresponde a la palabra “HELP”
(ayuda en inglés) en un teclado telefónico (consulte la página 7 (ES)).
Page 35

Sugerencias
• Debe especificar una contraseña aquí para obtener acceso
adicional al menú “Bloqueo”. Si pierde la contraseña, consulte
“Sugerencia” en la página 7 (ES)
• Si desea cambiar la contraseña, consulte la página 7 (ES).
4 Presione los botones M/m para seleccionar “País”
y presione el botón OK.
OK
Conf Fin
: TV
MENU
Bloqueo
Bloqueo: No
País: EE.UU.
Cambiar la Contraseña Canadá
Sel
Para cambiar la contraseña
1 Presione el botón MENU.
2 Presione los botones M/m para seleccionar
(bloqueo) y presione el botón OK.
3 Introduzca la contraseña de cuatro dígitos con los
botones 0 a 9.
Aparece el menú “Bloqueo” en la pantalla.
4 Presione los botones M/m para seleccionar
“Cambiar la Contraseña” y presione el botón OK.
5 Introduzca una nueva contraseña de cuatro dígitos
con los botones 0 a 9.
5 Presione los botones M/m para seleccionar su país
o región (EE.UU. o Canadá) y presione el botón OK.
6 Presione los botones M/m para seleccionar
“Bloqueo” y presione el botón OK.
OK
Conf Fin
: TV
MENU
Bloqueo
Bloqueo: No
País: Infante
Cambiar la Contraseña Niño
Joven
Personal
Sel
7 Presione los botones M/m para seleccionar la
clasificación deseada y presione el botón OK.
Si selecciona “Infante”, “Niño” o “Joven”, el nivel de bloqueo
se activa automáticamente.
Sugerencia
Si no está familiarizado con el sistema de clasificaciones para las
pautas de bloqueo de seguridad, debe seleccionar “Infante”, “Niño” o
“Joven” con el fin de simplificar la selección de clasificaciones. Para
establecer clasificaciones más restrictivas, seleccione “Personal”
(consulte “Selección de una clasificación personalizada” en la
página 8 (ES)).
6 Vuelva a introducir la contraseña definida en el
paso 5 para confirmarla.
7 Presione el botón MENU para salir de la pantalla de
menú.
Sugerencia
Si olvidó su contraseña, introduzca la contraseña maestra “4357” (que
corresponde a “HELP” (ayuda en inglés) en el teclado telefónico) en el
paso 3. A continuación, puede almacenar una contraseña nueva.
Notas
• Si introdujo “4357” como la contraseña la primera vez, no será posible
almacenar una contraseña nueva (consulte el paso 3 de “Activación de
la función de control de bloqueo” en la página 6 (ES)).
• Al seleccionar un programa bloqueado y cuando aparece el indicador
en la pantalla, no será posible ver dicho programa, incluso si se
introduce “4357”.
ES
8 Presione el botón MENU para salir de la pantalla de
menú.
Para desactivar la función de bloqueo
En el menú “Bloqueo”, establezca la opción “Bloqueo” en “No”.
7 (ES)
Page 36

x Selección de una clasificación
personalizada
Si desea seleccionar las clasificaciones que deben bloquearse
desde “Personal” tras activar la función de bloqueo (página 6
(ES)), realice el procedimiento siguiente.
Si desea obtener una descripción detallada de cada clasificación,
consulte “Significado de las clasificaciones” en la página 9 (ES).
1 Realice los pasos 1 a 6 en “Activación de la función
de control de bloqueo” en la página 6 (ES) para
mostrar el menú “Bloqueo” en pantalla.
2 Presione los botones M/m para seleccionar
“Personal” y presione el botón OK.
En EE.UU.
OK
Conf Fin
: TV
MENU
: TV
En Canadá
Bloqueo
Personal
Clasificación de Cine
Clasificación de TV
No clasificada: Permitir
Sel
Bloqueo
Personal
Clasificación Inglesa
Clasificación Francesa
Clasificación de EE.UU.
5 Presione los botones M/m para seleccionar y
presione el botón OK.
6 Para seleccionar una clasificación de televisión en
EE.UU.:
Presione los botones M/m para seleccionar “Clasificación de
TV” y presione el botón OK.
OK
Conf Fin
: TV
MENU
Bloqueo
Clasificación de TV
Clasif Contenido
TV-Y: –
TV-Y7: – FV: –
TV-G: –
TV-PG: – D:– L: – S: – V: –
TV-14: – D:– L: – S: – V: –
TV-MA: – L: – S: – V: –
Sel
Para seleccionar una clasificación de televisión en
Canadá:
Presione los botones M/m para seleccionar “Clasificación
Inglesa”, “Clasificación Francesa” o “Clasificación de
EE.UU.” y presione el botón OK.
Clasificación inglesa
Bloqueo
Clasificación Inglesa
C: –
C8+: –
G: –
PG: –
14+: –
18+: –
: TV
MENU
OK
Conf Fin
Sel
Para seleccionar una clasificación en Canadá, vaya al paso 6.
3 Presione los botones M/m para seleccionar
“Clasificación de Cine” y presione el botón OK.
OK
Conf Fin
: TV
MENU
Bloqueo
Clasificación de Cine
G: –
PG: –
PG-13: –
R: –
NC-17: –
X: –
Sel
4 Presione los botones M/m para seleccionar la
clasificación que se debe bloquear y presione el
botón OK.
El indicador aparece automáticamente junto a la
clasificación seleccionada y todas las clasificaciones
inferiores. También indica que se bloquearán los programas
que coinciden con las clasificaciones.
Para desbloquear una clasificación, seleccione y presione
el botón OK.
El indicador cambia a “–” y se desbloquean todas las
clasificaciones superiores.
Clasificación francesa
Bloqueo
Clasificación Francesa
G: –
8ans+: –
13ans+: –
16ans+: –
18ans+: –
Clasificación de EE.UU.
Bloqueo
Clasificación de EE.UU.
Clasif Contenido
TV-Y: –
TV-Y7: – FV: –
TV-G: –
TV-PG: – D:– L: – S: – V: –
TV-14: – D:– L: – S: – V: –
TV-MA: – L: – S: – V: –
Sel
Sel
Sel
OK
Conf Fin
OK
Conf Fin
OK
Conf Fin
MENU
: TV
MENU
: TV
MENU
8 (ES)
Page 37

7 Presione los botones M/m para seleccionar la
clasificación de televisión que se debe bloquear y
presione el botón OK.
El indicador aparece automáticamente junto a la
clasificación seleccionada y todas las clasificaciones
inferiores. También indica que se bloquearán los programas
que coinciden con las clasificaciones.
Ejemplo: clasificación de televisión en EE.UU.
OK
Conf Fin
: TV
MENU
Bloqueo
Clasificación de TV
Clasif Contenido
TV-Y: –
TV-Y7: – FV: –
TV-G: –
TV-PG: – D:– L: – S: – V: –
TV-14: D: L: S: V:
TV-MA: L: S: V:
Sel
Para desbloquear una clasificación, seleccione y presione
el botón OK.
El indicador cambia a “–” y se desbloquean todas las
clasificaciones superiores.
Algunas clasificaciones de televisión en EE.UU. incluyen
contenido adicional denominado “extensiones”.
Las extensiones se definen a continuación:
D (diálogo con contenido sexual), FV (violencia fantástica),
L (lenguaje vulgar), S (situaciones con contenido sexual) y V
(violencia).
Al establecer las extensiones, puede definir límites
adicionales para ver programas y películas.
Para obtener más información acerca de las extensiones,
consulte la página 10 (ES).
Se bloquearán todas las extensiones que se incluyen en las
clasificaciones seleccionadas. Si desea permitir la muestra de
alguna de ellas, vaya al paso 8. En caso contrario, vaya al paso
10.
8 Presione los botones M/m para seleccionar la
extensión que desea ver y presione el botón OK.
“–” aparece junto a la extensión seleccionada, indicando que
se puede ver el programa que coincide con la extensión.
Para volver a bloquear la extensión cancelada, seleccione .
El indicador aparece para mostrar que se bloquearán
nuevamente los programas que coinciden con la extensión .
9 Repita el paso 8 para otras extensiones.
Se bloquearán los programas que coinciden con las
clasificaciones seleccionadas y superiores, excepto para las
extensiones canceladas.
10 Presione el botón MENU para salir de la pantalla de
menú.
1 Realice los pasos 1 y 2 de “Selección de una
clasificación personalizada” en la página 8 (ES).
2 Presione los botones M/m para seleccionar “No
clasificada” y presione el botón OK.
3 Presione los botones M/m para seleccionar
“Bloquear” y presione el botón OK.
Opción Descripción
Permitir Permite programas y películas que se
emiten sin clasificación.
Bloquear Bloquea todos los programas y
películas que se emiten sin
clasificación.
4 Presione el botón MENU para salir de la pantalla de
menú.
Nota
Si decide bloquear programas de televisión no clasificados, tenga en
cuenta que pueden bloquearse los siguientes tipos de programas:
programas de otros países o regiones, emisiones de urgencia, programas
políticos, deportes, noticias, anuncios de servicio público, programas
religiosos y meteorológicos.
x Significado de las clasificaciones
Clasificaciones en EE.UU.
Clasificaciones predeterminadas de Sony
Se trata de clasificaciones originales que Sony ha predeterminado
en función de la edad del televidente. Cada clasificación permite
ver programas específicos como se indica a continuación:
Opción Descripción
Infante Adecuado para niños menores de 7 años.
Clasificaciones de películas estadounidenses:
G, NR y N/A
Clasificaciones de programas de televisión
estadounidenses: TV-Y, TV-G y TV-NR
Niño Adecuado para niños mayores de 7 años.
Clasificaciones de películas estadounidenses:
G, PG, NR y N/A
Clasificaciones de programas de televisión
estadounidenses: TV-Y, TV-Y7, TV-G, TV-PG
y TV-NR
Joven
(joven adulto)
Adecuado para niños mayores de 13 años.
Clasificaciones de películas estadounidenses:
G, PG, PG-13, NR y N/A
Clasificaciones de programas de televisión
estadounidenses: TV-Y, TV-Y7, TV-G, TV-PG,
TV-14 y TV-NR
ES
Para bloquear programas o películas que se emiten sin
clasificación
La opción no clasificada le permite bloquear programas o
películas que se emiten sin clasificación.
La opción no clasificada sólo está disponible si ha seleccionado
“EE.UU.” como país o región.
Para obtener una descripción de las clasificaciones, Infante, Niño
y Joven, consulte las opciones de clasificación personalizada
siguientes.
9 (ES)
Page 38

Clasificación de películas estadounidenses
Las clasificaciones de películas estadounidenses son para
películas (incluso las que se emiten por televisión) clasificadas
según las pautas de la Motion Picture Association of America
(MPAA).
Opción Descripción
G (público en general,
se admiten todas las
edades)
PG (Se recomienda
supervisión paterna,
puede que haya
contenido que sea
inapropiado para niños
pequeños)
PG-13 (Padres
seriamente advertidos,
es posible que haya
contenido que sea
inapropiado para niños
menores de 13 años)
R (Restringido, los
menores de 17 años
deberán estar
acompañados)
NC-17 o X (prohibida
para menores de 17
años)
Clasificación de televisión estadounidense
Las clasificaciones de te levisión estadounidenses están destinadas
para programas de televisión clasificados según las pautas U.S.
Television Parental.
Opción Descripción
TV-Y (todos
los niños)
TV-Y7
(destinado a
niños
mayores)
TV-G (público
en general)
TV-PG (se
recomienda
supervisión
paterna)
En las películas clasificadas G, no se
utilizan palabras vulgares, la violencia
es mínima, no hay escenas de
desnudez ni contenido sexual, ni se
muestra el uso de drogas.
Se trata de una película que los padres
posiblemente deberían controlar
primero.
Se advierte a los padres que tengan
cuidado cuando sus hijos menores de
13 años vean este tipo de película.
Este tipo de película contiene lenguaje
vulgar, violencia, desnudez, abuso de
drogas u otros elementos de
preocupación.
Se trata de una película que la mayoría
de los padres considerarán inapropiada
para menores de 17 años.
Puede que haya violencia, contenido
sexual, comportamiento detestable,
abuso de drogas u otros elementos de
preocupación.
Este programa está destinado a niños entre 2 y
6 años y es adecuado para todos los niños.
Este programa está dirigido a niños mayores
de 7 años. Los temas y elementos de este
programa pueden incluir violencia fantástica o
cómica o puede asustar a niños menores de 7
años.
La mayoría de los padres considerarían este
programa apto para todas las edades. Contiene
poca violencia y poco diálogo sexual, no
contiene lenguaje vulgar ni situaciones de
contenido sexual.
Este programa incluye algunos contenidos que
los padres podrían considerar inapropiados
para niños pequeños.
Opción Descripción
TV-14 (padres
seriamente
advertidos)
TV-MA (sólo
público
maduro)
Acerca de las extensiones de las clasificaciones de
televisión estadounidenses
Las clasificaciones TV-Y7, TV-PG, TV-14 y TV-MA incluyen
clasificaciones adicionales de contenido denominadas
“extensiones” para definir límites adicionales para ver programas
y películas. Las extensiones se definen a continuación:
Opción Descripción
FV (violencia
fantástica)
D (diálogo con
contenido sexual)
L (lenguaje vulgar) Programas que contienen lenguaje
S (situaciones
sexuales)
V (violencia) Programas con violencia.
Clasificaciones en Canadá
Clasificaciones predeterminadas de Sony
Se trata de clasificaciones originales que Sony ha predeterminado
en función de la edad del televidente. Cada clasificación permite
ver programas específicos como se indica a continuación:
Opción Descripción
Infante Adecuado para niños menores de 8 años.
Niño Adecuado para niños mayores de 8 años.
Joven Adecuado para mayores de 14 años.
Este programa incluye algunos contenidos que
la mayoría de los padres consideraría
inapropiado para niños menores de 14 años.
Este programa está específicamente diseñado
para adultos y ,por lo tanto, puede ser
inapropiado para menores de 17 años.
Programas que contienen violencia en
animación, que se produce solamente
en programas TV-Y7.
Programas con diálogo con contenido
sexual o connotaciones sexuales.
vulgar.
Programas con contenido sexual.
Puede que estos programas contengan
algo de lenguaje vulgar, violencia o un
poco de desnudez.
Clasificaciones canadienses en inglés: C y G
Clasificaciones canadienses en francés: G
Clasificaciones de programas de televisión
estadounidenses: TV-Y, TV-G y TV-NR
Clasificaciones canadienses en inglés: C, G,
C8+ y PG
Clasificaciones canadienses en francés: G y 8
ans+
Clasificaciones de programas de televisión
estadounidenses: TV-Y, TV-Y7, TV-G, TV-PG
y TV-NR
Clasificaciones canadienses en inglés: C, G,
C8+, PG y 14+
Clasificaciones canadienses en francés: G, 8
ans+ y 13 ans+
Clasificaciones de programas de televisión
estadounidenses: TV-Y, TV-Y7, TV-G, TV-PG,
TV-14 y TV-NR
10 (ES)
Page 39

Para obtener una descripción de las clasificaciones, Infante, Niño
y Joven, consulte las opciones de clasificación personalizada
siguientes.
Clasificaciones canadienses en inglés
Las clasificaciones canadienses en inglés son para programas de
televisión emitidos en inglés en Canadá.
Opción Descripción
C (programación
dirigida a niños
menores de 8 años)
C8+ (programación
generalmente
considerada aceptable
para niños mayores de
8 años, sin
supervisión)
G (público general) Contiene muy poca violencia, ya sea
PG (supervisión
paterna)
14+ (la programación
incluye temas o
contenido que podrían
ser inapropiados para
menores de 14 años)
18+ (adulto) Puede que contenga violencia esencial
No hay escenas realistas de violencia
ni lenguaje vulgar, desnudez ni
contenido sexual. Se presta una
especial atención a los temas, que
podrían amenazar el sentido de
seguridad y bienestar de los niños.
La violencia no se mostrará como la
manera preferida, aceptable o única
para la resolución de conflictos; o no
se animará a los niños a imitar actos
peligrosos que puedan ver por
televisión. No contiene lenguaje
vulgar, desnudez ni contenido sexual.
física, verbal o emocional. Puede que
haya algo de argot inofensivo, no
contiene lenguaje vulgar ni desnudez.
Programación dirigida a un público en
general pero que podría ser
inapropiada para niños pequeños. Es
posible que los padres consideren que
algunos contenidos sean inadecuados
para niños de 8 a 13 años sin
supervisión.
Se advierte a los padres que tengan
cuidado cuando pre-adolescentes o
adolescentes vean estos programas.
para el desarrollo de la trama, el
personaje o tema, destinada a un
público adulto. Puede contener
lenguaje vulgar y representaciones
explícitas de desnudez o contenido
sexual.
Opción Descripción
8 ans+ (8+ general, no
se recomienda para
niños pequeños)
13 ans+ (la
programación puede
no ser apropiada para
niños menores de 13
años)
16 ans+ (la
programación puede
no ser apropiada para
niños menores de 16
años)
18 ans+
(programación
únicamente para
adultos)
Programación dirigida a un público
amplio pero que contiene algo de
violencia que podría asustar a los niños
pequeños. Se recomienda que los niños
pequeños (menores de 8 años) vean
estos programas con un adulto.
Se recomienda rotundamente que los
niños menores de 13 años vean el
programa con un adulto.
Contiene escenas frecuentes de
violencia o violencia intensa.
Contiene violencia constante o escenas
de violencia extrema.
ES
Clasificaciones canadienses en francés
Las clasificaciones canadienses en francés son para programas de
televisión emitidos en francés en Canadá.
Opción Descripción
G (general) Programación dirigida para un público
de todas las edades. No contiene
violencia, o la que contiene es mínima
o se representa correctamente con
humor y caricatura o de una manera no
realista.
11 (ES)
Page 40

Solución de problemas
Problemas y soluciones
Si experimenta algún problema que no se explica a continuación, consulte el manual de instrucciones del CD-ROM suministrado. Para
problemas provocados por un computador u otro equipo, consulte su respectivo manual.
Para PC 1/PC 2
Problema Compruebe lo siguiente
No hay imagen.
Si el indicador 1 (alimentación) no
está encendido o si el indicador
1 (alimentación) no se enciende
cuando se presiona el interruptor
1 (alimentación),
Si “Cable Desconectado” aparece en
la pantalla,
Si “No Señal” aparece en pantalla o
el indicador 1 (alimentación) se
ilumina en naranja,
Si “Fuera de Alcance” aparece en
pantalla,
• Compruebe que el cable de alimentación está correctamente conectado.
• Compruebe que el cable de señal de video está conectado correctamente y que los
enchufes están perfectamente insertados en sus receptáculos (página 3 (ES)).
• Compruebe que los terminales del conector de entrada de vídeo no están doblados ni
aplastados.
• Compruebe que el ajuste de selección de entrada es correcto (para obtener más
información, consulte el manual de instrucciones del CD-ROM suministrado).
• Se ha conectado un cable de señal de video no suministrado. Si conecta un cable de señal
de video que no se haya suministrado con el equipo, es posible que el mensaje “Cable
Desconectado” aparezca en pantalla. No se trata de una falla en el funcionamiento.
• Compruebe que el cable de señal de video está conectado correctamente y que los
enchufes están perfectamente insertados en sus receptáculos (página 3 (ES)).
• Compruebe que los terminales del conector de entrada de vídeo no están doblados ni
aplastados.
• Compruebe que el ajuste de selección de entrada es correcto (para obtener más
información, consulte el manual de instrucciones del CD-ROM suministrado).
x Problema causado por un computador u otro equipo conectado y no por la
pantalla
• El PC se encuentra en el modo de ahorro de energía. Presione una tecla del teclado o
mueva el ratón.
• Compruebe que la tarjeta gráfica está instalada correctamente.
• Compruebe que la alimentación del equipo está activada.
• Reinicie el PC.
x Problema causado por un computador u otro equipo conectado y no por la
pantalla
• Compruebe que el rango de frecuencia de video se encuentra dentro del especificado para
la pantalla. Si ha sustituido una pantalla antigua por esta pantalla, vuelva a conectar la
pantalla antigua y ajuste la tarjeta gráfica del PC en los siguientes rangos.
MFM-HT75W
Frecuencia horizontal: de 28 – 69 kHz (RGB analógico), de 28 – 48 kHz (RGB digital)
Frecuencia vertical: de 48 – 85 Hz (RGB analógico), 60 Hz (RGB digital)
Resolución: 1 280 × 768 o inferior
MFM-HT95
Frecuencia horizontal: de 28 – 86 kHz (RGB analógico), de 28 – 64 kHz (RGB digital)
Frecuencia vertical: de 48 – 85 Hz (RGB analógico, resolución<1 280 × 1 024),
de 48 – 75 Hz (RGB analógico, resolución=1 280 × 1 024), 60 Hz (RGB digital)
Resolución: 1 280 × 1 024 o inferior
Solamente para MFM-HT75W
El modo de visualización segura (Safe Display) permite visualizar imágenes SXGA,
aunque éstas pueden aparecer borrosas. Ajuste la resolución de la computadora en
1280 × 768.
12 (ES)
Page 41
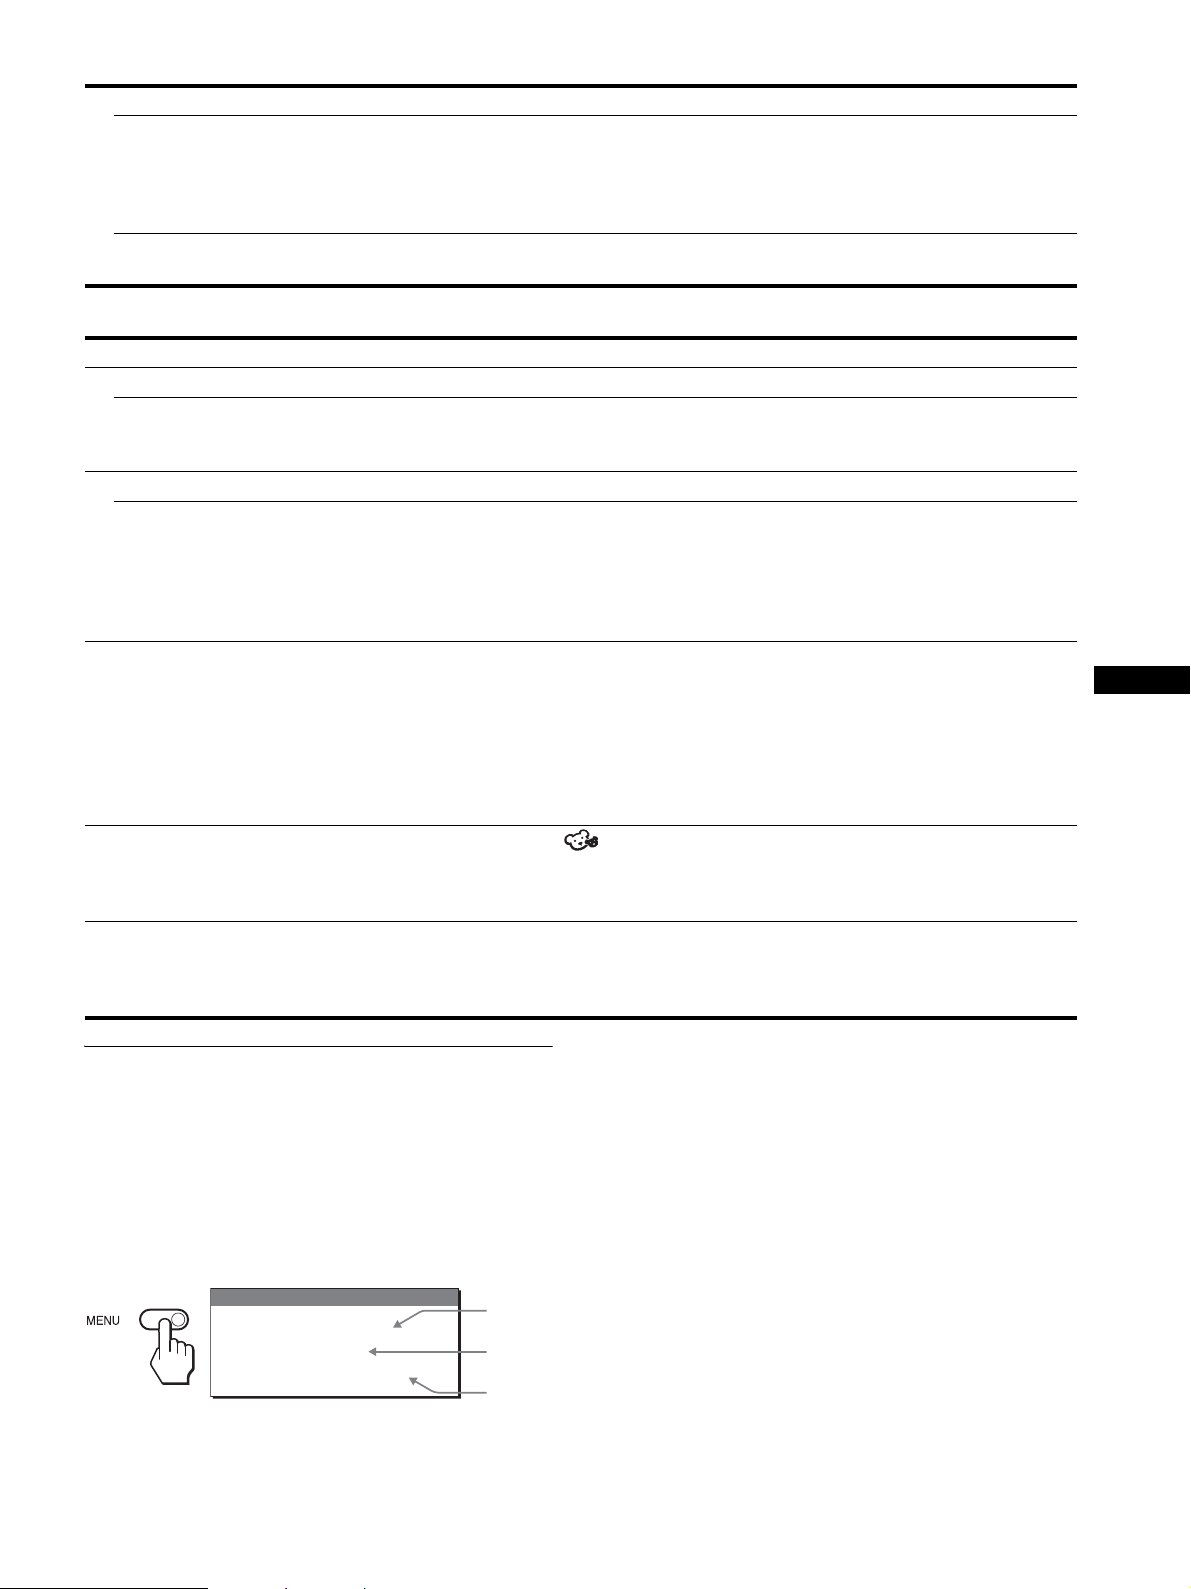
Problema Compruebe lo siguiente
Si utiliza Windows y ha sustituido
una pantalla antigua por ésta,
Si utiliza un sistema Macintosh, • Si conecta un equipo Macintosh, utilice un adaptador (no suministrado) si es necesario.
• Si ha sustituido una pantalla antigua por ésta, vuelva a conectar la antigua y realice lo
siguiente. Seleccione “SONY” en la lista “Fabricantes” y elija “MFM-HT75W” o
“MFM-HT95” en la lista “Modelos” de la pantalla de selección de dispositivos de
Windows. Si “MFM-HT75W” o “MFM-HT95” no aparece en la lista “Modelos”,
inténtelo con “Plug & Play”.
Conecte el adaptador al equipo antes de conectar el cable de señal de video.
Para TV/VIDEO 1/VIDEO 2
Problema Compruebe lo siguiente
No hay imagen.
No se recibe ningún canal. • Asegúrese de que el cable de alimentación esté conectado firmemente.
• Encienda la pantalla.
• Verifique las conexiones del cable de la antena.
No hay sonido./Sonido ruidoso.
Buena imagen, sin sonido. • Verifique las conexiones del cable de audio.
• Compruebe el control de volumen.
• Presione el botón MUTING o VOL + hasta que “Muting” desaparezca de la pantalla (para
obtener más información, consulte el manual de instrucciones del CD-ROM
suministrado).
• Desconecte los auriculares.
El control remoto no funciona. • Las pilas pueden estar agotadas. Reemplácelas.
• Compruebe la polaridad de las pilas.
• Si el indicador 1 (alimentación) de la pantalla no se iluminó en color naranja, presione el
interruptor 1 (alimentación) de la pantalla.
• Si su intención es utilizar las funciones del televisor, compruebe que se seleccionó la
entrada del televisor.
• Si su intención es utilizar las funciones del televisor con la función “PIP”, compruebe que
seleccionó la entrada del televisor para la imagen secundaria.
Contraseña olvidada. • Seleccione el menú (bloqueo) en la pantalla de menús e introduzca la contraseña
maestra siguiente: 4357. La contraseña maestra borra la contraseña anterior y permite
especificar una nueva (para obtener más información, consulte el manual de instrucciones
del CD-ROM suministrado).
La imagen aparece ruidosa
cuando se visualiza un canal de
televisión.
• Ajuste el menú “Reductor Ruido” en “Si” para reducir el ruido de la imagen (para obtener
más información, consulte el manual de instrucciones del CD-ROM suministrado).
• Disminuya el valor de ajuste del menú “Nitidez” (para obtener más información, consulte
el manual de instrucciones del CD-ROM suministrado).
ES
Para ver información relacionada
con esta pantalla
Mientras la pantalla recibe una señal de video,
mantenga presionado el botón MENU durante más de 5
segundos hasta que aparezca el cuadro de
información.
Para que desaparezca, presione de nuevo el botón MENU.
Ejemplo
INFORMATION
Model : MFM-HT75W
Ser.No. : 1234567
Manufactured : 2005-##
Nombre del
modelo
Número
de serie
Semana y
año de
fabricación
Si el problema persiste, llame a su distribuidor Sony autorizado y
proporciónele la siguiente información:
• Nombre del modelo: MFM-HT75W o MFM-HT95
• Número de serie
• Descripción detallada del problema
• Fecha de compra
• Nombre y especificaciones del PC y la tarjeta gráfica
• Tipo de señales de entrada (PC 1/PC 2/TV/VIDEO 1/VIDEO 2)
13 (ES)
Page 42

Especificaciones
Panel LCD
Tipo de panel: Matriz activa a-Si TFT
Tamaño de la pantalla:
17 pulgadas (43 cm) (MFM-HT75W)
19 pulgadas (48 cm) (MFM-HT95)
Resolución de la pantalla:
MFM-HT75W
Horizontal: máx. 1 280 puntos
Vertical: máx. 768 líneas
MFM-HT95
Horizontal: máx. 1 280 puntos
Vertical: máx. 1 024 líneas
Entrada de la señal
PC 1
Formato de la señal:
RGB digital (DVI-D) (TMDS enlace único)
Frecuencia de funcionamiento:
MFM-HT75W
Horizontal: 28–48 kHz
Vertical: 60 Hz
MFM-HT95
Horizontal: 28–64 kHz
Vertical: 60 Hz
Audio:
Minitoma estéreo, 500 mVrms (modulación 100%)
PC 2
Formato de la señal:
RGB analógica (HD-15D-sub)
Frecuencia de funcionamiento:
MFM-HT75W
Horizontal: 28–69 kHz
Vertical: 48–85 Hz
MFM-HT95
Horizontal: 28–86 kHz
Vertical: 48–85 Hz (resolución inferior a 1 280 ×
1 024)
48–75 Hz (resolución igual a 1 280 × 1 024)
Niveles de señal:
Señal RGB: 0,7 Vp-p, 75 Ω, positiva
Señal SYNC:
Nivel TTL, 2,2 kΩ, positiva o negativa
(horizontal y vertical independiente o
sincronización compuesta)
0,3 Vp-p, 75 Ω, negativa (sincronización en
verde)
Audio:
Minitoma estéreo, 500 mVrms (modulación
100%)
Televisor
Sistema de televisión:
Estándar de televisión americano (NTSC)
Cobertura de canales:
VHF: de 2 a 13
UHF: de 14 a 69
CATV: de 1 a 125
Antena:
Terminal externo de 75 ohmios para VHF/UHF
VIDEO 1
Estándar de la señal:
Video componente (Y, P
Y: 1,0 Vp-p, 75 ohmios, no equilibrada,
sincronización negativa
: 0,7 Vp-p, 75 Ω
P
B
: 0,7 Vp-p, 75 Ω
P
Formato de la señal:
Audio:
VIDEO 2
Estándar de la señal:
Formato de video: NTSC, PAL, SECAM
Audio:
Plug & Play
VESA, DDC2B
Salida de los altavoces
Máx. 3 W
Salida de los auriculares
Minitoma estéreo
Requisitos de alimentación
ca de 100 a 240 V y 50 a 60 Hz
Máx. 1,3 A (MFM-HT75W)
Máx. 1,4 A (MFM-HT95)
Consumo de energía
En uso (máx.):
68 W (MFM-HT75W)/74 W (MFM-HT95)
En modo de espera (máx.):
1,2 W
Temperatura de funcionamiento
de 0 a 35
Dimensiones (ancho/alto/profundidad)
Pantalla (vertical):
MFM-HT75W
MFM-HT95
Peso
MFM-HT75W
Aprox. 6,3 kg (13 lb 14 oz)
MFM-HT95
Aprox. 7,8 kg (17 lb 3 oz)
Accesorios
Consulte la página 3.
El diseño y las especificaciones están sujetos a cambios sin previo
aviso.
R
480i (525i), 480p (525p), 576i (625i), 576p (625p),
720p (750p), 1 080i (1 125i)
Toma RCA (estéreo), 500 mVrms (modulación
100%)
S-Video (mini DIN de 4 pines)
Y: 1,0 Vp-p, 75 ohmios, no equilibrada,
sincronización negativa
C: 0,286 Vp-p (señal de sincronización), 75 Ω
Video compuesto (toma RCA)
1,0 Vp-p, 75 ohmios, no equilibrada,
sincronización negativa
Toma RCA (estéreo), 500 mVrms (modulación
100%)
×
2 +5 W
°C
Aprox. 450,2 × 353,5 × 176 mm
(
17 3/4 ×
14
×
7
pulgadas)
Aprox. 466,6 × 437 × 185 mm
(
18 3/8 ×
17 1/
4
×
7 3/8 pulgadas)
, PR) (toma RCA)
B
14 (ES)
Page 43

REFERENCIA DE TERMINOLOGIA
Botones del TV y el mando a distancia suministrado
CH +/– (Presiónelo para cambiar el canal del TV.)
DISPLAY (Presiónelo para visualizar el número del canal que
está viendo.)
ENT (Presiónelo para fijar la entrada númerica mediante los
botones 0-9.)
JUMP (Presiónelo para avanzar al canal siguiente o retroceder al
anterior.)
MENU (Press to turn the menu screen on and off.)
MUTING (Presiónelo para silenciar el sonido.)
PC 1 (Presiónelo para seleccionar el equipo de video conectado a
la toma PC 1.)
PC 2 (Presiónelo para seleccionar el equipo de video conectado a
la toma PC 2.)
SLEEP (Presiónelo para configurar el temporizador de reposo o
cambiar sus ajustes.)
TV (Presiónelo para seleccionar los programas de televisión.)
VIDEO 1 (Presiónelo para seleccionar el equipo de video
conectado a la toma VIDEO 1.)
VIDEO 2 (Presiónelo para seleccionar el equipo de video
conectado a la toma VIDEO 2.)
VOL +/- (Presiónelo para cambiar el nivel del volumen.)
Palabras del panel posterior
AC IN (Entrada de corriente alterna)
AUDIO (Audio)
IN (Entrada)
L (Left)
R (Right)
S VIDEO (Señal de video de mejor calidad)
VHF/UHF (Frecuencia muy alta/Hiperfrecuencia)
VIDEO (Vídeo)
Otros
Auto SAP (Auto seleccionador de audio)
Caption Vision (Vista de subtítulos) (Esta opción permite
visualizar una versión impresa en pantalla del diálogo, o la
información de la red o la emisora.)
CD-ROM (disco compacto de memoria de solo lectura)
DMPM (administración de energía de monitor digital DVI)
DPMS (Estándar de administración de energía de pantalla)
DVI (Interfaz video de digital)
DVI-D (el interfaz visual digital para digital)
DVD (Disco de video información)
END (End)
HELP (Ayuda)
LCD (Pantalla de cristal de líquido)
MPAA (Motion Association of America)
MTS (Programas estereofónicos, bilingües y monofónicos)
OK (aceptar)
PC (computadora personal)
PIP (Picture in picture)
RGB (Red Green Blue)
TFT (transistor de pelicula fina)
TMDS (senal diferencial minimizada de transicion)
TTL (logica de transistor a transistor)
VCR (Grabadora de cintas de vídeo)
ES
15 (ES)
Page 44

Sony Corporation Printed in Korea
 Loading...