

Page 1

2-661-022-32(1)
LCD Multi
Function Display
MFM-HT205
© 2006 Sony Corporation
Page 2
Owner’s Record
The model and serial numbers are located at the rear of the unit.
Record these numbers in the spaces provided below. Refer to them
whenever you call upon your dealer regarding this product.
Model No.
Serial No.
WARNING
To reduce the risk of fire or electric shock, do not
expose this apparatus to rain or moisture.
Dangerously high voltages are present inside the
unit. Do not open the cabinet. Refer servicing to
qualified personnel only.
FCC Notice
This equipment has been tested and found to comply with the limits
for a Class B digital device, pursuant to Part 15 of the FCC Rules.
These limits are designed to provide reasonable protection against
harmful interference in a residential installation. This equipment
generates, uses, and can radiate radio frequency energy and, if not
installed and used in accordance with the instructions, may cause
harmful interference to radio communications. However, there is no
guarantee that interference will not occur in a particular installation.
If this equipment does cause harmful interference to radio or
television reception, which can be determined by turning the
equipment off and on, the user is encouraged to try to correct the
interference by one or more of the following measures:
– Reorient or relocate the receiving antenna.
– Increase the separation between the equipment and receiver.
– Connect the equipment into an outlet on a circuit different from
that to which the receiver is connected.
– Consult the dealer or an experienced radio/TV technician for help.
You are cautioned that any changes or modifications not expressly
approved in this manual could void your authority to operate this
equipment.
IMPORTANTE
Para prevenir cualquier mal funcionamiento y evitar daños, por
favor, lea detalladamente este manual de instrucciones antes
de conectar y operar este equipo.
If you have any questions about this product, you may call;
Sony Customer Information Services Center
1-800-222-7669 or http://www.sony.com/
Declaration of Conformity
Trade Name: SONY
Model: MFM-HT205
Responsible Party: Sony Electronics Inc.
Address: 16530 Via Esprillo,
Telephone Number: 858-942-2230
This device complies with part 15 of the FCC rules. Operation is
subject to the following two conditions: (1) This device may not
cause harmful interference, and (2) this device must accept any
interference received, including interference that may cause
undesired operation.
San Diego, CA 92127 U.S.A.
NOTICE
This notice is applicable for USA/Canada only.
If shipped to USA/Canada, install only a UL LISTED/CSA
LABELLED power supply cord meeting the following
specifications:
SPECIFICATIONS
Plug Type Nema-Plug 5-15p
Cord Type SVT or SJT, minimum 3 · 18 AWG
Length Maximum 15 feet
Rating Minimum 7 A, 125 V
NOTICE
Cette notice s’applique aux Etats-Unis et au Canada
uniquement.
Si cet appareil est exporté aux Etats-Unis ou au Canada, utiliser
le cordon d’alimentation portant la mention UL LISTED/CSA
LABELLED et remplissant les conditions suivantes:
SPECIFICATIONS
Type de fiche Fiche Nema 5-15 broches
Cordon Type SVT ou SJT, minimum 3 · 18 AWG
Longueur Maximum 15 pieds
Tension Minimum 7 A, 125 V
Important Safety Instructions
1) Read these instructions.
2) Keep these instructions.
3) Heed all warnings.
4) Follow all instructions.
5) Do not use this apparatus near water.
6) Clean only with dry cloth.
7) Do not block any ventilation openings. Install in accordance
with the manufacturer’s instructions.
8) Do not install near any heat sources such as radiators, heat
registers, stoves, or other apparatus (including amplifiers) that
produce heat.
9) Do not defeat the safety purpose of the polarized or groundingtype plug. A polarized plug has two blades with one wider than
the other. A grounding type plug has two blades and a third
grounding prong. The wide blade or the third prong are
provided for your safety. If the provided plug does not fit into
your outlet, consult an electrician for replacement of the
obsolete outlet.
10) Protect the power cord from being walked on or pinched
particularly at plugs, convenience receptacles, and the point
where they exit from the apparatus.
11) Only use attachments/accessories specified by the
manufacturer.
12) Use only with the cart, stand, tripod, bracket, or table specified
by the manufacturer, or sold with the apparatus. When a cart is
used, use caution when moving the cart/apparatus
combination to avoid injury from tip-over.
13) Unplug this apparatus during lightning storms or when unused
for long periods of time.
14) Refer all servicing to qualified service personnel. Servicing is
required when the apparatus has been damaged in any way,
such as power-supply cord or plug is damaged, liquid has been
spilled or objects have fallen into the apparatus, the apparatus
has been exposed to rain or moisture, does not operate
normally, or has been dropped.
2
Page 3
Table of Contents
Precautions . . . . . . . . . . . . . . . . . . . . . . . . . . . . . . . . . . . . . . . . . . . 5
Identifying parts and controls . . . . . . . . . . . . . . . . . . . . . . . . . . . . . . 6
Setup . . . . . . . . . . . . . . . . . . . . . . . . . . . . . . . . . . . . . . . . .9
Setup 1: Use the stand . . . . . . . . . . . . . . . . . . . . . . . . . . . . . . . . . . 9
Setup 2: Connect the cables . . . . . . . . . . . . . . . . . . . . . . . . . . . . . . 9
Setup 3: Connect the power cord . . . . . . . . . . . . . . . . . . . . . . . . . 13
Setup 4: Replace the connector cover . . . . . . . . . . . . . . . . . . . . . 13
Setup 5: Turn on the display and other equipment . . . . . . . . . . . . 13
Setup 6: Adjust the tilt . . . . . . . . . . . . . . . . . . . . . . . . . . . . . . . . . . 14
Setup 7: Insert batteries into the remote control . . . . . . . . . . . . . . 14
Watching the TV . . . . . . . . . . . . . . . . . . . . . . . . . . . . . . .15
Setting the TV channels . . . . . . . . . . . . . . . . . . . . . . . . . . . . 15
Changing the TV channel . . . . . . . . . . . . . . . . . . . . . . . . . . . . . . . 15
Skipping unnecessary channels . . . . . . . . . . . . . . . . . . . . . . . . . . 15
Choosing between cable and UHF/VHF . . . . . . . . . . . . . . . . . . . . 15
Using other features . . . . . . . . . . . . . . . . . . . . . . . . . . . . . . . . . . . 16
US
• Macintosh is a trademark licensed to
Apple Computer, Inc., registered in the
U.S.A. and other countries.
•Windows
Microsoft Corporation in the United
States and other countries.
• VGA is registered trademarks of IBM
Corporation of the U.S.A.
• VESA and DDC
Video Electronics Standards
Association.
• Adobe and Acrobat are trademarks of
Adobe Systems Incorporated.
• WOW, SRS and symbol are
trademarks of SRS Labs, Inc.
• WOW technology is incorporated under
license from SRS Labs, Inc.
• All other product names mentioned
herein may be the trademarks or
registered trademarks of their respective
companies.
•Furthermore, “™” and “®” are not
mentioned in each case in this manual.
®
is registered trademark of
™
are trademarks of the
Customizing Your Display . . . . . . . . . . . . . . . . . . . . . . .16
Navigating the menu . . . . . . . . . . . . . . . . . . . . . . . . . . . . . . . . . . . 16
Picture menu . . . . . . . . . . . . . . . . . . . . . . . . . . . . . . . . . . . . . 18
Selecting the Picture Mode for PC 1/PC 2 . . . . . . . . . . . . . . . . 18
Selecting the Picture Mode for TV/COMPONENT/VIDEO 1/
VIDEO 2 . . . . . . . . . . . . . . . . . . . . . . . . . . . . . . . . . . . . . . . . . . 18
Adjusting “Backlight” . . . . . . . . . . . . . . . . . . . . . . . . . . . . . . . . . 19
Adjusting “Contrast” (“Picture”) . . . . . . . . . . . . . . . . . . . . . . . . . 19
Adjusting “Brightness” . . . . . . . . . . . . . . . . . . . . . . . . . . . . . . . . 19
Adjusting “Color”
(for TV/COMPONENT/VIDEO 1/VIDEO 2 only) . . . . . . . . . . . . 19
Adjusting “Hue” (for TV/VIDEO 1/VIDEO 2 only) . . . . . . . . . . . 19
Adjusting “Sharpness”
(for TV/COMPONENT/VIDEO 1/VIDEO 2 only) . . . . . . . . . . . . 19
Adjusting “Color Temp.” (for PC 1/PC 2 only) . . . . . . . . . . . . . . 20
Adjusting “Gamma” (for PC 1/PC 2 only) . . . . . . . . . . . . . . . . . 20
Resetting Picture Mode to the default . . . . . . . . . . . . . . . . . . . . 21
Setting “NR”
(for TV/COMPONENT/VIDEO 1/VIDEO 2 only) . . . . . . . . . . . . 21
Setting “Dynamic Contrast”
(for TV/COMPONENT/VIDEO 1/VIDEO 2 only) . . . . . . . . . . . . 21
Audio menu . . . . . . . . . . . . . . . . . . . . . . . . . . . . . . . . . . . . . . 22
Setting “Surround” . . . . . . . . . . . . . . . . . . . . . . . . . . . . . . . . . . 22
Adjusting “Treble,” “Bass,” and “Balance” . . . . . . . . . . . . . . . . . 22
Setting “Auto Volume”
(for TV/COMPONENT/VIDEO 1/VIDEO 2 only) . . . . . . . . . . . . 22
Setting “MTS” (for TV only) . . . . . . . . . . . . . . . . . . . . . . . . . . . . 23
Resetting all audio settings to the default . . . . . . . . . . . . . . . . . 23
http://www.sony.net/
3
Page 4
Screen menu . . . . . . . . . . . . . . . . . . . . . . . . . . . . . . . . . . . . 23
Setting “Zoom” . . . . . . . . . . . . . . . . . . . . . . . . . . . . . . . . . . . . . 23
Automatic picture quality adjustment function
(for PC 2 only) . . . . . . . . . . . . . . . . . . . . . . . . . . . . . . . . . . . . . 24
Making further automatic adjustments to the picture quality for the
current input signal (Auto Adjust) (for PC 2 only) . . . . . . . . . . 24
Adjusting the picture’s sharpness manually (Phase/Pitch)
(for PC 2 only) . . . . . . . . . . . . . . . . . . . . . . . . . . . . . . . . . . . . . 24
Adjusting the picture’s position manually
(H Center /V Center) (for PC 2 only) . . . . . . . . . . . . . . . . . . . . 25
Adjusting the picture’s position manually (V Center)
(for TV/COMPONENT/VIDEO 1/VIDEO 2 only) . . . . . . . . . . . 25
Changing the display resolution (Resolution)
(for PC 2 only) . . . . . . . . . . . . . . . . . . . . . . . . . . . . . . . . . . . . . 25
Parent menu . . . . . . . . . . . . . . . . . . . . . . . . . . . . . . . . . . . . . 26
Activating the Parental Control feature . . . . . . . . . . . . . . . . . . 26
Selecting a Custom Rating . . . . . . . . . . . . . . . . . . . . . . . . . . . 27
What the Ratings Mean . . . . . . . . . . . . . . . . . . . . . . . . . . . . . . 29
Option menu . . . . . . . . . . . . . . . . . . . . . . . . . . . . . . . . . . . . . . 31
Setting “PIP” (Picture In Picture) or “PAP”
(Picture And Picture) (for PC 1/PC 2 only) . . . . . . . . . . . . . . . 31
Setting “Caption Vision”
(for TV/VIDEO 1/VIDEO 2 only) . . . . . . . . . . . . . . . . . . . . . . . 33
Setting “Input Sensing” (for PC 1/PC 2 only) . . . . . . . . . . . . . . 33
Setting “Language” . . . . . . . . . . . . . . . . . . . . . . . . . . . . . . . . . 33
Setting “Menu Position” . . . . . . . . . . . . . . . . . . . . . . . . . . . . . . 33
Setting “Menu Lock” . . . . . . . . . . . . . . . . . . . . . . . . . . . . . . . . 34
Setting “Demo Mode” . . . . . . . . . . . . . . . . . . . . . . . . . . . . . . . 34
Resetting to the default setting . . . . . . . . . . . . . . . . . . . . . . . . 34
Technical Features . . . . . . . . . . . . . . . . . . . . . . . . . . . . .35
Controlling the volume . . . . . . . . . . . . . . . . . . . . . . . . . . . . . . . . . 35
Power saving function . . . . . . . . . . . . . . . . . . . . . . . . . . . . . . . . . . 35
Setting the Picture Mode . . . . . . . . . . . . . . . . . . . . . . . . . . . . . . . 36
Automatic brightness adjustment function (light sensor) . . . . . . . 36
Automatic picture quality adjustment function
Turning off the display automatically
(for TV/COMPONENT/VIDEO 1/VIDEO 2 only) . . . . . . . . . . . . . . 37
(for PC 2 only) . . . 36
Troubleshooting . . . . . . . . . . . . . . . . . . . . . . . . . . . . . . .37
On-screen messages . . . . . . . . . . . . . . . . . . . . . . . . . . . . . . . . . . 37
Trouble symptoms and remedies . . . . . . . . . . . . . . . . . . . . . . . . . 39
Specifications . . . . . . . . . . . . . . . . . . . . . . . . . . . . . . . . .42
4
Page 5
Precautions
Warning on power connections
• Use the supplied power cord. If you use a different power cord,
be sure that it is compatible with your local power supply.
For the customers in the U.S.A.
If you do not use the appropriate cord, this display will not
conform to mandatory FCC standards.
For the customers in the UK
If you use the display in the UK, be sure to use the appropriate
UK power cord.
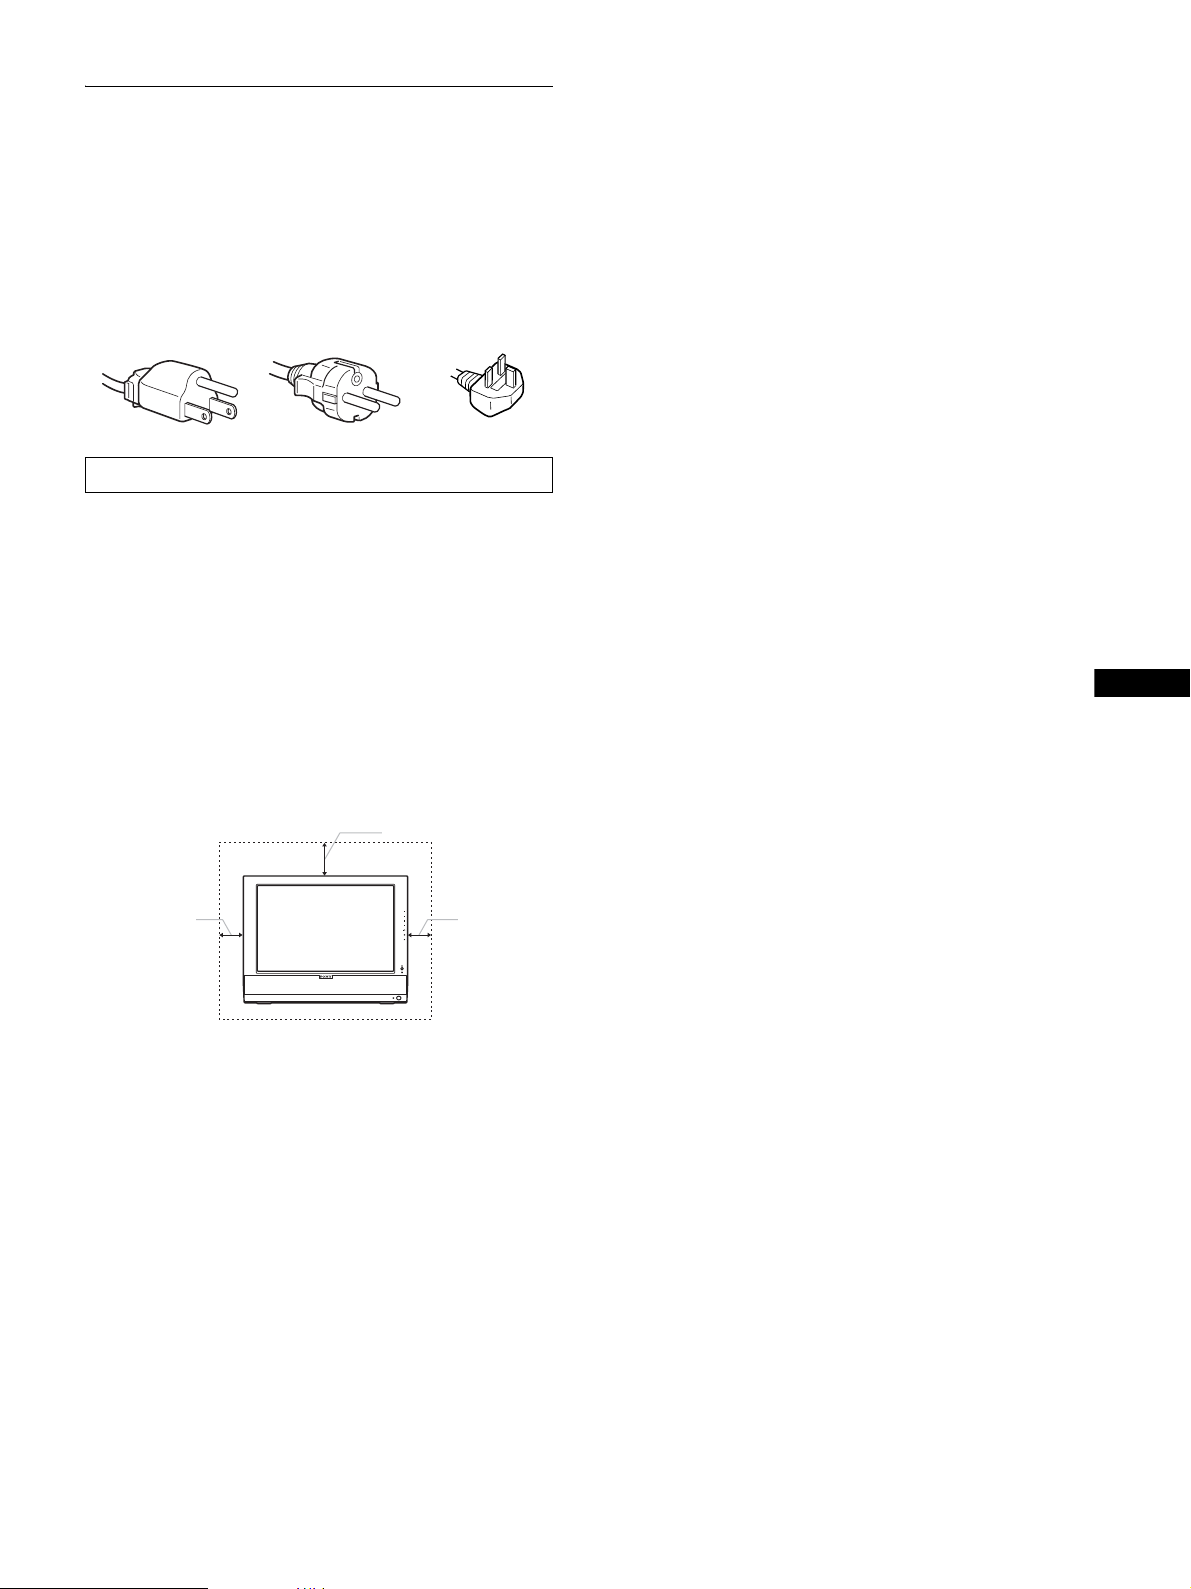
Example of plug types
for 100 to 120 V AC for 200 to 240 V AC for 240 V AC only
The equipment should be installed near an easily accessible outlet.
Installation
Do not install or leave the display:
• In places subject to extreme temperatures, for example near a
radiator, heating vent, or in direct sunlight. Subjecting the
display to extreme temperatures, such as in an automobile
parked in direct sunlight or near a heating vent, could cause
deformations of the casing or malfunctions.
• In places subject to mechanical vibration or shock.
• The ventilation should not be impeded by covering the
ventilation openings with items, such as newspapers, tablecloths, curtains, etc.
• Leave some space around the unit. Otherwise, adequate aircirculation may be blocked causing overheating and cause fire
or damage the unit.
20 cm
10 cm
• Near any equipment that generates a strong magnetic field,
such as a TV or various other household appliances.
• In places subject to inordinate amounts of dust, dirt, or sand, for
example near an open window or an outdoor exit. If setting up
temporarily in an outdoor environment, be sure to take
adequate precautions against airborne dust and dirt. Otherwise
irreparable malfunctions could occur.
• To reduce the risk of fire or electric shock, do not expose this
Apparatus to rain or moisture.
• Apparatus shall not be exposed to dripping or splashing and no
objects filled with liquids, such as vases, shall be placed on the
apparatus.
• To prevent fire, keep inflammable objects or naked lights (e.g.
candles) away from the unit.
• Do not place the unit near or over a radiator or heat register, or
where it is exposed to direct sunlight.
Handling the LCD screen
• Do not leave the LCD screen facing the sun as it can damage
the LCD screen. Take care when you place the display by a
window.
CH
VOL
10 cm
• Do not push on or scratch the LCD screen. Do not place a heavy
object on the LCD screen. This may cause the screen to lose
uniformity or cause LCD panel malfunctions.
• If the display is used in a cold place, a residual image may
appear on the screen. This is not a malfunction. The screen
returns to normal as the temperature rises to a normal operating
level.
• If a still picture is displayed for a long time, a residual image
may appear for a while. The residual image will eventually
disappear.
• The LCD panel becomes warm during operation. This is not a
malfunction.
About the built-in stereo speakers
Be sure to keep magnetic recording equipment, tapes, and floppy
discs away from the speaker’s opening as the speakers generate a
magnetic field. This magnetic field may affect data stored on
magnetic tapes and discs.
Note on the LCD (Liquid Crystal Display)
Please note that the LCD screen is made with high-precision
technology. However, black points or bright points of light (red,
blue, or green) may appear constantly on the LCD screen, and
irregular colored stripes or brightness may appear on the LCD
screen. This is not malfunction.
(Effective dots: more than 99.99%)
Maintenance
• Be sure to unplug the power cord from the power outlet before
cleaning your display.
• Clean the LCD screen with a soft cloth. If you use a glass
cleaning liquid, do not use any type of cleaner containing an
anti-static solution or similar additive as this may scratch the
LCD screen’s coating.
• Clean the cabinet, panel, and controls with a soft cloth lightly
moistened with a mild detergent solution. Do not use any type
of abrasive pad, scouring powder, or solvent, such as alcohol or
benzine.
• Do not rub, touch, or tap the surface of the screen with sharp or
abrasive items such as a ballpoint pen or screwdriver. This type
of contact may result in a scratched picture tube.
• Note that material deterioration or LCD screen coating
degradation may occur if the display is exposed to volatile
solvents such as insecticide, or if prolonged contact is
maintained with rubber or vinyl materials.
Transportation
• Disconnect all cables from the display, and grasp both side of
the LCD display firmly taking care not to scratch the screen
when transporting. If you drop the display, you may be injured
or the display may be damaged.
• When you transport this display for repair or shipment, use the
original carton and packing materials.
Disposal of the display
• Do not dispose of this display with general
household waste.
• The fluorescent tube used in this display contains
mercury. Disposal of this display must be carried out
in accordance to the regulations of your local
sanitation authority.
Disposal of used batteries
To preserve our environment, dispose the used batteries
according to your local laws or regulations.
US
5
Page 6
For customers in the United States
This product contains mercury. Disposal of this product may be
regulated if sold in the United States. For disposal or recycling
information, please contact your local authorities or the
Electronics Industries Alliance
(http://www.eiae.org).
Installation on a wall or a mounting arm
If you intend to install the display on a wall or a mounting arm, be
sure to consult qualified personnel.
Rear of the LCD display
qd
qs
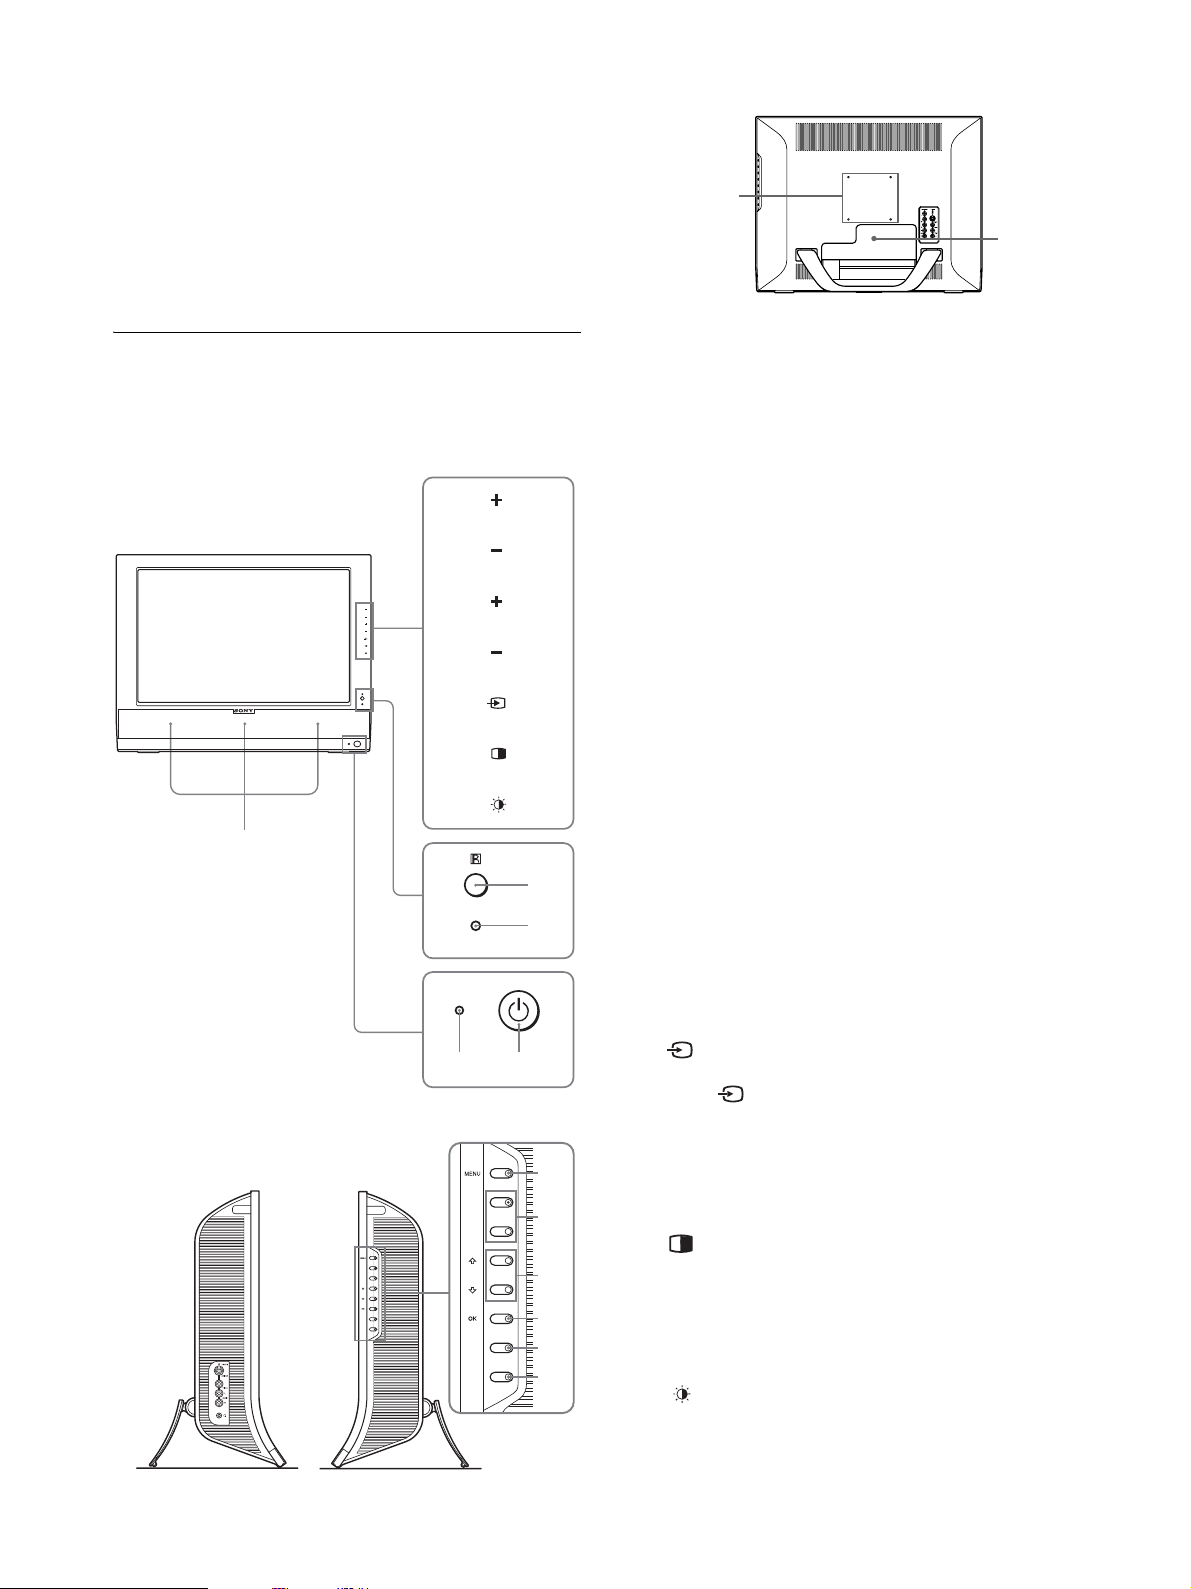
Identifying parts and controls
See the pages in parentheses for further details.
Front of the LCD display
CH
VOL
5
VOL
A Remote control sensor
This sensor receives a signal from the remote control.
Be sure not to cover the sensor with papers, etc.
B Light sensor (page 36)
This sensor measures the brightness of the surrounding area.
Be sure not to cover the sensor with papers, etc.
CH
1
C 1 (power) switch (page 13)
Press to turn the display on or off.
D 1 (power) indicator (pages 13, 35)
The power indicator lights up in green when the display is
turned on, and lights up in orange when the display is in the
power saving mode. Also, the power indicator lights up in red
when the display is in the standby mode or the Sleep timer is
activated.
E Stereo speakers (page 35)
These speakers output the audio signals as sound.
F MENU button (page 16)
Press to turn the menu screen on and off.
G CH+/– buttons (page 15)
Press to change the TV channel.
Side view of the LCD display
2
43
6
7
8
9
0
qa
H M/m and VOL+/– (volume control) buttons
(pages 16, 35)
Use to select the menu items and to make adjustments, and
also display the “Volume” adjustment bar to control the
volume.
I (input select)/OK button (page 13, 16)
This button functions in two ways.
As the button, this button switches the input signal
between PC 1, PC 2, TV, COMPONENT, VIDEO 1, and
VIDEO 2 when two computers and two pieces of video
equipment are connected.
As the OK button, this button activates the selected menu item
or adjustments made using the M/m buttons 8.
J (PIP/PAP) button (page 31)
Press to switch the “PIP” (Picture In Picture) or “PAP”
(Picture And Picture) setting.
Each time you press this button, the PIP or PAP setting
changes as follows.
PIP On t PAP On t Off t PIP On...
K (Picture Mode) button (page 36)
Press to switch the Picture Mode.
6
Page 7
L Connector cover (page 9)
Remove this cover when you connect cables or cords.
M Screw positions of VESA compatible mounting arm
or stand (page 9)
Attach the VESA compatible mounting arm or stand.
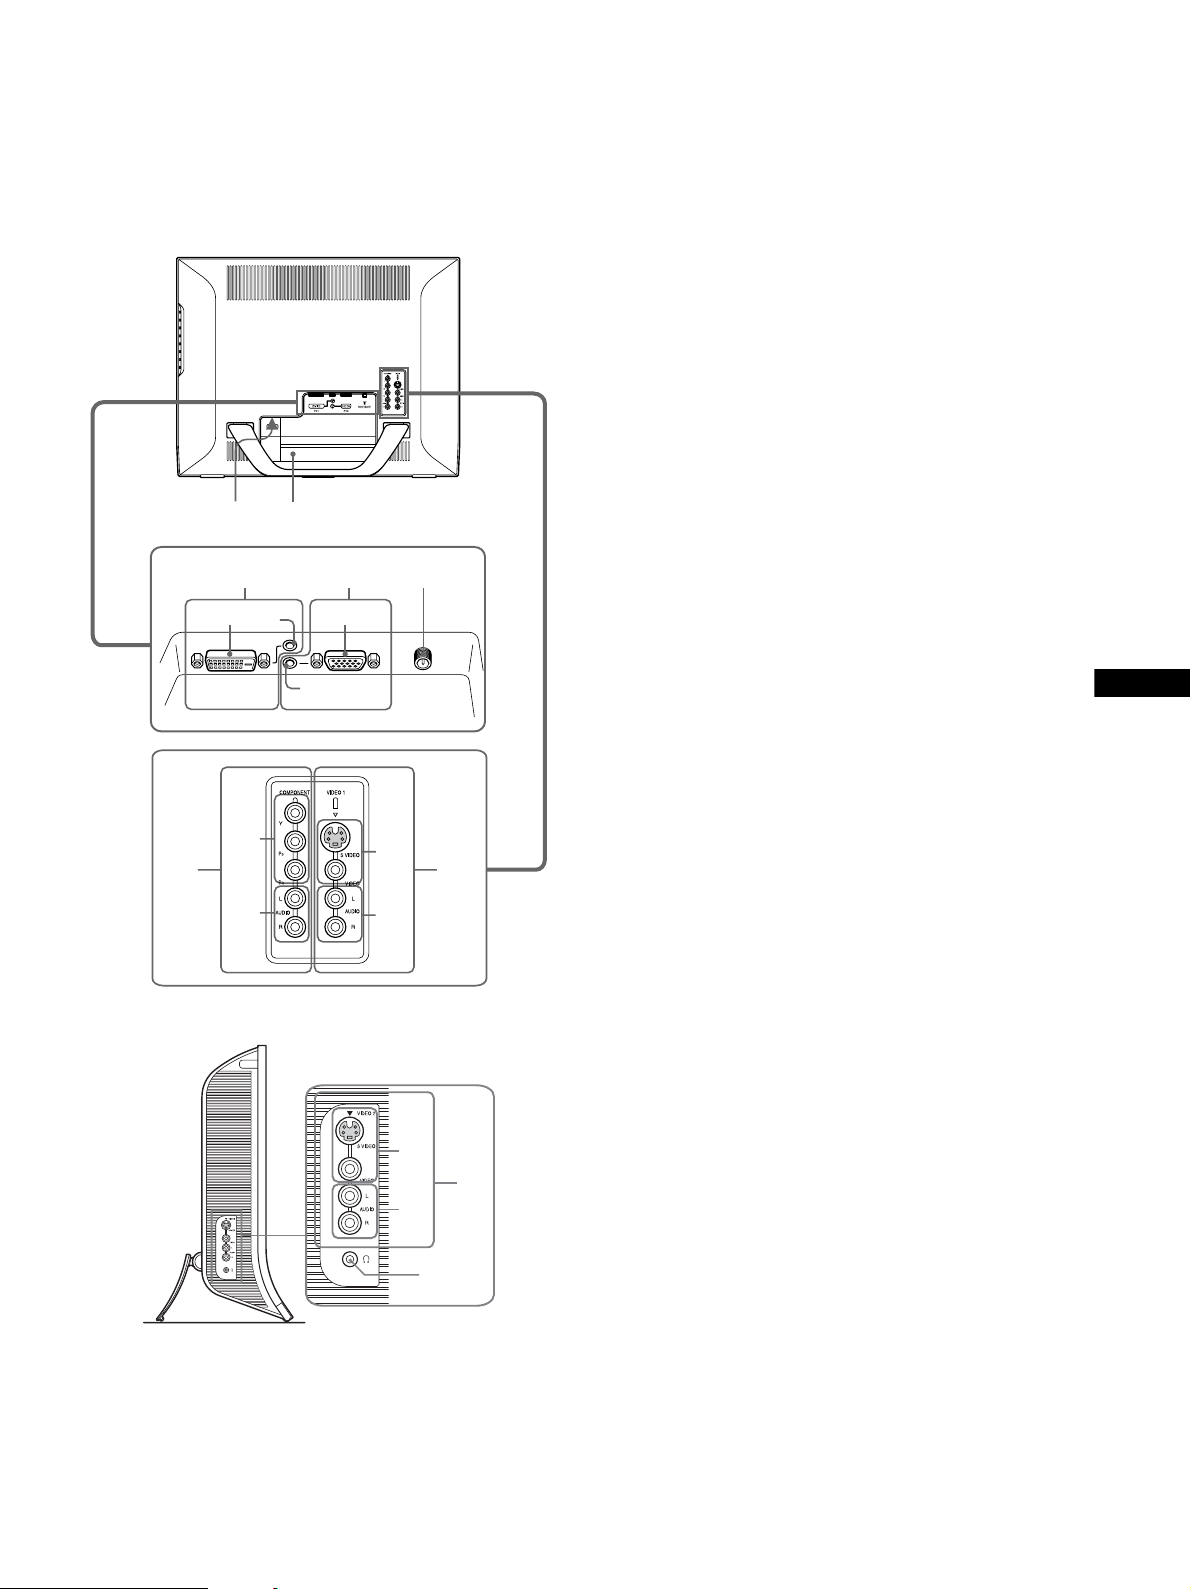
Rear of the LCD display
qf
qg
qh qj
1
2
PC 1 PC 2 VHF/UHF
1
2
1
qk
1
w;ql
O Security Lock Hole
The security lock hole should be used with the Kensington
Micro Saver Security System.
Micro Saver Security System is a trademark of Kensington.
P PC 1 connectors
1 DVI-D input connector (digital RGB) for PC 1
(page 10)
This connector inputs digital RGB video signals that
comply with DVI Rev.1.0.
2 Audio input jack for PC 1 (page 10)
This jack inputs audio signals when connected to the
audio output jack of a computer or other equipment
connected to PC 1.
Q PC 2 connectors
1 HD15 input connector (analog RGB) for PC 2
(page 10)
This connector inputs analog RGB video signals (0.700
Vp-p, positive) and sync signals.
2 Audio input jack for PC 2 (page 10)
This jack inputs audio signals when connected to the
audio output jack of a computer or other equipment
connected to PC 2.
R VHF/UHF jack (page 12)
This jack inputs a signal from an antenna.
S COMPONENT jacks
1 Y/P
COMPONENT (page 11)
These jacks input Y/P
B-Y/R-Y or Y/PB/PR).
2 Audio input jacks for COMPONENT (page 11)
These jacks input audio signals when connected to the
audio output jacks of a DVD player or other equipment
connected to COMPONENT.
Component Video input jacks for
B/PR
Component Video signals (Y/
B/PR
US
2
Side view of the LCD display
2
1
2
N AC IN connector (page 13)
This connector connects the power cord (supplied).
ws
wa
T VIDEO 1 jacks
1 Composite/S video input jacks for VIDEO 1
(page 11)
These jacks input composite video or S video signals.
When you connect video equipment to both composite
video input and S video input jacks, the signal from the S
video jack is displayed.
2 Audio input jacks for VIDEO 1 (page 11)
These jacks input audio signals when connected to the
audio output jacks of a VCR or other equipment
connected to VIDEO 1.
U VIDEO 2 jacks
1 Composite/S video input jacks for VIDEO 2
(page 11)
These jacks input composite video or S video signals.
When you connect video equipment to both composite
video input and S video input jacks, the signal from the S
video jack is displayed.
2 Audio input jacks for VIDEO 2 (page 11)
These jacks input audio signals when connected to the
audio output jacks of a VCR or other equipment
connected to VIDEO 2.
V Headphones jack (page 35)
This jack outputs audio signals to the headphones.
7
Page 8
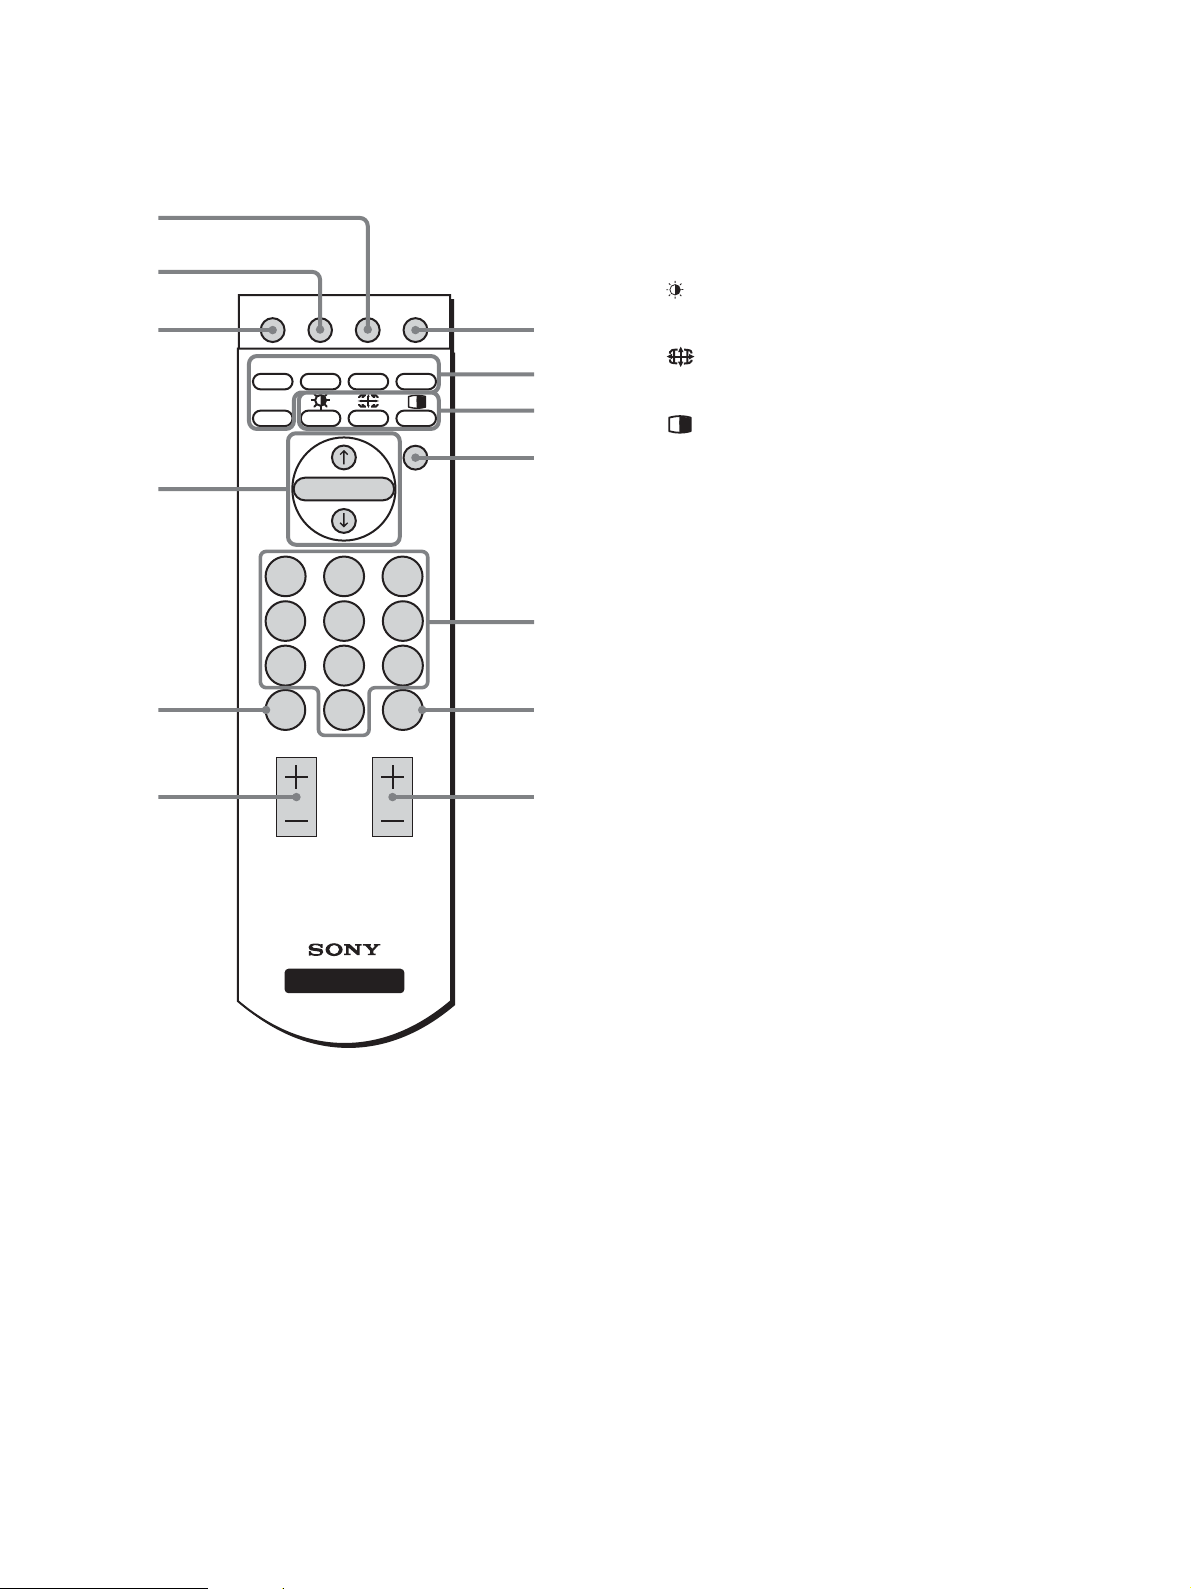
Remote control
8
VIDEO 1/2 (page 11):
Press to select a signal input through
the VIDEO 1 jacks (composite/S
video) on the rear and the VIDEO 2
jacks (composite/S video) on the side
of the display.
TV (page 15): Press to select the TV input.
9
0
qa
qs
qd
MUTING DISPLAY SLEEP 1
PC1 PC2 COMPONENT VIDEO1/2
TV
MENU
OK
123
456
7 8 9
JUMP
VOL CH
ENT
0
1
2
3
4
5
6
7
C Feature buttons
(Picture Mode) (page 36):
Press repeatedly to step through the
Picture Mode.
(Zoom) (page 23):
Press repeatedly to step through the
“Zoom” settings.
(PIP/PAP) (page 31):
Press repeatedly to step through the
“PIP” or “PAP” settings.
D MENU button (page 16)
Press to turn the menu screen on and off.
E 0-9 buttons (page 15)
Use these buttons to input numbers.
F ENT (enter) button (page 15)
Press to confirm the numbers you input using the 0-9 buttons.
G CH +/– buttons (page 15)
Press to change the TV channel.
H SLEEP button (page 37)
Press repeatedly to set the display to turn off automatically
after a specified period of time. If you use this function and
set the Sleep timer, the 1 (power) indicator lights up in red.
DISPLAY
A 1 (power) switch (page 13)
Press to turn the display on or off.
B Input select buttons
PC 1 (page 10): Press to select a signal input through
the PC 1 connectors (DVI-D) on the
rear.
PC 2 (page 10): Press to select a signal input through
the PC 2 connectors (HD15) on the
rear.
COMPONENT (page 11):
Press to select a signal input through
the COMPONENT jacks (Y/P
Component) on the rear.
B/PR
I DISPLAY button (page 16)
Press once to display the current channel number or the
current input. They will remain until you press this button
again.
J MUTING button (page 16)
Press to turn the sound off. Press again or press the VOL +
button to restore the sound.
K M/m and OK buttons (page 16)
Use the M/m buttons to select menu items and make
adjustments.
Press the OK button to activate the selected menu item and
adjustments made using the M/m buttons.
L JUMP button (page 16)
Press to switch the TV channel between the current one and
the last one that was selected using the 0-9 buttons.
M VOL +/– buttons (page 35)
Press to adjust the sound volume.
8
Page 9
Setup
Setup 2:Connect the cables
Before using your display, check that the following items are
included in your carton:
• LCD display
• Remote control
• Size AAA batteries (2)
•Power cord
• HD15-HD15 video signal cable (analog RGB)
• DVI-D video signal cable (digital RGB)
• Audio cord (stereo miniplug)
• 75-ohm coaxial cable
• CD-ROM (utility software for Windows/Macintosh, Operating
Instructions, etc.)
• Warranty card
• Quick Setup Guide
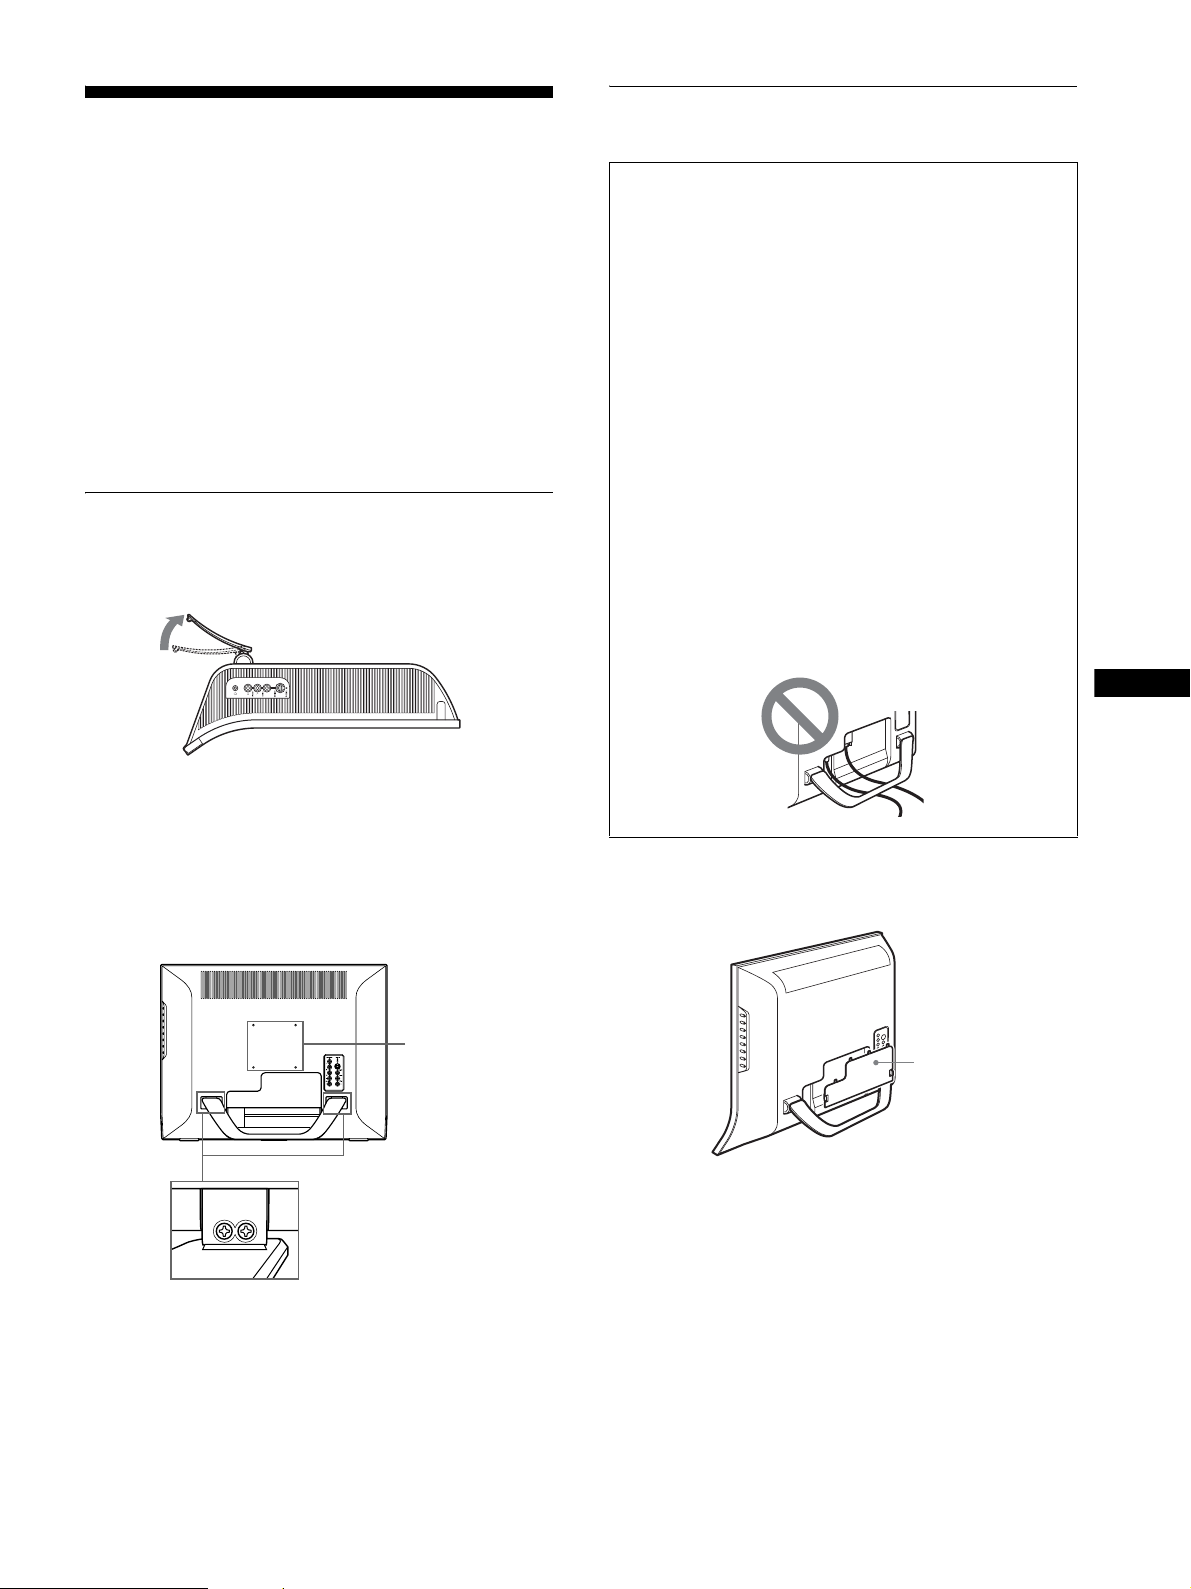
Setup 1:Use the stand
x Using the supplied stand
Open the stand.
• Turn off the display, computer, and other equipment
before connecting them.
• If you intend to connect:
– A computer equipped with an HD15 output connector
(analog RGB)
t See “Connecting a computer using the PC 2
connectors” (page 10).
– Video equipment that has component video output
jacks
t See “Connecting video equipment using the
COMPONENT jacks” (page 11).
– Video equipment that has composite/S video output
jacks
t See “Connecting video equipment using the
VIDEO 1/2 jacks” (page 11).
– An antenna
t See “Connecting an antenna” (page 12).
Notes
• Do not touch the pins of the video signal cable connector as this
might bend the pins.
• Be sure that the cables connected to the display does not get
pinched under the stand.
US
Note
The stand is folded at the factory. Be sure not to place the display
vertically with the stand as it is. Otherwise, the display may topple over.
x Using the VESA compatible stand
When using a non-supplied VESA compatible mounting arm or
stand, use the VESA compatible screws to attach.
screw positions of
VESA compatible
stand (100 mm)
screw positions of the
supplied stand
Bottom-side view
You can use the display with or without the supplied stand.
Remove the connector cover.
Push the hooks and draw the connector cover towards you.
connector cover
9
Page 10
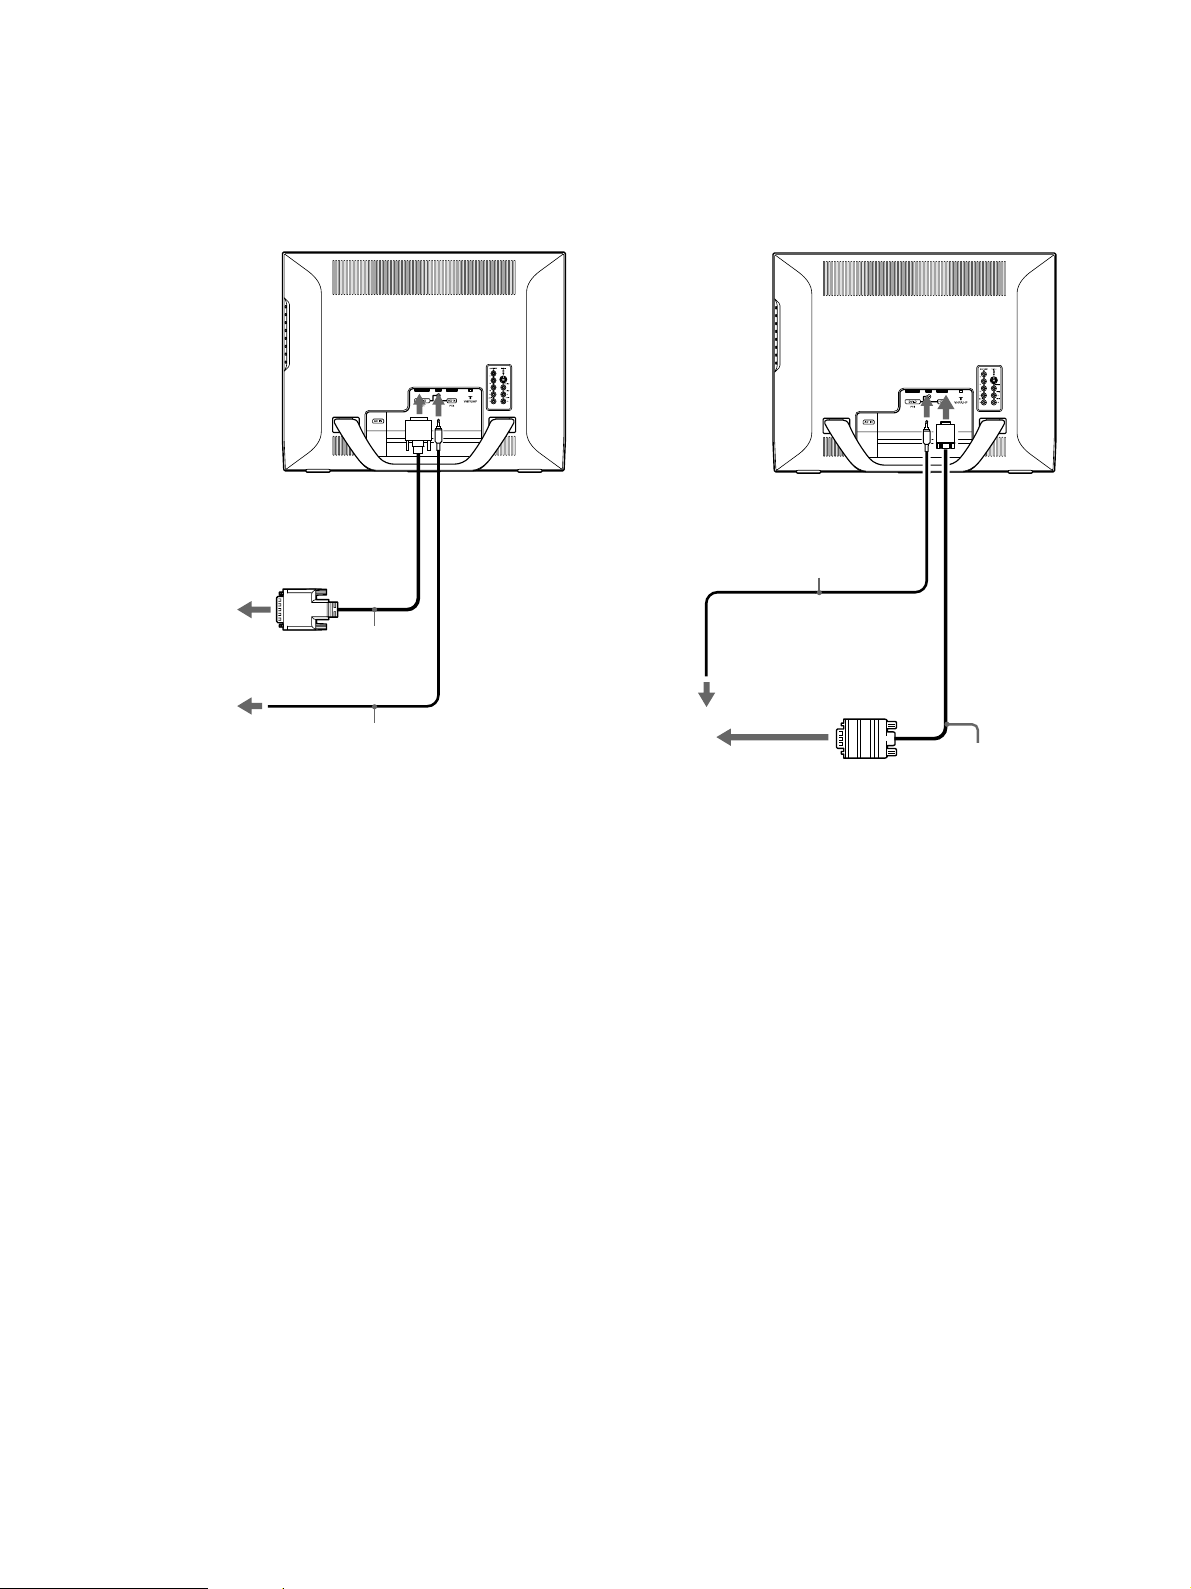
x Connecting a computer using the PC 1
connectors
If you intend to connect a computer equipped with a DVI
connector (digital RGB), follow the instructions below.
Using the supplied DVI-D video signal cable (digital
RGB) and the supplied audio cord, connect the
computer to the display’s PC 1 connectors.
x Connecting a computer using the PC 2
connectors
If you intend to connect a computer equipped with an HD15
connector (analog RGB), follow the instructions below.
Using the supplied HD15-HD15 video signal cable
(analog RGB) and the supplied audio cord, connect the
computer to the display’s PC 2 connectors.
to the DVI-D
input
to the computer’s DVI output
connector (digital RGB)
DVI-D video signal
to the audio output
of the computer
cable (digital RGB)
(supplied)
audio cord (supplied)
to the
audio input
for PC 1
to the
audio input
for PC 2
audio cord (supplied)
to the audio output
of the computer
to the computer’s HD15 output
connector (analog RGB)
to the HD15
input
HD15-HD15 video
signal cable (analog
RGB) (supplied)
10
Page 11
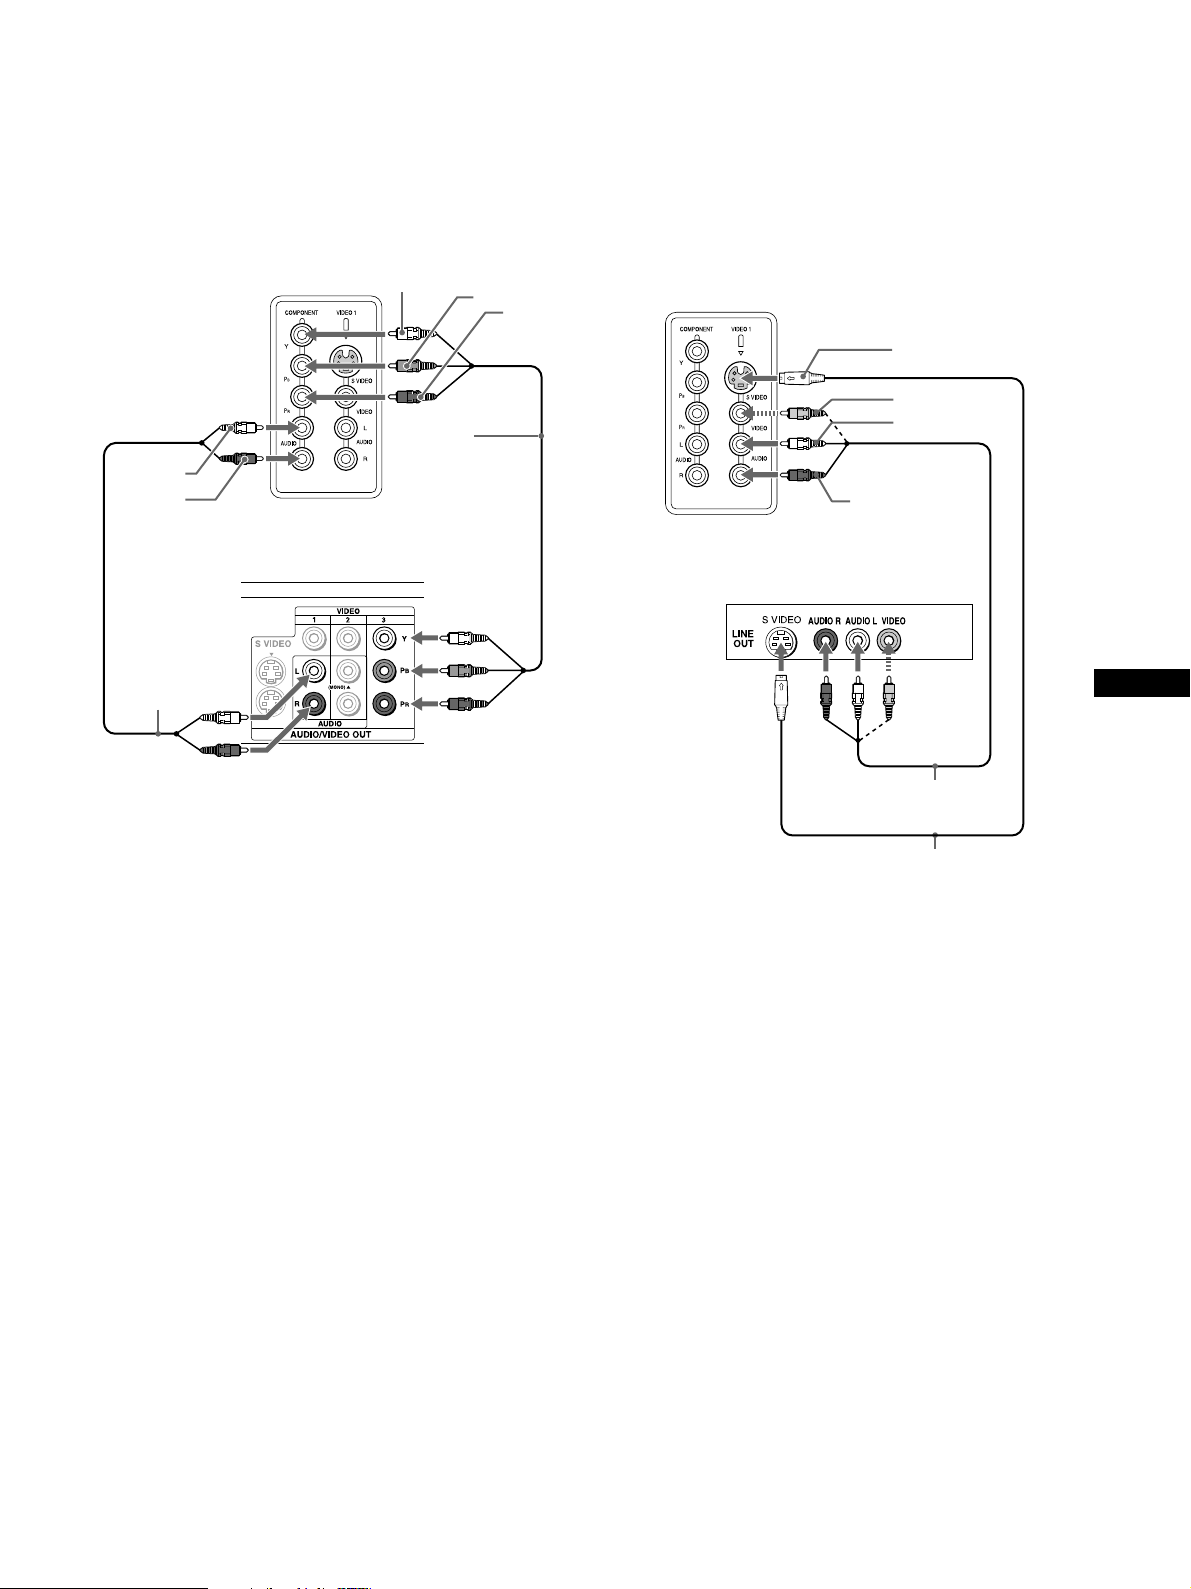
x Connecting video equipment using the
COMPONENT jacks
If you intend to connect video equipment that has component
video output jacks, such as a DVD player, follow the instructions
below.
Using a video signal cable (not supplied) and an audio
cord (not supplied), connect the video equipment to the
display’s COMPONENT jacks.
audio-L
(white)
audio-R
(red)
rear of the display
Y
component
video cable
(not supplied)
P
B
P
R
x Connecting video equipment using the
VIDEO 1/2 jacks
If you intend to connect video equipment that has composite/S
video output jacks, such as a VCR, follow the instructions below.
Using a video signal cable (not supplied) and an audio
cord (not supplied), connect the video equipment to the
display’s VIDEO 1/2 jacks.
For VIDEO 1
rear of the display
S video
video (yellow)
audio-L (white)
audio-R (red)
audio cord (not
supplied)
DVD player
VCR
video and audio cable
(not supplied)
S video cable (not supplied)
US
11
Page 12
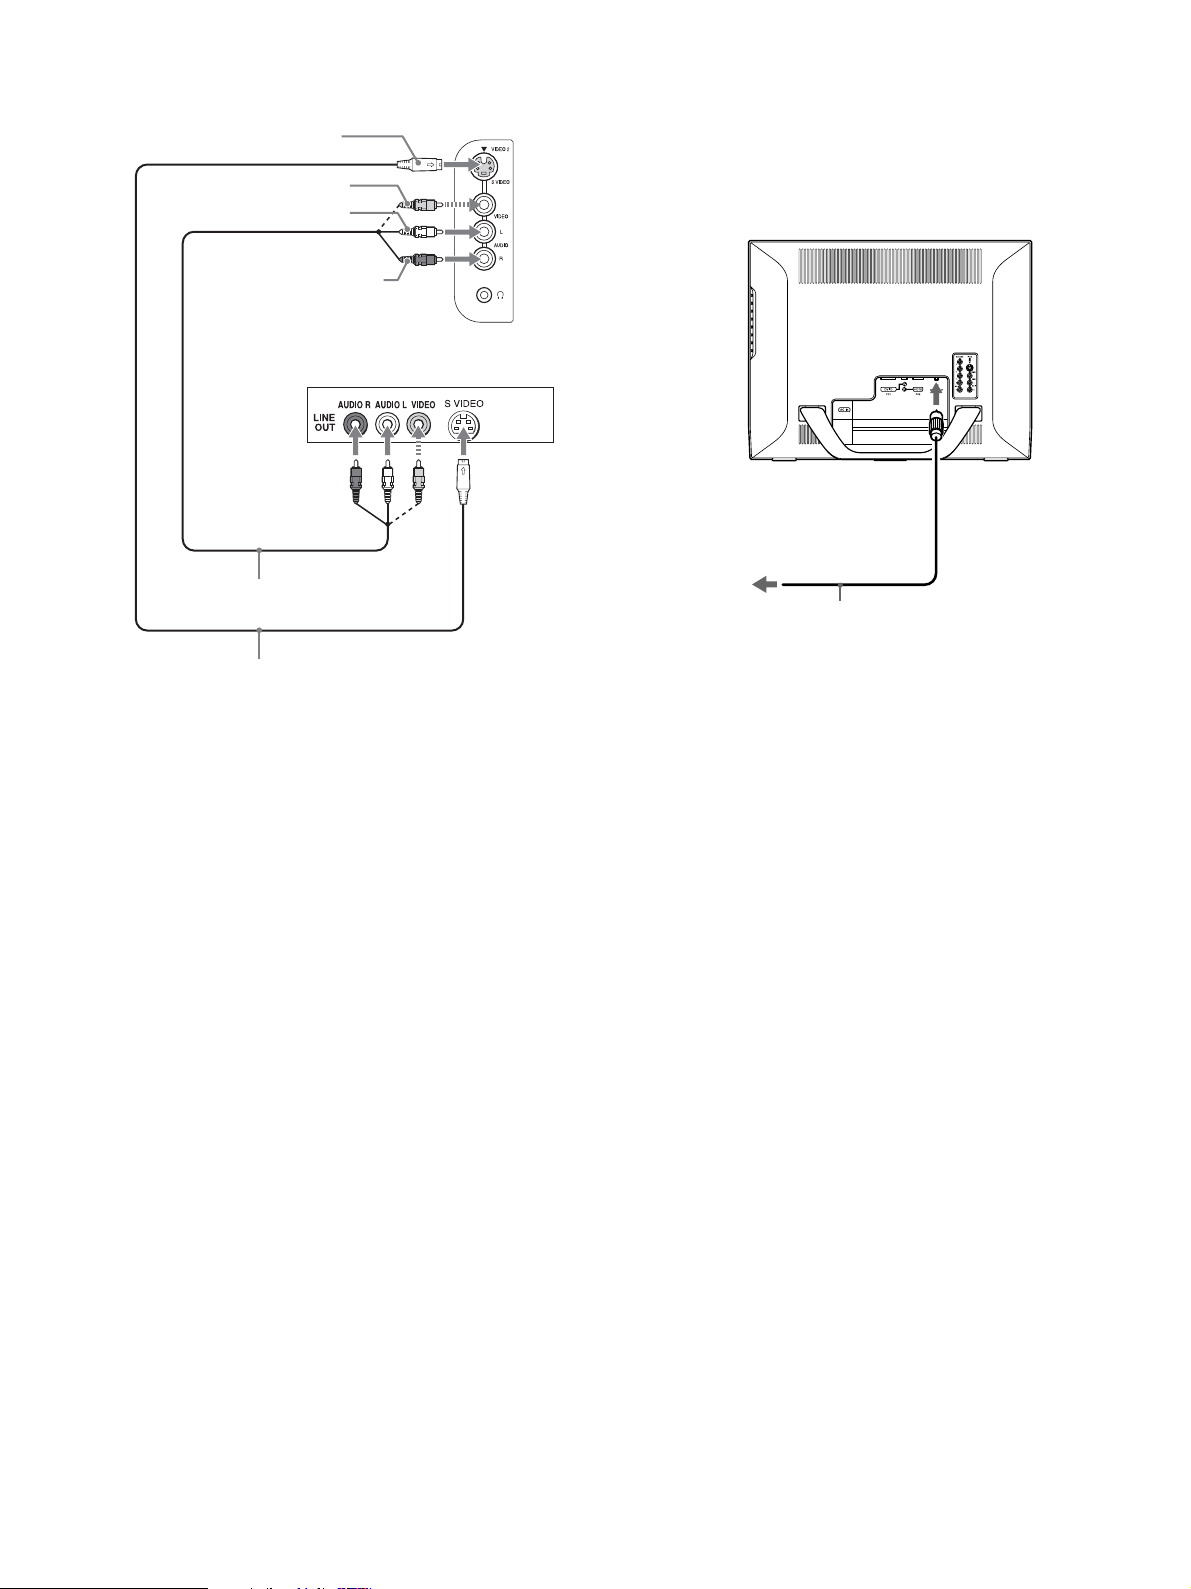
For VIDEO 2
video and audio cable
S video cable (not supplied)
S video
video (yellow)
audio-L (white)
audio-R (red)
(not supplied)
VCR
side of the display
x Connecting an antenna
If you intend to connect an antenna to receive the TV signal,
follow the instructions below.
Using the 75-ohm coaxial cable (supplied), connect an
antenna to the display’s VHF/UHF jack.
to the VHF/UHF jack
to an antenna
75-ohm coaxial cable
(supplied)
Note
When you connect video equipment to both composite video
input and S video input jacks, the signal from the S video jack
is displayed.
Note
It is strongly recommended that you connect the antenna using a 75-ohm
coaxial cable to get optimum picture quality. A 300-ohm twin lead cable
can be easily affected by radio noise and the like, resulting in signal
deterioration. If you use a 300-ohm twin lead cable, keep it away as far as
possible from the display.
12
Page 13
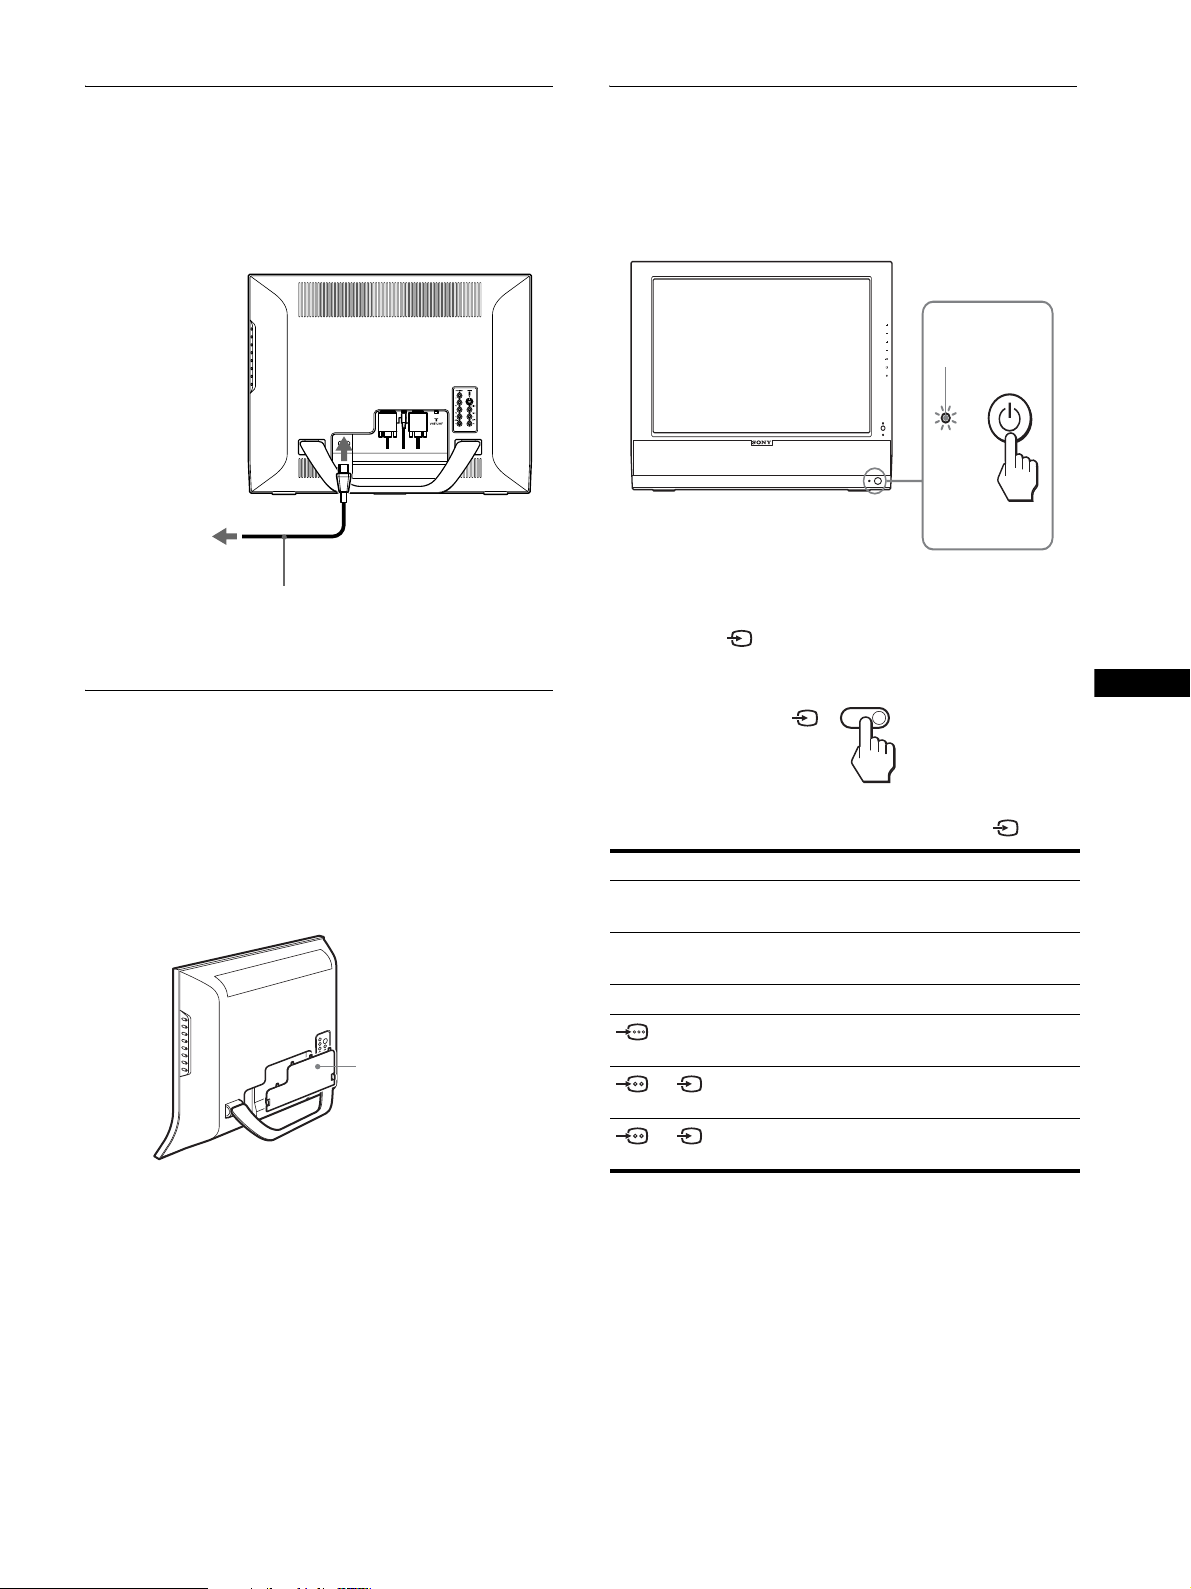
Setup 3:Connect the power cord
Setup 5:Turn on the display and
1 Connect the supplied power cord securely to the
display’s AC IN connector.
2 Connect the other end securely to a power outlet.
1
to
AC IN
2
to the power outlet
power cord (supplied)
Setup 4:Replace the connector
cover
other equipment
1Press the 1 (power) switch on the front of the
display.
The 1 (power) indicator lights up in green.
CH
VOL
lights in green
2 Turn on the computer or other video equipment.
3 Press the button to select the desired input
signal.
US
While pressing the hooks, push the connector cover
onto the display until it clicks.
connector cover
The input signal will change each time you press the button.
On-screen message Input signal configuration
DVI-D: PC 1 DVI-D input connector (digital
RGB) for PC 1
HD15: PC 2 HD15 input connector
(analog RGB) for PC 2
TV channels TV
: COMPONENT
Y/P
Component Video
B/PR
input jacks for COMPONENT
or : VIDEO 1
Composite/S video input jacks
for VIDEO 1
or : VIDEO 2
Composite/S video input jacks
for VIDEO 2
Tips
• You can also select the inputs using the input select buttons on the
remote control.
• When you select the TV input, the number of the selected channel is
displayed in the upper right corner of the screen.
• When using the PIP or PAP function, use “PIP/PAP” in the “PIP/PAP”
menu in the “Option” menu to select the input source for sub picture
(page 31). If the TV input is selected for sub picture, you can change
the channel using the CH +/– buttons.
• When you switch the TV channel while listening or operate your PC,
video or decoding device, switch the input to TV, then press CH +/– or
0-9 buttons. If you press CH +/– or 0-9 buttons, the input cannot be
automatically switched to TV.
13
Page 14
If no picture appears on the screen
• Check that the power cord and the video signal cable are
properly connected.
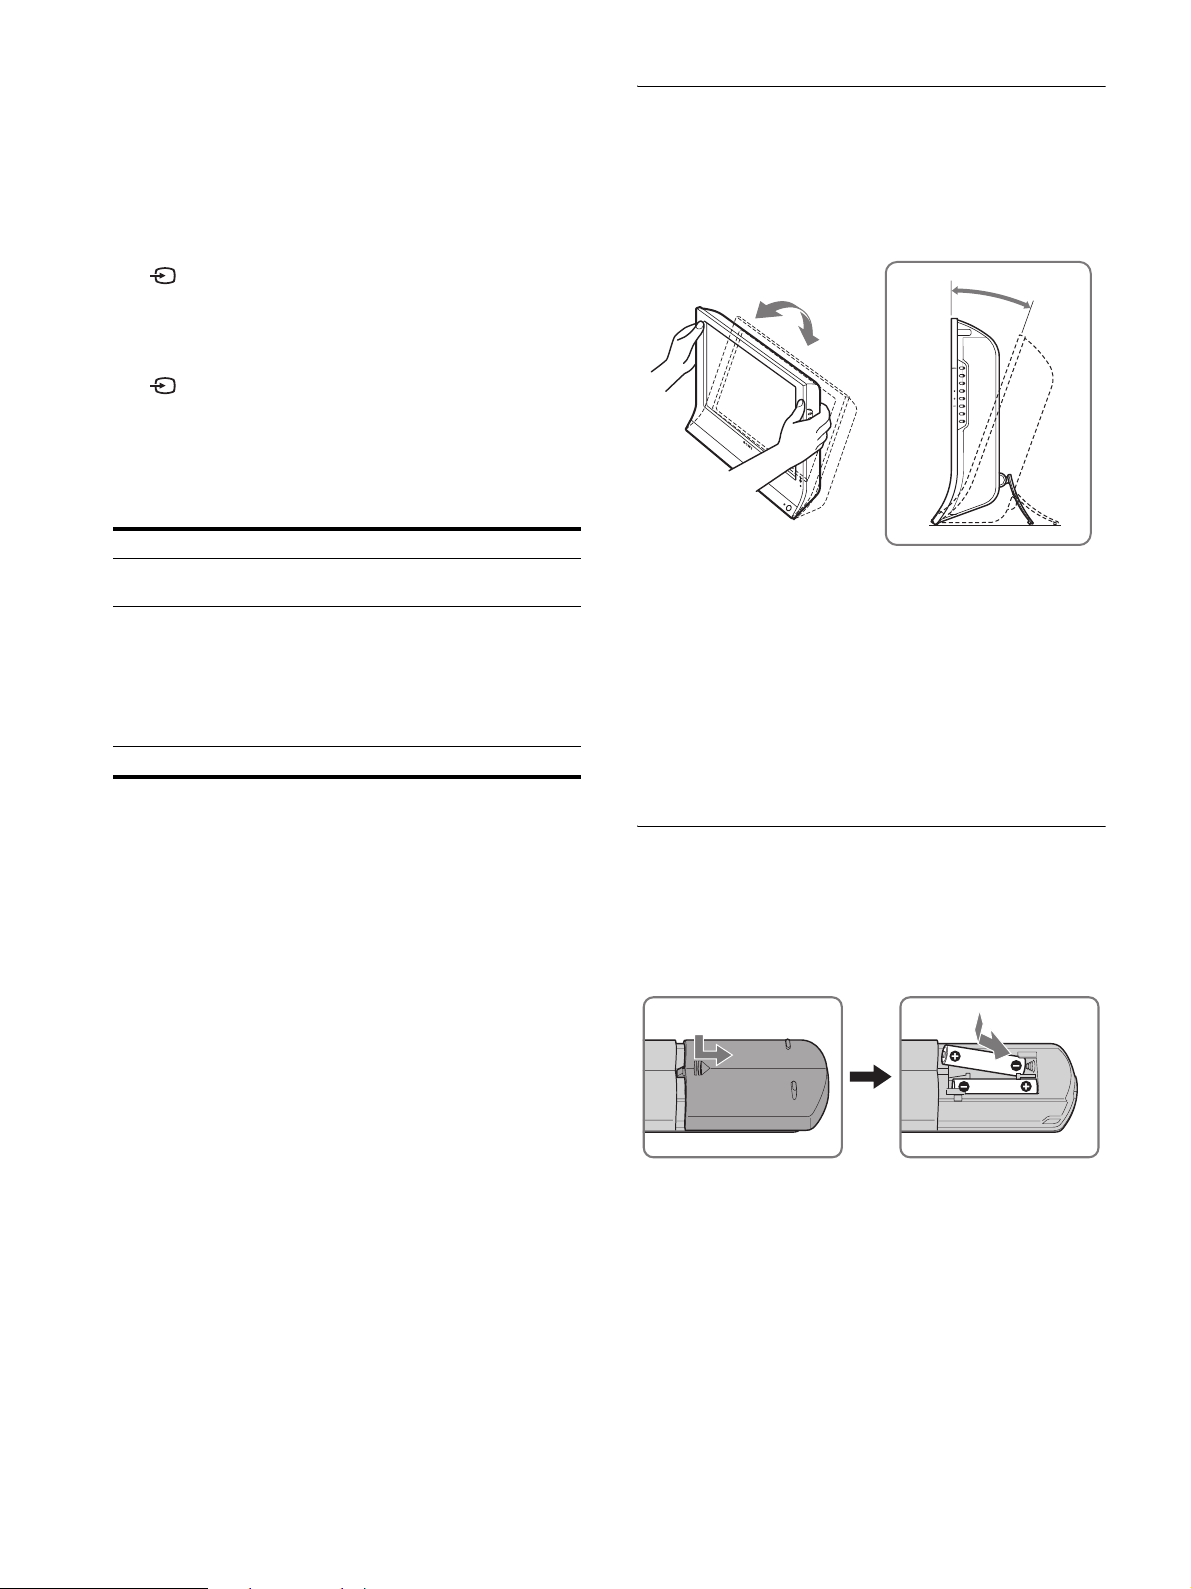
Setup 6:Adjust the tilt
This display can be adjusted within the angles shown below.
• If “No Input Signal” appears on the screen:
– The computer is in the power saving mode. Try pressing any
key on the keyboard or moving the mouse.
– Check that the input signal setting is correct by pressing the
button (page 13).
• If “Cable Disconnected” appears on the screen:
– Check that the video signal cable is properly connected.
– Check that the input signal setting is correct by pressing the
button (page 13).
• If “Out Of Range” appears on the screen, reconnect the old
display. Then adjust the computer’s graphics board within the
following ranges.
Analog RGB Digital RGB
Horizontal
frequency
Vertical
frequency
28–86 kHz 28–68 kHz
48–85 Hz (resolution
< 1,280 × 1,024)
48–75 Hz (resolution
< 1,400 × 1,050)
60 Hz
48–60 Hz (resolution
≤ 1,680 × 1,050)
Resolution 1,680 × 1,050 or less 1,680 × 1,050 or less
For more information about on-screen messages, see “Trouble
symptoms and remedies” on page 39.
No need for specific drivers
The display complies with the “DDC” Plug & Play standard and
automatically detects all the display’s information. No specific driver
needs to be installed on the computer.
The first time you turn on your computer after connecting the display, the
setup Wizard may appear on the screen. In this case, follow the on-screen
instructions. The Plug & Play display is automatically selected so that you
can use this display.
Grasp the sides of the LCD panel, then adjust the
screen angles.
approx. 20°
To use the display comfortably
Adjust the viewing angle of your display according to the height
of your desk and chair so that light is not reflected from the screen
to your eyes.
Notes
• When adjusting the screen tilt, proceed slowly and carefully, being sure
not to hit the display against the desk.
• When adjusting the screen tilt, make sure not to knock or drop the
display off the desk.
Setup 7:Insert batteries into the
remote control
Insert two size AAA batteries (supplied) by matching
the + and – marks on the batteries to the diagram inside
the remote control’s battery compartment.
The vertical frequency is set to 60 Hz.
Since flickers are unobtrusive on the display, you can use it as it is. You
do not need to set the vertical frequency to any particular high value.
Notes
• Remove the batteries to avoid damage from possible battery leakage
whenever you anticipate that the remote control will not be used for an
extended period.
• Handle the remote control with care. Avoid dropping it, getting it wet,
or placing it in direct sunlight, near a heater or where the humidity is
high.
14
Page 15
Watching the TV
Setting the TV channels
To watch TV programs, you need to run “Auto Program” to set up
your channels.
Perform the following “Auto Program” procedure before you
watch TV programs for the first time.
For details on the use of the menu and buttons, see “Navigating
the menu” on page 16.
Message of “Auto Program Not Run” appears until you select
“Auto Program.”
Skipping unnecessary channels
You can skip unnecessary channels when selecting channels
using the CH +/– button.
1 Press the MENU button.
2Press the M/m buttons to select (Channel) and
press the OK button.
The “Channel” menu appears on the screen.
3Press the M/m buttons to select “Channel Skip/
Add” and press the OK button.
The “Channel Skip/Add” menu appears on the screen.
1 Press the MENU button.
2 Press the M/m buttons to select (Channel) and
press the OK button.
The “Channel” menu appears on the screen.
3 Press the M/m buttons to select “Auto Program”
and press the OK button.
The “Auto Program” menu appears on the screen.
4 Press the M/m buttons to select “OK” and press the
OK button.
The display starts scanning and preparing channels
automatically.
Channel number and on-screen message appear.
5 Press the MENU button to exit the menu screen after
Auto Program is completed.
Note
This procedure may take some minutes. Do not press any buttons during
the process. Otherwise, “Auto Program” will not be completed properly.
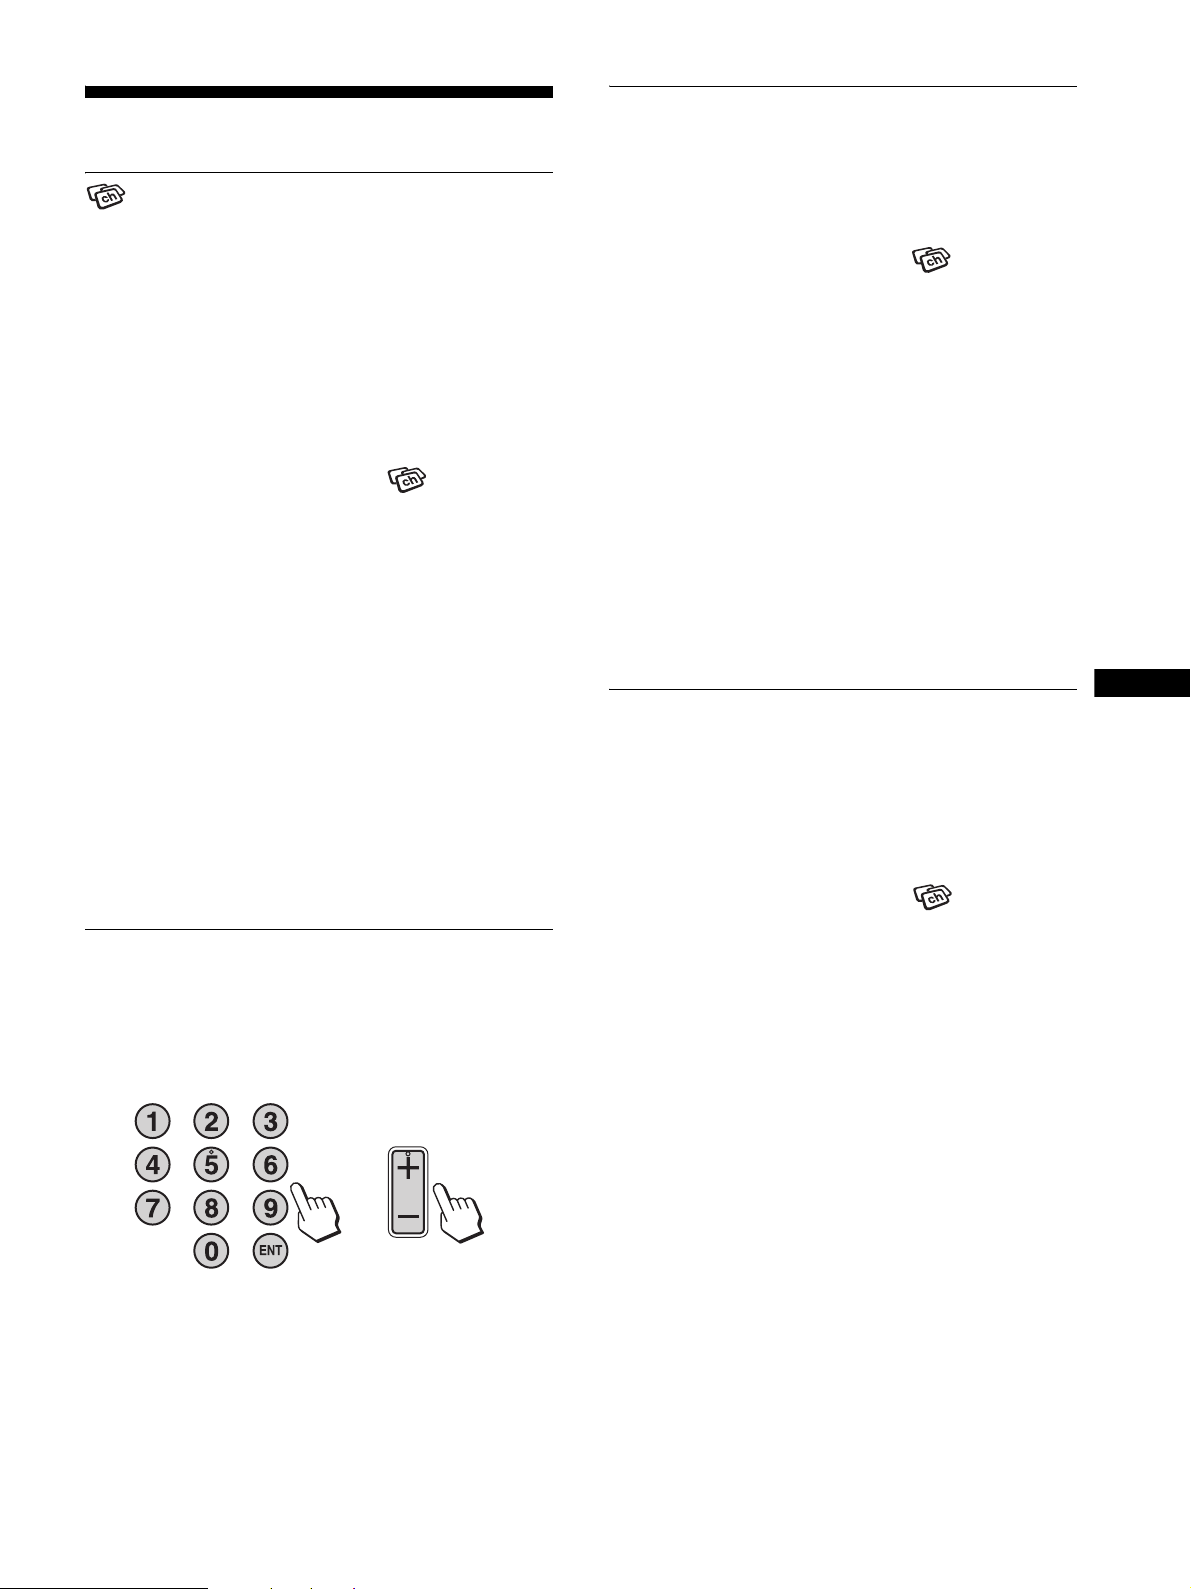
Changing the TV channel
Press the 0-9 buttons to input a channel number.
The channel changes after 3 seconds. Press the ENT (enter) button
to select immediately.
Use the CH +/– buttons to scan through the channels.
CH
or
4Press the M/m buttons to select the channel you
want to skip and press the OK button.
Tip
To scroll through the list, press and hold the M/m buttons.
5Press the M/m buttons to select “Skip” and press
the OK button.
If you want to restore skipped channel, select “Add.”
6 Press the MENU button to exit the menu screen.
US
Choosing between cable and UHF/
VHF
To set the UHF/VHF channels, you need to set the “Cable” menu
to “Off” by following the instructions below.
1 Press the MENU button.
2Press the M/m buttons to select (Channel) and
press the OK button.
The “Channel” menu appears on the screen.
3 Press the M/m buttons to select “Cable” and press
the OK button.
The “Cable” menu appears on the screen.
4Press the M/m buttons to select the desired mode
and press the OK button.
• On: The cable TV channels can be set.
• Off: The UHF/VHF channels can be set.
Notes
• You cannot set and receive cable TV channels and UHF/VHF channels
at the same time.
• After switching between the cable and the UHF/VHF mode, be sure to
perform “Auto Program.”
Tips
• When you press and hold the CH + or – button, the channel number will
change rapidly.
• When you switch the TV channel while listening or operate your PC,
video or decoding device, switch the input to TV, then press CH +/– or
0-9 buttons. If you press CH +/– or 0-9 buttons, the input cannot be
automatically switched to TV.
15
Page 16
Using other features
You can also use the following TV features.
x Watching TV programs with closed captions
Set “Caption Vision” in the “Option” menu to “On.” For details,
see “Setting “Caption Vision” (for TV/COMPONENT/VIDEO 1/
VIDEO 2 only)” on page 33.
x Using the Parental Control feature
Select control options in the “Parent” menu. For details, see
“Parent menu” on page 26.
Customizing Your Display
Before making adjustments
Connect the display and equipment, then turn them on.
For the best results, wait for at least 30 minutes before making
adjustments.
You can make numerous adjustments to your display using the
on-screen menu.
Navigating the menu
Button operations (remote control)
Press To
MUTING Turn off the sound. Press it again or press VOL+
to restore sound (page 35).
DISPLAY Display the current channel number or the
current input. Press it again to turn the display
off.
JUMP Jump back and forth between two channels. The
display alternates between the current channel
and the last channel.
SLEEP Turn off the display automatically after a
specified period of time (page 37).
Switch the Picture Mode (page 36).
Switch the “PIP” or “PAP” setting. Each time
you press this button, the setting changes as
follows.
PIP On t PAP On t Offt PIP On...
(page 31).
Switch the “Zoom” setting. Each time you press
this button, the setting changes as follows.
Normal t Full t Wide Zoom t Zoom t
Normal...(page 23)
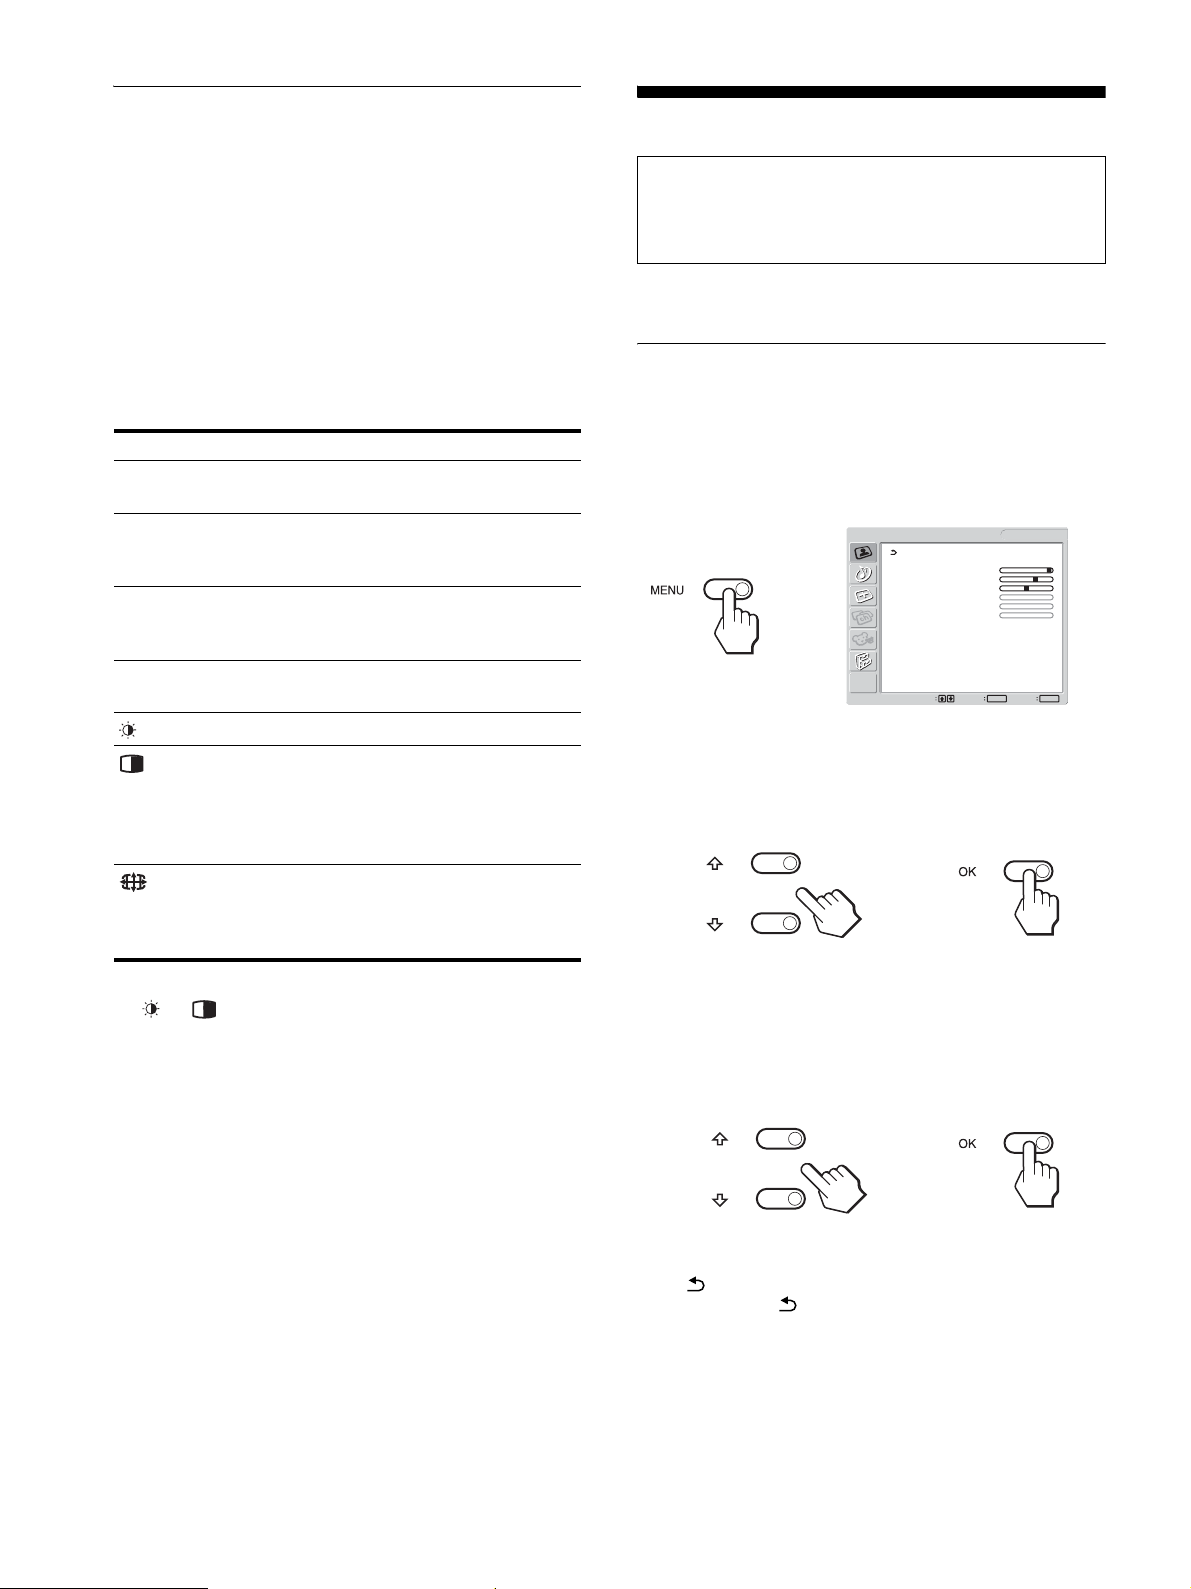
x When you use the buttons on the display
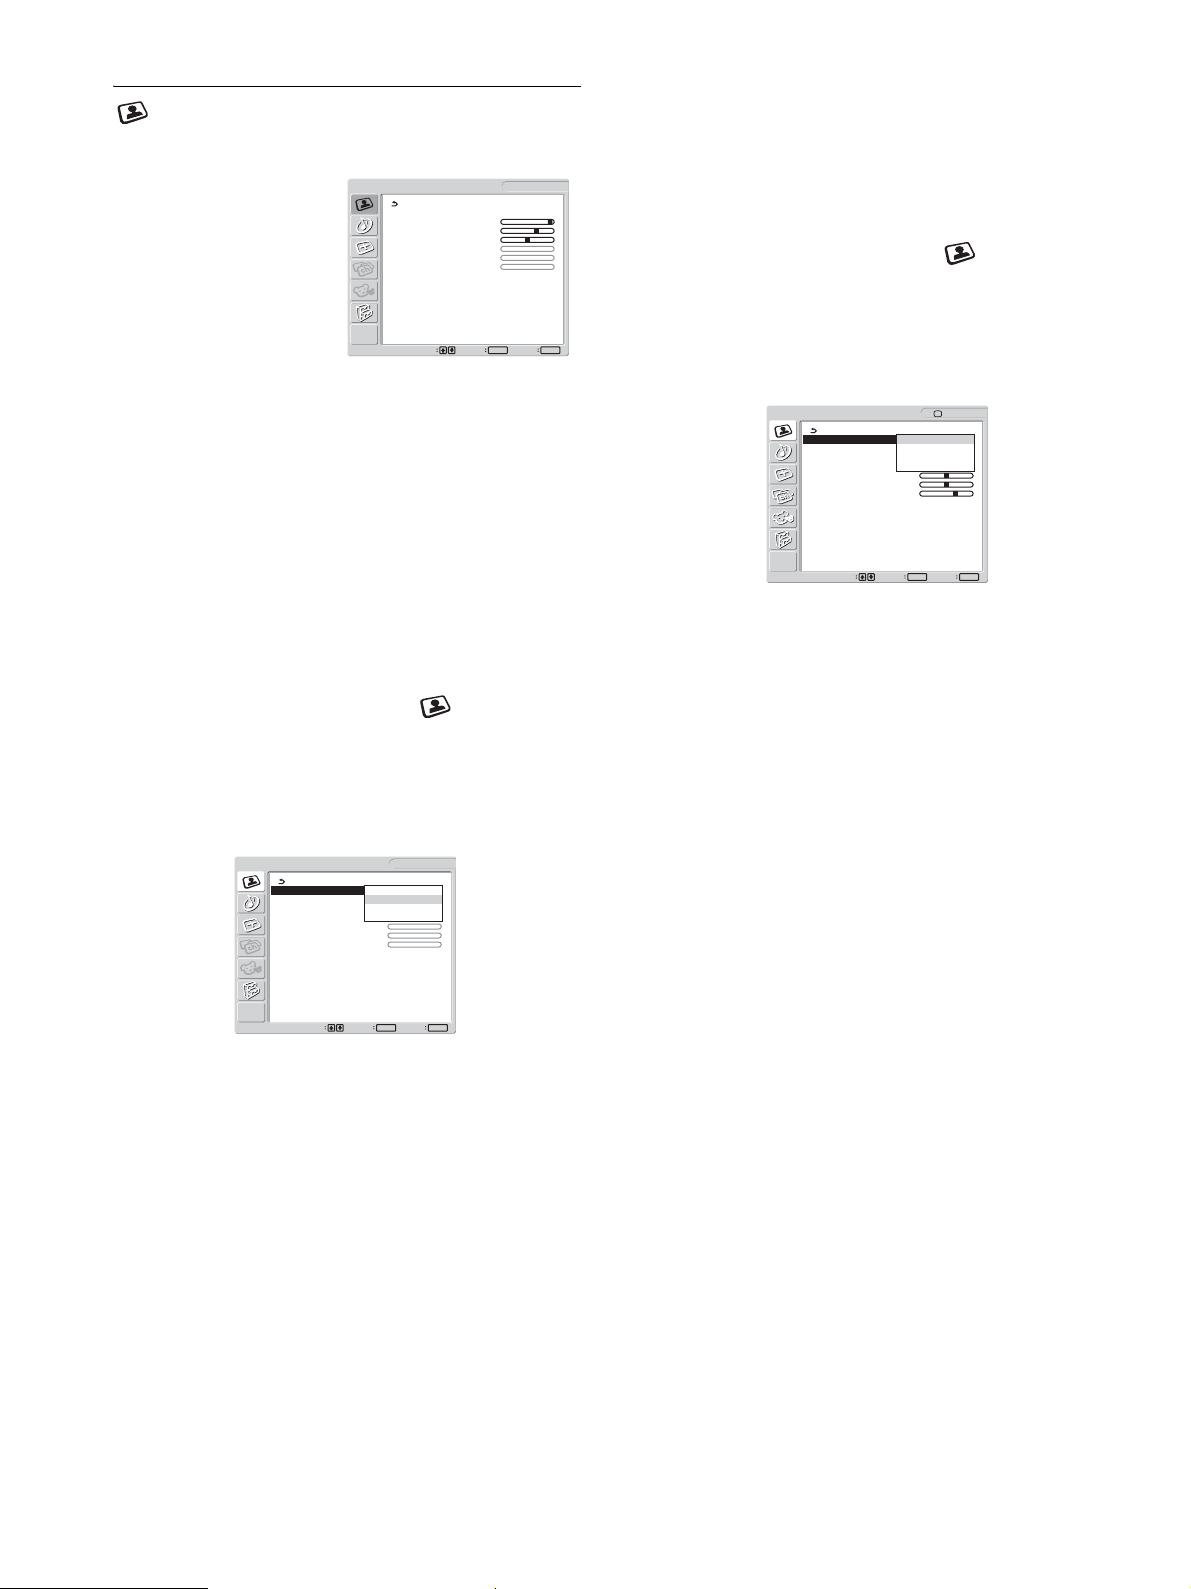
1 Display the main menu.
Press the MENU button to display the main menu on the
screen.
DVI-D: PC 1
1680 × 1050/60 Hz
OK
Set Exit
MENU
,
Picture
Mode: Movie
Backlight: 100
Contrast: 70
Brightness: 50
Color:
Hue:
Sharpness:
Color Temp.: 9300K
Gamma: Gamma4
Picture Mode Reset
NR:
Dynamic Contrast:
Select
2 Select the menu.
Press the M/m buttons to display the desired menu. Press the
OK button to move to the first menu item.
,
Tip
The and buttons are also available on the display.
3 Select the item you want to adjust.
Press the M/m buttons to select the item you want to adjust,
then press the OK button.
,
If is one of the menu items.
When you select and press the OK button, the display returns to
the previous menu.
16
Page 17
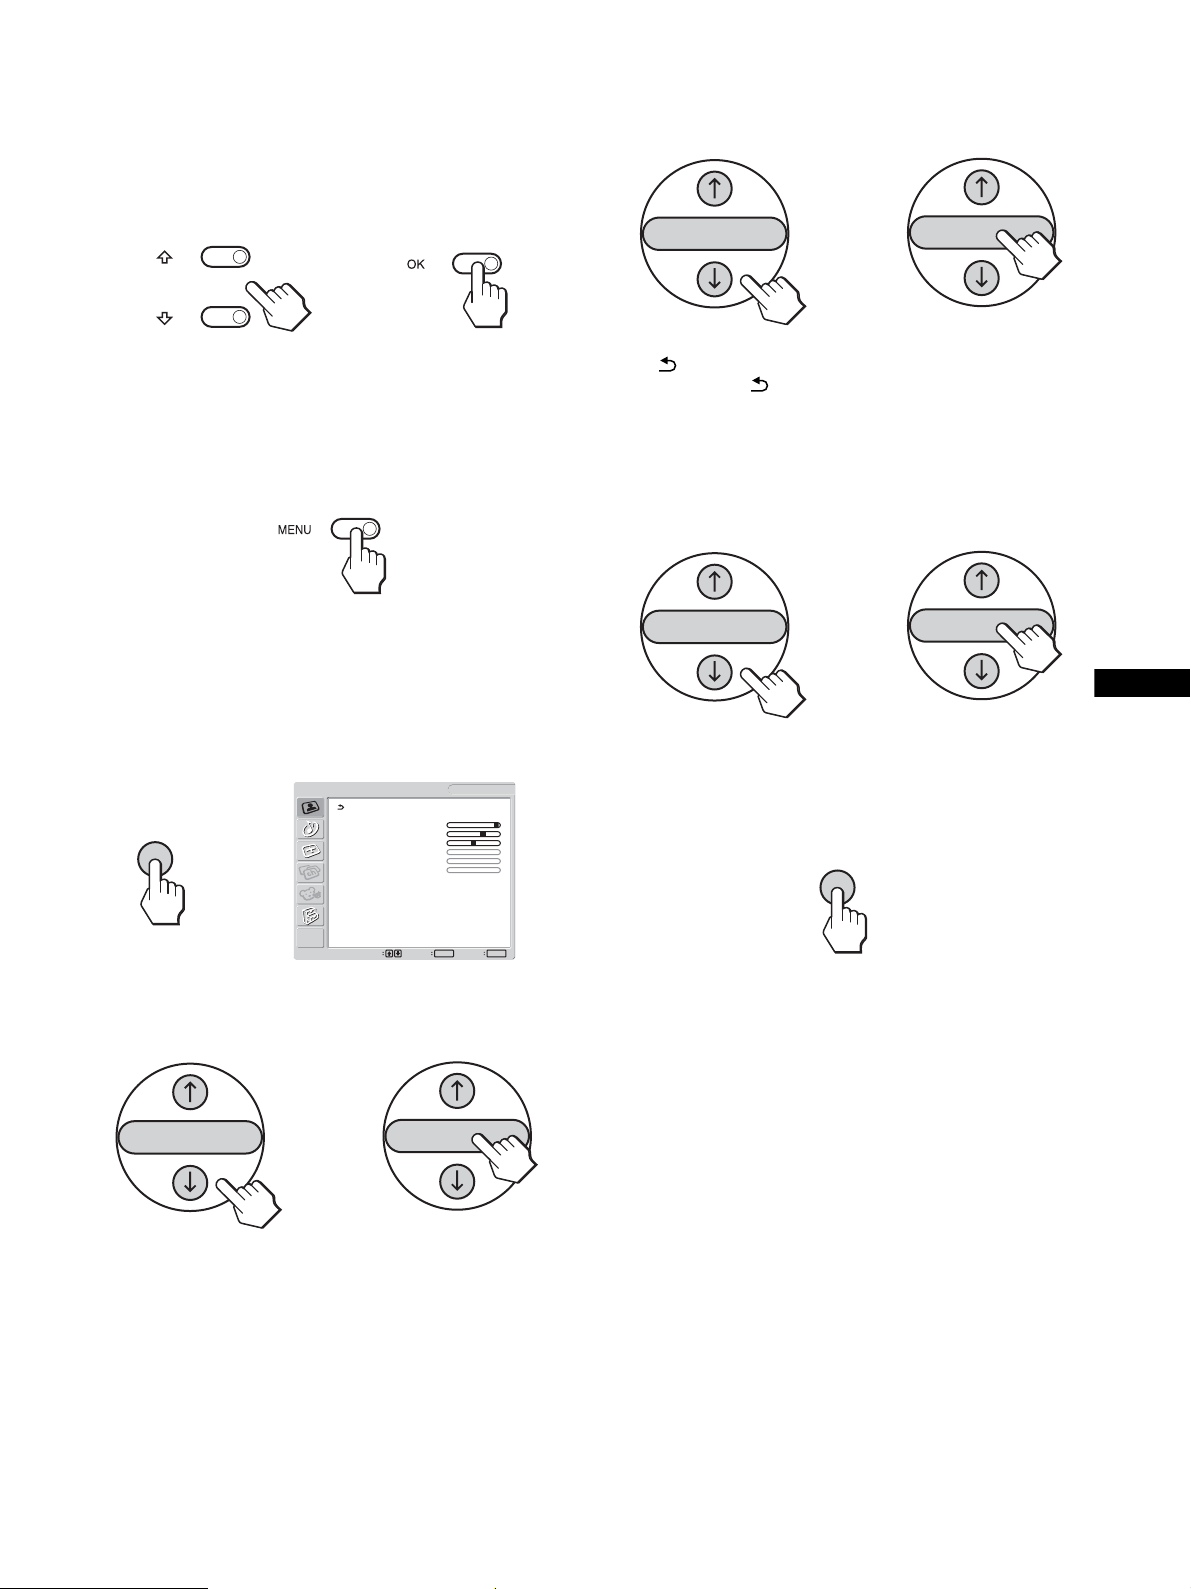
4 Adjust the item.
Press the M/m buttons to make the adjustment, then press the
OK button.
When you press the OK button, the setting is stored, then the
display returns to the previous menu.
3 Select the item you want to adjust.
Press the M/m buttons to select the item you want to adjust,
then press the OK button.
,
5 Close the menu.
Press the MENU button once to return to normal viewing. If
no buttons are pressed, the menu closes automatically after
about 45 seconds.
x When you use the buttons on the remote
control
1 Display the main menu.
Press the MENU button to display the main menu on the
screen.
DVI-D: PC 1
1680 × 1050/60 Hz
OK
Set Exit
MENU
MENU
,
Picture
Mode: Movie
Backlight: 100
Contrast: 70
Brightness: 50
Color:
Hue:
Sharpness:
Color Temp.: 9300K
Gamma: Gamma4
Picture Mode Reset
NR:
Dynamic Contrast:
Select
OK
If is one of the menu items.
When you select and press the OK button, the display returns to
the previous menu.
,
OK
4 Adjust the item.
Press the M/m buttons to make the adjustment, then press the
OK button.
When you press the OK button, the setting is stored, then the
display returns to the previous menu.
OK
,
OK
5Close the menu.
Press the MENU button once to return to normal viewing. If
no buttons are pressed, the menu closes automatically after
about 45 seconds.
MENU
US
2 Select the menu.
Press the M/m buttons to display the desired menu. Press the
OK button to move to the first menu item.
OK
,
OK
x Resetting the adjustments to the default
settings
You can reset the adjustments using the “All Reset” menu. For
more information about resetting the adjustments, see “Resetting
to the default setting” on page 34.
17
Page 18
Picture menu
You can adjust the following items using the “Picture” menu.
•Mode
Backlight
Contrast (Picture)
Brightness
Color
Hue
Sharpness
Color Temp.
Gamma
Picture
Mode: Movie
Backlight: 100
Contrast: 70
Brightness: 50
Color:
Hue:
Sharpness:
Color Temp.: 9300K
Gamma: Gamma4
Picture Mode Reset
NR:
Dynamic Contrast:
Select
Picture Mode Reset
•NR
• Dynamic Contrast
Tip
The “Backlight,” “Contrast,” “Brightness,” “Color,” “Hue,” “Sharpness,”
“Color Temp.,” and “Gamma” menus can be set for each Picture mode.
Also, Picture Mode can be set for each available input.
x Selecting the Picture Mode for PC 1/PC 2
You can select the appropriate screen brightness for your purpose.
1 Press the MENU button.
The main menu appears on the screen.
2Press the M/m buttons to select (Picture) and
press the OK button.
The “Picture” menu appears on the screen.
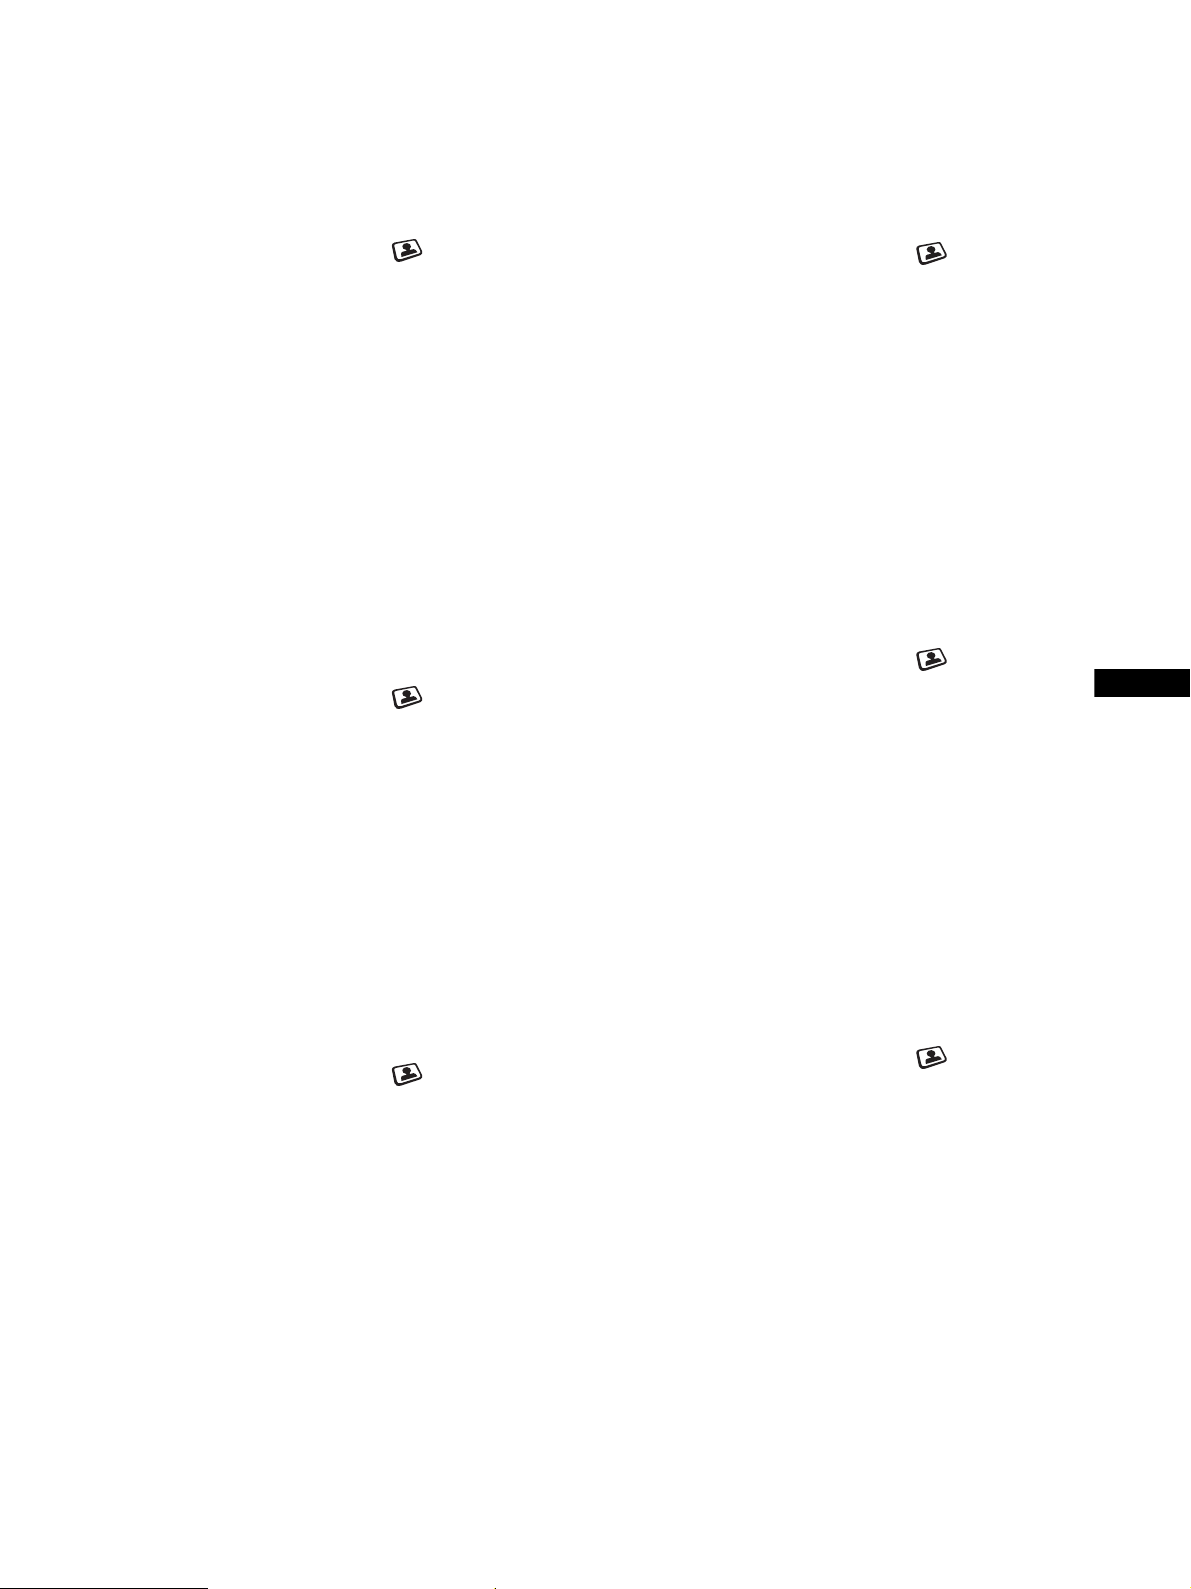
3Press the M/m buttons to select “Mode” and press
the OK button.
The “Mode” menu appears on the screen.
Picture
Mode: Game
Backlight: Movie
Contrast: PC
Brightness: Auto
Color:
Hue:
Sharpness:
Color Temp.: 9300K
Gamma: Gamma4
Picture Mode Reset
NR:
Dynamic Contrast:
Select
DVI-D: PC 1
1680 × 1050/60 Hz
OK
Set
MENU
Exit
DVI-D: PC 1
1680 × 1050/60 Hz
OK
Set Exit
MENU
x Selecting the Picture Mode for TV/
COMPONENT/VIDEO 1/VIDEO 2
You can select the appropriate screen brightness for your purpose.
1 Press the MENU button.
The main menu appears on the screen.
2 Press the M/m buttons to select (Picture) and
press the OK button.
The “Picture” menu appears on the screen.
3 Press the M/m buttons to select “Mode” and press
the OK button.
The “Mode” menu appears on the screen.
OK
Set Exit
: TV
MENU
Picture
Mode: Vivid
Backlight: Standard
Picture: ECO
Brightness: Auto
Color: 50
Hue: 0
Sharpness: 7
Color Temp.:
Gamma:
Picture Mode Reset
NR: Off
Dynamic Contrast: Off
Select
4 Press the M/m buttons to select the desired mode
and press the OK button.
The default setting is “Vivid.”
• Vivid: Picture with enhanced contrast and sharpness.
• Standard: Picture with contrast that suits the room light.
• ECO: Picture with low brightness.
• Auto: Automatically adjusts the screen brightness
according to the brightness of the surroundings
(automatic brightness adjustment function). For
more information, see “Automatic brightness
adjustment function (light sensor)” on page 36.
Note
When the Picture Mode is set to “Auto,” you cannot adjust the backlight.
4Press the M/m buttons to select the desired mode
and press the OK button.
The default setting is “Movie.”
• Game: Bright picture.
• Movie: Clear picture with strong contrast.
• PC: Soft tone picture.
• Auto: Automatically adjusts the screen brightness
according to the brightness of the surroundings
(automatic brightness adjustment function). For
more information, see “Automatic brightness
adjustment function (light sensor)” on page 36.
Note
When the Picture Mode is set to “Auto,” you cannot adjust the backlight.
18
Page 19
x Adjusting “Backlight”
If the screen is too bright, adjust the backlight to make the screen
easier to see.
x Adjusting “Color” (for TV/COMPONENT/
VIDEO 1/VIDEO 2 only)
You can change the color intensity of the picture displayed.
1 Press the MENU button.
The main menu appears on the screen.
2 Press the M/m buttons to select (Picture) and
press the OK button.
The “Picture” menu appears on the screen.
3 Press the M/m buttons to select “Backlight” and
press the OK button.
The “Backlight” menu appears on the screen.
4 Press the M/m buttons to adjust the light level and
press the OK button.
x Adjusting “Contrast” (“Picture”)
You can adjust the picture contrast. The “Contrast” menu is
available only for the PC 1 or PC 2 input. When you select the
COMPONENT, VIDEO 1, VIDEO 2, or TV input, the “Picture”
menu is available instead.
1 Press the MENU button.
The main menu appears on the screen.
2 Press the M/m buttons to select (Picture) and
press the OK button.
The “Picture” menu appears on the screen.
3 Press the M/m buttons to select “Contrast”
(“Picture”) and press the OK button.
The “Contrast” (“Picture”) menu appears on the screen.
4 Press the M/m buttons to adjust the contrast and
press the OK button.
x Adjusting “Brightness”
You can adjust the picture brightness (black level).
1 Press the MENU button.
The main menu appears on the screen.
2 Press the M/m buttons to select (Picture) and
press the OK button.
The “Picture” menu appears on the screen.
3 Press the M/m buttons to select “Brightness” and
press the OK button.
The “Brightness” menu appears on the screen.
4 Press the M/m buttons to adjust the brightness and
press the OK button.
1 Press the MENU button.
The main menu appears on the screen.
2Press the M/m buttons to select (Picture) and
press the OK button.
The “Picture” menu appears on the screen.
3Press the M/m buttons to select “Color” and press
the OK button.
The “Color” menu appears on the screen.
4 Press the M/m buttons to adjust the color intensity
and press the OK button.
x Adjusting “Hue” (for TV/VIDEO 1/VIDEO 2
only)
You can change the color tones of the picture displayed.
1 Press the MENU button.
The main menu appears on the screen.
2Press the M/m buttons to select (Picture) and
press the OK button.
The “Picture” menu appears on the screen.
3Press the M/m buttons to select “Hue” and press
the OK button.
The “Hue” menu appears on the screen.
4Press the M/m buttons to adjust the hue and press
the OK button.
x Adjusting “Sharpness” (for TV/
COMPONENT/VIDEO 1/VIDEO 2 only)
You can adjust the sharpness of the edges of images, etc.
1 Press the MENU button.
The main menu appears on the screen.
2Press the M/m buttons to select (Picture) and
press the OK button.
The “Picture” menu appears on the screen.
3Press the M/m buttons to select “Sharpness” and
press the OK button.
The “Sharpness” menu appears on the screen.
4Press the M/m buttons to adjust the sharpness and
press the OK button.
US
19
Page 20
x Adjusting “Color Temp.” (for PC 1/PC 2
only)
You can select the picture’s color level for the white color field
from the default color temperature settings.
Also, if necessary, you can fine tune the color temperature.
1 Press the MENU button.
The main menu appears on the screen.
4 Press the M/m buttons to select “Adjust” and press
the OK button.
The fine tuning menu for color temperature appears on the
screen.
R 160
G 128
B 75
2Press the M/m buttons to select (Picture) and
press the OK button.
The “Picture” menu appears on the screen.
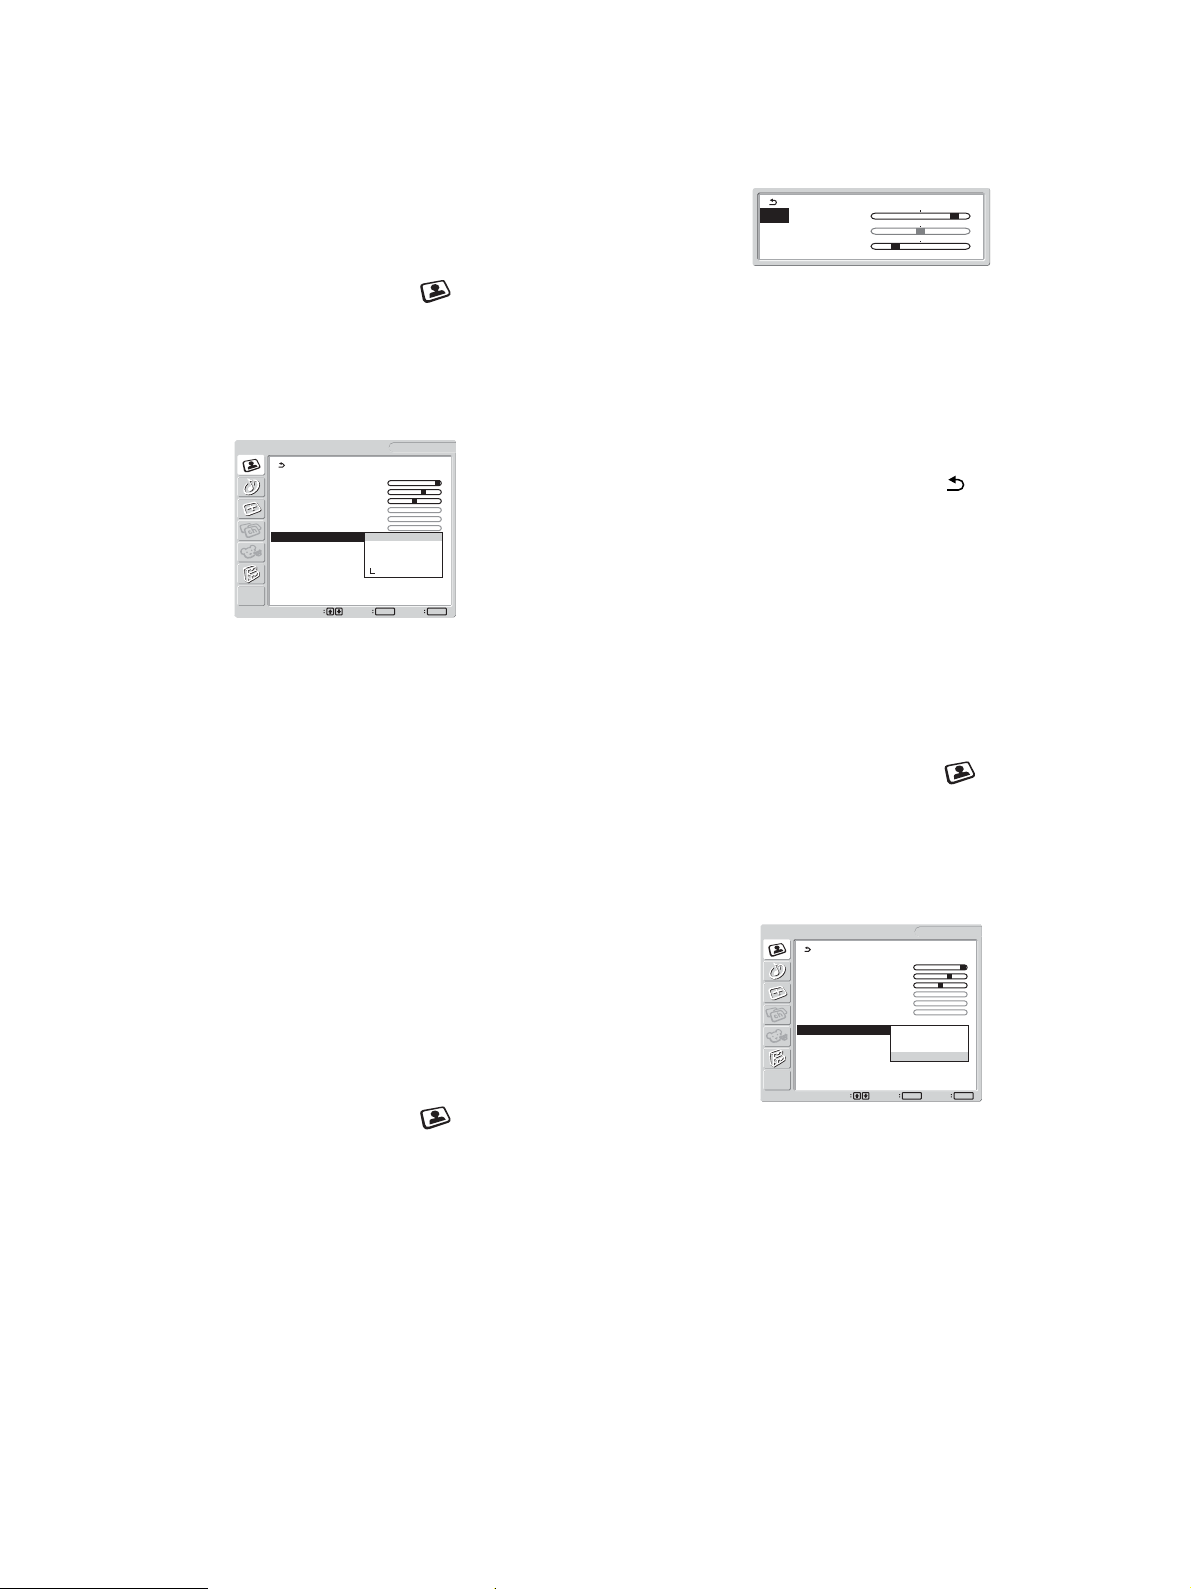
3Press the M/m buttons to select “Color Temp.” and
press the OK button.
The “Color Temp.” menu appears on the screen.
Picture
Mode: Movie
Backlight: 100
Contrast: 70
Brightness: 50
Color:
Hue:
Sharpness:
Color Temp.: 9300K
Gamma: 6500K
Picture Mode Reset sRGB
NR: User
Dynamic Contrast: Adjust
Select
DVI-D: PC 1
1680 × 1050/60 Hz
OK
Set Exit
MENU
4Press the M/m buttons to select the desired color
temperature and press the OK button.
White balance changes from bluish to reddish as the color
temperature is adjusted from 9,300K to 6,500K.
When you select “sRGB,” the colors adjust to the sRGB
profile. (The sRGB color setting is an industry-standard color
space protocol designed for computer products.) If you select
“sRGB,” the color settings of your computer must be set to the
sRGB profile.
Notes
• If a connected computer or other equipment is not sRGB-compliant,
color cannot be adjusted to the sRGB profile.
• You cannot select “sRGB” when the Picture Mode is set to “Auto.”
• If you select “sRGB,” you cannot adjust “Contrast” and “Brightness”
in the “Picture” menu. Also, you cannot adjust “Gamma.”
Fine tuning the color temperature
1 Press the MENU button.
The main menu appears on the screen.
2Press the M/m buttons to select (Picture) and
press the OK button.
The “Picture” menu appears on the screen.
5 Press the M/m buttons to select R (Red) or B (Blue)
and press the OK button. Then press the M/m
buttons to adjust the color temperature and press
the OK button.
Since this adjustment changes the color temperature by
increasing or decreasing the R and B components with respect
to G (green), the G component is fixed.
6 Press the M/m buttons to select , then press the
OK button.
The new color setting is stored in memory and automatically
recalled whenever “User” is selected.
The “Color Temp.” menu appears on the screen.
x Adjusting “Gamma” (for PC 1/PC 2 only)
You can associate the picture’s color shade on the screen with the
picture’s original color shade.
1 Press the MENU button.
The main menu appears on the screen.
2 Press the M/m buttons to select (Picture) and
press the OK button.
The “Picture” menu appears on the screen.
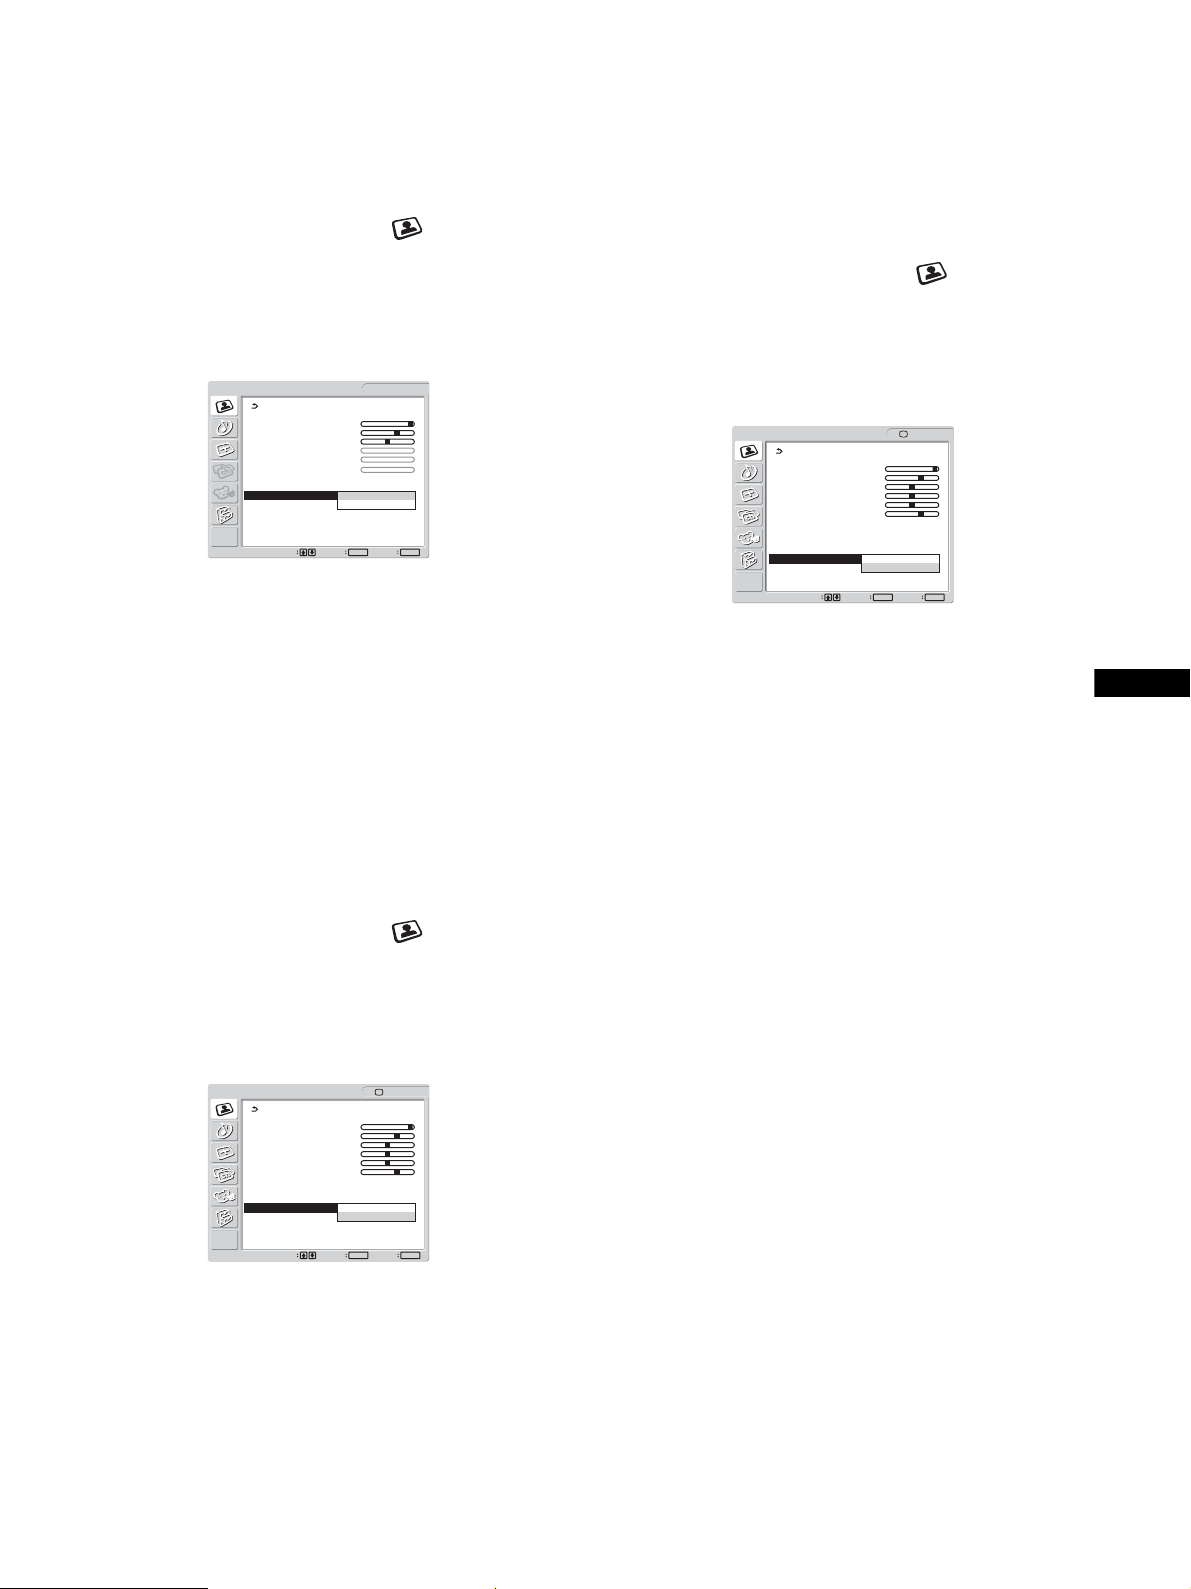
3 Press the M/m buttons to select “Gamma” and
press the OK button.
The “Gamma” menu appears on the screen.
Picture
Mode: Movie
Backlight: 100
Contrast: 70
Brightness: 50
Color:
Hue:
Sharpness:
Color Temp.: 9300K
Gamma: Gamma1
Picture Mode Reset Gamma2
NR: Gamma3
Dynamic Contrast: Gamma4
Select
4 Press the M/m buttons to select the desired mode
and press the OK button.
DVI-D: PC 1
1680 × 1050/60 Hz
OK
Set Exit
MENU
3Press the M/m buttons to select “Color Temp.” and
press the OK button.
The “Color Temp.” menu appears on the screen.
20
Page 21
x Resetting Picture Mode to the default
You can reset the adjustments to the default settings.
1 Press the MENU button.
The main menu appears on the screen.
2 Press the M/m buttons to select (Picture) and
press the OK button.
The “Picture” menu appears on the screen.
3 Press the M/m buttons to select “Picture Mode
Reset” and press the OK button.
The “Picture Mode Reset” menu appears on the screen.
Picture
Mode: Movie
Backlight: 100
Contrast: 70
Brightness: 50
Color:
Hue:
Sharpness:
Color Temp.: 9300K
Gamma: Gamma4
Picture Mode Reset OK
NR: Cancel
Dynamic Contrast:
Select
DVI-D: PC 1
1680 × 1050/60 Hz
OK
Set Exit
MENU
4 Press the M/m buttons to select the desired mode
and press the OK button.
• OK: To reset the all items in the current Picture
Mode to the default.
• Cancel: To cancel resetting and return to the “Picture”
menu.
x Setting “NR” (for TV/COMPONENT/VIDEO 1/
VIDEO 2 only)
You can set the noise reduction function to on or off.
This feature can be set for each available input.
1 Press the MENU button.
The main menu appears on the screen.
x Setting “Dynamic Contrast” (for TV/
COMPONENT/VIDEO 1/VIDEO 2 only)
You can set the “Dynamic Contrast” function to on or off.
This feature can be set for each available input.
1 Press the MENU button.
The main menu appears on the screen.
2Press the M/m buttons to select (Picture) and
press the OK button.
The “Picture” menu appears on the screen.
3Press the M/m buttons to select “Dynamic
Contrast” and press the OK button.
The “Dynamic Contrast” menu appears on the screen.
OK
Set Exit
: TV
MENU
Picture
Mode: Vivid
Backlight: 100
Picture: 70
Brightness: 50
Color: 50
Hue: 0
Sharpness: 7
Color Temp.:
Gamma:
Picture Mode Reset
NR: Off
Dynamic Contrast: On
Off
Select
4Press the M/m buttons to select the desired mode
and press the OK button.
• On: The picture contrast is enhanced.
• Off: The “Dynamic Contrast” function is turned
off.
Notes
• Only when the Picture Mode is set to “Vivid” or “Standard,” the
“Dynamic Contrast” is available.
• When the “Dynamic Contrast” function is set to “On,” the backlight
becomes default and you can not adjust it.
US
2 Press the M/m buttons to select (Picture) and
press the OK button.
The “Picture” menu appears on the screen.
3 Press the M/m buttons to select “NR” and press the
OK button.
The “NR” menu appears on the screen.
OK
Set Exit
: TV
MENU
Picture
Mode: Vivid
Backlight: 100
Picture: 70
Brightness: 50
Color: 50
Hue: 0
Sharpness: 7
Color Temp.:
Gamma:
Picture Mode Reset
NR: On
Dynamic Contrast: Off
Select
4 Press the M/m buttons to select the desired mode
and press the OK button.
• On: The noise level is reduced.
• Off: The noise reduction function is turned off.
21
Page 22

Audio menu
You can adjust the following items using the “Audio” menu.
The items in the “Audio” menu can be set for each available input.
• Surround
• Treble
•Bass
• Balance
•Auto Volume
Audio
Surround: SRS WOW
Treble:
Bass:
Balance: 0
Auto Volume: On
MTS: Stereo
Audio Reset
•MTS
•Audio Reset
Select
x Setting “Surround”
1 Press the MENU button.
The main menu appears on the screen.
2Press the M/m buttons to select (Audio) and
press the OK button.
The “Audio” menu appears on the screen.
OK
Set Exit
: TV
MENU
x Adjusting “Treble,” “Bass,” and “Balance”
1 Press the MENU button.
The main menu appears on the screen.
2 Press the M/m buttons to select (Audio) and
press the OK button.
The “Audio” menu appears on the screen.
3 Press the M/m buttons to select “Treble,” “Bass,” or
“Balance” and press the OK button.
4 Press the M/m buttons to adjust the level and press
the OK button.
Note
Only when “Surround” is set to off, “Treble” and “Bass” can be adjusted.
x Setting “Auto Volume” (for TV/
COMPONENT/VIDEO 1/VIDEO 2 only)
You can set the loudness of the sound to keep it at a specified
level.
3Press the M/m buttons to select “Surround” and
press the OK button.
The “Surround” menu appears on the screen.
OK
Set Exit
: TV
MENU
Audio
Surround: SRS WOW
Treble: Off
Bass:
Balance: 0
Auto Volume: On
MTS: Stereo
Audio Reset
Select
4Press the M/m buttons to select the desired mode
and press the OK button.
• SRS WOW: Deep rich bass tone and clear high tone
creates a rich surround sound experience,
and movies and games, especially, can be
enjoyed with powerful sound.
• Off: Turns off the SRS WOW effect.
Adopting the latest technology developed by SRS Labs, Inc., SRS
WOW significantly improves the sound quality of various audio
sources.
1 Press the MENU button.
The main menu appears on the screen.
2 Press the M/m buttons to select (Audio) and
press the OK button.
The “Audio” menu appears on the screen.
3 Press the M/m buttons to select “Auto Volume” and
press the OK button.
The “Auto Volume” menu appears on the screen.
OK
Set Exit
: TV
MENU
Audio
Surround: SRS WOW
Treble:
Bass:
Balance: 0
Auto Volume: On
MTS: Off
Audio Reset
Select
4 Press the M/m buttons to select the desired mode
and press the OK button.
• On: Loudness of the sound stays at the specified level,
independent of the broadcast signal (e.g. in the case
of advertisements).
• Off: Loudness of the sound changes automatically
according to the broadcast signal.
22
Page 23
x Setting “MTS” (for TV only)
You can enjoy stereo, bilingual, and monaural programs.
Screen menu
1 Press the MENU button.
The main menu appears on the screen.
2 Press the M/m buttons to select (Audio) and
press the OK button.
The “Audio” menu appears on the screen.
3 Press the M/m buttons to select “MTS” and press
the OK button.
The “MTS” menu appears on the screen.
OK
Set Exit
: TV
MENU
Audio
Surround: SRS WOW
Treble:
Bass:
Balance: 0
Auto Volume: On
MTS: Stereo
Audio Reset Auto SAP
Mono
Select
4 Press the M/m buttons to select the desired mode
and press the OK button.
• Stereo: Stereo sound is output when viewing a
program broadcast in stereo.
• Auto SAP: A second audio program channel is output
automatically when a signal received. (If no
SAP signal is present, the display remains in
stereo mode.)
• Mono: Monaural sound is output. (Use to reduce
noise during weak stereo broadcasts.)
x Resetting all audio settings to the default
You can reset the adjustments to the default settings.
1 Press the MENU button.
The main menu appears on the screen.
You can adjust the following items using the “Screen” menu.
• Zoom
•Auto Adjust
•Phase
•Pitch
•H Center
Screen
Zoom : Full
Auto Adjust
Phase : 30
Pitch : 50
H Center : 50
V Center : 50
Resolution
HD15: PC 2
•V Center
• Resolution
Select
1680 × 1050/60 Hz
Set Exit
MENU
OK
x Setting “Zoom”
This feature lets you watch 4:3 normal broadcasts or other picture
sizes such as Letter box movies in several “Zoom” modes.
A “Zoom” value is set for each available input.
Tip
You can also switch the “Zoom” setting by pressing the button on the
remote control repeatedly.
1 Press the MENU button.
The main menu appears on the screen.
2Press the M/m buttons to select (Screen) and
press the OK button.
The “Screen” menu appears on the screen.
3 Press the M/m buttons to select “Zoom” and press
the OK button.
The “Zoom” menu appears on the screen.
Screen
Zoom :
Normal
Auto Adjust
Full
Phase :
Wide Zoom
Pitch :
Zoom
H Center :
V Center :
Resolution
: TV
US
2 Press the M/m buttons to select (Audio) and
press the OK button.
The “Audio” menu appears on the screen.
3 Press the M/m buttons to select “Audio Reset” and
press the OK button.
The “Audio Reset” menu appears on the screen.
OK
Set Exit
: TV
MENU
Audio
Surround: SRS WOW
Treble:
Bass:
Balance: 0
Auto Volume: On
MTS: Stereo
Audio Reset OK
Cancel
Select
4 Press the M/m buttons to select the desired mode
and press the OK button.
• OK: To reset the all items in the “Audio” menu to the
default.
• Cancel: To cancel resetting and return to the “Audio”
menu.
MENU
OK
Set Exit
Select
4Press the M/m buttons to select the desired mode
and press the OK button.
• Normal: Original aspect ratio.
• Full: A picture is enlarged to fill the 16:10 screen.
Useful for viewing Squeeze signal.
• Wide Zoom: A picture is enlarged horizontally (non-
linear) to fill the 16:10 screen, keeping the
original image as much as possible.
• Zoom: A picture is enlarged horizontally and
vertically to an equal aspect ratio that fills a
16:10 screen. Useful for viewing Letter Box
signal.
Notes
• If the input from either PC 1 or PC 2 is selected, “Zoom” and
“Wide Zoom” are unavailable.
• If the input from COMPONENT is selected and the video signal
being input is 1080i format, “Wide Zoom” is unavailable.
• For “Normal” mode of PC 1 or PC 2, the input signal is displayed
on the screen at its actual aspect ratio and black bars may appear at
the top and bottom of the screen depending on the signal.
23
Page 24
x Automatic picture quality adjustment
function (for PC 2 only)
When the display receives an input signal, it automatically
adjusts the picture’s position and sharpness (phase/pitch), and
ensures that a clear picture appears on the screen (page 36).
If the automatic picture quality adjustment function of this
display seems to not completely adjust the picture
You can make further automatic adjustment of the picture quality for the
current input signal (See “Auto Adjust” below).
If you still need to make further adjustments to the picture
quality
You can manually adjust the picture’s sharpness (phase/pitch) and
position (horizontal/vertical position).
These adjustments are stored in memory and automatically
recalled when the display receives a previously input and
registered input signal.
x Making further automatic adjustments to
the picture quality for the current input
signal (Auto Adjust) (for PC 2 only)
1 Press the MENU button.
The main menu appears on the screen.
2Press the M/m buttons to select (Screen) and
press the OK button.
The “Screen” menu appears on the screen.
3 Press the M/m buttons to select “Auto Adjust” and
press the OK button.
Make the appropriate adjustments of the screen’s phase, pitch
and horizontal/vertical position for the current input signal
and store them.
4Press the M/m buttons to select the desired mode
and press the OK button.
• OK: To start adjusting.
• Cancel: To cancel adjustments.
x Adjusting the picture’s sharpness manually
(Phase/Pitch) (for PC 2 only)
You can adjust the picture’s sharpness as follows.
1 Set the resolution to 1,680 × 1,050 on the computer.
2 Load the CD-ROM.
3 Start the CD-ROM and display the test pattern.
For Windows User
When Auto run operates:
1 Click Display Adjustment tool (Utility).
2 Click “Adjust” and confirm the resolution and then click
“Next.”
Test pattern for Pitch and Phase appears in order.
When Auto run fails to operate:
1 Open “My Computer” and right click the CD-ROM icon.
Go to “Explorer” and open the CD-ROM icon.
2 Open [Utility] and then select [Windows].
3 Start [Win_Utility.exe].
Test pattern appears.
For Macintosh user
1 Open [Utility] and then select [Mac].
2 Start [Mac_Utility.exe].
Test pattern appears.
4 Press the MENU button.
The main menu appears on the screen.
5 Press the M/m buttons to select (Screen) and
press the OK button.
The “Screen” menu appears on the screen.
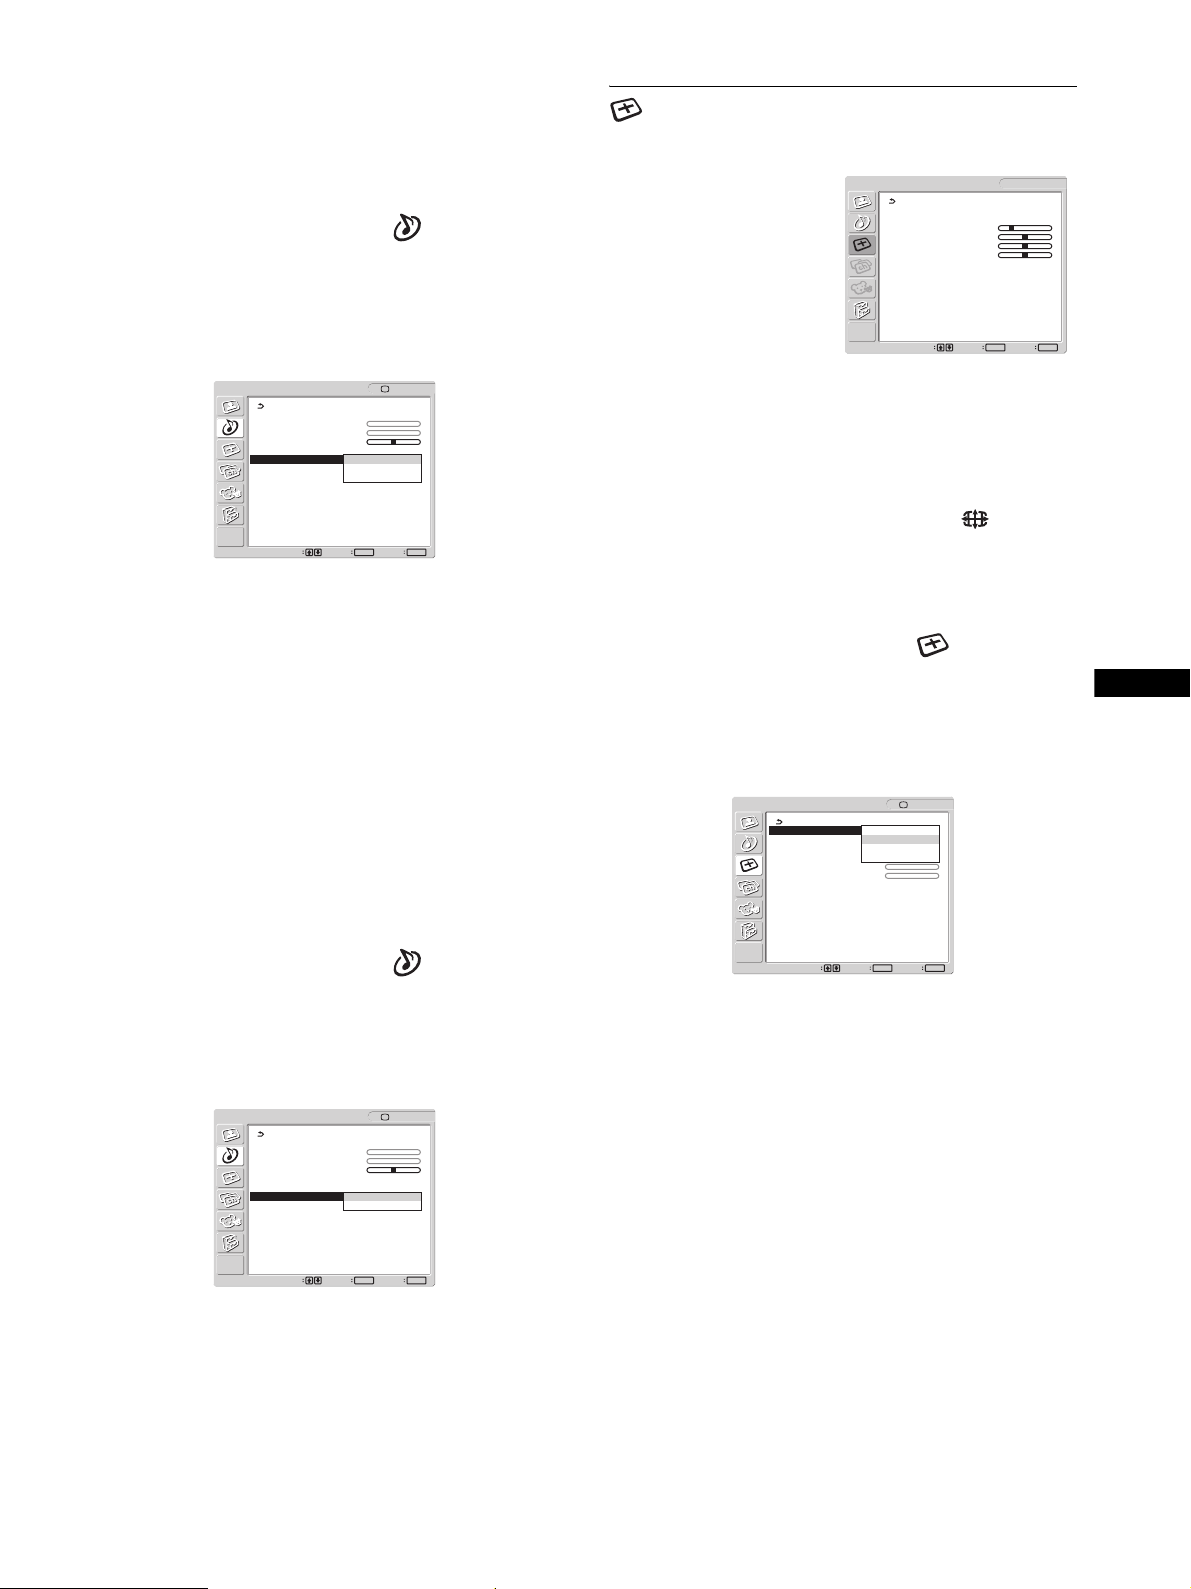
6 Press the M/m buttons to select “Phase” and press
the OK button.
The “Phase” adjustment menu appears on the screen.
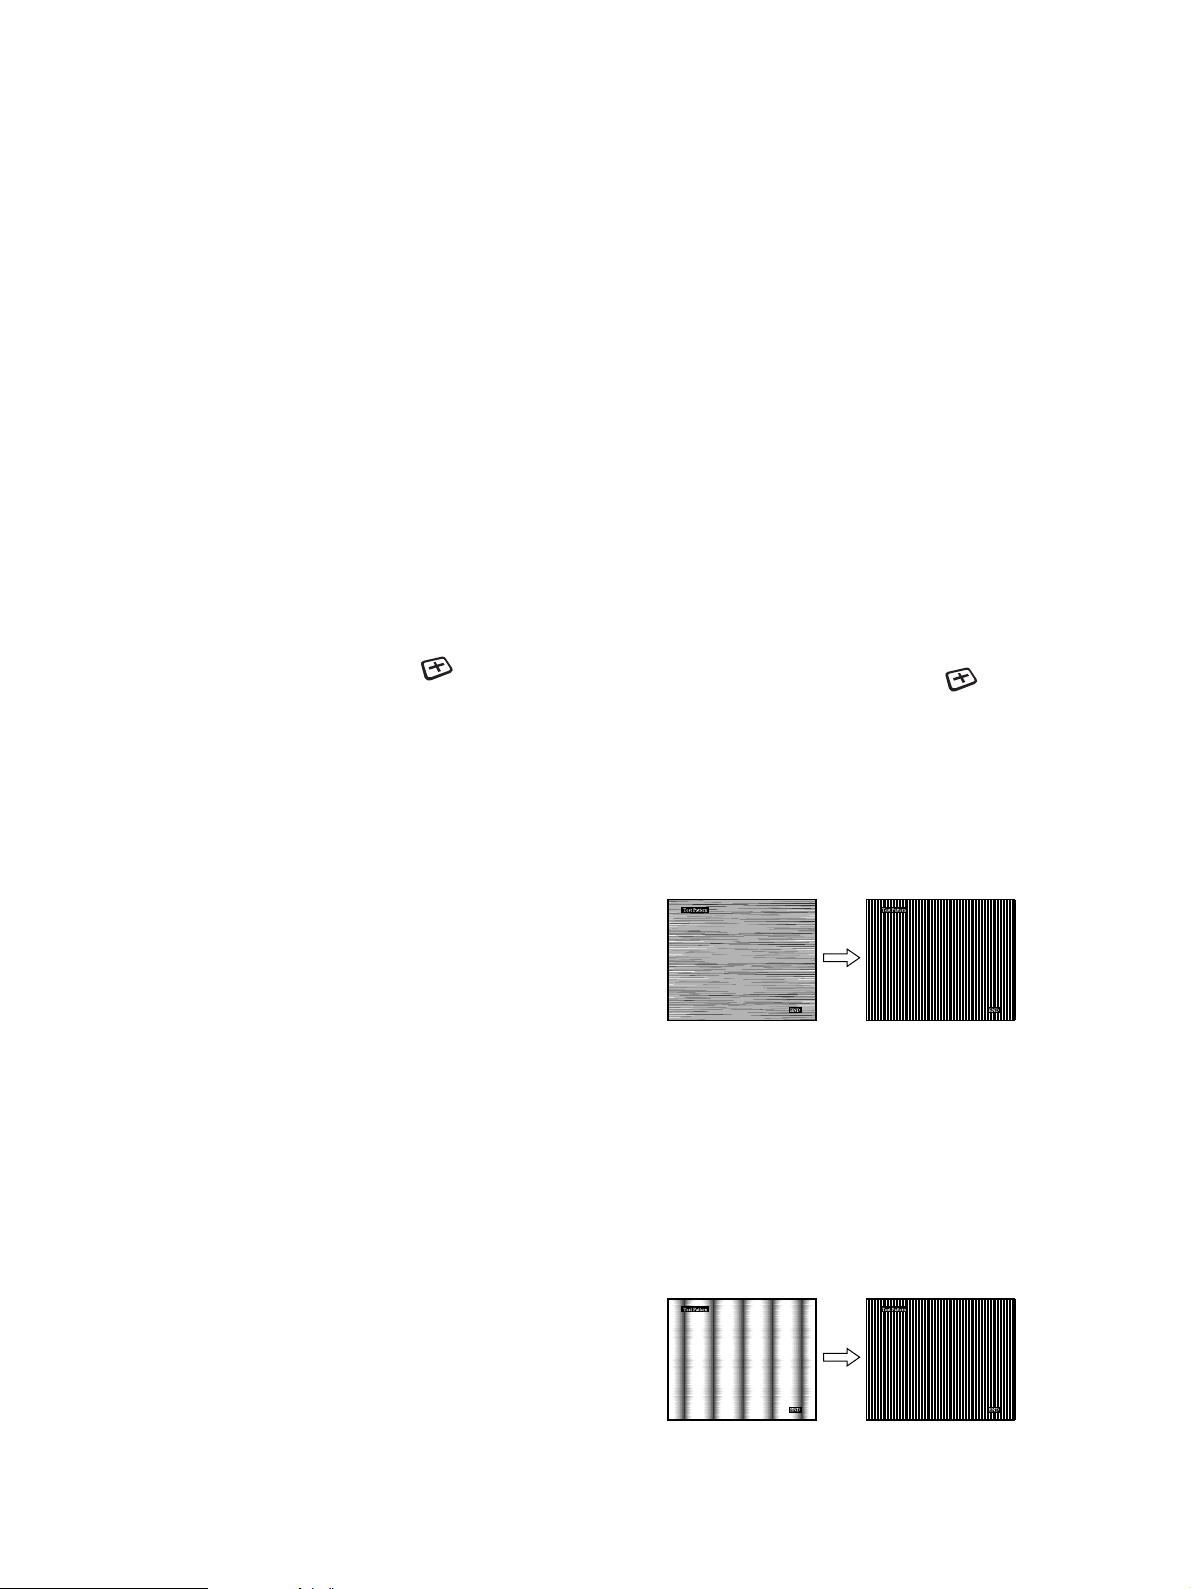
7 Press the M/m buttons until the horizontal stripes
are at a minimum.
Adjust so that the horizontal stripes are at a minimum.
8 Press the OK button.
The main menu appears on the screen.
If vertical stripes are observed over the entire screen, adjust
the pitch using the following procedures.
9 Press the M/m buttons to select “Pitch” and press
the OK button.
The “Pitch” adjustment menu appears on the screen.
10 Press the M/m buttons until the vertical stripes
disappear.
Adjust so that the vertical stripes disappear.
11 Click [END] on the screen to turn off the test pattern.
24
Page 25
x Adjusting the picture’s position manually
(H Center /V Center) (for PC 2 only)
If the picture is not in the center of the screen, adjust the picture’s
centering as follows.
x Changing the display resolution
(Resolution) (for PC 2 only)
You can change the display resolution when the current input is
different from the one displayed on the screen.
1 Set the resolution to 1,680 × 1,050 on the computer.
2 Load the CD-ROM.
3 Start the CD-ROM and display the test pattern.
For Windows User
When Auto run operates:
1 Click Display Adjustment tool (Utility).
2 Click “Adjust” and confirm the resolution and then click
“Next.”
Test pattern for H Center and V Center appears in order.
When Auto run fails to operate:
1 Open “My Computer” and right click the CD-ROM icon.
Go to “Explorer” and open the CD-ROM icon.
2 Open [Utility] and then select [Windows].
3 Start [Win_Utility.exe].
Test pattern appears.
For Macintosh user
1 Open [Utility] and then select [Mac].
2 Start [Mac_Utility.exe].
Test pattern appears.
4 Press the MENU button.
The main menu appears on the screen.
5 Press the M/m buttons to select (Screen) and
press the OK button.
The “Screen” menu appears on the screen.
Tip
Some of the output signals from your computer may not be recognized on
the display by assigning the default setting of resolution. The actual
resolution may not be displayed as you have selected. Use this function
only when you want to change the display resolution.
1 Press the MENU button.
The main menu appears on the screen.
2Press the M/m buttons to select (Screen) and
press the OK button.
The “Screen” menu appears on the screen.
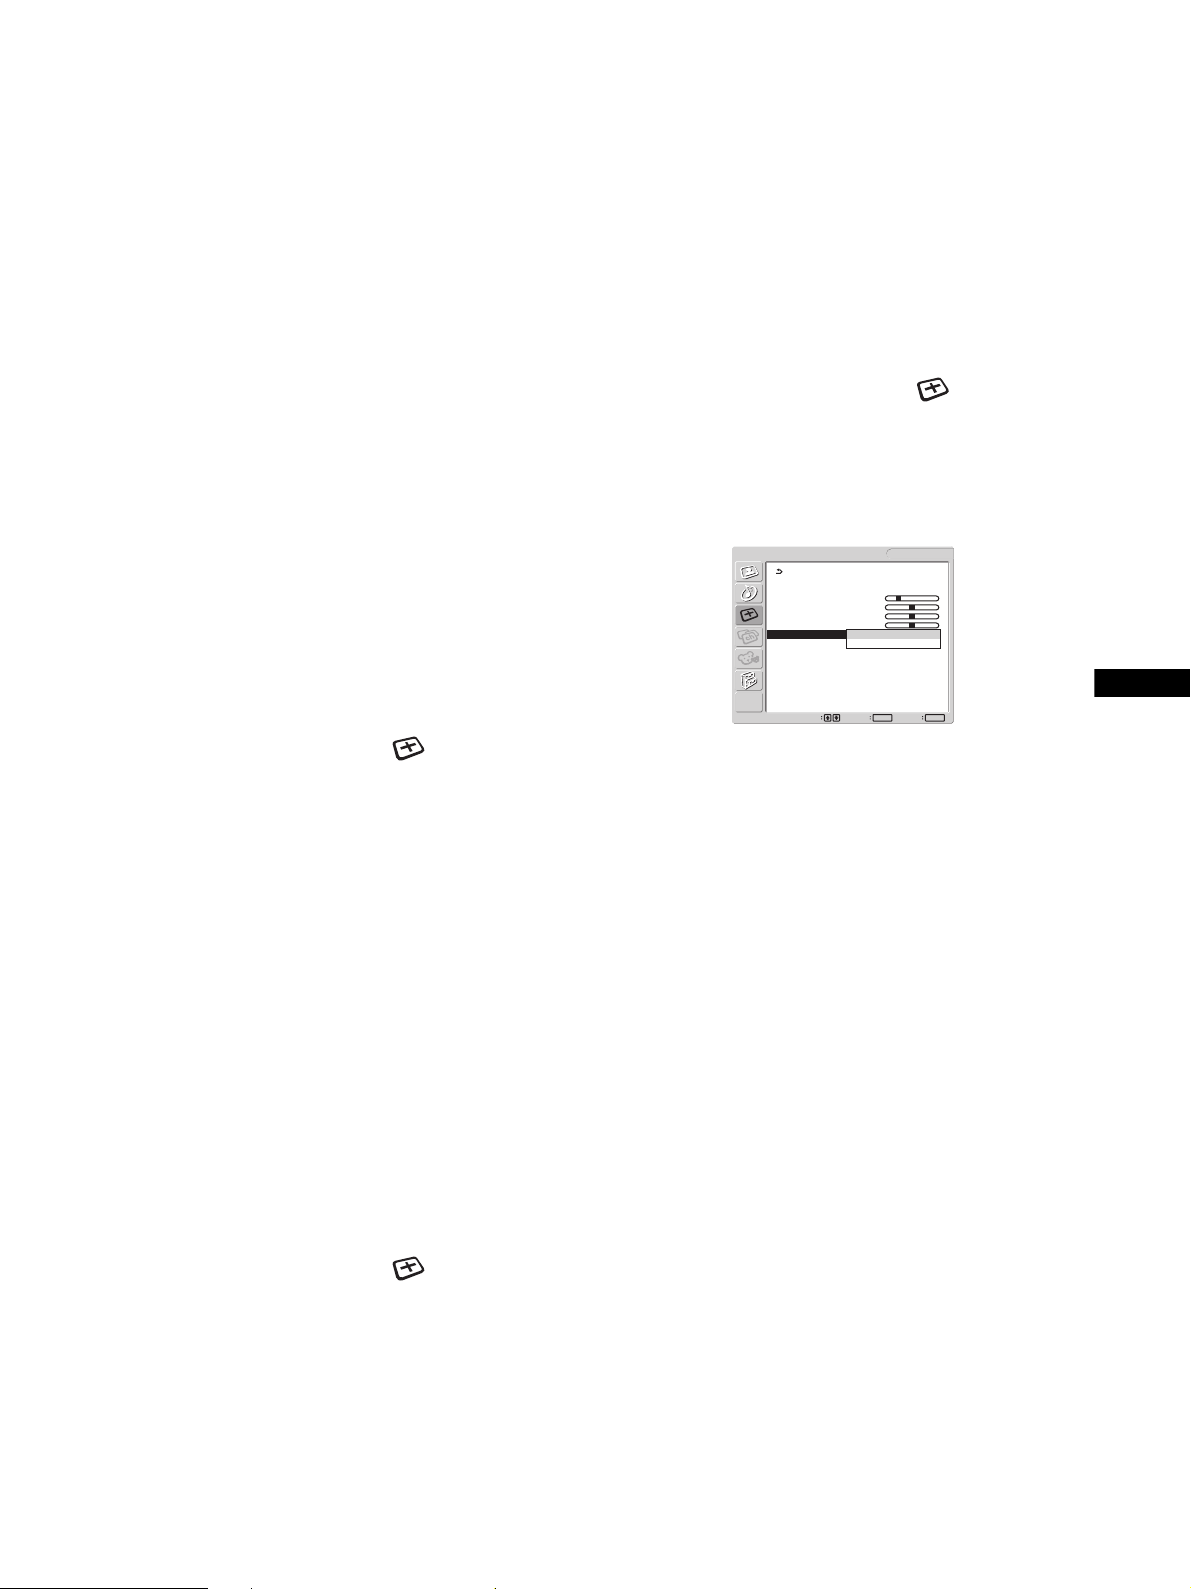
3Press the M/m buttons to select “Resolution” and
press the OK button.
The “Resolution” menu appears on the screen.
Screen
Zoom : Full
Auto Adjust
Phase : 30
Pitch : 50
H Center : 50
V Center : 50
Resolution 1680 × 1050
1400 × 1050
Select
HD15: PC 2
1680 × 1050/60 Hz
OK
Set Exit
MENU
4Press the M/m buttons to select the resolution you
want to display, and press the OK button.
US
6 Press the M/m buttons to select “H Center” or “V
Center” and press the OK button.
The “H Center” adjustment menu or “V Center” adjustment
menu appears on the screen.
7 Press the M/m buttons to center the test pattern on
the screen.
8Click [END] on the screen to turn off the test pattern.
x Adjusting the picture’s position manually
(V Center) (for TV/COMPONENT/VIDEO 1/
VIDEO 2 only)
If you want to adjust the picture position up or down, when “Wide
Zoom” or “Zoom” is selected, adjust the picture’s centring as
follows.
1 Press the MENU button.
The main menu appears on the screen.
2 Press the M/m buttons to select (Screen) and
press the OK button.
The “Screen” menu appears on the screen.
3 Press the M/m buttons to select “V Center” and
press the OK button.
The “V Center” adjustment menu appears on the screen.
4 Press the M/m buttons to adjust the picture position
where you like.
25
Page 26
Parent menu
TV programs and movies shown on TV are given a rating signal
based on the following rating systems.
In the U.S.A.: U.S. Television Parental Guidelines to rate
television programs (U.S. TV ratings), and Motion Picture
Association of America (MPAA) Guidelines to rate movies
including those shown on TV (movie ratings).
In Canada: Canadian English Language ratings to rate television
programs in English, and Canadian French Language ratings to
rate those in French.
4 Press the M/m buttons to select “Select Country”
and press the OK button.
OK
Set Exit
: TV
MENU
Parent
Lock: Off
Select Country: U.S.A.
Change Password Canada
Select
5 Press the M/m buttons to select your country/
region (U.S.A. or Canada) and press the OK button.
To block programs you feel unsuitable for your children, you need
to set the display for the desired rating systems. Sony’s
predetermined ratings are also available. See page 29 for a
description of the ratings.
The TV’s Parental Control feature functions by receiving the
rating signal from your local broadcasting station or cable service
provider.
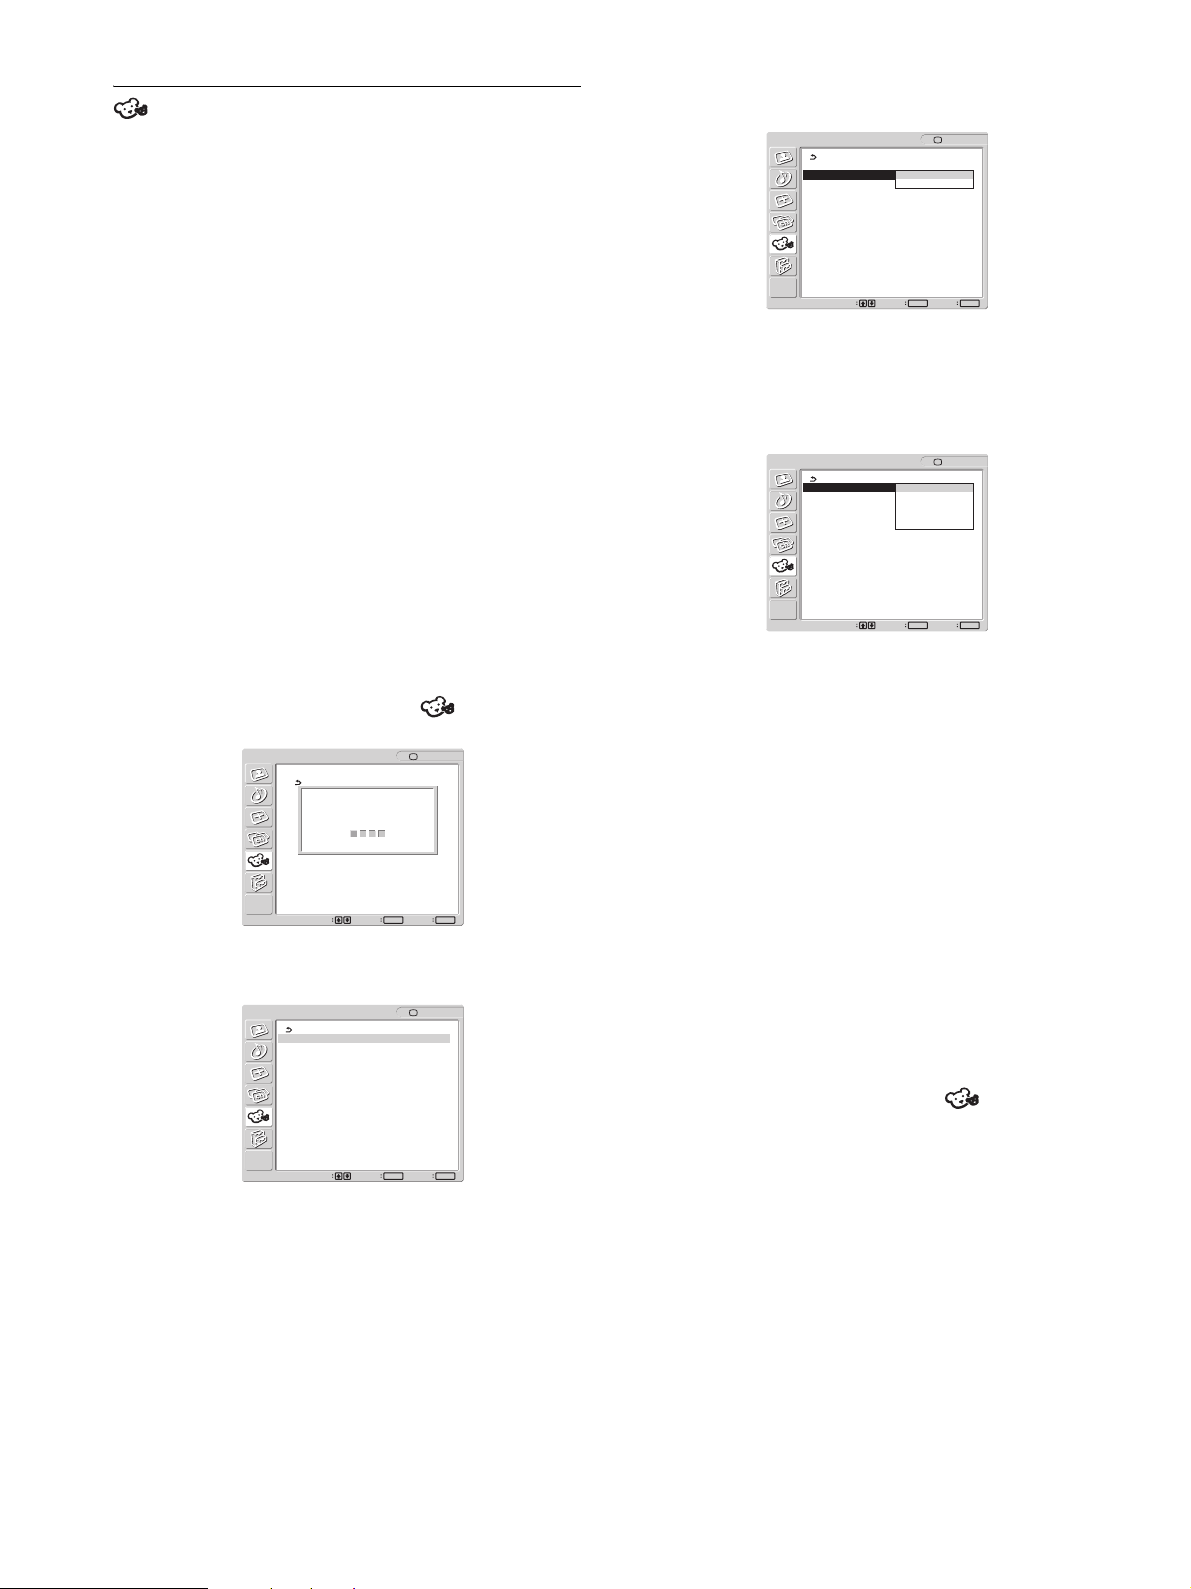
x Activating the Parental Control feature
1 Press the MENU button.
2Press the M/m buttons to select (Parent) and
press the OK button.
OK
Set Exit
: TV
MENU
: TV
Parent
Enter password
using 0 - 9 buttons
----
Select
3 Enter a four-digit password using the 0-9 buttons.
The “Parent” menu appears on the screen.
Parent
Lock: Off
Select Country: U.S.A.
Change Password
6 Press the M/m buttons to select “Lock” and press
the OK button.
OK
Set Exit
: TV
MENU
Parent
Lock: Off
Select Country: Child
Change Password Youth
Y.Adult
Custom
Select
7 Press the M/m buttons to select a desired rating and
press the OK button.
If you select “Child,” “Youth,” or “Y.Adult” (Young Adult),
the level of Parental Control is activated automatically.
Tip
If you are not familiar with the Parental Guideline rating system, you
should select “Child,” “Youth,” or “Y.Adult” to help simplify the
rating selection. To set more restrictive ratings, select “Custom” (see
“Selecting a Custom Rating” on page 27).
8 Press the MENU button to exit the menu screen.
To deactivate the Parental Control feature
Set “Lock” to “Off” in the “Parent” menu.
To change the password
1 Press the MENU button.
MENU
OK
Set Exit
Select
If you access the “Parent” menu for the first time, you are
requested to enter the password again for confirmation.
Note
Do not enter “4357” corresponding to “HELP” on a phone number
pad (see page 27).
Tips
• You need to enter the password here for any further access to the
“Parent” menu. If you lose your password, see “Tip” on page 27.
• If you want to change the password, see “To change the password”
on page 26.
2 Press the M/m buttons to select (Parent) and
press the OK button.
3 Enter your four-digit password using the 0-9
buttons.
The “Parent” menu appears on the screen.
4 Press the M/m buttons to select “Change
Password” then press the OK button.
5 Enter a new four-digit password using the 0-9
buttons.
6 Enter the password set in step 5 again to confirm.
7 Press the MENU button to exit the menu screen.
26
Page 27
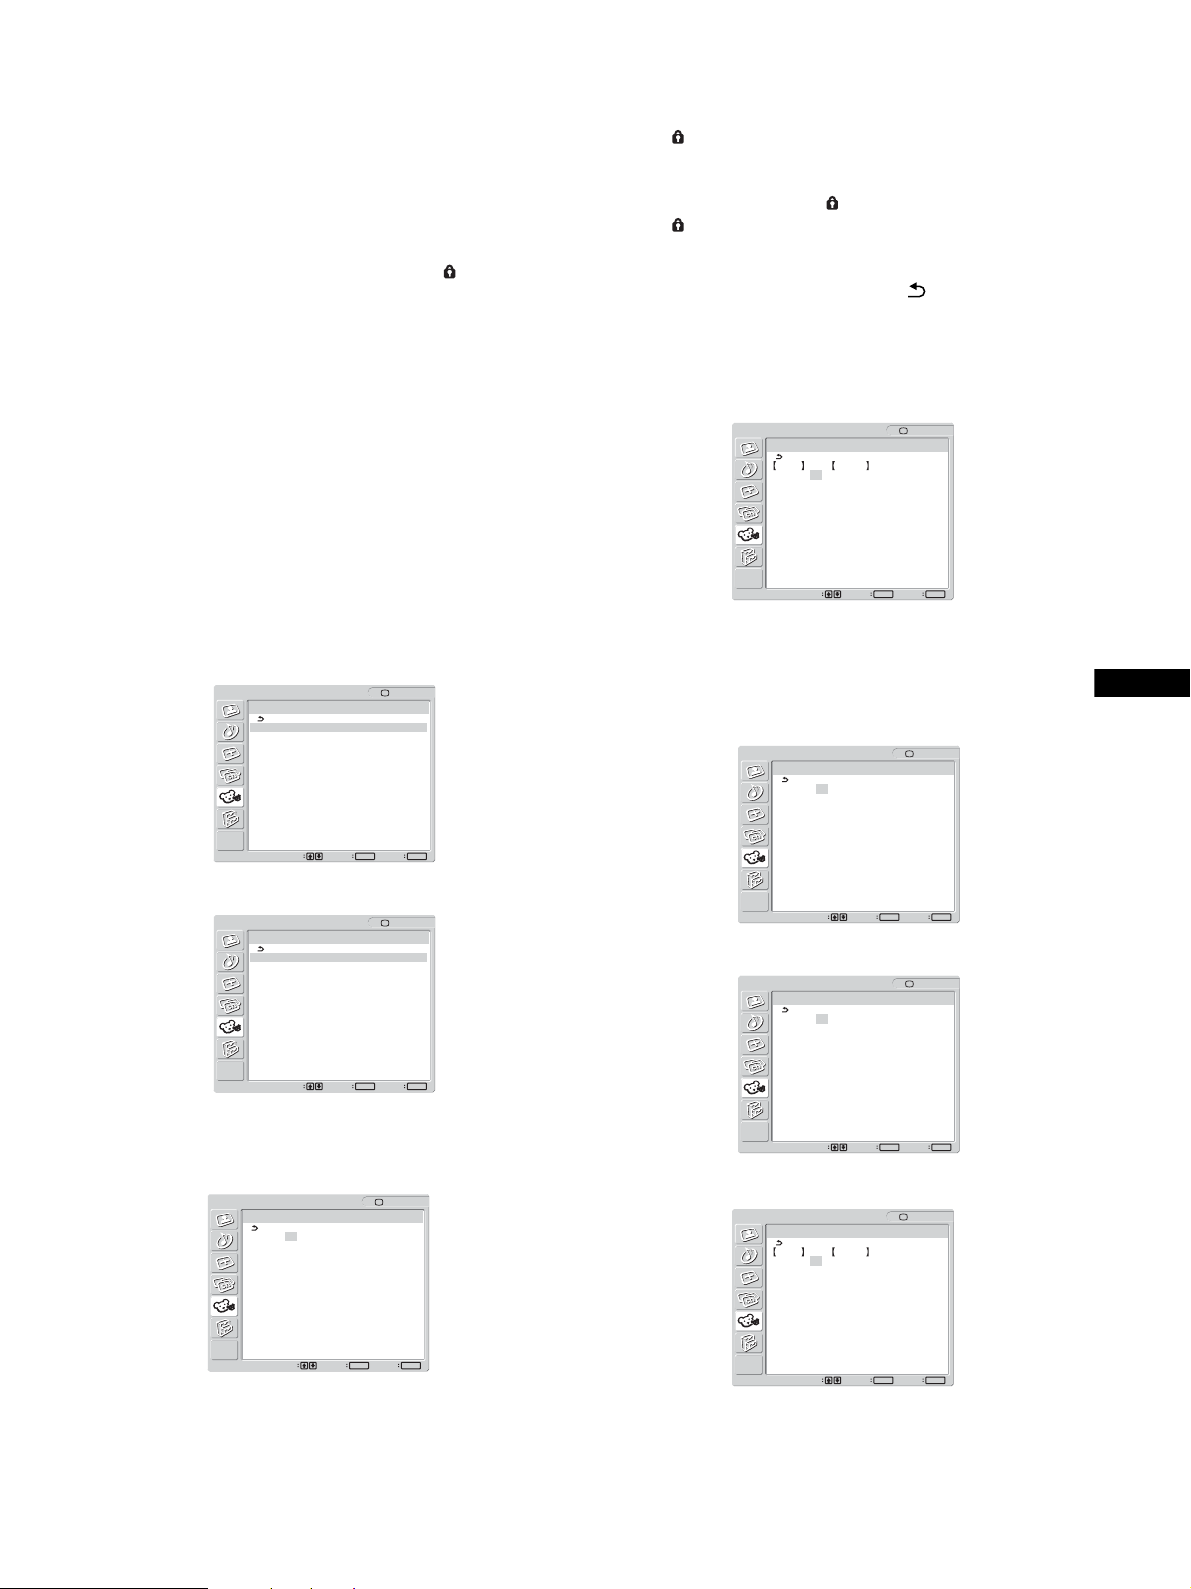
Tip
If you have forgotten your password, enter the master password “4357”
(corresponding to “HELP” on a phone number pad) in step 3. You can
then store a new password.
Notes
• If you entered “4357” as your password for the first time, you cannot
store a new password (see step 3 of “Activating the Parental Control
feature” on page 26).
• When you select a Parental Control program and the indicator is
displayed on the screen, you cannot view that program even if you enter
“4357”.
4Press the M/m buttons to select the rating to be
blocked and press the OK button.
The indicator automatically appears beside the selected
rating and all ratings below it, indicating that the programs
that match the ratings will be blocked.
To unlock a rating, select and press the OK button.
The indicator changes to “–” and all ratings above it are
unlocked.
5Press the M/m buttons to select and press the OK
button.
x Selecting a Custom Rating
If you want to select the ratings to be blocked from “Custom”
once you have activated the Parental Control feature (page 26),
follow the procedure below.
For a detailed description of each rating, see “What the Ratings
Mean” on page 29.
1 Perform steps 1 to 6 in “Activating the Parental
Control feature” on page 26 to display the “Lock”
menu.
2 Press the M/m buttons to select “Custom” and
press the OK button.
In the U.S.A.
OK
Set Exit
OK
Set Exit
: TV
MENU
: TV
MENU
Parent
Custom
Movie Rating
TV Rating
Unrated : Allow
Select
In Canada
Parent
Custom
English Rating
French Rating
U.S.A Rating
Select
To select a rating in Canada, go to step 6.
6 To select a TV rating in the U.S.A.:
Press the M/m buttons to select “TV Rating” and press the
OK button.
OK
Set Exit
: TV
MENU
Parent
TV Rating
Rating Content
TV-Y: –
TV-Y7: – FV: –
TV-G: –
TV-PG: – D:– L: – S: – V: –
TV-14: – D:– L: – S: – V: –
TV-MA: – L: – S: – V: –
Select
To select a TV rating in Canada:
Press the M/m buttons to select “English Rating,” “French
Rating,” or “U.S.A. Rating” and press the OK button.
English Rating
OK
Set Exit
: TV
MENU
: TV
French Rating
Parent
Parent
English Rating
C: –
C8+: –
G: –
PG: –
14+: –
18+: –
Select
French Rating
G: –
8ans+: –
13ans+: –
16ans+: –
18ans+: –
US
3 Press the M/m buttons to select “Movie Rating” and
press the OK button.
OK
Set Exit
: TV
MENU
Parent
Movie Rating
G: –
PG: –
PG-13: –
R: –
NC-17: –
X: –
Select
27
U.S.A. Rating
Select
Parent
U.S.A. Rating
Rating Content
TV-Y: –
TV-Y7: – FV: –
TV-G: –
TV-PG: – D:– L: – S: – V: –
TV-14: – D:– L: – S: – V: –
TV-MA: – L: – S: – V: –
Select
OK
Set Exit
OK
Set Exit
MENU
: TV
MENU
Page 28
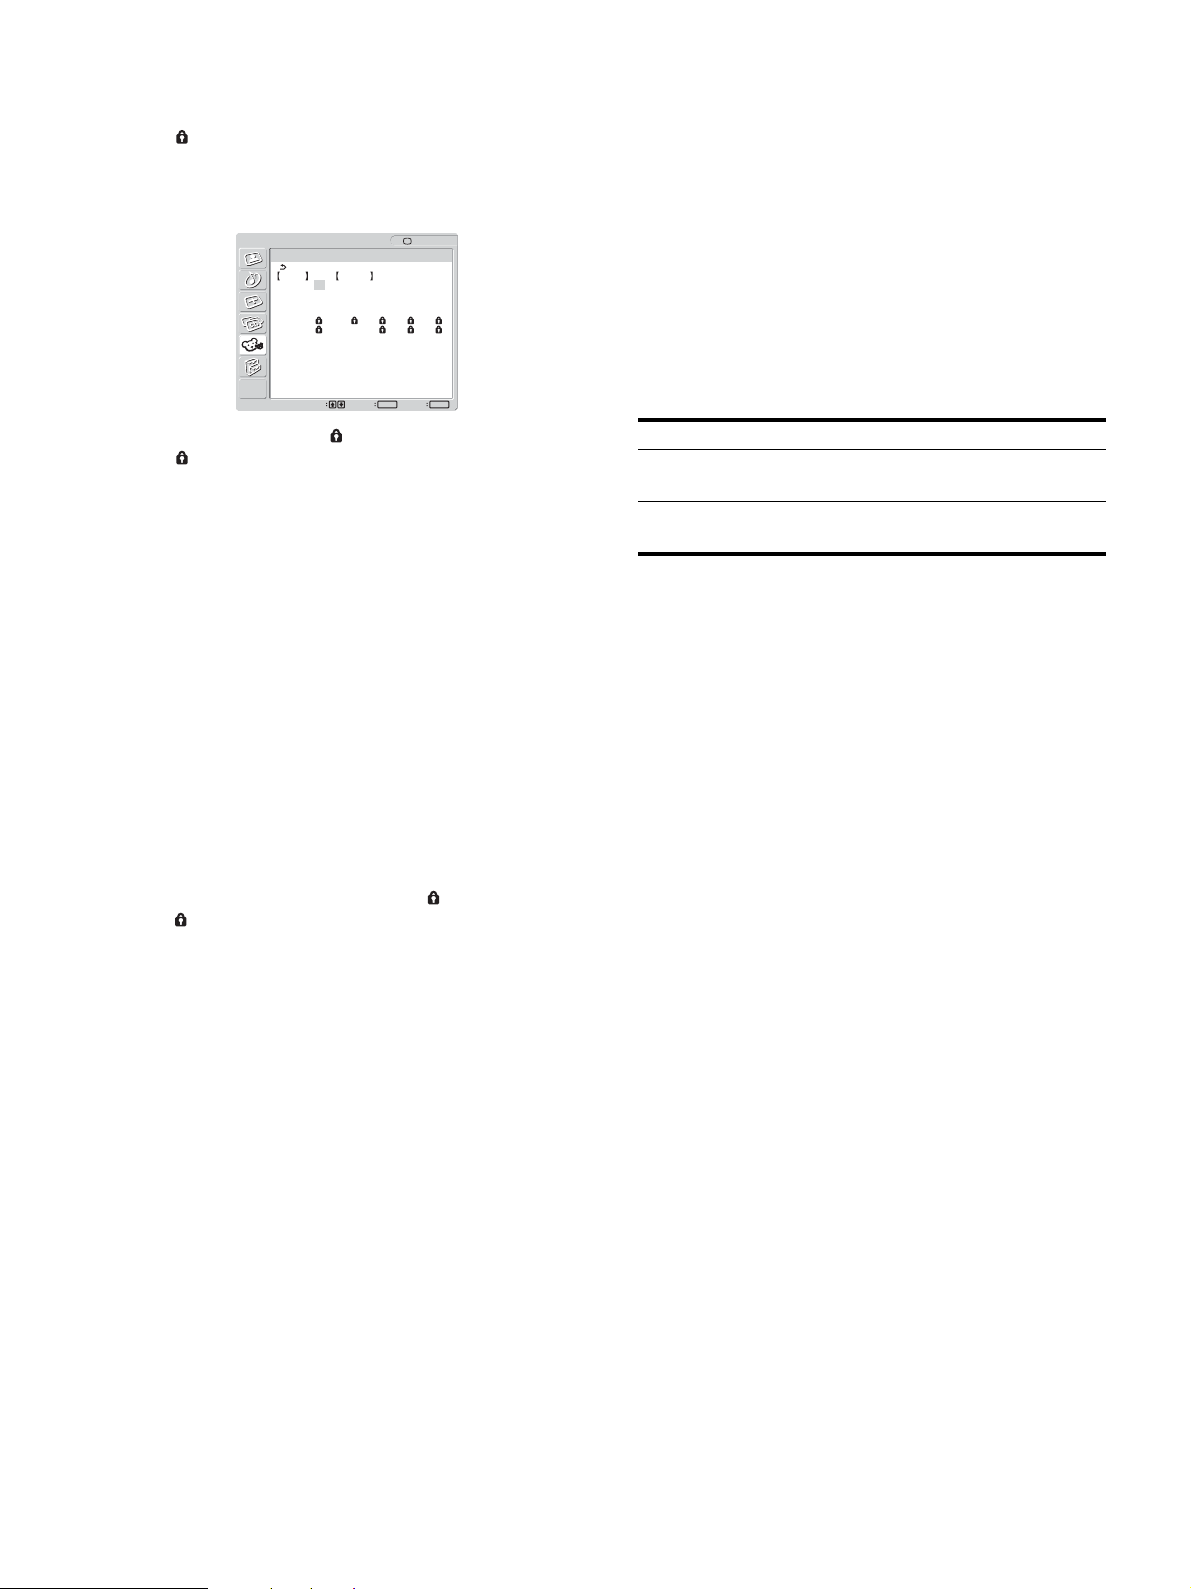
7Press the M/m buttons to select the TV rating to be
blocked and press the OK button.
The indicator automatically appears beside the selected
rating and all ratings below it, indicating that the programs
that match the ratings will be blocked.
Example: TV rating in the U.S.A.
OK
Set Exit
: TV
MENU
Parent
TV Rating
Rating Content
TV-Y: –
TV-Y7: – FV: –
TV-G: –
TV-PG: – D:– L: – S: – V: –
TV-14: D: L: S: V:
TV-MA: L: S: V:
Select
To unlock a rating, select and press the OK button.
The indicator changes to “–” and all ratings above it are
unlocked.
Some U.S. TV ratings have additional content ratings called
“extenders.”
The extenders are defined as follows:
D (sexually suggestive Dialogue), FV (Fantasy Violence), L
(coarse Language), S (Sexual situations) and V (Violence).
By setting the extenders, you can define additional viewing
limits.
For more details of extenders, see page 29.
All of the extenders included in the selected ratings will be
blocked. If you want to allow any of them to be viewed, go to
step 8. Otherwise, go to step 10.
To block programs or movies broadcast without a
rating
The unrated option allows you to block programs or movies that
are broadcast without a rating.
The unrated option is available only when you have selected
“U.S.A.” as your country/region.
1 Perform steps 1 and 2 of “Selecting a Custom
Rating” on page 27.
2 Press the M/m buttons to select “Unrated” and
press the OK button.
3 Press the M/m buttons to select “Block” and press
the OK button.
Option Description
Allow Allows programs and movies that are
broadcast without a rating.
Block Blocks all programs and movies that
are broadcast without a rating.
4 Press the MENU button to exit the menu screen.
Note
If you choose to block unrated TV programs, be aware that the following
types of programs may be blocked: programs broadcast from another
country/region, emergency broadcasts, political programs, sports, news,
public service announcements, religious programs, and weather.
8Press the M/m buttons to select the extender to be
viewed and press the OK button.
“–” appears beside the selected extender, indicating that the
programs that match the extender can be viewed.
To relock the canceled extender, select .
The indicator appears to show that the programs that match
the extender will be blocked again.
9 Repeat step 8 for other extenders.
All programs that match the ratings you select and higher,
except for the extenders that were canceled, will be blocked.
10 Press the MENU button to exit the menu screen.
28
Page 29

x What the Ratings Mean
Ratings in the U.S.A.
Sony’s predetermined ratings
These are original ratings that Sony has predetermined based on
the viewer’s age. Each rating allows you to view certain
programs, as follows:
Option Description
Child Suitable for children under the age of 7.
Viewable U.S. movie ratings: G, NR, and N/A
Viewable U.S. TV ratings: TV-Y, TV-G, and
TV-NR
Youth Suitable for children aged 7 and older.
Viewable U.S. movie ratings: G, PG, NR, and
N/A
Viewable U.S. TV ratings: TV-Y, TV-Y7, TVG, TV-PG, and TV-NR
Y.Adult
(Young Adult)
For descriptions of Child, Youth, and Y.Adult (Young Adult)
ratings, see the following custom rating options.
U.S. movie ratings
U.S. movie ratings are for movies (including those shown on TV)
rated according to the Motion Picture Association of America
(MPAA) Guidelines.
Option Description
G (General Audiences
– All Ages Admitted)
PG (Parental
Guidance Suggested –
Some Material May
Not Be Suitable For
Children)
PG-13 (Parents
Strongly Cautioned –
Some Material May
Be Inappropriate For
Children Under 13)
R (Restricted – Under
17 Requires
Accompanying Parent
Or Adult Guardian)
NC-17 or X (No One
17 And Under
Admitted)
Suitable for children aged 13 and older.
Viewable U.S. movie ratings: G, PG, PG-13,
NR, and N/A
Viewable U.S. TV ratings: TV-Y, TV-Y7, TVG, TV-PG, TV-14, and TV-NR
In G-rated films no strong words are
used, the violence is at a minimum,
nudity and sex scenes are not present,
nor is there any drug use.
This is a film which may need to be
monitored first by parents.
Parents are alerted to be very careful
about the attendance of their underteenage children when viewing films
with this rating.
This film includes hard language,
tough violence, nudity, drug abuse or
other elements of concern.
This is a film that most parents would
consider not suitable for children aged
17 and under.
There may be violence, sex, abhorrent
behavior, drug abuse or other elements
of concern.
U.S. TV ratings
U.S. TV ratings are for TV programs rated according to the U.S.
Television Parental Guidelines.
Option Description
TV-Y (All
Children)
TV-Y7
(Directed to
Older
Children)
TV-G
(General
Audience)
TV-PG
(Parental
Guidance
Suggested)
TV-14
(Parents
Strongly
Cautioned)
TV-MA
(Mature
Audience
Only)
About the extenders of U.S. TV ratings
TV-Y7, TV-PG, TV-14 and TV-MA ratings have additional
content ratings called “extenders” to define additional viewing
limits. The extenders are defined as follows:
Option Description
FV (Fantasy Violence) Programs containing cartoon violence
D (sexually suggestive
Dialogue)
L (coarse Language) Programs containing coarse language.
S (Sexual situations) Programs containing sexual content.
V (Violence) Programs containing violence.
This program is designed for young children
aged 2 – 6 and is appropriate for all children.
This program is designed for children aged 7
and older. Themes and elements in this
program may include mild fantasy violence or
slapstick violence, or may frighten children
under the age of 7.
Most parents would find this program suitable
for all ages. It contains little or no violence, no
strong language and little or no sexual
dialogue or situations.
This program contains some material that
parents may find unsuitable for younger
children.
This program contains some material that
many parents would find unsuitable for
children under the age of 14.
This program is specifically designed to be
viewed by adults and therefore may be
unsuitable for children under the age of 17.
occurring in TV-Y7 programs only.
Programs containing suggestive
dialogue, or sexual innuendo.
There may be some profanity, violence
or brief nudity in these programs.
US
29
Page 30

Ratings in Canada
Sony’s predetermined ratings
These are original ratings that Sony has predetermined based on
the viewer’s age. Each rating allows you to view certain
programs, as follows:
Option Description
Child Suitable for children under the age of 8.
Viewable Canadian English Language ratings:
C and G
Viewable Canadian French Language ratings:
G
Viewable U.S. TV ratings: TV-Y, TV-G, and
TV-NR
Youth Suitable for children aged 8 and older.
Viewable Canadian English Language ratings:
C, G, C8+, and PG
Viewable Canadian French Language ratings:
G and 8 ans+
Viewable U.S. TV ratings: TV-Y, TV-Y7, TVG, TV-PG, and TV-NR
Y.Adult
(Young Adult)
For descriptions of Child, Youth, and Y.Adult (Young Adult)
ratings, see the following custom rating options.
Canadian English Language ratings
The Canadian English Language ratings are for TV programs in
English broadcast in Canada.
Option Description
C (Programming
intended for children
under the age of 8)
C8+ (Programming
generally considered
acceptable for children
aged 8 and older to
watch on their own)
G (General Audience) Will contain very little violence, either
PG (Parental
Guidance)
Suitable for children aged 14 and older.
Viewable Canadian English Language ratings:
C, G, C8+, PG, and 14+
Viewable Canadian French Language ratings:
G, 8 ans+, and 13 ans+
Viewable U.S. TV ratings: TV-Y, TV-Y7, TVG, TV-PG, TV-14, and TV-NR
There will be no realistic scenes of
violence or no offensive language,
nudity or sexual content. Careful
attention is paid to themes, which
could threaten children’s sense of
security and well-being.
Violence will not be portrayed as the
preferred, acceptable, or only way to
resolve conflict; or children will not be
encouraged to imitate dangerous acts
which they may see on television.
There will be no profanity, nudity or
sexual content.
physical or verbal or emotional. There
may be some inoffensive slang, no
profanity and no nudity.
Programming intended for a general
audience but which may not be
suitable for younger children. Parents
may consider some content
inappropriate for unsupervised
viewing by children aged 8 – 13.
Option Description
14+ (Programming
contains themes or
content which may not
be suitable for viewers
under the age of 14)
18+ (Adult) May contain violence integral to the
Canadian French Language ratings
The Canadian French Language ratings are for TV programs in
French broadcast in Canada.
Option Description
G (General) Programming intended for audiences
8 ans+ (8+ General –
Not recommended for
young children)
13 ans+
(Programming may
not be suitable for
children under the age
of 13)
16 ans+
(Programming is not
suitable for children
under the age of 16)
18 ans+
(Programming
restricted to adults)
Parents are strongly cautioned to
exercise discretion in permitting
viewing by pre-teens and early teens.
development of the plot, character or
theme, intended for adult audiences.
May contain graphic language and
explicit portrayals of nudity and/or
sex.
of all ages. Contains no violence, or
the violence it contains is minimal or is
depicted appropriately with humor or
caricature or in an unrealistic manner.
Programming intended for a broad
audience but contains light or
occasional violence that could disturb
young children. Viewing with an adult
is recommended for young children
(under the age of 8).
Viewing with an adult is strongly
recommended for children under the
age of 13.
Contains frequent scenes of violence
or intense violence.
Contains constant violence or scenes
of extreme violence.
30
Page 31

Option menu
You can adjust the following items using the “Option” menu.
•PIP/PAP
• Caption Vision
• Input Sensing
• Language
• Menu Position
Option
PIP/PAP
Caption Vision :
Input Sensing : On
Language : English
Menu Position
Menu Lock : Off
Demo Mode : Off
All Reset
DVI-D: PC 1
• Menu Lock
• Demo Mode
• All Reset
Select
1680 × 1050/60 Hz
OK
Set
MENU
Exit
x Setting “PIP” (Picture In Picture) or “PAP”
(Picture And Picture) (for PC 1/PC 2 only)
When the “PIP/PAP Setting” menu is set to “PIP On” or “PAP
On,” pictures from two input sources are displayed on the screen
at the same time. When “PIP On” is set, the main picture is
displayed in full size, and the sub picture is displayed smaller in
the corner of the screen. When “PAP On” is set, two same-size
pictures are displayed in the center of the screen. The left screen
shows the main picture, the right screen shows the sub picture.
Also, you can choose either the sound from the main picture or the
sub picture.
5Press the M/m buttons to select the desired mode
and press the OK button.
• PIP On: Pictures from two input sources are displayed
on the screen. The main picture is displayed in
full size, and the sub picture is displayed
smaller in the corner of the screen. You can
select the input for sub picture, the sub picture’s
position, size, and audio input source.
• PAP On: Pictures from two input sources are displayed
on the screen. Two same-size pictures are
displayed in the center of the screen. The left
screen shows the main picture, the right screen
shows the sub picture. You can select the input
for sub picture and audio input source.
• Off: The PIP or PAP function is turned off.
To select the input for sub picture (PIP function: On/
PAP function: On)
1 Press the MENU button.
The main menu appears on the screen.
2Press the M/m buttons to select (Option) and
press the OK button.
The “Option” menu appears on the screen.
Tip
You can also switch the “PIP” or “PAP” setting by pressing the
button repeatedly.
To switch the PIP or PAP function on and off
1 Press the MENU button.
The main menu appears on the screen.
2 Press the M/m buttons to select (Option) and
press the OK button.
The “Option” menu appears on the screen.
3 Press the M/m buttons to select “PIP/PAP” and
press the OK button.
4 Press the M/m buttons to select “PIP/PAP Setting”
and press the OK button.
The “PIP/PAP Setting” menu appears on the screen.
Option
PIP/PAP
PIP/PAP Setting : PIP On
PIP/PAP : PAP On
PIP Size : Off
PIP Position
Audio Select :
Select
DVI-D: PC 1
1680 × 1050/60 Hz
OK
Set Exit
MENU
3Press the M/m buttons to select “PIP/PAP” and
press the OK button.
4Press the M/m buttons to select “PIP/PAP Setting”
and press the OK button.
The “PIP/PAP Setting” menu appears on the screen.
5Press the M/m buttons to select “PIP On” or “PAP
On” and press the OK button.
6Press the M/m buttons to select “PIP/PAP” and
press the OK button.
The “PIP/PAP” menu appears on the screen.
7Press the M/m buttons to select the desired input
source and press the OK button.
• TV: A TV program is displayed in the sub-
picture area.
• COMPONENT: The picture sent from the video
equipment connected to the display’s
video input jacks for COMPONENT is
displayed in the sub-picture area.
•VIDEO 1: The picture sent from the video
equipment connected to the display’s
video input jacks for VIDEO 1 is
displayed in the sub-picture area.
• VIDEO 2: The picture sent from the video
equipment connected to the display’s
video input jacks for VIDEO 2 is
displayed in the sub-picture area.
US
31
Page 32
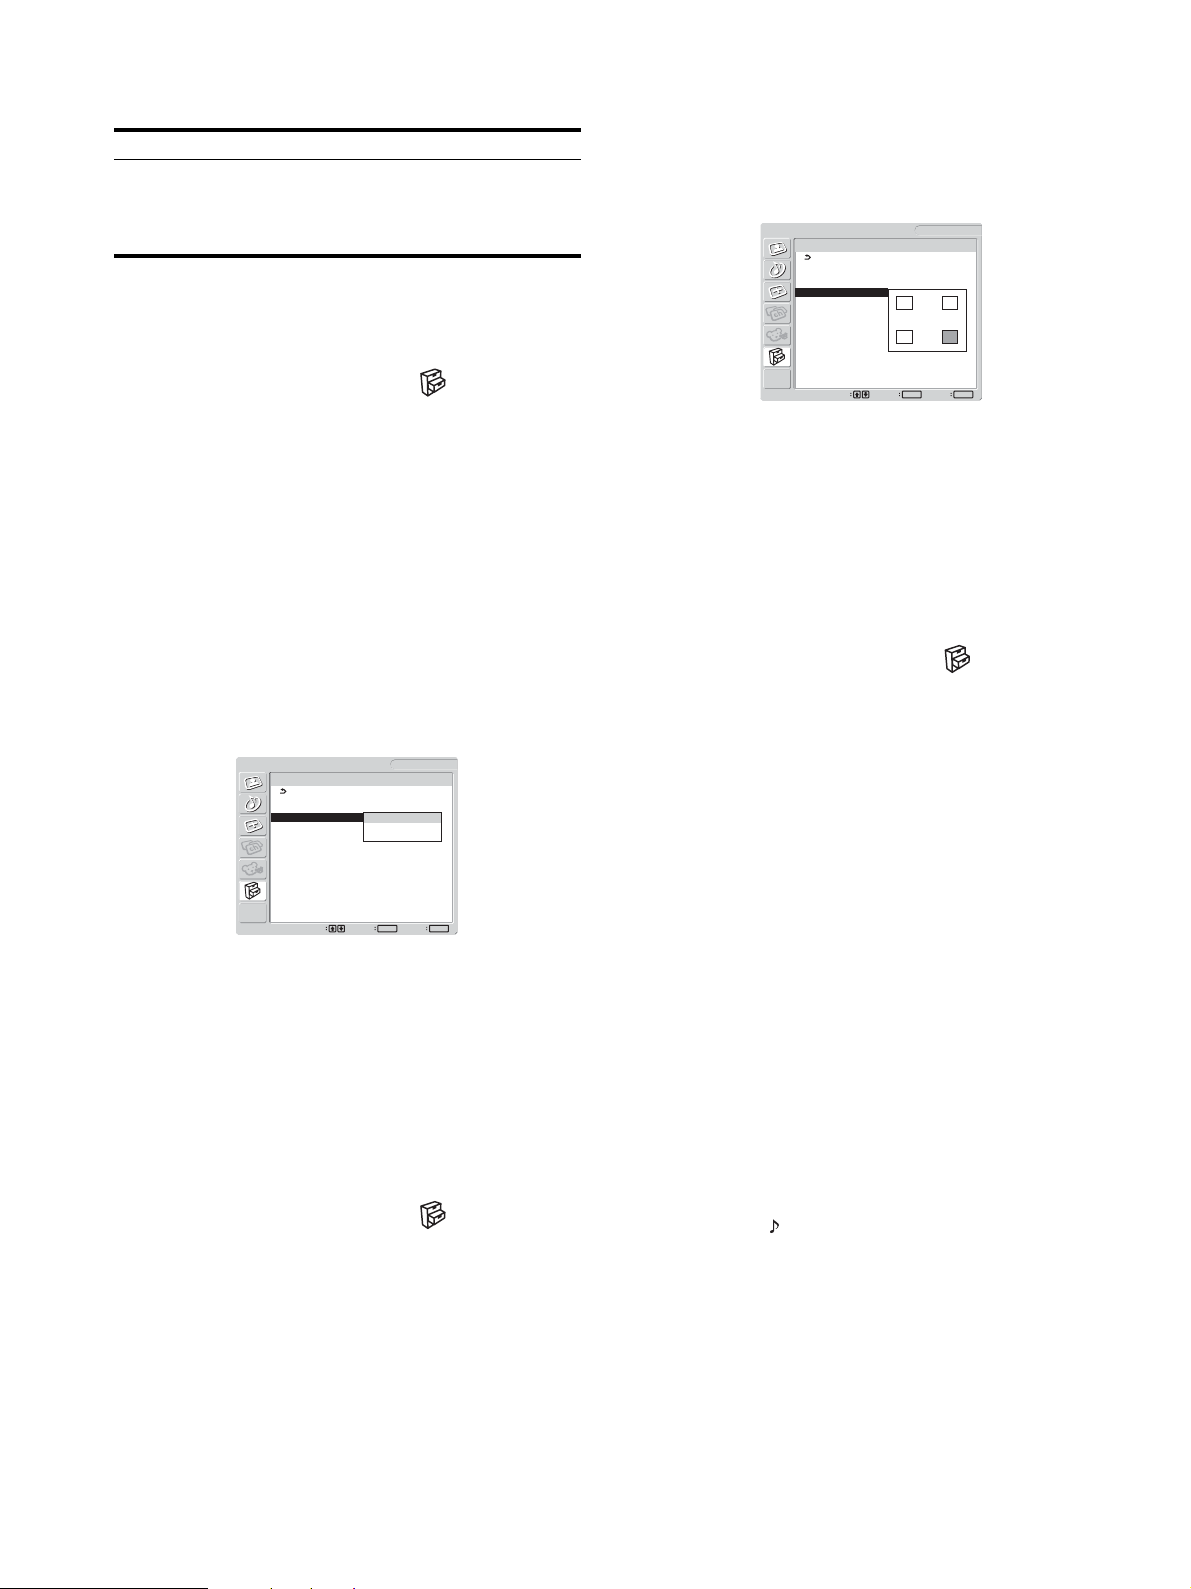
Note
The inputs for main/sub pictures must be selected as shown below.
Main Sub
PC 1
PC 2
TV
COMPONENT
VIDEO 1
VIDEO 2
To change the sub picture’s size (PIP function: On)
1 Press the MENU button.
The main menu appears on the screen.
2Press the M/m buttons to select (Option) and
press the OK button.
The “Option” menu appears on the screen.
3Press the M/m buttons to select “PIP/PAP” and
press the OK button.
5 Press the M/m buttons to select “PIP On” and press
the OK button.
6 Press the M/m buttons to select “PIP Position” and
press the OK button.
The “PIP Position” menu appears on the screen.
Option
PIP/PAP
PIP/PAP Setting : PIP On
PIP/PAP : TV
PIP Size : Large
PIP Position
Audio Select :
Select
DVI-D: PC 1
1680 × 1050/60 Hz
OK
Set Exit
MENU
7 Press the M/m buttons to select the desired position
and press the OK button.
You can choose one of 4 positions for the sub picture.
4Press the M/m buttons to select “PIP/PAP Setting”
and press the OK button.
The “PIP/PAP Setting” menu appears on the screen.
5Press the M/m buttons to select “PIP On” and press
the OK button.
6Press the M/m buttons to select “PIP Size” and
press the OK button.
The “PIP Size” menu appears on the screen.
Option
PIP/PAP
PIP/PAP Setting : PIP On
PIP/PAP : TV
PIP Size : Large
PIP Position Middle
Audio Select : Small
Select
DVI-D: PC 1
1680 × 1050/60 Hz
OK
Set Exit
MENU
7Press the M/m buttons to select the desired size and
press the OK button.
• Large
• Middle
•Small
To change the sub picture’s position (PIP function: On)
1 Press the MENU button.
The main menu appears on the screen.
To select the audio input source (PIP function: On/PAP
function: On)
1 Press the MENU button.
The main menu appears on the screen.
2 Press the M/m buttons to select (Option) and
press the OK button.
The “Option” menu appears on the screen.
3 Press the M/m buttons to select “PIP/PAP” and
press the OK button.
4 Press the M/m buttons to select “PIP/PAP Setting”
and press the OK button.
The “PIP/PAP Setting” menu appears on the screen.
5 Press the M/m buttons to select “PIP On” or “PAP
On” and press the OK button.
6 Press the M/m buttons to select “Audio Select” and
press the OK button.
The “Audio Select” menu appears on the screen.
7 Press the M/m buttons to select the desired source
and press the OK button.
• Main: The sound from the input source selected for the
main picture will be used.
• Sub: The sound from the input source selected for the
sub picture will be used.
2Press the M/m buttons to select (Option) and
press the OK button.
The “Option” menu appears on the screen.
3Press the M/m buttons to select “PIP/PAP” and
press the OK button.
4Press the M/m buttons to select “PIP/PAP Setting”
and press the OK button.
The “PIP/PAP Setting” menu appears on the screen.
Tip
If you select “Sub,” is displayed in the screen.
32
Page 33
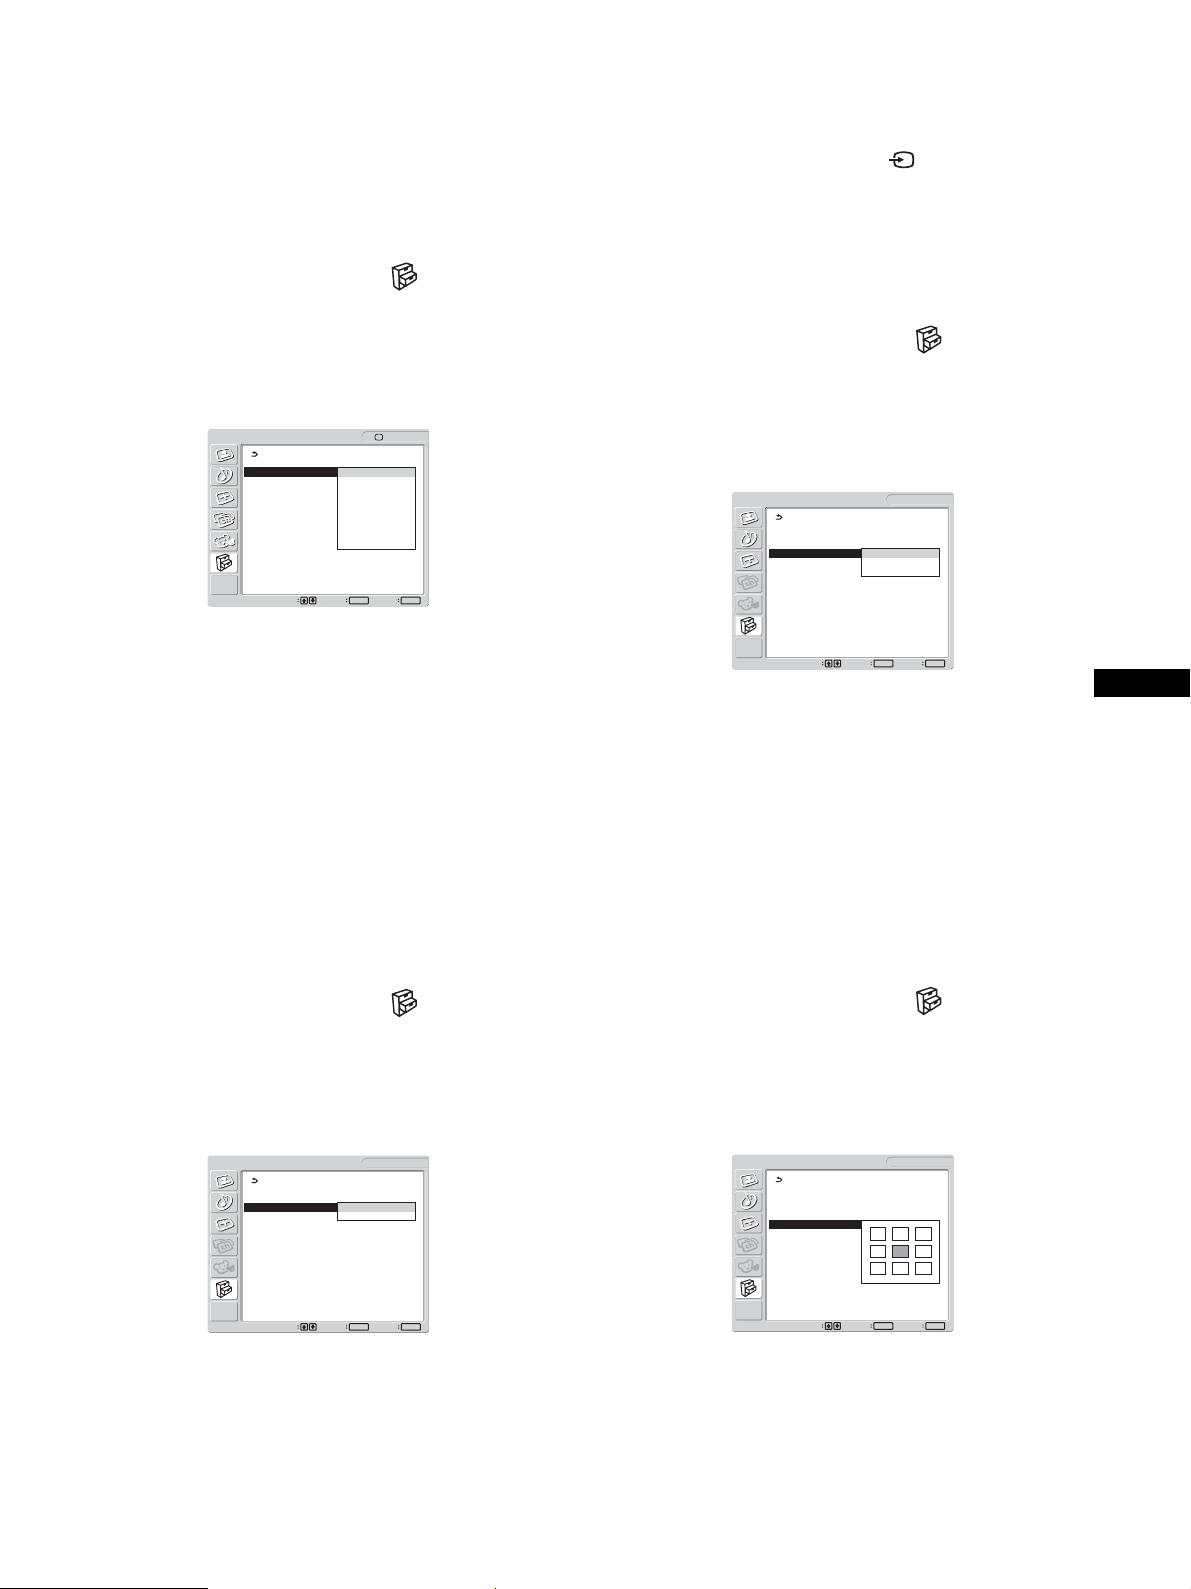
x Setting “Caption Vision” (for TV/VIDEO 1/
VIDEO 2 only)
You can display Caption Vision if the broadcaster offers this
service.
1 Press the MENU button.
The main menu appears on the screen.
signal, the display try to detect a signal from the
other computer input and display it, if available.
•Off: The display does not switch the input
automatically. Press the button or input select
buttons to change the input.
x Setting “Language”
2 Press the M/m buttons to select (Option) and
press the OK button.
The “Option” menu appears on the screen.
3 Press the M/m buttons to select “Caption Vision”
and press the OK button.
The “Caption Vision” menu appears on the screen.
OK
Set Exit
: TV
MENU
Option
PIP/PAP
Caption Vision : Off
Input Sensing : CC1
Language : CC2
Menu Position CC3
Menu Lock : CC4
Demo Mode : Text 1
All Reset Text 2
Text 3
Text 4
Select
4 Press the M/m buttons to select the desired type of
Caption Vision and press the OK button.
• Off: Caption Vision is turned off.
• CC1, CC2, CC3, CC4: A printed version of the dialogue
or sound effects of a program is displayed. (CC1 is
suitable for most programs.)
• Text1, Text2, Text3, Text4: Network/station information
is presented using either half or the whole screen.
x Setting “Input Sensing” (for PC 1/PC 2 only)
You can set the display to automatically detect an available input
signal, and switches the input.
1 Press the MENU button.
The main menu appears on the screen.
2Press the M/m buttons to select (Option) and
press the OK button.
The “Option” menu appears on the screen.
3Press the M/m buttons to select “Language” and
press the OK button.
The “Language” menu appears on the screen.
Option
PIP/PAP
Caption Vision :
Input Sensing : On
Language English
Menu Position Français
Menu Lock : Español
Demo Mode : Off
All Reset
Select
DVI-D: PC 1
1680 × 1050/60 Hz
OK
Set Exit
MENU
4Press the M/m buttons to select a language and
press the OK button.
• English
• Français: French
• Español: Spanish
x Setting “Menu Position”
You can change the menu position if it is blocking an image on
the screen.
US
1 Press the MENU button.
The main menu appears on the screen.
2 Press the M/m buttons to select (Option) and
press the OK button.
The “Option” menu appears on the screen.
3 Press the M/m buttons to select “Input Sensing”
and press the OK button.
The “Input Sensing” menu appears on the screen.
Option
PIP/PAP
Caption Vision :
Input Sensing : On
Language : Off
Menu Position
Menu Lock : Off
Demo Mode : Off
All Reset
Select
DVI-D: PC 1
1680 × 1050/60 Hz
OK
Set Exit
MENU
4 Press the M/m buttons to select either “On” or “Off”
and press the OK button.
• On: When a signal from the selected input source drops
off or you have selected the input that receives no
1 Press the MENU button.
The main menu appears on the screen.
2Press the M/m buttons to select (Option) and
press the OK button.
The “Option” menu appears on the screen.
3Press the M/m buttons to select “Menu Position”
and press the OK button.
The “Menu Position” menu appears on the screen.
Option
PIP/PAP
Caption Vision :
Input Sensing : On
Language : English
Menu Position
Menu Lock :
Demo Mode :
All Reset
Select
DVI-D: PC 1
1680 × 1050/60 Hz
OK
Set Exit
MENU
4 Press the M/m buttons to select the desired position
and press the OK button.
You can choose one of 9 positions where the menu will
appear.
33
Page 34

x Setting “Menu Lock”
You can lock in the menu adjustments to prevent accidental
adjustments or resetting.
x Resetting to the default setting
This function resets the adjustments for all inputs to the default
setting. Use this function with care.
1 Press the MENU button.
The main menu appears on the screen.
2Press the M/m buttons to select (Option) and
press the OK button.
The “Option” menu appears on the screen.
3Press the M/m buttons to select “Menu Lock” and
press the OK button.
The “Menu Lock” menu appears on the screen.
Option
PIP/PAP
Caption Vision :
Input Sensing : On
Language : English
Menu Position
Menu Lock On
Demo Mode : Off
All Reset
Select
DVI-D: PC 1
1680 × 1050/60 Hz
OK
Set Exit
MENU
4Press the M/m buttons to select either “On” or “Off”
and press the OK button.
• On: If “On” has been selected, when you attempt to
operate the MENU button, the “Option” menu
appears on the screen; when you attempt to operate
the button, the icon appears.
• Off: The lock on the menu adjustments is released.
1 Press the MENU button.
The main menu appears on the screen.
2 Press the M/m buttons to select (Option) and
press the OK button.
The “Option” menu appears on the screen.
3 Press the M/m buttons to select “All Reset” and
press the OK button.
The “All Reset” menu appears on the screen.
Option
PIP/PAP
Caption Vision :
Input Sensing : On
Language : English
Menu Position
Menu Lock : Off
Demo Mode : Off
All Reset OK
Cancel
Select
DVI-D: PC 1
1680 × 1050/60 Hz
OK
Set Exit
MENU
4 Press the M/m buttons to select the desired mode
and press the OK button.
• OK: To reset all of the adjustment data to the default
settings. Note that the “Language” setting and the
settings in Parent menu are not reset by this
method.
• Cancel: To cancel resetting and return to the menu screen.
To release the lock of the menu adjustments
1 Press the MENU button.
The “Option” menu appears.
2 Press the OK button.
The “Menu Lock” menu appears.
3Press the M/m buttons to select “Off” and press the
OK button.
The lock on the menu adjustments is released.
x Setting “Demo Mode”
You can set the “Demo Mode” function to on or off.
If you set the “Demo Mode” menu to “On,” the demonstration
image appears on the screen.
To cancel the “Demo Mode” function, set the “Demo Mode”
menu to “Off”.
Note
While the “Demo Mode” is on, only the 1 (power) switch and MENU
button will operate.
Note
If you select OK in step 4, the adjustments made using the “Channel”
menu are also set to the default. Therefore, after selecting OK, you need
to run “Auto Program” to watch TV programs (page 15).
34
Page 35

Technical Features
Controlling the volume
Using the display’s speakers or headphones, you can listen to
sound from your computer or other equipment connected to the
display’s audio input jacks.
You can control the volume by inputting either PC 1/PC 2 or TV/
COMPONENT/VIDEO 1/VIDEO 2.
You can control the volume by using the “Volume” adjustment
bar.
1 Press the VOL+/– buttons when there is no menu
displayed on the screen.
,
2 Press the VOL+/– buttons to set the desired volume
level.
The bar automatically disappears after about 5 seconds.
Volume 30
Power saving function
If the display is connected to a computer or video graphics board
that is DPMS (Display Power Management Standard) for Analog
input/DMPM (DVI Digital Monitor Power management) for
Digital input compliant, the display will automatically reduce
power consumption as shown below.
Power mode Power consumption 1 (power)
normal
operation
active off*
(deep sleep)**
* When your computer enters the “active off” mode, the input signal is
cut and “No Input Signal” appears on the screen. After 5 seconds, the
display enters the power saving mode.
** “Deep sleep” is a power saving mode defined by the Environmental
Protection Agency.
Tip
When the display is in the standby mode or the Sleep timer is activated,
the 1 (power) indicator lights up in red.
99 W (max.) green
2 W (max.) orange
indicator
US
Notes
• You cannot adjust the volume using the M/m buttons on the display
when the main menu is displayed on the screen. Use the VOL +/–
buttons on the remote control instead.
• You cannot adjust the volume using the M/m buttons on the remote
control.
• When your display is in power saving mode, no sound comes from the
speakers or the headphones.
35
Page 36

Setting the Picture Mode
Automatic picture quality
You can select the Picture Mode using the button or “Mode”
in the “Picture” menu.
When you select “Auto,” the display automatically adjusts the
screen brightness according to the brightness of the surroundings
(Automatic brightness adjustment function). For more
information, see “Automatic brightness adjustment function
(light sensor)”.
For details on using the “Mode” menu, see page 18.
For details on using the button, see below.
Press the button repeatedly.
Each time you press the button, the Picture Mode changes as
follows.
PC 1/PC 2
Movie
PC
Auto
Each indication appears on the screen and Picture Mode is
changed. The menu automatically disappears after about 10
seconds.
TV/COMPONENT/
VIDEO 1/VIDEO 2
Vivid Game
Standard
ECO
Auto
100100
adjustment function
(for PC 2 only)
When the display receives an input signal, it
automatically adjusts the picture’s position and
sharpness (phase/pitch), and ensures that a clear
picture appears on the screen.
The factory preset mode
When the display receives an input signal, it automatically
matches the signal to one of the factory preset modes stored in the
display’s memory to provide a high quality picture at the center of
the screen. If the input signal matches the factory preset mode, the
picture appears on the screen automatically with the appropriate
default adjustments.
If input signals do not match one of the factory
preset modes
When the display receives an input signal that does not match one
of the factory preset modes, the automatic picture quality
adjustment function of this display is activated to ensure that a
clear picture always appears on the screen (within the following
display frequency ranges):
Horizontal frequency: 28–86 kHz
Vertical frequency: 48–85 Hz (resolution < 1,280 × 1,024)
48–75 Hz (resolution < 1,400 × 1,050)
48–60 Hz (resolution ≤ 1,680 × 1,050)
Consequently, the first time the display receives input signals that
do not match one of the factory preset modes, the display may
take a longer time than normal to display the picture on the screen.
This adjustment data is automatically stored in memory so that
next time, the display will function in the same way as when the
display receives the signals that match one of the factory preset
modes.
Automatic brightness adjustment
function
This display is provided with a feature to automatically adjust the
screen brightness according to the brightness of the surroundings.
The brightness of the screen is set to the most appropriate level by
setting the Picture Mode to “Auto” with the
in the “Picture” menu. (When you select the input from PC 1 or
PC 2, “Movie” is selected as the default. When you select the
input from COMPONENT, VIDEO 1, VIDEO 2, or TV, “Vivid”
is selected as the default.)
Also, when you set the Picture Mode to “Auto” with the
button, the adjustment bar is displayed. You can adjust the bar
with the M/m buttons. Screen brightness changes according to
the level you set.
(light sensor)
button or “Mode”
If you adjust the phase, pitch, and picture position
manually
For some input signals, the automatic picture quality adjustment
function of this display may not completely adjust the picture
position, phase, and pitch. In this case, you can set these
adjustments manually (page 24). If you set these adjustments
manually, they are stored in memory as user modes and
automatically recalled whenever the display receives the same
input signals.
36
Page 37

Turning off the display
automatically
VIDEO 1/VIDEO 2 only)
(for TV/COMPONENT/
Troubleshooting
Before contacting technical support, refer to this section.
You can set the display to turn off automatically after a
predetermined period of time (15, 30, 45, 60, or 90 minutes).
Press the SLEEP button on the remote control
repeatedly.
Each time you press the SLEEP button, the period of time changes
as follows:
Off
15 min
SLEEP
30 min
45 min
60 min
90 min
To cancel the Sleep timer
Press the SLEEP button repeatedly until “Off” appears.
Tips
• If you turn the display off, and then turn it on again, the Sleep timer is
set to off.
• While the Sleep timer is activated, the 1 (power) indicator lights up in
red.
• If you press the SLEEP button, while Sleep timer is activated, the
remaining time in the timer is displayed.
• If the input from PC 1 or PC 2 is selected while Sleep timer is activated,
Sleep timer is canceled.
On-screen messages
If there is something wrong with the input signal, one of the
following messages appears on the screen. To solve the problem,
see “Trouble symptoms and remedies” on page 39.
If “Out Of Range” appears on the screen
This indicates that the input signal is not supported by the
display’s specifications. Check the following items.
For more information about on-screen messages, see “Trouble
symptoms and remedies” on page 39.
If “xxx.x kHz / xxx Hz” is displayed
This indicates that either the horizontal or vertical frequency
is not supported by the display’s specifications.
The figures indicate the horizontal and vertical frequencies of
the current input signal.
Information
Ou t O f Range
XXX . XkHz / X
If “Resolution i1680 × 1050” is displayed
This indicates that the resolution is not supported by the
display’s specifications.
Information
Ou t O f Range
Resol u t ion>1
If “No Input Signal” appears on the screen
This indicates that no signal is being input via the currently
selected connector.
Information
No I npu t S i gna l
Go To Powe r Save
DV I - D 1CP:
XXHz
DV I - D 1CP:
680X1050
DV I - D 1CP:
US
37
Page 38

If “Cable Disconnected” appears on the screen
This indicates that the video signal cable has been disconnected
from the currently selected connector. After 45 seconds, the
Power Save Mode activates.
Information
Cabl e Di sconnec t ed
DV I - D 1CP:
If “Power will be turned off by off timer soon”
appears on the screen
This indicates that the power provided to the display will be
turned off by off timer in 1 minute.
If “Feature Not Available” appears on the screen
This indicates that the function which you have attempted to
operate is not available.
38
Page 39

Trouble symptoms and remedies
If a problem occurs as a result of a connected computer or other equipment, refer to the connected computer/equipment’s instruction manual.
For PC 1/PC 2
Symptom Check these items
No picture.
If the 1 (power) indicator is not lit,
or if the 1 (power) indicator will not
light up when the 1 (power) switch
is pressed,
If “Cable Disconnected” appears on
the screen,
If “No Input Signal” appears on the
screen, or the 1 (power) indicator is
orange,
If “Out Of Range” appears on the
screen (page 37),
If using Windows, • If you replaced an old display with this display, reconnect the old display and do the
If using a Macintosh system, • When connecting a Macintosh computer, use an adapter (not supplied) if necessary.
• Check that the power cord is properly connected.
• Check that the video signal cable is properly connected and all plugs are firmly seated in
their sockets (page 9).
• Check that the video input connector’s pins are not bent or pushed in.
• Check that the input select setting is correct (page 13).
• A non-supplied video signal cable is connected. If you connect a non-supplied video
signal cable, “Cable Disconnected” may appear on the screen. This is not a malfunction.
• Check that the video signal cable is properly connected and all plugs are firmly seated in
their sockets (page 9).
• Check that the video input connector’s pins are not bent or pushed in.
• Check that the input select setting is correct (page 13).
xProblem caused by a computer or other equipment connected, and not
caused by the display
• The computer is in the power saving mode. Try pressing any key on the keyboard or
moving the mouse.
• Check that your graphics board is installed properly.
• Change your graphic board to the latest driver. Or match the version of your graphic board
to the current OS.
• When using a laptop computer, set the output of your computer to video out (for details on
video out setting, contact your computer manufacturer).
• Check that the computer’s power is on.
• Restart the computer.
xProblem caused by a computer or other equipment connected, and not
caused by the display
• Check that the video frequency range is within that specified for the display. If you
replaced an old display with this display, reconnect the old display and adjust the
computer’s graphics board within the following ranges:
Horizontal frequency: 28–86 kHz (Analog RGB), 28–68 kHz (Digital RGB)
Vertical frequency: 48-85 Hz (resolution < 1,280 × 1,024),
48–75 Hz (resolution < 1,400 × 1,050),
48–60 Hz (resolution ≤ 1,680 × 1,050) (Analog RGB), 60 Hz (Digital RGB)
Resolution: 1,680 × 1,050 or less
• Start your OS in Safe mode and restart the computer after setting the resolution. The
setting of safe mode varies depending on your OS. For more details, contact your
computer manufacturer.
following. Select “SONY” from the “Manufacturers” list and select “MFM-HT205” from
the “Models” list on the Windows device selection screen. If “MFM-HT205” does not
appear in the “Models” list, try “Plug & Play.”
Connect the adapter to the computer before connecting the video signal cable.
US
39
Page 40

Symptom Check these items
Picture flickers, bounces,
oscillates, or is scrambled.
Picture is fuzzy. • Adjust the contrast and brightness (page 19).
Picture is ghosting. • Eliminate the use of video cable extensions and/or video switch boxes.
Picture is not centered or sized
properly (PC 2 only).
Picture becomes vertically
stretched, or picture size looks
strange.
Picture is too small. xProblem caused by a computer or other equipment connected, and not
Picture is dark. • Adjust the backlight (page 19).
Wavy or elliptical pattern (moire)
is visible.
Color is not uniform. • Adjust the pitch and phase (PC 2 only) (page 24).
White does not look white. • Adjust the color temperature (page 20).
Display buttons do not operate
( appears on the screen).
Resolution displayed on the menu
screen is incorrect.
• Adjust the pitch and phase (PC 2 only) (page 24).
xProblem caused by a computer or other equipment connected, and not
caused by the display
• Check your graphics board manual for the proper display setting.
• Confirm that the graphics mode (VESA, Macintosh 19'' Color, etc.) and the frequency of
the input signal are supported by this display. Even if the frequency is within the proper
range, some graphics boards may have a sync pulse that is too narrow for the display to
sync with correctly.
• This display does not process interlace signals. Set for progressive signals.
• Adjust the computer’s refresh rate (vertical frequency) to obtain the best possible picture
(60 Hz is recommended).
• Adjusting the sharpness (page 19).
• Adjust the pitch and phase (PC 2 only) (page 24).
xProblem caused by a computer or other equipment connected, and not
caused by the display
• Set the resolution to 1,680 × 1,050 on your computer.
• Check that all plugs are firmly seated in their sockets.
• Adjust the pitch and phase (page 24).
• Adjust the picture position (page 25). Note that some video modes do not fill the screen to
the edges.
xProblem caused by a computer or other equipment connected, and not
caused by the display
• Set the resolution to 1,680 × 1,050 on your computer.
caused by the display
• Set the resolution to 1,680 × 1,050 on your computer.
• Adjust the brightness (page 19).
• Adjust the gamma on the “Gamma” menu (page 20).
• It takes a few minutes for the display to become bright after turning on the display.
• When the Picture Mode is set to “Auto,” the display brightness may become darker in low
ambient light (pages 18, 36).
• Adjust the pitch and phase (PC 2 only) (page 24).
• If “Menu Lock” is set to “On,” set it to “Off” (page 34).
• Depending on the graphics board setting, the resolution displayed on the menu screen may
not coincide with the one set on the computer.
40
Page 41

For TV/COMPONENT/VIDEO 1/VIDEO 2
Symptom Check these items
No picture.
Cannot receive any channels. • Make sure the power cord is connected securely.
• Turn on the power of the display.
• Check antenna cable connections.
No sound./Noisy sound.
Good picture, no sound. • Check audio cable connections.
• Check the volume control.
• Press the MUTING or VOL + button so that “Muting” disappears from the screen
(pages 16, 35).
• Disconnect your headphones.
Black bars appear besides, top
and bottom of the screen.
Remote control does not operate. • The batteries could be weak. Replace the batteries.
Lost password. • Select the (Parent) menu on the menu screen, then enter the following master
Noisy picture when viewing a TV
channel.
• It is depending on the type of the video source. Adjust the screen size using the “Zoom”
menu (page 23).
• Check the polarity of the batteries.
• If the 1 (power) indicator on the display does not light, press the 1 (power) switch on the
display.
• If you intend to operate the TV functions, check the TV input is selected.
• If you intend to operate the TV functions with the “PIP” or “PAP” function, check the TV
input is selected for sub picture.
password: 4357. The master password clears your previous password and allows you to
enter a new password (page 26).
• Set the “NR” menu to “On” to reduce the noise on the picture (page 21)
• Decrease the setting value for the “Sharpness” menu (page 19).
US
If any problem persists, call your authorized Sony dealer and give
the following information:
• Model name: MFM-HT205
• Serial number
• Detailed description of the problem
• Date of purchase
• Name and specifications of your computer and graphics board
• Type of input signals (PC 1/PC 2/TV/COMPONENT/
VIDEO 1/VIDEO 2)
41
Page 42

Specifications
LCD panel
Panel type: a-Si TFT Active Matrix
Screen size:
20 inch (51 cm)
Display resolution:
Horizontal: Max. 1,680 dots
Vertical: Max. 1,050 lines
Signal input
PC 1
Signal format:
Digital RGB (DVI-D) (TMDS Single link)
Operating frequency:
Horizontal: 28–68 kHz
Vertical: 60 Hz
Audio:
Stereo mini jack, 500 mVrms
PC 2
Signal format:
Analog RGB (HD-15D-sub)
Operating frequency:
Horizontal: 28–86 kHz
Vertical: 48–85 Hz (resolution < 1,280 × 1,024)
48–75 Hz (resolution < 1,400 × 1,050)
48–60 Hz (resolution ≤ 1,680 × 1,050)
Signal levels:
RGB signal: 0.7 Vp-p, 75 Ω, positive
SYNC signal:
TTL level, 2.2 kΩ, positive or negative (Separate
horizontal and vertical, or composite sync)
0.3 Vp-p, 75 Ω, negative (Sync on green)
Audio:
Stereo mini jack, 500 mVrms
TV
TV system:
American TV standard (NTSC)
Channel coverage:
VHF: 2 to 13
UHF: 14 to 69
CATV: 1 to 125
Antenna:
75-ohm external terminal for VHF/UHF
COMPONENT
Signal standard:
Component video (Y, P
Y: 1.0 Vp-p, 75-ohm unbalanced, sync negative
: 0.7 Vp-p, 75 Ω
P
B
: 0.7 Vp-p, 75 Ω
P
Signal format:
Audio:
VIDEO 1
Signal standard:
Video format: NTSC, PAL, SECAM
Audio:
VIDEO 2
Signal standard:
Video format: NTSC, PAL, SECAM
Audio:
Plug & Play
VESA, DDC2B
Speaker output
Max. 3 W × 2 +5 W
Headphones output
Stereo minijack
Power requirements
100–240 V AC, 50–60 Hz
Max. 1.2 A
Power consumption
In use (Max.): 99 W
In standby (Max.): 2 W
Operating temperature
0–35
Dimensions (width/height/depth)
Display (upright):
Approx. 523.7 × 406.8 × 197 mm
20 5/8 ×
(
Mass
Approx. 8.2 kg (18 lb. 1 oz.)
Accessories
See page 9.
R
480i (525i), 480p (525p), 576i (625i), 576p (625p),
720p (750p), 1080i (1125i)
RCA jack (stereo), 500 mVrms
S-Video (4-pin mini DIN)
Y: 1.0 Vp-p, 75-ohm unbalanced, sync negative
C: 0.286 Vp-p (Burst signal), 75 Ω
Composite video (RCA jack)
1.0 Vp-p, 75-ohm unbalanced, sync negative
RCA jack (stereo), 500 mVrms
S-Video (4-pin mini DIN)
Y: 1.0 Vp-p, 75-ohm unbalanced, sync negative
C: 0.286 Vp-p (Burst signal), 75 Ω
Composite video (RCA jack)
1.0 Vp-p, 75-ohm unbalanced, sync negative
RCA jack (stereo), 500 mVrms
°C
16 1/
8
×
7 7/8 inches)
, PR) (RCA jack)
B
Design and specifications are subject to change without notice.
42
Page 43

LCD Multi
Function Display
2-661-022-32(1)
MFM-HT205
© 2006 Sony Corporation
Page 44
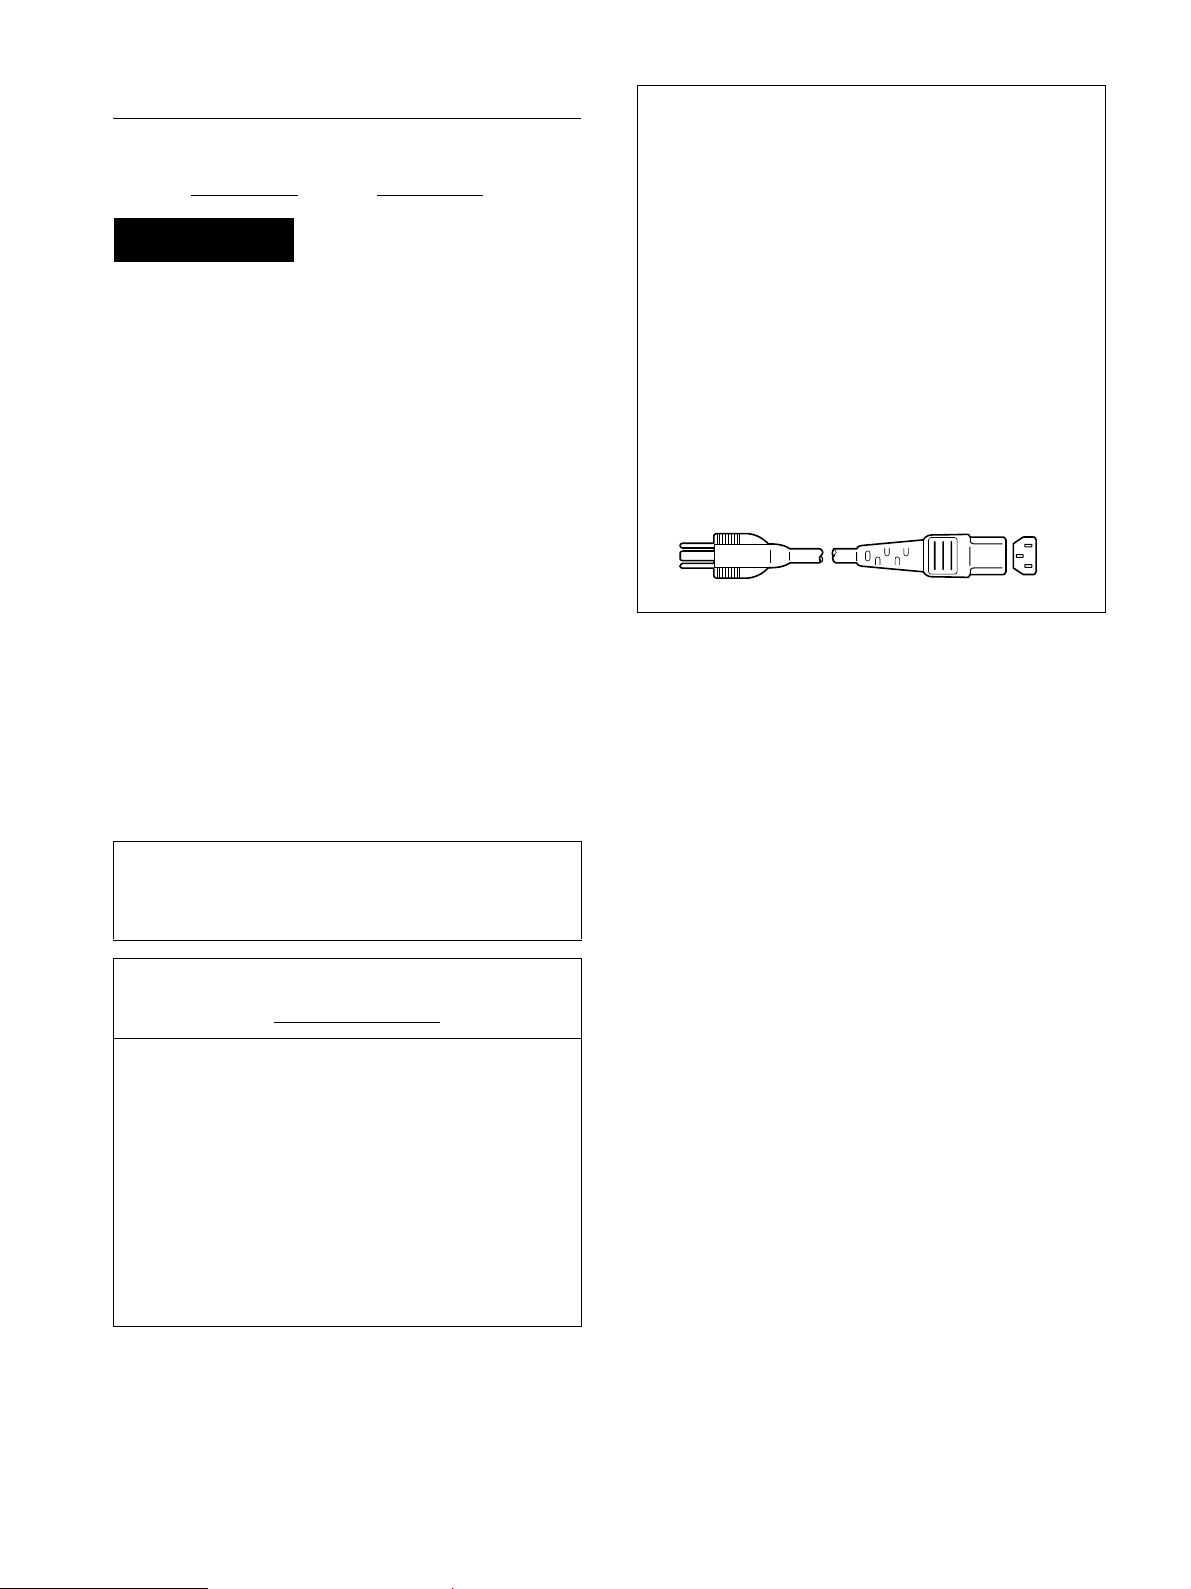
Owner’s Record
The model and serial numbers are located at the rear of the unit.
Record these numbers in the spaces provided below. Refer to them
whenever you call upon your dealer regarding this product.
Model No.
Serial No.
WARNING
Pour réduire le risque d’incendie ou
d’électrocution, placez cet appareil à l’abri de la
pluie et de l’humidité.
Dangerously high voltages are present inside the
unit. Do not open the cabinet. Refer servicing to
qualified personnel only.
FCC Notice
This equipment has been tested and found to comply with the limits
for a Class B digital device, pursuant to Part 15 of the FCC Rules.
These limits are designed to provide reasonable protection against
harmful interference in a residential installation. This equipment
generates, uses, and can radiate radio frequency energy and, if not
installed and used in accordance with the instructions, may cause
harmful interference to radio communications. However, there is no
guarantee that interference will not occur in a particular installation.
If this equipment does cause harmful interference to radio or
television reception, which can be determined by turning the
equipment off and on, the user is encouraged to try to correct the
interference by one or more of the following measures:
– Reorient or relocate the receiving antenna.
– Increase the separation between the equipment and receiver.
– Connect the equipment into an outlet on a circuit different from
that to which the receiver is connected.
– Consult the dealer or an experienced radio/TV technician for help.
You are cautioned that any changes or modifications not expressly
approved in this manual could void your authority to operate this
equipment.
NOTICE
This notice is applicable for USA/Canada only.
If shipped to USA/Canada, install only a UL LISTED/CSA
LABELLED power supply cord meeting the following
specifications:
SPECIFICATIONS
Plug Type Nema-Plug 5-15p
Cord Type SVT or SJT, minimum 3 · 18 AWG
Length Maximum 15 feet
Rating Minimum 7 A, 125 V
NOTICE
Cette notice s’applique aux Etats-Unis et au Canada
uniquement.
Si cet appareil est exporté aux Etats-Unis ou au Canada, utiliser
le cordon d’alimentation portant la mention UL LISTED/CSA
LABELLED et remplissant les conditions suivantes:
SPECIFICATIONS
Type de fiche Fiche Nema 5-15 broches
Cordon Type SVT ou SJT, minimum 3 · 18 AWG
Longueur Maximum 15 pieds
Tension Minimum 7 A, 125 V
IMPORTANTE
Para prevenir cualquier mal funcionamiento y evitar daños, por
favor, lea detalladamente este manual de instrucciones antes
de conectar y operar este equipo.
If you have any questions about this product, you may call;
Sony Customer Information Services Center
1-800-222-7669 or http://www.sony.com/
Declaration of Conformity
Trade Name: SONY
Model: MFM-HT205
Responsible Party: Sony Electronics Inc.
Address: 16530 Via Esprillo,
Telephone Number: 858-942-2230
This device complies with part 15 of the FCC rules. Operation is
subject to the following two conditions: (1) This device may not
cause harmful interference, and (2) this device must accept any
interference received, including interference that may cause
undesired operation.
San Diego, CA 92127 U.S.A.
2
Page 45

Consignes de sécurité importantes
1) Lisez les directives suivantes.
2) Conservez ces directives.
3) Observez et respectez tous les avertissements.
4) Suivez toutes les directives.
5) N’utilisez pas cet appareil près de l’eau.
6) Nettoyez cet appareil uniquement avec un chiffon sec.
7) Ne bouchez pas les fentes de ventilation. Respectez les
directives du fabricant pour l’installation de l’appareil.
8) N’installez pas l’appareil à proximité d’une source de chaleur
telle qu’un radiateur, une bouche d’air chaud, une cuisinière ou
tout autre appareil (y compris des amplificateurs) émettant de
la chaleur.
9) Ne désactivez pas le dispositif de sécurité appliqué à la fiche
polarisée ou à la fiche avec mise à la terre. Une fiche polarisée
est équipée de deux lames dont l’une est plus large que l’autre.
Une fiche avec mise à la terre est équipée de deux lames et
une broche destinée à la mise à la terre. Sur ces types de
fiches, la lame la plus large et la troisième broche sont des
dispositifs de sécurité. Si vous ne réussissez pas à brancher la
fiche fournie dans la prise de courant, consultez un électricien
et faites remplacer la prise par une neuve.
10) Ne placez pas le cordon d’alimentation dans des endroits
passants et assurez-vous qu’il ne peut pas être pincé, surtout
au niveau des fiches, de la prise de courant et à l’endroit où il
sort de l’appareil.
11) Utilisez uniquement les éléments de raccordement et les
accessoires recommandés par le fabricant.
12) Utilisez l’appareil uniquement avec le chariot, le socle, le
trépied, le support ou la table recommandés par le fabricant ou
achetés avec l’appareil. Lorsque vous utilisez un chariot,
prenez des précautions en déplaçant le chariot et l’appareil afin
de ne pas les renverser, ce qui pourrait entraîner des
blessures.
FR
13) Débranchez cet appareil en cas d’orage ou lorsque vous ne
l’utilisez pas pendant de longues périodes.
14) Pour toute réparation, adressez-vous à un réparateur qualifié.
Faites réparer l’appareil s’il a été endommagé de quelque
manière que ce soit, par exemple si le cordon d’alimentation ou
sa fiche sont endommagés, si du liquide ou tout autre corps
étranger a pénétré dans l’appareil, si l’appareil a été exposé à
la pluie ou à l’humidité, s’il ne fonctionne pas normalement ou
s’il a été échappé.
3
Page 46

Table des matières
Précautions . . . . . . . . . . . . . . . . . . . . . . . . . . . . . . . . . . . . . . . . . . . 6
Identification des pièces et des commandes . . . . . . . . . . . . . . . . . 8
Installation . . . . . . . . . . . . . . . . . . . . . . . . . . . . . . . . . . . .12
Installation 1: Utilisez le support . . . . . . . . . . . . . . . . . . . . . . . . . 12
Installation 2: Raccordez les câbles . . . . . . . . . . . . . . . . . . . . . . 12
Installation 3: Raccordez le cordon d’alimentation . . . . . . . . . . . 16
Installation 4: Replacez le couvercle des connecteurs . . . . . . . . 16
Installation 5: Allumez l’écran et les autres appareils . . . . . . . . . 16
Installation 6: Réglez l’angle de l’écran . . . . . . . . . . . . . . . . . . . 17
Installation 7: Insérez les piles dans la télécommande . . . . . . . . 17
Regarder la télévision . . . . . . . . . . . . . . . . . . . . . . . . . .18
Régler les canaux de télévision . . . . . . . . . . . . . . . . . . . . . . 18
Changer le canal de télévision . . . . . . . . . . . . . . . . . . . . . . . . . . . 18
Saut des canaux non désirés . . . . . . . . . . . . . . . . . . . . . . . . . . . . 18
Choisir la câblodistribution ou la réception UHF/VHF . . . . . . . . . . 18
Autres fonctions . . . . . . . . . . . . . . . . . . . . . . . . . . . . . . . . . . . . . . 19
• Macintosh est une marque de commerce
utilisée sous licence par Apple
Computer, Inc., et déposée aux ÉtatsUnis et dans d’autres pays.
• Windows
Microsoft Corporation aux États-Unis et
dans d’autres pays.
• VGA est une marque déposée d’IBM
aux États-Unis.
• VESA et DDC
commerce de la Video Electronics
Standards Association.
• Adobe et Acrobat sont des marques de
commerce d’Adobe Systems
Incorporated.
• WOW, SRS et le symbole sont
des marques de commerce de SRS Labs,
Inc.
• La technologie WOW est intégrée sous
licence de SRS Labs, Inc.
• Tous les autres noms de produits
mentionnés dans les présentes peuvent
être des marques de commerce ou des
marques déposées de leurs détenteurs
respectifs.
• En outre, les symboles
n’apparaissent pas systématiquement
dans ce manuel.
®
est une marque déposée de
™
sont des marques de
« ™ »
et « ® »
http://www.sony.net/
Personnalisation de l’écran . . . . . . . . . . . . . . . . . . . . . .19
Navigation dans le menu . . . . . . . . . . . . . . . . . . . . . . . . . . . . . . . 19
Menu Image . . . . . . . . . . . . . . . . . . . . . . . . . . . . . . . . . . . . . 21
Sélectionner le mode image pour PC 1/PC 2 . . . . . . . . . . . . . 21
Sélectionner le mode image pour TV/COMPONENT/VIDEO 1/
VIDEO 2 . . . . . . . . . . . . . . . . . . . . . . . . . . . . . . . . . . . . . . . . . 21
Réglage de « Rétroéclairage » . . . . . . . . . . . . . . . . . . . . . . . . 22
Réglage de « Contraste » (« Image ») . . . . . . . . . . . . . . . . . . 22
Réglage de « Luminosité » . . . . . . . . . . . . . . . . . . . . . . . . . . . 22
Réglage de « Couleur »
(TV/COMPONENT/VIDEO 1/VIDEO 2 seulement) . . . . . . . . . 22
Réglage de « Nuance »
(TV/VIDEO 1/VIDEO 2 seulement) . . . . . . . . . . . . . . . . . . . . . 22
Réglage de « Netteté »
(TV/COMPONENT/VIDEO 1/VIDEO 2 seulement) . . . . . . . . . 22
Réglage de « Temp. couleur » (PC 1/PC 2 seulement) . . . . . 23
Réglage de « Gamma » (PC 1/PC 2 seulement) . . . . . . . . . . 23
Rétablir les réglages de mode image aux valeurs
par défaut . . . . . . . . . . . . . . . . . . . . . . . . . . . . . . . . . . . . . . . . 24
Réglage de « Réduc.de bruit »
(TV/COMPONENT/VIDEO 1/VIDEO 2 seulement) . . . . . . . . . 24
Réglage de « Contraste dynamique »
(TV/COMPONENT/VIDEO 1/VIDEO 2 seulement) . . . . . . . . . 24
Menu Audio . . . . . . . . . . . . . . . . . . . . . . . . . . . . . . . . . . . . . . 25
Réglage de « Surround » (ambiophonie) . . . . . . . . . . . . . . . . 25
Réglage de « Aigu », « Grave » et « Balance » . . . . . . . . . . . 25
Réglage de « Volume auto »
(TV/COMPONENT/VIDEO 1/VIDEO 2 seulement) . . . . . . . . . 25
Réglage de « MTS » (TV seulement) . . . . . . . . . . . . . . . . . . . 25
Rétablir tous les réglages de mode audio aux valeurs
par défaut . . . . . . . . . . . . . . . . . . . . . . . . . . . . . . . . . . . . . . . . 26
4
Page 47

Menu Écran . . . . . . . . . . . . . . . . . . . . . . . . . . . . . . . . . . . . . . 26
Réglage de « Zoom » . . . . . . . . . . . . . . . . . . . . . . . . . . . . . . . . 26
Fonction de réglage automatique de la qualité de l’image
(PC 2 seulement) . . . . . . . . . . . . . . . . . . . . . . . . . . . . . . . . . . . 27
Réglages supplémentaires de la qualité de l’image pour le signal
d’entrée en cours (Réglage auto) (PC 2 seulement) . . . . . . . . 27
Réglage manuel de la netteté de l’image (phase/horloge)
(PC 2 seulement) . . . . . . . . . . . . . . . . . . . . . . . . . . . . . . . . . . . 27
Réglage manuel de la position de l’image
(Centrage H/Centrage V) (PC 2 seulement) . . . . . . . . . . . . . . . 28
Réglage manuel de la position de l’image
(Centrage V) (TV/COMPONENT/VIDEO 1/
VIDEO 2 seulement) . . . . . . . . . . . . . . . . . . . . . . . . . . . . . . . . . 28
Modification de la résolution d’affichage (Résolution)
(PC 2 seulement) . . . . . . . . . . . . . . . . . . . . . . . . . . . . . . . . . . . 28
Menu Parent . . . . . . . . . . . . . . . . . . . . . . . . . . . . . . . . . . . . . 29
Activation de la fonction de contrôle parental . . . . . . . . . . . . . . 29
Sélection d’un classement spécifique . . . . . . . . . . . . . . . . . . . . 30
Signification des classements . . . . . . . . . . . . . . . . . . . . . . . . . . 32
Menu Option . . . . . . . . . . . . . . . . . . . . . . . . . . . . . . . . . . . . . . 34
Définition du paramètre « PIP » (Picture In Picture) ou « PAP »
(Picture And Picture) (PC 1/PC 2 seulement) . . . . . . . . . . . . . . 34
Réglage de « Caption Vision » (TV/VIDEO 1/
VIDEO 2 seulement) . . . . . . . . . . . . . . . . . . . . . . . . . . . . . . . . . 36
Réglage de « Détecte Entrée » (détection de la source)
(PC 1/PC 2 seulement) . . . . . . . . . . . . . . . . . . . . . . . . . . . . . . . 37
Réglage de « Langue » . . . . . . . . . . . . . . . . . . . . . . . . . . . . . . 37
Réglage de « Position Menu » . . . . . . . . . . . . . . . . . . . . . . . . . 37
Réglage de « Verrou Du Menu » (verrouillage du menu) . . . . . 38
Réglage de « Mode Démo » (mode de démonstration) . . . . . . 38
Rétablir les réglages aux valeurs par défaut . . . . . . . . . . . . . . 38
FR
Fonctions techniques . . . . . . . . . . . . . . . . . . . . . . . . . . .39
Contrôle du volume . . . . . . . . . . . . . . . . . . . . . . . . . . . . . . . . . . . . 39
Fonction d’économie d’énergie . . . . . . . . . . . . . . . . . . . . . . . . . . . 39
Réglage du mode image . . . . . . . . . . . . . . . . . . . . . . . . . . . . . . . . 40
Fonction de réglage automatique de la luminosité
(capteur de lumière) . . . . . . . . . . . . . . . . . . . . . . . . . . . . . . . . . . . . 40
Fonction de réglage automatique de la qualité de l’image
(PC 2 seulement) . . . . . . . . . . . . . . . . . . . . . . . . . . . . . . . . . . . . . . 40
Arrêt par minuterie
(TV/COMPONENT/VIDEO 1/VIDEO 2 seulement) . . . . . . . . . . . . 41
Dépannage . . . . . . . . . . . . . . . . . . . . . . . . . . . . . . . . . . . .41
Messages à l’écran . . . . . . . . . . . . . . . . . . . . . . . . . . . . . . . . . . . . 41
Symptômes et solutions . . . . . . . . . . . . . . . . . . . . . . . . . . . . . . . . . 43
Spécifications . . . . . . . . . . . . . . . . . . . . . . . . . . . . . . . . .46
5
Page 48
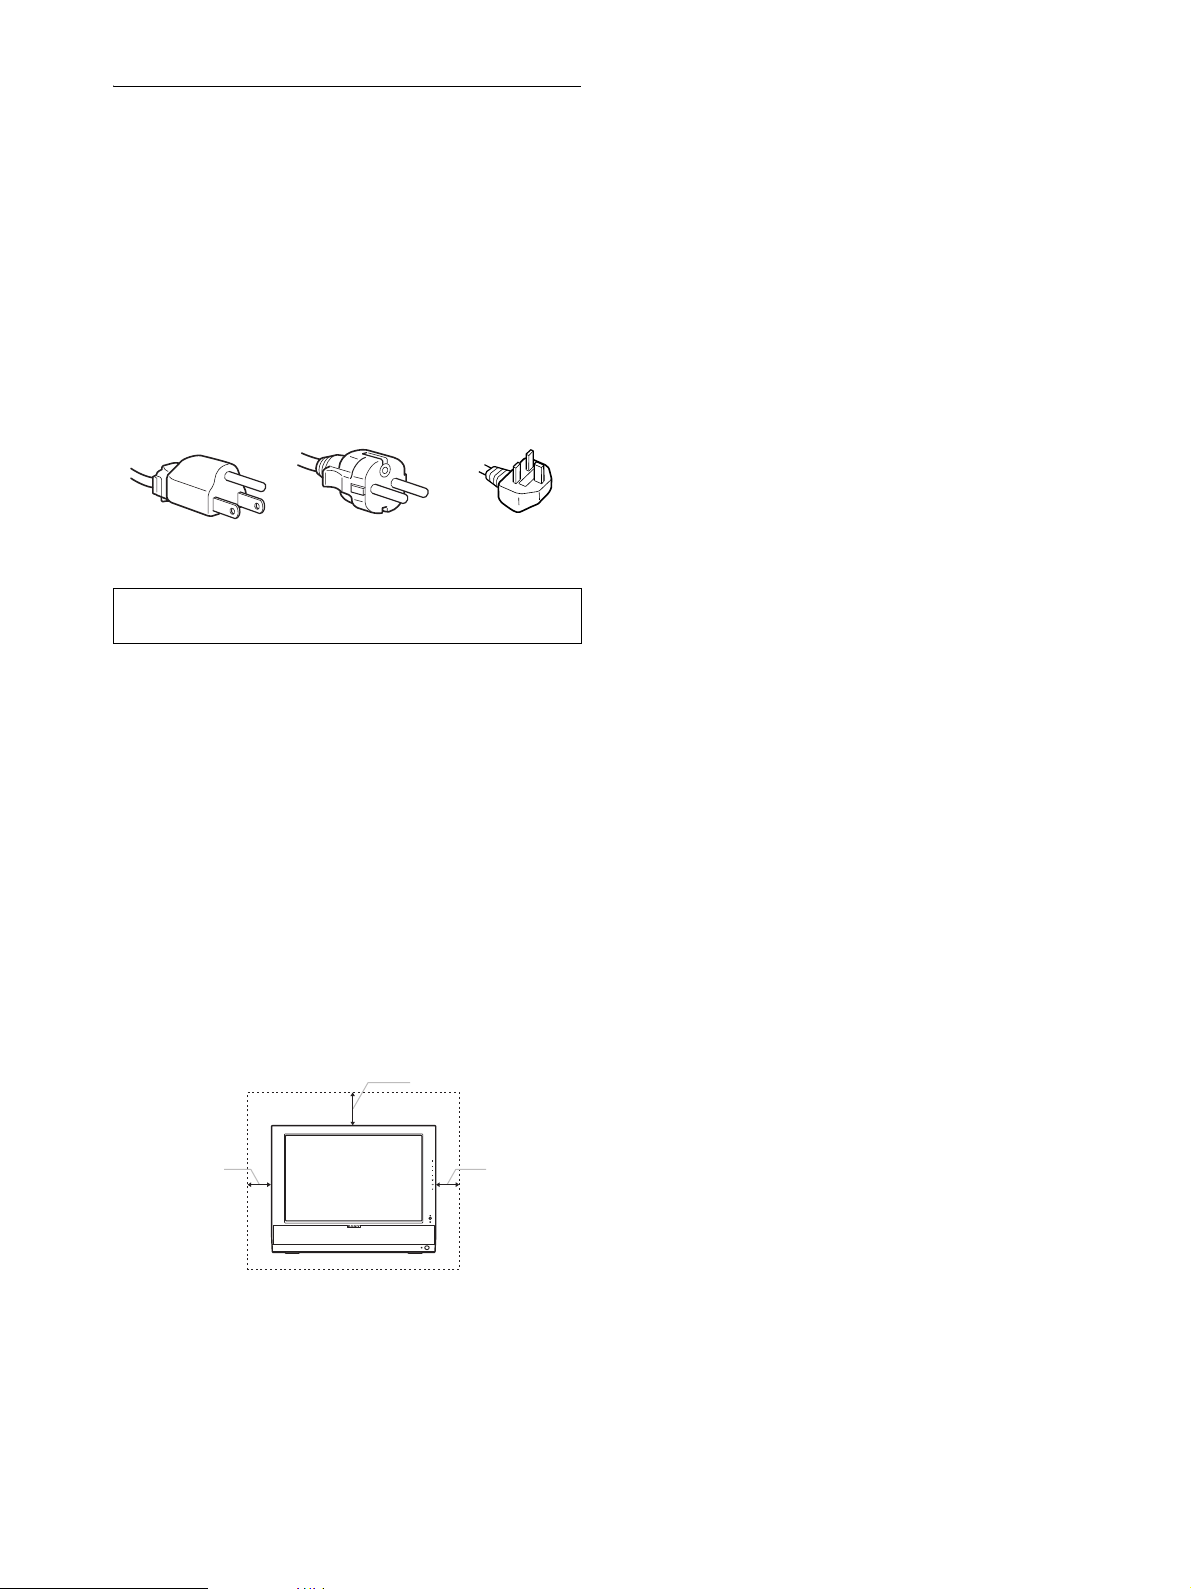
Précautions
Avertissement sur les raccordements
d’alimentation
• Utilisez le cordon d’alimentation fourni. Si vous utilisez un
cordon d’alimentation différent, assurez-vous qu’il est
compatible avec le système électrique local.
Pour les clients aux États-Unis
Si vous n’utilisez pas le cordon approprié, cet écran ne sera pas
conforme aux normes FCC obligatoires.
Pour les clients au Royaume-Uni
Si vous utilisez cet écran au Royaume-Uni, veillez à utiliser le
cordon d’alimentation adapté aux prises électriques du
Royaume-Uni.
Exemples de types de fiches
pour 100 à 120 V CA pour 200 à 240 V CA pour 240 V CA
L’appareil doit être installé à proximité d’une prise de courant
facile d’accès.
Installation
N’installez pas et ne laissez pas l’écran :
• À des endroits exposés à des températures extrêmes, par
exemple à proximité d’un radiateur ou d’un conduit de
chauffage, ou exposés aux rayons directs du soleil.
L’exposition de l’écran à des températures extrêmes, comme
dans l’habitacle d’un véhicule garé en plein soleil ou à
proximité d’un conduit de chauffage, risque d’entraîner des
déformations du boîtier ou des problèmes de fonctionnement.
• À des endroits soumis à des vibrations mécaniques ou à des
chocs.
• N’empêchez pas la circulation de l’air en bloquant les orifices
de ventilation avec des objets tels que des journaux, une nappe,
des rideaux, etc.
• Laissez un espace suffisant autour de l’appareil. Sinon, la
circulation de l’air peut être empêchée, ce qui peut causer la
surchauffe et provoquer un incendie ou des dommages à
l’appareil.
10 cm
• À proximité d’appareils générant de puissants champs
magnétiques, comme un téléviseur ou d’autres appareils
électroménagers.
• À des endroits soumis à des quantités inhabituelles de
poussière, de saleté ou de sable, par exemple à côté d’une
fenêtre ouverte ou d’une porte donnant sur l’extérieur. En cas
d’installation temporaire à l’extérieur, veillez à prendre les
précautions requises contre la poussière et la saleté en
20 cm
CH
VOL
uniquement
10 cm
suspension dans l’air. Sinon, des dommages irréparables
risquent de se produire.
• Pour réduire les risques d’incendie ou d’électrocution,
n’exposez jamais cet appareil à la pluie ou à l’humidité.
• Ne pas exposer l’appareil aux éclaboussures ou aux liquides de
toute sorte et ne pas poser de récipients remplis de liquide, tels
qu’un vase, sur l’appareil.
• Pour éviter les risques d’incendie, tenez les objets
inflammables et la flamme nue (p. ex. les bougies) à distance de
l’appareil.
• Ne placez pas l’appareil à proximité ou sur le dessus d’un
radiateur ou d’un conduit de chauffage, ou à un endroit exposé
aux rayons directs du soleil.
Manipulation de l’écran ACL
• Ne placez pas l’écran ACL face au soleil, ce qui pourrait
l’endommager. Faites attention si vous placez l’écran près
d’une fenêtre.
• N’appuyez pas sur la surface de l’écran ACL et ne l’égratignez
pas. Ne posez pas d’objets lourds sur l’écran ACL. Cela
pourrait altérer l’uniformité de l’affichage ou provoquer des
problèmes de fonctionnement du panneau ACL.
• Lorsque l’écran est utilisé dans un environnement froid, une
image rémanente peut apparaître à l’écran. Ceci n’est pas un
problème de fonctionnement. L’écran revient à la normale
lorsque la température revient au niveau de fonctionnement
normal.
• Si une image fixe reste affichée pendant une longue période,
une image rémanente peut apparaître pendant un certain temps.
Cette image rémanente disparaît progressivement.
• Le panneau ACL dégage de la chaleur pendant l’utilisation.
Ceci n’est pas un problème de fonctionnement.
À propos des haut-parleurs stéréo intégrés
Assurez-vous de tenir vos équipements d’enregistrement
magnétique, vos cassettes et vos disquettes à l’écart des
ouvertures des haut-parleurs, qui génèrent un champ magnétique.
Ce champ magnétique pourrait effacer ou endommager les
données stockées sur des cassettes ou des disquettes.
Remarque sur l’affichage à cristaux liquides
(ACL)
Veuillez noter que cet écran ACL est issu d’une technologie de
haute précision. Toutefois, il est possible que des points noirs ou
des points brillants colorés (rouges, bleus ou verts) apparaissent
constamment sur l’écran LCD, ainsi que des bandes de couleurs
ou des zones de luminosité irrégulières. Il ne s’agit pas d’un
problème de fonctionnement.
(Points effectifs : supérieurs à 99,99%)
Entretien
• Débranchez le cordon d’alimentation de la prise de courant
avant de nettoyer l’écran.
• Nettoyez l’écran ACL avec un chiffon doux. Si vous utilisez un
liquide nettoyant pour les vitres, n’utilisez pas de nettoyant
contenant une solution antistatique ou tout autre additif
semblable, ce qui pourrait égratigner le revêtement de l’écran
ACL.
• Nettoyez le boîtier, le panneau et les commandes avec un
chiffon doux légèrement imbibé d’une solution détergente
douce. N’utilisez aucun type de tampon abrasif, de poudre à
récurer ni de solvant, tels que de l’alcool ou du benzène.
6
Page 49

• Ne frottez pas, ne touchez pas et ne frappez pas la surface de
l’écran avec un objet pointu ou abrasif, tels qu’un stylo à bille
ou un tournevis. Ce type de contact pourrait égratigner le tube
image.
• Notez qu’une détérioration des matériaux ou du revêtement de
l’écran ACL peur se produire si l’écran est exposé à des
solvants volatils, tels que les insecticides, ou en cas de contact
prolongé avec des objets en vinyle ou en caoutchouc.
Transport
• Débranchez tous les câbles de l’écran, puis saisissez fermement
les deux côtés de l’écran ACL en prenant soin de ne pas
l’égratigner pendant le transport. Si vous laissez tomber
l’écran, vous risquez de vous blesser ou de l’endommager.
• Pour transporter cet écran en vue d’une réparation ou de
l’expédition, utilisez la boîte et les matériaux d’emballage
d’origine.
Élimination de l’écran
• Ne jetez pas cet écran avec les ordures ménagères
ordinaires.
• Le tube fluorescent utilisé dans cet écran contient du
mercure. L’élimination de cet écran doit être
effectuée conformément aux lois de votre
municipalité relatives à l’élimination des déchets
dangereux.
Mise au rebut des batteries usées
Pour protéger l’environnement, faites la mise au rebut des
batteries usées suivant les lois et règlements locaux.
Installation sur un mur ou un bras de montage
Si vous comptez installer l’écran sur un mur ou un bras de
montage, veillez à consulter un technicien qualifié.
FR
7
Page 50

Identification des pièces et des
commandes
Arrière de l’écran ACL
Pour plus de détails, reportez-vous aux pages indiquées entre
parenthèses.
Avant de l’écran ACL
CH
CH
VOL
VOL
5
1
2
qd
qs
A Capteur de télécommande
Ce capteur reçoit le signal envoyé par la télécommande.
Veillez à ne pas couvrir le capteur, par exemple avec du
papier.
B Capteur de lumière (page 40)
Ce capteur mesure la luminosité ambiante. Veillez à ne pas
couvrir le capteur, par exemple avec du papier.
C Interrupteur 1 (alimentation) (page 16)
Appuyez sur cette touche pour allumer ou éteindre l’écran.
D Témoin 1 (alimentation) (pages 16, 39)
Le témoin d’alimentation s’allume en vert lorsque l’écran est
sous tension et en orange lorsque l’écran est en mode
d’économie d’énergie. En outre, le témoin d’alimentation
s’allume en rouge lorsque l’écran est en mode de veille ou que
la minuterie d’arrêt automatique est activée.
E Haut-parleurs stéréo (page 39)
Ces haut-parleurs émettent le signal audio sous forme de sons.
Vue latérale de l’écran ACL
43
6
7
8
9
0
qa
F Touche MENU (page 19)
Appuyez sur cette touche pour activer ou désactiver le menu
à l’écran.
G Touches CH +/– (page 18)
Appuyez sur ces touches pour changer le canal de télévision.
H Touches M/m et VOL +/– (contrôle du volume)
(pages 19, 39)
Appuyez sur ces touches pour sélectionner des éléments du
menu, effectuer divers réglages ou afficher la barre de réglage
« Volume » et régler le niveau sonore.
I Touche (sélection de la source)/OK
(pages 16, 19)
Cette touche offre deux fonctions.
Comme la touche , cette touche fait basculer le signal
d’entrée entre PC 1, PC 2, TV, COMPONENT, VIDEO 1 et
VIDEO 2 lorsque deux ordinateurs et deux appareils vidéo
sont connectés.
En tant que touche OK, elle permet d’activer l’élément de
menu sélectionné ou de sélectionner le réglage effectué avec
les touches M/m 8.
J Touche (PIP/PAP) (page 34)
Appuyez sur cette touche pour régler l’affichage de l’image
incrustée (« PIP » (Picture In Picture)) ou l’affichage de
l’image et de l’image (« PAP » (Picture And Picture)).
A chaque pression sur cette touche, le paramètre PIP ou PAP
change dans l’ordre suivant.
PIP activé t PAP activé t Non t PIP activé...
8
Page 51
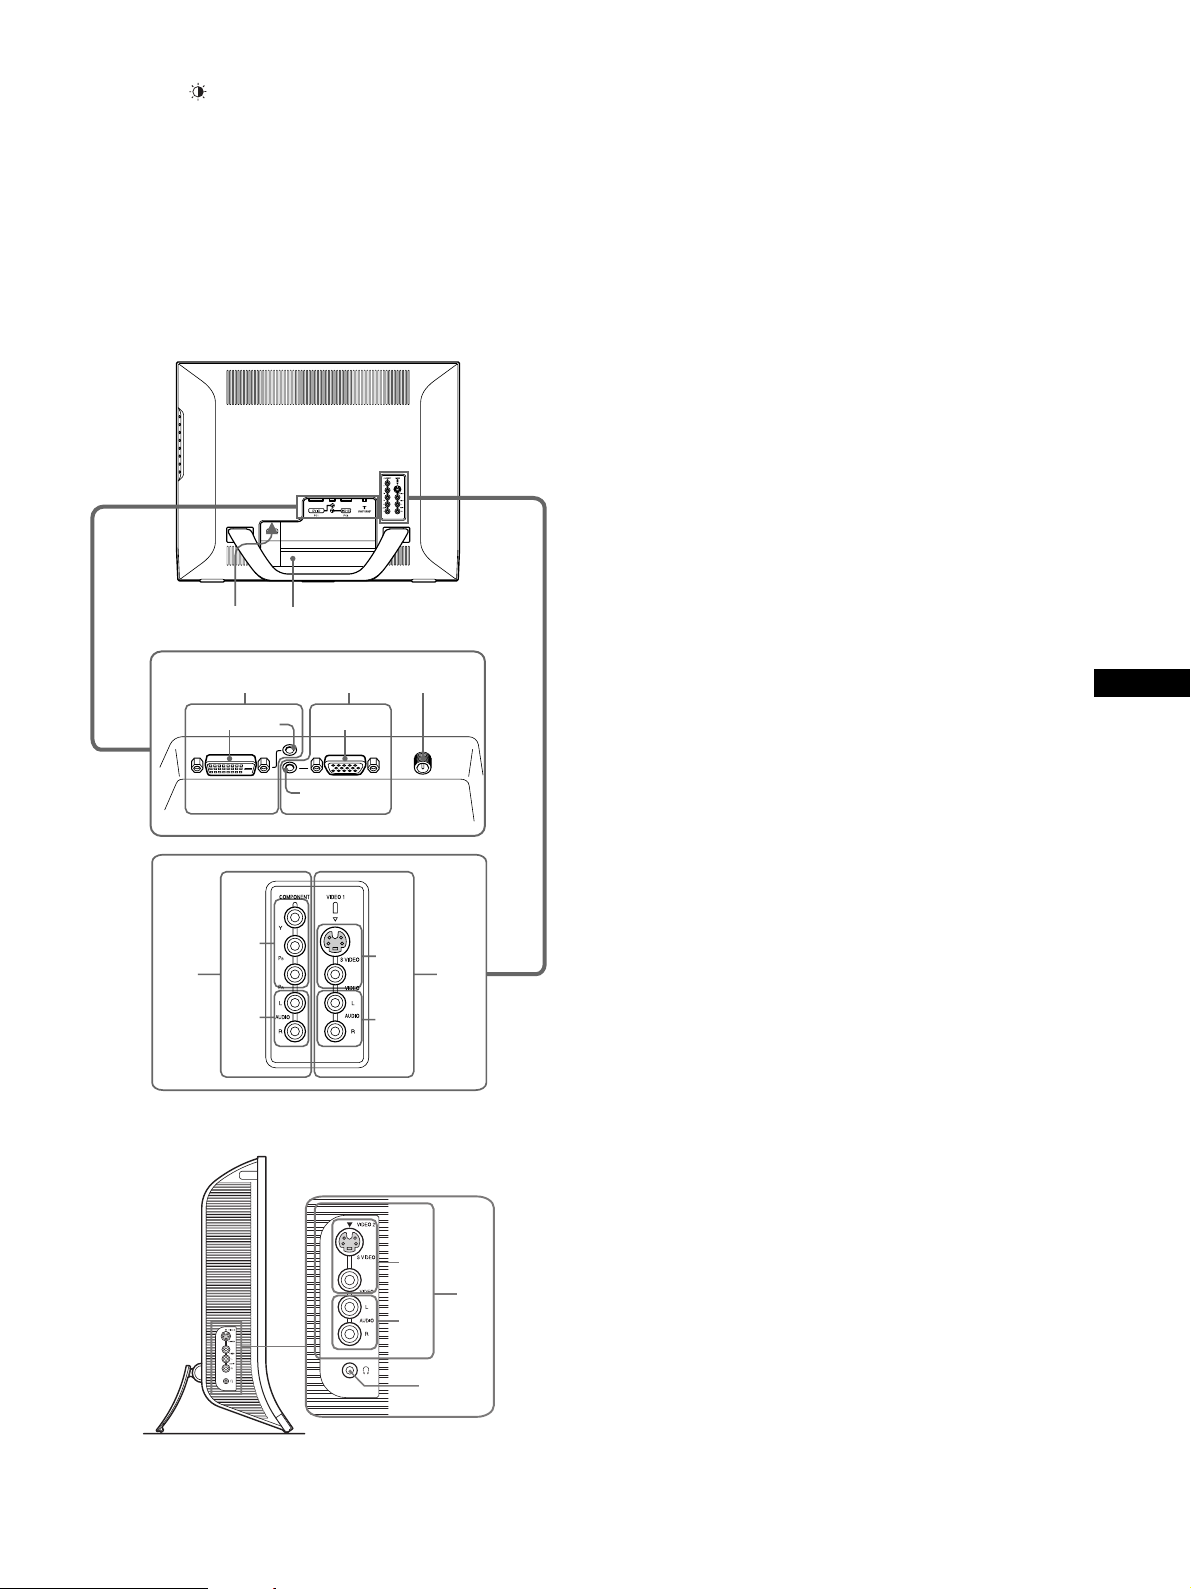
K Touche (mode image) (page 40)
Appuyez sur cette touche pour changer le mode image.
L Couvercle des connecteurs (page 12)
Retirez ce couvercle pour effectuer le raccordement de câbles
et de cordons.
M Positions des vis pour support ou bras de fixation
compatible VESA (page 12)
Fixez le support ou le bras de fixation compatible VESA.
Arrière de l’écran ACL
qf qg
qj
1
qk
1
qh
2
N Connecteur AC IN (page 16)
Ce connecteur permet de brancher le cordon d’alimentation
(fourni).
O Orifice de verrouillage de sécurité
L’orifice de verrouillage de sécurité doit être utilisé avec le
système Kensington Micro Saver Security System.
Micro Saver Security System est une marque de commerce de
Kensington.
P Connecteurs PC 1
1 Connecteur d’entrée DVI-D (RVB numérique)
pour PC 1 (page 13)
Ce connecteur permet l’entrée des signaux vidéo RVB
numériques conformes à la norme DVI version 1.0.
2 Prise d’entrée audio pour PC 1 (page 13)
Cette prise permet l’entrée du signal audio lorsque
raccordée à la prise de sortie audio d’un ordinateur ou
d’un autre appareil raccordé à PC 1.
Q Connecteurs PC 2
1 Connecteur d’entrée HD15 (RVB analogique)
pour PC 2 (page 13)
Ce connecteur permet l’entrée des signaux vidéo RVB
analogiques (0,700 Vc-c, positif) et des signaux de
synchronisation.
2 Prise d’entrée audio pour PC 2 (page 13)
Cette prise permet l’entrée du signal audio lorsque
raccordée à la prise de sortie audio d’un ordinateur ou
d’un autre appareil raccordé à PC 2.
FR
PC 1 PC 2 VHF/UHF
2
1
ql
2
Vue latérale de l’écran ACL
1
2
1
2
w;
wa
R Prise VHF/UHF (page 15)
Cette prise permet l’entrée du signal d’une antenne.
S Prises COMPONENT
1 Prises d’entrée composantes Y/P
COMPONENT (page 14)
Ces prises permettent l’entrée des signaux vidéo
composants Y/P
2 Prises d’entrée audio pour COMPONENT
(page 14)
Ces prises permettent l’entrée du signal audio lorsque
raccordées aux prises de sortie audio d’un lecteur de DVD
ou d’un autre appareil raccordé à COMPONENT.
T Prises VIDEO 1
1 Prises d’entrée composantes/S-vidéo pour
VIDEO 1 (page 14)
Ces prises permettent l’entrée des signaux composants ou
S-vidéo.
Lorsque des appareils vidéo sont raccordés aux prises
vidéo composantes et S-vidéo simultanément, le signal de
la prise S-vidéo s’affiche.
2 Prises d’entrée audio pour VIDEO 1 (page 14)
Ces prises permettent l’entrée du signal audio lorsque
raccordées aux prises de sortie audio d’un magnétoscope
ou d’un autre appareil raccordé à VIDEO 1.
(Y/B-Y/R-Y ou Y/PB/PR).
B/PR
B/PR
pour
ws
9
Page 52
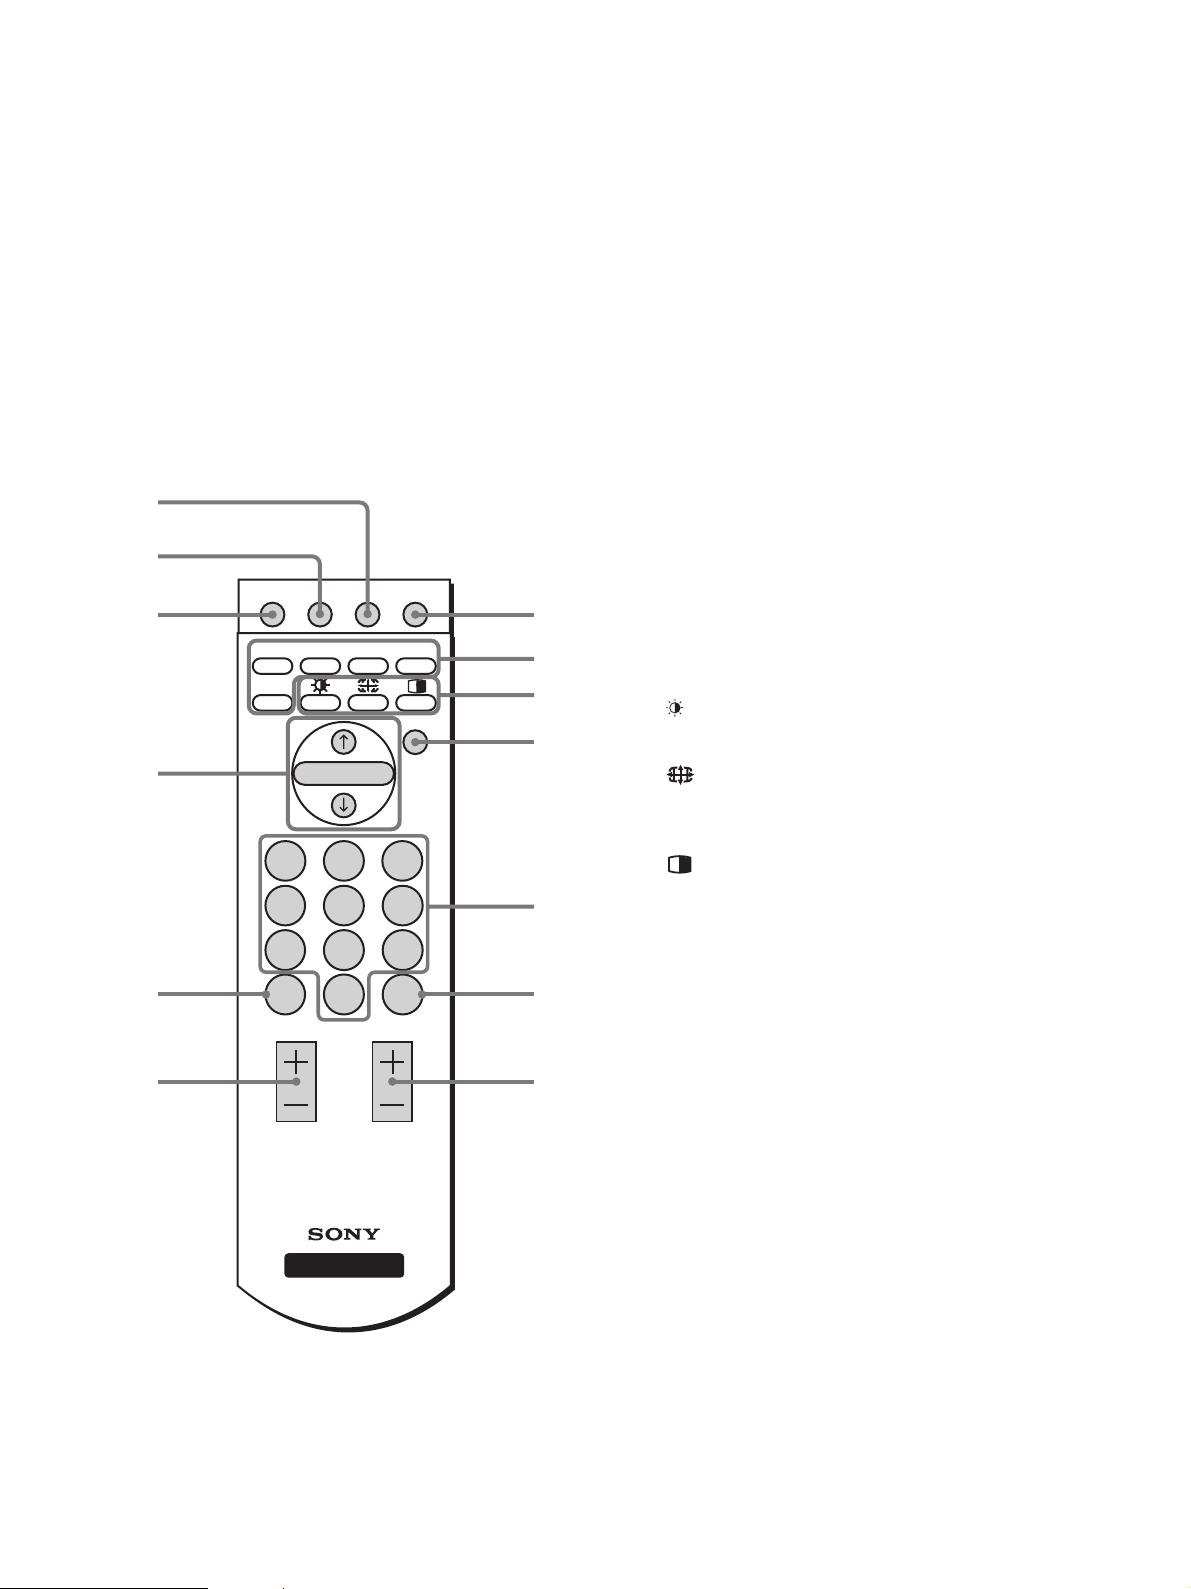
U Prises VIDEO 2
1 Prises d’entrée composantes/S-vidéo pour
VIDEO 2 (page 14)
Ces prises permettent l’entrée des signaux composants ou
S-vidéo.
Lorsque des appareils vidéo sont raccordés aux prises
vidéo composantes et S-vidéo simultanément, le signal de
la prise S-vidéo s’affiche.
2 Prises d’entrée audio pour VIDEO 2 (page 14)
Ces prises permettent l’entrée du signal audio lorsque
raccordées aux prises de sortie audio d’un magnétoscope
ou d’un autre appareil raccordé à VIDEO 2.
V Prise pour casque d’écoute (page 39)
Cette prise permet la transmission du signal audio vers un
casque d’écoute.
Télécommande
8
9
MUTING DISPLAY SLEEP 1
0
PC1 PC2 COMPONENT VIDEO1/2
TV
MENU
qa
OK
123
456
7 8 9
qs
qd
JUMP
0
VOL CH
ENT
1
2
3
4
5
6
7
B Touches de sélection de la source
PC 1 (page 13) : Appuyez sur cette touche pour
sélectionner la source des signaux
d’entrée des connecteurs PC 1 (DVI-D)
à l’arrière de l’écran.
PC 2 (page 13) : Appuyez sur cette touche pour
sélectionner la source des signaux
d’entrée des connecteurs PC 2 (HD15)
à l’arrière de l’écran.
COMPONENT (page 14) :
Appuyez sur cette touche pour
sélectionner la source des signaux
d’entrée des connecteurs
COMPONENT (composants Y/P
à l’arrière de l’écran.
VIDEO 1/2 (page 14) :
Appuyez sur cette touche pour
sélectionner la source des signaux
d’entrée par les connecteurs VIDEO 1
(composant/S video) à l’arrière de
l’écran et par les connecteurs VIDEO 2
(composant/S video) sur le côté de
l’écran.
TV (page 18) : Appuyez sur ces touches pour
sélectionner la source du signal de
télévision.
C Touches de fonction
(mode image) (page 40) :
Appuyez plusieurs fois sur cette touche
pour passer d’un mode image à l’autre.
(zoom) (page 26) :
Appuyez plusieurs fois sur cette touche
pour passer d’un réglage « Zoom » à
l’autre.
(PIP/PAP) (page 34) :
Appuyez à plusieurs reprises sur cette
touche pour parcourir les paramètres
« PIP » ou « PAP ».
D Touche MENU (page 19)
Appuyez sur cette touche pour activer ou désactiver le menu
à l’écran.
E Touches 0 à 9 (page 18)
Utilisez ces touches pour entrer des chiffres.
B/PR
)
DISPLAY
A Interrupteur 1 (alimentation) (page 16)
Appuyez sur cette touche pour allumer ou éteindre l’écran.
F Touche ENT (entrée) (page 18)
Appuyez sur cette touche pour confirmer les chiffres entrés à
l’aide des touches 0 à 9.
G Touches CH +/– (page 18)
Appuyez sur ces touches pour changer le canal de télévision.
H Touche SLEEP (page 41)
Appuyez plusieurs fois sur cette touche pour régler l’écran
afin qu’il s’éteigne automatiquement après la durée indiquée.
Si vous utilisez cette fonction et que vous réglez la minuterie
d’arrêt automatique, le témoin 1 (alimentation) s’allume en
rouge.
10
Page 53

I Touche DISPLAY (page 19)
Appuyez une fois pour afficher le numéro du canal en cours
ou l’entrée en cours. Ils demeurent affichés jusqu’à ce que
vous appuyiez de nouveau sur cette touche.
J Touche MUTING (page 19)
Appuyez sur cette touche pour désactiver le son. Appuyez de
nouveau sur cette touche ou appuyez sur VOL + pour rétablir
le son.
K Touches M/m et OK (page 19)
Utilisez les touches M/m pour sélectionner des éléments du
menu et faire des réglages.
Appuyez sur la touche OK pour activer l’élément de menu
sélectionné ou le réglage effectué avec les touches M/m.
L Touche JUMP (page 19)
Appuyez sur cette touche pour alterner entre le canal en cours
et le dernier canal entré à l’aide des touches 0 à 9.
M Touches VOL +/– (page 39)
Appuyez sur ces touches pour régler le volume sonore.
FR
11
Page 54
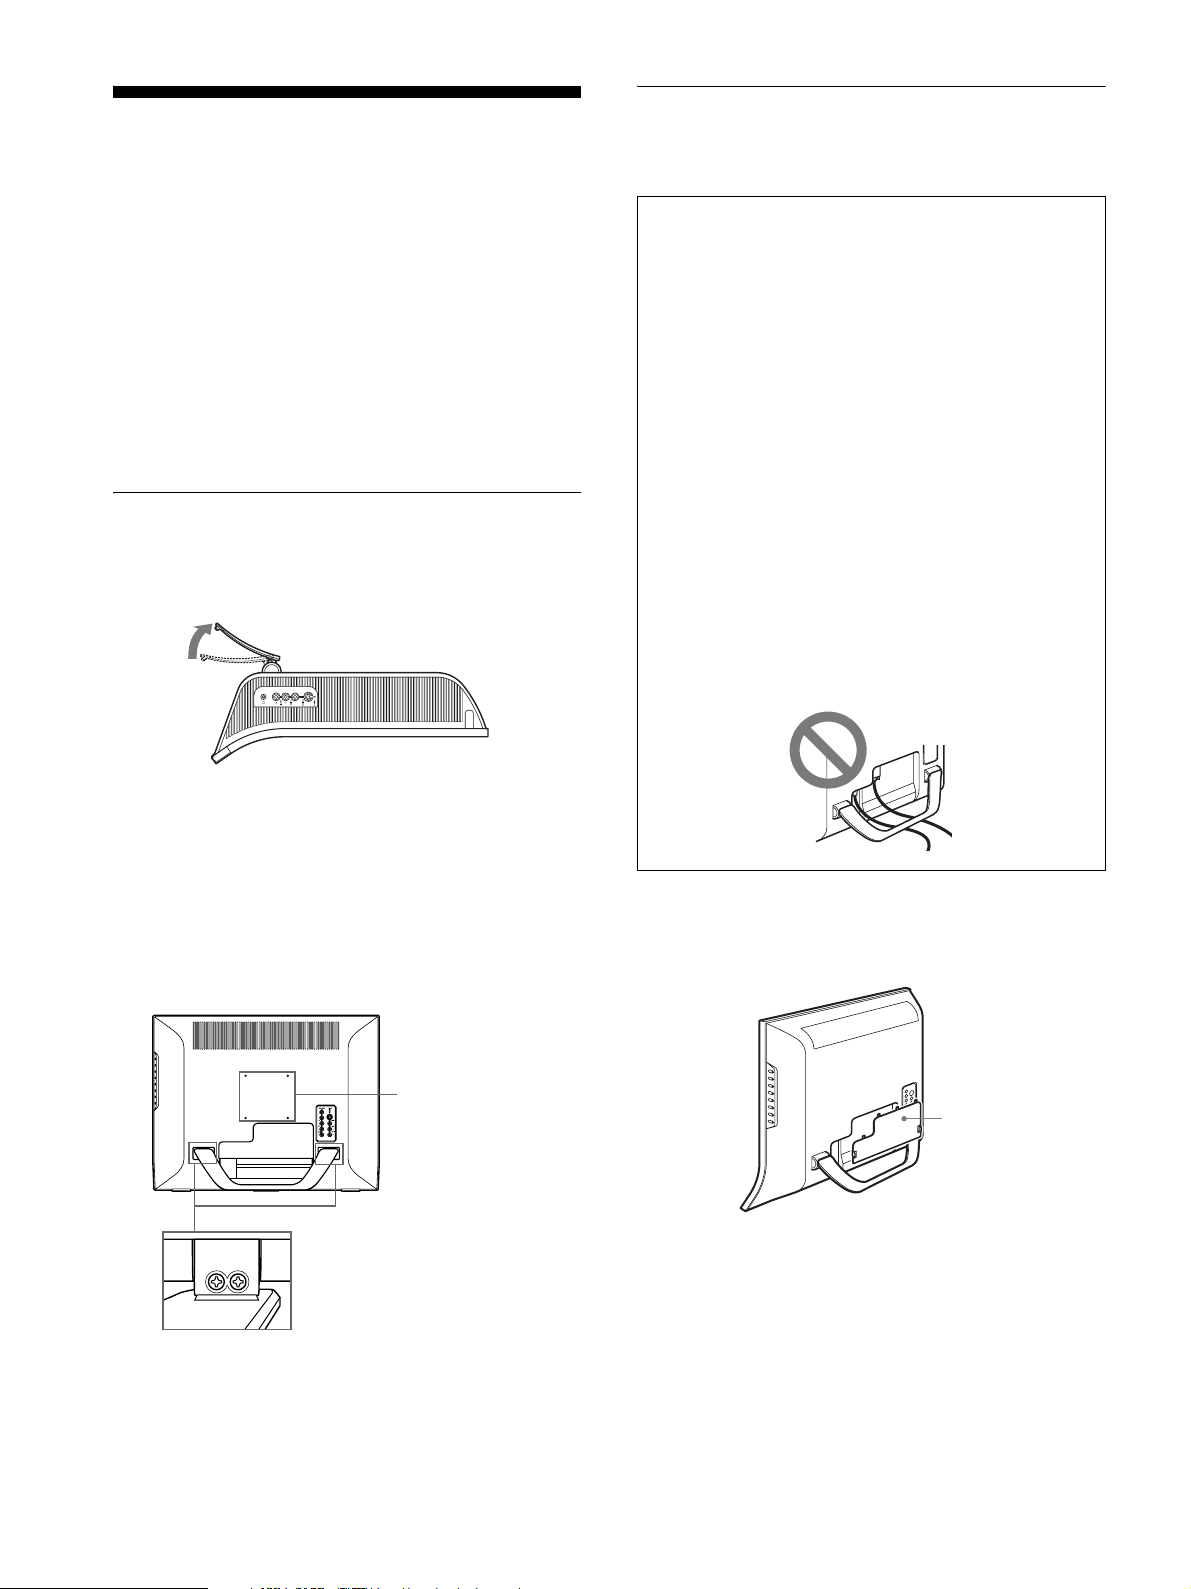
Installation
Avant d’utiliser votre écran, assurez-vous que les éléments
suivants sont bien inclus dans l’emballage :
•Écran ACL
• Télécommande
• Piles AAA (2)
• Cordon d’alimentation
• Câble de signal vidéo HD15-HD15 (RVB analogique)
• Câble de signal vidéo DVI-D (RVB numérique)
• Câble audio (minifiche stéréo)
• Câble coaxial de 75 ohms
• CD-ROM (logiciel utilitaire pour Windows et Macintosh,
mode d’emploi, etc.)
• Carte de garantie
• Guide de configuration rapide
Installation 1 :Utilisez le support
x Utilisation du support fourni
Ouvrez le support.
Installation 2 :Raccordez les
câbles
• Éteignez l’écran, l’ordinateur et tout autre appareil
avant d’effectuer le raccordement.
• Si vous comptez raccorder :
– Un ordinateur avec connecteur de sortie HD15 (RVB
analogique)
t Voir « Raccordement d’un ordinateur avec les
connecteurs PC 2 » (page 13).
– Un appareil vidéo avec prises de sortie vidéo
composantes
t Voir « Raccordement d’un appareil vidéo avec les
prises COMPONENT » (page 14).
– Un appareil vidéo avec prises de sortie vidéo
composantes/S-vidéo.
t Voir « Raccordement d’un appareil vidéo avec les
prises VIDEO 1/2 » (page 14).
– Une antenne
t Voir « Raccordement d’une antenne » (page 15).
Remarques
• Ne touchez pas les broches du connecteur du câble de signal vidéo
afin de ne pas plier les broches.
• Veillez à ce que les câbles raccordés à l’écran ne soient pas coincés
sous le support.
Remarque
Le support est plié pour l’emballage. Veillez à ne pas installer l’écran
verticalement avec le support plié tel quel. Dans ce cas, l’écran pourrait
basculer et tomber.
x Utilisation du support compatible VESA
Lorsque vous utilisez un support ou un bras de fixation
compatible VESA, mais non fourni d’origine, fixez-le à l’aide des
vis compatibles VESA.
positions des vis du
support compatible
VESA (100 mm)
positions des vis du
support fourni
Vue du dessous
Retirez le couvercle des connecteurs.
Appuyez sur les crochets et tirez le couvercle des connecteurs
vers vous.
Couvercle des
connecteurs
Vous pouvez utiliser l’écran avec ou sans le support fourni.
12
Page 55

x Raccordement d’un ordinateur avec les
connecteurs PC 1
Pour raccorder un ordinateur avec connecteur DVI (RVB
numérique) suivez les directives ci-dessous.
Avec le câble de signal vidéo DVI-D (RVB numérique)
fourni et le câble audio fourni, raccordez l’ordinateur
aux connecteurs PC 1 de l’écran.
x Raccordement d’un ordinateur avec les
connecteurs PC 2
Pour raccorder un ordinateur avec connecteur HD15 (RVB
analogique) suivez les directives ci-dessous.
Avec le câble de signal vidéo HD15-HD15 (RVB
numérique) fourni et le câble audio fourni, raccordez
l’ordinateur aux connecteurs PC 2 de l’écran.
Vers l’entrée
DVI-D
Vers le connecteur de sortie DVI
(RVB numérique) de l’ordinateur
Câble de signal vidéo
Vers la sortie audio
de l’ordinateur
DVI-D (RVB
numérique) (fourni)
Câble audio (fourni)
Vers
l’entrée
audio pour
PC 1
Vers
l’entrée
audio pour
PC 2
Câble audio (fourni)
Vers la sortie audio
de l’ordinateur
Vers le connecteur de sortie
HD15 (RVB analogique) de
l’ordinateur
Vers l’entrée
HD15
Câble de signal vidéo
HD15-HD15 (RVB
analogique) (fourni)
FR
13
Page 56
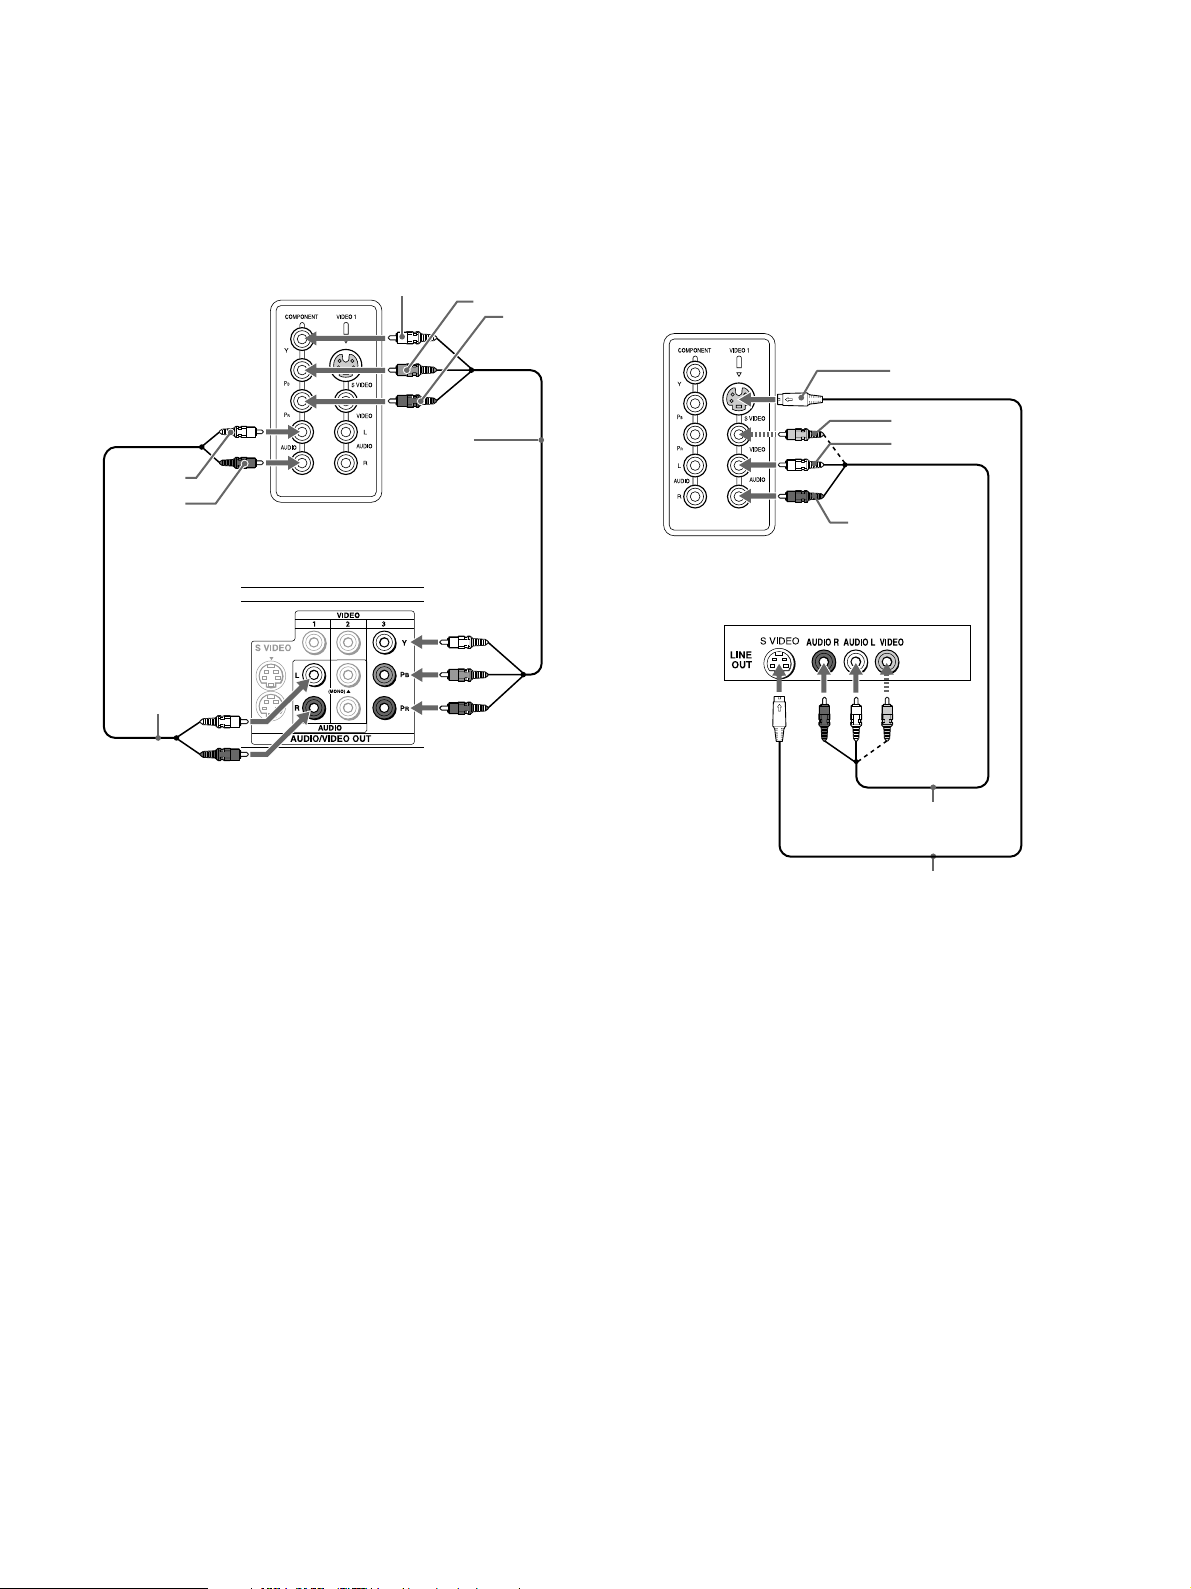
x Raccordement d’un appareil vidéo avec les
prises COMPONENT
Pour raccorder un appareil vidéo avec prises de sortie vidéo
composantes (tel qu’un lecteur de DVD) suivez les directives cidessous.
Avec un câble de signal vidéo (non fourni) et un câble
audio (non fourni), raccordez l’appareil vidéo aux
prises COMPONENT de l’écran.
Arrière de l’écran
Y
P
B
P
R
x Raccordement d’un appareil vidéo avec les
prises VIDEO 1/2
Pour raccorder un appareil vidéo avec prises de sortie vidéo
composantes/S-vidéo (tel qu’un magnétoscope) suivez les
directives ci-dessous.
Avec un câble de signal vidéo (non fourni) et un câble
audio (non fourni), raccordez l’appareil vidéo aux
prises VIDEO 1/2 de l’écran.
Pour VIDEO 1
Arrière de l’écran
S-vidéo
Audio-L
(blanc)
Audio-R
(rouge)
Câble audio
(non fourni)
Lecteur DVD
Câble vidéo
composant
(non fourni)
Magnétoscope
Vidéo (jaune)
Audio-L (blanc)
Audio-R (rouge)
Câble audio-vidéo
(non fourni)
Câble S-vidéo (non fourni)
14
Page 57

Pour VIDEO 2
S-vidéo
Vidéo (jaune)
Audio-L (blanc)
Audio-R (rouge)
Magnétoscope
côté de l’écran
x Raccordement d’une antenne
Si vous comptez raccorder une antenne pour recevoir le signal de
télévision, suivez les directives ci-dessous.
Avec le câble coaxial de 75 ohms (fourni), raccordez
l’antenne à la prise VHF/UHF de l’écran.
Vers la prise VHF/UHF
Vers l’antenne
Câble audio-vidéo (non fourni)
Câble S-vidéo (non fourni)
Remarque
Lorsque des appareils vidéo sont raccordés aux prises vidéo
composantes et S-vidéo simultanément, le signal de la prise
S-vidéo s’affiche.
Câble coaxial de
75 ohms (fourni)
FR
Remarque
Pour obtenir une qualité d’image optimale, il est fortement recommandé
de raccorder l’antenne avec un câble coaxial de 75 ohms. Un câble
bipolaire de 300 ohms est très sensible aux interférences radioélectriques
et autres, ce qui produit une détérioration du signal transmis. Si vous
utilisez un câble bipolaire de 300 ohms, placez-le aussi loin que possible
de l’écran.
15
Page 58

Installation 3 : Raccordez le cordon
Installation 5 : Allumez l’écran et
d’alimentation
1 Raccordez solidement le cordon d’alimentation
fourni au connecteur AC IN de l’écran.
2 Branchez solidement l’autre extrémité du cordon
dans une prise de courant.
1
Vers
AC IN
2
Vers la prise de courant
Cordon d’alimentation (fourni)
les autres appareils
1 Appuyez sur l’interrupteur 1 (alimentation) situé à
l’avant de l’écran.
Le témoin 1 (alimentation) s’allume en vert.
CH
VOL
S’allume en vert
2 Allumez l’ordinateur et les autres appareils vidéo.
3 Appuyez sur la touche pour sélectionner la
source de signal souhaitée.
Installation 4 : Replacez le
couvercle des
connecteurs
Tout en appuyant sur les crochets, placez le couvercle
des connecteurs sur l’appareil et appuyez jusqu’à ce
qu’il s’enclenche.
Couvercle des connecteurs
La source du signal en entrée change chaque fois que vous
appuyez sur la touche .
Message à l’écran Configuration du signal
d’entrée
DVI-D : PC 1 Connecteur d’entrée DVI-D
(RVB numérique) pour PC 1
HD15 : PC 2 Connecteur d’entrée HD15
(RVB analogique) pour PC 2
Canaux TV Téléviseur
: COMPONENT
ou : VIDEO 1
ou : VIDEO 2
Conseils
• Vous pouvez également sélectionner le signal en entrée à l’aide des
touches de sélection d’entrée de la télécommande.
• Lorsque vous sélectionnez l’entrée TV, le numéro du canal sélectionné
s’affiche dans le coin supérieur droit de l’écran.
• Lorsque vous utilisez la fonction PIP ou PAP, choisissez « PIP/PAP »
dans le menu « PIP/PAP » du menu « Option » pour sélectionner la
source d’entrée de l’image secondaire (page 34). Si l’entrée TV est
sélectionnée pour l’image secondaire, vous pouvez changer le canal à
l’aide des touches CH +/-.
• Si vous changez de canal TV pendant l’écoute ou si vous utilisez votre
PC, votre magnétoscope ou votre décodeur, réglez l’entrée sur TV, puis
appuyez sur CH +/– ou sur les touches 0-9. Si vous appuyez sur
CH +/– ou sur les touches 0-9, il n’est pas possible de permuter
automatiquement l’entrée sur TV.
Prises d’entrée composantes
Y/P
Prises d’entrée composantes/Svidéo pour VIDEO 1
Prises d’entrée composantes/Svidéo pour VIDEO 2
pour COMPONENT
B/PR
16
Page 59

Si aucune image n’apparaît à l’écran
• Vérifiez que le cordon d’alimentation et le câble de signal vidéo
sont correctement raccordés.
Installation 6 : Réglez l’angle de
l’écran
• Si le message « Pas d’Entree Video » s’affiche à l’écran :
– L’ordinateur est en mode d’économie d’énergie. Appuyez
sur n’importe quelle touche du clavier ou déplacez la souris.
– Vérifiez que le réglage du signal en entrée est correct en
appuyant sur la touche (page 16).
• Si le message « Cable Non Connecté » s’affiche à l’écran :
– Vérifiez que le câble de signal vidéo est correctement
raccordé.
– Vérifiez que le réglage du signal en entrée est correct en
appuyant sur la touche (page 16).
• Si le message « Hors Plage Fréquences » s’affiche à l’écran :
Réglez la carte graphique de l’ordinateur avec les valeurs
suivantes.
RVB analogique RVB numérique
Fréquence :
horizontale
Fréquence :
verticale
Résolution 1 680 × 1 050 ou
Pour plus de détails sur les messages à l’écran, voir « Symptômes
et solutions » à la page 43.
28–86 kHz 28–68 kHz
48–85 Hz (résolution
< 1 280 × 1 024)
48–75 Hz (résolution
< 1 400 × 1 050)
48–60 Hz (résolution
≤ 1 680 × 1 050)
moins
60 Hz
1 680 × 1 050 ou
moins
Cet écran peut être réglé selon les angles indiqués ci-dessous.
Saisissez le panneau ACL par les bords et réglez
l’angle de l’écran.
Environ
20°
Pour utiliser l’écran en tout confort
Réglez l’angle de l’écran selon la hauteur de votre bureau et de
votre chaise de manière à ce qu’aucune lumière ne se reflète sur
l’écran en direction de vos yeux.
Remarques
• Lorsque vous ajustez l’angle de l’écran, procédez avec soin et
lentement; veillez à ne pas cogner l’écran sur le bureau.
• Lorsque vous ajustez l'angle de l'écran, ne cognez pas l’écran et veillez
à ne pas le faire tomber du meuble.
FR
Aucun besoin de pilotes spécifiques
Cet écran est compatible avec la norme de raccordement DCC « prêt à
l’emploi » ; l’ordinateur détecte automatiquement toutes les informations
nécessaires à l’écran. Il n’est pas nécessaire d’installer de pilote spécifique
sur l’ordinateur.
La première fois que vous allumez votre ordinateur après avoir raccordé
l’écran, un assistant d’installation peut s’afficher. Dans ce cas, suivez les
instructions à l’écran. La fonction « prêt à l’emploi » est automatiquement
sélectionnée afin que vous puissiez utiliser cet écran.
La fréquence verticale est réglée à 60 Hz.
Comme le clignotement n’affecte pas l’affichage de l’écran, vous pouvez
l’utiliser tel quel. Il n’est pas nécessaire de régler la fréquence verticale à
une fréquence élevée particulière.
Installation 7 : Insérez les piles
dans la
télécommande
Insérez deux piles AAA (fournies) en faisant
correspondre les pôles + et – des piles avec les
inscriptions à l’intérieur du logement des piles de la
télécommande.
Remarques
• Si vous prévoyez de ne pas utiliser la télécommande pendant une
période prolongée, retirez-en les piles pour éviter toute fuite
d’électrolyte pouvant l’endommager.
• Manipulez la télécommande avec soin. Évitez de la laisser tomber, de
la mouiller et de la placer directement au soleil, à proximité d’un
appareil de chauffage ou dans un endroit très humide.
17
Page 60

Regarder la télévision
Régler les canaux de télévision
Pour regarder des programmes télévisés, vous devez exécuter la
fonction « Auto Programmation » afin de programmer les canaux.
Suivez la procédure « Auto Programmation » ci-dessous avant de
regarder des programmes télévisés pour la première fois.
Pour plus de détails sur l’utilisation du menu et des touches, voir
« Navigation dans le menu » à la page 19.
Le message « Non exécution de l’Auto Programmation »
demeure affiché jusqu’à ce que vous sélectionniez « Auto
Programmation ».
1 Appuyez sur la touche MENU.
Saut des canaux non désirés
Cette fonction vous permet de sauter les canaux non désirés
lorsque vous sélectionnez les canaux à l’aide de la touche CH +/–.
1 Appuyez sur la touche MENU.
2 Utilisez les touches M/m pour sélectionner
(Canal), puis appuyez sur la touche OK.
Le menu « Canal » apparaît à l’écran.
3 Utilisez les touches M/m pour sélectionner « Saut./
ajout. canal », puis appuyez sur la touche OK.
Le menu « Saut./ajout. canal » apparaît à l’écran.
4 Utilisez les touches M/m pour sélectionner le canal
à sauter, puis appuyez sur la touche OK.
2 Utilisez les touches M/m pour sélectionner
(Canal), puis appuyez sur la touche OK.
Le menu « Canal » apparaît à l’écran.
3 Utilisez les touches M/m pour sélectionner « Auto
Programmation », puis appuyez sur la touche OK.
Le menu « Auto Programmation » apparaît à l’écran.
4 Utilisez les touches M/m pour sélectionner « OK »,
puis appuyez sur la touche OK.
L’écran commence automatiquement à rechercher et à
préparer les canaux.
Le nombre de canaux et un message s’affichent à l’écran.
5 Utilisez la touche MENU pour quitter le menu une
fois la programmation automatique terminée.
Remarque
Cette procédure peut prendre plusieurs minutes. N’appuyez sur aucune
touche pendant la durée de cette procédure. Sinon, la procédure « Auto
Programmation » ne se déroulera pas correctement.
Changer le canal de télévision
Appuyez sur les touches 0 à 9 pour entrer un numéro
de canal.
Le canal change après 3 secondes. Appuyez sur la touche ENT
(entrée) pour le sélectionner immédiatement.
Appuyez sur les touches CH +/– pour balayer les canaux.
Conseil
Pour faire défiler la liste, appuyez sans relâcher sur les touches M/m .
5 Utilisez les touches M/m pour sélectionner « Saut »,
puis appuyez sur la touche OK.
Pour rétablir un canal sauté, sélectionnez « Ajout ».
6 Appuyez sur la touche MENU pour quitter le menu.
Choisir la câblodistribution ou la
réception UHF/VHF
Pour régler les canaux UHF/VHF, réglez le menu « Câble » à «
Non » comme suit.
1 Appuyez sur la touche MENU.
2 Utilisez les touches M/m pour sélectionner
(Canal), puis appuyez sur la touche OK.
Le menu « Canal » apparaît à l’écran.
3 Utilisez les touches M/m pour sélectionner
« Câble », puis appuyez sur la touche OK.
Le menu « Câble » apparaît à l’écran.
4 Utilisez les touches M/m pour sélectionner le mode
souhaité, puis appuyez sur la touche OK.
• Oui : Les canaux du câble peuvent être réglés.
• Non : Les canaux UHF/VHF peuvent être réglés.
CH
ou
Conseils
• Maintenez enfoncée la touche CH + ou – pour changer rapidement le
numéro de canal.
• Si vous changez de canal TV pendant l’écoute ou si vous utilisez votre
PC, votre magnétoscope ou votre décodeur, réglez l’entrée sur TV, puis
appuyez sur CH +/– ou sur les touches 0-9. Si vous appuyez sur
CH +/– ou sur les touches 0-9, il n’est pas possible de permuter
automatiquement l’entrée sur TV.
Remarques
• Vous ne pouvez pas régler et recevoir simultanément les canaux de la
câblodistribution et les canaux UHF/VHF.
• Après avoir commuté du mode câble au mode UHF/VHF, assurez-vous
d’exécuter la « Auto Programmation ».
18
Page 61

Autres fonctions
Les fonctions de télévision suivantes sont également disponibles.
x Écoute de programmes de télévision sous-
titrés
Réglez « Caption Vision » à « Oui » dans le menu « Option ».
Pour plus de détails, voir « Réglage de « Caption Vision » (TV/
COMPONENT/VIDEO 1/VIDEO 2 seulement) » à la page 36.
x Fonction de contrôle parental
Sélectionnez les options voulues dans le menu « Parent ». Pour
plus de détails, voir « Menu Parent » à la page 29.
Touches de commande (télécommande)
Appuyez
sur
MUTING Désactiver le son. Appuyez de nouveau sur cette
DISPLAY Afficher le numéro du canal en cours ou l’entrée
JUMP Alterner entre deux canaux. L’écran alterne entre
SLEEP Éteindre automatiquement l’écran après la durée
Pour
touche ou appuyez sur VOL + pour rétablir le son
(page 39).
en cours. Appuyez de nouveau sur cette touche
pour désactiver l’affichage.
le canal en cours et le dernier canal sélectionné.
indiquée (page 41).
Changer de mode image (page 40).
Régler le paramètre « PIP » ou « PAP ». A
chaque pression sur cette touche, le paramètre
change dans l’ordre suivant.
PIP activé t PAP activé t Non t
PIP activé... (page 34)
Changer le réglage « Zoom ». À chaque pression
sur la touche, le réglage change comme suit.
Normal t Plein écran t Grand Zoom t
Zoom t Normal... (page 26)
Personnalisation de l’écran
Avant d’effectuer les réglages
Raccordez l’écran et les autres appareils, puis allumez-les.
Pour de meilleurs résultats, attendez au moins 30 minutes avant
de faire des réglages.
Vous pouvez effectuer de nombreux réglages pour votre écran
avec le menu affiché à l’écran.
Navigation dans le menu
x Avec les touches de l’écran
1 Affichez le menu principal.
Appuyez sur la touche MENU pour afficher le menu principal
à l’écran.
Image
Mode: Cinéma
Rétroéclairage: 100
Contraste: 70
Luminosité: 50
Couleur:
,
Nuance:
Netteté:
Temp.couleur: 9300K
Gamma: Gamma4
Réinit.mode image
Réduc.de bruit:
Contraste dynamique:
Sél
2 Sélectionnez le menu souhaité.
Utilisez les touches M/m pour sélectionner le menu souhaité.
Appuyez sur la touche OK pour passer au premier élément du
menu.
,
DVI-D: PC 1
1680 × 1050/60 Hz
OK
Régl Fin
MENU
FR
Conseil
Les touches et sont aussi présentes sur l’écran.
3 Sélectionnez l’élément à régler.
Utilisez les touches M/m pour sélectionner l’élément à régler,
puis appuyez sur la touche OK.
,
Lorsque le menu comporte l’élément .
Lorsque vous sélectionnez et appuyez sur la touche OK, l’écran
vous ramène au menu précédent.
19
Page 62

4 Réglez l’élément sélectionné.
Utilisez les touches M/m pour faire le réglage, puis appuyez
sur la touche OK.
Lorsque vous appuyez sur la touche OK, le réglage est
enregistré et l’écran vous ramène au menu précédent.
3 Sélectionnez l’élément à régler.
Utilisez les touches M/m pour sélectionner l’élément à régler,
puis appuyez sur la touche OK.
,
5 Quittez le menu.
Appuyez une fois sur la touche MENU pour revenir à
l’affichage normal. Si vous n’appuyez sur aucune touche,
l’écran revient à l’affichage normal après environ 45
secondes.
x Avec les touches de la télécommande
1 Affichez le menu principal.
Appuyez sur la touche MENU pour afficher le menu principal
à l’écran.
DVI-D: PC 1
1680 × 1050/60 Hz
OK
Régl Fin
MENU
,
Image
Mode: Cinéma
Rétroéclairage: 100
Contraste: 70
Luminosité: 50
Couleur:
Nuance:
Netteté:
Temp.couleur: 9300K
Gamma: Gamma4
Réinit.mode image
Réduc.de bruit:
Contraste dynamique:
Sél
OK
,
OK
Lorsque le menu comporte l’élément .
Lorsque vous sélectionnez et appuyez sur la touche OK, l’écran
vous ramène au menu précédent.
4 Réglez l’élément sélectionné.
Utilisez les touches M/m pour faire le réglage, puis appuyez
sur la touche OK.
Lorsque vous appuyez sur la touche OK, le réglage est
enregistré et l’écran vous ramène au menu précédent.
OK
,
OK
5 Quittez le menu.
Appuyez une fois sur la touche MENU pour revenir à
l’affichage normal. Si vous n’appuyez sur aucune touche,
l’écran revient à l’affichage normal après environ 45
secondes.
MENU
MENU
2 Sélectionnez le menu souhaité.
Utilisez les touches M/m pour sélectionner le menu souhaité.
Appuyez sur la touche OK pour passer au premier élément du
menu.
OK
,
OK
x Rétablir les réglages aux valeurs par défaut
Le menu « Réinit. tout » vous permet de rétablir les réglages à
leurs valeurs d’origine. Pour plus de détails sur la réinitialisation
des réglages, voir « Rétablir les réglages aux valeurs par défaut »
à la page 38.
20
Page 63

Menu Image
Le menu « Image » permet de régler les éléments suivants.
• Mode
Rétroéclairage
Contraste (Image)
Luminosité
Couleur
Nuance
Netteté
Temp. couleur
(température de couleur)
Image
Mode: Cinéma
Rétroéclairage: 100
Contraste: 70
Luminosité: 50
Couleur:
Nuance:
Netteté:
Temp.couleur: 9300K
Gamma: Gamma4
Réinit.mode image
Réduc.de bruit:
Contraste dynamique:
Sél
Gamma
Réinit. mode image (réinitialisation du mode image)
• Réduc. de bruit
• Contraste dynamique
Conseil
Vous pouvez régler « Rétroéclairage », « Contraste », « Luminosité »,
« Couleur », « Nuance », « Netteté », « Temp. couleur » et « Gamma »
séparément pour chaque mode image. Vous pouvez également régler un
mode image différent pour chaque source d’entrée.
x Sélectionner le mode image pour PC 1/PC 2
Cette fonction vous permet de sélectionner la luminosité
appropriée pour l’utilisation.
1 Appuyez sur la touche MENU.
Le menu principal apparaît à l’écran.
2 Utilisez les touches M/m pour sélectionner
(Image), puis appuyez sur la touche OK.
Le menu « Image » apparaît à l’écran.
3 Utilisez les touches M/m pour sélectionner
« Mode », puis appuyez sur la touche OK.
Le menu « Mode » apparaît à l’écran.
1680 × 1050/60 Hz
OK
Régl
DVI-D: PC 1
Fin
MENU
Image
Mode: Jeu
Rétroéclairage: Cinéma
Contraste: PC
Luminosité: Auto
Couleur:
Nuance:
Netteté:
Temp.couleur: 9300K
Gamma: Gamma4
Réinit.mode image
Réduc.de bruit:
Contraste dynamique:
Sél
DVI-D: PC 1
1680 × 1050/60 Hz
OK
Régl Fin
MENU
x Sélectionner le mode image pour TV/
COMPONENT/VIDEO
Cette fonction vous permet de sélectionner la luminosité
appropriée pour l’utilisation.
1 Appuyez sur la touche MENU.
Le menu principal apparaît à l’écran.
2 Utilisez les touches M/m pour sélectionner
(Image), puis appuyez sur la touche OK.
Le menu « Image » apparaît à l’écran.
3 Utilisez les touches M/m pour sélectionner
« Mode », puis appuyez sur la touche OK.
Le menu « Mode » apparaît à l’écran.
Image
Mode: Éclatant
Rétroéclairage: Standard
Image: ECO
Luminosité: Auto
Couleur: 50
Nuance: 0
Netteté: 7
Temp.couleur:
Gamma:
Réinit.mode image
Réduc.de bruit: Non
Contraste dynamique: Non
4 Utilisez les touches M/m pour sélectionner le mode
souhaité, puis appuyez sur la touche OK.
Le réglage par défaut est « Éclatant ».
• Éclatant : Netteté et contraste rehaussés.
• Standard :
Contraste convenant à l’éclairage d’une pièce.
• ECO : Faible luminosité.
• Auto : Réglage automatique de la luminosité de l’écran
selon la luminosité ambiante (fonction de
réglage automatique de la luminosité). Pour plus
de détails, voir « Fonction de réglage
automatique de la luminosité (capteur de
lumière) » à la page 40.
Remarque
Lorsque le mode image est réglé à « Auto », vous ne pouvez pas régler le
rétroéclairage.
1/VIDEO 2
Régl Fin
Sél
: TV
MENU
OK
FR
4 Utilisez les touches M/m pour sélectionner le mode
souhaité, puis appuyez sur la touche OK.
Le réglage par défaut est « Cinéma ».
• Jeu : Luminosité élevée.
• Cinéma :
Image nette et contraste élevé.
• PC : Image à tonalité adoucie.
• Auto : Réglage automatique de la luminosité de l’écran
selon la luminosité ambiante (fonction de réglage
automatique de la luminosité). Pour plus de
détails, voir « Fonction de réglage automatique de
la luminosité (capteur de lumière) » à la page 40.
Remarque
Lorsque le mode image est réglé à « Auto », vous ne pouvez pas régler le
rétroéclairage.
21
Page 64

x Réglage de « Rétroéclairage »
Si l’écran est trop clair, réglez le rétroéclairage pour augmenter le
confort visuel.
1 Appuyez sur la touche MENU.
Le menu principal apparaît à l’écran.
2 Utilisez les touches M/m pour sélectionner
(Image), puis appuyez sur la touche OK.
Le menu « Image » apparaît à l’écran.
3 Utilisez les touches M/m pour sélectionner
« Rétroéclairage », puis appuyez sur la touche OK.
Le menu « Rétroéclairage » apparaît à l’écran.
4 Utilisez les touches M/m pour régler la luminosité,
puis appuyez sur la touche OK.
x Réglage de « Contraste » (« Image »)
Cette fonction vous permet de régler le contraste de l’image. Le
menu « Contraste » (« Image ») est seulement disponible pour les
sources d’entrée PC 1 et PC 2. Lors de la sélection de signaux
d’entrée COMPONENT, VIDEO 1, VIDEO 2 ou TV, le menu
« Image » est offert au lieu du menu de contraste.
1 Appuyez sur la touche MENU.
Le menu principal apparaît à l’écran.
2 Utilisez les touches M/m pour sélectionner
(Image), puis appuyez sur la touche OK.
Le menu « Image » apparaît à l’écran.
3 Utilisez les touches M/m pour sélectionner
« Contraste » (« Image »), puis appuyez sur la
touche OK.
Le menu « Contraste » (« Image ») apparaît à l’écran.
4 Utilisez les touches M/m pour régler le contraste,
puis appuyez sur la touche OK.
x Réglage de « Luminosité »
Cette fonction vous permet de régler la luminosité de l’image,
c’est-à-dire son niveau de noir.
1 Appuyez sur la touche MENU.
Le menu principal apparaît à l’écran.
2 Utilisez les touches M/m pour sélectionner
(Image), puis appuyez sur la touche OK.
Le menu « Image » apparaît à l’écran.
3 Utilisez les touches M/m pour sélectionner
« Luminosité », puis appuyez sur la touche OK.
Le menu « Luminosité » apparaît à l’écran.
4 Utilisez les touches M/m pour régler la luminosité,
puis appuyez sur la touche OK.
x Réglage de « Couleur » (TV/COMPONENT/
VIDEO
Cette fonction vous permet de régler l’intensité des couleurs de
l’image affichée à l’écran.
1 Appuyez sur la touche MENU.
Le menu principal apparaît à l’écran.
2 Utilisez les touches M/m pour sélectionner
(Image), puis appuyez sur la touche OK.
Le menu « Image » apparaît à l’écran.
3 Utilisez les touches M/m pour sélectionner
« Couleur », puis appuyez sur la touche OK.
Le menu « Couleur » apparaît à l’écran.
4 Utilisez les touches M/m pour régler la couleur, puis
appuyez sur la touche OK.
1/VIDEO 2 seulement)
x Réglage de « Nuance » (TV/VIDEO 1/
VIDEO
Cette fonction vous permet de régler les nuances de tonalité des
couleurs de l’image.
1 Appuyez sur la touche MENU.
Le menu principal apparaît à l’écran.
2 Utilisez les touches M/m pour sélectionner
(Image), puis appuyez sur la touche OK.
Le menu « Image » apparaît à l’écran.
3 Utilisez les touches M/m pour sélectionner
« Nuance », puis appuyez sur la touche OK.
Le menu « Nuance » apparaît à l’écran.
4 Utilisez les touches M/m pour régler les nuances de
tonalité, puis appuyez sur la touche OK.
2 seulement)
x Réglage de « Netteté » (TV/COMPONENT/
VIDEO
Cette fonction vous permet de régler la netteté des images, c’està-dire la précision de leurs contours.
1 Appuyez sur la touche MENU.
Le menu principal apparaît à l’écran.
2 Utilisez les touches M/m pour sélectionner
(Image), puis appuyez sur la touche OK.
Le menu « Image » apparaît à l’écran.
3 Utilisez les touches M/m pour sélectionner
« Netteté », puis appuyez sur la touche OK.
Le menu « Netteté » apparaît à l’écran.
4 Utilisez les touches M/m pour régler la netteté, puis
appuyez sur la touche OK.
1/VIDEO 2 seulement)
22
Page 65

x Réglage de « Temp. couleur » (PC 1/PC 2
seulement)
Cette fonction vous permet de sélectionner le niveau de
température du blanc pour les couleurs à partir des réglages de
température de couleur préréglés.
Vous pouvez également effectuer un réglage fin de la température
de couleur, au besoin.
1 Appuyez sur la touche MENU.
Le menu principal apparaît à l’écran.
2 Utilisez les touches M/m pour sélectionner
(Image), puis appuyez sur la touche OK.
Le menu « Image » apparaît à l’écran.
3 Utilisez les touches M/m pour sélectionner « Temp.
couleur », puis appuyez sur la touche OK.
Le menu « Temp. couleur » apparaît à l’écran.
Image
Mode: Cinéma
Rétroéclairage: 100
Contraste: 70
Luminosité: 50
Couleur:
Nuance:
Netteté:
Temp.couleur: 9300K
Gamma: 6500K
Réinit.mode image sRVB
Réduc.de bruit: Utilisateur
Contraste dynamique: Régler
Sél
DVI-D: PC 1
1680 × 1050/60 Hz
OK
Régl Fin
MENU
4 Utilisez les touches M/m pour sélectionner la
température de couleur souhaitée, puis appuyez sur
la touche OK.
La balance des blancs passe du bleu au rouge alors que la
température passe de 9 300 K à 6 500 K.
Lorsque vous sélectionnez « sRVB », les couleurs sont
ajustées au profil sRVB. (Le protocole d’espacement des
couleurs sRVB est une norme de l’industrie conçue pour les
produits informatiques.) Lorsque vous sélectionnez
« sRVB », le réglage des couleurs de votre ordinateur doit être
réglé au profil sRVB.
Remarques
• Si un ordinateur ou autre appareil raccordé n’est pas compatible avec la
norme sRVB, les couleurs ne peuvent pas être réglées au profil sRVB.
• Lorsque le mode image est réglé à « Auto », vous ne pouvez pas
sélectionner « sRVB ».
• Si vous sélectionnez « sRVB », vous ne pouvez pas régler
« Contraste » ni « Luminosité » dans le menu « Image ». De plus, vous
ne pouvez pas régler « Gamma ».
Réglage fin de la température de couleur
1 Appuyez sur la touche MENU.
Le menu principal apparaît à l’écran.
2 Utilisez les touches M/m pour sélectionner
(Image), puis appuyez sur la touche OK.
Le menu « Image » apparaît à l’écran.
4 Utilisez les touches M/m pour sélectionner
« Régler », puis appuyez sur la touche OK.
Le menu de réglage fin de la température de couleur apparaît
à l’écran.
R 160
V 128
B 75
5 Utilisez les touches M/m pour sélectionner R
(rouge) ou B (bleu), puis appuyez sur la touche OK.
Utilisez ensuite les touches M/m pour ajuster la
température de couleur, puis appuyez sur la touche
OK.
Comme ce réglage change la température de couleur en
augmentant ou en réduisant la quantité de rouge (R) et de bleu
(B) part rapport au vert (V), le réglage du vert est fixe.
6 Utilisez les touches M/m pour sélectionner , puis
appuyez sur la touche OK.
Les nouveaux réglages de couleur sont sauvegardés en
mémoire et automatiquement récupérés lorsque vous
sélectionnez « Utilisateur ».
Le menu « Temp. couleur » apparaît à l’écran.
x Réglage de « Gamma » (PC 1/PC 2
seulement)
Cette fonction vous permet de faire correspondre la teinte de
l’image à l’écran avec la teinte d’origine de l’image.
1 Appuyez sur la touche MENU.
Le menu principal apparaît à l’écran.
2 Utilisez les touches M/m pour sélectionner
(Image), puis appuyez sur la touche OK.
Le menu « Image » apparaît à l’écran.
3 Utilisez les touches M/m pour sélectionner
« Gamma », puis appuyez sur la touche OK.
Le menu « Gamma » apparaît à l’écran.
Image
Mode: Cinéma
Rétroéclairage: 100
Contraste: 70
Luminosité: 50
Couleur:
Nuance:
Netteté:
Temp.couleur: 9300K
Gamma: Gamma1
Réinit.mode image Gamma2
Réduc.de bruit: Gamma3
Contraste dynamique: Gamma4
Sél
4 Utilisez les touches M/m pour sélectionner le mode
souhaité, puis appuyez sur la touche OK.
DVI-D: PC 1
1680 × 1050/60 Hz
OK
Régl Fin
MENU
FR
3 Utilisez les touches M/m pour sélectionner « Temp.
couleur », puis appuyez sur la touche OK.
Le menu « Temp. couleur » apparaît à l’écran.
23
Page 66

x Rétablir les réglages de mode image aux
valeurs par défaut
Cette fonction permet de rétablir les réglages aux valeurs par
défaut.
1 Appuyez sur la touche MENU.
Le menu principal apparaît à l’écran.
2 Utilisez les touches M/m pour sélectionner
(Image), puis appuyez sur la touche OK.
Le menu « Image » apparaît à l’écran.
3 Utilisez les touches M/m pour sélectionner « Réinit.
mode image », puis appuyez sur la touche OK.
Le menu « Réinit. mode image » apparaît à l’écran.
Image
Mode: Cinéma
Rétroéclairage: 100
Contraste: 70
Luminosité: 50
Couleur:
Nuance:
Netteté:
Temp.couleur: 9300K
Gamma: Gamma4
Réinit.mode image OK
Réduc.de bruit: Annuler
Contraste dynamique:
Sél
DVI-D: PC 1
1680 × 1050/60 Hz
OK
Régl Fin
MENU
4 Utilisez les touches M/m pour sélectionner le mode
souhaité, puis appuyez sur la touche OK.
• OK : Réinitialise tous les éléments du mode image
en cours aux valeurs par défaut.
• Annuler : Annule la réinitialisation et revient au menu
« Image ».
x Réglage de « Réduc.de bruit » (TV/
COMPONENT/VIDEO
Permet d’activer ou de désactiver la fonction de réduction du
bruit.
Cette fonction peut être réglée séparément pour chaque source
d’entrée.
1 Appuyez sur la touche MENU.
Le menu principal apparaît à l’écran.
2 Utilisez les touches M/m pour sélectionner
(Image), puis appuyez sur la touche OK.
Le menu « Image » apparaît à l’écran.
1/VIDEO 2 seulement)
4 Utilisez les touches M/m pour sélectionner le mode
souhaité, puis appuyez sur la touche OK.
• Oui : Le niveau de bruit est réduit.
• Non : La fonction de réduction du bruit est
désactivée.
x Réglage de « Contraste dynamique » (TV/
COMPONENT/VIDEO
Permet d’activer ou de désactiver la fonction « Contraste
dynamique » (image dynamique).
Cette fonction peut être réglée séparément pour chaque source
d’entrée.
1 Appuyez sur la touche MENU.
Le menu principal apparaît à l’écran.
2 Utilisez les touches M/m pour sélectionner
(Image), puis appuyez sur la touche OK.
Le menu « Image » apparaît à l’écran.
3 Utilisez les touches M/m pour sélectionner
« Contraste dynamique », puis appuyez sur la
touche OK.
Le menu « Contraste dynamique » apparaît à l’écran.
Image
Mode: Éclatant
Rétroéclairage: 100
Image: 70
Luminosité: 50
Couleur: 50
Nuance: 0
Netteté: 7
Temp.couleur:
Gamma:
Réinit.mode image
Réduc.de bruit: Non
Contraste dynamique: Oui
Non
4 Utilisez les touches M/m pour sélectionner le mode
souhaité, puis appuyez sur la touche OK.
• Oui : Le contraste de l’image est rehaussé.
• Non : La fonction « Contraste dynamique » est
désactivée.
Remarques
• Le « Contraste dynamique » n’est disponible que si le mode image est
réglé sur « Éclatant » ou « Standard ».
• Quand la fonction « Contraste dynamique » est réglée sur « Oui », le
rétroéclairage est activé par défaut et ne peut plus être réglé.
1/VIDEO 2 seulement)
: TV
MENU
OK
Régl Fin
Sél
3 Utilisez les touches M/m pour sélectionner
« Réduc.de bruit », puis appuyez sur la touche OK.
Le menu « Réduc.de bruit » apparaît à l’écran.
OK
Régl Fin
: TV
MENU
Image
Mode: Éclatant
Rétroéclairage: 100
Image: 70
Luminosité: 50
Couleur: 50
Nuance: 0
Netteté: 7
Temp.couleur:
Gamma:
Réinit.mode image
Réduc.de bruit: Oui
Contraste dynamique: Non
Sél
24
Page 67

Menu Audio
x Réglage de « Aigu », « Grave » et
« Balance »
Le menu « Audio » permet de régler les éléments suivants.
Vous pouvez régler ces éléments du menu « Audio »
différemment pour chaque source d’entrée.
• Surround (ambiophonie)
•Aigu
•Grave
• Balance
• Volume auto
Audio
Surround: SRS WOW
Aigu:
Grave:
Balance: 0
Volume auto: Oui
MTS: Stéréo
Réinit.audio
: TV
•MTS
• Réinit.audio
OK
Régl Fin
Sél
x Réglage de « Surround » (ambiophonie)
1 Appuyez sur la touche MENU.
Le menu principal apparaît à l’écran.
2 Utilisez les touches M/m pour sélectionner
(Audio), puis appuyez sur la touche OK.
Le menu « Audio » apparaît à l’écran.
3 Utilisez les touches M/m pour sélectionner
« Surround », puis appuyez sur la touche OK.
Le menu « Surround » apparaît à l’écran.
Audio
Surround: SRS WOW
Aigu: Non
Grave:
Balance: 0
Volume auto: Oui
MTS: Stéréo
Réinit.audio
: TV
1 Appuyez sur la touche MENU.
Le menu principal apparaît à l’écran.
2 Utilisez les touches M/m pour sélectionner
(Audio), puis appuyez sur la touche OK.
Le menu « Audio » apparaît à l’écran.
3 Utilisez les touches M/m pour sélectionner « Aigu »,
« Grave » ou « Balance », puis appuyez sur la touche
MENU
OK.
4 Utilisez les touches M/m pour régler le niveau
souhaité, puis appuyez sur la touche OK.
Remarque
« Aigu » et « Grave » ne peuvent être réglés que si « Surround » est réglé
sur Non.
x Réglage de « Volume auto » (TV/
COMPONENT/VIDEO 1/VIDEO 2 seulement)
Cette fonction vous permet de régler la force du son pour le
maintenir à un niveau précis.
1 Appuyez sur la touche MENU.
Le menu principal apparaît à l’écran.
2 Utilisez les touches M/m pour sélectionner
(Audio), puis appuyez sur la touche OK.
Le menu « Audio » apparaît à l’écran.
FR
MENU
OK
Régl Fin
Sél
4 Utilisez les touches M/m pour sélectionner le mode
souhaité, puis appuyez sur la touche OK.
• SRS WOW :
Graves profondes et aiguës claires pour un
son ambiophonique riche; les films et jeux,
en particulier, profitent d’un son puissant.
• Non : Effet SRS WOW désactivé.
La fonction SRS WOW adopte la toute dernière technologie mise
au point par SRS Labs, Inc. pour améliorer de façon significative
la qualité de divers types de sources audio.
3 Utilisez les touches M/m pour sélectionner
« Volume auto », puis appuyez sur la touche OK.
Le menu « Volume auto » apparaît à l’écran.
OK
Régl Fin
: TV
MENU
Audio
Surround: SRS WOW
Aigu:
Grave:
Balance: 0
Volume auto: Oui
MTS: Non
Réinit.audio
Sél
4 Utilisez les touches M/m pour sélectionner le mode
souhaité, puis appuyez sur la touche OK.
• Oui : Le volume du son reste au niveau réglé, peu importe
le niveau de volume du signal de diffusion (par
exemple dans le cas de publicités).
• Non : Le niveau de volume change automatiquement
suivant le signal de diffusion.
x Réglage de « MTS » (TV seulement)
Cette fonction vous permet d’écouter des programmes stéréo,
mono et bilingues.
1 Appuyez sur la touche MENU.
Le menu principal apparaît à l’écran.
25
Page 68

2 Utilisez les touches M/m pour sélectionner
(Audio), puis appuyez sur la touche OK.
Le menu « Audio » apparaît à l’écran.
3 Utilisez les touches M/m pour sélectionner « MTS »,
puis appuyez sur la touche OK.
Le menu « MTS » apparaît à l’écran.
OK
Régl Fin
: TV
MENU
Audio
Surround: SRS WOW
Aigu:
Grave:
Balance: 0
Volume auto: Oui
MTS: Stéréo
Réinit.audio Auto SAP
Mono
Sél
4 Utilisez les touches M/m pour sélectionner le mode
souhaité, puis appuyez sur la touche OK.
• Stéréo : Le son est émis en stéréo lorsque vous
regardez un programme diffusé en stéréo.
• Auto SAP : Le son d’une deuxième bande sonore est émis
lorsque le signal correspondant est reçu. (Si
aucun signal SAP n’est présent, l’écran reste
en mode stéréo.)
• Mono : Le son est émis en mono. (Permet de réduire
les interférences lorsque le signal du son stéréo
est faible.)
x Rétablir tous les réglages de mode audio
aux valeurs par défaut
Cette fonction permet de rétablir les réglages aux valeurs par
défaut.
1 Appuyez sur la touche MENU.
Le menu principal apparaît à l’écran.
2 Utilisez les touches M/m pour sélectionner
(Audio), puis appuyez sur la touche OK.
Le menu « Audio » apparaît à l’écran.
Menu Écran
Le menu « Écran » permet de régler les éléments suivants.
• Zoom
• Réglage auto
•Phase
• Horloge
• Centrage H
Écran
Zoom: Plein écran
Réglage auto
Phase: 30
Horloge: 50
Centrage H: 50
Centrage V: 50
Résolution
• Centrage V
• Résolution
Sél
x Réglage de « Zoom »
Cette fonction vous permet de regarder des émissions 4:3 standard
ou d’autres formats (tels que letterbox) en divers modes
« Zoom ».
Un mode « Zoom » est réglé pour chaque source d’entrée.
Conseil
Vous pouvez également changer le réglage « Zoom » en appuyant
plusieurs fois sur la touche de la télécommande.
1 Appuyez sur la touche MENU.
Le menu principal apparaît à l’écran.
2 Utilisez les touches M/m pour sélectionner
(Écran), puis appuyez sur la touche OK.
Le menu « Écran » apparaît à l’écran.
3 Utilisez les touches M/m pour sélectionner
« Zoom », puis appuyez sur la touche OK.
Le menu « Zoom » apparaît à l’écran.
Écran
Zoom:
Normal
Réglage auto
Plein écran
Phase:
Grand Zoom
Horloge:
Zoom
Centrage H:
Centrage V:
Résolution
: TV
HD15: PC 2
1680 × 1050/60 Hz
OK
Régl Fin
MENU
3 Utilisez les touches M/m pour sélectionner
« Réinit.audio », puis appuyez sur la touche OK.
Le menu « Réinit.audio » apparaît à l’écran.
OK
Régl Fin
: TV
MENU
Audio
Surround: SRS WOW
Aigu:
Grave:
Balance: 0
Volume auto: Oui
MTS: Stéréo
Réinit.audio OK
Annuler
Sél
4 Utilisez les touches M/m pour sélectionner le mode
souhaité, puis appuyez sur la touche OK.
• OK : Réinitialise tous les éléments du menu « Audio »
aux valeurs par défaut.
• Annuler :
Annule la réinitialisation et revient au menu
« Audio ».
MENU
OK
Régl Fin
Sél
4 Utilisez les touches M/m pour sélectionner le mode
souhaité, puis appuyez sur la touche OK.
• Normal : Format d’écran original.
• Plein écran : L’image est agrandie pour remplir l’écran
16:10. Ce réglage est pratique pour
l’affichage d’un signal comprimé.
• Grand Zoom :
L’image est agrandie à l’horizontale (non
linéairement) pour remplir l’écran de 16:10,
en gardant l’image d’origine autant que
possible.
• Zoom : L’image est agrandie proportionnellement à
l’horizontale et à la verticale pour remplir
l’écran de 16:10. Ce réglage est pratique
pour l’affichage du signal letterbox.
26
Page 69

Remarques
• Lorsque vous sélectionnez l’entrée PC 1 ou PC 2, les réglages
« Zoom » et « Grand Zoom » ne sont pas disponibles.
• Lorsque vous sélectionnez l’entrée COMPONENT et que le signal
vidéo en entrée est de format 1080i, le réglage « Grand Zoom »
n’est pas disponible.
• En mode « Normal » de PC 1 ou PC 2, le signal d’entrée est affiché
à l’écran dans son format réel et des bandes noires peuvent
apparaître en haut et en bas de l’écran, en fonction du signal
d’entrée.
x Réglage manuel de la netteté de l’image
(phase/horloge) (PC 2 seulement)
Cette fonction vous permet de régler la netteté de l’image, comme
suit.
1 Réglez la résolution sur 1 680 × 1 050 sur
l’ordinateur.
2 Introduisez le CD-ROM.
x Fonction de réglage automatique de la
qualité de l’image (PC 2 seulement)
Lorsque l’écran reçoit un signal en entrée, il ajuste
automatiquement la position et la netteté (phase/horloge) de
l’image afin d’assurer un affichage clair à l’écran (page 40).
Lorsque la fonction de réglage automatique de la qualité de
l’image n’ajuste pas suffisamment l’image
Vous pouvez effectuer des réglages supplémentaires de la qualité de
l’image pour le signal d’entrée en cours (voir « Réglage auto » cidessous).
Si d’autres ajustements à la qualité de l’image sont
nécessaires
Vous pouvez régler manuellement la netteté de l’image (phase/horloge) et
sa position (horizontale/verticale).
Ces réglages sont sauvegardés en mémoire et sont récupérés
automatiquement lorsque l’écran reçoit un signal d’entrée déjà
reçu et enregistré.
x Réglages supplémentaires de la qualité de
l’image pour le signal d’entrée en cours
(Réglage auto) (PC 2 seulement)
3 Lancez le CD-ROM, puis affichez la mire de test.
Pour l’utilisateur Windows
Si le démarrage automatique est activé :
1 Cliquez sur l’outil Display Adjustment (utilitaire).
2 Cliquez sur « Adjust » et vérifiez la résolution, puis
cliquez sur « Suivant ».
Les mires de test de Horloge et Phase s’affichent
successivement.
Si le démarrage automatique échoue :
1 Ouvrez « Poste de travail » et cliquez avec le bouton droit
sur l’icône du CD-ROM. Cliquez sur « Explorer » et
ouvrez l’icône du CD-ROM.
2 Ouvrez [Utility], puis sélectionnez [Windows].
3 Démarrez [Win_Utility.exe].
La mire de test s’affiche.
Pour l’utilisateur Macintosh
1 Ouvrez [Utility], puis sélectionnez [Mac].
2 Démarrez [Mac_Utility.exe].
La mire de test s’affiche.
4 Appuyez sur la touche MENU.
Le menu principal apparaît à l’écran.
5 Utilisez les touches M/m pour sélectionner
(Écran), puis appuyez sur la touche OK.
Le menu « Écran » apparaît à l’écran.
FR
1 Appuyez sur la touche MENU.
Le menu principal apparaît à l’écran.
2 Utilisez les touches M/m pour sélectionner
(Écran), puis appuyez sur la touche OK.
Le menu « Écran » apparaît à l’écran.
3 Utilisez les touches M/m pour sélectionner
« Réglage auto », puis appuyez sur la touche OK.
Faites les réglages requis pour le signal d’entrée en cours
(phase, horloge et position horizontale/verticale) et
sauvegardez-les.
4 Utilisez les touches M/m pour sélectionner le mode
de votre choix, puis appuyez sur la touche OK.
• OK : Pour démarrer le réglage.
• Annuler : Pour annuler les réglages.
6 Utilisez les touches M/m pour sélectionner
« Phase », puis appuyez sur la touche OK.
Le menu « Phase » apparaît à l’écran.
7 Appuyez sur les touches M/m pour réduire les
lignes horizontales.
Continuez le réglage jusqu’à ce que les lignes horizontales
soient réduites au minimum.
8 Appuyez sur la touche OK.
Le menu principal apparaît à l’écran.
Si des lignes verticales apparaissent sur toute la largeur de
l’écran, réglez « Horloge », comme suit.
9 Utilisez les touches M/m pour sélectionner
« Horloge », puis appuyez sur la touche OK.
Le menu « Horloge » apparaît à l’écran.
27
Page 70

10 Appuyez sur les touches M/m pour réduire les
lignes verticales.
Continuez le réglage jusqu’à ce que les lignes verticales
disparaissent.
11 Cliquez sur [END] à l’écran pour fermer l’écran de
test.
x Réglage manuel de la position de l’image
(Centrage V) (TV/COMPONENT/VIDEO 1/
VIDEO 2 seulement)
Si vous souhaitez régler la position de l’image vers le haut ou le
bas lorsque vous sélectionnez « Grand Zoom » ou « Zoom »,
réglez le centrage de l’image comme suit.
1 Appuyez sur la touche MENU.
Le menu principal apparaît à l’écran.
2 Appuyez sur les touches M/m pour sélectionner
(Écran), puis appuyez sur la touche OK.
Le menu « Écran » apparaît à l’écran.
x Réglage manuel de la position de l’image
(Centrage H/Centrage V) (PC 2 seulement)
Si l’image n’est pas au centre de l’écran, ajustez-en le centrage
comme suit.
1 Réglez la résolution sur 1 680 × 1 050 sur
l’ordinateur.
2 Introduisez le CD-ROM.
3 Lancez le CD-ROM, puis affichez la mire de test.
Pour l’utilisateur Windows
Si le démarrage automatique est activé :
1 Cliquez sur l’outil Display Adjustment (utilitaire).
2 Cliquez sur « Adjust » et vérifiez la résolution, puis
cliquez sur « Suivant ».
Les mires de test de Centrage H et Centrage V s’affichent
successivement.
Si le démarrage automatique échoue :
1 Ouvrez « Poste de travail » et cliquez avec le bouton droit
sur l’icône du CD-ROM. Cliquez sur « Explorer » et
ouvrez l’icône du CD-ROM.
2 Ouvrez [Utility], puis sélectionnez [Windows].
3 Démarrez [Win_Utility.exe].
La mire de test s’affiche.
Pour l’utilisateur Macintosh
1 Ouvrez [Utility], puis sélectionnez [Mac].
2 Démarrez [Mac_Utility.exe].
La mire de test s’affiche.
4 Appuyez sur la touche MENU.
Le menu principal apparaît à l’écran.
5 Utilisez les touches M/m pour sélectionner
(Écran), puis appuyez sur la touche OK.
Le menu « Écran » apparaît à l’écran.
6 Utilisez les touches M/m pour sélectionner
« Centrage H » ou « Centrage V », puis appuyez sur
la touche OK.
Le menu de réglage « Centrage H » ou « Centrage V »
apparaît à l’écran.
3 Appuyez sur les touches M/m pour sélectionner
« Centrage V », puis appuyez sur la touche OK.
Le menu de réglage « Centrage V » apparaît à l’écran.
4 Appuyez sur les touches M/m pour régler la
position de l’image selon vos préférences.
x Modification de la résolution d’affichage
(Résolution) (PC 2 seulement)
Vous pouvez modifier la résolution d’affichage lorsque l’entrée
en cours est différente de celle affichée à l’écran.
Conseil
Certains signaux de sortie de votre ordinateur risquent de ne pas être
reconnus à l’écran si vous appliquez la résolution par défaut. La résolution
effective peut être différente de celle sélectionnée. N’utilisez cette
fonction que lorsque vous souhaitez modifier la résolution d’affichage.
1 Appuyez sur la touche MENU.
Le menu principal apparaît à l’écran.
2 Appuyez sur les touches M/m pour sélectionner
(Écran), puis appuyez sur la touche OK.
Le menu « Écran » apparaît à l’écran.
3 Appuyez sur les touches M/m pour sélectionner
« Résolution », puis appuyez sur la touche OK.
Le menu « Résolution » s’affiche à l’écran.
Écran
Zoom: Plein écran
Réglage auto
Phase: 30
Horloge: 50
Centrage H: 50
Centrage V: 50
Résolution 1680 × 1050
1400 × 1050
Sél
4 Appuyez sur les touches M/m pour sélectionner la
résolution d’affichage souhaitée, puis appuyez sur
la touche OK.
HD15: PC 2
1680 × 1050/60 Hz
OK
Régl Fin
MENU
7 Utilisez les touches M/m pour centrer l’écran de
test.
8 Cliquez sur [END] à l’écran pour fermer l’écran de
test.
28
Page 71
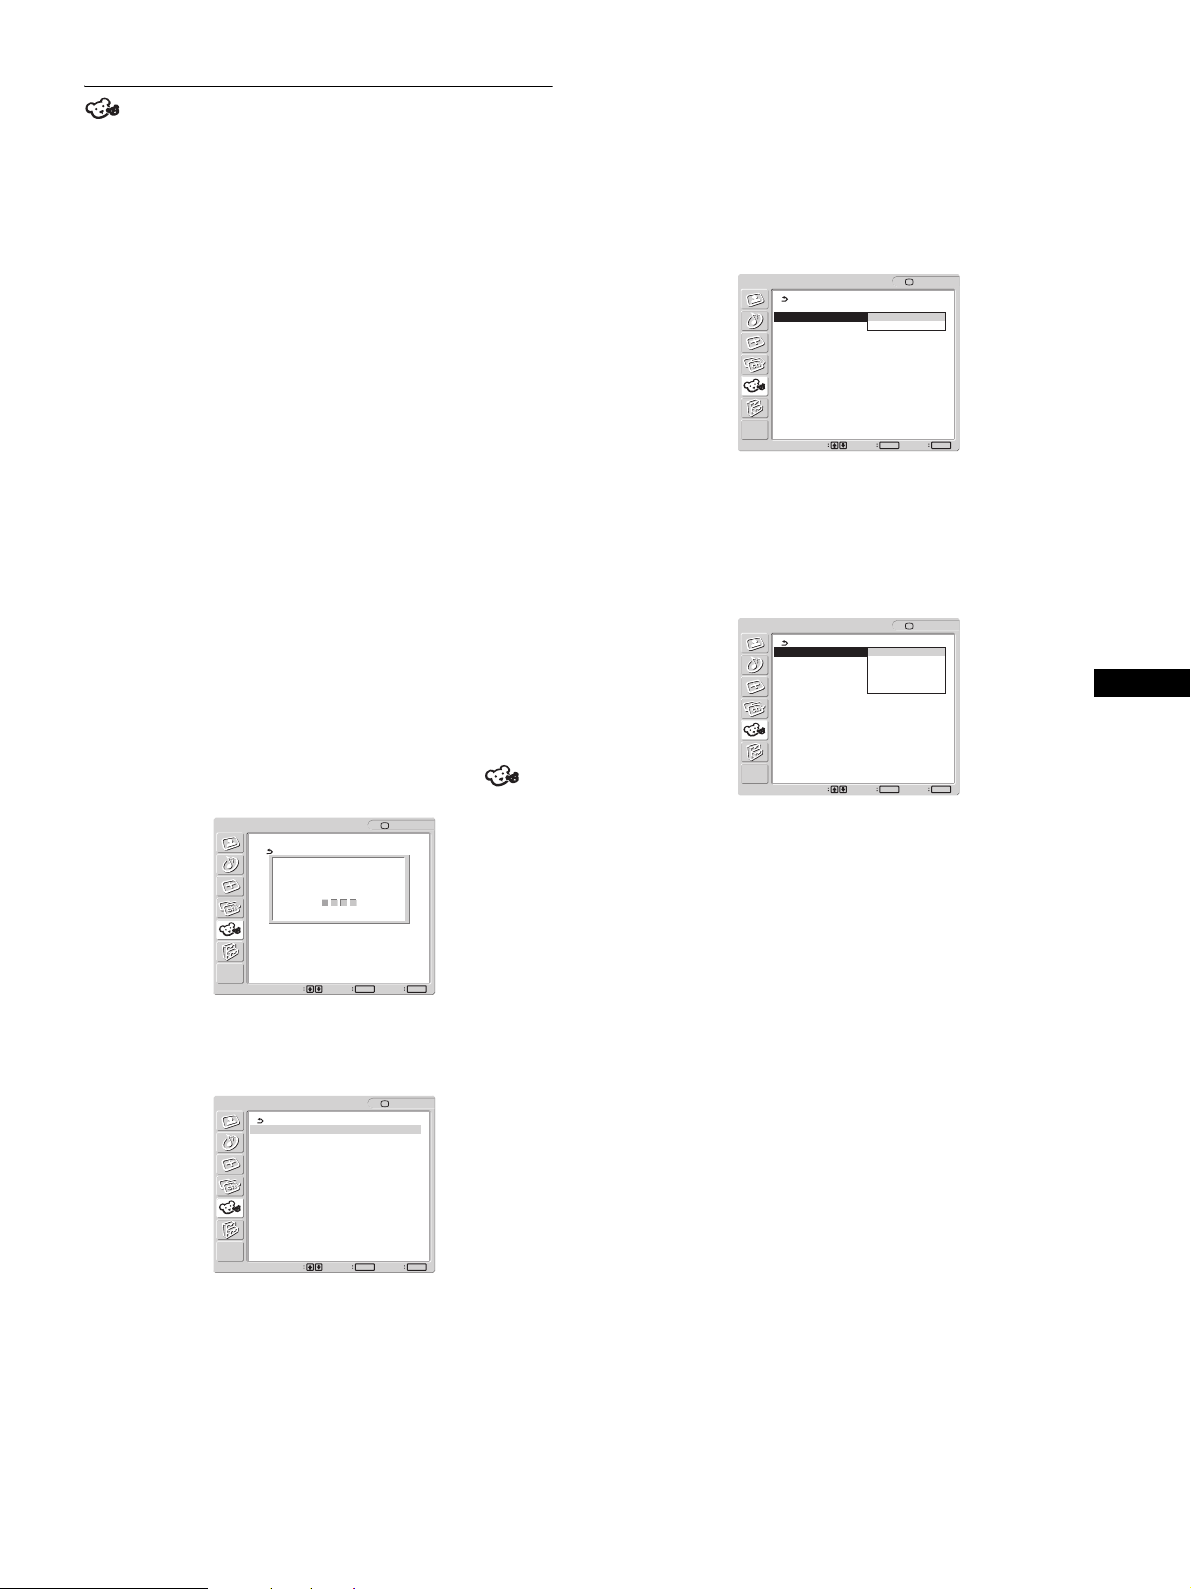
Menu Parent
Les programmes et films diffusés à la télévision comportent une
cote de classement transmise avec le signal et basée sur les
systèmes suivants.
Conseils
• Vous devez entrer le mot de passe à cette étape pour avoir accès au
reste du menu « Parent ». Si vous oubliez votre mot de passe, voir
« Conseil » à la page 30.
• Si vous souhaitez modifier le mot de passe, voir « Pour changer le
mot de passe » à la page 30.
Aux États-Unis : Les directives « U.S. Television Parental
Guidelines » pour les émissions de télévision et « Motion Picture
Association of America (MPAA) » pour les films, y compris ceux
qui sont diffusés à la télévision.
Au Canada : Un système de classement canadien pour les
émissions de télévision en français et un autre pour les émissions
de télévision en anglais.
Afin de bloquer les émissions qui ne conviennent pas à vos
enfants, réglez l’écran selon le système de classement souhaité.
Le classement prédéterminé de Sony est également disponible.
Voir la page 32 pour une description complète des systèmes de
classement.
La fonction de contrôle parental de l’écran reçoit le signal de cote
de classement de la station de diffusion locale ou du
câblodistributeur.
x Activation de la fonction de contrôle
parental
1 Appuyez sur la touche MENU.
2 Utilisez les touches M/m pour sélectionner
(Parent), puis appuyez sur la touche OK.
Parent
Entrez le mot de passe
----
: TV
4 Utilisez les touches M/m pour sélectionner « Pays »,
puis appuyez sur la touche OK.
OK
Régl Fin
: TV
MENU
Parent
Blocage: Non
Pays: U.S.A.
Changer le mot de pas Canada
Sél
5 Utilisez les touches M/m pour sélectionner votre
pays (U.S.A. ou Canada), puis appuyez sur la touche
OK.
6 Utilisez les touches M/m pour sélectionner
« Blocage », puis appuyez sur la touche OK.
OK
Régl Fin
: TV
MENU
Parent
Blocage: Non
Pays: Enfant
Changer le mot de pas Jeune
Adolescent
Spécifique
Sél
7 Utilisez les touches M/m pour sélectionner le
classement souhaité, puis appuyez sur la touche
OK.
Lorsque vous sélectionnez « Enfant », « Jeune » ou
« Adolescent », le niveau de contrôle parental est activé
automatiquement.
FR
MENU
OK
Régl Fin
Sél
3 Saisissez un mot de passe à quatre chiffres avec les
touches de 0 à 9.
Le menu « Parent » apparaît à l’écran.
OK
Régl Fin
: TV
MENU
Parent
Blocage: Non
Pays: U.S.A.
Changer le mot de passe
Sél
Lorsque vous accédez au menu « Parent » pour la première
fois, le menu vous invite à entrer le mot de passe de nouveau
pour le confirmer.
Remarque
N’utilisez pas « 4357 », qui correspond à « HELP » sur le clavier d’un
téléphone (voir page 30).
Conseil
Si vous ne connaissez pas le système de classement des émissions,
sélectionnez « Enfant », « Jeune » ou « Adolescent » afin de simplifier
la sélection du classement. Pour régler un contrôle plus strict,
sélectionnez « Spécifique » (voir « Sélection d’un classement
spécifique » à la page 30).
8 Appuyez sur la touche MENU pour quitter le menu.
Désactivation de la fonction de contrôle parental
Réglez « Blocage » à « Non » dans le menu « Parent ».
29
Page 72

Pour changer le mot de passe
1 Appuyez sur la touche MENU.
2 Utilisez les touches M/m pour sélectionner
(Parent), puis appuyez sur la touche OK.
x Sélection d’un classement spécifique
Pour sélectionner les cotes de classement à bloquer dans le
réglage « Spécifique » une fois que vous aurez activé la fonction
de contrôle parental (page 29), faites comme suit.
Pour une description complète des cotes de classement,
voir « Signification des classements » à la page 32.
3 Saisissez votre mot de passe à quatre chiffres avec
les touches de 0 à 9.
Le menu « Parent » apparaît à l’écran.
4 Utilisez les touches M/m pour sélectionner
« Changer le mot de passe », puis appuyez sur la
touche OK.
5 Saisissez un nouveau mot de passe à quatre
chiffres avec les touches de 0 à 9.
6 Entrez de nouveau le mot de passe de l’étape 5 pour
le confirmer.
7 Appuyez sur la touche MENU pour quitter le menu.
Conseil
Si vous avez oublié votre mot de passe, entrez le mot de passe maître, soit
« 4357 » (qui correspond à « HELP » sur le clavier d’un téléphone) à
l’étape 3. Vous pouvez ensuite régler un nouveau mot de passe.
Remarques
• Si vous avez saisi « 4357 » comme premier mot de passe, vous ne
pouvez pas saisir un nouveau mot de passe (voir l’étape 3 de la section
« Activation de la fonction de contrôle parental » à la page 29).
• Si vous avez sélectionné un programme bloqué par le contrôle parental
et que l’indicateur s’affiche à l’écran, vous ne pouvez pas regarder
ce programme, même si vous entrez « 4357 ».
1 Suivez les étapes 1 à 6 de la section « Activation de
la fonction de contrôle parental » à la page 29 pour
afficher le menu « Blocage ».
2 Utilisez les touches M/m pour sélectionner
« Spécifique », puis appuyez sur la touche OK.
Aux États-Unis
OK
Régl Fin
: TV
MENU
Parent
Spécifique
Classement des films
Classement de télé
Non-classé: Permettre
Sél
Au Canada
OK
Régl Fin
: TV
MENU
Parent
Spécifique
Classement Anglais
Classement Français
Classement U.S.A.
Sél
Pour sélectionner un classement au Canada, passez à
l’étape 6.
3 Utilisez les touches M/m pour sélectionner
« Classement des films », puis appuyez sur la
touche OK.
OK
Régl Fin
: TV
MENU
Parent
Classement des films
G: –
PG: –
PG-13: –
R: –
NC-17: –
X: –
Sél
4 Utilisez les touches M/m pour sélectionner le
classement à bloquer, puis appuyez sur la touche
OK.
L’indicateur s’affiche automatiquement à côté du
classement sélectionné et de tous les classements suivants,
indiquant que les programmes correspondant à ces
classements sont bloqués.
Pour débloquer un classement, sélectionnez , puis appuyez
sur la touche OK.
L’indicateur est remplacé par le signe « – », et tous les
classements au-dessus sont aussi débloqués.
30
Page 73

5 Utilisez les touches M/m pour sélectionner , puis
appuyez sur la touche OK.
6 Pour sélectionner un classement de télévision aux
États-Unis :
Utilisez les touches M/m pour sélectionner « Classement de
télé », puis appuyez sur la touche OK.
OK
Régl Fin
: TV
MENU
Parent
Classement de télé
Classes Contenu
TV-Y: –
TV-Y7: – FV: –
TV-G: –
TV-PG: – D:– L: – S: – V: –
TV-14: – D:– L: – S: – V: –
TV-MA: – L: – S: – V: –
Sél
Exemple : classement de
télévision aux États-Unis
OK
Régl Fin
: TV
MENU
Parent
Classement de télé
Classes Contenu
TV-Y: –
TV-Y7: – FV: –
TV-G: –
TV-PG: – D:– L: – S: – V: –
TV-14: D: L: S: V:
TV-MA: L: S: V:
Sél
Pour débloquer un classement, sélectionnez , puis appuyez
sur la touche OK.
L’indicateur est remplacé par le signe « – », et tous les
classements au-dessus sont aussi débloqués.
Pour sélectionner un classement de télévision au
Canada :
Utilisez les touches M/m pour sélectionner « Classement
Anglais », « Classement Français » ou « Classement
U.S.A. », puis appuyez sur la touche OK.
Classement Anglais
OK
Régl Fin
: TV
MENU
Parent
Classement Anglais
C: –
C8+: –
G: –
PG: –
14+: –
18+: –
Sél
Classement Français
OK
Régl Fin
: TV
MENU
Parent
Classement Français
G: –
8ans+: –
13ans+: –
16ans+: –
18ans+: –
Sél
Classement U.S.A.
OK
Régl Fin
: TV
MENU
Parent
Classement U.S.A.
Classes Contenu
TV-Y: –
TV-Y7: – FV: –
TV-G: –
TV-PG: – D:– L: – S: – V: –
TV-14: – D:– L: – S: – V: –
TV-MA: – L: – S: – V: –
Sél
7 Utilisez les touches M/m pour sélectionner le
classement de télévision à bloquer, puis appuyez
sur la touche OK.
L’indicateur s’affiche automatiquement à côté du
classement sélectionné et de tous les classements suivants,
indiquant que les programmes correspondant à ces
classements sont bloqués.
Certains classements de télévision aux États-Unis ont des
classements supplémentaires appelés « extenseurs ».
Les extenseurs sont définis comme suit :
D (dialogue sexuellement suggestif), FV (violence fictive), L
(langage vulgaire), S (situations sexuelles) et V (violence).
En réglant les extenseurs, vous pouvez définir des limites de
blocage supplémentaires.
Pour plus de détails sur les extenseurs, voir page 33.
Tous les extenseurs compris dans le classement sélectionné
sont bloqués. Pour débloquer certains d’entre eux, allez à
l’étape 8. Sinon, rendez-vous à l’étape 10.
8 Utilisez les touches M/m pour sélectionner
l’extenseur à débloquer, puis appuyez sur la touche
OK.
« – » s’affiche à côté de l’extenseur sélectionné, indiquant que
les programmes correspondant à cet extenseur peuvent être
visionnés.
Pour rebloquer l’extenseur annulé, sélectionnez .
L’indicateur s’affiche, indiquant que les programmes
correspondant à cet extenseur sont de nouveau bloqués.
9 Répétez l’étape 8 pour d’autres extenseurs.
Tous les programmes correspondant au classement
sélectionné et les classements au-dessus sont bloqués, sauf les
extenseurs annulés.
10 Appuyez sur la touche MENU pour quitter le menu.
Pour bloquer les programmes ou films sans
classement
L’option « Non-classé » permet de bloquer les programmes ou
films qui sont diffusés sans porter de classement.
L’option « Non-classé » est disponible uniquement lorsque vous
avez sélectionné le pays « U.S.A. ».
1 Suivez les étapes 1 et 2 de la section « Sélection
d’un classement spécifique » à la page 30.
2 Utilisez les touches M/m pour sélectionner « Non-
classé », puis appuyez sur la touche OK.
FR
31
Page 74

3 Utilisez les touches M/m pour sélectionner
« Blocage », puis appuyez sur la touche OK.
Option Description
Permettre Permet le visionnement des
programmes et films diffusés sans
classement.
Bloquer Bloque tous les programmes et films
diffusés sans classement.
4 Appuyez sur la touche MENU pour quitter le menu.
Remarque
Si vous choisissez de bloquer les programmes de télévision sans
classement, notez que les types de programmes suivants peuvent être
bloqués : émissions diffusées à partir d’un autre pays ou d’une autre
région ; diffusions d’urgence; émissions politiques ; sports ; nouvelles ;
météo ; avis publics ; programmes religieux.
x Signification des classements
Classement aux États-Unis
Classement prédéterminé de Sony
Ces classements originaux ont été établis par Sony selon l’âge des
téléspectateurs. Chaque cote permet de regarder certains
programmes, comme suit :
Option Description
Enfant Approprié pour les enfants de moins de 7 ans.
Classement des États-Unis pour les films : G,
NR et N/A
Classement des États-Unis pour la télévision :
TV-Y, TV-G et TV-NR
Jeune Approprié pour les enfants de 7 ans et plus.
Classement des États-Unis pour les films : G,
PG, NR et N/A
Classement des États-Unis pour la télévision :
TV-Y, TV-Y7, TV-G, TV-PG et TV-NR
Adolescent Approprié pour les enfants de plus de 13 ans.
Classement des États-Unis pour les films : G,
PG, PG-13, NR et N/A
Classement des États-Unis pour la télévision :
TV-Y, TV-Y7, TV-G, TV-PG, TV-14 et TV-NR
Pour une description des catégories « Enfant », « Jeune » et
« Adolescent », voir les options de classement spécifiques cidessous.
Classement des États-Unis pour les films
Le classement des États-Unis pour les films (y compris ceux qui
sont diffusés à la télévision) se base sur les directives de la
« Motion Picture Association of America (MPAA) ».
Option Description
G (grand public : tous
âges)
Dans les films classés G, aucun
langage grossier n’est utilisé, la
violence est minimale et la nudité et
les situations sexuelles sont absentes,
de même que l’utilisation de drogues.
Option Description
PG (supervision
parentale
recommandée :
certaines scènes
peuvent ne pas
convenir aux enfants)
PG-13 (supervision
parentale fortement
recommandée :
certaines scènes
peuvent ne pas
convenir aux enfants
de moins de 13 ans)
R (adultes : les enfants
de moins de 17 ans
doivent être
accompagnés d’un
adulte)
NC-17 ou X (18 ans et
plus)
Classement des États-Unis pour la télévision
Le classement des États-Unis pour les programmes de télévision
se base sur les directives « U.S. Television Parental Guidelines ».
Option Description
TV-Y (tous les
enfants)
TV-Y7
(conçus pour
les enfants de
plus de 6 ans)
TV-G (grand
public)
TV-PG
(supervision
parentale
recommandée)
TV-14
(supervision
parentale
fortement
recommandée)
TV-MA
(adultes
seulement)
Ce type de film devrait être d’abord
visionné par les parents.
Les parents sont avisés d’évaluer
sérieusement le visionnement de ces
films par des enfants pré-adolescents.
Ce type de film contient du langage
vulgaire, de la violence explicite, de la
nudité et représente l’utilisation de
drogues ou d’autres sujets délicats.
Ce type de film est considéré par la
plupart des parents comme étant
inapproprié pour des mineurs.
Ce type de film peut contenir des
situations sexuelles et de la violence et
représenter des comportements
aberrants, l’utilisation de drogues ou
d’autres sujets délicats.
Ces programmes sont conçus pour les enfants
de 2 à 6 ans et conviennent pour tous les
enfants.
Ces programmes sont appropriés pour les
enfants de 7 ans et plus. Ces programmes
peuvent inclure de la violence fictive légère ou
de la violence de comédie ou peuvent effrayer
les enfants de moins de 7 ans.
La plupart des parents considéreraient ces
programmes appropriés pour tous les âges. Ils
contiennent peu de violence ou aucune et pas
de langage grossier ni de dialogues ou de
situations sexuellement explicites.
Ces programmes contiennent des éléments que
les parents peuvent considérer inappropriés
pour les jeunes enfants.
Ces programmes contiennent des éléments que
les parents peuvent considérer inappropriés
pour les enfants de moins de 14 ans.
Ces programmes sont conçus pour les adultes
et peuvent être inappropriés pour les enfants de
moins de 17 ans.
32
Page 75

À propos des extenseurs du classement des États-Unis
pour la télévision
Les classements TV-Y7, TV-PG, TV-14 et TV-MA comportent
des classements supplémentaires appelés « extenseurs »
permettant de préciser les limites de visionnement. Les extenseurs
sont définis comme suit :
Option Description
FV (violence fictive) Programmes contenant de la violence
de comédie présente dans les
programmes TV-Y7 uniquement.
D (dialogues à
connotation sexuelle)
L (langage vulgaire) Programmes contenant du langage
S (situations
sexuelles)
V (violence) Programmes contenant de la violence.
Classement au Canada
Classement prédéterminé de Sony
Ces classements originaux ont été établis par Sony selon l’âge des
téléspectateurs. Chaque cote permet de regarder certains
programmes, comme suit :
Option Description
Enfant Approprié pour les enfants de moins de 8 ans.
Jeune Approprié pour les enfants de plus de 8 ans.
Adolescent Approprié pour les enfants de 14 ans et plus.
Programmes contenant des dialogues
suggestifs ou de l’humour à
connotation sexuelle.
vulgaire.
Programmes contenant des situations
sexuelles.
Ces programmes peuvent contenir du
langage grossier, de la violence ou de
brèves scènes de nudité.
Classement du Canada pour les programmes
de langue anglaise : C et G
Classement du Canada pour les programmes
de langue française : G
Classement des États-Unis pour la télévision :
TV-Y, TV-G et TV-NR
Classement du Canada pour les programmes
de langue anglaise : C, G, C8+ et PG
Classement du Canada pour les programmes
de langue française : G et 8 ans+
Classement des États-Unis pour la télévision :
TV-Y, TV-Y7, TV-G, TV-PG et TV-NR
Classement du Canada pour les programmes
de langue anglaise : C, G, C8+, PG et 14+
Classement du Canada pour les programmes
de langue française : G, 8 ans+ et 13 ans+
Classement des États-Unis pour la télévision :
TV-Y, TV-Y7, TV-G, TV-PG, TV-14 et TV-NR
Classement du Canada pour les programmes de langue
anglaise
Le classement canadien pour les programmes de langue anglaise
s’applique aux programmes de télévision diffusés en anglais au
Canada.
Option Description
C (programmes
conçus pour les
enfants de moins de 8
ans)
C8+ (programmes
appropriés pour les
enfants de 8 ans et
plus sans supervision)
G (grand public) Ces programmes contiennent très peu
PG (supervision
parentale
recommandée)
14+ (programmes
contenant des
éléments qui peuvent
être inappropriés pour
les enfants de moins
de 14 ans)
18+ (adulte) Ces programmes peuvent contenir de
Ces programmes ne contiennent pas de
scènes de violence réaliste, de langage
vulgaire, de nudité ni de contenu
sexuel. Une attention particulière est
portée aux sujets traités qui pourraient
porter atteinte au bien-être et au
sentiment de sécurité des enfants.
Dans ces programmes, la violence
n’est pas représentée comme le moyen
privilégié, acceptable ou unique de
résoudre les conflits ; les enfants ne
sont pas encouragés à imiter des actes
dangereux. Ces programmes ne
contiennent pas de langage grossier, de
violence ni de contenu sexuel.
de violence, qu’elle soit physique,
verbale ou émotionnelle. Ils peuvent
contenir du langage familier, mais pas
de langage vulgaire ni de nudité.
Programmes conçus pour le grand
public, mais qui peuvent ne pas être
appropriés pour les jeunes enfants. Les
parents peuvent considérer que
certaines scènes ne sont pas
appropriées pour les enfants de moins
de 8 à 13 ans sans supervision.
Il est fortement recommandé aux
parents de faire preuve de
discernement pour le visionnement par
les enfants et les jeunes adolescents.
la violence en tant que partie
intégrante du récit, des personnages ou
du sujet traité ; ils sont conçus pour un
public adulte. Ils peuvent contenir du
langage grossier et des scènes de
nudité et sexuelles explicites.
FR
Pour une description des catégories « Enfant », « Jeune » et
« Adolescent », voir les options de classement spécifiques cidessous.
33
Page 76

Classement du Canada pour les programmes de langue
française
Le classement canadien pour les programmes de langue française
s’applique aux programmes de télévision diffusés en français au
Canada.
Option Description
G (général) Programmes visant le public de tous
âges. Ne contient aucune violence ou
une violence représentée avec humour,
ou sous forme de caricature, de façon
non réaliste.
8 ans+ (général 8 ans
et plus ; non
recommandé pour les
jeunes enfants)
Programmes conçus pour le grand
public, mais qui contiennent de la
violence légère ou occasionnelle qui
pourrait perturber les jeunes enfants.
La supervision par un adulte est
recommandée pour les jeunes enfants
(moins de 8 ans).
13 ans+ (ces
programmes peuvent
ne pas convenir aux
La supervision par un adulte est
fortement recommandée pour les
enfants de moins de 13 ans.
enfants de moins de 13
ans)
16 ans+ (programmes
inappropriés pour les
Programmes contenant des scènes de
violence fréquentes ou intenses.
enfants de moins de 16
ans)
18+ (programmes
réservés aux adultes)
Programmes contenant des scènes de
violence constantes ou extrêmes.
Menu Option
Le menu « Option » permet de régler les éléments suivants.
•PIP/PAP
• Caption Vision (sous-titres)
• Détecte Entrée
•Langue
• Position Menu (position du
Option
PIP/PAP
Caption Vision:
Détecte Entrée: Oui
Langue: Français
Position Menu
Verrou Du Menu: Non
Mode Démo: Non
Réinit.tout
DVI-D: PC 1
menu)
• Verrou Du Menu
(verrouillage du menu)
• Mode Démo
1680 × 1050/60 Hz
MENU
OK
Régl
Fin
Sél
• Réinit. tout (réinitialiser
tout)
x Définition du paramètre « PIP » (Picture In
Picture) ou « PAP » (Picture And Picture)
(PC 1/PC 2 seulement)
Si vous sélectionnez « PIP activé » ou « PAP activé » dans le
menu « Réglage PIP/PAP », les images provenant des deux
sources d’entrée s’affichent à l’écran simultanément. Lorsque
« PIP activé » est sélectionné, l’image principale s’affiche en
plein écran et l’image secondaire s’affiche en taille réduite dans le
coin de l’écran. Lorsque « PAP activé » est sélectionné, deux
images de même taille s’affichent au centre de l’écran. L’écran
gauche correspond à l’image principale et l’écran droit à l’image
secondaire. Vous pouvez également choisir soit le son de l’image
principale, soit celui de l’image secondaire.
Conseil
Vous pouvez également faire basculer le paramètre « PIP » ou « PAP » en
appuyant à plusieurs reprises sur la touche .
Pour activer et désactiver la fonction PIP ou PAP
1 Appuyez sur la touche MENU.
Le menu principal apparaît à l’écran.
2 Utilisez les touches M/m pour sélectionner
(Option), puis appuyez sur la touche OK.
Le menu « Option » apparaît à l’écran.
3 Utilisez les touches M/m pour sélectionner « PIP/
PAP », puis appuyez sur la touche OK.
4 Utilisez les touches M/m pour sélectionner
« Réglage PIP/PAP », puis appuyez sur la touche
OK.
Le menu « Réglage PIP/PAP » apparaît à l’écran.
Option
PIP/PAP
Réglage PIP/PAP: PIP activé
PIP/PAP: PAP activé
Taille PIP: Non
Position PIP
Sel Audio:
Sél
DVI-D: PC 1
1680 × 1050/60 Hz
OK
Régl Fin
MENU
34
Page 77

5 Utilisez les touches M/m pour sélectionner le mode
souhaité, puis appuyez sur la touche OK.
• PIP activé : Les images des deux sources d’entrée
s’affichent à l’écran. L’image principale
s’affiche en plein écran et l’image
secondaire s’affiche en taille réduite
dans le coin de l’écran. Vous pouvez
sélectionner l’entrée de l’image
secondaire, sa position, son format et la
source d’entrée audio.
• PAP activé : Les images des deux sources d’entrée
s’affichent à l’écran. Deux images de
même taille sont affichées au centre de
l’écran. L’écran gauche correspond à
l’image principale et l’écran droit à
l’image secondaire. Vous pouvez
sélectionner l’entrée de l’image
secondaire et la source d’entrée audio.
• Non : La fonction PIP ou PAP est désactivée.
• VIDEO 2: L’image provenant d’un appareil vidéo raccordé
aux prises d’entrée vidéo de l’écran pour
VIDEO 2 s’affiche dans la zone de l’image
secondaire.
Remarque
Les entrées pour l’image principale (Principal) et l’image secondaire
(Inférieur) doivent être sélectionnées comme suit.
Principal Inférieur
PC 1
PC 2
TV
COMPONENT
VIDEO 1
VIDEO 2
Pour changer la taille de l’image secondaire (fonction
PIP activée)
1 Appuyez sur la touche MENU.
Le menu principal apparaît à l’écran.
Pour sélectionner la source de l’image secondaire
(fonction PIP : activée/fonction PAP : activée)
1 Appuyez sur la touche MENU.
Le menu principal apparaît à l’écran.
2 Utilisez les touches M/m pour sélectionner
(Option), puis appuyez sur la touche OK.
Le menu « Option » apparaît à l’écran.
3 Utilisez les touches M/m pour sélectionner « PIP/
PAP », puis appuyez sur la touche OK.
4 Utilisez les touches M/m pour sélectionner
« Réglage PIP/PAP », puis appuyez sur la touche
OK.
Le menu « Réglage PIP/PAP » apparaît à l’écran.
5 Utilisez les touches M/m pour sélectionner « PIP
activé » ou « PAP activé », puis appuyez sur la
touche OK.
6 Utilisez les touches M/m pour sélectionner
« PIP/PAP » (image secondaire), puis appuyez sur la
touche OK.
Le menu « PIP/PAP » apparaît à l’écran.
7 Utilisez les touches M/m pour sélectionner la
source d’entrée souhaitée, puis appuyez sur la
touche OK.
• TV : Un programme de télévision s’affiche dans la
zone de l’image secondaire.
•COMPONENT:
L’image provenant d’un appareil vidéo raccordé
aux prises d’entrée vidéo de l’écran pour
COMPONENT s’affiche dans la zone de
l’image secondaire.
•VIDEO1:L’image provenant d’un appareil vidéo raccordé
aux prises d’entrée vidéo de l’écran pour
VIDEO 1 s’affiche dans la zone de l’image
secondaire.
2 Utilisez les touches M/m pour sélectionner
(Option), puis appuyez sur la touche OK.
Le menu « Option » apparaît à l’écran.
3 Utilisez les touches M/m pour sélectionner « PIP/
PAP », puis appuyez sur la touche OK.
4 Utilisez les touches M/m pour sélectionner
« Réglage PIP/PAP », puis appuyez sur la touche
OK.
Le menu « Réglage PIP/PAP » apparaît à l’écran.
5 Utilisez les touches M/m pour sélectionner « PIP
activé », puis appuyez sur la touche OK.
6 Utilisez les touches M/m pour sélectionner « Taille
PIP » (taille de l’image secondaire), puis appuyez
sur la touche OK.
Le menu « Taille PIP » apparaît à l’écran.
Option
PIP/PAP
Réglage PIP/PAP: PIP activé
PIP/PAP: TV
Taille PIP: Grand
Position PIP Milieu
Sel Audio: Petit
Sél
DVI-D: PC 1
1680 × 1050/60 Hz
OK
Régl Fin
MENU
7 Utilisez les touches M/m pour sélectionner la taille
souhaitée, puis appuyez sur la touche OK.
• Grand
• Milieu
• Petit
FR
35
Page 78

Pour changer la position de l’image secondaire
(fonction PIP activée)
1 Appuyez sur la touche MENU.
Le menu principal apparaît à l’écran.
2 Utilisez les touches M/m pour sélectionner
(Option), puis appuyez sur la touche OK.
Le menu « Option » apparaît à l’écran.
3 Utilisez les touches M/m pour sélectionner « PIP/
PAP », puis appuyez sur la touche OK.
4 Utilisez les touches M/m pour sélectionner
« Réglage PIP/PAP », puis appuyez sur la touche
OK.
Le menu « Réglage PIP/PAP » apparaît à l’écran.
5 Utilisez les touches M/m pour sélectionner « PIP
activé », puis appuyez sur la touche OK.
6 Utilisez les touches M/m pour sélectionner
« Position PIP » (position de l’image secondaire),
puis appuyez sur la touche OK.
Le menu « Position PIP » apparaît à l’écran.
Option
PIP/PAP
Réglage PIP/PAP: PIP activé
PIP/PAP: TV
Taille PIP: Grand
Position PIP
Sel Audio:
Sél
DVI-D: PC 1
1680 × 1050/60 Hz
OK
Régl Fin
MENU
7 Utilisez les touches M/m pour sélectionner la
position souhaitée, puis appuyez sur la touche OK.
Vous pouvez choisir parmi 4 positions pour l’image
secondaire.
Pour sélectionner la source d’entrée audio (fonction
PIP : activée/fonction PAP : activée)
1 Appuyez sur la touche MENU.
Le menu principal apparaît à l’écran.
2 Utilisez les touches M/m pour sélectionner
(Option), puis appuyez sur la touche OK.
Le menu « Option » apparaît à l’écran.
3 Utilisez les touches M/m pour sélectionner « PIP/
PAP », puis appuyez sur la touche OK.
6 Utilisez les touches M/m pour sélectionner « Sel
Audio », puis appuyez sur la touche OK.
Le menu « Sel Audio » apparaît à l’écran.
7 Utilisez les touches M/m pour sélectionner la
source souhaitée, puis appuyez sur la touche OK.
• Principal :Le son de la source d’entrée sélectionnée pour
l’image principale est utilisé.
• Inférieur : Le son de la source d’entrée sélectionnée pour
l’image secondaire est utilisé.
Conseil
Si vous sélectionnez « Inférieur », s’affiche à l’écran.
x Réglage de « Caption Vision » (TV/VIDEO 1/
VIDEO 2 seulement)
Cette fonction vous permet d’afficher les sous-titres lorsque le
diffuseur offre ce service.
1 Appuyez sur la touche MENU.
Le menu principal apparaît à l’écran.
2 Utilisez les touches M/m pour sélectionner
(Option), puis appuyez sur la touche OK.
Le menu « Option » apparaît à l’écran.
3 Utilisez les touches M/m pour sélectionner
« Caption Vision », puis appuyez sur la touche OK.
Le menu « Caption Vision » apparaît à l’écran.
OK
Régl Fin
: TV
MENU
Option
PIP/PAP
Caption Vision : Inactif
Détecte Entrée: CC1
Langue: CC2
Position Menu CC3
Verrou Du Menu: CC4
Mode Démo: Text 1
Réinit.tout Text 2
Text 3
Text 4
Sél
4 Utilisez les touches M/m pour sélectionner le type
de sous-titres souhaités, puis appuyez sur la touche
OK.
• Inactif : Sous-titres désactivés.
• CC1, CC2, CC3, CC4 : Une version écrite des dialogues
ou des effets sonores du programme s’affiche à
l’écran. (CC1 convient à la plupart des
programmes.)
• Text1, Text2, Text3, Text4 : L’information relative à la
chaîne ou à la station s’affiche sur la moitié ou la
totalité de l’écran.
4 Utilisez les touches M/m pour sélectionner
« Réglage PIP/PAP », puis appuyez sur la touche
OK.
Le menu « Réglage PIP/PAP » apparaît à l’écran.
5 Utilisez les touches M/m pour sélectionner « PIP
activé » ou « PAP activé », puis appuyez sur la
touche OK.
36
Page 79

x Réglage de « Détecte Entrée » (détection de
la source)(PC
Lorsque cette fonction est activée, l’écran détecte
automatiquement un signal en entrée disponible et commute la
sélection de la source à cette entrée.
1 Appuyez sur la touche MENU.
Le menu principal apparaît à l’écran.
1/PC 2 seulement)
x Réglage de « Langue »
1 Appuyez sur la touche MENU.
Le menu principal apparaît à l’écran.
2 Utilisez les touches M/m pour sélectionner
(Option), puis appuyez sur la touche OK.
Le menu « Option » apparaît à l’écran.
2 Press the M/m buttons to select (Option) and
press the OK button.
Le menu « Option » apparaît à l’écran.
3 Utilisez les touches M/m pour sélectionner
« Détecte Entrée », puis appuyez sur la touche OK.
Le menu « Détecte Entrée » apparaît à l’écran.
Option
PIP/PAP
Caption Vision:
Détecte Entrée: Oui
Langue: Non
Position Menu
Verrou Du Menu: Non
Mode Démo: Non
Réinit.tout
Sél
DVI-D: PC 1
1680 × 1050/60 Hz
OK
Régl Fin
MENU
4 Utilisez les touches M/m pour sélectionner « Oui »
ou « Non », puis appuyez sur la touche OK.
• Oui : Lorsque le signal de la source d’entrée sélectionnée
est désactivé ou que vous avez sélectionné une
entrée ne recevant pas de signal, l’écran tente de
détecter un signal provenant de l’autre entrée
d’ordinateur et de l’afficher, si disponible.
• Non : L’écran ne commute pas automatiquement la
source d’entrée. Appuyez sur la touche ou sur
les touches de sélection d’entrée pour changer la
source.
3 Utilisez les touches M/m pour sélectionner
« Langue », puis appuyez sur la touche OK.
Le menu « Langue » apparaît à l’écran.
Option
PIP/PAP
Caption Vision:
Détecte Entrée: Oui
Langue: English
Position Menu Français
Verrou Du Menu: Español
Mode Démo: Non
Réinit.tout
Sél
DVI-D: PC 1
1680 × 1050/60 Hz
OK
Régl Fin
MENU
4 Utilisez les touches M/m pour sélectionner une
langue, puis appuyez sur la touche OK.
• English : anglais
• Français
• Español : espagnol
x Réglage de « Position Menu »
Cette fonction permet de changer la position du menu s’il cache
une image à l’écran.
1 Appuyez sur la touche MENU.
Le menu principal apparaît à l’écran.
2 Utilisez les touches M/m pour sélectionner
(Option), puis appuyez sur la touche OK.
Le menu « Option » apparaît à l’écran.
FR
3 Utilisez les touches M/m pour sélectionner
« Position Menu », puis appuyez sur la touche OK.
Le menu « Position Menu » apparaît à l’écran.
Option
PIP/PAP
Caption Vision:
Détecte Entrée: Oui
Langue: Français
Position Menu
Verrou Du Menu:
Mode Démo:
Réinit.tout
Sél
DVI-D: PC 1
1680 × 1050/60 Hz
OK
Régl Fin
MENU
4 Utilisez les touches M/m pour sélectionner la
position souhaitée, puis appuyez sur la touche OK.
Vous pouvez choisir parmi 9 positions pour le menu.
37
Page 80
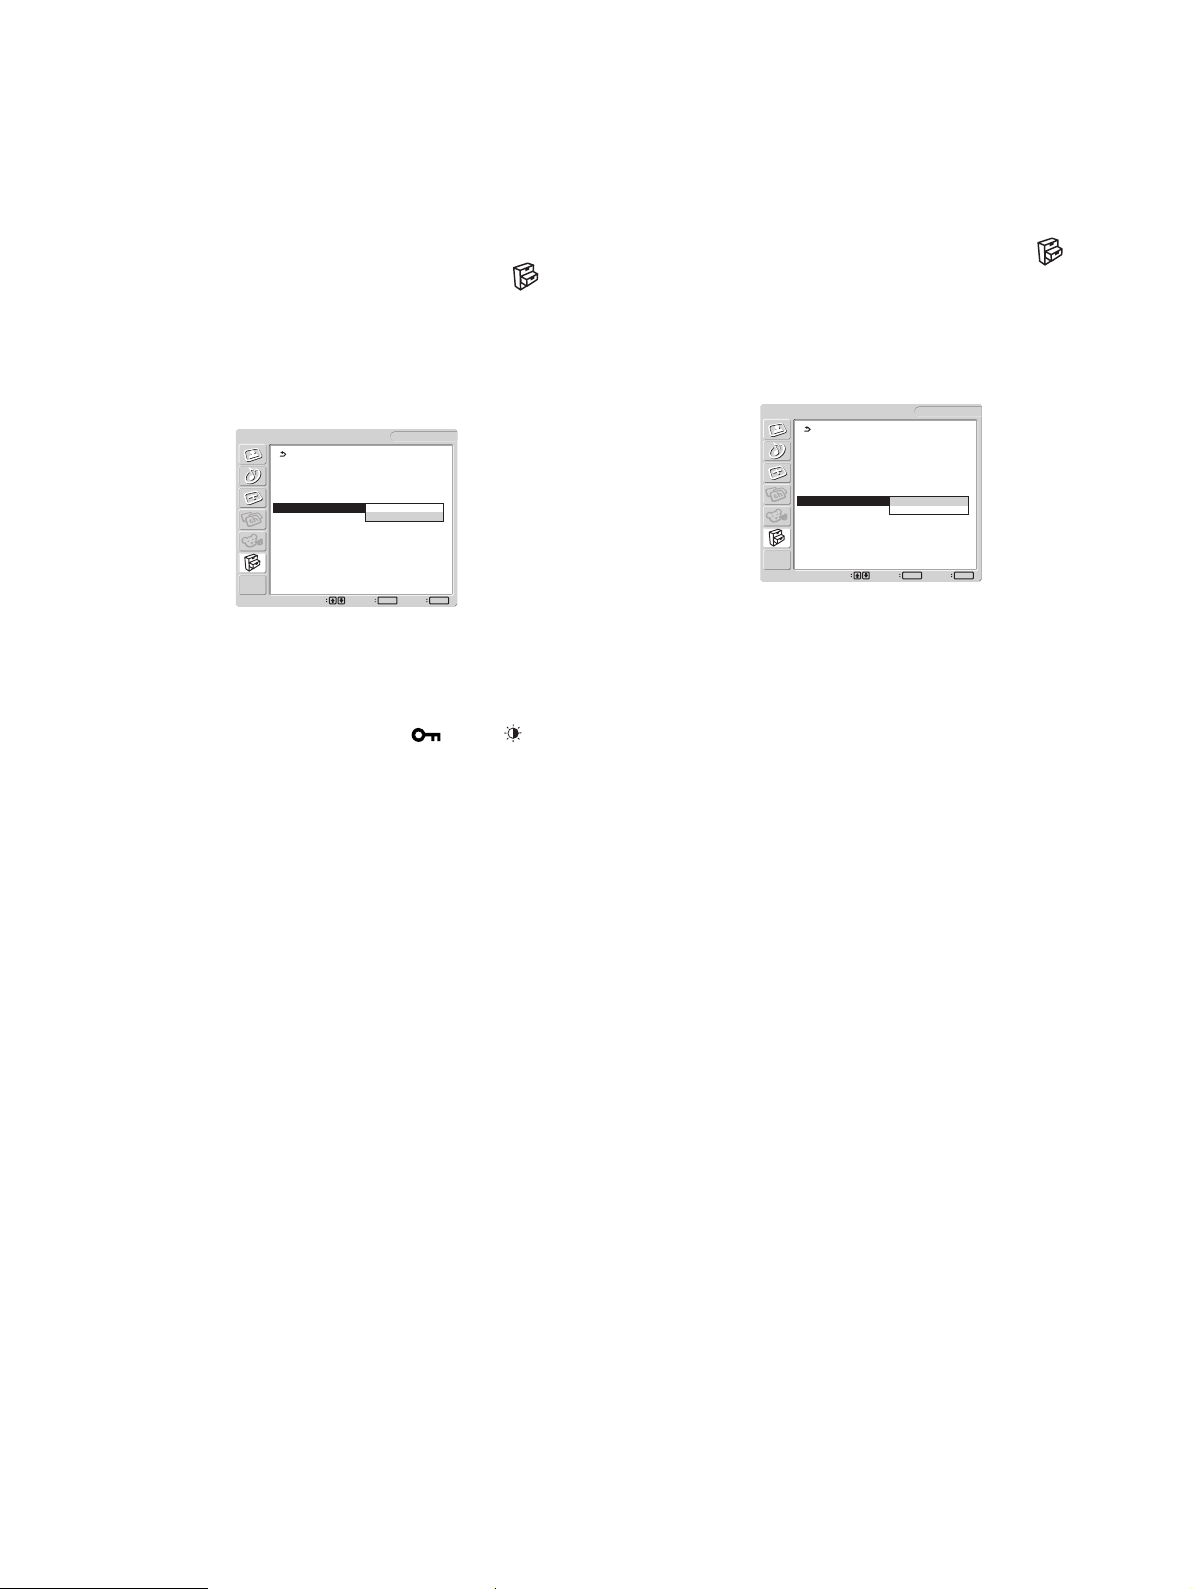
x Réglage de « Verrou Du Menu »
(verrouillage du menu)
Cette fonction vous permet de verrouiller les réglages du menu
afin d’éviter les modifications ou l’effacement accidentels.
1 Appuyez sur la touche MENU.
Le menu principal apparaît à l’écran.
2 Utilisez les touches M/m pour sélectionner
(Option), puis appuyez sur la touche OK.
Le menu « Option » apparaît à l’écran.
3 Utilisez les touches M/m pour sélectionner « Verrou
Du Menu », puis appuyez sur la touche OK.
Le menu « Verrou Du Menu » apparaît à l’écran.
Option
PIP/PAP
Caption Vision:
Détecte Entrée: Oui
Langue: Français
Position Menu
Verrou Du Menu: Oui
Mode Démo: Non
Réinit.tout
Sél
4 Utilisez les touches M/m pour sélectionner « Oui »
ou « Non », puis appuyez sur la touche OK.
• Oui : Lorsque « Oui » est sélectionné, si vous appuyez sur
la touche MENU, le menu s’affiche à l’écran; si
vous appuyez sur le bouton , l’icône
s’affiche.
• Non : Le verrouillage des réglages du menu est désactivé.
Pour déverrouiller les réglages du menu
1 Appuyez sur la touche MENU.
Le menu « Option » apparaît à l’écran.
DVI-D: PC 1
1680 × 1050/60 Hz
OK
Régl Fin
MENU
x Rétablir les réglages aux valeurs par défaut
Cette fonction permet de rétablir les réglages de toutes les entrées
aux valeurs par défaut. Utilisez cette fonction avec précaution.
1 Appuyez sur la touche MENU.
Le menu principal apparaît à l’écran.
2 Utilisez les touches M/m pour sélectionner
(Option), puis appuyez sur la touche OK.
Le menu « Option » apparaît à l’écran.
3 Utilisez les touches M/m pour sélectionner « Réinit.
tout », puis appuyez sur la touche OK.
Le menu « Réinit. tout » apparaît à l’écran.
Option
PIP/PAP
Caption Vision:
Détecte Entrée: Oui
Langue: Français
Position Menu
Verrou Du Menu: Non
Mode Démo: Non
Réinit.tout OK
Annuler
Sél
4 Utilisez les touches M/m pour sélectionner le mode
souhaité, puis appuyez sur la touche OK.
• OK : Réinitialise tous les réglages du menu aux valeurs
par défaut. À noter que le réglage « Langue » ainsi
que les réglages du Menu Parent ne sont pas
réinitialisés au moyen de cette méthode.
• Annuler : Annule la réinitialisation et revient au menu.
Remarque
Si vous sélectionnez OK à l’étape 4, les réglages effectués par le menu
« Canal » sont aussi rétablis aux valeurs par défaut. Après avoir
sélectionné OK, vous devez donc exécuter la fonction « Auto
Programmation » pour pouvoir regarder les canaux de télévision
(page 18).
DVI-D: PC 1
1680 × 1050/60 Hz
OK
Régl Fin
MENU
2 Appuyez sur la touche OK.
Le menu « Verrou Du Menu » apparaît à l’écran.
3 Utilisez les touches M/m pour sélectionner « Non »,
puis appuyez sur la touche OK.
Le verrouillage des réglages du menu est désactivé.
x Réglage de « Mode Démo » (mode de
démonstration)
Permet d’activer ou de désactiver la fonction « Mode Démo »
(mode de démonstration).
Lorsque le menu « Mode Démo » est réglé à « Oui », l’image de
démonstration apparaît à l’écran.
Pour annuler la fonction « Mode Démo », réglez le menu du
« Mode Démo » à « Non ».
Remarque
Pendant que le « Mode Démo » est activé, seuls l’interrupteur 1
(alimentation) et la touche MENU fonctionnent.
38
Page 81

Fonctions techniques
Contrôle du volume
Avec les haut-parleurs de l’écran ou un casque d’écoute, vous
pouvez écouter le son de votre ordinateur ou d’un autre appareil
raccordé aux prises d’entrée de l’écran.
Vous pouvez régler le volume de l’entrée PC 1/PC 2 ou TV/
COMPONENT/VIDEO 1/VIDEO 2.
La barre de réglage « Volume » permet de contrôler le niveau de
volume.
1 Appuyez sur les touches VOL +/– lorsqu’aucun
menu n’est affiché à l’écran.
,
2 Appuyez sur les touches VOL +/– pour régler le
volume au niveau souhaité.
La barre disparaît automatiquement après environ 5 secondes.
Volume 30
Fonction d’économie d’énergie
Si l’écran est raccordé à un ordinateur ou à une carte vidéo
graphique conforme à la norme DPMS (gestion d’alimentation
d’écran) pour l’entrée analogique ou à la norme DMPM (gestion
d’alimentation d’écran numérique DVI) pour l’entrée numérique,
l’écran réduit automatiquement sa consommation d’énergie, tel
qu’indiqué ci-dessous.
Mode
d’alimentation
fonctionnement
normal
veille active*
(hibernation)**
* Lorsque l’ordinateur passe en mode de « veille active », le signal
d’entrée est coupé et « Pas d’Entree Video » s’affiche à l’écran. Après
5 secondes, l’écran passe en mode d’économie d’énergie.
** Le mode d’hibernation (ou « Deep sleep ») est un mode d’économie
d’énergie défini par l’Environmental Protection Agency.
Conseil
Lorsque l’écran est en mode de veille ou que la minuterie d’arrêt
automatique est activée, le témoin 1 (alimentation) s’allume en rouge.
Consommation
électrique
99 W (max.) vert
2 W (max.) orange
Témoin 1
(alimentation)
FR
Remarques
• Vous ne pouvez pas régler le volume avec les touches M/m lorsque le
menu principal est affiché à l’écran. Utilisez plutôt les touches
VOL +/– de la télécommande.
• Vous ne pouvez pas régler le volume à l’aide des touches M/m de la
télécommande.
• Lorsque l’écran est en mode d’économie d’énergie, aucun son n’est
émis par les haut-parleurs ni par le casque d’écoute.
39
Page 82

Réglage du mode image
Fonction de réglage automatique
Vous pouvez sélectionner le mode image à l’aide de la touche
ou en sélectionnant « Mode » dans le menu « Image ».
Lorsque vous sélectionnez « Auto », l’écran règle
automatiquement la luminosité de l’écran selon la luminosité
ambiante (fonction de réglage automatique de la luminosité).
Pour plus de détails, voir « Fonction de réglage automatique de la
luminosité (capteur de lumière) ».
Pour plus de détails sur l’utilisation du menu « Mode », voir
page 21.
Pour plus de détails sur l’utilisation de la touche , voir cidessous.
Appuyez plusieurs fois sur la touche .
À chaque pression sur la touche , le mode image change
comme suit.
PC 1/PC 2
Cinéma
PC
Auto
Chaque indicateur apparaît à l’écran et le mode image change. Le
menu disparaît automatiquement après environ 10 secondes.
TV/COMPONENT/
VIDEO 1/VIDEO 2
Éclatant Jeu
Standard
ECO
Auto
100100
Fonction de réglage automatique
de la luminosité
Cette fonction de l’écran règle automatiquement la luminosité de
l’affichage selon la luminosité ambiante. La luminosité de l’écran
se règle optimalement en réglant le mode image à « Auto » avec
la touche ou en avec le menu
« Image ». (Si vous sélectionnez l’entrée à partir de PC 1 ou de
PC 2, « Cinéma » est sélectionné par défaut. Si vous sélectionnez
l’entrée à partir de COMPONENT, VIDEO 1, VIDEO 2 ou TV,
« Éclatant » est sélectionné par défaut.)
De plus, lorsque le mode image est réglé à « Auto » avec la touche
, la barre de réglage s’affiche. Effectuez le réglage avec la
barre en appuyant sur les touches M/m. La luminosité de l’écran
change selon le niveau réglé.
(capteur de lumière)
« Mode » dans le menu
de la qualité de l’image
(PC 2 seulement)
Lorsque l’écran reçoit un signal en entrée, il
ajuste automatiquement la position et la netteté
(phase/horloge) de l’image afin d’assurer un
affichage clair à l’écran.
Mode préréglé
Lorsque l’écran reçoit un signal en entrée, il fait automatiquement
correspondre le signal à l’un des modes préréglés dans la mémoire
de l’écran afin d’offrir une image de grande qualité au centre de
l’écran. Si le signal en entrée correspond au mode préréglé,
l’image apparaît à l’écran automatiquement avec les réglages par
défaut appropriés.
Lorsque le signal en entrée ne correspond à
aucun mode préréglé
Lorsque l’écran reçoit un signal en entrée qui ne correspond à
aucun des modes préréglés, la fonction de réglage automatique de
la qualité de l’image est activée afin de toujours assurer une image
claire à l’écran avec les plages de fréquences d’affichage
suivantes :
Fréquence horizontale :28 – 86 kHz
Fréquence verticale : 48 – 85 Hz (résolution < 1 280 × 1 024)
48 – 75 Hz (résolution < 1 400 × 1 050)
48 – 60 Hz (résolution ≤ 1 680 × 1 050)
La première fois que l’écran reçoit un signal en entrée qui ne
correspond à aucun des modes préréglés, il se peut que l’écran
prenne un délai un peu plus long que la normale avant d’afficher
l’image à l’écran. Ces données de réglage sont automatiquement
enregistrées en mémoire; ainsi, la prochaine fois, l’écran
fonctionne de la même façon que lorsqu’il a reçu le signal sans
mode préréglé la première fois.
Lorsque vous réglez la phase, l’horloge et la
position de l’image manuellement
Pour certains signaux en entrée, la fonction de réglage
automatique de la qualité de l’image de cet écran n’ajuste pas
suffisamment la position, la phase et l’horloge de l’image. Dans
ce cas, vous pouvez régler ces paramètres manuellement
(page 27). Lorsque vous faites ces réglages manuellement, ils
sont sauvegardés en mémoire en tant que modes utilisateur et sont
récupérés automatiquement lorsque l’écran reçoit un signal
d’entrée identique.
40
Page 83

Arrêt par minuterie (TV/COMPONENT/
VIDEO 1/VIDEO 2 seulement)
Vous pouvez programmer l’écran pour qu’il s’éteigne
automatiquement après une période prédéterminée (15, 30, 45, 60
ou 90 minutes).
Appuyez plusieurs fois sur la touche SLEEP de la
télécommande.
À chaque pression sur la touche SLEEP, la durée change comme
suit :
Non
15 min
SLEEP
30 min
45 min
60 min
Dépannage
Avant de communiquer avec notre service de soutien technique,
consultez cette section.
Messages à l’écran
Si le signal d’entrée présente un problème, l’un des messages
suivants s’affiche à l’écran. Pour résoudre le problème,
voir « Symptômes et solutions » à la page 43.
Si le message « Hors Plage Fréquences »
s’affiche à l’écran
Ce message indique que le signal en entrée n’est pas pris en
charge par cet écran selon ses spécifications Vérifiez les éléments
suivants.
Pour plus de détails sur les messages à l’écran, voir « Symptômes
et solutions » à la page 43.
Si le message « xxx.x kHz / xxx Hz » s’affiche
Ce message indique que la fréquence horizontale ou verticale
n’est pas prise en charge par cet écran selon ses spécifications.
Les chiffres correspondent aux fréquences horizontale et
verticale du signal d’entrée actuel.
Informations
Ho r s P l age F n c seré euq
XXX . XkHz / X
DV I - D 1CP:
XXHz
FR
90 min
Pour annuler l’arrêt par minuterie
Appuyez plusieurs fois sur la touche SLEEP jusqu’à ce que
« Non » s’affiche.
Conseils
• Si vous éteignez, puis rallumez l’écran, la minuterie d’arrêt
automatique est désactivée.
• Lorsque l’arrêt par minuterie est activé, le témoin 1 (alimentation)
s’allume en rouge.
• Si vous appuyez sur la touche SLEEP, pendant que la minuterie de mise
en veille est activée, le temps restant sur la minuterie s’affiche.
• Si vous sélectionnez l’entrée de PC 1 ou PC 2 alors que la minuterie de
mise en veille est activée, celle-ci est annulée.
Si le message « Résolution i1680 x 1050 » s’affiche
Ce message indique que la résolution n’est pas prise en charge
par cet écran selon ses spécifications.
Informations
Ho r s P l age F n c seré euq
Résol u t ion>1
DV I - D 1CP:
680X1050
Si le message « Pas d’Entree Video » s’affiche à
l’écran
Ce message indique qu’aucun signal n’est reçu par le connecteur
actuellement sélectionné.
Informations
Pas d ’Ent ree Video
Pas s e en Mode Éco
DV I - D 1CP:
41
Page 84

Si le message « Cable Non Connecté » s’affiche à
l’écran
Ce message indique que le câble de signal vidéo est débranché du
connecteur actuellement sélectionné. Après 45 secondes, le mode
d’économie d’énergie s’active.
Informations
Cab l e No n Conne c t é
DV I - D 1CP:
Si le message « L’appareil s’éteindra par
minuterie bientôt » s’affiche à l’écran
Ce message indique que l’alimentation de l’écran sera coupée par
minuterie dans 60 secondes.
Si le message « Fonction non disponible »
s’affiche à l’écran
Ce message indique que la fonction que vous avez tenté d’activer
n’est pas disponible.
42
Page 85

Symptômes et solutions
Si un problème survient en raison d’un ordinateur ou d’un autre appareil raccordé, reportez-vous au mode d’emploi fourni avec l’appareil
ou l’ordinateur en question.
Pour PC 1/PC 2
Symptôme Vérifiez ces éléments
Aucune image.
Si l’indicateur 1 (alimentation)
n’est pas allumé ou si l’indicateur 1
(alimentation) ne s’allume pas
lorsque vous appuyez sur
l’interrupteur 1 (alimentation),
Si le message « Cable Non
Connecté » s’affiche à l’écran,
Si le message « Pas d’Entree Video »
apparaît à l’écran ou le témoin 1
(alimentation) est orange,
Si le message « Hors Plage
Fréquences » s’affiche à l’écran
(page 41),
Si vous utilisez Windows, • Si vous avez remplacé votre ancien écran par cet écran, rebranchez l’ancien écran et
Si vous utilisez un système
Macintosh,
• Vérifiez que le cordon d’alimentation est correctement raccordé.
• Vérifiez que le câble de signal vidéo est correctement raccordé et que toutes les fiches sont
correctement branchées dans leur prise (page 12).
• Vérifiez que les broches du connecteur d’entrée vidéo ne sont pas pliées ou enfoncées.
• Vérifiez que le réglage du signal en entrée est correct (page 16).
• Un câble de signal vidéo non fourni est raccordé. Si vous raccordez un tel câble, le
message « Cable Non Connecté » peut apparaître à l’écran. Ceci n’est pas un problème de
fonctionnement.
• Vérifiez que le câble de signal vidéo est correctement raccordé et que toutes les fiches sont
correctement branchées dans leur prise (page 12).
• Vérifiez que les broches du connecteur d’entrée vidéo ne sont pas pliées ou enfoncées.
• Vérifiez que le réglage du signal en entrée est correct (page 16).
xProblème causé par un ordinateur ou un autre appareil raccordé et non par
l’écran
• L’ordinateur est en mode d’économie d’énergie. Appuyez sur n’importe quelle touche du
clavier ou déplacez la souris.
• Vérifiez que votre carte graphique est correctement installée.
• Installez le pilote le plus récent pour la carte graphique, ou adaptez la version de votre
carte graphique au système d’exploitation en cours.
• Si vous utilisez un ordinateur portable, réglez la sortie de l’ordinateur sur la sortie vidéo
(pour plus d’informations sur le réglage de la sortie vidéo, contactez le fabricant de
l’ordinateur).
• Vérifiez que l’alimentation de l’ordinateur est activée.
• Redémarrez l’ordinateur.
xProblème causé par un ordinateur ou un autre appareil raccordé et non par
l’écran
• Vérifiez que la plage de fréquence vidéo est comprise dans les spécifications de l’écran. Si
vous avez remplacé un ancien écran par cet écran, rebranchez l’ancien écran, puis ajustez
la carte graphique de l’ordinateur dans les plages suivantes :
Fréquence horizontale : 28 – 86 kHz (RVB analogique), 28 – 68 kHz (RVB numérique)
Fréquence verticale : 48–85 Hz (résolution < 1 280 × 1 024), 48–75 Hz (résolution
< 1 400 × 1 050), 48–60 Hz (résolution ≤ 1 680 × 1 050) (RVB analogique), 60 Hz (RVB
numérique)
Résolution : 1 680 × 1 050 ou moins
• Démarrez votre système d’exploitation en mode Sans échec et redémarrez l’ordinateur
après avoir défini la résolution. Le réglage du mode Sans échec varie selon le système
d’exploitation. Pour plus d’informations, contactez le fabricant de l’ordinateur.
suivez la procédure qui suit. Sélectionnez « SONY » dans la liste « Fabricants » et
sélectionnez « MFM-HT205 » dans la liste « Modèles » dans l’écran de sélection de
périphériques Windows. Si « MFM-HT205 » n’apparaît pas dans la liste « Modèles »,
essayez « Plug & Play ».
• En cas de raccordement d’un ordinateur Macintosh, utilisez si nécessaire un adaptateur
(non fourni). Raccordez l’adaptateur à l’ordinateur avant de raccorder le câble de signal
vidéo.
FR
43
Page 86

Symptôme Vérifiez ces éléments
L’image clignote, sautille, oscille
ou présente des interférences.
L’image est floue. • Réglez le contraste et la luminosité (page 22).
L’image se dédouble. • Éliminez les rallonges de câble vidéo et les commutateurs vidéo du raccordement.
L’image n’est pas centrée ou sa
taille est incorrecte (PC 2
seulement).
L’image s’étire verticalement ou sa
taille paraît étrange.
L’image est trop petite. xProblème causé par un ordinateur ou un autre appareil raccordé et non par
L’image est foncée. • Réglez le rétroéclairage (page 22).
Des ondulations ou un motif à
spirales (moiré) apparaissent.
La couleur n’est pas uniforme. • Réglez la phase et l’horloge (PC 2 seulement) (page 27).
Les blancs n’apparaissent pas
blancs.
Les touches de l’écran ne
fonctionnent pas
( s’affiche à l’écran).
La résolution affichée à l’écran est
incorrecte.
• Réglez la phase et l’horloge (PC 2 seulement) (page 27).
xProblème causé par un ordinateur ou un autre appareil raccordé et non par
l’écran
• Vérifiez le manuel de votre carte graphique pour obtenir le bon réglage d’écran.
• Vérifiez que le mode graphique (VESA, Macintosh 19 po couleur, etc.) et la fréquence du
signal en entrée sont pris en charge par cet écran. Même si la fréquence est dans la bonne
plage, certaines cartes graphiques peuvent comporter un signal de synchronisation trop
étroit pour que l’écran puisse se synchroniser correctement.
• Cet écran n’accepte pas les signaux entrelacés. Faites les réglages pour les signaux
progressifs.
• Réglez le taux de rafraîchissement de l’ordinateur (fréquence verticale) afin d’obtenir la
meilleure image possible (le réglage de 60 Hz est recommandé).
• Réglez la netteté (page 22).
• Réglez la phase et l’horloge (PC 2 seulement) (page 27).
xProblème causé par un ordinateur ou un autre appareil raccordé et non par
l’écran
• Réglez la résolution sur 1 680 × 1 050 sur l’ordinateur.
• Vérifiez que toutes les fiches sont correctement raccordées et solidement branchées.
• Réglez la phase et l’horloge (page 27).
• Réglez la position de l’image (page 28). Notez que certains modes vidéo ne remplissent
pas l’écran complètement.
xProblème causé par un ordinateur ou un autre appareil raccordé et non par
l’écran
• Réglez la résolution sur 1 680 × 1 050 sur l’ordinateur.
l’écran
• Réglez la résolution sur 1 680 × 1 050 sur l’ordinateur.
• Réglez la luminosité (page 22).
• Réglez le gamma dans le menu « Gamma » (page 23).
• Lorsque vous allumez l’écran, celui-ci atteint sa pleine luminosité après quelques minutes.
• Lorsque le mode image est réglé à « Auto », l’écran peut s’assombrir lorsque la lumière
ambiante est faible (pages 21, 40).
• Réglez la phase et l’horloge (PC 2 seulement) (page 27).
• Réglez la température de couleur (page 23).
• Si « Verrou Du Menu » est réglé à « Oui », réglez-le à « Non » (page 38).
• Selon le réglage de la carte graphique, la résolution affichée dans le menu de l’écran peut
ne pas correspondre à celle réglée dans l’ordinateur.
44
Page 87

Pour TV/COMPONENT/VIDEO 1/VIDEO 2
Symptôme Vérifiez ces éléments
Aucune image.
L’écran ne reçoit aucun canal. • Vérifiez que le cordon d’alimentation est solidement raccordé.
• Mettez l’écran sous tension.
• Vérifiez le raccordement du câble d’antenne.
Le son comporte des parasites ou
aucun son n’est émis.
L’image est bonne, mais il n’y a pas
de son.
Des barres noires apparaissent à
côté, au haut et au bas de l’écran.
La télécommande ne fonctionne
pas.
Mot de passe perdu. • Sélectionnez le menu (Parent) dans le menu à l’écran, puis saisissez le mot de passe
L’image comporte des parasites
lors de la réception d’une image
de télévision.
• Vérifiez le raccordement des câbles audio.
• Vérifiez le réglage du niveau de volume.
• Appuyez sur la touche MUTING ou VOL +/– pour que « Muting » disparaisse de l’écran
(pages 19, 39).
• Débranchez votre casque d’écoute.
• Cela depend du type de source video. Réglez la taille de l’écran à l’aide du menu
« Zoom » (page 26).
• Les piles sont peut-être faibles. Remplacez les piles.
• Vérifiez la polarité des piles.
• Si le voyant indicateur 1 (alimentation) ne s’allume pas, appuyez sur l’interrupteur 1
(alimentation) de l’écran.
• Si vous comptez utiliser les fonctions du téléviseur, vérifiez que l’entrée TV est
sélectionnée.
• Si vous envisagez d’utiliser les fonctions du téléviseur avec la fonction « PIP » ou
« PAP », vérifiez si l’entrée TV est sélectionnée pour l’image secondaire.
maître suivant : 4357. Le mot de passe maître efface le mot de passe précédent et vous
permet de saisir un nouveau mot de passe (page 30).
• Réglez le menu « Réduc.de bruit » à « Oui » pour réduire les parasites de l’image
(page 24 ).
• Réduisez la valeur de réglage du menu « Netteté » (page 22).
FR
Si le problème persiste, communiquez avec votre détaillant Sony
agréé et fournissez-lui les informations suivantes :
• Modèle : MFM-HT205
• Numéro de série
• Description détaillée du problème
• Date d’achat
• Nom et spécifications de votre ordinateur et de votre carte
graphique
• Type de signaux d’entrée (PC 1/PC 2/TV/COMPONENT/
VIDEO 1/VIDEO 2)
45
Page 88

Spécifications
Panneau ACL
Type de panneau : TFT a-Si à matrice active
Taille de l'écran :
20 po (51 cm)
Résolution :
Horizontale : Max. 1 680 points
Verticale : Max. 1 050 lignes
Entrée du signal
PC 1
Format du signal :
RVB numérique (DVI-D) (TMDS lien simple)
Fréquence de fonctionnement :
Horizontale : 28 – 68 kHz
Verticale : 60 Hz
Audio :
Mini-prise stéréo, 500 mV eff.
PC 2
Format du signal :
RVB analogique (HD-15D-secondaire)
Fréquence de fonctionnement :
Horizontale : 28 – 86 kHz
Verticale : 48 – 85 Hz (résolution < 1 280 × 1 024)
48 – 75 Hz (résolution < 1 400 × 1 050)
48 – 60 Hz (résolution ≤ 1 680 × 1 050)
Puissances de signal :
Signal RVB : 0,7 Vc-c, 75 Ω, positif
Signal SYNC :
Niveau TTL, 2,2 kΩ, positif ou négatif
(horizontal et vertical séparés, ou
sync composant)
0,3 Vc-c, 75 Ω, négatif (sync sur vert)
Audio :
Mini-prise stéréo, 500 mV eff.
TV
Système couleur :
Norme américaine (NTSC)
Couverture des canaux :
VHF : 2 à 13
UHF : 14 à 69
Câble : 1 à 125
Antenne :
Borne externe 75 ohms pour UHF et VHF
COMPONENT
Norme du signal :
Vidéo composant (Y, P
Y : 1,0 Vc-c, 75 ohms non équilibré, sync négatif
: 0,7 Vc-c, 75 Ω
P
B
P
: 0,7 Vc-c, 75 Ω
Format du signal :
Audio :
VIDEO 1
Norme du signal :
R
480i (525i), 480p (525p), 576i (625i), 576p (625p),
720p (750p), 1080i (1125i)
Prise RCA (stéréo), 500 mV eff.
S-vidéo (mini DIN à 4 broches)
Y : 1,0 Vc-c, 75 ohms non équilibré, sync négatif
C : 0,286 Vc-c (signal de salve), 75 Ω
Vidéo composant (prise RCA)
, PR) (prise RCA)
B
1,0 Vc-c, 75 ohms non équilibré, sync négatif
Formats vidéo : NTSC, PAL, SECAM
Audio :
Prise RCA (stéréo), 500 mV eff.
VIDEO 2
Norme du signal :
S-vidéo (mini DIN à 4 broches)
Y : 1,0 Vc-c, 75 ohms non équilibré, sync négatif
C : 0,286 Vc-c (signal de salve), 75 Ω
Vidéo composant (prise RCA)
1,0 Vc-c, 75 ohms non équilibré, sync négatif
Formats vidéo : NTSC, PAL, SECAM
Audio :
Prise RCA (stéréo), 500 mV eff.
Plug & Play
VESA, DDC2B
Sortie des haut-parleurs
×
°C
20 5/8 ×
2 +5 W
16 1/
8
×
7 7/8 po)
Max. 3 W
Sortie pour casque d’écoute
Mini-prise stéréo
Alimentation requise
100-240 V CA, 50-60 Hz
Max. 1,2 A
Consommation électrique
En fonctionnement (max.): 99 W
En mode de veille (max.): 2 W
Température de fonctionnement
0-35
Dimensions (largeur/hauteur/profondeur)
Écran (à la verticale) :
Environ 523,7 × 406,8 × 197 mm
(
Poids
Environ 8,2 kg (18 lb 1 oz)
Accessoires
Voir page 12
La conception et les spécifications sont sujettes à modifications
sans préavis.
46
Page 89

2-661-022-32(1)
Pantalla de cristal
líquido multifunción
MFM-HT205
© 2006 Sony Corporation
Page 90

Owner’s Record
The model and serial numbers are located at the rear of the unit.
Record these numbers in the spaces provided below. Refer to them
whenever you call upon your dealer regarding this product.
Model No.
Serial No.
WARNING
Para reducir el riesgo de incendios o
electrocución, no exponga este aparato a la lluvia
ni a la humedad.
Dangerously high voltages are present inside the
unit. Do not open the cabinet. Refer servicing to
qualified personnel only.
FCC Notice
This equipment has been tested and found to comply with the limits
for a Class B digital device, pursuant to Part 15 of the FCC Rules.
These limits are designed to provide reasonable protection against
harmful interference in a residential installation. This equipment
generates, uses, and can radiate radio frequency energy and, if not
installed and used in accordance with the instructions, may cause
harmful interference to radio communications. However, there is no
guarantee that interference will not occur in a particular installation.
If this equipment does cause harmful interference to radio or
television reception, which can be determined by turning the
equipment off and on, the user is encouraged to try to correct the
interference by one or more of the following measures:
– Reorient or relocate the receiving antenna.
– Increase the separation between the equipment and receiver.
– Connect the equipment into an outlet on a circuit different from
that to which the receiver is connected.
– Consult the dealer or an experienced radio/TV technician for help.
You are cautioned that any changes or modifications not expressly
approved in this manual could void your authority to operate this
equipment.
NOTICE
This notice is applicable for USA/Canada only.
If shipped to USA/Canada, install only a UL LISTED/CSA
LABELLED power supply cord meeting the following
specifications:
SPECIFICATIONS
Plug Type Nema-Plug 5-15p
Cord Type SVT or SJT, minimum 3 · 18 AWG
Length Maximum 15 feet
Rating Minimum 7 A, 125 V
NOTICE
Cette notice s’applique aux Etats-Unis et au Canada
uniquement.
Si cet appareil est exporté aux Etats-Unis ou au Canada, utiliser
le cordon d’alimentation portant la mention UL LISTED/CSA
LABELLED et remplissant les conditions suivantes:
SPECIFICATIONS
Type de fiche Fiche Nema 5-15 broches
Cordon Type SVT ou SJT, minimum 3 · 18 AWG
Longueur Maximum 15 pieds
Tension Minimum 7 A, 125 V
IMPORTANTE
Para prevenir cualquier mal funcionamiento y evitar daños, por
favor, lea detalladamente este manual de instrucciones antes
de conectar y operar este equipo.
If you have any questions about this product, you may call;
Sony Customer Information Services Center
1-800-222-7669 or http://www.sony.com/
Declaration of Conformity
Trade Name: SONY
Model: MFM-HT205
Responsible Party: Sony Electronics Inc.
Address: 16530 Via Esprillo,
Telephone Number: 858-942-2230
This device complies with part 15 of the FCC rules. Operation is
subject to the following two conditions: (1) This device may not
cause harmful interference, and (2) this device must accept any
interference received, including interference that may cause
undesired operation.
San Diego, CA 92127 U.S.A.
2
Page 91

Índice
Precauciones . . . . . . . . . . . . . . . . . . . . . . . . . . . . . . . . . . . . . . . . . . 5
Identificación de piezas y controles . . . . . . . . . . . . . . . . . . . . . . . . . 7
Instalación . . . . . . . . . . . . . . . . . . . . . . . . . . . . . . . . . . . .11
Paso 1: Uso del soporte . . . . . . . . . . . . . . . . . . . . . . . . . . . . . . . . 11
Paso 2: Conecte los cables . . . . . . . . . . . . . . . . . . . . . . . . . . . . . . 11
Paso 3: Conecte el cable de alimentación . . . . . . . . . . . . . . . . . . 15
Paso 4: Vuelva a colocar la cubierta del conector . . . . . . . . . . . . 15
Paso 5: Encienda la pantalla y otros equipos . . . . . . . . . . . . . . . . 15
Paso 6: Ajuste la inclinación . . . . . . . . . . . . . . . . . . . . . . . . . . . . . 16
Paso 7: Inserte las pilas en el control remoto . . . . . . . . . . . . . . . . 16
Para ver el televisor . . . . . . . . . . . . . . . . . . . . . . . . . . . .17
Configuración de los canales de televisión . . . . . . . . . . . . . . 17
Cambio de canales de televisión . . . . . . . . . . . . . . . . . . . . . . . . . . 17
Omisión de canales no necesarios . . . . . . . . . . . . . . . . . . . . . . . . 17
Selección entre el cable y UHF/VHF . . . . . . . . . . . . . . . . . . . . . . . 17
Uso de otras funciones . . . . . . . . . . . . . . . . . . . . . . . . . . . . . . . . . 18
ES
• Macintosh es una marca comercial con
licencia de Apple Computer, Inc.,
registrada en los Estados Unidos y en
otros países.
• Windows
registrada de Microsoft Corporation en
los Estados Unidos y en otros países.
• VGA es una marca comercial registrada
de IBM Corporation de EE. UU.
• VESA y DDC
de Video Electronics Standards
Association.
• Adobe y Acrobat son marcas
comerciales de Adobe Systems
Incorporated.
• WOW, SRS y el símbolo son
marcas comerciales de SRS Labs, Inc.
• La tecnología WOW está incorporada
con licencia de SRS Labs, Inc.
• Todos los demás nombres de productos
mencionados en este do cumento pueden
ser marcas comerciales o marcas
comerciales registradas de sus
respectivas empresas.
•Además, “™” y “®” no se mencionan en
cada caso en este manual.
®
es una marca comercial
™
son marcas comerciales
Personalización de la pantalla . . . . . . . . . . . . . . . . . . . .18
Navegación por el menú . . . . . . . . . . . . . . . . . . . . . . . . . . . . . . . . 18
Menú Imagen . . . . . . . . . . . . . . . . . . . . . . . . . . . . . . . . . . . . . 20
Selección del Modo imagen para PC 1/PC 2 . . . . . . . . . . . . . . 20
Selección del Modo imagen para TV/COMPONENT/
VIDEO 1/VIDEO 2 . . . . . . . . . . . . . . . . . . . . . . . . . . . . . . . . . . 20
Ajuste de “Luz de Fondo” . . . . . . . . . . . . . . . . . . . . . . . . . . . . . 21
Ajuste de “Contraste” . . . . . . . . . . . . . . . . . . . . . . . . . . . . . . . . 21
Ajuste de “Brillo” . . . . . . . . . . . . . . . . . . . . . . . . . . . . . . . . . . . . 21
Ajuste de “Color”
(solamente para TV/COMPONENT/VIDEO 1/VIDEO 2) . . . . . 21
Ajuste de “Tinte” (solamente para TV/VIDEO 1/VIDEO 2) . . . . 21
Ajuste de “Nitidez” (solamente para TV/COMPONENT/
VIDEO 1/VIDEO 2) . . . . . . . . . . . . . . . . . . . . . . . . . . . . . . . . . . 21
Ajuste de “Temp. color” (solamente para PC 1/PC 2) . . . . . . . 22
Ajuste de “Gamma” (solamente para PC 1/PC 2) . . . . . . . . . . 22
Restablecimiento del Modo imagen a los valores
predeterminados . . . . . . . . . . . . . . . . . . . . . . . . . . . . . . . . . . . . 23
Configuración de “Reductor Ruido”
(solamente para TV/COMPONENT/VIDEO 1/VIDEO 2) . . . . . 23
Configuración de “Contraste Dinámico”
(solamente para TV/COMPONENT/VIDEO 1/VIDEO 2) . . . . . 23
Menú Audio . . . . . . . . . . . . . . . . . . . . . . . . . . . . . . . . . . . . . . 24
Ajuste de “Surround” . . . . . . . . . . . . . . . . . . . . . . . . . . . . . . . . . 24
Ajuste de “Agudos”, “Graves” y “Balance” . . . . . . . . . . . . . . . . 24
Ajuste de “Auto Volumen”
(solamente para TV/COMPONENT/VIDEO 1/VIDEO 2) . . . . . 24
Configuración de “MTS” (solamente para TV) . . . . . . . . . . . . . 25
Restablecimiento de todos los ajustes de audio a los
valores predeterminados . . . . . . . . . . . . . . . . . . . . . . . . . . . . . 25
http://www.sony.net/
3
Page 92

Menú Pantalla . . . . . . . . . . . . . . . . . . . . . . . . . . . . . . . . . . . . 25
Ajuste de “Acerc.” . . . . . . . . . . . . . . . . . . . . . . . . . . . . . . . . . . 25
Función de ajuste automático de la calidad de imagen
(solamente para PC 2) . . . . . . . . . . . . . . . . . . . . . . . . . . . . . . 26
Ajustes automáticos adicionales a la calidad de imagen
para la señal de entrada actual (Ajuste automático)
(solamente para PC 2) . . . . . . . . . . . . . . . . . . . . . . . . . . . . . . 26
Ajuste manual de la nitidez de la imagen (fase/ancho)
(solamente para PC 2) . . . . . . . . . . . . . . . . . . . . . . . . . . . . . . 26
Ajuste manual de la posición de la imagen
(Centrado H /Centrado V) (solamente para PC 2) . . . . . . . . . 27
Ajuste manual de la posición de la imagen
(Centrado V) (para TV/COMPONENT/VIDEO 1/VIDEO 2
solamente) . . . . . . . . . . . . . . . . . . . . . . . . . . . . . . . . . . . . . . . . 27
Cambio de la resolución de la pantalla (Resolución)
(sólo para PC 2) . . . . . . . . . . . . . . . . . . . . . . . . . . . . . . . . . . . 27
Menú Bloqueo . . . . . . . . . . . . . . . . . . . . . . . . . . . . . . . . . . . . 28
Activación de la función de control de bloqueo . . . . . . . . . . . . 28
Selección de una clasificación personalizada . . . . . . . . . . . . . 29
Significado de las clasificaciones . . . . . . . . . . . . . . . . . . . . . . 31
Menú Opción . . . . . . . . . . . . . . . . . . . . . . . . . . . . . . . . . . . . . 33
Ajuste de “PIP” (imagen en imagen) o “PAP”
(imagen e imagen) (sólo para PC 1/PC 2) . . . . . . . . . . . . . . . 33
Ajuste de “Caption Vision”
(solamente para TV/VIDEO 1/VIDEO 2) . . . . . . . . . . . . . . . . . 35
Configuración de “Sin Señal Entr”
(solamente para PC 1/PC 2) . . . . . . . . . . . . . . . . . . . . . . . . . . 35
Ajuste de “Idioma” . . . . . . . . . . . . . . . . . . . . . . . . . . . . . . . . . . 35
Ajuste de “Posición Menú” . . . . . . . . . . . . . . . . . . . . . . . . . . . . 35
Ajuste de “Bloq de Ajustes” . . . . . . . . . . . . . . . . . . . . . . . . . . . 36
Configuración de “Modo Demo” . . . . . . . . . . . . . . . . . . . . . . . 36
Restablecimiento a los valores predeterminados . . . . . . . . . . 36
Funciones técnicas . . . . . . . . . . . . . . . . . . . . . . . . . . . .37
Control del volumen . . . . . . . . . . . . . . . . . . . . . . . . . . . . . . . . . . . 37
Función de ahorro de energía . . . . . . . . . . . . . . . . . . . . . . . . . . . 37
Ajuste del Modo imagen . . . . . . . . . . . . . . . . . . . . . . . . . . . . . . . . 38
Función de ajuste de brillo automático (sensor de luz) . . . . . . . . 38
Función de ajuste automático de la calidad de imagen
(solamente para PC 2) . . . . . . . . . . . . . . . . . . . . . . . . . . . . . . . . . 38
Apagado automático de la pantalla (solamente para TV/
COMPONENT/VIDEO 1/VIDEO 2) . . . . . . . . . . . . . . . . . . . . . . . . 39
Solución de problemas . . . . . . . . . . . . . . . . . . . . . . . . .39
Mensajes en pantalla . . . . . . . . . . . . . . . . . . . . . . . . . . . . . . . . . . 39
Problemas y soluciones . . . . . . . . . . . . . . . . . . . . . . . . . . . . . . . . 41
Especificaciones . . . . . . . . . . . . . . . . . . . . . . . . . . . . . . .44
REFERENCIA DE TERMINOLOGIA . . . . . . . . . . . . . . . . . . . . . . 45
4
Page 93

Precauciones
Advertencia sobre la conexión de la alimentación
• Utilice el cable de alimentación suministrado. En caso de
utilizar un cable de alimentación distinto, asegúrese de que sea
compatible con el suministro eléctrico local.
Para los clientes en EE.UU.
Si no utiliza el cable adecuado, esta pantalla no cumplirá con
las normas obligatorias de la FCC.
Para los clientes en el Reino Unido
Si utiliza la pantalla en el Reino Unido, asegúrese de utilizar el
cable de alimentación adecuado para esta región.
Ejemplo de tipos de enchufe
para ca de 100 a
120 V
para ca de 200 a
240 V
El equipo debe instalarse cerca de una toma de corriente de fácil
acceso.
Instalación
No instale ni deje la pantalla:
• En lugares expuestos a temperaturas extremas, por ejemplo
cerca de un radiador, una salida de aire caliente o bajo la luz
solar directa. Si la expone a temperaturas extremas, como en un
automóvil bajo la luz solar directa o cerca de una salida de aire
caliente, pueden producirse deformaciones del exterior o fallas
de funcionamiento.
• En lugares expuestos a vibraciones mecánicas o golpes.
• No debería impedirse la ventilación cubriendo las aberturas de
ventilación con objetos tales como periódicos, manteles,
cortinas, etc.
• Deje algo de espacio alrededor de la unidad. De lo contrario,
podría bloquearse la circulación adecuada de aire causando un
sobrecalentamiento, lo que podría provocar un incendio o dañar
la unidad.
10 cm
• Cerca de equipos que generan un campo magnético intenso,
como un televisor o demás electrodomésticos.
• En lugares expuestos a grandes cantidades de polvo, suciedad o
arena, como cerca de una ventana abierta o de una salida al
exterior. Si la coloca temporalmente en el exterior, asegúrese de
tomar las precauciones adecuadas contra el polvo y la suciedad,
ya que de lo contrario podrían producirse fallas irreparables en
el funcionamiento.
• Para reducir el riesgo de incendio o descarga eléctrica, no
exponga este aparato a la lluvia ni a la humedad.
• No exponga el aparato a salpicaduras o goteos ni coloque sobre
él jarrones u otros objetos llenos de líquido.
sólo para ca de
240 V
20 cm
CH
VOL
10 cm
• Para evitar el riesgo de incendio, mantenga los objetos
inflamables o las luces sin protección (por ejemplo, velas) lejos
de la unidad.
• No coloque la unidad cerca ni encima de un radiador o registro
de calor, ni donde pueda verse expuesta a luz solar directa.
Manipulación de la pantalla LCD
• No deje la pantalla LCD orientada a la luz solar directa, ya que
podría dañarse. Tenga cuidado al colocarla cerca de una
ventana.
• No presione ni raye la pantalla LCD. No coloque objetos
pesados sobre la misma. De lo contrario, ésta podría peder su
uniformidad o provocar fallas en el funcionamiento del panel
LCD.
• Si la pantalla se utiliza en un lugar frío, es posible que aparezca
una imagen residual. No se trata de una falla en el
funcionamiento. La pantalla vuelve a su estado normal a
medida que suba la temperatura a un nivel de funcionamiento
normal.
• Si se muestra una imagen fija durante un tiempo prolongado, es
posible que aparezca una imagen residual durante algún
tiempo. Ésta desaparecerá poco después.
• El panel LCD se calienta durante el funcionamiento. No se trata
de una falla en el funcionamiento.
Acerca del altavoz estéreo incorporado
Asegúrese de mantener alejados de la apertura del altavoz
disquetes, cintas y equipos magnéticos de grabación, ya que los
altavoces generan un campo magnético. Dicho campo puede
afectar a los datos almacenados en discos y cintas magnéticas.
Nota sobre la pantalla LCD (de cristal líquido)
Tenga en cuenta que la pantalla LCD está fabricada con
tecnología de alta precisión. No obstante, es posible que
aparezcan puntos negros o brillantes de luz (rojos, azules o
verdes) de forma constante y ocasionalmente brillos o rayas de
color irregular. No se trata de una falla en el funcionamiento.
(Puntos efectivos: más del 99,99%)
Mantenimiento
• Antes de limpiar la pantalla, asegúrese de desenchufar el cable
de alimentación de la toma de corriente.
• Límpiela con un paño suave. Si utiliza un líquido para limpiar
cristales, no utilice ninguno que contenga una solución
antiestática o aditivo similar, ya que podría rayarse la capa
protectora de la pantalla LCD.
• Utilice un paño suave, ligeramente humedecido en una
solución detergente poco concentrada para limpiar la carcasa,
el panel y los controles. No utilice ningún tipo de almohadilla
abrasiva, polvo de restregar ni solventes como alcohol o
benzina.
• No frote, toque ni golpee la superficie de la pantalla con objetos
puntiagudos o abrasivos como bolígrafos o destornilladores.
Este tipo de contacto puede rayar el tubo de imagen.
• Tenga en cuenta que el material o la capa protectora de la
pantalla LCD se pueden deteriorar si se exponen a solventes
volátiles como, insecticidas, o si se mantiene un contacto
prolongado con materiales de goma o vinilo.
ES
5
Page 94

Transporte
• Desconecte todos los cables de la pantalla y sujete firmemente
ambos lados de la pantalla LCD procurando no rayar la pantalla
durante el transporte. Si la deja caer, puede lesionarse o dañar
la pantalla.
• Cuando transporte la pantalla para su reparación o
desplazamiento, utilice la caja de cartón y los materiales de
embalaje originales.
Desecho de la pantalla
• No deseche la pantalla junto con los desechos
domésticos.
• El tubo fluorescente que se utiliza en la pantalla
contiene mercurio. Su desecho debe realizarse en
conformidad a las leyes de las autoridades de
sanidad local.
Desecho de las baterías usadas
Para conservar el medioambiente, deshágase de las baterías
usadas siguiendo la normativa o las regulaciones locales.
Instalación en una pared o en un soporte
Si su intención es instalar la pantalla en una pared o en un soporte,
asegúrese de consultar con personal cualificado.
6
Page 95

Identificación de piezas y controles
Consulte las páginas entre paréntesis para obtener más
información.
Parte frontal de la pantalla LCD
CH
CH
VOL
5
VOL
1
2
Parte posterior de la pantalla LCD
qd
qs
A Sensor de control remoto
Este sensor recibe una señal del control remoto.
Asegúrese de no cubrirlo con papeles u otros elementos.
B Sensor de luz (página 38)
Este sensor mide el brillo del entorno. Asegúrese de no
cubrirlo con papeles u otros elementos.
C Interruptor 1 (alimentación) (página 15)
Presiónelo para encender o apagar la pantalla.
D Indicador 1 (alimentación) (páginas 15, 37)
El indicador de alimentación se ilumina en verde cuando se
enciende la pantalla y en naranja cuando la pantalla se
encuentra en modo de ahorro de energía. Asimismo, el
indicador de alimentación se ilumina en color rojo cuando la
pantalla se encuentra en modo de espera o cuando el
temporizador de desconexión automática está activado.
E Altavoces estéreo (página 37)
Estos altavoces emiten las señales de audio como sonido.
ES
Vista lateral de la pantalla LCD
43
6
7
8
9
0
qa
F Botón MENU (página 18)
Presiónelo para activar y desactivar la pantalla de menús.
G Botones CH+/– (página 17)
Presiónelos para cambiar el canal del televisor.
H Botones M/m y VOL+/– (control de volumen)
(páginas 18, 37)
Utilícelos para seleccionar los elementos de menú, realizar
ajustes y mostrar la barra de ajuste “Volumen” para controlar
el volumen.
I Botón (selección de entrada)/OK (página 15, 18)
Este botón funciona de dos maneras.
Al igual que el botón , éste alterna la señal de entrada entre
PC 1, PC 2, TV, COMPONENT, VIDEO 1 y VIDEO 2
cuando se conectan dos computadoras y dos equipos de video.
Como el botón OK, activa el elemento de menú seleccionado
o los ajustes realizados mediante los botones M/m 8.
J Botón (PIP/PAP) (página 33)
Presiónelo para alternar el ajuste “PIP” (imagen en imagen) o
“PAP” (imagen e imagen).
Cada vez que presione este botón, el ajuste PIP o PAP
cambiará en la siguiente forma.
PIP activado t PAP activado t No t PIP activado...
K Botón (modo imagen) (página 38)
Presiónelo para cambiar al modo imagen.
L Cubierta del conector (página 11)
Quítela cuando vaya a conectar los cables.
7
Page 96

M Posiciones de los tornillos del soporte o brazo de
montaje compatible con VESA (página 11)
Fije el soporte o brazo de montaje compatible con VESA.
Parte posterior de la pantalla LCD
qf
1
PC 1 PC 2 VHF/UHF
qg
qh qj
2
1
2
qk
O Orificio de bloqueo de seguridad
El orificio de bloqueo de seguridad debe utilizarse con el
sistema de seguridad Micro Saver Security System de
Kensington.
Micro Saver Security System es una marca comercial de
Kensington.
P Conectores PC 1
1 Conector de entrada DVI-D (RGB digital) para
PC 1 (página 12)
Este conector recibe las señales de video RGB digital que
cumplen con la norma DVI Rev.1.0.
2 Toma de entrada de audio para PC 1 (página 12)
Esta toma recibe señales de audio cuando se conecta a la
toma de salida de audio de un PC u otro equipo conectado
a PC 1.
Q Conectores PC 2
1 Conector de entrada HD15 (RGB analógico) para
PC 2 (página 12)
Este conector recibe las señales de video RGB analógico
(0,700 Vp-p, positivo) y las señales de sincronización.
2 Toma de entrada de audio para PC 2 (página 12)
Esta toma recibe señales de audio cuando se conecta a la
toma de salida de audio de un PC u otro equipo conectado
a PC 2.
1
2
Vista lateral de la pantalla LCD
1
2
1
2
ws
R Toma VHF/UHF (página 14)
Esta toma recibe la señal de una antena.
S Tomas COMPONENT
1 Tomas de entrada de video componente Y/P
w;ql
wa
para COMPONENT (página 13)
Estas tomas reciben señales de video componente Y/P
PR (Y/B-Y/R-Y o Y/PB/PR).
2 Tomas de entrada de audio para COMPONENT
(página 13)
Estas tomas reciben señales de audio cuando se conectan
a las tomas de salida de audio de un reproductor DVD u
otro equipo conectado a COMPONENT.
T Tomas VIDEO 1
1 Tomas de entrada de video compuesto/S video
para VIDEO 1 (página 13)
Estas tomas reciben señales de video compuesto o S
video.
Al conectar equipos de video a las dos tomas de entrada
de video compuesto y de S video, se muestra la señal de
la toma de S video.
2 Tomas de entrada de audio para VIDEO 1
(página 13)
Estas tomas reciben señales de audio cuando se conectan
a las tomas de salida de audio de una videograbadora u
otro equipo conectado a VIDEO 1.
B/PR
B
/
N Conector AC IN (página 15)
Este conector conecta el cable de alimentación
(suministrado).
8
Page 97

U Tomas VIDEO 2
1 Tomas de entrada de video compuesto/S video
para VIDEO 2 (página 13)
Estas tomas reciben señales de video compuesto o S
video.
Al conectar equipos de video a las dos tomas de entrada
de video compuesto y de S video, se muestra la señal de
la toma de S video.
2 Tomas de entrada de audio para VIDEO 2
(página 13)
Estas tomas reciben señales de audio cuando se conectan
a las tomas de salida de audio de una videograbadora u
otro equipo conectado a VIDEO 2.
V Toma de auriculares (página 37)
Esta toma emite las señales de audio a los auriculares.
ES
9
Page 98

Control remoto
8
9
VIDEO 1/2 (página 13):
Presiónelo para seleccionar una entrada
de señal a través de las tomas VIDEO 1
(video compuesto/S video) y VIDEO 2
(video compuesto/S video) situados en
la parte posterior y lateral de la pantalla
respectivamente.
TV (página 17): Presiónelo para seleccionar la entrada
del televisor.
0
qa
qs
qd
MUTING DISPLAY SLEEP 1
PC1 PC2 COMPONENT VIDEO1/2
TV
MENU
OK
123
456
7 8 9
JUMP
VOL CH
DISPLAY
ENT
0
1
2
3
4
5
6
7
C Botones de función
(Modo imagen) (página 38):
Presiónelo varias veces para
desplazarse por el Modo imagen.
(acercamiento) (página 25):
Presiónelo varias veces para
desplazarse por los ajustes
“Acercamiento”.
(PIP/PAP) (página 33):
Presiónelo varias veces para
desplazarse por los ajustes de “PIP” o
“PAP”.
D Botón MENU (página 18)
Presiónelo para activar y desactivar la pantalla de menús.
E Botones de 0 a 9 (página 17)
Utilícelos para introducir números.
F Botón ENT (introducir) (página 17)
Presiónelo para confirmar los números introducidos con los
botones de 0 a 9.
G Botones CH+/– (página 17)
Presiónelos para cambiar el canal del televisor.
H Botón SLEEP (página 39)
Presiónelo varias veces para programar la desactivación
automática de la pantalla después de un tiempo definido.
Si utiliza esta función y se ajusta el temporizador de
desconexión automática, el indicador 1 (encendido) se
ilumina en rojo.
I Botón DISPLAY (página 18)
Presiónelo una vez para que se muestre el número de canal o
la entrada actuales. Se mantendrán en la pantalla hasta que
vuelva a presionar el botón.
A Interruptor 1 (alimentación) (página 15)
Presiónelo para encender o apagar la pantalla.
B Botones de selección de entrada
PC 1 (página 12): Presiónelo para seleccionar una entrada
de señal a través de los conectores PC 1
(DVI-D) en la parte posterior.
PC 2 (página 12): Presiónelo para seleccionar una entrada
de señal a través de los conectores PC 2
(HD15) en la parte posterior.
COMPONENT (página 13):
Presiónelo para seleccionar una entrada
de señal a través de los conectores
COMPONENT (componente Y/P
en la parte posterior.
B/PR
J Botón MUTING (página 18)
Presiónelo para desactivar el sonido. Presiónelo nuevamente
o presione el botón VOL + para recuperar el sonido.
K Botones M/m y OK (página 18)
Utilice los botones M/m para seleccionar los elementos de
menú y realizar ajustes.
Presione el botón OK para activar el elemento de menú
seleccionado y los ajustes realizados mediante los botones
M/m.
L Botón JUMP (página 18)
Presiónelo para cambiar el canal del televisor entre el canal
)
actual y el último seleccionado con los botones de 0 a 9.
M Botones VOL+/– (página 37)
Presiónelos para ajustar el volumen del sonido.
10
Page 99

Instalación
Paso 2: Conecte los cables
Antes de utilizar la pantalla, verifique que en el paquete se
incluyen los artículos siguientes:
• Pantalla LCD
• Control remoto
• Pilas de tamaño AAA (2)
• Cable de alimentación
• Cable de señal de video HD15-HD15 (RGB analógico)
• Cable de señal de video DVI-D (RGB digital)
• Cable de audio (minitoma estéreo)
• Cable coaxial de 75 ohm
• CD-ROM (software de utilidades para Windows/Macintosh,
Manual de instrucciones, etc.)
• Tarjeta de garantía
• Guía de instalación rápida
Paso 1: Uso del soporte
x Uso del soporte suministrado
Abra el soporte.
• Apague la pantalla, el PC y cualquier otro equipo antes
de conectarlos.
• Si planea conectar los equipos siguientes:
– Un PC equipado de un conector de salida HD15 (RGB
analógico)
t Consulte “Conexión de un PC mediante los
conectores PC 2” (página 12).
– Equipos de video con tomas de salida de video
componente
t Consulte “Conexión de un equipo de video
mediante las tomas COMPONENT” (página 13).
– Equipo de video que dispone de tomas de salida de
video compuesto/S video
t Consulte “Conexión de un equipo de video
mediante las tomas VIDEO 1/2” (página 13).
–Una antena
t Consulte “Conexión de una antena” (página 14).
Notas
• No toque las clavijas del conector del cable de señal de video, ya
que podrían doblarse.
• Asegúrese de que los cables conectados a la pantalla no quedan
atrapados bajo el soporte.
ES
Nota
El soporte viene plegado de fábrica. Asegúrese de no colocar la pantalla
en posición vertical con el soporte sin desplegar, ya que de lo contrario la
pantalla podría volcarse.
x Uso del soporte compatible con VESA
Si utiliza un soporte o brazo de montaje compatible con VESA no
suministrado, emplee tornillos compatibles con VESA para su
fijación.
posiciones de los
tornillos del soporte
compatible con
VESA (100 mm)
posiciones de los
tornillos del soporte
suministrado
Vista inferior
Extraiga la cubierta del conector.
Presione los ganchos y deslice la cubierta del conector hacia
usted.
cubierta del conector
Puede utilizar la pantalla con el soporte suministrado o sin él.
11
Page 100

x Conexión de un PC mediante los
conectores PC
Si planea conectar un PC equipado de un conector DVI (RGB
digital), realice el procedimiento siguiente.
Utilice el cable de señal de video DVI-D (RGB digital) y
el cable de audio suministrados para conectar el PC a
los conectores PC 1 de la pantalla.
1
x Conexión de un PC mediante los
conectores PC
Si planea conectar un PC equipado de un conector HD15 (RGB
analógico), realice el procedimiento siguiente.
Utilice el cable de señal de video HD15-HD15 (RGB
analógico) y el cable de audio suministrados para
conectar el PC a los conectores PC 2 de la pantalla.
2
a la entrada
DVI-D
al conector de salida DVI del PC
(RGB digital)
cable de señal de
a la salida de audio
del PC
video DVI-D
(RGB digital)
(suministrado)
cable de audio (suministrado)
a la entrada
de audio
para PC 1
a la entrada
de audio
para PC 2
cable de audio (suministrado)
a la salida de audio
del PC
al conector de salida HD15
del PC (RGB analógico)
a la entrada
HD15
cable de señal de
video HD15-HD15
(RGB analógico)
(suministrado)
12
 Loading...