

Sony HES-V1000 Important notice
Unpacking Guide
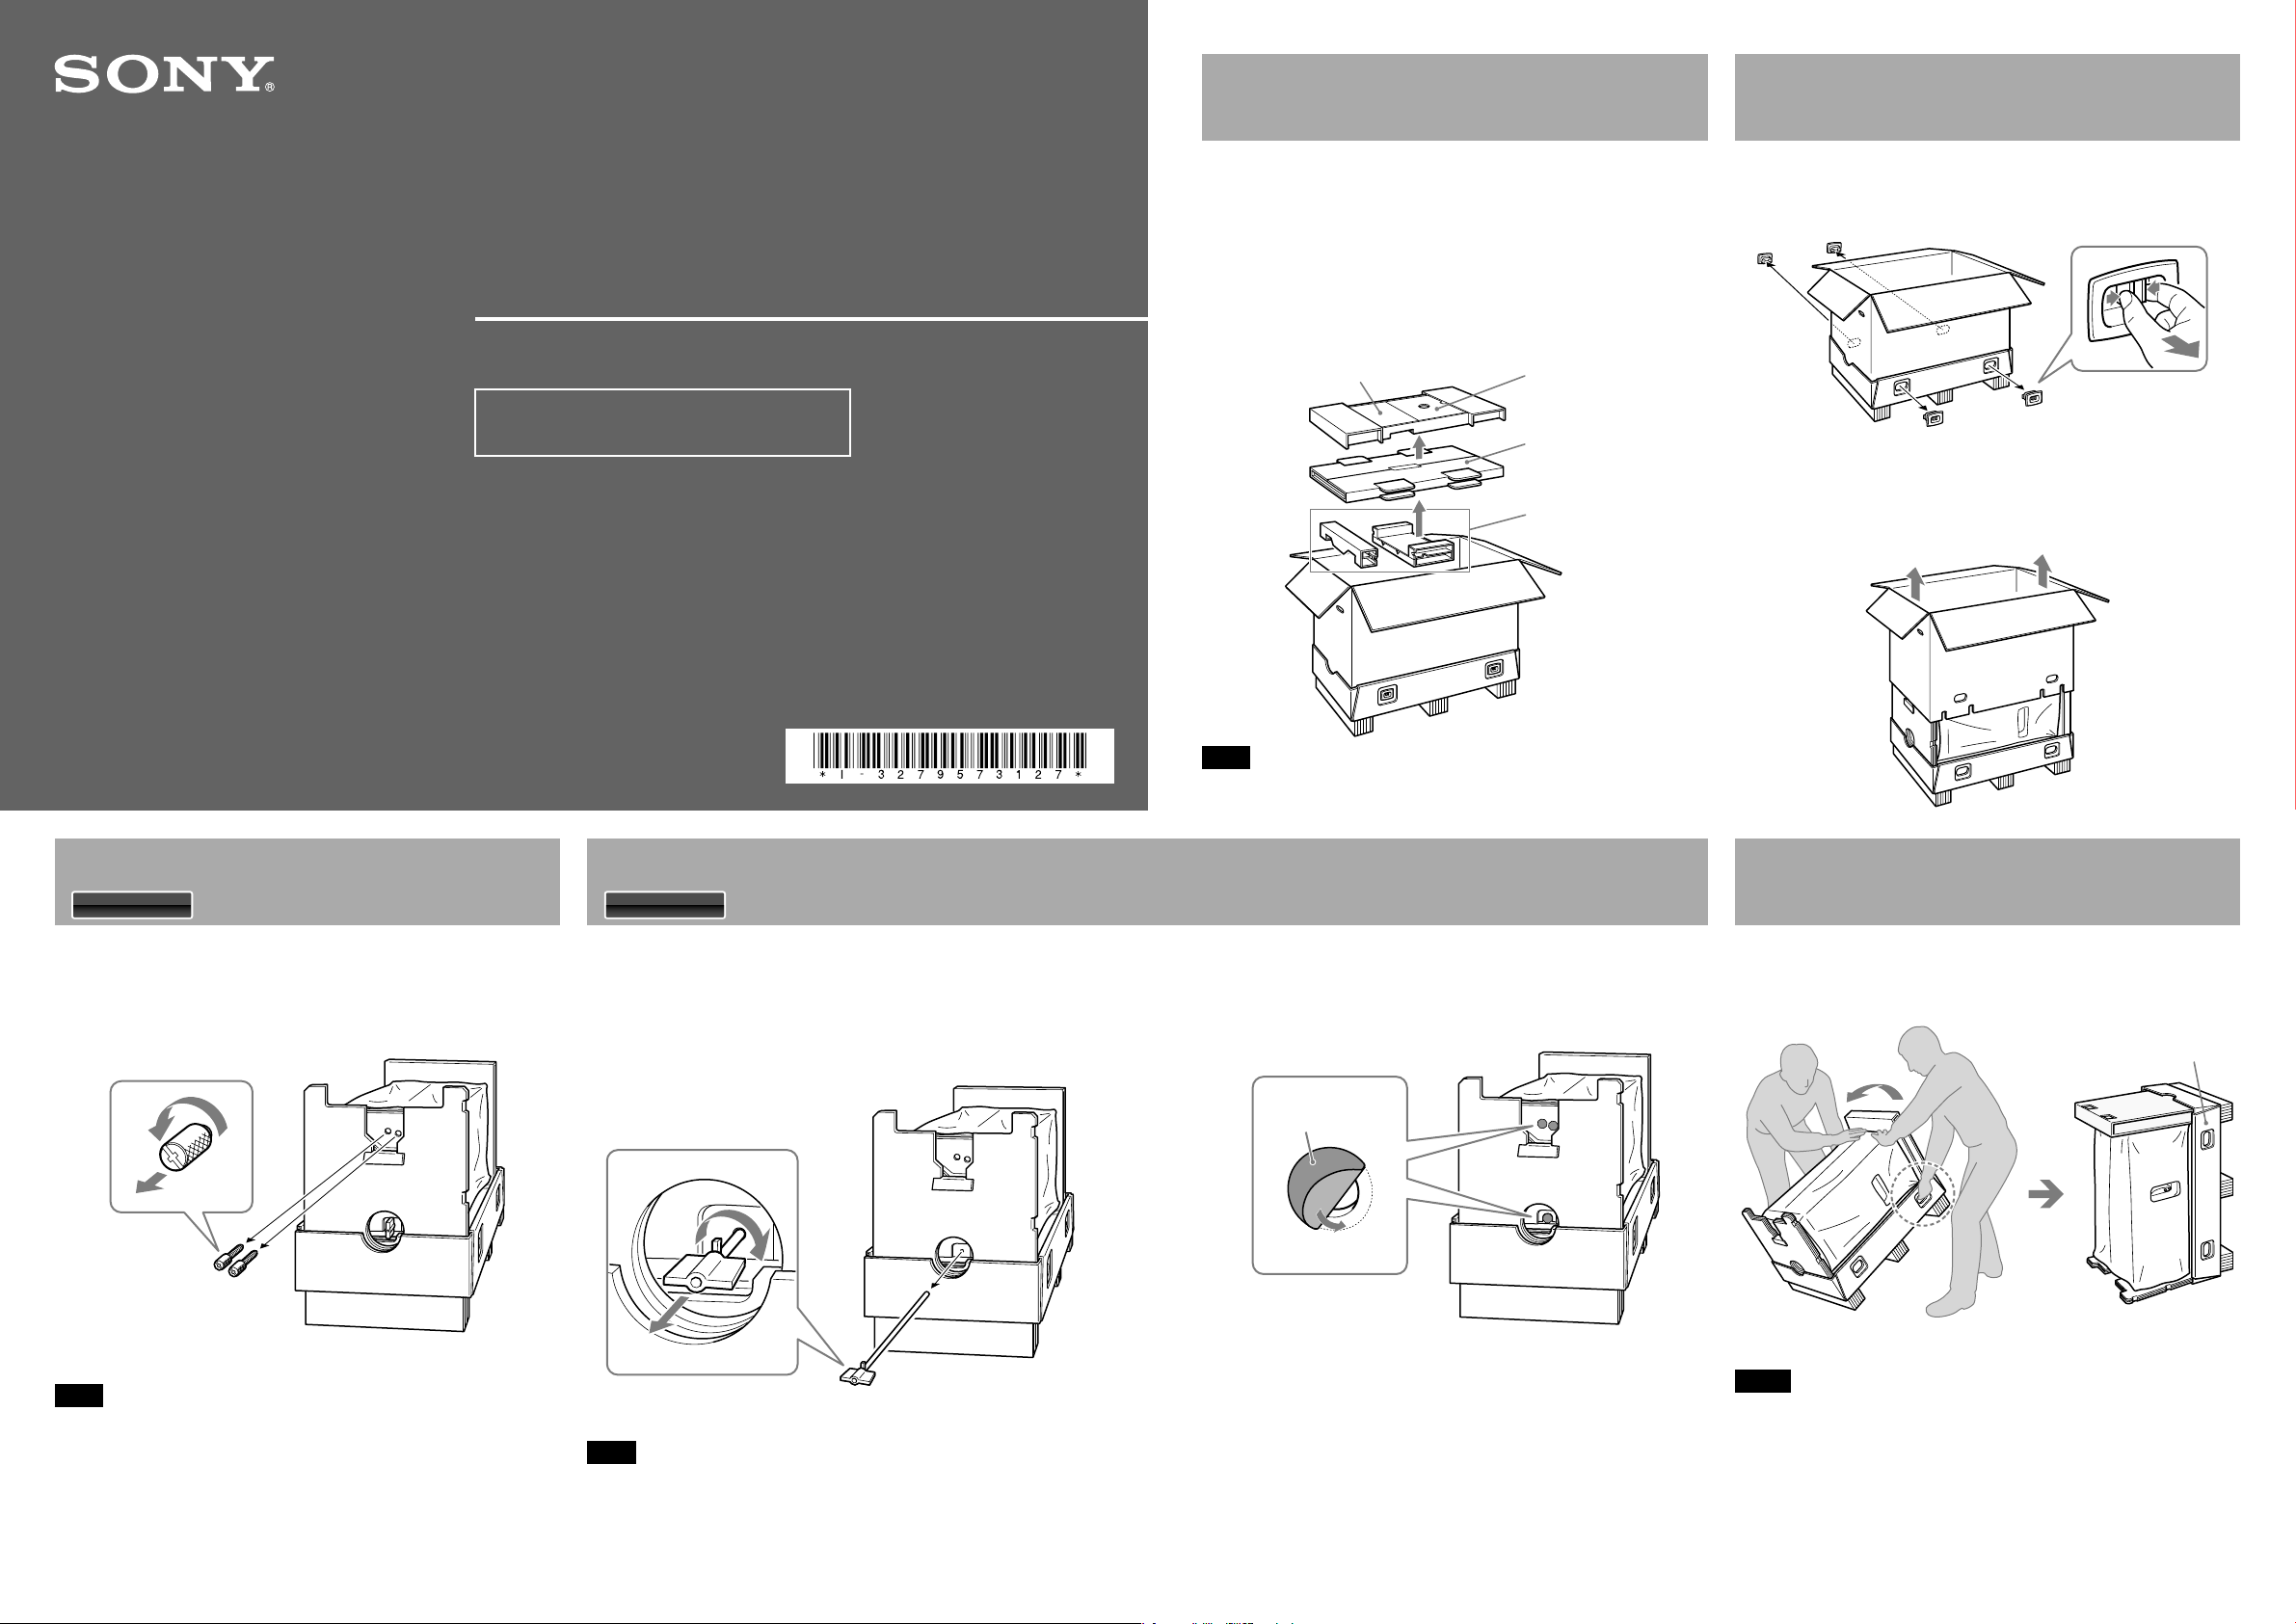
1 Removing the Accessories
and the Glass Panels
1 Remove the accessory pack.
Do not discard; the boxes contain accessories and operating
instructions.
2 Remove the glass panel cushioning.
3 Remove cushions.
Accessory box
Glass panels
Cushions
Operating instructions
Note
Handle the glass panels with care.
HES-V1000
After unpacking, move on to the following documents
(contained in the Operating Instructions box).
Quick Start Guide
Operating Instructions (“Getting Started”)
© 2007 Sony Corporation Printed in Japan
2 Removing the Upper Carton
1 Remove four plastic tabs located at the bottom of
the carton.
To pull out the joints
Grasp the middle
of the tab.
Pull out.
The upper box is detached from the pallet.
2 Lift the upper carton.
3 Removing the Lock Screws
1 On the bottom of the unit (not the box), you
should find two lock screws.
2 Unscrew counter-clockwise and remove them.
Note
Store the lock screws in a safe place as you will need them when
transporting the unit. These screws are necessary to prevent damage to
the disc pickup mechanism during shipping and transport.
4 Removing the Lock Stick
1 On the bottom of the unit (the same place as Sec.
3), you should find a lock stick.
2 Unlock the lock stick by turning the stick clockwise
90 degrees and remove it.
Note
Store the lock stick in a safe place as you may need it when transporting
the unit. The lock stick is necessary for securing the unit to the packing
material to prevent damage of the mechanical block during shipment
and transportation.
5 Placing the Unit Upright
With two persons, bring the unit gradually into the
upright position (pallet at the side).
Pallet
Notes
Make sure to move the unit with at least two persons. The unit weighs
48kg (105 3/4 lb).
Move the unit slowly and carefully so the unit does not drop out and
fall over.
Refer to the above illustration so as not to hold the wrong side of the
unit.
This box contains accessories, padding materials, and the server unit.
Since the unit is large and heavy, make sure to work with another person,
and follow the procedures in this document as described.
3 Close the three holes (including the holes in Sec. 3)
with the supplied dust-tight seals.
The dust-tight seals are included in the accessory box.
Dust-tight seals
3-279-573-12 (1)
Important Notice
Important
Important
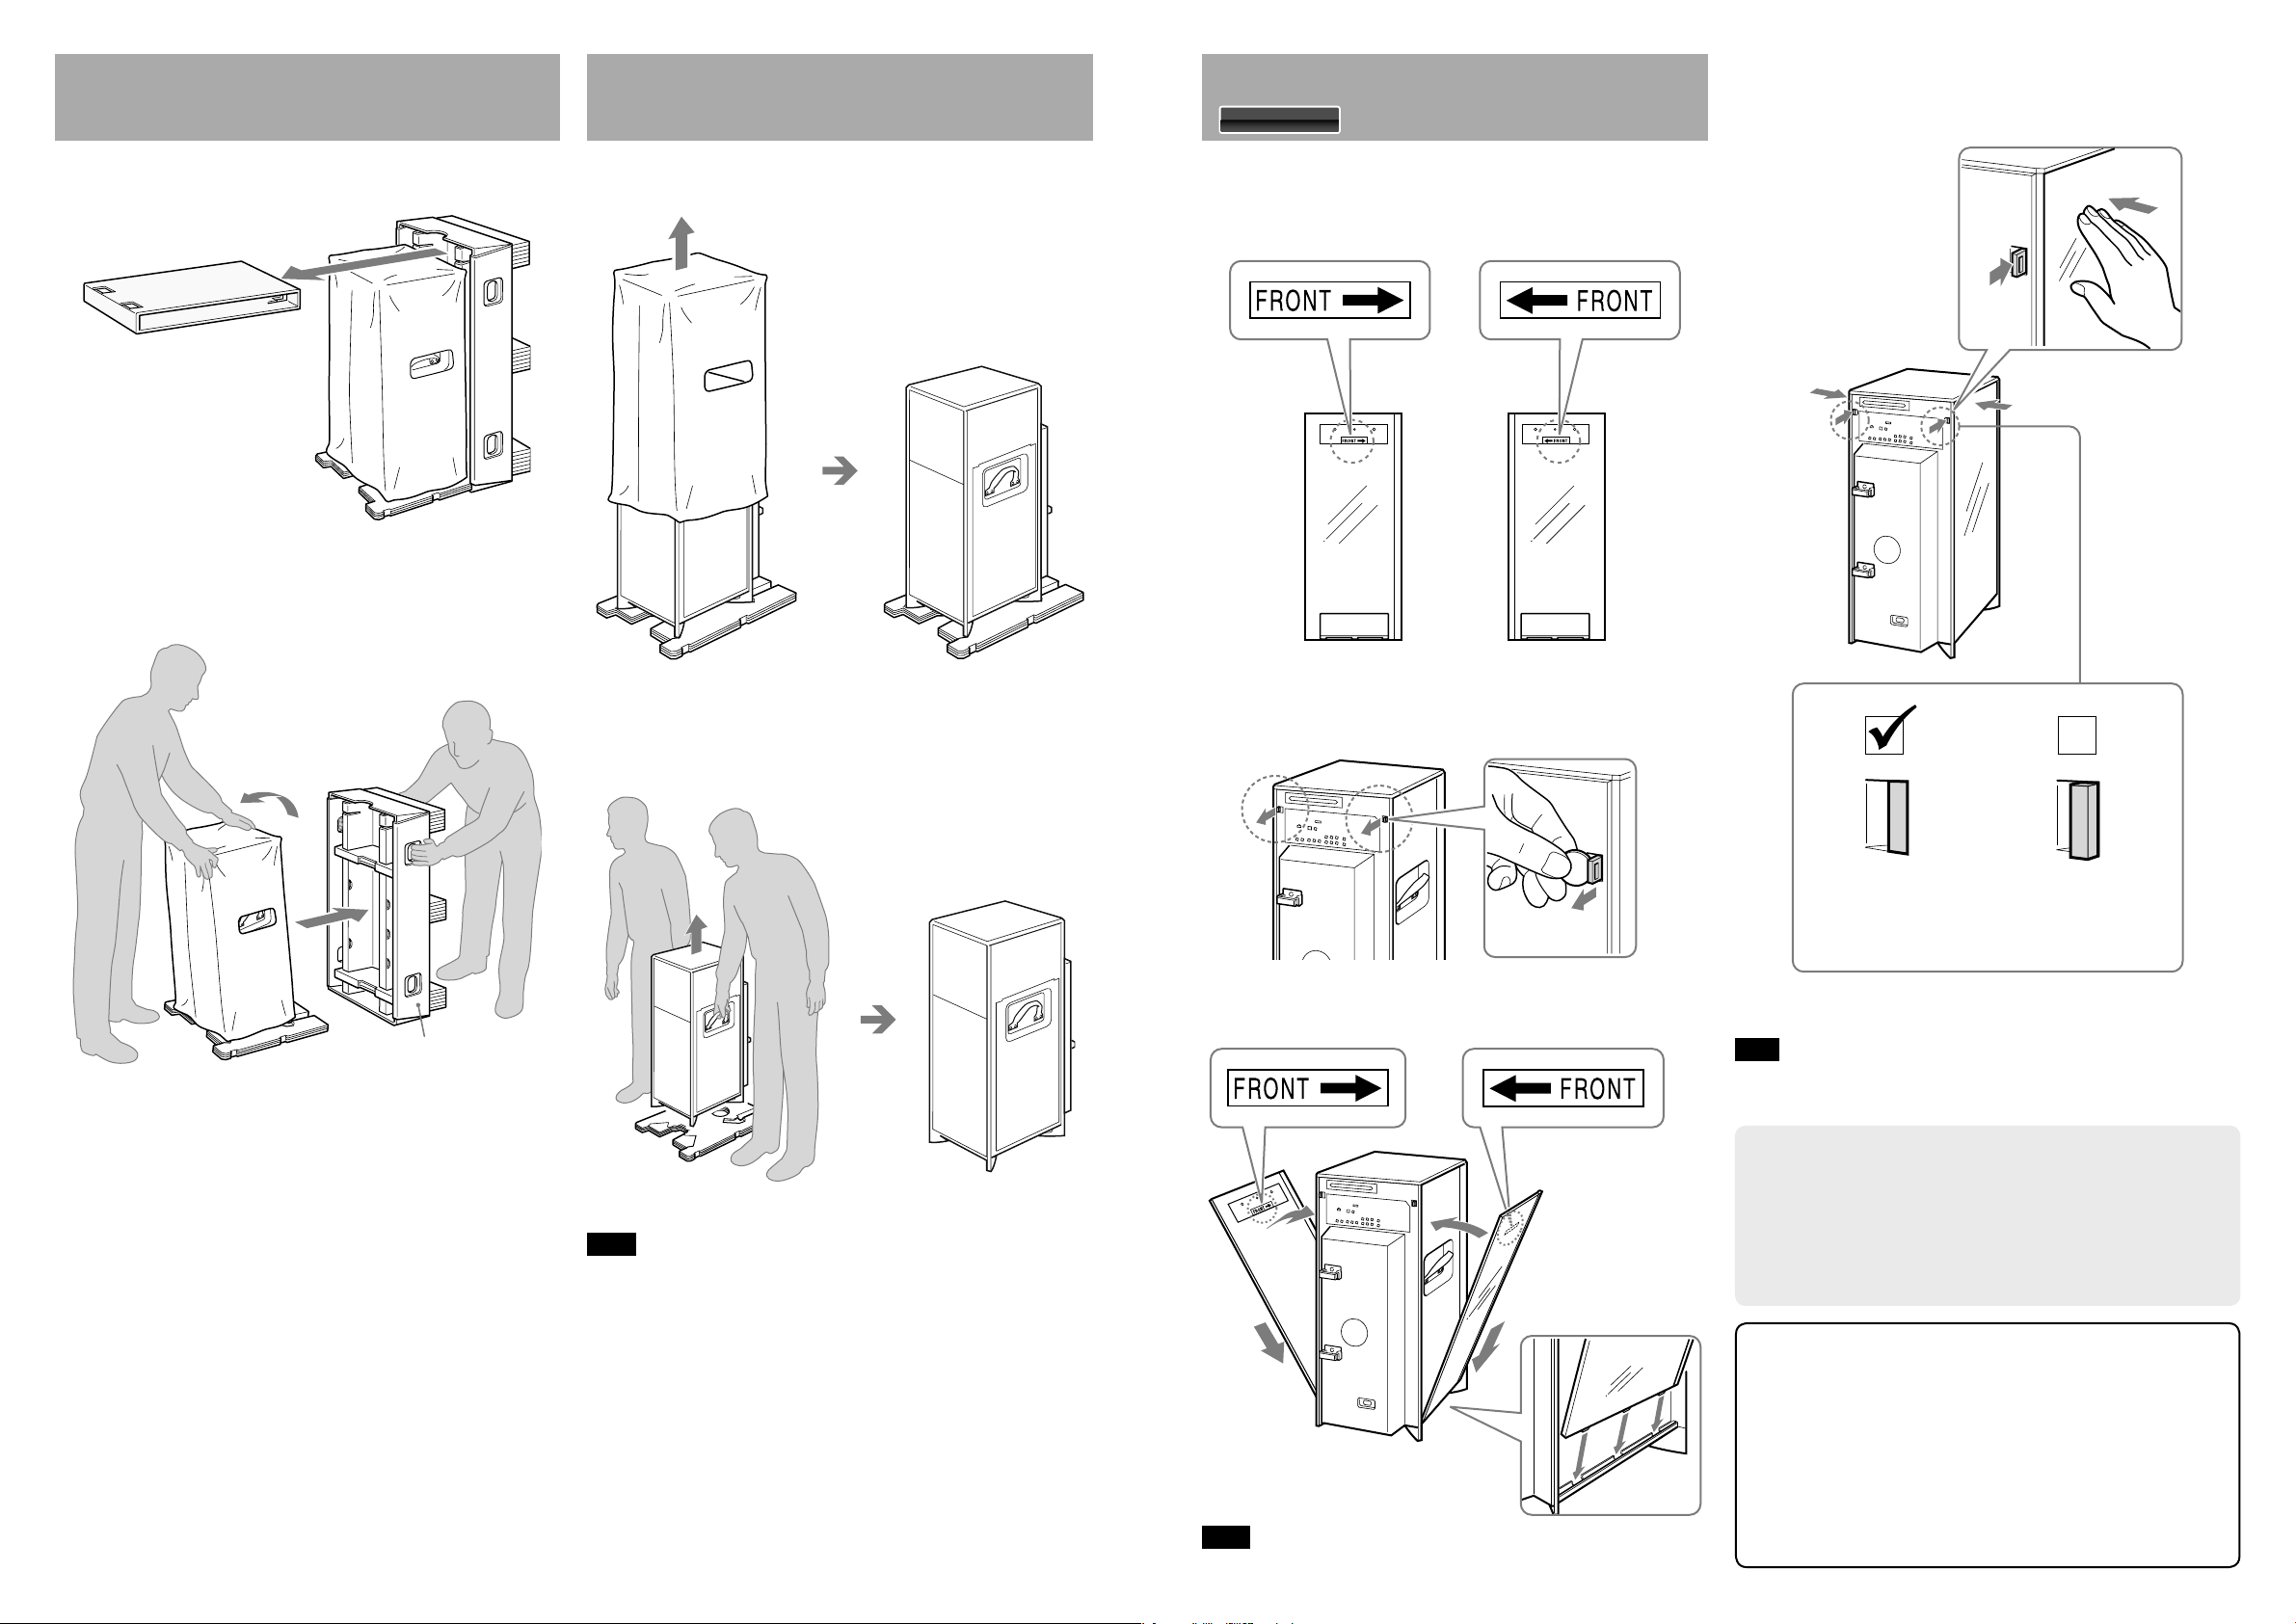
6 Removing the Pallet
1 Remove the cushioning from the top of the unit.
2 Remove the pallet while another person is holding
up the unit.
Pallet
7 Removing the Cover Sheet,
and Placing the Unit
1 Remove the white cover sheet.
2 Move the unit to the place of installation.
Be sure to grasp the handles when moving the unit.
Note
Install the unit on a flat surface in a stable place.
8 Attaching the Glass Panels
1 Check the orientation indicated on the glass panels.
Right side panel will only fit right side and left panel will fit
only left side. (They are not interchangeable.)
2 Remove the tape that covers the panel lock lever
(painted in red), and pull out the lever with a coin
or flathead screwdriver, etc.
3 Insert the panel’s projecting tabs on the bottom
edge into the three slots on the unit.
Note
To move the unit, detach the glass panels and grasp the handles underneath.
4 Holding the glass panel to the side, push the lever
back to its original position.
The panel is locked.
Push the lever inside
Lever not engaged, panel
not firmly locked. Push the
lever all the way through
till it remains flush with
the back panel surface.
5 Repeat steps 1 to 4 to attach the other panel.
Hint
Use the supplied cleaning cloth to wipe the glass surfaces. The cleaning
cloth is included in the accessory box.
Important
Observe the following precautions when
moving the unit:
Be sure to remove all discs before turning off the
power.
Attach the two lock screws and the lock stick to the
unit. Be sure to disconnect the power cord when
attaching them. Use the supplied carton and
cushions for transportation.
If the unit is brought directly from a cold to a warm
location, or is placed in a very damp room, moisture
may condense on the unit.
If this happens, leave the unit for about six hours
without connecting the power cord to the unit, until
the moisture inside the unit evaporates.
 Loading...