

Page 1
3-856-118-11 (2)
FM/MW/LW(SW)
Compact Disc
Player
Operating Instructions
Mode d’emploi
Bedienungsanleitung
Istruzioni per l’uso
For installation and connections, see the supplied installation/connections
manual.
En ce qui concerne l’installation et les connexions, consulter le manuel
d’installation/connexions fourni.
Zur Installation und zum Anschluß siehe die mitgelieferte Installations-/
Anschlußanleitung.
Per l’installazione e i collegamenti, fare riferimento al manuale di istruzioni di
installazione/collegamenti in dotazione.
EN
F
D
I
CDX-C810DSP
1996 by Sony Corporation
Actual total number: Sony CDX-C810DSP (E,F,G,I) 3-856-118-11 (2)
Page 2

EN
Welcome !
Thank you for purchasing the Sony Compact
Disc Player. This unit lets you enjoy a variety
of features by using either a rotary remote or a
wireless remote.
In addition to the CD playback and the radio
operations, you can expand your system by
connecting an optional CD/MD changer.
2
Actual total number: Sony CDX-C810DSP (E,F,G,I) 3-856-118-11(2)
Page 3

Table of Contents
This Unit Only
Getting Started
Resetting the unit ................................................ 4
Detaching the front panel .................................. 4
Preparing the rotary remote .............................. 4
Setting the clock .................................................. 5
CD Player
Listening to a CD ................................................ 5
Playing a CD in various modes ........................ 6
Creating a programme
— CD Programme Memory ......................... 6
Radio
Memorising stations automatically
— Best Tuning Memory (BTM) ................... 8
Memorising only the desired stations .............. 8
Receiving the memorised stations .................... 9
RDS
Overview of the RDS function .......................... 9
Displaying the station name .............................. 9
Re-tuning the same programme automatically
— Alternative Frequencies (AF) ................ 10
Listening to traffic announcements ................ 10
Presetting the RDS stations with the AF
and TA data .................................................. 11
Locating a station by programme type .......... 12
Setting the clock automatically ....................... 12
With Optional Equipment
CD/MD Changer
Playing a CD or MD ......................................... 18
Scanning the tracks
— Intro Scan ................................................. 19
Playing tracks repeatedly
— Repeat Play .............................................. 19
Playing tracks in random order
— Shuffle Play .............................................. 19
Creating a programme
— CD Programme Memory ....................... 20
Labelling a CD
— Disc Memo ............................................... 22
Locating a disc by name
— List-up ...................................................... 22
Selecting the specific tracks for playback
— Bank .......................................................... 23
EN
Additional Information
Precautions ......................................................... 24
Maintenance ....................................................... 25
Dismounting the unit ....................................... 25
Location of controls .......................................... 26
Specifications ..................................................... 28
Troubleshooting guide ..................................... 29
Index ................................................................... 31
DSP
Selecting a surround menu .............................. 13
Registering a surround menu onto each disc
— Disc Sound Memory (DSM) .................. 13
Selecting the listening position ....................... 14
Adjusting the fader (FAD) ............................... 14
Adjusting the volume of the subwoofer(s).... 15
Adjusting the volume of the bass and treble
— Digital Tone Control............................... 15
Listening to each programme source in its
registered surround mode
— Source Sound Memory .......................... 16
Other Functions
Using the rotary remote ................................... 16
Adjusting the sound characteristics ............... 17
Muting the sound.............................................. 17
Changing the sound and display settings ..... 18
Actual total number: Sony CDX-C810DSP (E,F,G,I) 3-856-118-11(2)
3
Page 4
EN
Getting Started
Resetting the unit
Before operating the unit for the first time or
after replacing the car battery, you must reset
the unit.
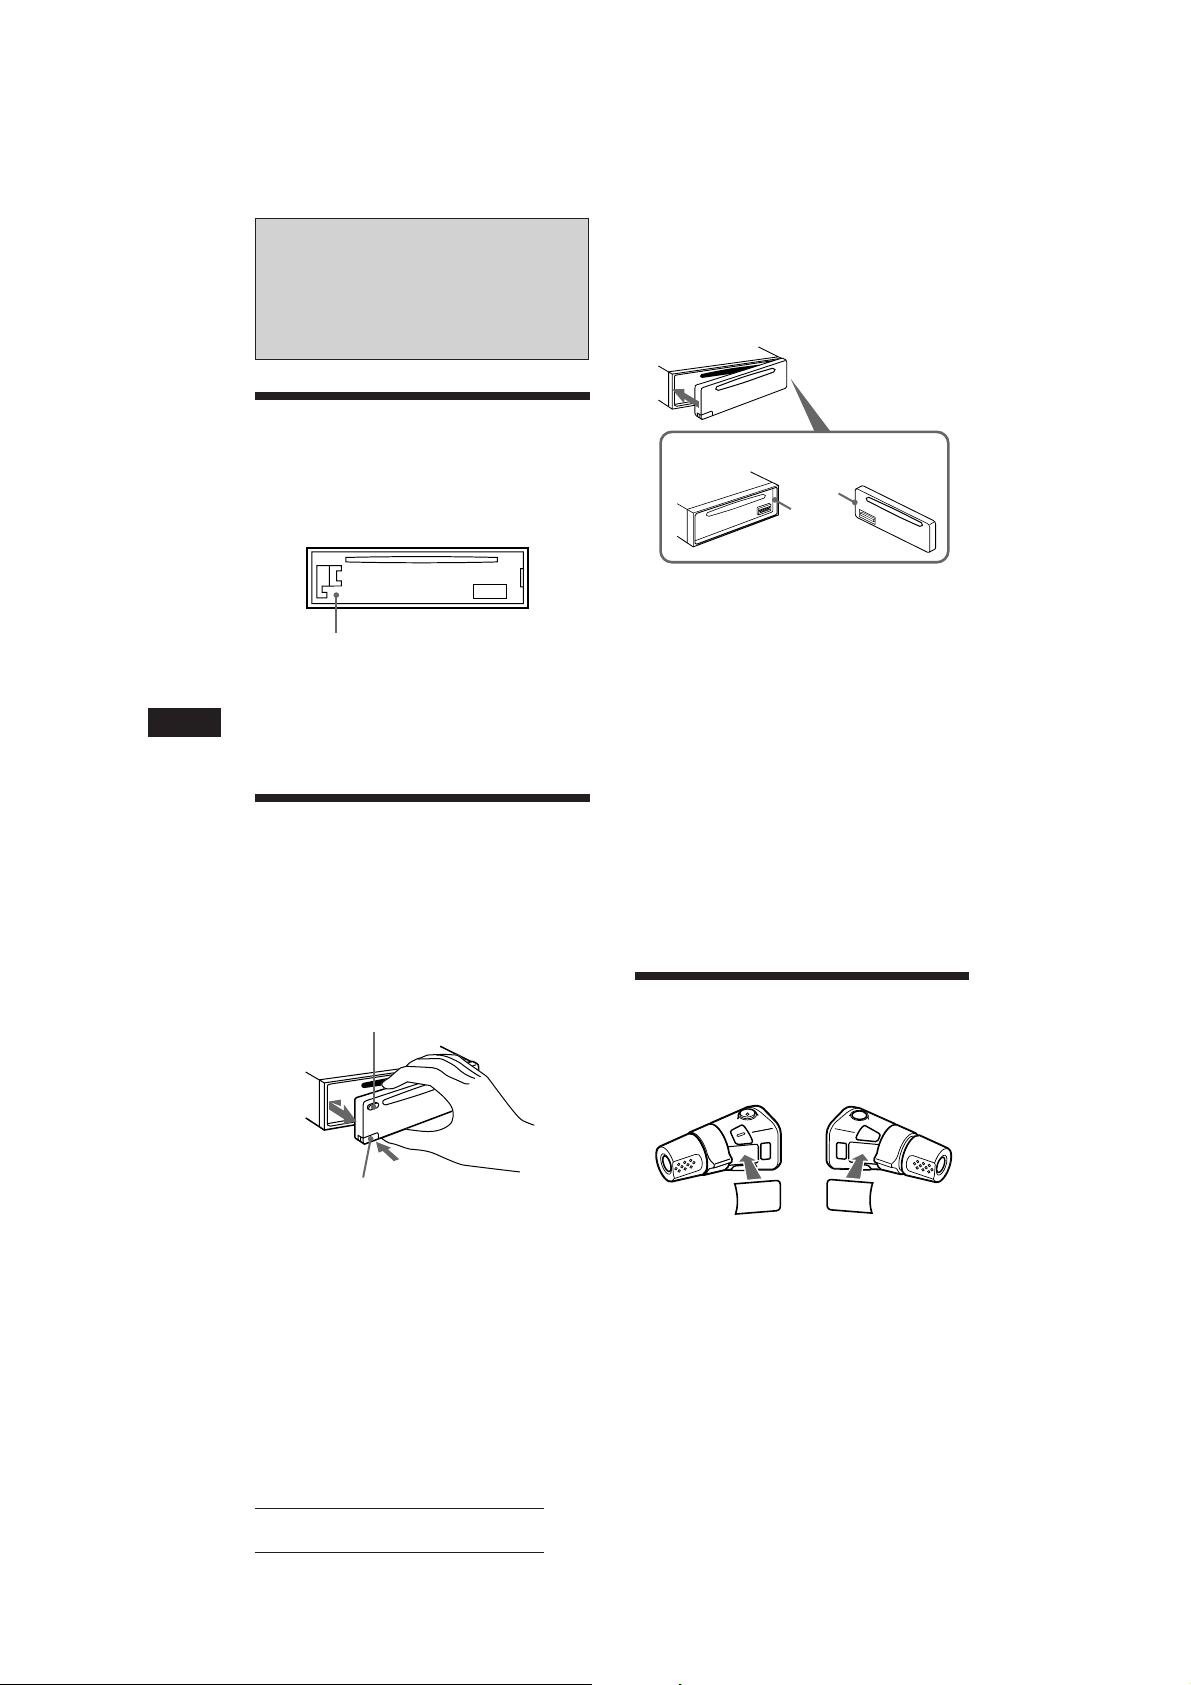
Press the reset button with a pointed object,
such as a ballpoint pen.
Reset button
Note
When you connect the power supply cord to the unit or
reset the unit, wait for about 10 seconds before you insert a
disc. Do not insert a disc within these 10 seconds,
otherwise, the unit will not be reset.
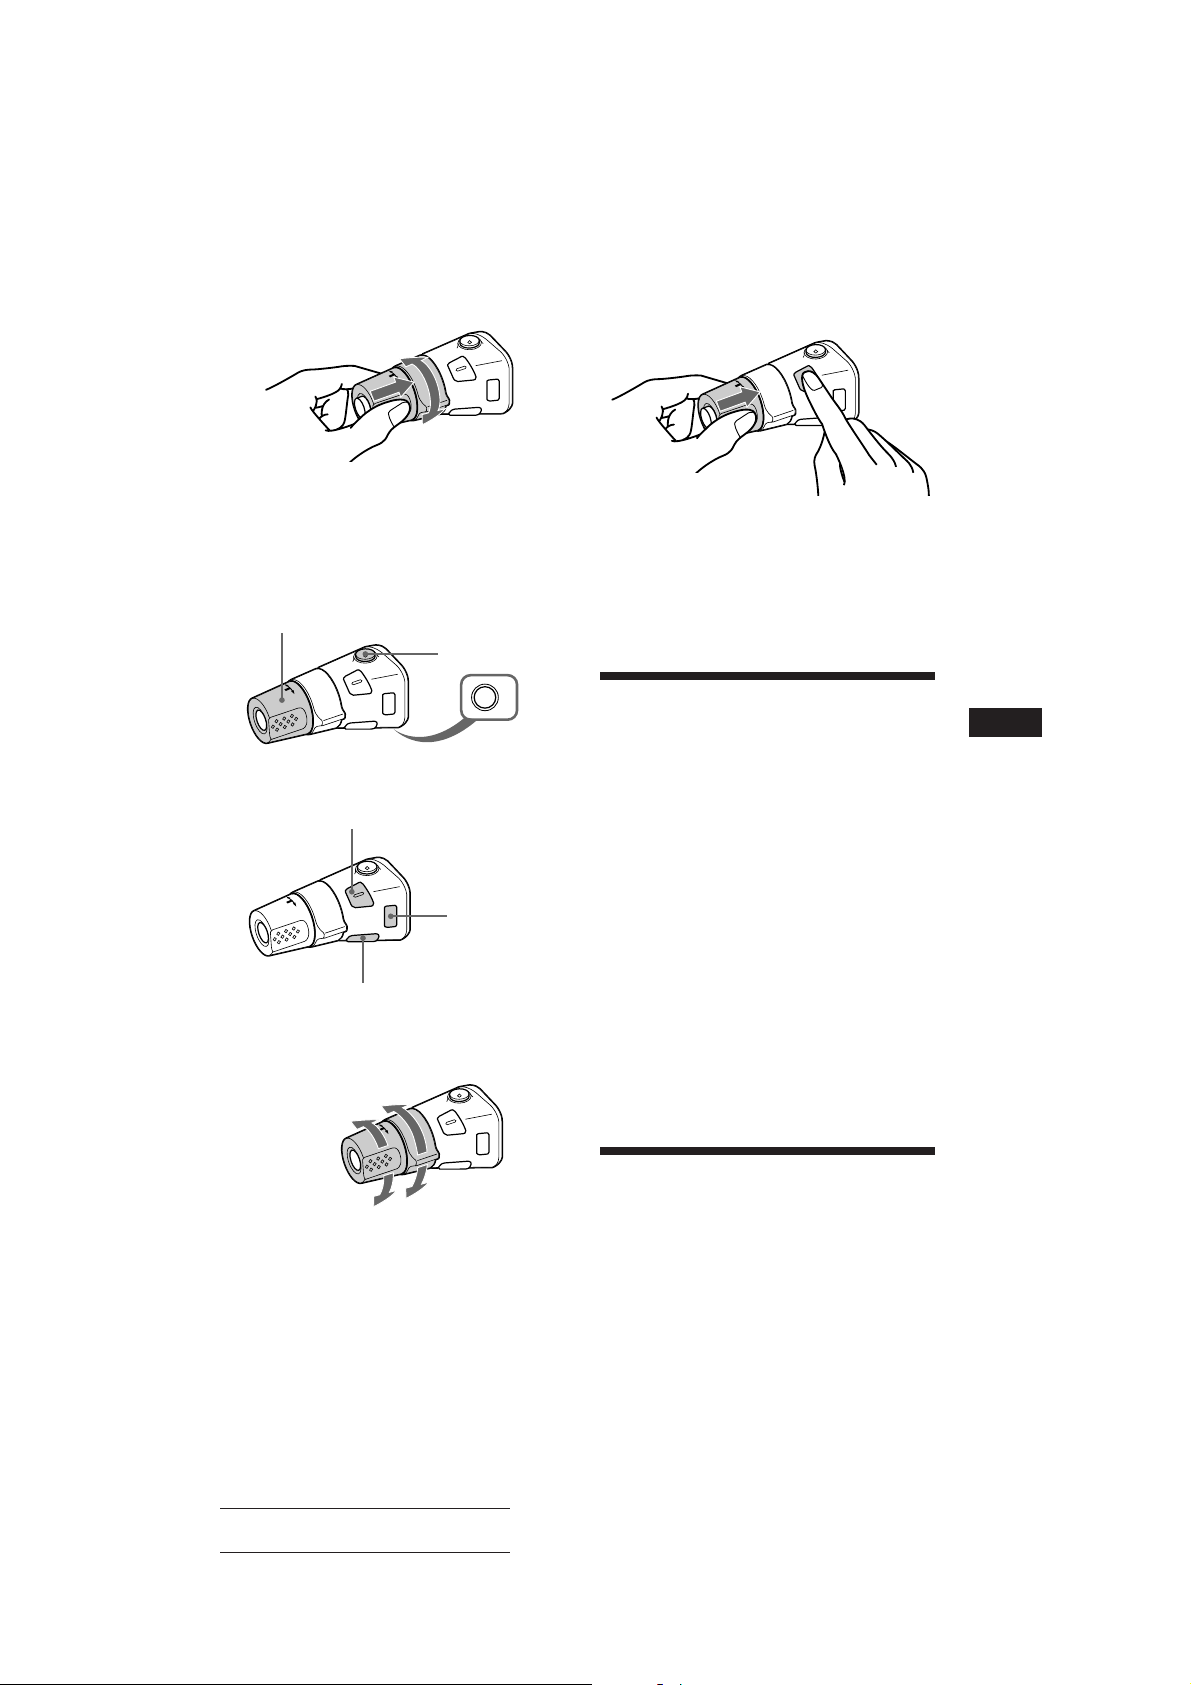
Attaching the front panel
Align part A of the front panel to part B of
the unit as illustrated, and push until it clicks.
A
B
Notes
• Be sure not to attach the front panel upside down.
• Do not press the front panel hard against the unit when
attaching it. Press it lightly against the unit.
• When you carry the front panel with you, put it in the
supplied front panel case.
• Do not press hard or put excessive pressure on the
display windows of the front panel.
• Do not expose the front panel to direct sunlight, heat
sources such as hot air ducts, and do not leave it in a
humid place. Never leave it on the dashboard of a car
parked in direct sunlight where there may be a
considerable rise in temperature.
Detaching the front panel
You can detach the front panel of this unit to
prevent the unit from being stolen.
1 Press (OFF).
2 Press (RELEASE) to open up the front
panel. Then slide the front panel a little
to the left, and pull it off towards you.
(OFF)
(RELEASE)
Notes
• Be sure not to drop the panel when detaching it from the
unit.
• If you press (RELEASE) to detach the panel while the
unit is still on, the unit will turn off automatically to
prevent the speakers from being damaged.
4
Caution alarm
If you turn the ignition key switch to the OFF
position without removing the front panel, the
caution alarm will beep for a few seconds
(only when the POWER SELECT switch is set
to the A position).
Preparing the rotary
remote
When you mount the rotary remote, attach the
label in the illustration below.
DSPL
LIST
SOUND
SOUND
LIST
DSPL
Actual total number: Sony CDX-C810DSP (E,F,G,I) 3-856-118-11(2)
Page 5
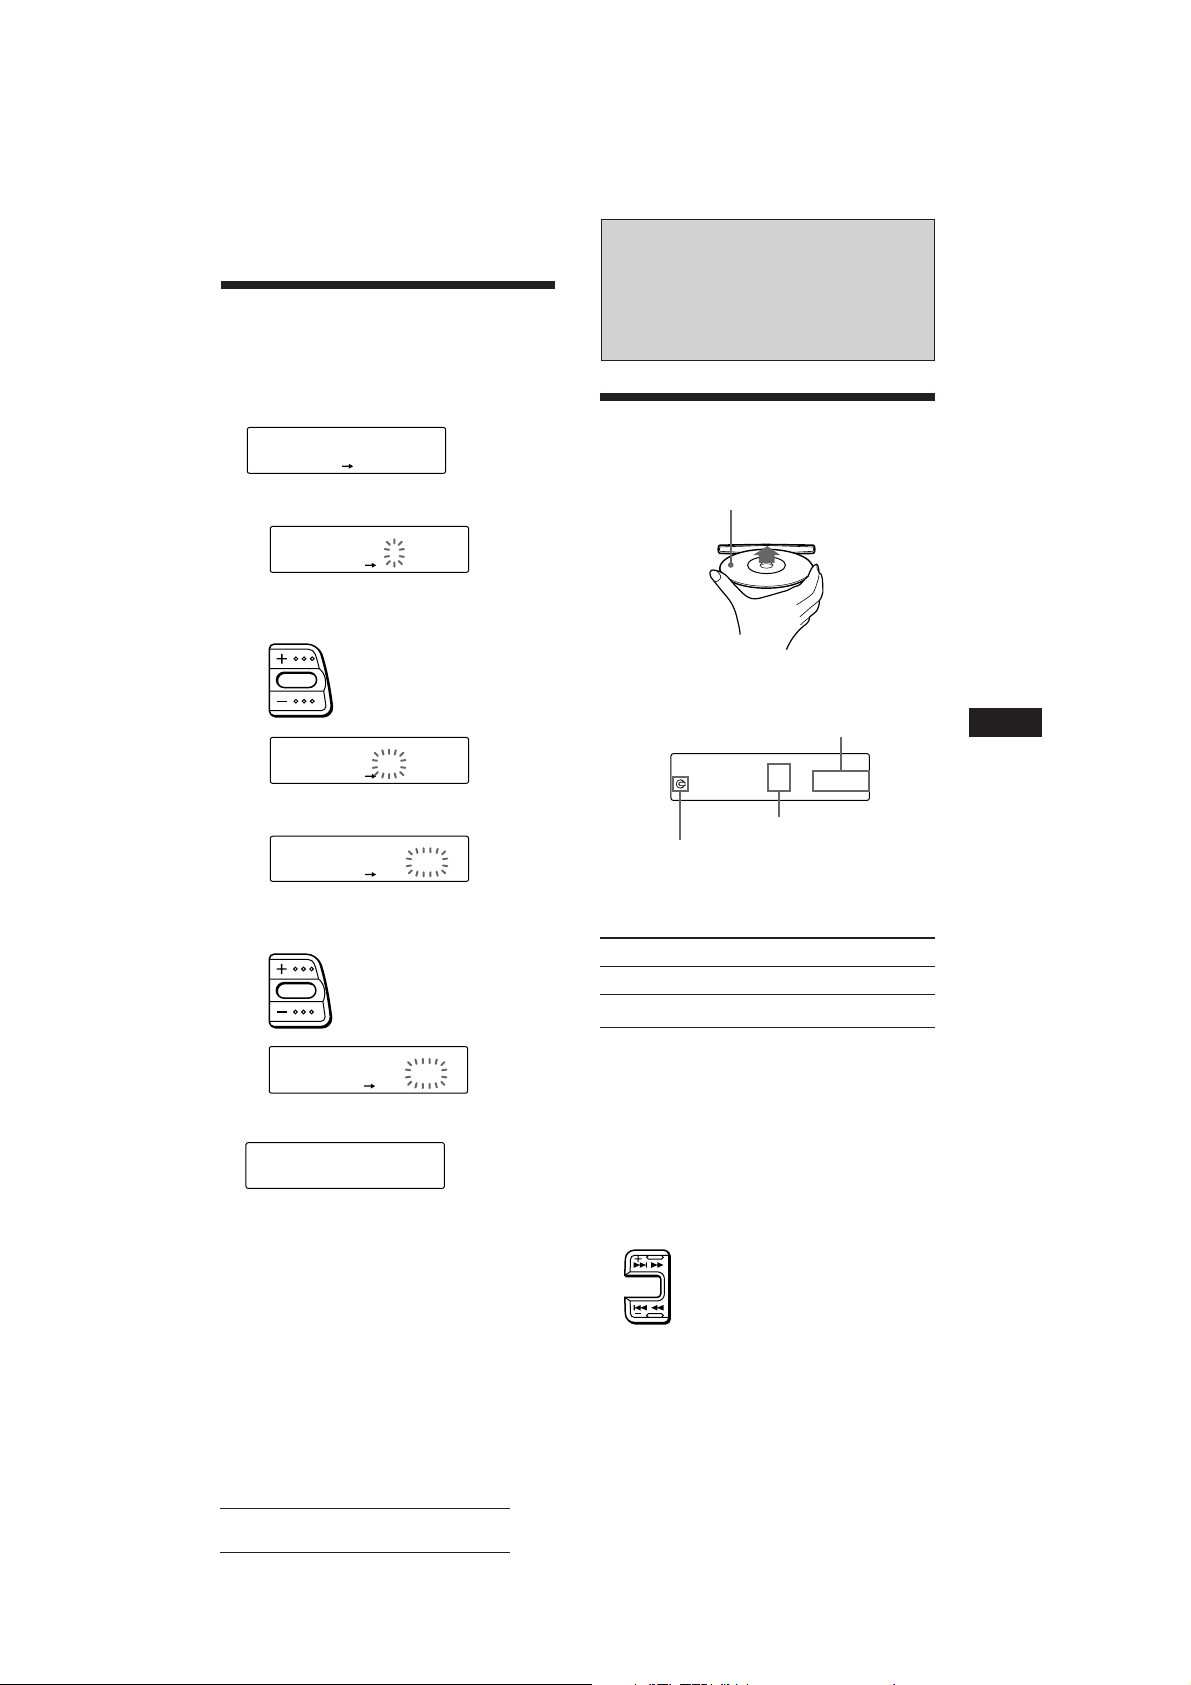
Setting the clock
SUR
EQ
TRACK
5 2.15
CD
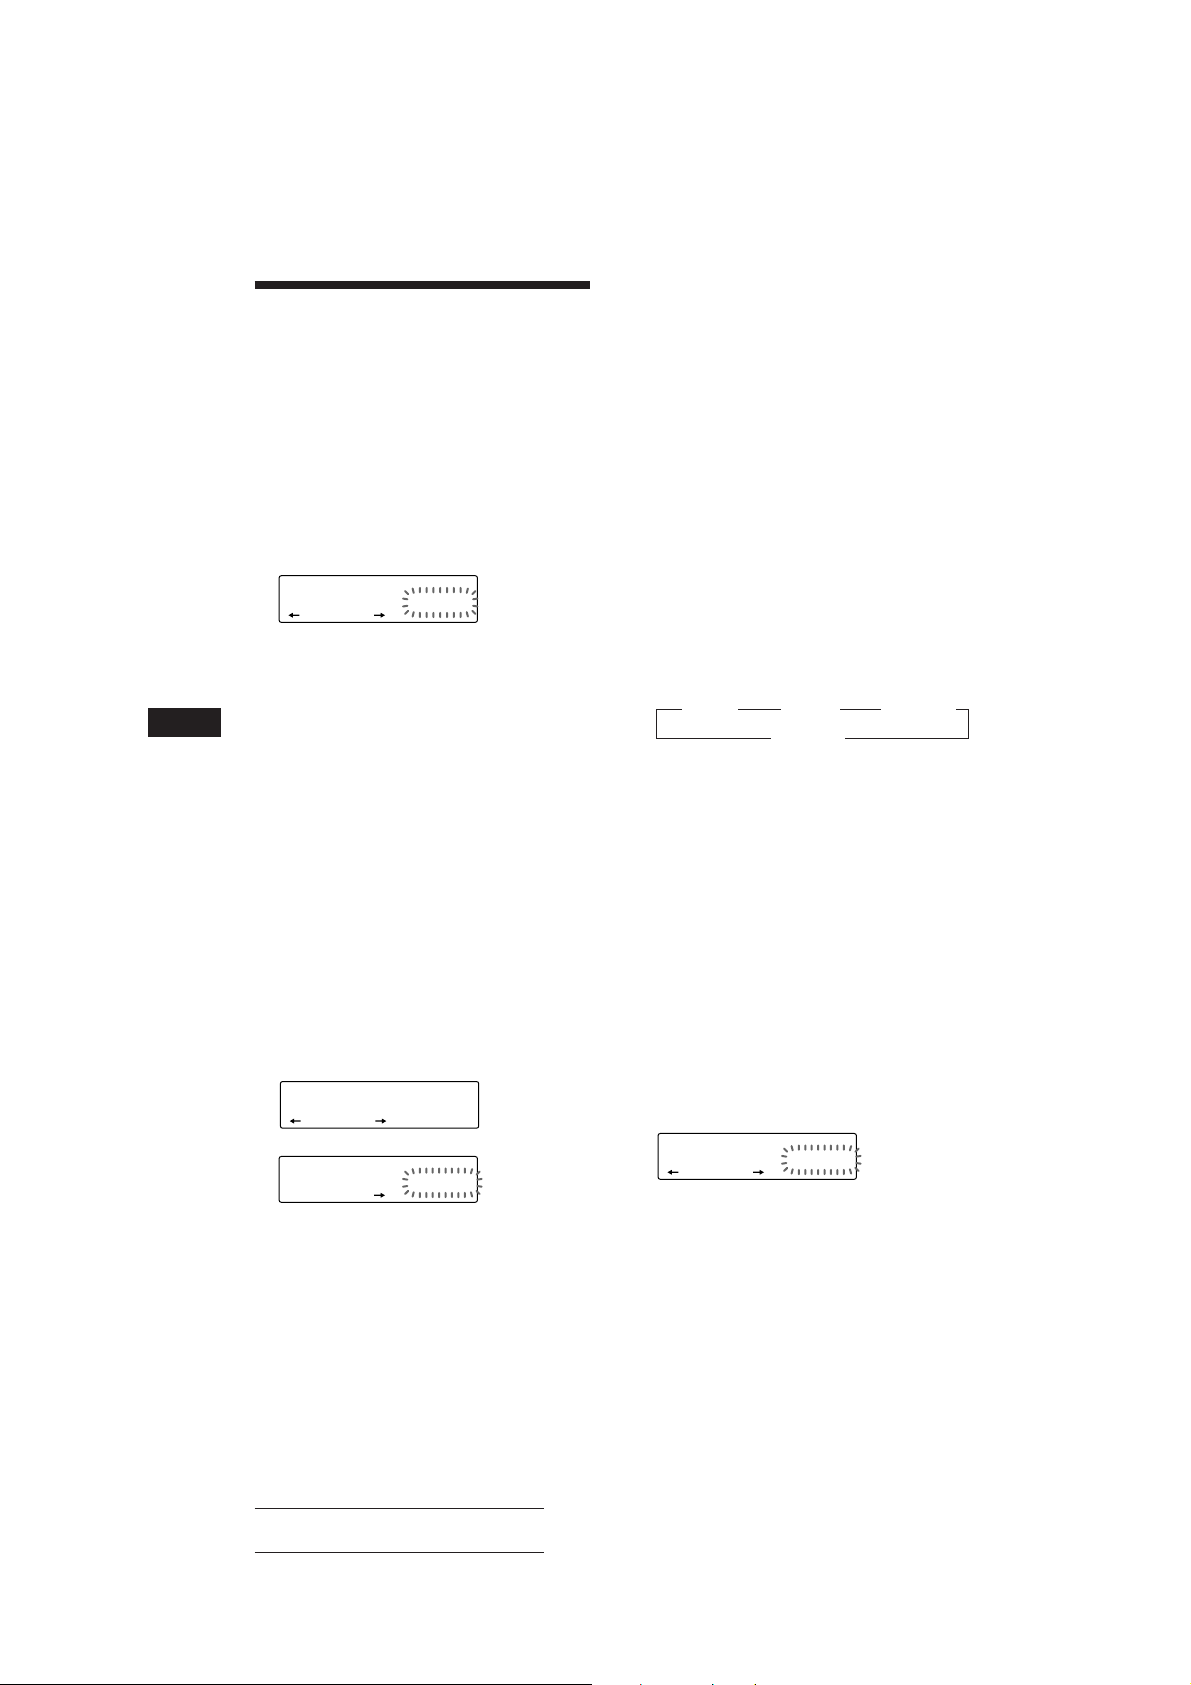
The clock has a 24-hour digital indication.
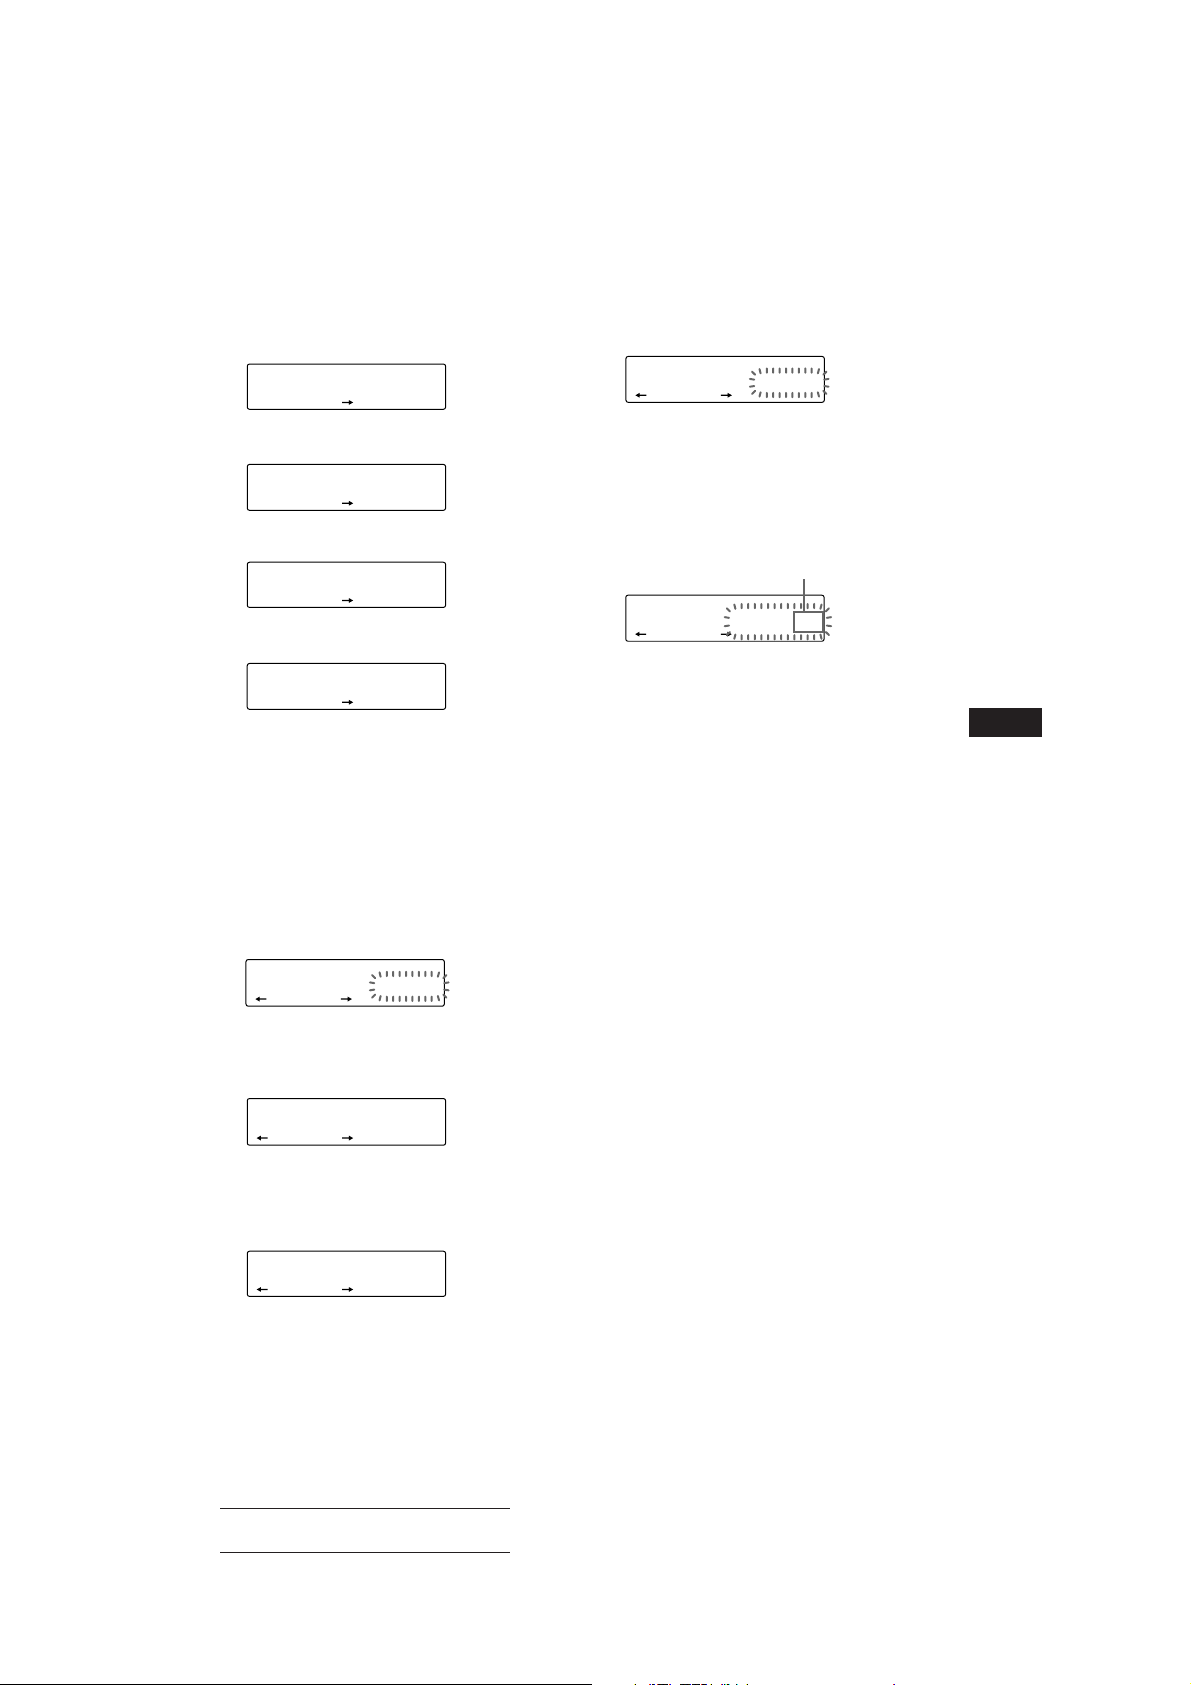
Example: Set the clock to 10:08
1 Press (SHIFT), then press (2) (SET UP).
SET
SUR
EQ
CLOCK
SET UP
1 Press (4) (n).
SET
SUR
EQ
1:‚‚
SET UP
The hour digit flashes.
2 Set the hour.
to go forward
to go back
SET
SUR
EQ
1‚:‚‚
SET UP
CD Player
Listening to a CD
Simply insert the CD.
Playback starts automatically.
Labelled side up
If a CD is already inserted, press (SOURCE)
repeatedly until “CD” appears.
Elapsed playing time
EN
Getting Started/CD Player
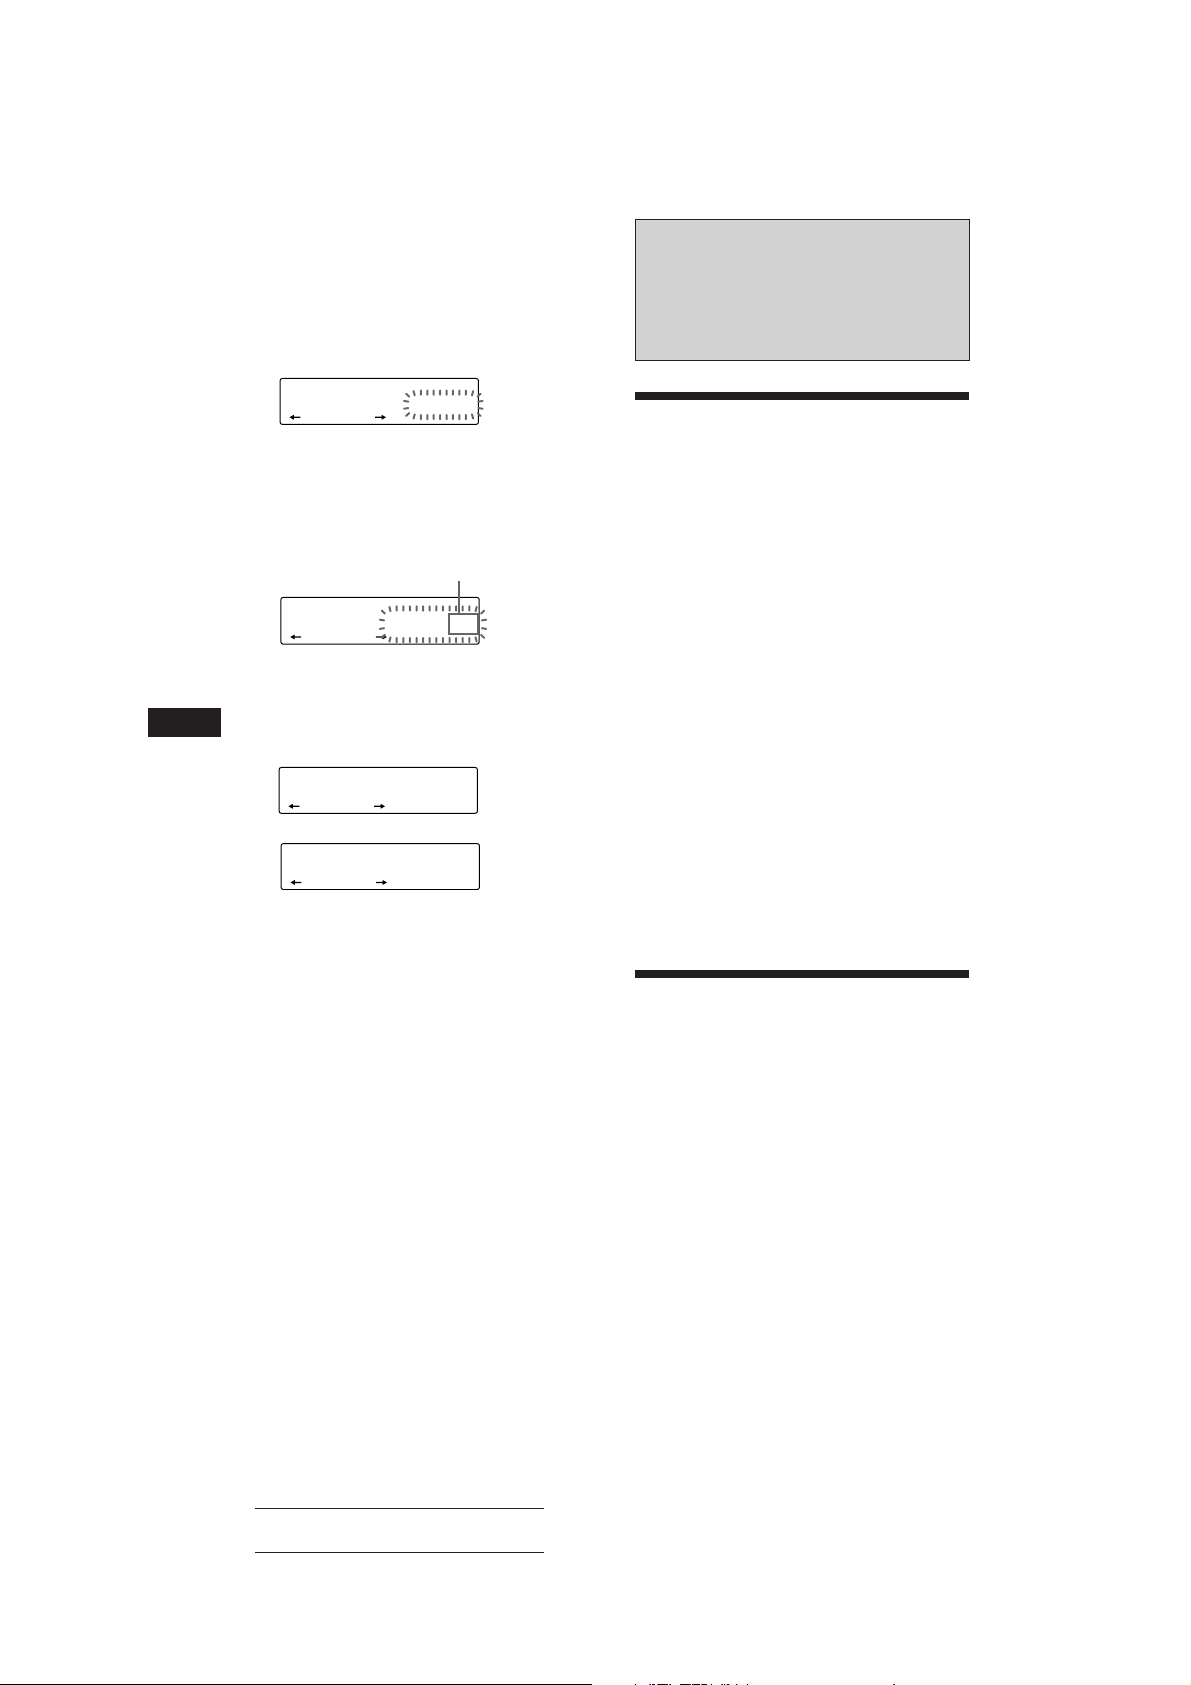
3 Press (4) (n).
SET
SUR
EQ
1‚:‚‚
SET UP
The minute digits flash.
4 Set the minute.
to go forward
to go back
SET
SUR
EQ
1‚:‚8
SET UP
2 Press (SHIFT).
SUR
EQ
1‚:‚8
The clock starts.
Note
If the POWER SELECT switch on the bottom of the unit is
set to the B position, turn the power on first, then set the
clock.
Track number
CD is already inserted
Note
To play back an 8 cm CD, use the optional Sony compact
disc single adapter (CSA-8).
To Press
Stop playback 6 or (OFF)
Eject the CD 6
Changing the displayed items
Each time you press (DSPL), the item changes
as follows:
Track number ˜ Clock
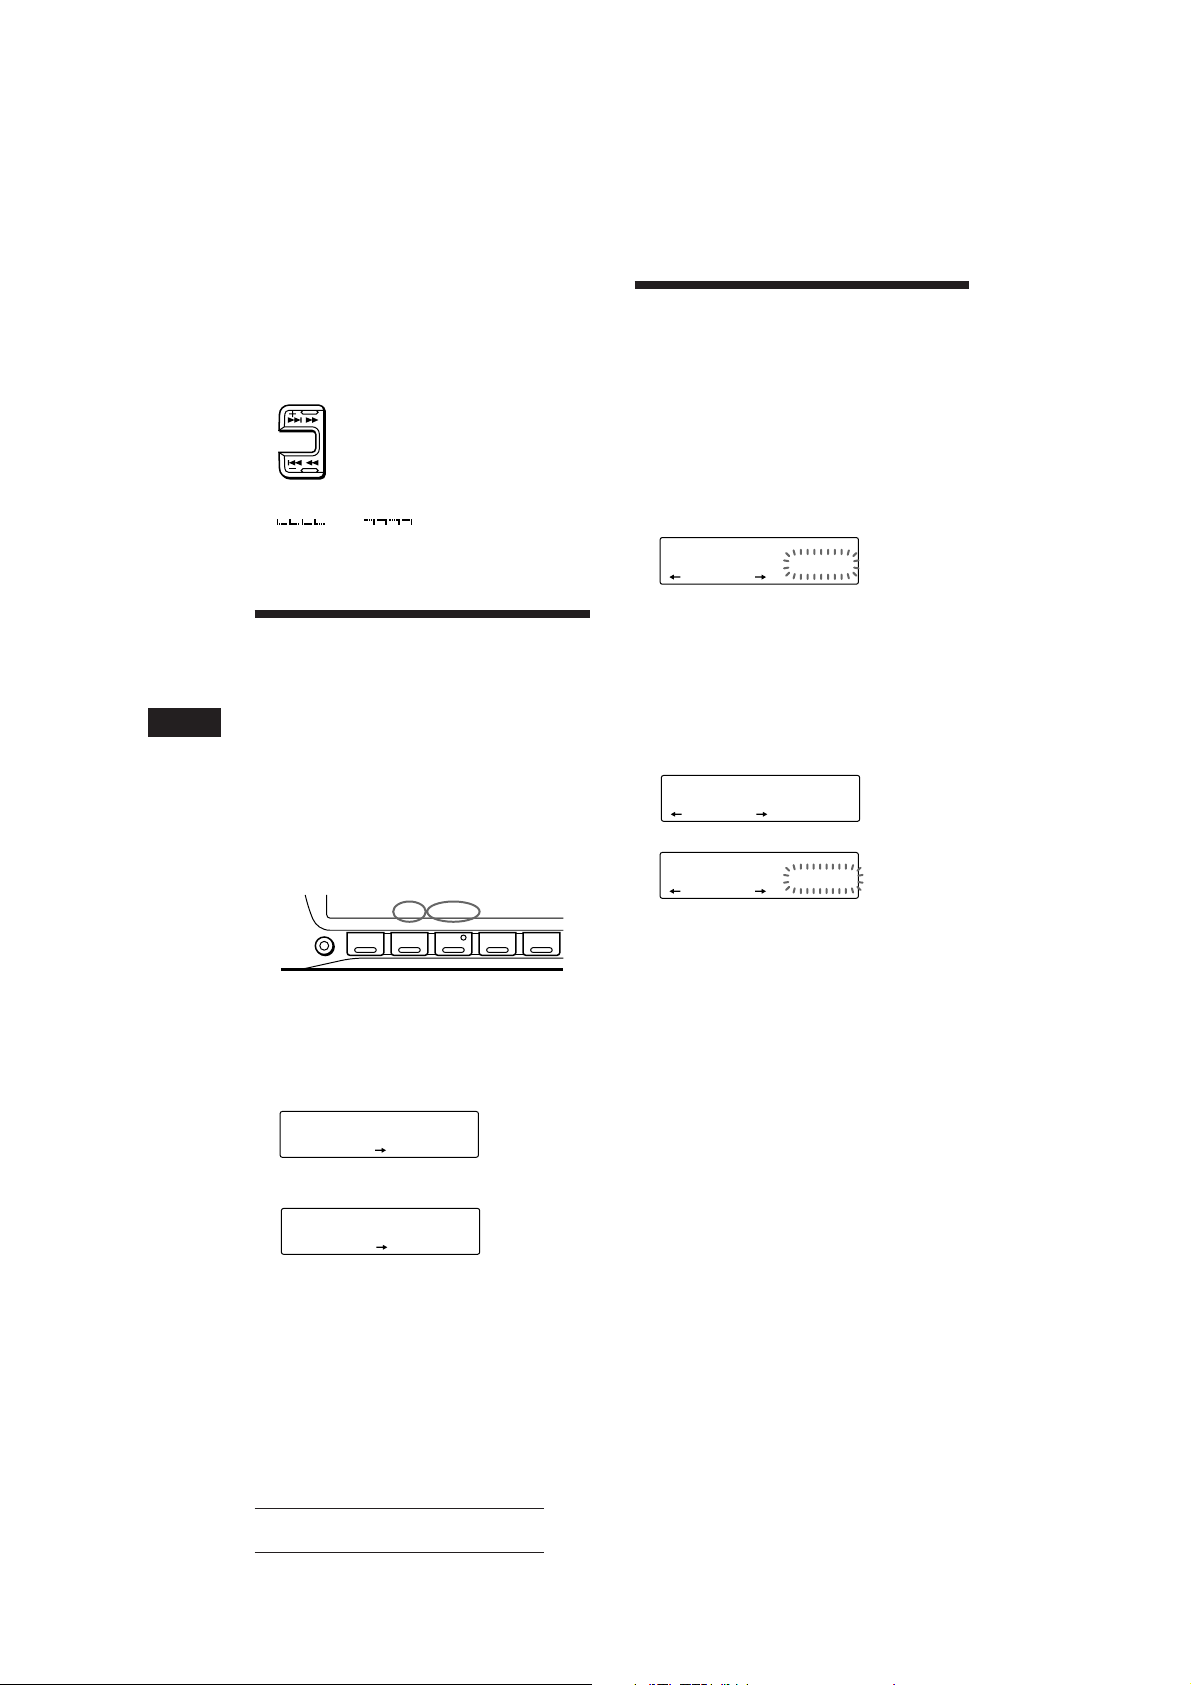
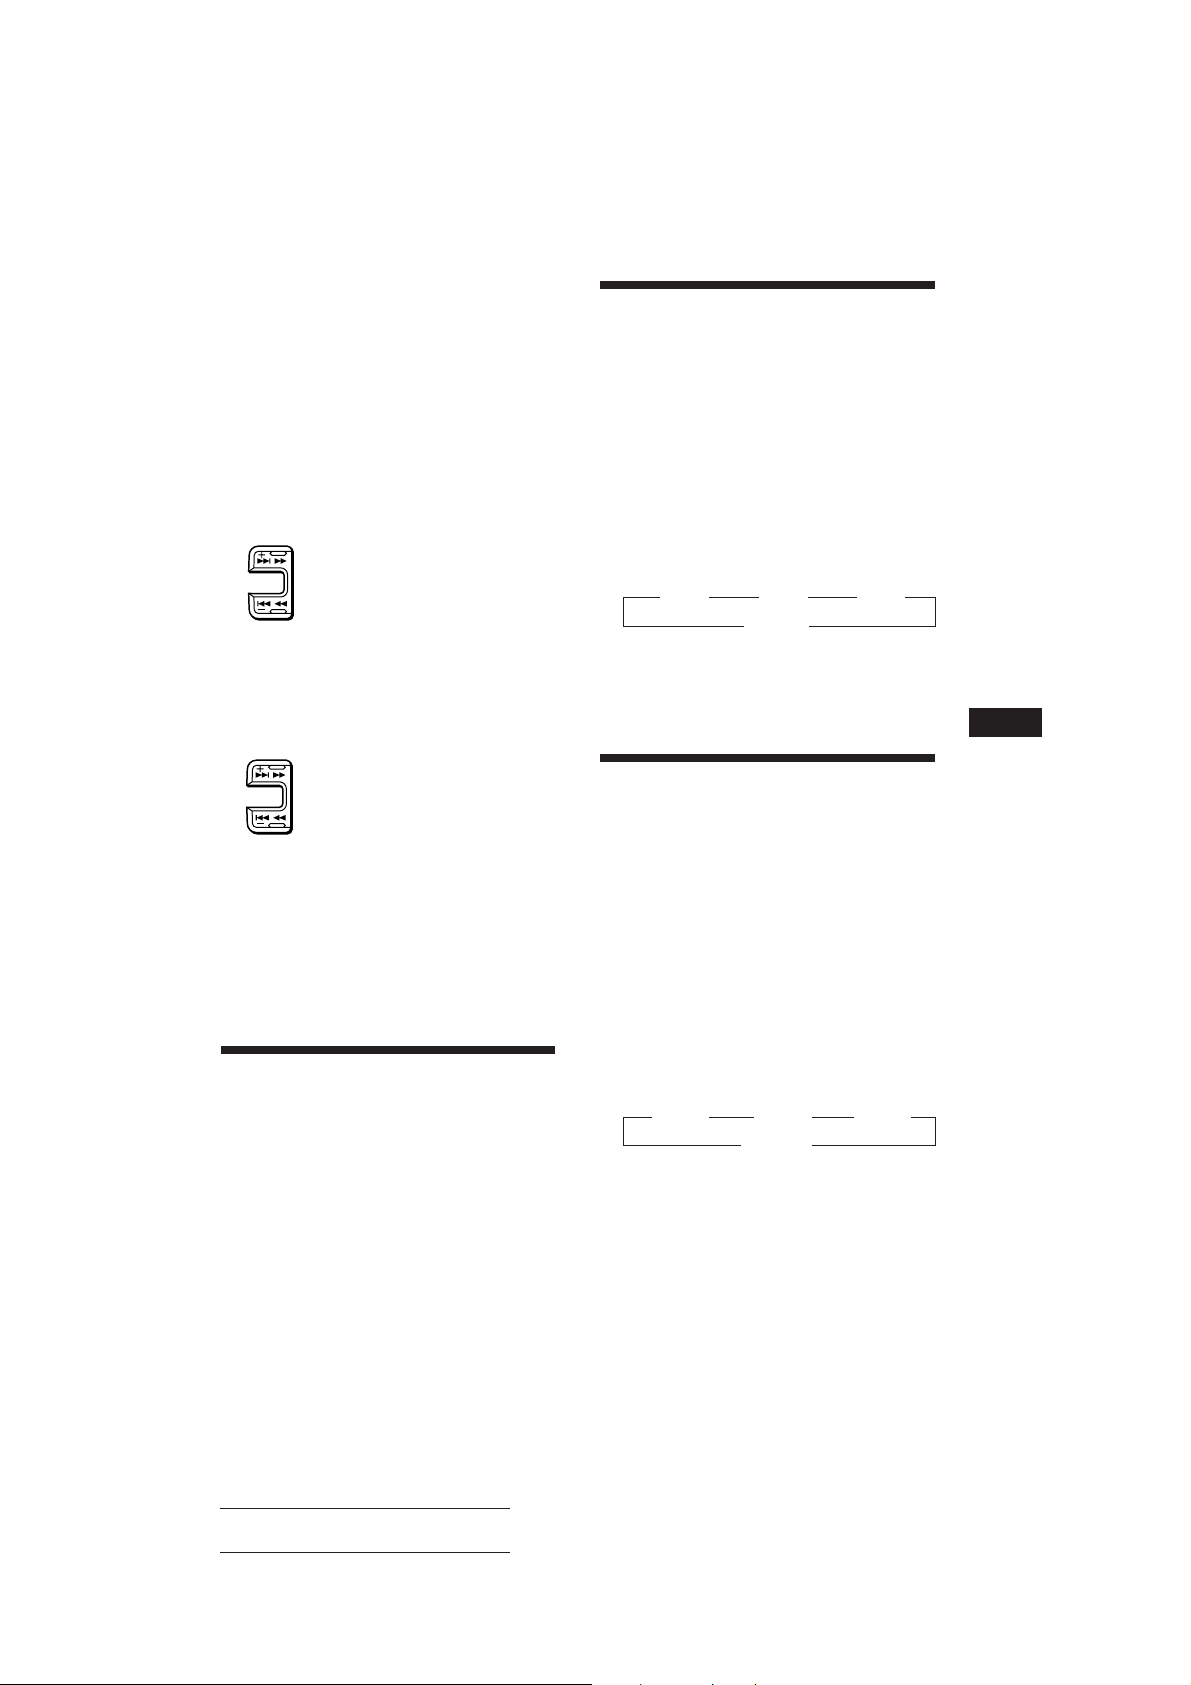
Locating a specific track
— Automatic Music Sensor (AMS)
During playback, press either side of
(SEEK/AMS) momentarily.
SEEK/AMS
To locate succeeding tracks
To locate previous tracks
5
Actual total number: Sony CDX-C810DSP (E,F,G,I) 3-856-118-11(2)
Page 6
Locating a specific point in a track
SUR
EQ
PLAY MODE ENTER
TRACK
3 P1.‚1
CD
SUR
EQ
PLAY MODE ENTER
+ENTER+
P1
SUR
EQ
PLAY MODE ENTER
TRACK
2 P1.‚2
CD
— Manual Search
During playback, press and hold either
side of (SEEK/AMS). Release the button
when you have found the desired point.
SEEK/AMS
To search forward
To search backward
Creating a programme
— CD Programme Memory
You can play the tracks in the order you want
by making your own programme. You can
make two programmes: Programme 1 and
Programme 2. You can select up to 12 tracks in
each programme. You can store the
programmes in memory.
EN
Note
If “
means you have reached the beginning or the end of the
disc and you cannot go any further.
” or “ ” appears in the display, that
Playing a CD in various
modes
You can play CDs in various modes:
• INTRO (Intro Scan) lets you play the first 10
seconds of all the tracks.
• REP (Repeat Play) repeats the current track.
• SHUF (Shuffle Play) plays all the tracks in
random order.
1 Press (SHIFT).
Every time you press (SHIFT), only the
items you can select light up.
SET UP PLAY MODE
SHIFT
2 Press (3) (PLAY MODE) repeatedly until
the desired play mode appears.
Each time you press (3) (PLAY MODE),
the item changes as follows:
INTRO n REP n SHUF n PGM n DSM SET
CD
SUR
EQ
3 Press (4) (n) to select “ON.”
CD
SUR
EQ
Playback starts.
To go back to the normal playback mode,
select “OFF” in step 3 above.
12345
INTRO OFF
PLAY MODE
INTRO
INTRO ON
PLAY MODE
1 Press (SHIFT), then press (3) (PLAY
MODE) for two seconds.
“P 1” shows Programme 1 is selected.
To select Programme 2, press (4) (n)
repeatedly until “P 2” appears.
2 Press either side of (SEEK/AMS) to select
the track you want.
3 Press (5) (ENTER) momentarily.
µ
4 To continue entering tracks, repeat steps
2 and 3.
5 When you finish selecting tracks, press
(3) (PLAY MODE) for two seconds.
Notes
• “*Wait*” appears in the display while the unit is reading
the data.
• “*Mem Full*” appears in the display when you try to
enter more than 12 tracks into a programme at one time.
Playing the stored programme
You can select:
•PGM 1 to play Programme 1.
•PGM 2 to play Programme 2.
•PGM 1+2 to play Programmes 1 and 2.
1 Press (SHIFT).
2 Press (3) (PLAY MODE) repeatedly until
“PGM” appears.
6
Actual total number: Sony CDX-C810DSP (E,F,G,I) 3-856-118-11(2)
Page 7
3 Press (4) (n) repeatedly until the
desired programme appears.
Programme 1 playback
CD
SUR
EQ
PGM 1
PLAY MODE
PGM
1
µ
Programme 2 playback
CD
SUR
EQ
PGM 2
PLAY MODE
PGM
2
µ
Programmes 1 and 2 playback
CD
SUR
EQ
PGM 1+2
PLAY MODE
PGM
1+2
µ
Normal playback
CD
SUR
EQ
PGM OFF
PLAY MODE
Programme Play starts.
To go back to the normal playback mode,
select “PGM OFF” in step 3 above.
Note
“NO Data” appears in the display if no track is stored in
the programme.
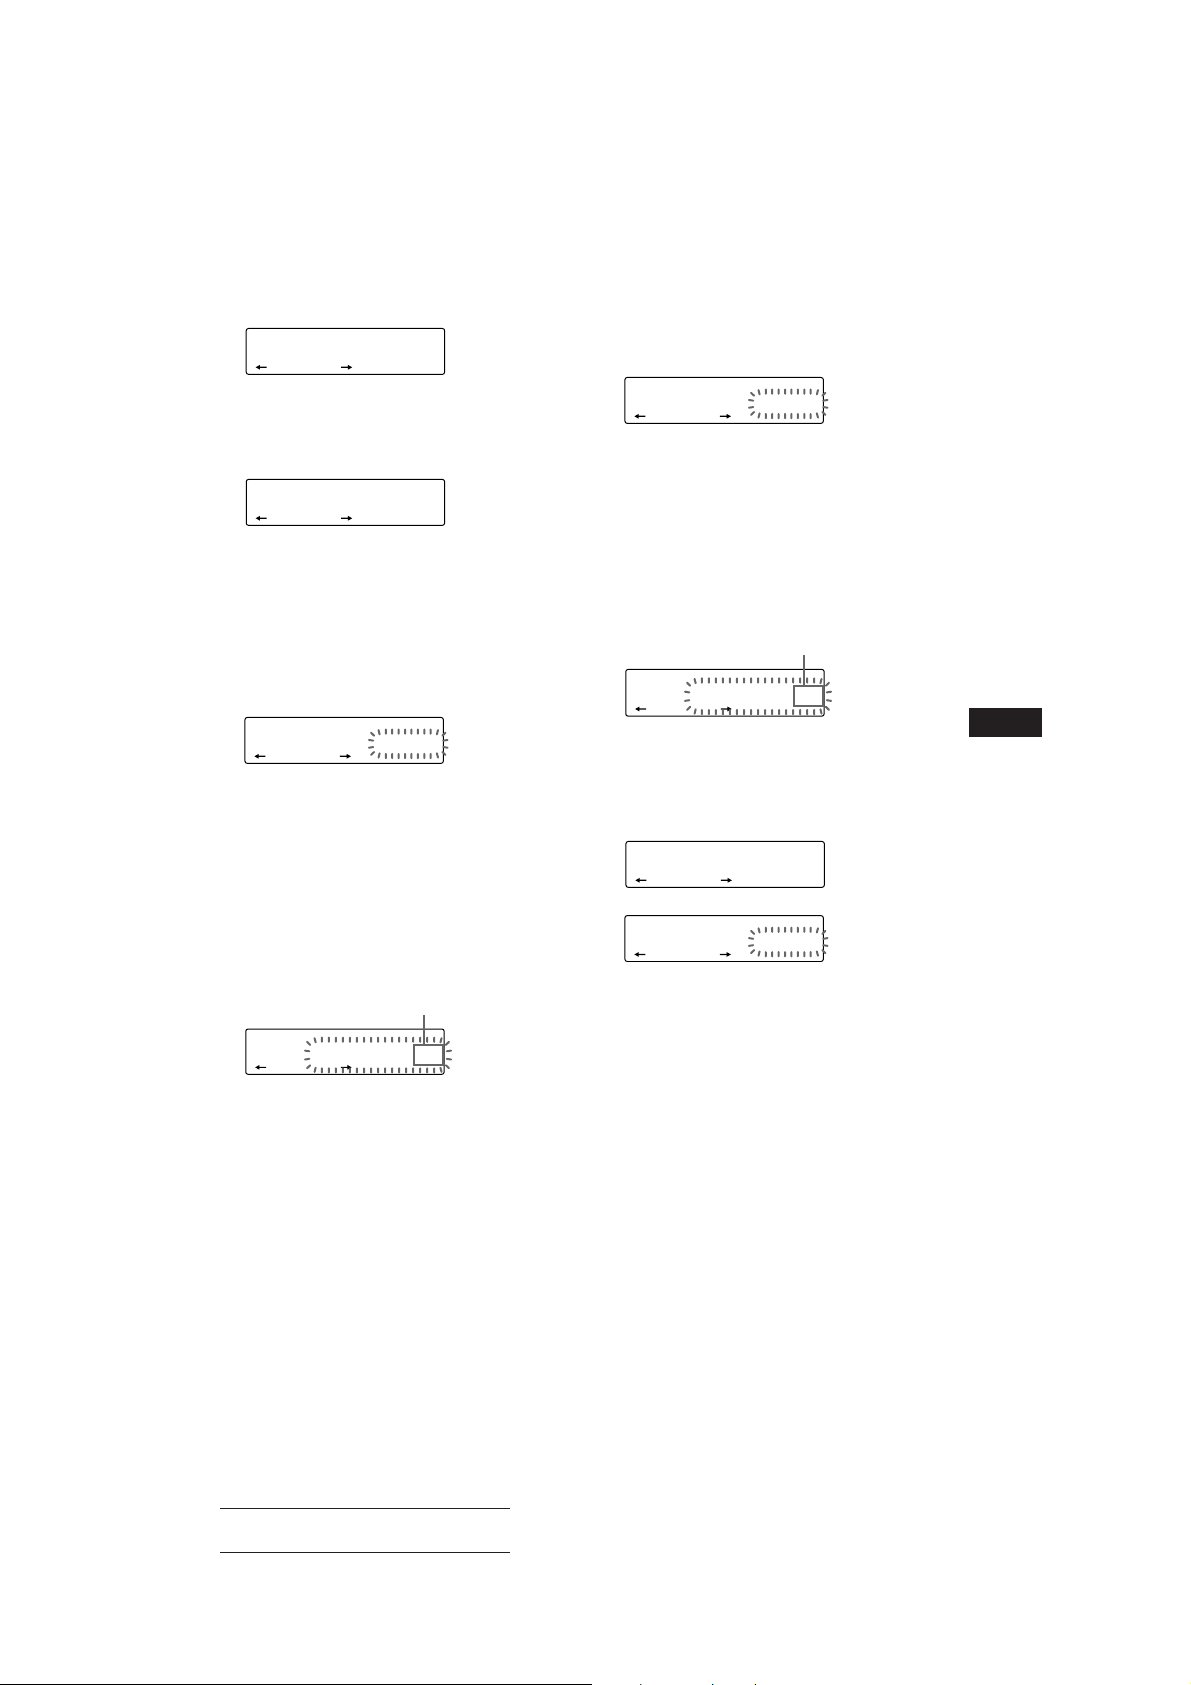
Erasing the entire programme
1 Press (SHIFT), then press (3) (PLAY
MODE) for two seconds.
CD
SUR
EQ
“P 1” shows Programme 1 is selected.
TRACK
7 P1.‚8
PLAY MODE ENTER
Adding tracks to the programme
1 Press (SHIFT), then press (3) (PLAY
MODE) for two seconds.
CD
SUR
EQ
“P 1 ” shows Programme 1 is selected.
TRACK
4 P1.‚3
PLAY MODE ENTER
To select Programme 2, press (4) (n)
repeatedly until “P 2” appears.
2 Press (1) (N) or (4) (n) to select the
track slot number where you want to
insert a track.
Track slot number
CD
SUR
EQ
TRACK
2 P1.‚2
PLAY MODE ENTER
3 Press either side of (SEEK/AMS) to select
the track you want to insert.
4 Press (5) (ENTER) momentarily to enter
the track.
The current track in that slot number and
the succeeding tracks shift down.
To continue inserting tracks, repeat steps 2
through 4.
Note
Once all 12 slots have been filled, “*Mem Full*”
appears in the display, and you cannot insert tracks.
5 When you finish inserting tracks, press
(3) (PLAY MODE) for two seconds.
continue to next page n
EN
CD Player
2 Press (1) (N) repeatedly until “DEL”
appears.
DEL
SUR
EQ
--PGM1--
PLAY MODE ENTER
To delete Programme 2, press (4) (n)
repeatedly until “PGM 2” appears.
3 Press (5) (ENTER) for two seconds.
P1
SUR
EQ
NO Data
PLAY MODE ENTER
The entire programme is erased.
4 When you finish erasing programmes,
press (3) (PLAY MODE) for two seconds.
Actual total number: Sony CDX-C810DSP (E,F,G,I) 3-856-118-11(2)
7
Page 8
EN
Erasing the tracks in the
programme
1 Press (SHIFT), then press (3) (PLAY
MODE) for two seconds.
CD
SUR
EQ
“P 1” shows Programme 1 is selected.
To select Programme 2, press (4) (n)
repeatedly until “P 2” appears.
TRACK
7 P1.‚8
PLAY MODE ENTER
2 Press (1) (N) or (4) (n) to select the
track you want to erase.
Track slot number
CD
SUR
EQ
The track currently registered in slot 6 of
Programme 1.
TRACK
3 P1.‚6
PLAY MODE ENTER
3 Press (5) (ENTER) for two seconds.
When you erase a track from a slot number,
the succeeding tracks shift up to fill the gap.
DEL
SUR
DISC
EQ
TRACK
- -- P1.‚6
PLAY MODE ENTER
µ
CD
SUR
EQ
TRACK
7 P1.‚6
PLAY MODE ENTER
4 To continue erasing tracks, repeat steps
2 and 3.
Radio
Memorising stations
automatically
— Best Tuning Memory (BTM)
The unit selects the stations with the strongest
signals and memorises them in the order of
their frequencies. You can store up to 10
stations on each band (FM1, FM2, MW and
LW/SW).
Caution
When tuning in the station while driving, use
Best Tuning Memory to prevent accidents.
1 Press (SOURCE) repeatedly to select the
desired band (FM1, FM2, MW or LW/SW).
2 Press (SHIFT), then press (6) (BTM).
The unit stores stations in the order of their
frequencies on the number buttons.
Notes
• The unit does not store stations with weak signals. If
only a few stations are received, some number buttons
remain empty.
• When a number is indicated in the display, the unit
starts storing stations from the one currently displayed.
5 When you finish erasing tracks, press (3)
(PLAY MODE) for two seconds.
8
Actual total number: Sony CDX-C810DSP (E,F,G,I) 3-856-118-11(2)
Memorising only the
desired stations
You can store up to 10 stations on each band
(20 for FM1 and FM2, 10 for each MW and
LW/SW) in the order of your choice.
1 Press (SOURCE) repeatedly to select the
desired band.
2 Press either side of (SEEK/AMS) to tune
in the station that you want to store on
the number button.
3 Keep the desired number button ((1) to
(10)) pressed for two seconds until you
hear a beep tone.
The number button indication appears in
the display.
Page 9

Note
If you try to store another station on the same number
button, the previously stored station will be erased.
RDS
Receiving the memorised
stations
1 Press (SOURCE) repeatedly to select the
desired band.
2 Press the number button ((1) to (10))
momentarily where the desired station is
stored.
If you cannot tune in a preset
station
Press either side of (SEEK/AMS)
momentarily to search for the station
(automatic tuning).
Scanning stops when the unit receives a
station. Press either side of (SEEK/AMS)
repeatedly until the desired station is
received.
Note
If the automatic tuning stops too frequently, press
(SHIFT), then press (3) (PLAY MODE) repeatedly until
“LOCAL” (local seek mode) is displayed. Then press (4)
(n) to select “ON.”
Only the stations with relatively strong signals will be
tuned in.
Tip
If you know the frequency of the station you want to listen
to, press and hold either side of (SEEK/AMS) for two
seconds until the desired frequency appears (manual
tuning).
If FM stereo reception is poor
— Monaural Mode
1 Press (SHIFT), then press (3) (PLAY
MODE) repeatedly until “MONO” is
appears.
2 Press (4) (n) repeatedly until “MONO
ON“ appears.
The sound improves, but becomes
monaural (“ST” disappears).
Overview of the RDS
function
Radio Data System (RDS) is a broadcasting
service that allows FM stations to send
additional digital information along with the
regular radio programme signal. Your car
stereo offers you a variety of services. Here are
just a few: re-tuning the same programme
automatically, listening to traffic
announcements and locating a station by
programme type.
Notes
• Depending on the country or region, not all of the RDS
functions are available.
• RDS may not work properly if the signal strength is
weak or if the station you are tuned in is not
transmitting RDS data.
Displaying the station
name
The name of the station currently received
lights up in the display.
Select an FM station.
When you tune in an FM station that
transmits RDS data, the station name
appear in the display.
FM1
SUR
EQ
BBC 1 FM
Note
The “*” indication means that an RDS station is being
received.
Changing the displayed items
Each time you press (DSPL), the item changes
as follows:
” Frequency ” Time ” Station Name
EN
CD Player/Radio/RDS
To go back to the normal mode, select
“MONO OFF” in step 2 above.
Note
“NO Name” appears if the station received does not
transmit RDS data.
Changing the displayed items
Each time you press (DSPL), the items
alternate between the frequency and time.
Actual total number: Sony CDX-C810DSP (E,F,G,I) 3-856-118-11(2)
9
Page 10
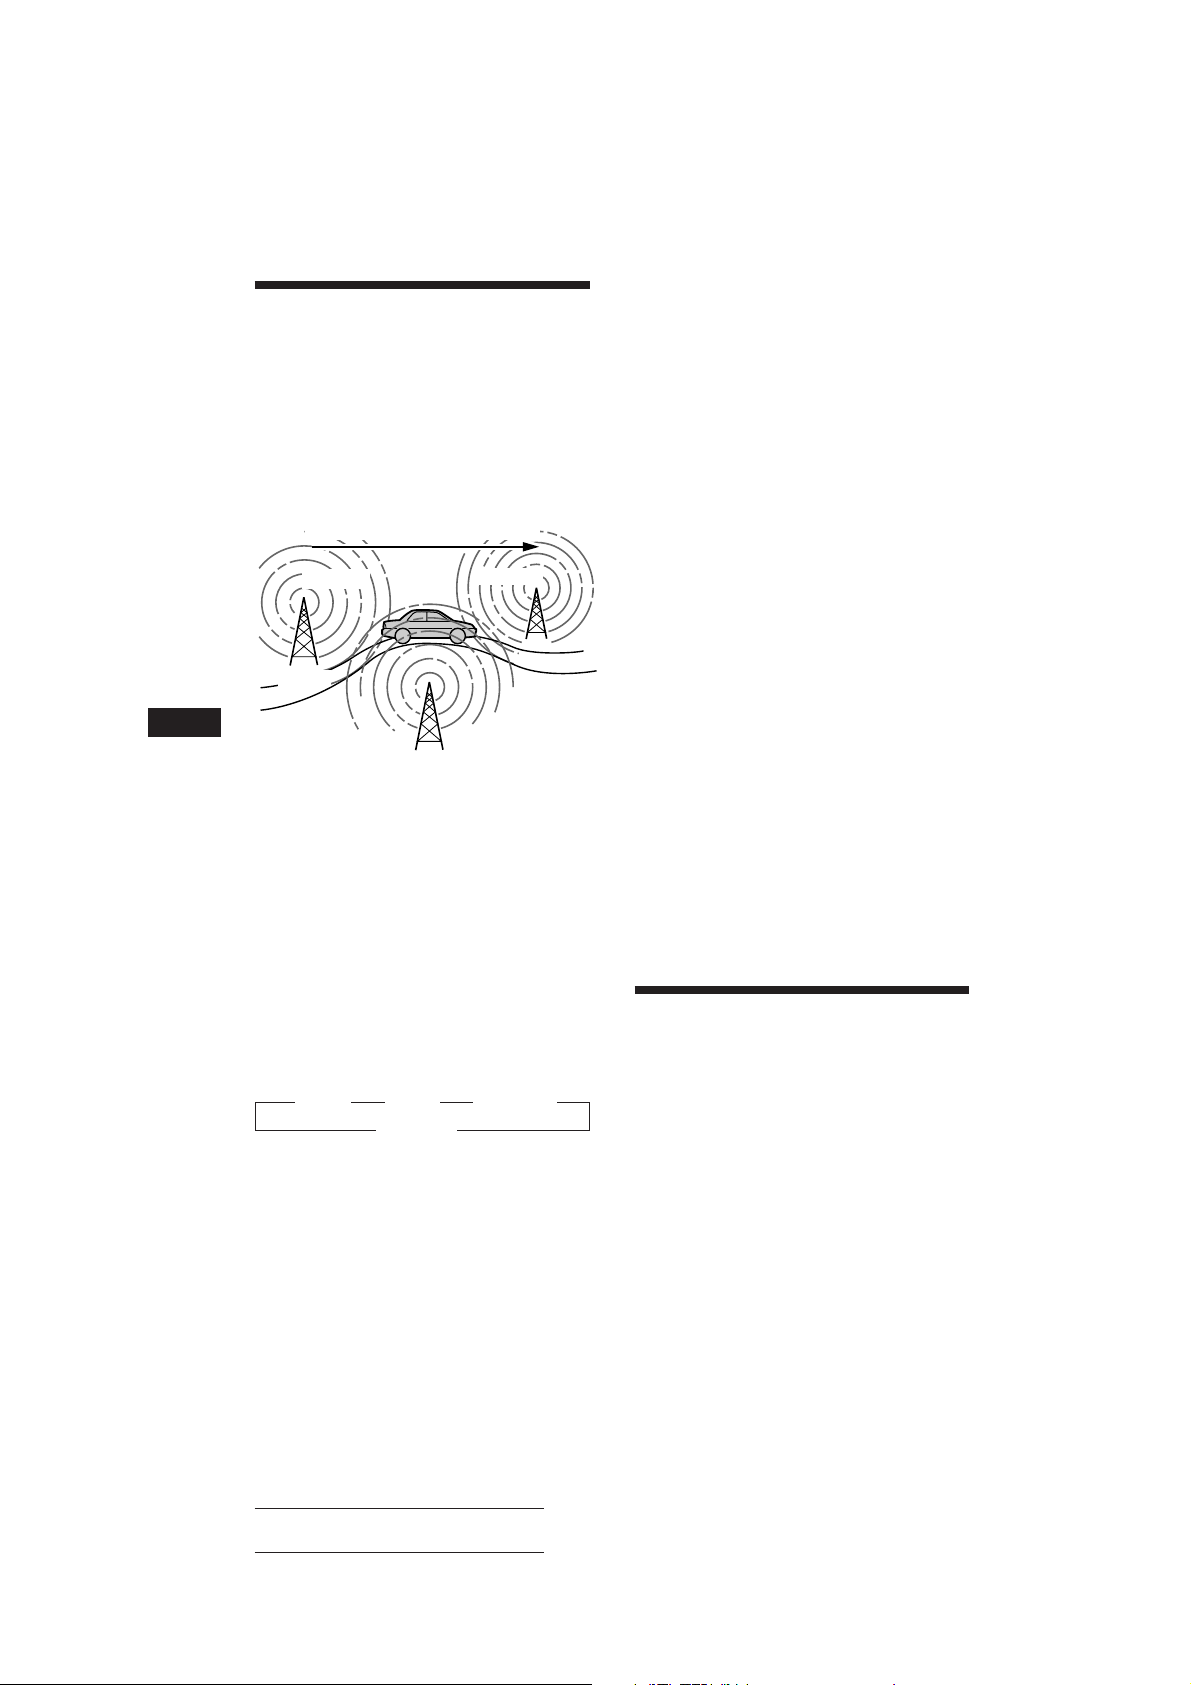
Re-tuning the same
programme automatically
— Alternative Frequencies (AF)
The Alternative Frequencies (AF) function
automatically selects and re-tunes the station
with the strongest signal in a network. By
using this function, you can continuously
listen to the same programme during a longdistance drive without having to re-tune the
station manually.
Frequencies change automatically.
98.5MHz
96.0MHz
Listening to a regional programme
The “REG ON” (regional on) function of this
unit lets you stay tuned to a regional
programme without being switched to another
regional station. (Note that you must turn the
AF function on.) The unit is factory preset to
“REG ON”, but if you want to turn off the
function, do the following.
Press (SHIFT), then press (3) (PLAY
MODE) repeatedly until “REG OFF”
appears.
Note that selecting “REG OFF” might cause
the unit to switch to another regional
station within the same network.
Note
This function does not work in the United Kingdom and in
some other areas.
EN
Station
102.5MHz
1 Select an FM station.
2 Press (AF/TA) repeatedly until “AF ON”
appears.
The unit starts searching for an alternative
station with a stronger signal in the same
network.
Note
When there is no alternative station in the area and you do
not need to search for an alternative station, turn the AF
function off by pressing (AF/TA) repeatedly until “AF TA
OFF” appears.
Changing the displayed items
Each time you press (AF/TA), the item changes
as follows:
” AF ON ” TA ON ” AF TA ON*
AF TA OFF “
* Select this to turn on both the AF and TA functions.
Notes
• “NO AF” and the station name flash alternately, if the
unit cannot find an alternative station in the network.
• If the station service name starts flashing after you have
made the preset selection, it means that no alternative
frequency is available, and the unit cannot receive the PI
(Programme Identification) data of the memorised
station. Press (SEEK/AMS) while the station service
name is flashing (for about eight seconds) so the unit
starts searching for a station with the same PI data, but
on another frequency (“PI seek” appears and no sound is
heard). If the unit still cannot find an alternative station,
“NO PI” appears and the unit goes back to the original
10
preset station.
Local link function (United
Kingdom only)
The Local Link function lets you select other
local stations in the area, even though they are
not stored on your number buttons.
1 Press a number button that has a local
station stored on it.
2 Within five seconds, press the number
button of the local station again.
3 Repeat this procedure until the desired
local station is received.
Listening to traffic
announcements
The Traffic Announcement (TA) and Traffic
Programme (TP) data let you automatically
tune in an FM station that is broadcasting
traffic announcements even though you are
listening to other programme sources.
Press (AF/TA) repeatedly until “TA ON”
or “AF TA ON” appears.
The unit starts searching for traffic
information stations. “TP” appears in the
display when the unit finds a station
broadcasting traffic announcements.
When the traffic announcement starts,
“TA” flashes. The flashing stops when the
traffic announcement is over.
Actual total number: Sony CDX-C810DSP (E,F,G,I) 3-856-118-11(2)
Page 11

Tips
• If you press (AF/TA) while tuning in the traffic
announcement, the unit can play a CD.
• If the traffic announcement starts while you are listening
to another programme source, the unit automatically
switches to the announcement and goes back to the
original source when the announcement is over.
Notes
• “NO TP” flashes for five seconds if the received station
does not broadcast traffic announcements. Then, the unit
starts searching for a station that broadcasts traffic
announcements.
• When “EON” appears with “TP” in the display, the
current station makes use of broadcast traffic
announcement of other stations in the same network.
To cancel the current traffic
announcement
Press (AF/TA) momentarily.
To cancel all traffic announcements, turn off
the function by pressing (AF/TA) until
“AF TA OFF” appears.
Presetting the volume of traffic
announcements
You can preset the volume level of the traffic
announcements beforehand so you won’t miss
the announcement. When a traffic
announcement starts, the volume will be
automatically adjusted to the preset level.
1 Select the desired volume level.
2 Press (AF/TA) for two seconds.
A beep sounds and the setting is stored.
Receiving emergency
announcements
If an emergency announcement comes in while
you are listening to the radio, the programme
will be automatically switched to the
announcement. If you are listening to a source
other than the radio, the emergency
announcements will be heard if you set AF or
TA to on. The unit will then automatically
switch to these announcements no matter what
you are listening to at the time.
Presetting the RDS
stations with the AF and
TA data
When you preset the RDS stations, the unit
stores each station’s data as well as its
frequency, so you don’t have to turn on the AF
or TA function every time you tune in the
preset station. You can select a different setting
(AF, TA, or both) for individual preset station,
or the same setting for all preset stations.
Presetting the same setting for all
preset stations
1 Press (SOURCE) to select an FM band.
2 Press (AF/TA) repeatedly to select either
“AF ON”, “TA ON” or “AF TA ON” (for
both AF and TA functions).
Note that selecting “AF TA OFF” stores not
only RDS stations, but also non-RDS
stations.
3 Press (SHIFT), then press (6) (BTM).
Presetting different settings for
each preset station
1 Select an FM band, and tune in the
desired station.
2 Press (AF/TA) repeatedly to select either
“AF ON”, “TA ON” or “AF TA ON” (for
both AF and TA functions).
3 Press the desired number button for two
seconds until a beep sounds.
Repeat from step 1 for presetting other
stations.
Tip
If you want to change the preset AF and/or TA setting
after you tuned in the preset station, you can do so by
turning on/off the AF or TA function.
EN
RDS
Actual total number: Sony CDX-C810DSP (E,F,G,I) 3-856-118-11(2)
11
Page 12
Locating a station by
SUR
EQ
SET UP
CT OFF
SET
SUR
EQ
SET UP
CT ON
SET
programme type
You can locate the station you want by
selecting one of the programme types shown
below.
Note
If the countries or regions where EON data is not
transmitted, you can use this function only for the stations
you have tuned in once.
3 Press either side of (SEEK/AMS).
The unit starts searching for a station
broadcasting the selected programme type.
When the unit finds the programme, the
programme type appears again for five
seconds.
“NO” and the programme type appear
alternately for five seconds if the unit
cannot find the programme type. It then
returns to the previous station.
EN
Programme types Display
News NEWS
Current Affairs AFFAIRS
Information INFO
Sports SPORT
Education EDUCATE
Drama DRAMA
Culture CULTURE
Science SCIENCE
Varied VARIED
Popular Music POP M
Rock Music ROCK M
Middle of the Road Music M.O.R. M
Light Classical LIGHT M
Classical CLASSICS
Other Music Type OTHER M
Not specified NONE
Note
You can not use this function in some countries where no
PTY (Programme Type selection) data is available.
1 Press (LIST) during FM reception until
“PTY” appears.
PTY
SUR
EQ
INFO
The current programme type name appears
if the station is transmitting the PTY data.
“- - - - -” appears if the received station is
not an RDS station, or if the RDS data has
not been received.
Setting the clock
automatically
The CT (Clock Time) data from the RDS
transmission sets the clock automatically.
1 Press (SHIFT), then press (2) (SET UP)
repeatedly until “CT” appears.
2 Press (4) (n) repeatedly until “CT ON”
appears.
The clock is set.
3 Press (SHIFT) to return to the normal
display.
To cancel the CT function
Select “CT OFF” in step 2 above.
Notes
• The CT function may not work even though an RDS
station is being received.
• There might be a difference between the time set by the
CT function and the actual time.
2 Press (LIST) repeatedly until the desired
programme type appears.
The programme types appear in the order
shown in the above table. Note that you
cannot select “NONE” (Not specified) for
searching.
PTY
SUR
EQ
SPORT
12
Actual total number: Sony CDX-C810DSP (E,F,G,I) 3-856-118-11(2)
Page 13
DSP
3 Press (+) or (–) repeatedly until the
desired surround menu appears.
SUR
SUR
EQ
Hall
Selecting a surround menu
You can select a desired surround mode to best
fit the audio source. The following modes can
simulate different sound fields and enhance
the sound so that you can feel as if you are in a
live concert.
Surround menu
Defeat Normal sound without any
Stadium Open-air concert in a
Disco Disco with thick walls
Theater Movie theater
Church Church/chapel with a lot of
Hall Concert hall
Studio Recording studio
1 Press (SOURCE) to select a source (radio,
CD or MD).
2 Press (SOUND) repeatedly until “SUR”
appears.
SUR
SUR
EQ
3 Press (+) or (–) to select the desired
surround menu.
The surround menu appears in the order
shown above.
After three seconds, the display will go
back to the normal playback mode.
Adjusting the effect level
1 Press (SOURCE) to select a source (radio,
CD or MD).
2 Press (SOUND) repeatedly until “SUR”
appears.
SUR
SUR
EQ
SUR effects
stadium
reverberation
Defeat
Defeat
4 Press (SOUND) for two seconds.
SUR
SUR
EQ
Effect 1
5 Press (+) or (–) to adjust the level.
You can adjust the level from 0 to 10.
Increase the level to enjoy more enhanced
effects.
SUR
SUR
EQ
Effect 8
6 Press (SOUND) for two seconds.
Registering a surround
menu onto each disc
— Disc Sound Memory (DSM) (CD/MD
changer with program memory function)
Once you have registered the desired surround
menu and the sound characteristics (bass,
treble and subwoower) onto the discs, you can
enjoy the same surround menu every time you
play them. You can register them of a
maximum of 126 discs.
1 Press (SHIFT), then press (3) (PLAY
MODE) repeatedly until “DSM SET”
appears.
CD1
SUR
EQ
DSM SET
PLAY MODE ENTER
2 Press (5) (ENTER).
When the DSM setting is complete, the
display will go back to the normal playback
mode.
Changing the stored surround
effect
Play the disc whose surround mode you wish
to change, and follow the “Registering a
surround menu onto each disc.”
EN
RDS/DSP
Actual total number: Sony CDX-C810DSP (E,F,G,I) 3-856-118-11(2)
13
Page 14
EN
SUR
EQ
R F
POS
Erasing the stored surround effect
Press (5) (ENTER) for two seconds in
step 2 of “Registering a surround menu
onto each disc.”
DSM
SUR
EQ
+DELETE+
PLAY MODE ENTER
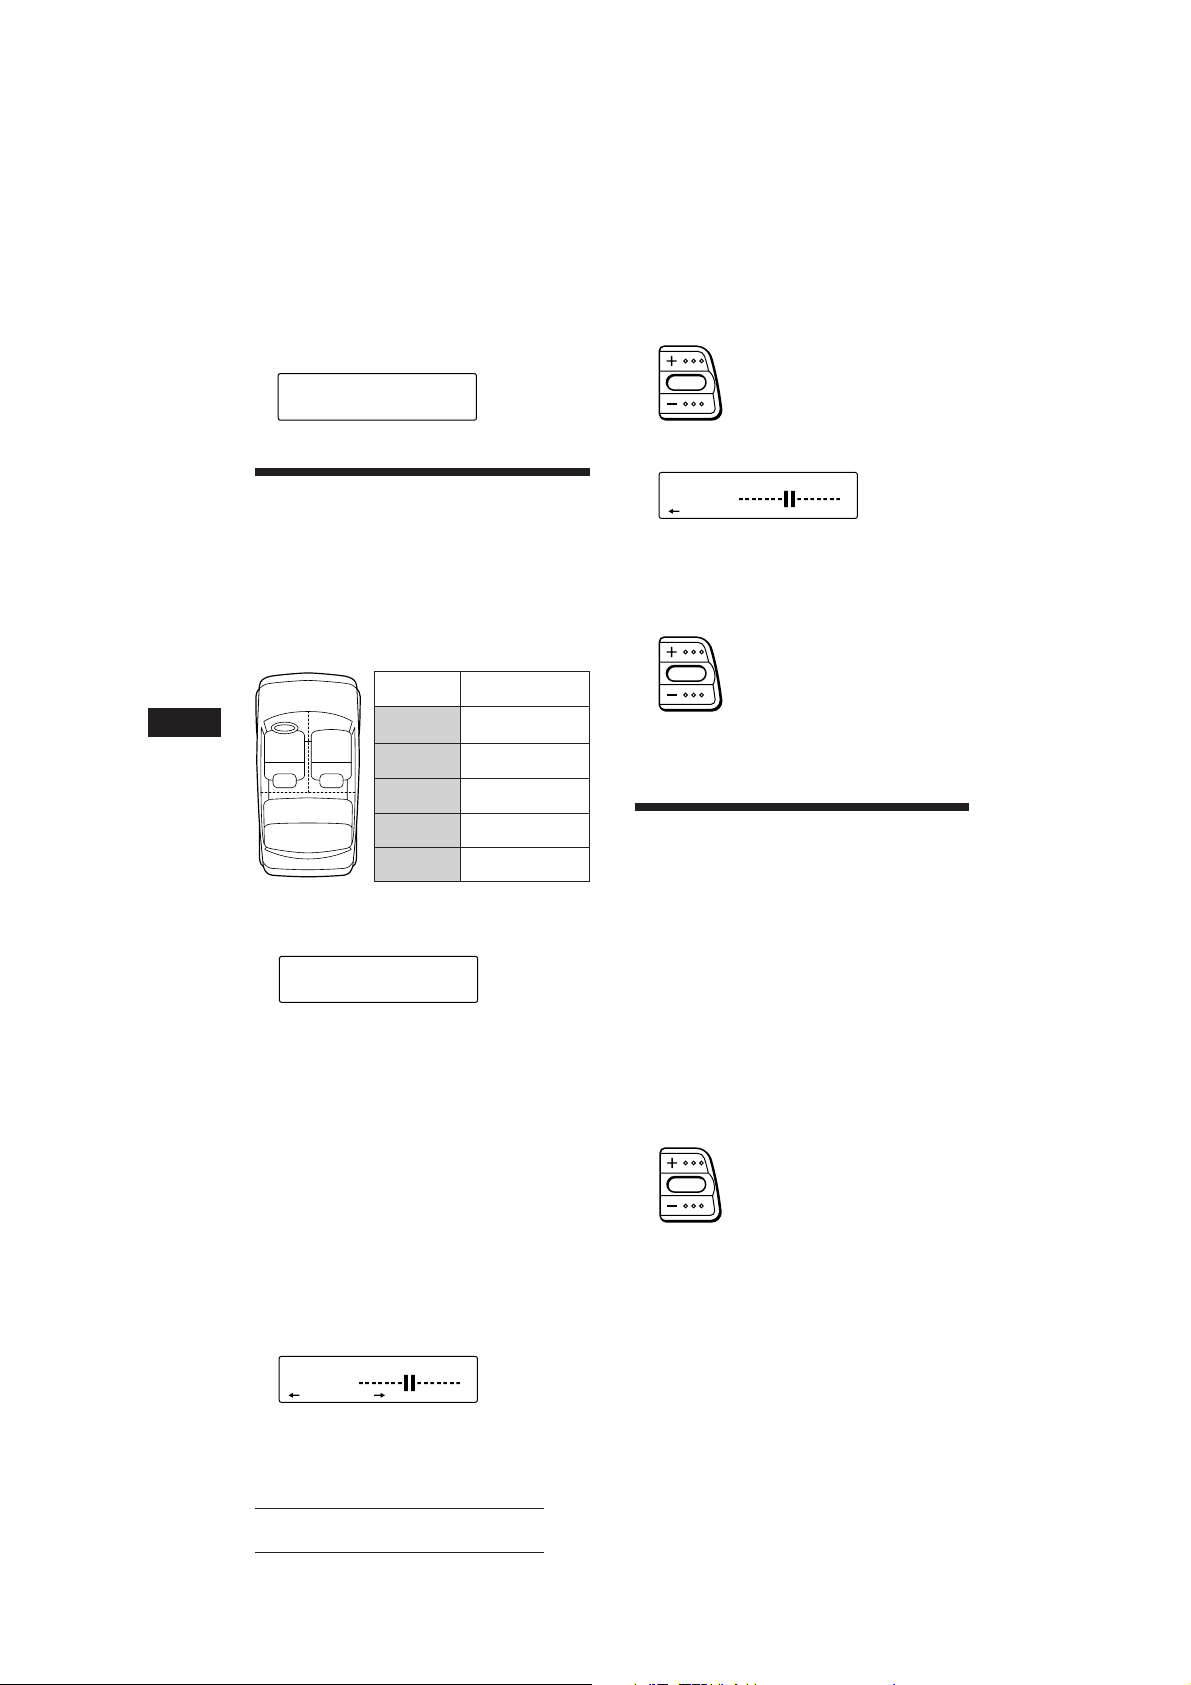
Selecting the listening
position
You can set the time for the sound to reach the
listeners from the speakers.
The unit can to simulate a natural sound field
so that you can feel as if you are is in the centre
of the sound field wherever you sit in the car.
Display
window
All
21
3
Front
Front-R
Front-L
Rear
1 Press (SOUND) momentarily until “POS”
appears.
POS
SUR
EQ
All
2 Press (+) or (–) to select the desired
listening position.
The listening positions appear in the order
shown in the table.
Center of
soundfield
Normal setting
(1 + 2 + 3)
Front part
(1 + 2)
Right front (2)
Left front (1)
Rear part (3)
4 Press (+) or (–) to adjust the centre of
the sound field to the left or right. Then
set the centre of the sound field.
Centre moves to the R (right).
Centre moves to the L (left).
5 Press (4) (n).
To go back to select the listening position,
press (1) (N).
6 Press (+) or (–) to adjust the centre of
the sound field to the front or rear.
Centre moves to the F (front).
Centre moves to the R (rear).
7 Press (SOUND) for two seconds.
Adjusting the fader (FAD)
Normally, with the DSP mode on, the volume
of the output sound from the rear speakers is
lowered automatically to improve the
efficiency of the listening position setting. If
you want to raise the rear speaker volume,
adjust the fader.
1 Follow steps 1 to 3 of “Selecting a
surround menu” (page 13).
2 Press (SOUND) repeatedly until “FAD”
appears.
After three seconds, the display goes back
to the normal playback mode.
Adjusting the listening position
1 Press (SOUND) repeatedly until “POS”
appears.
2 Press (+) or (–) to select the desired
listening position appears.
3 Press (SOUND) for two seconds.
POS
SUR
EQ
14
L R
Actual total number: Sony CDX-C810DSP (E,F,G,I) 3-856-118-11(2)
3 Press (+) or (–) to adjust the fader.
Increases front speaker volume
Decreases front speaker volume
After three seconds, the display goes back
to the normal playback mode.
Page 15
Adjusting the volume of
the subwoofer(s)
1 Press (SOURCE) to select a source (radio,
CD or MD).
2 Press (SOUND) repeatedly until “SUB”
appears.
3 Press (+) or (–) to adjust the volume.
After three seconds, the display goes back
to the normal playback mode.
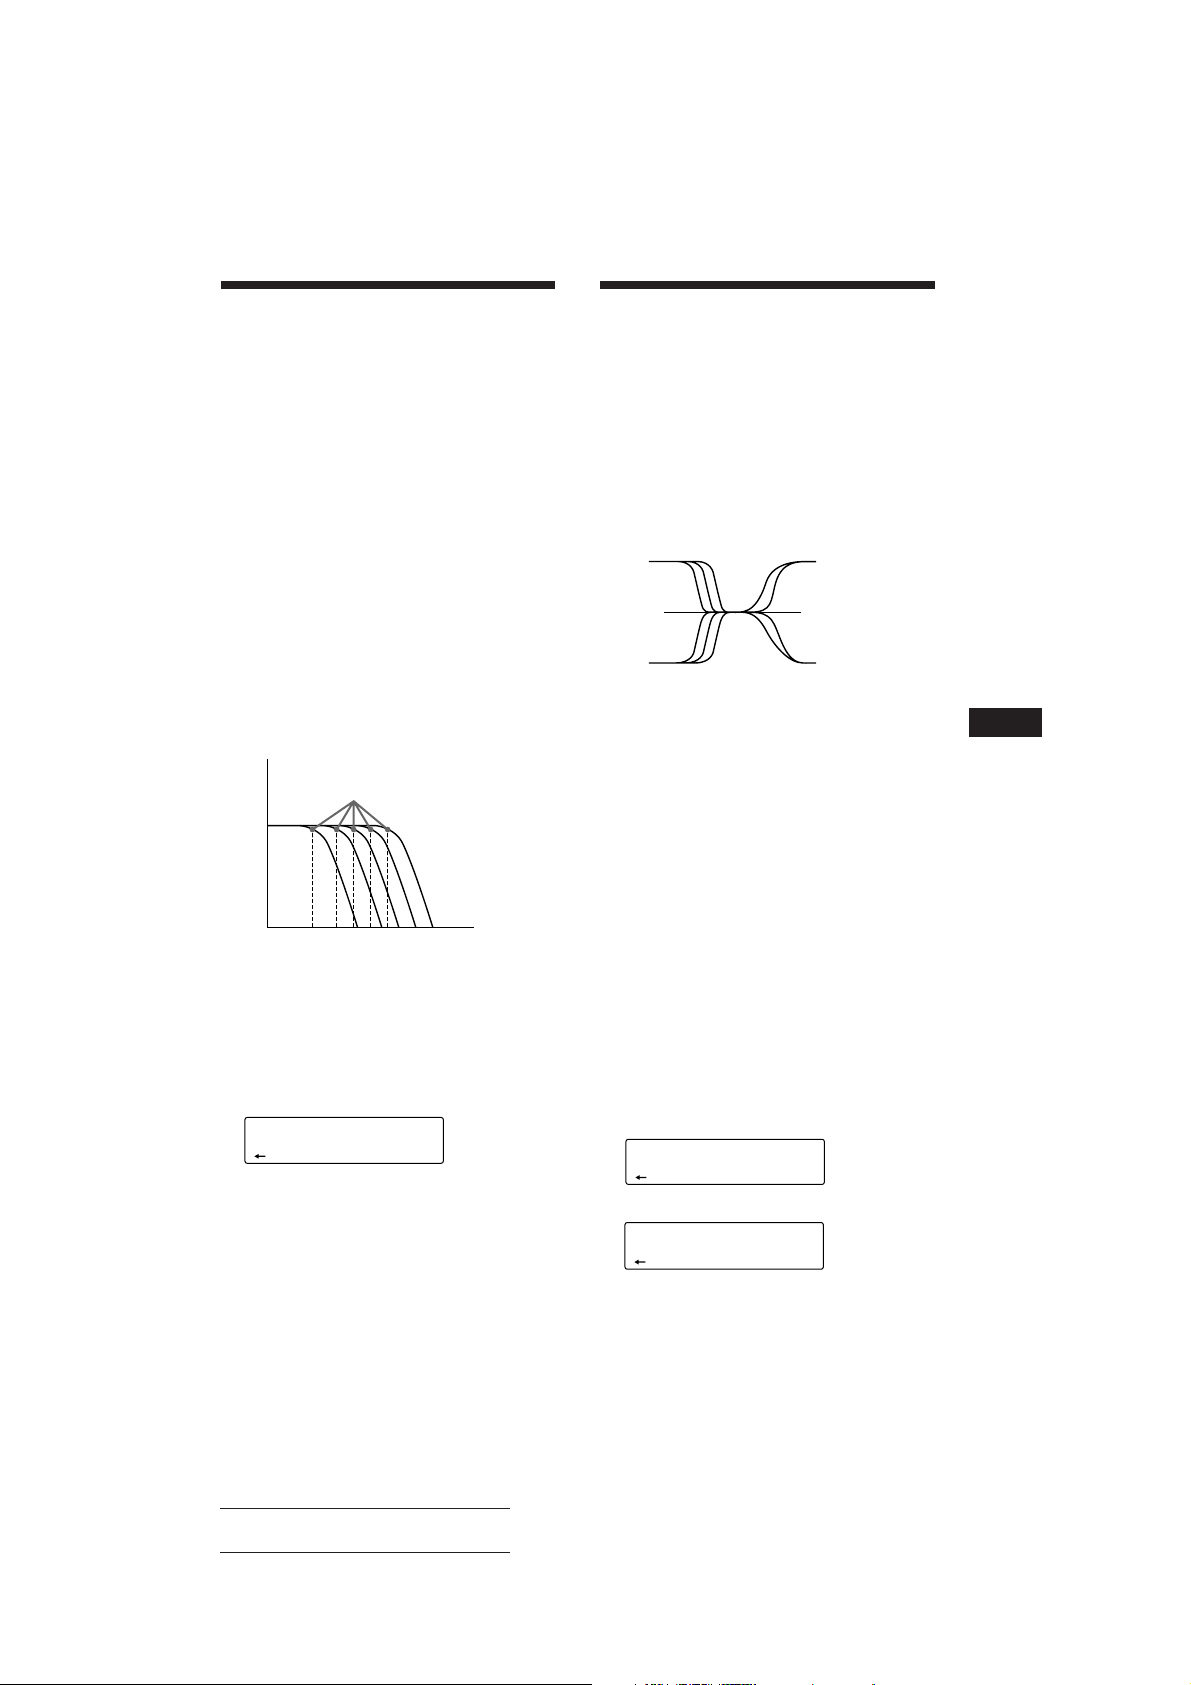
Adjusting the frequency of the
subwoofer(s)
To match the characteristics of the connected
subwoofer(s), you can cut the unwanted high
and middle frequency signals entering the
subwoofer(s). By setting the cut-off frequency
(see the diagram below), the subwoofer(s) will
output only low frequency signals so that you
can get a clearer sound image.
Level
Cut-off frequency
Adjusting the volume of
the bass and treble
— Digital Tone Control
The CDX-C810DSP has a built-in DSP IC that
uses digital processing to create clearer
adjustments to the bass and treble volume than
analog circuits.
The sharper tone slopes used in this unit
produce more obvious and effective tone
responses. For example, you can enhance the
background music with the bass volume and
effectively isolate the main vocals.
Frequency (Hz)
1 Press (SOURCE) to select a source (radio,
CD or MD).
2 Press (SOUND) repeatedly until “BAS” or
“TRE” appears.
3 Press (+) or (–) to adjust the volume.
After three seconds, the display goes back
to the normal playback mode.
EN
DSP
62 99 125 157 198 Frequency (Hz)
1 Press (SOURCE) to select a source (radio,
CD or MD).
2 Press (SOUND) repeatedly until “SUB”
appears.
3 Press (SOUND) for two seconds.
SUB
SUR
EQ
125Hz
4 Press (+) or (–) to select the desired cut-
off frequency.
62 Hz n 99 Hz n 125 Hz* n 157 Hz n 198 Hz
* Factory-set frequency
5 Press (SOUND) for two seconds.
To adjust volume of the subwoofer, press
(1) (N).
Adjusting the turn-over frequency
You can adjust the bass and treble turn-over
frequencies.
1 Press (SOURCE) to select a source (radio,
CD or MD).
2 Press (SOUND) repeatedly until “BAS” or
“TRE” appears.
3 Press (SOUND) for two seconds.
Bass adjust mode
BAS
SUR
EQ
157Hz
Treble adjust mode
TRE
SUR
EQ
7.1kHz
continue to next page n
15
Actual total number: Sony CDX-C810DSP (E,F,G,I) 3-856-118-11(2)
Page 16
4 Press (+) or (–) to select the turn-over
frequency.
The turn-over frequencies change as
follows:
Bass:
125 Hz n 157 Hz* n 198 Hz
Treble:
5.0 kHz n 7.1 kHz*
* Factory-set frequency
5 Press (SOUND) for two seconds.
To adjust the volume of the bass and treble,
press (1) (N).
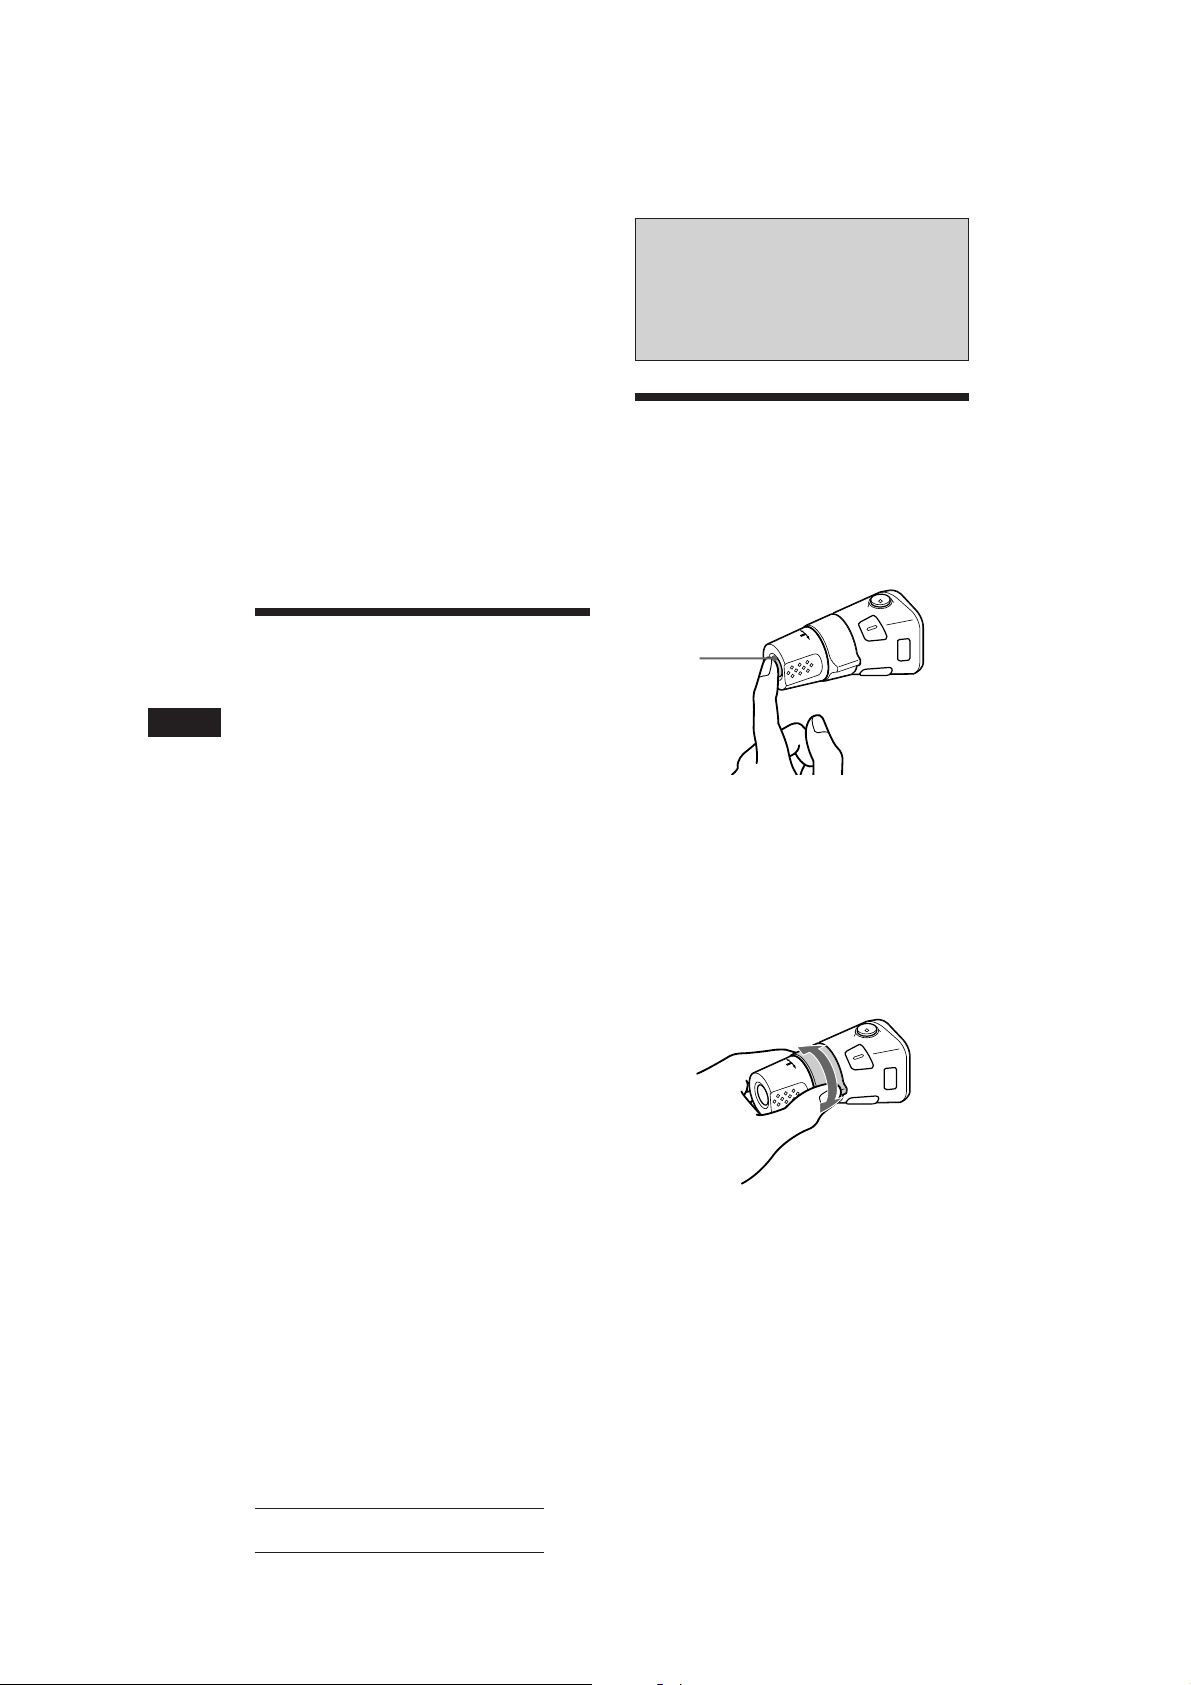
Other Functions
Using the rotary remote
The rotary remote works by pressing buttons
and/or rotating controls.
You can control the optional CD or MD
changer with the rotary remote.
By pressing the button (the
SOURCE button)
EN
Listening to each
programme source in its
registered surround mode
— Source Sound Memory
You can listen to the same source always in the
surround menu and the sound characteristics
(bass, treble and subwoofer) even after
changing the programme source or turning the
unit on and off again.
(SOURCE)
Every time you press (SOURCE), the
source changes as follows:
FM1 n FM2 n MW n LW (SW) n CD1 n
CD2 n MD1 n MD2
Tip
When the POWER SELECT switch is set to position B,
you can turn on this unit by pressing (SOURCE) on the
rotary remote.
By rotating the control (the SEEK/
AMS control)
Rotate the control momentarily and
release it to:
•Locate a specific track on a disc. Rotate
and hold the control to locate the specific
point in a track, then release it to start
playback.
•Tune in the stations automatically. Rotate
and hold the control to tune in the specific
station.
16
Actual total number: Sony CDX-C810DSP (E,F,G,I) 3-856-118-11(2)
Page 17
By rotating the control while
pushing (the PRESET/DISC control)
Rotate the control while pushing it to:
• Receive the stations memorised on the
number buttons.
• Change the disc.
Other operations
Rotate the VOL control to
adjust the volume.
Press (MUTE) to
mute the sound.
If you need to mount the rotary remote on the
right of the steering column, you can reverse
the operative direction of the controls.
Press (DSPL) for two seconds while
pushing the VOL control.
Tip
You can control the operative direction of controls with the
unit (page 18).
OFF
Press (OFF) to turn
off the unit.
Press (DSPL) to change
the displayed items.
Press (SOUND)
to adjust the
volume and
sound menu.
Press (LIST) to display memorized names.
Changing the operative direction
The operative direction of controls is factory
preset as in the illustration below.
To increase
To decrease
Adjusting the sound
characteristics
You can adjust bass, treble, balance and fader.
Each source can store the bass and treble level
respectively.
1 Select the item you want to adjust by
pressing (SOUND) repeatedly.
VOL (volume) n SUR (surround menu)
n POS (listening position) n SUB (Sub
output level) n BAS* (bass) n TRE*
(treble) n BAL (balance) n FAD* (fader)
* The level of the SUB output cannot be adjusted.
2 Adjust the selected item by pressing (+)
or (–).
Adjust within three seconds after selecting.
(After three seconds, the buttons work as
volume control buttons.)
Muting the sound
Press (MUTE).
“MUTE ON” flashes.
To restore the previous volume level, press
(MUTE) again.
EN
DSP/Other Functions
Actual total number: Sony CDX-C810DSP (E,F,G,I) 3-856-118-11(2)
17
Page 18

EN
Changing the sound and
display settings
You can set:
• AMBER/GREEN to change the illumination
color to amber or green.
• BEEP to turn on or off the beeps.
• DIMMER (Dimmer) to change the brightness
of the display.
• D.INFO (dual information) to display the
clock and the play mode at the same time
(ON) or to display the information
alternately (OFF).
• LOUD (Loudness) to enjoy bass and treble
even at low volume. Bass and treble will be
reinforced.
• RM (Rotary Remote) to change the operative
direction of the controls of the rotary remote.
— Select “NORM” to use the rotary remote
as the factory preset position.
— Select “REV” when you mount the rotary
remote on the right of the steering
column.
1 Press (SHIFT), then press (2) (SET UP).
2 Press (2) (SET UP) repeatedly until the
desired setting mode appears.
Each time you press (2) (SET UP), the item
changes as follows:
CLOCK n AMBER/GREEN n BEEP n DIMMER
n D.INFO
* When you have not tune the station or there is no
3 Press (4) (n) to select the desired
setting (for example: ON or OFF).
4 Press (SHIFT).
When the mode setting is complete, the
normal playback mode appears.
*
n LOUD* n RM
CD/MD being played, these items will not appear.
With Optional Equipment
CD/MD Changer
You can control up to 10 CD changers and MD
changers with this unit.
Playing a CD or MD
Press (SOURCE) until the desired
changer appears.
CD/MD playback starts.
When a CD or MD changer is connected, all
the tracks play from the beginning.
Changing the displayed items
Each time you press (DSPL) during CD/MD
playback, the item changes as follows:
Elapsed playback time
*1If you have not labeled the CD, “NO Name” appears in
the display. If there is no prerecorded name for an MD,
“NO D.Name” appears in the display.
2
If the track name is not prerecorded, “NO T.Name”
*
appears in the display for one second.
3
If the dual information is on, clock does not appear in
*
the display.
Tip
If the name of the MD is too long, you can scroll it across
the display window by pressing (SHIFT), then (1) (N).
$
$
Disc name*
$
Track name*
$
3
Clock*
1
2
18
Automatically scrolling a disc name
— Auto Scroll
The Auto Scroll function automatically scrolls
the disc or track name of the MD when you
press (DSPL) and the name length exceeds 10
characters.
1 Press (SHIFT), then press (2) (SET UP)
repeatedly until “A.SCRL” appears.
2 Press (4) (n) to select “A.SCRL ON.”
To cancel Auto Scroll, select “A.SCRL OFF” in
step 2 above.
Actual total number: Sony CDX-C810DSP (E,F,G,I) 3-856-118-11(2)
Page 19
Displaying the recording date of
the currently selected MD
Press (DSPL) for two seconds during MD
playback.
The recording date of the track is displayed
for about three seconds.
Locating a specific track
— Automatic Music Sensor (AMS)
During playback, press either side of
(SEEK/AMS) once for each track you
want to skip.
SEEK/AMS
To locate succeeding tracks
To locate previous tracks
Locating a specific point in a track
— Manual Search
During playback, press and hold either
side of (SEEK/AMS). Release the button
when you have found the desired point.
SEEK/AMS
To search forward
To search backward
Locating a disc by disc number
— Direct Disc Selection
Press the number button that
corresponds with the desired disc
number.
The desired disc in the currently selected
changer begins playback.
Playing tracks repeatedly
— Repeat Play
You can select:
• REP 1 to repeat a track.
• REP 2 to repeat a disc.
• REP 3 to repeat all the discs in the current
changer.
1 During playback, press (SHIFT). Then
press (3) (PLAY MODE) repeatedly until
“REP” appears.
2 Press (4) (n) repeatedly until the
desired setting appears.
z REP 1 z REP 2 z REP 3
REP OFF Z
Repeat Play starts.
To go back to the normal playback mode,
select “REP OFF” in step 2 above.
Playing tracks in random
order
You can select:
• SHUF 1 to play the tracks on the current disc
in a random order.
• SHUF 2 to play the tracks in the current
changer in a random order.
• SHUF 3 to play all the tracks in a random
order.
1 During playback, press (SHIFT), then
— Shuffle Play
press (3) (PLAY MODE) repeatedly until
“SHUF” appears.
EN
Other Functions/CD/MD Changer
Scanning the tracks
— Intro Scan
You can play the first 10 seconds of all the
tracks on the currently selected disc.
1 During playback, press (SHIFT), then
press (3) (PLAY MODE) repeatedly until
“INTRO” appears.
2 Press (4) (n) repeatedly until the
desired setting appears.
z SHUF 1 z SHUF 2 z SHUF 3
SHUF OFF Z
Shuffle Play starts.
To go back to the normal playback mode,
select “SHUF OFF” in step 2 above.
2 Press (4) (n) to select “INTRO ON.”
Intro Scan starts.
To go back to the normal playback mode,
select “INTRO OFF” in step 2 above.
Actual total number: Sony CDX-C810DSP (E,F,G,I) 3-856-118-11(2)
19
Page 20
Creating a programme
SUR
EQ
PLAY MODE ENTER
DISC
TRACK
4 7 P1.‚8
CD2
— CD Programme Memory (CD changer
with programme memory function)
You can play the tracks in the order you want
by making your own programme. You can
make two programmes: Programme 1 and
Programme 2. You can select up to 12 tracks in
each programme. You can store the
programmes in memory.
1 Press (SHIFT), then press (3) (PLAY
MODE) for two seconds.
Programme edit mode
CD2
SUR
“P 1” shows Programme 1 is selected.
DISC
EQ
TRACK
2 3 P1.‚1
PLAY MODE ENTER
Notes
• “*Wait*” appears in the display while the unit is reading
the data, or when a disc has not been put into the unit.
• “*Mem Full*” appears in the display when you try to
enter more than 12 tracks into a programme at one time.
Playing the stored programme
Changing the disc order in the changer will not
affect programme memory play.
You can select:
•PGM 1 to play Programme 1.
•PGM 2 to play Programme 2.
•PGM 1+2 to play Programmes 1 and 2.
1 Press (SHIFT).
2 Press (3) (PLAY MODE) repeatedly until
“PGM” appears.
EN
If have labelled the disc, the bank edit
mode appears. Press (3) (PLAY MODE) to
display “P 1” above.
To select Programme 2, press (4) (n)
repeatedly until “P 2” appears.
2 Select the track you want.
1 Press (SOURCE) repeatedly to select
the changer.
2 Press (SHIFT), then press the number
button to select the disc.
3 Press (SHIFT).
4 Press either side of (SEEK/AMS) to
select the track.
3 Press (5) (ENTER) momentarily.
P1
SUR
EQ
+ENTER+
PLAY MODE ENTER
µ
CD2
SUR
DISC
EQ
TRACK
3 2 P1.‚2
PLAY MODE
4 To continue entering tracks, repeat steps
2 and 3.
3 Press (4) (n) repeatedly until the
desired programme appears.
z PGM 1 z PGM 2 z PGM 1+2
PGM OFF Z
Programme Play starts.
To go back to the normal playback mode,
select “PGM OFF” in step 3 above.
Notes
• If you press the number button during programme
memory play, programme memory play is interrupted,
and playback of the selected disc starts.
• “NO Data” appears in the display if no track is stored in
the programme.
• If a track stored into the programme memory is not
contained in the disc magazine, the track will be skipped.
• When the disc magazine contains not a single track
stored into the programme memory, or when the
programme information has not been loaded yet, “Not
Ready” appears.
Erasing the entire programme
1 Press (SHIFT), then press (3) (PLAY
MODE) for two seconds.
“P 1” shows Programme 1 is selected.
If you have labelled the disc, the bank edit
mode appears. Press (3) (PLAY MODE) to
display “P 1” above.
5 When you finish entering tracks, press
(3) (PLAY MODE) for two seconds.
20
Actual total number: Sony CDX-C810DSP (E,F,G,I) 3-856-118-11(2)
Page 21
2 Press (1) (N) repeatedly until “DEL”
appears.
DEL
SUR
EQ
--PGM1--
PLAY MODE ENTER
To erase Programme 2, press (4) (n)
repeatedly until “PGM 2” appears.
3 Press (5) (ENTER) for two seconds.
P1
SUR
EQ
NO Data
PLAY MODE ENTER
The entire programme is erased.
4 When you finish erasing programmes,
press (3) (PLAY MODE) for two seconds.
Adding tracks to the programme
1 Press (SHIFT), then press (3) (PLAY
MODE) for two seconds.
CD2
“P 1” shows Programme 1 is selected.
DISC
SUR
EQ
4 7 P1.‚8
PLAY MODE ENTER
TRACK
If you have labelled the disc, the bank edit
mode appears. Press (3) (PLAY MODE) to
display “P 1” above.
To select Programme 2, press (4) (n)
repeatedly until “P 2” appears.
2 Press (1) (N) or (4) (n) to select the
track slot number where you want to
insert a track.
Track slot number
CD2
DISC
SUR
EQ
3 2 P1.‚5
PLAY MODE ENTER
TRACK
3 Press either side of (SEEK/AMS) to select
the track you want to insert.
Erasing the tracks in the
programme
1 Press (SHIFT), then press (3) (PLAY
MODE) for two seconds.
CD2
SUR
“P 1” shows Programme 1 is selected.
DISC
EQ
TRACK
3 2 P1.‚7
PLAY MODE ENTER
If you have labelled the disc, the bank edit
mode appears. Press (3) (PLAY MODE) to
display “P 1” above.
To select Programme 2, press (4) (n)
repeatedly until “P 2” appears.
2 Press (1) (N) or (4) (n) to select the
track you want to erase.
Track slot number
CD2
The track currently registered in slot 6 of
Programme 1.
DISC
SUR
EQ
3 3 P1.‚6
PLAY MODE ENTER
TRACK
3 Press (5) (ENTER) for two seconds.
When you erase a track from a slot number,
the succeeding tracks shift up to fill the gap.
DEL
DISC
SUR
EQ
- -- P1.‚6
PLAY MODE ENTER
TRACK
µ
CD2
SUR
DISC
EQ
TRACK
4 7 P1.‚6
PLAY MODE ENTER
4 To continue erasing tracks, repeat steps
2 and 3.
5 When you finish erasing tracks, press (3)
(PLAY MODE) for two seconds.
EN
CD/MD Changer
4 Press (5) (ENTER) momentarily to enter
the track.
The current track in that slot number and
the succeeding tracks shift down.
To continue inserting tracks, repeat steps 2
through 4.
Note
Once all 12 slots have been filled, “*Mem Full*”
appears in the display, and you cannot insert tracks.
5 When you finish inserting tracks, press
(3) (PLAY MODE) for two seconds.
Actual total number: Sony CDX-C810DSP (E,F,G,I) 3-856-118-11(2)
21
Page 22
EN
SUR
EQ
ENTER
1 SCHUBERT
LST
SUR
EQ
DISC
DISCNAME
1 SCHUBERT
CD1
Labeling a CD — Disc Memo
(CD changer with custom file function)
You can label each disc with a personalized
name. You can enter up to eight characters for
a disc. If you label a CD, you can locate a disc
by name and select the specific tracks for
playback (page 23).
1 Play the CD and press (LIST) for two
seconds.
CD1
SUR
EQ
2 Enter the characters.
1 Press (+) to select the desired
characters.
(A n B n C n ··· Z n 0 n 1 n 2 n
··· 9 n + n – n * n / n \ n > n <
n . n _ )
CD1
SUR
If you press (–), the characters appear
in the reverse order.
If you want to put a blank space
between characters, select “_” (underbar).
2 Press (4) (n) after locating the
desired character.
The flashing cursor moves to the next
space.
CD1
SUR
If you press (1) (N), the flashing cursor
moves to the left.
3 Repeat steps 1 and 2 to enter the
entire name.
3 To return to the normal CD playback
mode, press (LIST) for two seconds.
Tip
To erase/correct a name enter “_” (under-bar) for each
character.
DISCNAME
DISC
1 ________
DISCNAME
DISC
EQ
1 S_______
DISCNAME
DISC
EQ
1 S_______
Displaying the disc memo
Press (DSPL) during CD playback.
Each time you press (DSPL) during CD
playback, the item changes as follows:
z Elapsed playback time z Disc name
Clock Z
Erasing the disc memo
1 Press (SOURCE) to select the CD changer
(for example CD 2 or CD 3).
2 Press (LIST) for two seconds.
3 Press (DSPL) for two seconds.
4 Press (+) or (–) to select the name that
you want to erase.
5 Press (5) (ENTER) for two seconds.
The name is erased.
Repeat steps 4 and 5 if you want to erase
other names.
6 Press (LIST) for two seconds.
The unit returns to the normal CD playback
mode.
Locating a disc by name
— List-up (CD changer with custom file
function or MD changer)
You can use this function for the discs that
have been assigned a custom name. For more
information on disc names, refer to “Labeling a
CD.”
1 Press (LIST) momentarily.
The name assigned to the disc currently
playing appears in the display.
2 Press (LIST) repeatedly until you find the
desired disc.
3 Press (5) (ENTER) to play back the disc.
22
Actual total number: Sony CDX-C810DSP (E,F,G,I) 3-856-118-11(2)
Page 23
Notes
• Once a disc name has been displayed for five seconds, the
display goes back to its normal playback mode. To turn
off the display, press (DSPL).
• The track name are not displayed during MD playback.
• If there are no discs in the magazine, “NO Disc”
appears in the display.
• If a disc has not been assigned a custom file, “********”
appears in the display.
• If the disc information has not been read by the unit, “?”
appears in the display. To load the disc, first press the
number button, then choose the disc that has not been
loaded.
• The information is appears only in upper cases. There are
also some letters which cannot be displayed (during MD
playback).
Playing the specific tracks only
You can select:
• BANK ON to play the tracks with the
“PLAY” setting.
• BANK INV (Inverse) to play the tracks with
the “SKIP” setting.
1 During playback, press (SHIFT), then
press (3) (PLAY MODE) repeatedly until
“BANK” appears.
2 Press (4) (n) to repeatedly until the
desired setting appears.
z BANK ON z BANK INV z BANK OFF
Selecting the specific
tracks for playback
— Bank
(CD changer with custom file function)
If you label the disc, you can set the unit to
skip tracks and play only the tracks you want.
1 Start playing the disc and press (SHIFT).
Then press (3) (PLAY MODE) for two
seconds.
Bank edit mode.
CD2
SUR
Note
If you have not labeled the disc, the bank edit mode
does not appear and the programme edit mode appears.
To go back to the normal playback mode, press
(SHIFT).
2 Press either side of (SEEK/AMS) to select
the track number you want to skip and
press (5) (ENTER).
CD2
SUR
The indication changes from “PLAY” to
“SKIP.” If you want to return to “PLAY,"
press (5) (ENTER) again.
DISC
EQ
EQ
TRACK
5 1 PLAY
PLAY MODE ENTER
DISC
TRACK
5 3 SKIP
PLAY MODE ENTER
CD1
SUR
EQ
BANK
BANK ON
PLAY MODE
Playback starts from the track following the
current one.
To go back to the normal playing mode, select
“BANK OFF” in step 2 above.
EN
CD/MD Changer
3 Repeat step 2 to set the “PLAY” or “SKIP”
mode on all the tracks.
4 Press (3) (PLAY MODE) for two seconds.
The unit returns to the normal CD playback
mode.
Notes
• You can set the “PLAY” and “SKIP” mode on up to 24
tracks.
• You cannot set the “SKIP” mode on all the tracks.
Actual total number: Sony CDX-C810DSP (E,F,G,I) 3-856-118-11(2)
23
Page 24
Additional
Information
EN
Precautions
• If your car was parked in direct sunlight
resulting in a considerable rise in
temperature inside the car, allow the unit to
cool off before operating it.
• If no power is being supplied to the unit,
check the connections first. If everything is in
order, check the fuse.
• If no sound comes from the speakers of
two-speaker systems, set the fader control to
the centre position.
• If your car is equipped with a power aerial,
note that it will extend automatically while
the unit is operating.
If you have any questions or problems
concerning your unit that are not covered in
this manual, please consult your nearest Sony
dealer.
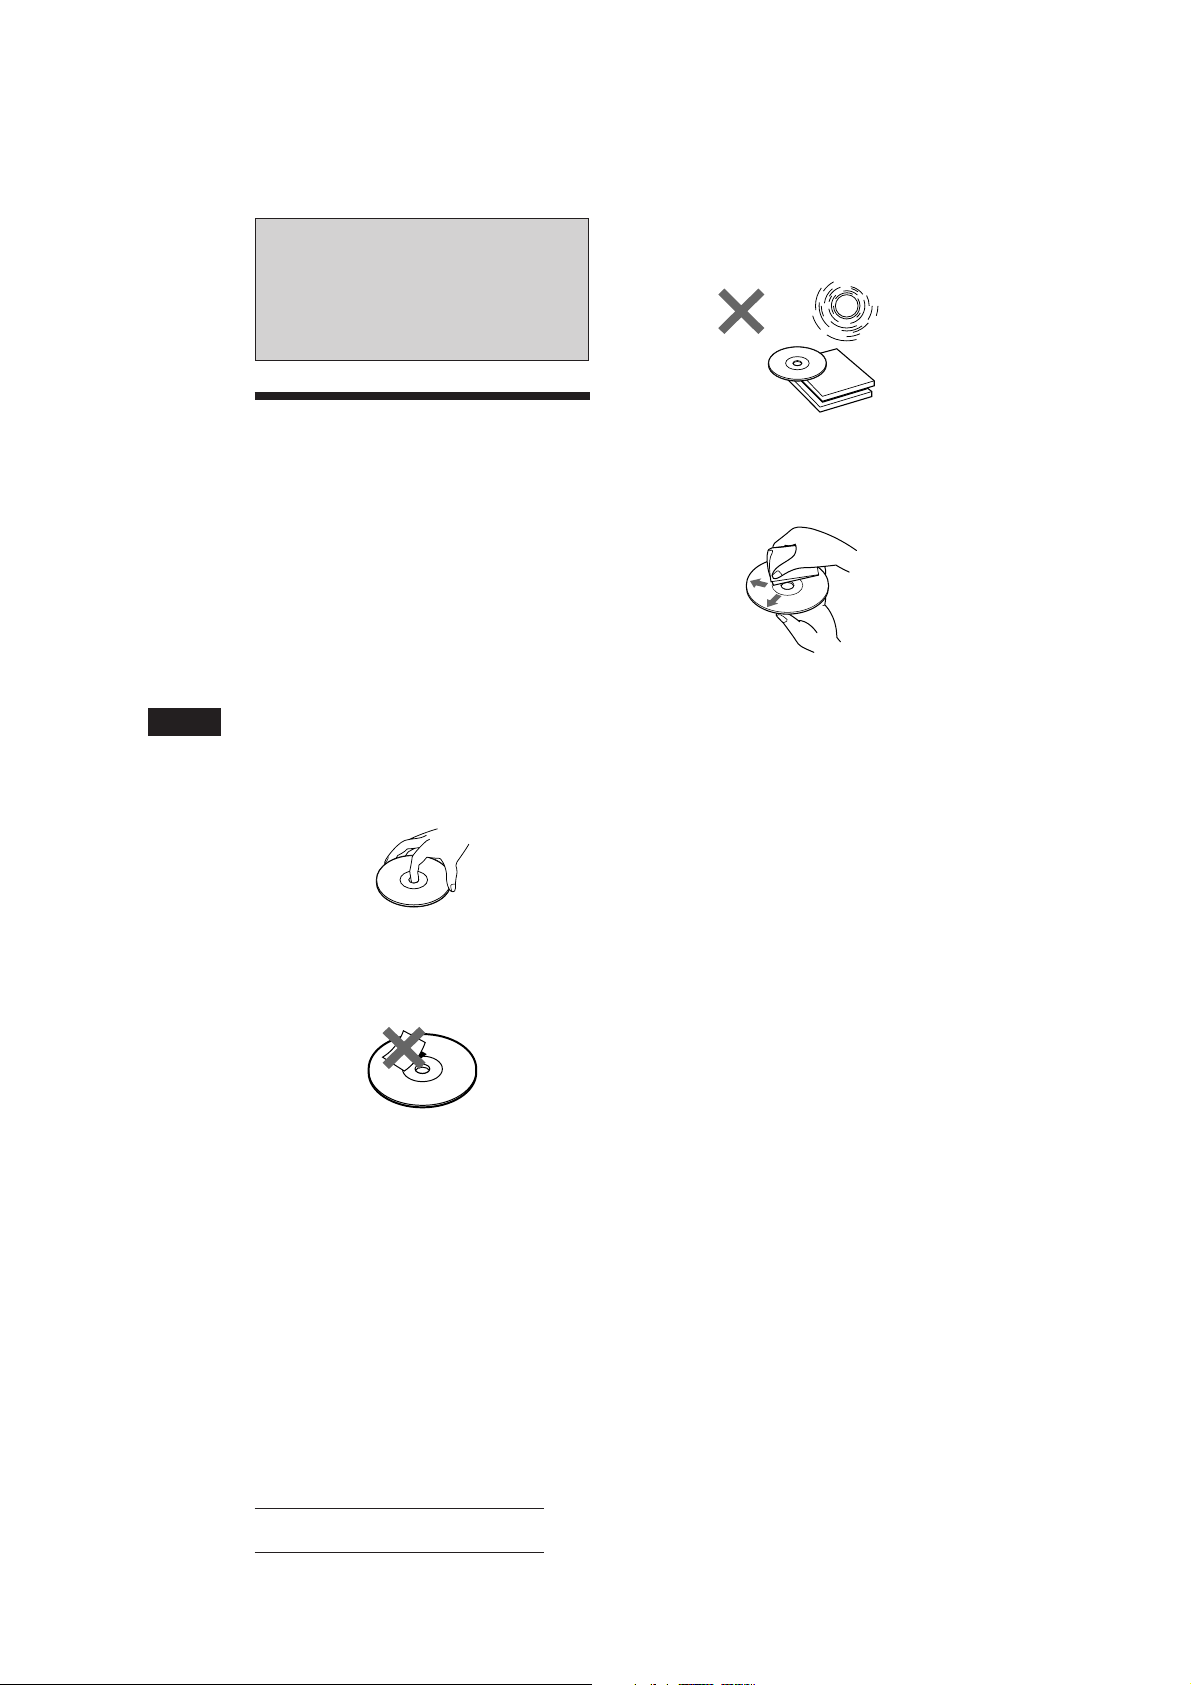
Notes on handling CDs
A dirty or defective disc may cause sound
dropouts while playing. To enjoy optimum
sound, handle the disc as follows.
Handle the disc by its edge. To keep the disc
clean, do not touch the surface.
Do not expose the discs to direct sunlight or
heat sources such as hot air-ducts, or leave
them in a car parked in direct sunlight where
there can be a considerable rise in the
temperature inside the car.
Before playing, clean the discs with an optional
cleaning cloth. Wipe each disc from the centre
out.
Do not use solvents such as benzine, thinner,
commercially available cleaners or antistatic
spray intended for analog discs.
Notes on moisture condensation
On a rainy day or in a very damp area,
moisture may condense on the lenses inside
the CD player. Should this occur, the unit will
not operate properly. In this case, remove the
disc and wait for about an hour until the
moisture evaporates.
When you play 8 cm CDs
Use the optional Sony compact disc single
adapter (CSA-8) to protect the CD player from
being damaged.
Do not stick paper or tape on the labelled
surface.
24
Actual total number: Sony CDX-C810DSP (E,F,G,I) 3-856-118-11 (2)
Page 25
Maintenance
Fuse replacement
When replacing the fuse, be sure to use one
that matches the amperage described on the
fuse. If the fuse blows, check the power
connection and replace the fuse. If the fuse
blows again after replacement, there may be an
internal malfunction. In such a case, consult
your nearest Sony dealer.
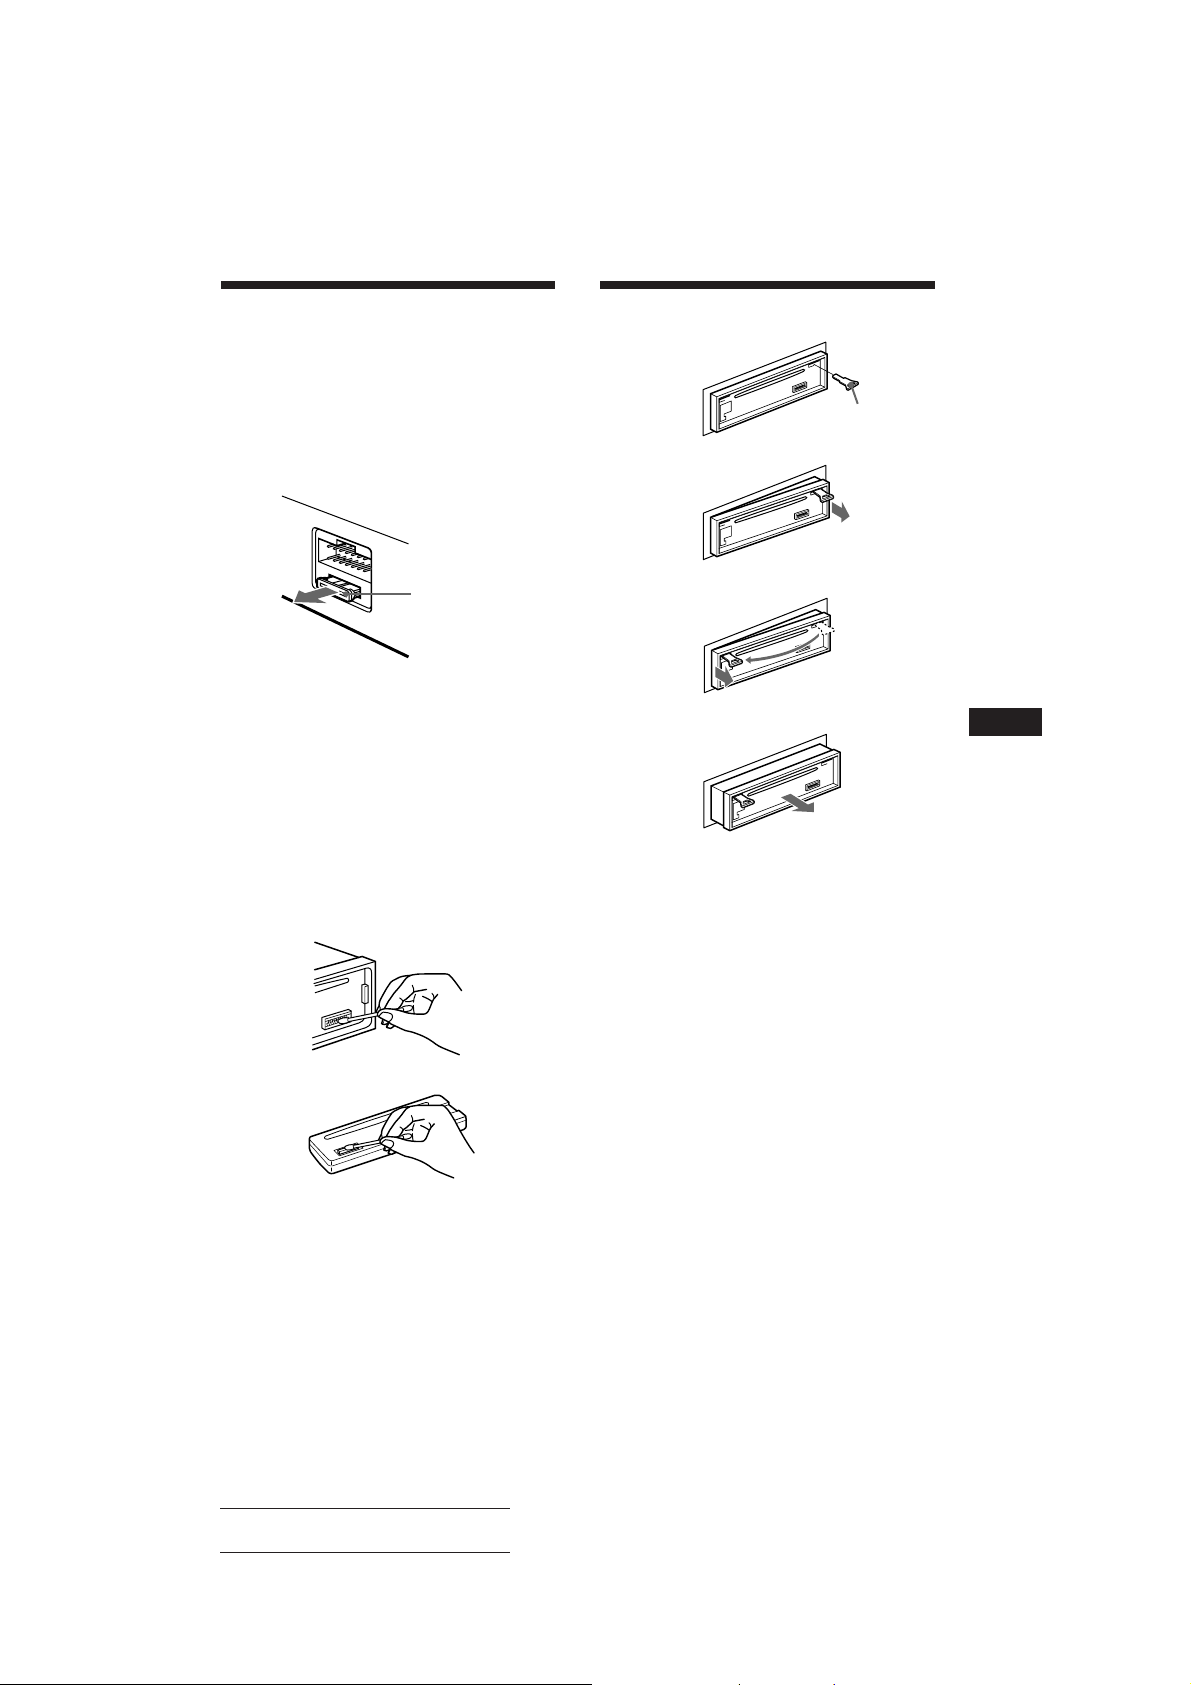
Dismounting the unit
Release key
(supplied)
µ
Fuse (15 A)
Warning
Never use a fuse with an amperage rating
exceeding the one supplied with the unit as
this could damage the unit.
Cleaning the connectors
The unit may not function properly if the
connectors between the unit and the front
panel are not clean. To prevent this, open the
front panel by pressing (RELEASE), then
detach it and clean the connectors with a
cotton swab dipped in alcohol. Do not apply
too much force. Otherwise, the connectors may
be damaged.
Main unit
µ
µ
EN
Additional Information
Back of the front panel
Actual total number: Sony CDX-C810DSP (E,F,G,I) 3-856-118-11 (2)
25
Page 26
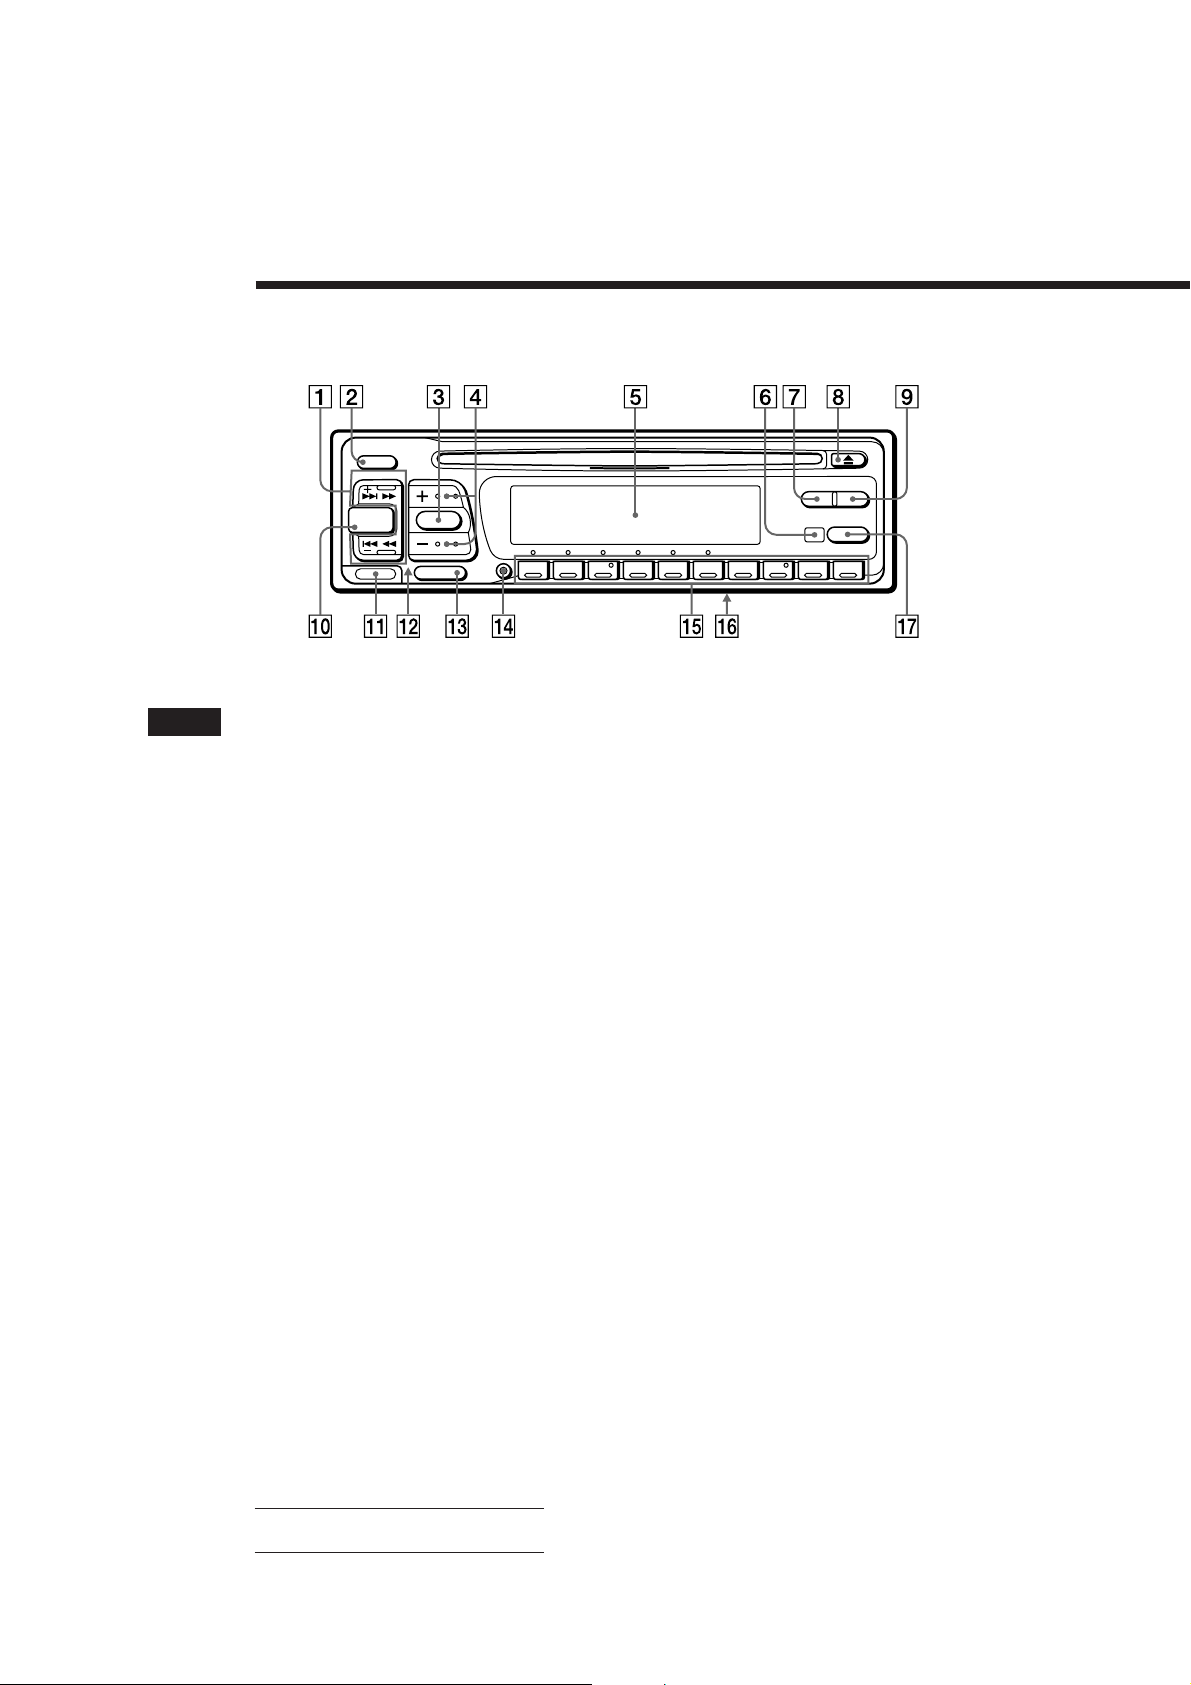
Location of controls
OFF
SEEK/AMS
DSPL LIST
EN
SOURCE SOUND
RELEASE
MUTE
SHIFT
12345678910
Refer to the pages for details.
1 SEEK/AMS (seek/Automatic Music
Sensor/manual search) button 5, 6, 7, 8,
9, 12, 19, 20, 21, 23
2 OFF button 4, 5,
3 SOUND button 13, 14, 15, 16, 17
4 (+) (–) (volume/surround menu/
listening position/sub output level/bass/
treble/balance/fader control) buttons 5,
13, 14, 15, 16, 17, 22
5 Display window
6 Receptor for the optional wireless
remote
7 DSPL (display mode change) button 5,
9, 18, 19, 22
8 6 (eject) button 5
9 LIST button
Disc Memo 22
List-up 22
RDS Programme 12
AF/TA
!º SOURCE (source select) button 5, 8, 9,
11, 13, 15, 18, 20, 22
!¡ RELEASE (front panel release) button 4,
25
!™ Reset button (located on the front side
of the unit hidden by the front panel) 4
!£ MUTE button 17
!¢ SHIFT button
BTM 8, 11
PLAY MODE 6, 7, 8, 9, 10, 13, 19, 20, 21,
23
SET UP 5, 12,18
!∞ During radio reception:
Number buttons 8, 9
During CD/MD playback:
Direct disc selection buttons 19
!§ POWER SELECT switch (located on the
bottom of the unit)
See “POWER SELECT Switch” in the
installation/Connections manual.
!¶ AF/TA button 10, 11
26
Actual total number: Sony CDX-C810DSP (E,F,G,I) 3-856-118-11 (2)
Page 27
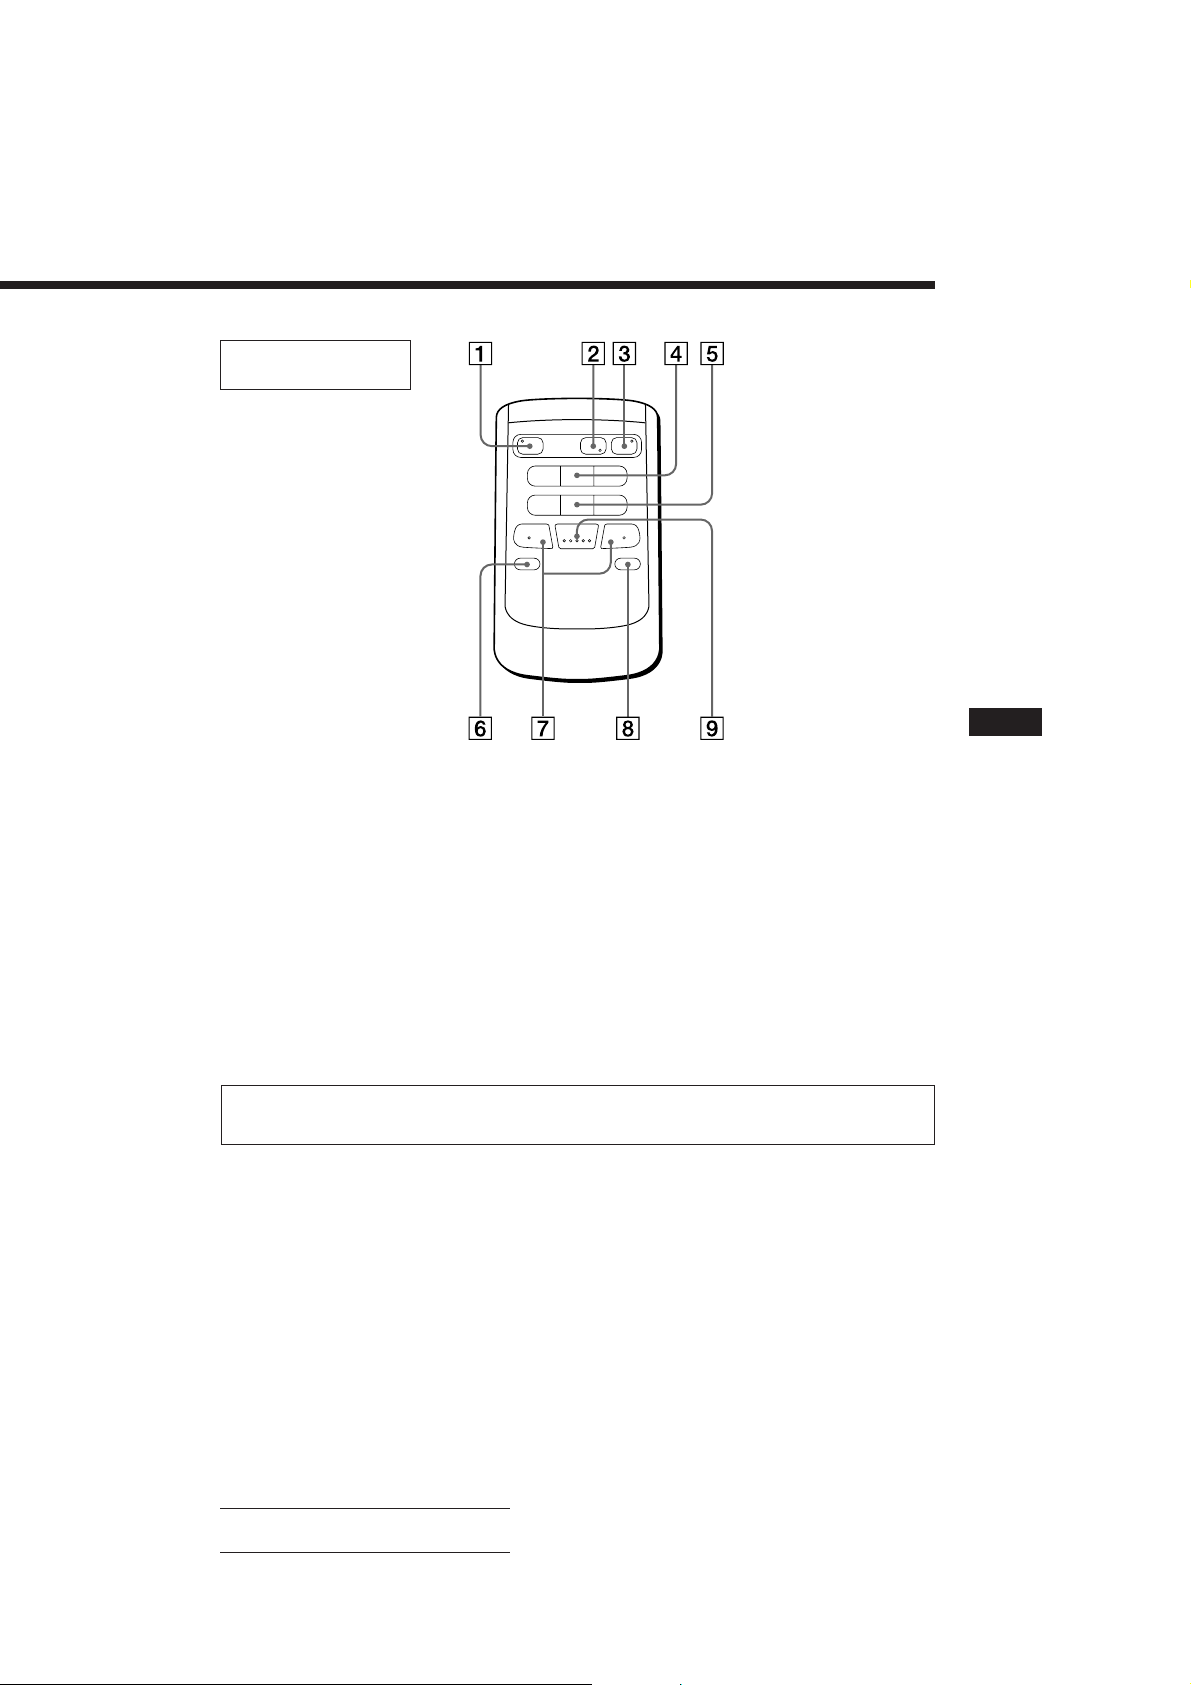
Optional wireless
remote (RM-X41)
The buttons of the wireless remote
work the same functions as those on
this unit.
1 OFF button
2 DIR button
(DIR) does not work with this unit.
3 SOURCE button
4 SEEK/AMS button
5 PRESET/DISC button
You cannot do the manual search and manual tuning
with the remote.
SOURCE
OFF
MUTE DSPL
DIR
MODE
SEEK
–
=
–
REW
–
AMS
PRESET
DISC
SOUND
SEL
+
+
+
FF
6 MUTE button
7 (–) (+) buttons
8 DSPL button
9 SOUND button
+
EN
Additional Information
When the POWER SELECT switch is set to the B position, the unit cannot be operated with the
wireless remote unless (SOURCE) on the unit is pressed or a CD is inserted to activate the unit
first.
Actual total number: Sony CDX-C810DSP (E,F,G,I) 3-856-118-11 (2)
27
Page 28

Specifications
EN
CD player section
System Compact disc digital audio
system
Signal-to-noise ratio 90 dB
Frequency response 10 – 20,000 Hz
Wow and flutter Below measurable limit
Tuner section
FM
Tuning range 87.5 – 108.0 MHz
Aerial terminal External antenna connector
Intermediate frequency 10.7 MHz
Usable sensitivity 8 dBf
Selectivity 75 dB at 400 kHz
Signal-to-noise ratio 62 dB (stereo),
65 dB (mono)
Harmonic distortion at 1 kHz
0.9 % (stereo),
0.5 % (mono)
Separation 35 dB at 1 kHz
Frequency response 30 – 15,000 Hz
Capture ratio 2 dB
MW/LW(SW*)
Tuning range MW: 531 – 1,602 kHz
LW: 153 – 281 kHz
SW: 5,950 – 6,205 kHz
Aerial terminal External antenna connector
Intermediate frequency 10.71 MHz/450 kHz
Sensitivity MW: 30 µV
LW: 50 µV
SW: 50 µV
* For the models for Germany, Switzerland and Austria.
Power amplifier section
Outputs Speaker outputs
(sure seal connectors)
Speaker impedance 4 – 8 ohms
Maximum power output 35 W × 4 (at 4 ohms)
General
Output lead Power antenna relay
control lead
Power amplifier control
lead
Tone controls Bass ±8 dB at 100 Hz
Treble ±8 dB at 10 kHz
Power requirements 12 V DC car battery
(negative ground)
Dimensions Approx. 188 × 58 × 177 mm
(w/h/d)
Mounting dimensions Approx. 178 × 50 × 154 mm
(w/h/d)
Mass Approx. 1.5 kg
Supplied accessories Rotary remote (1)
Parts for installation and
connections (1 set)
Front panel case (1)
Optional accessories Wireless remote RM-X41
BUS cable (supplied with
an RCA pin cord)
RC-61 (1 m), RC-62 (2 m)
RCA pin cord
RC-63 (1 m), RC-64 (2 m),
RC-65 (5 m)
Cleaning cloth XP-CD1
Compact disc single
adapter CSA-8
Optional equipment CD changer
CDX-71 (10 discs),
CDX-72 (10 discs),
CDX-81 (10 discs),
CDX-91 (10 discs),
CDX-T60 (6 discs),
CDX-T62 (6 discs)
MD changer
MDX-40, MDX-60
Source selector
XA-U20, etc.
Design and specifications are subject to change without
notice.
28
Actual total number: Sony CDX-C810DSP (E,F,G,I) 3-856-118-11 (2)
Page 29

Troubleshooting guide
The following check will help you remedy the problems that you may encounter with your unit.
Before going through the checklist below, check the connection and operating procedures.
General
Problem
No sound.
The contents of the memory
have been erased.
Indications do not appear in the
display.
CD/MD playback
Problem
A disc cannot be loaded.
Play does not begin.
A disc is automatically ejected.
The operation buttons do not
function.
The sound skips due to
vibration.
Cause/Solution
•Adjust the volume with (+).
•Set the fader control to the centre position for two-speaker
systems.
• The power cord or battery has been disconnected.
• The reset button has been pressed.
n Store again into the memory.
Remove the front panel and clean the connectors. See “Cleaning
the connectors” (page 25) for details.
Cause/Solution
•Another CD is already loaded.
•The CD is forcibly inserted upside down or in the wrong way
(MD).
Defective MD or dusty CD.
The ambient temperature exceeds 50°C.
Press the reset button.
• The unit is installed at an angle of more than 20°.
• The unit is not installed in a sturdy part of the car.
EN
Additional Information
Radio reception
Problem
Preset tuning is not possible.
Automatic tuning is not
possible.
The “ST” indication flashes.
Cause/Solution
• Memorise the correct frequency.
• The broadcast signal is too weak.
The broadcast signal is too weak.
n Use manual tuning.
•Tune in the frequency correctly.
•The broadcast signal is too weak.
n Set to the MONO mode (page 9).
RDS
Problem
A SEEK starts after a few
seconds of listening.
No traffic announcements.
PTY displays “NONE”.
Cause/Solution
The station in non-TP or weaken signal.
n Press (AF/TA) until “AF TA OFF” appears.
•Activate “TA.”
•The station does not broadcast any traffic announcements
despite being TP. n Tune in another station.
The station does not specify the programme type.
Actual total number: Sony CDX-C810DSP (E,F,G,I) 3-856-118-11 (2)
29
Page 30

EN
DSP functions
Problem
No sound, or sound is too low.
Cause/Solution
The volume of the rear speakers may have been automatically
lowered in order to maximize the effect of the listening position
adjustment.
n Press (+) to adjust the balance.
The speaker balance can be set separately for the DSP on
mode and DSP off mode (page 14).
Error displays (when the optional CD/MD changer is connected)
The following indications will flash for about five seconds, and an alarm sound will be heard.
Display
NO Mag
NO Disc
Error
Blank
PushReset
Not Ready
HighTemp
*1 When an error occurs during playback of an MD or CD, the disc number of the MD or CD dose not appear in the display.
2
The disc number of the disc causing the error appears in the display.
*
Cause
The disc magazine is not inserted in
the CD/MD changer.
No disc is inserted in the CD/MD
changer.
A CD is dirty or inserted upside
2
down.*
1
*
An MD does not play because of some
problem.*
No tracks have been recorded on an
1
*
MD.*
The CD/MD changer cannot be
operated because of some problem.
The lid of the MD changer is open or
MDs are not inserted properly.
The ambient temperature is more than
50°C.
2
2
Solution
Insert the disc in the CD/MD
changer.
Insert the discs in the CD/MD
changer.
Clean or insert the CD correctly.
Insert another MD.
Play an MD with recorded tracks on
it.
Press the reset button of the unit.
Close the lid or inserted the MDs
properly.
Wait until the temperature goes down
below 50°C.
If the above-mentioned solutions do not help improve the situation, consult your nearest Sony
dealer.
30
Actual total number: Sony CDX-C810DSP (E,F,G,I) 3-856-118-11 (2)
Page 31

Index
A
Alternative Frequencies (AF) 10
Automatic Music Sensor (AMS) 5, 19
Automatic tuning 9
Auto Scroll 18
B
Balance 17
Bass 15, 17
Bank Play 23
Beep tone 18
Best Tuning Memory (BTM) 8
C
Caution alarm 4
CD playback 5, 18
CD programme memory 6, 20
Clock 5
Clock Time function (CT) 12
D
Digital Signal Processor (DSP) 13
Digital tone control 15
Dimmer 18
Direct disc selection 19
Disc Memo 22
Disc Scan 19
Disc Sound Memory (DSM) 13
Display 5, 9, 10, 18, 22
Dual information 18
E
Effect 13
F, G, H
Fader 14, 17
Front panel 4
Fuse 25
I, J, K
Illumination color 18
Intro Scan 6, 19
L
List-up 22
Listening position 14
Local link fuction 10
Local seek 9
Locating
a disc 19, 22
a specific point 6, 19
a specific track 5, 19
a station 12
Loudness 18
M, N, O
Manual search 6, 19
Manual tuning 9
MD playback 18
Memorising a station 8
Monaural mode 9
Mute 17
P, Q
PLAY MODE
BANK 23
INTRO 6, 19
PGM 6, 20
LOCAL 9
MONO 9
REP 6, 19
SHUF 6, 19
Programme 6, 12, 20
R
Radio 8
Radio Data System (RDS) 9
Repeat Play 6, 19
Reset 4
Rotary remote 4, 16, 18
S
SET UP
AMBER 18
A.SCRL 18
BEEP 18
CLOCK 5
DIM 18
D.INFO 18
GREEN 18
LOUD 18
RM 18
Shuffle Play 6, 19
Source Sound Memory 16
Sub output level 17
Subwoofer 15
Surround 13, 16, 17
T, U
Traffic Announcement (TA) 10
Traffic Programme (TP) 10
Treble 16, 19
V
Volume 15, 17
W, X, Y, Z
Wireless remote 27
EN
Additional Information
31
Actual total number: Sony CDX-C810DSP (E,F,G,I) 3-856-118-11 (2)
Page 32

Félicitations !
Nous vous remercions d’avoir fait l’acquisition
d’un lecteur de disques compacts Sony. Cet
appareil est doté de multiples fonctions
d’utilisation que vous pouvez exploiter à l’aide
d’un satellite de commande ou d’une
télécommande sans fil.
En plus de la lecture de disques compacts et de
l’écoute d’émissions de radio, vous pouvez
étendre les possibilités de votre système en
raccordant un changeur de CD/MD disponible
en option.
F
2
Actual total number: Sony CDX-C810DSP (EFGI) 3-856-118-11 (2)
Page 33

Table des matières
Description de cet appareil
Préparation
Réinitialisation de l’appareil ............................. 4
Dépose de la façade ............................................ 4
Préparation du satellite de télécommande ...... 4
Réglage de l’horloge ........................................... 5
Lecteur CD
Ecouter un CD ..................................................... 5
Lecture d’un CD dans différents modes.......... 6
Création d’un programme
— Mémoire de programmation CD ............ 6
Radio
Mémorisation automatique des stations
— Mémorisation du meilleur accord
(BTM) ............................................................... 9
Mémorisation de stations déterminées ............ 9
Réception des stations présélectionnées .......... 9
RDS
Aperçu de la fonction RDS .............................. 10
Affichage du nom de la station ....................... 10
Resyntonisation automatique de la même
émission
— Fréquences alternatives (AF) ................ 11
Ecoute des messages de radioguidage........... 12
Présélection des stations RDS avec les données
AF et TA ........................................................ 12
Localisation d’une station en fonction du type
d’émission ..................................................... 13
Réglage automatique de l’heure ..................... 14
DSP
Sélection d’un menu d’effet spatial ................ 14
Mémorisation d’un menu d’effet spatial sur
chaque disque
— Mémoire de réglage du son des disques
(DSM) ............................................................ 15
Sélection de la position d’écoute..................... 15
Réglage de la balance avant/arrière (FAD) .... 16
Réglage du haut-parleur d’extrême grave .... 16
Réglage du volume des graves et des aiguës
— Commande de tonalité numérique ...... 17
Ecoute de chaque source programme avec le
mode spatial programmé
— Mémoire de réglage sonore de source .. 18
Autres fonctions
Utilisation du satellite de télécommande ...... 18
Réglage des caractéristiques du son ............... 19
Coupure du son ................................................. 20
Modification des réglages du son et de
l’affichage ...................................................... 20
Appareils optionnels
Changeur CD/MD
Lecture d’un CD ou d’un MD ......................... 20
Exploration des plages
— Balayage des intros ................................. 21
Lecture de plages répétée
— Lecture répétée ........................................ 21
Lecture de plages dans un ordre quelconque
— Lecture aléatoire ...................................... 22
Création d’un programme
— Mémoire de programmation CD .......... 22
Identification d’un CD
— Mémo de disque ..................................... 24
Localisation d’un disque par son titre
— Répertoire ................................................. 25
Sélection de plages déterminées pour la lecture
— Bloc ............................................................ 26
Informations complémentaires
Précautions ......................................................... 27
Entretien ............................................................. 28
Démontage de l’appareil .................................. 28
Emplacement des commandes ........................ 29
Spécifications ..................................................... 31
Dépannage ......................................................... 32
Index ................................................................... 34
F
Actual total number: Sony CDX-C810DSP (EFGI) 3-856-118-11 (2)
3
Page 34

Préparation
Réinitialisation de
l’appareil
Avant la première mise en service de l’appareil
ou après avoir remplacé la batterie de la
voiture, vous devez réinitialiser l’appareil.
Appuyez sur la touche de réinitialisation à
l’aide d’un objet pointu comme un stylo à bille.
Touche de réinitialisation
Remarque
Quand vous branchez le cordon d’alimentation sur
l’appareil ou que vous le réinitialisez, attendez environ 10
secondes avant d’introduire un disque. N’introduisez pas
un disque dans ce délai de 10 secondes, sinon l’appareil ne
F
sera pas réinitialisé.
Fixation de la façade
Alignez la partie A de la façade sur la partie
B de l’appareil comme illustré et poussez
dessus jusqu’à ce qu’elle s’encliquette.
A
B
Remarques
• Veillez à ne pas installer la façade à l’envers.
• N’appuyez pas trop fort la façade contre l’appareil lors de
l’installation. Appuyez légèrement la façade contre
l’appareil.
• Lorsque vous emmenez la façade, glissez-la dans l’étui
spécial fourni.
• N’appuyez pas trop fort et n’exercez pas de pression
excessive sur la fenêtre d’affichage de la façade.
• N’exposez pas la façade au rayonnement direct du soleil,
à des sources de chaleur comme des conduits d’air chaud,
et ne la laissez pas dans un endroit humide. Ne laissez
jamais la façade sur le tableau de bord d’une voiture
parquée en plein soleil, où la température à l’intérieur de
l’habitacle risque d’augmenter considérablement.
Dépose de la façade
La façade de cet appareil peut être déposée
afin d’empêcher que l’appareil soit volé.
1 Appuyez sur (OFF).
2 Appuyez sur (RELEASE) pour
déverrouiller la façade. Faites-la ensuite
glisser légèrement vers la gauche et
enlevez-la en tirant vers vous.
(OFF)
(RELEASE)
Remarques
• Veillez à ne pas laisser tomber la façade lorsque vous la
déposez de l’appareil.
• Si vous appuyez sur (RELEASE) pour déposer la façade
alors que l’appareil est toujours sous tension,
l’alimentation est coupée automatiquement de manière à
éviter d’endommager les haut-parleurs.
4
Avertisseur
Si vous tournez la clé de contact sur la position
OFF après avoir enlevé la façade, l’avertisseur
émet un bip sonore pendant quelques
secondes (uniquement si le contacteur POWER
SELECT est réglé sur la position A).
Préparation du satellite
de télécommande
Lorsque vous installez le satellite de
télécommande, apposez les étiquettes de la
façon illustrée ci-dessous.
DSPL
SOUND
LIST
SOUND
LIST
DSPL
Actual total number: Sony CDX-C810DSP (EFGI) 3-856-118-11 (2)
Page 35

Réglage de l’horloge
SUR
EQ
TRACK
5 2.15
CD
L’horloge à affichage numérique fonctionne
suivant un cycle à 24 heures.
Exemple: Réglez l’horloge sur 10:08
1 Appuyez sur (SHIFT) et ensuite sur (2)
(SET UP).
SET
SUR
EQ
CLOCK
SET UP
1 Appuyez sur (4) (n).
SET
SUR
EQ
1:‚‚
SET UP
Les chiffres des heures clignotent.
Lecteur CD
Ecouter un CD
Introduisez simplement le CD.
La lecture démarre automatiquement.
Avec l’étiquette vers le haut
2 Réglez l’heure.
pour avancer
pour reculer
SET
SUR
EQ
1‚:‚‚
SET UP
3 Appuyez sur (4) (n).
SET
SUR
EQ
1‚:‚‚
SET UP
Les chiffres des minutes clignotent.
4 Réglez les minutes.
pour avancer
pour reculer
SET
SUR
EQ
1‚:‚8
SET UP
2 Appuyez sur (SHIFT).
SUR
EQ
1‚:‚8
L’horloge démarre.
Remarque
Si le contacteur POWER SELECT situé sur le fond de
l’appareil est réglé sur la position B, mettez d’abord
l’appareil sous tension et réglez ensuite l’horloge.
Si un CD se trouve déjà dans l’appareil,
appuyez plusieurs fois de suite sur (SOURCE)
jusqu’à ce que l’indication “CD” s’affiche.
Temps de lecture écoulé
F
Préparation/Lecteur CD
Numéro de la plage
Un CD se trouve déjà dans l’appareil
Remarque
Pour écouter un CD de 8 cm, utilisez l’adaptateur pour
CD single optionnel Sony (CSA-8).
Pour Appuyez sur
Arrêter la lecture 6 ou (OFF)
Ejecter le CD 6
Changement des paramètres
affichés
Chaque fois que vous appuyez sur (DSPL), les
paramètres changent selon la séquence
suivante:
Numéro de plage ˜ Horloge
5
Actual total number: Sony CDX-C810DSP (EFGI) 3-856-118-11 (2)
Page 36

Localisation d’une plage
SUR
EQ
PLAY MODE
INTRO OFF
CD
SUR
EQ
PLAY MODE
INTRO
INTRO ON
CD
SUR
EQ
PLAY MODE ENTER
TRACK
3 P1.‚1
CD
SUR
EQ
PLAY MODE ENTER
+ENTER+
P1
SUR
EQ
PLAY MODE ENTER
TRACK
2 P1.‚2
CD
déterminée
— Détecteur automatique de musique (AMS)
En cours de lecture, appuyez brièvement
sur l’un ou l’autre côté de (SEEK/AMS).
SEEK/AMS
Pour localiser les plages suivantes
Pour localiser les plages précédentes
Localisation d’un passage
déterminé sur une plage
— Recherche manuelle
En cours de lecture, appuyez sur l’un ou
l’autre côté de (SEEK/AMS) et maintenezle enfoncé. Relâchez la touche lorsque
vous avez trouvé le passage voulu.
SEEK/AMS
Pour chercher vers l’avant
Pour chercher vers l’arrière
Remarque
F
Si l’indication “
la fenêtre d’affichage, cela signifie que vous êtes arrivé au
début ou à la fin du disque et que vous ne pouvez pas aller
plus loin.
” ou “ ” apparaît dans
Lecture d’un CD dans
différents modes
Vous pouvez reproduire un CD dans
différents modes:
•INTRO (balayage des intros) vous permet de
reproduire les 10 premières secondes de
toutes les plages.
•REP (lecture répétée) répète la lecture de la
plage en cours.
•SHUF (lecture aléatoire) reproduit toutes les
plages dans un ordre quelconque.
1 Appuyez sur (SHIFT).
Chaque fois que vous appuyez sur (SHIFT),
seuls les paramètres que vous pouvez
sélectionner s’illuminent.
2 Appuyez plusieurs fois de suite sur (3)
(PLAY MODE) jusqu’à ce que le mode de
lecture voulu apparaisse.
Chaque fois que vous appuyez sur (3)
(PLAY MODE), les paramètres affichés
changent selon la séquence suivante:
INTRO n REP n SHUF n PGM n DSM SET
3 Appuyez sur (4) (n) pour sélectionner
“ON”.
La lecture démarre.
Pour revenir au mode de lecture normal
sélectionnez “OFF” à l’étape 3 ci-dessus.
Création d’un programme
— Mémoire de programmation CD
Vous pouvez reproduire les plages dans
l’ordre de votre choix en créant votre propre
programme de lecture. Vous pouvez créer
deux programmes: Programme 1 et
Programme 2, et sélectionner jusqu’à 12 plages
dans chaque programme. Vous pouvez
enregistrer ces programmes.
1 Appuyez sur (SHIFT) et ensuite sur (3)
(PLAY MODE) pendant deux secondes.
“P 1” indique que le Programme 1 est
sélectionné.
Pour sélectionner Programme 2, appuyez
plusieurs fois de suite sur (4) (n) jusqu’à
ce que l’indication “P 2” apparaisse.
2 Appuyez sur l’un ou l’autre côté de
(SEEK/AMS) pour sélectionner la plage de
votre choix.
SHIFT
SET UP PLAY MODE
12345
3 Appuyez brièvement sur (5) (ENTER).
µ
6
Actual total number: Sony CDX-C810DSP (EFGI) 3-856-118-11 (2)
Page 37

4 Pour introduire d’autres plages, répétez
les étapes 2 et 3.
5 Lorsque vous terminé la sélection des
plages, appuyez sur (3) (PLAY MODE)
pendant deux secondes.
Remarques
• L’indication “*Wait*” apparaît dans la fenêtre
d’affichage pendant que l’appareil lit les données.
• L’indication “*Mem Full*” apparaît dans la fenêtre
d’affichage si vous essayez d’introduire plus de 12 plages
dans un programme de lecture.
Reproduction d’un programme
mémorisé
Vous pouvez sélectionner:
•PGM 1 pour reproduire le Programme 1.
•PGM 2 pour reproduire le Programme 2.
•PGM 1+2 pour reproduire les Programmes 1
et 2.
Suppression de la totalité du
programme
1 Appuyez sur (SHIFT) et ensuite sur (3)
(PLAY MODE) pendant deux secondes.
CD
SUR
EQ
“P 1” indique que le Programme 1 est
sélectionné.
TRACK
7 P1.‚8
PLAY MODE ENTER
2 Appuyez plusieurs fois de suite sur (1)
(N) jusqu’à ce que l’indication “DEL”
apparaisse .
DEL
SUR
EQ
--PGM1--
PLAY MODE ENTER
Pour supprimer le Programme 2, appuyez
plusieurs fois de suite sur (4) (n) jusqu’à
ce que l’indication “PGM 2” apparaisse.
1 Appuyez sur (SHIFT).
2 Appuyez plusieurs fois de suite sur (3)
(PLAY MODE) jusqu’à ce que l’indication
“PGM” apparaisse.
3 Appuyez plusieurs fois de suite sur (4)
(n) jusqu’à ce que le programme voulu
apparaisse.
Reproduction du Programme 1
CD
SUR
EQ
PGM 1
PLAY MODE
Reproduction du Programme 2
CD
SUR
EQ
Reproduction des Programmes 1 et 2
CD
SUR
EQ
Lecture normale
CD
SUR
EQ
µ
PGM 2
PLAY MODE
µ
PGM 1+2
PLAY MODE
µ
PGM OFF
PLAY MODE
La lecture du programme démarre.
PGM
1
PGM
2
PGM
1+2
3 Appuyez sur (5) (ENTER) pendant deux
secondes.
P1
SUR
EQ
NO Data
PLAY MODE ENTER
Le programme est complètement effacé.
4 Lorsque vous avez terminé la procédure
de suppression de programmes, appuyez
sur (3) (PLAY MODE) pendant deux
secondes.
page suivante n
F
Lecteur CD
Pour revenir au mode de lecture normal,
sélectionnez “PGM OFF” à l’étape 3 ci-dessus.
Remarque
L’indication “NO Data” apparaît dans la fenêtre
d’affichage si aucune plage n’a été enregistrée dans le
programme.
Actual total number: Sony CDX-C810DSP (EFGI) 3-856-118-11 (2)
7
Page 38
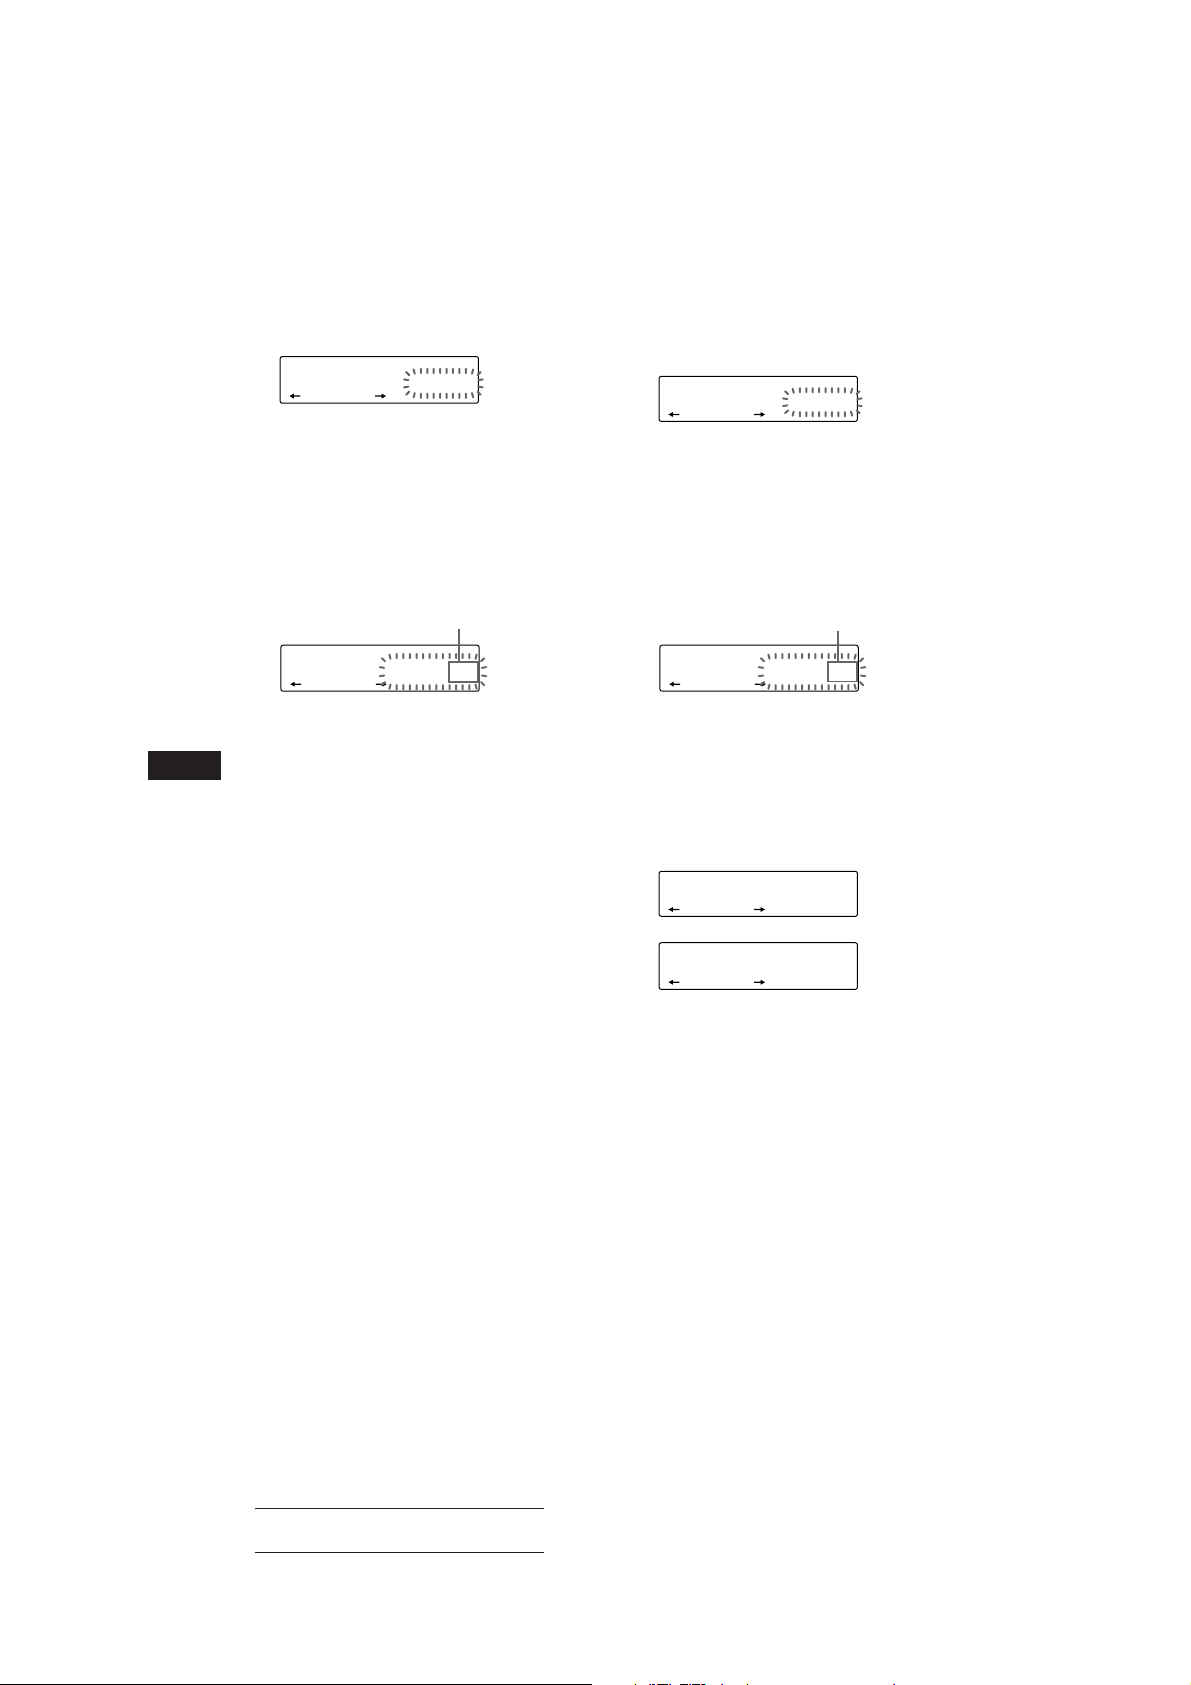
Ajouter des plages au programme
SUR
EQ
PLAY MODE ENTER
DISC
TRACK
- -- P1.‚6
DEL
SUR
EQ
PLAY MODE ENTER
TRACK
7 P1.‚6
CD
SUR
EQ
PLAY MODE ENTER
TRACK
7 P1.‚8
CD
1 Appuyez sur (SHIFT) et ensuite sur (3)
(PLAY MODE) pendant deux secondes.
CD
SUR
EQ
“P 1” indique que le Programme 1 est
sélectionné.
TRACK
4 P1.‚3
PLAY MODE ENTER
Pour sélectionner le Programme 2, appuyez
plusieurs fois de suite sur (4) (n) jusqu’à
ce que l’indication “P 2” s’apparaisse.
2 Appuyez sur (1) (N) ou (4) (n) pour
désigner le numéro de la cellule
d’enregistrement de plage dans laquelle
vous souhaitez introduire une plage.
Numéro de cellule de plage
Suppression de plages dans un
programme
1 Appuyez sur (SHIFT) et ensuite sur (3)
(PLAY MODE) pendant deux secondes.
“P 1” indique que le Programme 1 est
sélectionné.
Pour sélectionner le Programme 2, appuyez
plusieurs fois de suite sur (4) (n) jusqu’à
ce que l’indication “P 2” s’affiche.
2 Appuyez sur (1) (N) ou (4) (n) pour
sélectionner la plage que vous voulez
supprimer.
Numéro de cellule de plage
CD
SUR
EQ
TRACK
2 P1.‚2
PLAY MODE ENTER
3 Appuyez sur l’un ou l’autre côté de
(SEEK/AMS) pour sélectionner la plage à
F
insérer.
4 Appuyez brièvement sur (5) (ENTER)
pour introduire la plage.
La plage enregistrée sous ce numéro de
cellule et les plages suivantes se décalent.
Pour introduire d’autres plages dans le
programme, répétez les étapes 2 à 4.
Remarque
Lorsque les 12 cellules sont occupées, l’indication
“*Mem Full*” apparaît dans la fenêtre d’affichage et il
est impossible d’introduire d’autres plages.
5 Lorsque vous avez terminé la procédure
de sélection de plages, appuyez sur (3)
(PLAY MODE) pendant deux secondes.
CD
SUR
EQ
La plage enregistrée se trouve dans la cellule
d’enregistrement n° 6 du Programme 1.
TRACK
3 P1.‚6
PLAY MODE ENTER
3 Appuyez sur (5) (ENTER) pendant deux
secondes.
Lorsque vous supprimez une plage d’un
numéro de cellule d’enregistrement, les
plages suivantes se décalent de façon à
occuper l’espace libéré.
µ
4 Pour supprimer d’autres plages, répétez
les étapes 2 et 3.
5 Lorsque vous avez terminé la procédure
de suppression de plages, appuyez sur
(3) (PLAY MODE) pendant deux
secondes.
8
Actual total number: Sony CDX-C810DSP (EFGI) 3-856-118-11 (2)
Page 39

Radio
Mémorisation
automatique des stations
— Mémorisation du meilleur accord (BTM)
L’appareil sélectionne les stations de radio
émettant avec le signal le plus puissant et les
mémorise dans l’ordre de leur fréquence. Vous
pouvez mémoriser jusqu’à 10 stations dans
chaque bande (FM1, FM2, MW et LW/SW).
Attention
Si vous voulez syntoniser une station de radio
pendant que vous conduisez, utilisez la
fonction de mémorisation du meilleur accord
(BTM) de façon à prévenir tout risque
d’accident.
1 Appuyez plusieurs fois de suite sur
(SOURCE) pour sélectionner la bande de
fréquence voulue (FM1, FM2, MW ou
LW/SW).
2 Appuyez sur (SHIFT) et appuyez ensuite
sur (6) (BTM).
L’appareil mémorise les stations sous les
touches numériques dans l’ordre de leur
fréquence.
Remarques
• L’appareil ne mémorise pas les stations émettant avec de
faibles signaux. Si seulement quelques stations sont
captables, certaines touches numériques resteront
inutilisées.
• Si un numéro est indiqué dans la fenêtre d’affichage,
l’appareil commence la mémorisation des stations à
partir de la station affichée.
Mémorisation de stations
déterminées
Vous pouvez mémoriser jusqu’à 10 stations sur
chaque bande dans l’ordre de votre choix. (20
stations en FM1 et FM2, 10 stations en MW et
en LW/SW).
1 Appuyez plusieurs fois de suite sur
(SOURCE) pour sélectionner la bande de
fréquence voulue.
2 Appuyez sur l’un ou l’autre côté de
(SEEK/AMS) pour syntoniser la station
que vous voulez mémoriser sous une
touche numérique donnée.
3 Maintenez la touche numérique voulue
((1) à (10)) enfoncée pendant environ
deux secondes jusqu’à ce que vous
entendiez un bip sonore.
Le numéro de la touche numérique de
présélection apparaît dans la fenêtre
d’affichage.
Remarque
Si vous essayez de mémoriser une autre station sous une
touche numérique déjà utilisée, la station précédemment
mémorisée est supprimée.
Réception des stations
présélectionnées
1 Appuyez plusieurs fois de suite sur
(SOURCE) pour sélectionner la bande de
fréquence voulue.
2 Appuyez brièvement sur la touche
numérique ((1) à (10)) sous laquelle la
station voulue est mémorisée.
F
Lecteur CD/Radio
page suivante n
Actual total number: Sony CDX-C810DSP (EFGI) 3-856-118-11 (2)
9
Page 40

Si vous ne parvenez pas à
SUR
EQ
BBC 1 FM
FM1
syntoniser une station
présélectionnée
Appuyez brièvement sur l’un ou l’autre
côté de (SEEK/AMS) pour rechercher la
station (syntonisation automatique).
L’exploration s’arrête dès que l’appareil
capte une station. Appuyez plusieurs fois
de suite sur l’un ou l’autre côté de
(SEEK/AMS) jusqu’à ce que ce que vous
captiez la station voulue.
Remarque
Si la syntonisation automatique s’arrête trop fréquemment,
appuyez sur (SHIFT) et appuyez ensuite plusieurs fois de
suite sur (3) (PLAY MODE) jusqu’à ce que l’indication
“LOCAL” (mode de recherche locale) s’affiche. Appuyez
ensuite sur (4) (n) pour sélectionner “ON.”
Seules les stations émettant avec un signal relativement
puissant seront syntonisées.
RDS
Aperçu de la fonction RDS
Le système RDS (Radio Data System) est un
service de diffusion qui permet aux stations de
radio FM d’émettre des informations
numériques complémentaires en même temps
que le signal normal de leurs émissions
radiophoniques. Votre autoradio stéréo vous
offre de multiples possibilités, dont voici un
aperçu: resyntonisation automatique de la
même émission, écoute des messages de
radioguidage et localisation d’une station en
fonction du type d’émission.
Conseil
Si vous connaissez la fréquence de la station que vous
voulez écouter, appuyez sur l’un ou l’autre côté de
(SEEK/AMS) pendant deux secondes jusqu’à ce que la
fréquence voulue apparaisse (syntonisation manuelle).
F
Si la réception FM est faible
— Mode monaural
1 Appuyez sur (SHIFT) et appuyez ensuite
sur (3) (PLAY MODE) jusqu’à ce que
l’indication “MONO” apparaisse.
2 Appuyez plusieurs fois sur (4) (n)
jusqu’à ce que l’indication “MONO ON”
apparaisse.
La qualité sonore s’en trouve améliorée,
mais le son est diffusé en mode monaural
(l’indication “ST” disparaît).
Pour revenir au mode de lecture normal,
sélectionnez “MONO OFF” à l’étape 2 cidessus.
Changement des paramètres
affichés
Chaque fois que vous appuyez sur (DSPL), les
paramètres affichés alternent entre la
fréquence et l’heure.
Remarques
• Suivant le pays ou la région, toutes les fonctions RDS
peuvent ne pas être accessibles.
• Le RDS peut ne pas fonctionner correctement si le signal
de retransmission est faible ou si la station syntonisée ne
transmet pas de signaux RDS.
Affichage du nom de la
station
Le nom de la station captée apparaît dans la
fenêtre d’affichage.
Sélectionnez une station FM.
Lorsque vous syntonisez une station FM
qui retransmet des signaux RDS, le nom de
la station apparaît dans la fenêtre
d’affichage.
Remarque
L’indication “*” signifie que la station captée est de type
RDS.
Changement des paramètres
affichés
Chaque fois que vous appuyez sur (DSPL), les
paramètres changent selon la séquence
suivante:
z Fréquence z Horloge z Nom de la station
Remarque
L’indication “NO Name” apparaît si la station captée ne
retransmet pas de signaux RDS.
10
Actual total number: Sony CDX-C810DSP (EFGI) 3-856-118-11 (2)
Page 41

Resyntonisation
automatique de la même
émission
— Fréquences alternatives (AF)
La fonction de fréquences alternatives (AF)
sélectionne et resyntonise automatiquement la
station d’un même réseau de radiodiffusion
émettant avec le signal le plus puissant. Cette
fonction vous permet d’écouter la même
émission sans interruption pendant un long
trajet sans devoir resyntoniser la station
manuellement.
Changement automatique de fréquence
98,5 MHz
Emetteur
102,5 MHz
1 Sélectionnez une station FM.
2 Appuyez sur (AF/TA) jusqu’à ce que
l’indication “AF ON” apparaisse dans la
fenêtre d’affichage.
L’appareil entame la recherche d’une
station alternative émettant avec un signal
plus puissant dans le même réseau de
radiodiffusion.
Remarque
S’il n’y a pas de station alternative dans la région et si
vous ne devez pas rechercher une station alternative,
désactivez la fonction AF en appuyant sur (AF/TA)
jusqu’à ce que l’indication “AF TA OFF” s’affiche.
Changement des paramètres
affichés
Chaque fois que vous appuyez sur (AF/TA), les
paramètres affichés changent selon la séquence
suivante:
z AF ON z TA ON z AF TA ON*
AF TA OFF Z
* Sélectionnez ce paramètre pour activer les fonctions AF
et TA.
96,0 MHz
Remarques
• Si l’appareil ne trouve pas de station alternative sur le
même réseau, l’indication “NO AF” et le nom de la
station clignotent alternativement.
• Si le nom de service de la station clignote après avoir
activé une présélection, cela signifie qu’aucune fréquence
alternative n’est accessible et que l’appareil ne peut
capter les données PI (identification de programme) de la
station mémorisée. Appuyez sur (SEEK/AMS) lorsque le
nom de service de la station clignote (pendant environ
huit secondes) de façon à ce que l’appareil commence à
chercher une station identifiée par les mêmes données PI,
mais avec une autre fréquence (l’indication “PI seek”
apparaît et aucun son n’est diffusé). Si l’appareil ne
trouve toujours pas de station alternative, l’indication
“NO PI” apparaît et l’appareil revient à la station
présélectionnée de départ.
Ecoute d’une émission régionale
La fonction “REG ON” (écoute régionale
activée) de cet appareil vous permet de rester
syntonisé sur une émission régionale sans être
commuté sur une autre station régionale.
(Attention que vous devez activer la function
AF.) L’appareil est réglé par défaut sur “REG
ON”, mais vous pouvez appliquer la
procédure suivante pour désactiver cette
fonction.
Appuyez sur (SHIFT), puis sur (3) (PLAY
MODE) de manière répétée jusqu’à ce
que “REG OFF” apparaisse.
Attention que, si vous sélectionnez “REG
OFF”, il est possible que l’appareil passe
sur une autre station régionale du même
réseau de radiodiffusion.
Remarque
Cette fonction est inopérante au Royaume-Uni ainsi que
dans d’autres régions.
Fonction de liaison locale
(Royaume-Uni uniquement)
La fonction de liaison locale vous permet de
sélectionner d’autres stations locales de la
région où vous vous trouvez même si elles ne
sont pas mémorisées dans vos présélections.
1 Appuyez sur la touche de présélection
d’une station locale.
2 Appuyez à nouveau dans les cinq
secondes sur la touche de présélection
de cette station locale.
3 Répétez cette procédure jusqu’à ce que
vous captiez la station locale voulue.
F
Radio/RDS
Actual total number: Sony CDX-C810DSP (EFGI) 3-856-118-11 (2)
11
Page 42

Ecoute des messages de
radioguidage
Les messages de radioguidage (TA) et les
émission de radioguidage (TP) vous
permettent de syntoniser automatiquement
une station FM qui diffuse des messages de
radioguidage même lorsque vous écoutez
d’autres émissions.
Appuyez sur (AF/TA) jusqu’à ce que
l’indication “TA ON” ou “AF TA ON”
apparaisse.
L’appareil recherche alors des stations
d’information routière. L’indication “TP”
apparaît dans la fenêtre d’affichage lorsque
l’appareil capte une station émettant des
messages de radioguidage.
L’indication “TA” clignote lorsque les
messages de radioguidage commencent et
cessent lorsqu’ils se terminent.
Conseils
• Si vous appuyez sur (AF/TA) pendant la syntonisation
d’un message de radioguidage, il se peut que l’appareil
F
active la lecture d’un CD.
• Si les messages de radioguidage commencent alors que
vous êtes en train d’écouter une autre émission,
l’appareil commute automatiquement la diffusion des
messages de radioguidage et revient à l’émission de
départ lorsqu’ils se terminent.
Remarques
• L’indication “NO TP” clignote pendant cinq secondes si
la station captée ne diffuse pas de messages de
radioguidage. L’appareil recherche ensuite une station
qui diffuse des messages de radioguidage.
• Lorsque l’indication “EON” apparaît avec “TP” dans la
fenêtre d’affichage, la station en cours de réception utilise
les messages de radioguidage d’autres stations du même
réseau.
Pour désactiver le radioguidage en
cours
Appuyez brièvement sur (AF/TA).
Pour annuler la diffusion de tous les
messages de radioguidage, désactivez la
fonction en appuyant sur (AF/TA) jusqu’à
ce que l’indication “AF TA OFF”
apparaisse.
Présélection du volume pour les
messages de radioguidage
Vous pouvez présélectionner au préalable le
niveau du volume de diffusion des messages
de radioguidage de façon à ne manquer
aucune information. Dès que la diffusion d’un
message de radioguidage commence, le
volume est automatiquement réglé au niveau
présélectionné.
12
1 Sélectionnez le niveau de volume voulu.
2 Appuyez sur (AF/TA) pendant deux
secondes.
Un bip sonore retentit et le réglage est
mémorisé.
Réception de messages d’urgence
Si un message d’urgence est diffusé pendant
que vous écoutez la radio, le syntoniseur
commute automatiquement la diffusion du
message. Si vous écoutez une source autre que
la radio, les messages d’urgence sont diffusés
si vous avez réglé AF ou TA sur la position
ON. L’appareil commute alors
automatiquement la diffusion de ces messages,
quelle que soit la source que vous écoutiez à ce
moment précis.
Présélection des stations
RDS avec les données AF
et TA
Lorsque vous présélectionnez les stations RDS,
l’appareil mémorise les données de chaque
station ainsi que sa fréquence de telle sorte que
vous ne devez pas activer la fonction AF ou
TA chaque fois que vous syntonisez la station
présélectionnée. Vous pouvez sélectionner
différents réglages (AF, TA ou les deux) pour
une station présélectionnée déterminée ou
encore programmer le même réglage pour
toutes les stations présélectionnées.
Sélection du même réglage pour
toutes les stations
présélectionnées
1 Appuyez sur (SOURCE) pour sélectionner
une bande FM.
2 Appuyez plusieurs fois de suite sur
(AF/TA) pour sélectionner “AF ON”, “TA
ON” ou “AF TA ON” (pour les deux
fonctions AF et TA).
Attention que la sélection “AF TA OFF” ne
mémorise pas uniquement les stations RDS,
mais aussi des stations FM autres que RDS.
3 Appuyez sur (SHIFT) et ensuite sur (6)
(BTM).
Actual total number: Sony CDX-C810DSP (EFGI) 3-856-118-11 (2)
Page 43

Sélection de réglages différents
pour chaque station
présélectionnée
1 Sélectionnez une bande FM et syntonisez
la station voulue.
2 Appuyez plusieurs fois de suite sur
(AF/TA) pour sélectionner “AF ON”, “TA
ON” ou “AF TA ON” (pour les fonctions
AF et TA).
3 Appuyez sur la touche de présélection
voulue pendant deux secondes jusqu’à
ce qu’un bip sonore retentisse.
Répétez la procédure à partir de l’étape 1
pour la présélection d’autres stations.
Conseil
Si vous voulez changer la présélection AF et/ou le réglage
TA après avoir syntonisé la station présélectionnée, c’est
possible en activant/désactivant la fonction AF ou TA
.
Localisation d’une station
en fonction du type
d’émission
Vous pouvez localiser la station de votre choix
en sélectionnant l’un des types d’émission
mentionnés ci-dessous.
Remarque
Dans les pays et les régions où aucun signal EON n’est
diffusé, vous ne pouvez utiliser cette fonction que pour les
stations que vous avez déjà syntonisées une fois.
Types d’émission Affichage
Actualités NEWS
Dossiers d’actualité AFFAIRS
Informations INFO
Sports SPORT
Education EDUCATE
Théâtre DRAMA
Culture CULTURE
Science SCIENCE
Divers VARIED
Musique populaire POP M
Musique rock ROCK M
Musique de variété M.O.R. M
Types d’émission Affichage
Musique classique “légère” LIGHT M
Musique classique CLASSICS
Autres types de musique OTHER M
Non spécifié NONE
Remarque
Vous ne pouvez pas utiliser cette fonction dans certains
pays où aucun signal PTY (sélection du type d’émission)
n’est accessible.
1 Appuyez sur (LIST) en cours de
réception FM jusqu’à ce que l’indication
“PTY” apparaisse.
PTY
SUR
EQ
INFO
Le type de l’émission diffusée apparaît
dans la fenêtre d’affichage si la station
transmet des signaux PTY. L’indication
“- - - - -” apparaît si la station captée n’est
pas de type RDS ou si aucun signal RDS n’a
été capté.
2 Appuyez plusieurs fois de suite sur
(LIST) jusqu’à ce que le type d’émission
voulu s’affiche.
Les types d’émission apparaissent dans
l’ordre du tableau ci-dessus. Attention que
vous ne pouvez pas sélectionner le type
“NONE” (non spécifié) pour la recherche.
PTY
SUR
EQ
SPORT
3 Appuyez sur l’un ou l’autre côté de
(SEEK/AMS).
L’appareil entame la recherche d’une
station diffusant le type d’émission
sélectionné. Lorsque l’appareil capte une
telle émission, le type d’émission s’affiche à
nouveau pendant cinq secondes.
L’indication “NO” et le type d’émission
apparaissent alternativement pendant cinq
secondes si l’appareil ne peut trouver le
type d’émission sélectionné et revient à la
station précédente.
F
RDS
Actual total number: Sony CDX-C810DSP (EFGI) 3-856-118-11 (2)
13
Page 44

Réglage automatique de
SUR
EQ
Defeat
SUR
l’heure
Les données CT (heure) accompagnant la
transmission RDS assurent un réglage
automatique de l’heure.
1 Appuyez sur (SHIFT) et puis plusieurs
fois de suite sur (2) (SET UP) jusqu’à ce
que l’indication “CT” apparaisse.
SET
SUR
EQ
CT OFF
SET UP
2 Appuyez sur (4) (n) de manière répétée
jusqu’à ce que “CT ON” s’affiche.
L’heure est réglée.
SET
SUR
EQ
CT ON
SET UP
3 Appuyez sur (SHIFT) pour revenir à la
fenêtre d’affichage normale.
F
Pour annuler la fonction CT
Sélectionner “CT OFF” à l’étape 2 cidessus.
Remarques
• Il est possible que la fonction CT ne fonctionne pas même
si une station RDS est captée.
• Il peut y avoir une différence entre l’heure réglée par la
fonction CT et l’heure réelle.
DSP
Sélection d’un menu
d’effet spatial
Vous pouvez sélectionner le mode spatial qui
convient le mieux à la source audio
sélectionnée. Les modes suivants permettent
de simuler des champs sonores et d’intensifier
la restitution sonore de telle sorte que vous
avez l’impression d’assister à un concert en
direct.
Menu d’effet spatial
Defeat Son normal sans aucun effet
SUR
Stadium Concert en plein air dans un
stade
Disco Disco avec murs épais
Theater Cinéma
Church Eglise/chapelle avec beaucoup
de réverbération
Hall Salle de concert
Studio Studio d’enregistrement
1 Appuyez sur (SOURCE) pour sélectionner
une source (radio, CD ou MD).
2 Appuyez sur (SOUND) de manière
répétée jusqu’à ce que “SUR” s’affiche.
3 Appuyez sur (+) ou (–) pour
sélectionner le menu d’effet spatial
souhaité.
Les effets spatiaux apparaissent dans
l’ordre indiqué dans le menu ci-dessus.
Après trois secondes d’attente, la fenêtre
d’affichage reviend à l’affichage du mode
de lecture normal.
Réglage du niveau d’effet
1 Appuyez sur (SOURCE) pour sélectionner
une source (radio, CD ou MD).
14
Actual total number: Sony CDX-C810DSP (EFGI) 3-856-118-11 (2)
Page 45
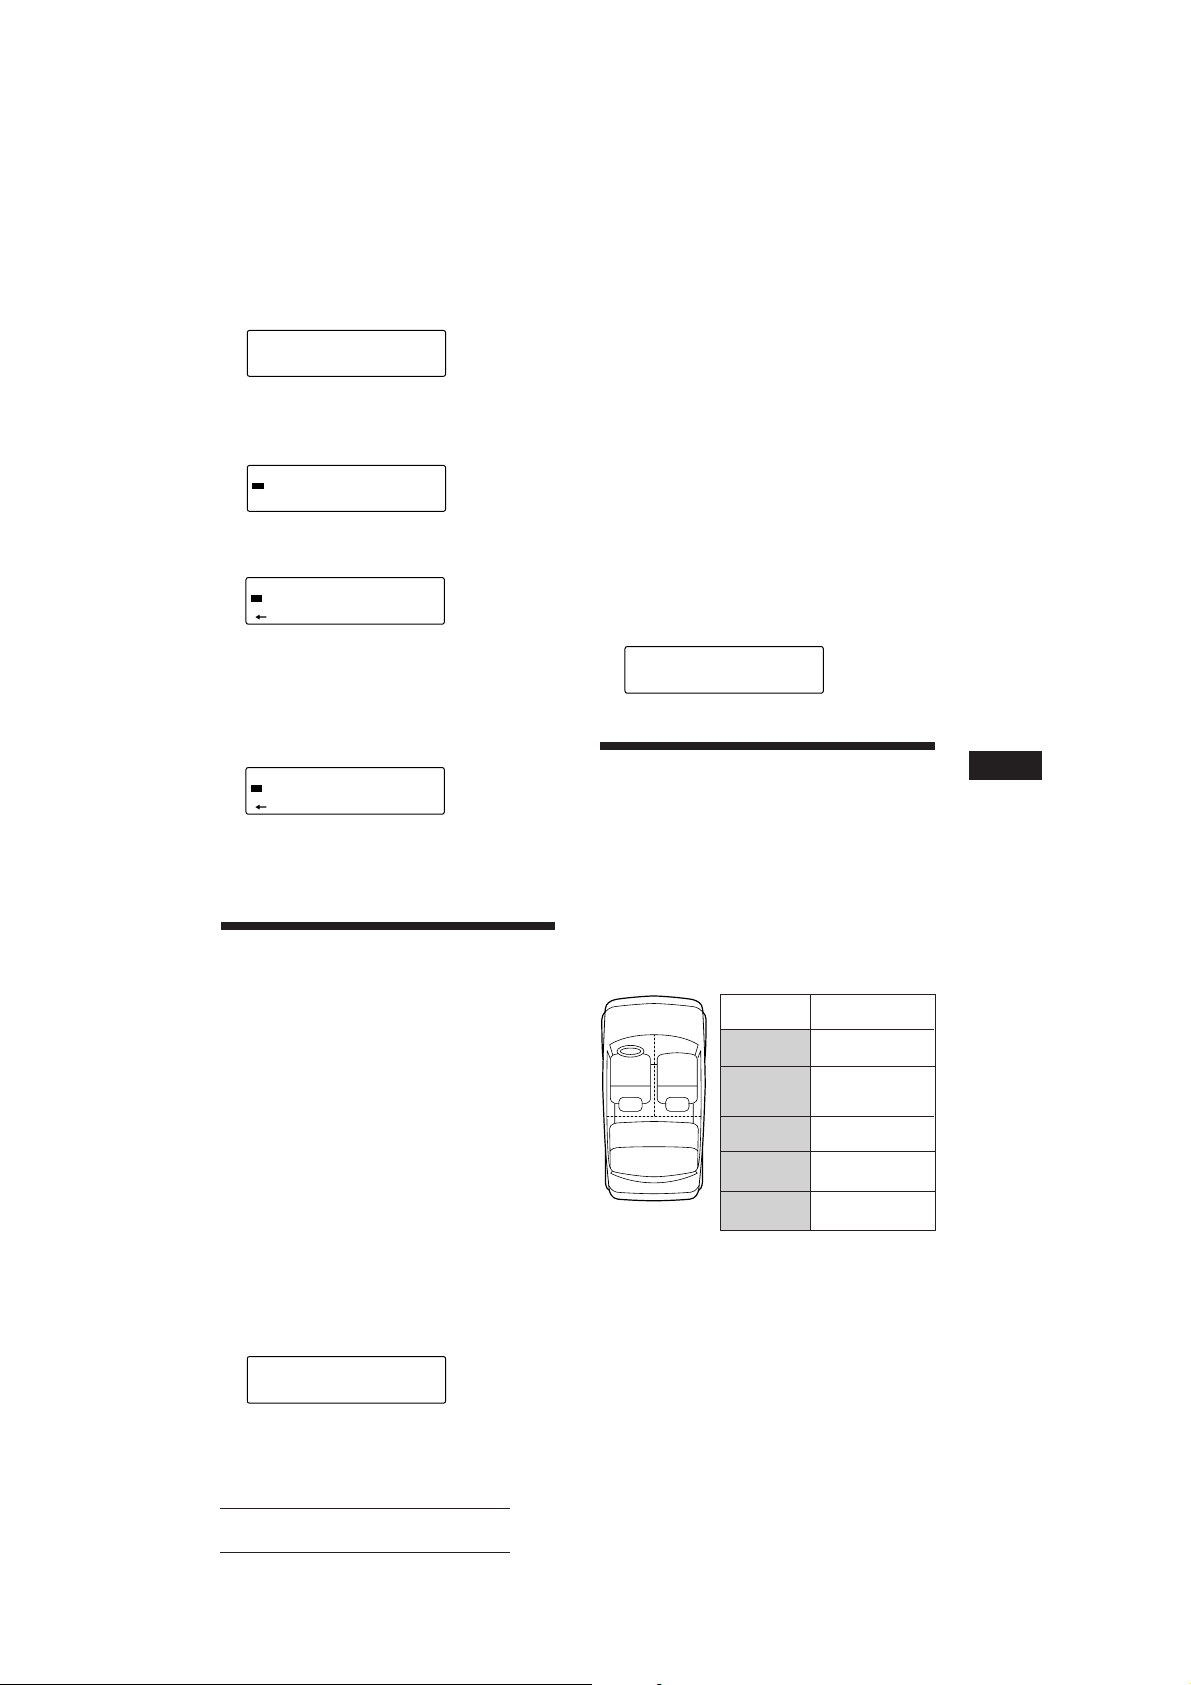
2 Appuyez sur (SOUND) de manière
repétée jusqu’à ce que “SUR” s’affiche.
SUR
SUR
EQ
Defeat
3 Appuyez plusieurs fois de suite sur (+)
ou (–) jusqu’à ce que le menu d’effet
spatial voulu apparaisse.
SUR
SUR
EQ
Hall
4 Appuyez sur (SOUND) pendant deux
secondes.
SUR
SUR
EQ
Effect 1
5 Appuyez sur (+) ou (–) pour régler
l’amplitude de l’effet.
Le niveau d’amplitude est réglable de 0 à
10.
Augmentez le niveau pour renforcer la
puissance de l’effet sélectionné.
SUR
SUR
EQ
Effect 8
6 Appuyez sur (SOUND) pendant deux
secondes.
Mémorisation d’un menu
d’effet spatial sur chaque
disque
— Mémoire de réglage du son des disques
(DSM) (changeur CD/MD avec fonction de
mémoire de programmation)
Lorsque vous avez enregistré le menu de
réglage d’effet spatial et les caractéristiques
sonores (graves, aiguës et extrêmes graves)
voulus sur les disques, vous pouvez exploiter
le même menu de réglage d’effet spatial
chaque fois que vous les écoutez. Vous pouvez
enregistrer de tels réglages sur 126 disques au
maximum.
1 Appuyez sur (SHIFT) et puis plusieurs
fois de suite sur (3) (PLAY MODE)
jusqu’à ce que l’indication “DSM SET”
apparaisse.
CD1
SUR
EQ
DSM SET
PLAY MODE ENTER
2 Appuyez sur (5) (ENTER).
Lorsque le réglage DSM est terminé, la
fenêtre d’affichage revient au mode de
lecture normal.
Modification de l’effet spatial
mémorisé
Activez la lecture du disque dont vous
souhaitez modifier l’effet spatial mémorisé et
appliquez la procédure de “Mémorisation d’un
menu d’effet spatial sur chaque disque.”
Suppression de l’effet spatial
mémorisé
Appuyez sur (5) (ENTER) pendant deux
secondes à l’étape 2 de la procédure de
“Mémorisation d’un menu d’effet spatial
sur chaque disque.”
DSM
SUR
EQ
+DELETE+
PLAY MODE ENTER
Sélection de la position
d’écoute
Vous pouvez sélectionner l’endroit où le son
diffusé par les haut-parleurs parvient aux
auditeurs.
L’appareil permet de simuler un champ sonore
naturel de telle façon que vous ayez
l’impression de vous trouver au centre du
champ sonore lorsque vous êtes assis dans
votre voiture.
Centre du
champ sonore
Réglage normal
(1 + 2 + 3)
Avant de
l’habitacle
(1 + 2)
Avant droit (2)
Avant gauche
(1)
Arrière de
l’habitacle (3)
page suivante n
3
Fenêtre
d’affichage
All
21
Front
Front-R
Front-L
Rear
F
RDS/DSP
15
Actual total number: Sony CDX-C810DSP (EFGI) 3-856-118-11 (2)
Page 46
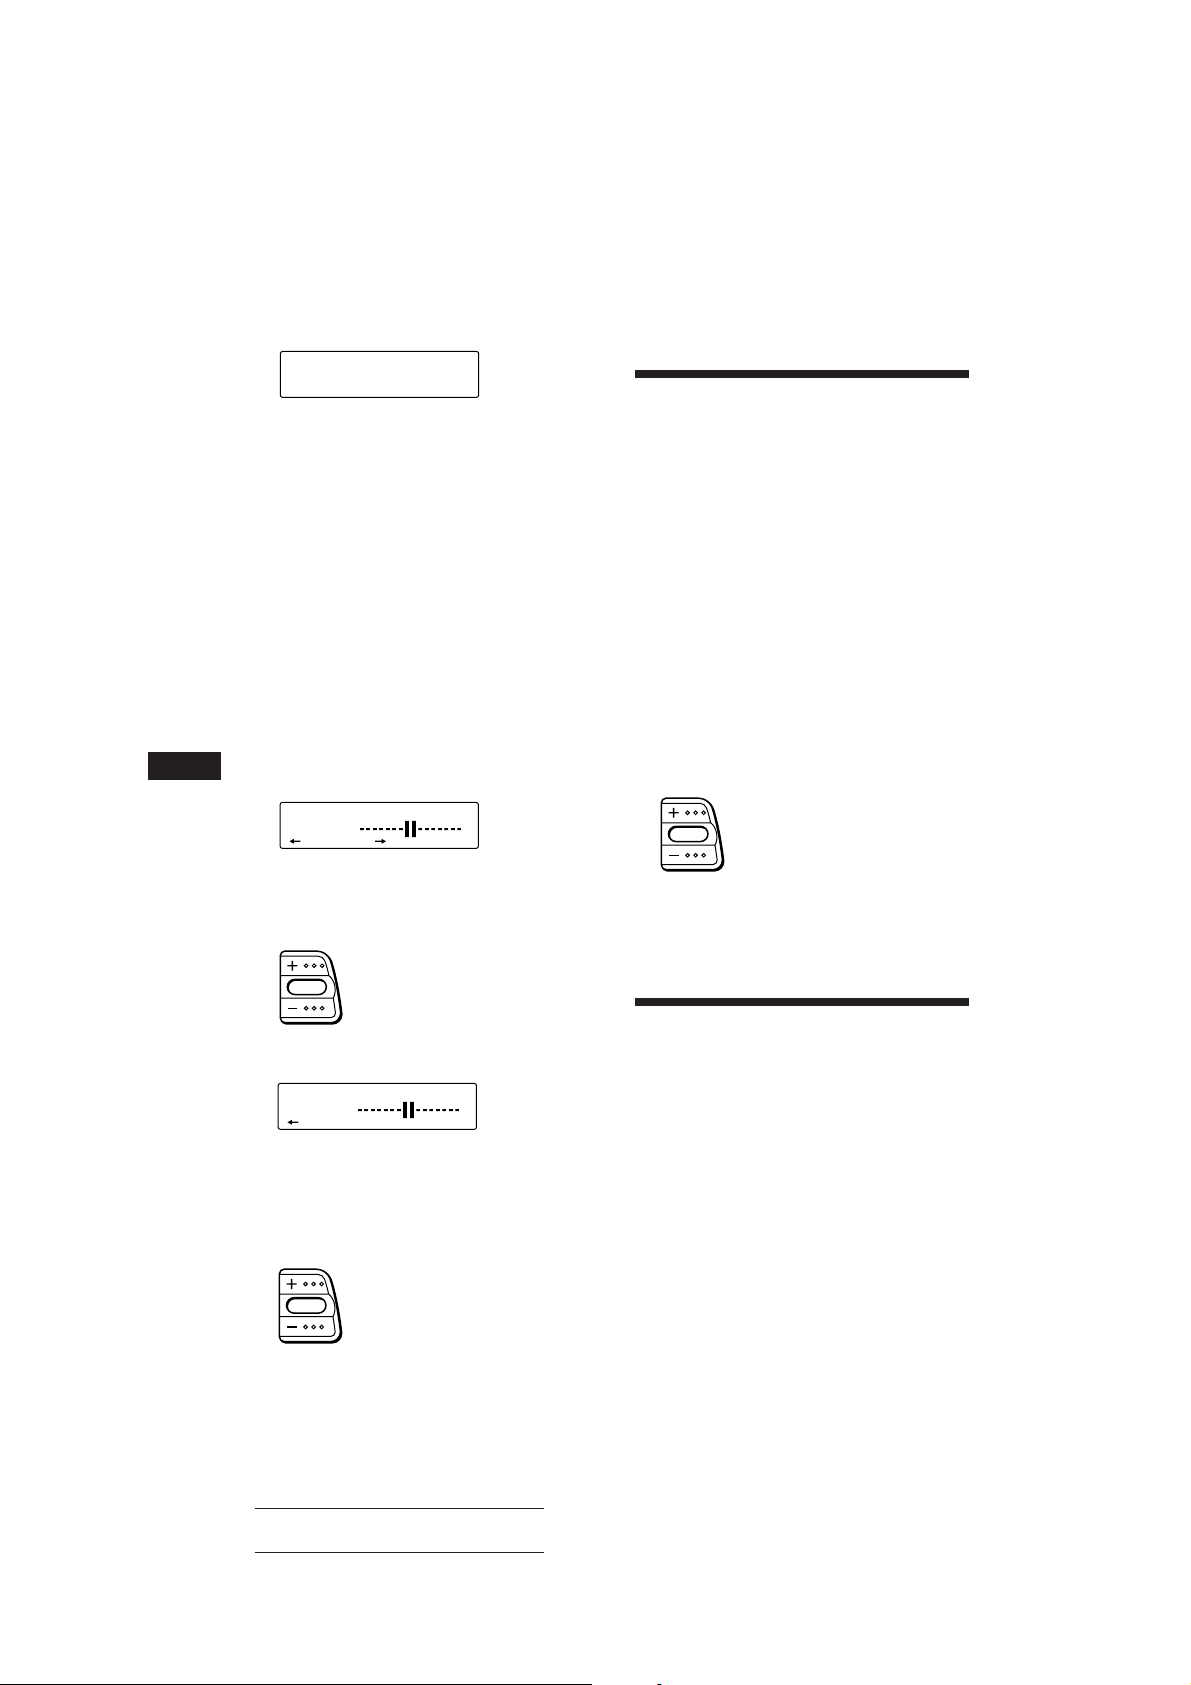
1 Appuyez brièvement sur (SOUND)
jusqu’à ce que l’indication “POS”
apparaisse.
POS
SUR
EQ
All
2 Appuyez sur (+) ou (–) pour sélectionner
la position d’écoute souhaitée.
Les positions d’écoute apparaissent dans
l’ordre indiqué dans le tableau ci-dessus.
Après trois secondes d’attente, la fenêtre
d’affichage reviend à l’affichage du mode
de lecture normal.
Réglage de la position d’écoute
1 Appuyez brièvement sur (SOUND)
jusqu’à ce que l’indication “POS”
apparaisse.
2 Appuyez sur (+) ou (–) pour
sélectionner la position d’écoute voulue.
7 Appuyez sur (SOUND) pendant deux
secondes.
Réglage de la balance
avant/arrière (FAD)
Normalement, lorsque le mode DSP est activé,
le volume du son émis par les haut-parleurs
arrière est automatiquement atténué pour
améliorer l’efficacité du réglage de la position
d’écoute. Si vous souhaitez augmenter le
volume des haut-parleurs arrière, réglez la
balance avant/arrière.
1 Suivez les étapes 1 à 3 de “Sélection d’un
menu d’effet spatial” à la page 14.
2 Appuyez plusieurs fois de suite sur
(SOUND) jusqu’à ce que l’indication
“FAD” apparaisse.
3 Appuyez sur (SOUND) pendant deux
F
secondes
POS
SUR
EQ
L R
4 Appuyez sur (+) ou (–) pour déplacer le
centre du champ sonore vers la gauche
ou vers la droite. Programmez ensuite le
centre du champ sonore.
Le centre se déplace vers la droite
(R).
Le centre se déplace vers la gauche
(L).
5 Appuyez sur (4) (n).
POS
SUR
EQ
R F
Pour revenir à la sélection de la position
d’écoute, appuyez sur (1) (N).
6 Appuyez sur (+) ou (–) pour déplacer le
centre du champ sonore vers l’avant ou
vers l’arrière.
Le centre se déplace vers l’avant (F).
Le centre se déplace vers l’arrière (R).
3 Appuyez sur (+) ou (–) pour régler la
balance avant/arrière.
Augmente le volume des hautparleurs arrière.
Diminue le volume des hautparleurs arrière.
Après cinq secondes d’attente, la fenêtre
d’affichage reviend à l’affichage du mode
de lecture normal.
Réglage du haut-parleur
d’extrême grave
1 Appuyez sur (SOURCE) pour sélectionner
une source (radio, CD ou MD).
2 Appuyez plusieurs fois de suite sur
(SOUND) jusqu’à ce que l’indication
“SUB” apparaisse.
3 Appuyez sur (+) ou (–) pour régler le
volume.
Après deux secondes, la fenêtre d’affichage
revient en mode d’affichage normal.
16
Actual total number: Sony CDX-C810DSP (EFGI) 3-856-118-11 (2)
Page 47
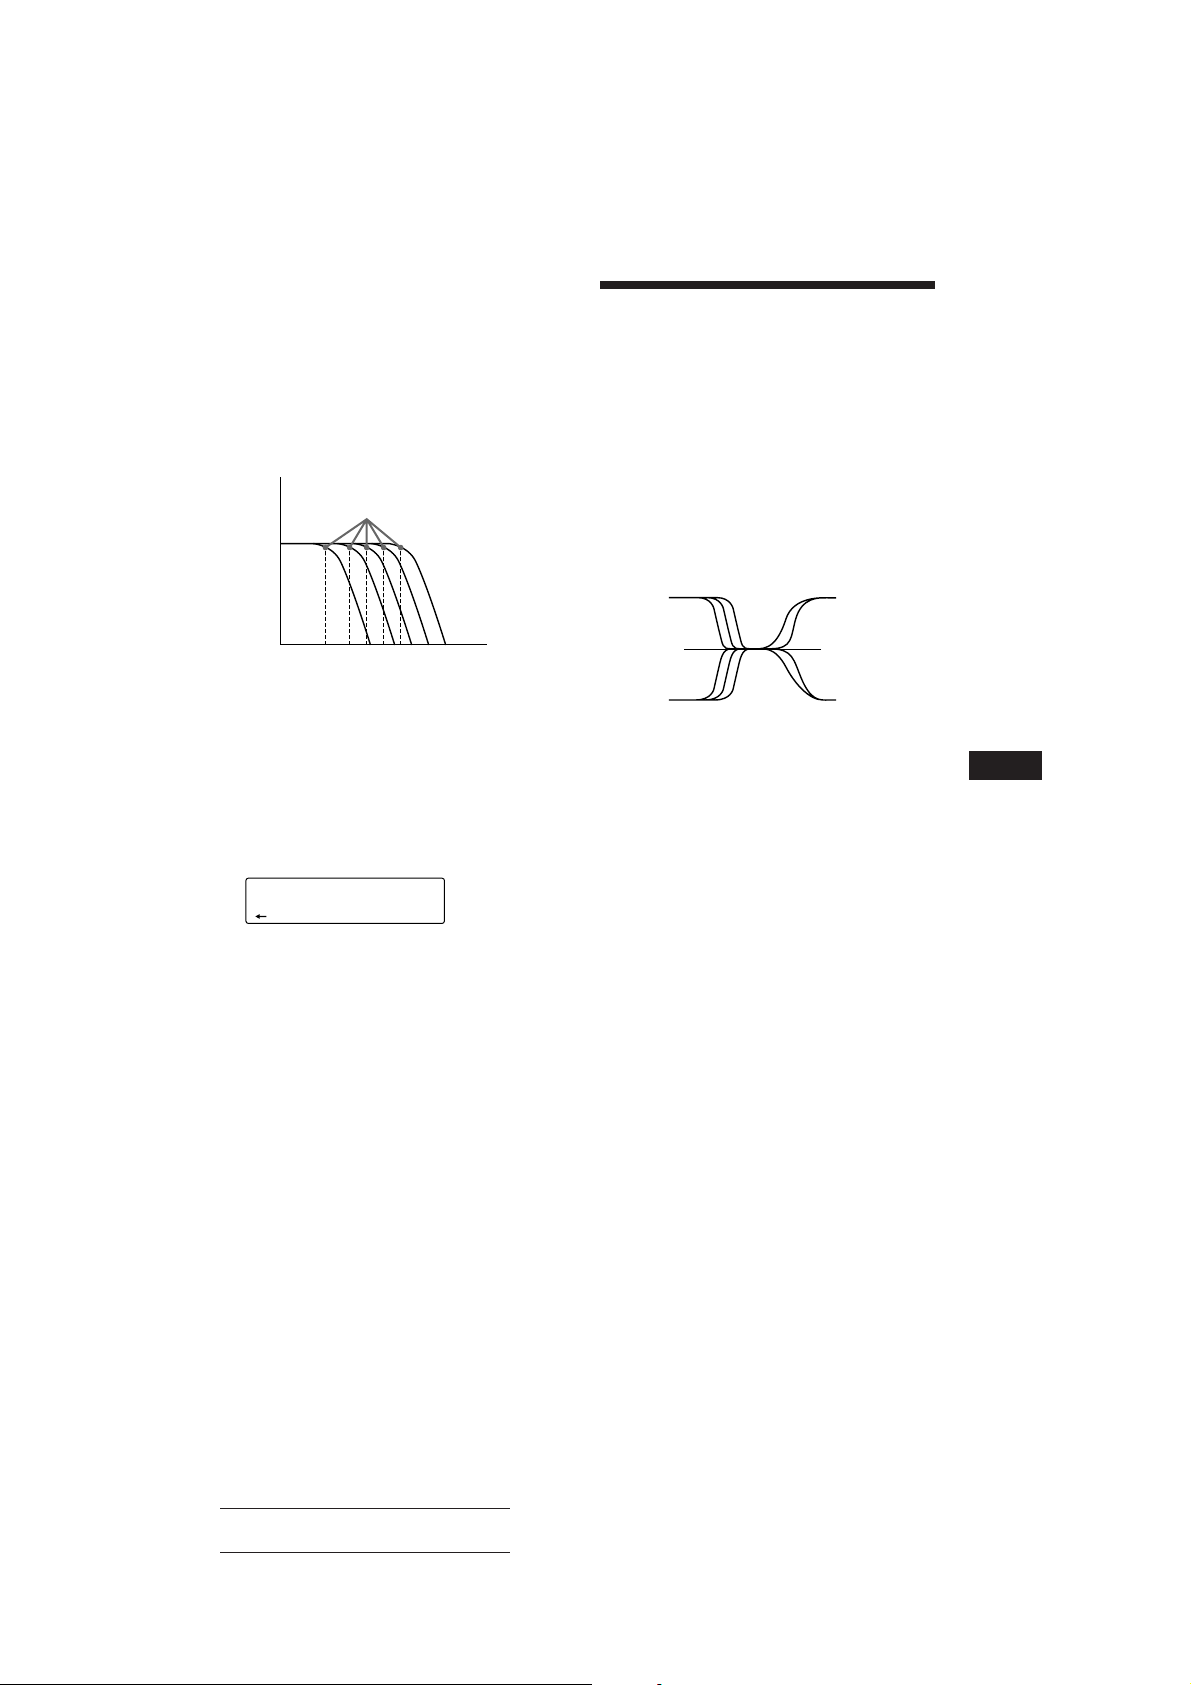
Réglage de la fréquence des
subwoofers
Suivant les spécifications des subwoofers
raccordés, vous pouvez supprimer les signaux
de haute et de moyenne fréquences transmis
aux subwoofers. Si vous activez la fréquence
de coupure (voir diagramme ci-dessous), les
subwoofers ne transmettront que des signaux
de basse fréquence de façon à obtenir une
image sonore plus claire.
Fréquence de coupure
Niveau
Réglage du volume des
graves et des aiguës
— Commande de tonalité numérique
Le CDX-C810DSP est doté d’un circuit intégré
DSP qui utilise le traitement numérique pour
créer des réglages plus clairs du volume des
graves et des aiguës qu’avec des circuits
analogiques.
La courbe de tonalité plus serrée de cet
appareil produit des tonalités d’une présence
et d’une efficacité plus marquées. Vous êtes
ainsi en mesure d’intensifier la présence du
fond musical avec le volume des graves et
d’isoler efficacement la partie vocale.
62 99 125 157 198
Fréquence (Hz)
1 Appuyez sur (SOURCE) pour sélectionner
une source (radio, CD ou MD).
2 Appuyez plusieurs fois de suite sur
(SOUND) jusqu’à ce que l’indication
“SUB” apparaisse.
3 Appuyez sur (SOUND) pendant deux
secondes.
SUB
SUR
EQ
125Hz
4 Appuyez sur (+) ou (–) pour
sélectionner la fréquence de coupure
voulue.
62 Hz n 99 Hz n 125 Hz* n 157 Hz n 198 Hz
* Fréquence par défaut
5 Appuyez sur (SOUND) pendant deux
secondes.
Pour régler le volume du haut-parleur
d’extrême grave, appuyez sur (1) (N).
Fréquence (Hz)
1 Appuyez sur (SOURCE) pour sélectionner
une source (radio, CD ou MD).
2 Appuyez sur (SOUND) de manière
répétée jusqu’à ce que “BAS” ou “TRE”
apparaisse.
3 Appuyez sur (+) ou (–) pour régler le
volume.
Après trois secondes d’attente, la fenêtre
d’affichage revient en mode de lecture
normal.
Réglage de la fréquence de
basculement
Vous pouvez régler la fréquence de
basculement des graves et des aiguës.
1 Appuyez sur (SOURCE) pour sélectionner
une source (radio, CD ou MD).
2 Appuyez sur (SOUND) de manière
répétée jusqu’à ce que “BAS” ou “TRE”
apparaisse.
F
DSP
page suivante n
Actual total number: Sony CDX-C810DSP (EFGI) 3-856-118-11 (2)
17
Page 48

3 Appuyez sur (SOUND) pendant deux
secondes.
Mode de réglage des graves
BAS
SUR
EQ
157Hz
Autres fonctions
Mode de réglage des aiguës
TRE
SUR
EQ
7.1kHz
4 Appuyez sur (+) ou (–) pour
sélectionner la fréquence de
basculement.
Les fréquences de basculement changent
selon la séquence suivante:
Graves:
125 Hz n 157 Hz* n 198 Hz
Aiguës:
5,0 kHz n 7,1 kHz *
* Fréquence par défaut
5 Appuyez sur (SOUND) pendant deux
secondes:
F
Pour régler le volume des graves et des
aiguës, appuyez sur(1) (N).
Ecoute de chaque source
programme avec le mode
spatial programmé
— Mémoire de réglage sonore de source
Vous pouvez toujours écouter une source
déterminée avec les mêmes réglages de menu
d’effet spatial et des caractéristiques sonores
(graves, aiguës et extrêmes graves), même
après avoir changé la source de programme ou
mis l’appareil hors et puis à nouveau sous
tension.
Utilisation du satellite de
télécommande
Le satellite de télécommande fonctionne en
appuyant sur les touches et/ou en faisant
tourner les commandes.
Le satellite de télécommande vous permet
également de commander le changeur CD ou
MD en option.
En appuyant sur la touche (la
touche SOURCE)
(SOURCE)
Chaque fois que vous appuyez sur
(SOURCE), la source change comme suit:
FM1 n FM2 n MW n LW (SW) n CD1 n
CD2 n MD1 n MD2
Conseil
Lorsque le sélecteur POWER SELECT est réglé sur la
position B, vous pouvez mettre l’appareil sous tension en
appuyant sur (SOURCE) du satellite de télécommande.
En faisant tourner la commande (la
commande SEEK/AMS)
18
Faites tourner la commande
momentanément et relâchez-la pour:
• Repérer une plage spécifique sur une
cassette ou sur un disque. Faites tourner
et maintenez la commande pour repérer
un point spécifique dans une plage, puis
relâchez-la pour commencer la lecture.
Actual total number: Sony CDX-C810DSP (EFGI) 3-856-118-11 (2)
Page 49

• Syntoniser automatiquement les stations
de radio. Faites tourner et maintenez la
commande pour accorder la station
spécifique.
En faisant tourner la commande
tout en appuyant dessus (la
commande PRESET/DISC)
Faites tourner la commande tout en
appuyant dessus pour:
• Recevoir les stations mémorisées sur les
boutons de présélection.
• Changer le disque.
Autres opérations
Faites tourner la commande
VOL pour régler le volume.
Appuyez sur (DSPL) pour changer les
paramètres affichés.
Appuyez sur (MUTE)
pour mettre le son
en sourdine.
OFF
Appuyez sur
(OFF) pour
éteindre
l’appareil.
Appuyez sur
(SOUND) pour
régler le
volume et le
menu d’effet
spatial.
Si vous devez monter le satellite de
télécommande à droite de la colonne de
direction, vous pouvez inverser le sens de
fonctionnement des commandes.
Appuyez sur (DSPL) pendant deux
secondes tout en maintenant la
commande VOL enfoncée.
Conseil
Vous pouvez contrôler le sens de fonctionnement des
commandes de cet appareil (page 20) .
Réglage des
caractéristiques du son
Vous pouvez régler les graves, les aiguës ainsi
que la balance gauche-droite et la balance
avant-arrière. Chaque source peut mémoriser
les niveaux de graves et d’aiguës.
1 Sélectionnez le paramètre que vous
voulez régler en appuyant plusieurs fois
de suite sur (SOUND).
VOL (volume) n SUR (Menu déffet spatal)
n POS (position d’écoute) n SUB (niveau
de sortie secondaire) n BAS* (graves) n
TRE* (aiguës) n BAL (balance gauchedroite) n FAD* (balance avant-arrière)
* Vous ne pouvez pas régler le niveau de sortie
secondaire (SUB).
F
DSP/Autres fonctions
Appuyez sur (LIST) pour
afficher les noms mémorisés.
Modification du sens de
fonctionnement
Le sens de fonctionnement des commandes est
réglé par défaut comme indiqué dans
l’illustration ci-dessous.
Pour augmenter
Pour diminuer
2 Réglez le paramètre sélectionné en
appuyant sur (+) ou (–).
Réglez le paramètre au maximum trois
secondes après l’avoir sélectionné. (Après
trois secondes, la touche sert de touche de
réglage du volume.)
Actual total number: Sony CDX-C810DSP (EFGI) 3-856-118-11 (2)
19
Page 50

Coupure du son
Appuyez sur (MUTE).
L’indication “MUTE ON” clignote.
Pour restaurer le niveau précédent du volume,
appuyez à nouveau sur (MUTE).
Appareils optionnels
Changeur CD/MD
Vous pouvez commander jusqu’à 10
changeurs de CD et changeur de MD avec cet
appareil.
Modification des réglages
du son et de l’affichage
Vous pouvez régler:
• AMBER/GREEN pour changer la couleur
d’illumination en ambre ou en vert.
• BEEP pour activer ou désactiver le bip sonore.
• DIMMER (gradateur) pour régler l’intensité
lumineuse de la fenêtre d’affichage.
• D.INFO (double information) pour afficher
simultanément l’horloge et le mode de
lecture (ON) ou pour afficher
alternativement ces informations (OFF).
• LOUD (correction physiologique) pour
exploiter les graves et les aiguës même à
F
faible volume. Les graves et les aiguës sont
renforcées.
• RM (satellite de télécommande) pour
inverser le sens de fonctionnement des
commandes du satellite.
— Sélectionnez “NORM” pour utiliser le
satellite de télécommande avec le sens
de fonctionnement des commandes par
défaut.
— “REV” si vous montez le satellite de
télécommande à la droite de la colonne
de direction.
1 Appuyez sur (SHIFT) et appuyez ensuite
sur (2) (SET UP).
2 Appuyez plusieurs fois de suite sur (2)
(SET UP) jusqu’à ce que le mode de
réglage voulu apparaisse.
Chaque fois que vous appuyez sur (2)
(SET UP), les paramètres changent selon la
séquence suivante:
CLOCK n AMBER/GREEN n BEEP n DIMMER
n D.INFO* n LOUD* n RM
* Si vous n’avez pas syntonisé la station ou s’il n’y a
aucun CD/MD en cours de lecture, ces paramètres
ne s’affichent pas.
Lecture d’un CD ou d’un MD
Appuyez sur (SOURCE) jusqu’à ce que le
changeur voulu apparaisse.
La lecture CD/MD démarre.
Si un changeur CD ou MD est raccordé, toutes
les plages sont reproduites depuis le début.
Changement de l’affichage
Chaque fois que vous appuyez sur (DSPL) en
cours de lecture CD/MD, l’affichage change
selon la séquence suivante:
Temps de lecture écoulé
*1Si vous n’avez pas attribué d’identification personnalisée
au CD, l’indication “NO Name” apparaît dans la
fenêtre d’affichage. Si aucun titre n’a été préenregistré
pour le MD, l’indication “NO D.Name” apparaît dans
la fenêtre d’affichage.
2
Si aucun titre n’a été préenregistré pour la plage
*
sélectionnée, l’indication “NO T.Name” apparaît dans
la fenêtre d’affichage pendant une seconde.
3
Si la fonction de double information (D.INFO) est
*
activée, l’horloge n’apparaît pas dans la fenêtre
d’affichage.
Conseil
Si le titre du MD est trop long, vous pouvez le faire défiler
dans la fenêtre d’affichage en appuyant sur (SHIFT) et
ensuite sur (1) (N).
$
$
Titre du disque*
$
Titre de la plage*
$
Horloge*
3
1
2
3 Appuyez sur (4) (n) pour sélectionner
le réglage voulu (par ex.: ON ou OFF).
4 Appuyez sur (SHIFT).
Lorsque le réglage de mode est terminé, le
20
mode de lecture normal s’affiche.
Actual total number: Sony CDX-C810DSP (EFGI) 3-856-118-11 (2)
Page 51

Défilement automatique du titre
d’un disque — Défilement automatique
Lorsque vous appuyez sur (DSPL), la fonction
de défilement automatique fait défiler
automatiquement le titre d’un MD ou d’une
plage s’il comporte plus de 10 caractères.
1 Appuyez sur (SHIFT) et appuyez ensuite
plusieurs fois sur (2) (SET UP) jusqu’à ce
que l’indication “A.SCRL” apparaisse.
Localisation d’un disque par le
numéro de disque
— Sélection directe de disque
Appuyez sur la touche numérique
correspondant au numéro du disque
voulu.
La lecture du disque en question qui se
trouve dans le changeur sélectionné
commence.
2 Appuyez sur (4) (n) pour sélectionner
“A.SCRL ON”.
Pour désactiver la fonction de défilement
automatique, sélectionnez “A.SCRL OFF” à
l’étape 2 ci-dessus.
Affichage de la date
d’enregistrement du MD sélectionné
Appuyez sur (DSPL) pendant deux
secondes pendant la lecture du MD.
La date d’enregistrement de la plage
s’affiche pendant environ trois secondes.
Localisation d’une plage
déterminée
— Détecteur automatique de musique (AMS)
En cours de lecture, appuyez une fois sur
l’un ou l’autre côté de (SEEK/AMS) pour
chaque plage que vous voulez sauter.
SEEK/AMS
Pour localiser les plages suivantes
Pour localiser les plages précédentes
Localisation d’un passage
déterminé sur une plage
— Recherche manuelle
En cours de lecture, appuyez sur l’un ou
l’autre côté de (SEEK/AMS) et maintenezle enfoncé. Relâchez la touche lorsque
vous avez trouvé le passage voulu.
SEEK/AMS
Pour chercher vers l’avant
Pour chercher vers l’arrière
Exploration des plages
— Balayage des intros
Vous pouvez reproduire les 10 premières
secondes de toutes les plages du disque
sélectionné.
1 En cours de lecture, appuyez d’abord sur
(SHIFT) ensuite plusieurs fois de suite sur
(3) (PLAY MODE) jusqu’à ce que
l’indication “INTRO” apparaisse.
2 Appuyez sur (4) (n) pour sélectionner
“INTRO ON”.
La balayage des intros démarre.
Pour revenir au mode de lecture normal,
sélectionnez “INTRO OFF” à l’étape 2 cidessus.
Lecture de plages répétée
— Lecture répétée
Vous pouvez sélectionner:
• REP 1 pour répéter une plage.
• REP 2 pour répéter un disque.
• REP 3 pour répéter tous les disques du
changeurs sélectionné.
1 En cours de lecture, appuyez d’abord sur
(SHIFT) ensuite plusieurs fois sur (3)
(PLAY MODE) jusqu’à ce que l’indication
“REP” apparaisse.
2 Appuyez plusieurs fois de suite sur (4)
(n) jusqu’à ce que l’indication voulue
apparaisse.
z REP 1 z REP 2 z REP 3
REP OFF Z
La lecture répétée démarre.
F
Autres fonctions/Changeur CD/MD
Pour revenir au mode de lecture normal,
sélectionnez “REP OFF” à l’étape 2 ci- dessus.
Actual total number: Sony CDX-C810DSP (EFGI) 3-856-118-11 (2)
21
Page 52

Lecture de plages dans un
SUR
EQ
PLAY MODE ENTER
+ENTER+
P1
SUR
EQ
PLAY MODE
DISC
TRACK
3 2 P1.‚2
CD2
ordre quelconque
— Lecture aléatoire
Vous pouvez sélectionner:
• SHUF 1 pour reproduire les plages du disque
sélectionné dans un ordre aléatoire.
• SHUF 2 pour reproduire les plages du
changeur sélectionné dans un ordre aléatoire.
• SHUF 3 pour reproduire toutes les plages
dans un ordre aléatoire.
1 En cours de lecture, appuyez d’abord sur
(SHIFT) ensuite plusieurs fois de suite sur
(3) (PLAY MODE) jusqu’à ce que
l’indication “SHUF” apparaisse.
2 Appuyez plusieurs fois de suite sur (4)
(n) jusqu’à ce que l’indication voulue
apparaisse.
z SHUF 1 z SHUF 2 z SHUF 3
SHUF OFF Z
F
La lecture aléatoire démarre.
Pour revenir au mode de lecture normal,
sélectionnez “SHUF OFF” à l’étape 2 cidessus.
Si vous avez attribué un titre au disque, le
mode de lecture de bloc apparaît. Appuyez
sur (3) (PLAY MODE) de façon à ce que
l’indication “P 1” s’affiche au-dessus.
Pour selectionner le Programme 2, appuyez
plusieurs fois de suite sur (4) (n) jusqu’à
ce que l’indication “P 2” s’affiche.
2 Sélectionnez la plage de votre choix.
1 Appuyez plusieurs fois de suite sur
(SOURCE) pour sélectionner le
changeur.
2 Appuyez sur (SHIFT) et ensuite sur
une touche numérique pour
sélectionner le disque.
3 Appuyez sur (SHIFT).
4 Appuyez sur l’un ou l’autre côté de
(SEEK/AMS) pour sélectionner la
plage.
3 Appuyez brièvement sur (5) (ENTER).
µ
Création d’un programme
— Mémoire de programmation CD
(changeur de CD avec fonction de mémoire
de programmation)
Vous pouvez reproduire les plages dans
l’ordre de votre choix en créant votre propre
programme de lecture. Vous pouvez créer
deux programmes: Programme 1 et
Programme 2, et sélectionner jusqu’à 12 plages
dans chaque programme. Vous pouvez
enregistrer ces programmes dans la mémoire.
1 Appuyez sur (SHIFT) et ensuite sur (3)
(PLAY MODE) pendant deux secondes.
Mode de lecture programmée
CD2
“P 1” indique que le Programme 1 est
sélectionné.
DISC
SUR
EQ
2 3 P1.‚1
PLAY MODE ENTER
TRACK
22
4 Pour introduire d’autres plages, répétez
les étapes 2 et 3.
5 Lorsque vous terminé la procédure de
sélection de plages, appuyez sur (3)
(PLAY MODE) pendant deux secondes.
Remarques
• L’indication “*Wait*” apparaît dans la fenêtre
d’affichage si les données de la plage introduite n’ont pas
encore été chargées dans la mémoire ou si un disque n’a
pas encore été introduit dans l’appareil.
• L’indication “*Mem Full*” apparaît dans la fenêtre
d’affichage si vous essayez d’introduire plus de 12 plages
à la fois dans un programme de lecture.
Reproduction d’un programme
mémorisé
Une modification de l’ordre des disques dans
le changeur n’affecte pas lecture programmée.
Vous pouvez sélectionner:
•PGM 1 pour reproduire le Programme 1.
•PGM 2 pour reproduire le Programme 2.
•PGM 1+2 pour reproduire les Programmes 1
et 2.
Actual total number: Sony CDX-C810DSP (EFGI) 3-856-118-11 (2)
Page 53
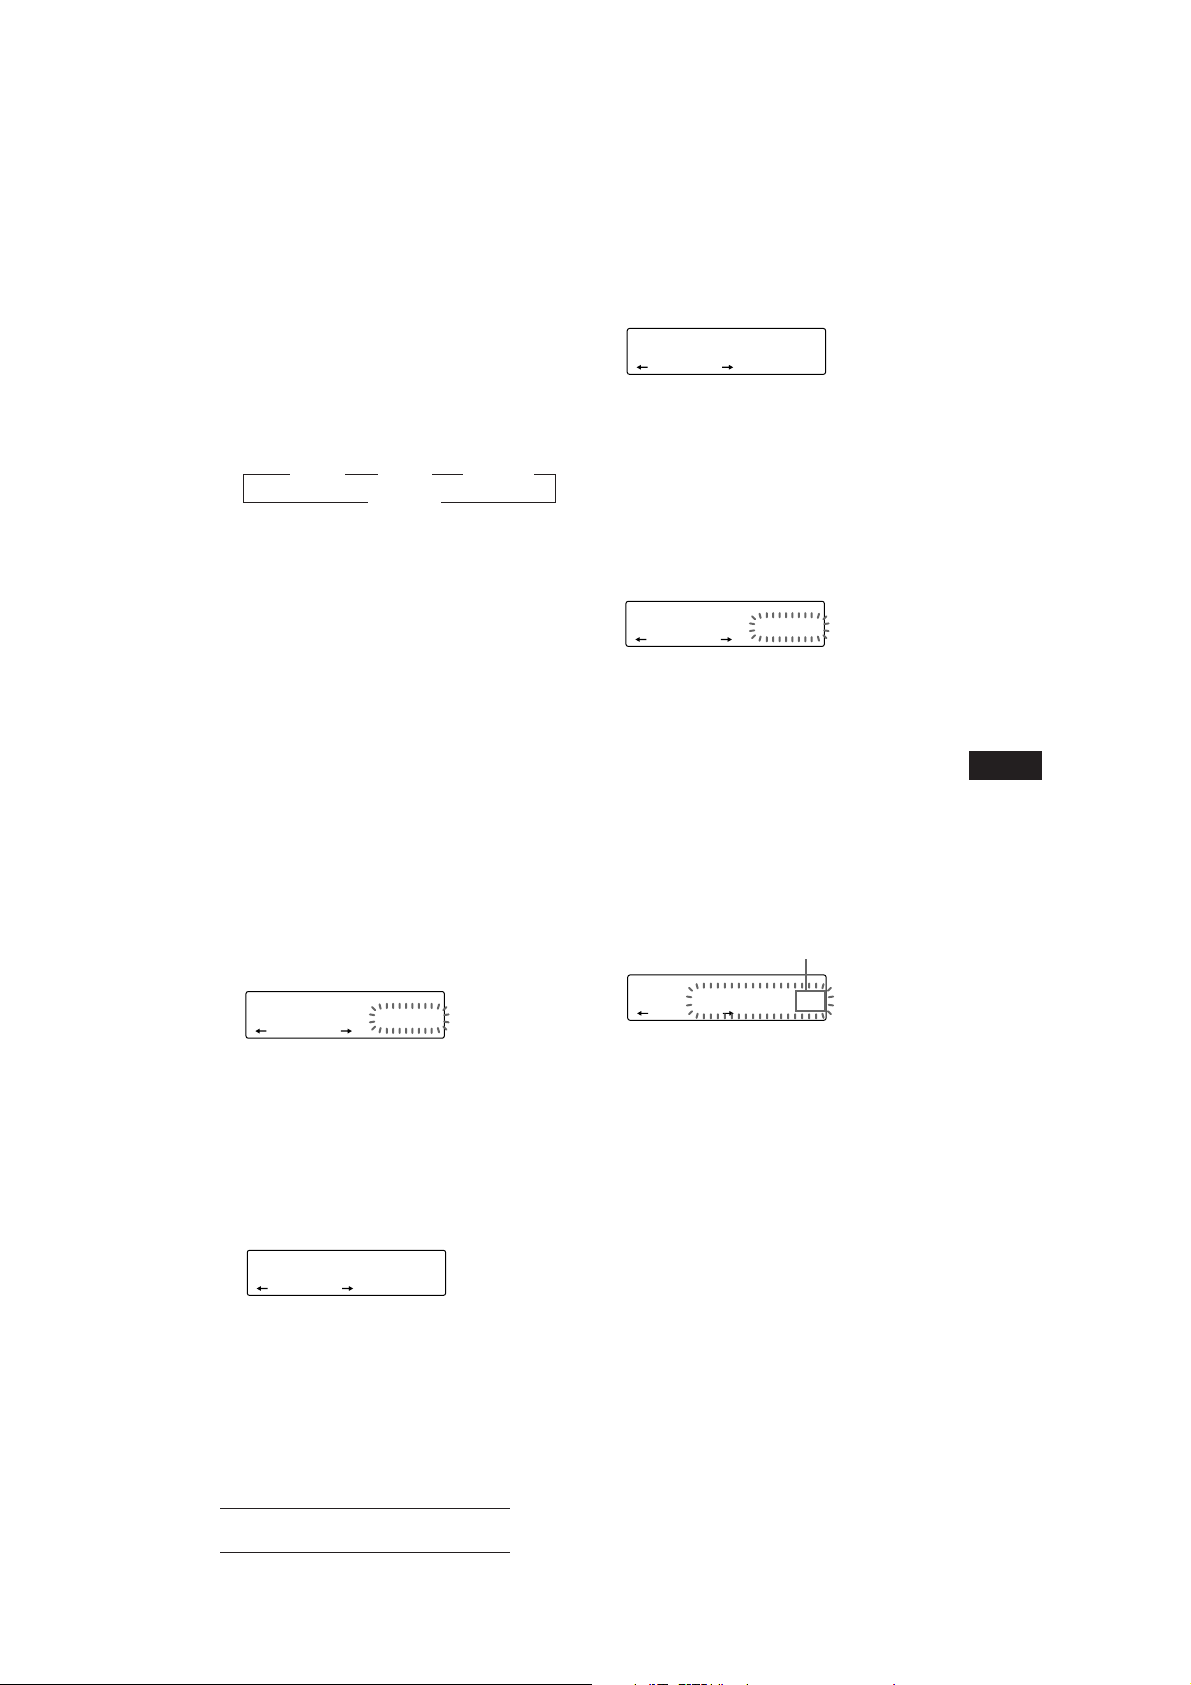
1 Appuyez sur (SHIFT).
2 Appuyez plusieurs fois sur (3) (PLAY
MODE) jusqu’à ce que l’indication “PGM”
apparaisse.
3 Appuyez plusieurs fois de suite sur (4)
(n) jusqu’à ce que le programme voulu
apparaisse.
z PGM 1 z PGM 2 z PGM 1+2
PGM OFF Z
La lecture programmée démarre.
Pour revenir au mode de lecture normal,
sélectionnez “PGM OFF” à l’étape 3.
Remarques
• Si vous appuyez sur une touche numérique pendant la
lecture d’une mémoire de programmation, la lecture de
mémoire de programmation est interrompue et la lecture
du disque sélectionné démarre.
• L’indication “NO Data” apparaît dans la fenêtre
d’affichage si aucune plage n’a été enregistrée dans le
programme.
• Si une plage enregistrée dans la mémoire de
programmation ne figure pas dans le magasin à disques,
cette plage sera omise.
• Si le magasin à disques ne contient aucune plages
enregistrées dans la mémoire de programmation ou si les
données relatives aux plages enregistrées dans la
mémoire de programmation n’ont pas encore été
chargées, l’indication “Not Ready” s’affiche.
Suppression de la totalité du
programme
1 Appuyez sur (SHIFT) et ensuite sur (3)
(PLAY MODE) pendant deux secondes.
CD2
DISC
SUR
EQ
“P 1” indique que le Programme 1 est
sélectionné.
TRACK
4 7 P1.‚8
PLAY MODE ENTER
Si vous avez attribué un titre au disque, le
mode de lecture de bloc apparaît. Appuyez
sur (3) (PLAY MODE) jusqu’à ce que
l’affichage “P 1” apparaisse.
2 Appuyez plusieurs fois sur (1) (N)
jusqu’à ce que l’indication “DEL”
apparaisse.
DEL
SUR
EQ
--PGM1--
PLAY MODE ENTER
Pour supprimer le Programme 2, appuyez
plusieurs fois de suite sur (4) (n) jusqu’à
ce que l’indication “PGM 2” apparaisse.
3 Appuyez sur (5) (ENTER) pendant deux
secondes.
P1
SUR
EQ
NO Data
PLAY MODE ENTER
Le programme est complétement effacé.
4 Lorsque vous avez terminé la procédure
de suppression de plages, appuyez sur
(3) (PLAY MODE) pendant deux
secondes.
Ajouter des plages au programme
1 Appuyez sur (SHIFT) et ensuite sur (3)
(PLAY MODE) pendant deux secondes.
CD2
“P 1” indique que le Programme 1 est
sélectionné.
DISC
SUR
EQ
4 7 P1.‚8
PLAY MODE ENTER
TRACK
Si vous avez attribué un titre au disque, le
mode de lecture de bloc apparaît. Appuyez
sur (3) (PLAY MODE) jusqu’à ce que
l’affichage “P 1” apparaisse.
Pour sélectionner le Programme 2, appuyez
plusieurs fois de suite sur (4) (n) jusqu’à
ce que “P 2” apparaisse.
2 Appuyez sur (1) (N) ou (4) (n) pour
sélectionner le numéro de la cellule
d’enregistrement dans laquelle vous
souhaitez introduire une plage.
Numéro de cellule de plage
CD2
DISC
SUR
EQ
3 2 P1.‚5
PLAY MODE ENTER
TRACK
3 Appuyez sur l’un ou l’autre côté de
(SEEK/AMS) pour sélectionner la plage à
introduire.
4 Appuyez brièvement sur (5) (ENTER)
pour introduire la plage.
La plage enregistrée sous ce numéro de
cellule et les plages suivantes se décalent.
Pour introduire d’autres plages dans le
programme, répétez les étapes 2 à 4.
Remarque
Lorsque les 12 cellules sont occupées, l’indication
“*Mem Full*” apparaît dans la fenêtre d’affichage et il
est impossible d’introduire d’autres plages.
5 Lorsque vous avez terminé la procédure
de sélection de plages, appuyez sur (3)
(PLAY MODE) pendant deux secondes.
F
Changeur CD/MD
23
Actual total number: Sony CDX-C810DSP (EFGI) 3-856-118-11 (2)
Page 54

Suppression des plages du
SUR
EQ
DISC
DISCNAME
1 ________
CD1
SUR
EQ
DISC
DISCNAME
1 S_______
CD1
SUR
EQ
DISC
DISCNAME
1 S_______
CD1
programme
1 Appuyez sur (SHIFT) et ensuite sur (3)
(PLAY MODE) pendant deux secondes.
CD2
“P 1” indique que le Programme 1 est
sélectionné.
Si vous avez attribué un titre au disque, le
mode de lecture de bloc apparaît. Appuyez
sur (3) (PLAY MODE) jusqu’à ce que
l’affichage “P 1” apparaisse.
Pour sélectionner le Programme 2, appuyez
plusieurs fois de suite sur (4) (n) jusqu’à
ce que “P 2” apparaisse.
DISC
SUR
EQ
3 2 P1.‚7
PLAY MODE ENTER
TRACK
Identification d’un CD
— Mémo de disque (changeur de CD avec
fonction de personnalisation de lecture)
Vous pouvez identifier chaque disque par un
titre personnalisé. Vous pouvez introduire
jusqu’à huit caractères par disque. Si vous
identifiez un disque de cette façon, vous
pouvez ensuite le rappeler en introduisant son
titre (page 24) et sélectionner des plages
spécifiques en vue de la lecture (page 25).
1 Activez la lecture du CD et appuyez sur
(LIST) pendant deux secondes.
2 Appuyez plusieurs fois de suite sur (1)
(N) ou (4) (n) pour sélectionner la
plage à supprimer.
Numéro de cellule de plage
F
CD2
La plage enregistrée se trouve dans la cellule
d’enregistrement n° 6 du Programme 1.
DISC
SUR
EQ
3 3 P1.‚6
PLAY MODE ENTER
TRACK
3 Appuyez sur (5) (ENTER) pendant deux
secondes.
Lorsque vous supprimez une plage d’un
numéro de cellule, les plages suivantes se
décalent de façon à occuper l’espace libéré.
DEL
DISC
SUR
EQ
- -- P1.‚6
PLAY MODE ENTER
TRACK
µ
CD2
SUR
DISC
EQ
TRACK
4 7 P1.‚6
PLAY MODE ENTER
4 Pour supprimer d’autres plages, répétez
les étapes 2 et 3.
5 Lorsque vous avez terminé la procédure
de suppression de plages, appuyez sur
(3) (PLAY MODE) pendant deux
secondes.
2 Introduisez les caractères.
1 Appuyez sur (+) pour sélectionner les
caractères voulus.
(A n B n C n ··· Z n 0 n 1 n 2 n
··· 9 n + n – n * n / n \ n > n <
n . n _ )
Si vous appuyez sur (–), les caractères
se succèdent dans l’ordre inverse.
Si vous souhaitez insérer un espace
entre des caractères, sélectionnez “_”
(tiret inférieur).
2 Appuyez sur (4) (n) après avoir
localisé le caractère voulu.
Le curseur clignotant se déplace sur
l’espace suivant.
Si vous appuyez sur (1) (N), le curseur
clignotant se déplace vers la gauche.
3 Répétez les étapes 1 et 2 pour
introduire le titre en entier.
3 Pour revenir en mode de lecture CD
normal, appuyez sur (LIST) pendant
deux secondes.
Conseil
Pour supprimer ou corriger un titre, introduisez un “_”
(tiret inférieur) pour chaque caractère.
24
Actual total number: Sony CDX-C810DSP (EFGI) 3-856-118-11 (2)
Page 55

Affichage du mémo de disque
Appuyez sur (DSPL) pendant la lecture
du CD.
CD1
SUR
EQ
Chaque fois que vous appuyez sur (DSPL)
en cours de lecture du CD, l’affichage
change selon la séquence suivante:
Horloge Z Titre du disque Z
DISCNAME
DISC
1 SCHUBERT
z Temps de lecture écoulé
Suppression du mémo de disque
1 Appuyez sur (SOURCE) pour sélectionner
le changeur de CD (par ex., CD 2 ou
CD 3).
2 Appuyez sur (LIST) pendant deux
secondes.
3 Appuyez sur (DSPL) pendant deux
secondes.
4 Appuyez sur (+) ou (–) pour
sélectionner le titre à supprimer.
5 Appuyez sur (5) (ENTER) pendant deux
secondes.
Le titre est effacé.
Répétez les étapes 4 et 5 pour effacer
d’autres titres.
6 Appuyez sur (LIST) pendant deux
secondes.
L’appareil revient en mode de lecture CD
normal.
Localisation d’un disque
par son titre
— Répertoire (changeur de CD ou de MD
avec fonction de personnalisation de
lecture)
Cette fonction est opérante avec les disques
auxquels vous avez attribué un titre
personnalisé. Pour des informations plus
détaillées sur les titres de disques, reportezvous à la section “Identification d’un CD” à la
page 24.
1 Appuyez brièvement sur (LIST).
Le titre attribué au disque en cours de
lecture apparaît dans la fenêtre d’affichage.
LST
SUR
EQ
1 SCHUBERT
2 Appuyez plusieurs fois de suite sur
(LIST) jusqu’à ce que vous trouviez le
disque voulu.
3 Appuyez sur (5) (ENTER) pour
reproduire le disque (fonction de
recherche directe).
Remarques
• Lorsqu’un titre de disque a été affiché pendant cinq
secondes, la fenêtre d’affichage revient à son mode
d’affichage normal. Pour désactiver l’affichage, appuyez
sur (DSPL).
• Le titre des plages n’est pas affiché pendant la lecture
d’un MD.
• S’il n’y a aucun disque dans le magasin, l’indication
“NO Disc” apparaît dans la fenêtre d’affichage.
• Si aucun titre personnalisé n’a été attribué à un disque
donné, l’indication “********” apparaît dans la fenêtre
d’affichage.
• Si les informations relatives au disque n’ont pas encore
été lues par l’appareil, l’indication “?” apparaît dans la
fenêtre d’affichage. Pour exécuter le chargement, appuyez
d’abord sur la touche numérique et choisissez ensuite le
disque qui n’a pas été chargé.
• Ces informations s’affichent uniquement en lettres
capitales. De plus, certaines lettres ne peuvent pas être
affichées (en cours de lecture MD).
ENTER
F
Changeur CD/MD
Actual total number: Sony CDX-C810DSP (EFGI) 3-856-118-11 (2)
25
Page 56

Sélection de plages
SUR
EQ
PLAY MODE
BANK
BANK ON
CD1
déterminées pour la
lecture
fonction de personnalisation de lecture)
Si vous avez attribué un titre au disque, vous
pouvez programmer l’appareil pour qu’il
saute des plages et reproduise uniquement les
plages que vous souhaitez.
— Bloc (changeur de CD avec
Lecture de plages déterminées
Vous pouvez sélectionner:
•BANK ON pour reproduire les plages avec le
réglage “PLAY”.
•BANK INV (Inverse) pour reproduire les
plages avec le réglage “SKIP”.
1 En cours de lecture, appuyez sur (SHIFT)
et ensuite plusieurs fois de suite sur (3)
(PLAY MODE) jusqu’à ce que “BANK”
apparaisse.
1 Activez la lecture du disque et appuyez
sur (SHIFT). Appuyez ensuite sur (3)
(PLAY MODE) pendant deux secondes.
Mode de lecture de bloc
CD2
DISC
SUR
EQ
Remarque
Si vous n’avez pas attribué de titre au disque, le mode
de lecture de bloc n’apparaît pas et le mode de lecture
programmée apparaît.
Pour revenir au mode de lecture normal, appuyez sur
F
(SHIFT).
TRACK
5 1 PLAY
PLAY MODE ENTER
2 Appuyez sur l’un ou l’autre côté de
(SEEK/AMS) pour sélectionner le numéro
de la plage que vous voulez sauter et
appuyez sur (5) (ENTER).
CD2
SUR
DISC
EQ
TRACK
5 3 SKIP
PLAY MODE ENTER
L’indication passe de “PLAY” à “SKIP”. Si
vous voulez revenir à “PLAY,” appuyez à
nouveau sur (5) (ENTER).
3 Répétez l’étape 2 pour définir le mode
“PLAY” ou “SKIP” sur toutes les plages.
4 Appuyez sur (3) (PLAY MODE) pendant
deux secondes.
L’appareil revient au mode de lecture CD
normal.
2 Appuyez plusieurs fois de suite sur (4)
(n) jusqu’à ce que le mode voulu
apparaisse.
z BANK ON z BANK INV
BANK OFF Z
La lecture démarre à partir de la plage
suivant la plage en cours.
Pour revenir au mode de lecture normal,
sélectionnez “BANK OFF” à l’étape 2 cidessus.
Remarques
• Vous pouvez activer le modes “PLAY” et “SKIP” sur 24
plages.
• Vous ne pouvez pas activer le mode “SKIP” sur toutes
les plages.
26
Actual total number: Sony CDX-C810DSP (EFGI) 3-856-118-11 (2)
Page 57

Informations
complémentaires
Précautions
•Si votre voiture est parquée en plein soleil et
si la température à l’intérieur de l’habitacle a
considérablement augmenté, laissez refroidir
l’appareil avant de l’utiliser.
•Si l’appareil n’est pas alimenté, vérifiez
d’abord les connexions. Si tout est en ordre,
vérifiez le fusible.
•Si aucun son n’est diffusé par les hautparleurs d’un système à deux haut-parleurs,
réglez la commande de balance avant-arrière
sur la position centrale.
•Si votre voiture est équipée d’une antenne
électrique, vérifiez si elle se déploie
automatiquement lorsque vous utilisez
l’appareil.
Si vous avez des questions ou des problèmes
concernant le fonctionnement de cet appareil
qui ne sont pas abordés dans le présent mode
d’emploi, consultez votre revendeur Sony.
Remarques sur la manipulation des
CD
Un disque souillé ou défectueux peut
occasionner des pertes de son en cours de
lecture. Pour obtenir une qualité sonore
optimale, manipulez les disques de la façon
illustrée.
Saisissez les disques par les bords. Pour que les
disques restent propres, n’en touchez jamais la
surface.
N’exposez pas les disques au rayonnement
direct du soleil ou à des sources de chaleur
telles que des conduits d’air chaud. De même,
ne les laissez pas dans une voiture parquée en
plein soleil où la température à l’intérieur de
l’habitacle risque d’augmenter dans des
proportions considérables.
Avant d’écouter un disque, nettoyez-le à l’aide
d’un chiffon de nettoyage disponible en
option. Essuyez les disques en allant du centre
vers l’extérieur.
N’utilisez pas de solvants tels que du benzène,
du diluant, des nettoyants disponibles dans le
commerce ou des sprays antistatiques destinés
aux disques analogiques en vinyle.
Remarques sur la condensation
d’humidité
Par temps de pluie ou dans les régions très
humides, de l’humidité risque de se condenser
sur la lentille à l’intérieur du lecteur CD. Si cela
se produit, l’appareil ne fonctionnera pas
correctement. Dans ce cas, retirez le disque et
attendez environ une heure que l’humidité se
soit évaporée.
Lecture de CD de 8 cm
Vous devez utiliser l’adaptateur pour CD
single optionnel Sony (CSA-8) de façon à
protéger le lecteur contre tout dommage.
F
Changeur CD/MD/Informations complémentaires
Ne collez pas de papier ni de bande adhésive
sur la face imprimée.
Actual total number: Sony CDX-C810DSP (EFGI) 3-856-118-11 (2)
27
Page 58

Entretien
Remplacement du fusible
En cas de remplacement du fusible, veillez à
utiliser un fusible dont l’intensité correspond à
celle inscrite sur le fusible. Si le fusible grille,
vérifiez le branchement de l’alimentation et
remplacez le fusible. Si le fusible grille une
nouvelle fois après avoir été remplacé, cela
peut révéler une défaillance interne de
l’appareil. Le cas échéant, consultez un
revendeur Sony.
Démontage de l’appareil
Clé de dégagement
(fournie)
µ
Fusible (15 A)
Avertissement
N’utilisez jamais de fusible dont l’intensité
dépasse celle du fusible fourni avec l’appareil,
F
car vous risqueriez d’endommager l’appareil.
Nettoyage des connecteurs
L’appareil peut ne pas fonctionner
correctement si les connecteurs entre l’appareil
et la façade sont souillés. Pour éviter cela,
ouvrez la façade en appuyant sur (RELEASE)
et enlevez-le. Nettoyez les connecteurs à l’aide
d’un Coton-tige imprégné d’alcool.
N’appliquez pas une trop forte pression. Vous
risquez sinon d’endommager les connecteurs.
Appareil principal
µ
µ
28
Arrière de la façade
Actual total number: Sony CDX-C810DSP (EFGI) 3-856-118-11 (2)
Page 59
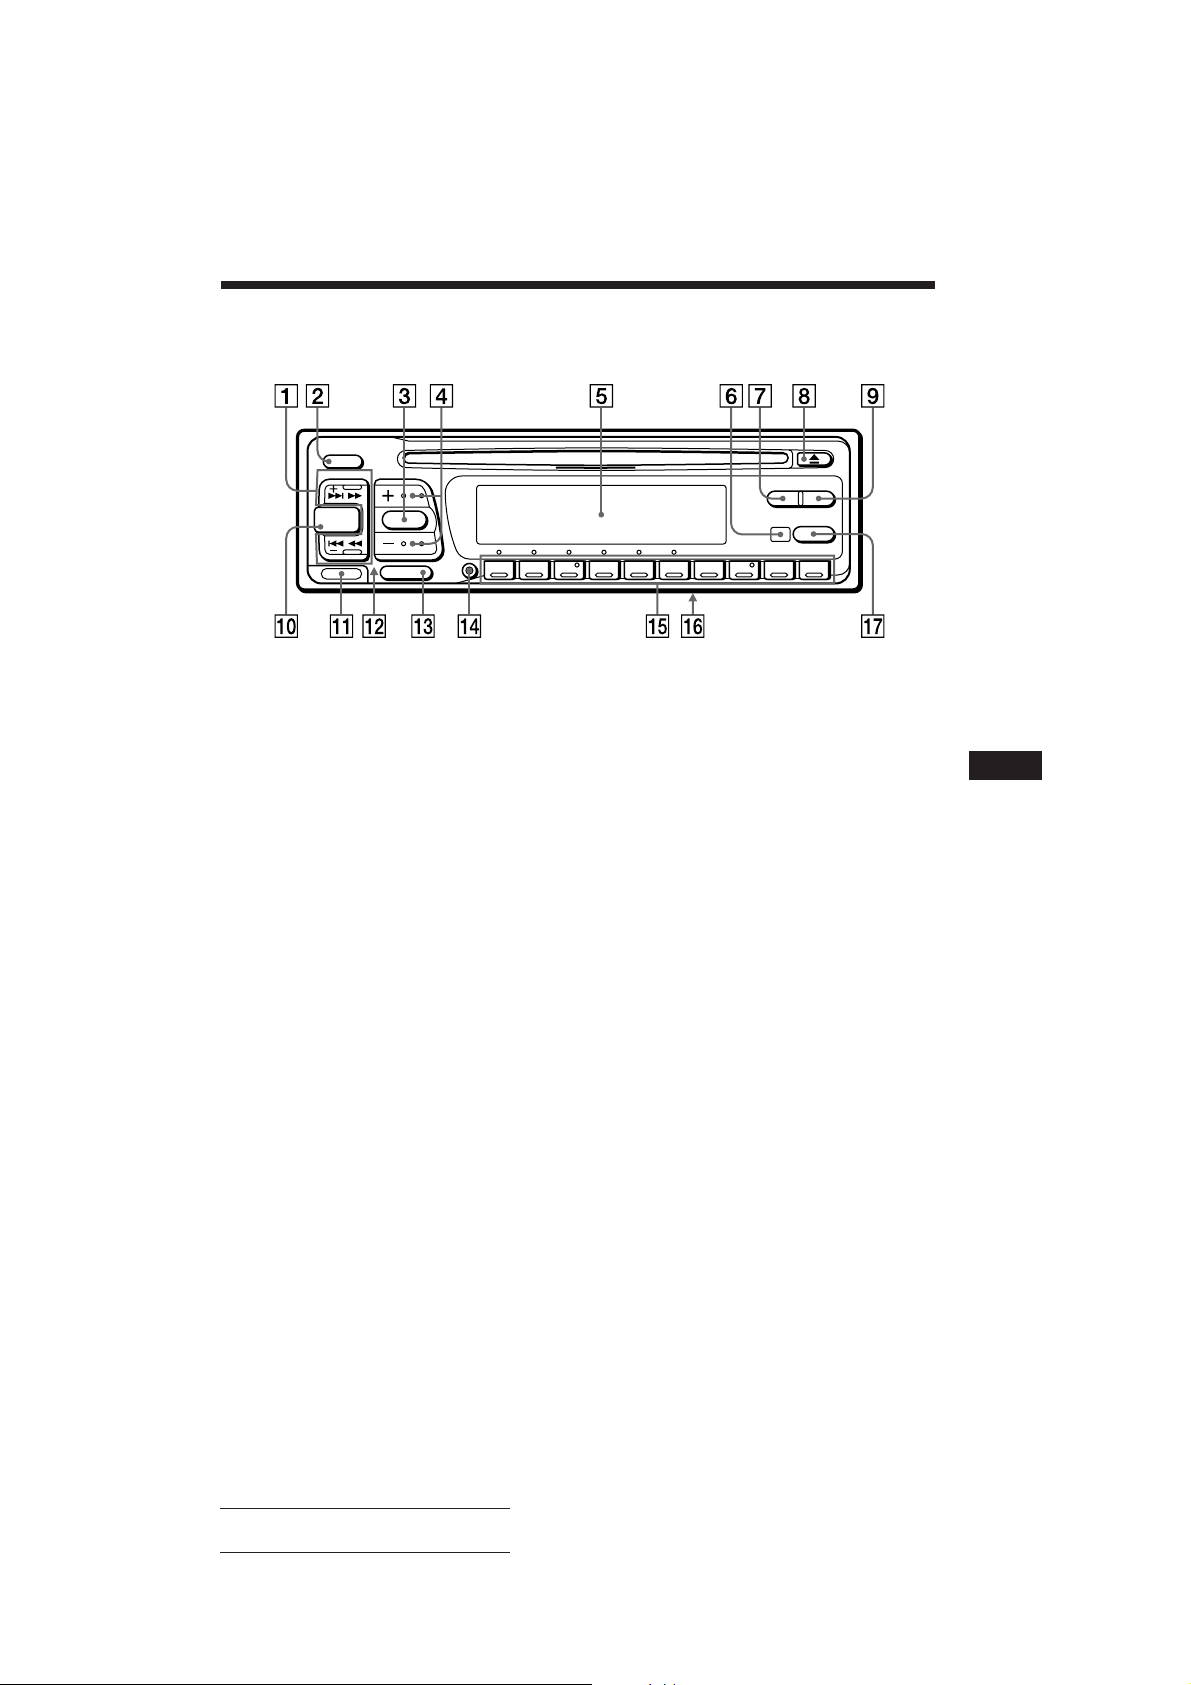
Emplacement des commandes
OFF
SEEK/AMS
DSPL LIST
SOURCE SOUND
RELEASE
MUTE
SHIFT
12345678910
Pour plus de détails, reportez-vous aux pages indiquées.
1 Touche SEEK/AMS (recherche/détecteur
!¡ Touche RELEASE (dégagement façade)
automatique de musique/recherche
manuelle) 6, 8, 9, 10, 13, 21, 22, 23, 26
!™ Touche de réinitialisation (à l’avant de
2 Touche OFF 4, 5
3 Touche SOUND 14, 16, 17, 18, 19
4 Touches (+) (–) (volume/memu déffet/
!£ Touche MUTE 20
!¢ Touche SHIFT
position d’écoute/niveau de sortie
secondaire/graves/aiguës/balance
gauche-droite/balance avant-arrière)
5, 14, 15, 16, 17, 18, 19, 24, 25
5 Fenêtre d’affichage
6 Récepteur de la télécommande sans fil
!∞ En cours de réception radio:
en option
7 Touche DSPL (changement de mode
d’affichage) 5, 10, 21, 25
8 Touche 6 (éjection) 5
!§ Contacteur POWER SELECT (sur la base
9 Touche LIST
Mémo de disque 24
Répertoire 25
Emissions RDS 13
!¶ Touche AF/TA 11, 12, 13
!º Touche SOURCE (sélection de source)
5, 9, 12, 14, 16, 17, 20, 22, 25
AF/TA
4, 28
l’appareil, dissimulée par la façade) 4
BTM 9, 12
PLAY MODE 6, 7, 8, 9, 10, 11, 15, 21, 22,
23, 24, 26
SET UP 5, 14, 20
Touches numériques 9
En cours de lecture CD/MD:
Touches de sélection directe de disque
21
de l’appareil)
Voir “Contacteur POWER SELECT” dans
le manuel d’installation/raccordement.
F
Informations complémentaires
Actual total number: Sony CDX-C810DSP (EFGI) 3-856-118-11 (2)
29
Page 60

Emplacement des commandes
Télécommande sans fil
en option (RM-X41)
F
Les touches de la télécommande
remplissent la même fonction que
celles de l’appareil.
1 Touche OFF
2 Touche DIR
(DIR) est inopérante avec cet appareil.
3 Touche SOURCE
4 Touche SEEK/AMS
5 Touche PRESET/DISC
Vous ne pouvez pas commander la recherche manuelle
et la syntonisation manuelle à l’aide de la
télécommande.
SOURCE
OFF
MUTE DSPL
DIR
MODE
SEEK
–
=
–
REW
–
AMS
PRESET
DISC
SOUND
SEL
+
+
+
FF
6 Touche MUTE
7 Touches (–) (+)
8 Touche DSPL
9 Touche SOUND
+
30
Si le contacteur POWER SELECT est réglé sur la position B, l’appareil ne peut pas être
commandé à l’aide de la télécommande sans fil sauf si, au préalable, (SOURCE) de l’appareil a
été enfoncée ou si un CD a été introduit de manière à activer l’appareil.
Actual total number: Sony CDX-C810DSP (EFGI) 3-856-118-11 (2)
Page 61

Spécifications
Lecteur CD
Système Système audionumérique à
disques compacts
Rapport signal-bruit 90 dB
Réponse en fréquence 10 – 20.000 Hz
Pleurage et scintillement En dessous du seuil
mesurable
Radio
FM
Plage de syntonisation 87,5 – 108,0 MHz
Borne d’antenne Connecteur d’antenne
externe
Fréquence intermédiaire 10,7 MHz
Sensibilité utile 8 dBf
Sélectivité 75 dB à 400 kHz
Rapport signal-bruit 62 dB (stéréo),
65 dB (mono)
Distorsion harmonique à 1 kHz
0,9 % (stéréo),
0,5 % (mono)
Séparation 35 dB à 1 kHz
Réponse en fréquence 30 – 15.000 Hz
Taux de capture 2 dB
PO/GO(OC*)
Plage de syntonisation PO: 531 – 1.602 kHz
GO: 153 – 281 kHz
OC: 5.950 – 6.205 kHz
Borne d’antenne Connecteur d’antenne
externe
Fréquence intermédiaire 10,71 MHz/450 kHz
Sensibilité PO: 30 µV
GO: 50 µV
OC: 50 µV
* Pour les modèles commercialisés en Allemagne, Suisse et
Autriche.
Amplificateur de puissance
Sorties Sorties pour haut-parleurs
(connecteurs de sécurité)
Impédance de haut-parleurs
4 – 8 ohms
Puissance utile maximum 35 W × 4 (à 4 ohms)
Caractéristiques générales
Fil de sortie Fil de commande de relais
d’antenne électrique
Fil de commande
d’amplificateur de
puissance
Commandes de tonalité Graves ± 8 dB à 100 Hz
Aiguës ± 8 dB à 10 kHz
Puissance de raccordement
Batterie de voiture
12 V CC (masse négative)
Dimensions Approx. 188 × 58 × 177 mm
(L × H × P)
Dimensions de montage Approx. 178 × 50 × 154 mm
(L × H × P)
Masse Approx. 1,5 kg
Accessoires fournis Satellite de télécommande
(1)
Eléments d’installation et
de raccordement (1 jeu)
Etui pour la façade (1)
Accessoires optionnels Télécommande sans fil
RM-X41
Câble BUS (fourni avec un
cordon à broche RCA)
RC-61 (1 m), RC-62 (2 m)
Cordon à broche RCA
RC-63 (1 m), RC-64 (2 m),
RC-65 (5 m)
Chiffon de nettoyage
XP-CD1
Adaptateur pour CD single
optionnel CSA-8
Appareils optionnels Changeur de CD
CDX-71 (10 disques),
CDX-72 (10 disques),
CDX-81 (10 disques),
CDX-91 (10 disques),
CDX-T60 (6 disques),
CDX-T62 (6 disques)
Changeur MD
MDX-40,
MDX-60
Sélecteur de source
XA-U20, etc.
F
Informations complémentaires
La conception et les spécifications sont sujettes à
modifications sans préavis.
Actual total number: Sony CDX-C810DSP (EFGI) 3-856-118-11 (2)
31
Page 62

Dépannage
Les points de contrôle suivants vous permettront de remédier à la plupart des problèmes que vous
pourriez rencontrer dans le cadre de l’utilisation de votre appareil.
Avant de passer en revue la liste de contrôle ci-dessous, vérifiez les procédures de raccordement et
d’utilisation.
Généralités
Problème
Pas de son.
Le contenu de la mémoire a été
effacé.
Aucune indication n’apparaît
dans la fenêtre d’affichage.
Lecture CD/MD
Problème
F
Impossible d’introduire un
disque.
La lecture ne démarre pas.
Un disque est éjecté
automatiquement.
Les touches de commande sont
inopérantes.
Le son saute à la suite de
vibrations.
Cause/Solution
• Réglez le volume à l’aide de (+).
• Réglez la commande de balance avant-arrière sur la position
centrale, si vous utilisez un système à 2 haut-parleurs.
• Le cordon d’alimentation ou la batterie a été déconnecté.
• La touche de réinitialisation a été enfoncée.
n Recommencez la procédure d’enregistrement dans la
mémoire.
Déposez la façade et nettoyez les connecteurs. Pour plus de
détails, voir la procédure “Nettoyage des connecteurs”
(page 28).
Cause/Solution
• Un autre CD a déjà été introduit dans l’appareil.
• Le CD est introduit à l’envers en forçant ou dans le mauvais
sens (MD).
Disque défectueux (MD) ou poussiéreux. (CD).
La température ambiante dépasse 50˚C.
Appuyez sur la touche de réinitialisation.
• L’appareil est installé suivant un angle de plus de 20˚.
• L’appareil n’a pas été installé à un endroit suffisamment stable
de la voiture.
Réception radio
Problème
Impossible de syntoniser une
présélection.
La syntonisation automatique
est impossible.
L’indication “ST” clignote.
32
Actual total number: Sony CDX-C810DSP (EFGI) 3-856-118-11 (2)
Cause/Solution
• Mémorisez la fréquence correcte.
• Le signal d’émission est trop faible.
Le signal d’émission est trop faible.
n Utilisez la syntonisation manuelle.
• Syntonisez la fréquence correctement.
• Le signal d’émission est trop faible.
n Activez le mode MONO (page 10).
Page 63

Fonctions RDS
Problème
Une recherche (SEEK)
commence après quelques
secondes d’écoute.
Aucun message de
radioguidage
PTY affiche “NONE” (Aucun).
Fonctions DSP
Problème
Aucun son ou le son est trop
faible.
Cause/Solution
La station n’est pas une station émettant des messages de
radioguidage ou le signal est faible.
n Appuyez sur (AF/TA) jusqu’à ce que l’indication “AF TA
OFF” apparaisse.
• Activez “TA.”
• La station n’émet pas d’informations routières malgré le
message TP.
n Recherchez une autre station.
La station ne spécifie pas le type de programme.
Cause/Solution
Le volume des haut-parleurs arrière peut avoir été atténué
automatiquement afin de maximiser l’effet du réglage de la
position d’écoute.
n Appuyez sur (+) pour régler la balance.
La balance des haut-parleurs peut être réglée séparément
pour le mode DSP activé et le mode DSP désactivé (page 15).
Affichages d’erreur (lorsque le changeur de CD/MD en option est raccordé)
Les indications suivantes clignotent pendant environ cinq secondes et un bip d’alarme retentit.
Affichage
NO Mag
NO Disc
Error
Blank
PushReset
Not Ready
HighTemp
*1Si une erreur se produit en cours de lecture d’un MD ou d’un CD, le numéro du MD ou du CD n’apparaît pas dans la
fenêtre d’affichage.
2
Le numéro du disque qui pose un problème apparaît dans la fenêtre d’affichage.
*
Si les solutions proposées ci-dessus ne permettent pas de remédier au problème, consultez votre
revendeur Sony.
Cause
Le magasin à disques n’a pas été
introduit dans le changeur CD/MD.
Il n’y a aucun disque dans le changeur
de CD/MD.
Un CD est souillé ou a été introduit à
l’envers.*
1
*
Impossible de reproduire un MD en
raison d’un problème.*
Aucune plage n’a été enregistrée sur
1
*
un MD.*
Le changeur CD/MD ne peut
fonctionner en raison d’un problème.
Le couvercle du changeur de MD est
ouvert ou les MD ne sont pas bien en
place.
La température ambiante dépasse
50°C.
2
2
2
Solution
Introduisez le magasin à disques avec
des disques dans le changeur CD/MD.
Introduisez des disques dans le
changeur de CD/MD.
Nettoyez ou introduisez correctement
le CD.
Introduisez un autre MD.
Choisissez un MD sur lequel des
plages ont été enregistrées.
Appuyez sur la touche de
réinitialisation de l’appareil.
Fermez le couvercle ou remettez les
MD en place correctement.
Attendez que la température baisse
sous 50°C.
F
Informations complémentaires
Actual total number: Sony CDX-C810DSP (EFGI) 3-856-118-11 (2)
33
Page 64

F
34
Index
A
Aiguës 18, 19
Avertisseur 4
B
Balance 19
Balance avant/arrière 16, 19
Balayage des intros 6, 21
Bip sonore 20
C
Commande de tonalité numérique 17
Correction physiologique 20
Couleur d’illumination 20
Coupure du son 20
D
Défilement automatique 21
Détecteur automatique de musique (AMS)
6,␣ 21
Double information 20
E
Effet 14
Effet spatial 14, 18, 19
Emission de radioguidage (TP) 12
Exploration de disque 21
F
Façade 4
Fenêtre d’affichage 5, 10, 21
Fonction de liaison locale 11
Fonction d’heure (CT) 14
Fréquences alternatives (AF) 11, 12
Fusible 28
G
Gradateur 20
Graves 19
H, I, J, K
Horloge 5
L
Lecture aléatoire 6, 22
Lecture CD 5, 20
Lecture de bloc 26
Lecture MD 20
Lecture répétée 6, 21
M
Message de radioguidage (TA) 12
Mémo de disque 24
Mémoire de programmation CD 6, 22
Mémorie de réglage du son des disques
(DSM) 15
Mémoire de réglage sonore de source 18
Mémorisation du meilleur accord (BTM) 9
Mémorisation d’une station 9
Mode monaural 10
N, O
Niveau de sortie secondaire 19
P, Q
PLAY MODE
BANK 26
INTRO 6, 21
LOCAL 10
MONO 10
PGM 7, 22
REP 7, 21
SHUF 6, 22
Position d’écoute 15, 19
Programme 6, 13, 22
R
Radio 9
Recherche
d’un disque 21, 25
d’un passage déterminé 6, 21
d’une plage déterminée 6, 21
d’une station 13
Recherche locale 10
Recherche manuelle 6, 21
Réinitialisation 4
Répertoire 25
RDS 10
S
Satellite de télécommande 4, 18, 20
Sélection directe de disque 21
SET UP
AMBER 20
A.SCRL 21
BEEP 20
CLOCK 5
DIMMER 20
D.INFO 20
GREEN 20
LOUD 20
RM 20
Syntonisation automatique 10
Syntonisation manuelle 9
Subwoofer 16, 17
T, U
Télécommande sans fil 30
V, W, X, Y, Z
Volume 19
Actual total number: Sony CDX-C810DSP (EFGI) 3-856-118-11 (2)
Page 65

Willkommen!
Danke, daß Sie sich für den CD-Player von
Sony entschieden haben. Dieses Gerät bietet
Ihnen eine Vielzahl von Funktionen, die Sie
über einen Joystick oder eine drahtlose
Fernbedienung aufrufen können.
Ihnen stehen zusätzlich zur CD-Wiedergabe
und zum Radioempfang weitere Funktionen
zur Verfügung, wenn Sie die Anlage erweitern
und einen gesondert erhältlichen CD/MDWechsler.
D
2
Actual total number: Sony CDX-C810DSP (E,F,G,I) 3-856-118-11(2)
Page 66

Inhalt
Anleitung für dieses Gerät
Vorbereitungen
Zurücksetzen des Geräts.................................... 4
Abnehmen der Frontplatte ................................ 4
Vorbereiten des Joystick .................................... 4
Einstellen der Uhr ............................................... 5
CD-Player
Wiedergeben einer CD ....................................... 5
Wiedergeben einer CD in verschiedenen
Modi................................................................. 6
Zusammenstellen eines Programms
— CD-Programmspeicher ............................ 6
Radio
Automatisches Speichern von Sendern
— Speicherbelegungsautomatik (BTM-
Funktion) ......................................................... 8
Speichern der gewünschten Sender ................. 9
Einstellen der gespeicherten Sender ................ 9
RDS
Überblick über die RDS-Funktion .................. 10
Anzeigen des Sendernamens .......................... 10
Automatisches Neueinstellen eines Senders
— Alternativfrequenzen (AF-Funktion)... 10
Empfangen von Verkehrsdurchsagen ........... 11
Speichern von RDS-Sendern mit AF- und
TA-Daten ....................................................... 12
Suchen eines Senders nach Programmtyp .... 12
Automatisches Einstellen der Uhr.................. 13
Weitere Funktionen
Der Joystick ........................................................ 18
Einstellen der Klangeigenschaften ................. 19
Stummschalten des Tons ................................. 19
Wechseln der Klang- und
Anzeigeeinstellungen .................................. 19
Wenn zusätzliche Geräte
angeschlossen sind
CD/MD-Wechsler
Wiedergeben einer CD oder MD .................... 20
Anspielen der Titel
— Intro Scan ................................................. 21
Wiederholtes Wiedergeben von Titeln
— Repeat Play .............................................. 21
Wiedergeben von Titeln in willkürlicher
Reihenfolge
— Shuffle Play .............................................. 21
Zusammenstellen eines Programms
— CD-Programmspeicher .......................... 21
Benennen einer CD
— Disc Memo ............................................... 24
Ansteuern einer CD/MD anhand des Namens
— List-up ...................................................... 24
Auswählen bestimmter Titel für die
Wiedergabe
— Bank .......................................................... 25
D
DSP
Auswählen des Raumklangmodus ................ 14
Speichern des Raumklangmodus zu einer Disc
— Disc Sound Memory (DSM-Funktion) ..
Einstellen des Klangs auf die Sitzposition .... 15
Einstellen des Faders (FAD) ............................ 16
Einstellen der Lautstärke des/der
Tiefsttonlautsprecher(s) .............................. 16
Einstellen der Lautstärke von Bässen und
Höhen
— Diqitate klangregelung .......................... 17
Einschalten der verschiedenen Tonquellen mit
dem registrierten Raumklangmodus
— Source Sound Memory (SSM) ............... 17
14
Actual total number: Sony CDX-C810DSP (E,F,G,I) 3-856-118-11(2)
Weitere Informationen
Sicherheitsmaßnahmen .................................... 26
Wartung .............................................................. 27
Ausbauen des Geräts ........................................ 27
Lage und Funktion der Teile und
Bedienelemente ............................................ 28
Technische Daten .............................................. 30
Störungsbehebung ............................................ 31
Index ................................................................... 33
3
Page 67
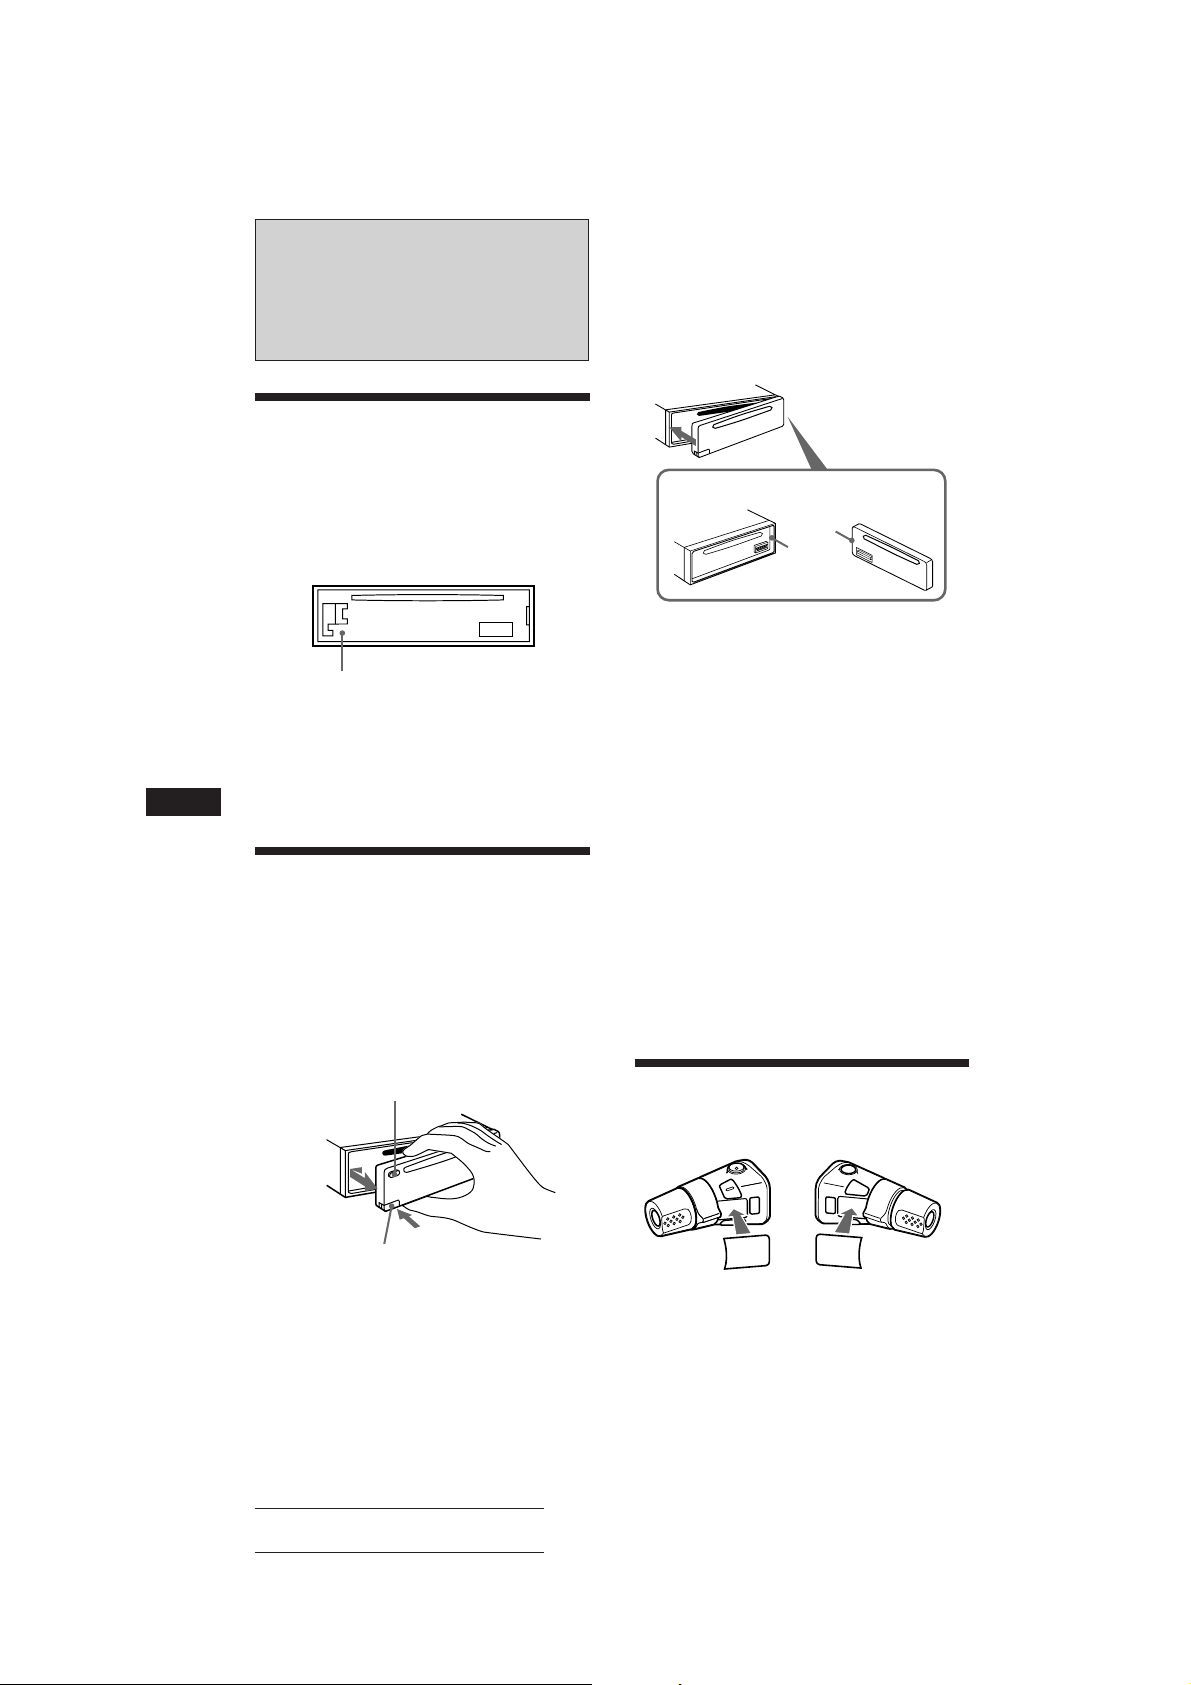
Vorbereitungen
Zurücksetzen des Geräts
Bevor Sie das Gerät zum ersten Mal benutzen
oder nachdem Sie die Autobatterie
ausgetauscht haben, müssen Sie das Gerät
zurücksetzen.
Drücken Sie die Rücksetztaste mit einem
spitzen Gegenstand wie z. B. einem
Kugelschreiber.
Rücksetztaste
Hinweis
Wenn Sie das Stromversorgungskabel an das Gerät
anschließen oder das Gerät zurücksetzen, warten Sie etwa
10 Sekunden, bevor Sie eine CD einlegen. Legen Sie in
diesen 10 Sekunden keine CD ein. Andernfalls wird das
Gerät nicht zurückgesetzt.
D
Abnehmen der Frontplatte
Um einem Diebstahl des Geräts vorzubeugen,
kann die Frontplatte abgenommen werden.
1 Drücken Sie (OFF).
2 Lösen Sie mit (RELEASE) die Frontplatte.
Schieben Sie die Frontplatte dann ein
wenig nach links, und nehmen Sie sie ab,
indem Sie sie auf sich zu ziehen.
(OFF)
Anbringen der Frontplatte
Setzen Sie Teil A der Frontplatte wie in der
Abbildung dargestellt an Teil B des Geräts an,
und drücken Sie die Frontplatte an, bis sie mit
einem Klicken einrastet.
A
B
Hinweise
• Achten Sie beim Anbringen der Frontplatte darauf, daß
sie richtigherum ausgerichtet ist. Die Frontplatte kann
nicht andersherum angebracht werden.
• Wenden Sie beim Festdrücken der Frontplatte keine
Gewalt an. Ein leichter Druck reicht aus, um die
Frontplatte am Gerät zu befestigen.
• Bewahren Sie die Frontplatte beim Transportieren im
mitgelieferten Behälter auf.
• Drücken Sie nicht stark auf die Displays an der
Vorderseite der Frontplatte.
• Schützen Sie die Frontplatte vor direktem Sonnenlicht,
vor Wärmequellen wie Warmluftauslässen und vor
Feuchtigkeit. Wenn das Fahrzeug in der Sonne geparkt
ist, legen Sie sie nicht auf das Armaturenbrett, da sie
sich sonst zu stark erhitzen kann.
Warnton
Wenn Sie den Zündschlüssel in die OFFPosition stellen, ohne die Frontplatte
abzunehmen, ertönt einige Sekunden lang ein
Warnton (nur wenn der Schalter POWER
SELECT in der Position A steht).
Vorbereiten des Joystick
Bringen Sie bei der Montage des Joystick den
Aufkleber wie in der Abbildung unten an.
(RELEASE)
Hinweise
• Achten Sie darauf, daß die Frontplatte beim Abnehmen
nicht herunterfällt.
• Wenn Sie zum Abnehmen der Frontplatte bei
eingeschaltetem Gerät die Taste (RELEASE) drücken,
wird das Gerät automatisch ausgeschaltet, um eine
Beschädigung der Lautsprecher zu vermeiden.
4
Actual total number: Sony CDX-C810DSP (E,F,G,I) 3-856-118-11(2)
DSPL
SOUND
LIST
SOUND
LIST
DSPL
Page 68

Einstellen der Uhr
SUR
EQ
TRACK
5 2.15
CD
Die Uhr zeigt die Zeit digital im 24-StundenFormat an.
Beispiel: Einstellen der Uhr auf 10:08
1 Drücken Sie (SHIFT) und dann (2) (SET
UP).
SET
SUR
EQ
CLOCK
SET UP
1 Drücken Sie (4) (n).
SET
SUR
EQ
1:‚‚
SET UP
Die Stundenziffern blinken.
CD-Player
Wiedergeben einer CD
Legen Sie einfach die CD ein.
Die Wiedergabe beginnt automatisch.
Mit der beschrifteten Seite nach oben
2 Stellen Sie die Stunden ein.
vorwärts
rückwärts
SET
SUR
EQ
1‚:‚‚
SET UP
3 Drücken Sie (4) (n).
SET
SUR
EQ
1‚:‚‚
SET UP
Die Minutenziffern blinken.
4 Stellen Sie die Minuten ein.
vorwärts
rückwärts
SET
SUR
EQ
1‚:‚8
SET UP
2 Drücken Sie (SHIFT).
SUR
EQ
1‚:‚8
Die Uhr beginnt zu laufen.
Hinweis
Steht der Schalter POWER SELECT an der Unterseite des
Geräts auf B, schalten Sie zuerst das Gerät ein, und
stellen Sie dann die Uhr ein.
Wenn bereits eine CD eingelegt ist, drücken
Sie (SOURCE) so oft, bis „CD“ angezeigt wird.
Verstrichene Spieldauer
Titelnummer
Eine CD ist bereits eingelegt
Hinweis
Wenn Sie eine Single-CD (8-cm-CD) wiedergeben wollen,
verwenden Sie den gesondert erhältlichen Single-CDAdapter von Sony (CSA-8).
Zum Drücken Sie
Beenden der Wiedergabe 6 oder (OFF)
Auswerfen der CD 6
Wechseln der Anzeige im Display
Mit jedem Tastendruck auf (DSPL) wechselt
die Anzeige folgendermaßen:
Titelnummer ˜ Uhrzeit
Ansteuern eines bestimmten Titels
— AMS (Automatischer Musiksensor)
Drücken Sie während der Wiedergabe
kurz eine Seite von (SEEK/AMS).
SEEK/AMS
Ansteuern nachfolgender Titel
Ansteuern vorhergehender Titel
D
Vorbereitungen/CD-Player
5
Actual total number: Sony CDX-C810DSP (E,F,G,I) 3-856-118-11(2)
Page 69

Ansteuern einer bestimmten
SUR
EQ
PLAY MODE
INTRO
INTRO ON
CD
SUR
EQ
PLAY MODE ENTER
TRACK
3 P1.‚1
CD
SUR
EQ
PLAY MODE ENTER
+ENTER+
P1
SUR
EQ
PLAY MODE ENTER
TRACK
2 P1.‚2
CD
Passage in einem Titel
— Manuelle Suche
Halten Sie während der Wiedergabe eine
Seite von (SEEK/AMS) gedrückt. Lassen
Sie die Taste wieder los, wenn Sie die
gewünschte Passage gefunden haben.
SEEK/AMS
Vorwärtssuchen
Rückwärtssuchen
3 Wählen Sie mit (4) (n) die Einstellung
„ON.“
Die Wiedergabe beginnt.
Wenn Sie wieder in den normalen
Wiedergabemodus schalten wollen, wählen Sie
in Schritt 3 oben die Einstellung „OFF.“
Hinweis
Wenn „
sind Sie am Anfang bzw. Ende der CD angelangt.
In diesen Fällen können Sie nicht zum vorhergehenden
bzw. zum folgenden Titel schalten.
“ oder „ “ im Display erscheint,
Wiedergeben einer CD in
verschiedenen Modi
Sie können CDs in verschiedenen Modi
wiedergeben lassen:
• INTRO (Intro Scan) zum Anspielen der
D
ersten 10 Sekunden jedes Titels.
• REP (Repeat Play) zum Wiederholen des
aktuellen Titels.
• SHUF (Shuffle Play) zum Wiedergeben der
Titel in willkürlicher Reihenfolge.
1 Drücken Sie (SHIFT).
Mit jedem Tastendruck auf (SHIFT)
leuchten jeweils nur die Optionen auf, die
Sie auswählen können.
SET UP PLAY MODE
SHIFT
12345
2 Drücken Sie (3) (PLAY␣ MODE) so oft, bis
der gewünschte Wiedergabemodus
erscheint.
Mit jedem Tastendruck auf (3)
(PLAY␣ MODE) wechselt die Anzeige
folgendermaßen:
INTRO n REP n SHUF n PGM n DSM SET
CD
SUR
EQ
INTRO OFF
PLAY MODE
Zusammenstellen eines
Programms
— CD-Programmspeicher
Sie können die Titel, die Sie hören möchten, in
der gewünschten Wiedergabereihenfolge
auswählen und als Programm speichern. Bei
dieser Funktion können Sie zwei Programme
mit jeweils 12 Titeln zusammenstellen.
1 Drücken Sie (SHIFT) und dann zwei
Sekunden lang (3) (PLAY MODE).
„P 1“ zeigt die Auswahl von Programm 1 an.
Wenn Sie Programm 2 zusammenstellen
wollen, drücken Sie (4) (n) so oft, bis
„P 2“erscheint.
2 Drücken Sie eine der Seiten von
(SEEK/AMS), und wählen Sie damit den
Titel, den Sie programmieren wollen.
3 Drücken Sie kurz (5) (ENTER).
µ
4 Um weitere Titel zu programmieren,
gehen Sie wie in Schritt 2 und 3 erläutert
vor.
5 Wenn Sie alle gewünschten Titel
eingegeben haben, drücken Sie zwei
Sekunden lang (3) (PLAY MODE).
6
Actual total number: Sony CDX-C810DSP (E,F,G,I) 3-856-118-11(2)
Page 70
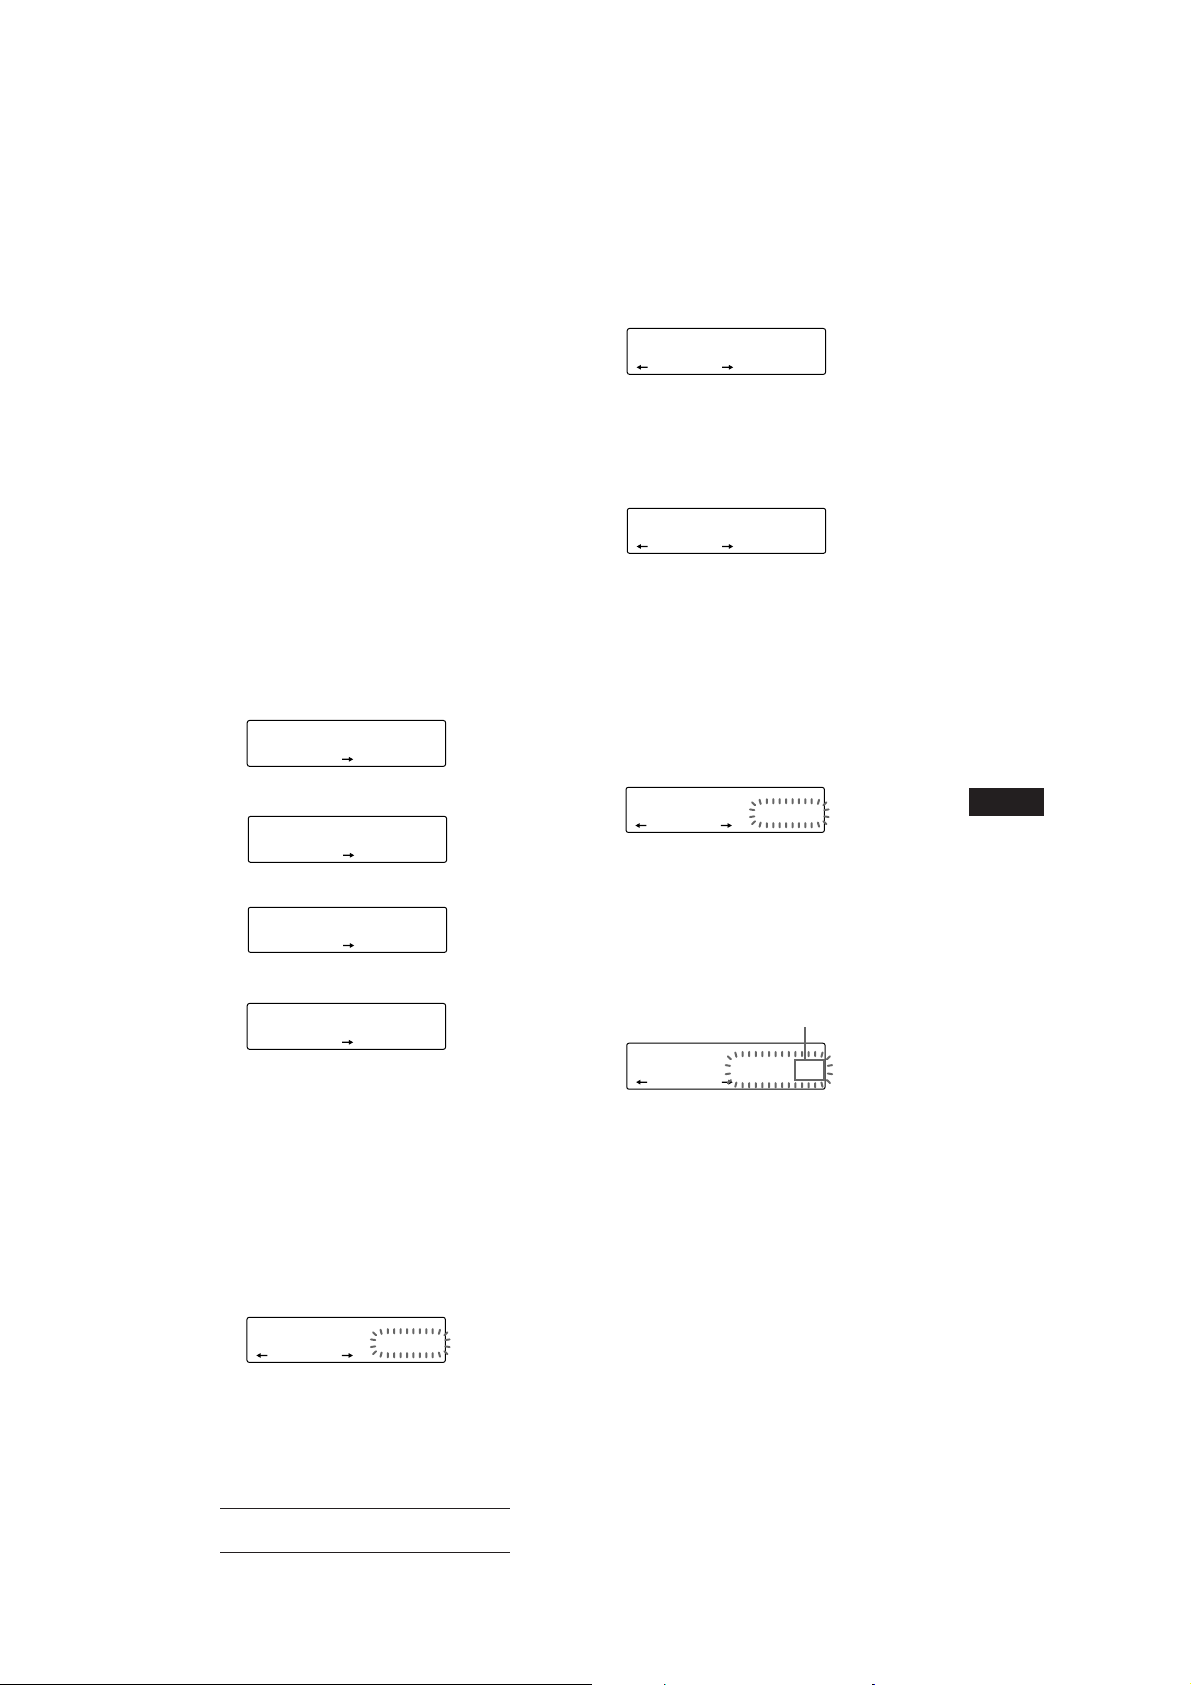
Hinweise
• „*Wait*“ erscheint im Display, während das Gerät die
Daten einliest.
• „*Mem Full*“ erscheint im Display, wenn Sie versuchen,
mehr als 12 Titel für ein Programm einzugeben.
Wiedergeben des gespeicherten
Programms
Sie haben folgende Auswahlmöglichkeiten:
• PGM 1 zur Wiedergabe von Programm 1.
• PGM 2 zur Wiedergabe von Programm 2.
• PGM 1+2 zur Wiedergabe von Programm 1
und 2.
1 Drücken Sie (SHIFT).
2 Drücken Sie (3) (PLAY MODE) so oft, bis
„PGM“ erscheint.
3 Drücken Sie (4) (n) so oft, bis das
gewünschte Programm erscheint.
Wiedergabe von Programm 1
CD
SUR
EQ
PGM 1
PLAY MODE
Wiedergabe von Programm 2
CD
SUR
EQ
Wiedergabe von Programm 1 und 2
CD
SUR
EQ
Normale Wiedergabe
CD
SUR
EQ
µ
PGM 2
PLAY MODE
µ
PGM 1+2
PLAY MODE
µ
PGM OFF
PLAY MODE
PGM
1
PGM
2
PGM
1+2
Die Wiedergabe des Programms beginnt.
Wenn Sie wieder in den normalen
Wiedergabemodus schalten wollen, wählen Sie
in Schritt 3 oben die Einstellung „PGM OFF.“
Hinweis
Wenn für das Programm keine Titel programmiert
wurden, erscheint „NO Data“ im Display.
Löschen des gesamten Programms
1 Drücken Sie (SHIFT) und dann zwei
Sekunden lang (3) (PLAY MODE).
CD
SUR
EQ
„P 1“ zeigt die Auswahl von Programm 1 an.
TRACK
7 P1.‚8
PLAY MODE ENTER
2 Drücken Sie (1) (N) so oft, bis „DEL“
erscheint.
DEL
SUR
EQ
--PGM1--
PLAY MODE ENTER
Wenn Sie Programm 2 löschen wollen,
drücken Sie (4) (n) so oft, bis „PGM 2“
angezeigt wird.
3 Drücken Sie (5) (ENTER) zwei Sekunden
lang.
P1
SUR
EQ
NO Data
PLAY MODE ENTER
Das gesamte Programm wird gelöscht.
4 Wenn alle Titel gelöscht sind, drücken
Sie zwei Sekunden lang (3) (PLAY
MODE).
Hinzufügen von Titeln zum
Programm
1 Drücken Sie (SHIFT) und dann zwei
Sekunden lang (3) (PLAY MODE).
CD
SUR
EQ
„P 1“ zeigt die Auswahl von Programm 1 an.
TRACK
4 P1.‚3
PLAY MODE ENTER
Wenn Sie Programm 2 auswählen wollen,
drücken Sie (4) (n) so oft, bis
„P 2“ erscheint.
2 Geben Sie mit (1) (N) oder (4) (n) die
Titelpositionsnummer an, an der Sie
einen Titel hinzufügen wollen.
Titelpositionsnummer
CD
SUR
EQ
TRACK
2 P1.‚2
PLAY MODE ENTER
3 Wählen Sie mit einer der Seiten von
(SEEK/AMS) den Titel aus, den Sie
einfügen wollen.
4 Drücken Sie kurz (5) (ENTER), um den
Titel einzufügen.
Der aktuelle Titel an dieser
Titelpositionsnummer und die
nachfolgenden Titel werden nach unten
verschoben.
Wenn Sie weitere Titel in das Programm
einfügen möchten, gehen Sie wie in Schritt
2 bis 4 erläutert vor.
Fortsetzung siehe nächste Seite n
D
CD-Player
7
Actual total number: Sony CDX-C810DSP (E,F,G,I) 3-856-118-11(2)
Page 71

Hinweis
Sobald für alle 12 Positionen ein Titel programmiert
wurde, erscheint „*Mem Full*“ im Display, und Sie
können keine weiteren Titel einfügen.
5 Wenn Sie alle gewünschten Titel
eingefügt haben, drücken Sie zwei
Sekunden lang (3) (PLAY MODE).
Löschen programmierter Titel
1 Drücken Sie (SHIFT) und dann zwei
Sekunden lang (3) (PLAY MODE).
CD
SUR
EQ
„P 1“ zeigt die Auswahl von Programm 1 an.
TRACK
7 P1.‚8
PLAY MODE ENTER
Wenn Sie Programm 2 auswählen wollen,
drücken Sie (4) (n) so oft, bis „P 2“
erscheint.
2 Geben Sie mit (1) (N) oder (4) (n) an,
welcher Titel gelöscht werden soll.
Titelpositionsnummer
CD
SUR
EQ
D
Der momentan an Position 6 im Programm 1
gespeicherte Titel.
TRACK
3 P1.‚6
PLAY MODE ENTER
3 Drücken Sie zwei Sekunden lang (5)
(ENTER).
Wenn Sie einen gespeicherten Titel löschen,
verschieben sich die nachfolgenden Titel
nach oben und schließen die Lücke.
DEL
DISC
SUR
EQ
- -- P1.‚6
PLAY MODE ENTER
TRACK
µ
CD
SUR
EQ
TRACK
7 P1.‚6
PLAY MODE ENTER
Radio
Automatisches Speichern
von Sendern
— Speicherbelegungsautomatik (BTMFunktion)
Diese Funktion sucht die Sender mit den
stärksten Signalen und speichert diese in der
Reihenfolge ihrer Frequenzen. Sie können pro
Frequenzbereich (FM1, FM2, MW und LW
bzw. SW) bis zu 10 Sender auf den
Stationstasten speichern.
ACHTUNG - UNFALLGEFAHR!
Wenn Sie während der Fahrt Sender einstellen
wollen, benutzen Sie, um Unfälle zu
vermeiden, bitte die BTM-Funktion.
1 Drücken Sie mehrmals (SOURCE), um
den gewünschten Frequenzbereich
einzustellen (FM1,FM2, MW oder LW
bzw. SW).
2 Drücken Sie (SHIFT) und dann (6) (BTM).
Das Gerät speichert die Sender in der
Reihenfolge ihrer Frequenzen auf den
Stationstasten.
Hinweise
• Sender, die nicht in guter Qualität zu empfangen sind
(zu schwache Signale), speichert das Gerät nicht auf den
Stationstasten. Wenn nur wenige Sender in guter
Qualität zu empfangen sind, bleiben einige
Stationstasten leer.
• Wenn im Display eine Stationstastennummer angezeigt
wird, werden die Stationstasten beginnend mit der
angezeigten Tastennummer mit Sendern belegt.
4 Wenn Sie weitere Titel löschen wollen,
gehen Sie wie in Schritt 2 und 3 erläutert
vor.
5 Wenn Sie alle gewünschten Titel
gelöscht haben, drücken Sie zwei
Sekunden lang (3) (PLAY MODE).
8
Actual total number: Sony CDX-C810DSP (E,F,G,I) 3-856-118-11(2)
Page 72

Speichern der
gewünschten Sender
Bis zu 10 Sender können pro Frequenzbereich
(FM1, FM2, MW und LW bzw. SW) auf den
Stationstasten gespeichert werden, und zwar
in der Reihenfolge Ihrer Wahl. Das heißt, allein
im UKW-Bereich können Sie 20 Sender
speichern.
1 Drücken Sie mehrmals (SOURCE), um
den gewünschten Frequenzbereich
auszuwählen.
2 Drücken Sie eine Seite von (SEEK/AMS),
um den Sender einzustellen, der auf der
entsprechenden Stationstaste
gespeichert werden soll.
3 Halten Sie die gewünschte Stationstaste
((1) bis (10)) etwa zwei Sekunden lang
gedrückt, bis ein Signalton zu hören ist.
Die Nummer der gedrückten Stationstaste
erscheint auf dem Display.
Hinweis
Wenn Sie auf einer bereits belegten Stationstaste einen
weiteren Sender speichern, wird der zuvor gespeicherte
Sender gelöscht.
Einstellen der
gespeicherten Sender
1 Drücken Sie mehrmals (SOURCE), um
den gewünschten Frequenzbereich
auszuwählen.
2 Drücken Sie kurz die Stationstaste ((1)
bis (10)), auf der der gewünschte Sender
gespeichert ist.
Wenn sich ein gespeicherter Sender
nicht einstellen läßt
Drücken Sie kurz eine der Seiten von
(SEEK/AMS), um den Sender zu suchen
(Senderspeichersuchfunktion).
Der Suchlauf stoppt, wenn ein Sender
empfangen wird. Drücken Sie wiederholt
auf eine Seite der Taste (SEEK/AMS), bis Sie
den gewünschten Sender empfangen.
Hinweis
Wenn die automatische Sendersuche zu oft unterbrochen
wird, drücken Sie (SHIFT) und dann (3) (PLAY MODE)
so oft, bis „LOCAL“ (lokaler Suchmodus) angezeigt wird.
Wählen Sie dann mit (4) (n) die Einstellung „ON“.
Nun lassen sich nur die Sender einstellen, die in relativ
guter Qualität zu empfangen sind.
Tip
Wenn Sie die Frequenz des gewünschten Senders kennen,
halten Sie eine Seite von (SEEK/AMS) zwei Sekunden lang
gedrückt, bis der gewünschte Sender empfangen wird
(manuelle Sendersuche).
D
CD-Player/Radio
Bei schlechtem UKW-Empfang
— Monauraler Modus
1 Drücken Sie (SHIFT) und dann (3) (PLAY
MODE) so oft, bis „MONO“ angezeigt
wird.
2 Drücken Sie (4) (n) so oft, bis „MONO
ON“ angezeigt wird.
Dadurch wird die Tonqualität besser, aber
der Ton wird zugleich monaural („Mono“).
Die Anzeige „ST“ wird ausgeblendet.
Wenn Sie wieder den normalen Modus
einstellen möchten, wählen Sie in Schritt 2
oben „MONO OFF.“
Wechseln der Anzeige
Mit jedem Tastendruck auf (DSPL) wechselt
die Anzeige zwischen Frequenz und Uhrzeit.
Actual total number: Sony CDX-C810DSP (E,F,G,I) 3-856-118-11(2)
9
Page 73
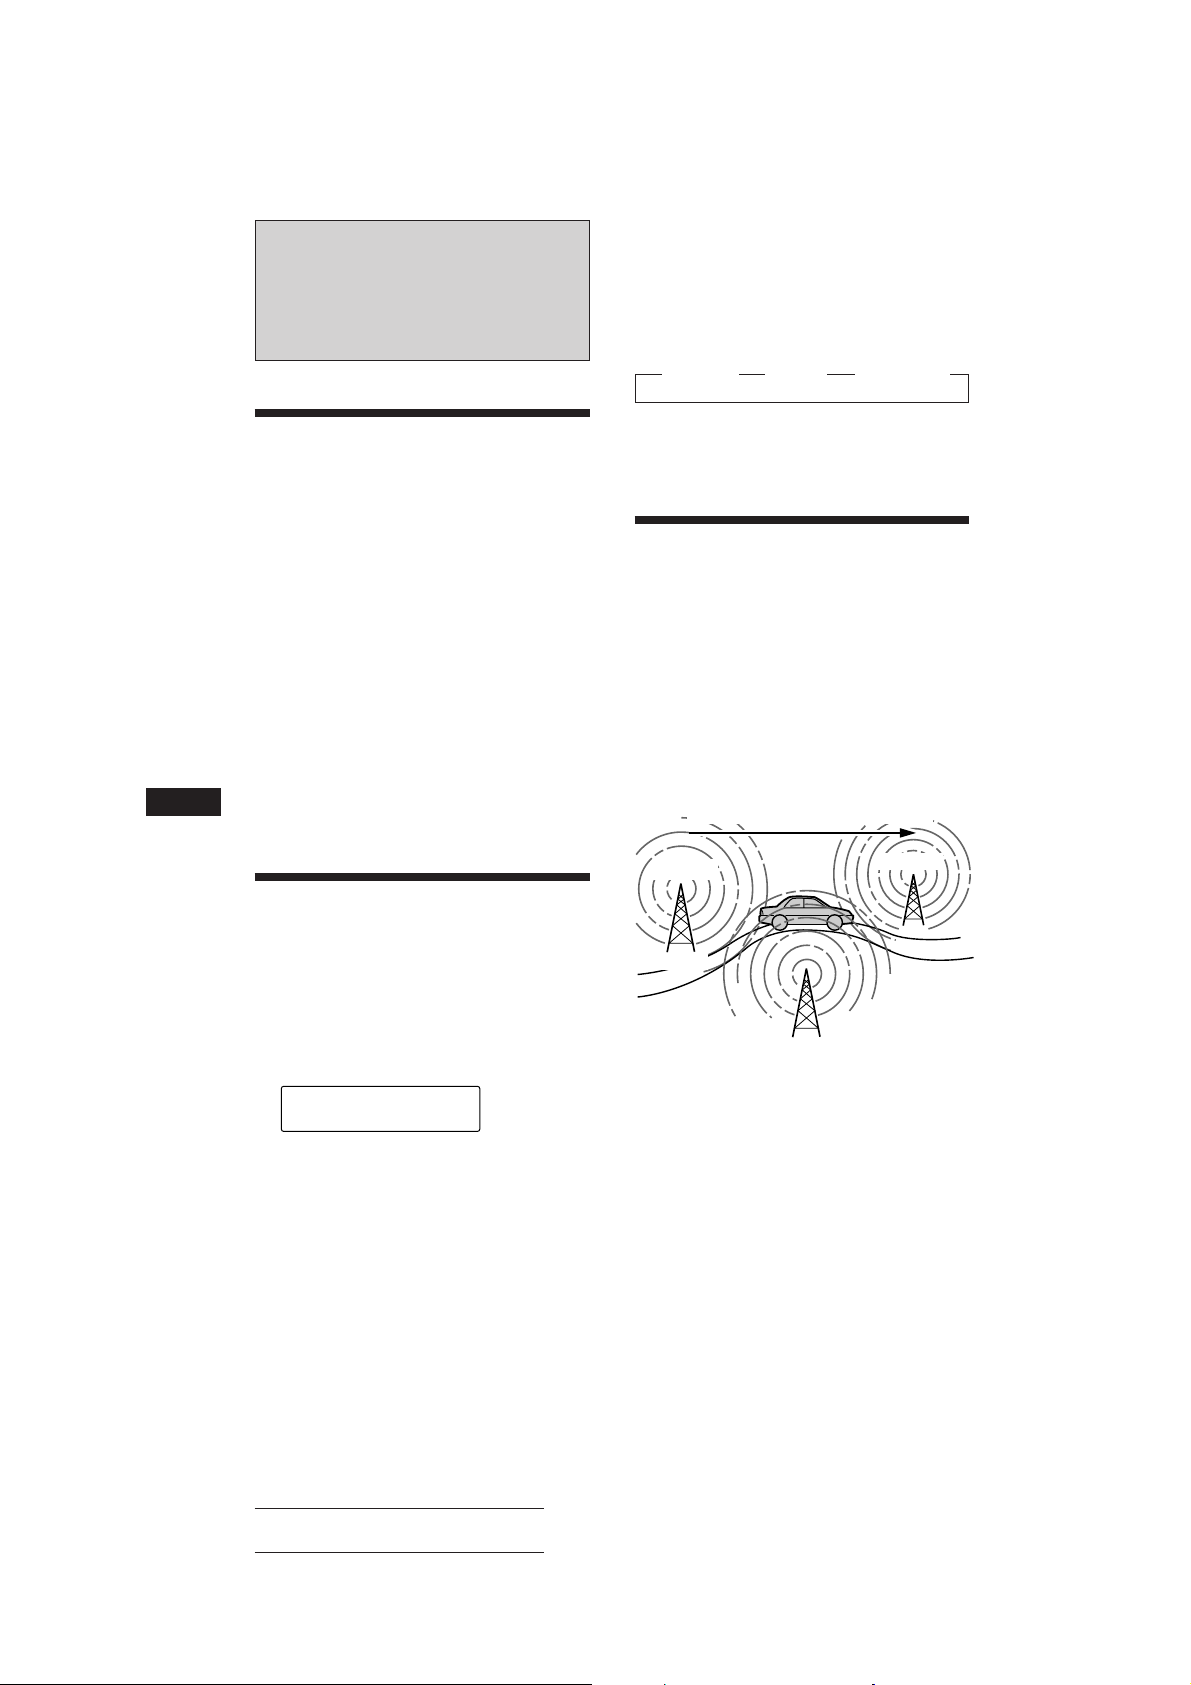
RDS
Umschalten der Anzeigen im
Display
Mit jedem Tastendruck auf (DSPL) wechseln
die Anzeigen im Display folgendermaßen:
” Frequenz ” Uhrzeit ” Sendername
Überblick über die RDSFunktion
RDS (Radio Data System - Radiodatensystem)
ist ein Rundfunksystem, bei dem FM-Sender
zusätzlich zu den normalen
Radioprogrammsignalen digitale
Informationen übertragen. Dank dieser
Informationen bietet Ihnen Ihr Radio eine
Reihe von Diensten. Beispielsweise können Sie
einen Sender automatisch neu einstellen,
Verkehrsdurchsagen einblenden und einen
Sender nach Programmtyp suchen.
Hinweise
• In unterschiedlichen Ländern oder Gegenden stehen
möglicherweise nicht alle RDS-Funktionen zur
Verfügung.
• Wenn die Empfangssignale zu schwach sind oder der
Sender, den das Gerät gerade empfängt, keine RDS-
D
Daten ausstrahlt, funktioniert das RDS-System nicht
korrekt.
Anzeigen des
Sendernamens
Der Name des Senders, den das Gerät gerade
empfängt, leuchtet im Display auf.
Stellen Sie einen FM-Sender ein.
Wenn dieser FM-Sender RDS-Daten sendet,
leuchtet der Name des Senders im Display
auf.
FM1
SUR
EQ
BBC 1 FM
Hinweis
Wenn auf dem Display die Anzeige „*“ erscheint, wird ein
RDS-Sender empfangen.
Hinweis
„NO Name“ leuchtet auf, wenn der Sender, der gerade
empfangen wird, keine RDS-Daten ausstrahlt.
Automatisches
Neueinstellen eines
Senders
— Alternativfrequenzen (AF-Funktion)
Die AF-Funktion stellt das Radio automatisch
auf die Frequenz des gerade ausgewählten
Senders ein, die in der Gegend, in der Sie sich
gerade befinden, am besten empfangen wird.
Auf diese Weise können Sie auch bei einer
längeren Fahrt den gleichen Sender
empfangen, ohne den Sender immer wieder
manuell neu einstellen zu müssen.
Die Frequenz wechselt automatisch.
98,5MHz
Sender
1 Wählen Sie einen FM-Sender aus.
2 Drücken Sie (AF/TA) so oft, bis „AF ON“
aufleuchtet.
Das Gerät beginnt mit der Suche nach einer
Alternativfrequenz, auf der Sie den gerade
eingestellten Sender besser empfangen
können.
96,0MHz
102,5MHz
10
Hinweis
Wenn es in der Gegend, in der Sie sich befinden, keine
Alternativfrequenz gibt und es sich daher erübrigt, bessere
Empfangsfrequenzen zu suchen, schalten Sie die AFFunktion aus, indem Sie (AF/TA) drücken, bis „AF TA
OFF“ aufleuchtet.
Actual total number: Sony CDX-C810DSP (E,F,G,I) 3-856-118-11(2)
Page 74

Umschalten der Anzeigen im
Display
Mit jedem Tastendruck auf (AF/TA) wechseln
die Anzeigen im Display in der folgenden
Reihenfolge:
” AF ON ” TA ON ” AF TA ON*
AF TA OFF “
* Wählen Sie diese Einstellung, um die AF- und die TA-
Funktion einzuschalten.
2 Drücken Sie innerhalb von fünf
Sekunden erneut die Stationstaste des
Lokalsenders.
3 Wiederholen Sie diesen Schritt, bis der
gewünschte Lokalsender empfangen
wird.
Hinweise
• „NO AF“ und der Sendername blinken abwechselnd im
Display, wenn das Gerät keine Alternativfrequenz finden
kann.
• Wenn der Name eines gespeicherten Senders anfängt zu
blinken, nachdem Sie den Sender eingestellt haben, steht
keine Alternativfrequenz zur Verfügung, und das Gerät
kann die PI-Daten (Programme Identification Programmkennung) des gespeicherten Senders nicht
empfangen. Drücken Sie (SEEK/AMS), während der
Sendername blinkt (ca. 8 Sekunden lang). Das Gerät
beginnt dann mit der Suche nach einem Sender mit
denselben PI-Daten, aber einer anderen Frequenz („PI
seek“ leuchtet auf, und der Ton wird stummgeschaltet).
Wenn das Gerät immer noch keine Alternativfrequenz
finden kann, leuchtet „NO PI“ auf, und das Gerät kehrt
wieder zu dem zuvor eingestellten Sender zurück.
Empfangen von Regionalsendern
Die Funktion „REG ON“ (regional ein) dieses
Geräts bewirkt, daß ein einmal ausgewählter
Regionalsender nicht gewechselt wird. So
können Sie verhindern, daß ein anderer
Regionalsender eingestellt wird. Beachten Sie,
daß die AF-Funktion eingeschaltet sein muß.
Werkseitig ist das Gerät auf „REG ON“
eingestellt. Wenn Sie diese Funktion
ausschalten möchten, gehen Sie
folgendermaßen vor:
Drücken Sie (SHIFT) und dann (3) (PLAY
MODE) so oft, bis „REG OFF“ im Display
aufleuchtet.
Beachten Sie, daß das Gerät möglicherweise
zu einem anderen Regionalsender wechselt,
wenn Sie „REG OFF“ wählen.
Hinweis
Diese Funktion steht in Großbritannien und manchen
anderen Gebieten nicht zur Verfügung.
Local-Link-Funktion (nur
Großbritannien)
Mit Hilfe der Local-Link-Funktion können Sie
andere Lokalsender auswählen, auch wenn
diese zuvor nicht unter einer Stationstaste
gespeichert wurden.
1 Drücken Sie eine Stationstaste, unter der
ein Lokalsender gespeichert ist.
Empfangen von
Verkehrsdurchsagen
Mit Hilfe von TA- (Traffic Announcement Verkehrsdurchsage) und TP-Daten (Traffic
Programme - Verkehrsfunk) können Sie einen
UKW-Sender, der Verkehrsdurchsagen sendet,
automatisch empfangen, und zwar auch dann,
wenn nicht das Radio, sondern eine andere
Programmquelle läuft.
Drücken Sie (AF/TA) so oft, bis „TA ON“
oder „AF TA ON“ im Display aufleuchtet.
Das Gerät beginnt, nach
Verkehrsfunksendern zu suchen. „TP“
leuchtet im Display auf, wenn ein
Verkehrsfunksender gefunden wird.
Beginnt eine Verkehrsdurchsage, blinkt
„TA“, bis die Verkehrsdurchsage zu Ende
ist.
Tips
• Wenn Sie (AF/TA) drücken, während der
Verkehrsfunksender eingestellt wird, kann das Gerät eine
CD wiedergeben.
• Wenn die Verkehrsdurchsage beginnt, während eine
andere Programmquelle läuft, wechselt das Gerät
automatisch zu der Durchsage. Nach Beendigung der
Durchsage wechselt das Gerät wieder zu der
ursprünglichen Programmquelle.
Hinweise
• Ist der Empfang einer Verkehrsdurchsage nicht möglich,
blinkt fünf Sekunden lang die Anzeige „NO TP“.
Danach beginnt das Gerät, nach einem anderen
Verkehrsfunksender zu suchen.
• „TP“ und „EON“ werden im Display angezeigt, wenn
der aktuelle Sender oder andere Sender gerade eine
Verkehrsdurchsage senden.
Abbrechen der gerade
empfangenen Verkehrsdurchsage
Drücken Sie kurz (AF/TA).
Wenn Sie den automatischen Empfang von
Verkehrsdurchsagen beenden möchten,
schalten Sie die Funktion aus. Drücken Sie
dazu (AF/TA), bis „AF TA OFF“
aufleuchtet.
D
RDS
11
Actual total number: Sony CDX-C810DSP (E,F,G,I) 3-856-118-11(2)
Page 75

Voreinstellen der Lautstärke von
Verkehrsdurchsagen
Sie können für Verkehrsdurchsagen eine feste
Lautstärke voreinstellen, damit Sie die
Durchsage nicht überhören. Wird eine
Verkehrsdurchsage gesendet, hören Sie die
Durchsage automatisch in der voreingestellten
Lautstärke.
2 Drücken Sie (AF/TA) so oft, bis die
gewünschte Einstellung, „AF ON“, „TA
ON“ oder „AF TA ON“ (AF- und TAFunktion), im Display aufleuchtet.
Beachten Sie bitte, daß nicht nur RDSSender gespeichert werden, wenn Sie „AF
TA OFF“ auswählen, sondern auch FMSender, die RDS nicht unterstützen.
1 Stellen Sie die gewünschte Lautstärke
ein.
2 Drücken Sie (AF/TA) zwei Sekunden lang.
Ein akustisches Signal ertönt, und die
Einstellung wird gespeichert.
Empfangen von
Katastrophenwarnungen
Wenn Sie Radio hören und eine
Katastrophenwarnung ausgestrahlt wird,
wechselt das Programm automatisch zur
Katastrophenwarnung. Wenn Sie eine andere
Programmquelle hören als das Radio, können
Sie Katastrophenwarnungen nur empfangen,
wenn die AF- oder die TA-Funktion
eingeschaltet ist. Das Gerät wechselt in diesem
Fall automatisch zu der
D
Katastrophenwarnung, und zwar auch dann,
wenn nicht das Radio, sondern eine andere
Programmquelle läuft.
Speichern von RDSSendern mit AF- und TADaten
Beim Speichern von RDS-Sendern werden die
AF- und TA-Daten der Sender und deren
Frequenz gespeichert, so daß Sie nicht
jedesmal die AF- oder die TA-Funktion
einschalten müssen, wenn Sie einen solchen
Sender einstellen. Sie können für die einzelnen
Sender unterschiedliche Einstellungen (AF, TA
oder beides) oder für alle Sender dieselbe
Einstellung wählen.
Speichern derselben Einstellung für
alle voreingestellten Sender
1 Wählen Sie mit (SOURCE) einen FM-
Frequenzbereich.
3 Drücken Sie (SHIFT) und dann (6) (BTM).
Speichern unterschiedlicher
Einstellungen für jeden
voreingestellten Sender
1 Wählen Sie einen FM-Frequenzbereich,
und stellen Sie den gewünschten Sender
ein.
2 Drücken Sie (AF/TA) so oft, bis die
gewünschte Einstellung, „AF ON“, „TA
ON“ oder „AF TA ON“ (AF- und TAFunktion), im Display aufleuchtet.
3 Drücken Sie die gewünschte
Stationstaste zwei Sekunden lang, bis
ein akustisches Signal ertönt.
Einstellungen für weitere Sender können
Sie wie in den Schritten oben angegeben
speichern.
Tip
Wenn Sie die gespeicherte AF- und/oder TA-Einstellung
nach dem Einstellen eines voreingestellten Senders ändern
möchten, schalten Sie die AF- oder die TA-Funktion
einfach ein oder aus.
Suchen eines Senders nach
Programmtyp
Sie können den gewünschten Sender suchen,
indem Sie einen der unten aufgelisteten
Programmtypen auswählen.
Hinweis
In Ländern oder Regionen, in denen keine EON-Daten
ausgestrahlt werden, steht diese Funktion nur für die
Sender zur Verfügung, die Sie bereits mindestens einmal
eingestellt haben.
12
Actual total number: Sony CDX-C810DSP (E,F,G,I) 3-856-118-11(2)
Page 76
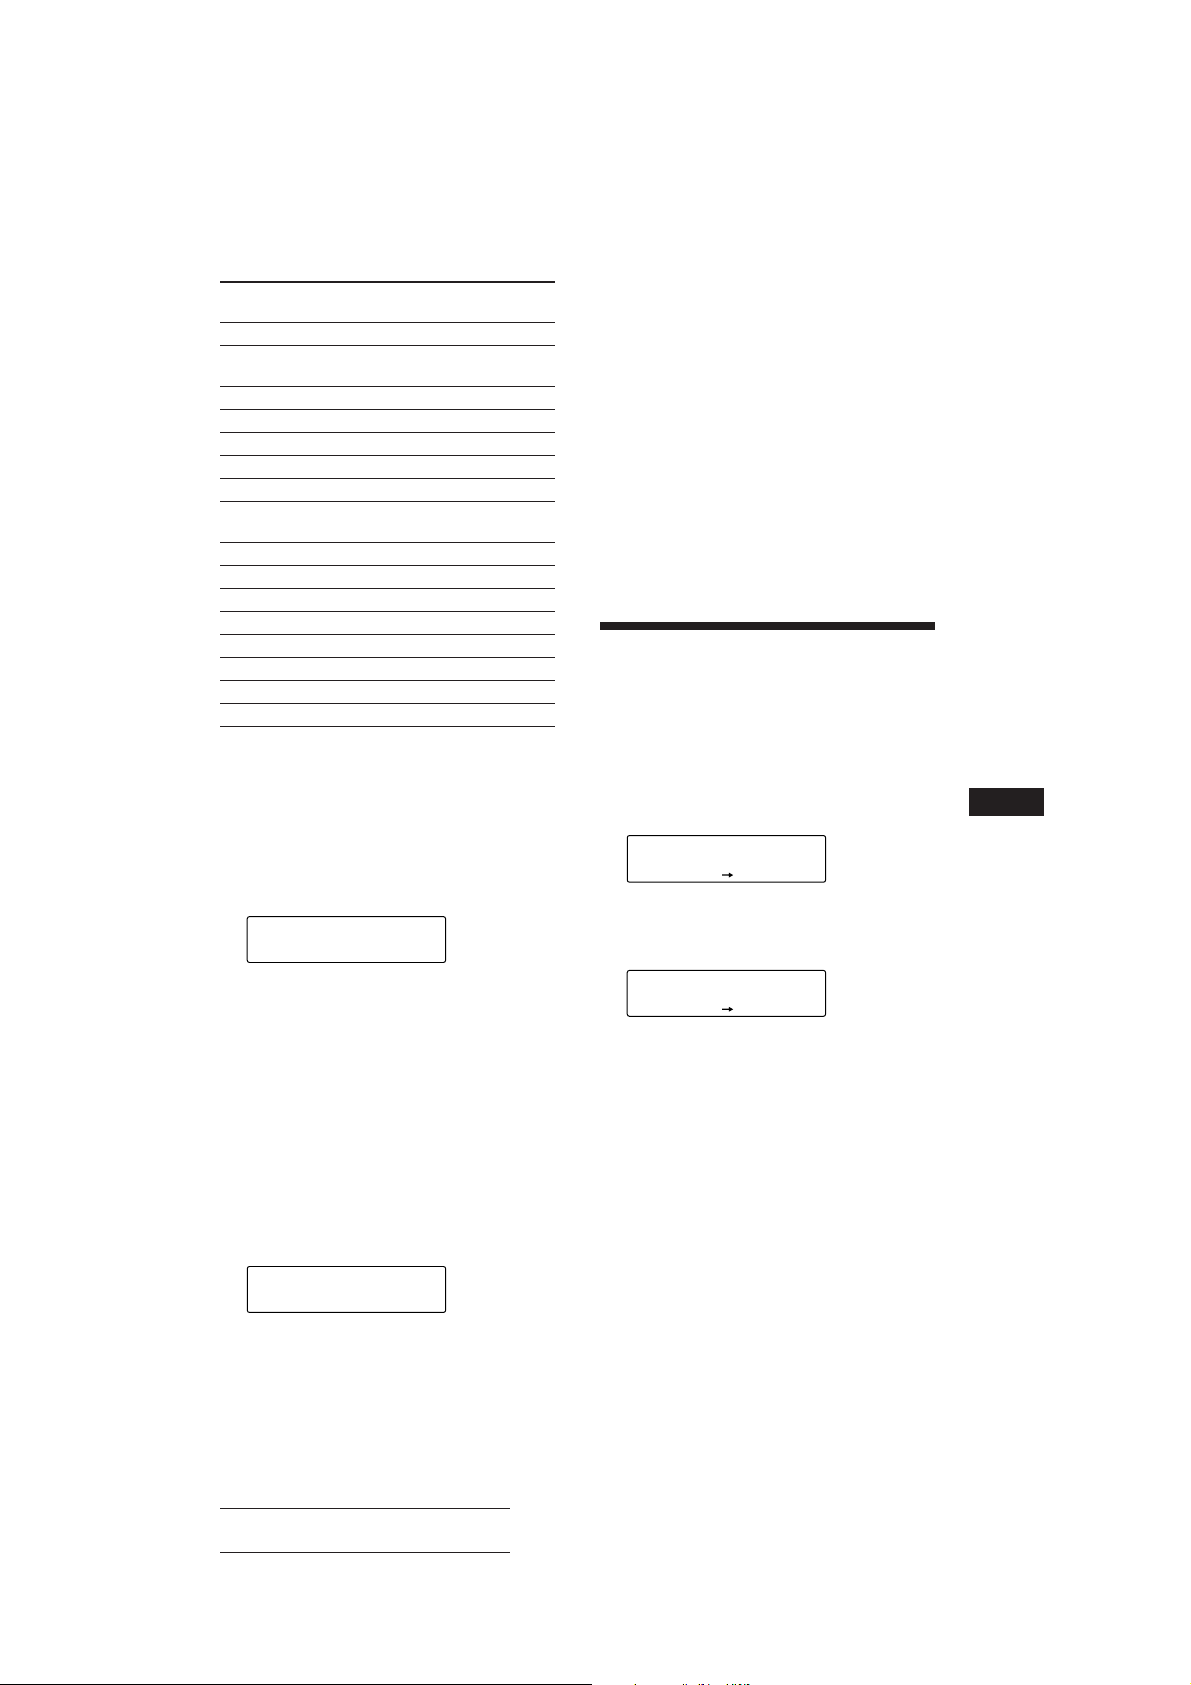
Programmtypen Anzeige im
Display
Nachrichten NEWS
Aktuelle AFFAIRS
Informationssendungen
Informationssendungen INFO
Sport SPORT
Bildungsprogramme EDUCATE
Hörspiele DRAMA
Kulturprogramme CULTURE
Wissenschaftliche SCIENCE
Sendungen
Sonstiges VARIED
Pop POP M
Rock ROCK M
Middle of the Road M.O.R. M
Leichte Klassik LIGHT M
Klassik CLASSICS
Sonstige Musikrichtungen OTHER M
Nicht angegeben NONE
Hinweis
Diese Funktion steht in den Ländern, in denen keine PTYDaten (Programme Type Selection Programmtypauswahl) ausgestrahlt werden, nicht zur
Verfügung.
1 Drücken Sie (LIST), während Sie einen
UKW-Sender empfangen, bis „PTY“ im
Display aufleuchtet.
PTY
SUR
EQ
INFO
Der aktuelle Programmtyp erscheint, wenn
der Sender PTY-Daten ausstrahlt. „- - - - -“
erscheint, wenn der im Augenblick
eingestellte Sender kein RDS-Sender ist
oder wenn die RDS-Daten nicht empfangen
werden.
2 Drücken Sie (LIST) so oft, bis der
gewünschte Programmtyp angezeigt
wird.
Die Programmtypen werden in der oben
aufgelisteten Reihenfolge angezeigt.
Beachten Sie, daß für die Suche „NONE“
(Nicht angegeben) nicht ausgewählt
werden kann.
PTY
SUR
EQ
SPORT
3 Drücken Sie eine der Seiten von
(SEEK/AMS).
Das Gerät beginnt mit der Suche nach
einem Sender, der den gewählten
Programmtyp ausstrahlt. Wenn ein
Programm des gewünschten Typs
empfangen wird, erscheint die
Programmtypanzeige nochmals fünf
Sekunden lang im Display.
Findet das Gerät keinen Sender, der den
gewünschten Programmtyp ausstrahlt,
erscheinen fünf Sekunden lang
abwechselnd „NO“ und der Programmtyp
im Display, und das Gerät schaltet wieder
auf den Empfang des vorhergehenden
Senders.
Automatisches Einstellen
der Uhr
Dieses Gerät kann mit RDS CT-Daten (CT Clock Time = Uhrzeit) empfangen und danach
die Uhrzeit automatisch einstellen.
1 Drücken Sie (SHIFT) und danach (2) (SET
UP) so oft, bis „CT“ aufleuchtet.
SET
SUR
EQ
CT OFF
SET UP
2 Drücken Sie (4) (n) so oft, bis „CT ON“
aufleuchtet.
Die Uhr wird nun eingestellt.
SET
SUR
EQ
CT ON
SET UP
3 Drücken Sie (SHIFT), um zur normalen
Anzeige zurückzuschalten.
So schalten Sie die CT-Funktion aus
Wählen Sie in Schritt 2 oben „CT OFF“.
Hinweise
• Die CT-Funktion steht nicht immer zur Verfügung,
auch wenn Sie einen RDS-Sender empfangen.
• Die über die CT-Funktion eingestellte Uhrzeit ist nicht
immer korrekt.
D
RDS
Actual total number: Sony CDX-C810DSP (E,F,G,I) 3-856-118-11(2)
13
Page 77
DSP
SUR
EQ
Defeat
SUR
SUR
EQ
Hall
SUR
SUR
EQ
Effect 8
SUR
SUR
EQ
Effect 1
SUR
Auswählen des
Raumklangmodus
Sie können einen bestimmten
Raumklangmodus auswählen, der für den
wiedergegebenen Musiktyp geeignet ist. Mit
den Raumklangmodi können Sie verschiedene
Klangumgebungen simulieren und den Klang
verbessern, so daß Sie im Auto in den gleichen
Hörgenuß kommen, als würden Sie
beispielsweise einem Live-Konzert beiwohnen.
Einstellen des Pegels für den
gewünschten Effekt
1 Wählen Sie mit (SOURCE) eine Tonquelle
(Radio, CD oder MD).
2 Drücken Sie (SOUND) so oft, bis „SUR“
angezeigt wird.
3 Drücken Sie (+) oder (–) so oft, bis der
gewünschte Raumklangmodus angezeigt
wird.
Raumklangmodus
Defeat Normaler Klang ohne
Stadium Open-Air-Konzert in einem
Disco Disco mit dicken Wänden
Theater Filmvorführungs-/Kinosaal
D
Church Kirche/Kapelle mit starkem
Hall Konzertsaal
Studio Aufnahmestudio
Raumklangeffekte
Stadion
Widerhall
1 Wählen Sie mit (SOURCE) eine Tonquelle
(Radio, CD oder MD).
2 Drücken Sie (SOUND) so oft, bis „SUR“
angezeigt wird.
SUR
SUR
EQ
Defeat
3 Drücken Sie (+) oder (–), um den
gewünschten Raumklangmodus
auszuwählen.
Die Raumklangeffekte erscheinen in der
oben angegebenen Reihenfolge.
Nach drei Sekunden erscheint im Display
wieder die Anzeige für den normalen
Wiedergabemodus.
4 Drücken Sie (SOUND) zwei Sekunden
lang.
5 Stellen Sie mit (+) oder (–) den Pegel
ein.
Sie können den Pegel auf einen Wert
zwischen 0 und 10 einstellen. Je höher der
Wert, desto stärker kommt der Effekt zur
Geltung.
6 Drücken Sie (SOUND) zwei Sekunden
lang.
Speichern des
Raumklangmodus zu einer
Disc
— Disc Sound Memory (DSM-Funktion)
(CD/MD-Wechsler mit
Programmspeicherfunktion)
Wenn Sie den gewünschten Raumklangmodus
und die Klangeigenschaften (Bässe, Höhen,
Tiefsttonlautsprecher) zu einer CD/MD
speichern, werden diese beim erneuten
Wiedergeben der betreffenden CD/MD
automatisch eingestellt. Sie können die
Einstellungen für bis zu 126 CDs speichern.
14
Actual total number: Sony CDX-C810DSP (E,F,G,I) 3-856-118-11(2)
Page 78
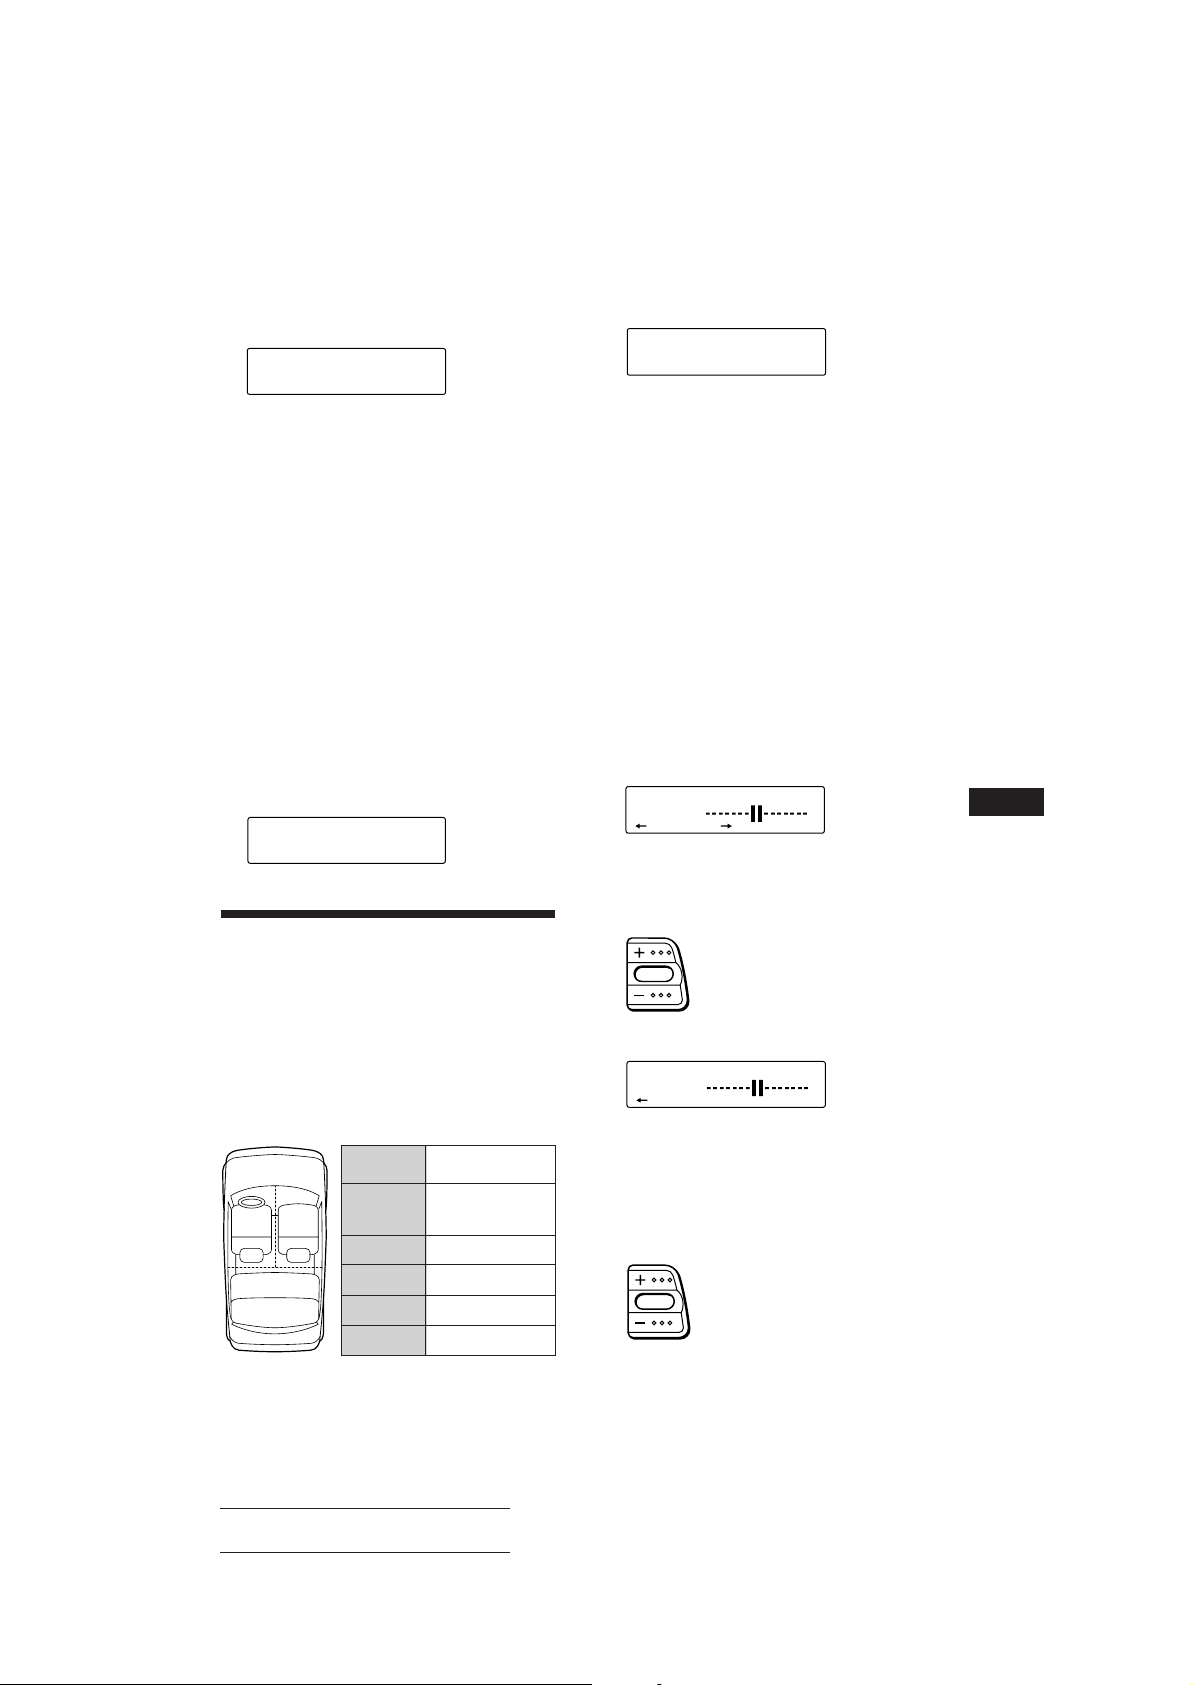
1 Drücken Sie (SHIFT) und danach (3)
(PLAY MODE) so oft, bis „DSM SET“
erscheint.
CD1
SUR
EQ
DSM SET
PLAY MODE ENTER
2 Drücken Sie (5) (ENTER).
Wenn Sie die DSM-Funktion eingestellt
haben, erscheint im Display wieder die
Anzeige für den normalen
Wiedergabemodus.
Wechseln des gespeicherten
Raumklangeffekts
Geben Sie die CD/MD wieder, deren
Raumklangmodus geändert werden soll, und
gehen Sie wie unter „Speichern des
Raumklangmodus zu einer Disc“ beschrieben
vor.
1 Drücken Sie kurz (SOUND), bis „POS“
erscheint.
POS
SUR
EQ
All
2 Wählen Sie mit (+) oder (–) die
gewünschte Sitzposition.
Die Optionen erscheinen wie in der
Reihenfolge der Tabelle oben.
Nach drei Sekunden erscheint im Display
wieder die Anzeige für den normalen
Wiedergabemodus.
Einstellen des Klangs auf die
Sitzposition
1 Drücken Sie (SOUND) so oft, bis „POS“
erscheint.
Löschen des gespeicherten
Raumklangeffekts
Drücken Sie unter „Speichern des
Raumklangmodus zu einer Disc“ in
Schritt 2 die Taste (5) (ENTER) zwei
Sekunden lang.
DSM
SUR
EQ
+DELETE+
PLAY MODE ENTER
Einstellen des Klangs auf
die Sitzposition
Die Zeit, die der Ton benötigt, um von den
Lautsprechern aus die Hörer zu erreichen,
können Sie einstellen.
Es ist möglich, ein natürliches Klangfeld zu
simulieren, so daß der Hörer das Gefühl hat,
sich im Zentrum des Klangfeldes zu befinden,
unabhängig von seiner Sitzposition im Auto.
3
Anzeige
im Display
All
21
Front
Front-R
Front-L
Rear
Zentrum des
Klangfeldes
Normale
Einstellung
(1 + 2 + 3)
Vorne (1 + 2)
Rechts vorne (2)
Links vorne (1)
Hinten (3)
2 Drücken Sie (+) oder (–) so oft, bis die
gewünschte Sitzposition angezeigt wird.
3 Drücken Sie (SOUND) zwei Sekunden
lang.
POS
SUR
EQ
L R
4 Verschieben Sie mit (+) oder (–) das
Zentrum des Klangfeldes nach links bzw.
rechts. Stellen Sie dann das Zentrum des
Klangfeldes ein.
Zentrum wird nach R (rechts)
verschoben.
Zentrum wird nach L (links)
verschoben.
5 Drücken Sie (4) (n).
POS
SUR
EQ
R F
Wenn Sie wieder zum Auswählen der
Sitzposition zurückschalten wollen,
drücken Sie (1) (N).
6 Verschieben Sie mit (+) oder (–) das
Zentrum des Klangfeldes nach vorne
bzw. hinten.
Zentrum wird nach F (vorne)
verschoben.
Zentrum wird nach R (hinten)
verschoben.
7 Drücken Sie (SOUND) zwei Sekunden
lang.
D
DSP
15
Actual total number: Sony CDX-C810DSP (E,F,G,I) 3-856-118-11(2)
Page 79
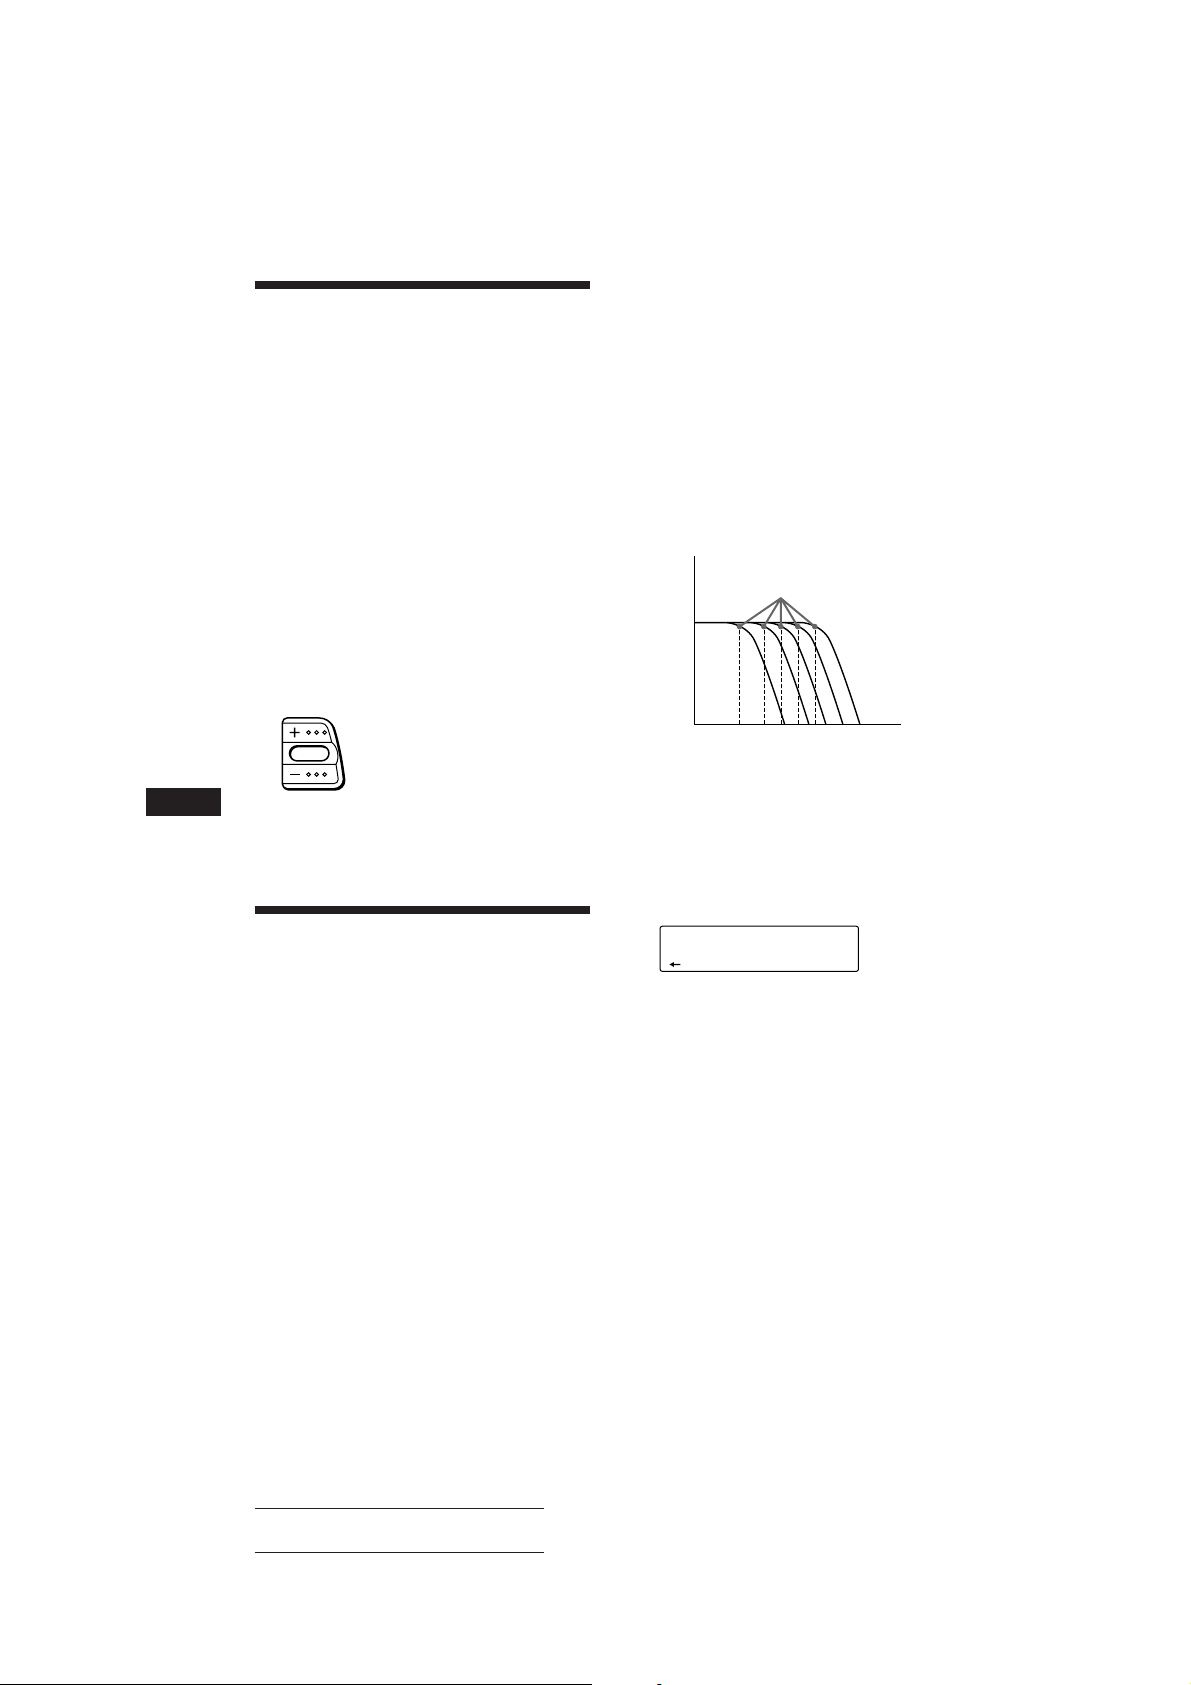
Einstellen des Faders
SUR
EQ
125Hz
SUB
(FAD)
Wenn der DSP-Modus eingeschaltet ist, wird
die Lautstärke des von den Hecklautsprechern
ausgegebenen Tons normalerweise automatisch
verringert, um die Einstellung des Klangs auf
die Sitzposition zu verbessern. Wenn Sie die
Lautstärke für die Hecklautsprecher erhöhen
wollen, stellen Sie diese mit dem Fader ein.
1 Gehen Sie wie in Schritt 1 bis 3 unter
„Auswählen des Raumklangmodus“ auf
Seite 14 beschrieben vor.
2 Drücken Sie (SOUND) so oft, bis „FAD“
erscheint.
3 Stellen Sie mit (+) oder (–) den Fader
ein.
Erhöht Lautstärke der
Frontlautsprecher
Verringert Lautstärke der
Frontlautsprecher
D
Nach drei Sekunden erscheint im Display
wieder die Anzeige für den normalen
Wiedergabemodus.
Einstellen des Grenzwerts für die
Frequenz des/der
Tiefsttonlautsprecher(s)
Wenn Sie die Klangeigenschaften
angeschlossener Tiefsttonlautsprecher optimal
nutzen wollen, können Sie die nicht
gewünschten Audiosignale mit hoher und
mittlerer Frequenz, die in
Tiefsttonlautsprecher eingespeist werden,
ausblenden. Wenn Sie den Grenzwert für die
Frequenz festlegen (siehe das Diagramm
unten), geben die Tiefsttonlautsprecher nur die
entsprechenden niederfrequenten Signale aus,
so daß ein klareres Klangbild erzeugt wird.
Pegel
Grenzwert für Frequenz
62 99 125 157 198
Frequenz (Hz)
1 Wählen Sie mit (SOURCE) eine Tonquelle
(Radio, CD oder MD).
2 Drücken Sie (SOUND) so oft, bis „SUB“
erscheint.
Einstellen der Lautstärke
des/der
Tiefsttonlautsprecher(s)
1 Wählen Sie mit (SOURCE) eine Tonquelle
(Radio, CD oder MD).
2 Drücken Sie (SOUND) so oft, bis „SUB“
erscheint.
3 Stellen Sie mit (+) oder (–) die
Lautstärke ein.
Nach drei Sekunden erscheint im Display
wieder die Anzeige für den normalen
Wiedergabemodus.
16
3 Drücken Sie (SOUND) zwei Sekunden
lang.
4 Wählen Sie mit (+) oder (–) den
gewünschten Grenzwert für die
Frequenz.
62 Hz n 99 Hz n 125 Hz* n 157 Hz n 198 Hz
* Werkseitig eingestellte Frequenz
5 Drücken Sie (SOUND) zwei Sekunden
lang.
Wenn Sie die Lautstärke des
Tiefsttonlautsprechers einstellen wollen,
drücken Sie (1) (N).
Actual total number: Sony CDX-C810DSP (E,F,G,I) 3-856-118-11(2)
Page 80

Einstellen der Lautstärke
von Bässen und Höhen
— Digitale klangregelung
Der CDX-C810DSP ist mit einem integrierten
DSP IC ausgestattet, der mit Hilfe digitaler
Schaltkreise die Lautstärke von Bässen und
Höhen präziser regeln kann, als das bei
analogen Schaltkreisen möglich ist.
Die steileren Tonkurven bei diesem Gerät
bewirken eine deutlichere und effektivere
Klangwiedergabe. Sie können z. B. die
Hintergrundmusik durch eine entsprechende
Einstellung der Bässe hervorheben und die
Hauptgesangsstimme wirksam isolieren.
Frequenz (Hz)
1 Wählen Sie mit (SOURCE) eine Tonquelle
(Radio, CD oder MD).
2 Drücken Sie (SOUND) so oft, bis „BAS“
oder „TRE“ erscheint.
3 Stellen Sie mit (+) oder (–) die
Lautstärke ein.
Nach drei Sekunden erscheint im Display
wieder die Anzeige für den normalen
Wiedergabemodus.
4 Wählen Sie mit (+) oder (–) die
Übergangsfrequenz.
Die Übergangsfrequenzen ändern sich
folgendermaßen:
Bässe:
125 Hz n 157 Hz* n 198 Hz
Höhen:
5,0 kHz n 7,1 kHz*
* Werkseitig eingestellte Frequenz
5 Drücken Sie (SOUND) zwei Sekunden
lang.
Wenn Sie die Lautstärke von Bässen und
Höhen einstellen wollen, drücken Sie (1)
(N)
Einschalten der
verschiedenen Tonquellen
mit dem registrierten
Raumklangmodus
— Source Sound Memory (SSM)
Sie können dieselbe Tonquelle immer mit
demselben Raumklangmodus und denselben
Klangeigenschaften (Bässe, Höhen,
Tiefsttonlautsprecher) wiedergeben lassen,
auch wenn Sie die Tonquelle gewechselt oder
das Gerät aus- und wieder eingeschaltet
haben.
D
DSP
Einstellen der Übergangsfrequenz
Sie können die Baß- und
Höhenübergangsfrequenzen einstellen.
1 Wählen Sie mit (SOURCE) eine Tonquelle
(Radio, CD oder MD).
2 Drücken Sie (SOUND) so oft, bis „BAS“
oder „TRE“ erscheint.
3 Drücken Sie (SOUND) zwei Sekunden
lang.
Baßeinstellmodus
BAS
SUR
EQ
157Hz
Höheneinstellmodus
TRE
SUR
EQ
7.1kHz
Actual total number: Sony CDX-C810DSP (E,F,G,I) 3-856-118-11(2)
17
Page 81

Weitere Funktionen
Der Joystick
Der Joystick funktioniert, indem Sie die Tasten
darauf drücken und/oder an den Reglern
drehen.
Sie können den zusätzlich erhältlichen CDoder MD-Wechsler mit dem Joystick steuern.
Tastendruck (Taste SOURCE)
(SOURCE)
D
Mit jedem Tastendruck auf (SOURCE)
wechselt die Tonquelle folgendermaßen:
FM1 n FM2 n MW n LW (SW) n CD1 n
CD2 n MD1 n MD2
Drehen und Drücken des Reglers
(Regler PRESET/DISC)
Wenn Sie den Regler gleichzeitig drehen
und drücken, können Sie:
•die auf den Stationstasten gespeicherten
Sender einstellen.
•die CD/MD wechseln.
Sonstige Funktionen
Drehen Sie den Regler VOL, um
die Lautstärke einzustellen.
Drücken Sie (DSPL), um die
Anzeige im Display zu wechseln.
Drücken Sie (MUTE),
um den Ton
stummzuschalten.
Drücken Sie (OFF),
um das Gerät
auszuschalten.
OFF
Tip
Wenn sich der Schalter POWER SELECT in der Position
B befindet, können Sie das Gerät einchalten, indem Sie
(SOURCE) am Joystick drücken.
Drehen des Reglers (Regler SEEK/
AMS)
Wenn Sie den Regler kurz drehen und
dann loslassen, können Sie:
•einen bestimmten Titel auf einer CD/MD
ansteuern. Wenn Sie den Regler gedreht
halten, können Sie eine bestimmte
Passage in einem Titel ansteuern. Lassen
Sie den Regler dann los, startet die
Wiedergabe.
•die Sender automatisch einstellen. Wenn
Sie den Regler gedreht halten, können Sie
einen bestimmten Sender einstellen.
18
Drücken Sie
(SOUND), um
die Lautstärke
und das
Klangmenü
einzustellen.
Drücken Sie (LIST), um
gespeicherte Namen aufzurufen.
Wechseln der Drehrichtung
Die Drehrichtung der Regler ist werkseitig wie
in der Abbildung unten eingestellt.
Erhöhen
Verringern
Actual total number: Sony CDX-C810DSP (E,F,G,I) 3-856-118-11(2)
Page 82

Wenn Sie den Joystick rechts von der
Lenksäule montieren, können Sie die
Drehrichtung der Regler wechseln.
Stummschalten des Tons
Drücken Sie (MUTE).
Die Anzeige „MUTE ON“ blinkt.
Um die vorherige Lautstärke wieder
einzustellen, drücken Sie (MUTE) nochmals.
Drücken Sie zwei Sekunden lang (DSPL),
und halten Sie dabei den Regler VOL
gedrückt.
Tip
Sie können die Drehrichtung der Regler auch mit dem
Gerät steuern.
Einstellen der
Klangeigenschaften
Sie können Bässe, Höhen, Balance und Fader
einstellen. Für die einzelnen Tonquellen wird
der Pegel für Bässe und Höhen gespeichert.
1 Wählen Sie die einzustellende
Klangoption, indem Sie (SOUND)
mehrmals drücken.
VOL (Lautstärke) n SUR
(Raumklangmodus) n POS (Hörposition)
n SUB (Tiefsttönerpegel) n BAS* (Bässe)
n TRE* (Höhen) n BAL (Balance) n
FAD* (Fader)
* Den Pegel des Ausgangs SUB können Sie nicht
einstellen.
2 Stellen Sie die ausgewählte Option mit
(+) oder (–) ein.
Nachdem Sie eine Klangoption ausgewählt
haben, müssen Sie innerhalb von drei
Sekunden den Einstellvorgang beginnen.
Danach dienen die Tasten wieder nur zur
Regelung der Lautstärke.
Wechseln der Klang- und
Anzeigeeinstellungen
Sie können folgende Optionen einstellen:
• AMBER/GREEN — Die Display-Farbe
wechselt zwischen bernstein und grün.
• BEEP — Der Signalton kann ein- oder
ausgeschaltet werden.
• DIMMER (Dimmer) — Die Helligkeit des
Displays kann verringert werden.
• D.INFO (Dual Information) — Uhrzeit und
Wiedergabemodus können gleichzeitig (ON)
oder abwechselnd (OFF) angezeigt werden.
• LOUD (Loudness) — Bässe und Höhen
werden verstärkt, so daß der Klang auch bei
geringer Lautstärke von guter Qualität ist.
• RM (Joystick) — Dient zum Wechseln der
Drehrichtung der Regler am Joystick.
— Wählen Sie „NORM,“ um den Joystick so
zu verwenden, wie er werkseitig
eingestellt wurde.
— Wählen Sie „REV,“ wenn Sie den Joystick
rechts der Lenksäule montieren.
1 Drücken Sie (SHIFT) und dann (2) (SET
UP).
2 Drücken Sie (2) (SET UP) so oft, bis der
gewünschte Einstellmodus erscheint.
Mit jedem Tastendruck auf (2) (SET UP)
wechseln die Optionen folgendermaßen:
CLOCK n AMBER/GREEN n BEEP n DIMMER
n D.INFO* n LOUD* n RM
* Wenn Sie den Sender nicht eingestellt haben bzw.
keine CD/MD wiedergegeben wird, erscheinen diese
Optionen nicht.
3 Wählen Sie mit (4) (n) die gewünschte
Einstellung (z. B. ON oder OFF).
D
Weitere Funktionen
4 Drücken Sie(SHIFT).
Wenn Sie den Modus eingestellt haben,
erscheint wieder die Anzeige für den
normalen Wiedergabemodus.
Actual total number: Sony CDX-C810DSP (E,F,G,I) 3-856-118-11(2)
19
Page 83

Wenn zusätzliche Geräte angeschlossen
sind
CD/MD-Wechsler
Sie können mit diesem Gerät bis zu 10 CDund MD-Wechsler steuern.
1 Drücken Sie (SHIFT) und dann (2) (SET
UP) so oft, bis „A.SCRL“ erscheint.
2 Wählen Sie mit (4) (n) die Option
„A.SCRL ON.“
Wenn Sie die Funktion ausschalten wollen,
wählen Sie in Schritt 2 oben die Option
„A.SCRL OFF.“
Wiedergeben einer CD
oder MD
Drücken Sie (SOURCE), bis der
gewünschte Wechsler angezeigt wird.
Die Wiedergabe einer CD/MD beginnt.
Wenn ein CD- oder MD-Wechsler
angeschlossen ist, werden alle Titel ab dem
Anfang abgespielt.
Umschalten der Anzeigen im
Display
Mit jedem Tastendruck auf (DSPL) während
der Wiedergabe einer CD/MD wechselt die
Anzeige im Display folgendermaßen:
D
Abgelaufene Spieldauer
1
∗
Ist für die CD kein Name vorhanden, erscheint „NO
Name“ im Display. Wenn eine MD keinen Namen hat,
erscheint „NO D.Name“ im Display.
2
Wurde kein Name für den Titel aufgezeichnet, erscheint
∗
eine Sekunde lang „NO T.Name“ im Display.
3
Wenn die Dual-Information-Funktion aktiviert ist,
∗
erscheint die Uhrzeit nicht im Display.
Tip
Wenn der Name der MD zu lang ist, können Sie ihn im
Display verschieben und auf diese Weise ganz anzeigen
lassen, indem Sie (SHIFT) und dann (1) (N) drücken.
Automatisches Verschieben des
Namens einer scheibe — Auto Scroll
Mit der Funktion Auto Scroll wird der Name
einer MD oder eines Titels automatisch
verschoben und auf diese Weise ganz
angezeigt, wenn Sie (DSPL) drücken und die
Länge des Namens 10 Zeichen überschreitet.
$
$
Name der CD/MD*
$
Name des Titels*
$
3
Uhrzeit*
Anzeigen des Aufnahmedatums
der gerade ausgewählten MD
Drücken Sie während der Wiedergabe
der MD zwei Sekunden lang (DSPL).
Das Aufnahmedatum des betreffenden
Titels erscheint für ca. drei Sekunden.
Ansteuern eines bestimmten Titels
— AMS (Automatischer Musiksensor)
Drücken Sie während der Wiedergabe
eine der Seiten von (SEEK/AMS) jeweils
einmal für jeden zu überspringenden
Titel.
SEEK/AMS
Ansteuern nachfolgender Titel
Ansteuern vorhergehender Titel
1
2
Ansteuern einer bestimmten
Passage in einem Titel
— Manuelle Suche
Halten Sie während der Wiedergabe eine
der Seiten von (SEEK/AMS) gedrückt.
Lassen Sie die Taste wieder los, wenn Sie
die gewünschte Stelle gefunden haben.
SEEK/AMS
Vorwärtssuchen
Rückwärtssuchen
Direktes Auswählen einer
bestimmten CD/MD
— Direct Disc Selection-Funktion
Drücken Sie die Zahlentaste, die der
Nummer der gewünschten CD/MD
entspricht.
Die gewünschte CD/MD im gerade
ausgewählten Wechsler wird
wiedergegeben.
20
Actual total number: Sony CDX-C810DSP (E,F,G,I) 3-856-118-11(2)
Page 84

Anspielen der Titel
— Intro Scan
Mit dieser Funktion werden die ersten 10
Sekunden aller Titel der gerade ausgewählten
CD/MD wiedergegeben.
1 Drücken Sie während der Wiedergabe
(SHIFT) und dann (3) (PLAY MODE) so
oft, bis „INTRO“ erscheint.
2 Wählen Sie mit (4) (n) „INTRO ON.“
Intro Scan startet.
Wiedergeben von Titeln in
willkürlicher Reihenfolge
— Shuffle Play
Sie haben folgende Auswahlmöglichkeiten:
• SHUF 1 zum Wiedergeben der Titel auf der
aktuellen CD/MD in willkürlicher
Reihenfolge .
• SHUF 2 zum Wiedergeben der Titel im
aktuellen Wechsler in willkürlicher
Reihenfolge.
• SHUF 3 zum Wiedergeben aller Titel in
willkürlicher Reihenfolge.
Wenn Sie wieder zum normalen
Wiedergabemodus wechseln wollen, wählen
Sie „INTRO OFF“ in Schritt 2.
Wiederholtes
Wiedergeben von Titeln
— Repeat Play
Sie haben folgende Auswahlmöglichkeiten:
• REP 1 zum Wiederholen eines Titels.
• REP 2 zum Wiederholen einer CD/MD.
• REP 3 zum Wiederholen aller CDs/MDs im
aktuellen Wechsler.
1 Drücken Sie während der Wiedergabe
(SHIFT). Drücken Sie dann (3) (PLAY
MODE) so oft, bis „REP“ erscheint.
2 Drücken Sie (4) (n) so oft, bis die
gewünschte Einstellung erscheint.
z REP 1 z REP 2 z REP 3
REP OFF Z
Repeat Play startet.
Wenn Sie wieder zum normalen
Wiedergabemodus wechseln wollen, wählen
Sie „REP OFF“ in Schritt 2.
1 Drücken Sie während der Wiedergabe
(SHIFT) und dann (3) (PLAY MODE) so
oft, bis „SHUF“ erscheint.
2 Drücken Sie (4) (n) so oft, bis die
gewünschte Einstellung erscheint.
z SHUF 1 z SHUF 2 z SHUF 3
SHUF OFF Z
Shuffle Play startet.
Wenn Sie wieder zum normalen
Wiedergabemodus wechseln wollen, wählen
Sie „SHUF OFF“ in Schritt 2.
Zusammenstellen eines
Programms
— CD-Programmspeicher (CD-Wechsler mit
Programmspeicherfunktion)
Sie können vor der Wiedergabe die Titel, die
Sie hören möchten, in der gewünschten
Wiedergabereihenfolge auswählen und als
Programm speichern. Bei dieser Funktion
können Sie zwei Programme mit jeweils 12
Titeln zusammenstellen. Die Titel können Sie
als Programm 1 oder Programm 2 speichern.
1 Drücken Sie (SHIFT) und dann (3) (PLAY
MODE) zwei Sekunden lang.
Programmbearbeitungsmodus
CD2
„P 1“ zeigt an, daß Programm 1 ausgewählt ist.
DISC
SUR
EQ
2 3 P1.‚1
PLAY MODE ENTER
TRACK
D
CD/MD-Wechsler
Fortsetzung siehe nächste Seite n
Actual total number: Sony CDX-C810DSP (E,F,G,I) 3-856-118-11(2)
21
Page 85

Wenn Sie einer CD einen Namen gegeben
SUR
EQ
PLAY MODE ENTER
DISC
TRACK
4 7 P1.‚8
CD2
SUR
EQ
PLAY MODE ENTER
--PGM1--
DEL
haben, erscheint zunächst die Anzeige für
die Bank-Funktion. Drücken Sie dann (3)
(PLAY MODE), so daß „P 1“ im Display
erscheint.
1 Drücken Sie (SHIFT).
2 Drücken Sie (3) (PLAY MODE) so oft, bis
„PGM“ erscheint.
Wollen Sie Programm 2 eingeben, drücken
Sie (4) (n) so oft, bis „P 2“ erscheint.
2 Wählen Sie den ersten Titel aus.
1 Wählen Sie mit (SOURCE) den
Wechsler.
2 Drücken Sie (SHIFT), und geben Sie
dann mit den Zahlentasten die
gewünschte CD ein.
3 Drücken Sie (SHIFT).
4 Drücken Sie die entsprechende Seite
von (SEEK/AMS), und wählen Sie so
den Titel.
3 Drücken Sie kurz (5) (ENTER).
P1
SUR
EQ
+ENTER+
PLAY MODE ENTER
D
CD2
SUR
EQ
µ
DISC
TRACK
3 2 P1.‚2
PLAY MODE
4 Um weitere Titel zu programmieren,
gehen Sie wie in Schritt 2 und 3 erläutert
vor.
5 Wenn Sie alle gewünschten Titel
eingegeben haben, drücken Sie zwei
Sekunden lang (3) (PLAY MODE).
Hinweise
• „*Wait*“ erscheint im Display, während die Daten des
programmierten Titels in den Speicher eingelesen werden
oder wenn keine CD eingelegt wurde.
• „*Mem Full*“ erscheint im Display, wenn Sie
versuchen, mehr als 12 Titel für ein Programm
einzugeben.
Wiedergeben des gespeicherten
Programms
Wenn Sie die Reihenfolge der CDs im
Wechsler ändern, so hat dies keinen Einfluß
auf die Wiedergabe des gespeicherten
Programms.
3 Drücken Sie (4) (n) so oft, bis das
gewünschte Programm angezeigt wird.
z PGM 1 z PGM 2 z PGM 1+2
PGM OFF Z
Die Wiedergabe des Programms startet.
Wollen Sie wieder zur normalen Wiedergabe
zurückschalten, wählen Sie in Schritt 3 die
Option „PGM OFF.“
Hinweise
• Wenn Sie während der Wiedergabe eines Programms die
Zahlentasten drücken, wird die Wiedergabe des
Programms unterbrochen, und die Wiedergabe der
ausgewählten CD beginnt.
• Wenn kein Titel für ein Programm gespeichert ist,
erscheint „NO Data“ im Display.
• Wenn ein programmierter Titel nicht auf den CDs im
Magazin enthalten ist, wird dieser Titel übersprungen.
• Wenn die CDs im Magazin keinen der programmierten
Titel enthalten oder wenn die Informationen über die
gespeicherten Titel noch nicht eingelesen wurden,
erscheint „Not Ready“ im Display.
Löschen des gesamten Programms
1 Drücken Sie (SHIFT) und dann zwei
Sekunden lang (3) (PLAY MODE).
„P 1“ zeigt an, daß Programm 1 ausgewählt
wurde.
Wenn Sie einer CD einen Namen gegeben
haben, erscheint zunächst die Anzeige für
die Bank-Funktion. Drücken Sie dann (3)
(PLAY MODE), so daß „P 1“ im Display
erscheint.
2 Drücken Sie (1) (N) so oft, bis „DEL“
erscheint.
Wollen Sie Programm 2 löschen, drücken
Sie (4) (n) so oft, bis „PGM 2“ erscheint.
Sie haben folgende Auswahlmöglichkeiten:
• PGM 1 Zur Wiedergabe vor Programm 1.
• PGM 2 Zur Wiedergabe vor Programm 2.
• PGM 1+2 Zur Wiedergabe vor Programm 1
und 2.
22
Actual total number: Sony CDX-C810DSP (E,F,G,I) 3-856-118-11(2)
Page 86

3 Drücken Sie zwei Sekunden lang (5)
(ENTER).
P1
SUR
EQ
NO Data
PLAY MODE ENTER
Das gesamte Programm wird gelöscht.
4 Wenn Sie das gewünschte Programm
bzw. die Programme gelöscht haben,
drücken Sie zwei Sekunden lang (3)
(PLAY MODE).
Einfügen von Titeln in ein
Programm
1 Drücken Sie (SHIFT) und dann zwei
Sekunden lang (3) (PLAY MODE).
CD2
DISC
SUR
EQ
„P 1“ zeigt an, daß Programm 1 ausgewählt ist.
TRACK
4 7 P1.‚8
PLAY MODE ENTER
Wenn Sie einer CD einen Namen gegeben
haben, erscheint zunächst die Anzeige für
die Bank-Funktion. Drücken Sie dann (3)
(PLAY MODE), so daß „P 1“ im Display
erscheint.
Wollen Sie Programm 2 auswählen,
drücken Sie (4) (n) so oft, bis „P 2“
erscheint.
2 Wählen Sie mit (1) (N) oder (4) (n) die
Titelpositionsnummer, an der ein Titel
eingefügt werden soll.
Titelpositionsnummer
CD2
DISC
SUR
EQ
3 2 P1.‚5
PLAY MODE ENTER
TRACK
3 Drücken Sie die entsprechende Seite von
(SEEK/AMS), um den Titel auszuwählen,
der eingefügt werden soll.
4 Drücken Sie kurz (5) (ENTER). Der Titel
wird eingefügt.
Der betreffende Titel wird an der
angegebenen Positionsnummer eingefügt,
und die folgenden Titel werden um eine
Position nach unten verschoben.
Wollen Sie weitere Titel in ein Programm
einfügen, gehen Sie wie in Schritt 2 bis 4
erläutert vor.
5 Wenn Sie alle gewünschten Titel
eingefügt haben, drücken Sie zwei
Sekunden lang (3) (PLAY MODE).
Löschen von Titeln in einem
Programm
1 Drücken Sie (SHIFT) und dann zwei
Sekunden lang (3) (PLAY MODE).
CD2
SUR
„P 1“ zeigt an, daß Programm 1 ausgewählt ist.
DISC
EQ
TRACK
3 2 P1.‚7
PLAY MODE ENTER
Wenn Sie einer CD einen Namen gegeben
haben, erscheint zunächst die Anzeige für
die Bank-Funktion. Drücken Sie dann (3)
(PLAY MODE), so daß „P 1“ im Display
erscheint.
Wollen Sie Programm 2 auswählen,
drücken Sie (4) (n) so oft, bis „P 2“
erscheint.
2 Drücken Sie (1) (N) oder (4) (n), um
den Titel auszuwählen, den Sie löschen
wollen.
Titelpositionsnummer
CD2
Der im Moment an Position 6 von Programm 1
registrierte Titel
DISC
SUR
EQ
3 3 P1.‚6
PLAY MODE ENTER
TRACK
3 Drücken Sie zwei Sekunden lang (5)
(ENTER).
Wenn Sie einen Titel löschen, verschieben
sich die anderen Titel hinter der
betreffenden Positionsnummer um eine
Stelle nach oben, um die Lücke zu füllen.
DEL
DISC
SUR
EQ
- -- P1.‚6
PLAY MODE ENTER
TRACK
µ
CD2
SUR
DISC
EQ
TRACK
4 7 P1.‚6
PLAY MODE ENTER
4 Wollen Sie weitere Titel löschen, gehen
Sie wie in Schritt 2 und 3 erläutert vor.
5 Wenn Sie alle gewünschten Titel
gelöscht haben, drücken Sie zwei
Sekunden lang (3) (PLAY MODE).
D
CD/MD-Wechsler
Hinweis
Sobald für alle 12 Positionen ein Titel programmiert
wurde, erscheint „*Mem Full*“ im Display, und Sie
können keine weiteren Titel einfügen.
Actual total number: Sony CDX-C810DSP (E,F,G,I) 3-856-118-11(2)
23
Page 87
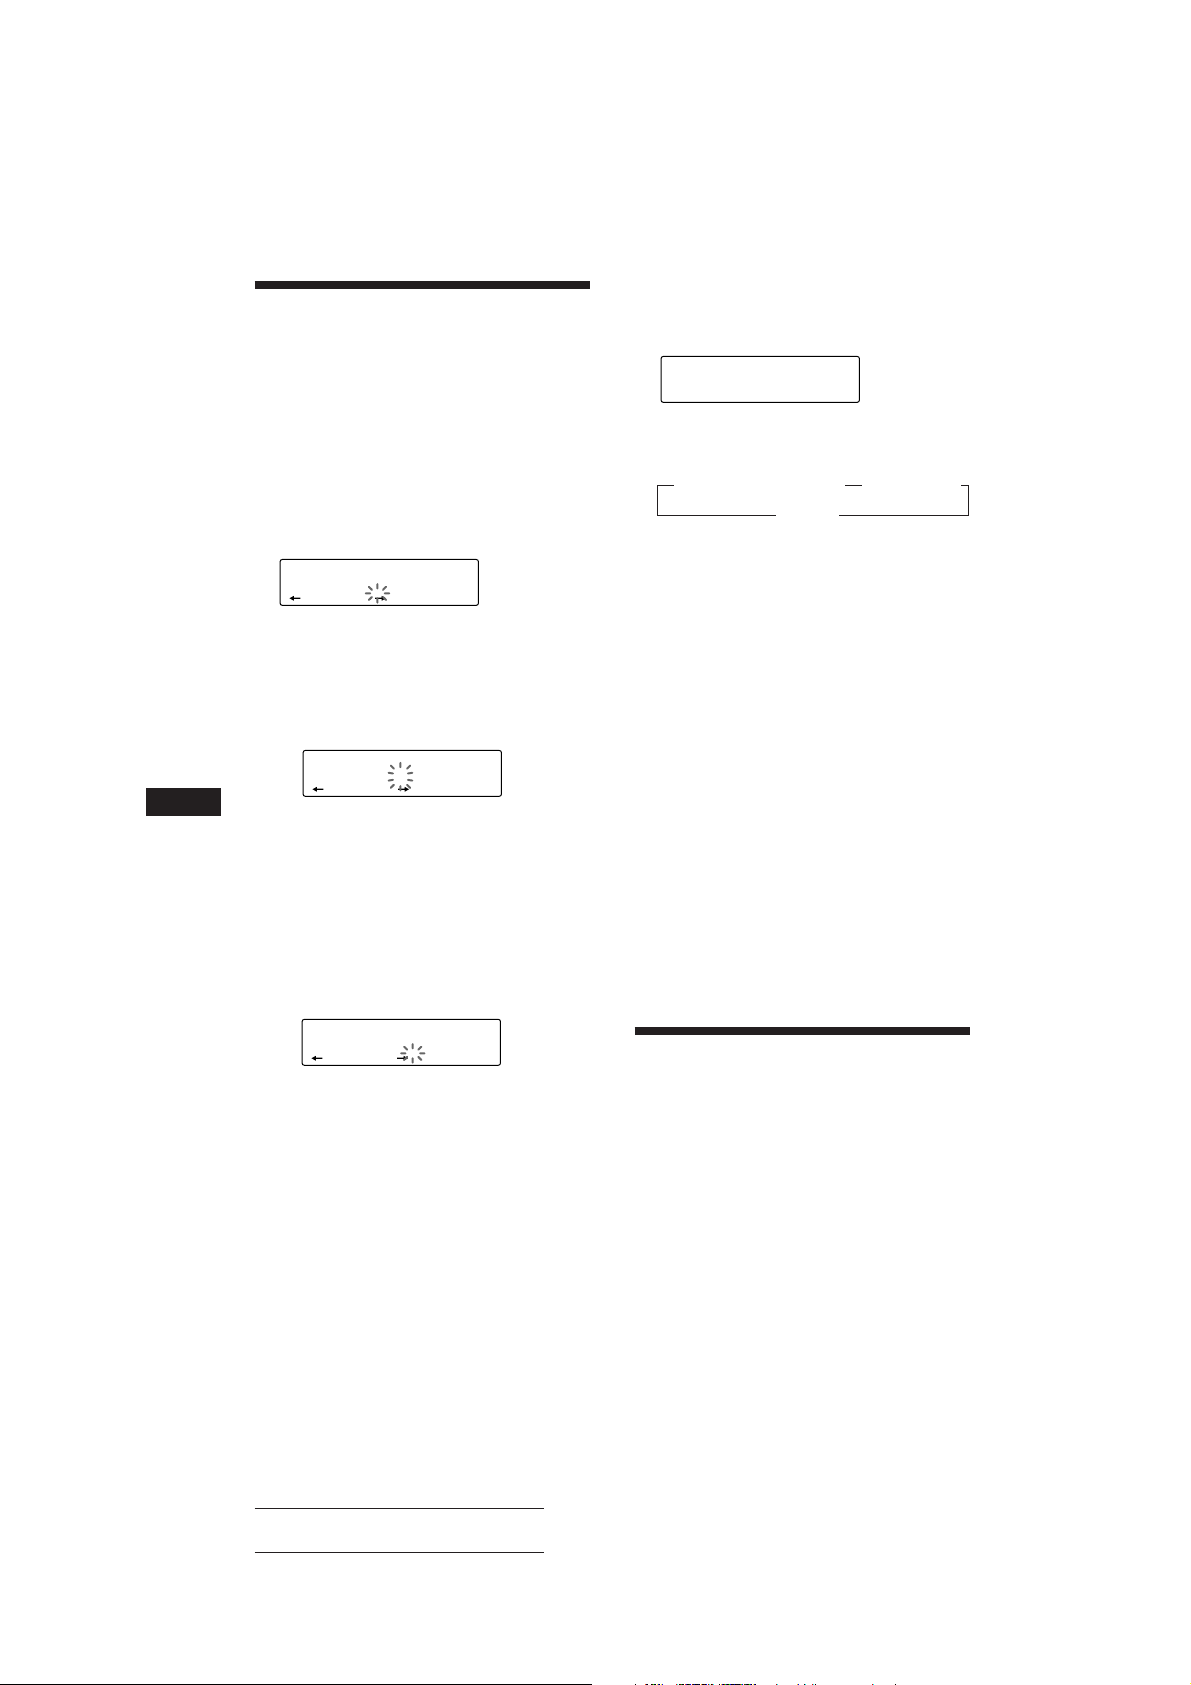
Benennen einer CD
SUR
EQ
DISC
DISCNAME
1 SCHUBERT
CD1
— Disc Memo (bei CD-Wechsler mit
Custom-File-Funktion)
Sie können jeder CD einen eigenen Namen
geben. Pro CD können Sie bis zu acht Zeichen
eingeben. Wenn Sie eine CD benannt haben,
können Sie sie nach dem Namen suchen und
bestimmte Titel für die Wiedergabe auswählen
(Seite 25).
1 Lassen Sie die CD wiedergeben, und
drücken Sie (LIST) zwei Sekunden lang.
CD1
SUR
EQ
DISCNAME
DISC
1 ________
Aufrufen des Disc Memo
Drücken Sie (DSPL) während der
Wiedergabe der CD.
Mit jedem Tastendruck auf (DSPL)
während der Wiedergabe der CD wechselt
die Anzeige folgendermaßen:
z Abgelaufene Spieldauer z Name der CD
Uhrzeit Z
Löschen des Disc Memo
1 Wählen Sie mit (SOURCE) den CD-
Wechsler aus (z. B. CD 2 oder CD 3).
2 Geben Sie die Zeichen ein.
1 Wählen Sie mit (+) die gewünschten
Zeichen.
(A n B n C n ··· Z n 0 n 1 n 2 n
··· 9 n + n – n * n / n \ n > n <
n. n _ )
CD1
SUR
EQ
DISCNAME
DISC
1 S_______
D
Wenn Sie (–) drücken, werden die
Zeichen in umgekehrter Reihenfolge
angezeigt.
Wenn Sie nach einem Zeichen ein
Leerzeichen setzen wollen, wählen Sie
„_“ (Unterstrich).
2 Drücken Sie (4) (n), wenn Sie das
gewünschte Zeichen gefunden haben.
Der blinkende Cursor wechselt zur
nächsten Eingabeposition.
CD1
SUR
EQ
Wenn Sie (1) (N) drücken, bewegt sich
der blinkende Cursor nach links.
3 Geben Sie wie in Schritt 1 und 2
erläutert den ganzen Namen ein.
DISCNAME
DISC
1 S_______
3 Wenn Sie zum normalen CD-
Wiedergabemodus zurückschalten
möchten, drücken Sie (LIST) zwei
Sekunden lang.
Tip
Wenn Sie einen Namen löschen/korrigieren möchten,
geben Sie „_“ (Unterstrich) für jedes Zeichen ein.
2 Drücken Sie (LIST) zwei Sekunden lang.
3 Drücken Sie (DSPL) zwei Sekunden lang.
4 Wählen Sie mit (+) oder (–) den zu
löschenden Namen aus.
5 Drücken Sie (5) (ENTER) zwei Sekunden
lang.
Der Namen wird gelöscht.
Wenn Sie weitere Namen löschen wollen,
gehen Sie wie in Schritt 4 und 5 erläutert
vor.
6 Drücken Sie (LIST) zwei Sekunden lang.
Das Gerät schaltet in den normalen CDWiedergabemodus zurück.
Ansteuern einer CD/MD
anhand des Namens
— List-up (CD-Wechsler mit Custom-FileFunktion oder MD-Wechsler)
Wenn Sie diese Funktion verwenden wollen,
muß ein MD- oder CD-Wechsler mit CustomFile-Funktion angeschlossen sein.
Sie können diese Funktion nur verwenden,
wenn den CDs/MDs ein eigener Name
zugewiesen wurde. Weitere Informationen zu
den Namen finden Sie unter „Benennen einer
CD.“
24
Actual total number: Sony CDX-C810DSP (E,F,G,I) 3-856-118-11(2)
Page 88

1 Drücken Sie kurz (LIST).
Der Name der gerade abgespielten CD/MD
erscheint im Display.
LST
SUR
EQ
1 SCHUBERT
ENTER
2 Drücken Sie (LIST) so oft, bis Sie die
gewünschte CD/MD gefunden haben.
3 Starten Sie mit (5) (ENTER) die
Wiedergabe der CD/MD.
Hinweise
• Wenn ein CD/MD-Name fünf Sekunden lang angezeigt
wurde, erscheint im Display wieder die normale Anzeige.
Wenn Sie das Display ausschalten wollen, drücken Sie
(DSPL).
• Die Namen der Titel können während der Wiedergabe
einer MD nicht angezeigt werden.
• Wenn das Magazin keine CDs/MDs enthält, erscheint
„NO Disc“ im Display.
• Wenn einer CD/MD kein eigener Name zugeordnet
wurde, erscheint „********“ im Display.
• Wenn die Daten auf der CD/MD nicht eingelesen
wurden, erscheint „?“ im Display. Damit das Gerät die
Daten einliest, drücken Sie zunächst die Zahlentaste,
und wählen Sie dann die CD/MD, deren Daten nicht
eingelesen wurden.
• Die Daten werden nur in Großbuchstaben angezeigt.
Außerdem gibt es einige Buchstaben, die nicht angezeigt
werden können (während der MD-Wiedergabe).
Auswählen bestimmter
Titel für die Wiedergabe
— Bank (bei CD-Wechsler mit Custom-FileFunktion)
Sie können das Gerät so einstellen, daß
bestimmte Titel übersprungen und nur die
gewünschten Titel wiedergegeben werden,
vorausgesetzt, Sie haben Ihre CDs benannt.
2 Drücken Sie eine der Seiten von
(SEEK/AMS), und wählen Sie damit die
Nummer des Titels, den Sie auslassen
wollen. Drücken Sie (5) (ENTER).
CD2
SUR
DISC
EQ
TRACK
5 3 SKIP
PLAY MODE ENTER
Statt „PLAY“ wird nun „SKIP“ angezeigt.
Wenn Sie wieder zu „PLAY“ schalten
wollen, drücken Sie nochmals (5)
(ENTER).
3 Wenn Sie den Modus „PLAY“ oder „SKIP“
für weitere Titel festlegen wollen, gehen
Sie wie in Schritt 2 erläutert vor.
4 Drücken Sie (3) (PLAY MODE) zwei
Sekunden lang.
Das Gerät schaltet zum normalen CDWiedergabemodus zurück.
Hinweise
• Sie können den Modus „PLAY“ und „SKIP“ für bis zu
24 Titel einstellen.
• Sie können den Modus „SKIP“ nicht für alle Titel
festlegen.
Wiedergeben der gewünschten
Titel
Sie haben zwei Auswahlmöglichkeiten:
• BANK ON — Alle Titel mit der Einstellung
„PLAY“ werden wiedergegeben.
• BANK INV (umgekehrt) — Alle Titel mit der
Einstellung „SKIP“ werden wiedergegeben.
1 Drücken Sie während der Wiedergabe
(SHIFT) und dann (3) (PLAY MODE) so
oft, bis „BANK“ erscheint.
2 Wählen Sie mit (4) (n) den
gewünschten Modus.
z BANK ON z BANK INV z BANK OFF
D
CD/MD-Wechsler
1 Starten Sie die Wiedergabe der CD, und
drücken Sie (SHIFT) und dann (3) (PLAY
MODE) zwei Sekunden lang.
Bank-Modus
CD2
DISC
SUR
EQ
Hinweis
Hat die CD keinen Namen, erscheint statt des BankModus der Programmbearbeitungsmodus. Wollen Sie
zur normalen Wiedergabe zurückschalten, drücken Sie
(SHIFT).
TRACK
5 1 PLAY
PLAY MODE ENTER
CD1
SUR
EQ
Die Wiedergabe beginnt mit dem Titel, der
auf den aktuellen Titel folgt.
Wenn Sie zum normalen Wiedergabemodus
zurückschalten möchten, wählen Sie in Schritt
2 „BANK OFF.“
Actual total number: Sony CDX-C810DSP (E,F,G,I) 3-856-118-11(2)
BANK
BANK ON
PLAY MODE
25
Page 89

Weitere
Informationen
Sicherheitsmaßnahmen
• Wenn Sie Ihr Auto direkt in der Sonne
geparkt haben und die Temperatur im
Wageninneren sehr hoch ist, lassen Sie das
Gerät zunächst etwas abkühlen, bevor Sie es
benutzen.
• Wenn die Stromversorgung des Geräts
unterbrochen ist, überprüfen Sie zunächst die
Anschlüsse. Sind diese in Ordnung,
überprüfen Sie die Sicherung.
• Wenn bei einem Zwei-Lautsprecher-System
über diese Lautsprecher kein Ton
ausgegeben wird, stellen Sie den FaderRegler in die mittlere Position.
•Wenn Ihr Auto mit einer Motorantenne
ausgestattet ist, beachten Sie bitte, daß diese
beim Einschalten des Geräts automatisch
ausgefahren wird.
Wenn Sie Fragen haben oder an Ihrem Gerät
D
Probleme auftauchen, die in dieser
Bedienungsanleitung nicht behandelt werden,
wenden Sie sich bitte an Ihren Sony-Händler.
Hinweise zu CDs
Bei verschmutzter oder beschädigter CD kann
es während der Wiedergabe zu Tonaussetzern
kommen. Um einen optimalen Klang zu
gewährleisten, beachten Sie folgendes:
Fassen Sie die CD stets nur am Rand an.
Berühren Sie die Oberfläche der CD nicht, und
halten Sie sie sauber.
Setzen Sie die CD weder direktem Sonnenlicht
noch Wärmequellen wie zum Beispiel
Warmluftauslässen aus. Lassen Sie sie nicht in
einem in der Sonne geparkten Auto liegen,
denn die Temperaturen im Wageninneren
können sehr stark ansteigen.
Reinigen Sie die CD vor dem Abspielen mit
einem Reinigungstuch. Wischen Sie dabei
immer von der Mitte nach außen.
Verwenden Sie keine Lösungsmittel wie
Benzin oder Verdünner und keine
handelsüblichen Reinigungsmittel oder
Antistatik-Sprays für Schallplatten.
Hinweise zur
Feuchtigkeitskondensation
An einem Regentag oder in einer sehr feuchten
Umgebung kann sich auf den Linsen im CDPlayer Feuchtigkeit niederschlagen. Ist dies der
Fall, arbeitet das Gerät nicht mehr
ordnungsgemäß. Nehmen Sie dann die CD
heraus, und warten Sie etwa eine Stunde, bis
die Feuchtigkeit verdunstet ist.
Wiedergeben von Single-CDs (8-cmCDs)
Verwenden Sie dazu den gesondert
erhältlichen Single-CD-Adapter von Sony
(CSA-8), damit der CD-Player nicht beschädigt
wird.
Kleben Sie kein Papier, keine Aufkleber u. ä.
auf die beschriftete Oberfläche.
26
Actual total number: Sony CDX-C810DSP (E,F,G,I) 3-856-118-11(2)
Page 90

Wartung
Austauschen einer Sicherung
Wenn Sie eine Sicherung austauschen, achten
Sie darauf, eine Ersatzsicherung mit dem
gleichen Ampere-Wert zu verwenden. Dieser
ist auf der Sicherung angegeben. Wenn die
Sicherung durchbrennt, überprüfen Sie den
Stromanschluß und tauschen die Sicherung
aus. Wenn auch die neue Sicherung
durchbrennt, kann es sich um eine interne
Störung handeln. Wenden Sie sich in diesem
Fall an Ihren Sony-Händler.
Sicherung (15 A)
Achtung
Verwenden Sie unter keinen Umständen eine
Sicherung mit einem höheren Ampere-Wert
als dem der Sicherung, die ursprünglich mit
dem Gerät geliefert wurde. Andernfalls kann
es zu Schäden am Gerät kommen.
Reinigen der Anschlüsse
Das Gerät funktioniert unter Umständen nicht
korrekt, wenn die Anschlüsse zwischen dem
Gerät und der Frontplatte verschmutzt sind.
Um dies zu vermeiden, lösen Sie mit der Taste
(RELEASE) die Frontplatte, dann nehmen Sie
sie ab und reinigen sie mit einem mit Alkohol
getränkten Wattestäbchen. Drücken Sie dabei
nicht zu fest auf. Andernfalls könnten die
Anschlüsse beschädigt werden.
Ausbauen des Geräts
Freigabeschlüssel
(mitgeliefert)
µ
µ
µ
D
Weitere Informationen
am Gerät
Rückseite der Frontplatte
Actual total number: Sony CDX-C810DSP (E,F,G,I) 3-856-118-11(2)
27
Page 91

Lage und Funktion der Teile und Bedienelemente
OFF
SEEK/AMS
DSPL LIST
SOURCE SOUND
SHIFT
RELEASE
MUTE
Näheres finden Sie auf den angegebenen Seiten.
1 Taste SEEK/AMS (Suchen/Automatischer
Musiksensor/Manuelle Suche) 5, 6, 7, 9,
11, 13, 20, 22, 23
D
2 Taste OFF 4, 5
3 Taste SOUND 14, 15, 16, 17
4 Tasten (+) (–) (Lautstärke-/
Hörposition-/Tiefsttönerpegel-/
Tiefsttönerpegel-/Bässe-/Höhen-/
Balance-/Fader-Regler) 5, 14, 15, 16, 17,
19, 24
5 Display
6 Empfänger für die gesondert erhältliche
drahtlose Fernbedienung
7 Taste DSPL (Ändern des Anzeigemodus)
9, 10, 20, 24, 25
8 Taste 6 (Auswerfen) 5
9 Taste LIST
Disc Memo 24
List-up 25
RDS-Programme 13
0 Taste SOURCE (Auswählen der
Tonquelle ) 5, 8, 9, 12, 14, 16, 17, 20, 22,
24
AF/TA
12345678910
!¡ Taste RELEASE (Lösen der Frontplatte) 4,
27
!™ Rücksetztaste (an der Gerätevorderseite,
unter der Frontplatte) 4
!£ Taste MUTE (Stummschalten des Tons)
19
!¢ Taste SHIFT
BTM 8, 12
PLAY MODE 6, 7, 8, 9, 11, 15, 21, 22, 23,
25
SET UP 5, 13, 19, 20
!∞ Beim Radioempfang:
Stationstasten 9
Bei CD/MD-Wiedergabe:
Direct Disc Selection-Tasten 20
!§ Schalter POWER SELECT (an der
Geräteunterseite)
Siehe den Abschnitt „POWER SELECTSchalter“ in der Installations-/
Anschlußanleitung.
!¶ Taste AF/TA 10, 11, 12
28
Actual total number: Sony CDX-C810DSP (E,F,G,I) 3-856-118-11(2)
Page 92

Als Sonderzubehör
erhältliche, drahtlose
Fernbedienung
(RM-X41)
SOURCE
OFF
MUTE DSPL
DIR
MODE
SEEK
–
=
–
REW
–
AMS
PRESET
DISC
SOUND
SEL
+
+
+
FF
+
Die Tasten an der drahtlosen
Fernbedienung haben dieselbe
Funktion wie die Tasten am Hauptgerät.
1 Taste OFF
2 Taste DIR
(DIR) hat bei diesem Gerät keine
Funktion.
3 Taste SOURCE
6 Taste MUTE
7 Tasten (–) (+)
8 Taste DSPL
9 Taste SOUND
4 Taste SEEK/AMS
5 Taste PRESET/DISC
Mit der Fernbedienung können Sie weder manuell
suchen noch manuell Sender einstellen.
Wenn sich der Schalter POWER SELECT in der Position B befindet, können Sie das Gerät nicht
mit der drahtlosen Fernbedienung steuern, es sei denn, am Gerät wird (SOURCE) gedrückt, oder
eine CD wird eingelegt, um das Gerät zuerst einzuschalten.
D
Weitere Informationen
Actual total number: Sony CDX-C810DSP (E,F,G,I) 3-856-118-11(2)
29
Page 93

Technische Daten
CD-Player
System Digitales CD-Audiosystem
Signal-Rauschabstand 90 dB
Frequenzgang 10 – 20.000 Hz
Gleichlaufschwankungen Unterhalb der Meßgrenze
Radio
UKW
Empfangsbereich 87,5 – 108,0 MHz
Antennenanschluß Externer
Zwischenfrequenz 10,7 MHz
Nutzbare Empfindlichkeit 8 dBf
Trennschärfe 75 dB bei 400 kHz
Signal-Rauschabstand 62 dB (stereo),
Harmonische Verzerrung bei 1 kHz
Kanaltrennung 35 dB bei 1 kHz
Frequenzgang 30 – 15.000 Hz
Gleichwellenselektion 2 dB
Antennenanschluß
65 dB (mono)
0,9 % (stereo),
0,5 % (mono)
MW/LW(KW*)
Empfangsbereich MW: 531 – 1.602 kHz
Antennenanschluß Externer
D
Zwischenfrequenz 10,71 MHz/450 kHz
Empfindlichkeit MW: 30 µV
* Bei den Modellen für Deutschland, Schweiz und
Österreich.
LW: 153 – 281 kHz
KW: 5.950 – 6.205 kHz
Antennenanschluß
LW: 50 µV
KW: 50 µV
Endverstärker
Ausgänge Lautsprecherausgänge
Lautsprecherimpedanz 4 – 8 Ohm
Maximale Leistungsabgabe
(versiegelte Anschlüsse)
35 W × 4 (an 4 Ohm)
Allgemeines
Ausgangskabel Motorantennen-
Steuerleitung
Steuerleitung für
Endverstärker
Klangregler Bässe ±8 dB bei 100 Hz
Höhen ±8 dB bei 10 kHz
Betriebsspannung 12 V Gleichstrom,
Autobatterie (negative
Erdung)
Abmessungen ca. 188 × 58 × 177 mm
(B/H/T)
Einbaumaß ca. 178 × 50 × 154 mm
(B/H/T)
Gewicht ca. 1,5 kg
Mitgeliefertes Zubehör Joystick (1)
Montageteile und
Anschlußzubehör (1 Satz)
Behälter für Frontplatte (1)
Sonderzubehör Drahtlose Fernbedienung
RM-X41
BUS-Kabel (mit einem
Cinchkabel geliefert)
RC-61 (1 m), RC-62 (2 m)
Cinchkabel
RC-63 (1 m), RC-64 (2 m),
RC-65 (5 m)
Reinigungstuch XP-CD1
Single-CD-Adapter CSA-8
Sonderzubehörgeräte CD-Wechsler
CDX-71 (10 CDs),
CDX-72 (10 CDs),
CDX-81 (10 CDs),
CDX-91 (10 CDs),
CDX-T60 (6 CDs)
CDX-T62 (6 CDs)
MD-Wechsler
MDX-40, MDX-60
Signalquellenwähler
XA-U20, usw.
Änderungen, die dem technischen Fortschritt dienen,
bleiben vorbehalten.
30
Actual total number: Sony CDX-C810DSP (E,F,G,I) 3-856-118-11(2)
Page 94

Störungsbehebung
Die meisten Störungen, die unter Umständen an Ihrem Gerät auftreten, können Sie anhand der
folgenden Checkliste selbst beheben.
Bevor Sie die Liste unten durchgehen, überprüfen Sie nochmals, ob die Anschlüsse korrekt
vorgenommen wurden und ob das Gerät korrekt bedient wurde.
Allgemeines
Problem
Kein Ton.
Der Speicherinhalt wurde
gelöscht.
Im Display erscheinen keine
Anzeigen.
CD/MD-Wiedergabe
Problem
Es kann keine CD/MD eingelegt
werden.
Die Wiedergabe startet nicht.
Die CD/MD wird automatisch
ausgeworfen.
Die Betriebstasten
funktionieren nicht.
Der Ton fällt aufgrund von
Erschütterungen aus.
Ursache/Abhilfe
•Stellen Sie mit (+) die Lautstärke ein.
•Stellen Sie bei einem 2-Lautsprecher-System den Fader-Regler
in die mittlere Position.
•Das Netzkabel hat sich gelöst, oder die Autobatterie wurde
abgeklemmt.
•Die Rücksetztaste wurde gedrückt.
n Speichern Sie die Einstellungen erneut.
Nehmen Sie die Frontplatte ab, und reinigen Sie die Anschlüsse.
Näheres dazu finden Sie unter „Reinigen der Anschlüsse“
(Seite 27).
Ursache/Abhilfe
•Es ist bereits eine CD eingelegt.
•Die CD wurde falschherum eingelegt, bzw. die MD wurde
falsch eingelegt.
Die MD ist beschädigt, bzw. die CD ist schmutzig.
Die Umgebungstemperatur liegt bei über 50 °C.
Drücken Sie die Rücksetztaste.
•Das Gerät wurde mit einem Winkel von über 20° installiert.
•Das Gerät wurde an einem Teil des Autos installiert, das zu
starken Vibrationen ausgesetzt ist.
D
Weitere Informationen
Radioempfang
Problem
Ein gespeicherter Sender läßt
sich nicht einstellen.
Der automatische
Sendersuchlauf funktioniert
nicht.
Die Anzeige „ST“ blinkt.
Ursache/Abhilfe
•Speichern Sie den Sender mit der korrekten Frequenz ab.
•Die Sendesignale werden zu schwach empfangen.
Die Sendesignale werden zu schwach empfangen.
n Stellen Sie den Sender manuell ein.
•Stellen Sie den Sender exakt ein.
•Die Sendesignale werden zu schwach empfangen.
n Wechseln Sie in den MONO-Modus (Seite 9).
Actual total number: Sony CDX-C810DSP (E,F,G,I) 3-856-118-11(2)
31
Page 95
RDS-Funktionen
Problem
Nach ein paar Sekunden
Radioempfang beginnt der
Sendersuchlauf.
Keine Verkehrsdurchsagen
Bei PTY wird „NONE“ angezeigt.
Ursache/Abhilfe
Der Sender ist kein Verkehrsfunksender, oder die Sendesignale
werden zu schwach empfangen.
n Wechseln Sie mit (AF/TA) in den Modus „AF TA OFF.“
•Aktivieren Sie „TA.“
•Der Sender strahlt keine Verkehrsdurchsagen aus, obwohl es
ein Verkehrsfunksender (TP) ist.
n Stellen Sie einen anderen Sender ein.
Der Sender gibt keinen Programmtyp an.
DSP-Funktionen
Problem
Kein Ton, oder Ton ist zu leise.
Fehlermeldungen (wenn Sie (einen) zusätzlich erhältliche(n) CD/MD-Wechsler
D
angeschlossen haben)
Die folgenden Anzeigen blinken etwa fünf Sekunden lang, und ein akustisches Signal ist zu hören.
Display
NO Mag
NO Disc
Error
Blank
PushReset
Not Ready
HighTemp
*1Wenn ein Fehler während der Wiedergabe einer MD oder CD auftritt, erscheint die Nummer der MD oder CD nicht im
Display.
2
Die Nummer der CD/MD, die den Fehler verursacht, erscheint im Display.
*
Ursache
Das CD/MD-Magazin ist nicht in den
CD/MD-Wechsler eingelegt.
Im CD/MD-Wechsler befindet sich
keine CD/MD.
Die CD ist verschmutzt oder wurde
falschherum eingelegt.*
1
*
Die MD kann wegen einer Störung
nicht wiedergegeben werden.*
1
Die MD ist nicht bespielt.*
*
Der CD/MD-Wechsler kann aufgrund
einer Störung nicht bedient werden.
Der Deckel des MD-Wechslers ist
offen, oder die MDs wurden nicht
korrekt eingelegt.
Die Umgebungstemperatur ist höher
als 50 Grad Celsius.
Ursache/Abhilfe
Die Lautstärke der Hecklautsprecher wurde möglicherweise
automatisch verringert, um die Wirkung der Klangeinstellung
auf die Sitzposition zu verstärken.
n Drücken Sie (+), um die Balance einzustellen.
Die Balance der Lautsprecher kann getrennt für die
aktivierte DSP-Funktion und die deaktivierte DSP-Funktion
eingestellt werden (Seite 15).
Abhilfe
Legen Sie ein CD/MD-Magazin mit
CDs/MDs in den CD/MD-Wechsler
ein.
Legen Sie CDs/MDs in den CD/MDWechsler ein.
2
2
2
Reinigen Sie die CD, bzw. legen Sie sie
mit der richtigen Seite nach oben ein.
Legen Sie eine andere MD ein.
Lassen Sie eine bespielte MD
wiedergeben.
Drücken Sie die Rücksetztaste am
Gerät.
Schließen Sie den Deckel, oder legen
Sie die MDs korrekt ein.
Warten Sie, bis die Temperatur unter
50 Grad Celsius sinkt.
Wenn Sie das Problem mit den oben genannten Abhilfemaßnahmen nicht lösen können, wenden Sie
sich bitte an Ihren Sony-Händler.
32
Actual total number: Sony CDX-C810DSP (E,F,G,I) 3-856-118-11(2)
Page 96

Index
A
Akustisches Signal 19
Alternativfrequenzen (AF) 10
AMS (Automatischer Musiksensor) 5, 20
Auto-Scroll-Funktion 20
B
Balance 19
Bank-Funktion 25
Bässe 17, 19
Beleuchtungsfarbe 19
BTM-Funktion
(Speicherbelegungsautomatik) 8
C
CD-Programmspeicher 6, 21
CD-Wiedergabe 5, 20
D
Digitale klangregelung 17
Dimmer 19
Direct Disc Selection-Funktion 20
Disc Memo 24
Disc Scan 20
Display 5, 10, 20, 24
Drahtlose Fernbedienung 29
DSM (Disc Sound Memory) 14
Dual-Information-Funktion 19
E
Effekt 14
F, G
Fader 16, 19
Frontplatte 4
H
Höhen 17, 19
Hörposition 15, 19
I
Intro Scan 6, 21
J, K
Joystick 4, 18, 19
L
Lautstärke 16, 19
List-up 24
Local-Link-Funktion 11
Local-Seek-Funktion 9
Loudness 19
M, N, O
Manuelle Sendersuche 9
Manuelle Suche 6, 20
MD-Wiedergabe 20
Monauraler Modus 9
P, Q
PLAY MODE
BANK 25
INTRO 6, 21
LOCAL 9
MONO 9
PGM 7, 22
REP 6, 21
SHUF 6, 21
Programm 6, 13, 21
R
Radio 8
Raumklang 14, 17, 19
RDS (Radiodatensystem) 10, 11, 12, 13
Repeat Play 6, 21
S
Senderspeichersuchfunktion 9
SET UP
AMBER 19
A.SCRL 20
BEEP 19
CLOCK 5
DIMMER 19
D.INFO 19
GREEN 19
LOUD 19
RM 19
Shuffle Play 6, 21
Sicherung 27
Speichern eines Senders 9
SSM (Source Sound Memory) 17
Stummschaltfunktion 19
Suchen
bestimmte Passage 6, 20
bestimmten Titel 5, 20
CD/MD 20, 24
Sender 12
T
TA (Verkehrsdurchsage) 11
Tiefsttönerpegel 19
Tiefsttonlautsprecher 16
TP (Verkehrsfunksender) 11
U
Uhr 5
Uhreinstellfunktion 13
V
Voreinstellen eines Senders 8
W, X, Y
Warnton 4
Z
Zurücksetzen 4
D
Weitere Informationen
Actual total number: Sony CDX-C810DSP (E,F,G,I) 3-856-118-11(2)
33
Page 97

Benvenuti !
Grazie per avere acquistato questo lettore CD
della Sony. Questo apparecchio consente di
utilizzare una varietà di funzioni mediante un
comando a rotazione o un telecomando senza
fili.
Oltre alle funzioni di radio e di riproduzione
dei CD, il sistema può essere ampliato con il
collegamento di un cambia CD/MD opzionale.
I
2
Actual total number: Sony CDX-C810DSP (E,F,G,I) 3-856-118-11 (2)
Page 98

Indice
Informazioni su questo
apparecchio
Operazioni preliminari
Azzeramento dell’apparecchio ......................... 4
Estrazione del pannello frontale ....................... 4
Preparazione del comando a rotazione ........... 4
Impostazione dell’orologio................................ 5
Lettore CD
Ascolto di un CD................................................. 5
Vari modi di riproduzione di un CD ............... 6
Creazione di un programma
— Memorizzazione di programmi CD ....... 6
Radio
Memorizzazione automatica delle stazioni
— BTM (memorizzazione della sintonia
migliore) .......................................................... 8
Memorizzazione delle stazioni desiderate ...... 9
Ricezione delle stazioni memorizzate .............. 9
RDS
Presentazione della funzione RDS ................. 10
Visualizzazione del nome della stazione....... 10
Risintonizzazione automatica dello stesso
programma
— Funzione AF (frequenza alternativa) ... 10
Ascolto di notiziari sul traffico........................ 11
Preimpostazione delle stazioni RDS con i dati
AF e TA ......................................................... 12
Ricerca di una stazione in base al tipo di
programma ................................................... 13
Impostazione automatica dell’orologio ......... 13
DSP
Selezione del menu surround ......................... 14
Registrazione di un menu surround su ogni
dischi
— Disk Sound Memory (DSM) .................. 14
Selezione della posizione di ascolto ............... 15
Regolazione dell’attenuatore (FAD)............... 16
Regolazione del (o dei) subwoofer ................. 16
Regolazione dei bassi e degli acuti
— Controllo della tonalità digitale ............ 17
Ascolto di ogni fonte di programmi nel modo
surround registrato
— Source Sound Memory .......................... 17
Altre funzioni
Utilizzo del comando a rotazione ................... 18
Regolazione delle caratteristiche dell’audio . 19
Disattivazione dell’audio ................................. 19
Modifica delle impostazioni dell’audio e del
display ........................................................... 19
Collegamento di apparecchi
opzionali
Cambia CD/MD
Riproduzione di CD o MD .............................. 20
Ricerca dei brani
— Scorrimento delle introduzioni ............. 21
Riproduzione ripetuta dei brani
— Riproduzione ripetuta ............................ 21
Riproduzione casuale dei brani
— Riproduzione in ordine casuale ............ 21
Creazione di un programma
— Memorizzazione dei programmi CD ... 21
Assegnazione di nomi ai CD
— Promemoria disco ................................... 24
Ricerca di un disco in base al nome
— Elenco ....................................................... 24
Selezione di brani specifici per la riproduzione
— Memoria ................................................... 25
Informazioni aggiuntive
Precauzioni ........................................................ 26
Manutenzione .................................................... 27
Smontaggio dell’apparecchio .......................... 27
Posizione dei comandi ..................................... 28
Caratteristiche tecniche .................................... 30
Guida alla soluzione dei problemi ................. 31
Indice analitico .................................................. 33
I
Actual total number: Sony CDX-C810DSP (E,F,G,I) 3-856-118-11 (2)
3
Page 99

Operazioni preliminari
Azzeramento
dell’apparecchio
Se si utilizza l’unità centrale per la prima volta
o si è sostituita la batteria dell’auto, è
necessario azzerare l’unità centrale.
Premere il tasto di azzeramento con un oggetto
appuntito, come ad esempio una penna a sfera.
Tasto di azzeramento
Nota
Quando si collega il cavo di alimentazione o si azzera
l’apparecchio, aspettare circa 10 secondi prima di inserire il
disco. Non inserire dischi prima che siano passati 10
secondi altrimenti l’azzeramento non verrà eseguito.
I
Estrazione del pannello
frontale
Il pannello frontale di questo apparecchio può
essere estratto per evitare il furto
dell’apparecchio.
1 Premere (OFF).
2 Premere (RELEASE) per sganciare il
pannello frontale ed estrarlo tirandolo
verso l’esterno.
(OFF)
Applicazione del pannello frontale
Fare combaciare la parte A del pannello
frontale alla parte B dell’unità centrale nel
modo illustrato e premere fino ad udire uno
scatto.
A
B
Note
• Accertarsi di non rimontare il pannello frontale alla
rovescia.
• Non esercitare una pressione eccessiva sul pannello
frontale durante l’operazione. Spingerlo delicatamente
verso l’apparecchio.
• Per il trasporto del pannello frontale, utilizzare la
custodia fornita in dotazione.
• Non esercitare una pressione eccessiva sul display del
pannello frontale.
• Non esporre il pannello frontale alla luce diretta del sole e
non lasciarlo in prossimità di sorgenti di calore come
condotte d’aria calda o in ambienti umidi. Non lasciarlo
sul cruscotto dell’auto parcheggiata direttamente sotto la
luce del sole con un conseguente notevole aumento della
temperatura.
Suoneria di avvertimento
Se si spegne il motore dell’auto girando la
chiave in posizione OFF senza avere prima
estratto il pannello frontale, viene emesso per
qualche secondo un segnale acustico di
avvertimento (solo se l’interruttore POWER
SELECT è posizionato su A).
Preparazione del comando
a rotazione
Nel montare il comando a rotazione, applicare
l’etichetta sotto illustrata.
(RELEASE)
Note
• Fare attenzione a non lasciar cadere il pannello durante
l’operazione.
• Se si preme (RELEASE) per estra il pannello mentre
l’apparecchio è ancora acceso, l’alimentazione viene
disattivata automaticamente per evitare di danneggiare i
4
diffusori.
Actual total number: Sony CDX-C810DSP (E,F,G,I) 3-856-118-11 (2)
DSPL
SOUND
LIST
SOUND
LIST
DSPL
Page 100

Impostazione
SEEK/AMS
SUR
EQ
TRACK
5 2.15
CD
dell’orologio
L’orologio mostra l’indicazione digitale
dell’ora in base al sistema delle 24 ore.
Esempio: Impostazione dell’orologio su 10:08
1 Premere (SHIFT) e quindi premere (2)
(SET UP).
SET
SUR
EQ
CLOCK
SET UP
1 Premere (4) (n).
SET
SUR
EQ
1:‚‚
SET UP
Le cifre dell’ora lampeggiano.
2 Impostare l’ora.
per avanzare
per tornare indietro
SET
SUR
EQ
1‚:‚‚
SET UP
3 Premere (4) (n).
SET
SUR
EQ
1‚:‚‚
SET UP
Le cifre dei minuti lampeggiano.
4 Impostare i minuti.
per avanzare
Lettore CD
Ascolto di un CD
Inserire il CD.
La riproduzione inizia in maniera automatica.
Lato etichetta verso l’alto
Se è già inserito un CD, premere (SOURCE)
più volte fino a visualizzare “CD.”
Tempo di riproduzione trascorso
Numero del brano
Il CD è già inserito
Nota
Per riprodurre un CD da 8 cm, usare l’adattatore singolo
opzionale per CD della Sony (CSA-8).
Per Premere
Interrompere la 6 o (OFF)
riproduzione
Espellere il CD 6
I
Operazioni preliminari/Lettore CD
per tornare indietro
SET
SUR
EQ
1‚:‚8
SET UP
2 Premere (SHIFT).
SUR
EQ
1‚:‚8
L’orologio viene attivato.
Nota
Se l’interruttore POWER SELECT nella parte inferiore
dell’unità centrale è posizionato su B, accendere prima
l’apparecchio quindi impostare l’orologio.
Modifica degli elementi visualizzati
Ogni volta che si preme (DSPL), gli elementi
cambiano come segue.
Numero del brano ˜ Ora
Ricerca di un brano specifico
— Funzione AMS (accesso rapido ai brani)
Durante la riproduzione, premere per un
attimo un lato di (SEEK/AMS).
Per cercare brani successivi
Per cercare brani precedenti
Actual total number: Sony CDX-C810DSP (E,F,G,I) 3-856-118-11 (2)
5
 Loading...