

Sonova USA RICR User Manual

Phonak AudéoTM V-R
(V90)
User Guide
This user guide is valid for:
Wireless hearing aid
Your hearing aid & charger details
Phonak Audéo V90-R
Non wireless charging accessories
Phonak Charger Case
Phonak Power Pack
Phonak Mini Charger
2
2016
2016
2016
2016
If no box is checked and you do not know the
model of your hearing aid or charging accessories,
please ask your hearing care professional.
Audéo V-R contains a built-in and non-removable
rechargeable lithium-ion battery.
Please also read safety information regarding
handling rechargeable hearing aids (chapter 16).
Please ensure to charge and use the hearing aid
within operating temperature range: 0° to +40°
Celsius (33° to 104° Fahrenheit)
Hearing aid model Earpieces
F Audéo V90-R F Dome
F SlimTip
F cShell
Charging accessories
F Charger Case incl. power supply
F Power Pack
F Mini Charger incl. power supply
Your hearing aids and chargers have been developed by
Phonak – the world leader in hearing solutions based in
Zurich, Switzerland.
These premium products are the result of decades of
research and expertise and are designed to keep you
connected to the beauty of sound! We thank you for
making such a great choice and wish you many years of
listening pleasure.
Please read the user guide carefully to make sure that you
understand and get the best out of your hearing aids. For
more information about features and benets, simply
contact your hearing care professional.
Phonak - life is on
www.phonak.com
3
4
Contents
Your hearing aid and charger
1. Quick guide
2. Parts of the hearing aid & charger
Using the charger
3. Preparing the charger
4. Charging the hearing aids
Using the hearing aid
5. Left & right hearing aid markings
6. Push button
7. On/O
8. Putting on the hearing aid
9. Removing the hearing aid
Further information
10. Care and maintenance
11. Wireless accessories
12. Service and warranty
13. Compliance information
14. Information and description of symbols
15. Troubleshooting
16. Important safety information
12
14
20
21
22
23
24
25
27
28
30
35
40
44
1. Quick guide
Charging your hearing aids
6
8
After placing your
hearing aid in the
charger, the
indicator light will
slowly blink until
the hearing aid is
fully charged. When
fully charged the
indicator light will
be constantly on,
i.e. solid green light.
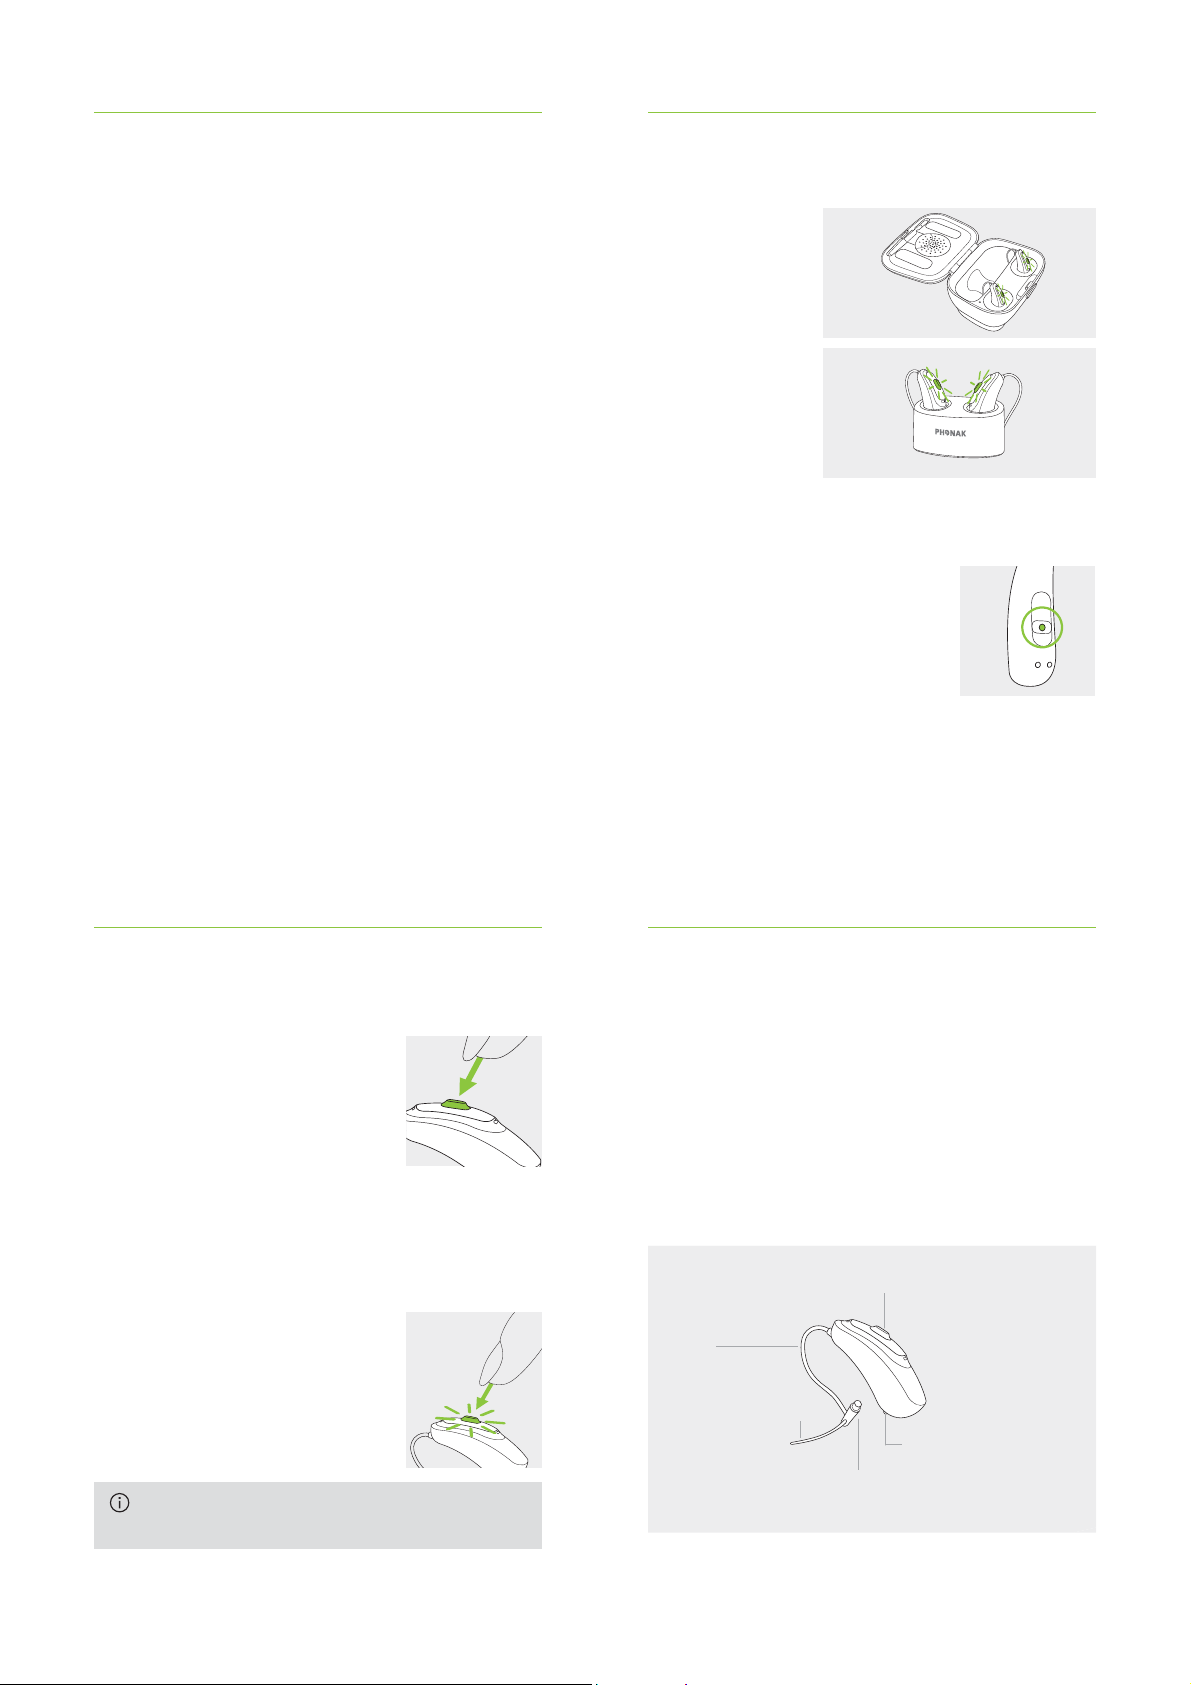
Left & right hearing aid markings
Blue marking for left hearing aid.
Red marking for right hearing aid.
Push button with indicator light
The push button has two functions:
A short push can have various
functions. The function for your
hearing aid is indicated in your
individual instructions.
A long push (3 seconds) is used to
switch the hearing aid on/o.
On/O
Firmly press the button using the tip
of your nger for 3 seconds until the
indicator light blinks.
On: One short blink
O: Two short blinks
Before using Audéo V-R for the rst time, it is
recommended to charge it for 3 hours.
5
6
2. Parts of the hearing aid & charger
The following pictures show the hearing aid model and
charger accessories described in this user guide. You can
identify your personal models by:
• Checking “Your hearing aid & charger details” on
page 3.
• Or comparing your hearing aid and charger with the
following shown models.
Audéo V-R
Push button with built-in green indicator light
Tube
Anchor (optional)
Charging contacts
Speaker
(without earpiece attached)
7
8
Charger Case
Charger Case with optional Power Pack
Cleaning tool
Space for drying capsule
(cover closed)
Space for earpieces
Hearing aid charging inserts with left/right indicators
Space for drying
capsule (cover open)
Drying capsule
(optional)
Charger Case
Indicator light for power
micro-USB connection
to external power supply
Power Pack
micro-USB connection to external power supply
Battery check button
Indicator light for battery status
and external power
Power Pack lock and release
9
10
Mini Charger
Hearing aid charging inserts
with left/right indicators
micro-USB connection
to external power supply
Indicator light for power
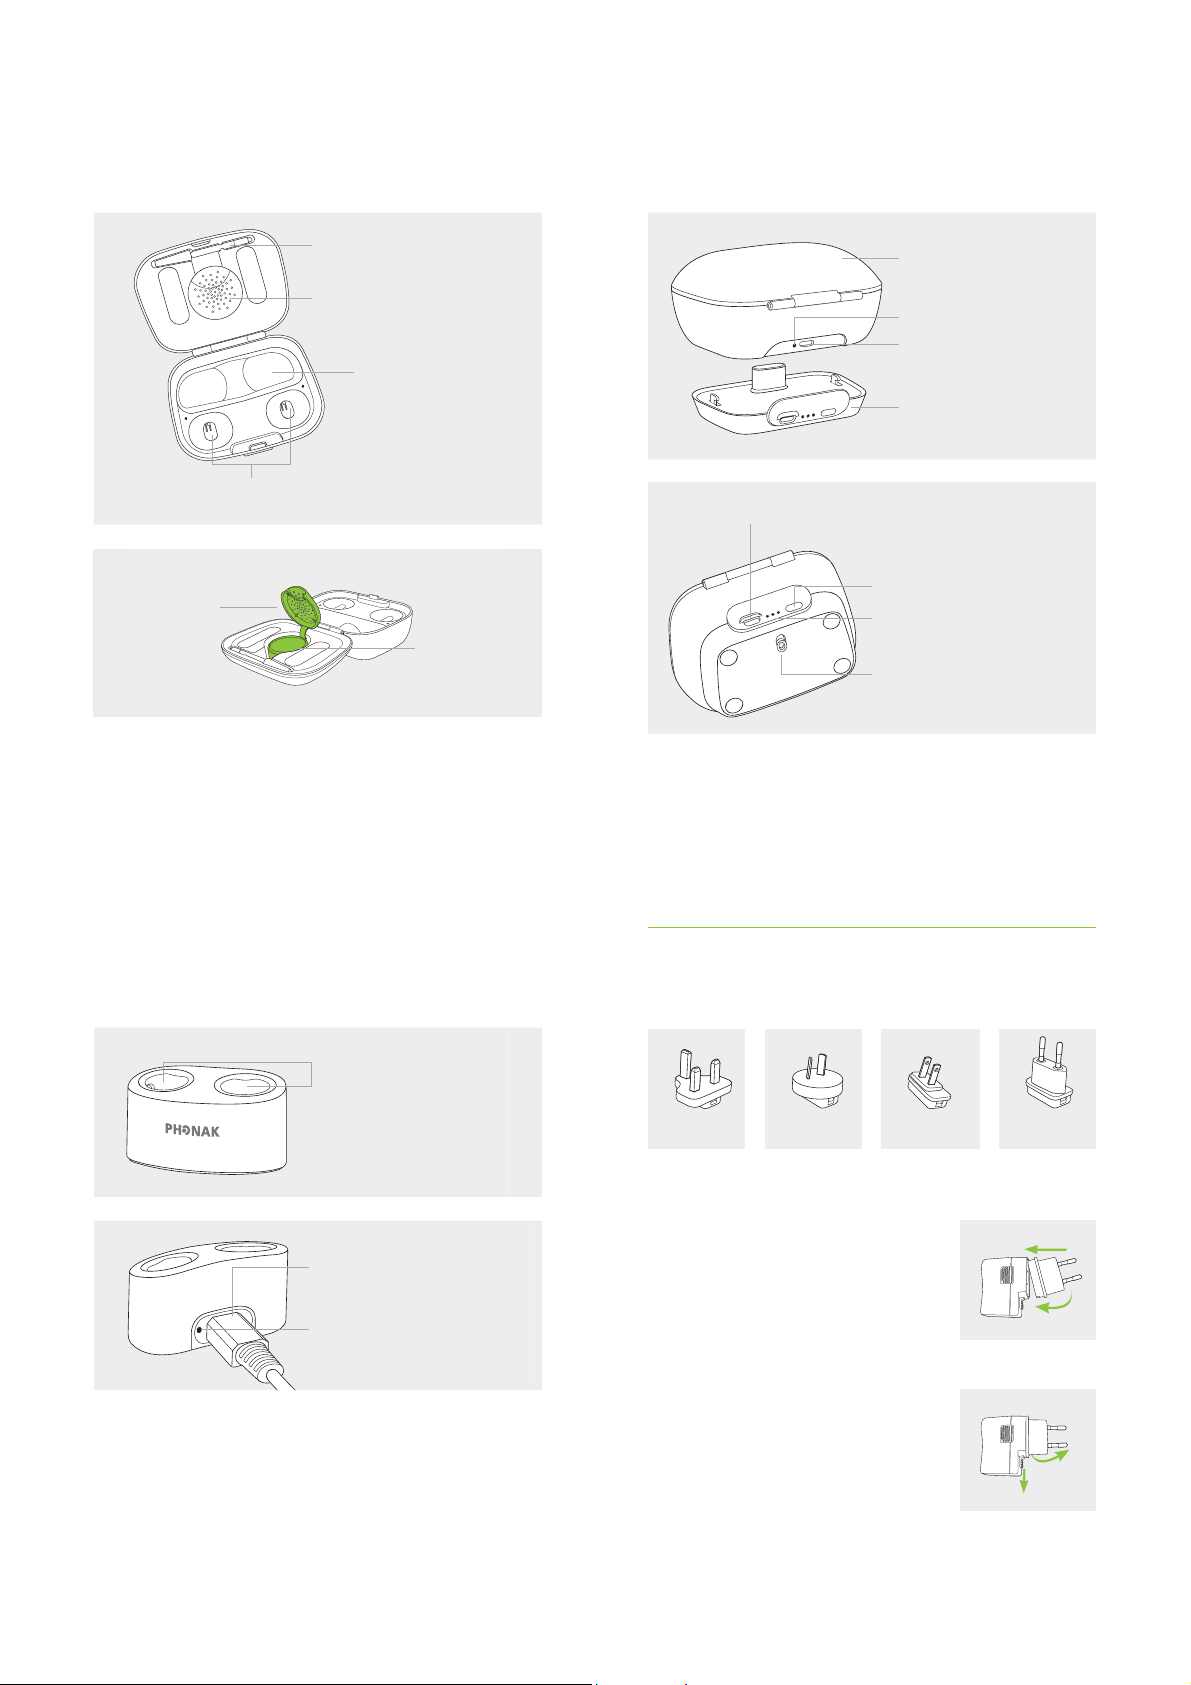
3. Preparing the charger
3.1 Setting up the power supply
UK AUS US EU
Select the adapter for your country.
a) Firstly, insert the top round end of
the adapter into the corresponding
round side of the power supply.
b) Click the bottom end of the adapter
to lock into place.
c) To remove, rst pull back the tab on
the power supply.
d) Pull the adapter upwards to remove
it.
a
b
d
c
11
12
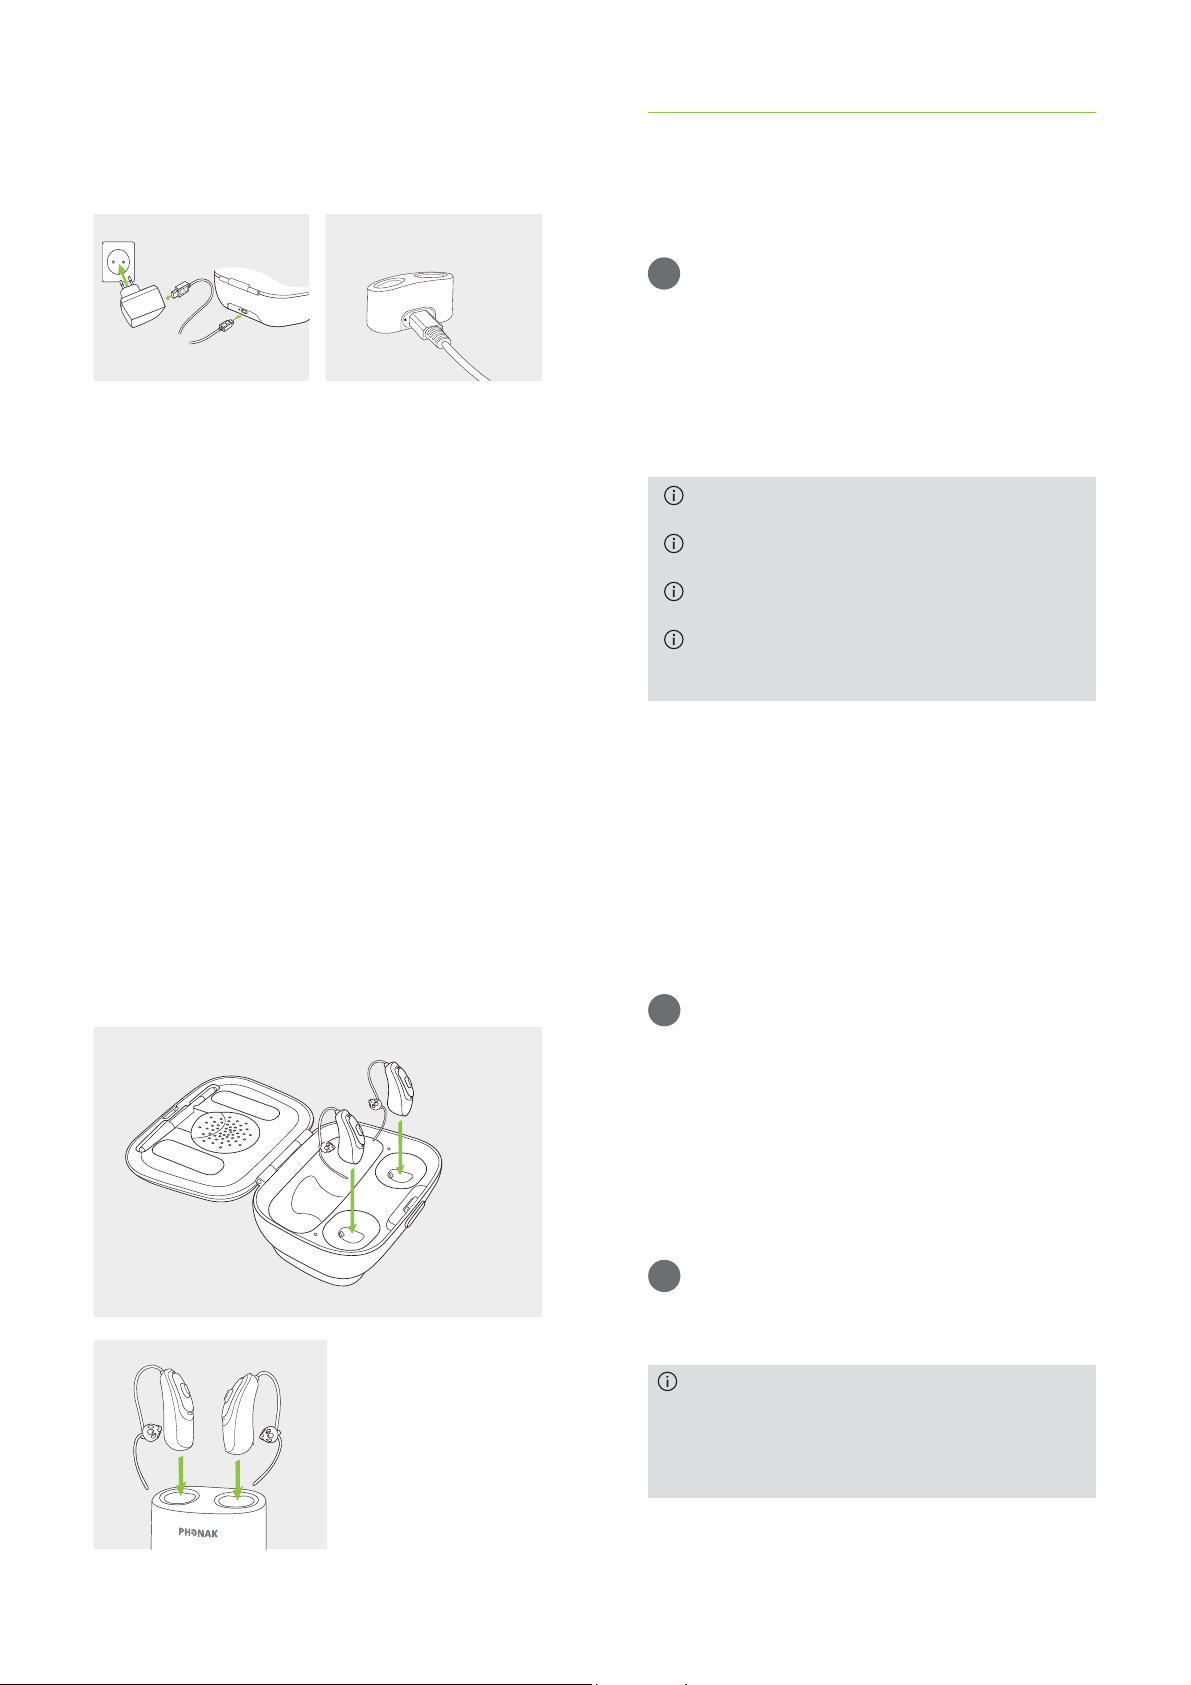
4. Charging the hearing aids
3.2 Connecting the power supply
a
d
c
b
a) Plug the larger end of the charging cable into the power
supply.
b) Plug the smaller end into the micro-USB port on the
charger.
c) Plug the power supply into a power outlet.
d) The indicator light is green when the charger
is connected to the power supply.
13
4.1 Using the Charger Case or Mini Charger
Please refer to chapter 6 for how to set up the charger.
1
Insert the hearing aid into the charging inserts.
Make sure the left and right hearing aid markings match
the left (blue)/right (red) indicators next to the charging
inserts. The hearing aids will automatically switch o
when inserted into the charger.
Audéo V-R contains a built-in and non-removable
rechargeable lithium-ion battery.
Before using Audéo V-R for the rst time, it is
recommended to charge it for 3 hours.
The hearing aid must be dry before charging,
see chapter 10.
Please ensure to charge and use the hearing aid
within operating temperature range: 0° to +40°
Celsius (32° to 104° Fahrenheit).
14
15 16
2
The indicator light will slowly blink until the hearing aid
is fully charged. When fully charged the indicator light
will remain on, i.e. solid green light.
The charging process will automatically stop when the
batteries are fully charged, so the hearing aids can be
safely left in the charger. It can take up to 3 hours to
charge the hearing aids. The Charger Case cover can be
closed while charging.
3
Remove the hearing aids from the charging inserts and
switch them on, refer to chapter 7.
Audéo V-R charging times
100% charge: 3 h
80% charge: 90 min
50% charge: 60 min
30% charge: 30 min
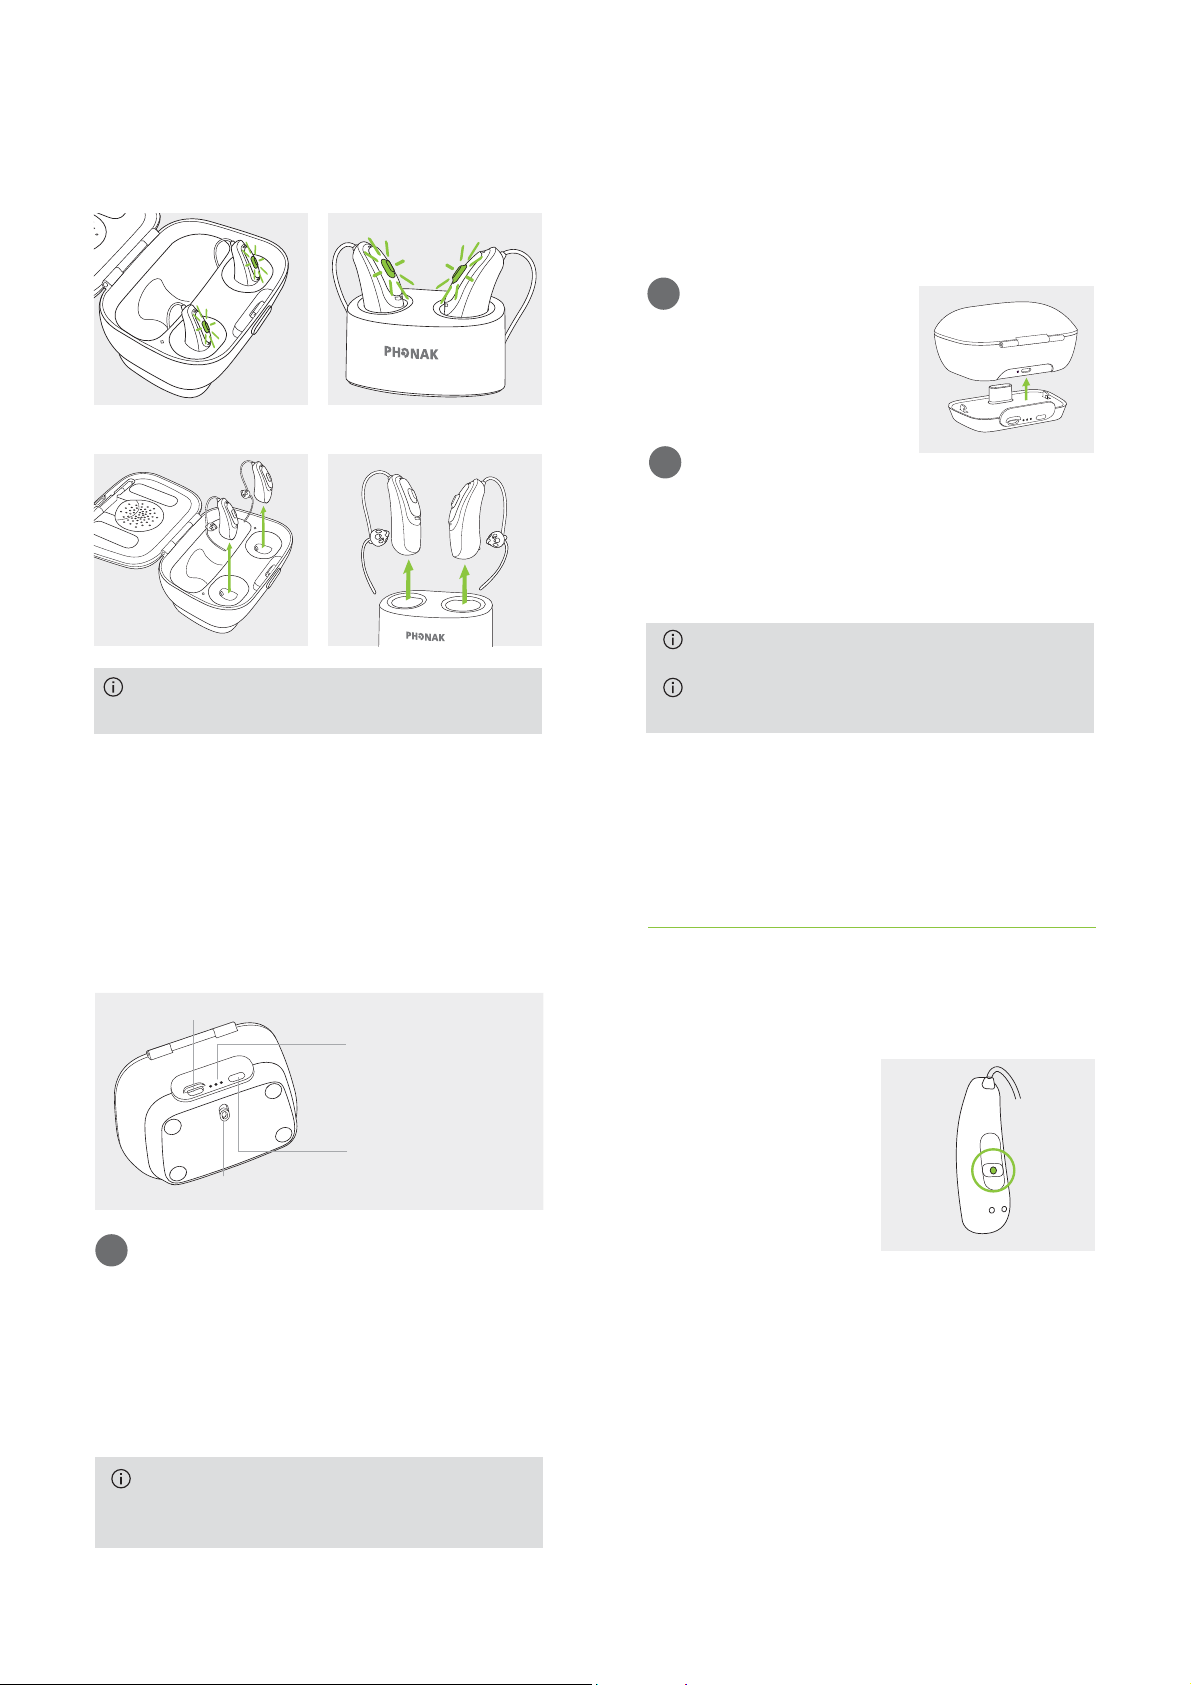
Do not hold the tubes for removing the hearing aids
from the charger as this can damage the xReceiver.
4.2 Using the optional Power Pack
Note: The Power Pack is only compatible with the Charger Case.
1
Attach and lock the Power Pack
to the Charger Case.
2
Plug in the micro-USB and connect to an external power
supply. The Power Pack and hearing aids will be charged at
the same time. While connected to an external power
supply, the Power Pack indicator light will show the
current battery charge status.
Before using Power Pack for the rst time, it is
recommended to charge it for 3 hours.
The Power Pack contains a built-in and non-
removable rechargeable lithium-polymer battery.
micro-USB connection to external power source
Indicator light battery
status:
• 0%-29%
•• 30%-59%
••• 60%-100%
Battery check push button
Power Pack lock and release
3
The fully charged Power Pack oers 7 charging cycles for
a pair of hearing aids. To check the remaining battery
capacity of the Power Pack, press the battery check push
button (indicator lights will be o otherwise, to preserve
battery).
17
18
5. Left & right hearing aid markings
There is a red or blue marking on the back of the hearing
aid. This will tell you if it is a left or a right hearing aid.
Blue marking
for left hearing aid.
Red marking
for right hearing aid.
Please ensure to charge the Power Pack within
operating temperature range: 0° to +40° Celsius
(32° to 104° Fahrenheit)
19
20
 Loading...