

Page 1
EN
AB
D
E
C
Plant monitoring
Patch Panel Set
Mounting Instructions
1 Product Description
The Patch Panel Set is an accessory kit for the Communit. You can use the Patch Panel Set to connect
an Ethernet installation cable via a Keystone jack to a patch cable.
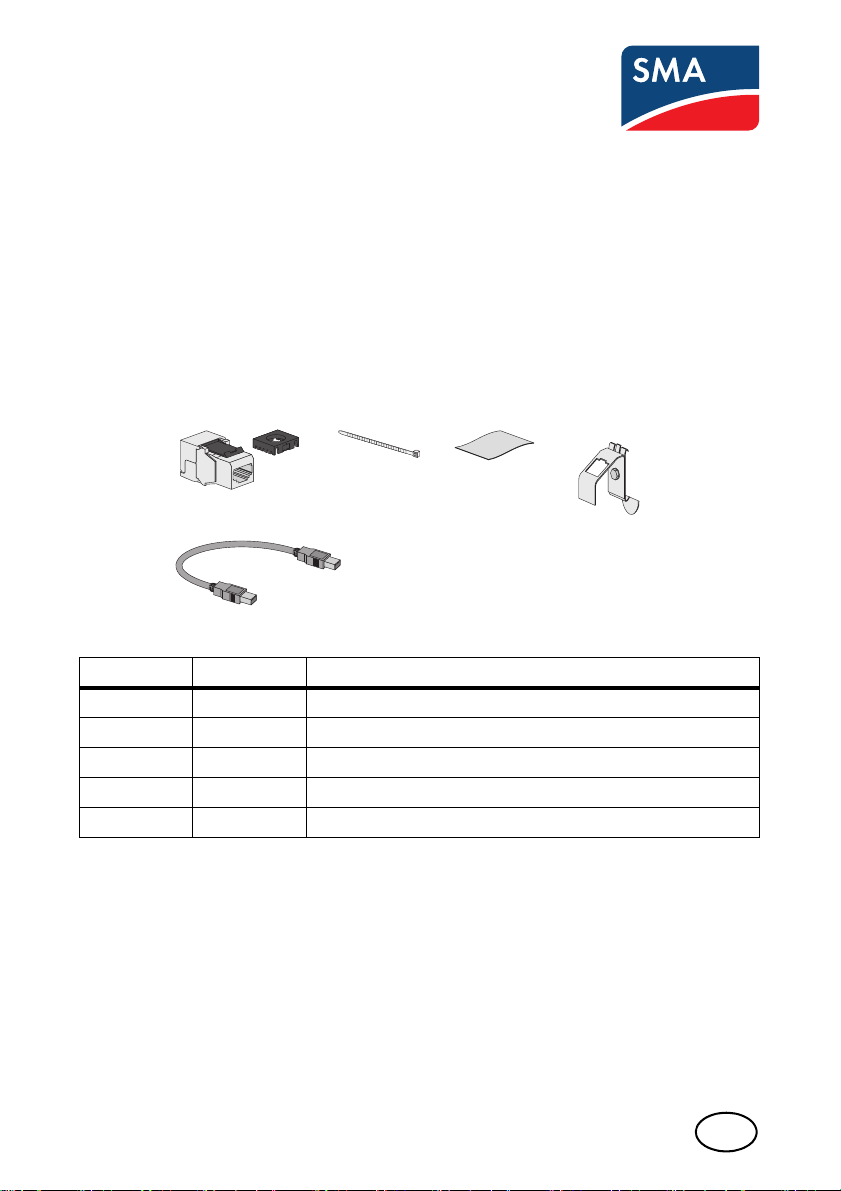
2 Scope of Delivery of the Patch Panel Set
Check the delivery for completeness and any visible external damage. Contact your specialty retailer
or the SMA Service Line if the delivery is incomplete or damaged.
Position Quantity Designation
A 4 Keystone jack with cable organiser
B 4 Cable tie
C 4 Aluminium foil
D 4 Top-hat rail adaptor
E 4 Patch cable (500 mm)
PPS-MO-IEN114510 | 98-4102810 | Version 1.0
Page 2
SMA Solar Technology AG Mounting the Patch Panel Set
3 Mounting the Patch Panel Set
EIA/TIA-568A and EIA/TIA-568B are standards for the electrical contacts of 8-pole RJ45 plugs and
jacks. A cable conforming to this standard consists of 8 insulated conductors twisted to form 4
insulated conductor pairs. The difference between the EIA/TIA-568A and EIA/TIA-568B standards is
that the insulated conductor pairs 2 (orange) and 3 (green) are swapped over.
Procedure:
• Connect the network cable to the Keystone jack.
• Mount the Keystone jack with network cable on the top-hat rail.
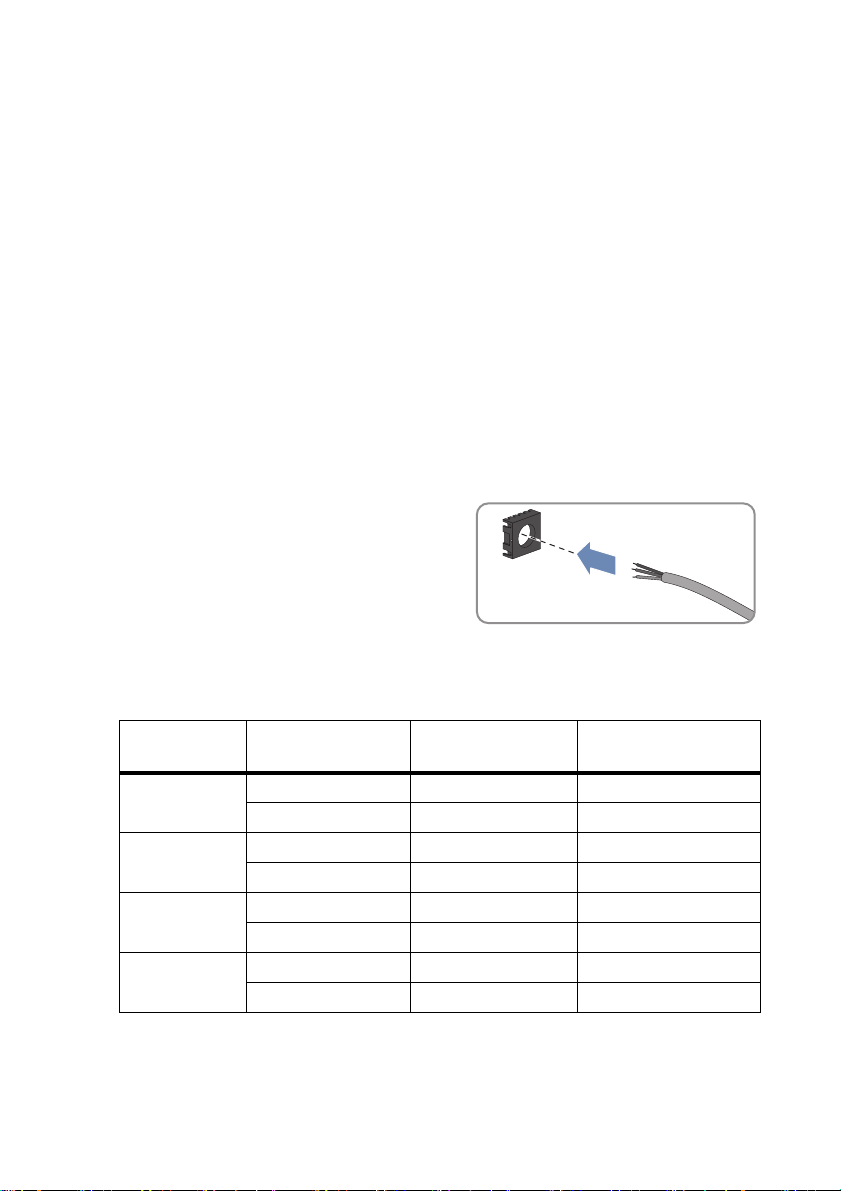
Connecting the Network Cable to the Keystone Jack
1. Strip the cable jacket by 30 mm.
2. Fold back the braided shielding.
3. Remove the foil shield from the insulated conductor pairs.
4. Attach the copper foil from the outside to the braided shielding with the adhesive side in.
5. Lead the cable into the cable organiser.
6. Insert the conductors into the slots of the cable organiser. Observe the appropriate colour
coding for the standard of your choice.
Insulated
conductor pair
1white-blue5 5
2white-orange3 1
3white-green1 3
4white-brown7 7
7. Shorten protruding conductors.
Mounting Instructions PPS-MO-IEN114510 2/4
Insulated conductor
colour
blue 4 4
orange 6 2
green 2 6
brown 8 8
Contact -568A Contact -568B
Page 3

SMA Solar Technology AG Mounting the Patch Panel Set
8. Insert the cable organiser into the enclosure. Make
sure that the white arrow of the cable organiser is
pointing towards the white arrow on the enclosure.
☑ The cable organiser snaps into place.
9. Push the folding parts of the enclosure back together using a suita ble pai r of p lie rs ( e.g . plu mbe r
wrench).
☑ The folding parts of the enclosure snap into place with an audible click.
10. Secure the cable retainer of the enclosure with a
cable tie.
11. Cut off the protruding end of the cable tie.
Mounting Instructions PPS-MO-IEN114510 3/4
Page 4

SMA Solar Technology AG Mounting the Patch Panel Set
Mounting the Keystone Jack with Patch Cable on the Top-hat Rail
Requirements:
☐ The top-hat rail is mounted.
☐ The opening of the top-hat rail points upwards.
1. Hook the upper part of the top-hat rail adaptor into
the top-hat rail and press the lower part down.
☑ The top-hat rail adaptor snaps into place.
2. Insert the Keystone jack from below into the
opening of the top-hat rail adaptor.
☑ The clip of the Keystone jack snaps in.
Mounting Instructions PPS-MO-IEN114510 4/4
 Loading...