

Page 1

SCM 2937 KAHVE MAK‹NES‹
KULLANMA KILAVUZU
TR
EN
FR
NL
DE
ES
RU
AR
HR
Page 2

De¤erli Müflterimiz,
Ürün seçiminde S‹NBO'yu tercih etti¤iniz için teflekkür ederiz.
Uzun ve verimli bir kullan›m için cihaz› kullanmadan önce bu k›lavuzu
özellikle güvenlik talimatlar›na dikkat ederek okuman›z› ve devaml› suretle
saklaman›z› tavsiye ederiz.
Sayg›lar›m›zla,
Sinbo Küçük Ev Aletleri
SINBO SCM 2937 KAHVE MAK‹NASI
KULLANIM KILAVUZU
Cihaz› kullanmadan once bu kitap盤› dikkatle okuyun ve daha sonraki baflvurular için
saklay›n.
This appliance is not intended for use by persons (including children) with reduced physical,
sensory or mental capabilities, or lack of experience and knowledge, unless they have
been given supervision or instruction concerning use of the appliances by a person
responsible for their safety. Children should be supervised to ensure that they do not play
with the appliance.
This appliance is intended to be used in household and similar applications such as:
- staff kitchen areas in shops, offices and other working environments;
- farm houses;
- by clients in hotels, motels and other residential type environments;
- bed and breakfast type environments.
Bu ürün (çocuklar dahil ) fiziksel hassasiyeti az, zihinsel olarak yetersiz, deneyimsiz ve
yeterli bilgiye sahip olmadan yada kendilerinin güvenli¤inden sorumlu olan kifliler tarafından
bu ürünü kullanmak için gerekli talimatlar verilmemifl kiflilerin kullanımına uygun de¤ildir.
- 1 -
Page 3

L-1
E
F
D
C
B
R
Q
A
G
H
I
L-2
P N
O
J
K
M
- 2 -
Page 4

ÖNEML‹ GÜVENL‹K UYARILARI
• Bakım, Onarım ve Kullanımda Uyulması Gereken Kurallar
Elektrikli cihaz kullan›lmadan önce afla¤›da belirtilen temel güvenlik kurallar›na mutlaka
uyulmas› gerekmektedir:
1. Tüm talimatlar› okuyunuz.
2. Kullanmadan önce, prizdeki voltaj ile cihaz›n anma de¤eri plakas› üzerindeki voltaj›n
ayn› olup olmad›¤›n› kontrol ediniz.
3. Bu cihaz üzerinde toprakl› kablo bulunmaktad›r. Evinizdeki prizin de do¤ru biçimde
topraklanm›fl oldu¤undan emin olunuz.
4. Yang›ndan, elektrik çarpmas›ndan ve kiflilerin yaralan›p zarar görmesinden korunmak
için, kablonun su veya bir baflka s›v›ya girmemesine özen gösteriniz.
5. Temizlik öncesinde ve cihaz kullan›lmazken kabloyu prizden çekin. Cihaz› kald›rmadan,
eklentilerini takmadan veya temizlemeden önce tamamen so¤umas›n› bekleyiniz.
6. Hasar görmüfl bir kablo veya fifl ile hiçbir cihaz› çal›flt›rmay›n›z, ayn› flekilde herhangi
bir biçimde hasarl› veya ar›zal› cihazlar› kullanmay›n›z. Cihaz› en yak›n yetkili servise
kontrol, onar›m elektrik veya mekanik ayar için
7. Cihaz›n üreticisi taraf›ndan önerilmemifl aksesuar eklentilerinin kullan›lmas› yang›n,
elektrik çarpmas› veya kiflilerin yaralanmas›na neden olabilir.
8. Cihaz› düz bir yüzey veya masa üzerine yerlefltiriniz, cihaz kablosunun masa veya
tezgah kenar›ndan sarkmas›n› engelleyiniz.
9. Güç kablosunun cihaz›n s›cak yüzeylerine temas etmemesini sa¤lay›n›z.
10. Kahve makinas›n› s›cak yüzeye veya ocak ya da f›r›n yan›na koymay›n›z, aksi takdirde
hasar görebilir.
11. Ba¤lant›y› kesmek için kabloyu prizden çekiniz, ancak daima fiflten tutunuz kablodan
çekmeyiniz.
12. Cihaz› kullan›m amac› d›fl›nda kullanmay›n›z ve kuru bir ortama yerlefltiriniz.
13. Cihaz›n çocuklar›n yak›n kullan›ld›¤› ortamlarda, yak›ndan denetim sa¤lay›n›z.
14. Buhardan yanmamak için dikkatli olunuz.
15. Cihaz›n s›cak yüzeylerine (örne¤in kaynama esnas›nda buhar ç›k›fl ucu veya çelika¤)
dokunmay›n›z. Tutamak veya saplar› kullan›n›z.
16. Kahve makinas›n›n içinde su olmaks›z›n çal›flmas›na olanak vermeyiniz.
17. Uyar›: doldurma ünitesi cihaz çal›fl›rken aç›lmamal›d›r.
18. Cihaz s›cak kahveyi bardaya ak›t›rken veya a¤›zdan buhar ve s›cak su kaç›fl› olurken
metal a¤›zl›¤› ç›karmay›n›z ve metal a¤›zl›¤› ç›karmadan önce su kazan›ndaki bas›nc›n
boflaldo›¤›ndan emin olunuz.
19. Kullan›m öncesi kabloyu prize tak›n›z ve kabloyu prizden çekmeden önce, tüm
anahtarlar›n kapat›lm›fl oldu¤undan emin olunuz.
20. Bu cihaz, (çocuklar da dâhil), güvenliklerinden sorumlu kiflilerce denetim alt›nda
olmad›lar› veya cihaz›n kullan›m›na iliflikin yeterli bilgi verilmeksizin fiziksel, alg›sal veya
zihinsel yeterlili¤i s›n›rl›, deneyim veya bilgi eksikli¤i olan insanlar›n kullan›m› için uygun
de¤ildir.
21. Çucuklar, cihazla oynamamalarn› sa¤lamak üzere gözetim alt›nda tutulmal›d›r.
22. Bu cihaz ev içi kullan›m ve benzer amaçlar için üretilmifltir, örne¤in:
- Dükkan, ofis ve di¤er ifl ortamlar›nda personel mutfa¤›,
- Çiftlik evleri,
- Otel, motel ve di¤er konaklama ortamlar›nda müflterilerin kullan›m›,
- Yatak ve kahvalt› hizmeti sunan ortamlar
- 3 -
Page 5

ÖNEML‹ GÜVENL‹K UYARILARI
23. D›flmekanlarda kullanmay›n›z
24. Bu talimatlar› saklay›n›z.
ÖZELL‹KLER‹
* 15 bar güçlü bas›nca sahip ‹talyan pompa
* Pres-döküm alüminyum alafl›ml› kaynat›c›
* 1,8 L genifl hacimli ayr›labilir su tank›
* Çift yönlü paslanmaz çelik filtre ve alüminyum alafl›ml› filtre tutucu
* Mükemmel kremas› ile espresso haz›rlayabilir
* Yüksek bas›nçl› köpük ifllevi ile capuccino veya di¤er s›cak içecekler haz›rlamak
mümkündür
* Gösterge ›fl›klar› olan 3 anahtar
* fi›k tasar›ml› paslanmaz çelik süsleme
* Afl›r› ›s›nma ve afl›r› bas›nç koruma sistemleri ile emniyetli ve güvenilirdir
* Ayr›labilir köpük a¤›zl›¤› ve damlama tepsisi
* 230V~50Hz 850W
Eklentiler (Aksesuarlar)
1. 1 adet Kahve kafl›¤›
2. 1 adet 2 kap ö¤ütülmüfl kahve filtresi
3. 1 adet ESE kabuk filtresi
D‹KKAT!!
Ürünün üzerinde bulunan iflaretlemelerde veya ürünle verilen di¤er bas›l›
dökümanlarda beyan edilen de¤erler, ilgili standartlara göre laboratuar ortam›nda
elde edilen de¤erlerdir. Bu de¤erler, ürünün kullan›m ve ortam flartlar›na göre
de¤iflebilir.
C‹HAZIN TANITIMI
(Ürün, önceden bildirim olmaks›z›n de¤ifltirilebilir)
A. AÇMA/KAPAMA (ON/OFF) anahtar›
B. Buhar anahtar›
C. Kahve anahtar›
D. Buhar kontrol dü¤mesi
E. Su haznesi kapa¤›
F. Su
G. Üst kapak
H. Su haznesi buhar ç›k›fl›
‹. Köpük cihaz›
J. Ana gözve
K. Ç›kar›labilir raf
L.-1. Kahve tozu
L.-2. Kahve çekirde¤i süzgeci
M. Metal huni
- 4 -
N. Alt kapak
O. Metal huni tutaca¤›
P. Ölçü kafl›¤› ve kar›flt›r›c›
Q. Güç göstergesi
R. Haz›r göstergesi
Page 6

‹LK KULLANIMDAN ÖNCE
‹lk fincan kahvenin mükemmel tat verebilmesini sa¤lamak için kahve makinas›n›, afla¤›da
anlat›ld›¤› flekilde s›cak su ile çalkalay›n›z:
1. Suyu su tank›na dökünüz, haznedeki su miktar› “MAX” iflaretini yani en üst seviyeyi
aflmamal›d›r. Ard›ndan su tank›n›n kapa¤›n› yerine yerlefltiriniz.
Not: Cihaz, temizlemeyi kolaylaflt›rmak aç›s›ndan, ayr›labilir bir su tank›na sahiptir, önce
tank› su ile doldurup ard›ndan yerine koyabilirsiniz.
2. Kahve tozu süzgecini metal a¤›zl›¤a yerlefltirin (süzgeçte kahve olmadan)
3. Metal a¤›zl›¤› cihaza “Yerlefltirme” konumundan yerlefltirin ve bask› çubu¤unu serbest
b›rak›n, ard›ndan yerine oturup kilitleninceye kadar saat yönünün tersine döndürerek
kahve makinas›na s›k›ca sabitleyiniz.
4. Ç›kar›labilir rafa bir sürahi yerlefltiriniz. Bu arada, buhar kontrol dü¤mesinin en düflük
seviye konumunda olup olmad›¤›n› kontrol edip, en düflük seviye konumunda kalmas›n›
sa¤lay›n›z.
Not: Cihazla birlikte sürahi v.b. verilmemifltir, kendi sürehi veya kahve bardaklar›n›z›
kullan›n›z.
5. Kabloyu prize yerlefltiriniz, AÇMA/KAPAMA (ON/OFF) anahtar›n› “—” konumuna
ayarlay›n›z. Güç göstergesi yanacakt›r.
6. Kahve dü¤mesini “—” konumuna ayarlay›n›z, pompa suyu pompalamaya bafllayacakt›r.
Su akmaya bafllad›¤›nda, kahve anahtar›n› “O” konumuna, buhar anahtar›n› da “O”
konumuna getirip k›sa bir süre bekleyin. Cihaz, haz›r ›fl›¤› yanana kadar ön-›s›tmaya
geçecektir. Ifl›¤›n yanmas›, ön ›s›tman›n tamamland›¤›n› gösterir. Kahve anahtar›n› “I”
konumuna getirin, su d›flar›ya akmaya bafllayacakt›r.
7. Suyun boflalmas› tamamen kesildikten sonra, tüm kaplardaki suyu dökebilirsiniz. Art›k
içecek haz›rlamaya bafllayabilirsiniz.
Not: ‹lk kez su d›flar› pompalan›rken bir ses gelebilir, bu normaldir, Cihaz içerisinde
hapsolmufl hava d›flar› at›lmaktad›r. Yaklafl›k 20 saniye sonra ses kesilecektir.
TAfiIMA VE NAKL‹YE ESNASINDA
• Ürünü düflürmeyiniz,
• Darbelere maruz kalmamas›n› sa¤lay›n›z,
• S›k›flmamas›n›, ezilmemesini sa¤lay›n›z,
• Ambalaj üzerindeki iflaretlemelere uyunuz.
• Orjinal ambalajıyla taflımaya özen gösteriniz.
ÇEVRE VE ‹NSAN SA⁄LI⁄I
Çevre korumas›na siz de katk›da bulunabilirsiniz!
Lütfen yerel düzenlemelere uymay› unutmay›n: Çal›flmayan
elektrikli cihazlar›, uygun elden ç›karma merkezlerine götürün.
Kullanım sırasında insan ve çevre sa¤lı¤ına tehlikeli veya zararlı olabilecek bir durum
söz konusu de¤ildir.
- 5 -
Page 7

C‹HAZIN KULLANIMI
• Ba¤lantı veya Montajın Nasıl Yapılaca¤ını Gösterir fiema ile Ba¤lantı veya Montajın
Kimin Tarafından Yapılaca¤ına (tüketici, yetkili servis) iliflkin bilgiler
ÖN ISITMA
‹yi, s›cak bir fincak Espresso kahve haz›rlamak için, kahve haz›rlamadan önce cihaz›,
köpük cihaz›, filtre ve fincan da dahil ön ›s›tmaya alman›zd›r, böylece kahvenin lezzeti
so¤uk parçalardan dolay› olumsuz etkilenmez.
Not: Cihazda iki adet çelik süzgeç bulunmaktad›r, kahve tozu süzgeci ve kahve çekirde¤i
süzgeci. Arzunuza göre süzgeçlerden herhangi birini kullanabilirsiniz.
1. Ayr›labilir su tank›n› al›p, su koymak üzere tank kapa¤›n› aç›n. Su seviyesi tank üzerinde
bulunan “MAX” iflaretini aflmamal›d›r. Ard›ndan tank› uygun flekilde cihaza yerlefltirin.
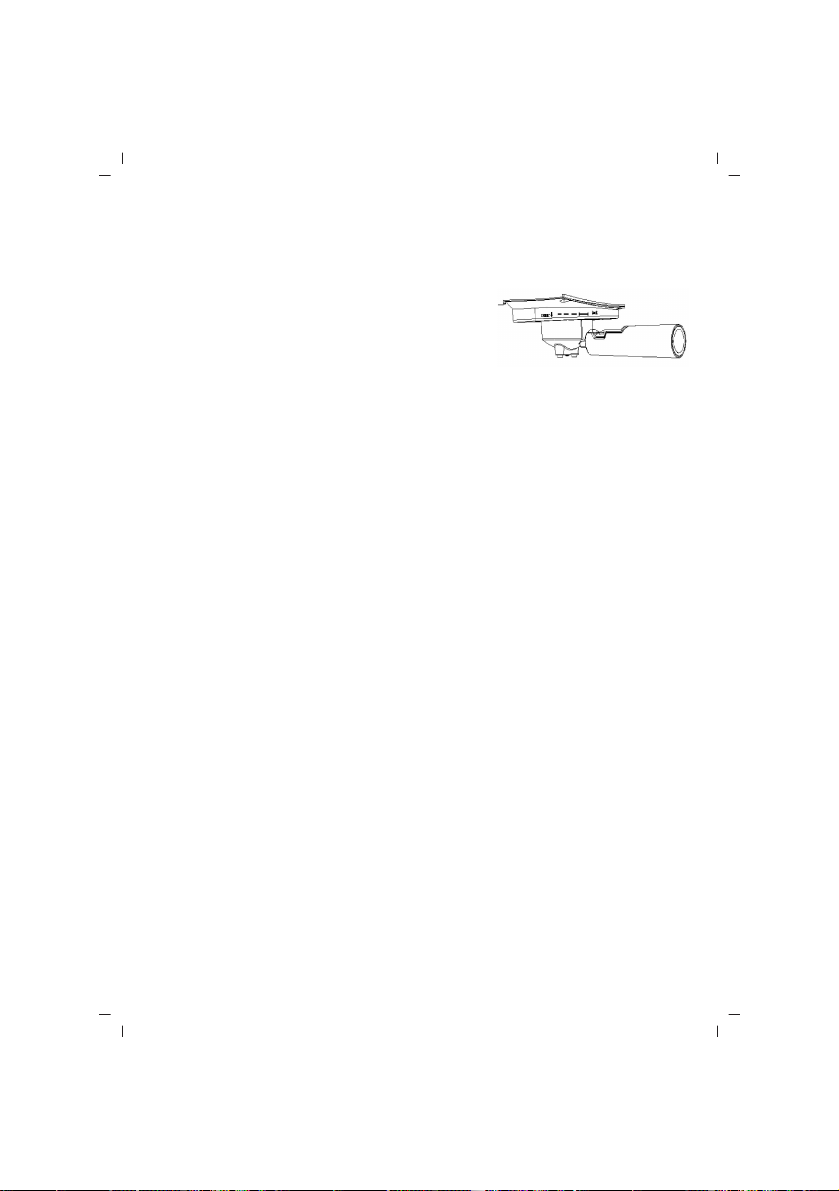
2. Kahve tozu süzgecini metal a¤›zl›¤a yerlefltirin,
ard›ndan a¤›zl›¤›, “yerlefltirme” konumundan cihaza
yerlefltirip, bask› çubu¤unu serbest b›rak›n›z. Yerine
oturup kilitleninceye kadar saat yönünün tersine
döndürerek kahve makinas›na s›k›ca sabitleyiniz (Bak›n›z
fiekil 1).
3. Ç›kart›labilir rafa bir espresso fincan› (kendi fincan›n›z) yerlefltirin.
4. Ard›ndan kabloyu prize tak›p cihaz› elektri¤e ba¤lay›n. Buhar kontrol dü¤mesinin
minimum konumunda oldu¤undan emin olun.
5. AÇMA/KAPAMA (ON/OFF) anahtar›n› “—” konumuna ayarlay›n›z. Güç göstergesi
yanacakt›r. Buhar anahtar›n›n da “O” konumunda olmas›n› sa¤lay›n›z. Kahve dü¤mesini
“—” konumuna ayarlay›n›z, su akar akmaz, kahve dü¤mesini derhal “O” konumuna
getiriniz. Bu ad›m›n amac› tanktaki suyun hazneye pompalanmas›n› sa¤lamakt›r.
6. Haz›r göstergesi yand›¤›nda, kahve anahtar›n› tekrar “—” konumuna ayarlay›n›z, s›cak
su gelmeye bafllayacakt›r. Haz›r ›fl›¤› söndü¤ünde, kahve anahtar›n› “O” konumuna
çeviriniz. Ön ›s›tma tamamlanm›flt›r.
ESPRESSO KAHVE HAZIRLAMAK
1. Saat yönünde döndürerek metal a¤›zl›¤› ç›kar›n, kahve tozu süzgecini metal a¤›zl›¤a
yerlefltirin. Ölçü kafl›¤› ile süzgece ö¤ütülmüfl kahve koyun, bir kafl›k ö¤ütülmüfl kavle
ile yaklafl›k bir fincan iyi kaliteli kahve yap›labilir, sonraö¤ütülmüfl kahve tozunu kar›flt›r›c›
ile s›k›flt›r›n. E¤er kahve çekirde¤i kullan›yorsan›z toz kahve süzgeci yerine kahve çekirde¤i
süzgecini kullan›n›z.
2. Ard›ndan a¤›zl›¤› cihaza, “yerlefltirme” konumunda yerlefltiriniz, saat yönünün tersine,
kilitlenme konumuna kadar çevirerek a¤›zl›¤› cihaza sabitleyiniz. (Bak›n›z fiekil 1)
3. Fincana s›cak su dökünüz. Ard›ndan s›cak fincan› (kendi fincan›n›z›) ç›kar›labilir rafa
yerlefltiriniz.
4. Haz›r ›fl›¤› yanacakt›r, haz›r ›fl›¤› yand›¤›nda, Kahve dü¤mesini “—” konumuna ayarlay›n›z
ve k›sa bir süre bekleyiniz, kahve akmaya bafllayacakt›r.
Not: Kahve haz›rlarken veya buhar olufltururken, haz›r ›fl›¤›n›n söner gibi yapmas›
normaldir, sadece ›s›t›c›n›n ›s›y› belirli bir aral›kta tutmaya yönelik ›s›tma yapt›¤› anlam›na
gelir.
5. ‹stenen kahve elde edildi¤inde veya kahvenin rengi görünür biçimde zay›flad›¤›nda
- 6 -
fiekil 1
Page 8

C‹HAZIN KULLANIMI
AÇMA/KAPAMA (ON/OFF) anahtar›n› elle “O” konumuna ayarlamal›s›n›z, güç göstergesi
de haz›r göstergesi de sönecek ve kahve makinas› çal›fllmay› durduracakt›r, kahveniz
haz›rd›r.
UYARI: Kahve haz›rlarkenzaman zaman elle ifllem yapman›z gerekece¤inden kahve
makinas›n› denetimsiz olarak kendi bafl›na b›rakmay›n›z.
6. Kahve haz›rlamay› tamamlad›¤›n›zda, metal a¤›zl›¤› saat yönünde çevirerek alabilirsiniz.
Ard›ndan kalan kahveyi veya kaynam›fl kahve çekirdeklerini bast›r›c› ile bast›rarak
süzgeçten boflalt›n›z.
7. Tamamen so¤umalar›n› bekleyin ve sonra akan suda çalkalay›p durulay›n.
CAPPUCCINO YAPMAK
Bir fincan espressonun üzerine köpüklü süt koydu¤unuzda bir fincan cappuccino elde
edersiniz.
Not: Buhar olufltururken, metal a¤›zl›k do¤ru konumda yerkeltirilmifl olmal›d›r.
Yöntem:
1. “ESPRESSO KAHVE HAZIRLAMA” bölümüne uygun flekilde önce yeterince büyük bir
kapta espresso haz›rlay›n, buhar kontrol dü¤mesinin minimum konumunda oldu¤undan
emin olun.
2. Buhar anahtar›n› “—” konumuna ayarlay›n›z, haz›r ›fl›¤› yanana kadar bekleyiniz.
3. Bir kâseye, haz›rlanacak her bir fincan cappuccino için yaklafl›k 100 gram kadar süt
koyun, tüm sütü buzdolab› s›cakl›¤›nda (s›cak olmayan!) kullanman›z önerilir.
Not: Kâse büyüklü¤ünü seçerken, çap›n›n 70±5mmden az olmamas› önerilir, sütün
hacminin iki kat artt›¤› ak›lda tutularak kase yüksekli¤ini yeterli olmas›na dikkat ediniz.
4. Köpük cihaz›n› süte yaklafl›k iki santimetre kadar bat›r›n›z.
5. Bukar kontrol dü¤mesini saat yönünün tersine yavafl yavafl çeviriniz, köpük cihaz›ndan
buhar gelecektir. Köpük a¤›zl›¤›n› yukar›dan afla¤›ya hareketlerle dolaflt›rarak sütü
köpürtün.
Not: Buhar k›sa sürede birikip patlama riskini art›raca¤› için buhar kontrol dü¤mesini
asla birden döndürmeyiniz.
6. ‹stenen amaca ulafl›ld›¤›nda, buhar kontrol dü¤mesini minimum konumuna
getirebilirsiniz.
Not: Buhar ç›k›fl a¤›zl›¤›n›, buhar üretimi durdu¤unda ›slak bir msüngerle siliniz ancak
zedelememek için dikkatli olunuz.
7. Köpürmüfl sütü haz›rlanan espressonun içine dökün, flimdi capuccinonuz haz›rd›r.
‹ste¤inize göre tatland›r›n ve arzu ederseniz köpü¤e biraz kakao tozu serpin.
8. Gücü kesmek üzere AÇMA/KAPAMA (ON/OFF) anahtar›n› “O” konumuna getiriniz.
Not: Buhar oluflturduktan sonra, kahve makinan›z› yeniden kahve yapmadan önce en az
befl dakika so¤umaya b›rakman›z önerilir. Aksi takdirde Espresso kahvenizde yan›k
kokusu oluflabilir. E¤er befl dakika beklemek istemiyorsan›z, sadece buhar anahtar›n›
“O” konumuna getirin ve buhar a¤›zl›¤›n› kahve fincan›na önceden yerlefltirin. Ard›ndan
buhar kontrol dü¤mesini saat yönünün tersine do¤ru çevirin, suyu pompalamak üzere
kahve anahtar›n› “—” konumuna getirin, haz›r göstergesinin ›fl›¤› söndü¤ünde kahve
anahtar›n› “O” konumuna getirmelisiniz ve buhar kontrol dü¤mesini de minimum
konumuna getirip haz›r göstergesi ›fl›¤› yanana kadar k›sa bir süre bekleyin, tekrar kahve
haz›rlayabilirsiniz.
- 7 -
Page 9

C‹HAZIN KULLANIMI
SIVILARI ISITMAK YA DA TEK OLARAK SÜTÜ KÖPÜRTMEK ‹Ç‹N BUHAR ÜRETMEK
Buhar a¤›zl›¤› sadece sütü köpürtmek veya s›cak çikolata, su veya çay gibi s›cak içecekleri
haz›rlamak için de kullan›labilir.
Yöntem:
1. Tank›n kapa¤›n› aç›n, ayr›labilir tank› yerinden ç›kar›n ve istenen su ile doldurun, su
seviyesi tank üzerinde bulunan “MAX” iflaretini aflmamal›d›r. Ard›ndan tank› uygun flekilde
cihaza yerlefltirin.
2. Tank kapa¤›n› yerine yerlefltirin, ard›ndan kabloyu prize takarak cihaz› elektrik kayna¤›na
ba¤lay›n
3. AÇMA/KAPAMA (ON/OFF) anahtar›n› “—” konumuna getirin, güç göstergesi ›fl›¤›
yanacakt›r.
4. Kahve anahtar›n› “—” konumuna getirin, buhar anahtar›n› da “O” konumuna getirin,
suyun d›flar› akmas› ile birlikte Kahve anahtar›n› derhal “O” konumuna getirin, Buhar
anahtar›n› “I” konumuna getirerek k›sa bir süre bekleyin, cihaz haz›r ›fl›¤› yan›ncaya kadar
›s›tmaya bafllayacakt›r. Ifl›¤›n yanmas›, ›s›nma iflleminin bitti¤ini göstyerir.
5. Buhar a¤›zl›¤›n› ›s›t›lacak s›v›n›n içine veya köpürtülecek sütün içine dald›r›n. Buhar
oluflturmaya bafllamak için buhar kontrol dü¤mesini saat yönünün tersine döndürün.
6. ‹stenen s›cakl›k seviyesine ulafl›ld›¤›nda veya köpüklü süt elde edildi¤inde buhar kontrol
dü¤mesini minimum konumuna getirebilirsiniz.
7. Güç kayna¤›n› kesmek için AÇMA/KAPAMA (ON/OFF) anahtar›n› “O” konumuna getirin.
KULLANIM HATALARINA ‹L‹fiK‹N B‹LG‹LER
Cihazınızı, beyan edilen voltaj ile çal›flt›r›n›z.Bulundu¤unuz yerin voltaj›n›n uygun olup
olmad›¤›n› kontrol ediniz.
Güç kablosunun ar›zalanmas› durumunda tehlikelerin önlenmesi için kablo üretici, servis
merkezi ya da benzer bir ehliyetli kifli taraf›ndan de¤ifltirilmelidir. Ar›za durumunda cihaz›
kendiniz onarmaya kalk›flmay›n›z. Meydana gelebilecek ar›zalardan firmam›z kesinlikle
sorumlu de¤ildir, ve cihaz›n›z garanti kapsam› d›fl›nda ifllem görecektir.
TEM‹ZL‹K VE BAKIM
• Tüketicinin Kendi Yapabilece¤i Bakım, Onarım veya Ürünün Temizli¤ine ‹liflkin Bilgiler
1. Gücü kesin ve temizlemeden önce kahve makinas›n›n tamamen so¤umas›n› bekleyin.
2. Kahve makinas›n›n haznesini neme dayan›kl› bir süngerle s›k s›k temizleyiniz ve su
tank›n›, damlama tepsisini ve ayr›labilir raf› düzenli olarak temizleyip kurutunuz.
Not: Alkol veya solvent bazl› temizleyicilerle tamizlemeyiniz. Hazneyi temizlik amac›yla
suya bat›rmay›n›z.
3. Saat yönüne döndürerek metal a¤›zl›¤› ç›kart›n›z, içeride kalan kakve art›klar›n›
temizleyiniz, ard›ndan temizleyici ile temiflzleyebilirsiniz. Fakat sonra duru su ile
durulaman›z gerekmektedir.
4. Tüm eklentileri suyla temizleyip kurulay›n›z.
M‹NERAL ARTIKLARI TEM‹ZLEMEK
1. Kahve makinan›z›n etkin bir flekilde çal›flmas›n›, iç borular›n temiz olmas›n› ve kahvenizin
- 8 -
Page 10

TEM‹ZL‹K VE BAKIM
en üst lezzet düzeyinde olmas›n› sa¤lamak için, her iki üç ayda bir mineral art›klar›n›
temizlemelisiniz.
2. Tank› su ve kazan tafl› giderici ile “MAX” seviyesine kadar (Su ile kazan tafl› sökücünün
oran› 4:1 olmal›d›r, ayr›nt›lar için kazan tafl› sökücünün üretici talimatlar›na bak›n›z)
suyun doldurun. Lütfen “ev tipi kazan tafl› sökücü” kullan›n, kazan tafl› sökücü yerine
sitrik asit de kullanabilirsiniz (sitrik asit eczanelerden elde edilebilir) (bu durumda yüz
ölçü suya 3 ölçü sitrik asit kullan›lmal›d›r.)
3. Ön-›s›tma program›na göre, metal a¤›zl›¤› (içinde kahve tozu olmaks›z›n) ve kâse ya
da sürehiyi yerlerine yerlefltirin. “ÖN-ISITMA” (“PRE-HEATING”) talimatlar›na göre suyu
kaynat›n.
4. AÇMA/KAPAMA (ON/OFF) anahtar›n› “—” konumuna getirin, güç göstergesi ›fl›¤›
yanacakt›r. Kahve anahtar›n› “—” konumuna getirin, buhar anahtar›n›n “O” konumunda
olmas› gerekmektedir. Su akmaya bafllad›¤›nda, Kahve anahtar›n› “O” konumuna getirin
ve kahve makinas› ›s›tmaya bafllay›ncaya kadar k›sa bir süre bekleyin.
5. Haz›r gösterge ›fl›¤› yand›¤›nda, ›s›tman›n tamamland›¤›n› ifade eder. Kahve anahtar›n›
“—” konumuna getirin ve 2 fincan kahve (yaklafl›k 2 Oz) haz›rlay›n. Ard›ndan Kahve
anahtar›n› “O” konumuna getirin ve 5 saniye kadar bekleyin.
6. Buhar anahtar›n› “—” konumuna getirin, haz›r göstergesi ›fl›¤› yanana kadar bekleyin.
2 dakika süreyle buhar al›n ard›ndan buhar› durdurmak için buhar kontrol dü¤mesini
minimum konumuna getirin. AÇMA/KAPAMA (ON/OFF) anahtar›n› derhal “O” konumuna
getirerek cihaz› durdurun, kazan tafl› sökücüyü cihaz içerisinde en az onbefl dakika
kalacak flekilde b›rak›n.
7. Cihaz› yeniden çal›flt›r›n ve 4-6 aras›ndaki ad›mlar› en az 3 kez tekrar edin.
8. Ard›ndan buhar anahtar›n› “O” konumuna getirin, haz›r göstergesi ›fl›¤› yan›nca kahve
anahtar›n› “—” konumuna getirin ve içinde hiç kazan tafl› temizleyici kalmay›ncaya kadar
boflalt›n.
9. (Kahve tozu olmadan), musluk suyu ile “MAX” seviyede kahve kaynat›n, 4 – 6 aras›ndaki
ad›mlar› 3 kez tekrarlay›n (6. Ad›m için 15 dakika beklemeniz gerekmemektedir) ard›ndan
tankta hiç su kalmay›ncaya kadar kaynat›n.
10. 9. ad›m› borular›n temizli¤inden emin oluncaya kadar en az üç kez tekrarlay›n.
BAKIM
• Periyodik Bakım Gerektirmesi Durumunda, Periyodik Bakımın Yapılaca¤ı Zaman
Aralıkları ile Kimin Tarafından Yapılması Gerekti¤ine ‹liflkin Bilgiler
Cihaz periyodik bak›m gerektirmez.
Her kullan›mdan sonra temizli¤inin yap›lmas›nda fayda vard›r.
- 9 -
Page 11

SORUN G‹DERME
E¤er ar›za nedeni bulunamam›flsa, cihaz› kendi bafl›n›za sökmeyiniz, yetki belgesi olan
bir yetkili servisle temas kurman›z en do¤rusudur.
- 10 -
Page 12

ENGLISH
SINBO SCM 2937 COFFEE MAKER
INSTRUCTION MANUAL
Read this booklet thoroughly before using and save it for future reference
IMPORTANT SAFEGUARDS
Before using the electrical appliance, the following basic precautions should always be
followed including the following:
1. Read all instructions.
2. Before using check that the voltage of wall outlet corresponds to rated voltage marked
on the rating plate.
3. This appliance has been incorporated with a grounded plug. Please ensure the wall
outlet in your house is well earthed.
4. To protect against fire, electric shock and injury to persons do not immerse cord, plug,
in water or other liquid.
5. Remove plug from wall outlet before cleaning and when not in use. Allow appliance
cool down completely before taking off, attaching components or before cleaning.
6. Do not operate any appliance with a damaged cord or plug or after the appliance
malfunctions, or is dropped or damaged in any manner. Return appliance to the nearest
authorized service facility for examination, repair or electrical or mechanical adjustment.
7. The use of accessory attachments not recommended by the appliance manufacturer
may result in fire, electric shock or injury to persons.
8. Place appliance on flat surface or table, do not hang power cord over the edge of table
or counter.
9. Ensure the power cord do not touch hot surface of appliance.
10. Do not place the coffee maker on hot surface or beside fire in order to avoid to be
damaged.
11. To disconnect, remove plug from wall outlet. Always hold the plug. But never pull
the cord.
12. Do not use appliance for other than intended use and place it in a dry environment.
13. Close supervision is necessary when your appliance is being used near children.
14. Be careful not to get burned by the steam.
15. Do not touch the hot surface of appliance (such as steam wand, and the steel mesh
just boiling). Use handle or knobs.
16. Do not let the coffee maker operate without water.
17. Warning: the filling aperture must not be opened during use.
18. Do not remove the metal funnel when appliance in brewing coffee or when steam
and hot water escape from metal funnel and ensure to release the pressure in water
tank before removing metal funnel.
19. Connect plug to wall outlet before using and turn any switch off before plug is removed
from wall outlet.
20. This appliance is not intended for use by persons (including children) with reduced
physical, sensory or mental capabilities, or lack of experience and knowledge, unless
they have been given supervision or instruction concerning use of the appliances by a
- 11 -
Page 13

IMPORTANT SAFEGUARDS
person responsible for their safety.
21. Children should be supervised to ensure that they do not play with the appliance.
22. This appliance is intended to be used in household and similar applications such as:
– staff kitchen areas in shops, offices and other working environments;
– farm houses;
– by clients in hotels, motels and other residential type environments;
– bed and breakfast type environments.
23. Do not use outdoors.
24. Save these instructions.
KNOW YOUR COFFEE MAKER
(Product may be subject to change without prior notice)
A. ON/OFF switch
B. Steam switch
C. coffee switch
D. Steam control knob
E. water tank cover
F. Water
G. top cover
H. Steam wand water tank
I. Froth device
J. Main body
K. Removable shelf
L -1. Coffee powder mesh
L -2. Coffee pod mesh
M. Metal funnel
N. Bottom cover
O. Metal funnel handle
P. Measuring spoon and tamper
Q. Power indicator
R. Ready indicator
BEFORE THE FIRST USE
To ensure the first cup of coffee tastes excellent, you should rinse the coffee maker with
warm water as follows:
1. Pour water into water tank, the water level should not exceed the “MAX” mark in the
tank. Then replace the water tank cover.
Note: the appliance is supplied with a detachable tank for easy cleaning, you can fill the
tank with water firstly, and then put the tank into the appliance.
2. Set coffee powder mesh into metal funnel (no coffee in the mesh).
3. Insert the funnel into the appliance from the “Insert” position and release the press
bar, and you can fix them into coffee maker firmly through turn it anticlockwise until it
is at the lock position.
4. Place a jug on removable shelf. Make sure the steam control knob is on the minimum
- 12 -
Page 14

BEFORE THE FIRST USE
position.
Note: the appliance is not equipped with jug, please use yourself jug or coffee cup.
5. Connect to power source, turn the ON/OFF switch to the “—” position. The power
indicator will be illuminated.
6. Turn the coffee switch to the “—” position, the pump will pump water, when there is
water flowing out and turn the coffee switch to the “O” position, turn the steam switch
to the “O” position and waiting for a moment, the appliance begins to be pre-heated until
the ready indicator is illuminated, it shows the pre-heating is finished. Turn the coffee
switch to “I” position again, and water will flow out.
7. After water not dropping out any more, you can pour the water in each container out
then clean them thoroughly, now you can start brewing.
Note: There may be noise when pumping the water on the first time, it is normal, the
appliance is releasing the air in the appliance. After about 20s, the noise will disappear.
PRE-HEATING
To make a cup of good hot Espresso coffee, we recommend you preheating the appliance
before making coffee, including the funnel, filter and cup, so that the coffee flavour can
not be influenced by the cold parts.
Note: The appliance is equipped with two steel meshes of coffee powder mesh and coffee
pod mesh. Select desired steel mesh according to your desired.
1. Remove the detachable tank and open the tank cover to fill it with desired water, the
water level should not exceed the “MAX” mark in the tank. Then place the tank into the
appliance properly.
2. Set coffee powder mesh into metal funnel, then insert the funnel into the appliance
from the “Insert” position and release the press bar, and you can fix them into coffee
maker firmly through turn it anticlockwise until it is at the lock position.(See fig. 1).
3. Place an espresso cup (your cup) on removable shelf.
4. Then connect the appliance to power supply source. Make sure the steam control knob
is on the minimum position.
5. Turn the ON/OFF switch to the “—” position, the power indicator will be illuminated,
make sure the steam switch on the “O” position. Turn the coffee switch to the “—”
position, when there is water flowing out, turn the coffee switch to the “O” position
immediately. The purpose of the step is to pump the water of the tank into the housing.
6. When the ready indicator is illuminated, you should turn the coffee switch to the “—”
position again, there will be hot water flowing out. When the ready indicator is extinguished,
turn the coffee switch to the “O” position. The pre-heating is finished.
MAKE ESPRESSO COFFEE
1. Remove the metal funnel by turning it in clockwise, set coffee powder mesh into metal
funnel. Add ground coffee to the mesh with measuring spoon, a spoon ground coffee
power can make about a cup of top-grade coffee, then press the ground coffee powder
tightly with the tamper. If you use the coffee pod, you shall use the coffee pod mesh
instead of the coffee powder mesh.
- 13 -
Page 15

MAKE ESPRESSO COFFEE
2. Then insert the funnel into the appliance from the
“Insert” position, and you can fix them into coffee maker
firmly through turn it anticlockwise until it is at the lock
position.(See fig. 1).
3. Pour out the hot water in the cup. Then place the hot
cup (your cup) on removable shelf.
4. At the time, the ready indicator is illuminated, once the ready indicator is illuminated,
you should turn the coffee switch to the “—” position, waiting for a moment, there will
be coffee flowing out.
Note: During brewing coffee or making steam, it is normal that the ready indicator is
likely to extinguish, it only means that the heater is heating up to keep the temperature
at the standard range.
5. You should turn the ON/OFF switch to “O” position manually when desired coffee is
obtained or the colour of coffee changes weak obviously, the power indicator and ready
indicator go out and the coffee maker stops working, your coffee is ready now.
WARNING: Do not leave the coffee maker unattended during making the coffee, as you
need operate manually sometimes!
6. After finishing making the coffee, you can take the metal funnel out by turning it
clockwise, and then pour the coffee residue or the brewed coffee pod out with the mesh
pressed by press bar.
7. Let them cool down completely, then rinse under running water.
MAKE CAPPUCCINO
You get a cup of cappuccino when you top up a cup of espresso with frothing milk.
Note: during making steam, the metal funnel must be assembled in position.
Method:
1. Prepare espresso first with container big enough according to the part “MAKE ESPRESSO
COFFEE”, make sure that the steam control knob is on the minimum position.
2. Turn the steam switch to the “—” position, waiting for until the ready indicator is
illuminated.
3. Fill a jug with about 100 grams of milk for each cappuccino to be prepared, you are
recommended to use whole milk at refrigerator temperature (not hot!).
Note: In choosing the size of jug, it is recommended the diameter is not less than 70±5mm,
and bear in mind that the milk increases in volume by 2 times, make sure the height of
jug is enough.
4. Insert the frothing device into the milk about two centimetres.
5. Turn the steam control knob slowly in anti-clockwise, steam will come out from the
frothing device. Froth milk in the way moving vessel round from up to down.
Note: Never turn the steam control knob rapidly, as the steam will accumulate rapidly
in short time which may increase the potential of the risk of explosion.
6. When the required purpose is reached, you can turn the steam control knob to the
minimum position.
Note: Clean steam outlet with wet sponge immediately after steam stops generating,
- 14 -
Fig. 1
Page 16

MAKE CAPPUCCINO
but care not to hurt!
7. Pour the frothed milk into the espresso prepared; now the cappuccino is ready. Sweeten
to taste and if desired, sprinkle the froth with a little cocoa powder.
8. Turn the ON/OFF switch to the “O” position to cut off the power source.
Note: After making steam, we recommend you allow the coffee maker to cool down at
least for 5 min before making coffee again. Otherwise burnt odor may occur in your
Espresso coffee. If you do not want to wait for 5 minutes, you only need turn the steam
switch to the “O” position and dip the steam wand into you cup firstly, then turn the steam
control knob in anti-clockwise, turn the coffee switch to the “—” position to pump water,
once the ready indicator is extinguished, you shall turn the coffee switch to the “O”
position and turn the steam control knob to the minimum position, wait for a moment,
once the ready indicator is illuminated again, you can make coffee again.
PRODUCING STEAM TO HEAT LIQUIDS OR FROTH MILK SINGLY
The steam wand can be used to froth milk singly or make hot beverages like drinking
chocolate, water or tea.
Method:
1. Open the tank cover, remove the detachable tank and fill it with desired water, the
water level should not exceed the “MAX” mark in the tank. Then place the tank into the
appliance properly.
2. Replace the tank cover, and then connect the appliance to power supply source.
3. Turn the ON/OFF switch to the “—” position, the power indicator is illuminated.
4. Turn the coffee switch to the “—” position, make the steam switch to the “O” position,
when there is water flowing out, turn the coffee switch to the “O” position immediately,
turn the steam switch to the “I” position and waiting for a moment, the appliance begins
to be heated until the ready indicator is illuminated, it shows the heating is finished.
5. Dip the steam wand into the liquid to be heated or into the prepared froth milk. Turn
the steam control knob in anti-clockwise slowly to start making steam.
6. When the required temperature is reached or the frothing milk is obtained, you can
turn the steam control knob to the minimum position.
8. Press the ON/OFF switch to the “O” position to cut off the power source.
CLEAN AND MAINTENANCE:
1. Cut off power source and let the coffee maker cool down completely before cleaning.
2. Clean housing of coffee maker with moisture-proof sponge often and clean water tank,
drip tray and removable shelf regularly then dry them.
Note: Do not clean with alcohol or solvent cleanser. Never immerse the housing in water
for cleaning.
3. Detach the metal funnel through turn it clockwise, get rid of coffee residue inside,
then you can clean it with cleanser, but at last you must rinse with clear water.
4. Clean all the attachments in the water and dry thoroughly.
CLEANING MINERAL DEPOSITS
1. To make sure your coffee maker operating efficiently, internal piping is cleanly and
- 15 -
Page 17

CLEANING MINERAL DEPOSITS
the peak flavor of coffee, you should clean away the mineral deposits left every 2-3
months.
2. Fill the tank with water and descaler to the MAX level ( the scale of water and descaler
is 4:1, the detail refers to the instruction of descaler. Please use “household descaler”,
you can use the citric acid (obtainable from chemist’s or drug stores) instead of the
descaler (the one hundred parts of water and three parts of citric acid).
3. According to the program of pre-heating, put the metal funnel (no coffee powder in
it) and carafe (jug) in place. Brewing water per “PRE-HEATING”.
4. Press the ON/OFF switch to “—” position, the power indicator will be illuminated, you
should turn the coffee switch to the “—” position, make sure the steam switch to the“O”
position, when there is water flowing out and turn the coffee switch to the “O” position,
and waiting for a moment, the coffee maker begins to be heated.
5. When the ready indicator is illuminated, it shows the heating is finish. Turn the coffee
switch to the “—” position and make two cups coffee (about 2Oz). Then turn the coffee
switch to the “O” position and wait for 5s.
6. Turn the steam switch to the “—” position, waiting for until the ready indicator is
illuminated. Make steam for 2min, then turn the steam control knob to the minimum
position to stop making steam. Turn the ON/OFF switch to the “O” position to stop the
unit immediately, make the descalers deposit in the unit at least 15 minutes.
7. Restart the unit and repeat the steps of 4-6 at least 3 times.
8. Then turn the steam switch to “O” position, when the ready indicator is illuminated,
turn the coffee switch to the “—” position to brew until no descaler is left.
9. Then brewing coffee (no coffee powder) with tap water in the MAX level, repeat the
steps of 4-6 for 3 times (it is not necessary to wait for 15 minutes in step of 6), then
brewing until no water is left in the tank.
10. Repeat the step of 9 at least 3 times to make sure the piping is cleanly.
FEATURES
*15bar powerful pressure italian pump
*Die-casting aluminum alloy boiler
*1.8L large detachable water tank
*Aluminum alloy filter holder with dual-stainless steel filter
*Can make espresso with perfect crema
*With high pressure frothing function for making cappuccino or other hot beverage
*3 switches with indicator lights
*Elegant design with stainless steel decoration
*Safe and reliable, with overheating and overpressure protected device
*Detachable frothing nozzle and drip tray
*230V~50Hz 850W
Accessories
1. 1pc Coffee spoon
2. 1pc of 2-cup ground coffee filter
3. 1pc of ESE pod filter
- 16 -
Page 18

TROUBLESHOOTING
Do not take apart the appliance by yourself if the cause of failure is not found, you had
better contact certified serving center.
Environment friendly disposal
You can help protect the environment!
Please remember to respect the local regulations: hand in the non-working electrical
equipments to an appropriate waste disposal center.
- 17 -
Page 19

FRANÇAIS
SINBO SCM 2937 MACHINE À CAFÉ
MODE D’EMPLOI
Avant de commencer à utiliser l’appareil, lisez ce manuel en entier et conservez-le pour
vous y référer ultérieurement.
CONSIGNES IMPORTANTES DE SÉCURITÉ
Vous devez absolument prendre en considération les précautions principales de sécurité
avant l'utilisation de l’appareil électrique.
1. Lisez les instructions en entier.
2. Avant de commencer à utiliser l’appareil, contrôlez si voltage du réseau de la prise
correspond bien au niveau du voltage indiqué sur l’étiquette du produit.
3. Un cordon électrique de terre est monté à cet appareil.Assurez-vous que la prise de
courant est correctement installée à base de terre.
4. Pour éviter de subir un incendie, un choc électrique ou une blessure, n’immergez pas
le cordon ou la fiche électrique dans l’eau ou dans tout autre liquide.
5. Débranchez le cordon de la prise de courant avant de le nettoyer ou lorsque vous n'en
faites pas usage.Attendez que l’appareil refroidisse avant d’y monter ou d’en démonter
les pièces ou avant de nettoyer l’appareil.
6. Ne tentez pas d’utiliser un appareil dont le cordon d’alimentation ou la fiche électrique
est détériorée, ou de même au appareil qui est en panne ou endommagé.Remettez
l’appareil au centre de service agréé pour examen, réparation ou opération d’ajustement
électrique ou mécanique.
7. En cas d’usage d’accessoires qui ne sont pas conseillés par le fabricant de l’appareil,
des dangers tels qu’un incendie, un choc électrique ou une blessure peuvent se produire.
8. Installez l’appareil sur une surface ou une table plate de façon à ce que le cordon de
l’appareil ne pende pas du bord de la table ou de l’établi.
9. Veillez à ce que le cordon d’alimentation de l’appareil ne soit pas en contact avec des
surfaces chaudes.
10. Afin d’éviter que la machine à café ne subisse de dommage, ne le posez pas sur des
surfaces chaudes ou à proximité des cuisinières pu des fours chauds.
11. Pour couper la connexion de source de l’appareil, débranchez la fiche électrique de
la prise de courant.Saisissez toujours la fiche. Ne tirez jamais du cordon.
12. N’utilisez pas l’appareil à des fins autres que celles pour lesquelles il est conçu et
installez-le dans sur un endroit sec.
13. Si l’appareil est utilisé près des enfants, ces derniers doivent être surveillés de près.
14. Prenez garde à ne pas vous brûler à chaude la vapeur.
15. Ne touchez pas les surfaces chaudes (par exemple le bout de sortie de vapeur lors
du bouillonnement ou le filtre en acier) de l’appareil. Utilisez les poignées ou les manches.
16. Ne faites pas fonctionner la machine à café sans avoir mis de l’eau à l’intérieur.
17. Avertissement : l’unité de remplissage ne doit pas être ouverte lorsque l’appareil est
en marche.
18. Ne retirez pas le bec en métal lorsque l’appareil fait couler le café chaud dans la
tasse ou lorsque de la vapeur ou de l’eau chaude s’échappe du bec, et avant de retirer
- 18 -
Page 20

CONSIGNES IMPORTANTES DE SÉCURITÉ
le bec en métal assurez-vous que la pression à l’intérieur de la chaudière à eau s’est
libérée.
19. Branchez la fiche électrique à la prise de courant avant l’utilisation et assurez-vous
d’avoir positionné tous les boutons sur « arrêt ».
20. Cet appareil n’est pas prévu pour être utilisé par des personnes (y compris les enfants)
dont les capacités physiques, sensorielles ou mentales sont réduites, ou des personnes
dénuées d’expérience ou de connaissance, sauf si elles ont pu bénéficier, par l’intermédiaire
d’une personne responsable de leur sécurité, d’une surveillance ou d’instructions
préalables concernant l’utilisation de l’appareil.
21. Il convient de bien surveiller les enfants pour s’assurer qu’ils ne jouent pas avec
l’appareil.
22. Cet appareil est conçu pour usage domestique ou pour applications similaires
indiquées ci-dessous :
- magasins, offices et salles communes pour personnels dans les autres lieux de travail
- les maisons de fermes ;
- par les clients se trouvant dans les hôtels, motels et autres aires de repos ;
- installations types chambre et petit-déjeuner.
23. N’utilisez pas dans des espaces libres.
24. Conservez ce manuel.
PRENEZ CONNAISSANCE DE VOTRE MACHINE À CAFÉ
(Une modification de produit peut avoir lieu sans préavis).
A. Commutateur de Marche/Arrêt (ON/OFF)
B. Commutateur de Vapeur
C. Commutateur de café
D. Bouton de contrôle de vapeur
E. Couvercle de réservoir d’eau
F. Eau
G. Couvercle supérieur
H. Sortie de vapeur de réservoir d’eau
‹. Appareil de mousse
J. Corps principal
K. Étagère amovible
L. -1. Poudre de café
L. – 2.. Filtre de grains de café
M. Entonnoir en métal
N. Couvercle inférieur
O. Poignée d’entonnoir en métal
P. Cuillère de mesurage et mélangeur
Q. Indicateur d’alimentation
R. Indicateur de « prêt »
AVANT LA PREMIÈRE UTILISATION
Pour que le premier verre de café que vous allez préparer soit bon, rincez la machine
- 19 -
Page 21

AVANT LA PREMIÈRE UTILISATION
à café tel que décrit ci-dessous:
1. Remplissez de l’eau dans le réservoir d’eau, le niveau d’eau ne doit pas dépasser le
signe de « MAX » qui est à l’intérieur du réservoir.Fermez ensuite le couvercle du réservoir
d’eau.
Remarque : L’appareil dispose d’un réservoir d’eau démontable facile à nettoyer et, vous
pouvez monter le réservoir à l’appareil après l’avoir remplis avec de l’eau.
2. Montez le filtre de poudre de café au bec en métal (sans mettre de café dans le filtre)
3. Installez le filtre en métal à l’appareil en position de « Insertion » et laissez le bâton
de pression libre, immobilisez ensuite à la machine à café en faisant tourner dans le
sens antihoraire jusqu'à ce que cela se verrouille en s’installant à sa place.
4. Installez une carafe sur l’étagère amovible. Entre-temps, vérifiez si le bouton de
contrôle de vapeur est au plus bas niveau, gardez-le sur le niveau le plus bas.
Remarque: L’appareil ne dispose pas de carafe etc. vous devez utiliser votre propre
carafe ou verre.
5. Branchez le cordon à la prise de courant, positionnez le commutateur de Marche/Arrêt
sur « - ».La lampe indicatrice va s’allumer.
6. Positionnez le bouton de café sur “—”, la pompe commencera à pomper l’eau. Lorsque
l’eau commencera à couler, positionnez le commutateur de café sur “O”, et le commutateur
de vapeur sur “O” et attendez pendant un petit moment. L’appareil passera au préchauffage
jusqu’à ce que la lumière de « prêt » s’allume. L’allumage de la lumière indique que le
préchauffage est terminé. Positionnez le commutateur de café sur “I”, l’eau commencera
à couler dehors.
7. Une fois que l’écoulement de l’eau est entièrement terminé, vous pouvez déverser
l’eau dans tous les récipients. Vous pouvez désormais préparer votre boisson.
Remarque :L’appareil peut faire du bruit lorsque de l’eau se pompe pour la première
fois de l’appareil, cela est normal, l’appareil est en train d’éjecter l’air qui est enfermé
à l’intérieur.Cette situation n’aura plus lieu environ 20 secondes après.
PRÉCHAUFFAGE
Pour préparer une bonne tasse d'expresso chaud, nous vous conseillons de préchauffer
l’appareil, l’appareil de mousse, le filtre et la tasse avant de démarrer l’opération de
préparation de café, ainsi l’arôme de votre café ne deviendra pas mauvais à cause des
pièces froides.
Remarque: Il se trouve deux filtres en acier dans l’appareil, le filtre de café de poudre
et le filtre de grains de café. Vous pouvez utiliser celui que vous désirez.
1. Faites sortir le réservoir d’eau démontable et remplissez assez d'eau en ouvrant le
couvercle du réservoir, le niveau d'eau ne doit pas dépasser le signe de "MAX" qui est
à l'intérieur du réservoir.Installez ensuite le réservoir correctement à l’appareil.
2. Installez le filtre de café de poudre au bec en métal et puis installez le bec à l’appareil
en position de « Insertion »etlaissez le bâton de pression libre, immobilisez ensuite à
la machine à café en faisant tourner dans le sens antihoraire jusqu'à ce que cela se
verrouille en s’installant à sa place (voirIllustration 1).
3. Installez une tasse d’expresso (votre propre tasse) sur l’étagère amovible.
4. Branchez par la suite le cordon dans la prise de courant et mettez l’appareil sous
- 20 -
Page 22

PRÉCHAUFFAGE
tension. Assurez-vous que le bouton de contrôle de vapeur est au plus bas niveau.
5. Positionnez le commutateur de Marche/Arrêt (ON/OFF) sur “—”. La lampe indicatrice
va s’allumer, positionnez aussi le commutateur de vapeur sur “O”. Positionnez le bouton
de café sur “—”, dès que l’eau coule, positionnez immédiatement le bouton de café sur
“O”. Le but de ce pas est de pomper au réservoir l’eau qui se trouve dans le tank.
6. Lorsque l’indicateur de « prêt » est allumé, positionnez à nouveau le commutateur de
café sur “—”, de l’eau chaude commencera à couler. Lorsque l’indicateur de « prêt »
s’éteindra, positionnez le commutateur de café sur “O”. Le préchauffage est terminé.
PRÉPARATION DE CAFÉ EXPRESSO
1. Retirez le bec en métal en faisant tourner dans le sens horaire, installez le filtre de
café de poudre au bec en métal. Mettez du café moulu dans le filtre avec la cuillère de
mesurage. Il est possible de faire environ une tasse de café de bonne qualité avec une
cuillère de café moulu. Ensuite, compressez la poudre café moulu avec le mélangeur.
Si vous utilisez des grains de café, utilisez le filtre de café en grains au lieu du filtre de
café en poudre.
2. Ensuite, installez le bec à l’appareil en position de
« Insertion », fixez le bec à l’appareil en faisant tourner
dans le sens antihoraire jusqu’à la position de
verrouillage. (Voir Illustration 1)
3. Versez de l’eau chaude dans la tasse. Par la suite,
placez la tasse chaude (votre propre tasse) à l’étagère amovible.
4. La lumière de « prêt » va s’allumer, lorsque la lumière de « prêt » sera allumée,
positionnez le bouton de café sur “—” et attendez pendant un petit moment, le café
commencera à couler.
Remarque : Il est normal que la lumière de « prêt » devienne comme éteinte lors de
l’opération de préparation de café ou de formation devapeur, cela montre que le réchauffeur
se réchauffe pour assurer que la température reste à un intervalle standard.
5. Une fois que le café voulu est obtenu ou que la couleur du café devienne visiblement
claire vous devez positionner le commutateur de Marche/Arrêt (ON/OFF) avec votre main
sur “O”, la lampe d’alimentation va s’éteindre aussi bien que la lumière de « prêt » et
la machine à café arrêtera de fonctionner, votre café est « prêt ».
AVERTISSEMENT: Ne laissez pas la machine sans surveillance puisque vous aussi vous
devez parfois effectuer des opérations manuelles lors de l’opération de préparation de
café.
6. Une fois que vous avez terminé de préparer votre café, vous pouvez enlever le bec en
métal en faisant tourner dans le sens horaire. Ensuite, dévidez les résidus de café ou
les grains de café bouillis qui sont restés dans le filtre en pressant avec le presseur.
7. Après avoir attendu que les pièces refroidissent totalement, rincez en lavant sous
l’eau courante.
PRÉPARATION DE CAPPUCCINO
Lorsque vous versez du lait moussé par-dessus un verre d’expresso, vous obtiendrez
une tasse de cappuccino.
- 21 -
Illustration 1
Page 23

PRÉPARATION DE CAPPUCCINO
Remarque : Lors de l’opération de préparation de vapeur, le bec en métal doit être monté
à sa place.
Méthode :
1. Tout d’abord, préparez de l’expresso dans un bol de grandeur suffisante tel que décrit
sous le chapitre de « PRÉPARATION DE CAFÉ EXPRESSO », assurez-vous que le bouton
de contrôle de vapeur est au minimum niveau.
2. Positionnez le commutateur de vapeur sur “—”, attendez jusqu’à ce que la lumière
de « prêt » s’allume.
3. Pour chaque tasse de cappuccino que vous allez préparer, versez environ 100 grammes
de lait dans un récipient, nous vous conseillons d’utiliser un lait qui vient d’être sorti du
frigidaire (il ne doit pas être chaud !).
Remarque : Lorsque vous choisissez la grandeur du récipient, il est conseillé que le
diamètre ne soit pas plus petit que 70±5 mm, étant donné que le lait va augmenter 2 fois
plus de volume, n’oubliez que le récipient doit être assez haut.
4. Introduisez l’appareil de mousse dans le lait environ de deux centimètres
5. Faites tourner doucement le bouton de contrôle de vapeur dans le sens antihoraire,
de la vapeur sortira de l’appareil de mousse. Faites mousser le lait en faisant circuler
le bec de mousse avec des mouvements du haut vers le bas.
Remarque: Étant donné que la vapeur peut s’accumuler en peu de temps et peut
augmenter le risque d’explosion, ne faites jamais tourner le bouton de contrôle de vapeur
tout d’un coup.
6. Une fois que vous aurez obtenu ce que vous vouliez, vous devez positionner le bouton
de contrôle de vapeur au minimum niveau.
Remarque: Essuyez le bec de sortie de vapeur avec une éponge mouillée une fois que
la production de vapeur se sera arrêtée, seulement prenez soin de ne pas abîmer.
7. Versez le lait mousseux dans l’expresso que vous venez de préparer, maintenant votre
cappuccino est prêt.Parsemez un peu de cacao en poudre sur la mousse après avoir
sucré à votre goût.
8. Coupez la connexion de source d’alimentation en positionnant le commutateur de
Marche/Arrêt (ON/OFF) sur “O”.
Remarque: Après avoir formé de la vapeur, il est conseillé de laisser votre machine à
café refroidir pendant au moins 5 minutes avant de faire à nouveau du café. Dans le cas
contraire, une odeur de brûlé peut se former dans votre café expresso. Si vous ne voulez
pas attendre 5 minutes, positionnez seulement le commutateur de vapeur sur “O” et
installez le bec de vapeur à la tasse de café à l’avance. Faites ensuite tourner le bouton
de contrôle de vapeur dans le sens antihoraire, positionnez le commutateur de café sur
“—” afin de pomper l’eau, lorsque la lumière indicatrice de « prêt » sera éteinte vous
devez positionner le commutateur de café sur “O” vous devez aussi positionner le bouton
de contrôle de vapeur au minimum niveau et attendre pendant un petit moment jusqu’à
ce que la lumière indicatrice de « prêt » s’allume, vous pouvez à nouveau préparer du
café.
- 22 -
Page 24

EMPLOI DE VAPEUR POUR RÉCHAUFFER LES LIQUIDES OU POUR MOUSSER LE LAIT
Le bec de vapeur peut aussi être utilisé seulement en vue de mousser le lait ou de
préparer des boissons chaudes telles que du chocolat chaud, de l’eau chaude ou du thé.
Méthode :
1. Ouvrez le couvercle du réservoir, détachez le réservoir amovible de sa place et
remplissezd’eau, le niveau d’eau ne doit pas dépasser le signe de “MAX” se trouvant dur
le réservoir. Installez ensuite le réservoir correctement à l’appareil.
2. Installez le couvercle du réservoir à sa place, et puis branchez le cordon dans la prise
de courant et mettez l’appareil sous tension.
3. Positionnez le commutateur de Marche/Arrêt (ON/OFF) sur “—”. La lampe indicatrice
va s’allumer.
4. Positionnez le bouton de café sur “—”, positionnez aussi le commutateur de vapeur
sur “O”, dès que l’eau coule dehors,positionnez immédiatement le commutateur de café
sur “O”. Attendez pendant un petit moment en positionnant le commutateur de vapeur
sur “I”, l’appareil commencera à chauffer jusqu’à ce que la lumière de « prêt » s’allume.
L’allumage de la lumière indique que ‘opération de chauffage est terminée.
5. Plongez le bec de vapeur à l’intérieur du liquide à chauffer ou à l’intérieur du lait à
mousser. Pour commencer à produire de la vapeur, faites tourner le bouton de contrôle
de vapeur dans le sens antihoraire.
6. Une fois la température désirée obtenue ou lorsque le lait mousseux est obtenu vous
pouvez positionner le bouton de contrôle de vapeur au niveau minimum.
7. Positionnez le commutateur de Marche/Arrêt (ON/OFF) sur “O” pour couper la source
d’alimentation.
NETTOYAGE ET ENTRETIEN
1. Coupez la connexion de la source d’alimentation avant de démarrer l’opération de
nettoyage et attendez que la machine à café refroidisse complètement.
2. Nettoyez fréquemment le réservoir de la machine à café à l’aide d’une éponge résistante
à l’humidité.Nettoyez et essuyez régulièrement le réservoir d’eau, le plateau d'égouttement,
et l'étagère amovible.
Remarque : N’utilisez jamais de produits de nettoyage à base d’alcool ou de solvant.Ne
tentez jamais de nettoyer le corps de l’appareil en le plongeant dans l’eau.
3. Retirez le bec en métal en le faisant tourner dans le sens horaire, éliminez les restes
de café qui sont à l’intérieur, après vous pouvez nettoyer avec un nettoyant par contre
après vous devez bien rincer à l’eau propre.
4. Lavez tous les accessoires avec de l’eau puis essuyez bien.
NETTOYAGE DES RESTES DE MINÉRAUX
1. Pour assurer que la machine à café fonctionne sans problème et que le café puisse
donner sa saveur complète, les tubes qui sont à l’intérieur de l’appareil doivent être
tenus propres, à cet effet vous devez nettoyer les restes de minéraux qui sont à l’intérieur
de l’appareil une fois tous les 2-3 mois.
2. Remplissez le réservoir avec de l’eau et de l’anticalcaire jusqu’au niveau de MAX (le
taux d’eau et de l’anticalcaire est de 4 :1, pour plus d’information, veuillez-vous référer
au mode d'emploi de l'anticalcaire).Veuillez utiliser de « l’anticalcaire de type domestique
», au lieu de l'anticalcaire, vous pouvez aussi bien utiliser de l'acide citrique (peut être
acheté des dépôts de matériaux chimiques ou des pharmacies), (trois mesures d’acide
citrique pour cents mesures d'eau).
- 23 -
Page 25

NETTOYAGE DES RESTES DE MINÉRAUX
3. Installez le bec en métal (sans mettre de café à l’intérieur) et la tasse ou la carafe à
leur place selon le programme de préchauffage. Faites bouillir l’eau tel que décrit sous
le chapitre de "PRÉCHAUFFAGE" (“PRE-HEATING”).
4. Positionnez le bouton de Marche/Arrêt (ON/OFF) sur “-”, la lampe indicatrice va
s’allumer.Positionnez le commutateur de café sur « - », le commutateur de vapeur doit
être sur « O ». Lorsque l’eau commence à couler, positionnez le commutateur de café
sur « O » et attendez pendant un petit moment jusqu’à ce que la machine à café commence
à chauffer.
5. Le fait que la lampe indicatrice de « prêt » s’allume montre que l’opération de chauffage
est terminée.Positionnez le bouton de café sur “-” et préparez deux tasses de café
(environ 2oz).Positionnez ensuite le commutateur de café sur « O » et attendez pendant
environ 5 secondes.
6. Positionnez le commutateur de vapeur sur “—”, attendez jusqu’à ce que la lumière
de « prêt » s’allume. Recevez de la vapeur pendant 2 minutes et ensuite positionnez le
bouton de contrôle de vapeur au niveau minimum pour arrêter la vapeur. Arrêtez
immédiatement l’appareil en positionnant le commutateur de Marche/Arrêt (ON/OFF)
sur “O”, faites attendre l’anticalcaire dans l’appareil au moins pendant 15 minutes.
7. Remettez l’appareil en marche appliquez les pas entre 4-6 au moins 3 fois.
8. Positionnez ensuite le bouton de vapeur sur “O”, lorsque la lumière de « prêt » sera
allumée positionnez le commutateur de café sur “—” et faites fonctionner l’appareil
jusqu'à ce qu’il ne reste plus aucun anticalcaire dans.
9. Faites bouillir ensuite du café avec de l’eau du robinet jusqu’au niveau de MAX. (sans
mettre de café), et répétez 3 fois les pas entre 4-6 (il n’y a plus besoin d’attendre 15
minutes au 6ème pas) et faites fonctionner l’appareil jusqu'à ce qu’il ne reste plus aucune
eau dans le réservoir.
10. Assurez-vous que les tubes sont nettoyés en répétant le 9ème pas au moins 3 fois.
CARACTÉRISTIQUES
* Pompe italienne de 15 bars à haute pression
* Bouilleur moulage en coquille allié aluminium
* Bac d’eau détachable à large volume de 1,8 L
* Filtre à double sens en acier inoxydable et préhenseur de filtre allié aluminium
* Peut préparer de l’expresso avec sa crème parfaite
* Il est possible de préparer du cappuccino ou d’autres boissons chaudes grâce à sa
fonction de mousse à haute pression
* 3 commutateurs à voyants lumineux
* Ornement à conception élégante en acier inoxydable
* Sécurisé et assuré avec ses systèmes de protection contre surchauffe et contre pression
excessive
* Bec de mousse amovible et égouttoir
* 230V~50Hz 850W
Appendices (Accessoires)
1. 1 unité de cuillère à café
2. 1 unité de filtre de 2 récipients de café moulu
3. 1 unité de filtre de croûte ESE
- 24 -
Page 26

DÉPANNAGE
Dans le cas où vous ne trouvez pas la cause du problème, ne tentez pas de démonter
l’appareil tout seul, passez en contact avec le centre de service agréé qui dispose d’un
certificat d’autorisation.
MISE AU REBUT DE FAÇON RESPECTUEUSE ENVERS L’ENVIRONNEMENT
Vous pouvez aider à protéger l’environnement !
Veuillez respecter les réglementations locales.Veuillez délivrer vos appareils électriques
qui ne fonctionnent plus aux centres de traitement de déchets appropriés.
- 25 -
Page 27

NEDERLANDS
SINBO SCM 2937 KOFFIEZETAPPARAAT
GEBRUIKSHANDLEIDING
Lees deze handleiding aandachtig voordat u het apparaat in gebruik neemt en bewaar
ze zorgvuldig als naslagbron.
BELANGRIJKE VEILIGHEIDSVOORZORGEN
Bij het gebruik van elektrische apparaten moeten altijd volgende essentiele
veiligheidsvoorschriften worden in acht genomen:
1. Lees aandachtig alle instructies.
2. Controleer of de plaatselijke netspanning overeenkomt met de voltage die vermeld is
op het kenplaatje van het apparaat.
3. Dit apparaat is voorzien van een geaard snoer. Sluit het apparaat alleen aan op een
degelijk geaard stopcontact.
4. Dompel het apparaat, snoer of stekker nooit in water of een andere vloeistof om brand,
elektrische schok en persoonlijk letsel te voorkomen.
5. Haal de stekker uit het stopcontact als het apparaat niet wordt gebruikt en voor
reiniging. Wacht met reinigen en opbergen tot het apparaat volledig is afgekoeld.
6. Gebruik het apparaat niet ingeval het snoer, de stekker of het apparaat zelf beschadigd
is . Breng het naar de dichtst bijgelegen bevoegde Service voor nazicht, mechanische
afstelling of reparatie van elektrische componenten
7. Gebruik van accessoires die niet door de fabrikant zijn aanbevolen kan leiden tot brand,
elektrische schok en persoonlijk letsel.
8. Installeer het apparaat op een vlak en stabiel oppervlak, tafel of aanrecht.
9. Laat het snoer niet over de randen van tafel of aanrecht hangen of in aanraking komen
met de hete onderdelen van het apparaat.
10. Plaats het koffiezetapparaat niet op een heet oppervlak of nabij een kookvuur, hete
oven of andere hittebron.
11. Trek nooit aan het snoer om de stekker uit het stopcontact te halen, grijp altijd de
stekker vast.
12. Gebruik het apparaat uitsluitend voor het bestemde doel en installeer het in een
droge omgeving.
13. Houd nauw toezicht als het apparaat wordt gebruikt terwijl er kinderen in de buurt
zijn.
14. Wees voorzichtig tijdens het gebruik om verbranding door heet water en stoom te
voorkomen.
15. Raak hete delen van het apparaat niet aan terwijl het in werking is ( bv. stoommondstuk
of stalen trechter). Hanteer het apparaat alleen aan handvat en bedieningsknoppen.
16. Zet het koffiezetapparaat nooit aan zonder water.
17. Waarschuwing: open de watertank niet terwijl het apparaat in werking is.
18. Neem de trechter niet uit het apparaat terwijl het in werking is of als er stoom of
heet water uit de trechtermond vloeit ; laat de lucht uit de watertank ontsnappen vooraleer
u de trechter verwijdert.
19. Vergewis u ervan dat het apparaat uitgeschakeld is voordat u het op het stroomnet
- 26 -
Page 28

BELANGIJKE VEILIGHEIDSVOORZORGEN
aansluit en voordat u de stekker uit het stopcontact haalt.
20. Dit apparaat mag niet worden gebruikt door kinderen of door personen die niet over
alle lichamelijke, zintuiglijke of geestelijke vermogens beschikken of gebrek hebben aan
kennis en ervaring, tenzij onder toezicht en leiding van een persoon die verantwoordelijk
is voor het veilig gebruik.
21. Er moet voldoende toezicht worden gehouden om te voorkomen dat kinderen met
het apparaat gaan spelen.
22. Dit apparaat is bedoeld voor huishoudelijk en gelijkaardig gebruik, bv.:
- Personeelskeuken van winkels, kantoren en andere werkplaatsen,
- Landbouwbedrijven,
- Gebruik door gasten van hotel, motel en andere logeergelegenheden,
- Bed & Ontbijt gelegenheden
23. Gebruik het apparaat niet in open lucht.
24. Bewaar deze handleiding.
LEER UW KOFFIEZETAPPARAAT KENNEN
(Het product kan zonder voorafgaande kennisgeving worden gewijzigd)
A. AAN/UIT (ON/OFF) schakelknop
B. Stoomschakelknop
C. Koffieschakelknop
D. Stoomregelknop
E. Watertankdeksel
F. Watertank
G. Bovendeksel
H. Stoompijp
‹. Opschuimmondstuk
J. Behuizing
K. Lekbak met uitneembaar rek
L. -1. Koffiefilter
L. – 2.. Koffiepad filter
M. Metalen trechter
N. Deksel onderaan
O. Handvat v. metalen trechter
P. Maatlepel en stamper
Q. Stroomindicatielampje
R. “Gereed” indicatielampje
VOOR HET EERSTE GEBRUIK
Om vanaf het eerste kopje een uitstekend koffiearoma te bekomen, spoel voor het eerste
gebruik uw koffiezetapparaat uit met warm water als volgt:
1. Vul de tank met water tot aan het “MAX” peilteken zonder het maximum niveau te
overschrijden. Bevestig het deksel weer behoorlijk op de watertank.
Opmerking: Om reiniging te vergemakkelijken is de watertank uitneembaar. U kunt de
watertank vullen en vervolgens weer in het apparaat plaatsen.
- 27 -
Page 29

VOOR HET EERSTE GEBRUIK
2. Plaats de Koffiefilter (zonder koffie) in de metalen trechtermond.
3. Schuif de metalen trechter in het apparaat in “Insert” stand, laat de stoterstang los
en draai de trechter vervolgens tegen de klok in tot hij vastklikt.
4. Plaats een kan op het uitneembaar rek en vergewis u ervan dat de stoomregelknop
in minimum stand staat.
Opmerking: Er is geen kan of koffiekop met het apparaat meegeleverd, gebruik uw eigen
koffiekan of koffiekoppen.
5. Steek de stekker in het stopcontact en zet de AAN/UIT schakelknop op “—” . Het
stroomindicatielampje gaat branden.
6. Zet de koffieschakelknop op “—”, water van de tank wordt in het apparaat gepompt.
Zet de koffieschakelknop weer in “O” stand zodra er water uit de trechtermond vloeit.
Zet de stoomschakelknop op “O” en wacht eventjes. Het apparaat zal voorverwarmen tot
het “gereed” indicatielampje oplicht. Dit geeft aan dat de voorverwarming voltooid is. Zet
de koffieschakelknop op “I” , warm water begint uit het apparaat te vloeien.
7. Laat het water doorlopen tot het apparaat helemaal leeg is. Giet het opgevangen water
weg en reinig de kan of koppen. U kunt nu beginnen koffie zetten.
Opmerking: Het apparaat zal wat lawaai voortbrengen als het de eerste maal begint te
pompen. Dit is normaal en wordt veroorzaakt door het ontsnappen van de in het apparaat
opgesloten lucht. Het zal na een 20 tal seconden ophouden.
VOORVERWARMING
Als u een kop lekker warme Espresso koffie wil bereiden raden wij u aan het apparaat,
met inbegrip van trechter, filter en kop te laten voorverwarmen, zodat het koffiearoma
niet nadelig wordt beïnvloed door koude onderdelen.
Opmerking: Het apparaat wordt geleverd met twee stalen filters, een filter voor gemalen
koffie en een filter voor koffiepad’s. Gebruik een filter naar wens.
1. Neem de watertank uit het apparaat en vul met de gewenste hoeveelheid water zonder
het “MAX” peilteken te overschrijden. Plaats de tank weer behoorlijk in het apparaat met
gesloten deksel.
2. Plaats de koffiefilter in de metalen trechtermond. Schuif de metalen trechter in het
apparaat in “Insert” stand, laat de stoterstang los en draai de trechter vervolgens tegen
de klok in tot hij vastklikt (zie fig.1).
3. Plaats een espresso kop (uw eigen kop) op het uitneembaar rek.
4. Steek de stekker in het stopcontact. Vergewis u ervan dat de stoomregelknop in
minimum stand staat.
5. Zet de AAN/UIT schakelknop op “—” , het stroomindicatielampje gaat branden. Vergewis
u ervan dat de stoomschakelknop op “O” staat. Zet de koffieschakelknop op “—” . Hierdoor
wordt water van de tank in het apparaat gepompt. Zet de koffieschakelknop weer op “O”
zodra er water uit de trechtermond vloeit.
6. Wacht tot het “gereed” indicatielampje oplicht en zet de koffieschakelknop op “—”, na
enkele ogenblikken komt er warm water uit de trechtermond. Zet de koffieschakelknop
weer op “O” als het “gereed” indicatielampje dooft. De voorverwarming is voldtooid.
- 28 -
Page 30
ESPRESSOKOFFIE BEREIDEN
1. Draai de metalen trechter los met de klok mee en neem hem uit het apparaat. Plaats
de koffiefilter in de trechtermond. Doe met de maatlepel de nodige hoeveelheid gemalen
koffie in de filter – één maat is voldoende voor een goede kop koffie – en druk de koffie
in de filter aan met de stamper. Ingeval u koffiepad’s
gebruikt leg die dan in de koffiepad filter.
2. Schuif de metalen trechter weer in het apparaat in
“Insert” stand, laat de stoterstang los en draai de trechter
vervolgens tegen de klok in tot hij vastklikt (zie fig.1).
3. Giet het warm water uit de espresso kop en plaats
de kop (uw eigen koffiekop) op het uitneembaar rek.
4. Als het “gereed” indicatielampje brandt, zet de koffieschakelknop op “—”, na enkele
ogenblikken vloeit de hete koffie in uw kop.
Opmerking: Terwijl u koffie zet of stoom maakt gaat het “gereed” indicatielampje met
tussenpozen aan en uit, dit is normaal, het wijst erop dat de verwarmingselementen
regelmatig worden in- en uitgeschakeld om het water of de stoom heet te houden.
5. Als de gewenste hoeveelheid koffie is doorgelopen is of als de kleur van de doorlopende
koffie aanmerkelijk lichter wordt zet de AAN/UIT schakelknop op “O” om met koffiezetten
te stoppen en het apparaat uit te schakelen. Uw koffie is klaar.
WAARSCHUWING: Vermits op sommige momenten de manuele tussenkomst van de
gebruiker is vereist mag het apparaat niet onbeheerd worden achtergelaten tijdens het
koffie zetten.
6. Draai na het koffie zetten de metalen trechter met de klok mee om hem los te maken
en uit het apparaat te halen. Leeg vervolgens de koffiefilter of koffiepad filter.
7. Wacht tot ze volledig zijn afgekoeld en spoel uit onder de kraan.
CAPPUCCINO BEREIDEN
Door een hoeveelheid melkschuim aan te brengen op een kop espresso bekomt u
cappuccino.
Opmerking: Tijdens de stoomproductie moet de metalen trechter op zijn plaats in het
apparaat zitten.
Bereidingswijze:
1. Maak om te beginnen espresso (in grotere koffiekoppen) op de wijze uiteengezet onder
“ESPRESSOKOFFIE BEREIDEN”, vergewis u ervan dat de stoomregelknop in minimum
stand staat.
2. Zet de stoomschakelknop op “—” en wacht tot het “gereed” indicatielampje oplicht.
3. Doe per kop cappuccino ongeveer 100 gram melk (geen warme melk) in een beker;
gebruik bij voorkeur volle melk recht uit de koelkast.
Opmerking: Het is aanbevolen een beker te gebruiken van minstens 70±5mm doormeter
en wat de hoogte betreft moet u er rekenig mee houden dat de schuimende melk
aanzienlijk in volume zal toenemen.
4. Dompel het opschuimmondstuk ongeveer twee centimeter diep in de melk.
5. Draai de stoomregelknop voorzichtig en geleidelijk aan tegen de klok in, er zal stoom
uit het opschuimmondstuk komen. Beweeg de beker in kringen op en neer om de melk
gelijkmatig op te schuimen.
Opmerking: Draai de stoomregelknop nooit bruusk open, want doordat stoom zich op
korte tijd ophoopt ontstaat er een hoger risico van ontploffing.
- 29 -
Fig. 1
Page 31

CAPPUCCINO BEREIDEN
6. Zet de stoomregelknop in minimum stand zodra het gewenste schuimresultaat bekomen
is.
Opmerking: Maak nadat de stoomafgifte heeft opgehouden het opschuimmondstuk
schoon met een natte spons maar wees voorzichtig om het niet te beschadigen.
7. Giet de schuimende melk op de espresso en uw cappuccino is klaar. Voeg naar believen
suiker of een zoetmiddel toe en strooi eventueel een beetje kakaopoeder over het schuim.
8. Zet de AAN/UIT schakelknop op “O”.
Opmerking: Na het produceren van stoom is het aangeraden het koffiezetapparaat
minstens 5 minuten te laten afkoelen voordat u opnieuw koffie zet, anders zou uw
espresso koffie een aangebrande smaak kunnen hebben. Als u geen 5 minuten kunt
wachten, doe als volgt. Zet de stoomschakelknop op “O” en plaats het opschuimmondstuk
in een koffiekop. Draai vervolgens de stoomregelknop tegen de klok in en zet de
koffieschakelknop op “—” om water te pompen. Zodra het “gereed” indicatielampje dooft
zet u de koffieschakelknop op “O” en de stoomregelknop in minimumstand. Wacht even
tot het “gereed” indicatielampje weer oplicht , dan kunt u opnieuw beginnen koffie zetten.
STOOM PRODUCEREN OM MELK OP TE SCHUIMEN OF DRANKEN TE VERWARMEN
Het opschuimmondstuk kan gebruikt worden om melk op te schuimen of om water,
chokolademelk, thee en dergelijke dranken op te warmen.
Werkwijze:
1. Neem de watertank uit het apparaat , doe er de gewenste hoeveelheid water in zonder
het “MAX” peil te overschrijden en plaats weer behoorlijk in het apparaat.
2. Doe het deksel op de watertank en steek de stekker in het stopcontact.
3. Zet de AAN/UIT schakelknop op “—”, het stroomindicatielampje gaat branden.
4. Zet de koffieschakelknop op “—” en de stoomschakelknop in “O” stand. Zet de
koffieschakelknop op “O” zodra er water uit de trechtermond vloeit. Zet dan de
stoomschakelknop op “I” en laat het apparaat opwarmen tot het “gereed” indicatielampje
oplicht. Dit toont aan dat het apparaat voldoende is opgewarmd.
5. Plaats het opschuimmondstuk in de op te schuimen melk of te verwarmen drank.
Draai vervolgends de stoomregelknop langzaam tegen de klok in om stoom te produceren.
6. Als de drank voldoende is opgewarmd of de melk voldoende opgeschuimd kunt u de
stoomregelknop in minimum stand zetten.
7. Schakel vervolgens het apparaat uit door de AAN/UIT schakelknop op “O” te zetten.
REINIGING EN ONDERHOUD:
1. Neem de stekker uit het stopcontact en laat het koffiezetapparaat volledig afkoelen
voordat u het gaat reinigen.
2. Wrijf de buitenzijde van de behuizing schoon met een vochtige doek of spons. De
watertank, het lekbakje en het rooster zijn uitneembaar en kunnen gewoon in een sopje
worden afgewassen. Spoel na en droog goed af.
Opmerking: Gebruik geen alcohol, solvent e.d. reinigingsmiddelen om het apparaat
schoon te maken. Dompel de behuizing nooit in water.
3. Draai de metalen trechter tegen de klok in om hem los te maken en uit het apparaat
te nemen, verwijder de koffieresten en was in water en detergent. Spoel na en droog
goed af.
4. Alle accessoires en uitneembare delen van het apparaat kunnen in water worden
gewassen. Droog altijd goed af.
- 30 -
Page 32

VERWIJDEREN VAN KALKAANSLAG EN MINERALE RESTEN (ONTKALKEN)
1. Voor optimaal rendement van uw koffiezetapparaat en een goede koffiesmaak moeten
de pijpen en de binnenzijde van het apparaat schoon zijn; afhankelijk van de hardheid
van het water en de gebruiksfrequentie moet het apparaat om de 2 – 3 maanden worden
ontkalkt.
2. Vul de watertank tot aan het MAX peil met een solutie van water en een kalkoplosmiddel
(in de verhouding van 4:1; gedetailleerde uitleg vindt u in de gebruiksaanwijzing van het
ontkalkproduct). Gebruik een ontkalker voor huishoudelijke apparaten. In de plaats
daarvan kunt u ook citroenzuur gebruiken, verkrijgbaar bij uw drogist (3 delen citroenzuur
op 100 delen water).
3. Bevestig de metalen trechter (zonder koffie in de filter te doen) in het apparaat, plaats
een kan op het uitneembaar rek, onder de trechtermond en laat het apparaat werken
volgens het programma “VOORVERWARMING”.
4. Zet de AAN/UIT schakelknop op “—”, het stroomindicatielampje licht op, zet de
koffieschakelknop in “—” stand. De stoomschakelknop moet op “O” staan. Zet de
koffieschakelknop in “O” stand zodra de solutie uit de trechtermond begint te vloeien en
laat het koffiezetapparaat opwarmen.
5. Als het “gereed” indicatielampje oplicht betekent dit dat de verwarming voltooid is.
Zet de koffieschakelknop op “—” stand en laat 2 kopjes (ongeveer 2 Oz) van de solutie
doorlopen. Zet dan de koffieschakelknop weer in “O” stand en wacht 5 seconden.
6. Zet vervolgens de stoomschakelknop op “—”, en wacht tot het “gereed” indicatielampje
oplicht. Laat 2 minuten stoom produceren en zet daarna de stoomregelknop in minumum
stand om de stoomvorming te stoppen. Schakel onmiddelijk het apparaat uit door de
AAN/UIT schakelknop in “O” stand te zetten en laat de ontkalksolutie minstens 15 minuten
in het apparaat inwerken.
7. Zet het apparaat opnieuw aan en herhaal de stappen van 4 tot 6 minstens 3 maal.
8. Zet vervolgens de stoomschakelknop op “O” stand en zodra het “gereed” indicatielampje
brandt, de koffieschakelknop op “—” . Laat de ontkalksolutie doorlopen tot het apparaat
leeg is.
9. Vul het apparaat op nieuw tot MAX peil met vers kraanwater (doe geen koffie in de
filter) en herneem de volledige cyclus met 3 herhalingen van de stappen van 4 tot 6
(ditmaal zonder 15 minuten wachten na de 6e stap) en laat ten slotte het apparaat werken
tot het volledig leeg is.
10. Herhaal de cyclus zoals beschreven onder punt 9 minstens 3 maal om zeker te zijn
dat de pijpen en de binnenzijde van het apparaat weer helemaal schoon zijn.
FUNCTIES
* Een Italiaanse pomp die heeft een krachtige druk van 15 bar
* Persgieten is een aluminium samensmeltende koker
* Een 1,8 L ruime losgaande watertank
* Een roestvrije stalen filter met dubbele richting en een filter behoudend met een
aluminium samensmelting
* Kan een espresso klaarmaken met haar perfecte creme
* Met haar schuim functie met hoge druk is het mogelijk een cappuccino of andere warme
dranken klaar te maken
* 3 sleutels die wijzerlichten hebben
* Een roestvrije stalen versiering met keurige image
- 31 -
Page 33

FUNCTIES
* Is veilig en degelijk met haar enorme verwarming en met haar enorme
drukbeschermingssystemen
* Een schuimstang die los kan gaan en een druppelblad
* 230V -50Hz 850 W
Verlengsels (Accessoires)
1. 1 paar Koffielepel
2. 1 paar 2 borden vermalen koffie filter
3. 1 paar ESE schaalfilter
PROBLEMEN OPLOSSEN
Ingeval u de reden van het probleem niet kunt achterhalen, tracht niet het apparaat op
eigen houtje te demonteren; contacteer een bevoegde Service voor nazicht en reparatie.
Milieuvriendelijke afvoer.
Draag bij tot de bescherming van het mileu!
Neem de plaatselijke voorschriften in acht: lever onbruikbare elektrische apparaten in,
op het betreffend verzamelpunt.
- 32 -
Page 34

DEUTSH
SINBO SCM 2937 KAFFEEAUTOMAT
BEDIENUNGSANLEITUNG
Bitte lesen Sie die Bedienungsanleitung vor der Benutzung aufmerksam durch und
bewahren Sie sie für späteres Nachschlagen auf.
WICHTIGE SICHERHEITSHINWEISE
Bei der Benutzung dieses Gerätes sind folgende Sicherheitshinweise unbedingt zu
beachten:
1. Vor dem ersten Gebrauch lesen Sie alle Anleitungen durch.
2. Vergewissern Sie sich vor dem Anschluss des Gerätes, dass die auf dem Typenschild
angegebene Netzspannung mit der Spannung Ihres Haushaltes übereinstimmt.
3. Schliessen Sie das Gerät nur an eine vorschriftsmässig installierte SchutzkontaktSteckdose an.
4. Um die Gefahr von Verbrennungen, Stromschlägen, Bränden, und/oder
Personenschäden zu vermeiden, Tauchen Sie das Netzkabel niemals in Wasser oder
andere Flüssigkeiten.
5. Schalten Sie das Gerät bei Nichtgebrauch, beim Austausch der Zubehörteile und zur
Reinigung aus, ziehen Sie den Netzstecker und lassen Sie das Gerät vollständig abkühlen.
6. Setzen Sie das Gerät nicht in Betrieb, wenn das Netzkabel, der Netzstecker beschädigt
ist oder das Gerät nicht ordnungsgemäss funktioniert. Bringen Sie das Gerät zur
Überprüfung und Reparatur dem Hersteller oder an das Service Center zurück.
7. Die Verwendung von Zubehör, das nicht vom Hersteller empfohlen wurde, kann Feuer,
Elektroschock oder Verletzung von Personen verursachen.
8. Stellen Sie das Gerät auf eine ebene Oberfläche. Achten Sie darauf, dass das
Netzanschlusskabel nicht über die Tischkante bzw. die Arbeitsplatte hängt.
9. Achten Sie darauf, dass das Netzkabel nicht mit heißen Oberflächen in Berührung
kommt.
10. Das Gerät nie auf oder neben einen Gas- oder Elektroherd oder einen heissen
Backofen stellen.
11. Den Netzstecker nicht an der Anschlussleitung aus der Steckdose ziehen, bitte fassen
Sie den Netzstecker an.
12. Das Gerät darf nur für den vorgesehenen Zweck benutzt werden. Bewahren Sie das
Gerät an einem trockenen Ort auf.
13. Höchste Vorsicht ist geboten, wenn das Gerät in der Nähe von Kindern benutzt wird.
14. Bei Verwendung von heißem Dampf mit äußerster Vorsicht verfahren.
15. Die Düse für die Ausgabe von heißem Wasser/Dampf kann hohe Temperaturen
erreichen: Die direkte Berührung mit den Händen vermeiden. Nur am entsprechenden
Griffstück anfassen.
16. Das Gerät nie ohne Wasser einschalten.
17. Im Betriebszustand soll die Einfüllöffnung nicht geöffnet werden.
18. Nehmen Sie beim Ausgiessen vom heissen Kaffee niemals die Metalldüse ab und
achten Sie dabei, dass der Wassertank drucklos ist.
19. Achten Sie darauf, dass das Gerät ausgeschaltet ist, bevor Sie den Netzstecker aus
- 33 -
Page 35

WICHTIGE SICHERHEITSHINWEISE
der Steckdose ziehen.
20. Das Gerät ist nicht dafür bestimmt, durch Personen (einschliesslich Kinder) mit
eingeschränkten physischen, sensorischen oder geistigen Fähigkeiten oder mangels
Erfahrung und/oder mangels Wissen benutzt zu werden, es sei denn, sie werden durch
eine für ihre Sicherheit zuständige Person beaufsichtigt oder erhielten von ihr Anweisungen,
wie das Gerät zu benutzen ist.
21. Kinder sollten beaufsichtigt werden, um sicherzustellen, dass Sie nicht mit dem
Gerät spielen.
22. Dieses Gerät ist nicht für kommerziellen Gebrauch geeignet. Es ist nur für die Nutzung
im Haushalt und ähnlichen Anwendungen konzipiert, wie beispielsweise:
- in Küchen für Mitarbeiter, in Läden, Büros und anderen gewerblichen Bereichen;
- in Farmhäusern;
- von Kunden in Hotels, Motels und anderen Wohneinrichtungen;
- in Frühstückspensionen.
23. Verwenden Sie das Gerät nicht im Freien.
24. Bewahren Sie diese Bedienungsanleitung sorgfältig auf.
GERÄTEBESCHREIBUNG
(Änderungen sind vorbehalten)
A. Ein-/Ausschalter
B. Dampftaste
C. Kaffeetaste
D. Dampfdrehknopf
E. Wassertankdeckel
F. Wasser
G. Oberdeckel
H. Heisswasser-/Dampfdüse
‹. Brüheinheit
J. Gehäue
K. Abtropfschale (abnehmbar)
L. 1. Kaffeepulver
2. Kaffeebohnenfilter
M. Auslauf
N. Unterdeckel
O. Filterträger
P. Messlöffel
Q. Betriebsanzeige
R. Bereitschaftsanzeige
VOR DEM ERSTEN GEBRAUCH
Reinigen Sie das Gerät vor dem ersten Gebrauch wie folgt:
1. Den Wassertank herausnehmen, diesen ausspülen und bis zur Markierungslinie MAX
mit frischem Wasser füllen. Den Deckel schliessen.
Hinweis: Der Wassertank ist herausnehmbar.
- 34 -
Page 36

VOR DEM ERSTEN GEBRAUCH
2. Setzen Sie den Kaffeepulverfilter auf auf den Filterträger. (ohne Kaffee).
3. Befestigen Sie den Filterträger, indem Sie ihn gegen den Uhrzeigersinn drehen.
4. Eine Tasse auf die Abtropfschale stellen. Stellen Sie den Dampfdrehknopf auf minimale
Position.
Hinweis: Tasse oder Behälter ist nicht mitgeliefert.
5. Stecken Sie den Netzstecker in die Steckdose. Schalten Sie das Gerät ein. Die
Betriebsanzeige leuchtet auf.
6. Stellen Sie die Kaffeetaste auf Position „-„ Die Pumpe ist nun aktiv. Wenn Wasser
austritt, stellen Sie die Kaffee- und die Dampftaste auf Position „0“. Warten Sie kurz ab.
Das Gerät heizt auf bis die Beritschaftsanzeige leuchtet. Stellen Sie die Kaffeetaste auf
Position „I“. Das Wasser beginnt auszutreten.
7. Wenn das Wasser nicht mehr austritt, schütten Sie das Wasser von den Behältern
weg. Nun können Sie mit der Zubereitung beginnen.
Hinweis: Die Maschine gibt ein normales Geräusch von sich. Nach ca. 20 Sekunden hört
dieses auf.
VORHEIZEN
Um bessere Ergebnisse zu erzielen und dem Kaffee einen hervorragenden Geschmack
zu verleihen, empfehlen wir das Gerät vorzuheizen.
Hinweis: Filter für Kaffeepulver und für Kaffeebohnen sind mitgeliefert. Wählen Sie den
entsprechenden Filter aus.
1. Den Wassertank herausnehmen, diesen ausspülen und bis zur Markierungslinie MAX
mit frischem Wasser füllen. Den Wassertank wieder einsetzen.
2. Setzen Sie den Kaffeepulverfilter auf auf den Filterträger. Befestigen Sie den Filterträger,
indem Sie ihn gegen den Uhrzeigersinn drehen. (Abb.1)
3. Stellen Sie auf die Abtropfschale eine Espressotasse.
4. Stecken Sie den Netzstecker in die Steckdose. Stellen Sie den Dampfdrehknopf auf
minimale Position.
5. Schalten Sie das Gerät ein. Die Betriebsanzeige leuchtet auf. Stellen Sie die Dampftaste
auf Position „0“ und die Kaffeetaste auf Position „-„. Wenn Wasser austritt, stellen Sie
die Kaffeetaste auf Position „0“.
6. Wenn die Beritschaftsanzeige leuchtet, stellen Sie die Kaffeetaste wieder auf Position
„-„. Das Wasser tritt nun heraus. Wenn die Bereitschaftsanzeige erlischt, stellen Sie die
Kaffeetaste auf Position „0“. Der Vorgang ist beendet.
ZUBEREITUNG VON ESPRESSOKAFFEE
1. Nehmen Sie den Filterträger heraus, indem Sie sie ihn im Uhrzeigersinn drehen.
Setzen Sie den Kaffeepulverfilter auf auf den Filterträger. Geben Sie mit dem Messlöffel
etwas gemahlene Kaffeepulver. Ein Messlöffel gemahlene Kaffeepulver reicht für eine
Tasse Kaffee aus. Pressen Sie die Kaffeepulver mit dem
Rührer fest. Wenn Sie Kaffeebohnen verwenden, setzen
Sie den Kaffeebohnenfilter ein.
2. Befestigen Sie den Filterträger, indem Sie ihn gegen
den Uhrzeigersinn drehen. (Abb.1)
- 35 -
Abb. 1
Page 37

ZUBEREITUNG VON ESPRESSOKAFFEE
3. Füllen Sie die Tasse mit heissem Wasser und stellen Sie sie auf die Abtropfschale.
4. Die Bereitschaftsanzeige leuchtet auf. Stellen Sie die Kaffeetaste auf Position „-„ und
warten Sie kurz ab. Der Kaffee wird ausgegeben.
Hinweis: Es ist normal, dass die Bereitschaftsanzeige im Betriebszustand etwas erlischt.
Es deutet darauf hin, dass die Warmhaltefunktion aktiviert ist.
5. Wenn die gewünschte Kaffeemenge ausgegeben ist, stellen Sie den Ein-/Ausschalter
auf Position „0“. Die Betriebsanzeige und die Bereitschaftsanzeige erlischt und das Gerät
schaltet sich aus. Der Kaffee ist zubereitet.
Warnung: Lassen Sie das Gerät nicht unbeaufsichtigt.
6. Nach Zubereiten von Kaffee nehmen Sie den Filterträger heraus, indem Sie ihn im
Uhrzeigersinn drehen. Nachfolgend entleeren Sie die restlichen Kaffeebohnen aus dem
Filter.
7. Lassen Sie dieTeile vollständig abkühlen und reinigen Sie sie nachfolgend unter
fliessendem Wasser.
ZUBEREITUNG VON CAPPUCCINO
Geben Sie auf eine Tasse Espresso aufgeschäumte Milch, um Cappuccino zu zubereiten.
Hinweis: Der Filterträger soll richtig eingesetzt werden.
1. Bereiten Sie eine grosse Tasse Espresso (siehe Kapitel “Zubereitung von Espresso”.
Stellen Sie den Dampfdrehknopf auf minimale Position.
2. Stellen Sie die Dampftaste auf Position “-“ und warten Sie ab, bis die
Bereitschaftsanzeige aufleuchtet.
3. Das Gefäß mit 100 Gramm Milch pro Cappuccino, den Sie zubereiten möchten, füllen.
Es wirdempfohlen, halbfette, kühle Milch aus dem Kühlschrank zu verwenden.
Hinweis: Bei der Wahl der Größe des Behältnisses ist zu berücksichtigen, dass das
Milchvolumen sich verdoppelt (Durchmesser min. 70 mm).
4. Den Milchaufschäumer ca. 2 cm in das Gefäß mit der Milch eintauchen.
5. Den Dampfdrehknopf gegen den Uhrzeigersinn drehen. Aus dem Milchaufschäumer
entweicht der Dampf, der die Milch aufschäumt.
Hinweis: Den Dampfdrehknopf niemals schnell drehen.
6. Sobald die gewünschte Temperatur erreicht wird, die Dampfabgabe durch Drehen des
Dampfdrehknopfs auf minimale Position stellen.
Hinweis: Die Dampfdüse nach dem Dampfvorgang mit einem feuchten Schwamm
abwischen.
7. Füllen Sie die Espresso mit dem vorab zubereiteten Milchschaum. Der Cappuccino ist
fertig: Nach Belieben zuckern und, wenn Sie wünschen, den Schaum mit etwas Kakaopulver
bestreuen.
8. Schalten Sie das Gerät aus.
Hinweis: Lassen Sie das Gerät mindestens 5 Minuten abkühlen, bevor Sie es erneut in
Betrieb setzen. Sie brauchen nicht 5 Minuten abzuwarten, wenn Sie die Dampftaste auf
Position “0” stellen und die Dampfdüse zuvor in die Kaffeetasse eintauchen. Nachfolgend
den Dampfdrehknopf gegen den Uhrzeigersinn drehen und die Kaffeetaste auf Position
“-“ stellen. Wenn die Bereitschaftsanzeige erlischt, stellen Sie die Kaffeetaste auf
Position”0” und den Dampfdrehknopf auf minimale Stufe. Warten Sie kurz ab. Nun können
Sie erneut Kaffee zubereiten.
- 36 -
Page 38

ZUBEREITUNG VON DAMPF (FÜR MILCH AUFSCHÄUMEN)
Die Dampfdüse kann für Milch Aufschäumen und für Zubereitung von heisser Schokolade,
Wasser oder Tee verwendet werden.
1. Den Wassertankdeckel öffnen, den Wassertank herausnehmen und bis zur
Markierungslinie MAX mit frischem Wasser füllen. Den Deckel schliessen und den
Wassertank wieder einsetzen.
2. Den Deckel aufsetzen und das Gerät an das Stromnetz anschliessen.
3. Schalten Sie das Gerät ein. Die Betriebsanzeige leuchtet auf.
4. Stellen Sie die Kaffeetaste auf Position „-„ und die Dampftaste auf Position „0“. Wenn
das Wasser heraustritt, die Kaffeetaste auf Position „I“ stellen und kurz abwarten. Das
Gerät beginnt zum Erhitzen bis die Bereitschaftsanzeige aufleuchtet.
5. Die Dampfdüse in das Gefäss mit der Milch oder Flüssigkeit eintauchen. Drehen Sie
den Dampfdrehknopf gegen den Uhrzeigersinn, um mit der Dampferzeugung zu beginnen.
6. Sobald die gewünschte Temperatur erreicht wird, die Dampfabgabe durch Drehen des
Dampfdrehknopfs auf minimale Position stellen.
7. Schalten Sie das Gerät aus.
REINIGUNG UND PFLEGE
1. Trennen Sie das Gerät vom Netz und lassen Sie das Gerät abkühlen.
2. Die Brüheinheit ist mit einem Schwamm regelmässig zu reinigen. Den Wssertank und
die Abtropfschale regelmässig reinigen und abtrocknen.
Hinweis: Für die Reinigung sollte kein Äthylalkohol, Lösungsmittel, Benzin und/oder
scheuernde Produkte verwendet werden. Tauchen Sie die Brüheinheit niemals in Wasser.
3. Nehmen Sie den Filterträger heraus, indem Sie ihn im Uhrzeigersinn drehen. Entleeren
Sie die Kaffeereste und spülen Sie aus.
4. Alle Zubehöre gründlich reinigen und abtrocknen.
ENTKALKUNG
1. Das Entkalken dient zur Beseitigung aller Kalkablagerungen auf den Oberfl ächen
und aller Öffnungen durch die Wasser fl ießt.Daher sollte das Gerät 1 Mal in 2-3 Monate
entkalkt werden.
2. Füllen Sie den Wassertank mit Gemisch von Wasser und Entkalkungsmittel (4/1).
Beachten Sie die Anweisungen auf der Verpackung. Anstatt Entkalkungsmittel können
Sie auch Zitronensäure verwenden (Menge: 100/3).
3. Setzen Sie den Filterträger ein und stellen Sie ein Gefäss auf die entsprechnde Stelle.
Bringen Sie das Wasser zum Kochen. (siehe Kapitel „Vorheizen“).
4. Schalten Sie das Gerät ein. Die Betriebsanzeige leuchtet auf. Stellen Sie die Kaffeetaste
auf Position “-“ und die Dampftaste auf Position “0” ein. Wenn das Wasser herausritt,
die Kaffeetaste auf Position “0” einstellen und kurz abwarten, bis das Gerät mit erhitzen
beginnt.
5. Wenn die Bereitschaftsanzeige aufleuchtet, ist das Aufheizen beendet. Die Kaffeetaste
auf Position “-“ einstellen. 2 Tassen Kaffee zubereiten (ca. 2 Oz). Nachfolgend die
Kaffeetaste auf Position “0” stellen und ca. 5 Sekunden abwarten.
6. Stellen Sie die Dampftaste auf Position “-“ und warten Sie ab, bis die
Bereitschaftsanzeige aufleuchtet. 2 Minuten lang den Dampf entnehmen und nachfolgend
- 37 -
Page 39

ENTKALKUNG
den Dampfdrehknopf auf minimale Stufe stellen. Schalten Sie sofort das Gerät aus und
lassen Sie das Entkalkungsmittel ca 15 Minuten einwirken.
7. Schalten Sie das Gerät erneut ein und führen Sie die Schritte 4-6 3 Mal durch.
8. Stellen Sie die Dampftaste auf Position “0”. Wenn die Bereitschaftsanzige aufleuchtet,
stellen Sie die Kaffeetaste auf Position”-“ und schütten Sie das Entkalkungsmittel weg.
9. Den Wassertank bis zur Markierungslinie MAX mit Wasser füllen. Bringen Sie das
Wasser zum Kochen (ohne Kaffeepulver) und führen Sie die Schritte 4-6 3 Mal durch.
Es ist nicht notwendig 15 Miuten abzuwarten (Schritt 6). Lassen Sie nun das Wasser
zusammen mit dem Dampf herauslaufen, bis nur noch Dampf heraustritt.
10. 9. Schritt mindestens 3 Mal wiederholen, bis die Röhre gründlich entkalkt werden.
FEATURES
* 15 bar Pumpensystem
* Alu-Kocher
* abnehmbarer Wassertank (1,8 Liter)
* Edelstahlfilter und Filterhalter
* hervorragende Espresso-Zubereitung
* Geeignet auch für Capuccino
* 3 Schalter mit Leuchte
* hübsches Design
* Überhitzungsschutz
* abnehmbare Tropfplatte und -schale
* 230V~50Hz 850W
Zubehöre
1. Löffel für Espresso-Kaffeemehl
2. Kaffeefilter
3. ESE-Filter
- 38 -
Page 40

FEHLERBEHEUNG
Öffnen Sie das Gerät nicht selbst. Setzen Sie Sich mit der Service-Stelle in Verbindung.
BITTE UMWELTFREUNDLICH ENTSORGEN!
Leisten Sie einen Beitrag zum Schutze unserer Umwelt. Bitte beachten Sie die örtliche
Ordnungen. Am Ende der Lebensdauer, das Gerät an einem Sammelpunkt für das
Recycling von elektrischen und elektronischen Geräten abgeben.
- 39 -
Page 41

ESPANOL
SINBO SCM 2937 MÁQUINA DE CAFÉ
GUÌA DEL USO
Antes de utilizar la máquina lee este guía cuidadamente y guarde para consultar en el
futuro.
PRECAUCIONES IMPORTANTES DE LA SEGURIDAD
Antes de utilizar las máquinas eléctricas sigue las siguientes precauciones básicas.
1. Lee toda de la instrucción.
2. Controle que el voltaje de la máquina de café es conforme con el voltaje de red de
electricidad.
3. Esta máquina tiene el enchufe con alambre de tierra. Tiene que estar seguro que la
toma tiene el alambre de tierra correcto.
4. Para evitar incendios, choque de electricidad no mete el cable y enchufe en agua u
otro líquido.
5. Cuando no se utiliza la máquina o antes de limpieza tiene que desenchufarla. Antes
de montar o desmontar las piezas o antes de empezar a la limpieza espere que la máquina
se enfríe.
6. No intenta a utilizar si su cable o enchufe está averiada o si la máquina no se funciona
correctamente. Si el cable de energía se avería, se debe cambiar por el fabricante, centro
de servicio más cercano o un técnico cualificado.
7. No se recomienda utilizar los accesorios que no se dan por el fabricante de la máquina.
Si no, se puede ocurrir el riesgo de incendio, choque de electricidad y/o herirse.
8. El cable no se debe colgar del borde de encimera o no se debe tocar a las superficies
calientes.
9. El cable de energía no se debe tocar a las superficies calientes.
10. Para no averiar la máquina de café, no haga situar la máquina encima de las superficies
calientes o cerca del fuego.
11. Para cortar la conexión de energía desenchufe la máquina. Siempre coge el enchufe.
No tira por el cable nunca.
12. No utilice la máquina por un objeto excepto del objeto de su diseño y guarde en un
lugar seco.
13. Tenga mucho cuidado cuando está utilizándose cerca de los niños.
14. Tenga cuidado para el vapor caliente no quemar su piel.
15. No toque a las superficies calientes (durante la ebullición barra del vapor y filtro del
vapor). Solo coge por los mangos.
16. No haga funcionar la máquina de café sin poner agua al dentro.
17. No intente desmontar el cono metal cuando está preparándose café o se sale el
vapor.
18. Cuando está vertiendo café al vaso o cuando se sale vapor o agua desde la boca, no
desmonte la boca metal y antes de desmontar la boca metal asegúrese que la presión
en la cisterna de agua se vacía.
19. Antes de hacer funcionar la máquina enchúfela y antes de desenchufar, haga todos
los botones apagados.
- 40 -
Page 42

PRECAUCIONES IMPORTANTES DE LA SEGURIDAD
20. Para seguridad, las personas quien tienen obstáculos mentales, psicológicos o
personas minusválidos (incluso los niños) y las personas que no tienen información y
experiencia no pueden usar si no hay una persona responsable que hace supervisión y
orienta el uso.
21. Hay que hacer la vigilancia suficiente para evitar que los niños juegan con la máquina.
22. Esta máquina se ha diseñado para el uso domestico y las siguientes aplicaciones:
- Tiendas, oficinas y las habitaciones de descansar de personal en los lugares de trabajo.
- Granjas
- Por los visitantes en los hoteles, moteles y otras instalaciones de alojamiento
- instalaciones del tipo de desayunar y habitación
23. No utilice en la fuera.
24. Guarde esta instrucción.
INTRODUCCIÓN DE SU MÁQUINA DE CAFÉ
(El producto se puede cambiar sin avisar)
A. Llave de ABRIR/APAGAR (ON/OFF)
B. Llave de vapor
C. Llave de café
D. Botón de control de vapor
E. Tapa de la cisterna de agua.
F. Agua
G. Tapa superior
H. Salida del vapor de la cisterna de agua.
I. Aparato de espuma
J. Cuerpo principal
K. Estante desmontable
L - 1 . Polvo de café
L - 2. Filtro de café
M. Cono metal
N. Tapa inferior
O. Mango de cono metal
P. Cuchara de medición y mezclador
Q. Indicador de energía
R. Indicador de listo
ANTES DEL PRIMER USO
Para el sabor delicioso del primer vaso del café aclara la máquina del café por el agua
caliente como se explica abajo:
1. Llene la cisterna de agua por agua, el nivel de agua no se debe exceder el signo de
“MAX”. Luego cierre la tapa de cisterna.
Nota: La máquina tiene una cisterna desmontable y fácil de limpiar, después de llenar
la cisterna por agua puede montar a la máquina.
2. Fije el filtro del polvo de café a la boca.
3. Nivela las repisas del cono a los huecos de la máquina y mete el cono en la posición
- 41 -
Page 43

ANTES DEL PRIMER USO
de INSERTAR, haga situar el cono por girar hacia la dirección contraria del reloj hasta
que se cierre a la máquina estrechamente.
4. Fije un jarro encima del estante desmontable, libere la barra de presión, luego gire
hacia la dirección contraria de reloj hasta que se cierre para fijar a la máquina de café
estrechamente.
Nota: La máquina no tiene el jarro, se debe utilizar su jarro o vaso.
5. Conecta la máquina a la fuente de energía. Lleve el botón de ABRRIR/APAGAR la
máquina a la posición de abierta. La luz roja del indicador se iluminará.
6. Configure la el botón de café a la posición de “-“, la bomba empieza bombear el agua.
Cuando se empieza a salirse el agua, espere un poco por llevar la llave de café a la
posición de “0” y la llave de vapor a la posición de “0”. La máquina se pasa a precalentamiento hasta que la luz de calentamiento se ilumina. La iluminación de luz indica
que el pre-calentamiento se ha finalizado. Lleve la llave de café a la posición de “l”, el
agua empieza a salirse.
7. Después de que el vertiendo de agua se finaliza, puede verter el agua de todos los
vasos. Ahora puede empezar a preparar la bebida.
Nota: Se puede salir sonido cuando la máquina está empezando bombear agua en el
primer uso, es un caso normal, se tira el aire fuera de la máquina. Después de 20
segundos este caso se elimina.
PRE-CALENTAMIENTO
Para preparar un vaso de café de expreso, antes de empezar al proceso de preparar el
café, recomendamos calentar el cono, filtro de acero y vaso, mediante eso no se cambia
el sabor del café por las piezas frías.
Nota: Hay dos tipos de filtros de acero inoxidable, filtro de polvo de café y filtro de grano
de café. Puede utilizar cualquier tipo de filtro.
1. Saca la cisterna desmontable y llene el agua por abrir la tapa de la cisterna, el nivel
de agua no se debe exceder el signo de “MAX”. Luego haga situar la cisterna a la máquina
correctamente.
2. Nivela las repisas del cono a los huecos de la máquina
y mete el cono en la posición de insertar, haga situar
el cono por girar hacia la dirección contraria del reloj
hasta que se fija a la máquina de café estrechamente.
(Mire la figura 1)
3. Fije un vaso de expreso (su vaso) encima del estante desmontable del vaso.
4. Conecta la máquina a la fuente de energía. Lleve el botón de café/vapor a la posición
mínima.
5. Lleve el botón de ABRRIR/APAGAR la máquina a la posición de “-”. El indicador de
energía se ilumina. Suministre que la llave del vapor a la posición de “0”. Lleve el botón
de café, cuando se sale el agua, lleve el botón de café a la posicion de “0”. El fin de este
proceso es suministar a bombear el agua desde la cisterna.
6. El corriente de agua se empieza cuando el idnicador de listo se ilumina. Cuando la luz
de listo se apaga, gire la llave de café a la posicion de “0”. El proceso de pre-calentamiento
se ha finalizado.
- 42 -
Figura 1
Page 44

PREPARAR EL CAFÉ DE EXPRESO
1. Haga situar el filtro del acero al cono metal, por utilizar la cuchara de medición llene
el filtro de acero por el café molido, con un cuchara de café molido se puede preparar
un vaso de café de la calidad buena. Luego estruje el café molido. Si se utiliza los granos
de café, utilice el filtro de grano de café.
2. Luego monte el cono a la máquina desde la posición de Insertar y levante la barra de
empujar, fija a la máquina de café por girar hacia la dirección contraria hasta que se
cierre a la la máquina estrechamente (Mirar la figura 1).
3. Vierte el agua caliente al vaso. Luego puede fijar el vaso caliente encima del estante
desmontable.
4. Durante eso la luz de listo se iluminará, gire el botón de café/vapor a la posición de
”-“, después de esperar un poco se empieza salir el café.
Nota: Durante el proceso de preparar el café o vapor, es un caso normal que la luz verde
se apaga, este caso muestra que el calentador se caliente para quedar en un intervalo
estándar.
5. Después de preparar el café o el calor del café se reduce pulse el botón de Abrir/apagar
y lleve la máquina a la posición de “0”. El indicador de energía y indicador de listo se
apaga y la máquina de café se para, su café está listo para beber.
ATENCIÓN: Durante el proceso de preparar el café no deje la máquina sola porque a
veces usted tiene que hacer alguno proceso.
6. Después de finalizar el proceso de preparar el café saca el cono de metal por girar
hacia la dirección contraria del reloj y vacía los residuos de café desde el filtro de acero
empujado por la barra de empujar.
7. Después de esperar que las piezas se enfríen aclara debajo de agua corriente.
PREPARAR CAPUCHINO
Por añadir un poco de leche a un vaso de expreso se obtiene un vaso de capuchino.
Método:
1. Primero en un caja suficiente prepara expreso según el aparto de “PREPARAR EL
CAFÉ DE EXPRESO”.
2. Lleve el botón de café/vapor a la posición de -, espere hasta que la luz de listo se
ilumina.
3. Para cada vaso añade 100g de leche aproximadamente a la caja, recomendamos
utilizar la leche entera fría. (no se debe ser caliente)
Nota: Se recomienda una caja no menos de 70±5mm, no olvide que la caja se debe tener
la altura suficiente porque la leche se aumenta su volumen.
4. Empuje el aparato de espuma por dos centímetros aproximadamente.
5. Gire el botón de control del vapor hacia la dirección contraria de reloj, se sale el vapor
desde el aparato de espuma. Hace espuma de leche por hacer mover la boca de espuma
hacia arriba y abajo.
Nota: No gire el botón de vapor rápidamente porque el vapor aumenta el riesgo de
explosión.
6. Cuando se llega al objeto, puede llevar el botón de control de vapor a la posición
mínima.
Nota: Limpie la boca de salida de vapor por una esponja mojada.
- 43 -
Page 45

PREPARAR CAPUCHINO
7. Vierte la leche espumada al café expreso, su capuchino está listo. Después de añadir
azúcar de cualquier cantidad añade un poco de cacao encima de la espuma.
8. Por pulsar el botón de abrir/apagar lleve a la posición de apagada “0” y corte la
conexión de energía.
Nota: Después de producir el vapor, se recomienda dejar la máquina de café a enfriarse
por mínimo cinco minutos. Si no, se puede ocurrir el olor quemado. Si no quiere esperar
por cinco minutos, solo lleve el botón de vapor a la posición de “0” y fije la boca de vapor
anteriormente. Luego gire el botón de control de vapor hacia la dirección contra de reloj,
lleve la llave de café a la posición de “-“ para bombear el agua, cuando la luz de indicador
listo se apaga, se debe llevar la llave de café a la posición de “0” y por llevar el botón
de control de vapor a la posición de “0” y espere un poco hasta que la luz de indicador
de listo se ilumina, puede preparar el café otra vez.
UTILIZAR EL VAPOR PARA CALENTAR LOS LIQUIDOS O ESPUMAR LA LECHE
La barra de vapor se puede utilizar para espumar la leche, preparar chocolate caliente
o bebidas calientes como agua o té.
Método:
1. Saca la cisterna desmontable, llene agua suficiente al dentro, el nivel de agua no se
debe exceder el signo de “MAX”. Luego haga situar la cisterna correctamente.
2. Luego conecta la máquina a la fuente de energía.
3. Por empujar el botón de Abrir/apagar hacia abajo lleve a la posición de “-“, la luz de
indicador de energía se iluminará.
4. Lleve la llave de café y llave de vapor a la posición de “-“, con que el agua se sale lleve
la llave de café a la posición de “0” inmediatamente, espere un poco por llevar la llave
de vapor a la posición de “l”, la máquina empieza a calentar hasta que la luz de listo se
ilumina. La iluminación de la luz se significa que el proceso de calentamiento se finaliza.
5. Mete el extremo de la boca del vapor en el líquido o leche. Gire el botón de control de
vapor hacia la contra dirección de reloj para empezar a producir vapor.
6. Cuando se llega al nivel de temperatura o se obtiene la leche con espuma puede llevar
el botón de control de vapor a la posición mínima.
7. Por pulsar el botón de abrir/apagar a la posición de apagada 0 y se corte la conexión
de energía.
LIMPIEZA Y MANTENIMIENTO
1. Antes de empezar al proceso de limpieza corte la conexión de energía y espere que
la máquina de café se enfríe.
2. Limpie el cuerpo de la máquina de café por una esponja húmeda.
Nota: No utiliza los materiales de limpieza como alcohol o disolventes nunca. No mete
el cuerpo de la máquina por meter en agua nunca.
3. Saca el cono metal por girar hacia la dirección contraria del reloj, limpie los residuos
del café que se quedan dentro y después de lavar por detergente de lavavajillas aclara
bien.
4. Lava todos los accesorios desmontables y seca bien.
- 44 -
Page 46

LIMPIAR LOS RESIDUOS DE MINERALES
1. Se debe guardar los tubos limpio para el funcionamiento correcto de la máquina de
café y para obtener un sabor bueno del café, por eso debe limpiar los residuos de mineral
dentro de la máquina cada 2-3 meses.
2. Llene la cisterna por agua y limpiador de cal hasta el nivel de MAX (proporción de
agua y limpiador de cal es 4:1, para la información detallada mire a la instrucción del
uso del limpiador de cal). Por favor utilice el limpiador de cal del tipo domestico, puede
utilizar acido cítrico en el lugar de limpiador de cal. (tres medida de acido cítrico por cien
medidas de agua).
3. Haga situar el cono metal (sin poner café) y el jarro según el programa del café de
expreso. Haga procesar el agua como se explica en el aparto de “PRE-CALENTAMIENTO”.
4. Por empujar el botón de abrir/apagar a la posición de “-“, la luz de indicador de energía
se iluminará. Lleve el botón de café a la posición de “0”, después de esperar un poco
hasta que se empieza a calentar.
5. La luz verde muestra que el proceso de calentamiento se finaliza, Lleve el botón de
café a la posición de “-” y obtiene dos vasos de agua (2Oz aproximadamente). Luego lleve
el botón de café a la posición de “0” y espere por 5 segundos.
6. Lleve la llave de vapor a la posición de “-“ hasta que la luz de listo se ilumina. Prepara
el vapor por 2 minutos y luego haga parar el proceso de preparar el vapor por girar el
botón de café a la posición mínima. Lleve a la posición de apagada y parar la máquina
por pulsar el botón de abrir/apagar a la posición de “0” , haga esperar el limpiador de
cal por 15 minutos dentro de la máquina.
7. Haga empezar la máquina otra vez y repite las etapas de 4-6 tres veces por lo mínimo.
8. Luego lleve la llave de vapor a la posición de “0”, cuando la luz de listo se ilumina lleve
la llave de café a la posición de “-“ y haga vaciar hasta que no se queda ningún material
de limpieza en dentro.
9. Llene por agua hasta el nivel de MAX. Y haga procesar el agua otra vez (sin poner
café) y repite las etapas 4 y 6 tres veces (ahora no se debe esperar por 15 minutos en
la etapa 6) y haga funcionar la máquina hasta que no se queda agua dentro de la máquina.
10. Comprueba que los tubos están limpiados por repetir la etapa 9 tres veces.
CARACTERÍSTICAS
* 15bar poderosa presión de la bomba italiana
* La caldera de aleación de aluminio de fundición
* 1.8L gran depósito extraíble de agua
* Filtro de aleación de aluminio con doble filtro de acero inoxidable
* Puede hacer café con crema perfecta
* Con la alta presión para espumar la función para la producción de bebidas calientes
capuchino o de otro tipo
* 3 interruptores con luces indicadoras
* Diseño elegante con la decoración de acero inoxidable
* Seguro y confiable, con un dispositivo de protección de sobrecalentamiento y sobrepresión
* Espumador desmontable y la bandeja de goteo
* 230V~ 50Hz 850W
- 45 -
Page 47

SOLUCIONAR LOS PROBLEMAS
Accesorios
1. 1pz cuchara de café
2. 1pz de café molido 2 tazas de filtro
3. 1pz de filtro de la vaina de ESE
SOLUCIONAR LOS PROBLEMAS
TIRAR CON LA SENSIBILIDAD DE MEDIO AMBIENTE
Puede ayudar a la protección de medio ambiente!
Por favor respete a las disposiciones locales: lleve las máquinas eléctricas que no se
funcionan a los centros apropiados de residuo.
- 46 -
Page 48

Page 49

Page 50

Page 51

Page 52

Page 53

Page 54

Page 55

Page 56

No: 1-2937-30062011
- 55 -
Page 57
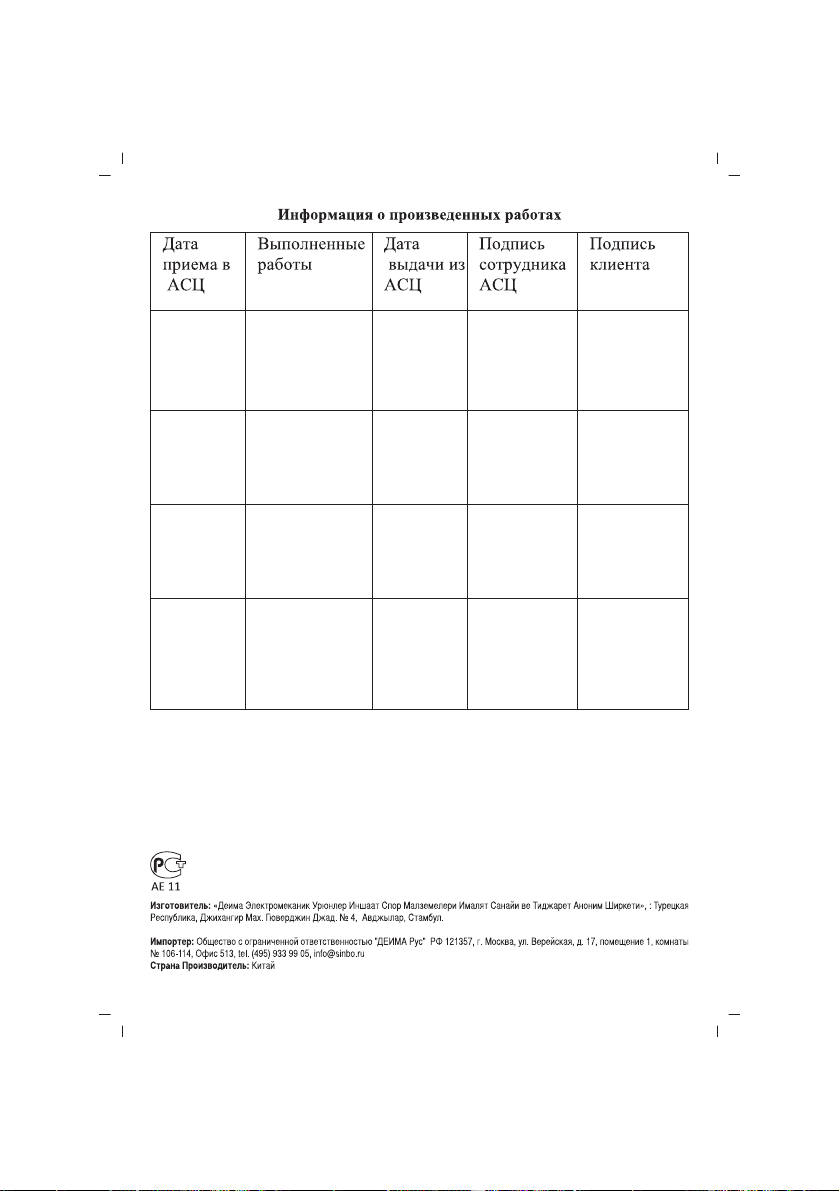
- 56 -
Page 58
- 57 -
Page 59

- 58 -
Page 60
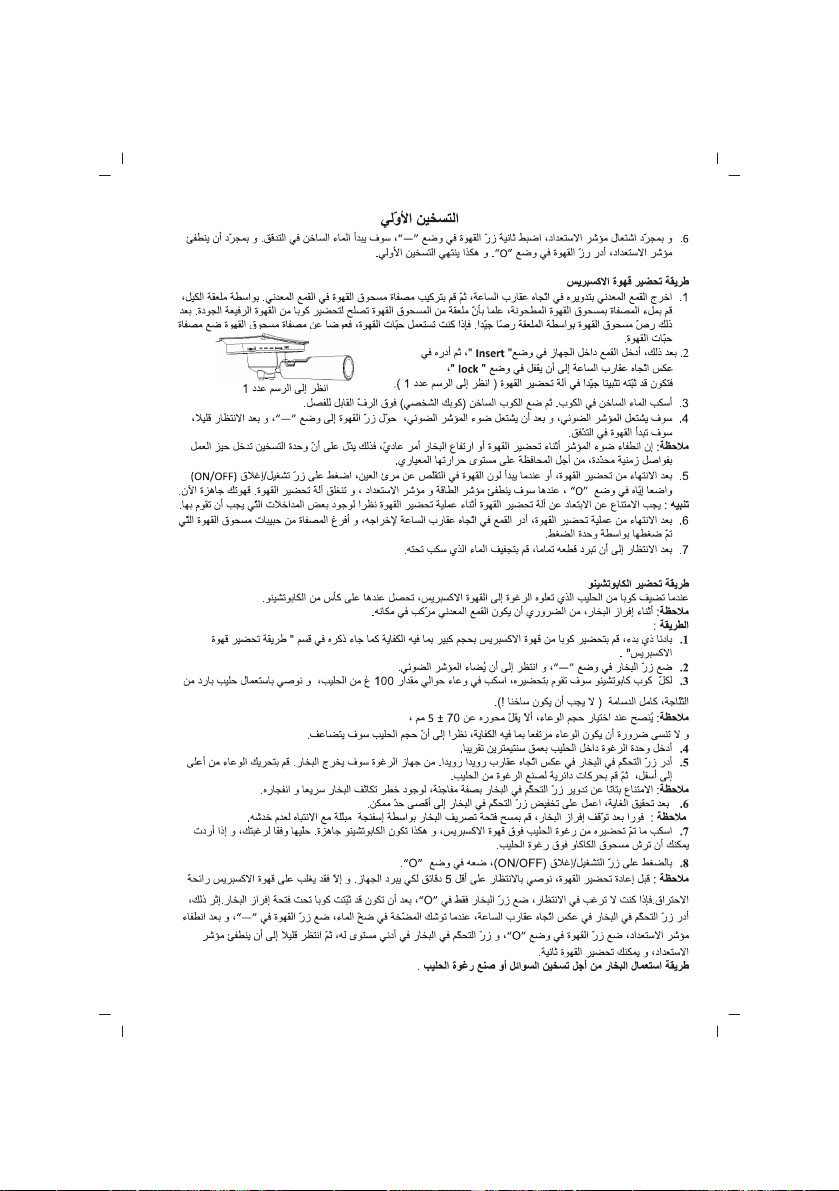
- 59 -
Page 61

-60 -
Page 62
- 61 -
Page 63

HRVATSKI
SINBO SCM 2937 APARAT ZA KAVU
UPUSTVO ZA UPORABU
Prije poˇcetka uporabe aparata molimo vas da temeljno proˇcitate sve upute za uporabu
i saˇcuvate za budu´ce potrebe.
BITNE SIGURNOSNE MJERE OPREZA
Prije poˇceta uporabe elektriˇcnih ured¯aja potrebno je imati u vidu sljede´ce osnovne mjere
zaˇstite:
1. Proˇcitajte sve upute za uporabu.
2. Prije poˇcetka uporabe uvjerite se da napon u utiˇcnici odgovara naponu na informacijskoj
ploˇcici koja se nalazi na aparatu.
3. Ovaj aparat posjeduje kabel s uzemljenjem. Uvjerite se da je i utiˇcnica u vaˇsem domu
pravilno instalirana odnosno da ima uzemljenje.
4. Za izbjegavanje rizika od strujnog udara, poˇzara i osobne ozljede kabel zaˇstitite od
kontakta s vodom i ne uranjajte u vodu ili neke druge teku´cine.
5. Prije ˇciˇs´cenja i kada aparat ne rabite izvucite utikaˇc iz utiˇcnice. Prije odlaganja aparata,
prije postavljanja ili odvajanja dijelova ili prije ˇciˇs´cenja saˇcekajte da se aparat upotpunosti
ohladi.
6. Ne pokuˇsavajte ukljuˇciti bilo koji ured¯aj s oˇste´cenim kabelom ili utikaˇcem. Isto tako
ne pokuˇsavajte koristiti bilo koji ured¯aj koji je oˇste´cen ili pokvaren. Ured¯aj odnesite u
najbliˇzi ovlaˇsteni servisni centar za kontrolu, popravku ili mekaniˇcko podeˇsavanje.
7. Uporaba pribora ili bilo kojih dodataka koje ne preporuˇcuje proizvod¯aˇc moˇze uzrokovati
izbijanje poˇzara, strujnog udara ili osobne ozljede.
8. Aparat postavite na ravnu i stabilnu povrˇsinu ili stol. Kabel aparata ne smije visiti preko
rubova radne povrˇsine ili stola.
9. Zaˇstitite kabel za napajanje od kontakta s vru´cim povrˇsinama.
10. Aparat za kavu ne stavljate u blizini toplih povrˇsina, ˇstednjaka ili pe´cnica, u suprotnom
moˇze do´ci do njihovog kvara.
11. Za prekid veze s napajanjem izvucite utikaˇc iz utiˇcnice. Kada aparat iskljuˇcujete iz
utiˇcnice uvijek uhvatite za glavu utikaˇca i izvucite, nipoˇsto ne vucite za kabel.
12. Aparat ne koristite u neke druge svrhe osim u svrhu za koju je dizajniran i drˇzite na
suhom mjestu.
13. Uporaba aparata u blizini djece zahtjeva briˇzan nadzor.
14. Budite oprezni da se ne biste opekli vrelom parom.
15. Ne dodirujte vru´ce dijelove aparata (npr. tijekom kljuˇcanja izlaz za paru ili ˇceliˇcnu
mreˇzui). Uvijek uzimajte za ruˇcke ili drˇsku.
16. Ne ukljuˇcujte aparat za kavu bez vode.
17. Upozorenje: jedinicu za punjenje ne treba otvarati tijekom rada aparata.
18. Kada iz aparata sipate vrelu kavu u ˇsalicu ili kada iz otvora na aparatu izlazi para ili
curi topla voda ne uklanjajte metalni pisak. Prije odvajanja metalnog piska uvjerite se
da je para iz spremnika za vodu ispraˇznjena.
19. Prije poˇcetka uporabe kabel umetnite u utiˇcnicu a prije nego kabel iskljuˇcite iz utiˇcnice
uvjerite se da ste sve prekidaˇce podesili u poziciju iskljuˇceno.
- 62 -
Page 64

BITNE SIGURNOSNE MJERE OPREZA
20. Ovaj aparat nije pogodan za uporabu od strane osoba s fiziˇckim, psihiˇckim i mentalnim
invaliditetom(ukljuˇcuju´ci i djecu) bez nadzora osobe koja moˇze snositi odgovornost za
sigurnu uporabu aparata. Isto tako aparat ne treba da koriste i neiskusne i osobe koje
nisu dovoljno upu´cene u naˇcin njegove uporabe.
21. Djecu treba drˇzati pod nadzorom kako se ne bi igrali sa ovim aparatom.
22. Ovaj aparat je dizajniran za ku´cnu uporabu i uporabu u sliˇcne svrhe, na primjer:
- U kuhinjama osoblja koje radi u du´canu, uredu i drugim poslovnim prostorima,
- U ku´cama na farmi,
- Od strane gostiju u hotelima, motelima i sliˇcnim odmaraliˇstima,
- U pansionima.
23. Ne koristite na vanjskim povrˇsinama.
24. Saˇcuvajte ove upute.
OPIS APARATA ZA KAVU
(Proizvod je podloˇzan promjenama bez prethodnog obavjeˇstenja)
A. Gumb za UKLJUˇCITI/ISKLJUˇCITI (ON/OFF)
B. Gumb za paru
C. Gumb za kavu
D. Gumb za regulaciju pare
E. Poklopac spremnika za vodu
F. Voda
G. Gornji poklopac
H. Izlaz za paru spremnika za vodu
I. Cjevˇcica za pjenu
J. Glavno ku´ciˇste
K. Odvojiva polica
L. -1. Kava u prahu(mljevena kava)
L. - 2.. Filter za kavu
M. Metalni lijevak
N. Donji poklopac
O. Drˇzaˇc metalnog lijevka
P. Mjerna ˇzlica i mjeˇsalica
Q. Indikator napajanja
R. Indikator spremnosti
PRIJE PRVE UPORABE
Da bi prva ˇsalica kave imala savrˇsen okus aparat za kavu isperite toplom vodom na dolje
opisan naˇcin:
1. Vodu uspite u spremnik za vodu vode´ci raˇcuna da ne pred¯ete oznaku za “MAX” razinu
vode. Nakon toga zatvorite poklopac spremnika.
Napomena: Za jednostavno ˇciˇs´cenje aparat za kavu posjeduje odvojiv spremnik za vodu.
Prvo moˇzete nasuti vodu u spremnik a nakon toga ga staviti na njegovo mjesto.
2. Filter za kavu umetnite u metalni lijevak(pisak) (u filteru ne treba da ima kave).
3. Metalni lijevak postavite na aparat u poziciju “Postavljanje” i oslobodite cjevˇcicu za
- 63 -
Page 65

PRIJE PRVE UPORABE
pritisak. Nakon toga ˇcvrsto fiksirajte na aparat za kavu okretanjem u smjeru suprotnom
smjeru kazaljke na satu sve dok se ne zakljuˇca
4. Na odvojivu policu postavite vrˇc. U med¯uvremenu provjerite da li se gumb za regulaciju
pare nalazi na najniˇzoj razini. Gumb za regulaciju pare podesite na najniˇzu razinu.
Napomena: Vrˇc ili sliˇcna posuda nisu priloˇzeni sa aparatom za kavu. Koristite vaˇs vrˇc ili
ˇsalice za kavu.
5. Umetnite utikaˇc u utiˇcnicu i gumb za UKLJUˇCITI/ISKLJUˇCITI (ON/OFF) podesite u
poziciju “—”. Upali´ce se svjetle´ci indikator napajanja.
6. Gumb za kavu podesite u poziciju “—”, pumpa ´ce poˇceti sa pumpanjem vode. Kada
poˇcne izlaziti voda gumb za kavu podesite u poziciju “O” i gumb za paru isto tako podesite
u poziciju “O” i malo saˇcekajte. Aparat ´ce sve dok se ne upali indikator spremnosti pre´ci
u poziciju pred-zagrijavanja. Kada se upali lampica znaˇci da je funkcija pred-zagrijavanja
zavrˇsena. Gumb za kavu podesite u poziciju “I”, voda ´ce poˇceti da izlazi vani.
7. Kada prestane praˇznjenje vode moˇzete prosuti vodu iz svih posuda. Moˇzete poˇceti sa
pripremom kave.
Napomena: Kod prvog pumpanja vode vani iz aparata moˇze iza´ci zvuk ˇsto je normalno
stanje. Zrak koji je zarobljen u aparatu izlazi vani. Nakon 20 sekundi ovaj zvuk ´ce nestati.
PRED-ZAGRIJAVANJE
Za pripremu ˇsalice dobre, tople Espresso kave, prije pripreme kave aparat, cjevˇcicu za
pjenu, filter i ˇsalicu stavite u poziciju pred zagrijavanja. Na taj naˇcin hladni dijelovi ne´ce
negativno utjecati na okus kave.
Napomena: U aparatu se nalaze dva ˇceliˇcna filtera: filter za mljevenu kavu i filter za kavu
u zrnu. Moˇzete koristiti filter koji ˇzelite.
1. Podignite poklopac spremnika za vodu i izvadite odvojiv spremnik za vodu. U spremnik
uspite vodu paze´ci da ne pred¯ete oznaku za “MAX” razinu vode. Nakon toga spremnik
vratite u aparat.
2. Mljevenu kavu stavite u metalni lijevak a nakon toga metalni lijevak podesite u poziciju
“podeˇseno” a cjevˇcicu za pritiskanje oslobodite. Okre´cite u smjeru suprotnom smjeru
kazaljke na satu sve dok se ne zakljuˇca odnosno fiksira na aparatu (Vidi sliku 1).
3. Na odvojivu policu postavite ˇsalicu za espresso kavu(vaˇsu ˇsalicu).
4. Nakon toga umetnite utikaˇc u utiˇcnicu. Uvjerite se da je gumb za regulaciju pare
podeˇsen u poziciju minimalno.
5. Gumb za UKLJUˇCITI/ISKLJUˇCITI (ON/OFF) podesite u poziciju “—”. Upali´ce se indikator
napajanja. Gumb za paru treba da bude u poziciji “O”. Gumb za kavu podesite u poziciju
“—” , ˇcim voda poˇcne izlaziti iz aparata gumb za kavu podesite u poziciju “O” . Ovaj korak
omogu´cava pumpanje vode iz rezervoara u spremnik.
6. Kada se upali indikator spremnosti gumb za kavu podesite u poziciju “—”, poˇce´ce da
izlazi topla voda. Kada se iskljuˇci indikator spremnosti gumb za kavu podesite u poziciju
“O” . Pred-zagrijavanje je zavrˇseno.
PRIPREMA ESPRESSO KAVE
1. Okretanjem u smjeru kazaljke na satu izvadite matalni pisak(lijevak). Filter za mljevenu
kavu smjestite unutar metalnog piska(lijevka). Uporabom mjerne ˇzlice stavite kavu u
- 64 -
Page 66

PRIPREMA ESPRESSO KAVE
filter. Jedna ˇzlica mljevene kave dovoljna je za pripremu jedne ˇsalice kvalitetne kave.
Nakon toga mljevenu kavu stegnite s mjeˇsalicom za kavu. Ako koristite kavu u zrnu
umjeto filtera za mljevenu kavu postavite filter za kavu
u zrnu.
2. Nakon toga metalni pisak (lijevak) postavite na aparat
u poziciju “postavljanje” okrenite u smjeru suprotnom
smjeru kazaljke na satu sve dok se ne zakljuˇca odnosno
fiksira na aparat (Vidi sliku1)
3. Uspite toplu vodu u ˇsalicu. Nakon toga vaˇsu toplu ˇsalicu postavite na policu.
4. Upali´ce se indikator spremnosti. Kada se upali indikator spremnosti gumb za kavu
podesite u poziciju “—” i malo saˇcekajte. Kava ´ce poˇceti da curi u ˇsalicu.
Napomena: U vrijeme pripreme kave ili stvaranja pare normalno je da se indikator
spremnosti gasi. To znaˇci da grijaˇc povremeno vrˇsi zagrijavanje, odnosno aparata odrˇzava
u toplom stanju.
5. Nakon pripreme ˇzeljene kave ili ako je boja kave oˇcigledno oslabila gumb za
UKLJUˇCITI/ISKLJUˇCITI(ON/OFF) podesite u poziciju “O” . Ugasi´ce se i indikator spremnosti
i indikator napajanja i aparat za kavu ´ce prestati da radi. Vaˇsa kava je spremna.
UPOZORENJE: U vrijeme pripreme kave potrebna je povremena manualna intervencija
pa stoga nije preporuˇcljivo da se odvajate od aparata za kavu dok radi.
6. Kada kava bude spreman metalni pisak okrenite u smjeru kazaljke na satu. Nakon
toga ostatak kave ili kavu u zrnima pritisnite potiskivaˇcem i ispraznite iz filtera.
7. Saˇcekajte da se potpuno ohladi i nakon toga operite pod vodom.
PRIPREMA CAPPUCCINA
Dodavanjem pjenuˇsavog mlijeka na ˇsalicu espresso kave dobi´cete capuccino.
Napomena: Kod pripreme pare metalni pisak mora biti postavljen u pravilnu poziciju.
Metoda:
1. Prema uputama u dijelu “PRIPREMA ESPRESSO KAVE” u ve´coj ˇsalici pripremite
espresso kavu i uvjerite se da se gumb za regulaciju pare nalazi u minimalnoj poziciji.
2. Gumb za paru podesite u poziciju “—“ i saˇcekajte dok se ne upali indikator spremnosti.
3. U jednu zdjelu stavite mlijeko, za pripremu svake ˇsalice capuccina potrebno je oko 100
gr mlijeka. Mlijeko mora biti hladno iz hladnjaka, nikako toplo.
Napomena: Kod odabira veliˇcine zdjele povedite raˇcuna da njen promjer ne bude manji
od 70±5mm i isto tako imaju´ci u vidu da ´ce zapremina mlijeka biti udvostruˇcena odaberite
zdjelu koja je dovoljno visoka.
4. Aparat za pjenu ubacite oko 2 cm u mlijeko.
5. Lagano okrenite gumb za regulaciju pare u smjeru suprotnom smjeru kazaljke na
satu, iz aparata za pjenu poˇce´ce da izlazi para. Cjevˇcicu za paru pomjerajte gore dolje i
zapjenuˇsajte mlijeko.
Napomena: Budite oprezni jer para moˇze za kartko vrijeme da se kondenzuje i isprazni
stoga gumb za regulaciju pare obavezno lagano okre´cite.
6. Kada se zavrˇsi ˇzeljena funkcija gumb za regulaciju pare podesite u poziciju minimalno.
Napomena: Cjevˇcicu za ispust pare obriˇsite vlaˇznom krpom ili spuˇzvom ali tek nakon
zavrˇsetka formiranja pare. Pazite da ne oˇstetite aparat za stvaranje pjene.
- 65 -
Vidi sliku 1
Page 67

PRIPREMA CAPPUCCINA
7. Pjenasto mlijeko uspite u espresso kavu i vaˇs capuccino je spreman. Zasladite ga po
ˇzelji a ako ˇzelite preko pjene moˇzete staviti i malo kakao praha.
8. Za prekid napajanja gumb UKLJUˇCITI/ISKLJUˇCITI (ON/OFF) podesite u poziciju “O”.
Napomena: Nakon formiranja pjene saˇcekajte da se aparat za kavu ohladi najmanje pet
minuta prije ponovne uporabe. U suprotnom vaˇsa espresso kava moˇze imati zagorjeli
okus. Ako ipak ne ˇzelite ˇcekati pet minuta onda gumb za paru podesite u poziciju “O” i
cjevˇcicu za paru prethodno stavite u ˇsalicu za kavu. Nakon toga gumb za regulaciju pare
okrenite u smjeru suprotnom smjeru kazaljke na satu, a za pumpanje vode gumb za kavu
podesite u poziciju “—”, nakon ˇsto se ugasi indikator spremnosti gumb za kavu podesite
u poziciju “O” i gumb za regulaciju pare podesite u poziciju minimalno i saˇcekajte kratko
dok se ne upali indikator spremnosti, aparat je spreman za ponovnu pripremu kave.
STVARANJE PARE ZA GRIJAVANJE TEKU´CINA ILI SAMO ZA PJENUˇSANJE MLIJEKA
Pisak za paru moˇzete koristiti samo za pjenuˇsanje mlijeka ili za zagrijavanje nekih
napitaka kao ˇsto su topla ˇcokolada, voda ili ˇcaj.
Metoda:
1. Podignite poklopac spremnika, izvadite spremnik i napunite vodom vode´ci raˇcuna da
ne pred¯ete oznaku za “MAX” koliˇcinu vode. Nakon toga spremnik stavite u aparat.
2. Zatvorite poklopac spremnika za vodu i nakon toga umetnite utikaˇc u utiˇcnicu.
3. Gumb za UKLJUˇCITI/ISKLJUˇCITI (ON/OFF) podesite u poziciju “—” , upali´ce se indikator
napajanja.
4. Gumb za kavu podesite u poziciju “—” , gumb za paru podesite u poziciju “O”, skupa
sa izlazom vode iz aparata gumb za kavu odmah podesite u poziciju “O”. Gumb za paru
podesite u poziciju “I” saˇcekajte malo, aparat ´ce vrˇsiti zagrijavanje sve dok se ne upali
indikator spremnosti. Paljenje indikatora pokazuje da je funkcija zagrijavanja zavrˇsena.
5. Pisak za paru ubacite u teku´cinu koju ˇzelite zagrijati ili u mlijeko koje ˇzelite pjenuˇsati.
Za poˇcetak formiranja pare gumb za regulaciju pare okrenite u smjeru suprotnom smjeru
kazaljke na satu.
6. Nakon postizanja ˇzeljene temperature ili dobijanja pjenastog mlijeka gumb za regulaciju
pare podesite u poziciju minimalno.
7. Za prekid napajanja gumb za UKLJUˇCITI/ISKLJUˇCITI (ON/OFF) podesite u poziciju “O”.
ˇCIˇS´
CENJE I ODRˇZAVANJE:
1. Prekinite vezu s napajanjem i saˇcekajte da se aparat za kavu potpuno ohladi.
2. Spremnik aparata za kavu ˇcesto ˇcistite spuˇznom otpornom na vlagu. Spremnik za
vodu, pladanj za kapanje i odvojivu policu redovno ˇcistite a nakon ˇciˇs´cenja posuˇsite.
Napomena: Ne koristite alkohol ili sredstva za ˇciˇs´cenje na bazi otapala. Ku´ciˇste aparata
ne uranjajte u vodu.
3. Okrenite u smjeru kazaljke na satu i izvadite metalni lijevak, oˇcistite od ostatka kave
a zatim operite s deterdˇzentom. Ali nakon toga dobro isperite vodom.
4. Sve dijelove moˇzete prati u vodi.
UKLANJANJE MINERALNIH NASLAGA
1. Za uˇcinkovit rad aparata za kavu, ˇcisto´cu unutarnjih cijevi i postizanje najboljeg okusa
- 66 -
Page 68

ˇCIˇS´
C ENJE I ODRˇZAVANJE
kave potrebno je aparat jedanput u tri mjeseca ˇcistiti od mineralnih naslaga.
2. U kotao uspite vodu i sredstvo za uklanjanje kamenca do oznake za “MAX” razinu
(promjer vode i sredstva za uklanjanje kamenca treba da bude 4:1, detalje proˇcitajte u
uputama koje se nalaze na sredstvu za uklanjanej kamenca). Molimo vas da koristite
“sredstvo za uklanjanje kamenca ku´cnog tipa” a umjesto ovog sredstva moˇzete koristiti
i limunsku kiselinu (limunsku kiselinu moˇzete kupiti u apoteci) . U tom sluˇcaju za 100
mjera vode koriste se 3 mjere limunske kiseline.
3. Prema programu “pred-zagrijavanja”, postavite metalni pisak (bez kave) i zdjelu ili vrˇc
na svoje mjesto. Vodu prokuhajte prema uputama “PRED-ZAGRIJAVANJA” (“PREHEATING”).
4. Gumb za UKLJUˇCITI/ISKLJUˇCITI (ON/OFF) podesite u poziciju“—”, upali´ce se svijetle´ci
indikator. Gumb za kavu podesite u poziciju “—” , gumb za paru treba da bude u poziciji
“O”. Kada voda poˇcne da kapa gumb za kavu podesite u poziciju “O” i aparat za kavu
ostavite tako na kratko sve dok se ne poˇcne zagrijavati.
5. Kada se upali indikator spremnosti znaˇci da je zagrijavanje zavrˇseno. Gumb za kavu
podesite u poziciju “—” i pripremite 2 ˇsalice kave (oko 2 Oz). Nakon toga gumb za kavu
podesite u poziciju “O” i saˇcekajte 5 sekundi.
6. Gumb za paru podesite u poziciju “—” i saˇcekajte dok se ne upali indikator spremnosti.
2 minute ispuˇstajte paru a nakon toga za zaustavljanje izlaza pare gumb za regulaciju
pare podesite u poziciju minimalno. Gumb za UKLJUˇCITI/ISKLJUˇCITI (ON/OFF) odmah
podesite u poziciju “O” i zaustavite aparat. Sredstvo za uklanjanje kamenca ostavite da
stoji u aparatu najmanje 15 minuta.
7. Ponovno ukljuˇcite aparat i 3 puta ponovite korake od 4 do 6.
8. Nakon toga gumb za paru podesite u poziciju “O”, a nakon ˇsto se upali indikator
spremnosti gumb za kavu podesite u poziciju “—” i ispraznite sredstvo za ˇciˇs´cenje tako
da u kotlu ne ostane nimalo kamenca.
9. U spremnik uspite vodu iz vodovoda do oznake za “MAX” razinu (bez kave) i prokuhajte.
3 puta ponovite korake od 4 do 6 (za 6. Korak treba da saˇcekate 15 minuta) a zatim
prokuhajte tako da izad¯e sva voda iz spremnika.
10. 9. Korak ponovite najmanje 3 puta sve dok se ne uvjerite da su cijevi ˇciste.
SPECIFIKACIJA
* Italijanska pumpa s pritiskom jaˇcine 15 bara
* Kotao od presovane-lijevane aluminijske legure
* Odvojiv ˇsirok spremnik za vodu 1,8 L
* Dvosmjerni filter od nehrd¯aju´ceg ˇcelika i drˇzaˇc filtera od aliminijske legure
* Priprema espresso kave s odliˇcnom kremom
* Zahvaljuju´ci funkciji snaˇznog pritiska mogu´ce je pripremiti capuccino ili druge tople
napitke
* 3 gumba sa svjetlosnim indikatorom
* Ukras od nehrd¯aju´ceg ˇcelika modernog dizajna
* Sigurnosni sustav zaˇstite od pregrijavanja i prevelikog pritiska
* Odvojiv izlaz za pjenu i pladanj za kapanje
* 230V~50Hz 850W
- 67 -
Page 69

SPECIFIKACIJA
Dodaci (Pribor)
1. 1 ˇzlica za kavu
2. 1 filter za 2 ˇcaˇse mljevene kave
3. 1 ESE filter
RJEˇSAVANJE PROBLEMA
Ako nije pronad¯en razlog kvara nipoˇsto ne pokuˇsavajte sami rasklopiti aparat. U tom
sluˇcaju najbolje je da kontaktirate ovlaˇsteni servisni centar.
Pravilno zbrinjavanje aparata
‹vi moˇzete pomo´ci u zaˇstiti okoliˇsa!
Pridrˇzavajte se lokalnih propisa u mjestu u kom se nalazite: dotrajale elektriˇcne ured¯aje
predajte u odgovaraju´ce sabirne centre.
- 68 -
Page 70

ADANA-SEYHAN-DORUK SO⁄UTMA -REfiATBEY MAH. AV. MEHMET ERO⁄LU CAD. NO:8-TEL.:0322 458 55 14 ADANA-KOZAN-DURAN SO⁄UTMA-
YETK‹L‹ SERV‹SLER L‹STES‹
CUMHUR‹YET MH. DEDEO⁄LU SK. S‹S. APT.- TEL.:0322 516 57 78 ADANA-SEYHAN-DÜZOVA ELEKTR‹K - KÜÇÜK SAAT MEYDANI HILAL HAN IS MRK NO
32 - TEL.:0322 363 67 87 ADANA-SEYHAN-ÖZER ELEKTRON‹K - OBALAR CAD. SAL‹H ZEK‹ BUGAY ‹fi HANI NO:11 - TEL.:0322 352 25 75 ADANA-SEYHAN-
SER‹N ELEKTRON‹K - MAHFESI⁄MAZ MH. KENAN EVREN BULV. 21.SK. KAROL S‹T. E BLOK NO:2/A - TEL.:0322 233 74 84 ADANA-CEYHAN-URANYUM
ELEKTRON‹K - ‹NÖNÜ BULVARI NO: 172 - TEL.:0322 611 29 95 ADANA-CEYHAN-CEYHAN ELEKTRON‹K - BÜYÜKKIRIM MH. MEHMET fiER‹F Y‹⁄‹T CD.
4.SK. NO:3/B TEL. : 0322 613 45 96 ADIYAMAN-YILDIRIM SERV‹S - BAHÇEL‹EVLER MH. 177 SK. NO:2 - TEL.:0416 214 40 83 ADIYAMAN-KAHTA-ELK.
EV ALET. TAM‹RC‹S‹-FAT‹H MH. ZAFER CD. NO:20 - TEL.:0416 725 99 89 ADIYAMAN-ÜNAL ELEKTRON‹K-BAHÇEL‹EVLER MAH. ESK‹ KAHTA CAD.
NO:11/A-TEL.:0416 216 75 56 ADIYAMAN-BEYAZ EfiYA TAM‹R‹-ÇATI MH. BADEM SK. NO:11 BESN‹ TEL.: 0416 318 32 00 AFYON-EM‹N ELEKTRON‹K-
ENST‹TÜ CAD. NO:19-TEL.:0272 215 43 32 AFYON-D‹NAR-GÖKÇEO⁄LU ELEKTR‹K-EMN‹YET MH. YEN‹YOL CD. 146 BLOK NO:4-TEL.: 0272 353 53 44 A⁄RI-
PATNOS-ACELE PEfi‹N ELEKTRON‹K-BUHARA SOK. NO:12-TEL.:0472 616 46 08 A⁄RI-ÖZPAK ELEKTRONIK-ESKI VAN CAD NO: 341 Ömer Hamam Yan›TEL.:0472 216 53 14 AKSARAY-‹T‹NA ELEKTR‹K-TAfi PAZARI MH. fiEH‹T HAT‹P UÇKUN SK. ESK‹ TERM‹NAL ÇIKIfiI NO:9/A-TEL.:0382 212 63 99 AMASYA-
KUTUP TEKN‹K SO⁄UTMA-GÖKMEDRESE MAH. M.K.P. CAD. HAM‹TBATIR APT. NO:115/A-TEL.:0358 212 61 66 AMASYA-SULUOVA-ÇALIfiKAN ELEKTRON‹K-
ÖZEL ‹DARE ‹fi HANI NO:121-TEL.:0358 417 18 64 AMASYA-FLAfi ELEKTRON‹K-YÜZEVLER MAH.TORUMTAY SOK. NO:25 DEM‹RD‹fi APT. ALTI-TEL.:0358
212 33 71 ANKARA-PURSAKLAR-DEM‹R TEKN‹K-MERKEZ MH. MEL‹KfiAH CD.NO:11/A-TEL.:0312 328 1122 ANKARA-YEN‹MAHALLE-ERDO⁄DU SO⁄UTMA-
ÇARfiI MH. DAMLADOL SK. NO:74/C-TEL.:0312 315 60 25 ANKARA-KEÇ‹ÖREN-VEFA ELEKTRON‹K-PINARBAfiI MH. AfiIK PAfiA CD. NO: 67/C-TEL.:0312
380 42 30 ANKARA-MAMAK-YÜCEL ELEKTRON‹K-ASIM GÜNDÜZ CD. 20/D-TEL.:0312 365 14 14 ANKARA-ÇANKAYA-GÖKSEL ELEKTRON‹K-21.CD.
KARTAL KAYA APT. NO:29/A KIRKKONAKLAR-TEL.:0312 496 42 53 ANKARA-ÇANKAYA-ATC ‹LET‹fi‹M-SELAN‹K CAD. NO: 31/3-TEL.: 0312 419 82 70
ANKARA-GÖLBAfiI-BEKS SERV‹S H‹ZMETLER‹-SE⁄MENLER MAH. CEMAL GÜRSEL CAD. NO:51/A-TEL.:0312 484 21 19 ANKARA-BEYPAZARI-DO⁄AN
TEKN‹K-KAYHAN GÜVEN CD. NO:22/C-TEL.:0312 762 89 19 ANKARA-S‹NCAN-Y‹⁄‹T TEKN‹K ONARIM-M.Ç.M. 12. CADDE GÜLSUYU SK. NO:5/21-TEL.:0312
264 10 31ANKARA-KEÇ‹ÖREN-MERT TEKN‹K SERV‹S-ÖZYURT CD. NO:27/A AKTEPE-TEL.: 0312 380 00 22 ANKARA-ERYAMAN-ARSLANLAR ELEKTRON‹K-
GÜZELKENT MAH.ÇARfiI ARYA 511 SK. NO:40-TEL.:0312 279 16 41 ANTALYA-KUMLUCA-AKGÜL TEKN‹K SERV‹S H‹ZMETLER‹-ADNAN MENDERES
BULV.KAVAKLI KUYU CAD. YED‹TEPELER KAR.SULAR APT.NO:9-TEL.:0242 887 53 80 ANTALYA-CANKALP ELEKTRON‹K-TUZCULAR MAH. ‹MARET SOK.
FARAÇLAR PASJ.NO:11-TEL.:0242 242 31 35 ANTALYA-MANAVGAT-ÖNAL ‹LET‹fi‹M-AfiA⁄I PAZARCI MH. ‹BRAH‹M SÖZEN CD. fiELALE PSJ.NO: 18 1006
SK. TEL.:0242 742 35 36 ANTALYA-ALANYA-Ç‹NTAfi ELEKTRON‹K-SARAY MH. ATATÜRK CD. HACI HAMD‹ O⁄LU SK.NO: 20/A-TEL.:0242 513 88 85
ANTALYA-MERKEZ-BÜYÜKGEB‹Z ELEKTROMEKAN‹K GÜVENL‹K-MUSTAFA GÖKSU-KIZILSARAY MH. DOLAPLIDERE CD. 80 SK. ÇAKMAK ‹fi HANI NO:
8/5-6 TEL. :0242 243 33 90 ARDAHAN-YILDIRIM ELEKTR‹K-ATATÜRK CAD.NO:69-TEL.:0478 211 28 58 ARTV‹N-ARTV‹N ELEKTR‹K-HALKEVI CADDESI
NO: 12-TEL.: 0466 212 10 82 AYDIN-YILMAZ ELEKTRON‹K-KURTULUS MH. GARAJ CD. NO:5/B-TEL.:0256 212 00 35 AYDIN-SÖKE-ÖZLEM ELEKTRON‹K-
YEN‹ CAM‹ MH. SEK‹LER CD. NO: 47-TEL.:0256 518 26 40 AYDIN-NAZ‹LL‹-BARIN ELEKTRON‹K-ALTINTAfi MH. HÜRR‹YET CD. NO:161 B-TEL.: 0256 315
43 21 BALIKES‹R-BANDIRMA-ANIL SO⁄UTMA-GÜNAYDIN MAH. 2.OKUL CAD.NO:16/A-TEL.:0266 713 56 78 BALIKES‹R-EDREM‹T-ÖZER TEKN‹K-CAM‹
VASAT MH. PARK CD. NO:12/A-TEL.:0266 373 12 44 BALIKES‹R-BURHAN‹YE-U⁄UR TEKN‹K SO⁄UTMA-MAHKEME MH. M‹THATPAfiA CD. NO: 68-TEL.:0266
412 86 89 BALIKES‹R-KILIÇ ELEKTRON‹K-YEN‹ ÇARfiI BASIN SOK. NO: 4/B-TEL.:0266-241 87 54 BALIKES‹R-GÖNEN-GÜRSES ELEKTRON‹K-MALKOÇ
MAH.MÜFTÜ fiEVKET CAD. 76.SOK. NO:2/B-TEL.:0266 762 01 28 BALIKES‹R-BANDIRMA-D‹J‹TAL ELEKTRON‹K-17 EYLÜL MAH.HAVUZLU BAHÇE
SK.NO:8/A-TEL.:0266 715 16 46 BALIKES‹R-ERDEK-MERT TEKN‹K-YALI MH. HÜKÜMET CD. NO:55-TEL.:0266 845 61 10-97 BARTIN-MARTI ELEKTRON‹K-
HENDEKYANI CAD. ORTA MAH.101/B - BARTIN-TEL.:0378 228 34 22 BATMAN-fiAH‹NLER ELEKTRON‹K-CUMHUR‹YET CD. NO:20 2000 ‹fi MERKEZ‹
KARfiISI-TEL.:0488 213 17 02 B‹LEC‹K-EDEBAL‹ TEKN‹K-‹ST‹KLAL MH V.REF‹K A ÖZTÜRK CD NO: 1/A-TEL.:0228 212 46 80 B‹NGÖL-KARLIOVA-MEHMET
KARTAL - KARTAL ELEKTRON‹K-CUMHUR‹YET CD. NO:8-TEL.:0426 511 26 39 B‹NGÖL-S‹MGE ELEKTRON‹K- YEN‹fiEH‹R MH. YEfi‹M SK. BO⁄ATEK‹N
APT ALTI NO:14/C-TEL.:0426 213 77 56 B‹TL‹S-AHLAT-U⁄UR SO⁄UTMA-TOK‹ KONUTLARI YUKARI ÇARfiI-TEL.:0434 412 41 72 B‹TL‹S-D‹ZAYN ELEKTR‹K-
NUR CAD. EREM CENTER ‹fi MERKEZ‹KAT:2 NO:5-TEL.:0434 226 74 43 BOLU-BEST ELEKTRON‹K-TABAKLAR MAH.CUMHUR‹YET CAD.NO:28/B-TEL.:0374
218 12 25 BURSA-OSMANGAZ‹-AKYÜZ ELEKTRON‹K-ÇIRPAN MH. UYSAL SK. NO:13/B-TEL.:0224 254 60 76 BURSA-GEML‹K-AC‹L TV TAM‹R SERV‹S‹-
DEM‹R SUBAfiI MH. FIRIN SK. NO:7-TEL.:0224 514 71 20 BURSA-MUDANYA-ER T‹CARET-ÖMERBEY MH. CAM‹ SK. SU APT. NO:30-TEL.:0224 544 86 16
BURSA-MUSTAFAKEMALPAfi-AGUfi ELEKTR‹K-HAMZABEY MAHALLESI PAZARYERI SOKAK NO: 2/A-TEL.:0224 613 19 99 BURSA-‹NEGÖL-S.B.S
ELEKTRON‹K-OSMAN‹YE MH.DERE SK. N:25/D-TEL.:0224 715 48 94 BURSA-KARACABEY-GÜRKAN T‹CARET-RUNGUÇPAfiA MH. 14. SK. NO:11-TEL.:
0224 676 66 80 BURSA-N‹LÜFER-ÖZME TEKN‹K-KARAMAN MH. BAYINDIR SK. NO:4/B CARREFOUR KARfiISI-TEL.: 0224 249 12 48 ÇANAKKALE-ÇANTÜRKER ELEKTRON‹K-CUMHUR‹YET MAH. ÇANAKKALE CAD.NO:41-TEL.:0286 416 13 89 ÇANAKKALE-GEL‹BOLU-GÜVEN ELEKTRON‹K-YAZICIZADE
MAH. M‹RALAY fiEF‹K AKER CAD. 2. SOK NO:4 / A TEL.:0286 566 90 70 ÇANAKKALE-MERKEZ-SAM ELEKTRON‹K-‹SMETPAfiA MH. ARSLANCA SK.TEL.:0286 212 35 59 ÇANKIRI-B‹LG‹ÇLER ELEKTRON‹K-BUGDAY PAZARI MH. A.TALAT ONAY BULVARI SAIM A⁄A S‹T. B/BLOK TEL.:0376 213 48 19 ÇORUM-
H‹T‹T SO⁄UTMA-YEN‹YOL MH. MÜFTÜ AHMET GÖKEfiME SK. NO: 5 / I-TEL.:0364 225 70 58 ÇORUM-U⁄UR ELEKTRON‹K-ÜÇTUTLAR MAH. FAT‹H CAD.
5.SOK.EYÜP SULTAN APT. NO:1/C-TEL.:0364 227 44 91 ÇORUM-ÖMÜR ELEKTRON‹K-CENG‹ZTOPEL CAD. NO:2/F-TEL.:0364 224 68 09 ÇORUM-ALACA-
EROL ELEKTRON‹K-AYHAN MH. ANKARA CD. NO:18-TEL.:0364 411 42 03 ÇORUM-GÜNDÜZ BEYAZ EfiYA SERV‹S‹-SUNGURLU-SUNGURO⁄LU MH. ÇANKIRI
CD. NO: 46-TEL.:0364 311 31 13 DEN‹ZL‹-KARDELEN SO⁄UTMA-EMEK CD. NO: 30-TEL.:0258 241 67 31 DEN‹ZL‹-ÖZ ELEKTRON‹K-ÇAYBAfiI CD. ÜNAL
APT. NO: 28-TEL.:0258 261 29 25 DEN‹ZL‹-MERKEZ-ÇA⁄LAYAN SO⁄UTMA-TOPRAKLIK MH. TURAN GÜNEfi CD.NO:34 TEL. : 0258 242 85 86 D‹YARBAKIR-
B‹SM‹L-fiIK ELEKTR‹K-KURTULUfi MH. AHMET AR‹F BULVARI NO: 19/F-TEL.:0412 415 05 94 D‹YARBAKIR-‹LKADIM T‹CARET-BATIKENT S‹T. A/5 BLOK
ALTI NO:1 SA⁄LIK OCA⁄I YANIBA⁄LAR-TEL.:0412 235 70 89 D‹YARBAKIR-AZ‹Z ELEKTRON‹K-HATBOYU CD. 469. SK. GÜNEfi 2 APT. NO:3/B-TEL.:0412
223 33 46 D‹YARBAKIR-S‹LVAN-DIGITAL ELEKTRONIC-KALE MH. SAM‹ SEÇK‹N CD. NO:9/B-TEL.:0412 711 44 14 D‹YARBAKIR-JAPON RECEP-YENI MAH
19 MAYIS CAD NO74-TEL.:0412 511 24 10 D‹YARBAKIR-BA⁄LAR-AZ‹Z ELEKTRON‹K-HATBOYU CD. 469 SK. NO:3/B-TEL.: 0412 236 81 10 DÜZCE-ENSAR
TEK SU S‹STEMLER‹-AZM‹N‹LL‹ MH. AYDINPINAR CD. SERHAT SK.NO:1/B-TEL.:0380 514 34 12 DÜZCE-BULUfi ELEKTRON‹K-CED‹D‹YE MAH. M‹MAR
S‹NAN CAD.-TEL.: 0380 514 66 81 ED‹RNE-UZUNKÖPRÜ-GÜVEN TEKN‹K-GAZ‹ CAD. YUSUF SOK. YURDACAN PASAJI NO:7-TEL.:0284 513 89 66 ED‹RNE-
YILDIZ SO⁄UTMA-1.MURAT MH. GÜNGÖR MAZLUM CAD. SERHAT S‹TES‹ B/BLOK 35/A-TEL.:0284 235 37 63 ED‹RNE-KEfiAN-MUTLU TEKN‹K-YUKARI
ZAFER‹YE MH. ‹LYASBEY CD. NO:32/B-TEL.:0284 715 22 71ELAZI⁄-ÖZDEV TEKN‹K -‹ZZETPAfiA MAH.KAZIM BAYER CAD.NO:24/A-TEL.:0424 238 51 67
ELAZI⁄-YILMAZ BOB‹NAJ-YEN‹ MAH. KEMAL fiEDELE CAD. NO: 12/E-TEL.:0424 212 08 96 ELAZI⁄-GÜNEfi ELEKTRON‹K-KÜLTÜR MAH. VAL‹ FAHR‹BEY
CAD.NO:113/D-TEL.:0424 233 10 18 ERZ‹NCAN-AYDINLAR ELEKTR‹K-‹NÖNÜ MAH. MERKEZ ÇARfiISI 15.SK NO:5 -TEL.:0446 223 59 76 ERZ‹NCAN-
REFAH‹YE-B‹LG‹N ELEKTRON‹K-ERZ‹NCAN CAD. BELED‹YE ‹fi HANI-TEL.:0446 611 26 10 ERZURUM-OLTU-GÜVEN ELEKTRON‹K-Z‹YABEY CAD. BELED‹YE
PSJ. NO:6-TEL.:0442 816 42 23 ERZURUM-AT‹LAY ELEKTRON‹K-KONGRE CAD. HASIRHAN PASJ. NO:87-TEL.:0442 213 30 60 ERZURUM-‹SP‹R-YILMAZ
ELEKTRON‹K-Z‹YAPAfiA CD. AfiA⁄I MH. NO:186-TEL.:0442 451 40 95 ESK‹fiEH‹R-ARZU ELEKTRON‹K-DEL‹KL‹TAfi MH. GÜRMAN SOK. NO:37/B-TEL.:0222
234 87 15 ESK‹fiEH‹R-S‹VR‹H‹SAR-DERMAN ELEKTRON‹K-CAM‹KEB‹R MH. YUNUSEMRE CD. NO:7-TEL.:0222 711 22 60 GAZ‹ANTEP-ELEKTR‹KL‹ EV
ALETLER‹ TAM‹RC‹S‹-MÜTERC‹M ASIM CAD. KÖRÜKÇÜ SOK. NO:8/A-TEL.:0342 231 00 73 GAZ‹ANTEP-ISLAH‹YE-YILMAZ SO⁄UTMA-AYDINLIK MH. GÖZ
CAD.ÜNLÜ S‹TES‹ NO: 2-TEL.:0342 862 12 20 GAZ‹ANTEP-‹K‹ZO⁄LU ELEKTRON‹K-BEY MAH. EBLEHAN ÇARfiISI NO:12/A-TEL.:0342 230 71 00 GAZ‹ANTEP-
- 69 -
Page 71

N‹Z‹P-ÇAPAN TEKN‹K-CUMHUR‹YET MAH. MERMER SOK. NO:10-TEL.:0342 517 51 66 G‹RESUN-BULANCAK-YÜKSEL SO⁄UTMA-‹HSAN‹YE MH. CEMAL
YETK‹L‹ SERV‹SLER L‹STES‹
GÜRSEL. CD. NO: 257-TEL.:0454 318 17 28 G‹RESUN-U⁄UR ELEKTRON‹K-HACI HÜSEY‹N MH. GAZ‹ CD. NO: 185 / 1-TEL.:0454 212 00 90 GÜMÜfiHANEGÜMÜfiHANE SERV‹S‹-HASANBEY MH. HASANBEY CD.NO:17/A-TEL.:0456 213 51 54 HATAY-SAMANDA⁄-GÜNEfi ELEKTR‹K-ATATÜRK MAH. ‹SKELE
CAD. HAYÜK PSJ NO:38-TEL.:0326 512 71 04 HATAY-KIRIKHAN-SEREN MAK‹NA-BARBAROS MAH. BOZTEPE CAD. NO:23/B-TEL.:0326 344 32 49 HATAYANTAKYA-SER‹ SO⁄UTMA-KURTULUfi CD. NO:51/C-TEL.:0326 213 28 32 HATAY-ERZ‹N-YEL‹Z BOB‹NAJ-MUSTAFAL‹ MH. ‹STASYON CD. NO: 143-
TEL.:0326 68148 32 HATAY-REYHANLI-BAfi TEKN‹K SO⁄UTMA-ATATÜRK CD. DÖ⁄ÜCÜLER ‹fiHANI NO:1 -TEL.:0326 413 44 04 HATAY-REYHANLI-ÖZ ‹fi
SO⁄UTMA-CUMHUR‹YET MH. TAYFUR SÖKMEN CD. NO:26/B TEL. : 0326 413 21 22 HATAY-DÖRTYOL-FAT‹H ELEKTRON‹K-SANAY‹ MH. EVREN CD. YEN‹
S‹NEMA KARfiISI NO:15 - TEL.:0326 712 86 46 HATAY-‹SKENDERUN-GÜL‹STAN ELEKTRON‹K-KURTULUfi MH. fi.O⁄UZ YENER CD. NO:64/C-TEL.:0326
613 50 64 I⁄DIR-PARLAK TEKN‹K-TOPÇULAR CD. NO:34-TEL.:0476 227 47 51 ISPARTA-ÖZSOYLAR SO⁄UTMA-YAYLA MAH. ‹SMETPAfiA CAD. NO: 60 fi‹FA
TIP MERKEZ‹ ALTI-TEL.:0246 223 13 61 ‹ÇEL-ERDEML‹-ESEN ELEKTR‹K-MERKEZ MAH. ATATÜRK CAD. NO:11-TEL.:0324 515 68 87 ‹ÇEL-MEZ‹TL‹-
AKN‹SAN SO⁄UTMA&ELEKTRON‹K-GMK.BUL. FAT‹H MH. 18 SK.ÖZÜDO⁄RU S‹T. 3/A-TEL.:0324 359 64 34 ‹ÇEL-PINAR ELEKTRON‹K-MAHMUD‹YE MH.
108. CD. NO:32/B-TEL.:0324 336 82 98 ‹ÇEL-TARSUS-MERT ELEKTRON‹K-GAZ‹LER MAH. ATATÜRK BULV. NO:119-TEL.:0324 626 83 98 ‹ÇEL-TARSUS-
TEKN‹K ‹fi ELEKTR‹K T‹C.-ATATÜRK CAD. U⁄UR ‹fi HANI NO:1-TEL.:0324 6242797 ‹ÇEL-ANAMUR-ÇEL‹K ELEKTRON‹K-BAHÇE MH. ORMAN ‹fiLETMES‹
ALTI NO:61/B-TEL.:0324 814 85 90 ‹ÇEL-HAKAN ELEKTRON‹K-BAHÇEL‹EVLER MH. 1809 SK. D‹NL‹ APT.ALTI NO:3/B-TEL.:0324 328 03 25 ‹ÇEL-S‹L‹FKE-
SADIK ELEKTR‹K-GÖKSU MAH. O⁄UZKAAN CAD. DERYALAR APT.NO:22/B-TEL.:0324 714 05 54 ‹STANBUL-ATAfiEH‹R-VURAL ELEKTRON‹K-KARAMAN
Ç‹FTL‹K YOLU NO:12(ESK‹ PTT HAST. KARfiISI) ‹ÇERENKÖY TEL. : 0216 575 63 35 ‹STANBUL-fi‹fiL‹-YILKA T‹CARET-SEYMEN SOK. NO:27/A KURTULUfiTEL.:0212-233 80 53 ‹STANBUL-KÜÇÜKÇEKMECE-ÇA⁄DAfi SERV‹S-CENNET MAH.Y.KEMAL BEYATLI CAD.NO:14/D-TEL.:0212 579 35 30 ‹STANBUL-
ZEYT‹NBURNU-KARDEfiLER SO⁄UTMA-SEY‹T N‹ZAM MAH. fiEH‹T ERKAN ALYANAK SOK.NO:11-TEL.:0212 546 57 36 ‹STANBUL-ESENLER-YILDIRIM
ELEKTRON‹K-KAZIM KARABEK‹R MAH. 2.SOK. NO:10 -TEL.:0212 611 10 76 ‹STANBUL-EM‹NÖNÜ-IRMAK DIfi T‹CARET-TAHTAKALE CD. TAHTAKALE
T‹CARET MERKEZ‹ NO:34 2.BODRUM NO:204 -TEL.:0212 520 55 80 ‹STANBUL-ÜMRAN‹YE-GÜL-SER TEKN‹K SERV‹S-NAMIK KEMAL MH. SÜTCÜ ‹MAM
CD. SÜTÇÜ ÇIKMAZI NO:6/1- TEL.:0216 335 60 19 ‹STANBUL-ÜMRAN‹YE-GÖZDE ELEKTRON‹K-ATATÜRK MH. ALEMDA⁄ CD. YILDIZ SK. NO:12/A-TEL.:
0216 329 57 03 ‹STANBUL-MALTEPE-GÜR TEKN‹K SERV‹S-BA⁄DAT CD. BOLAYIR SK. NO:3/A-TEL.:0216 352 25 20 ‹STANBUL-BEYL‹KDÜZÜ-SC ELEKTRON‹K-
GÜZELYURT MH. M‹MAR S‹NAN CD. NO:71-TEL.:0212 852 34 45 ‹STANBUL-GAZ‹OSMANPAfiA-DEDEO⁄LU ELEKTR‹K-2124 SOK NO:4 SULTANÇ‹FTL‹⁄‹TEL.:0212 594 50 91 ‹STANBUL-TUZLA-AKIN ISI TEKN‹K SERV‹S-YAYLA MH. F.ÇAKMAK CD. ‹SMA‹L A⁄A SK. NO:11 TEL.:0216 395 66 62 ‹STANBUL-
SARIYER-H‹SAR SERV‹S 1-NUR‹PAfiA CD NO\48A BA⁄LAR MEVK‹ YEN‹KÖY-TEL.:0212 223 27 96 ‹STANBUL-SARIYER-H‹LAL SO⁄UTMA-KAPTAN SK.
NO:2-TEL.:0212 218 45 61 ‹STANBUL-BÜYÜKÇEKMECE-AYGÜL DEKORASYON-19 MAYIS MH. OSMAN GAZ‹ CD. NO: 7-TEL.:0212 881 33 18 ‹STANBUL-
GAZ‹OSMANPAfiA-ÇAM TEKN‹K-ISLAMBEY MAH NECIP FAZIL CAD 257 SK NO:25-TEL.:0212 597 86 62 ‹STANBUL-KÜÇÜKÇEKMECE-YILDIZ ELEKTR‹K
SO⁄UTMA-HALKALI CD. ANADOLU PSJ. NO: 185-TEL.:0212 580 76 02 ‹STANBUL-KÜÇÜKÇEKMECE-BATI TEKN‹K-GÜLTEPE MH. DEL‹ORMAN CD. NO:75
SEFAKÖY-TEL.:0212 599 36 79 ‹STANBUL-BAYRAMPAfiA-ÖZKAN ELEKTRON‹K-KARTALTEPE MH. B‹LGEHAN CD. NO:36-TEL.:0212 564 33 46 ‹STANBULGAZ‹OSMANPAfiA-TOROS ELEKTRON‹K-MERKEZ MH. BA⁄LAR CD. NO:77-TEL.:0212 563 50 38 ‹STANBUL-fi‹fiL‹-CHIP ELEKTRON‹K-BOZKURT CAD.NO:
235-TEL.:0212 231 65 43 ‹STANBUL-GÜNGÖREN-YÜKSEL ELEKTRON‹K-M.FEVZ‹ ÇAKMAK MAH.‹NÖNÜ CAD.NO: 138-TEL.:0212-504 61 42 ‹STANBULBEYO⁄LU-TOLGA ELEKTRON‹K-CAM‹ KEB‹R MH. DEREBOYU CAD. NO:28 KASIMPAfiA-TEL.:0212 235 65 34 ‹STANBUL-AVCILAR-NUR ELEKTRON‹K-
DEN‹ZKÖfiKLER MAH.DERYA SOK. NO:36/1-TEL.:0212 694 12 82 ‹STANBUL-BA⁄CILAR-ÇA⁄LAYAN ELEKTRON‹K-‹STOÇ 25.ADA NO.:109-TEL.:0212 659
92 49 ‹STANBUL-KADIKÖY-UMUT ELEKTRON‹K-HAL‹TA⁄A CAD. CELAL MUHTAR SOK. NO:20/2-TEL.:0216 346 39 78 ‹STANBUL-ZEYT‹NBURNU-UZMAN
ELEKTRON‹K-YEN‹DO⁄AN MH. 42.SK NO:50-TEL.:0212 582 36 37 ‹STANBUL-KADIKÖY-MICROSYSTEM ELEKTRON‹K-1. ORTA SK. NO:18/1 GÖZTEPETEL.:0216 411 91 50 ‹STANBUL-MALTEPE-BEYDA⁄I TEKN‹K ELEKTRON‹K-BA⁄LARBAfiI MAH. ‹NÖNÜ CAD.-TEL.:0216 457 63 34 ‹STANBUL-BA⁄CILAR-
KUMRU ELEKTRON‹K-KEMALPAfiA MAH. NAMIK KEMAL CAD. NO: 126-TEL.:0212 429 34 19 ‹STANBUL-BAKIRKÖY-‹K‹ZLER ELEKTRON‹K-SAKIZA⁄A
MH. BERR‹NC‹N‹ SK. NO:16/A-TEL.:0212 543 85 83 ‹STANBUL-ÜSKÜDAR-KÖYLÜBAY ELEKTRON‹K-ALBAY HÜSAMETT‹N ERTÜRK SK. NO:7/A ÇENGELKÖY
TEL.:0216 318 35 13 ‹STANBUL-ÜSKÜDAR-AKÇEL‹K T‹CARET-M‹MAR S‹NAN MH. ‹SMA‹L DÜMBÜLLÜ SK. NO:9/A TEL.:0216 342 99 22 ‹STANBUL-
KADIKÖY-TELV‹D ELEKTRON‹K-MAZHAR OSMAN SOK FERAH APT NO:24/A FENERYOLU-TEL.:0216 414 66 00 ‹STANBUL-‹K‹TELL‹-BARIfi TEKN‹K-
ATATÜRK MH. ‹K‹TELL‹ CD. DURAK SK. NO:18 TEL. : 0212 471 04 76 ‹STANBUL-K.ÇEKMECE-ENG‹N ELEKTRON‹K-TEVF‹K BEY MH. MERKEZ CD.
ORK‹DE SOK. NO: 3 /1-TEL.:0212 598 44 76 ‹STANBUL-BAHÇEL‹EVLER-SEV-CAN DAYANIKLI TÜK.MALLARI.-YILDIRIM BEYAZIT CD .ZAFER MH. TÜRKBEY‹
SK. NO:6/2-3-TEL.:0212 552 45 87 ‹STANBUL-fi‹fiL‹-IfiIK ELEKTRON‹K-AYAZA⁄A MASLAK ATATÜRK CD NO: 25-TEL.:0212 289 76 94 ‹STANBUL-PEND‹K-
GÖKHAK ELEKTRON‹K-BATI MH. SABR‹ TAfiKIN CD. SEB‹L SK. NO:4/1 TEL. : 0216 354 07 00 ‹STANBUL-G.O.PAfiA-ATILIM ELEKTRON‹K-CEBEC‹ MAH.
2472 SOK: NO:14/A SULTANÇ‹FTL‹⁄‹- TEL.:0212 475 85 62 ‹STANBUL-GÜNGÖREN-NUR ELEKTR‹K ELEKTRON‹K-MERKEZ MH. ASALET CD. NO: 22/DTEL.:0212 641 42 09 ‹STANBUL-BEYKOZ-ULUDO⁄AN ELEKTRON‹K-KAYABAfiI ÇIKMAZI NO: 4/B PAfiABAHÇE-TEL.:0216 322 85 85 ‹STANBUL-KARTAL-
ÖZO⁄LU ELEKTRON‹K-KIZILAY BULVARI CD. BAHADIR SK. 4/A-TEL.:0216 387 18 87 ‹STANBUL-FAT‹H-SOYLU TEKN‹K-HIRKA‹ fiER‹F CAM‹ ARKASI ESK‹
AL‹PAfiA CD. NO: 26-TEL.:0212 631 85 88 ‹STANBUL-FAT‹H-IRMAK DIfi T‹CARET-HACI KADIN CD. NO:15 K.M. PAfiA TEL.: 0212 589 75 27 ‹STANBUL-
S‹L‹VR‹-PDS ELEKTRON‹K-P.M. PAfiA MH. HACI PERVANE CD. NO:35/B -TEL.:0212 728 76 75 ‹STANBUL-GÜLTEPE-B‹L‹M ELEKTRON‹K-HARMANTEPE
MH. ABD‹ ‹PEKÇ‹ CD. NO:14/D -TEL.:0212 278 72 27 ‹ZM‹R-KARfiIYAKA-AYSER ELEKTR‹KL‹ EV ALETLER‹-ZÜBEYDE HANIM CADDES‹ NO:87/A-TEL.:0232
366 19 19 ‹ZM‹R-BERGAMA-GEZG‹N SERV‹S-K.KEMALBEY CAD. NO:82-84-TEL.:0232 633 35 15 ‹ZM‹R-KONAK-TUNCA ELEKTR‹K-76 SK 10/A GÜZELYALITEL.:0232 246 40 62 ‹ZM‹R-ÇAMD‹B‹-KUDRET ELEKTRON‹K-BURAK RE‹S CAD. NO: 239/A-TEL.:0232 435 81 36 ‹ZM‹R-MENEMEN-AY ELEKTRON‹K-DR.
SELAHATT‹N ÖZKURT CD. NO:22/B-TEL.:0232 832 02 31 ‹ZM‹R-KONAK-S‹STEM ELEKTRON‹K-2414 SK. NO:10 GÜLTEPE-TEL.:0232 469 72 69 ‹ZM‹R-
KARfiIYAKA-LEVENT ELEKTR‹K LABORATUVARI-1710 SK. NO:70/B ESHOT SOKA⁄I-TEL.:0232 381 14 42 ‹ZM‹R-KARfiIYAKA-ASMERKEZ T‹CARET-ESK‹
TRAMVAY CD. 1675. SK. NO:78/1B ALAYBEY-TEL.:0232 364 33 73 ‹ZM‹R-BORNOVA-ACEM ELEKTRON‹K-552/2 SK. NO: 4/A-TEL.:0232 339 73 31 ‹ZM‹R-
KONAK-KILIÇ ELEKTRON‹K-BARBAROS HAYRETT‹N PAfiA CD. NO:62/1 LEVENT-TEL.:0232 433 15 19 ‹ZM‹R-URLA-‹LTER ELEKTRON‹K-‹ZM‹R 75. YILl
CADDES‹NO:81/C-D-TEL.:0232 754 44 44 ‹ZM‹R-BUCA-ÇA⁄LAR ELEKTRON‹K-670/1 SK. NO:57/B-TEL.:0232 276 27 77 ‹ZM‹R-YEfi‹LYURT-UMUT ELEKTR‹K
& ELEKTRON‹K-YILDIZ CAD. NO: 152/A-TEL.:0232 244 65 77 ‹ZM‹R-ÖDEM‹fi-MURAT ELEKTRON‹K-UMURBEY MH. SANAY‹ S‹T. 9.SK NO: 10 -TEL.:0232
544 41 98 KAHRAMANMARAfi-AKSUNGUR ELEKTR‹K-UZUNOLUK CAD. 20.SOKAK NO:20/A-TEL.:0344 212 77 50 KAHRAMANMARAfi-KALE ELEKTRON‹K-
FEVZ‹PAfiA MH. UZUNLUK CD.-TEL.: 0344 225 07 94 KARABÜK-SAFRANBOLU-MEHMET SA⁄LAM - GÖKAY TEKN‹K-‹NÖNÜ MH. ESK‹ BA⁄LAR SK. NO:13TEL.:0370 712 24 97 KARABÜK-ACAR ELEKTRON‹K-VAKIF ‹fi HANI KAT:2 EMN‹YET MÜDÜRLÜ⁄Ü YANI-TEL.:0370 424 32 00 KARAMAN-ÖZ AS SO⁄UTMA-
ABBAS MH. MUT CD. NO: 82/A TEL. : 0338 214 56 74 KARS-AYDIN ELEKTRON‹K-KAZIM KARABEK‹R ‹fiHANI KAT:2 NO: 125 -TEL.:0474 212 87 82
KASTAMONU-TAfiKÖPRÜ-DE⁄‹fi‹M ELEKTR‹K-TABAKHANE MH. ATATÜRK CD. NO:55/A-TEL.:0366 417 42 04 KASTAMONU-TOSYA-DO⁄Ufi ELEKTRON‹K-
VAKIF SK. 15/A-TEL.:0366 313 42 59 KASTAMONU-HARUN TELEKOMÜN‹KASYON-‹NÖNÜ MAHALLES‹ AFfi‹NBEY SOKAK NO:8/B-TEL.:0366 212 33 66
KAYSER‹-MEL‹KGAZ‹-AKTÜRK BEYAZ EfiYA SERV‹S‹-AYDINLIKEVLER MH.FIRAT CD.KR‹STAL APT.A-B NO.17 TEL.:0352 332 08 25 KAYSER‹-MEL‹KGAZ‹AKIfi ELEKTRON‹K-ÇORAKÇILAR MH. CENG‹Z TOPEL CD.NO:20/B-TEL.:0352 320 14 00 KAYSER‹-DEVEL‹-U⁄UR SO⁄UTMA-HARMAN MAHALLES‹ BELED‹YE
PASAJ‹ ÜZER‹ NO: 15-TEL.:0352 621 56 31 KAYSER‹-SÖNMEZ ELEKTRON‹K-CAM‹ KEB‹R MAH. BASMANE SOK. NO:16/A-TEL.:0352 231 69 62 KAYSER‹-
- 70 -
Page 72

ZERO COMPUTER-SAHAB‹YE MH. METE CD. fiAH‹R SATO⁄LU SK. SATO⁄LU AP D: 1-TEL.:0352 232 15 34 KIRIKKALE-MERKEZ-BULUT ELEKTR‹K
YETK‹L‹ SERV‹SLER L‹STES‹
B‹LG‹SAYAR-B.HAYRETT‹N CAD. NO:9/C-TEL.:0318 212 31 73 KIRKLAREL‹-MERKEZ-BUSE ELEKTRON‹K-KARACA ‹BRAH‹M MH. KAPAN CAM‹ SK. ACUN
PSJ. NO:23-TEL.:0288 212 73 57 KIRKLAREL‹-LÜLEBURGAZ-BUSE ELEKTRON‹K-YILMAZ MH. ESK‹ KIRKLAREL‹ CD. EFSANE DÜ⁄ÜN SALONU YANI
NO:36/A TEL.: 0288 412 88 92 KIRfiEH‹R-GARANT‹ ELEKTRON‹K-ANKARA CD. C‹NGÖZ BEBE ARKASI YA⁄MUR ‹fiHANI NO:9/B-TEL.:0386 214 02 18 K‹L‹S-
FLAfi ELEKTRON‹K-fiEH‹TLER PARKI KARfiISI NO:63/1-TEL.: 0348 814 55 28 KOCAEL‹-DORUK TEKN‹K H‹Z. -KARABAfi MH. CENG‹Z TOPEL CD. MÜNECC‹M
AR‹F SK. NO:6/A -TEL.:0262 331 11 66 KOCAEL‹-KARAMÜRSEL-KILINÇ ELEKTRON‹K-‹NÖNÜ CD. M.YASEF SK. NO:10/M-TEL.:0262 452 55 55 KOCAEL‹-
D‹LOVASI-SAMET ELEKTRON‹K-BA⁄DAT CAD NO: 42/2-TEL.:0262 754 79 86 KOCAEL‹-DARICA-KARDEfiLER ELEKTRON‹K-KAZIM KARABEK‹R MH.
MEVALANA CAD. NO: 1/A-TEL.:0262 656 27 88 KOCAEL‹-GEBZE-YILDIRIM ELEKTRON‹K-H. HAL‹L MH. 1209 SK. NO:13/C-TEL.:0262 641 35 88KONYA-
BEYfiEH‹R-SELV‹ SO⁄UTMA-HACI ARMA⁄AN MH. ANTALYA CD. NO:108/F-TEL.:0332 512 40 10 KONYA-SELÇUKLU-SAF‹R SO⁄UTMA-FER‹T PAfiA MH.
GÜNEY SK. NO:3/F KULE S‹TE C‹VARI-TEL.:0332 236 36 75 KONYA-ERKAM SO⁄UTMA-KARAKURT MH. FURKAN DEDE CD.ASBAfiKAN SK. NO:13/BTEL.:0332 350 00 32 KONYA-ÖZCAN SO⁄UTMA VE ISITMA LTD fiT‹-N‹fiANTAfiIMH. HULUS‹ BAYBAL CD. NO:36/A-TEL.:0332 236 33 37 KONYA-SELÇUKLU-
KONSEY SOGUTMA VE ISITMA-KÜÇÜK ‹HSAN‹YE MH. fiA‹R GUBAR‹ SK.B‹NSA S‹TES‹ ALTI NO : 15 TEL.:0332 321 21 22 KONYA-AKfiEH‹R-EROL
ELEKTRON‹K-MEYDAN MAH. ÇOCUK PARKI KOD NO:38-TEL.:0332 812 61 12 KONYA-MERAM-GÜRKAN TEKN‹K-‹HT‹YARETT‹N MH.SIRÇALI MEDRESE
CAD.‹BN‹B‹B‹ SK. NO:1/B-TEL.:0332-351 02 03 KONYA-SEYD‹fiEH‹R-TUNCER ELEKTRON‹K-KIBRIS CD. NO:26-TEL.:0332 582 93 92 KONYA-DURMAZLAR
ELEKTR‹K-ANKARA-KONYA CAD. NO:67-TEL.:0332 673 28 48 KONYA-ERE⁄L‹-ERDEM‹R TEKN‹K-ÜÇ GÖZ MH. KIBRIS CD.EL‹T APT. NO:3 TEL.: 0332 713
02 53 KÜTAHYA-EL‹FO⁄LU ELEKTR‹K-FAT‹H SULTAN MEHMET BULVARI DUAGÜR CAM‹‹ ALTI 43/B-TEL.:0274 226 32 80 MALATYA-YUVAM ELEKTRON‹K-
‹ST‹KLAL MH. FUZUL‹ CD.‹MAMO⁄LU SK. NO:1-TEL.:0422 322 52 88 MALATYA-HAL‹M ELEKTRON‹K-SARAY MH. DEVECEL SK. NO:3-TEL.:0422 321 86
08MAN‹SA-SOMA-GÜRMAK TEKN‹K-KURTULUfi MH. ‹DMAN SK. NO:47/A-TEL.:0236 613 66 56 MAN‹SA-SAL‹HL‹-AYKAR SO⁄UTMA- BEfiEYLÜL MH.
BELED‹YE CD. NO:TEL.:243-0236 714 88 68 MAN‹SA-AY ELEKTRON‹K MAN‹SA fiB.-YARHASANLAR MAH. ESK‹ HASA⁄A 2306 SOK.NO: 18/A-TEL.:0236
237 30 62-63 MAN‹SA-BURCU ELEKTRON‹K-TUNCA MAH. KURTULUfi CAD. NO:54-TEL.:0236-234 57 42 MAN‹SA-TURGUTLU-EM‹N ELEKTRON‹K-ALTAY
MH. SEV‹NÇ SK. NO:25-TEL.:0236 313 28 35 MAN‹SA-SARUHANLI-fiEN SO⁄UTMA-ATATÜRK MH. 7 EYLÜL CD. NO: 21/B-TEL.:0236 357 12 00 MAN‹SA-
KULA-ERDAL KARAHAN-TERMO D‹NAM‹K-CAM‹‹ CED‹T MH. 62 SK. NO:67-TEL.:0236 816 70 99 MARD‹N-M‹DYAT-SA⁄LAM ELEKTRON‹K-ESNAF
SANATKARLAR KRED‹ KOOP. KARfiISI 2.CD.NO:56-TEL.:0482 462 33 90 MARD‹N-KIZILTEPE-‹BRAH‹MO⁄LU ISITMA-fiANLIURFA CAD. ECE PASAJI NO:7TEL.:0482 312 55 99 MARD‹N-DER‹K-UZAY ELEKTRON‹K-BELED‹YE MEYDANI NO:36-TEL.:0482 251 34 35 MARD‹N-YEN‹fiEH‹R-MERKEZ TEKN‹K-
KARAYOLLARI ARKASI BARIfi CAD GÜNAYDIN APT ALTI-TEL.:0482 212 83 06 MARD‹N-NUSAYB‹N-BÜDÜN ELEKTRON‹K-ZEYNEL AB‹D‹N MH. Ç‹LEK SK
NO: 1/B-TEL.:0482 415 61 98 MU⁄LA-FETH‹YE-ANADOLU TEKN‹K SERV‹S-ÖLÜDEN‹Z YOLU ÜZER‹ BAHA fiIKMAN CD.NO:157-TEL.:0252 611 39 12 MU⁄LA-
M‹LAS-AFfi‹N YILDIRIM - TEKN‹K SO⁄UTMA-HACI ‹LYAS MAH. PAZAR SOK.NO:14-TEL.:0252 512 14 45 MU⁄LA-YATA⁄AN-ASTEKN‹K ISITMA SO⁄UTMA
SERV‹S‹-YEN‹ MH. 152. SK. NO:8-TEL.:0252 572 56 31 MU⁄LA-DALAMAN-ÖZKAN TEKN‹K SO⁄UTMA-MERKEZ MAHALLES‹ ATATÜRK CD.NO:56-TEL.:0252
692 25 25 MU⁄LA-ELBO ELEKTR‹K ELEKTRON‹K-ORHAN‹YE MH. HÜRR‹YET CAD. NO:1/6-TEL.:0252 214 18 84 MU⁄LA-DATÇA-MEL‹H ELEKTRON‹K-
‹SKELE MH. AMBARCA CD. NO:17-TEL.:0252 712 02 30 MU⁄LA-MARMAR‹S-‹LKSEL ELEKTRON‹K-YEN‹ YOL CD. N0:51/9-TEL.:0252 412 62 60 MU⁄LA-
URLA-STAR ELEKTRON‹K-‹N‹fiD‹B‹ CAD NO 1/C AKYAKA BELDES‹-TEL.:0252 243 40 42 MUfi-HAfi‹MO⁄LU EK‹C‹ ELEKTRON‹K-HAfi‹MO⁄ULLARI EK‹C‹
‹fi HANI BELED‹YE CD.NO:20/A-TEL.:0436 212 38 80 N‹⁄DE-HUZUR ELEKTR‹K-ILHANLI MAH ÖZKUL MARKET KARSISI ÖZKILIÇ AP ALTI NO: 43-TEL.:0388
233 54 05 ORDU-TEK ISITMA SO⁄UTMA-SAKARYA MAH YENI KUMRU CAD NO: 111-TEL.:0452 423 84 49 ORDU-HAZAR SO⁄UTMA-YEN‹ MAH. 26.SOK
NO:17-TEL.:0452 214 04 49 ORDU-ÜNYE-STAR TEKN‹K-KALEDERE MH. 20TEMMUZ CD. NO:16-TEL.:0452 324 82 51 ORDU-MERKEZ-M‹KRO ELEKTRON‹K-
YEN‹ MH. 319 SK. NO:18 -TEL.: 0452 223 13 49 OSMAN‹YE-MODERN ELEKTRON‹K-ORTAOKUL CD. K‹fi‹O⁄LU ÇARfiISI NO:15-TEL.:0328 812 82 84 R‹ZE-
ÇAYEL‹-ÖZER TEKN‹K- MAKSUT ÖZER-EMNIYET MÜD.KARfiISI fiA‹RLER YOLU ÜZERI NO:3/2B-TEL.:0464 532 63 81 R‹ZE-CEVAH‹R ELEKTRON‹K-TOPHANE
MAH. ATATÜRK CAD. ‹fi PASAJI-TEL.:0464 213 16 17 SAKARYA-ADAPAZARI-ÇINAR ELEKTRON‹K-KÖMÜR PAZARI CAD. NO: 15 A-TEL.:0264 271 39 12
SAMSUN-ÇARfiAMBA-ÖZKAN SO⁄UTMA-ORTA MH. TUNCAY KOCABAfi SK. NO:85-TEL.:0362 832 28 90 SAMSUN-BAFRA-KARATAfi T‹CARET-KIZILIRMAK
MH. F.ÇAKMAK SK. NO:18/A-TEL.: 0362 543 04 91 SAMSUN-GÜLTEK‹N SERV‹S-ATATÜRK BULVARI NO.285-TEL.:0362 437 33 82 SAMSUN-DEN‹Z
ELEKTRON‹K-KADIKÖY MH. OSMAN‹YE CD. NO: 68-TEL.:0362 432 44 80 S‹‹RT-ERYILMAZ ELEKTRON‹K-CUMHUR‹YET CAD. NO:25 ULUCAM‹ KARfiISITEL.:0484 224 03 92 S‹NOP-ADA EV ALETLER‹-CAM‹ KEB‹R MH. TÜTÜNCÜ SK. NO: 16-TEL.:0368 260 12 64 S‹NOP-AYANCIK-YILKAY SO⁄UTMA-YALI
MH. DR.AZM‹ HAMZAO⁄LU CD. NO:46-TEL.:0368 613 52 12 S‹NOP-BOYABAT-ÖZTÜRK BEYAZ EfiYA BAKIM SERV‹S-GÖKDERE MH.YUSUF KEMAL BEY
CD.NO:24-TEL.:0368 315 61 21 S‹VAS-EKOL ELEKTRON‹K-H‹KMET IfiIK CD.NALBANTLAR BAfiI KAVfiA⁄I NO:1/D-TEL.:0346 223 44 96 fiANLIURFA-SURUÇ-
IfiIK SO⁄UTMA TEKN‹KERL‹⁄‹-D‹K‹L‹ MH. Z‹YARET CD. NO:10-TEL.:0414 612 17 25 fiANLIURFA-AKTAfi ELEKTRON‹K-ASFALT CD. N0.22/F-TEL.:0414
217 14 87 fiANLIURFA-B‹REC‹K-YARAfiIR SO⁄UTMA-MEYDAN MAH 10 TEMMUZ CAD KÖPRÜ ÇIKIfiI NO : 9-TEL.:0414 652 36 38 fiIRNAK-S‹LOP‹-ABAY
ELEKTRON‹K-2. CADDE S‹EMENS BAY‹‹ KARfiISI-TEL.:0486 518 50 99 fiIRNAK-ULUDERE-ÜRÜN ELEKTRON‹K-CUMHUR‹YET CD. PTT YANI-TEL.:0486
351 28 22 TEK‹RDA⁄-HAYRABOLU-POYRAZ TEKN‹K-H‹SAR MAH. ADELET SK. NO:24-TEL.:0282 315 55 48 TEK‹RDA⁄-SARAY-BATI TEKN‹K-YEN‹ MH.
TAKS‹M CD. NO:9 TEL.:0282 768 69 34 TEK‹RDA⁄-MURATLI-AKAN ELEKTRON‹K-MURAD‹YE MH. NAZIM SAV CD. NO:30/A-TEL.:0282 361 28 17 TEK‹RDA⁄-
ÇORLU-FULL TEKN‹K-MUH‹TT‹N MH. F‹K‹R SK. NO:12/B-TEL.:0282 652 28 68 TEK‹RDA⁄-ARI ELEKTRON‹K-AYDO⁄DU MH. fiEH‹TLER CD. NO: 33/ATEL.:0282 263 40 61 TEK‹RDA⁄-MALKARA-KER‹MO⁄ULLARI T‹CARET-YEN‹MAHALLE GÜLDESTE SOK. NO: 4/B-TEL.:0282 427 16 61 TEK‹RDA⁄-
ÇERKEZKÖY-ÇA⁄RI ELEKTRON‹K-G.O. PAfiA MH. SAYAR SK. KARDEfiLER APT. NO:5 -TEL.:0282 726 02 66 TOKAT-ERBAA-H‹DRO ELEKT‹R‹K-CUMHUR‹YET
MH. GAZ‹ BULVARI NO:144-TEL.:0356 715 56 01 TOKAT-C‹HAN ELEKTRON‹K-G.O.PAfiA BULVARI S‹VAS CAD. NO:290/A- TEL.:0356 214 00 74 TOKAT-
TURHAL-GÜÇLÜ SO⁄UTMA-CELAL MH. TUNA SK. NO:11-TEL.: 0356 276 39 66 TOKAT-CEM TEKN‹K SO⁄UTMA-SO⁄UKPINAR MH. GOP BULVARI 241/A
GÖKÇE PASAJI NO:14-TEL.:0356 212 37 57 TRABZON-ÇIRAK TEKN‹K-FAT‹H MH. AYASOFYA CD. NO: 57 MÜZE KARfiISI-TEL.:0462 229 66 44 TRABZON-
AKÇAABAT-ATOM ELEKTR‹K-ORTA MH. ERENLER SK. NO:5 -TEL.:0462 228 12 58 TRABZON-YET-SAN ELEKTRON‹K-FAT‹H MH. FAT‹H CD. COfiKUNER
PASAJI NO:2/B-TEL.:0462 223 15 04 TRABZON-ARAKLI-fiENGÜL TEKN‹K-BA⁄KUR ÇARfiISI NO: 10 / A-TEL.:0462 721 74 11 UfiAK-MERKEZ-KOÇ SO⁄UTMA-
‹fiL‹CE MH. ADAfi SK. NO:29/E -TEL.:0284 513 89 66 VAN-ERC‹fi-ÖZKANAT TAM‹RAT-EMN‹YET KARAKOL ARKASI NO:3-TEL.:0432 351 95 40 VAN-EB‹NÇ
TEKN‹K-SIHKE CAD ATEfi SOK. NO 10-TEL.:0432 214 31 37 VAN-BURHAN AYDIN - ÖZ USTA TAM‹RAT-KÜLTÜR MERKEZ‹ C‹VARI DEM‹RC‹LER 1. SK.
NO:1/C-TEL.:0432 216 34 58 YALOVA-ALTINOVA-DO⁄AN TEKN‹K SO⁄UTMA-CUMHUR‹YET MH.MERKEZ DURAK KARfiISI NO:29A-TEL.:0226 461 26 21
YALOVA-TINAZTEPE ELEKTR‹K-‹STANBUL CD. BORA SK. NO: 14-TEL.:0226 812 01 60 YOZGAT-AKDA⁄MADEN‹-AYDIN SO⁄UTMA-AHISHAVI MH. 2.
HANLAR SK. NO :10-TEL.:0354 314 64 12 YOZGAT-ÖNDER ELEKTRON‹K-UN PAZARI NO:14-TEL.:0354 212 79 67 YOZGAT-SORGUN-KARDEfiLER
ELEKTRON‹K-CUMHUR‹YET CD. NO:29 1/C-TEL.:0354 415 45 79 ZONGULDAK-KRD ERE⁄L‹-UZMAN ELEKTRON‹K-ERDEM‹R CAD NO:130-TEL.:0372 316
31 28 ZONGULDAK-MERKEZ-EMEK ELEKTRON‹K-PAP‹LA ‹fi HANI ZEM‹N KAT NO:9 SO⁄UKSU-TEL.:0372 251 67 31
- 71 -
Page 73
- GARANT‹ fiARTLARI -
1. Garanti süresi, mal›n teslim tarihinden itibaren bafllar ve 2 y›ld›r.
2. Mal›n bütün parçalar› dahil(kullan›m hatalar›ndan kaynaklanan k›r›lmalar hariç) olmak üzere tamam› firmam›z›n
garantisi kapsam›ndad›r.
3. Mal›n garanti süresi içerisinde ar›zalanmas› durumunda, tamirde geçen süre garanti süresine eklenir. Mal›n tamir
süresi en fazla 20 ifl günüdür. Bu süre, mala iliflkin ar›zan›n servis istasyonuna servis istasyonunun olmamas›
durumunda, mal›n sat›c›s›, bayii, acentas›,temsilcili¤i, ithalatç›s› veya imalatç›s›-üreticisinden birisine bildirim tarihinden
itibaren bafllar. Mal›n ar›zas›n›n 10 ifl günü içerisinde giderilmemesi halinde, imalatç›-üretici veya ithalatç›; mal›n
tamiri tamamlan›ncaya kadar, benzer özelliklere sahip baflka mal› tüketicinin kullan›m›na tahsis etmek zorundad›r.
4. Mal›n garanti süresi içerisinde, gerek malzeme ve iflçilik, gerekse montaj hatalar›ndan dolay› ar›zalanmas› halinde,
iflçilik masraf›, de¤ifltirilen parça bedeli ya da baflka herhangi bir ad alt›nda hiçbir ücret talep etmeksizin tamiri
yap›lacakt›r.
5. Tüketicinin onar›m hakk›n› kullanmas›na ra¤men mal›n;
-Tüketiciye teslim edildi¤i tarihten itibaren, belirlenen garanti süresi içinde kalmak kayd›yla,bir y›l içerisinde; ayn›
ar›zan›n ikiden fazla tekrarlanmas› veya farkl› ar›zalar›n dörtten fazla meydan gelmesi veya belirlenen garanti süresi
içerisinde farkl› ar›zalar›n toplam›n›n alt›ndan fazla olması unsurlar›n›n yan›s›ra, bu ar›zalar›n maldan yararlanamamay›
sürekli k›lmas›,
-Tamiri için gereken azami sürenin afl›lmas›,
-Firman›n servis istasyonunun, servis istasyonunun mevcut olmamas› halinde s›rayla sat›c›s›, bayii, acentesi temsilcili¤i,
ithalatç›s› veya imalatç› - üreticisinden birisine düzenleyece¤i raporla ar›zan›n tamirine mümkün bulunmad›¤›n›n
belirlenmesi,durumlar›nda, tüketici mal›n ücretsiz de¤ifltirilmesini, bedel iadesi veya ay›p oran›nda bedel indirimi
talep edebilir.
6. Mal›n kullanma k›lavuzunda yer alan hususlara ayk›r› kullan›lmas›ndan kaynaklanan ar›zalar garanti kapsam›
d›fl›ndad›r.
7. Garanti Belgesi ile ilgili olarak ç›kabilecek sorunlar için Sanayi ve Ticaret Bakanl›¤› Tüketicinin ve Rekabetin
Korunmas› Genel Müdürlü¤ü’ne baflvurulabilir.
‹THALATÇI F‹RMA
DE‹MA ELEKTROMEKAN‹K ÜRÜNLER ‹NfiAAT SPOR MALZEMELER‹ ‹MALAT SAN. VE T‹C. A.fi.
Cihangir Mh. Güvercin Cd. No:4 Haramidere Mevkii Avcılar - ‹stanbul - Türkiye
Tel : (0212) 422 94 94 & Fax : (0212) 422 03 49
www.sinbo.com.tr - info@sinbo.com.tr
- 72 -
Page 74
- SCM 2937 KAHVE MAK‹NES‹ -
- GARANT‹ BELGES‹ -
Garanti Belge No : 69829
SSHY Belge No : 25551
‹THALATÇI F‹RMA
Ünvanı : DE‹MA ELEKTROMEKAN‹K ÜRÜNLER‹ ‹Nfi. SPOR MALZ.
‹MALAT SAN. ve T‹C. A.fi.
Adresi : Cihangir Mah. Güvercin Cad. No:4 Haramidere Mevkii
Avc›lar / ‹STANBUL
Tel. : 0212 422 94 94 & Fax: 0212 422 03 49
Yetkili Kifli :
Yönetim Kurulu Baflkan›
Ürünün Cinsi : KAHVE MAK‹NASI
Markası : S‹NBO
Modeli : SCM 2937
Alt Modeli : Bandrol ve Seri No :
Teslim Tarihi ve Yeri :
Garanti Süresi : 2 Yıldır
Azami Tamir Süresi : 20 ‹fl Günü
Kullanım Ömrü : Bakanl›kça belirlenen ve ilan edilen kullan›m ömrü 7 y›ld›r.
(Ürünün fonksiyonlar›n› yerine getirebilmesi için gereken yedek parça temin süresi)
SATICI F‹RMA
Ünvanı :
Adresi :
Tel.Fax :
Fatura Tarihi ve No :
Teslim Tarihi ve Yeri :
‹mza ve Kafle :
Bu bölüm, ürünü sat›n ald›¤›n›z Yetkili Sat›c› taraf›ndan imzalanacak ve kaflelenecektir.
Bu belgenin kullan›lmas›na; 4077 say›l› Tüketicinin Korunması Hakkında Kanun ve bu Kanun’a dayan›larak yürürlü¤e konulan Garanti Belgesi
Uygulama Esaslar›na Dair Tebli¤ uyar›nca, TC Sanayi ve Ticaret Bakanl›¤› Tüketicinin ve Rekabetin Korunmas› Genel Müdürlü¤ü tarafından
izin verilmifltir.
Garanti Belge Onay Tarihi : 03/06/2009
SSHY Belge Onay Tarihi : 30/03/2010
- 73 -
Page 75

MÜfiTER‹ H‹ZMETLER‹
De¤erli Müflterimiz,
En uygun fiyata en iyi ürünü vermenin yan› s›ra; en iyi hizmeti vermenin de
önemli oldu¤una inan›yoruz. Bu nedenle siz bilinçli tüketicilere daha yak›n
olabilmek için, internet adresimizdeki eriflim formlar›n›n yan› s›ra, tüketici
dan›flma hatlar›m›z› da hizmetinize açm›fl durumday›z.
TÜKET‹C‹
DANIfiMA HATTI
444 66 86
MERKEZ
TEKN‹K SERV‹S
(0212) 422 94 94
www.sinbo.com.tr
Dan›flma Hatlar›m›z›,
- Hafta içi her gün 08.30-18.00 saatleri aras›nda arayabilir; istek, öneri ve
flikayetlerinizi firmam›za iletebilirsiniz.
Tüketicinin Dikkatine:
Ürünlerimizle ilgili hizmetleri tam olarak alabilmek için afla¤›daki önerilere
uyman›z› rica ederiz:
1. Ürünü ald›¤›n›zda Garanti Belgesini mutlaka yetkili sat›c›n›za onaylatt›r›n›z.
2. Ürünü kullanma k›lavuzu esaslar›na göre kullan›n›z.
3. Ürününüzle ilgili hizmet talebiniz oldu¤unda yukar›daki telefon
numaralar›ndan, Tüketici ‹liflkileri Merkezi'ne baflvurunuz.
4. Ürünü promosyon arac›l›¤› ile edinmiflseniz, ürüne ait garanti belgesini en
yak›n yetkili servisimize giderek onaylatt›r›n›z.
5. Teknik servisteki ifliniz bitti¤inde "Hizmet Fifli" almay› unutmay›n›z.
Alaca¤›n›z bu fifl, ileride ürününüzde meydana gelebilecek herhangi bir
sorunda size yarar sa¤layacakt›r.
6. Cihaz›n›z ilk çal›flt›rmada çal›flm›yor veya ar›zal› ise, size en yak›n S‹NBO
Yetkili Servisine baflvurabilir veya S‹NBO Dan›flma Hatlar›ndan yard›m
alabilirsiniz.
- 74 -
Page 76

Made in P.R.C.
‹mal Y›l› : 2011
- TEDAR‹KÇ‹ F‹RMA / EXPORTER United Favour Development Limited
Unit B, 10/F Lee May Building 788-790
Nathan Road, Mongkok, Kowloon, HK.
- UYGUNLUK BEYANI / CE CONFORMITY TÜV SÜD Product Service GmbH
Zertifizierstelle, Ridlerstrasse 65, 80339
München, Germany
N8 08 10 36143 01437
EEE Yönetmeli¤ine uygundur.
 Loading...