

Page 1
Wake-Up Light3
Wake-Up Light
Operating instructions
KH 2600
KOMPERNASS GMBH
BURGSTRASSE 21 · D-44867 BOCHUM
www.kompernass.com
ID-Nr.: KH2600-09/10-V4
Lys til at vågne ved
Betjeningsvejledning
Page 2
KH 2600
10
2
3
4
5
78
9
6
20
19
17
1315
11
12141618
21
5
26
2425
23
22
Page 3

Index
Introduction . . . . . . . . . . . . . .2
Information for these operating
instructions . . . . . . . . . . . . . . . . . . . . 2
Copyright . . . . . . . . . . . . . . . . . . . . . 2
Proper use. . . . . . . . . . . . . . . . . . . . . 2
Warnings . . . . . . . . . . . . . . . . . . . . . 3
Safety . . . . . . . . . . . . . . . . . . .4
Basic Safety Instructions . . . . . . . . . .4
Danger from electric shock . . . . . . . . 5
Danger of hearing damage . . . . . . . 5
Interaction with batteries . . . . . . . . .6
General description . . . . . . . .7
Device summary . . . . . . . . . . . . . . . . 7
Remote control . . . . . . . . . . . . . . . . . 8
Display . . . . . . . . . . . . . . . . . . . . . . . 9
Setting up and connecting .10
Safety instructions . . . . . . . . . . . . . . 10
Package contents and
transportation inspection . . . . . . . .10
Unpacking . . . . . . . . . . . . . . . . . . .10
Disposal of the packaging . . . . . . .11
Requirements for the set-up location 11
Electrical connections . . . . . . . . . . .12
Inserting back-up batteries . . . . . . .12
Activating the remote control battery 13
Changing the remote control battery 13
Providing mains power . . . . . . . . . . 13
VHF wire antenna . . . . . . . . . . . . .13
Connecting the headphones . . . . .13
GB
IE
Handling and operation . . .14
Switching On and Off . . . . . . . . . .14
Setting the time . . . . . . . . . . . . . . . .14
Adjusting the volume . . . . . . . . . . .15
Radio operation . . . . . . . . . . . . . . .15
Playback music from an iPod/iPhone 17
Playback of external audio devices 19
Playback of nature sounds . . . . . .19
Mood lighting . . . . . . . . . . . . . . . . .19
Reading lamp . . . . . . . . . . . . . . . . .20
Alarm Function . . . . . . . . . . . . . . . .21
Cleaning . . . . . . . . . . . . . . . .25
Safety instructions . . . . . . . . . . . . . . 25
Cleaning the housing . . . . . . . . . . .25
Storage/Disposal . . . . . . . . .25
Storage . . . . . . . . . . . . . . . . . . . . . .25
Disposal of the device . . . . . . . . . . 25
Disposing of the batteries . . . . . . . .25
Troubleshooting . . . . . . . . . .26
Safety instructions . . . . . . . . . . . . . . 26
Malfunction causes and remedies . 26
Appendix . . . . . . . . . . . . . . .27
Information regarding the
EC conformity declaration . . . . . . .27
Technical data . . . . . . . . . . . . . . . .28
Warranty . . . . . . . . . . . . . . . . . . . .29
Service . . . . . . . . . . . . . . . . . . . . . . 29
Importer . . . . . . . . . . . . . . . . . . . . .29
KH 2600
1
Page 4
Introduction
GB
IE
Introduction
Information for these operating instructions
These operating instructions are a component of the KH 2600 Wake-Up Light
(henceforth designated as the device) and they supply you with important
information about the intended use, safety and connection as well as operation
of the device .
The operating instructions must be constantly kept available close to the device.
They are to be read and applied by everyone assigned to operate and troubleshoot the device.
Keep these operating instructions and hand them over with the device to any
future owners.
Copyright
This documentation is copyright protected.
Any copying or reproduction, including extracts, as well as the reproduction of
images, also in an altered state, is not permitted without express written permission
from the manufacturer.
iPhone, iPod, iPod classic, iPod nano, iPod shuffl e, and iPod touch are brand
names of Apple Inc., registered in the USA and other countries.
Proper use
This device is intended only for reception of VHF radio programmes, for the connection of external devices (i.e. MP3 players) and iPod/iPhone and for alarms
by means of audible signals, nature sounds, radio or music from an iPod/iPhone,
in enclosed spaces. This device is not intended for any other use or for uses
beyond those mentioned.
WARNING
Danger from unintended use!
Danger can come from the device if used for unintended purposes and/or
other types of use.
Use the device exclusively for intended purposes. ►
Observe the procedures described in these operating instructions. ►
Claims of any kind resulting from damage caused by improper use, incompetent
r
s, unauthorized modifi cations or the use of non-approved spare parts will
epair
not be acknowledged.
The operator alone bears liability.
2
KH 2600
Page 5
Introduction
Warnings
In the current operating instructions the following warnings are used:
DANGER
A warning at this danger level indicates a threatening dangerous
situation.
If the dangerous situation is not av
injury.
Follow the instructions given in this warning notice to avoid the risks of ►
death or serious injury to people.
WARNING
A warning of this danger level signifi es a possible dangerous
situation.
If the dangerous situation is not avoided it can lead to injuries.
The directives in this warning are there to avoid personal injuries. ►
IMPORTANT
A warning of this danger level signifi es possible pr
damage.
If the situation is not avoided it can lead to property damage.
The directives in this warning are there to avoid property damage. ►
oided, it could result in death or serious
operty
GB
IE
KH 2600
NOTICE
A notice signifi es additional information that assists in the handling of the ►
device.
3
Page 6

Safety
GB
IE
Safety
In this chapter you receive important safety information regarding handling of the
device.
This device complies with the statutory safety regulations. Incorrect usage can,
however, lead to personal injury and property damage.
Basic Safety Instructions
For safe handling of the device observe the following safety information:
Before use check the device for visible external damage. Do not put into ■
operation a device that is damaged or has been dropped.
er use the device if the lamp housing is damaged, broken or missing. ■
Nev
Damaged cables or connections should be replaced by authorized qualifi ed ■
persons or by the customer service department.
P
sons who, due to their physical, intellectual or motor abilities, are incapable ■
er
of operating the device safely may only use the device under supervision or
direction fr
Only permit children to use the device under supervision. ■
Repairs should only be carried out by authorized specialist companies or by ■
the customer service department. Incompetent repairs can result in signifi cant
risk
A repair to the device during the warranty period may only be carried out ■
by a customer service department authorized by the manufacturer otherwise
no additional warr
Defective components may only be replaced with original replacement parts. ■
Only by using original replacement parts can you guarantee that the safety
requir
Protect the device from moisture and liquid penetration. Never submerge the ■
device in water, never locate the device in the close vicinity of water and
nev
om a responsible person.
s for the user
ements are complied with.
er place any objects fi lled with liquids (such as vases) on the device.
. In addition warranty claims become void.
anty claims can be considered for subsequent damages.
4
KH 2600
Page 7
Safety
Do not operate the device close to open fl ames (e.g. candles). ■
Avoid direct sunlight. ■
Do not use the device when the room temperature is below 10° C or above ■
35° C.
If y
such at present, consult your doctor before you use the device.
Alw
never pull on the connection cable.
If malfunctions occur or thunder storms threaten pull the po
wall socket.
ou hav
ay
s pull on the power plug when disconnecting from the wall socket, ■
e previously suff ered from severe depression or are suff ering from ■
Danger from electric shock
DANGER
Risk of fatal electrocution!
A life-t
hreatening situation can arise from contact with live
wires or components!
Observe the following safety instructions to avoid electric shock hazards:
Do not use the device if the mains power plug or the connection cable are ►
damaged.
Do not, under any cir
electric shock is present if the power carrying connections are touched or
the electrical and mechanical construction is changed.
cumstances, open the device housing. The risk of an ►
GB
IE
wer plug from the ■
Danger of hearing damage
WARNING
Danger from extreme volumes!
Listening to loud music via connected headphones can result in
hearing damage.
Avoid extreme volumes, especially over long periods of time, ►
when you are using headphones.
KH 2600
5
Page 8

Safety
GB
IE
Interaction with batteries
WARNING
Danger from improper use!
For safe handling of batteries observe the following safety instructions:
Do not throw batteries into a fi re. ►
Do not short circuit batteries. ►
Do not attempt to recharge batteries. ►
Regularly check the condition of the batteries. Leaking battery acid can
►
cause permanent damage to the device. Special caution should be shown
when handling damaged or leaking batteries. Danger from acid burns!
Wear protective gloves.
Store batteries in a place inaccessible to children. When swallowed seek ►
immediate medical attention.
ve the batteries from the device and the remote control if you do not ►
Remo
intend to use the device for an extended period of time.
6
KH 2600
Page 9
General description
General description
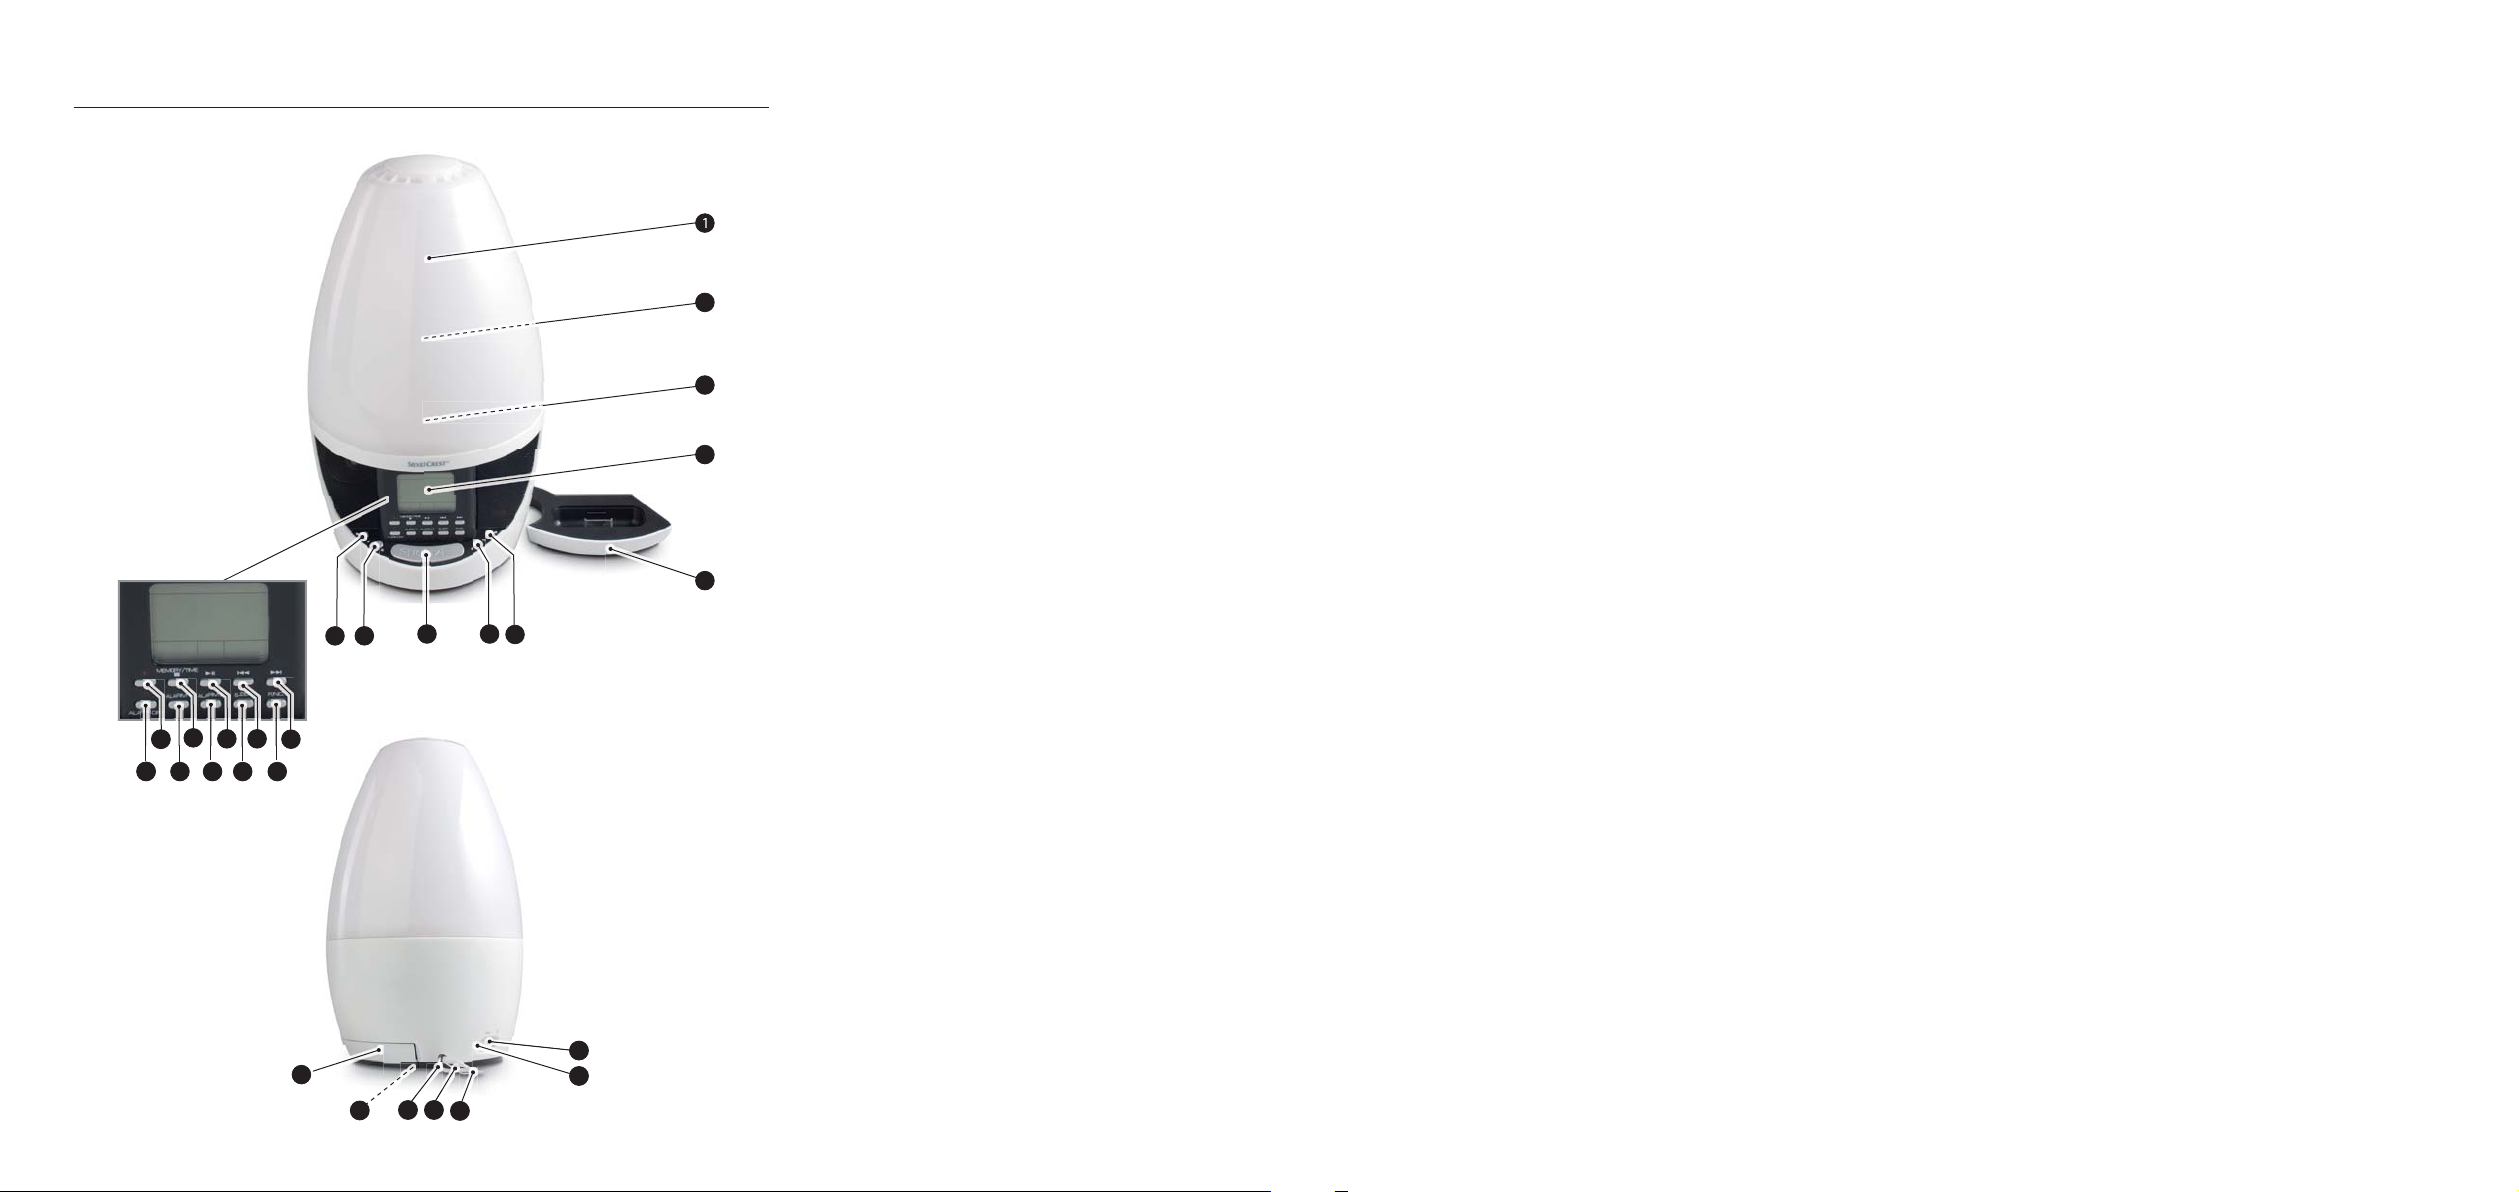
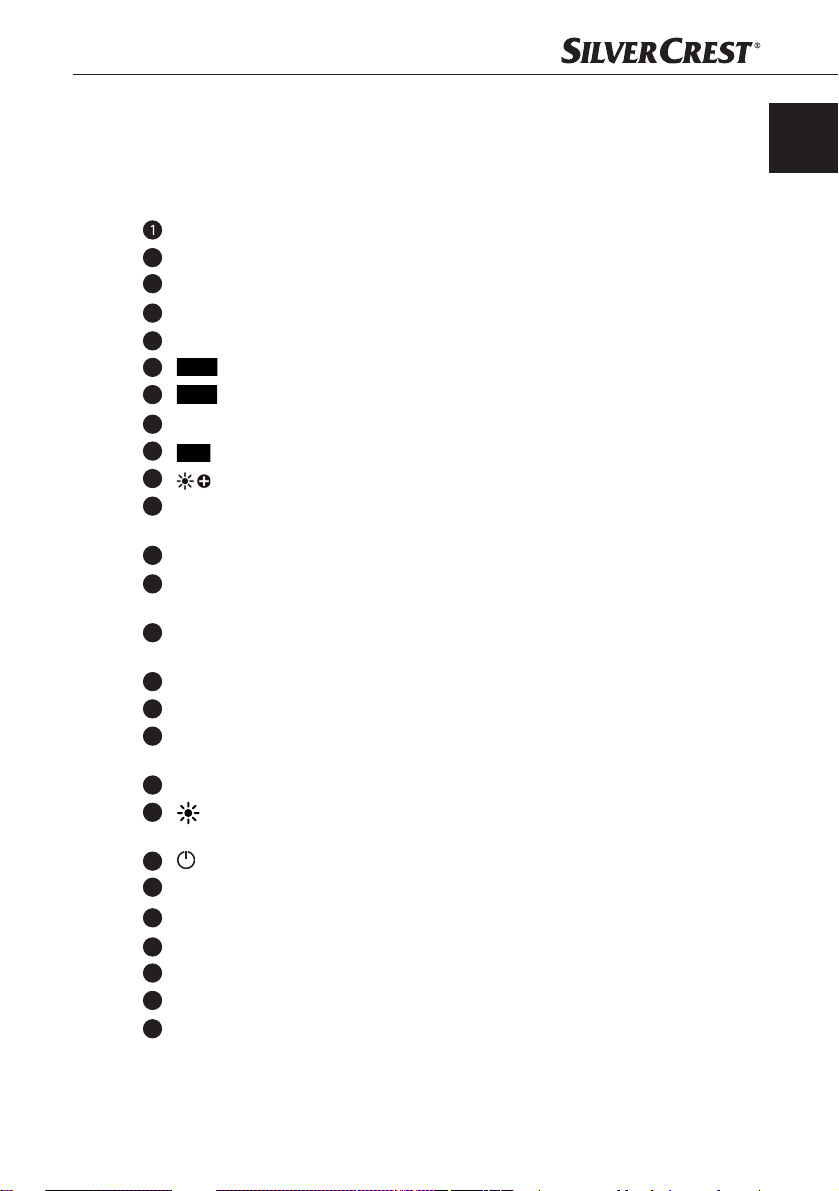
Device summary
For the following see the diagrams on the fold out sides.
Lamp housing
2
Halogen lamp (42 W, E27)
3
Mood light (3 LEDs: green, blue and red)
4
Display
5
Station for iPod/iPhone
6
button: Volume increase
7
button: Volume decrease
8
SNOOZE Button: Activate snooze function / set the mood light colour
9
button: Reduce light intensity
10
button: Increase light intensity
11
►►I button: Title skip forwards / fast forward play (iPod/iPhone) / station search
(Radio) / selection of nature sounds 1-4
12
FUNC.: Select function
I◄◄ button: Title skip backwards / fast backward play (iPod/iPhone) / station
13
search (Radio) / selection of nature sounds 1-4
SLEEP button: Set automatic switch off / change between 12h/24h time of day
14
display
►II button: Playback start / stop
15
Alarm2/UP button: Programme alarm 2 / memory slot selection upwards
16
MEMORY/TIME button: Save station (Radio) / setting the time in standby mode /
17
stop playback of iPod/iPhone
Alarm1/DOWN button: Programme alarm 1 / memory slot selection downwards
18
button: Switch lamp on/off / activate wake-up light function during wake time
19
programming
/ALARM OFF button: Switch device on/off / switch alarm off (Alarm)
20
21
Headphones connection socket
22
AUX IN: Audio input for the connection of an external device
Mains connection cable
23
24
Wire antenna for VHF reception
25
Temperature sensor
26
Battery compartment
GB
IE
KH 2600
7
Page 10
General description
GB
IE
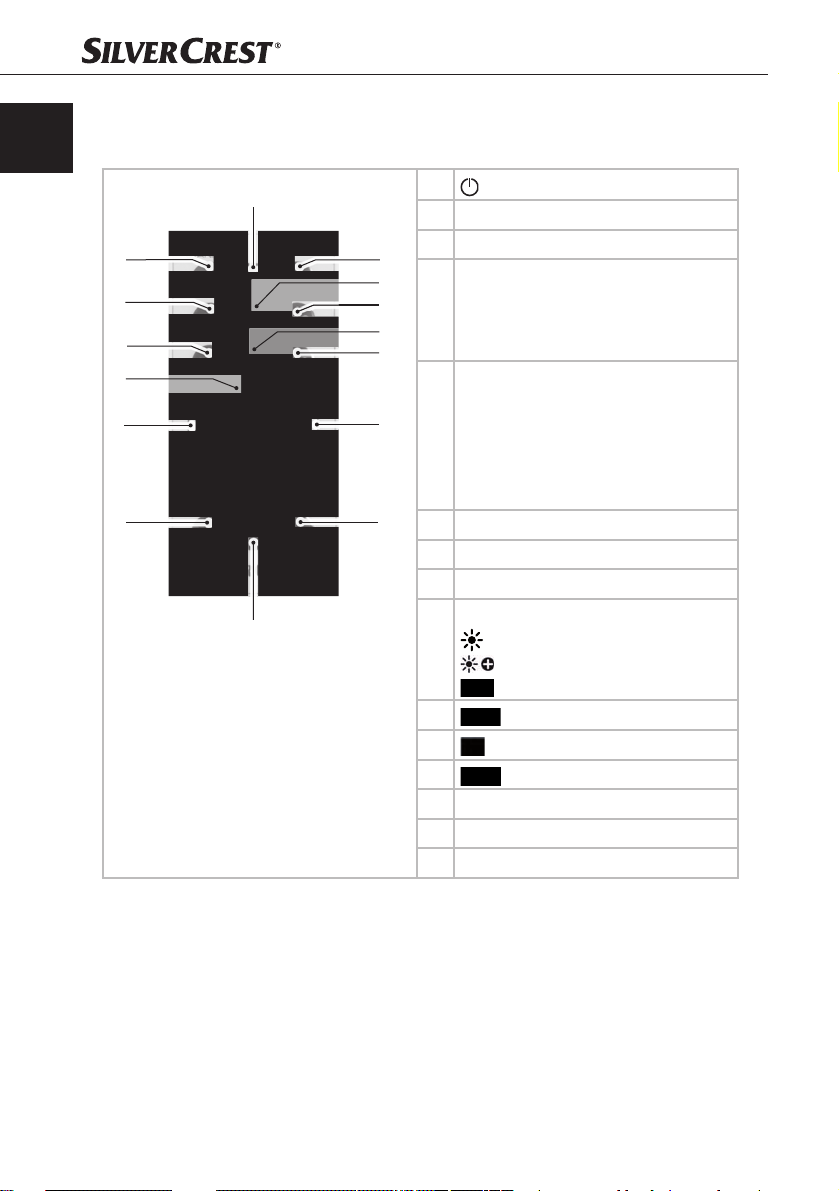
Remote control
All device functions can be carried out with the remote control.
15
1
2
3
4
5
6
7
1
: Standby
2 ►►I : Fast play forward
3 I◄◄ : Fast play backwards
14
13
12
11
10
9
8
Memory control:
MEM: Programming stations
4
MEM +: Selecting memory slot
MEM -: Selecting memory slot
Alarm control:
Alarm ON/OFF
AL1: Programme alarm1 / memory slot
5
6 TIME: Set time of day
7 SNOOZE: Activate snooze function
8 SLEEP: Automatic switch off
9
10
11
12
13 ►II : Play/Pause
14 FUNC: Select function
15 COLOR: Select mood light colour
selection downwards
AL2: Programme alarm2 / memory slot
selection upwards
Lamp control:
: Lamp ON/OFF
: brighter
: darker
: Volume decrease
: Stop
: Volume increase
8
KH 2600
Page 11
General description
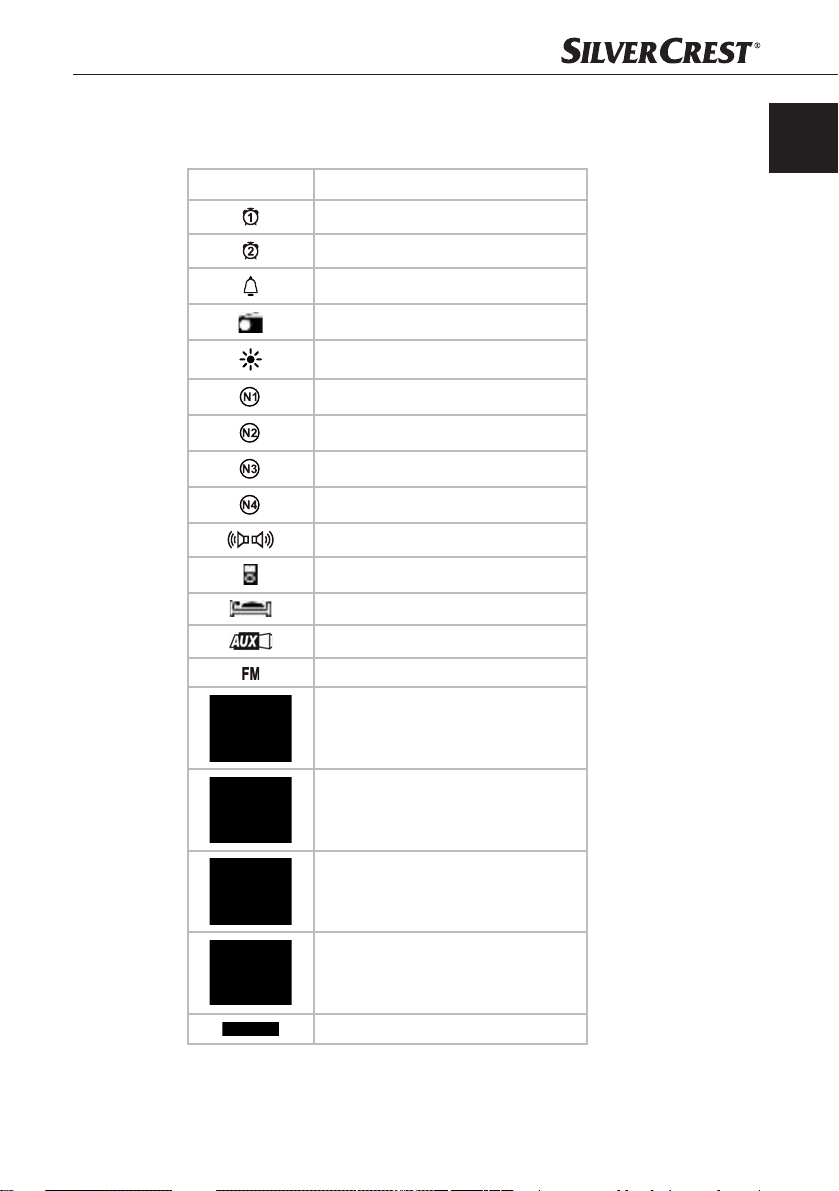
Display
The symbols in the display have the following meanings:
Symbol Meaning
Alarm 1 activated
Alarm 2 activated
Alarm tone
Radio function
Lamp / wake-up light function
Nature sound 1
Nature sound 2
Nature sound 3
Nature sound 4
Stereo reception
iPod/iPhone function
Automatic switch off activated
External audio device
VHF reception
GB
IE
KH 2600
Temperature Display
Memory slot indicator
Light intensity indicator
Volume level indicator
Snooze function activated
9
Page 12

Setting up and connecting
GB
IE
Setting up and connecting
Safety instructions
WARNING
Damage may occur to people and property when operating
the device!
Observe the following safety information to avoid any risks:
Packaging material should not be used as a play thing. There is a risk of ►
suff ocation!
To av
oid risks to persons and property, pay attention to the requirements ►
for the set-up location and the electrical connections.
Package contents and transportation inspection
The device is delivered with the following components as standard:
Wake-Up Light ▯
Remote control with battery (CR 2032, 3V) ▯
2 x Batteries type AA, 1.5 V ▯
5 x Adapter docks for iPod/iPhone ▯
Operating instructions ▯
NOTICE
Check the contents to make sure everything is there and for visible damage. ►
If the items supplied are incomplete, or damaged due to defective ►
packaging or transportation, contact the Service Hotline (see chapter
Service
).
Unpacking
10
Remove all parts of the device and the operating instructions from the box. ¡
Remove all packing material. ¡
KH 2600
Page 13
Setting up and connecting
Disposal of the packaging
The packaging protects the device from transport damage. The packaging
materials are chosen from an environmentally friendly and disposal technological
point of view and are therefore recyclable.
The recirculation of packaging into the material circuit saves on raw material
and reduces generated waste. Dispose of packaging material that is no longer
needed according to the regionally established regulations.
NOTICE
If possible preserve the device's original packaging during the warranty ►
period so that in the case of a warranty claim you can package the device
properly for r
eturn.
Requirements for the set-up location
For safe and fault free operation of the device, the set-up location must fulfi ll the
following conditions:
Place the device on a fi rm, fl at and level surface. ■
To avoid overheating maintain a free space of at least 15 cm around and ■
40 cm above the device.
Do not position the device in a dust
in the vicinity of fl ammable materials.
Protect the de
The surfaces of furniture may contain components that could aff ect and ■
soften the rubber feet on the device. If necessary, place an anti-slip mat or
similar under the rubber feet of the de
The w
can be quickly withdrawn from the socket.
vice from vibration. ■
all socket must be easily accessible so that, in an emergency, the plug ■
y, hot, wet or very humid environment or ■
vice.
GB
IE
KH 2600
11
Page 14

Setting up and connecting
GB
IE
Electrical connections
Before connecting the device, compare the connection data (voltage and ■
frequency) on the rating plate of the device with that of your power supply
network. This data must tally in order to avoid damage to the device.
Make sure that the device's connection cable is not damaged and is not ■
laying over hot surfaces and/or sharp edges.
Make sur
Do not allow the connection cord to hang over edges (Trip wire eff ect). ■
e that the connection cable is not tightly stretched or bent. ■
Inserting back-up batteries
By inserting the batteries you can avoid the loss of programmed time of day and
alarm wake time in the event of a possible power outage. The batteries make
sure that the internal clock continues to run even during a power outage. When
power is restored the correct time appears automatically in the display
NOTICE
The back-up batteries only save the time of day and the programmed wake ►
time. All other functions are only possible with mains power operation.
The device can also be oper
Slide the access cover of the battery compartment ¡
the device in the direction of the arrow and remove the access cover.
Insert 2 batteries type AA (supplied) into the battery compartment. Make ¡
sure that you observe the polarity as depicted in the battery compartment.
Close the battery compar
and allow it to lock into place.
4
.
ated without batteries. ►
26
on the underside of
tment by replacing the access cover, slide back in ¡
12
KH 2600
Page 15
Setting up and connecting
Activating the remote control battery
The remote control battery is already inserted when delivered.
Activate the battery by removing the isolation strip. ¡
Changing the remote control battery
Press, with the fi ngernail, the recess (A) to the right ¡
and, at the same time, pull the battery compartment
out.
Insert a 3 V battery type CR 2032 in the battery ¡
compartment. The side with the marking "+" points
upwar
ds.
Slide the battery compartment completely back into ¡
the remote control.
Providing mains power
Place the device approx. 40 to 50 cm away from your head (i.e. on the ¡
bedside table).
Plug the mains power plug into a wall socket. In the display ¡
day (0:00 o'clock) and the temperature will be shown.
4
the time of
GB
IE
VHF wire antenna
For VHF reception completely unfold the wire antenna ¡
Connecting the headphones
If required you can connect headphones (with a 3.5 mm jackplug) to the ¡
connection socket
switch off automatically.
KH 2600
24
.
21
on the rear panel of the device. The speakers then
13
Page 16
Handling and operation
GB
IE
Handling and operation
In this chapter you receive important information for the handling and operation
of the device.
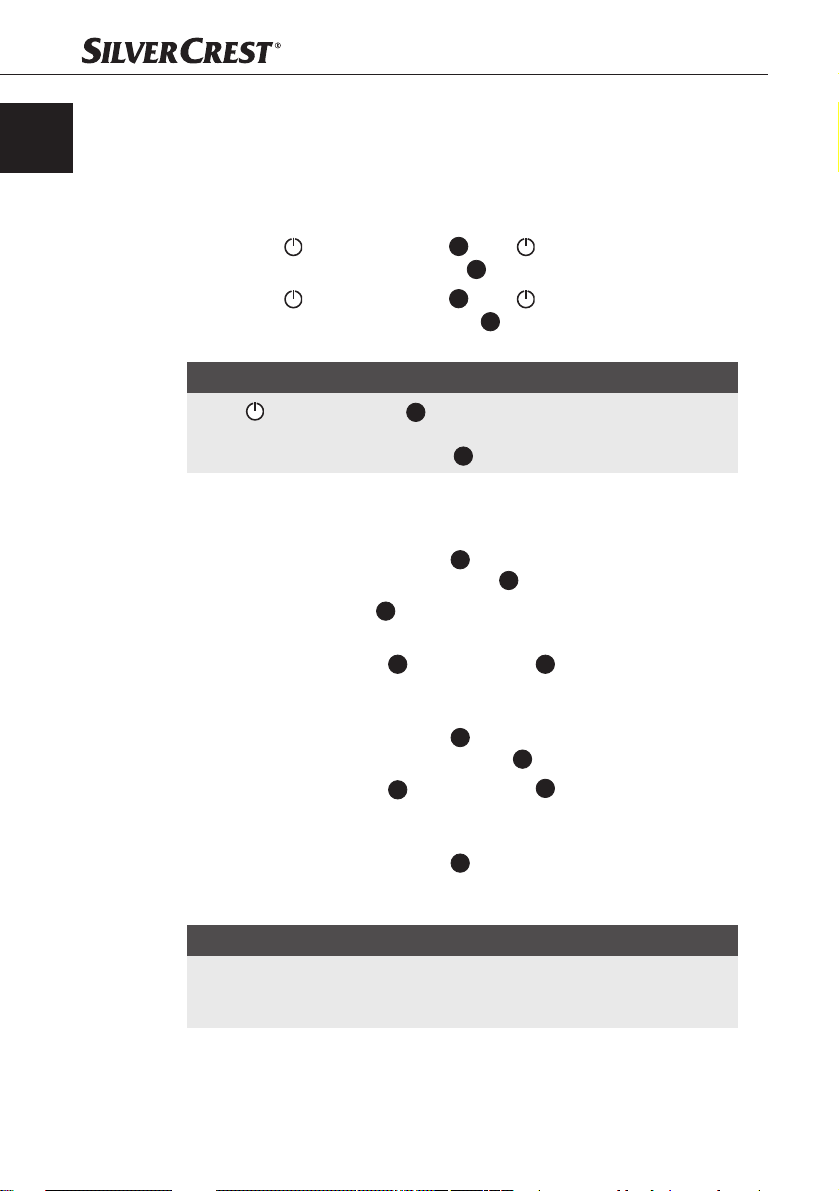
Switching On and Off
Press the ¡ /ALARM OFF button 20 or the button on the remote control
to switch the device on. The display
Press the ¡
to switch the device off . In the display 4 is shown the time of day, the
temperature and a programmed alarm time (Standby mode).
NOTICE
The ►
from the mains power. To completely disconnect the device from the mains
power the mains power cable plug
Setting the time
Prerequisite: The device is in standby mode.
Press the MEMORY/TIME button ¡
control. The hour indicator in the display
Press the SLEEP button ¡
12h/24h time of day display.
Set, with the ►►I button ¡
hour. With each button press the time changes by one hour. Holding down
the respective button for more than 2 seconds starts the speed setting.
Press the MEMORY/TIME button ¡
control. The minute indicator in the display 4 blinks.
Set, with the ►►I button ¡
minutes. With each button press the time changes by one minute. Holding
down the respective button for more than 2 seconds starts the speed setting.
Press the MEMORY/TIME button ¡
control to confi rm the time input or wait for approx. 7 seconds after which
the time input will be automatically confi rmed.
/ALARM OFF button 20 or the button on the remote control
/ALARM OFFbutton 20 does not completely disconnect the device
14
for approx. 2 seconds to switch between the
11
11
4
is activated.
23
must be pulled from the mains socket.
17
or the TIME button on the remote
4
blinks.
or the I◄◄ button 13 , the current time of day
17
or the TIME button on the remote
or the I◄◄ button 13, the current time of day
17
or the TIME button on the remote
14
NOTICE
The time of day will revert back to 0:00 o'clock if the device is disconnected ►
from the mains power supply with no back-up batteries inserted or if the
back-up batteries ar
e too weak.
KH 2600
Page 17

Handling and operation
Adjusting the volume
Prerequisite: The device is switched on.
Press the ¡
control to adjust the volume. The set volume level is shown below and to the
right in the display
NOTICE
The set volume applies for all functions. ►
The volume you have selected will also be saved automatically as the ►
volume for the wake function.
button 6 or button 7 on the device or on the remote
Radio operation
NOTICE
For a good radio reception the wire antenna ►
coiled. Adjust the antenna, whilst in radio operation, to the best reception.
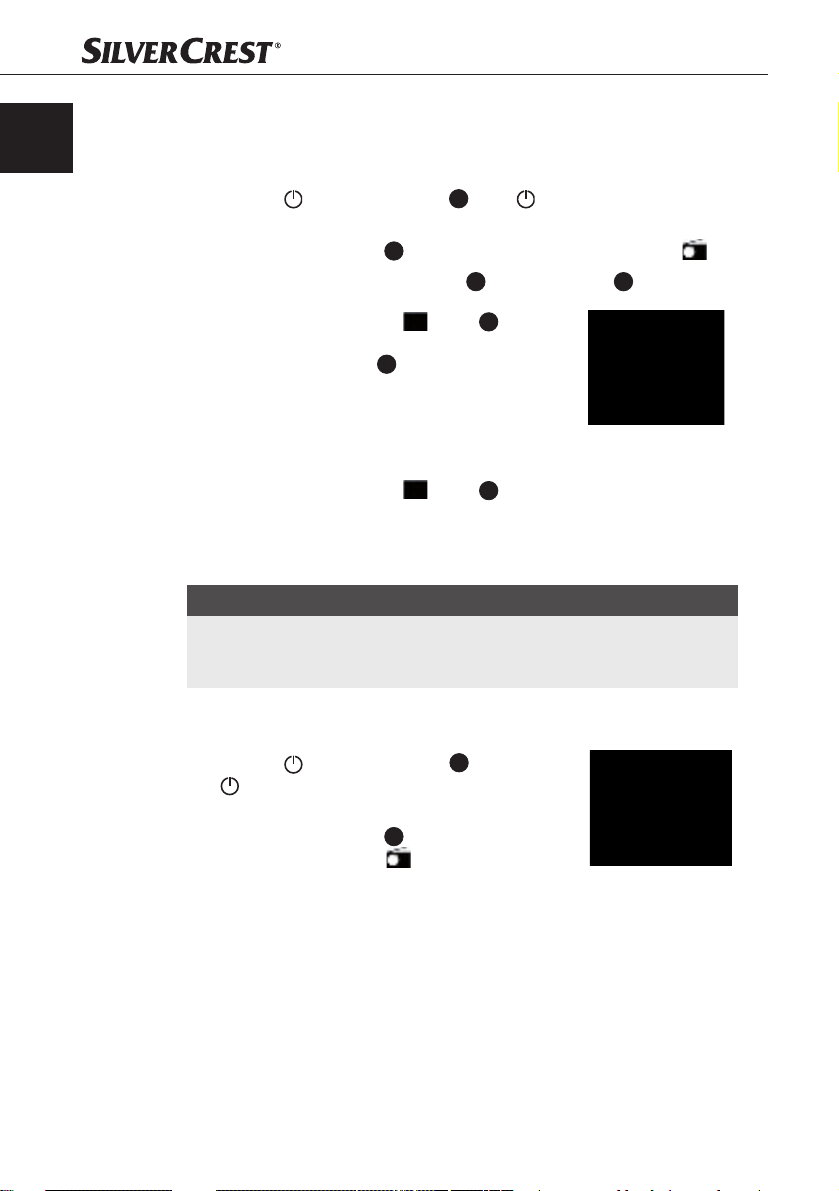
Switching on the radio
Press the ¡ /ALARM OFF button 20 or the
button on the remote control to switch the
device on.
Press the FUNC. button ¡
select the radio function. In the display
appears the symbol
tion frequency of the set station.
4
.
12
several times to
and the current recep-
24
must be completely un-
4
GB
IE
Manual station selection
Press the ►►I button ¡
desired station gradually with each button press.
Automatic station search
Press and hold down the ►►I button ¡
seconds. The device automatically searches for the nearest station with
sufficient reception quality.
NOTICE
If the reception quality is especially high, in the display ►
stereo symbol .
KH 2600
11
or I◄◄ button 13 briefly to set the frequency of the
11
or I◄◄ button 13 for at least two
4
appears the
15
Page 18
Handling and operation
GB
IE
Saving stations manually
The device has 20 memory slots available for station frequencies. To save a
station frequency proceed as follows:
Press the ¡
to switch the device on.
Press the FUNC. button ¡
Select a station with the ►►I button ¡
Press the MEMORY/TIME ¡
MEM button on the remote control. "MEMORY"
appears in the display
Press the A ¡ LARM1/ALARM2 button or the
MEM-/MEM+ button on the remote contr
to select the desired memory slot between 01
and 20.
Press the MEMORY/TIME ¡
MEM button on the remote control again to
save the reception frequency of the set station
to the selected memory slot.
NOTICE
If no input is made within approx. 5 seconds after the MEMORY/TIME ►
button or the MEM button on the remote control is pressed the "MEMORY
01" indicator in the display goes out and the current station is not sav
/ALARM OFF button 20 or the button on the remote control
12
several times to select the radio function.
11
or the I◄◄ button 13.
button 17 or the
4
and "01" blinks.
ol
button 17 or the
ed.
Selecting a saved radio station
Press the ¡ /ALARM OFF button 20 or the
button on the remote control to switch the
device on.
Press the FUNC. button ¡
select the radio function.
Select with the A ¡ LARM1/ALARM2 buttons or
the MEM-/MEM+ buttons on the remote control
the desired memory slot for the saved station
between 01 and 20.
16
12
several times to
KH 2600
Page 19
Handling and operation
Playback music from an iPod/iPhone
With the station 5 you can use the device as a speaker for your iPod/iPhone.
If you insert the iPod/iPhone in the station it will, in addition, be automatically
charged.
The device is equipped with 5 adapters for the station thus even the most current
iPod/iPhone models will, in any case, fi t into the station. The adapters, provided
with numbers, are on the rear panel. In the table you will fi nd, itemized, the
adapter that is to be used for your model.
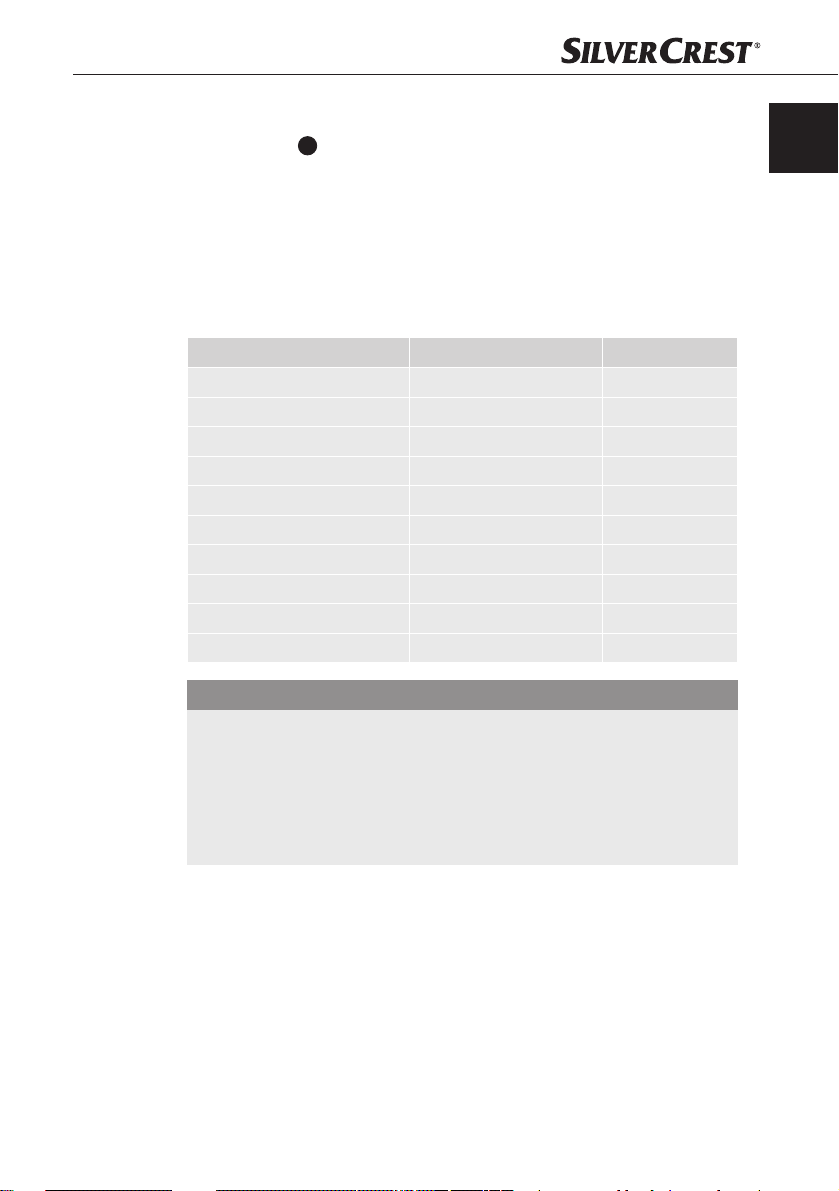
You can use the station for the following iPod and iPhone models:
Model Type Adapter
5G iPod (with video) 30GB 9
U2 iPod with video 30GB 9
iPod classic 80GB, 120GB 9
iPod touch 8GB & 16GB 14
iPod touch 2G 8GB, 16GB, & 32GB 14
iPod touch (Fall 2009) 16GB, 32GB, & 64GB 14
iPhone 3G 8GB & 16GB 15
iPhone 3GS 16GB & 32GB 15
iPod nano (4th generation) 8GB & 16GB 17
iPod nano (5th generation) 8GB & 16GB 18
GB
IE
KH 2600
IMPORTANT
Damaging of the device or the iPods/iPhones!
Inserting the iP
device and/or the iPods/iPhones.
Place the iPod/iPhone in the station only with the proper adapter. ►
In the event that the proper adapter has not been provided get in touch ►
with the Service-Hotline (see chapter Service
ods/iPhones without an adapter can result in damage to the
).
17
Page 20

Handling and operation
GB
IE
Inserting / removing the adapter in / from the station
Select from the table the required adapter and place it in the station dock as
follows:
Lay the front edge of the ¡
adapter on the front edge of
the dock.
Press the r
wards until you hear a light
"click".
To remove the adapter from the dock proceed as follows:
Grip with the thumbnail in the groove and lift the adapter out of the dock. ¡
ear edge down- ¡
Station
Playback of music
Insert your iPod and/or iPhone into the station ¡
12
Press the FUNC. button ¡
In the display
Title skip and fast forward / backward
Press the ►►Ibutton ¡
beginning of the next title.
Press the I◄◄ button ¡
beginning of the current title. Press the I◄◄ button
to the beginning of the previous title.
Hold down the ►►I button ¡
ward.
Press the MEMORY/TIME ¡
control to stop playback.
4
appears the symbol and the music playback can begin.
several times to select the iPod/iPhone function.
11
on the device or on the remote control to skip to the
13
on the device or on the remote control to skip to the
11
or I◄◄ button 13 for fast forward / back-
button 17 or the button on the remote
5
.
13
a second time to skip
Groove
Adapter
Charging the iPod/iPhone
If your iPod/iPhone is inserted into the station it will charge automatically until the
battery is full.
NOTICE
The iPod/iPhone will not charge via the back-up battery. ►
18
KH 2600
Page 21

Handling and operation
Playback of external audio devices
Connect an external audio device, for example, an MP3 player to the ¡
3.5 mm jackplug socket AUX IN
Press the FUNC. button ¡
Start playback of the external audio device and set the volume. ¡
NOTICE
Follow the operating instructions for the external audio device. ►
12
22
on the rear panel of the device.
several times to select the AUX function.
Playback of nature sounds
Press the ¡ /ALARM OFF button 20 or the button on the remote control
to switch the device on.
12
Press the FUNC. button °
tion
.
Select with the ►►I button ¡
4 nature sounds:
Rain
Babbling brook
Seagulls
Rural life
several times to select the nature sounds func-
11
or the I◄◄ button 13 between the following
Mood lighting
Press the SNOOZE button ¡
The LEDs light up in the following sequence:
blue → red → red + blue → green → green + blue → red + green → all LEDs → etc.
Press the SNOOZE button ¡
this colour permanently.
Press the SNOOZE button ¡
8
on the device to switch on the mood lighting.
8
again when the desired colour lights up to set
8
once more to switch off the mood lighting.
GB
IE
KH 2600
NOTICE
Instead of the SNOOZE button ►
control can also be used.
The colour setting via the SNOOZE button ►
function has been activated.
8
the COLOUR button on the remote
8
will not work if the SNOOZE
19
Page 22

Handling and operation
GB
IE
Reading lamp
You can use the device as a reading lamp.
Press the ¡
lamp on and off .
Press the ¡
light intensity (00 to 20) are shown in the display 4.
NOTICE
If you have set the light intensity to 00 you can, by all means, set a higher ►
value, the lamp remains, however, switched off and must be switched back
on via the
The light intensity that you have selected will also be saved automatically ►
as the light intensity for the wake function.
Replacing the halogen lamp
The halogen lamp 2 must be replaced if it is defective or the light intensity
decreases.
DANGER
Risk of fatal electrocution!
Pull the plug from the mains sock
NOTICE
The halogen lamp ►
type: E27 42 W.
button 19 on the device or on the remote control to switch the
/ button to set the brightness. The symbol and the
button 19 on the device or on the remote control.
2
must only be replaced with one of the same lamp
et before you change the halogen lamp ►
2
.
20
Turn the lamp housing ¡
tion of the arrow and lift it upwards.
Unscrew the defective halogen lamp ¡
from the lamp socket.
Scre
w a new 42 W halogen lamp into ¡
the lamp socket.
Place the lamp housing ¡
from above and turn it in the opposite
direction to the arrow to attach.
in the direc-
carefully
KH 2600
Page 23

Handling and operation
Alarm Function
When setting the wake time you confi gure the light intensity, the wake sound
and the volume. In the 30 minutes before the set wake time the light intensity
increases slowly to the selected level. When the set wake time is reached the
sound level increases, within 90 seconds, slowly to the selected volume.
Programming alarm wake times
The device has two alarms available. All settings for both alarms can be carried
out independently from each other. You can choose whether, at the programmed
time, an alarm tone or a variety of nature sounds should be played, whether
the radio should sound out or music from an iPod/iPhone or an external audio
device should be played.
Prerequisite: The device is in standby mode.
Press the ALARM1/DOWN button ¡
ALARM2/UP button
AL1/AL2 button on the remote control. The hour
indicator in the display
Set with the ►►I button ¡
the hour. With each button press the time changes
by one hour. Holding down the respective button
for more than two seconds starts the speed setting.
Press the ALARM1/DOWN button ¡
ALARM2/UP button
AL1/AL2 button on the remote control. The
minute indicator in the display
Set with the ►►I button ¡
13
the minutes. With each button press the time
changes by one minute. Holding down the respective button for more than two seconds starts
the speed setting.
Press the ALARM1/DOWN button ¡
device or the AL1/AL2 button on the remote control again to confi rm the
setting.
16
on the device or the
4
blinks.
11
or the I◄◄ button 13
16
on the device or the
11
or the I◄◄ button
18
/
18
/
4
blinks.
18
/ALARM2/UP button 16 on the
GB
IE
KH 2600
21
Page 24

Handling and operation
GB
IE
Setting the wake tone
Press the ►►I button ¡
repeatedly to select a wake tone:
→ → → → → → →
delete. (For an explanation of the symbols see
chapter Display.)
Press the ¡
wake-up light function.
NOTICE
Set the volume that you want to be woken with as described in the chapter ►
Setting the volume.
Set the light intensity that y
chapter Reading lamp.
The w
tone. The light intensity increases in the 30 minutes before the set wake
time and the
To be woken with the wake-up light only the volume must be set to 00. ►
Press the ALARM1/DOWN button ¡
device or the AL1/AL2 button on the remote control again to confi rm the
setting or wait approx. 7 seconds and the alarm will be confi rmed automatically.
The symbol for the selected wake tone blinks in the display and the alarm goes
off via the speaker with the arrival of the wake time.
button to activate, in addition, the
ake-up light function can only be activated together with a wake ►
11
or the I◄◄ button 13
ou want to be woken with as described in the ►
symbol blinks in the display 4.
18
/ALARM2/UP button 16 on the
22
NOTICE
If you want to use music from your iPod/iPhone as the wake tone select a ►
title on the iPod/iPhone (or an album and/or playback list) that is to be
used as a wak
time arrives.
e tone. Your choice will be played back when the set wake
KH 2600
Page 25

Handling and operation
Switching the alarm off
Snooze function ("SNOOZE" function)
Whilst the alarm is sounding press the SNOOZE ¡
button
In the display
After 9 minutes the alarm sounds again.
(In the diagram on the right both alarm 1 and alarm 2
are programmed. The alarm 2 goes off and the symbol
blinks.)
Switching the alarm off
When the programmed time is reached the alarm continues to sound until it is
switched off .
Press the ¡
to switch the alarm off .
Press the ¡
Fast switch on/off of t
Prerequisite: The device is in standby mode.
Press the ALARM1/DOWN button ¡
device or the AL1/AL 2 button on the remote control continually until the
alarm symbol / in the display appears/disappears.
to temporarily switch off the alarm.
8
4
appears the notice .
/ALARM OFF button 20 or the button on the remote control
button if you have activated the wake-up light function.
NOTICE
The alarm goes off again within 24 hours. ►
he alarm
18
/ALARM2/UP button 16 on the
GB
IE
KH 2600
NOTICE
The last selected alarm settings remain saved. ►
23
Page 26

Handling and operation
GB
IE
Deleting wake times
4
blinks.
18
18
Press the ALARM1/DOWN button ¡
device or the AL1/AL 2 button on the remote control three times until the
alarm symbol in the display
11
Press the ►►I button ¡
appear in the display 4.
Press the ALARM1/DOWN button ¡
device or the AL1/AL2 button on the remote control again or wait approx.
10 seconds. There are no more wake times programmed.
or the I◄◄ button 13 until no more wake tones
Automatic Switch-off ("SLEEP" function)
With the sleep function you can listen to your favourite music or your favourite
station whilst falling asleep. The device switches itself off after a time between
10 and 90 minutes.
Prerequisite: The device is set to either the radio, AUX IN or iPod/iPhone
function.
Press the SLEEP button ¡
and the notice
Press the SLEEP button ¡
10 minutes with each button press.
Setting options: 90, 80, 70, 60, 50, 40, 30, 20 or 10 minutes. After fi ve
seconds the selected setting is saved.
Press the SLEEP button ¡
To end the sleep function before it is automatically ended press the ¡
ALARM OFF button
14
. In the display 4 appears the symbol
.
14
again to reduce the time in increments of
14
again to switch off the "Sleep" function.
20
or the button on the remote control.
/ALARM2/UP button 16 on the
/ALARM2/UP button 16 on the
/
24
KH 2600
Page 27

Cleaning/Storage/Disposal
Cleaning
Safety instructions
DANGER
Risk of fatal electrocution!
Remo
ve the plug from the mains power socket before cleaning. ►
IMPORTANT
Damage to the device!
Make sur
in order to avoid irreparable damage to it.
e when you are cleaning the device that no moisture gets inside ►
Cleaning the housing
Clean the surfaces of the device with a soft, dry cloth. ■
Storage/Disposal
Storage
If you do not intend to use the device for an extended period of time disconnect
it from the power supply, remove the batteries and store it in a clean, dry location
that is not subjected to direct sunlight.
GB
IE
Disposal of the device
Do not dispose of the device in your normal domestic waste.
This product is subject to the European directive 2002/96/ECWEEE (Waste Electrical and Electronic Equipment).
Dispose of the device through an approved disposal centre or at your community
waste facility. Observe the currently applicable regulations. In case of doubt,
please contact your waste disposal centre.
Disposing of the batteries
Do not dispose of the batteries with household waste. Every consumer is legally
obligated to hand in batteries at a collection centre in his/her community/district
or a dealer. This obligation is intended to ensure that batteries are disposed of in
an environmentally friendly manner. Hand batteries in only when they are fully
discharged.
KH 2600
25
Page 28

Troubleshooting
GB
IE
Troubleshooting
In this chapter you will receive important information for malfunction localization
and remedies. Observe the instructions in order to avoid danger and damage.
Safety instructions
WARNING
Observe the following safety information to avoid danger and property
damage:
Repairs to electronic devices may only be carried out by specialists who ►
have been trained by the manufacturer. Considerable danger to the consumer and damage to the device can occur as a r
Malfunction causes and remedies
The following table will help with localizing and remedying minor malfunctions:
Defect Possible cause Solution
Insert the plug into the
mains power socket.
Check the circuit fuse.
Increase the volume with the
button
remote control.
Remove the headphones plug from
the connection socket
Start playback of the audio device.
Tune the station correctly with the ►►I
button
Try to improve reception by moving
the wire antenna
The display is
showing nothing.
No sound.
Noisy radio reception
The plug is not inserted.
Mains power socket is not
supplying power.
The volume is set to
minimum.
Headphones are connected.
Playback of the audio device has not been started.
The radio station is not
properly tuned in.
Reception is too weak.
esult of incorrect repairs.
6
on the device or on the
21
.
11
or the I◄◄ button 13.
28
.
26
KH 2600
Page 29

Troubleshooting/Appendix
Defect Possible cause Solution
The alarm does not
go off .
iPod/iPhone does
not charge.
NOTICE
If you cannot solve the problem with the aforementioned methods, please ►
contact Customer Service.
The alarm time is incorrectly
programmed.
The alarm is not programmed.
The device is not in standby
mode.
The mains power plug is
not plugged in.
Check the programmed wake time.
Programme the alarm correctly.
Switch the device to the standby
mode before you go to sleep.
Insert the plug into the mains power
socket.
Appendix
Information regarding the EC conformity declaration
This device complies regarding conformance to the basic
requirements and other relevent regulations of the European
directive for electromagnetic compatibility 2004/108/EC,
the low voltage directive 2006/95/EC as well as the Ecodesign directive 2009/125/EC (Supplement 1275/2008
Appendix II, Nr.1)
The complete original declaration of conformity can be
obtained from the importer.
GB
IE
KH 2600
27
Page 30

Appendix
GB
IE
Technical data
Operational voltage 220-240 V / 50 Hz
Backup batteries
Remote control Battery: 3 V, CR 2032
Power consumption
Operation with light 50 W
Operation without light 10 W
Standby approx. 1.7 W
Speaker power output: 2 x 1 W (with 10 % harmonic distortion)
Headphone Output Voltage max. 120 mV
Radio frequency range (VHF) 87.5 - 108 MHz
Lamp E27 max. 42 W
Operating temperature +10 - +35 °C
Humidity (no condensation) 5 - 90 %
Dimensions (H x W x D) 29 x 17.5 x 19.5 cm
Weight approx. 1650 g
2 x 1.5 V Typ “AA”
(supplied)
28
Protection class
II
KH 2600
Page 31

Appendix
Warranty
You receive a 3-year warranty for this device as of the purchase date. This device
has been manufactured with care and meticulously examined before delivery.
Please retain your receipt as proof of purchase. In the case of a warranty claim,
please get in touch by telephone with our service department. Only in this way
can a post-free dispatch for your goods be assured.
NOTICE
This product is for private use only and is not intended for commercial applications. In the event of misuse and improper handling, use of force and interference
not carried out by our authorized service branch, the warranty will become void..
Your statutory rights are not restricted in any way by this warranty. The warranty
period is not extended by repairs eff ected under warranty. This applies also to
replaced and repaired parts.
Damages or defects discovered after purchase are to be reported directly after
unpacking, at the latest two days after the purchase date.
Repairs carried out after the lapse of the warranty period are subject to charge.
Service
DES UK LTD
Tel.: 0871 5000 700
e-mail: support.uk@kompernass.com
Kompernass Service Ireland
Tel: 1850 930 412
Standard call rates apply. Mobile operators may vary.
e-mail: support.ie@kompernass.com
The warranty adjustment is valid only for material or manufacturing defects ►
not, however, for transport damage, wear and tear or for damage to breakable parts, i.e. switches or r
(£ 0.10 / minute)
(0,082 EUR/Min.)
echargeable batteries.
GB
IE
Importer
KH 2600
KOMPERNASS GMBH
BURGSTRASSE 21
44867 BOCHUM, GERMANY
www.kompernass.com
29
Page 32

Page 33

Indholdsfortegnelse
Introduktion . . . . . . . . . . . . .32
Informationer til denne
betjeningsvejledning . . . . . . . . . . . . 32
Ophavsret . . . . . . . . . . . . . . . . . . . .32
Anvendelsesområde . . . . . . . . . . . . 32
Advarselsinfo . . . . . . . . . . . . . . . . .33
Sikkerhed . . . . . . . . . . . . . . .34
Grundlæggende
sikkerhedsanvisninger . . . . . . . . . . .34
Fare på grund af elektrisk strøm . . . 35
Fare for høreskader . . . . . . . . . . . . 35
Anvendelse af batterier . . . . . . . . .36
Almindelige beskrivelse . . .37
Oversigt over fjernbetjeningen . . . .37
Fjernbetjening . . . . . . . . . . . . . . . . . 38
Display . . . . . . . . . . . . . . . . . . . . . .39
Opstilling og tilslutning . . . .40
Sikkerhedsanvisninger . . . . . . . . . . 40
Leverede dele og transporteftersyn 40
Udpakning . . . . . . . . . . . . . . . . . . .40
Bortskaff else af emballagen . . . . . . 41
Krav til opstillingsstedet . . . . . . . . .41
Eltilslutning . . . . . . . . . . . . . . . . . . .42
Indsætning af backup-batterier . . .42
Aktivering af batteri til
fjernbetjeningen . . . . . . . . . . . . . . .43
Skift af batteri til fjernbetjeningen .43
Tilslutning af strømforsyning . . . . . .43
FM-ledningsantenne . . . . . . . . . . . 43
Tilslutning af hovedtelefon . . . . . . . 43
Betjening og funktion . . . . . .44
Tænd/sluk . . . . . . . . . . . . . . . . . . . . 44
Indstilling af klokkeslæt . . . . . . . . . .44
Indstilling af lydstyrke . . . . . . . . . . .45
Radiofunktion . . . . . . . . . . . . . . . . .45
Afspilning af musik fra iPod/iPhone 47
Afspilning fra eksterne
audioapparater . . . . . . . . . . . . . . .49
Afspilning af naturlyde . . . . . . . . .49
Stemningslys . . . . . . . . . . . . . . . . . . 49
Læselampe . . . . . . . . . . . . . . . . . . .50
Alarmfunktion . . . . . . . . . . . . . . . .51
Rengøring . . . . . . . . . . . . . . .55
Sikkerhedsanvisninger . . . . . . . . . . 55
Rengøring af kabinettet . . . . . . . . .55
Opbevaring/Bortskaff else .55
Opbevaring . . . . . . . . . . . . . . . . . . 55
Bortskaff else af clockradioen . . . . .55
Bortskaff else af batterier . . . . . . . . .55
Afhjælpning af fejl . . . . . . . .56
Sikkerhedsanvisninger . . . . . . . . . . 56
Fejlårsager og -afhjælpning . . . . . .56
Tillæg . . . . . . . . . . . . . . . . . . .57
Info til
EF-overensstemmelseserklæringen .57
Tekniske data . . . . . . . . . . . . . . . . .58
Garanti . . . . . . . . . . . . . . . . . . . . . .59
Service . . . . . . . . . . . . . . . . . . . . . . 59
Importør . . . . . . . . . . . . . . . . . . . . . 59
DK
KH 2600
31
Page 34

DK
Introduktion
Introduktion
Informationer til denne betjeningsvejledning
Denne betjeningsvejledning er del af clockradioen KH 2600 og giver vigtige
informationer om anvendelsesområdet, sikkerheden, tilslutningen samt betjeningen
af den.
Betjeningsvejledningen skal altid opbevares i nærheden af clockradioen. Den
skal læses og anvendes af de personer, som skal installere, betjene og reparere
fejl på clockradioen.
Opbevar denne betjeningsvejledning, og lad den følge med clockradioen, hvis
du giver den videre til andre.
Ophavsret
Denne dokumentation er ophavsretligt beskyttet.
Enhver form for kopiering eller eftertryk - også i uddrag - samt gengivelse af
billederne - også i ændret tilstand - er kun tilladt med skriftlig godkendelse fra
producenten.
iPhone, iPod, iPod classic, iPod nano, iPod shuffl e og iPod touch er mærkenavne
for Apple Inc., som er registreret i USA og andre lande.
Anvendelsesområde
Denne clockradio er kun beregnet til modtagelse af FM-radioprogrammer, til
tilslutning af eksterne audioapparater (f.eks. MP3-player) og iPod/iPhone samt
til alarmgivning med alarmtone, naturlyde, radio eller musik fra iPod/iPhone i
indendørs rum. Al anden anvendelse betragtes som værende uden for anvendelsesområdet.
32
ADVARSEL
Fare på grund af anvendelse uden for anvendelsesområdet!
Der kan være farer forbundet med clockradioen, hvis den anvendes til områder,
den ikke er beregnet til.
Brug kun clockradioen til anvendelsesområdet, den er beregnet til. ►
Følg fremgangsmåden, som er beskrevet i denne betjeningsvejledning. ►
Krav af enhver form på grund af skader ved anvendelse uden for anvendelsesomr
ådet, fork
eller anvendelse af ikke-tilladte reservedele er udelukkede.
Ejeren bærer alene risikoen.
ert udførte reparationer, ændringer, der er foretaget uden tilladelse
KH 2600
Page 35

Introduktion
Advarselsinfo
I denne betjeningsvejledning anvendes følgende advarselsinformationer:
FARE!
Advarselsinfo på dette faretrin markerer en truende farlig
situation.
Hvis den farlige situation ikke undgås, k
kvæstelser.
Overhold anvisningerne i denne advarselsinfo, så livsfarlige eller alvorlige ►
kvæstelser af personer undgås.
ADVARSEL
Advarselsinfo på dette faretrin markerer en mulig farlig
situation.
Hvis den farlige situation ikke undgås, kan den føre til personskader.
Følg anvisningerne i denne advarselsinfo for at undgå, at personer kommer ►
til skade.
OBS
Advarselsinfo på dette faretrin markerer en mulig materiel
sk
ade.
Hvis den farlige situation ikke undgås, kan det føre til materielle skader.
Følg anvisningerne i denne advarselsinfo for at undgå materielle skader. ►
BEMÆRK
En bemærk-info markerer ekstra informationer, som gør brugen af clock
radioen lettere.
an den medføre alvorlige eller livsfarlige
DK
- ►
KH 2600
33
Page 36

DK
Sikkerhed
I dette kapitel får du vigtige sikkerhedsanvisninger til brug af clockradioen.
Denne clockradio overholder de foreskrevne sikkerhedsbestemmelser. Forkert
anvendelse kan føre til personskader og materielle skader.
Grundlæggende sikkerhedsanvisninger
Overhold de følgende sikkerhedsanvisninger for sikker brug af clockradioen:
Kontrollér clockradioen for udvendige, synlige skader før brug. Tænd ikke for ■
clockradioen, hvis den er beskadiget eller har været faldet ned.
Brug aldrig clockradioen, h
Hvis der opstår skader på ledninger eller tilslutninger, skal de udskiftes af en ■
autoriseret reparatør eller kundeservice.
P
soner, som ikke er i stand til at betjene clockradioen sikkert på grund af ■
er
deres fysiske, psykiske eller motoriske evner, må ikke bruge clockradioen
uden opsyn og anvisninger fr
Lad kun børn bruge clockradioen under opsyn. ■
Lad kun clockradioen reparere af autoriserede specialforretninger eller kunde- ■
service. Ved forkert udførte reparationer kan der opstå fare for brugeren.
Endvider
Reparation af clockradioen i løbet af garantiperioden må kun foretages af ■
en kundeservice, som er autoriseret af producenten, da der ellers ikke kan
stilles garantikr
Defekte komponenter må kun udskiftes med originale reservedele. Sikker- ■
hedskravene kan kun garanteres, hvis disse dele anvendes.
Beskyt clockradioen mod fugt og indtrængende v
radioen ned i vand, og stil den ikke i nærheden af vand, og stil heller ikke
genstande, der er fyldt med vand (f.ek
ves alle garantikrav.
e ophæ
av ved efterfølgende skader.
vis lampehuset er i stykker eller mangler. ■
a en ansvarlige person.
s. en vase) på den.
Sikkerhed
æsker. Læg aldrig clock- ■
34
KH 2600
Page 37

Sikkerhed
Clockradioen må ikke anvendes i nærheden af åben ild (f.eks. stearinlys). ■
Undgå direkte påvirkning fra solens stråler. ■
Brug ikke clockradioen ved en rumtemperatur under 10° C eller over 35° C. ■
Hvis du har haft en alvorlig depression eller lider af depression i øjeblikket, ■
skal du konsultere din læge, før du bruger clockradioen.
T
r
æk altid ledningen ud af stikket ved at holde på stikkontakten og ikke ved ■
at trække i ledningen.
Tr
æk altid stikket ud af stikkontakten, hvis der opstår fejl samt ved tordenvejr. ■
Fare på grund af elektrisk strøm
FARE!
Livsfare på grund af elektrisk strøm!
Ved k
ontakt med ledninger eller komponenter, der står under
spænding, er der livsfare!
Overhold følgende sikkerhedsanvisninger for at undgå fare på grund af
elektrisk strøm:
Brug ikke clockradioen, hvis strømstikket eller ledningen er beskadiget. ►
Åbn aldrig clockradioens hus. Hvis spændingsførende tilslutninger berøres, ►
og den elektriske og mekaniske opbygning ændres, er der fare for strømstød.
DK
Fare for høreskader
ADVARSEL
KH 2600
Fare på grund af ekstrem lydstyrke!
Hvis du lytter til høj musik med høretelefoner på, kan du få høreskader.
Undgå ekstremt høj lydstyrke, hvis du hører musik i længere tid ►
med høretelefoner på.
35
Page 38

DK
Anvendelse af batterier
ADVARSEL
Fare på grund af forkert anvendelse!
Overhold følgende sikkerhedsanvisninger vedrørende sikker brug af batterier:
Smid aldrig batterier ind i ild. ►
Kortslut aldrig batterierne. ►
Prøv ikke på at genoplade batterierne. ►
Kontrollér regelmæssigt batterierne. Hvis der løber batterisyre ud, kan det ►
forårsage vedvarende skader på clockradioen. Vær særligt opmærksom
ved omgang med besk
Bær beskyttelseshandsker.
Opbevar batterierne, så de er utilgængelige for børn. Søg omgående ►
læge, hvis batteriet puttes i munden og synkes.
Tag batterierne ud af clockr
bruge apparaterne i længere tid.
Sikkerhed
adigede eller udløbne batterier. Ætsningsfare!
adioen og fjernbetjeningen, hvis du ikke skal ►
36
KH 2600
Page 39

Almindelige beskrivelse
Almindelige beskrivelse
Oversigt over fjernbetjeningen
Se billederne på klap-ud-siden.
Lampehus
2
Halogenlampe (42 W, E27)
3
Stemningslys (3 LEDer: grøn, blå og rød)
4
Display
5
Station til iPod/iPhone
6
-knap: Skruer op for lydstyrken
7
-knap: Skruer ned for lydstyrken
8
SNOOZE-knap: Aktivering af slumrefunktion/indstiller stemningslysets farve
9
-knap: Lav lysintensitet
10
-knap: Højere lysintensitet
11
►►I -knap: spring frem til næste titel/hurtigt spring frem (iPod/iPhone)/kanal-
søgning (radio)/valg af naturlyde 1-4
12
FUNC.: Valg af funktion
I◄◄ -knap: spring tilbage til titel/hurtigt spring tilbage (iPod/iPhone)/kanalsøgning
13
(radio)/valg af naturlyde 1-4
SLEEP-knap: Automatisk indstilling af afbrydelse/skift mellem 12h/24h-display
14
►II -knap: Start/standsning af afspilningen
15
ALARM2/UP-knap: Programmering af alarm 2/valg af hukommelsesplads op
16
MEMORY/TIME-knap: Lagring af kanaler (radio)/indstilling af tiden i standby-
17
modus/standsning af afspilning fra iPod/iPhone
ALARM1/DOWN-knap: Programmering af alarm 1/valg af hukommelsesplads ned
18
-knap: Tænd/sluk for lampen/aktivering af wake-up light-funktionen under
19
programmering af vækketiden
/ALARM OFF-knap: Tænd/sluk for clockradioen /sluk alarm (alarm)
20
21
Tilslutningsstik til hovedtelefon
22
AUX IN: Audioindgang til tilslutning af eksternt apparat
Strømtilslutningsledning
23
24
Ledningsantenne til FM-modtagelse
25
Temperatursensor
26
Batterirum
DK
KH 2600
37
Page 40

DK
Fjernbetjening
Alle clockradioens funktioner kan udføres med fjernbetjeningen.
15
1
2
3
4
5
6
Almindelige beskrivelse
1
: Standby
2 ►►I : Hurtigt fremløb
3 I◄◄ : Hurtigt tilbageløb
14
13
12
11
10
9
8
7
Lagringskontrol:
MEM: Lagring af kanaler
4
MEM +: Valg af hukommelsesplads
MEM -: Valg af hukommelsesplads
Alarmkontrol:
Alarm ON/OFF
AL1: Programmering af alarm1/
5
6 TIME: Indstilling af tid
7 SNOOZE: Aktivering af slumrefunktion
8 SLEEP: Automatisk deaktivering
9
10
11
12
13 ►II : Play/Pause
14 FUNC: Valg af funktion
15 COLOR: Valg af stemningslysets farve
valg af hukommelsesplads ned
AL2: Programmering af alarm2/
valg af hukommelsesplads op
Lampekontrol:
: Lampe ON/OFF
: Lysere
: Mørkere
:Skruer ned for lydstyrken
: Stop
:Skruer op for lydstyrken
38
KH 2600
Page 41

Almindelige beskrivelse
Display
Symbolerne på displayet har følgende betydning:
Symbol Betydning
Alarm 1 aktiveret
Alarm 2 aktiveret
Alarmtone
Radiofunktion
Lampe/wake-up light-funktion
Naturlyd 1
Naturlyd 2
Naturlyd 3
Naturlyd 4
Stereomodtagelse
iPod/iPhone-funktion
Automatisk afbrydelse aktiveret
Eksternt audioapparat
FM-modtagelse
DK
KH 2600
Temperaturvisning
Visning af hukommelsesplads
Visning lysintensitet
Visning lydstyrkeniveau
Slumrefunktion aktiveret
39
Page 42

Opstilling og tilslutning
Sikkerhedsanvisninger
Opstilling og tilslutning
DK
ADVARSEL
Ved opstart af clockradioen er der fare for personskader og
materielle skader!
Overhold følgende sikkerhedsanvisninger for at undgå farerne:
Emballeringsmaterialer må ikke bruges til leg. Der er fare for kvælning. ►
Overhold info om kravene til opstillingsstedet samt om eltilslutning af ►
clockradioen, så personskader og materielle skader undgås.
Leverede dele og transporteftersyn
Clockradioen leveres standardmæssigt med følgende komponenter:
Clockradio ▯
Fjernbetjening med batteri (CR 2032, 3V) ▯
2x batterier type AA 1,5 V ▯
5 x adaptere til iPod/iPhone ▯
Betjeningsvejledning ▯
BEMÆRK
Kontrollér, at alle dele er leveret med, og at de ikke har synlige skader. ►
Hvis der mangler dele, eller hvis der fi ndes skader på grund af mangelfuld ►
emballage eller på grund af transporten, bedes du henvende dig til vores
service-hotline (se k
apitel Service).
Udpakning
40
Tag alle delene og betjeningsvejledningen ud af kassen. ¡
Fjern alt emballeringsmaterialet. ¡
KH 2600
Page 43

Opstilling og tilslutning
Bortskaff else af emballagen
Emballagen beskytter clockradioen mod transportskader. Emballagematerialerne
er udvalgt efter miljøforligelige og bortskaff elsestekniske synspunkter og kan
derfor genbruges.
Afl evering af emballagen til materialerecirkulation sparer råstoff er og reducerer
aff aldsmængden. Bortskaf emballeringsmaterialerne, som ikke skal bruges mere,
i henhold til de gældende lokale forskrifter.
BEMÆRK
Opbevar den originale emballage i løbet af clockradioens garantiperiode, ►
hvis det er muligt, så du kan pakke clockradioen ordentligt ind, hvis du skal
gøre brug af gar
Krav til opstillingsstedet
Følgende forudsætninger skal være opfyldt for sikker og fejlfri anvendelse af
clockradioen:
Stil clockradioen på et fast, fl adt og vandret underlag. ■
Hold et område fri på mindst 40 cm over og mindst 15 cm omkring clock- ■
radioen.
Stil ikke clockr
eller i nærheden af brændbart materiale.
Beskyt clockradioen mod vibr
Møblers overfl ader indeholder muligvis bestanddele, som kan angribe og ■
opbløde clockradioens gummifødder. Læg i så fald et underlag under clockr
adioens gummifødder
Der skal være let adgang til stikkontakten, så strømstikket kan trækkes ud i en ■
nødssitaution.
antien.
adioen i støvede, varme, våde eller meget fugtige omgivelser ■
.
DK
ationer. ■
KH 2600
41
Page 44

DK
Opstilling og tilslutning
Eltilslutning
Sammenlign tilslutningsdataene (spænding og frekvens) på typeskiltet med ■
strømnettet, før clockradioen sluttes til. Disse data skal stemme overens, så
clockradioen ikke beskadiges.
Kontrollér, at clockradioens tilslutningsledning er ubeskadiget og ikke lægges ■
over varme fl ader og/eller skarpe kanter.
Sørg for
, at tilslutningsledningen ikke strammes eller knækkes. ■
Lad ikke tilslutningsledningen hænge ud over hjørner (snubletrådseff ekt). ■
Indsætning af backup-batterier
Ved indsætning af batterier undgår du, at det programmerede klokkeslæt og
vækketiden går tabt ved en strømafbrydelse. Batterierne bevirker, at det interne
ur går videre ved en strømafbrydelse. Når strømmen vender tilbage, vises den
rigtige tid automatisk på displayet
BEMÆRK
Backup-batterierne gemmer kun klokkeslættet og den programmerede ►
vækketid. Alle andre funktioner er kun mulige, når strømmen er sluttet til.
Clockradioen k
Skub afdækningen til batterirummet ¡
pilens retning, og tag afdækningen af.
Sæt 2 batterier af typen AA (medfølger ved køb) ind i batterirummet. Sørg ¡
for, at batterierne vender som vist i batterirummet.
Luk batterirummet v
den går i hak.
an også anvendes uden batterier. ►
ed at sætte afdækningen på og skubbe den tilbage, til ¡
4
.
26
på undersiden af clockradioen i
42
KH 2600
Page 45

Opstilling og tilslutning
Aktivering af batteri til fjernbetjeningen
Batteriet til fjernbetjeningen er allerede sat i ved udleveringen.
Aktivér batteriet ved at fjerne isoleringsstrimlen. ¡
Skift af batteri til fjernbetjeningen
Tryk kærven (A) til højre med en fi ngernegl, og tag ¡
samtidig batterirummet ud.
Sæt et 3 V batteri af typen CR 2032 i batterirummet. ¡
Siden med markeringen "+" skal vende opad.
Skub batterirummet helt ind i fjernbetjeningen igen. ¡
Tilslutning af strømforsyning
Stil clockradioen med en afstand på ca. 40 til 50 cm til dit hoved (f.eks. på ¡
natbordet).
Sæt strømstikket i en stikkontakt. På displayet ¡
(kl. 0:00) og temperaturen.
4
vises klokkeslættet
DK
FM-ledningsantenne
Vikl ledningsantennen ¡
Tilslutning af hovedtelefon
Slut en hovedtelefon (med 3,5 mm jackstik) ved behov til tilslutningsstikket ¡
på bagsiden af clockradioen. Højttalerne slukkes så automatisk.
KH 2600
24
til FM-modtagelsen helt af.
21
43
Page 46

Betjening og funktion
I dette kapitel får du vigtige informationer om clockradioens betjening og funktion.
Betjening og funktion
DK
Tænd/sluk
Tryk på ¡ /ALARM OFF-knappen 20 eller -knappen på fjernbetjeningen
for at tænde for clockradioen. Displayet
Tryk på ¡
for at slukke for clockradioen. I displayet
og en programmeret alarm (standbymodus).
BEMÆRK
► /ALARM OFF-knappen 20 afbryder ikke clockradioen fuldstændigt fra
strømnettet. For at afbryde clockradioen
slutningsledningens stik tages ud af stikkontakten.
/ALARM OFF-knappen 20 eller -knappen på fjernbetjeningen
Indstilling af klokkeslæt
Forudsætning: Clockradioen er i standby-modus.
Tryk på MEMORY/TIME-knappen ¡
Timevisningen blinker i displyet
Tryk på SLEEP-knappen ¡
visningen af klokkeslættet.
Indstil timerne for det aktuelle klokkeslæt med ►►I -knappen ¡
13
-knappen
du holder knappen nede i mere end 2 sekunder, starter lynindstillingen.
Tryk på MEMORY/TIME-knappen ¡
gen. Minutvisningen i displayet 4 blinker.
Indstil minutterne for det aktuelle klokkeslæt med ►►I -knappen ¡
I◄◄ -knappen
Hvis du holder knappen nede i mere end 2 sekunder, starter lynindstillingen.
Tryk på MEMORY/TIME-knappen ¡
for at bekræfte tidsindtastningen, eller vent ca. 7 sekunder, hvorefter tidsangivelsen bekræftes automatisk.
. Hver gang du trykker på knappen, ændres tiden en time. Hvis
13
. Hver gang du trykker på knappen, ændres tiden et minut.
4
aktiveres.
4
vises klokkeslættet, temperaturen
23
helt fra strømnettet skal strømtil-
17
eller TIME-knappen på fjernbetjeningen.
4
.
14
i ca. 2 sekunder for at skifte mellem 12h/24h-
11
eller I◄◄
17
eller TIME-knappen på fjernbetjenin-
11
17
eller TIME-knappen på fjernbetjeningen
eller
44
BEMÆRK
Klokkeslættet nulstilles til kl. 0:00, hvis clockradioen afbrydes fra strøm- ►
forsyningen, og der ikke er sat batterier i, eller backup-batterierne er for
svage.
KH 2600
Page 47

Betjening og funktion
Indstilling af lydstyrke
Forudsætning: Clockradioen er tændt.
Tryk på ¡
på fjernbetjeningen for at indstille lydstyrken. Den indstillede lydstyrke vises
nederst til højre i displayet
BEMÆRK
Den indstillede lydstyrke gælder for alle funktioner. ►
Den valgte lydstyrke gemmes automatisk som lydstyrke for vækkefunktionen. ►
Radiofunktion
BEMÆRK
Ledningsantennen skal vikles helt af, for at radiomodtagelsen ►
Indstil antennen efter den bedste modtagelse, mens radioen er i gang.
Sådan tændes radioen
Tryk på ¡ /ALARM OFF-knappen 20 eller
-knappen på fjernbetjeningen for at tænde for
clockradioen.
Tryk fl ere gange på FUNC.-knappen ¡
at vælge funktionen radio. I displayet
vises symbolet
frekvens for den indstillede kanal.
-knappen 6 eller -knappen 7 på clockradioen eller
og den aktuelle modtage-
4
.
24
er god.
12
for
4
DK
Manuel indstilling af kanaler
Tryk kort på ►►I -knappen ¡
trinvist for den ønskede kanal med hvert tryk på knappen.
Automatisk søgning af kanaler
Tryk på ►►I -knappen ¡
to sekunder. Clockradioen leder automatisk efter den nærmeste kanal med
tilstrækkelig modtagekvalitet.
BEMÆRK
Hvis modtagekvaliteten er særligt god, vises stereosymbolet i ►
.
KH 2600
11
eller I◄◄ -knappen 13 for at indstille frekvensen
11
eller I◄◄ -knappen 13 og hold den nede i mindst
4
displayet
45
Page 48

DK
Manuel lagring af kanal
Clockradioen har 20 hukommelsespladser til rådighed til sendefrekvenser.
Gå frem på følgende måde for at gemme en sendefrekvens:
Tryk på ¡
for at tænde for clockradioen.
Tryk fl ere gange på FUNC.-knappen ¡
Vælg en kanal med ►►I -knappen ¡
/ALARM OFF-knappen 20 eller -knappen på fjernbetjeningen
Betjening og funktion
12
for at vælge funktionen radio.
11
eller I◄◄ -knappen 13.
Tryk på MEMORY/TIME ¡
MEM-knappen på fjernbetjeningen. "MEMORY"
vises i displayet
Tryk på ¡ ALARM1/ALARM2 -knappen eller
MEM-/MEM+ -knappen på fjernbetjeningen
for at vælge den ønsk
mellem 01 og 20.
Tryk på MEMORY/TIME ¡
MEM-knappen på fjernbetjeningen igen for at
gemme modtagefrekvensen for den indstillede
kanal på den valgte hukommelsesplads.
BEMÆRK
Hvis der ikke foretages nogen indtastning ca. 5 sekunder efter tryk på ►
MEMORY/TIME-knappen eller MEM-knappen på fjernbetjeningen, slukkes
"MEMORY 01" i display
4
og "01" blinker.
ede hukommelsesplads
Åbning af lagrede stationer
Tryk på ¡ /ALARM OFF-knappen 20 eller
-knappen på fjernbetjeningen for at tænde
for clockradioen.
Tryk fl ere gange på FUNC.-knappen ¡
vælge funktionen radio .
Vælg med ¡ ALARM1/ALARM2 -knapperne eller
MEM-/MEM+ -knapperne på fjernbetjeningen
den ønskede huk
kanal mellem 01 og 20.
ommelsesplads til den gemte
-17 knappen eller
-knappen 17 eller
et, og den aktuelle kanal gemmes ikke.
12
for at
46
KH 2600
Page 49

Betjening og funktion
Afspilning af musik fra iPod/iPhone
Med stationen 5 kan du bruge clockradioen som højttaler til din iPod/iPhone.
Hvis du sætter iPoden/iPhonen ind i stationen, oplades den endvidere automatisk.
Clockradioen er udstyret med 5 adaptere til stationen, så de almindeligste iPod/
iPhone-modeller passer ind i stationen. Adapterne er forsynet med numre på
bagsiden. I tabellen kan du fi nde en opstilling over, hvilken adapter, der skal
anvendes til modellen.
Du kan anvende stationen til følgende iPod- og iPhone-modeller:
Model Type Adapter
5G iPod (med video) 30 GB 9
U2 iPod med video 30 GB 9
iPod classic 80GB, 120GB 9
iPod touch 8GB & 16GB 14
iPod touch 2G 8GB, 16GB, & 32GB 14
iPod touch (2009) 16GB, 32GB, & 64GB 14
iPhone 3G 8GB & 16GB 15
iPhone 3GS 16GB & 32GB 15
iPod nano (4. generation) 8GB & 16GB 17
iPod nano (5. generation) 8GB & 16GB 18
DK
KH 2600
OBS
Clockradioen eller iPoden/iPhonen kan ødelægges!
Indsætning af iPoden/iPhonen uden adapter k
radioen og/eller iPoden/iPhonen.
Sæt kun iPoden/iPhonen ind i stationen med en adapter, der passer. ►
Hvis der ikke følger en egnet adapter med de leverede dele, bedes du ►
henvende dig til service-hotline (se kapitlet Service
an føre til skader på clock-
).
47
Page 50

DK
Betjening og funktion
Indsætning/udtagning af adapteren i/af stationen
Vælg den rigtige adapter fra tabellen, og sæt den ind i stationens fordybning på
følgende måde:
Sæt adapterens forreste kant ¡
på fordybningens forreste kant.
Tr
yk den bageste kant ned, ¡
indtil du hører et let "klik".
Gå frem på følgende måde for at tage adapteren ud af fordybningen:
Sæt tommelfi ngerneglen ind i åbningen, og løft adapteren ud af fordybningen. ¡
Afspilning af musik
Sæt din iPod eller iPhone ind i stationen ¡
Tryk fl ere gange på FUNC.-knappen ¡
I displayet
Overspringning af titler og hurtigt fremløb/tilbageløb
Tryk på ►►I-knappen ¡
springe til starten på den næste titel.
Tryk på I◄◄ -knappen ¡
springe til starten på den aktuelle titel. Tryk på I◄◄ -knappen
springe til starten på den foregående titel.
Hold ►►I -knappen ¡
frem og tilbage.
Tryk på MEMORY/TIME ¡
ningen for at stoppe afspilningen.
4
vises symbolet , og afspilningen af musikken begynder.
11
på clockradioen eller på fjernbetjeningen for at
13
på clockradioen eller på fjernbetjeningen for at
11
eller I◄◄ -knappen 13 nede for at springe hurtigt
-knappen 17 eller -knappen på fjernbetje-
Station
5
.
12
for at vælge funktionen iPod/iPhone.
Åbning
Adapter
13
igen for at
Opladning af iPod/iPhone
Når iPoden/iPhonen sættes ind i stationen, oplades den automatisk, til batteriet
er fuldt.
BEMÆRK
iPoden/iPhonen oplades ikke via backup-batteriet. ►
48
KH 2600
Page 51

Betjening og funktion
Afspilning fra eksterne audioapparater
Slut et eksternt audioapparat som f.eks. en MP3-player til 3,5 mm jackstikket ¡
AUX IN
Tryk fl ere gange på FUNC.-knappen ¡
Start afspilningen på det eksterne audioapparat, og indstil lydstyrken. ¡
BEMÆRK
Overhold betjeningsvejledningen til det eksterne audioapparat. ►
Afspilning af naturlyde
Tryk på ¡ /ALARM OFF-knappen 20 eller -knappen på fjernbetjeningen
for at tænde for clockradioen.
Tryk fl ere gange på FUNC.-knappen ¡
Vælg mellem følgende 4 naturlyde med ►►I -knappen ¡
pen
22
på bagsiden af clockradioen.
13
:
Regn
Rislende bæk
Måger
Landliv
12
12
for at vælge funktionen AUX .
for at vælge funktionen naturlyde .
11
eller I◄◄ -knap-
DK
Stemningslys
KH 2600
Tryk på SNOOZE-knappen ¡
LEDerne lyser med følgende rækkefølge:
blå → rød → rød + blå → grøn → grøn + blå → rød + grøn → alle LEDer→ osv.
Tryk på SNOOZE-knappen ¡
indstille den permanent.
Tryk på SNOOZE-knappen ¡
stemningslyset.
BEMÆRK
I stedet for SNOOZE-knappen ►
anvendes.
Farveindstillingen via SNOOZE-knappen ►
funktionen er aktiveret.
8
på clockradioen for at aktivere stemningslyset.
8
igen, når den ønskede farve lyser for at
8
på clockradioen igen for at deaktivere
8
kan COLOR-knappen på fjernbetjeningen
8
fungerer ikke, hvis SNOOZE-
49
Page 52

DK
Læselampe
Du kan bruge clockradioen som læselampe.
Tryk på ¡
tænde/slukke for lampen.
Tryk på ¡
lysintensiteten (00 til 20) vises i displayet 4.
BEMÆRK
Hvis du har indstillet lysintensiteten på 00, kan du ganske vist indstille en ►
højere værdi igen, men lampen er slukket og skal tændes igen på
-knappen
Den valgte lydintensitet gemmes automatisk som lydintensitet for vække- ►
funktionen.
Udskiftning af halogenlampen
Halogenlampen 2 skal udskiftes, hvis den er defekt, eller hvis lysintensiteten
forringes.
FARE!
Livsfare på grund af elektrisk strøm
Tag stikk
-knappen 19 på clockradioen eller på fjernbetjeningen for at
/ -knappen for at indstille lysstyrken. Symbolet og
19
på clockradioen eller på fjernbetjeningen.
et ud af stikkontakten, før du begynder at skifte halogenlampen ►
Betjening og funktion
2
.
50
BEMÆRK
Halogenlampen ►
Drej lampehuset ¡ i pilens retning, og
løft det op.
Skru den defekte halogenlampe ud af ¡
fatningen.
Skru en ny 42 W halogenlampe i ¡
fatningen.
Sæt forsigtigt lampehuset ¡
oven, og drej det i pilens retning for at
fastgøre det.
2
må kun udskiftes med den samme lampetype: E27 42 W.
på fra
KH 2600
Page 53

Betjening og funktion
Alarmfunktion
Ved indstilling af vækketiden fastsætter du lysintensiteten, vækkelyden og lydstyrken.
30 minutter før den indstillede vækketid stiger lysintensiteten langsomt til det
valgte niveau. Når den indstilled vækketid er nået, stiger støjniveauet langsomt til
den valgte lydstyrke i løbet af 90 sekunder.
Programmering af vækketider
Clockradioen har to vækkemuligheder. Alle indstillinger kan foretages uafhængigt
af hinanden for de to vækkemuligheder. Du kan vælge, om der skal lyde en
alarmtone eller forskellige naturlyde på det programmerede tidspunkt, om
radioen skal gå i gang, eller om der skal spilles musik fra din iPod/iPhone eller et
andet eksternt audioapparat.
Forudsætning: Headsettet er i standby-modus.
DK
11
blinker.
18
/
eller I◄◄
18
/
11
eller I◄◄
18
/ALARM2/UP-knappen 16 på
Tryk på ALARM1/DOWN-knappen ¡
ALARM2/UP-knappen
på AL1/AL2-knappen på fjernbetjeningen. Timevisningen i displayet
Indstil timerne med ►►I -knappen ¡
-knappen
ændres tiden en time. Hvis du holder knappen
nede i mere end to sekunder, starter lynindstillingen.
Tryk på ALARM1/DOWN-knappen ¡
ALARM2/UP-knappen
eller på AL1/AL2-knappen på fjernbetjeningen.
Minutvisningen i displayet
Indstil minutterne med ►►I -knappen ¡
-knappen
ændres tiden et minut. Hvis du holder knappen
nede i mere end to sekunder, starter lynindstillingen.
Tryk på ALARM1/DOWN-knappen ¡
clockradioen eller på AL1/AL2-knappen på fjernbetjeningen igen for at
bekræfte indstillingen.
13
. Hver gang du trykker på knappen,
13
. Hver gang du trykker på knappen,
16
på clockradioen eller
4
blinker.
16
på clockradioen
4
KH 2600
51
Page 54

Indstilling af vækketone
Betjening og funktion
DK
Tryk på ►►I-knappen ¡
fl ere gange for at vælge en vækketone:
→ → → → → → → slet.
(Se kapitlet Display vedrørende forklaring
af symbolerne.)
Tryk på ¡
light-funktionen.
BEMÆRK
Indstil lydstyrken, du vil vækkes med, som beskrevet i kapitlet ► Indstilling
af lydst
Indstil lysintensiteten, du vil vækkes med, som beskrevet i kapitlet ► Læse-
lampe.
Wake-up light-funktionen kan kun aktiveres sammen med en vækkelyd. ►
Lysintensiteten øges 30 minutter før den indstillede vækketid, og
symbolet blinker i displayet
Hvis du kun vil vækkes med wake-up light, skal du indstille lydstyrken ►
på 00.
Tryk på ALARM1/DOWN-knappen ¡
clockradioen eller på AL1/AL2-knappen på fjernbetjeningen igen for at bekræfte indstillingen, eller vent ca. 7 sekunder, hvorefter alarmen bekræftes
automatisk.
Symbolet for den valgte vækketone blinker i displayet, og alarmen kommer ud
gennem højttalerne, når vækketiden er nået.
-knappen for at aktivere wake-up
yrke.
11
eller I◄◄-knappen 13
4
.
18
/ALARM2/UP-knappen 16 på
52
BEMÆRK
Hvis du vil bruge musik fra din iPod/iPhone som vækketone, skal du vælge ►
en titel (eller et album eller en afspilningsliste) på iPoden/iPhonen som
etone. Den valgte musik afspilles, når den indstillede vækketid er nået.
vækk
KH 2600
Page 55

Betjening og funktion
Deaktivering af vækkeur
Slumrefunktion ("SNOOZE"-funktion)
Tryk på SNOOZE-knappen ¡
lyder, for at deaktivere alarmen forbigående.
I displayet
starter alarmen igen.
(På billedet til højre er både alarm 1 og 2 programmeret.
Alarm 2 går i gang, og symbolet blinker.)
Deaktivering af alarm
Når den programmerede tid er nået, lyder alarmen, indtil den slukkes.
Tryk på ¡
for at slukke for alarmen.
Tryk på ¡
BEMÆRK
Hurtigt tænd/sluk for alarmen
Forudsætning:
Tryk på ALARM1/DOWN-knappen ¡
clockradioen eller på AL1/AL 2-knappen på fjernbetjeningen, indtil alarmsymbolet / vises/forsvinder på displayet.
BEMÆRK
4
vises . Efter 9 minutter
/ALARM OFF-knappen 20 eller -knappen på fjernbetjeningen
-knappen, hvis du har aktiveret wake-up light-funktionen.
Alarmen går i gang igen 24 timer senere.. ►
Clockradioen er i standby-modus.
De sidst valgte alarmindstillinger bliver ved med at være gemt. ►
, mens alarmen
8
18
/ALARM2/UP-knappen 16 på
DK
KH 2600
53
Page 56

DK
Betjening og funktion
Sletning af vækketider
18
Tryk på ALARM1/DOWN-knappen ¡
clockradioen eller på AL1/AL 2-knappen på fjernbetjeningen tre gange,
indtil alarmsymbolet / blinker på displayet
11
Tryk på ►►I -knappen ¡
vækketone mere i displayet 4.
Tryk på ALARM1/DOWN-knappen ¡
clockradioen eller på AL1/AL2-knappen på fjernbetjeningen eller vent ca.
10 sekunder. Nu er der ikke programmeret nogen vækketid mere.
eller I◄◄ -knappen 13, indtil der ikke vises nogen
Automatisk deaktivering (SLEEP-funktion)
Med Sleep-funktionen kan du falde i søvn til din yndlingsmusik eller din yndlingskanal. Clockradioen slukkes af sig selv efter en tid mellem 10 og 90 minutter.
Forudsætning: Clockradioen skal være i radio-, AUX IN- eller iPod/iPhonefunktion.
Tryk på SLEEP-knappen ¡
visningen
Tryk på SLEEP-knappen ¡
hvert tryk på knappen.
Indstillingsmuligheder: 90, 80, 70, 60, 50, 40, 30, 20 eller 10 minutter.
Efter fem sekunder er den valgte indstilling gemt.
Tryk igen på SLEEP-knappen ¡
For at afslutte sleep-funktionen, før den afsluttes automatisk, skal du trykke ¡
på
.
/ALARM OFF-knappen 20 eller -knappen på fjernbetjeningen.
14
. I displayet 4 vises symbolet og
14
igen for at reducere tiden med 10 minutter for
14
/ALARM2/UP-knappen 16 på
18
/ALARM2/UP-knappen 16 på
for at deaktivere sleep-funktionen.
4
.
54
KH 2600
Page 57

Rengøring/Opbevaring/Bortskaff else
Rengøring
Sikkerhedsanvisninger
FARE!
Livsfare på grund af elektrisk strøm
Tag stikk
et ud af stikkontakten, før du begynder rengøringen. ►
OBS
Skader på clockradioen!
Sørg for
, at der ikke trænger fugt ind i clockradioen ved rengøring, så ►
irreparable skader undgås.
Rengøring af kabinettet
Rengør clockradioens overfl ader med en blød, tør klud. ■
Opbevaring/Bortskaff else
Opbevaring
Hvis clockradioen ikke skal bruges i længere tid, skal den afbrydes fra strømforsyningen, batterierne skal tages ud og opbevares på et rent, tørt sted uden
direkte solpåvirkning.
Bortskaff else af clockradioen
Smid aldrig clockradioen ud sammen med det normale husholdningsaff ald. Dette produkt er underlagt det europæiske direktiv
2002/96/EC-WEEE (Waste Electrical and Electronic Equipment).
Bortskaf clockradioen via en godkendt bortskaff elsesvirksomhed eller den
kommunale genbrugsstation. Følg de aktuelt gældende regler. Henvend dig i
tvivlstilfælde til det lokale bortskaff elsessted.
DK
Bortskaff else af batterier
Batterier må ikke smides ud sammen med husholdningsaff aldet. Alle forbrugere
er efter loven forpligtede til at afl evere batterier på et indsamlingssted i kommunen
eller i forretninger. Denne forpligtelse hjælper med til, at batterierne kan bortskaff es
på en miljøvenlig måde. Levér kun batterierne tilbage i afl adet tilstand.
KH 2600
55
Page 58

DK
Afhjælpning af fejl
Afhjælpning af fejl
I dette kapitel får du vigtige anvisninger til fejlfi nding og fejlafhjælpning.
Overhold anvisningerne, så farer og skader undgås.
Sikkerhedsanvisninger
ADVARSEL
Overhold følgende sikkerhedsanvisninger, så farer og materielle skader undgås:
Reparationer på elapparater må kun udføres af autoriserede reparatører, ►
som er oplært af producenten. Der kan opstå alvorlige farer for brugeren
og skader på clockr
Fejlårsager og -afhjælpning
Den efterfølgende tabel hjælper til lokalisering og afhjælpning af mindre fejl:
Fejl Mulig årsag Afhjælpning
adioen, hvis reparationerne udføres forkert.
Displayet viser
ingenting.
Ingen lyd.
Støj ved radiomodtagelsen
Alarmen går ikke i
gang.
iPod/iPhone lader
ikke.
Strømstikket er ikke sat i. Sæt strømstikket i stikkontakten.
Stikkontakten giver ingen
spænding.
Lydstyrken står på laveste
trin.
Der er tilsluttet en hovedtelefon.
Afspilningen fra audioapparatet er ikke startet.
Kanalen er ikke indstillet
rigtigt.
Modtagelsen er for svag.
Alarmtiden er programmeret forkert.
Alarmen er ikke programmeret.
Clockradioen er ikke på
standbymodus.
Stikket er ikke sat i. Sæt strømstikket i stikkontakten.
Kontrollér husets sikringer.
Skru op for lydstyrken med
knappen på clockradioen eller på
fjernbetjeningen.
Tag hovedtelefonens stik ud af
21
tilslutningsstikket
Start afspilningen på audioapparatet.
Indstil kanalen rigtigt med ►►I -knap-
11
pen
eller I◄◄ -knappen 13.
Prøv at forbedre modtagelsen ved
28
at fl ytte
Kontrollér den programmerede
vækketid.
Programmér alarmen korrekt.
Stil clockradioen på standbymodus,
før du går i seng.
.
ledningsantennen.
6
-
56
KH 2600
Page 59

Afhjælpning af fejl/Tillæg
BEMÆRK
Hvis problemet ikke kan løses med de angivne forslag, bedes du henvende ►
dig til kundeservice.
Tillæg
Info til EF-overensstemmelseserklæringen
Denne clockradio er i overensstemmelse med de grundlæggende krav og andre relevante forskrifter i det europæiske
direktiv for elektromagnetisk kompatibilitet 2004/108/EC,
lavspændingsdirektivet 2006/95/EC samt økodesign-direktivet
2009/125/EC (forordning 1275/2008 tillæg II, nr.1).
Den komplette, originale overensstemmelseserklæring kan
rekvireres hos importøren.
DK
KH 2600
57
Page 60

DK
Tekniske data
Driftsspænding 220-240 V / 50 Hz
Backup-batterier
Batteri fjernbetjening 3 V, CR 2032
Strømforbrug
Drift med lys 50 W
Drift uden lys 10 W
Standby ca. 1,7 W
Udgangseff ekt højttaler 2 x 1 W (ved 10 % klirfaktor)
Hovedtelefon-udgangsspænding maks. 120mV
Frekvensområde radio (FM) 87,5 - 108 MHz
Lysmidler E27 maks. 42 W
Funktionstemperatur +10 - +35 °C
Fugt (ingen kondensering) 5 - 90 %
Tillæg
2 x 1,5 V type AA
(medfølger ved køb)
58
Mål (H x B x D) 29 x 17,5 x 19,5 cm cm
Vægt ca. 1650 g
Beskyttelsesklasse
II
KH 2600
Page 61

Tillæg
Garanti
På denne clockradio får du 3 års garanti fra købsdatoen. Clockradioen er produceret omhyggeligt og inden levering afprøvet samvittighedsfuldt.
Opbevar kassebonen som bevis for købet. Kontakt venligst din serviceafdeling
telefonisk, hvis du ønsker at gøre brug af garantien. På denne måde garanteres
det, at tilsendelsen af varen er gratis.
BEMÆRK
Garantiydelsen gælder kun for materiale- eller fabrikationsfejl, men ikke ►
for transportskader, sliddele eller skader på skrøbelige dele som f.eks.
kontakter eller batterier
Produktet er kun beregnet til privat og ikke til erhvervsmæssigt brug. Ved misbrug
og uhensigtsmæssig behandling, anvendelse af vold og ved indgreb, som ikke er
foretaget af vores autoriserede service-afdeling, ophører garantien.
Dine juridiske rettigheder indskrænkes ikke ved denne garanti. Garantiperioden
forlænges ikke, hvis der gøres brug af garantien. Det gælder også for udskiftede
og reparerede dele.
Skader og mangler, som eventuelt forefi ndes allerede ved køb, skal straks anmeldes
efter udpakning og senest to dage efter købsdatoen.
Når garantiperioden er udløbet, er reparation af skader betalingspligtig.
.
DK
Service
Importør
KH 2600
Kompernass Service Danmark
Tel.: 80-889 980
(Der kan kun ringes til servicenummeret fra fastnet)
e-mail: support.dk@kompernass.com
KOMPERNASS GMBH
BURGSTRASSE 21
44867 BOCHUM, GERMANY
www.kompernass.com
59
Page 62

 Loading...