

Page 1
Operating instructions
H-3265
53B&RYHUB6DQGZLFKPDNHUB/%LQGG
Page 2
Sandwich Maker LB6 Seite 1 Mittwoch, 25. November 2009 10:38 10
1
2
3
4
5
6
78
Page 3

Sandwich Maker LB6 Seite 2 Mittwoch, 25. November 2009 10:38 10
Please fold out.....
H-3265_10_V1.3_GB
Page 4

Sandwich Maker LB6 Seite 2 Mittwoch, 25. November 2009 10:38 10
Page 5
Sandwich Maker LB6 Seite 3 Mittwoch, 25. November 2009 10:38 10
Contents
1. Device description . . . . . . . . . . . . . . . . . . . . . . . . . . . . . . . . . . . . . . . . . . . . . . . . . . . . . 3
2. Part names (see foldout page) . . . . . . . . . . . . . . . . . . . . . . . . . . . . . . . . . . . . . . . . . . . . 4
3. Safety information. . . . . . . . . . . . . . . . . . . . . . . . . . . . . . . . . . . . . . . . . . . . . . . . . . . . . 4
4. Before using for the first time . . . . . . . . . . . . . . . . . . . . . . . . . . . . . . . . . . . . . . . . . . . . 7
5. Preparing sandwiches . . . . . . . . . . . . . . . . . . . . . . . . . . . . . . . . . . . . . . . . . . . . . . . . . . 7
6. Cleaning . . . . . . . . . . . . . . . . . . . . . . . . . . . . . . . . . . . . . . . . . . . . . . . . . . . . . . . . . . . . 8
7. Recipes . . . . . . . . . . . . . . . . . . . . . . . . . . . . . . . . . . . . . . . . . . . . . . . . . . . . . . . . . . . . . 9
8. Disposal . . . . . . . . . . . . . . . . . . . . . . . . . . . . . . . . . . . . . . . . . . . . . . . . . . . . . . . . . . . 10
9. Technical data . . . . . . . . . . . . . . . . . . . . . . . . . . . . . . . . . . . . . . . . . . . . . . . . . . . . . . . 10
10. Warranty . . . . . . . . . . . . . . . . . . . . . . . . . . . . . . . . . . . . . . . . . . . . . . . . . . . . . . . . . . 10
1. Device description
1.1 Intended purpose
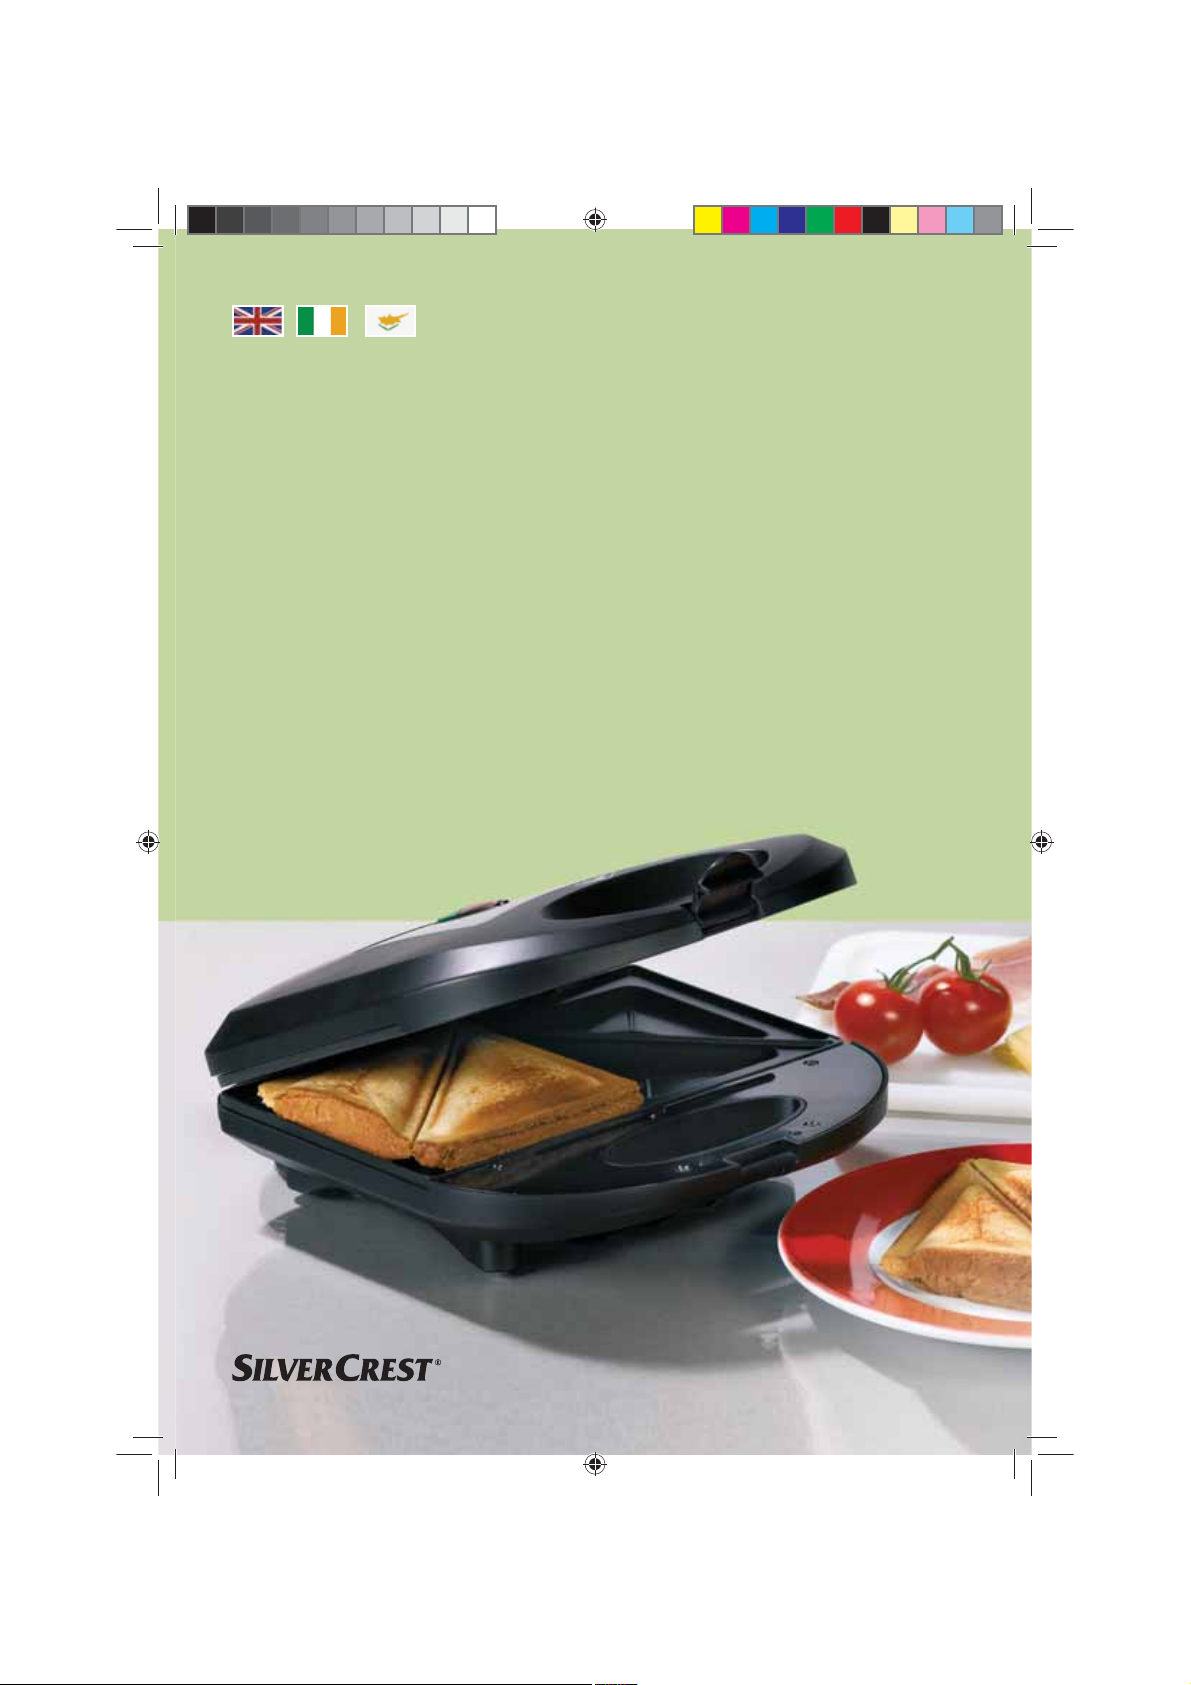
The SilverCrest H-3265 sandwich maker is
suitable for preparing sandwiches. The
preparation of other foods is not permissible.
Only use the sandwich maker indoors, never
outside.
This product is intended for use in private
households and is not suitable for
commercial purposes.
1.2 Scope of supply
• 1 Sandwich maker
• 1 Set of user instructions
1.3 Function
The appliance is preheated (red indicator
light 2 lights up). As soon as the temperature
is high enough for toasting, the green
indicator light 1 lights up.
The heater switches off automatically as
soon as the necessary temperature has been
reached. If the temperature falls below this
value, the heater switches on again until the
required temperature is reached.
There are moulds 7 in the appliance into
which the prepared sandwiches are
inserted.
Toasting begins when the lid 4 is closed.
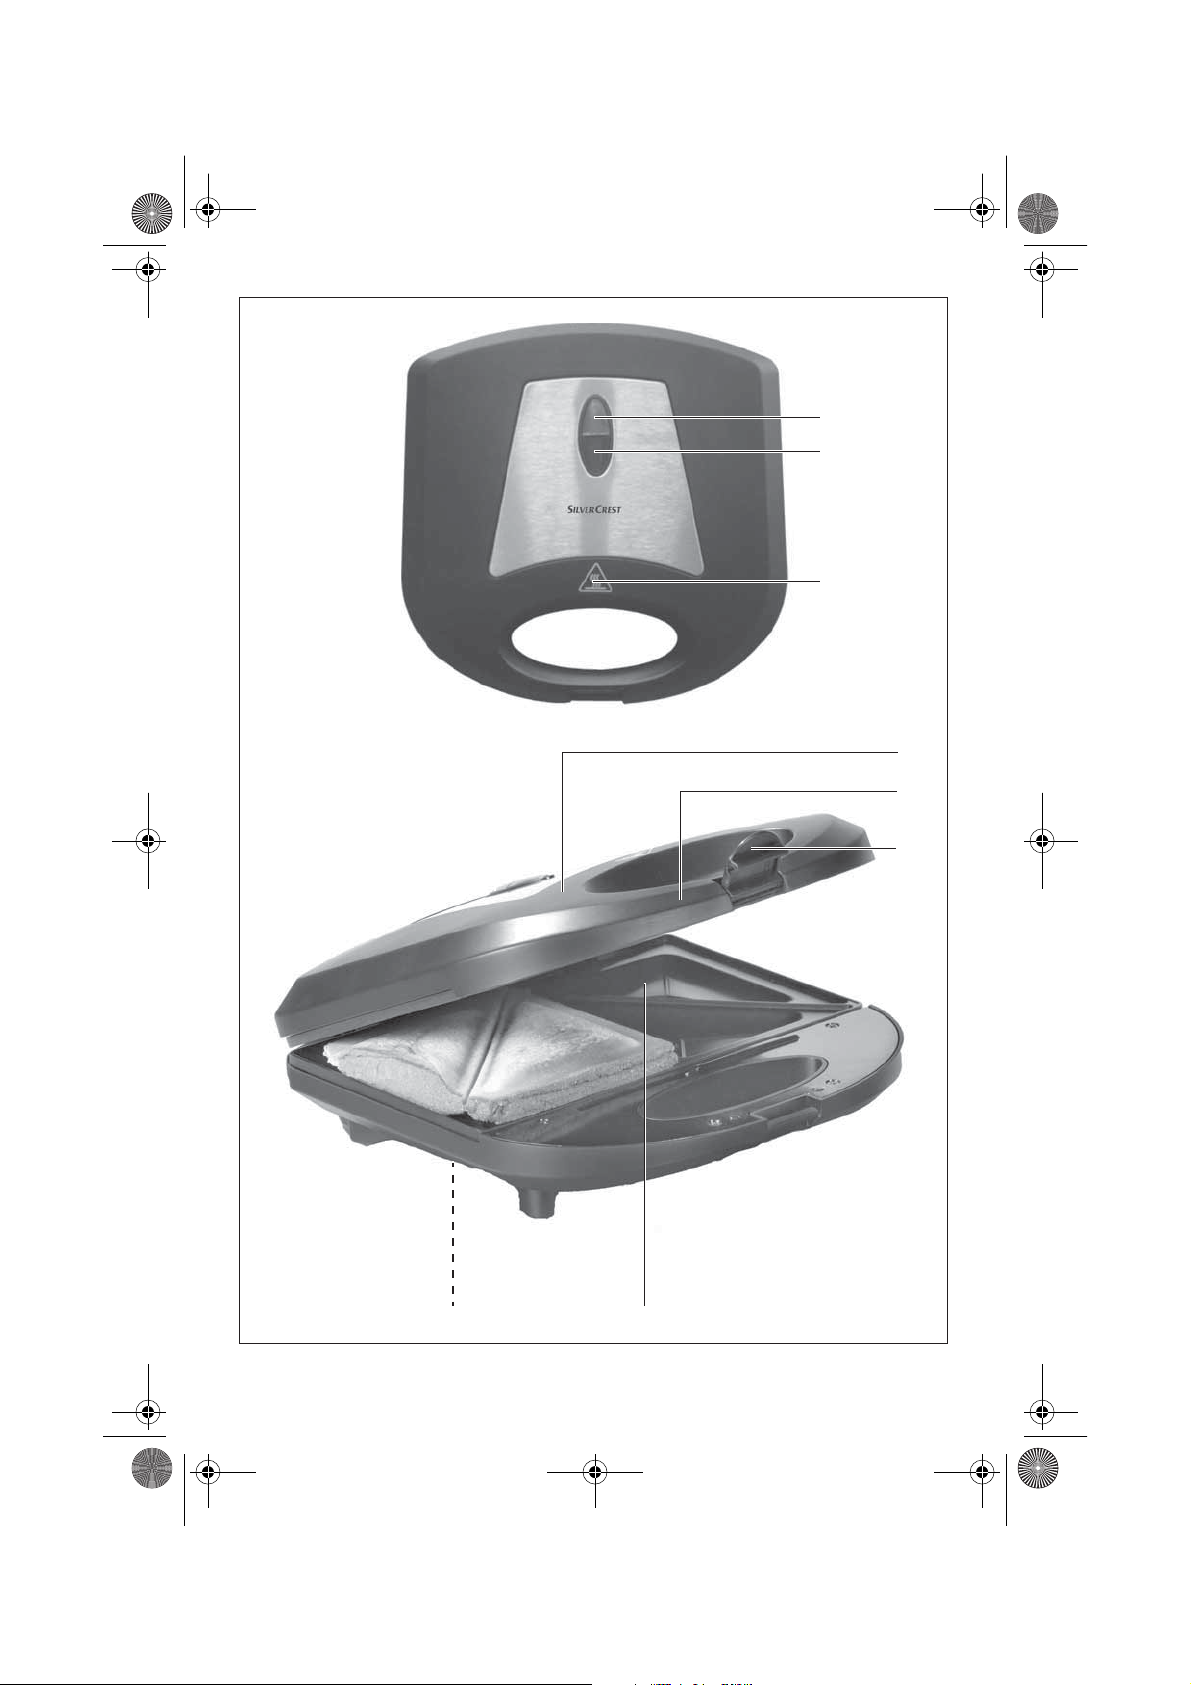
1.4 Symbols on the appliance
Symbol 3 Location Meaning
Lid 4
Warns against hot
surfaces
H-3265
3
Page 6

2
3
4
5
6
7
1
Sandwich Maker LB6 Seite 4 Mittwoch, 25. November 2009 10:38 10
8
2. Part names
Green indicator light
– comes on as soon as the temperature
for toasting has been reached
Red indicator light
– comes on when the appliance is
connected to the mains supply
Warning symbol “Warns against hot
surfaces”
3. Safety information
3.1 Explanation of terms
The following keywords are used in these
user instructions:
Warning!
High risk: ignoring this warning
could result in a risk to life and
limb.
Caution!
Medium risk: ignoring this warning may
result in damage.
Note:
Low risk: points to be noted when handling
the appliance.
3.2 General information
• Please read these user instructions carefully before use. They are a constituent
part of the appliance and must be kept
to hand at all times.
• Use the appliance only for the purpose
described (see "1.1 Intended purpose"
on page 3).
• To prevent damage, check that the mains
voltage required (see type plate on the
appliance) is compatible with your
mains voltage.
(see foldout page)
Lid
Lid handle
Lock
Moulds
– into which the prepared sandwiches
are inserted
Cable store (on the bottom)
• This appliance is not intended for use by
persons (including children) with
reduced physical, sensory or mental
capabilities or lack of experience and/
or lack of knowledge, unless either
supervised by a person responsible for
their safety or given instructions on the
use of the appliance by such a person.
Children should be supervised to ensure
they do not play with the appliance.
• Please note that any claim under the
warranty or for liability will be invalid if
accessories are used that are not
recommended in these user instructions,
or if original spare parts are not used for
repairs. This also applies to repairs
undertaken by unqualified persons. You
will find the service address in
"10. Warranty" on page 10.
• If the appliance should develop a fault
during the warranty period, it may only
be repaired by our Service Centre.
Otherwise all claims under warranty are
null and void. You will find the service
address in "10. Warranty" on page 10.
• To ensure you can intervene promptly if
a fault occurs, never leave the appliance
unsupervised during operation.
4
Page 7

Sandwich Maker LB6 Seite 5 Mittwoch, 25. November 2009 10:38 10
• The appliance must not be operated with
an external time switch or separate
remote control system, such as a wireless
remote control socket.
• Check that the power socket is easily
accessible since the appliance does not
have an On/Off switch.
• Ensure that it is not possible for anyone to
trip over or to get caught up in or step on
the mains cable and injure themselves.
• The appliance may only be used on a
firm, level, dry and non-flammable
surface. This will prevent it from tipping
over, sliding or setting fire to the surface
and causing damage.
• Maintain a distance of at least 50 cm
from other objects to prevent them from
catching fire.
• The appliance must not be placed on hot
stoves, put in a hot oven or set up in the
vicinity of gas heaters and on-demand
water heaters, as this could cause
damage.
• Only use implements made from wood
or heat-resistant plastic. Metal
implements may damage the coated
surfaces.
• Surface cleaners (furniture and work
surfaces) may contain ingredients that
could attack and soften the rubber feet.
In this case, place the appliance on a
non-flammable surface.
• Do not place any items on the
appliance.
3.3 Protection against electric shock
Warning! The following safety
information is intended to protect
you against electric shock.
• The appliance must not under any
circumstances be used if it is damaged.
Have the device repaired in such cases
by a qualified specialist. You will find the
service address in "10. Warranty" on
page 10.
• If the mains cable for this appliance is
damaged, it must be replaced by the
manufacturer or a person with similar
qualifications in order to avoid a
hazard.
• Water or other liquids must never be
allowed to enter the appliance. For this
reason:
– never use it outdoors
– never immerse it in liquids
– never place liquid-filled objects, e.g.
pans, on the appliance
– never use in very humid environments.
If liquid should enter the appliance,
unplug the mains plug immediately and
have the appliance repaired by a
qualified technician. You will find the
service address in "10. Warranty" on
page 10.
• The appliance must be connected up to a
mains socket with earthing contact.
• Avoid using extension cables. An
extension cable may only be used under
very specific conditions:
– the extension cable must be suitable
for the current rating of the appliance;
– the extension cable must be routed
across surfaces or the floor (not
allowed to hang in mid air); ensure
the cable is out of the reach of
children and does not pose a tripping
hazard;
H-3265
5
Page 8

Sandwich Maker LB6 Seite 6 Mittwoch, 25. November 2009 10:38 10
– never use a damaged extension cable;
– do not connect any other appliances
to the mains socket as this could
overload the mains supply (do not use
multi-sockets).
• Do not touch the grill, the mains cable or
the mains plug with wet hands.
• Always unplug the mains cable by
pulling out the plug. Never pull on the
cable to remove the plug.
• Never carry the appliance by the mains
cable.
• Ensure that the mains cable is not
kinked, twisted or crushed.
• Fully unwind the mains cable during use
to avoid overheating and scorching.
• Keep the mains cable away from hot
surfaces, such as cooker hotplates.
• If you are not going to use the appliance
for a while, remove the plug from the
wall socket. This is the only way to
ensure that the machine is completely
free of current.
• If the appliance is connected to the
mains it may be damaged by lightning
during thunderstorms.
3.4 Protection against scalds and
burns
Warning! Hot surfaces may cause
injury. Please note therefore:
• The surfaces of the appliance can get
hot. You should therefore only hold the
appliance by the lid handle 5 when in
use.
• Please note that hot steam may escape
from the sides of the appliance while the
sandwiches are toasting.
• Take care when removing the toasted
sandwiches – they are also very hot.
• Do not move the appliance during use
as it becomes hot. This will ensure you
avoid sustaining any burns.
• Always allow the appliance to cool
down before transporting or cleaning.
3.5 For the safety of your child
Warning! Children are often
unaware of danger and are
injured as a result. Please note
therefore:
• Only allow children to use this appliance
under the supervision of an adult.
• Ensure the appliance is always kept out
of the reach of children.
• Ensure that children cannot pull the
appliance down onto themselves with
the cable.
• Ensure that the packing foil does not
become a deadly trap for a child.
Packing foils are not toys.
6
Page 9

Sandwich Maker LB6 Seite 7 Mittwoch, 25. November 2009 10:38 10
4. Before using for the first time
During manufacture, many parts are given a
thin film of protective oil. Before using the
appliance for the first time, heat it up without
sandwiches so that any residues can
evaporate.
Note: When heating up for the first few time
a slight smell may be produced. Make sure
the room is adequately ventilated.
1. Take the appliance and all the accessory
parts out of the packaging.
2. Check that the appliance shows no signs
of damage.
3. Clean the appliance before using it for
the first time. Observe the information in
the section entitled "6. Cleaning" on
page 8.
4. Select a location that is firm, level and
not flammable. Maintain a distance of
approx. 50 cm from other objects.
5. Unwind the mains cable completely.
5. Preparing sandwiches
Notes:
• We recommend toast bread for making
sandwiches.
• Prepare the sandwiches before switching
on the appliance.
• As far as possible, spread the filling so
that the sandwiches are evenly thick.
1. Select a location that is firm, level and
not flammable. Maintain a distance of
approx. 50 cm from other objects.
2. Unwind the mains cable completely.
3. Release the lid 4 by pulling up the lock 6
and open up the lid 4 fully by the lid
handle 5 .
6. Insert the plug into a suitable mains
socket.
The red indicator light 2 now lights up
and the appliance heats up.
As soon as the operating temperature
has been reached, the green indicator
light 1 lights up.
7. Leave the appliance switched on for
around 10 – 15 minutes.
8. Push up the lock 6 and open the lid 4 by
the lid handle 5 .
9. Unplug the mains plug and allow the
appliance to cool down.
10.Clean the appliance again. Observe the
information in the section entitled
"6. Cleaning" on page 8.
Note: For reasons of taste you should not
eat the first toasted sandwiches but should
throw them away.
4. Remove any dust that may be present
using a dry cloth.
5. Close the lid 4 .
6. Insert the plug into a suitable mains
socket.
The red indicator light 2 now lights up
and the appliance heats up.
As soon as the operating temperature
has been reached, the green indicator
light 1 lights up.
The appliance is now ready to use.
7. Release the lid 4 by pulling up the lock 6
and open up the lid 4 fully by the lid
handle 5 .
H-3265
7
Page 10

Sandwich Maker LB6 Seite 8 Mittwoch, 25. November 2009 10:38 10
8. Lay the prepared sandwiches in the
moulds 7 .
9. Close the lid 4 .
10.Lock the lid 4 by pushing the lock 6
down until it snaps audibly into position.
Note: Depending on the thickness of the
sandwiches and the required degree of
browning, toasting takes some minutes.
Warning! When you open the lid 4
hot steam may rise towards you.
You should therefore protect your
hands with a tea towel or kitchen
gloves.
Note: The green indicator light 1 will go off
at first during toasting. As soon as it lights
up again, it is time to check the progress.
6. Cleaning
Warning! To avoid the danger of
an electric shock or damage:
– Always remove the plug from the
mains socket before starting to
clean the appliance.
– Never immerse the appliance in
water, and protect it from
splashes and water droplets.
– Before cleaning, allow the
appliance to cool down to avoid
the risk of burns.
Caution! Never use abrasive, corrosive or
caustic cleaning materials. These could
damage the appliance as well as the nonstick coating.
Note: Do not leave it too long before
cleaning the appliance, otherwise food
residue may harden and be difficult to
remove.
1. Remove crumbs and larger food
residues.
11.Check whether the sandwiches are
already as brown as you require. If not,
close the lid 4 again.
12.As soon as the sandwiches have been
toasted to your taste, remove them from
the appliance.
Caution: Only use implements made
from wood or heat-resistant plastic.
Metal implements may damage the
coated surfaces.
13.Remove the plug from the mains socket
after use. This is the only way to ensure
that the machine is completely free of
current.
2. Wipe the appliance inside and out with
a soft, damp cloth. You may also use a
little mild washing-up liquid, but must
then wipe the appliance again using
clean water to avoid any aftertaste
affecting the flavour of the sandwiches.
3. Dry with a cloth.
8
Page 11

Sandwich Maker LB6 Seite 9 Mittwoch, 25. November 2009 10:38 10
7. Recipes
7.1 Dutch tomato sandwich
Ingredients:
• Toast bread
• Spring onions
• Tomatoes
• Butter (or herb butter/garlic butter)
• Cooked ham
• Sliced young Gouda cheese
• Salt and pepper
Preparation:
1. Wash and drain the spring onions.
2. Cut the spring onions into long, narrow
strips.
3. Blanch the strips in boiling, salted water
for about one minute.
4. Drain the strips into a sieve.
5. Rinse with cold water to retain the fresh
colour and drain.
6. Wash, dry and thinly slice the tomatoes.
7. Butter a slice of bread.
8. Place the ham on the bread.
9. Spread the spring onions and sliced
tomatoes on top.
10.Season with salt and pepper.
11.Top with a slice of Gouda.
12.Cover with a second slice of buttered
bread.
13.Cut the sandwich diagonally.
7.2 Italian sandwich
Ingredients:
• Toast bread
• Tomato purée
• Tomatoes
• Mayonnaise
• Herbs of Provence
• Sliced mozzarella cheese
• Salt and pepper
Preparation:
1. Stir together the tomato purée,
mayonnaise, salt, pepper and herbs of
Provence to make a paste.
2. Spread the paste onto the slices of
bread.
3. Wash, dry and thinly slice the tomatoes.
4. Fill one of the ready-spread bread slices
with slices of tomato and mozzarella
cheese.
5. Cover with a second slice of readyspread bread.
6. Cut the sandwich diagonally.
H-3265
9
Page 12

Sandwich Maker LB6 Seite 10 Mittwoch, 25. November 2009 10:38 10
8. Disposal
8.1 Appliance
The symbol showing the
wheelie bin with a cross
through it means that that
product must be handed in for
the separated collection of
waste in the European Union.
This applies to the product and all
accessories that are marked with this
symbol. Products marked like this may not
be disposed of in normal domestic waste but
must be handed in at a collection point for
9. Technical data
Power supply: 230 V~/50 Hz
Rated power: 750 W
Protection class: I
10. Warranty
The warranty for your appliance is valid for
3 years from the date of purchase. The
appliance has been manufactured in
accordance with strict quality guidelines and
tested before delivery. Should operational
errors occur despite this, however, please
phone the service centre first. Our customer
consultants will gladly assist you, and
arrange with you how to proceed. The
warranty will be invalidated if the appliance
is incorrectly connected, if parts from
different manufacturers are used, in the case
of normal wear and tear, upon the use of
force, independent attempts at repairing the
appliance or improper use.
the recycling of electric and electronic
appliances. Recycling helps to reduce the
consumption of raw materials and hence is
better for the environment.
8.2 Packaging
If you wish to discard the packaging, please
observe the applicable environmental
regulations in your country. In Germany,
you should dispose of the packaging via the
Dual Recycling System (Grüner Punkt).
Please contact our service hotline for
guarantee claims and technical matters:
00800/4212 4212
(Monday to Friday between
8 a.m. and 4 p.m.)
10
Page 13

Sandwich Maker LB6 Seite 11 Mittwoch, 25. November 2009 10:38 10
Page 14

Hoyer Handel GmbH
Van-der-Smissen-Str.1
H-3265_6
53B&RYHUB6DQGZLFKPDNHUB/%LQGG
D-22767 Hamburg
 Loading...