

Page 1

WEEE:
Inter-Union · Technohandel GmbH
Klaus-von-Klitzing-Str. 2
D-76829 Landau / Pfalz
www.inter-union.de
250 V~ 50 Hz · 10 A
max. 2300 W
EIM-804 GR
DIGITALE WOCHENZEITSCHALTUHR
- nicht hintereinander stecken
- spannungsfrei nur bei
gezogenem Stecker
- nicht abgedeckt betreiben
- nur in trockenen Räumen
verwenden
manufactured: 06/2011
IAN: 66142 · S./N.: 372211
66142_sil_Zeitschaltuhr_digital_innen_label_Schuko.indd 130.06.11 12:15
Page 2
1
Digitale Wochenzeitschaltuhr
keine Haftung. Dieses Gerät ist nicht für den gewerblichen
Einsatz bestimmt.
Einleitung
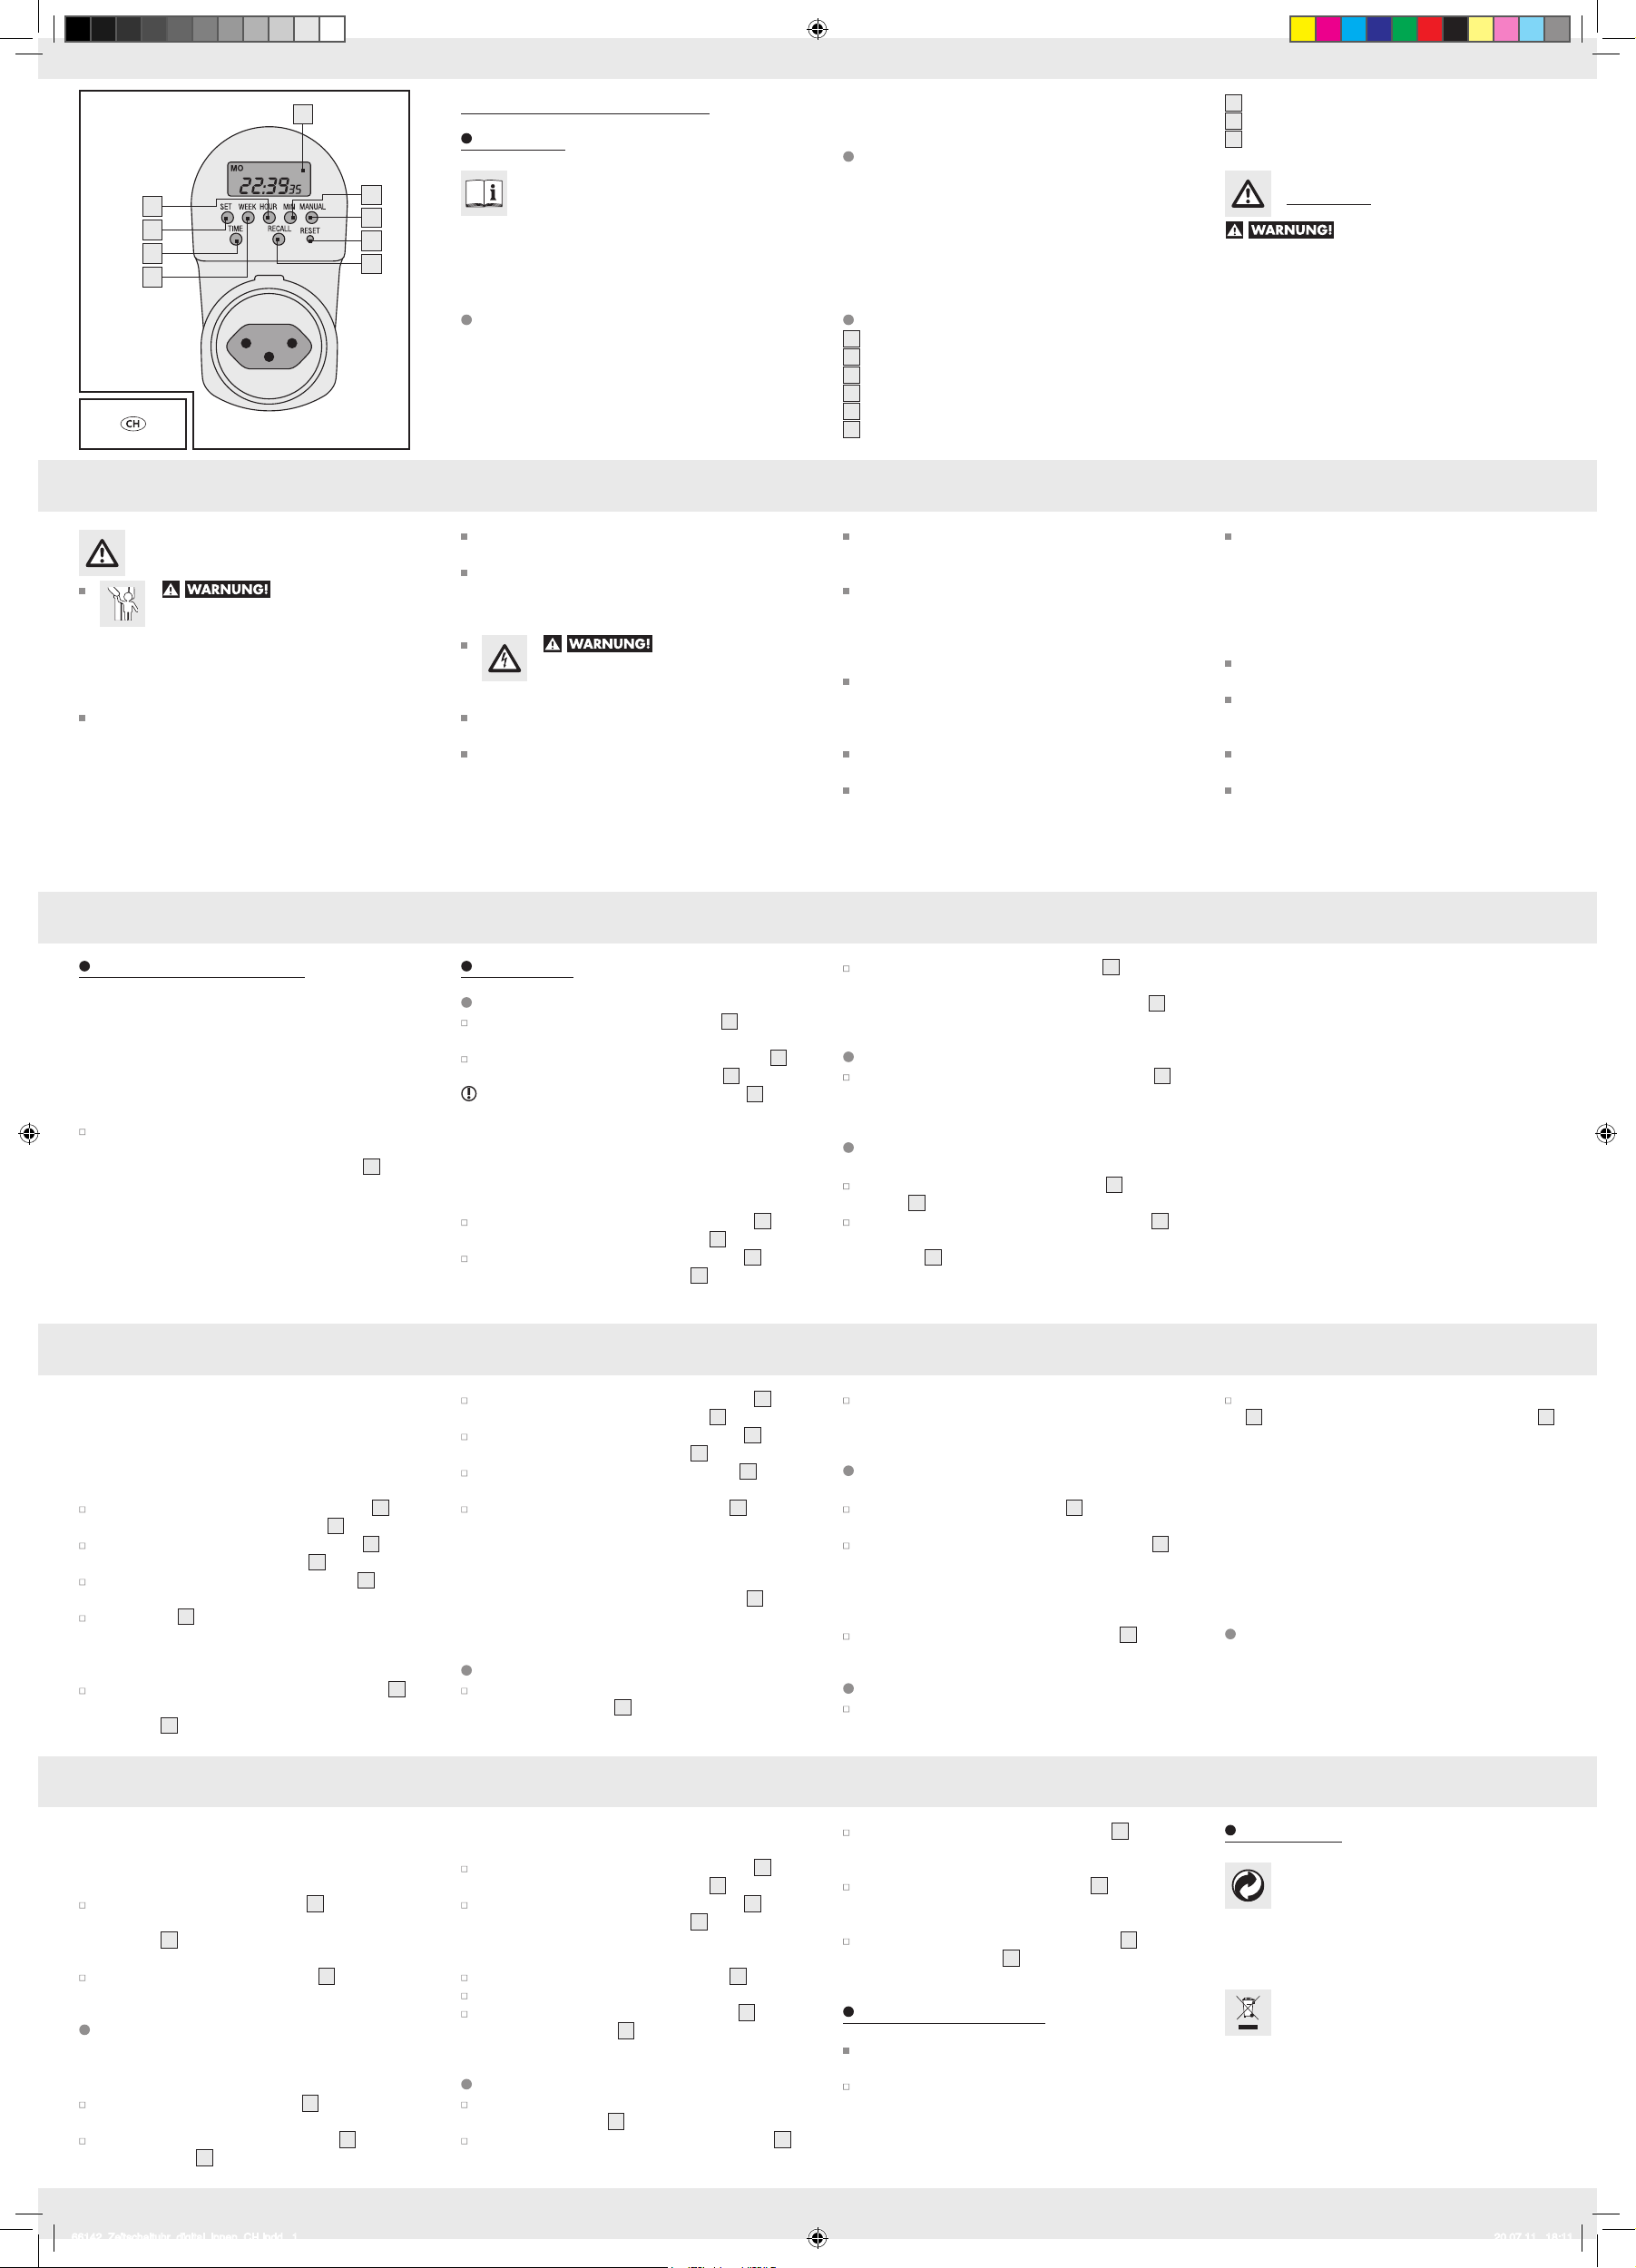
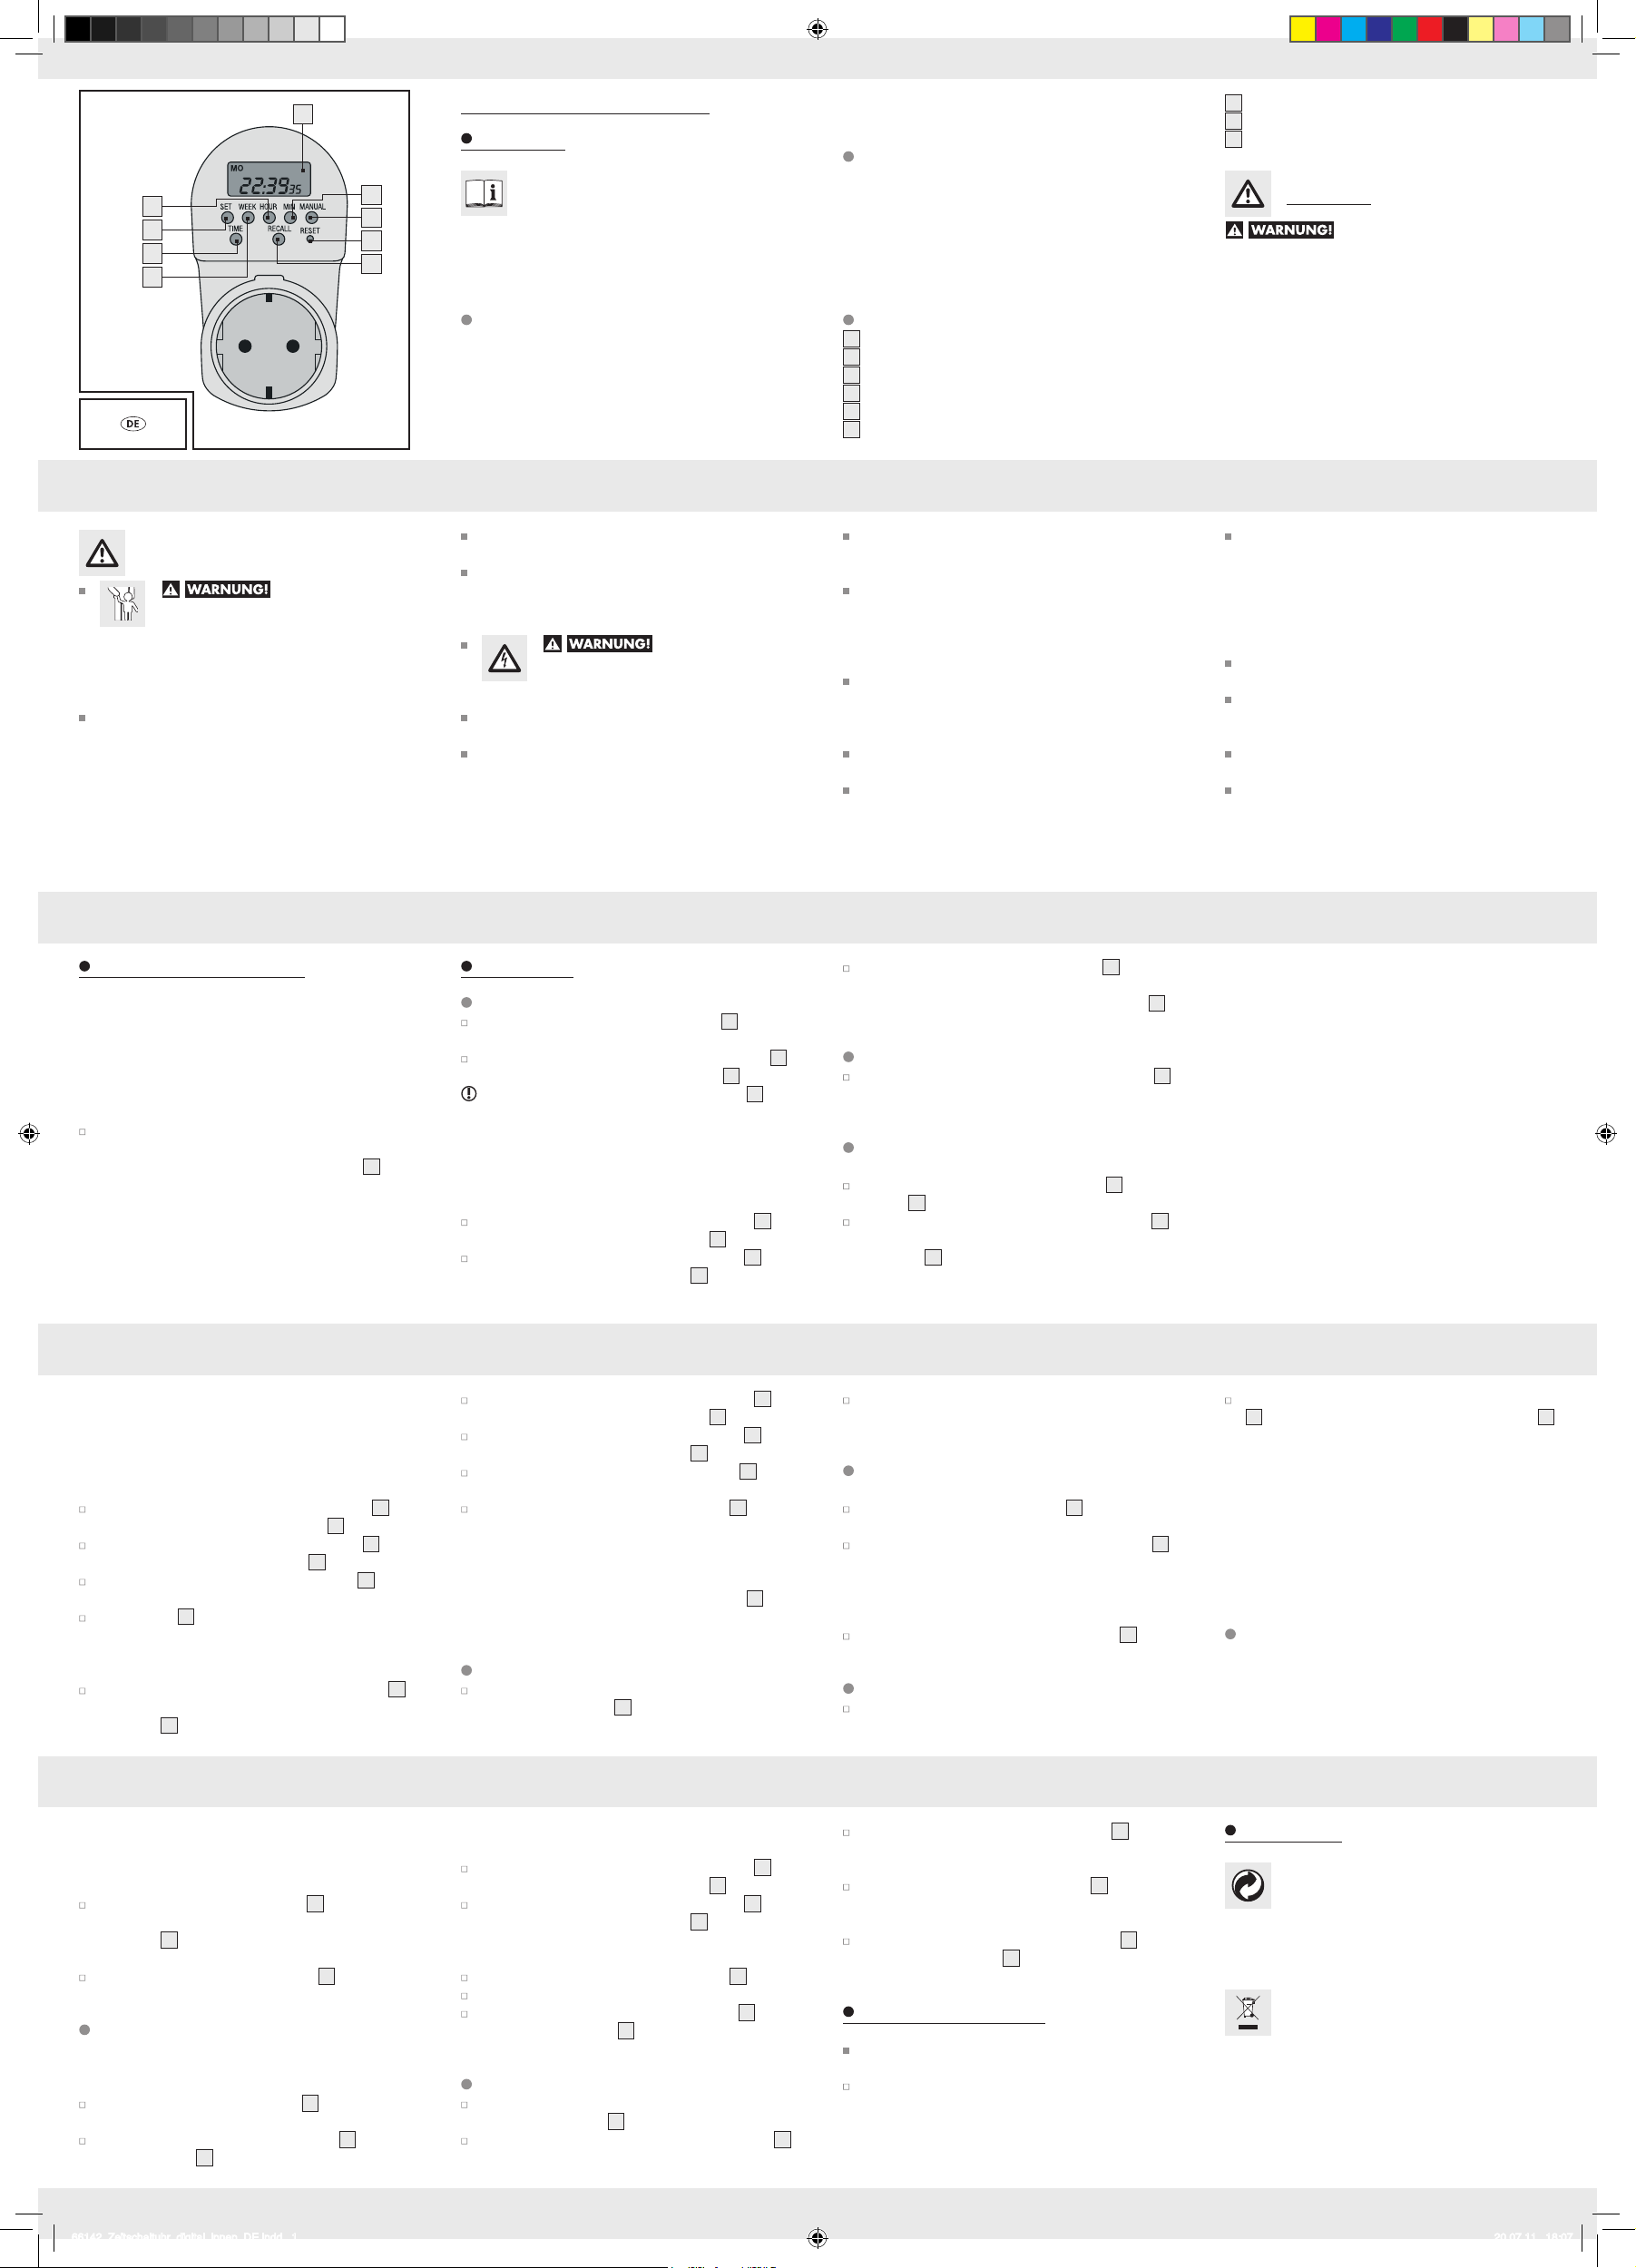
Taste Anzeigemodus (TIME)
7
Eingabe-Taste (SET)
8
Stunden-Taste (HOUR)
9
Technische Daten
Machen Sie sich vor der ersten Inbetriebnahme
9
8
7
6
2
3
4
5
heitshinweise. Benutzen Sie das Gerät nur wie beschrieben
und für die angegebenen Einsatzbereiche. Bewahren Sie
diese Anleitung gut auf. Händigen Sie alle Unterlagen bei
Weitergabe des Geräts an Dritte ebenfalls mit aus.
mit dem Gerät vertraut. Lesen Sie hierzu die
nachfolgende Bedienungsanleitung und die Sicher-
Bemessungsspannung: 240 V ∼, 50 Hz
Bemessungsstrom: AC 10 A
Maximale Last: 2300 Watt
Ausgangsschalter: Relais
Timer-Genauigkeit: + /– 1 Sekunde / Tag bei 20 °C
Kürzeste,
programmierbare Zeit: 1 Minute
Sicherheit
Lesen Sie alle Sicherheitshinweise und
Anweisungen. Versäumnisse bei der Einhaltung der Sicherheitshinweise und Anweisungen können Brand und / oder
schwere Verletzungen verursachen.
Allgemeine Sicherheitshinweise
LEBENS- UND UN-
FALLGEFAHR FÜR KLEINKINDER UND
KINDER! Das Produkt ist kein Spielzeug.
Lassen Sie Kinder niemals unbeaufsichtigt mit Verpackungsmaterial und Gerät. Es besteht Erstickungsgefahr durch
Verpackungsmaterial und Lebensgefahr durch elektrischen
Schlag.
Dieses Gerät ist nicht dafür bestimmt, durch Personen
(einschließlich Kinder) mit eingeschränkten physischen,
sensorischen oder geistigen Fähigkeiten oder mangels
Erfahrung und / oder mangels Wissen benutzt zu werden,
es sei denn, sie werden durch eine für ihre Sicherheit
zuständige Person beaufsichtigt oder erhielten von ihr
Anweisungen, wie das Gerät zu benutzen ist. Kinder
sollten beaufsichtigt werden, um sicherzustellen, dass sie
nicht mit dem Gerät spielen.
Bestimmungsgemäße Verwendung
Dieses Gerät ist zum automatischen Ein- und Ausschalten von
Elektrogeräten bestimmt. Das Gerät darf nur in geschlossenen
Räumen verwendet werden. Alle Veränderungen des Geräts
sind nicht bestimmungsgemäß und können erhebliche Unfallgefahren bedeuten. Der Hersteller übernimmt für aus
bestimmungswidriger Verwendung entstandene Schäden
DE/AT/CH DE/AT/CH DE/AT/CH
Betreiben Sie das Gerät nur an einer fachgerecht
installierten Netzsteckdose.
VORSICHT! Stecken Sie die digitale Zeitschaltuhr
nicht hintereinander. Bei aufeinander gesteckten
Zwischensteckern besteht die Gefahr einer mechanischen
Beschädigung.
LEBENSGEFAHR
DURCH ELEKTRISCHEN SCHLAG! Halten
Sie das Gerät von Feuchtigkeit fern und fassen
Sie es nicht mit feuchten Händen an.
Setzen Sie das Gerät keiner extremen Hitze bzw. keiner
extremen Kälte aus.
Setzen Sie das Gerät keinen extremen Temperatur-
schwankungen aus. Andernfalls besteht die Gefahr, dass
sich Kondenswasser bildet. Warten Sie ab, bis das
Gerät Zimmertemperatur erreicht hat, bevor Sie es in
Betrieb nehmen.
Teilebeschreibung
LC-Display
1
Minuten-Taste (MIN)
2
EIN- / AUTO- / AUS-Taste (MANUAL)
3
Reset-Taste
4
Rückruf-Taste (RECALL)
5
Wochentag-Taste (WEEK)
6
Decken Sie das Gerät nicht mit Zeitungen, Kleidungs-
stücken oder Ähnlichem ab, um eine unzulässige
Erwärmung zu vermeiden.
Überprüfen Sie das Gerät vor jedem Netzanschluss auf
etwaige Beschädigungen. Benutzen Sie das Gerät niemals, wenn Sie irgendwelche Beschädigungen feststellen.
Bei Beschädigungen, Reparaturen oder anderen Problemen am Gerät wenden Sie sich an eine Fachkraft.
Stecken Sie keine Geräte ein, deren Eigengewicht am
Stecker hängt. So vermeiden Sie eine unzulässige
Erwärmung sowie mechanische Beschädigungen an der
Netzsteckdose.
Verwenden Sie das Gerät nicht zusammen mit Steckdosen-
leisten oder Verlängerungskabeln.
Beachten Sie, dass Beschädigungen durch unsachge-
mäße Handhabung, Nichtbeachtung der Bedienungsanleitung oder Eingriff durch nicht autorisierte Personen
von der Garantie ausgeschlossen sind.
BEWAHREN SIE ALLE SICHERHEITSHINWEISE UND
ANWEISUNGEN FÜR DIE ZUKUNFT AUF!
Das Gerät ist nicht geeignet, induktive Lasten, die größer
als 10 A (Ampere) sind, zu schalten. Betreiben Sie aus
diesem Grunde niemals Elektromotoren oder Leuchtstoffröhren mit konventionellen Vorschaltgeräten mit dieser
Zeitschaltuhr. Wenden Sie sich an eine Fachkraft, falls
Sie sich nicht über die induktive Belastung Ihres Gerätes
sicher sind.
Öffnen Sie das Gerät nicht selbst und versuchen Sie
niemals, Teile selbst auszuwechseln oder zu reparieren.
Trennen Sie das Gerät für die Reinigung immer von der
Netzsteckdose und ziehen Sie alle Netzstecker aus dem
Gerät.
Achten Sie darauf, dass das Gerät immer frei
zugänglich ist.
Ziehen Sie das Gerät bei Störungen sofort aus der
Netzsteckdose.
DE/AT/CH DE/AT/CH DE/AT/CH DE/AT/CH
Vor der Inbetriebnahme
Die Zeitschaltuhr verfügt über einen integrierten Akku. Dieser
dient zum Erhalt der gespeicherten Daten wie z.B. Zeit,
Datum und Schaltvorgänge. Der Akku muss vor dem ersten
Gebrauch 24 Stunden aufgeladen werden. Während des
Ladevorgangs können Sie bereits Einstellungen am Gerät
vornehmen.
Stecken Sie das Gerät in eine vorschriftsmäßig installierte
220–250 V, 50 Hz Netzsteckdose. Für einen kurzen
Moment erscheinen alle Anzeigen im LC-Display 1. Anschließend erscheint die Zeitanzeige.
Hinweis: Im Falle einer Unterbrechung der Stromversorgung sichert der eingebaute Akku, dass die Uhrzeit
weiter angegeben wird und das automatische Schaltprogramm aktiviert bleibt. Das Gerät kann vollständig
ohne Stromversorgung programmiert werden, sofern der
Akku voll geladen ist.
DE/AT/CH DE/AT/CH DE/AT/CH DE/AT/CH
Schaltfolge an jedem dieser Wochentage zur selben Zeit
ausgeführt.
Hinweis: Sofern ca. 10 Sekunden keine Einstellungen vorgenommen werden, wechselt das Gerät zur normalen Zeitanzeige zurück.
Drücken Sie so häufig die Stunden-Taste (HOUR) 9,
bis die gewünschte Stunde im LC-Display 1 erscheint.
Drücken Sie so häufig die Minuten-Taste (MIN) 2, bis
die gewünschte Minute im LC-Display 1 erscheint.
Drücken Sie nochmals die Eingabe-Taste (SET) 8, um
mit der Einstellung fortzufahren.
Im LC-Display 1 erscheint die Anzeige PROG 1 OFF
„- - : - -”.
Ausschaltzeit:
Drücken Sie so häufig die Wochentag-Taste (WEEK) 6,
bis der gewünschte Wochentag oder Tagesblock im
LC-Display 1 erscheint.
Bedienung
Wochentag und Uhr einstellen
Halten Sie die Taste Anzeigemodus (TIME) 7 während
des folgenden Programmiervorgangs gedrückt.
Drücken Sie so häufig die Wochentag-Taste (WEEK) 6,
bis der gewünschte Wochentag im LC-Display 1 erscheint.
Tipp: Halten Sie die Wochentag-Taste (WEEK) 6 für
ca. 3 Sekunden gedrückt. So erreichen Sie ein beschleunigtes Einstellen der Werte. Diese Schnelleinstellung
können Sie auch für die folgenden Einstellvorgänge nutzen.
Hinweis: MO = Montag, TU = Dienstag,
WE = Mittwoch, TH = Donnerstag, FR = Freitag,
SA = Samstag, SU = Sonntag
Drücken Sie so häufig die Stunden-Taste (HOUR) 9,
bis die gewünschte Stunde im LC-Display 1 erscheint.
Drücken Sie so häufig die Minuten-Taste (MIN) 2, bis
die gewünschte Minute im LC-Display 1 erscheint.
Drücken Sie so häufig die Stunden-Taste (HOUR) 9,
bis die gewünschte Stunde im LC-Display 1 erscheint.
Drücken Sie so häufig die Minuten-Taste (MIN) 2, bis
die gewünschte Minute im LC-Display 1 erscheint.
Drücken Sie nochmals die Eingabe-Taste (SET) 8, um
die Einstellung zu speichern.
Drücken Sie die Taste Anzeigemodus (TIME) 7, um zur
aktuellen Uhrzeit zurückzukehren.
Hinweis: Sie können bis zu 20 unterschiedliche Schaltfolgen
programmieren. Wiederholen Sie dazu jeweils den zuvor
beschriebenen Programmiervorgang. Im LC-Display 1
erscheint bei jedem weiteren Speichervorgang fortlaufend
PROG 2 ON „- - : - -” usw.
Schaltzeiten ändern oder prüfen
Drücken Sie zum Ändern oder Prüfen der Schaltzeiten
die Eingabe-Taste (SET) 8 und die einprogrammierten
Schaltzeiten erscheinen nacheinander im Display.
Lassen Sie die Taste Anzeigemodus (TIME) 7 los.
Hinweis: Die Zeitschaltuhr ist nun in Betrieb. Dieses
wird durch Blinken des Doppelpunkts im LC-Display 1
angezeigt.
Sommer- / Winterzeit aktivieren
Drücken Sie so lange die Taste Anzeigemodus (TIME) 7,
bis der Zusatz „+1h“ in der Zeitanzeige erscheint bzw.
erlischt.
Zeitschaltuhr programmieren
Einschaltzeit:
Drücken Sie einmal die Eingabe-Taste (SET) 8. Im LC-
Display 1 erscheint die Anzeige PROG 1 ON „- - : - -”.
Drücken Sie so häufig die Wochentag-Taste (WEEK) 6,
bis der gewünschte Wochentag oder Tagesblock im
LC-Display 1 erscheint. Folgende Wochen- und Tagesblöcke sind möglich:
Gehen Sie zum Ändern der Tage, Stunden oder Minuten
vor, wie im Kapitel „Zeitschaltuhr programmieren“
beschrieben.
Schaltzeiten aktivieren /
deaktivieren
Drücken Sie die Eingabe-Taste (SET) 8 so oft, bis die
gewünschte Schaltzeit gewählt ist.
Drücken Sie anschließend die Rückruf-Taste (RECALL) 5,
um die programmierte Schaltzeit aufzuheben. Die Schaltdaten werden nicht aus dem Speicher gelöscht, sondern
lediglich deaktiviert. Im Display erscheint das Symbol
“- - : - -”.
Drücken Sie erneut die Rückruf-Taste (RECALL) 5, um
die aufgehobene Schaltzeit zu aktivieren.
Schaltzeiten manuell überspringen
Unabhängig von der Programmierung können Sie jeder-
zeit eine nachfolgende Schaltzeit manuell überspringen.
• MO TU WE TH FR
Montag – Freitag
• SA SU
Samstag + Sonntag
• MO TU WE TH FR SA
Montag – Samstag
• MO WE FR
Montag + Mittwoch + Freitag
• TU TH SA
Dienstag + Donnerstag + Samstag
• MO TU WE
Montag – Mittwoch
• TH FR SA
Donnerstag – Samstag
• MO TU WE TH FR SA SO
Montag – Sonntag
Hinweis: Sobald ein bestimmter Tag oder eine Kombination
von Tagen eingespeichert worden ist, wird die programmierte
Drücken Sie dazu die EIN-/AUTO-/AUS-Taste (MANUAL)
so häufig, bis der gewünschte Befehl im LC-Display 1
3
erscheint:
OFF: Alle Schaltzeiten sind aufgehoben, die Zeitschaltuhr
leitet keinen Strom an angeschlossene Geräte weiter.
AUTO OFF: Schaltzeiten aktiv, die Zeitschaltuhr ist
ausgeschaltet.
ON: Alle Schaltzeiten sind aufgehoben, das die Zeitschaltuhr leitet dauerhaft Strom an das angeschlossene
Gerät weiter.
AUTO ON: Schaltzeiten aktiv, die Zeitschaltuhr ist
eingeschaltet.
Zufallsmodus einstellen
Hinweis: Diese Funktion schaltet die Zeitschaltuhr willkürlich
ein und aus und soll Hauseinbrüchen vorbeugen, indem durch
die Unregelmäßigkeit der Schaltzeiten (z. B. bei Lampen)
ein bewohntes Haus vorgetäuscht wird. Die von Ihnen
vorprogrammierten Schaltbefehle verschieben sich täglich
DE/AT/CH DE/AT/CH DE/AT/CH DE/AT/CH
zufällig um bis zu 30 Minuten. Diese Funktion ist jedoch nur
möglich, wenn ein oder mehrere Schaltbefehle eingestellt
worden sind.
Drücken Sie die Stunden-Taste (HOUR) 9 für 3 Sekunden.
Die Zeitschaltuhr wechselt in den Zufallsmodus. Auf dem
LC-Display 1 erscheint das Symbol „RND“, der Zufallsmodus ist eingeschaltet.
Drücken Sie die Stunden-Taste (HOUR) 9 erneut für 3
Sekunden, um den Zufallsmodus zu beenden.
Countdown einstellen
Hinweis: Mittels des Countdowns können Sie die Zeitspanne
bis zum Ausschalten der Stromversorgung regulieren.
Hinweis: Das „CTD“-Icon erscheint nach dem 20.
Speicherplatz.
Drücken Sie so häufig die Stunden-Taste (HOUR) 9,
bis die gewünschte Stunde im LC-Display 1 erscheint.
Drücken Sie so häufig die Minuten-Taste (MIN) 2, bis
die gewünschte Minute im LC-Display 1 erscheint.
Hinweis: Der Countdown kann von 1 Minute bis
23 Stunden, 59 Minuten, eingestellt werden.
Drücken Sie die Taste Anzeigemodus (TIME) 7.
Das Gerät kehrt in den normalen Betriebsmodus zurück.
Drücken Sie gleichzeitig die Stunden- (HOUR) 9 und
die Minuten-Taste (MIN) 2, um die Countdown-Funktion
zu starten.
Countdown manuell beenden
Drücken Sie die Eingabe-Taste (SET) 8, um in das
Timer-Menü zu gelangen.
Halten Sie so lange die Eingabe-Taste (SET) 8 gedrückt,
bis im LC-Display 1 das „CTD“-Icon erscheint.
DE/AT/CH DE/AT/CH DE/AT/CH DE/AT/CH
66142_Zeitschaltuhr_digital_innen_CH.indd 1 20.07.11 18:11
Drücken Sie während des Countdowns die EIN- / AUTO- /
AUS-Taste (MANUAL) 3, um diesen anzuhalten.
Drücken Sie die EIN- / AUTO- / AUS-Taste (MANUAL) 3
erneut, um den Countdown fortzusetzen.
Drücken Sie die Taste Anzeigemodus (TIME) 7, um
von der Countdown-Anzeige zur aktuellen Uhrzeit zu
wechseln.
Drücken Sie Taste Anzeigemodus (TIME) 7 erneut, um
von der aktuellen Uhrzeit zur Countdown-Anzeige zu
wechseln.
Drücken Sie gleichzeitig die Stunden- (HOUR) 9 und
die Minuten-Taste (MIN) 2, um den Countdown abzubrechen.
Reinigung und Pflege
Verwenden Sie in keinem Fall Flüssigkeiten und keine
Reinigungsmittel, da diese das Gerät beschädigen.
Reinigen Sie das Gerät nur äußerlich mit einem weichen
trockenen Tuch.
Entsorgung
Die Verpackung besteht aus umweltfreundlichen
Materialien, die Sie über die örtlichen Recyclingstellen entsorgen können.
Möglichkeiten zur Entsorgung des ausgedienten Produkts
erfahren Sie bei Ihrer Gemeinde- oder Stadtverwaltung.
Werfen Sie Ihr Gerät, wenn es ausgedient hat,
im Interesse des Umweltschutzes nicht in den
Hausmüll, sondern führen Sie es einer fachgerechten Entsorgung zu. Über Sammelstellen und
deren Öffnungszeiten können Sie sich bei Ihrer
zuständigen Verwaltung informieren.
Page 3
Produktbezeichnung:
Digitale Wochenzeitschaltuhr
Art.-Nr.: 97318-11
Modell-Nr.: EIM-804 SW
Programmateur digital hebdomadaire
Introduction
Avant la première mise en service, veuillez vous
familiariser avec l’appareil. Veuillez lire pour
cela le mode d’emploi ci-dessous et les consignes
de sécurité. L’appareil doit uniquement être utilisé conformément
aux instructions et dans les domaines d’application spécifiés.
Soigneusement conserver ces instructions. Remettez tous les
documents aux utilisateurs lorsque vous prêtez cet appareil.
pour les dégâts issus d’une utilisation non conforme. Cet
appareil n’est pas conçu pour une utilisation commerciale.
Caractéristiques
Tension nominale : 240 V ∼, 50 Hz
Courant nominal : AC 10 A
Charge maximale : 2300 watts
Interrupteur de sortie : relais
Précision de la minuterie : + / – 1 seconde / jour à
20 °C
Durée programmable minimale : 1 minute
Touche mode d’affichage (TIME)
7
Touche d’entrée (SET)
8
Touche heures (HOUR)
9
Sécurité
Veuillez lire toutes les consignes
de sécurité et instructions. Tout manquement aux consignes
de sécurité et aux instructions peut provoquer des brûlures
et / ou de graves blessures.
DE/AT/CH
Consignes de sécurité générales
DANGER DE
MORT ET D’ACCIDENT POUR LES ENFANTS EN BAS ÂGE ET LES ENFANTS !
Ce produit n’est pas un jouet. Ne jamais laisser les enfants
manipuler sans surveillance le matériel d’emballage et
l’appareil. Il existe un risque d’étouffement par le matériel
d’emballage et un danger de mort par électrocution.
Cet appareil n’est pas conçu pour être utilisé par des
personnes (enfants compris) dont les aptitudes physiques,
sensorielles ou mentales sont limitées ou manquant
d’expérience et / ou des connaissances requises, sauf
sous la surveillance d’une personne responsable de leur
sécurité ou après avoir été instruit du maniement de
l’appareil. Surveiller les enfants pour garantir qu’ils ne
jouent pas avec l’appareil.
Utilisation conforme
Cet appareil est conçu pour allumer et éteindre automatiquement des appareils électriques. L’appareil doit uniquement
être utilisé dans des locaux fermés. Toutes modifications de
l’appareil ne sont pas conformes et peuvent être sources de
graves accidents. Le fabricant décline toute responsabilité
FR/CH FR/CH FR/CH
Uniquement faire fonctionner l’appareil sur une prise de
courant correctement installée.
PRUDENCE ! Ne pas connecter la minuterie numé-
rique en série. Les adaptateurs enfichés représentent un
risque d’endommagement mécanique.
DANGER DE MORT
PAR ÉLECTROCUTION ! Tenir l’appareil à
l’écart de l’humidité et ne jamais le saisir
avec des mains mouillées.
Ne pas exposer l’appareil à une chaleur ou à un froid
extrêmes.
Ne pas exposer l’appareil à des variations de tempéra-
ture extrêmes. Autrement, il peut se former de l’eau de
condensation. Attendre que l’appareil s’acclimate à la
température ambiante avant de le mettre en marche.
Ne pas recouvrir l’appareil par des journaux, des vête-
ments ou similaires afin d’éviter qu’il chauffe de manière
excessive.
Description des pièces
Affichage à cristaux liquides
1
Touche minutes (MIN)
2
Touche MARCHE / AUTO / ARRÊT (MANUAL)
3
Touche Reset
4
Touche de rappel (RECALL)
5
Touche jour de la semaine (WEEK)
6
Vérifier le parfait état de l’appareil avant chaque raccor-
dement au secteur. Ne jamais utiliser l’appareil si vous
détectez le moindre endommagement. En cas d’endommagement, pour toute réparation ou autre problème
avec l’appareil, veuillez contacter un professionnel.
Ne pas brancher d’appareil dont le poids serait supporté
par la fiche. Ceci évite une surchauffe excessive et un
endommagement mécanique de la prise de courant.
Ne pas utiliser l’appareil avec des multiprises ou des
câbles de rallonge.
Tenir compte que tout endommagement dû à une mani-
pulation incorrecte, au non respect du mode d’emploi
ou à une intervention par des personnes non autorisées
est exclu de la garantie.
L’appareil n’est pas conçu pour commuter des charges
inductives supérieures à 10 A (ampères). Pour cette raison,
cette minuterie ne doit jamais être utilisée pour faire
fonctionner des moteurs électriques ou des tubes fluorescents avec des ballasts conventionnels. Consultez un
CONSERVER TOUTES LES CONSIGNES DE SÉCURITÉ ET
INSTRUCTIONS POUR CONSULTATION ULTÉRIEURE !
professionnel si vous n’êtes pas sûr de la charge inductive
de votre appareil.
Ne pas ouvrir le boîtier et ne jamais tenter de remplacer
vous-même des pièces ou d’effectuer des réparations.
Avant d’effectuer le nettoyage, toujours débrancher
l’appareil de la prise de courant et déconnecter toutes
les fiches secteurs de l’appareil.
Veiller à ce que l’appareil soit toujours aisément accessible.
En cas de panne, immédiatement débrancher l’appareil
de la prise de courant.
Avant la mise en service
La minuterie est équipée d’un accu intégré. Celui-ci sert à
conserver les données mémorisées telles que l’heure, la
date et les commutations. Avant la première utilisation, l’accu
doit être chargé pendant 24 heures. Pendant le chargement,
vous pouvez déjà effectuer les réglages de l’appareil.
FR/CH FR/CH FR/CH FR/CH
Brancher l’appareil dans une prise de courant de
220–250 V, 50 Hz correctement installée. Pendant un
bref instant, tous les témoins apparaissent sur l’affichage
à cristaux liquides 1. L’horloge est ensuite affichée.
Remarque : en cas d’interruption de l’alimentation
électrique, l’accu intégré assure la continuité de l’affichage
de l’heure et du programme de commutation automatique.
L’appareil peut être totalement programmé sans alimentation électrique si l’accu est complètement chargé.
Utilisation
Réglage du jour de la semaine
et de l’heure
Enfoncer la touche du mode d’affichage (TIME) 7
pendant la procédure de programmation suivante.
Appuyer plusieurs fois sur la touche du jour de la se-
maine (WEEK) 6 jusqu’à ce le jour désiré soit indiqué
sur l’affichage à cristaux liquides 1.
FR/CH FR/CH FR/CH FR/CH
Appuyer plusieurs fois sur la touche des heures (HOUR)
jusqu’à ce que l’heure désirée soit indiquée dans
9
l’affichage à cristaux liquides 1.
Appuyer plusieurs fois sur la touche des minutes (MIN) 2
jusqu’à ce que la minute désirée soit indiquée dans
l’affichage à cristaux liquides 1.
Appuyer une fois de plus sur la touche d’entrée (SET) 8
pour mémoriser les réglages.
Le témoin PROG 1 OFF «- - : - -» apparaît dans l’affi-
chage à cristaux liquides 1.
Heure d’extinction :
Appuyer plusieurs fois sur la touche du jour de la semaine
(WEEK) 6 jusqu’à ce que le jour de semaine ou la série
de jour désirée apparaisse dans l’affichage à cristaux
liquides 1.
Appuyer plusieurs fois sur la touche des heures (HOUR)
jusqu’à ce que l’heure désirée apparaisse dans
9
l’affichage à cristaux liquides 1.
Conseil : enfoncer la touche du jour de la semaine
(WEEK) 6 pendant env. 3 secondes. Ceci permet de
régler les valeurs plus rapidement. Vous pouvez aussi
utiliser ce réglage rapide pour les réglages suivants.
Remarque : MO = lundi, TU = mardi, WE = mercredi,
TH = jeudi, FR = vendredi, SA = samedi, SU = dimanche
Appuyer plusieurs fois sur la touche des heures (HOUR)
jusqu’à ce que l’heure désirée soit indiquée sur
9
l’affichage à cristaux liquides 1.
Appuyer plusieurs fois sur la touche des minutes (MIN) 2
jusqu’à ce que la minute désirée soit indiquée sur
l’affichage à cristaux liquides 1.
Relâcher la touche de mode d’affichage (TIME) 7.
Remarque : si aucun réglage n’est effectuer pendant
env. 10 secondes, l’appareil repasse sur l’affichage de
l’heure.
Remarque : la minuterie est à présent en marche.
Ceci est signalé par le clignotement du double point sur
l’affichage à cristaux liquides 1.
Appuyer plusieurs fois sur la touche des minutes (MIN) 2
jusqu’à ce que la minute désirée apparaisse dans
l’affichage à cristaux liquides 1.
Appuyer une fois de plus sur la touche d’entrée (SET) 8
pour mémoriser les réglages.
Appuyer sur la touche du mode d’affichage (TIME) 7
pour retourner à l’heure actuelle.
Remarque : vous pouvez programmer jusque 20 différentes
séquences de commutation. Vous devez pour cela répéter
la procédure de programmation plus haut décrite. L’affichage
à cristaux liquides 1 indique pour chaque autre enregistrement consécutif PROG 2 ON «- - : - -», etc.
Modification ou vérification des
heures de commutation
Pour modifier ou vérifier les heures de commutation,
appuyer sur la touche d’entrée (SET) 8 afin d’afficher
Activation de l’heure d’été / d’hiver
Appuyer plusieurs fois sur la touche de mode d’affichage
(TIME) 7 jusqu’à ce que le témoin «+1h» s’affiche ou
s’éteigne dans l’horloge.
Programmation de la minuterie
Heure d’allumage :
Appuyer une fois sur la touche d’entrée (SET) 8. Le
témoin PROG 1 ON «- - : - -» apparaît dans l’affichage
à cristaux liquides 1.
Appuyer plusieurs fois sur la touche du jour de la semaine
(WEEK) 6 jusqu’à ce que le jour désiré ou la série de
jours apparaisse dans l’affichage à cristaux liquides 1.
Vous disposez des jours et séries de jours suivants :
• MO TU WE TH FR
lundi – vendredi
• SA SU
samedi + dimanche
consécutivement les heures de commutation programmées
sur l’écran.
Pour modifier les jours, les heures ou les minutes, procéder
comme décrit au chapitre «Programmation de la minuterie».
Activation / désactivation des heures
de commutation
Appuyer sur la touche d’entrée (SET) 8.
Appuyer ensuite sur la touche de rappel (RECALL) 5
pour annuler l’heure de commutation programmée. Les
données de commutation ne seront pas effacées de la
mémoire, mais simplement désactivées. L’écran affiche
le symbole «- - : - -».
Appuyer de nouveau sur la touche de rappel (RECALL) 5
pour réactiver l’heure de commutation annulée.
• MO TU WE TH FR SA
lundi – samedi
• MO WE FR
lundi + mercredi + vendredi
• TU TH SA
mardi + jeudi + samedi
• MO TU WE
lundi – mercredi
• TH FR SA
jeudi – samedi
• MO TU WE TH FR SA SO
lundi – dimanche
Remarque : après l’enregistrement d’un jour ou d’une série
de jours, la séquence de commutations programmée est
exécutée aux mêmes heures pour chaque jour de semaine
sélectionné.
Saut manuel des heures de
commutation
Indépendamment de la programmation, vous pouvez à
tout moment sauter manuellement la prochaine heure de
commutation.
Pour cela, appuyer plusieurs fois sur la touche
MARCHE / AUTO / ARRÊT (MANUAL) 3 jusqu’à ce
que l’instruction désirée apparaisse sur l’affichage à
cristaux liquides 1:
OFF : toutes les heures de commutation sont annulées,
l’appareil n’alimente plus les appareils branchés en
courant électrique.
AUTO OFF : les heures de commutations sont actives,
l’appareil est éteint.
ON : toutes les heures de commutation sont annulées,
l’appareil alimente en permanence les appareils branchés
en courant électrique.
AUTO ON : les heures de commutation sont actives,
l’appareil est allumé.
FR/CH FR/CH FR/CH FR/CH
Réglage du mode aléatoire
Remarque : cette fonction assure un allumage et une
extinction arbitraire de la minuterie et est sensée prévenir
contre des cambriolages en simulant une maison habitée
par des heures de commutation (par ex. allumage de lampes)
irréguliers. Les instructions de commutation que vous avez
programmées se décalent chaque jour de manière aléatoire
jusque 30 minutes. Cependant, cette fonction est uniquement
disponible à condition qu’une ou plusieurs instructions de
commutation sont réglées.
Appuyer sur la touche des heures (HOUR) 9 pendant
3 secondes. La minuterie passe en mode aléatoire.
L’affichage à cristaux liquides 1 indique le symbole
«RND», le mode aléatoire est activé.
Appuyer de nouveau sur la touche des heures (HOUR) 9
pendant 3 secondes pour quitter le mode aléatoire.
FR/CH FR/CH FR/CH FR/CH
66142_Zeitschaltuhr_digital_innen_CH.indd 2 20.07.11 18:11
Réglage du compte à rebours
Appuyer sur la touche d’entrée (SET) 8 pour accéder
au menu de la minuterie.
Enfoncer la touche d’entrée (SET) 8 jusqu’à ce que
l’affichage à cristaux liquides 1 indique le symbole
«CTD».
Appuyer plusieurs fois sur la touche des heures (HOUR)
jusqu’à ce que l’heure désirée apparaisse sur
9
l’affichage à cristaux liquides 1.
Appuyer plusieurs fois sur la touche des minutes (MIN) 2
jusqu’à ce que la minute désirée apparaisse sur l’affichage à cristaux liquides 1.
Remarque : le compte à rebours peut être réglé sur
une durée allant d’1 minute à 23 heures et 59 minutes.
Appuyer sur la touche de mode d’affichage (TIME) 7.
L’appareil repasse en mode de fonctionnement normal.
Appuyer simultanément sur les touches des heures
(HOUR) 9 et des minutes (MIN) 2 pour lancer la
fonction de compte à rebours.
Arrêt manuel du compte à rebours
Pour stopper le compte à rebours pendant son exécution,
appuyer sur la touche MARCHE / AUTO / ARRÊT
(MANUAL) 3.
Appuyer de nouveau sur la touche MARCHE / AUTO /
ARRÊT (MANUAL) 3 pour relancer le compte à rebours.
Appuyer sur la touche de mode d’affichage (TIME) 7
pour passer de l’affichage du compte à rebours à
l’heure actuelle.
Appuyer de nouveau sur la touche de mode d’affichage
(TIME) 7 pour repasser de l’heure actuelle à l’affichage
du compte à rebours.
Appuyer simultanément sur les touches des heures
(HOUR) 9 et des minutes (MIN) 2 pour annuler le
compte à rebours.
Nettoyage et entretien
Ne jamais utiliser des liquides ou des détergents sous
peine d’endommager l’appareil.
Uniquement essuyer les surfaces externes de l’appareil
avec un chiffon sec et doux.
Mise au rebut
L’emballage se compose exclusivement de
matières recyclables qui peuvent être mises au
rebut dans les déchetteries locales.
Renseignez-vous auprès de votre mairie ou de l’administration
municipale concernant les possibilités de mise au rebut du
produit usé.
Page 4
Afin de contribuer à la protection de l’environnement, veuillez ne pas jeter votre appareil usé
dans les ordures ménagères, mais le mettre au
rebut de manière adéquate. Veuillez vous renseigner auprès des autorités responsables concernant
les déchetteries et leurs horaires d’ouverture.
Désignation du produit :
Programmateur digital hebdomadaire
N° d’art. : 97318-11
N° du modèle : EIM-804 SW
Presa temporizzata digitale
Introduzione
Familiarizzarsi con l’apparecchio prima di avviarlo e di utilizzarlo per la prima volta. A questo
proposito leggere le seguenti istruzioni d’uso
nonché le indicazioni di sicurezza. Utilizzare l’apparecchio
solamente come descritto e per gli ambiti di utilizzo indicati.
Conservare queste istruzioni d’uso in buono stato. In caso
di trasferimento del prodotto a terzi, consegnare anche tutta
la documentazione.
Utilizzo secondo la
destinazione d’uso
Questo apparecchio è adatto per l’accensione e lo spegnimento automatico di apparecchi elettrici. L’apparecchio
può essere utilizzato solamente in ambienti chiusi. Tutte le
modifiche apportate all’apparecchio sono da considerarsi
non conformi alla destinazione d’uso e possono comportare
notevoli pericoli di infortuni. Il produttore non si assume alcuna
responsabilità per danni derivanti da un utilizzo non conforme.
Questo apparecchio non è destinato all’uso commerciale.
Dati tecnici
Tensione nominale: 240 V ∼, 50 Hz
Corrente nominale: AC 10 A
Carico massimo: 2300 Watt
Interruttore di uscita: Relè
Precisione del timer: + / – 1 secondo / giorno
alla temperatura di 20 °C
Tempo minimo programmabile: 1 Minuto
Descrizione dei componenti
Display a cristalli liquidi
1
Tasto di impostazione dei minuti (MIN)
2
Tasto ON / AUTO / OFF (MANUAL)
3
Tasto di reset
4
Tasto di richiamo (RECALL)
5
Tasto di impostazione del giorno della settimana (WEEK)
6
Tasto di modalità di visualizzazione (TIME)
7
Tasto di immissione (SET)
8
Tasto di impostazione delle ore (HOUR)
9
Sicurezza
Leggere tutte le indicazioni di sicurezze
e le istruzioni riportate. Il mancato rispetto delle indicazioni
di sicurezza e delle istruzioni d’uso può provocare incendi
e / o gravi lesioni.
CONSERVARE TUTTE LE INDICAZIONI DI SICUREZZA
E LE ISTRUZIONI D’USO PER UN’EVENTUALE FUTURA
CONSULTAZIONE!
FR/CH
Indicazioni generali di sicurezza
PERICOLO DI
MORTE E DI INCIDENTI PER BAMBINI
E INFANTI! Il prodotto non è un giocattolo.
Non lasciare mai i bambini incustoditi nei pressi del
materiale di imballaggio e dell’apparecchio. Sussiste il
pericolo di soffocamento a causa del materiale per
imballaggio nonché un pericolo di morte a causa di
scossa elettrica.
Non fare utilizzare questo prodotto da persone (ivi inclusi
bambini) con capacità fisiche, sensoriali o mentali limitate
o che siano prive di esperienza e / o conoscenza, a
meno che esse non vengano sorvegliate da una persona
responsabile per la loro sicurezza o ricevano indicazioni
su come l’apparecchio debba essere utilizzato. I bambini
devono essere sorvegliati per assicurarsi che non
giochino con il prodotto.
IT/CH IT/CH IT/CH IT/CH
la prima volta. Durante la procedura di carico si possono
già eseguire delle impostazioni all’apparecchio.
Inserire l’apparecchio in una presa elettrica di rete da
220–250 V, 50 Hz installata a regola d’arte. Per un breve
istante sul display a cristalli liquidi 1 appaiono tutte le
visualizzazioni. In seguito appare la visualizzazione
dell’ora.
Nota: In caso di interruzione dell’alimentazione elettrica,
l’accumulatore incorporato assicura che l’ora continui a
essere visualizzata e che il programma automatico di
attivazione rimanga inserito. Fino a quando l’accumulatore è completamente carico, l’apparecchio può essere
normalmente programmato anche senza alimentazione
elettrica.
IT/CH IT/CH IT/CH
Utilizzare per l’apparecchio solamente a una presa
elettrica di rete installata a regola d’arte.
ATTENZIONE! Non collegare l’orologio temporizzatore
digitale in serie. Le spine intermedie inserite l’una nell’altra
possono provocare un danno meccanico.
PERICOLO DI
MORTE DETERMINATO DA UNA
SCOSSA ELETTRICA! Mantenere l’appa-
recchio lontano dall’umidità e non afferrarlo con mani
bagnate.
Non esporre l’apparecchio a calore o a freddo estremi.
Non esporre il prodotto ad estreme oscillazioni di tem-
peratura. In caso contrario vi è il pericolo che si formi
acqua di condensa. Non mettere in funzione l’apparecchio
fino a quando esso non abbia raggiunto la temperatura
ambiente.
Non coprire l’apparecchio con giornali, vestiario o simili,
e ciò al fine di evitare un eccessivo riscaldamento.
Funzionamento
Impostazione del giorno della
settimana e dell’ora
Premere e mantenere premuto il tasto di modalità di
visualizzazione (TIME) 7 durante la successiva proce-
dura di programmazione.
Premere ripetutamente il tasto di impostazione del
giorno della settimana (WEEK) 6, fino a quando sul
display a cristalli liquidi 1 non appare il giorno della
settimana desiderato.
Suggerimento: Premere e mantenere premuto il tasto
del giorno della settimana (WEEK) 6 per circa 3 secondi.
In questo modo si ottiene un’impostazione accelerata
dei valori. Questa impostazione veloce può essere
utilizzata anche per le successive procedure di imposta-
zione.
Nota: MO = lunedì, TU = martedì, WE = mercoledì,
TH = giovedì, FR = venerdì, SA = sabato, SU = domenica
Prima di ogni collegamento alla rete elettrica, controllare
l’apparecchio per verificare l’eventuale presenza di
danni. Non utilizzare mai l’apparecchio qualora si
notassero dei danni. Rivolgersi a un elettricista in caso
di danneggiamenti, necessità di riparazioni o altri
problemi nell’utilizzo dell’apparecchio.
Non inserire alcun apparecchio il cui peso ricada sulla
spina. In questo modo si evita un riscaldamento non am-
messo nonché danni meccanici alla presa elettrica di rete.
Non utilizzare l’apparecchio con ciabatte o prolunghe.
Tenere presente che sono esclusi dall’applicazione della
prestazione di garanzia i danni derivanti da un utilizzo
scorretto, dalla mancata osservanza delle istruzioni
d’uso o da un intervento sull’apparecchio da parte di
persone non autorizzate.
L’apparecchio non è adatto a collegare carichi induttivi
superiori a 10 A (Ampere). Per questo motivo non azio-
nare mai motori elettrici o tubi fluorescenti con alimentatori
con questo orologio temporizzatore. Rivolgersi a un
Premere ripetutamente il tasto di impostazione dell’ora
(HOUR) 9, fino a quando sul display a cristalli liquidi 1
non appare l’ora desiderata.
Premere ripetutamente il tasto di impostazione dei minuti
(MIN) 2, fino a quando sul display a cristalli liquidi 1
non appare il minuto desiderato.
Rilasciare il tasto di modalità di visualizzazione (TIME) 7.
Nota: Qualora entro 10 secondi non venisse eseguita
alcuna impostazione, l’apparecchio si commuta nuova-
mente nella visualizzazione oraria normale.
Nota: L’orologio temporizzatore è ora in funzione.
Ciò viene indicato sul display a cristalli liquidi 1 dal
lampeggio dei due punti.
Attivazione dell’ora legale / ora
solare
Mantenere premuto il tasto di modalità di visualizzazione
(TIME) 7, fino a quando appare o scompare il messaggio
“+1h” nella visualizzazione dell’orario.
tecnico qualificato qualora non siate sicuri sul carico
induttivo del Vostro apparecchio.
Non aprire l’apparecchio da soli e non cercare mai di
sostituire da soli componenti o di riparare l’apparecchio.
Quando si eseguono interventi di pulizia, staccare
sempre l’apparecchio dalla presa elettrica di rete ed
estrarre tutte le spine dall’apparecchio.
Fare attenzione a che l’apparecchio sia sempre ben
accessibile.
In caso di disturbi estrarre subito l’apparecchio dalla
presa elettrica di rete.
Prima dell’avvio
L’orologio temporizzatore dispone di un accumulatore integrato. Esso serve allo scopo di mantenere i dati memorizzati
quali ora, data, e procedure di attivazione. L’accumulatore
deve essere caricato per 24 ore prima di essere utilizzato per
Programmazione dell’orologio
temporizzatore
Orario di accensione:
Premere una volta il tasto di immissione (SET) 8. Nel
display a cristalli liquidi 1 appare la visualizzazione
PROG 1 ON “- - : - -”.
Premere ripetutamente il tasto di impostazione del
giorno della settimana (WEEK) 6, fino a quando sul
display a cristalli liquidi 1 non appare il giorno della
settimana. Sono possibili i seguenti blocchi di settimane
e di giorni:
• MO TU WE TH FR
lunedì – venerdì
• SA SU
sabato + domenica
• MO TU WE TH FR SA
lunedì – venerdì
• MO WE FR
lunedì + mercoledì + venerdì
IT/CH IT/CH IT/CH IT/CH
• TU TH SA
martedì + giovedì + sabato
• MO TU WE
lunedì – mercoledì
• TH FR SA
giovedì – sabato
• MO TU WE TH FR SA SO
lunedì – domenica
Nota: Non appena è stato memorizzato un determinato
giorno o una combinazione di giorni, la sequenza di attivazione programmata in ciascuno di questi giorni viene eseguita
alla stessa ora.
Premere ripetutamente il tasto di impostazione dell’ora
(HOUR) 9, fino a quando sul display a cristalli liquidi 1
non appare l’ora desiderata.
IT/CH IT/CH IT/CH IT/CH
temporizzatore non trasferisce più l’energia elettrica
agli apparecchi collegati.
AUTO OFF: I tempi di attivazione sono attivi, l’orologio
temporizzatore è disinserito.
ON: Tutti gli orari di attivazione sono rimossi, l’orologio
trasferisce regolarmente all’apparecchio collegato.
AUTO ON: I tempi di attivazione sono attivi, l’orologio
temporizzatore è acceso.
Impostazione della
modalità causale
Nota: Questa funzione permette di accendere e spegnere
l’orologio temporizzatore a discrezione e ha, ad esempio,
lo scopo di impedire svaligiamenti, dando l’impressione che
una casa sia abitata con la non regolarità dei tempi di attivazione (ad esempio di lampade). I comandi di attivazione
programmati in precedenza vengono rinviati giornalmente
a caso fino a 30 minuti. Tale funzione è tuttavia solamente
Premere ripetutamente il tasto di impostazione dei minuti
(MIN) 2, fino a quando sul display a cristalli liquidi non
appare la cifra dei minuti desiderato 1.
Memorizzare l’impostazione premendo ancora una
volta il tasto di immissione (SET) 8.
Sul display a cristalli liquidi 1 appare la visualizzazione
PROG 1 OFF “- - : - -”.
Ora di spegnimento:
Premere ripetutamente il tasto di impostazione del
giorno della settimana (WEEK) 6, fino a quando sul
display a cristalli liquidi 1 non appare il giorno della
settimana o il blocco di giorni desiderato.
Premere ripetutamente il tasto di impostazione dell’ora
(HOUR) 9, fino a quando sul display a cristalli liquidi 1
non appare l’ora desiderata.
Premere ripetutamente il tasto di impostazione dei minuti
(MIN) 2, fino a quando sul display a cristalli liquidi 1
non appare il minuto desiderato.
possibile quando uno i più comandi di attivazione sono stati
impostati.
Premere il tasto di impostazione delle ore (HOUR) 9
per 3 secondi. L’orologio temporizzatore si commuta
nella modalità casuale. Sul display a cristalli liquidi 1
appare il simbolo “RND”, e la modalità casuale è inserita.
Per interrompere la modalità casuale premere nuovamente
il tasto di impostazione delle ore (HOUR) 9 per 3 secondi.
Impostazione del conto alla
rovescia
Per accedere al Menù Timer premere il tasto di
immissione (SET) 8.
Tenere il tasto di immissione (SET) 8 premuto fino a
quando sul display a cristalli liquidi 1 appare l’icona
“CTD”.
Memorizzare l’impostazione premendo ancora una
volta il tasto di immissione (SET) 8.
Per tornare all’ora attuale, premere il tasto di modalità
di visualizzazione (TIME) 7.
Nota: Possono essere programmate fino a 20 diverse sequenze di attivazione. Ripetere di volta in volta la procedura
di programmazione precedentemente descritta. Nel display
a cristalli liquidi 1 a ogni successiva procedura di memorizzazione appare la visualizzazione PROG 2 ON “- - : . - -” ecc.
Modifica o verifica dei
tempi di attivazione
Modificare o verificare i tempi di attivazione premendo
il tasto di immissione (SET) 8, e uno dopo l’altro
appariranno gli orari programmati di attivazione.
Per modificare il dato relativo ai giorni, alle ore e ai
minuti, procedere come descritto nel capitolo “Programmazione dell’orologio temporizzatore”.
Premere ripetutamente il tasto di impostazione dell’ora
(HOUR) 9, fino a quando sul display a cristalli liquidi 1
non appare l’ora desiderata.
Premere ripetutamente il tasto di impostazione dei minuti
(MIN) 2, fino a quando sul display a cristalli liquidi non
appare la cifra dei minuti desiderata 1.
Nota: Il conto alla rovescia può essere impostato da 1
minuto fino a 23 ore, 59 minuti e 59 secondi.
Premere il tasto della modalità di visualizzazione
(TIME) 7.
L’apparecchio torna nella normale modalità di esercizio.
Per avviare la funzione di conto alla rovescia premere
contemporaneamente i tasti di impostazione delle ore
(HOUR) 9 e quello d impostazione dei minuti (MIN) 2.
Interruzione manuale del
conto alla rovescia
Per fermare il conto alla rovescia premere, mentre esso
è in corso, il tasto ON / AUTO / OFF (MANUAL) 3.
Inserimento / disinserimento degli
orari di attivazione
Premere il tasto di immissione (SET) 8.
Rimuovere il tempo di attivazione premendo in seguito il
tasto di richiamo (RECALL) 5. I dati di attivazione non
vengono cancellati dalla memoria, bensì solamente
disinseriti. Sul display appare il simbolo “- - : - -”.
Attivare il tempo di attivazione premendo nuovamente il
tasto di richiamo (RECALL) 5.
Come saltare manualmente
gli orari di attivazione
Indipendentemente dalla programmazione fatta, in ogni
momento è possibile saltare manualmente un orario di
attivazione successivo.
A tale scopo continuare a premere il tasto ON / AUTO /
OFF (MANUAL) 3 fino a quando sul display a cristalli
liquidi 1 non appare il comando desiderato:
OFF: Tutti gli orari di attivazione sono rimossi, l’orologio
Per fare proseguire il conto alla rovescia, premere
nuovamente il tasto ON / AUTO / OFF (MANUAL) 3.
Per tornare dalla visualizzazione del conto alla rovescia
a quella dell’ora attuale premere il tasto di modalità di
visualizzazione (TIME) 7.
Per tornare dalla visualizzazione dell’ora attuale a quella
del conto alla rovescia, premere il tasto di modalità di
visualizzazione (TIME) 7.
Per interrompere la funzione di conto alla rovescia, pre-
mere contemporaneamente i tasti di impostazione delle
ore (HOUR) 9 e dei minuti (MIN) 2.
Pulizia e manutenzione
Non utilizzare in nessun caso liquidi o detersivi, giacché
essi danneggiano l’apparecchio.
Pulire l’apparecchio solo esternamente con un panno
soffice e asciutto.
IT/CH IT/CH IT/CH IT/CH
66142_Zeitschaltuhr_digital_innen_CH.indd 3 20.07.11 18:11
Page 5
Smaltimento
L’imballaggio è costituito da materiali ecologici
che possono essere smaltiti presso i centri di
riciclaggio locali.
Informarsi presso l’amministrazione cittadina o comunale
sulle possibilità di uno smaltimento ecologico e corretto del
prodotto usato
Nell’interesse dell’ambiente, si prega di non
gettare l’apparecchio, una volta che è divenuto
inservibile, nella spazzatura domestica, bensì di
smaltirlo in modo corretto. Informarsi sull’ubicazione
dei punti di raccolta e sui loro orari di apertura
presso l’amministrazione locale competente.
Nome del prodotto:
Presa temporizzata digitale
Art. n°: 97318-11
Modello n°: EIM-804 SW
© by ORFGEN Marketing
IAN 66142
Inter-Union Technohandel GmbH
Klaus-von-Klitzing-Str. 2
D-76829 Landau / Pfalz
IT/CH
IT/CH
66142_Zeitschaltuhr_digital_innen_CH.indd 4 20.07.11 18:11
Page 6
1
Digitale Wochenzeitschaltuhr
keine Haftung. Dieses Gerät ist nicht für den gewerblichen
Einsatz bestimmt.
Einleitung
Taste Anzeigemodus (TIME)
7
Eingabe-Taste (SET)
8
Stunden-Taste (HOUR)
9
Technische Daten
Machen Sie sich vor der ersten Inbetriebnahme
9
8
7
6
2
3
4
5
heitshinweise. Benutzen Sie das Gerät nur wie beschrieben
und für die angegebenen Einsatzbereiche. Bewahren Sie
diese Anleitung gut auf. Händigen Sie alle Unterlagen bei
Weitergabe des Geräts an Dritte ebenfalls mit aus.
mit dem Gerät vertraut. Lesen Sie hierzu die
nachfolgende Bedienungsanleitung und die Sicher-
Bemessungsspannung: 240 V ∼, 50 Hz
Bemessungsstrom: AC 10 A
Maximale Last: 2300 Watt
Ausgangsschalter: Relais
Timer-Genauigkeit: + /– 1 Sekunde / Tag bei 20 °C
Kürzeste,
programmierbare Zeit: 1 Minute
Sicherheit
Lesen Sie alle Sicherheitshinweise und
Anweisungen. Versäumnisse bei der Einhaltung der Sicherheitshinweise und Anweisungen können Brand und / oder
schwere Verletzungen verursachen.
Allgemeine Sicherheitshinweise
LEBENS- UND UN-
FALLGEFAHR FÜR KLEINKINDER UND
KINDER! Das Produkt ist kein Spielzeug.
Lassen Sie Kinder niemals unbeaufsichtigt mit Verpackungsmaterial und Gerät. Es besteht Erstickungsgefahr durch
Verpackungsmaterial und Lebensgefahr durch elektrischen
Schlag.
Dieses Gerät ist nicht dafür bestimmt, durch Personen
(einschließlich Kinder) mit eingeschränkten physischen,
sensorischen oder geistigen Fähigkeiten oder mangels
Erfahrung und / oder mangels Wissen benutzt zu werden,
es sei denn, sie werden durch eine für ihre Sicherheit
zuständige Person beaufsichtigt oder erhielten von ihr
Anweisungen, wie das Gerät zu benutzen ist. Kinder
sollten beaufsichtigt werden, um sicherzustellen, dass sie
nicht mit dem Gerät spielen.
Bestimmungsgemäße Verwendung
Dieses Gerät ist zum automatischen Ein- und Ausschalten von
Elektrogeräten bestimmt. Das Gerät darf nur in geschlossenen
Räumen verwendet werden. Alle Veränderungen des Geräts
sind nicht bestimmungsgemäß und können erhebliche Unfallgefahren bedeuten. Der Hersteller übernimmt für aus
bestimmungswidriger Verwendung entstandene Schäden
DE DE DE
Betreiben Sie das Gerät nur an einer fachgerecht
installierten Netzsteckdose.
VORSICHT! Stecken Sie die digitale Zeitschaltuhr
nicht hintereinander. Bei aufeinander gesteckten
Zwischensteckern besteht die Gefahr einer mechanischen
Beschädigung.
LEBENSGEFAHR
DURCH ELEKTRISCHEN SCHLAG! Halten
Sie das Gerät von Feuchtigkeit fern und fassen
Sie es nicht mit feuchten Händen an.
Setzen Sie das Gerät keiner extremen Hitze bzw. keiner
extremen Kälte aus.
Setzen Sie das Gerät keinen extremen Temperatur-
schwankungen aus. Andernfalls besteht die Gefahr, dass
sich Kondenswasser bildet. Warten Sie ab, bis das
Gerät Zimmertemperatur erreicht hat, bevor Sie es in
Betrieb nehmen.
Teilebeschreibung
LC-Display
1
Minuten-Taste (MIN)
2
EIN- / AUTO- / AUS-Taste (MANUAL)
3
Reset-Taste
4
Rückruf-Taste (RECALL)
5
Wochentag-Taste (WEEK)
6
Decken Sie das Gerät nicht mit Zeitungen, Kleidungs-
stücken oder Ähnlichem ab, um eine unzulässige
Erwärmung zu vermeiden.
Überprüfen Sie das Gerät vor jedem Netzanschluss auf
etwaige Beschädigungen. Benutzen Sie das Gerät niemals, wenn Sie irgendwelche Beschädigungen feststellen.
Bei Beschädigungen, Reparaturen oder anderen Problemen am Gerät wenden Sie sich an eine Fachkraft.
Stecken Sie keine Geräte ein, deren Eigengewicht am
Stecker hängt. So vermeiden Sie eine unzulässige
Erwärmung sowie mechanische Beschädigungen an der
Netzsteckdose.
Verwenden Sie das Gerät nicht zusammen mit Steckdosen-
leisten oder Verlängerungskabeln.
Beachten Sie, dass Beschädigungen durch unsachge-
mäße Handhabung, Nichtbeachtung der Bedienungsanleitung oder Eingriff durch nicht autorisierte Personen
von der Garantie ausgeschlossen sind.
BEWAHREN SIE ALLE SICHERHEITSHINWEISE UND
ANWEISUNGEN FÜR DIE ZUKUNFT AUF!
Das Gerät ist nicht geeignet, induktive Lasten, die größer
als 10 A (Ampere) sind, zu schalten. Betreiben Sie aus
diesem Grunde niemals Elektromotoren oder Leuchtstoffröhren mit konventionellen Vorschaltgeräten mit dieser
Zeitschaltuhr. Wenden Sie sich an eine Fachkraft, falls
Sie sich nicht über die induktive Belastung Ihres Gerätes
sicher sind.
Öffnen Sie das Gerät nicht selbst und versuchen Sie
niemals, Teile selbst auszuwechseln oder zu reparieren.
Trennen Sie das Gerät für die Reinigung immer von der
Netzsteckdose und ziehen Sie alle Netzstecker aus dem
Gerät.
Achten Sie darauf, dass das Gerät immer frei
zugänglich ist.
Ziehen Sie das Gerät bei Störungen sofort aus der
Netzsteckdose.
DE DE DE DE
Vor der Inbetriebnahme
Die Zeitschaltuhr verfügt über einen integrierten Akku. Dieser
dient zum Erhalt der gespeicherten Daten wie z.B. Zeit,
Datum und Schaltvorgänge. Der Akku muss vor dem ersten
Gebrauch 24 Stunden aufgeladen werden. Während des
Ladevorgangs können Sie bereits Einstellungen am Gerät
vornehmen.
Stecken Sie das Gerät in eine vorschriftsmäßig installierte
220–250 V, 50 Hz Netzsteckdose. Für einen kurzen
Moment erscheinen alle Anzeigen im LC-Display 1. Anschließend erscheint die Zeitanzeige.
Hinweis: Im Falle einer Unterbrechung der Stromversorgung sichert der eingebaute Akku, dass die Uhrzeit
weiter angegeben wird und das automatische Schaltprogramm aktiviert bleibt. Das Gerät kann vollständig
ohne Stromversorgung programmiert werden, sofern der
Akku voll geladen ist.
DE DE DE DE
Schaltfolge an jedem dieser Wochentage zur selben Zeit
ausgeführt.
Hinweis: Sofern ca. 10 Sekunden keine Einstellungen vorgenommen werden, wechselt das Gerät zur normalen Zeitanzeige zurück.
Drücken Sie so häufig die Stunden-Taste (HOUR) 9,
bis die gewünschte Stunde im LC-Display 1 erscheint.
Drücken Sie so häufig die Minuten-Taste (MIN) 2, bis
die gewünschte Minute im LC-Display 1 erscheint.
Drücken Sie nochmals die Eingabe-Taste (SET) 8, um
mit der Einstellung fortzufahren.
Im LC-Display 1 erscheint die Anzeige PROG 1 OFF
„- - : - -”.
Ausschaltzeit:
Drücken Sie so häufig die Wochentag-Taste (WEEK) 6,
bis der gewünschte Wochentag oder Tagesblock im
LC-Display 1 erscheint.
Bedienung
Wochentag und Uhr einstellen
Halten Sie die Taste Anzeigemodus (TIME) 7 während
des folgenden Programmiervorgangs gedrückt.
Drücken Sie so häufig die Wochentag-Taste (WEEK) 6,
bis der gewünschte Wochentag im LC-Display 1 erscheint.
Tipp: Halten Sie die Wochentag-Taste (WEEK) 6 für
ca. 3 Sekunden gedrückt. So erreichen Sie ein beschleunigtes Einstellen der Werte. Diese Schnelleinstellung
können Sie auch für die folgenden Einstellvorgänge nutzen.
Hinweis: MO = Montag, TU = Dienstag,
WE = Mittwoch, TH = Donnerstag, FR = Freitag,
SA = Samstag, SU = Sonntag
Drücken Sie so häufig die Stunden-Taste (HOUR) 9,
bis die gewünschte Stunde im LC-Display 1 erscheint.
Drücken Sie so häufig die Minuten-Taste (MIN) 2, bis
die gewünschte Minute im LC-Display 1 erscheint.
Drücken Sie so häufig die Stunden-Taste (HOUR) 9,
bis die gewünschte Stunde im LC-Display 1 erscheint.
Drücken Sie so häufig die Minuten-Taste (MIN) 2, bis
die gewünschte Minute im LC-Display 1 erscheint.
Drücken Sie nochmals die Eingabe-Taste (SET) 8, um
die Einstellung zu speichern.
Drücken Sie die Taste Anzeigemodus (TIME) 7, um zur
aktuellen Uhrzeit zurückzukehren.
Hinweis: Sie können bis zu 20 unterschiedliche Schaltfolgen
programmieren. Wiederholen Sie dazu jeweils den zuvor
beschriebenen Programmiervorgang. Im LC-Display 1
erscheint bei jedem weiteren Speichervorgang fortlaufend
PROG 2 ON „- - : - -” usw.
Schaltzeiten ändern oder prüfen
Drücken Sie zum Ändern oder Prüfen der Schaltzeiten
die Eingabe-Taste (SET) 8 und die einprogrammierten
Schaltzeiten erscheinen nacheinander im Display.
Lassen Sie die Taste Anzeigemodus (TIME) 7 los.
Hinweis: Die Zeitschaltuhr ist nun in Betrieb. Dieses
wird durch Blinken des Doppelpunkts im LC-Display 1
angezeigt.
Sommer- / Winterzeit aktivieren
Drücken Sie so lange die Taste Anzeigemodus (TIME) 7,
bis der Zusatz „+1h“ in der Zeitanzeige erscheint bzw.
erlischt.
Zeitschaltuhr programmieren
Einschaltzeit:
Drücken Sie einmal die Eingabe-Taste (SET) 8. Im LC-
Display 1 erscheint die Anzeige PROG 1 ON „- - : - -”.
Drücken Sie so häufig die Wochentag-Taste (WEEK) 6,
bis der gewünschte Wochentag oder Tagesblock im
LC-Display 1 erscheint. Folgende Wochen- und Tagesblöcke sind möglich:
Gehen Sie zum Ändern der Tage, Stunden oder Minuten
vor, wie im Kapitel „Zeitschaltuhr programmieren“
beschrieben.
Schaltzeiten aktivieren /
deaktivieren
Drücken Sie die Eingabe-Taste (SET) 8 so oft, bis die
gewünschte Schaltzeit gewählt ist.
Drücken Sie anschließend die Rückruf-Taste (RECALL) 5,
um die programmierte Schaltzeit aufzuheben. Die Schaltdaten werden nicht aus dem Speicher gelöscht, sondern
lediglich deaktiviert. Im Display erscheint das Symbol
“- - : - -”.
Drücken Sie erneut die Rückruf-Taste (RECALL) 5, um
die aufgehobene Schaltzeit zu aktivieren.
Schaltzeiten manuell überspringen
Unabhängig von der Programmierung können Sie jeder-
zeit eine nachfolgende Schaltzeit manuell überspringen.
• MO TU WE TH FR
Montag – Freitag
• SA SU
Samstag + Sonntag
• MO TU WE TH FR SA
Montag – Samstag
• MO WE FR
Montag + Mittwoch + Freitag
• TU TH SA
Dienstag + Donnerstag + Samstag
• MO TU WE
Montag – Mittwoch
• TH FR SA
Donnerstag – Samstag
• MO TU WE TH FR SA SO
Montag – Sonntag
Hinweis: Sobald ein bestimmter Tag oder eine Kombination
von Tagen eingespeichert worden ist, wird die programmierte
Drücken Sie dazu die EIN-/AUTO-/AUS-Taste (MANUAL)
so häufig, bis der gewünschte Befehl im LC-Display 1
3
erscheint:
OFF: Alle Schaltzeiten sind aufgehoben, die Zeitschaltuhr
leitet keinen Strom an angeschlossene Geräte weiter.
AUTO OFF: Schaltzeiten aktiv, die Zeitschaltuhr ist
ausgeschaltet.
ON: Alle Schaltzeiten sind aufgehoben, das die Zeitschaltuhr leitet dauerhaft Strom an das angeschlossene
Gerät weiter.
AUTO ON: Schaltzeiten aktiv, die Zeitschaltuhr ist
eingeschaltet.
Zufallsmodus einstellen
Hinweis: Diese Funktion schaltet die Zeitschaltuhr willkürlich
ein und aus und soll Hauseinbrüchen vorbeugen, indem durch
die Unregelmäßigkeit der Schaltzeiten (z. B. bei Lampen)
ein bewohntes Haus vorgetäuscht wird. Die von Ihnen
vorprogrammierten Schaltbefehle verschieben sich täglich
DE DE DE DE
zufällig um bis zu 30 Minuten. Diese Funktion ist jedoch nur
möglich, wenn ein oder mehrere Schaltbefehle eingestellt
worden sind.
Drücken Sie die Stunden-Taste (HOUR) 9 für 3 Sekunden.
Die Zeitschaltuhr wechselt in den Zufallsmodus. Auf dem
LC-Display 1 erscheint das Symbol „RND“, der Zufallsmodus ist eingeschaltet.
Drücken Sie die Stunden-Taste (HOUR) 9 erneut für 3
Sekunden, um den Zufallsmodus zu beenden.
Countdown einstellen
Hinweis: Mittels des Countdowns können Sie die Zeitspanne
bis zum Ausschalten der Stromversorgung regulieren.
Hinweis: Das „CTD“-Icon erscheint nach dem 20.
Speicherplatz.
Drücken Sie so häufig die Stunden-Taste (HOUR) 9,
bis die gewünschte Stunde im LC-Display 1 erscheint.
Drücken Sie so häufig die Minuten-Taste (MIN) 2, bis
die gewünschte Minute im LC-Display 1 erscheint.
Hinweis: Der Countdown kann von 1 Minute bis
23 Stunden, 59 Minuten, eingestellt werden.
Drücken Sie die Taste Anzeigemodus (TIME) 7.
Das Gerät kehrt in den normalen Betriebsmodus zurück.
Drücken Sie gleichzeitig die Stunden- (HOUR) 9 und
die Minuten-Taste (MIN) 2, um die Countdown-Funktion
zu starten.
Countdown manuell beenden
Drücken Sie die Eingabe-Taste (SET) 8, um in das
Timer-Menü zu gelangen.
Halten Sie so lange die Eingabe-Taste (SET) 8 gedrückt,
bis im LC-Display 1 das „CTD“-Icon erscheint.
DE DE DE DE
66142_Zeitschaltuhr_digital_innen_DE.indd 1 20.07.11 18:07
Drücken Sie während des Countdowns die EIN- / AUTO- /
AUS-Taste (MANUAL) 3, um diesen anzuhalten.
Drücken Sie die EIN- / AUTO- / AUS-Taste (MANUAL) 3
erneut, um den Countdown fortzusetzen.
Drücken Sie die Taste Anzeigemodus (TIME) 7, um
von der Countdown-Anzeige zur aktuellen Uhrzeit zu
wechseln.
Drücken Sie Taste Anzeigemodus (TIME) 7 erneut, um
von der aktuellen Uhrzeit zur Countdown-Anzeige zu
wechseln.
Drücken Sie gleichzeitig die Stunden- (HOUR) 9 und
die Minuten-Taste (MIN) 2, um den Countdown abzubrechen.
Reinigung und Pflege
Verwenden Sie in keinem Fall Flüssigkeiten und keine
Reinigungsmittel, da diese das Gerät beschädigen.
Reinigen Sie das Gerät nur äußerlich mit einem weichen
trockenen Tuch.
Entsorgung
Die Verpackung besteht aus umweltfreundlichen
Materialien, die Sie über die örtlichen Recyclingstellen entsorgen können.
Möglichkeiten zur Entsorgung des ausgedienten Produkts
erfahren Sie bei Ihrer Gemeinde- oder Stadtverwaltung.
Werfen Sie Ihr Gerät, wenn es ausgedient hat,
im Interesse des Umweltschutzes nicht in den
Hausmüll, sondern führen Sie es einer fachgerechten Entsorgung zu. Über Sammelstellen und
deren Öffnungszeiten können Sie sich bei Ihrer
zuständigen Verwaltung informieren.
Page 7

Produktbezeichnung:
Digitale Wochenzeitschaltuhr
Art.-Nr.: 97318-1
Modell-Nr.: EIM-804 GR
© by ORFGEN Marketing
IAN 66142
Inter-Union Technohandel GmbH
Klaus-von-Klitzing-Str. 2
D-76829 Landau / Pfalz
DE
66142_Zeitschaltuhr_digital_innen_DE.indd 2 20.07.11 18:07
Page 8
1
Digitalt tænd- og sluk-ur
imod bestemmelsen. Dette produkt er ikke beregnet til
erhvervsmæssig brug.
Indledning
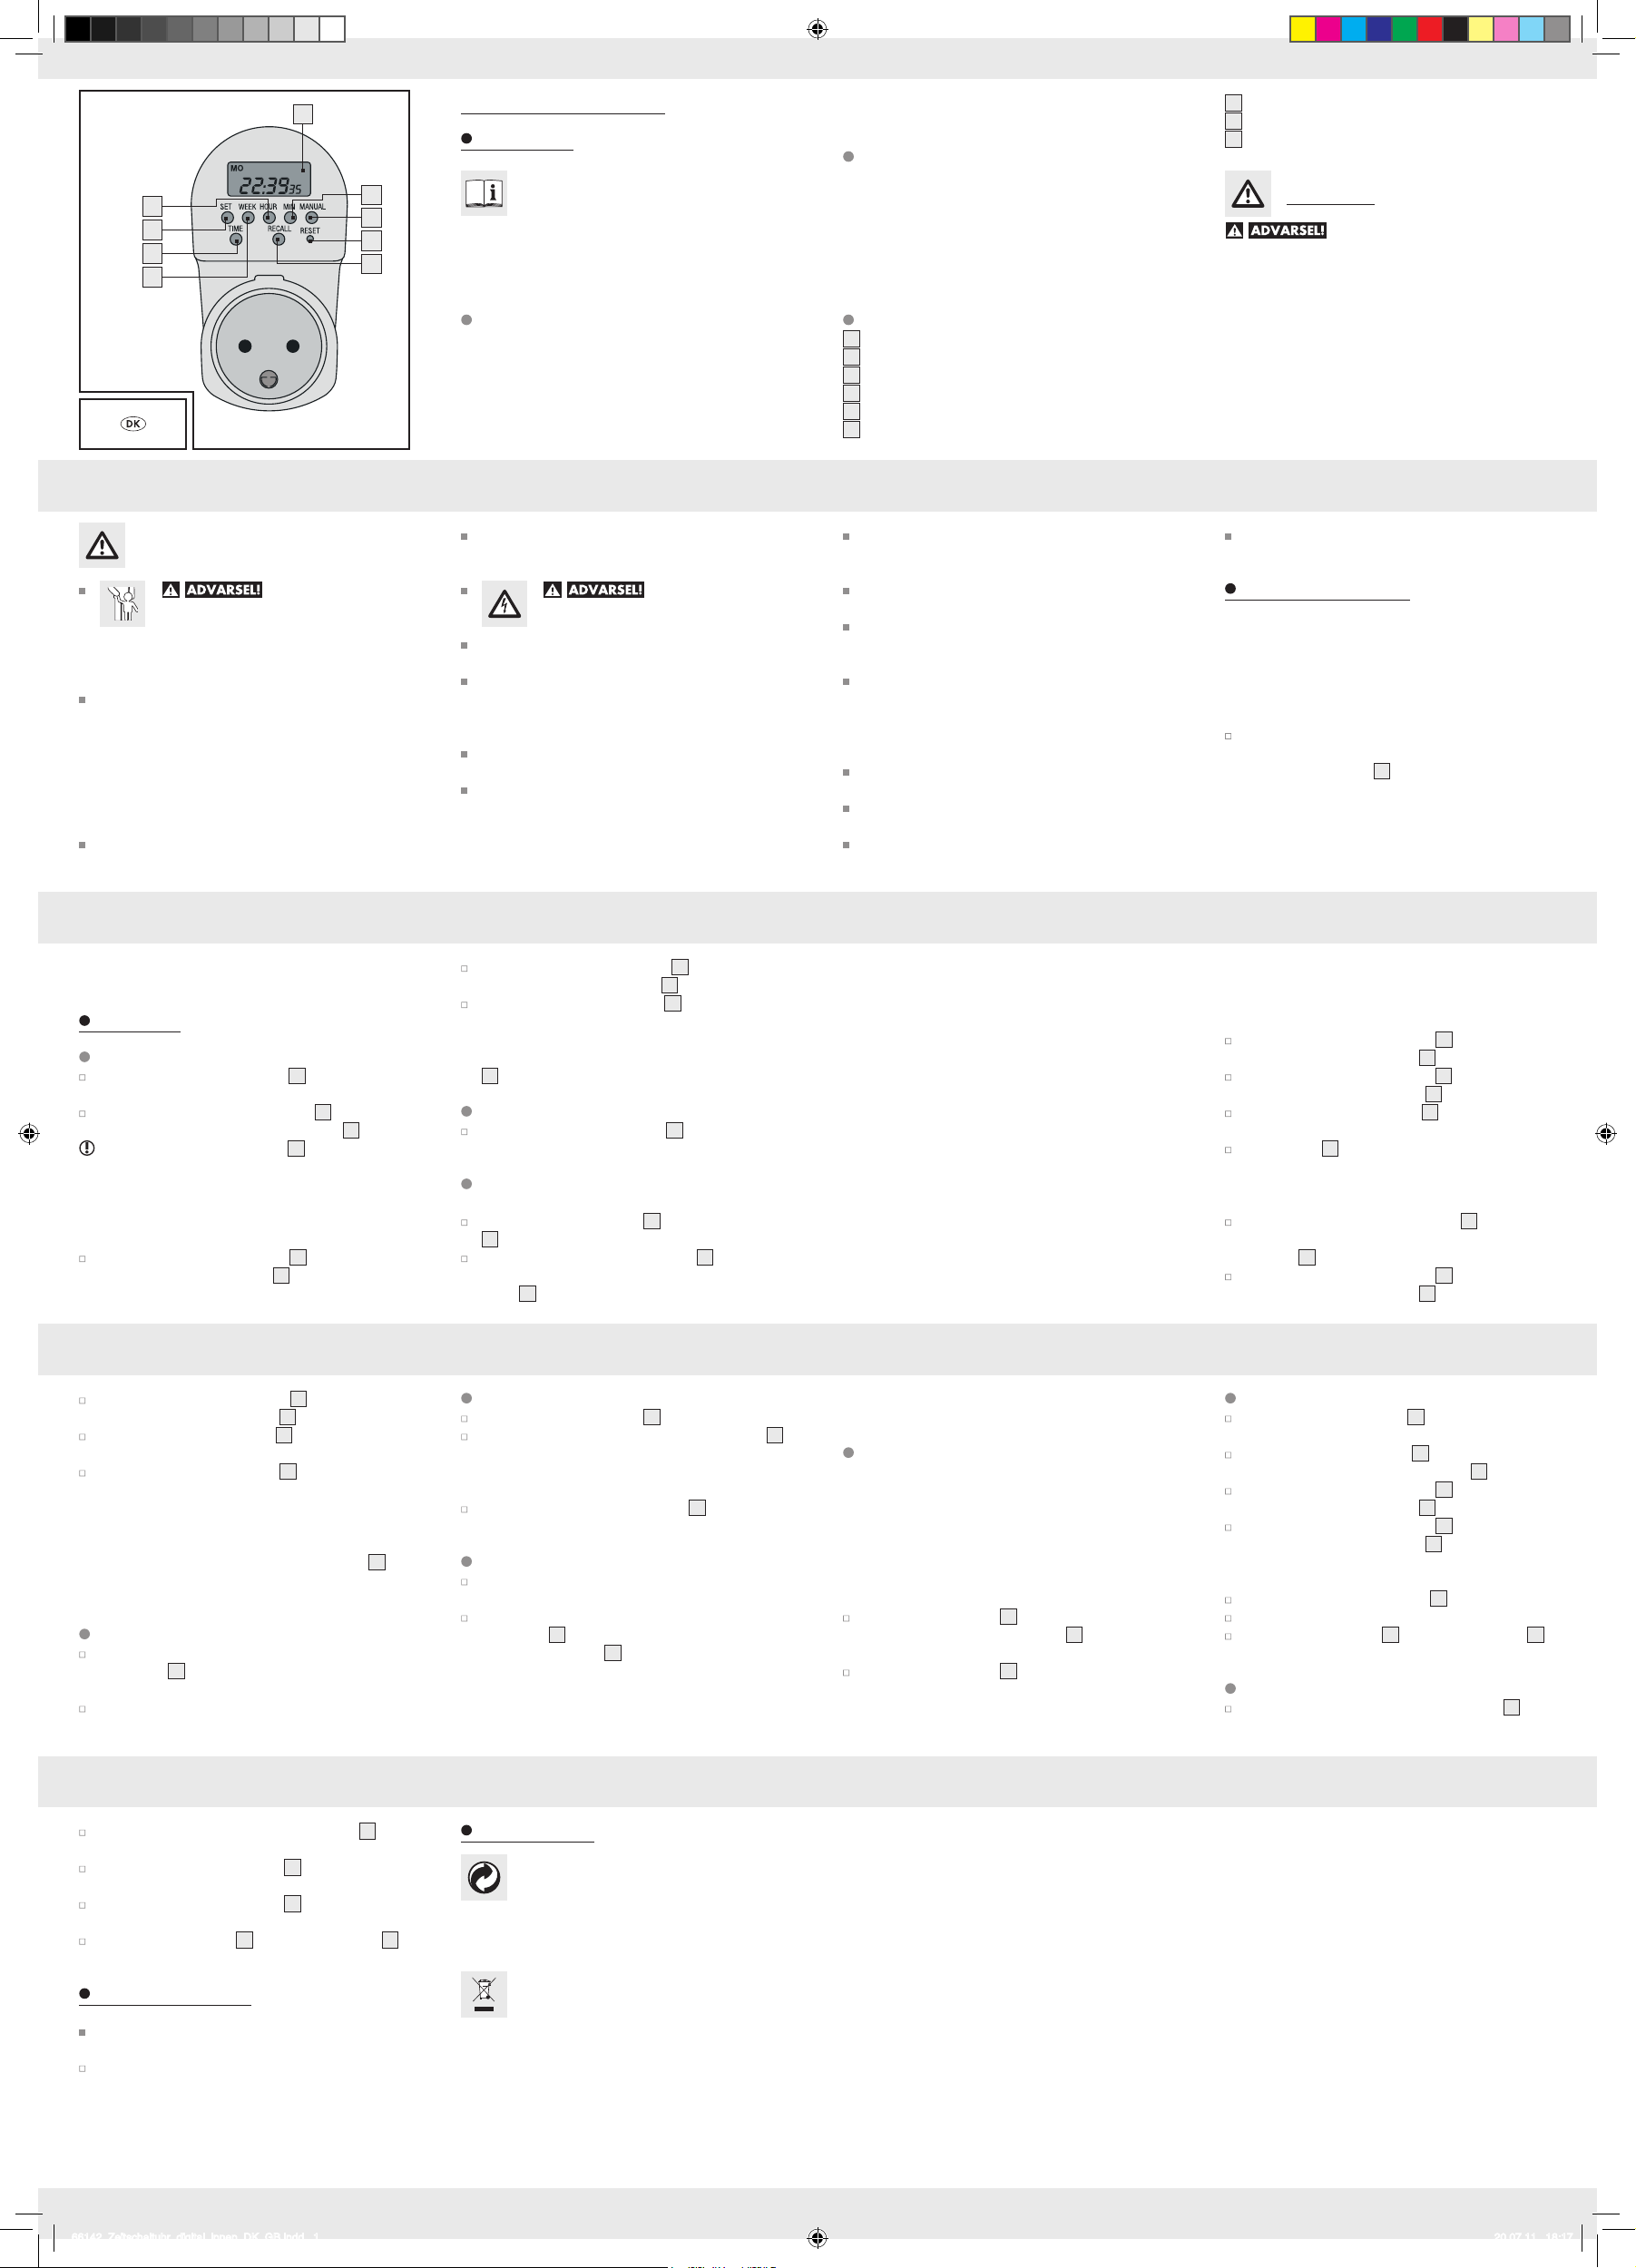
visningsmodus-tast (TIME)
7
indlæsnings-tast (SET)
8
time-tast (HOUR)
9
Tekniske specifikationer
Gør dig fortrolig med apparatet inden første
9
8
7
6
2
3
4
5
Anvend apparatet kun som beskrevet og til de nævnte
anvendelsesområder. Opbevar denne vejledning godt.
Udlever også alle dokumenter, når apparatet gives videre til
tredje mand.
ibrugtagning. Læs til dette formål den efterfølgende
betjeningsvejledning og sikkerhedshenvisningerne.
Mærkespænding: 240 V ∼, 50 Hz
Mærkestrøm: AC 10 A
Maksimal last: 2300 Watt
Udgangsafbryder: relæ
Timernøjagtighed: + / – 1 sekund / dag ved 20 °C
Korteste
programmerbare tidsrum: 1 minut
Sikkerhed
Læs alle sikkerhedshenvisninger og
anvisninger. Forsømmelser ved overholdelse af sikkerhedshenvisningerne og anvisningerne kan resultere i brand og /
eller alvorlige kvæstelser.
Generelle
sikkerhedshenvisninger
LIVSFARE OG RISIKO
FOR ULYKKER FOR SMÅBØRN OG
BØRN! Produktet er ikke noget legetøj. Lad
aldrig børn være uden opsyn med emballage og apparat.
Der er risiko for kvælning på grund af emballagemateriale
og livsfare grundet elektrisk stød.
Dette apparat er ikke beregnet til at blive brugt af personer
(inklusive børn) med indskrænkede fysiske, sensoriske
eller mentale evner eller manglende erfaring og / eller
manglende viden, medmindre de er under opsyn af en
person, som er ansvarlig for vedkommendes sikkerhed
eller har fået anvisninger om hvordan apparatet benyttes
af samme. Børn bør være under opsyn, for at sikre, at
de ikke leger med produktet.
Apparatet må udelukkende drives på en fagligt korrekt
installeret stikkontakt.
Anvendelse efter bestemmelsen
Dette apparatet er beregnet til automatisk tænding og slukning
af elektriske apparater. Apparatet må kun anvendes i lukkede
rum. Alle ændringer på apparatet er imod bestemmelsen
og kan resultere i alvorlige ulykkesrisici. Producenten påtager
sig intet ansvar for skader, som er opstået på grund af brug
DK DK DK
OBS! Den digitale timer må ikke sættes i række. Ved
mellemstik, som er sat oven på hinanden, er der risiko
for en mekanisk beskadigelse.
LIVSFARE GRUNDET
ELEKTRISK STØD! Hold apparatet væk fra
fugt og rør ikke ved det med fugtige hænder.
Apparatet må ikke udsættes for ekstrem varme hhv.
ekstrem kulde.
Udsæt ikke apparatet for ekstreme temperatursving.
Ellers er der risiko for, at der dannes kondensvand. Vent
med at tage apparatet i brug, indtil det har nået rumtemperatur.
Apparatet må ikke dækkes til af aviser, beklædningsstyk-
ker eller lignende, for at undgå utilladelig opvarmning.
Kontroller apparatet for eventuelle beskadigelser inden
hver strømtilslutning. Brug aldrig apparatet, hvis du konstaterer nogen som helst beskadigelse. Henvend dig til
en fagmand ved beskadigelser, reparationer eller andre
problemer.
Beskrivelse af delene
LC-display
1
minut-tast (MIN)
2
TÆND- / AUTO - / SLUK-tast (MANUAL)
3
reset-tast
4
tilbagekaldelses-tast (RECALL)
5
ugedag-tast (WEEK)
6
Sæt ingen apparater til, hvis egenvægt hænger på stikket.
På den måde undgås utilladelig opvarmning samt mekaniske beskadigelser på stikkontakten.
Apparatet må ikke bruges sammen med stikkontaktlister
eller forlængerledninger.
Husk, at beskadigelser grundet usagmæssig håndtering,
tilsidesættelse af betjeningsvejledningen eller indgreb af
uautoriserede personer er udelukket fra garantien.
Apparatet er ikke egnet til tilslutning af induktive laster,
som er større end 10 A (ampere). Derfor må elektromotorer eller lysstofrør med konventionelle forkoblingsmoduler
aldrig drives med denne timer. Spørg en fagmand, hvis
du ikke er sikker på den induktive belastning af dit apparat.
Du må ikke åbne apparatet selv, og prøv aldrig selv at
skifte dele eller reparere.
Til rensning skilles apparatet altid fra stikkontakten og
alle strømstik trækkes ud af apparatet.
Sørg for, at apparatet altid er frit tilgængeligt.
OPBEVAR ALLE SIKKERHEDSHENVISNINGER OG
ANVISNINGER TIL BRUG I FREMTIDEN!
Skil apparatet fra stikkontakten med det samme ved
eventuelle fejl!
Inden ibrugtagning
Timeren er udstyret med en integreret akku. Denne tjener til
opretholdelse af de gemte data som f.eks. tid, dato og skifteforløb. Akku’en skal oplades i 24 timer inden første brug.
Der kan foretages indstillinger på apparatet allerede under
opladningsforløbet.
Sæt apparatet til en forskriftsmæssig installeret 220–250 V,
50 Hz stikkontakt. I et kort moment fremkommer alle
visninger i LC-displayet 1. Efterfølgende fremkommer
tidsvisningen.
Bemærk: I tilfælde af afbrydelse af strømforsyningen
sikrer den integrerede akku, at klokkeslæt vises videre
og at det automatiske skifteprogram forbliver aktiveret.
DK DK DK DK
Apparatet kan programmeres fuldstændig uden strømforsyning, såfremt akku’en er fuldstændig opladet.
Betjening
Ugedag og ur indstilles
Hold visningsmodus-tasten (TIME) 7 trykket under den
efterfølgende programmeringsprocedure.
Tryk så ofte på ugedag-tasten (WEEK) 6, indtil den
ønskede ugedag fremkommer i LC-displayet 1.
Tip: Hold ugedag-tasten (WEEK) 6 trykket i ca.
3 sekunder. På den måde opnås en hurtigere indstilling
af værdierne. Denne lynindstilling kan også benyttes til
de følgende indstillingsprocedurer.
Bemærk: MO = mandag, TU = tirsdag, WE = onsdag,
TH = torsdag, FR = fredag, SA = lørdag, SU = søndag
Tryk så ofte på time-tasten (HOUR) 9, indtil den ønskede
time fremkommer i LC-displayet 1.
DK DK DK DK
Tryk så ofte på minut-tasten (MIN) 2, indtil det ønskede
minut fremkommer i LC-displayet 1.
Tryk visningsmodus-tasten (SET) 8 en gang til, for at
gemme indstillingen.
Tryk visningsmodus-tasten (TIME) 7, for at vende tilbage
til det aktuelle klokkeslæt.
Bemærk: Du kan programmere op til 20 forskellige skifterækkefølger. Gentag til dette formål den tidligere beskrevne
programmeringsprocedure hver gang. I LC-displayet 1
fremkommer ved hver yderligere gemmeprocedure fortløbene
visningen PROG 2 ON ”- - : - -” osv.
Skiftetider ændres eller kontrolleres
Tryk til ændring eller kontrol af skiftetider indlæsnings-
tasten (SET) 8 og de programmerede skiftetider fremkommer i displayet efter hinanden.
Gå frem som beskrevet i kapitlet ”Timer programmeres”,
for at ændre dage, timer eller minutter.
Tryk så ofte på minut-tasten (MIN) 2, indtil det ønskede
minut fremkommer i LC-displayet 1.
Slip visningsmodus-tasten (TIME) 7.
Bemærk: Såfremt der ikke foretages nogen indstillinger
i ca. 10 sekunder, skifter apparatet til almindelig tidsvisning.
Bemærk: Timeren er i drift nu. Dette vises i LC-displayet
ved at kolonet blinker.
1
Sommer- / vintertid aktiveres
Tryk visningsmodus-tasten (TIME) 7 sålænge, indtil til-
føjelsen ”+1h“. fremkommer hhv. slukkes i tidsvisningen.
Timer programmeres
Tændetid:
Tryk indlæsnings-tasten (SET) 8 en gang. I LC-displayet
fremkommer visningen PROG 1 ON ”- - : - -”.
1
Tryk så ofte på ugedag-tasten (WEEK) 6, indtil den øn-
skede ugedag eller blok af dage fremkommer i LC-displayet 1. Følgende uger og blokke af dage er mulige:
Skiftetider aktiveres / deaktiveres
Tryk indlæsnings-tasten (SET) 8.
Tryk efterfølgende tilbagekaldelses-tasten (RECALL) 5,
for at ophæve den programmerede skiftetid. Skiftetiderne
slettes ikke fra hukommelsen, men deaktiveres bare. I
displayet fremkommer symbolet “- - : - -”.
Tryk tilbagekaldelses-tasten (RECALL) 5 igen, for at
aktivere den ophævede skiftetid.
Skiftetider overspringes manuelt
Uafhængig af programmeringen kan en efterfølgende
skiftetid til enhver tid overspringes manuelt.
Til dette formål trykkes TÆND- / AUTO- / SLUK-tasten
(MANUAL) 3 så ofte, indtil den ønskede ordre fremkommer i LC-displayet 1:
OFF: Alle skiftetider er ophævet, timeren leder ingen
strøm videre til tilsluttede apparater.
AUTO OFF: Skiftetider aktiv, timeren er slukket.
ON: Alle skiftetider er ophævet, timeren leder vedvarende
• MO TU WE TH FR
mandag – fredag
• SA SU
lørdag + søndag
• MO TU WE TH FR SA
mandag – lørdag
• MO WE FR
mandag + onsdag + fredag
• TU TH SA
tirsdag + torsdag + lørdag
• MO TU WE
mandag – onsdag
• TH FR SA
torsdag – sørdag
• MO TU WE TH FR SA SO
mandag – søndag
strøm videre til det tilsluttede apparat.
AUTO ON: Skiftetider aktiv, timeren er slået til.
Tilfældighedsmodus indstilles
Bemærk: Denne funktion skifter timeren vilkårligt tændt og
slukket og skal forebygge hjemmerøveri, idet grundet uregelmæssigheden i skiftetiderne (f.eks. ved lamper) simulerer
et beboet hus. De af dig forud programmerede skifteordrer
skubbes dagligt tilfældigt op til 30 minutter. Dog er denne
funktion kun mulig, hvis en eller flere skifteordrer er belvet
indstillet.
Tryk time-tasten (HOUR) 9 i 3 sekunder. Timeren skifter
til tilfældighedsmodus. I LC-displayet 1 fremkommer
symbolet ”RND“, tilfældighedsmodussen er slået til.
Tryk time-tasten (HOUR) 9 igen i 3 sekunder, for at
slutte tilfældighedsmodussen.
Bemærk: Så snart en bestemt dag eller en kombination af
dage er blevet gemt, udføres den proframmerede skifterækkefølge på hver af disse ugedage til samme tid.
Tryk så ofte på time-tasten (HOUR) 9, indtil den ønskede
time fremkommer i LC-displayet 1.
Tryk så ofte på minut-tasten (MIN) 2, indtil det ønskede
minut fremkommer i LC-displayet 1.
Tryk visningsmodus-tasten (SET) 8 en gang til, for at
gemme indstillingen.
I LC-displayet 1 fremkommer visningen PROG 1 OFF
”- - : - -”.
Slukketid:
Tryk så ofte på ugedag-tasten (WEEK) 6, indtil den
ønskede ugedag eller blok af dage fremkommer i LCdisplayet 1.
Tryk så ofte på time-tasten (HOUR) 9, indtil den ønskede
time fremkommer i LC-displayet 1.
Nedtælling indstilles
Tryk indlæsnings-tasten (SET) 8, for at komme i timer-
menuen.
Hold indlæsnings-tasten (SET) 8 trykket så længe, indtil
”CTD“-Iikonet fremkommer i LC-displayet 1.
Tryk så ofte på time-tasten (HOUR) 9, indtil den ønskede
time fremkommer i LC-displayet 1.
Tryk så ofte på minut-tasten (MIN) 2, indtil det ønskede
minut fremkommer i LC-displayet 1.
Bemærk: Nedtællingen kan indstilles fra 1 minut til
23 timer, 59 minutter.
Tryk visningsmodus-tasten (TIME) 7.
Apparatet vender tilbage til almindelig driftsmodus.
Tryk time-tasten (HOUR) 9 og minut-tasten (MIN) 2
samtidigt, for at starte nedtællings-funktionen.
Nedtælling sluttes manuelt
Tryk TÆND- / AUTO- / SLUK-tasten (MANUAL) 3 under
nedtællingen, for at stoppe denne.
DK DK DK DK
Tryk TÆND- / AUTO- / SLUK-tasten (MANUAL) 3 igen,
for at fortsætte nedtællingen.
Tryk visningsmodus-tasten (TIME) 7, for at skifte fra
nedtællings-visningen til det aktuelle klokkeslæt.
Tryk visningsmodus-tasten (TIME) 7 igen, for at skifte
fra det aktuelle klokkeslæt til nedtællings-visningen.
Tryk time-tasten (HOUR) 9 og minut-tasten (MIN) 2
samtidigt, for at afbryde nedtællings-funktionen.
Rensning og pleje
Brug under ingen omstændigheder væsker og ingen
rensemidler, da disse kan beskadige apparatet.
Rens apparatet kun udefra med en blød tør klud.
DK DK DK
66142_Zeitschaltuhr_digital_innen_DK_GB.indd 1 20.07.11 18:17
Bortskaffelse
Emballagen består af miljøvenlige materialer, som
kan bortskaffes via de lokale genbrugssteder.
Muligheder for bortskaffelse af det udtjente produkt erfarer
du på din kommune eller byforvaltning.
I miljøets interesse må dit udtjente apparat ikke
kastes i husholdningsaffaldet, men skal tilføres
faglig korrekt bortskaffelse. Du kan informere dig
om opsamlingssteder og deres åbningstider på
din forvaltning.
Produktbetegnelse:
Digitalt tænd- og sluk-ur
Art.-nr.: 97318-33
Model-nr.: EIM-804 DK
Page 9
Digital Weekly Timer
Introduction
Before using the device for the first time, please
make yourself familiar with the way it works.
Please refer in addition to the operating instructions
below and the safety advice. Use the device only as described
and for the indicated purposes. Keep these instructions in a
safe place. If you pass the device on to anyone else, please
ensure that you also pass on all the documentation.
Proper use
This product is intended for the automatic switching on and
off of electrical devices. The device is intended for indoor
use only. Any modification to the device shall be considered
as improper use and can lead to considerable risk of accident.
The manufacturer will not accept liability for loss or damage
GB GB GB GB
arising from improper use. This device is not intended for
commercial use.
Technical data
Designed electrical supply: 240 V ∼, 50 Hz
Designed current: AC 10 A
Maximum load: 2300 watts
Outlet switch: Relay
Timer accuracy: + / – 1 second / day at
20 °C
Shortest programmable time: 1 minute
Description of parts
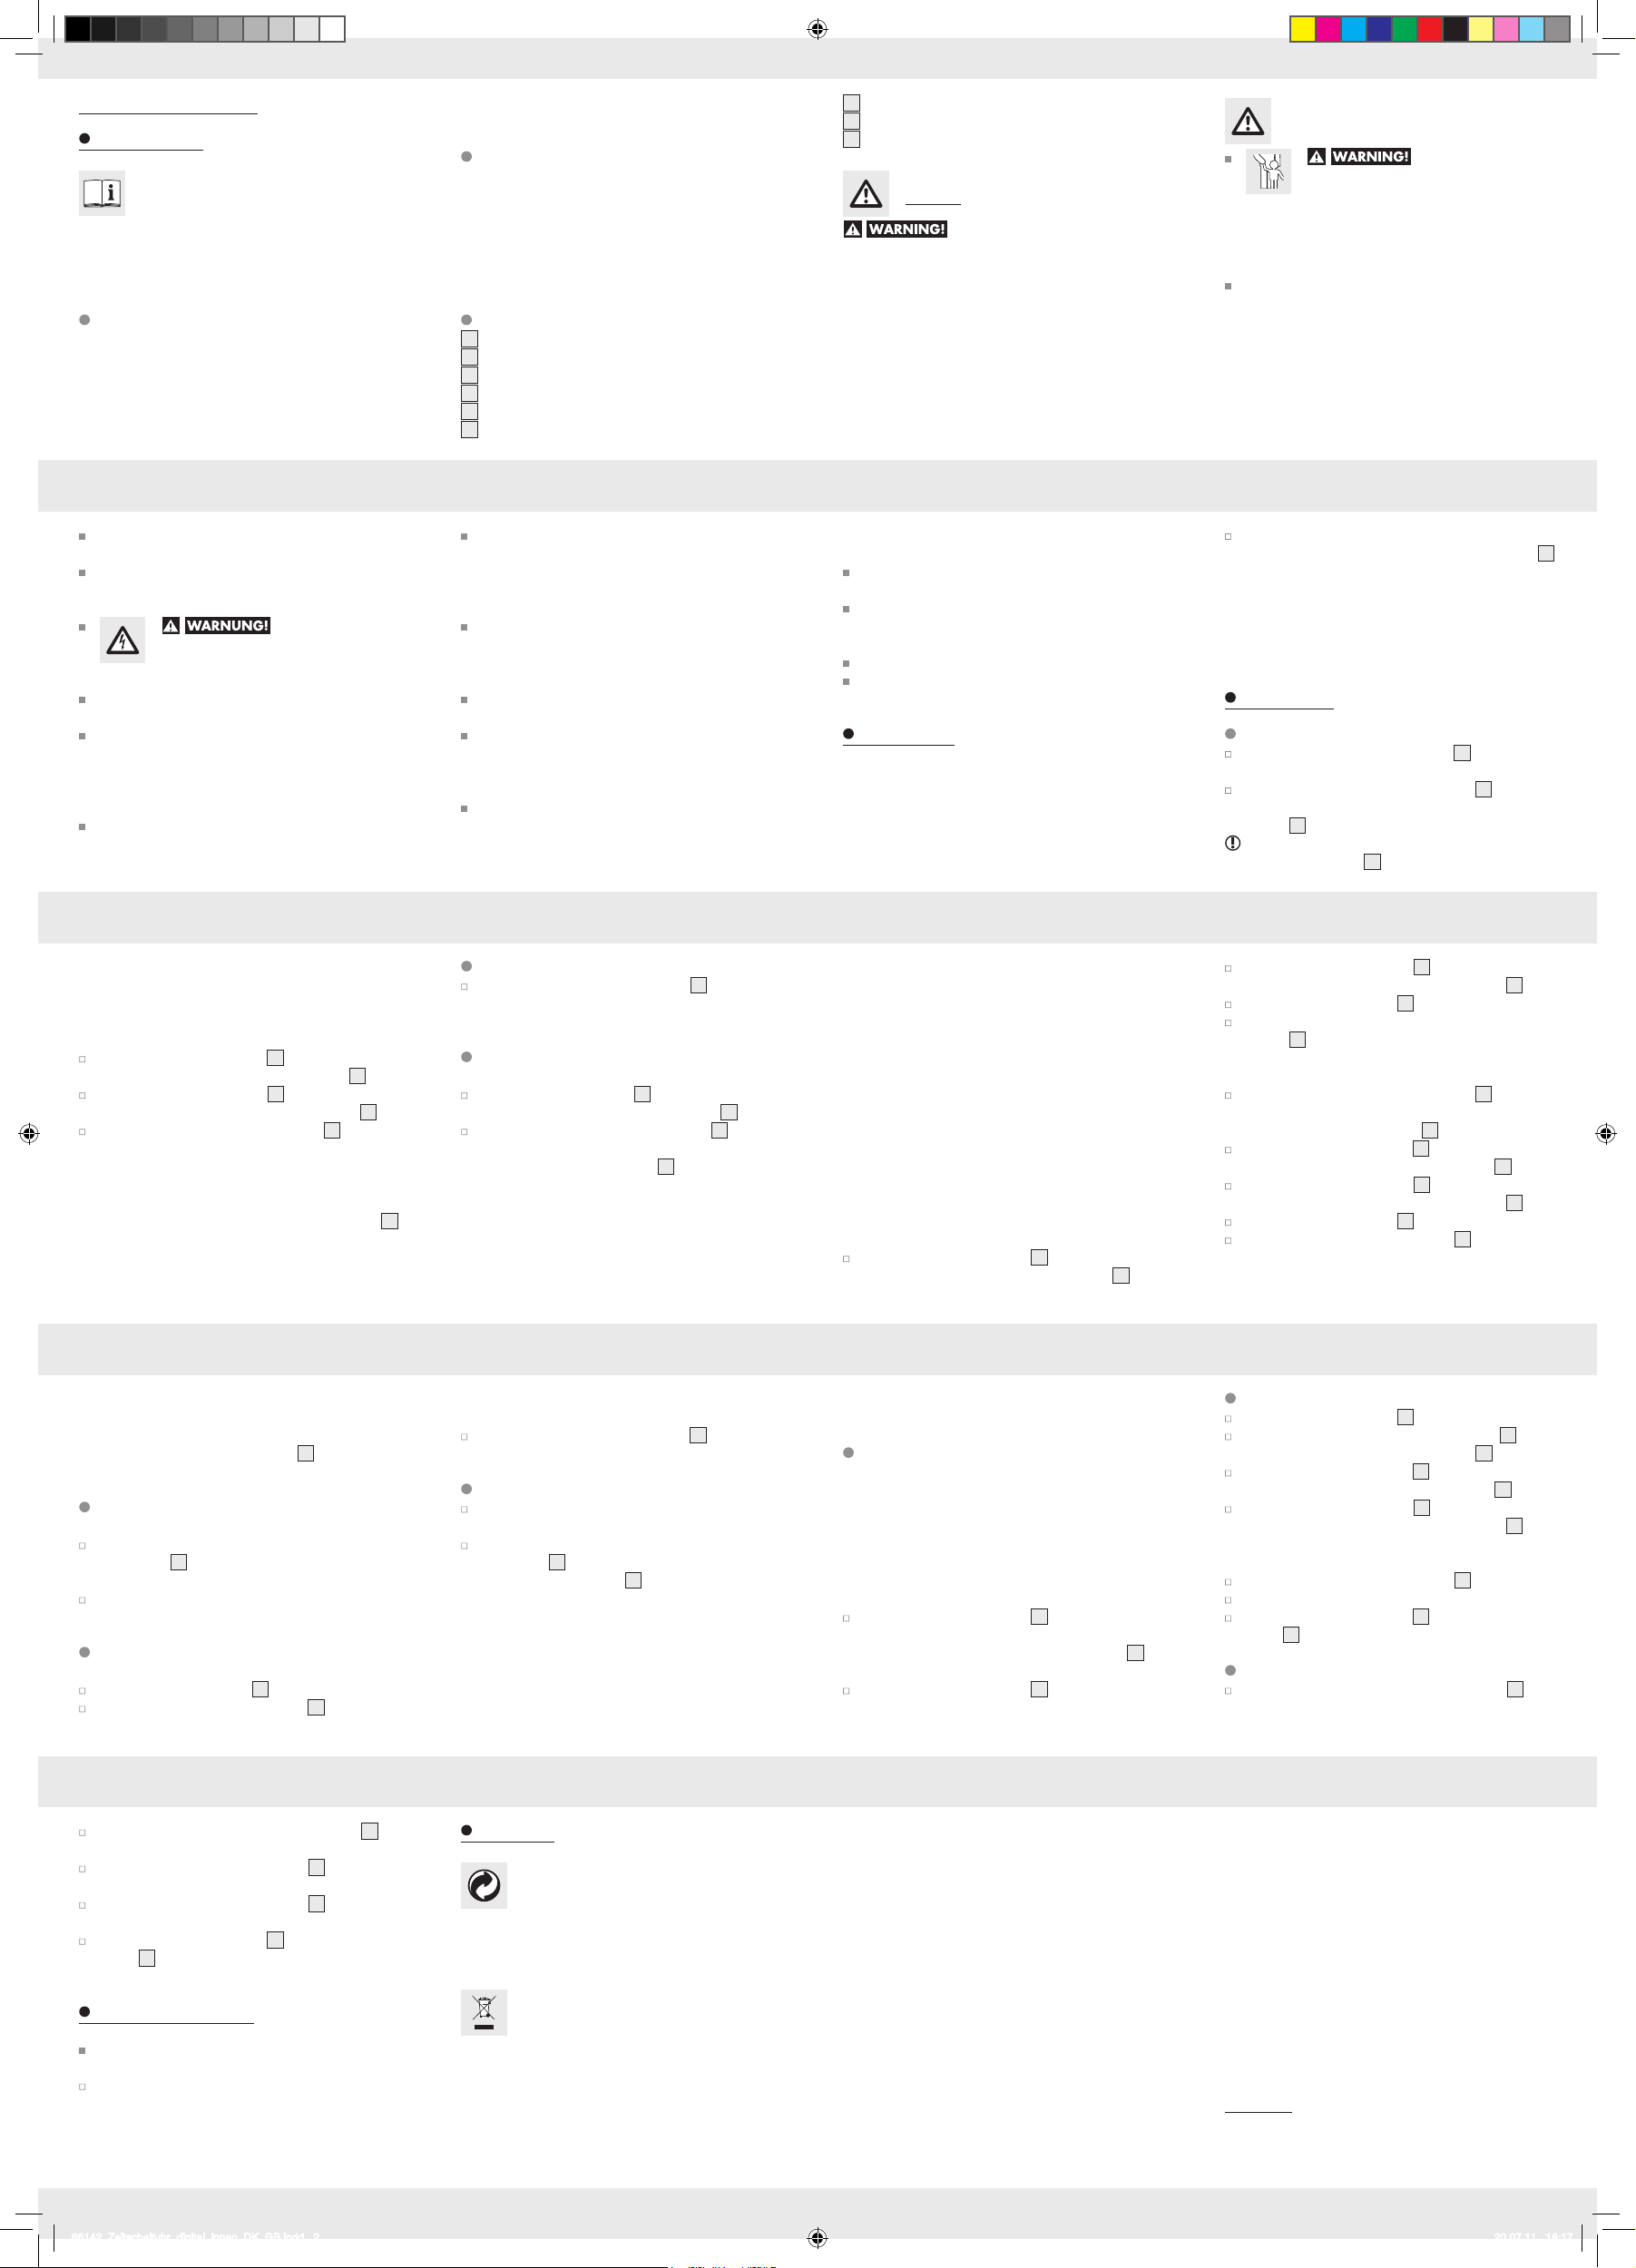
LC display
1
Minute button (MIN)
2
ON / AUTO / OFF button (MANUAL)
3
Reset button
4
Recall button (RECALL)
5
Day of the week button (WEEK)
6
Display mode button (TIME)
7
Input button (SET)
8
Hour button (HOUR)
9
Safety
Read all the safety advice and instructions.
Failure to observe the safety advice and instructions may
result in fire and / or serious injury.
KEEP ALL THE SAFETY ADVICE AND INSTRUCTIONS IN
A SAFE PLACE FOR FUTURE REFERENCE!
General safety advice
DANGER OF LOSS
OF LIFE OR ACCIDENT TO INFANTS
AND CHILDREN! The product is not a toy.
Never leave children unsupervised with the packaging
material or the device. The packaging material presents
a suffocation hazard and there is a risk of loss of life
from electric shock.
This device is not intended to be used by persons (in-
cluding children) with restricted physical, sensory or
mental abilities or with insufficient experience and / or
knowledge, unless they are supervised by a person who
is responsible for their safety or they have received instruction on how to use the device from such a responsible
person. Children should be supervised in order to ensure
that they do not play with the device.
Use the device only with a properly installed mains
outlet socket.
CAUTION! Do not have one digital time switch in-
serted behind another. There is the danger of mechanical
damage if one adapter plug is inserted behind another.
RISK TO LIFE FROM
ELECTRIC SHOCK! Keep the device away
from moisture and do not touch it with moist
hands.
Do not allow the device to be subjected to extreme heat
or cold.
Do not allow the device to be subjected to extreme
temperature fluctuations. Failure to observe this advice
could lead to condensation forming. Wait until the device
has reached the temperature of the room before you
use it.
Do not cover the device with newspapers, articles of
clothing or the like. Otherwise the device may heat up,
which is not permitted.
GB GB GB GB
accelerate the setting process and reach the desired
value more quickly. This quicker method can also be
used for making the following settings.
Note: MO = Monday, TU = Tuesday, WE = Wednesday,
TH = Thursday, FR = Friday, SA = Saturday, SU = Sunday
Press the hour button (HOUR) 9 repeatedly until the
desired hour value appears in the LC display 1.
Press the minute button (MIN) 2 repeatedly until the
desired minute value appears in the LC display 1.
Release the display mode (TIME) button 7.
Note: If approx. 10 seconds pass without any settings
being made, then the device returns to the normal time
display.
Note: The time switch is now in operation. This is indicated by the flashing of the colon in the LC display 1.
Always check the device for damage before plugging it
into a mains outlet socket. Do not use the device if you
discover it is damaged in any way. In the event of damage, repairs or other problems with the device, please
contact a specialist repair shop.
Do not plug in any devices that hang from and exert
their self-weight on the plug. This will prevent any nonpermitted heating up of and mechanical damage to the
mains outlet socket.
Do not use the device with power outlet strips or extension
cables.
Please note that damage arising from improper handling,
non-observance of the operating instructions or interference with the inside of the device by unauthorised persons
is excluded from the warranty.
The device is not suitable for switching inductive loads in
excess of 10 A (amperes). For this reason never operate
electric motors or fluorescent lights fitted with conventional ballasts with this time switch. Ask an electrician or
Activating summer / winter time
Press the display mode button (TIME) 7 until the
additional “+1h” appears in or disappears from the
time indicator.
Programming the time switch
Switching-on time:
Press the input button (SET) 8 once. The PROG 1 ON
“- - : - -” indicator appears in the LC display 1.
Press the day of the week button (WEEK) 6 repeatedly
until the desired day of the week or block of days of the
week appears in the LC display 1. The following days
of the week or blocks of days of the week are possible:
• MO TU WE TH FR
Monday – Friday
• SA SU
Saturday + Sunday
• MO TU WE TH FR SA
Monday – Saturday
other suitable expert if you are in any doubt about the
inductive load of your device.
Do not open the device. Never attempt to replace or
repair parts yourself.
Before cleaning the device, always disconnect it from
the mains outlet socket and pull all mains plugs out of
the device.
Please ensure that the device is always easily accessed.
In the event of malfunctions, pull the device out of the
mains outlet socket.
Before use
The time switch has an integral rechargeable battery. This
serves to retain stored data, e.g. time, date and switching
procedures. The rechargeable battery must be charged for
24 hours before first use. You can make settings on the
device during the charging process.
• MO WE FR
Monday + Wednesday + Friday
• TU TH SA
Tuesday + Thursday + Saturday
• MO TU WE
Monday – Wednesday
• TH FR SA
Thursday – Saturday
• MO TU WE TH FR SA SO
Monday – Sunday
Note: As soon as a particular day or combination of days
has been stored, the device executes the programmed
switching sequence at the same time on each of these days
of the week.
Press the hour button (HOUR) 9 repeatedly until the
desired hour value appears in the LC display 1.
Plug the device into a properly installed 220–250 V, 50 Hz
mains outlet socket. All the indicators in the LC display 1
appear briefly. Then the time indicator appears.
Note: In the event of a power cut, the in-built rechargeable battery ensures that the time is kept going and the
automatic switching program remains activated. The
device is fully programmable without a power supply,
as long as the rechargeable battery is fully charged.
Operation
Setting the day of the week and time
Keep the display mode button (TIME) 7 pressed during
the following programming procedures.
Press the day of the week button (WEEK) 6 repeatedly
until the desired day of the week appears in the LC
display 1.
Tip: By pressing and keeping pressed the day of the
week button (WEEK) 6 for approx. 3 seconds you can
Press the minute button (MIN) 2 repeatedly until the
desired minute value appears in the LC display 1.
Press the input button (SET) 8 again to store the setting.
The PROG 1 OFF “- - : - -” indicator appears in the LC
display 1.
Switch-off time:
Press the day of the week button (WEEK) 6 repeatedly
until the desired day of the week or block of days of the
week appears in the LC display 1.
Press the hour button (HOUR) 9 repeatedly until the
desired hour value appears in the LC display 1.
Press the minute button (MIN) 2 repeatedly until the
desired minute value appears in the LC display 1.
Press the input button (SET) 8 again to store the setting.
Press the display mode button (TIME) 7 to return to the
current time.
Note: You can program up to 20 different switching
sequences. To do this, repeat the above-described programming procedure in each case. The PROG 2 ON “- - : - -”
indicator etc. appears in the LC display 1 when each
further setting is stored.
Changing or checking
switching times
To change or check the switching times, press the input
button (SET) 8 and the programmed switching times
appear one after the other in the display.
To change the days, hours or minutes, proceed as
described in the section “Programming the time switch”.
Activating / deactivating
switching times
Press the input button (SET) 8.
Then press the recall button (RECALL) 5 to cancel the
programmed switching time. The switching data are not
Press the ON / AUTO / OFF button (MANUAL) 3
again to continue the countdown.
Press the display mode button (TIME) 7 to change
from the countdown display to the current time.
Press the display mode button (TIME) 7 to change
from the current time to the countdown display.
Press the hour button (HOUR) 9 and the minute button
(MIN) 2 at the same time to cancel the countdown
function.
Cleaning and care
Never use liquids or cleaning agents, as they may
damage the device.
Clean the outside of the device only with a soft, dry
cloth.
GB GB GB GB
erased from the memory, merely deactivated. The symbol
“- - : - -” appears in the display.
Then press the recall button (RECALL) 5 again to
reactivate the cancelled switching time.
Manually skipping switching times
At any time, and independently of programmed times,
you can skip manually to the next switching time.
To do this, press the ON / AUTO / OFF button
(MANUAL) 3 repeatedly until the desired command
appears in the LC display 1:
OFF: All switching times are cancelled, the time switch
allows no current to pass to the connected devices.
AUTO OFF: Switching times are active, the time switch
is switched off.
ON: All switching times are cancelled, the time switch
allows current to pass continuously to the connected
devices.
GB GB GB GB
Disposal
The packaging is wholly composed of environmentally friendly materials that can be disposed
of at a local recycling centre.
Contact your local refuse disposal authority for more details
of how to dispose of your discarded product.
In the interest of the environment, do not throw
out your discarded device with your household
refuse. Take it to a suitable centre where it can
be disposed of properly. Your local council will
be able to tell you where the collection centres
are located and their opening times.
AUTO ON: Switching times are active, the time switch
is switched on.
Setting the random mode
Note: This function switches the time switch arbitrarily on
and off and is intended to prevent burglaries by simulating
an occupied house with e.g. lights switching on and off at
irregular intervals. Your preprogrammed switching commands
are moved by a random amount up to 30 minutes on each
day. This function is only possible if one or more switching
commands have been set.
Press the hour button (HOUR) 9 for at least 3 seconds.
The time switch changes into random mode. The random
mode symbol “RND” appears in the LC display 1 to
show that the random mode is switched on.
Press the hour button (HOUR) 9 again for 3 seconds
to cancel the random mode.
Product description:
Digital Weekly Timer
Art. No.: 97318-33
Model No.: EIM-804 DK
Setting the countdown
Press the input button (SET) 8 to access the timer menu.
Press and keep pressed the input button (SET) 8 until
the “CTD” icon appears in the LC display 1.
Press the hour button (HOUR) 9 repeatedly until the
desired hour value appears in the LC display 1.
Press the minute button (MIN) 2 repeatedly until the
desired minute value appears in the LC display 1.
Note: The countdown can be set from 1 minute to
11 hours, 59 minutes.
Press the display mode (TIME) button 7.
The device returns to its normal operating mode.
Press the hour button (HOUR) 9 and the minute button
(MIN) 2 at the same time to start the countdown function.
Manually ending the countdown
Press the ON / AUTO / OFF button (MANUAL) 3 to
halt the countdown while it is running.
© by ORFGEN Marketing
IAN 66142
Inter-Union Technohandel GmbH
Klaus-von-Klitzing-Str. 2
D-76829 Landau / Pfalz
GB GB GB
66142_Zeitschaltuhr_digital_innen_DK_GB.indd 2 20.07.11 18:17
Page 10
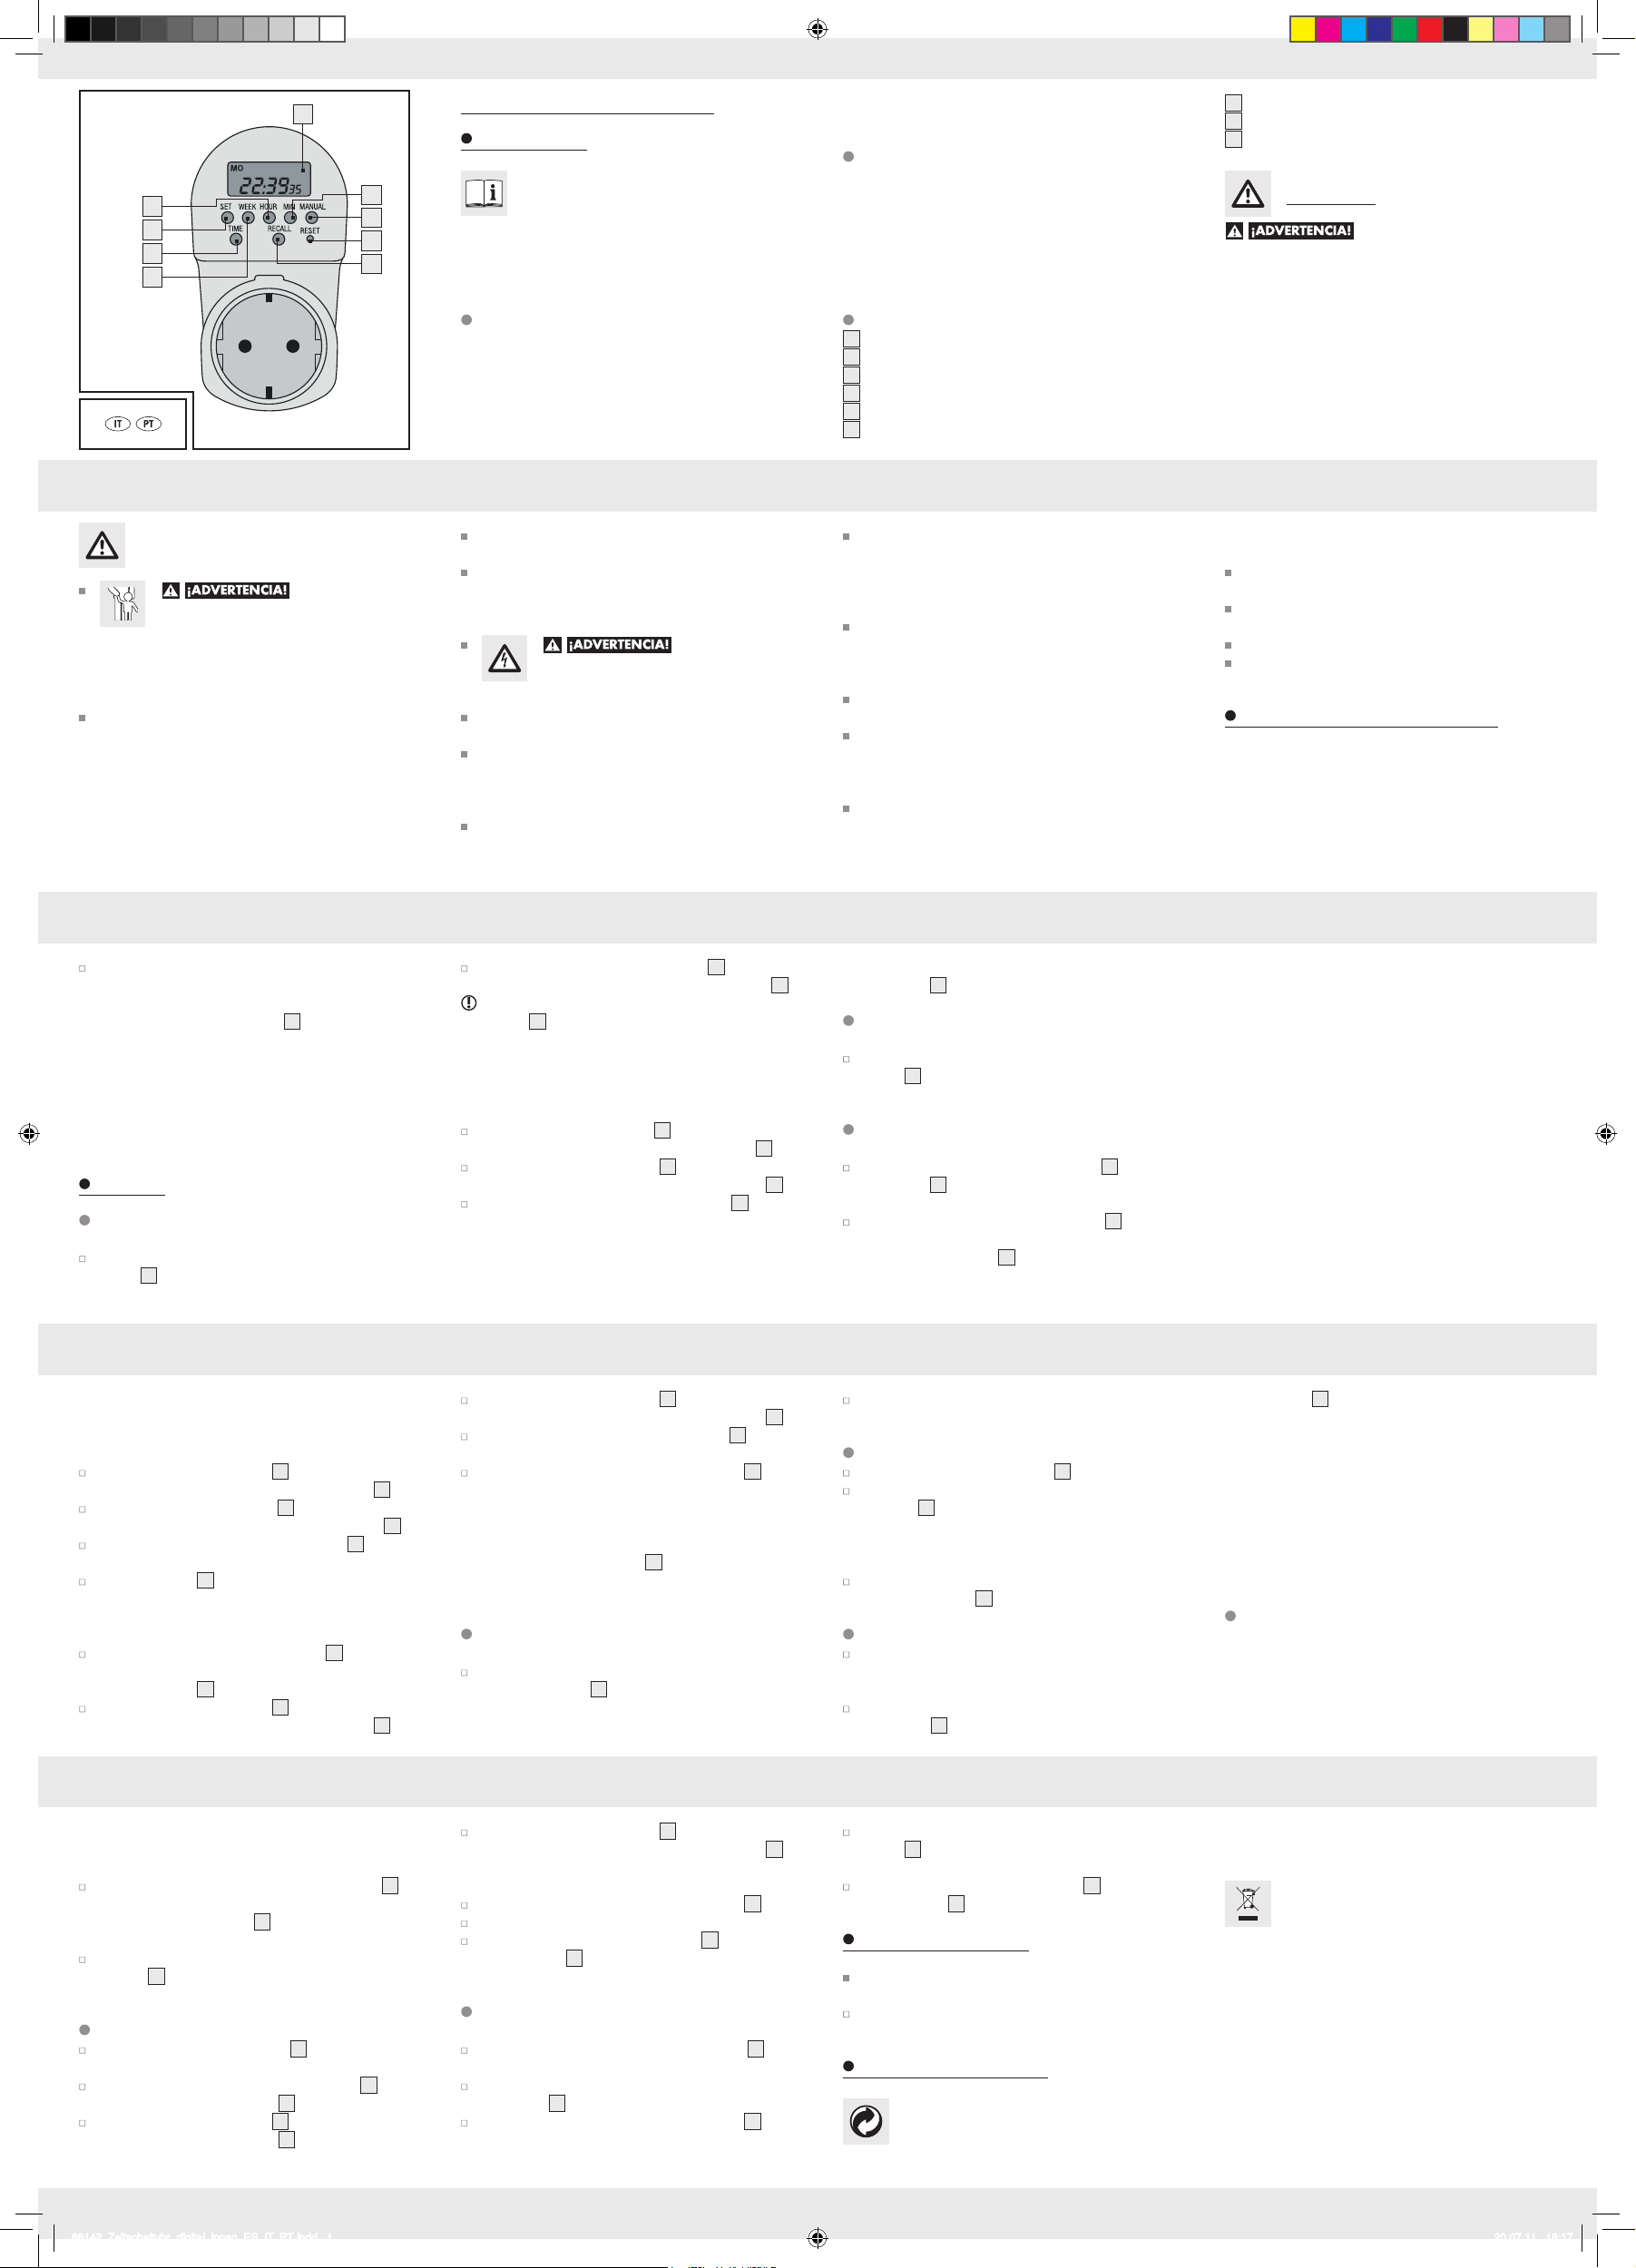
1
Programador digital semanal
incorrecta del aparato. Este aparato no está diseñado para
un uso industrial.
Introducción
Tecla modo de visualización (TIME)
7
Tecla de entrada (SET)
8
Tecla para las horas (HOUR)
9
Datos técnicos
Antes de usarlo por primera vez, familiarícese con
9
8
7
6
2
3
4
5
aparato únicamente de la forma descrita y para las áreas de
aplicación especificadas. Conserve bien estas instrucciones.
Entregue toda la documentación en caso de transferir el
aparato a terceros.
el aparato. Para ello, lea las siguientes instrucciones y las indicaciones de seguridad. Utilice el
Tensión asignada: 240 V ∼, 50 Hz
Corriente asignada: CA 10 A
Carga máxima: 2300 vatios
Interruptor de salida: Relé
Precisión del temporizador: + / – 1 s / día a 20 °C
Tiempo de contacto
mínimo programable: 1 minuto
Seguridad
Lea las advertencias e indicaciones
de seguridad. El incumplimiento de las advertencias e
indicaciones de seguridad puede provocar incendios y / o
lesiones graves.
Indicaciones generales de
seguridad
¡PELIGRO DE
MUERTE Y DE ACCIDENTES PARA
NIÑOS! El producto no es un juguete.
Nunca deje a los niños sin vigilancia con el material de
embalaje o el aparato. Existe riesgo de asfixia con el
material de embalaje y peligro de muerte por descarga
eléctrica.
Este aparato no ha sido diseñado para ser utilizado por
personas (niños inclusive) con capacidades físicas, sensoriales o mentales limitadas, o con falta de experiencia
y / o de conocimiento, a no ser que cuenten con una
persona encargada de velar por su seguridad o de proporcionarles las indicaciones necesarias para el uso
adecuado del aparato. Los niños deben estar vigilados
para asegurarse de que no jueguen con el aparato.
Uso adecuado
El uso previsto de este aparato es conectar y desconectar
automáticamente aparatos eléctricos. El producto sólo debe
utilizarse en espacios interiores. Cualquier modificación en
el aparato no entra dentro del uso adecuado y pueden
provocar accidentes graves. El fabricante no se hace responsable de los daños causados por la utilización
Utilice el aparato sólo enchufado en una toma de
corriente instalada según las normas correspondientes.
¡ATENCIÓN! No utilice el temporizador digital
conectado en cadena. En el caso de usar adaptadores
enchufados uno tras otro existe peligro de daños mecánicos.
¡PELIGRO DE
MUERTE POR DESCARGA ELÉCTRICA!
Mantenga el aparato lejos de la humedad y
no lo toque con las manos mojadas.
No exponga el aparato a temperaturas extremas, ni
altas ni bajas.
No exponga el aparato a cambios extremos de tempe-
ratura. De lo contrario existe peligro de formación de
agua condensada. Antes de poner en funcionamiento
el aparato espere a que esté a temperatura ambiente.
Para evitar un aumento excesivo del aparato, no lo
cubra con periódicos, prendas u objetos similares.
Descripción de las piezas
Pantalla LC
1
Tecla para los minutos (MIN)
2
Tecla ON / AUTO / OFF (MANUAL)
3
Tecla de reinicio (reset)
4
Tecla para ajustes guardados (RECALL)
5
Tecla para día de la semana (WEEK)
6
ES ES ES
Antes de conectar el aparato a la red, revíselo en busca
de posibles daños. Nunca utilice el aparato si ha detectado cualquier tipo de daño. En caso de daños, reparaciones u otro tipo de problemas en el aparato, diríjase
a un técnico electricista.
No conecte aparatos de modo que su propio peso
cuelgue del enchufe. De este modo evitará un aumento
excesivo de temperatura y daños mecánicos en la toma
de corriente.
No utilice el aparato conectado a regletas de enchufes
o cables de extensión.
Observe que los daños producidos por la manipulación
incorrecta, omisión del manual de instrucciones o la manipulación por parte de personas no autorizadas, están
excluidos de la garantía.
El aparato no es apto para conmutar cargas inductivas
superiores a 10 A (amperios). Por este motivo no debe
utilizar este temporizador nunca con motores eléctricos
o tubos fluorescentes con reactancias convencionales.
¡CONSERVE TODAS LAS INDICACIONES DE SEGURIDAD
Y ADVERTENCIAS POR SI LAS NECESITARA EN UN
FUTURO!
Consulte con un técnico electricista si tiene dudas sobre
la carga inductiva del aparato que quiere conectar.
No abra nunca el aparato y tampoco intente efectuar
reparaciones o recambios de piezas.
Para limpiar el aparato sepárelo de la toma de corriente
instalada y extraiga todos los enchufes del aparato.
Asegúrese de tener siempre un buen acceso al aparato.
En caso de fallos retire el aparato inmediatamente de la
toma de corriente.
Antes de la puesta en marcha
El temporizador dispone de una batería integrada. Este
sirve para mantener los datos guardados como p. ej. hora,
fecha y operaciones de conmutación. Antes de usar por
primera vez el aparato debe cargarse la batería durante
24 horas. Puede realizar ajustes en el aparato cuando la
batería aún se está cargando.
Enchufe el aparato en una toma de corriente de
220–250 V, 50 Hz, instalada según las normas correspondientes. Durante un breve instante aparecerán todos
los indicadores en la pantalla LC 1. A continuación
aparecerá el indicador de la hora.
Nota: En caso de una interrupción del suministro
eléctrico la batería incorporada mantiene la indicación
de la hora y garantiza que siga activado el programa
de conmutación automática. El aparato puede ser programado completamente sin estar conectado a la red,
siempre que la batería esté totalmente cargada.
Manejo
Ajuste del día de la semana
y de la hora
Mantenga presionada la tecla modo de visualización
(TIME) 7 durante la siguiente operación de programación.
Nota: En cuanto se guarde un día determinado o una
combinación de días, la secuencia programada será ejecutada cada uno de estos días a la misma hora.
Presione la tecla hora (HOUR) 9 tantas veces hasta
que aparezca la hora deseada en la pantalla LC 1.
Presione la tecla minutos (MIN) 2 tantas veces hasta
que aparezca el minuto deseado en la pantalla LC 1.
Vuelva a presionar la tecla de entrada (SET) 8 para
confirmar el ajuste.
En la pantalla LC 1 aparecerá la indicación PROG 1
OFF “- - : - -”.
Hora de desconexión:
Presione la tecla día de la semana (WEEK) 6 tantas veces
hasta que aparezca el día o bloque de días deseado
en la pantalla LC 1.
Presione la tecla hora (HOUR) 9 tantas veces hasta
que aparezca la hora deseada en la pantalla LC 1.
ES ES ES ES
Presione la tecla día de la semana (WEEK) 6 tantas veces
hasta que aparezca el día deseado en la pantalla LC 1.
Consejo: Mantenga pulsada la tecla día de la semana
(WEEK) 6 durante aprox. 3 segundos. De este modo
conseguirá ajustar más rápido el valor. Este modo de
ajuste rápido puede emplearse también para las demás
configuraciones.
Nota: MO= Lunes, TU= Martes, WE= Miércoles,
TH= Jueves, FR= Viernes, SA= Sábado, SU= Domingo
Presione la tecla hora (HOUR) 9 tantas veces hasta
que aparezca la hora deseada en la pantalla LC 1.
Presione la tecla minutos (MIN) 2 tantas veces hasta
que aparezca el minuto deseado en la pantalla LC 1.
Suelte la tecla modo de visualización (TIME) 7.
Nota: Si durante 10 segundos no se efectúa ningún
ajuste el aparato cambia de nuevo al modo de indicación
del tiempo.
Nota: El temporizador está ahora en funcionamiento.
ES ES ES ES
Presione la tecla minutos (MIN) 2 tantas veces hasta
que aparezca el minuto deseado en la pantalla LC 1.
Vuelva a presionar la tecla de entrada (SET) 8 para
confirmar el ajuste.
Presione la tecla modo de visualización (TIME) 7 para
volver a la hora actual.
Nota: Se pueden programar hasta 20 secuencias diferentes.
Para ello repita el procedimiento de programación anteriormente descrito. En la pantalla LC 1 aparecerá con cada
secuencia adicional la subsiguiente indicación PROG 2 ON
“- - : - -” etc.
Esto es lo que indica el parpadeo del punto doble en la
pantalla LC
.
1
Activar horario de verano /
de invierno
Mantenga presionada la tecla modo de visualización
(TIME) 7 hasta que se apague o encienda el anexo
“+1h” en la pantalla LC.
Programar el temporizador
Hora de conexión:
Presione una vez la tecla de entrada (SET) 8. En la
pantalla LC 1 aparecerá la indicación PROG 1 ON
“- - : - -”.
Presione la tecla día de la semana (WEEK) 6 tantas
veces hasta que aparezca el día o bloque de días deseado en la pantalla LC 1. Los siguientes bloques de
semana y de días son posibles:
Para cambiar los días, horas o minutos proceda como
descrito en el capítulo “Programar el temporizador”.
Activar / desactivar secuencias
Presione la tecla de entrada (SET) 8.
A continuación presione la tecla para ajustes guardados
(RECALL) 5 para desactivar la secuencia programada.
Los datos correspondientes no se borran de la memoria
del temporizador, simplemente se desactivan. En la pantalla aparecerá la indicación “- - : - -”.
A continuación presione de nuevo la tecla para ajustes
guardados (RECALL) 5 para volver a activar la secuencia.
• MO TU WE TH FR
Lunes – viernes
• SA SU
Sábado + domingo
• MO TU WE TH FR SA
Lunes – sábado
• MO WE FR
Lunes + miércoles + viernes
• TU TH SA
Martes + jueves + sábado
• MO TU WE
Lunes – miércoles
• TH FR SA
Jueves – sábado
• MO TU WE TH FR SA SO
Lunes – domingo
pantalla LC
OFF: Quedan desactivadas todas las secuencias, el
temporizador no aporta corriente a los aparatos conectados.
AUTO OFF: Las secuencias quedan activadas, el
temporizador está apagado.
ON: Quedan desactivadas todas las secuencias, el
temporizador aporta continuamente corriente a los
aparatos conectados.
AUTO ON: Las secuencias quedan activadas, el
temporizador está encendido.
el comando deseado:
1
Activar el modo aleatorio
Modificar o comprobar las
secuencias programadas
Para modificar o comprobar las secuencias presione la
tecla entrada (SET) 8 y en la pantalla LC irán apareciendo una tras otra las secuencias programadas.
Saltar secuencias manualmente
Independientemente de las programaciones puede
saltarse manualmente en todo momento una secuencia
subsiguiente.
Para ello presione la tecla ON / AUTO / OFF
(MANUAL) 3 tantas veces hasta que aparezca en la
Nota: Esta función enciende y apaga el temporizador de
manera aleatoria y está diseñado para prevenir robos en
su casa, simulando una casa habitada mediante secuencias
irregulares (p. ej. en el encendido y apagado de lámparas).
Los comandos de conmutación programados por usted se
desplazan cada día de manera aleatoria hasta 30 minutos.
ES ES ES ES
Sin embargo, esta función sólo está disponible si anteriormente se llegaron a programar una o varias secuencias.
Mantenga presionada la tecla de la hora (HOUR) 9
durante 3 segundos. El temporizador cambio al modo
aleatorio. En la pantalla LC 1 aparece el símbolo
“RND”; el modo aleatorio está activado.
Mantenga presionada nuevamente la tecla de la hora
(HOUR) 9 durante 3 segundos para volver a desactivar
el modo aleatorio.
Presione la tecla minutos (MIN) 2 tantas veces hasta
que aparezca el minuto deseado en la pantalla LC 1.
Nota: La cuenta atrás puede ajustarse en 1 minuto
hasta 23 horas, 59 minutos.
Presione la tecla modo de visualización (TIME) 7.
El aparato vuelve al modo de funcionamiento normal.
Presione a la vez la tecla hora (HOUR) 9 y la tecla
minutos (MIN) 2, para iniciar la función de la cuenta
atrás.
Finalizar la cuenta atrás
Ajuste de la cuenta atrás
Presione la tecla de entrada (SET) 8, para entrar en el
menú del temporizador.
Mantenga presionada la tecla de entrada (SET) 8 hasta
que aparezca en la pantalla LC 1 el icono “CTD”.
Presione la tecla hora (HOUR) 9 tantas veces hasta
que aparezca en la pantalla LC 1 la hora deseada.
ES ES ES ES
66142_Zeitschaltuhr_digital_innen_ES_IT_PT.indd 1 20.07.11 18:17
manualmente
Presione la tecla ON / AUTO / OFF (MANUAL) 3
durante la cuenta atrás para detenerla.
Presione nuevamente la tecla ON / AUTO / OFF
(MANUAL) 3 para reanudar la cuenta atrás.
Presione la tecla modo de visualización (TIME) 7 para
volver de la indicación de la cuenta atrás a la hora actual.
Presione de nuevo la tecla modo de visualización
(TIME) 7 para volver de la hora actual a la indicación
de la cuenta atrás.
Presione a la vez la tecla hora (HOUR) 9 y la tecla
minutos (MIN) 2, para cancelar la cuenta atrás.
Limpieza y cuidado
No utilice en ningún caso líquidos o productos de
limpieza ya que éstos dañarían el aparato.
Limpie el aparato sólo por fuera con un paño suave y
seco.
Desecho del producto
El embalaje se compone de materiales reciclables
que puede desechar en los puntos locales de
recogida selectiva.
Para deshacerse del producto una vez que ya no sirva,
pregunte a las autoridades locales o municipales.
Para proteger el medio ambiente, cuando ya no
utilice el aparato no lo arroje a la basura doméstica sino deséchelo adecuadamente. Diríjase
a la administración competente para obtener
información sobre los puestos de recogida de
residuos y sus horarios.
Denominación del producto:
Programador digital semanal
N.º de ref.: 97318-5
N.º de modelo: EIM-804 GR
Page 11
Presa temporizzata digitale
Introduzione
Familiarizzarsi con l’apparecchio prima di avviarlo e di utilizzarlo per la prima volta. A questo
proposito leggere le seguenti istruzioni d’uso
nonché le indicazioni di sicurezza. Utilizzare l’apparecchio
solamente come descritto e per gli ambiti di utilizzo indicati.
Conservare queste istruzioni d’uso in buono stato. In caso
di trasferimento del prodotto a terzi, consegnare anche tutta
la documentazione.
Utilizzo secondo la
destinazione d’uso
Questo apparecchio è adatto per l’accensione e lo spegnimento automatico di apparecchi elettrici. L’apparecchio
può essere utilizzato solamente in ambienti chiusi. Tutte le
modifiche apportate all’apparecchio sono da considerarsi
non conformi alla destinazione d’uso e possono comportare
notevoli pericoli di infortuni. Il produttore non si assume alcuna
responsabilità per danni derivanti da un utilizzo non conforme.
Questo apparecchio non è destinato all’uso commerciale.
Dati tecnici
Tensione nominale: 240 V ∼, 50 Hz
Corrente nominale: AC 10 A
Carico massimo: 2300 Watt
Interruttore di uscita: Relè
Precisione del timer: + / – 1 secondo / giorno
alla temperatura di 20 °C
Tempo minimo programmabile: 1 Minuto
Descrizione dei componenti
Display a cristalli liquidi
1
Tasto di impostazione dei minuti (MIN)
2
Tasto ON / AUTO / OFF (MANUAL)
3
Tasto di reset
4
IT IT IT IT
Tasto di richiamo (RECALL)
5
Tasto di impostazione del giorno della settimana (WEEK)
6
Tasto di modalità di visualizzazione (TIME)
7
Tasto di immissione (SET)
8
Tasto di impostazione delle ore (HOUR)
9
Sicurezza
Leggere tutte le indicazioni di sicurezze
e le istruzioni riportate. Il mancato rispetto delle indicazioni
di sicurezza e delle istruzioni d’uso può provocare incendi
e / o gravi lesioni.
CONSERVARE TUTTE LE INDICAZIONI DI SICUREZZA
E LE ISTRUZIONI D’USO PER UN’EVENTUALE FUTURA
CONSULTAZIONE!
Indicazioni generali di sicurezza
PERICOLO DI
MORTE E DI INCIDENTI PER BAMBINI
E INFANTI! Il prodotto non è un giocattolo.
Non lasciare mai i bambini incustoditi nei pressi del
materiale di imballaggio e dell’apparecchio. Sussiste il
pericolo di soffocamento a causa del materiale per
imballaggio nonché un pericolo di morte a causa di
scossa elettrica.
Non fare utilizzare questo prodotto da persone (ivi inclusi
bambini) con capacità fisiche, sensoriali o mentali limitate
o che siano prive di esperienza e / o conoscenza, a
meno che esse non vengano sorvegliate da una persona
responsabile per la loro sicurezza o ricevano indicazioni
su come l’apparecchio debba essere utilizzato. I bambini
devono essere sorvegliati per assicurarsi che non
giochino con il prodotto.
Utilizzare per l’apparecchio solamente a una presa
elettrica di rete installata a regola d’arte.
ATTENZIONE! Non collegare l’orologio temporizzatore
digitale in serie. Le spine intermedie inserite l’una nell’altra
possono provocare un danno meccanico.
PERICOLO DI
MORTE DETERMINATO DA UNA
SCOSSA ELETTRICA! Mantenere l’appa-
recchio lontano dall’umidità e non afferrarlo con mani
bagnate.
Non esporre l’apparecchio a calore o a freddo estremi.
Non esporre il prodotto ad estreme oscillazioni di tem-
peratura. In caso contrario vi è il pericolo che si formi
acqua di condensa. Non mettere in funzione l’apparecchio
fino a quando esso non abbia raggiunto la temperatura
ambiente.
Non coprire l’apparecchio con giornali, vestiario o simili,
e ciò al fine di evitare un eccessivo riscaldamento.
Funzionamento
Impostazione del giorno della
settimana e dell’ora
Premere e mantenere premuto il tasto di modalità di
visualizzazione (TIME) 7 durante la successiva proce-
dura di programmazione.
Premere ripetutamente il tasto di impostazione del
giorno della settimana (WEEK) 6, fino a quando sul
display a cristalli liquidi 1 non appare il giorno della
settimana desiderato.
Suggerimento: Premere e mantenere premuto il tasto
del giorno della settimana (WEEK) 6 per circa 3 secondi.
In questo modo si ottiene un’impostazione accelerata
dei valori. Questa impostazione veloce può essere
utilizzata anche per le successive procedure di imposta-
zione.
Nota: MO = lunedì, TU = martedì, WE = mercoledì,
TH = giovedì, FR = venerdì, SA = sabato, SU = domenica
Prima di ogni collegamento alla rete elettrica, controllare
l’apparecchio per verificare l’eventuale presenza di
danni. Non utilizzare mai l’apparecchio qualora si
notassero dei danni. Rivolgersi a un elettricista in caso
di danneggiamenti, necessità di riparazioni o altri
problemi nell’utilizzo dell’apparecchio.
Non inserire alcun apparecchio il cui peso ricada sulla
spina. In questo modo si evita un riscaldamento non am-
messo nonché danni meccanici alla presa elettrica di rete.
Non utilizzare l’apparecchio con ciabatte o prolunghe.
Tenere presente che sono esclusi dall’applicazione della
prestazione di garanzia i danni derivanti da un utilizzo
scorretto, dalla mancata osservanza delle istruzioni
d’uso o da un intervento sull’apparecchio da parte di
persone non autorizzate.
L’apparecchio non è adatto a collegare carichi induttivi
superiori a 10 A (Ampere). Per questo motivo non azio-
nare mai motori elettrici o tubi fluorescenti con alimentatori
con questo orologio temporizzatore. Rivolgersi a un
IT IT IT IT
Premere ripetutamente il tasto di impostazione dell’ora
(HOUR) 9, fino a quando sul display a cristalli liquidi 1
non appare l’ora desiderata.
Premere ripetutamente il tasto di impostazione dei minuti
(MIN) 2, fino a quando sul display a cristalli liquidi 1
non appare il minuto desiderato.
Rilasciare il tasto di modalità di visualizzazione (TIME) 7.
Nota: Qualora entro 10 secondi non venisse eseguita
alcuna impostazione, l’apparecchio si commuta nuova-
mente nella visualizzazione oraria normale.
Nota: L’orologio temporizzatore è ora in funzione.
Ciò viene indicato sul display a cristalli liquidi 1 dal
lampeggio dei due punti.
Attivazione dell’ora legale / ora
solare
Mantenere premuto il tasto di modalità di visualizzazione
(TIME) 7, fino a quando appare o scompare il messaggio
“+1h” nella visualizzazione dell’orario.
tecnico qualificato qualora non siate sicuri sul carico
induttivo del Vostro apparecchio.
Non aprire l’apparecchio da soli e non cercare mai di
sostituire da soli componenti o di riparare l’apparecchio.
Quando si eseguono interventi di pulizia, staccare
sempre l’apparecchio dalla presa elettrica di rete ed
estrarre tutte le spine dall’apparecchio.
Fare attenzione a che l’apparecchio sia sempre ben
accessibile.
In caso di disturbi estrarre subito l’apparecchio dalla
presa elettrica di rete.
Prima dell’avvio
L’orologio temporizzatore dispone di un accumulatore integrato. Esso serve allo scopo di mantenere i dati memorizzati
quali ora, data, e procedure di attivazione. L’accumulatore
deve essere caricato per 24 ore prima di essere utilizzato per
Programmazione dell’orologio
temporizzatore
Orario di accensione:
Premere una volta il tasto di immissione (SET) 8. Nel
display a cristalli liquidi 1 appare la visualizzazione
PROG 1 ON “- - : - -”.
Premere ripetutamente il tasto di impostazione del
giorno della settimana (WEEK) 6, fino a quando sul
display a cristalli liquidi 1 non appare il giorno della
settimana. Sono possibili i seguenti blocchi di settimane
e di giorni:
• MO TU WE TH FR
lunedì – venerdì
• SA SU
sabato + domenica
• MO TU WE TH FR SA
lunedì – venerdì
• MO WE FR
lunedì + mercoledì + venerdì
la prima volta. Durante la procedura di carico si possono
già eseguire delle impostazioni all’apparecchio.
Inserire l’apparecchio in una presa elettrica di rete da
220–250 V, 50 Hz installata a regola d’arte. Per un
breve istante sul display a cristalli liquidi 1 appaiono
tutte le visualizzazioni. In seguito appare la visualizzazione dell’ora.
Nota: In caso di interruzione dell’alimentazione elettrica,
l’accumulatore incorporato assicura che l’ora continui a
essere visualizzata e che il programma automatico di
attivazione rimanga inserito. Fino a quando l’accumulatore è completamente carico, l’apparecchio può essere
normalmente programmato anche senza alimentazione
elettrica.
• TU TH SA
martedì + giovedì + sabato
• MO TU WE
lunedì – mercoledì
• TH FR SA
giovedì – sabato
• MO TU WE TH FR SA SO
lunedì – domenica
Nota: Non appena è stato memorizzato un determinato
giorno o una combinazione di giorni, la sequenza di attivazione programmata in ciascuno di questi giorni viene eseguita
alla stessa ora.
Premere ripetutamente il tasto di impostazione dell’ora
(HOUR) 9, fino a quando sul display a cristalli liquidi 1
non appare l’ora desiderata.
Premere ripetutamente il tasto di impostazione dei minuti
(MIN) 2, fino a quando sul display a cristalli liquidi non
appare la cifra dei minuti desiderato 1.
Memorizzare l’impostazione premendo ancora una
volta il tasto di immissione (SET) 8.
Sul display a cristalli liquidi 1 appare la visualizzazione
PROG 1 OFF “- - : - -”.
Ora di spegnimento:
Premere ripetutamente il tasto di impostazione del
giorno della settimana (WEEK) 6, fino a quando sul
display a cristalli liquidi 1 non appare il giorno della
settimana o il blocco di giorni desiderato.
Premere ripetutamente il tasto di impostazione dell’ora
(HOUR) 9, fino a quando sul display a cristalli liquidi 1
non appare l’ora desiderata.
Premere ripetutamente il tasto di impostazione dei minuti
(MIN) 2, fino a quando sul display a cristalli liquidi 1
non appare il minuto desiderato.
possibile quando uno i più comandi di attivazione sono stati
impostati.
Premere il tasto di impostazione delle ore (HOUR) 9
per 3 secondi. L’orologio temporizzatore si commuta
nella modalità casuale. Sul display a cristalli liquidi 1
appare il simbolo “RND”, e la modalità casuale è inserita.
Per interrompere la modalità casuale premere nuovamente
il tasto di impostazione delle ore (HOUR) 9 per 3 secondi.
Impostazione del conto alla
rovescia
Per accedere al Menù Timer premere il tasto di
immissione (SET) 8.
Tenere il tasto di immissione (SET) 8 premuto fino a
quando sul display a cristalli liquidi 1 appare l’icona
“CTD”.
IT IT IT IT
Memorizzare l’impostazione premendo ancora una
volta il tasto di immissione (SET) 8.
Per tornare all’ora attuale, premere il tasto di modalità
di visualizzazione (TIME) 7.
Nota: Possono essere programmate fino a 20 diverse sequenze di attivazione. Ripetere di volta in volta la procedura
di programmazione precedentemente descritta. Nel display
a cristalli liquidi 1 a ogni successiva procedura di memorizzazione appare la visualizzazione PROG 2 ON “- - : . - -” ecc.
Inserimento / disinserimento degli
orari di attivazione
Premere il tasto di immissione (SET) 8.
Rimuovere il tempo di attivazione premendo in seguito il
tasto di richiamo (RECALL) 5. I dati di attivazione non
vengono cancellati dalla memoria, bensì solamente
disinseriti. Sul display appare il simbolo “- - : - -”.
Attivare il tempo di attivazione premendo nuovamente il
tasto di richiamo (RECALL) 5.
Come saltare manualmente
Modifica o verifica dei
tempi di attivazione
Modificare o verificare i tempi di attivazione premendo
il tasto di immissione (SET) 8, e uno dopo l’altro
appariranno gli orari programmati di attivazione.
Per modificare il dato relativo ai giorni, alle ore e ai
minuti, procedere come descritto nel capitolo “Programmazione dell’orologio temporizzatore”.
IT IT IT IT
Premere ripetutamente il tasto di impostazione dell’ora
(HOUR) 9, fino a quando sul display a cristalli liquidi 1
non appare l’ora desiderata.
Premere ripetutamente il tasto di impostazione dei minuti
(MIN) 2, fino a quando sul display a cristalli liquidi non
appare la cifra dei minuti desiderata 1.
Nota: Il conto alla rovescia può essere impostato da 1
minuto fino a 23 ore, 59 minuti e 59 secondi.
Premere il tasto della modalità di visualizzazione
(TIME) 7.
L’apparecchio torna nella normale modalità di esercizio.
Per avviare la funzione di conto alla rovescia premere
contemporaneamente i tasti di impostazione delle ore
(HOUR) 9 e quello d impostazione dei minuti (MIN) 2.
Interruzione manuale del
conto alla rovescia
Per fermare il conto alla rovescia premere, mentre esso
è in corso, il tasto ON / AUTO / OFF (MANUAL) 3.
gli orari di attivazione
Indipendentemente dalla programmazione fatta, in ogni
momento è possibile saltare manualmente un orario di
attivazione successivo.
A tale scopo continuare a premere il tasto ON / AUTO /
OFF (MANUAL) 3 fino a quando sul display a cristalli
liquidi 1 non appare il comando desiderato:
OFF: Tutti gli orari di attivazione sono rimossi, l’orologio
Per fare proseguire il conto alla rovescia, premere
nuovamente il tasto ON / AUTO / OFF (MANUAL) 3.
Per tornare dalla visualizzazione del conto alla rovescia
a quella dell’ora attuale premere il tasto di modalità di
visualizzazione (TIME) 7.
Per tornare dalla visualizzazione dell’ora attuale a quella
del conto alla rovescia, premere il tasto di modalità di
visualizzazione (TIME) 7.
Per interrompere la funzione di conto alla rovescia, pre-
mere contemporaneamente i tasti di impostazione delle
ore (HOUR) 9 e dei minuti (MIN) 2.
Pulizia e manutenzione
Non utilizzare in nessun caso liquidi o detersivi, giacché
essi danneggiano l’apparecchio.
Pulire l’apparecchio solo esternamente con un panno
soffice e asciutto.
temporizzatore non trasferisce più l’energia elettrica
agli apparecchi collegati.
AUTO OFF: I tempi di attivazione sono attivi, l’orologio
temporizzatore è disinserito.
ON: Tutti gli orari di attivazione sono rimossi, l’orologio
trasferisce regolarmente all’apparecchio collegato.
AUTO ON: I tempi di attivazione sono attivi, l’orologio
temporizzatore è acceso.
Impostazione della
modalità causale
Nota: Questa funzione permette di accendere e spegnere
l’orologio temporizzatore a discrezione e ha, ad esempio,
lo scopo di impedire svaligiamenti, dando l’impressione che
una casa sia abitata con la non regolarità dei tempi di attivazione (ad esempio di lampade). I comandi di attivazione
programmati in precedenza vengono rinviati giornalmente
a caso fino a 30 minuti. Tale funzione è tuttavia solamente
Smaltimento
L’imballaggio è costituito da materiali ecologici
che possono essere smaltiti presso i centri di
riciclaggio locali.
Informarsi presso l’amministrazione cittadina o comunale
sulle possibilità di uno smaltimento ecologico e corretto del
prodotto usato
Nell’interesse dell’ambiente, si prega di non
gettare l’apparecchio, una volta che è divenuto
inservibile, nella spazzatura domestica, bensì di
smaltirlo in modo corretto. Informarsi sull’ubicazione
dei punti di raccolta e sui loro orari di apertura
presso l’amministrazione locale competente.
IT IT IT IT
66142_Zeitschaltuhr_digital_innen_ES_IT_PT.indd 2 20.07.11 18:17
Page 12
Nome del prodotto:
Presa temporizzata digitale
Art. n°: 97318-5
Modello n°: EIM-804 GR
Temporizador digital semanal
Introdução
Familiarize-se com o aparelho antes da primeira
colocação em funcionamento. Para isso, leia o
seguinte manual de instruções e as indicações
de segurança. Utilize o aparelho apenas conforme descrito
e para as finalidades indicadas. Guarde bem este manual.
Ao entregar o aparelho a terceiros, entregue também todos
os documentos.
Utilização correcta
Este aparelho destina-se a ligar e desligar automaticamente
aparelhos eléctricos. O produto apenas pode ser utilizado
em espaços fechados. Qualquer alteração ao mesmo é
considerada incorrecta, podendo dar origem a acidentes.
O fabricante não se responsabiliza por danos provocados
por uma utilização incorrecta. Este aparelho não se destina
a uso industrial.
Dados técnicos
Tensão medida: 240 V ∼, 50 Hz
Corrente medida: AC 10 A
Carga máxima: 2300 watts
Interruptor de saída: Relé:
Precisão do temporizador: + / – 1 segundo / dia em 20º C
Menor tempo programável: 1 Minuto
Descrição das peças
Visor LCD
1
Botão Minutos (MIN)
2
Botão LIGAR / AUTO / DESLIGAR (MANUAL)
3
Botão Reset
4
Botão Rechamada (RECALL)
5
Botão Dias da semana (WEEK)
6
Botão Modo de visualização (TIME)
7
Botão Introdução (SET)
8
Botão Horas (HOUR)
9
Segurança
Leia todas as indicações de segurança e
instruções. A inobservância das indicações de segurança e
instruções pode provocar ferimentos graves e / ou incêndio.
GUARDE TODAS AS INDICAÇÕES DE SEGURANÇA E
INSTRUÇÕES PARA CONSULTA FUTURA!
Indicações gerais de segurança
PERIGO DE MORTE E DE
ACIDENTES PARA BEBÉS E CRIANÇAS!
O produto não é nenhum brinquedo. Nunca
deixe crianças sem vigilância com o material da embalagem ou com o aparelho. Existe perigo de asfixia pelo
material de embalagem e perigo de morte por choque
eléctrico.
Este aparelho não deve ser utilizado por pessoas
(incluindo crianças) com limitações físicas, sensoriais ou
mentais ou pessoas sem experiência e / ou conhecimento,
a não ser que estas sejam vigiadas por alguém responsável pela sua segurança ou recebam instruções desta
pessoa acerca do funcionamento do aparelho. As
crianças devem ser vigiadas, de modo a assegurar que
não brincam com o aparelho.
Ligue o aparelho apenas a uma tomada de rede
correctamente montada.
CUIDADO! Não ligue os temporizadores digitais em
série. Neste caso existe perigo de danos mecânicos.
Utilização
Configurar o dia da semana e hora
Mantenha o botão Modo de visualização (TIME) 7
premido durante o seguinte processo de programação.
Prima o botão Dias da semana (WEEK) 6 as vezes
necessárias até aparecer no visor LCD 1 o dia da
semana pretendido.
Dica: Mantenha o botão Dias da semana (WEEK) 6
premido durante aprox. 3 segundos. Deste modo, a
configuração dos valores será mais rápida. Pode fazer
uso desta configuração rápida durante os processos de
configuração subsequentes.
Nota: MO = Segunda, TU = Terça, WE = Quarta,
TH = Quinta, FR = Sexta, SA = Sábado, SU = Domingo
Prima o botão Horas (HOUR) 9 as vezes necessárias
até aparecer a hora pretendida no visor LCD 1.
Prima o botão Minutos (MIN) 2 as vezes necessárias
até aparecer o minuto pretendido no visor LCD 1.
IT
PERIGO DE MORTE POR
CHOQUE ELÉCTRICO! Mantenha o aparelho afastado de humidade e não toque no
mesmo com mãos húmidas.
Não exponha o aparelho a calor e frio extremos.
Não exponha o produto a grandes variações de tem-
peratura. Caso contrário existe perigo de condensação.
Aguarde até o aparelho atingir a temperatura ambiente
antes de o colocar em funcionamento.
Não cubra o aparelho com jornais, peças de roupa ou
semelhante para evitar um aquecimento não permitido.
Antes de cada ligação à rede eléctrica, verifique o apa-
relho quanto a eventuais danos. Nunca utilize o aparelho
caso sejam detectados quaisquer danos. Em caso de
danos, reparações ou outros problemas no aparelho,
contacte um técnico especializado.
Nunca ligue aparelhos cujo peso próprio fique suportado
pela tomada. Desta forma evita um aquecimento não per-
mitido assim como um dano mecânico na tomada de rede.
PT PT PT PT
Solte o botão Modo de visualização (TIME) 7.
Nota: Caso não sejam efectuadas configurações
durante aprox. 10 segundos, o aparelho muda para a
indicação de hora normal.
Nota: O temporizador está agora em funcionamento.
O mesmo é indicado no visor LCD 1 através da inter-
mitência de dois pontinhos.
Activar hora de Verão / Inverno
Mantenha o botão de Visualização (TIME) 7 premido
até aparecer ou desaparecer o adicional “+1h” na
indicação da hora.
Programar temporizador
Período de activação:
Pima uma vez o botão de Introdução (SET) 8. No visor
LCD 1 aparece a indicação PROG 1 ON “- - : - -”.
Prima o botão Dias da semana (WEEK) 6 as vezes
necessárias até aparecer o dia da semana ou o bloco
PT PT PT
Não utilize o aparelho com extensões de tomadas ou
extensões.
Os danos causados por um manuseamento inadequado,
pela inobservância do manual de instruções ou uma
intervenção por pessoal não autorizado estão excluídos
da garantia.
O aparelho não é adequado para ligar cargas indutivas
com mais de 10 A (ampères). Por este motivo, nunca
utilize motores eléctricos ou tubos fluorescentes com balastros convencionais com este temporizador. Contacte
um técnico especializado caso não tenha a certeza
sobre a carga indutiva do seu aparelho.
Não abra o aparelho e nunca tente substituir ou reparar
peças.
Tire sempre o aparelho da tomada de rede para a
limpeza e tire todos os cabos do aparelho.
Certifique-se de que o aparelho está sempre acessível.
Em caso de avarias retire de imediato o aparelho da
tomada de rede.
de dias pretendido no visor LCD 1. Estão disponíveis
os seguintes blocos semanais e de dias:
• MO TU WE TH FR
Segunda a Sexta
• SA SU
Sábado + Domingo
• MO TU WE TH FR SA
Segunda a Sábado
• MO WE FR
Segunda + Quarta + Sexta
• TU TH SA
Terça + Quinta + Sábado
• MO TU WE
Segunda a Quarta
• TH FR SA
Quinta a Sábado
• MO TU WE TH FR SA SO
Segunda a Domingo
Antes da colocação em
funcionamento
O temporizador dispõe de uma bateria integrada. A
mesma destina-se à recepção dos dados armazenados
como p. ex. hora, data e processos de comutação. A bateria
deve ser carregada 24 horas antes da primeira utilização.
Durante o processo de carregamento pode efectuar configurações.
Ligue o aparelho a uma tomada de rede de 220–250 V,
50 Hz instalada correctamente. Durante um curto momento aparecem todas as indicações no visor LCD 1.
De seguida aparece a indicação do tempo.
Nota: Em caso de uma falha de luz, a bateria montada
assegura-se de que a hora seja indicada e o programa
de comutação automático se mantenha activo. O aparelho pode ser programado por completo sem corrente
desde que a bateria esteja completamente carregada.
Nota: Assim que um dia especifico ou uma combinação
de dias tiver sido programado, a sequência programada é
executada à mesma hora em cada desses dias de semana.
Prima o botão Horas (HOUR) 9 as vezes necessárias
até aparecer a hora pretendida no visor LCD 1.
Prima o botão Minutos (MIN) 2 as vezes necessárias
até aparecer o minuto pretendido no visor LCD 1.
Prima novamente o botão de Introdução (SET) 8 para
guardar a configuração.
No visor LCD 1 aparece a indicação PROG 1 OFF
“- - : - -”.
Hora para desligar:
Prima o botão Dias da semana (WEEK) 6 as vezes
necessárias até aparecer o dia da semana ou o bloco
de dias pretendido no visor LCD 1.
Prima o botão Horas (HOUR) 9 as vezes necessárias
até aparecer a hora pretendida no visor LCD 1.
Prima o botão Minutos (MIN) 2 as vezes necessárias
até aparecer o minuto pretendido no visor LCD 1.
Prima novamente o botão de Introdução (SET) 8 para
guardar a configuração.
Prima o botão Visualização (TIME) 7 para voltar para
a hora acutal.
Nota: Pode programar até 20 sequências diferentes. Para
isso, repita o processo de programação descrito anteriormente. No visor LCD 1 aparece sequencialmente em
cada processo de programação PROG 2 ON “- - : - -” etc.
Alterar ou verificar tempos de
comutação
Prima o botão de Introdução (SET) 8 para alterar ou
verificar os tempos de comutação. Os tempos de comutação aparecem sequencialmente no visor.
Para alterar os dias, as horas ou os minutos proceda
como descrito no capítulo “Programar temporizador”.
O aparelho volta ao modo de funcionamento normal.
Prima os botões Horas (HOUR) 9 e Minutos (MIN) 2
em simultâneo para iniciar a função de contagem
decrescente.
Terminar contagem decrescente
manualmente
Prima o botão LIGAR / AUTO / DESLIGAR (MANUAL) 3
durante a contagem decrescente para parar a mesma.
Prima novamente o botão LIGAR / AUTO / DESLIGAR
(MANUAL) 3 para continuar com a contagem decrescente.
Prima o botão Visualização (TIME) 7 para mudar da
indicação contagem decrescente para a hora actual.
Prima novamente o botão Visualização (TIME) 7 para
mudar da hora acutal para a indicação de contagem
decrescente.
Prima os botões Hora (HOUR) 9 e Minutos (MIN)
em simultâneo para cancelar a contagem decrescente.
2
PT PT PT PT
Activar / desactivar tempos de
comutação
Pima o botão de Introdução (SET) 8.
Prima de seguida o botão Rechamada (RECALL)
para anular o tempo de comutação programado. Os
dados de comutação não são eliminados, são desactivados apenas. No visor aparece o símbolo “- - : - -”.
Prima novamente o botão Rechamada (RECALL)
para activar o tempo de comutação anulado.
5
5
Saltar manualmente tempos de
comutação
Pode saltar sempre manualmente um tempo de comuta-
ção seguinte independentemente da programação.
Para isso, prima o botão LIGAR / AUTO / DESLIGAR
(MANUAL) 3 as vezes necessárias, até aparecer o
comando pretendido no visor LCD 1:
OFF: Todos os tempos de comutação são anulados, o
temporizador não conduz corrente aos aparelhos ligados.
PT PT PT PT
Limpeza e conservação
Nunca utilize líquidos e detergentes, pois estes danificam
o aparelho.
Limpe o aparelho apenas por fora com um pano seco e
macio.
AUTO OFF: Os tempos de comutação estão activos, o
temporizador está desligado.
ON: Todos os tempos de comutação são anulados, o
temporizador conduz permanente corrente ao aparelho
ligado.
AUTO ON: Os tempos de comutação estão activos, o
temporizador está ligado.
Configurar modo aleatório
Nota: Esta função liga e desliga o temporizador aleatoria-
mente e deve prevenir assaltos, simulando uma casa
habitada através dos tempos de comutação irregulares (p.
ex. em lâmpadas). Os comandos de comutação pré-programados retardam-se diariamente de forma aleatória, em
até 30 minutos. No entanto, esta função apenas é possível
caso um ou mais comandos de comutação tenham sido
programados.
Não deposite o seu aparelho usado no lixo
doméstico, a favor da protecção do ambiente.
Proceda antes a uma eliminação responsável.
Pode obter informações sobre os pontos de
recolha e os respectivos horários junto da administração responsável.
Prima o botão Horas (HOUR) 9 durante 3 segundos.
O temporizador muda para o modo aleatório. Aparece
o símbolo “RND” no visor LCD 1, o modo aleatório
está ligado.
Prima novamente o botão Horas (HOUR) 9 durante 3
segundos para terminar o modo aleatório.
Configurar contagem decrescente
Prima o botão Introdução (SET) 8 para alcançar o
menu Timer.
Mantenha o botão Introdução (SET) 8 premido até
aparecer o ícone “CTD” no visor LCD 1.
Prima o botão Horas (HOUR) 9 as vezes necessárias
até aparecer a hora pretendida no visor LCD 1.
Prima o botão Minutos (MIN) 2 as vezes necessárias
até aparecer o minuto pretendido no visor LCD 1.
Nota: A contagem decrescente pode ser configurada
de 1 minuto a 23 horas, 59 minutos.
Prima o botão modo de visualização (TIME) 7.
Eliminação
Designação do produto:
A embalagem é composta por materiais
recicláveis, que pode eliminar através dos pontos
de reciclagem locais.
Poderá obter informações relativas à eliminação do
produto usado junto das autoridades locais responsáveis
pela reciclagem.
Temporizador digital semanal
N.º do artigo: 97318-5
N.º de modelo: EIM-804 GR
© by ORFGEN Marketing
IAN 66142
Inter-Union Technohandel GmbH
Klaus-von-Klitzing-Str. 2
D-76829 Landau / Pfalz
PT PT PT
66142_Zeitschaltuhr_digital_innen_ES_IT_PT.indd 3 20.07.11 18:17
Page 13

66142_Zeitschaltuhr_digital_innen_ES_IT_PT.indd 4 20.07.11 18:17
Page 14

1
Digitaalinen viikkoajastin
vahingoista. Tämä laite ei ole tarkoitettu ammattimaiseen
käyttöön.
Johdanto
Näyttömoodi-painike (TIME)
7
Syöttöpainike (SET)
8
Tuntipainike (HOUR)
9
Tekniset tiedot
Tutustu ennen ensimmäistä käyttöönottoa laitteen
9
8
7
6
2
3
4
5
tavalla ja ainoastaan ilmoitettuihin käyttötarkoituksiin. Säilytä
tämä käyttöohje huolellisesti. Anna kaikki tiedot mukaan, jos
luovutat laitteen edelleen.
toimintoihin. Lue myös seuraava käyttöohje ja
turvallisuusohjeet. Käytä laitetta vain kuvatulla
Nimellisjännite: 240 V ∼, 50 Hz
Nimellisvirta: AC 10 A
Max. kuormitus: 2300 wattia
Output-kytkin: Rele
Ajastimen tarkkuus + / – 1 sekunti / päivä
20 °C lämpötilassa
Lyhyin ohjelmoitava aika: 1 minuutti
Turvallisuus
Lue kaikki turvallisuusohjeet ja käyttöohjeet
tarkkaavaisesti läpi. Mikäli turvallisuusohjeiden ja määräysten
noudattaminen laiminlyödään, siitä voi olla seurauksena
tulipalo ja / tai vakava loukkaantuminen.
Määräystenmukainen käyttö
Tämä laite on tarkoitettu sähkölaitteiden automaattiseen
käynnistämiseen ja sammuttamiseen. Laitteen käyttö on sallittu ainoastaan suljetuissa tiloissa. Kaikenlaisten muutosten
teko laitteeseen on määräystenvastaista ja voi aiheuttaa
huomattavia tapaturmavaaroja. Valmistaja ei ota mitään
vastuuta määräystenvastaisesta käytöstä aiheutuneista
Osien kuvaus
LC-näyttö
1
Minuuttipainike (MIN)
2
PÄÄLLE- / AUTO- / POIS -painike (MANUAALI)
3
Reset-painike
4
Palautuspainike (RECALL)
5
Viikonpäiväpainike (WEEK)
6
FI FI FI
SÄILYTÄ KAIKKI TURVALLISUUSOHJEET JA
KÄYTTÖOHJEET VASTAISUUDEN VARALLE!
Yleiset turvallisuusohjeet
HENGEN- JA TAPA-
TURMAVAARA PIKKULAPSILLE JA
LAPSILLE! Tuote ei ole lasten leikkikalu. Älä
koskaan päästä lapsia ilman valvontaa pakkausmateriaalin ja laitteen pariin. Pakkausmateriaali voi aiheuttaa
tukehtumisvaaran ja hengenvaarallisen sähköiskuvaaran.
Tämä laite ei ole tarkoitettu sellaisten henkilöiden (lapset
mukaan luettuina) käyttöön, joiden fyysinen, aistimuksellinen tai henkinen kunto on rajoittunut tai joilla ei ole
kokemusta / tietoja laitteen käytöstä. He saavat käyttää
laitetta ainoastaan turvallisuudesta vastuussa olevan
henkilön valvonnassa tai jos heille on annettu opastusta
laitteen käytössä. Lapsia on valvottava ja pidettävä huoli
siitä, etteivät he pääse leikkimään laitteen kanssa.
Käytä laitetta vain määräystenmukaisesti asennetussa
verkkopistorasiasssa.
voidaan ohjelmoida täysin ilman virransyöttöä sikäli kun
akku on ladattu täyteen.
Käyttö
Viikonpäivän ja kellonajan asetus
Pidä painike näyttömoodi (TIME) 7 painettuna seuraavan
ohjelmoinnin aikana.
Paina niin usein viikonpäiväpainiketta (WEEK) 6,
kunnes haluttu viikonpäivä tulee LC-näytttöön 1.
Ohje: Pidä viikonpäiväpainiketta (WEEK) 6 painettuna
noin 3 sekuntia. Näin nopeutat arvojen asetusta.
Tätä pikasäätöä voit käyttää hyväksi myös seuraavissa
asetuksissa.
Huomautus: MO= maanantai, TU= tiistai,
WE= keskiviikko, TH= torstai, FR= perjantai, SA= lauantai,
SU= sunnuntai
Paina niin usein tuntipainiketta (HOUR) 9, kunnes
haluttu tunti tulee LC-näytttöön 1.
VARO! Älä pistä digitaalista ajastinta perätysten. Pääl-
lekkäin pistettyjä välipistokkeita käytettäessä on olemassa
mekaanisten vaurioiden vaara.
HENGENVAARALLI-
NEN SÄHKÖISKU! Pidä laite loitolla
kosteudesta äläkä tartu siihen märin käsin.
Älä altista tuotetta äärimmäiselle kuumuudelle tai
äärimmäiselle kylmyydelle.
Älä koskaan altista laitetta äärimmäisille lämpötilan
vaihteluille. Muuten on olemassa vaara, että siihen muodostuu lauhdetta. Odota ennen käyttöönottoa, kunnes
laite on saavuttanut huoneenlämpötilan.
Varo ylikuumenemista ja älä peitä laitetta sanomalehdillä,
vaatekappaleilla tai muilla vastaavilla.
Tarkista aina ennen laitteen verkkoon liittämistä, ettei
siinä mahdollisesti ole vaurioita. Älä milloinkaan käytä
laitetta, jos havaitset siinä jotain vikoja. Käänny ammattiliikkeen puoleen, jos laite on vaurioitunut, se on korjattava
tai siinä on muita ongelmia.
FI FI FI FI
Paina niin usein minuuttipainiketta (MIN) 2, kunnes
haluttu minuutti tulee LC-näyttöön 1.
Päästä painike näyttömoodi (TIME) 7 lirti.
Huomautus: Ellei noin 10 sekuntiin suoriteta mitään
asetuksia, laite palaa takaisin normaaliin ajannäyttöön.
Huomautus: Ajastin on nyt käytössä. Tämä näytetään
kaksoispisteen vilkunnalla LC-näytössä 1.
Kesä- / talviajan aktivointi
Paina niin kauan painiketta näyttömoodi (TIME) 7,
kunnes lisä ”+1h“ tulee ajannäyttöön tai sammuu.
Ajastimen ohjelmointi
Käynnistysaika:
Paina kerran syöttöpainiketta (SET) 8 LC-näyttöön 1
tulee näyttö PROG 1 ON ”- - : - -”.
Paina niin usein viikonpäiväpainiketta (WEEK) 6, kunnes
haluttu viikonpäivä tai päivälohko tulee LC-näytttöön 1.
Seuraavat viikko- ja päivälohkot ovat mahdollisia:
Älä kiinnitä mitään laitteita, joiden oma paino riippuu
pistokkeessa. Vältä sallimaton lämpeneminen sekä
verkkopistorasian mekaaniset vauriot.
Älä käytä laitetta pistorasiarimoissa äläkä jatkojohdoilla.
Muista, että asiantuntemattomasta käsittelystä, käyttöoh-
jeen noudattamatta jättämisestä tai valtuuttamattomien
henkilöiden puuttumisesta tuotteeseen aiheutuneet vauriot
on poissuljettu takuun piiristä.
Laite ei sovellu induktiivisten kuormien kytkemiseen, jotka
ovat suurempia kuin 10 A (ampeeri). Älä tästä syystä
milloinkaan käytä sähkömoottoreita tai loistevaloputkia
tavanomaisilla esikytkinlaitteilla tällä ajastimella. Käänny
alan ammattiliikkeen puoleen, ellet ole varma laitteesi
induktiivisesta kuormituksesta.
Älä koskaan avaa laitetta itse äläkä yritä itse vaihtaa
osia tai korjata laitetta.
Irrota laite aina puhdistuksen ajaksi verkkopistorasiasta
ja vedä kaikki pistokkeet laitteesta.
Pidä huoli siitä, että laitteeseen on aina vapaa pääsy.
• MO TU WE TH FR
maanantai – perjantai
• SA SU
lauantai + sunnuntai
• MO TU WE TH FR SA
maanantai – lauantai
• MO WE FR
maanantai + keskiviikko + perjantai
• TU TH SA
tiistai + torstai + lauantai
• MO TU WE
maanantai – keskiviikko
• TH FR SA
torstai – lauantai
• MO TU WE TH FR SA SO
maanantai – sunnuntai
Vedä laite välittömästi pois verkkopistorasiasta häiriöiden
esiintyessä.
Ennen käyttöönottoa
Ajastimessa on integroitu akku. Tämän tehtävänä on tallennettujen tietojen säilyttäminen, kuten esim. aika, päiväys ja
kytkintoiminnot. Akkua on ladattava 24 tuntia ennen ensimmäistä käyttöä. Voit jo lataamisen aikana suorittaa asetuksia
laitteessa.
Liitä pistoke määräysten mukaisesti asennettuun
220–250 V, 50 Hz verkkopistorasiaan. Kaikki näytöt
tulevat hetkeksi LC-näyttöön 1. Tämän jälkeen näyttöön
tulee ajannäyttö.
Huomautus: Sähkökatkon aikana sisäänasennettu
akku varmistaa, että kellonaika ilmoitetaan edelleen ja
automaattinen kytkinohjelma säilyy aktivoituna. Laite
Huomautus: Heti kun määrätty päivä tai päivien yhdistelmä
on tallennettu, suoritetaan ohjelmoitu kytkentäjärjestys samaan
aikaan jokaiselle näistä viikonpäivistä.
Paina niin usein tuntipainiketta (HOUR) 9, kunnes
haluttu tunti tulee LC-näytttöön 1.
Paina niin usein minuuttipainiketta (MIN) 2, kunnes
haluttu minuutti tulee LC-näyttöön 1.
Paina vielä kerran syöttöpainiketta (SET) 8 tallentaaksesi
asetuksen.
LC-näyttöön 1 tulee näyttö PROG 1 OFF ”- - : - -”.
Poiskytkentäaika:
Paina niin usein viikonpäiväpainiketta (WEEK) 6, kunnes
haluttu viikonpäivä tai päivälohko tulee LC-näytttöön 1.
Paina niin usein tuntipainiketta (HOUR) 9, kunnes haluttu
tunti tulee LC-näytttöön 1.
Paina niin usein minuuttipainiketta (MIN) 2, kunnes
haluttu minuutti tulee LC-näyttöön 1.
Paina vielä kerran syöttöpainiketta (SET) 8 tallentaaksesi
asetuksen.
Paina painiketta näyttömoodi (TIME) 7 palataksesi
takaisin aktuelliin kellonaikaan.
Huomautus: Voit ohjelmoida jopa 20 erilaista kytkentäjaksoa. Toista tätä varten kulloinkin edellä kuvattu ohjelmointi.
LC-näyttöön 1 tulee jokaisessa seuraavassa tallennuksessa
PROG 2 ON ”- - : - -”. jne.
Muuta tai tarkista kytkentäajat
Paina kytkentäaikojen muuttamiseksi tai tarkistamiseksi
syöttöpainiketta (SET) 8 ja ohjelmoidut kytkentäajat
tulevat näyttöön vierekkään.
Menettele päivien, tuntien tai minuuttien muuttamiseksi
kuten kappaleessa ”Ajastimen ohjelmointi“ on kuvattu.
Kytkentäaikojen
aktivointi / deaktivointi
Paina syöttöpainiketta (SET)
8
Countdown toiminnon päättäminen
manuaalisesti
Paina Countdownin aikana PÄÄLLE- / AUTO- / POIS -pai-
niketta (MANUAL) 3, kun haluat pysäyttää tämän.
Paina PÄÄLLE- / AUTO- / POIS -painiketta (MANUAL) 3,
kun haluat jatkaa Countdownia.
Paina painiketta näyttömoodi (TIME) 7 vaihtaaksesi
Countdown-näytöstä aktuelliin kellonaikaan.
Paina painiketta näyttömoodi (TIME) 7 uudelleen vaih-
taaksesi aktuellista kellonajasta Countdown-näyttöön.
Paina samanaikaisesti tunti.- (HOUR) 9 ja minuuttipai-
niketta (MIN) 2, kun haluat keskeyttää Countdown-toiminnon.
Puhdistus ja hoito
FI FI FI FI
Paina tämän jälkeen palautuspainiketta (RECALL) 5
ohjelmoidun kytkentäajan hväksymiseksi. Kytkentäaikoja
ei tyhjätä muistista, ne vain poistetaan käytöstä. Näyttöön
tulee symboli ” - -: - -”.
Paina uudelleen palautuspainiketta (RECALL) 5 poistetun
kytkentäajan aktivoimiseksi.
Kytkentäaikojen ohittaminen
manuaalisesti
Ohjelmoinnista riippumatta voit milloin tahansa ohittaa
manuaalisesti seuraavan kytkentäajan.
Paina tätä varten PÄÄLLE- / AUTO- / POIS -painiketta
(MANUAL) 3 niin usein, kunnes LC-näyttöön 1 tulee
haluttu kehoitus:
OFF: Kaikki kytkentäajat on kumottu, laite ei johda virtaa
edelleen liitettyyn laitteeseen.
AUTO OFF: Kytkentäajat aktiivisia, ajastin on kytketty
pois.
FI FI FI FI
Hävittäminen
Pakkaus koostuu vain ympäristöystävällisistä
materiaaleista ja se voidaan hävittää paikallisessa
kierrätyspisteeseessä.
Pyydä paikkakuntasi tai kaupunkisi virastosta tietoja
käytettyjen tuotteiden hävitysmahdollisuuksista.
Suojaa ympäristöä äläkä koskaan heitä käytettyä
laitetta talousjätteisiin, vaan hävitä se määräysten
mukaisesti. Keräyspisteiden osoitteet ja niiden
aukioloajat saat tietää paikkakuntasi asianomaisesta virastosta.
ON: Kaikki kytkentäajat on kumottu, ajastin johtaa
edelleen jatkuvasti virtaa liitettyyn laitteeseen.
AUTO ON: Kytkentäajat aktiivisia, ajastin on kytketty pois.
Satunnaisen moodin asetus
Huomautus: Tämä toiminto kytkee ajastimen päälle tai
pois mielivaltaisesti ja sen tarkoitus on estää murtoja, koska
se kytkentäaikojen epäsäännöllisyydellä (esim. valoilla) antaa
kuvan, että talo on asuttu. Ohjelmoimasi kytkentäkomennot
siirtyvät päivittäin sattumanvaraisesti jopa 30 minuuttia.
Tämä toiminto on kuitenkin mahdollista vain, jos on asetettu
yksi tai useampia kytkentäkomentoja.
Paina tuntipainiketta (HOUR) 9 3 sekuntia. Ajastin
vaihtaa satunnaismoodiin. LC-näyttöön 1 tulee symboli
”RND“, satunnaismoodi on kytketty päälle.
Paina tuntipainiketta (HOUR) 9 uudelleen 3 sekuntia
päättääksesi satunnaismoodin.
Tuotteen nimike:
Digitaalinen viikkoajastin
Tuote-nro: 97318-3
Tyyppi-nro: EIM-804 GR
Countdown toiminnon asetus
Paina syöttöpainiketta (SET) 8 päästäksesi Timer-valik-
koon.
Pidä syöttöpainiketta (SET) 8 painettuna, kunnes
LC-näyttöön 1 tulee ”CTD“-kuvake
Paina niin usein tuntipainiketta (HOUR) 9, kunnes
haluttu tunti tulee LC-näytttöön 1.
Paina niin usein minuuttipainiketta (MIN) 2, kunnes
haluttu minuutti tulee LC-näyttöön 1.
Huomautus: Countdown voidaan asettaa 1 minuutista
23 tuntiin, 59 minuuttiin.
Paina painiketta näyttömoodi (TIME) 7.
Laite palaa normaaliin käyttömoodiin.
Paina samanaikaisesti tunti.- (HOUR) 9 ja minuuttipai-
niketta (MIN) 2, kun haluat käynnistää Countdown-toi-
minnon.
Älä missään tapauksessa käytä puhdistukseen nesteitä
äläkä puhdistusainetta, koska tämä vahingoittaa laitteen.
Puhdista laite vain ulkopuolelta pehmeällä, kuivalla liinalla.
FI FI FI
66142_Zeitschaltuhr_digital_innen_FI_SE_GB.indd 1 20.07.11 18:16
Page 15

Digital veckotimer
Inledning
Gör dig bekant med produkten innan du använder
den. Läs nedanstående drifts- och säkerhetsanvis-
ningar noga. Använd endast produkten enligt
beskrivningen och för avsett ändamål. Förvara denna anvisning väl. Se till att bruksanvisningen alltid finns tillgänglig
även vid vidare användning av tredje man.
Avsedd användning
Denna produkt är avsedd för automatisk start och avstängning
av elektrisk utrustning. Produkten får endast användas i
torra utrymmen. Alla förändringar av produkten anses som
icke avsedd användning och kan medföra allvarliga
olycksrisker. Tillverkaren ansvarar inte för skador som kan
härledas ur icke avsedd användning. Produkten är endast
avsedd för privat bruk.
Tekniska data
Märkspänning: 240 V ∼, 50 Hz
Märkström: AC 10 A
Maximal last: 2300 Watt
Utgångsbrytare: Relä
Timerns noggrannhet: + / – 1 sekund / dag vid 20 °C
Kortast
programmeringsbara tid: 1 minut
De olika delarna
Display
1
Minut-knapp (MIN)
2
TILL- / AUTO- / FRÅN-knapp (MANUAL)
3
Reset-knapp
4
Återställningsknapp (RECALL)
5
Veckodagsknapp (WEEK)
6
Knapp för indikeringsläge (TIME)
7
Inmatningsknapp (SET)
8
Timknapp (HOUR)
9
SE SE SE SE
anvisningar. Icke beaktande av säkerhetsanvisningar och
övriga anvisningar kan medföra brand och / eller allvarliga
personskador.
FÖRVARA ALLA SÄKERHETSINSTRUKTIONER OCH
ANVISNINGAR FÖR FRAMTIDA BEHOV!
RISK FÖR LIVSFAR-
Säkerhet
Läs alla säkerhetsanvisningar och övriga
Allmänna
säkerhetsanvisningar
LIGA SKADOR FÖR SPÄDBARN OCH
BARN! Produkten är ingen leksak. Låt inte
barn leka med förpackningsmaterial och produkt. Risk
för kvävning och livsfara pga elstötar föreligger i samband
med förpackningmaterialet.
Barn och personer med bristande kunskaper och eller
erfarenhet samt personer med nedsatta fysiska, motoriska
hinder, handikappade personer eller barn skall om
möjligt inte använda produkten utan uppsikt eller handledning av säkerhetsansvarig person. Barn skall hållas
under uppsikt och får absolut inte använda produkten
som leksak.
Använd endast produkten i ett korrekt monterat vägguttag.
OBSERVERA! Anslut inte flera digitala tidur efter
varandra. Vid efter varandra anslutna mellankontakter
föreligger risk för mekanisk skada.
LIVSFARA FÖR ELSTÖ-
TAR! Håll produkten borta från fukt och
greppa inte produkten med våta händer.
Utsätt inte produkten för extrem värme resp. extrem kyla.
Utsätt inte produkten för extrema temperaturväxlingar.
Annars föreligger risk att kondensvatten bildas. Vänta
tills produkten nått rumstemperatur innan det tas i drift.
Övertäck inte produkten med tidningar, klädesplagg
eller liknande för att undvika överhettning.
Kontrollera att produkten inte är skadad före varje
anslutning till nätet. Använd inte produkten om den är
skadad på något sätt. Kontakta kundtjänst eller behörig
elektriker om produkten är skadad, behöver repareras
eller annat problem föreligger.
Anslut ingen utrustning som hänger i sin egen vikt i kon-
takten. Så undviks otillåten överhettning och mekaniska
skador i vägguttaget.
Använd inte produkten tillsammans med grenuttag med
flera uttag eller förlängningskablar.
Garantin omfattar inte skador vilka kan härledas till
osakkunnig hantering, icke beaktande av bruksanvisning
eller otillåtet ingrepp av obehörig person samt slitageskador.
Programmera tiduret
Starttid:
Tryck inmatningsknappen (SET) 8 en gång. Displayen 1
visar indikeringen PROG 1 ON ”- - : - -”.
Tryck veckodagsknappen (WEEK) 6 tills önskad
veckodag eller dagar visas i displayen 1. Följande
veckor och dagar är möjliga:
• MO TU WE TH FR
Måndag – fredag
• SA SU
Lördag + söndag
• MO TU WE TH FR SA
Måndag – lördag
• MO WE FR
Måndag + onsdag + fredag
• TU TH SA
Tisdag + torsdag + lördag
• MO TU WE
Måndag – onsdag
Produkten är inte lämplig att koppla induktiva laster högre
än 10 A (Ampere). Använd därför inte elmotorer eller
lysrör med vanliga förkopplingsdon med detta tidur.
Kontakta behörig elektriker om du inte är säker på den
induktiva belastningen för utrustningen.
Öppna inte produkten själv och försök aldrig att byta
eller reparera delar.
Dra alltid ut produkten ur vägguttaget före rengöring
och dra alla nätkontakter ur produkten.
Se alltid till att produkten är väl tillgänglig.
Dra omedelbart ut produkten ur vägguttaget om
störningar föreligger.
Före användning
Tiduret är utrustat med ett integrerat laddbart batteri. Detta
används för att spara inställda data, t.ex. tid och kopplingar.
Det laddbara batteriet måste laddas i 24 timmar före första
användning. Produkten kan ställas in under laddningen.
SE SE SE SE
• TH FR SA
Torsdag – lördag
• MO TU WE TH FR SA SO
Måndag – söndag
Obs: När en viss dag eller en kombination av dagar
sparats, utförs den programmerade kopplingsföljden varje
respektive veckodag vid samma tid.
Tryck timknappen (HOUR) 9 tills önskad timme visas i
displayen 1.
Tryck minutknappen (MIN) 2 tills önskad minut visas i
displayen 1.
Tryck inmatningsknappen (SET) 8 en gång till för att
spara inställningen.
Displayen 1 visar indikeringen PROG 1 OFF ”- - : - -”.
Anslut produkten till ett föreskriftsmässigt anslutet vägguttag
med 220–250 V, 50 Hz. Alla symboler visas i displayen
för en kort stund. Sedan visas tidsindikeringen.
1
Obs: Vid strömavbrott säkrar det integrerade laddbara
batteriet att tiden visas och att det automatiska kopplingsprogrammet är aktiverat. Produkten kan programmeras utan strömförsörjning om det laddbara batteriet
är helt laddat.
Användning
Ställa in veckodag och klockslag
Håll knappen för indikeringsläge (TIME) 7 tryckt under
följande programmering.
Tryck veckodagsknappen (WEEK) 6 tills önskad
veckodag visas i displayen 1.
Tips: Håll veckodagsknappen (WEEK) 6 tryckt i
ca. 3 sekunder. Värdet ändras snabbare. Denna snabbinställningsfunktion kan även användas för nedanstående
Sluttid:
Tryck veckodagsknappen (WEEK) 6 tills önskad
veckodag eller dagar visas i displayen 1.
Tryck timknappen (HOUR) 9 tills önskad timme visas i
displayen 1.
Tryck minutknappen (MIN) 2 tills önskad minut visas i
displayen 1.
Tryck inmatningsknappen (SET) 8 en gång till för att
spara inställningen.
Tryck knappen för indikeringsläge (TIME) 7 för att
återgå till aktuellt klockslag.
Obs: Du kan programmera upp till 20 kopplingsföljder.
Upprepa den beskrivna programmeringen. Displayen 1
visar indikeringen PROG 2 ON ”- - : - -” osv varje gång man
sparar en programmering.
inställningar.
Obs: MO = måndag, TU = tisdag, WE = onsdag,
TH = torsdag, FR = fredag, SA = lördag SU = söndag
Tryck timknappen (HOUR) 9 tills önskad timme visas i
displayen 1.
Tryck minutknappen (MIN) 2 tills önskad minut visas i
displayen 1.
Släpp knappen för indikeringsläge (TIME) 7.
Obs: Produkten återgår till normal tidsindikering om
inga inställningar görs inom ca. 10 sekunder.
Obs: Tiduret är nu i drift. Detta visas med en blinkande
dubbelpunkt i displayen 1.
Aktivera sommer- / vinter tid
Tryck knappen för indikeringsläge (TIME) 7 tills ”+1h“
visas eller slocknar i tidsindikeringen.
Ändra eller kontrollera
kopplingstider
Tryck inmatningsknappen (SET) 8 för att ändra eller
kontrollera kopplingstider, de programmerade kopplingstiderna visas efter varandra i displayen.
Gör som i kapitel ”Programmera tiduret“ för att ändra
dagar, timmar eller minuter.
Aktivera / inaktivera kopplingstider
Tryck inmatningsknappen (SET) 8.
Tryck sedan återställningsknappen (RECALL) 5 för att
inaktivera programmerad kopplingstid. Tiden raderas inte
i minnet utan inaktveras bara. Displayen visar symbolen
“- - : - -”.
Tryck återställningsknappen (RECALL) 5 igen för att
aktivera programmerad kopplingstid.
Hoppa över kopplingstider manuellt
Du kan hoppa över en efterföljande kopplingstid
oberoende av programmeringen.
Tryck TILL- / AUTO- / FRÅN-knappen (MANUAL) 3 tills
önskat kommando visas i displayen 1:
OFF: Alla kopplingstider är inaktiverade, tiduret ger
ingen ström till ansluten utrustning.
AUTO OFF: Kopplingstiderna är aktiva, tiduret är
avstängt.
ON: Alla kopplingstider är inaktiverade, tiduret ger
ström hela tiden till ansluten utrustning.
AUTO ON: Kopplingstiderna är aktiva, tiduret är på.
Ställa in slumpvis läge
Obs: Denna funktion kopplar till och från tiduret slumpvis
och skall på detta sätt förhindra inbrott genom att låta t.ex.
lampor tändas och släckas vid oregelbundna tider. Programmerade kopplingstider förskjuts slumpvis med upp till
Produktbeteckning:
Digital veckotimer
Art.-nr.: 97318-3
Modell nr: EIM-804 GR
SE SE SE SE
30 minuter. Denna funktion är endast möjlig när en eller
flera kopplingstider är programmerade.
Tryck timknappen (HOUR) 9 i 3 sekunder. Tiduret
växlar till slumpvis läge. Displayen 1 visar symbolen
”RND“, slumpvis läge är aktiverat.
Tryck timknappen (HOUR) 9 igen i 3 sekunder för att
avsluta slumpvis läge.
Ställa in nedräkning
Tryck inmatningsknappen (SET) 8 för att öppna
timermenyn.
Håll inmatningsknappen (SET) 8 tryckt tills displayen 1
visar ”CTD“-ikonen.
Tryck timknappen (HOUR) 9 tills önskad timme visas i
displayen 1.
Tryck minutknappen (MIN) 2 tills önskad minut visas i
displayen 1.
SE SE SE SE
Digital Weekly Timer
Obs: Nedräkningen kan ställas in från 1 minut till 23
timmar, 59 minuter.
Tryck knappen för indikeringsläge (TIME) 7.
Produkten återgår till normalt driftsläge.
Tryck timknappen (HOUR) 9 och minutknappen
(MIN) 2 samtidigt för att starta nedräkningsfunktionen.
Avsluta nedräkningen manuellt
Tryck TILL- / AUTO- / FRÅN-knappen (MANUAL) 3
under pågående nedräkning för att stoppa den.
Tryck TILL- / AUTO- / FRÅN-knappen (MANUAL) 3
igen för att fortsätta nedräkningen.
Tryck knappen för indikeringsläge (TIME) 7 för att
växla från nedräkningsindikering till aktuellt klockslag.
Tryck knappen för indikeringsläge (TIME) 7 igen för
att växla från aktuellt klockslag till nedräkningsindikering.
Tryck timknappen (HOUR) 9 och minutknappen
(MIN) 2 samtidigt för att avbryta nedräkningen.
arising from improper use. This device is not intended for
commercial use.
Introduction
Rengöring och skötsel
Använd inte vätskor eller rengöringsmedel som kan
skada produkten.
Rengör produktens utsida med mjuk, torr duk.
Avfallshantering
Förpackningen består av miljövänligt material
som kan avfallshanteras vid lokala återvinningsstationer.
Kontakta miljökontoret på din ort för vidare information om
avfallshantering av förbrukad produkt.
Kasta inte produkten i hushållssoporna utan tillför till närmaste återvinningsstation. Information
om öppettider finns hos din kommun.
Display mode button (TIME)
7
Input button (SET)
8
Hour button (HOUR)
9
Technical data
Before using the device for the first time, please
make yourself familiar with the way it works.
Please refer in addition to the operating instructions
below and the safety advice. Use the device only as described
and for the indicated purposes. Keep these instructions in a
safe place. If you pass the device on to anyone else, please
ensure that you also pass on all the documentation.
Proper use
This product is intended for the automatic switching on and
off of electrical devices. The device is intended for indoor
use only. Any modification to the device shall be considered
as improper use and can lead to considerable risk of accident.
The manufacturer will not accept liability for loss or damage
Designed electrical supply: 240 V ∼, 50 Hz
Designed current: AC 10 A
Maximum load: 2300 watts
Outlet switch: Relay
Timer accuracy: + / – 1 second / day at
20 °C
Shortest programmable time: 1 minute
Description of parts
LC display
1
Minute button (MIN)
2
ON / AUTO / OFF button (MANUAL)
3
Reset button
4
Recall button (RECALL)
5
Day of the week button (WEEK)
6
Safety
Read all the safety advice and instructions.
Failure to observe the safety advice and instructions may
result in fire and / or serious injury.
KEEP ALL THE SAFETY ADVICE AND INSTRUCTIONS IN
A SAFE PLACE FOR FUTURE REFERENCE!
GBGBGBSE
66142_Zeitschaltuhr_digital_innen_FI_SE_GB.indd 2 20.07.11 18:16
Page 16

General safety advice
DANGER OF LOSS
OF LIFE OR ACCIDENT TO INFANTS
AND CHILDREN! The product is not a toy.
Never leave children unsupervised with the packaging
material or the device. The packaging material presents
a suffocation hazard and there is a risk of loss of life
from electric shock.
This device is not intended to be used by persons (in-
cluding children) with restricted physical, sensory or
mental abilities or with insufficient experience and / or
knowledge, unless they are supervised by a person who
is responsible for their safety or they have received instruction on how to use the device from such a responsible
person. Children should be supervised in order to ensure
that they do not play with the device.
Use the device only with a properly installed mains
outlet socket.
CAUTION! Do not have one digital time switch in-
serted behind another. There is the danger of mechanical
damage if one adapter plug is inserted behind another.
RISK TO LIFE FROM
ELECTRIC SHOCK! Keep the device away
from moisture and do not touch it with moist
hands.
Do not allow the device to be subjected to extreme heat
or cold.
Do not allow the device to be subjected to extreme
temperature fluctuations. Failure to observe this advice
could lead to condensation forming. Wait until the device
has reached the temperature of the room before you
use it.
Do not cover the device with newspapers, articles of
clothing or the like. Otherwise the device may heat up,
which is not permitted.
GB GB GB GB
Always check the device for damage before plugging it
into a mains outlet socket. Do not use the device if you
discover it is damaged in any way. In the event of damage, repairs or other problems with the device, please
contact a specialist repair shop.
Do not plug in any devices that hang from and exert
their self-weight on the plug. This will prevent any nonpermitted heating up of and mechanical damage to the
mains outlet socket.
Do not use the device with power outlet strips or extension
cables.
Please note that damage arising from improper handling,
non-observance of the operating instructions or interference with the inside of the device by unauthorised persons
is excluded from the warranty.
The device is not suitable for switching inductive loads in
excess of 10 A (amperes). For this reason never operate
electric motors or fluorescent lights fitted with conventional ballasts with this time switch. Ask an electrician or
other suitable expert if you are in any doubt about the
inductive load of your device.
Do not open the device. Never attempt to replace or
repair parts yourself.
Before cleaning the device, always disconnect it from
the mains outlet socket and pull all mains plugs out of
the device.
Please ensure that the device is always easily accessed.
In the event of malfunctions, pull the device out of the
mains outlet socket.
Before use
The time switch has an integral rechargeable battery. This
serves to retain stored data, e.g. time, date and switching
procedures. The rechargeable battery must be charged for
24 hours before first use. You can make settings on the
device during the charging process.
Plug the device into a properly installed 220–250 V, 50 Hz
mains outlet socket. All the indicators in the LC display 1
appear briefly. Then the time indicator appears.
Note: In the event of a power cut, the in-built rechargeable battery ensures that the time is kept going and the
automatic switching program remains activated. The
device is fully programmable without a power supply,
as long as the rechargeable battery is fully charged.
Operation
Setting the day of the week and time
Keep the display mode button (TIME) 7 pressed during
the following programming procedures.
Press the day of the week button (WEEK) 6 repeatedly
until the desired day of the week appears in the LC
display 1.
Tip: By pressing and keeping pressed the day of the
week button (WEEK) 6 for approx. 3 seconds you can
Press the minute button (MIN) 2 repeatedly until the
desired minute value appears in the LC display 1.
Press the input button (SET) 8 again to store the setting.
The PROG 1 OFF “- - : - -” indicator appears in the LC
display 1.
Switch-off time:
Press the day of the week button (WEEK) 6 repeatedly
until the desired day of the week or block of days of the
week appears in the LC display 1.
Press the hour button (HOUR) 9 repeatedly until the
desired hour value appears in the LC display 1.
Press the minute button (MIN) 2 repeatedly until the
desired minute value appears in the LC display 1.
Press the input button (SET) 8 again to store the setting.
Press the display mode button (TIME) 7 to return to the
current time.
accelerate the setting process and reach the desired
value more quickly. This quicker method can also be
used for making the following settings.
Note: MO = Monday, TU = Tuesday, WE = Wednesday,
TH = Thursday, FR = Friday, SA = Saturday, SU = Sunday
Press the hour button (HOUR) 9 repeatedly until the
desired hour value appears in the LC display 1.
Press the minute button (MIN) 2 repeatedly until the
desired minute value appears in the LC display 1.
Release the display mode (TIME) button 7.
Note: If approx. 10 seconds pass without any settings
being made, then the device returns to the normal time
display.
Note: The time switch is now in operation. This is indicated by the flashing of the colon in the LC display 1.
GB GB GB GB
Note: You can program up to 20 different switching
sequences. To do this, repeat the above-described programming procedure in each case. The PROG 2 ON “- - : - -”
indicator etc. appears in the LC display 1 when each
further setting is stored.
Activating summer / winter time
Press the display mode button (TIME) 7 until the
additional “+1h” appears in or disappears from the
time indicator.
Programming the time switch
Switching-on time:
Press the input button (SET) 8 once. The PROG 1 ON
“- - : - -” indicator appears in the LC display 1.
Press the day of the week button (WEEK) 6 repeatedly
until the desired day of the week or block of days of the
week appears in the LC display 1. The following days
of the week or blocks of days of the week are possible:
• MO TU WE TH FR
Monday – Friday
• SA SU
Saturday + Sunday
• MO TU WE TH FR SA
Monday – Saturday
erased from the memory, merely deactivated. The symbol
“- - : - -” appears in the display.
Then press the recall button (RECALL) 5 again to
reactivate the cancelled switching time.
Manually skipping switching times
Changing or checking
switching times
To change or check the switching times, press the input
button (SET) 8 and the programmed switching times
appear one after the other in the display.
To change the days, hours or minutes, proceed as
described in the section “Programming the time switch”.
Activating / deactivating
switching times
Press the input button (SET) 8.
Then press the recall button (RECALL) 5 to cancel the
programmed switching time. The switching data are not
At any time, and independently of programmed times,
you can skip manually to the next switching time.
To do this, press the ON / AUTO / OFF button
(MANUAL) 3 repeatedly until the desired command
appears in the LC display 1:
OFF: All switching times are cancelled, the time switch
allows no current to pass to the connected devices.
AUTO OFF: Switching times are active, the time switch
is switched off.
ON: All switching times are cancelled, the time switch
allows current to pass continuously to the connected
devices.
• MO WE FR
Monday + Wednesday + Friday
• TU TH SA
Tuesday + Thursday + Saturday
• MO TU WE
Monday – Wednesday
• TH FR SA
Thursday – Saturday
• MO TU WE TH FR SA SO
Monday – Sunday
Note: As soon as a particular day or combination of days
has been stored, the device executes the programmed
switching sequence at the same time on each of these days
of the week.
Press the hour button (HOUR) 9 repeatedly until the
desired hour value appears in the LC display 1.
AUTO ON: Switching times are active, the time switch
is switched on.
Setting the random mode
Note: This function switches the time switch arbitrarily on
and off and is intended to prevent burglaries by simulating
an occupied house with e.g. lights switching on and off at
irregular intervals. Your preprogrammed switching commands
are moved by a random amount up to 30 minutes on each
day. This function is only possible if one or more switching
commands have been set.
Press the hour button (HOUR) 9 for at least 3 seconds.
The time switch changes into random mode. The random
mode symbol “RND” appears in the LC display 1 to
show that the random mode is switched on.
Press the hour button (HOUR) 9 again for 3 seconds
to cancel the random mode.
Setting the countdown
Press the input button (SET) 8 to access the timer menu.
Press and keep pressed the input button (SET) 8 until
the “CTD” icon appears in the LC display 1.
Press the hour button (HOUR) 9 repeatedly until the
desired hour value appears in the LC display 1.
Press the minute button (MIN) 2 repeatedly until the
desired minute value appears in the LC display 1.
Note: The countdown can be set from 1 minute to
11 hours, 59 minutes.
Press the display mode (TIME) button 7.
The device returns to its normal operating mode.
Press the hour button (HOUR) 9 and the minute button
(MIN) 2 at the same time to start the countdown function.
Manually ending the countdown
Press the ON / AUTO / OFF button (MANUAL) 3 to
halt the countdown while it is running.
GB GB GB GB
Press the ON / AUTO / OFF button (MANUAL) 3
again to continue the countdown.
Press the display mode button (TIME) 7 to change
from the countdown display to the current time.
Press the display mode button (TIME) 7 to change
from the current time to the countdown display.
Press the hour button (HOUR) 9 and the minute button
(MIN) 2 at the same time to cancel the countdown
function.
Cleaning and care
Never use liquids or cleaning agents, as they may
damage the device.
Clean the outside of the device only with a soft, dry
cloth.
GB GB GB
Disposal
The packaging is wholly composed of environmentally friendly materials that can be disposed
of at a local recycling centre.
Contact your local refuse disposal authority for more details
of how to dispose of your discarded product.
In the interest of the environment, do not throw
out your discarded device with your household
refuse. Take it to a suitable centre where it can
be disposed of properly. Your local council will
be able to tell you where the collection centres
are located and their opening times.
Product description:
Digital Weekly Timer
Art. No.: 97318-3
Model No.: EIM-804 GR
GB
© by ORFGEN Marketing
IAN 66142
Inter-Union Technohandel GmbH
Klaus-von-Klitzing-Str. 2
D-76829 Landau / Pfalz
66142_Zeitschaltuhr_digital_innen_FI_SE_GB.indd 3 20.07.11 18:16
Page 17

66142_Zeitschaltuhr_digital_innen_FI_SE_GB.indd 4 20.07.11 18:16
Page 18

1
Digitális időzítő kapcsoló
alkalmazásokból származó károkért. Ez a készülék nem
ipari használatra készült.
Bevezető
kijelzés módus gomb (TIME)
7
bevitel-gomb (SET)
8
órák-gomb (HOUR)
9
Műszaki adatok
Az első üzembevétel előtt ismerkedjen meg a
9
8
7
6
2
3
4
5
utalásokat. A készüléket csak a leírtak szerint és a megadott
alkalmazási területeken használja. Őrizze meg jól ezt az
útmutatót. A készülék továbbadása esetén harmadiknak
kézbesítse vele annak a teljes dokumentációját is.
termékkel. Ebből a célból olvassa el a következő
kezelési útmutatót és a biztonságra vonatkozó
Névleges feszültség: 240 V ∼, 50 Hz
Névleges áramerősség: AC 10 A
Maximális terhelés: 2300 Watt
Kimeneti kapcsoló: relé
timer-pontosság: + / – 1 másod-
perc / nap 20 °C-nál
Legrövidebb programozható idő: 1 perc
Biztonság
Olvassa el valamennyi a biztonságra vonatkozó utalást és utasítást. A biztonságra vonatkozó
utalások és utasítások betartása alkalmával elkövetett mulasztások tűz kitörését és / vagy súlyos sérüléseket okozhatnak.
Általános biztonsági utalások
ÉLET- ÉS BAL-
ESETVESZÉLY KISGYEREKEK ÉS
GYEREKEK SZÁMÁRA! A termék nem
játékszer! Sohase hagyja a gyerekeket felügyelet nélkül
a csomagolóanyagokkal és a készülékkel. A csomagolóanyagok által fulladásveszély és a készülék által
áramütés általi életveszély áll fenn.
Ez a készülék nem arra készült, hogy korlátozott
pszihikai, szenzórikus vagy szellemi képességgel rendelkező, vagy tapasztalatlan és / vagy tudatlan személyek
(gyerekeket beleértve) használják, kivéve ha rájuk egy a
biztonságukért felelős személy felügyel, vagy tőle utasításokban részesülnek arra vonatkozóan, hogy a terméket
hogyan kell használni. A gyerekekre felügyelni kell annak
a biztosítására, hogy a készülékkel ne játsszanak.
Rendeltetésszerű használat
Ez a készülék elektromos készülékek automatikus be- és kikapcsolására készült. A készüléket csak zárt helyiségekben
szabad használni. A készülék bármilyen megváltoztatása a
rendeltetésétől eltérő és jelentős balesetveszélyeket jelenthet.
A gyártó nem áll jót a rendeltetésétől eltérő
HU HU HU
A készüléket csak szakszerűen felszerelt hálózati
dugaljhoz csatlakoztatva üzemeltesse.
VIGYÁZAT! Ne csatlakoztasson digitális kapcsolóórá-
kat egymásután. Egymásba dugott közbenső dugaszolóknál mechanikai meghibásodás következhet be.
ÁRAMÜTÉS
ÁLTALI ÉLETVESZÉLY! Tartsa a készüléket
nedvességtől távol és ne fogja azt meg ned-
ves kézzel.
Ne tegye ki a készüléket szélsőséges hő ill. szélsőséges
hideg hatásának.
Ne tegye ki a készüléket szélsőséges hőmérsékletinga-
dozásoknak. Ellenkező esetben fennáll annak a veszélye,
hogy kondenzvíz képződik. Várja meg, amíg a készülék
elérje a szobahőmérsékletet, mielőtt azt üzembe veszi.
Nem megengedett felmelegedés elkerülése végett ne
takarja le a készüléket újságokkal, ruhadarabokkal
vagy hasonlókkal.
A részek megnevezése
LC-diszplé
1
percek-gomb (MIN)
2
BE- / AUTO- / KI-gomb (MANUAL)
3
reset-gomb
4
visszaállító-gomb (RECALL)
5
hét napja-gomb (WEEK)
6
Minden egyes az áramellátó hálozathoz való csatlakoz-
tatás előtt vizsgálja meg a készüléket esetleges károsodások szempontjából. Sohase használja a készüléket,
ha rajta valamiféle sérüléseket állapít meg. Károsodások
előállása, javítások szükségessége vagy más problémák
előállása esetén forduljon egy szakemberhez.
Ne csatlakoztasson hozzá olyan készülékeket, amelyek
önsúlya a csatlakozó dugón függ. Így elkerüli a készülék
felesleges felmelegedését, valamint a hálózati dugalj
megkárosodásait.
Sohase használja a készüléket elosztó lécekkel vagy
hosszabbító kábelekkel együtt.
Vegye figyelembe, hogy azok a károsodások, amelyeket
szakszerűtlen kezelés, a használati útmutató figyelmen
kívül hagyása vagy nem feljogosított személyek beavatkozása okozott a garanciából kizártak.
A készülék nem alkalmas 10 A (Ampere)-nél nagyobb
induktiv terhelések kapcsolására. Ezért sohase
üzemeltessen elektromos motorokat vagy hagyományos
ŐRIZZE MEG AZ ÖSSZES A BIZTONSÁGRA VONATKOZÓ UTALÁST ÉS UTASÍTÁST A JÖVŐ SZÁMÁRA!
előtétkészülékkel rendelkező fénycsöveket ezzel a
kapcsolóórával. Amennyiben a készüléke induktiv terhelésével kapcsolatban bizonytalan, forduljon egy szakemberhez.
Ne nyissa fel sajátkezüleg a készüléket és sohase
kisérelje meg saját maga a részeket kicserélni vagy azt
megjavítani.
A tisztítás előtt válassza le mindig a készüléket a hálózati
dugaljról és húzza ki az összes hálózati csatlakozó dugót
a készülékből.
Ügyeljen arra, hogy a készülék mindig szabadon
hozzáférhető legyen.
Zavarok előállása esetén húzza ki azonnal a készüléket
a hálózati dugaljból.
HU HU HU HU
Az üzembevétel előtt
A kapcsolóóra integrált akkuval rendelkezik. Az a tárolt
adatok, pld. időpont, dátum megőrzésére és a kapcsolási
folyamatok elvégzésére szolgál. Az akkut az első használat
előtt 24 órán keresztül fel kell tölteni. A feltöltési folyamat
ideje alatt máris elvégezheti a készülék beállításait.
Dugja a készüléket egy szabályszerűen felszerelt
220–250 V, 50 Hz hálózati dugaljba. Az LC diszplén 1
egy pillanatra valamennyi kijelzés megjelenik. Ezután
megjelenik az idő kijelzése.
Utalás: Az áramellátás megszakadása esetén a beépített akku gondoskodik arról, hogy a pontos idő továbbra
is megjelenjen és hogy az automatikus kapcsolási program aktiválva maradjon. A készüléket áramellátás nélkül
is teljes mértékben programozni lehet, ha az akku teljesen
fel van töltve.
HU HU HU HU
sorozatot a hétnek azokon a napjain ugyanabban az
időben véghezviszi.
Nyomja meg annyiszor az órák gombot (HOUR) 9,
amíg az LC-diszplén 1 megjelenik a kívánt óraszám.
Nyomja meg annyiszor a percek gombot (MIN) 2,
amíg az LC-diszplén 1 megjelenik a kívánt percek száma.
A beállítás tárolásához nyomja meg mégegyszer a
bevitel gombot (SET) 8.
Az LC-diszplén 1 megjelenik a PROG 1 ON „- - : - -”
kijelzés.
Kikapcsolási idő:
Nyomja meg annyiszor a hét napja gombot (WEEK) 6,
amíg az LC-diszplén 1 megjelenik a hét kívánt napja
vagy a kívánt nap-csoport.
Nyomja meg annyiszor az órák gombot (HOUR) 9,
amíg az LC-diszplén 1 megjelenik a kívánt óraszám.
Kezelés
A hét napja és a pontos
idő beállítása
Tartsa a kijelzés módus gombot (TIME) 7 a következő
programozási eljárás alatt lenyomva.
Nyomja meg annyiszor a hét napja gombot (WEEK) 6,
amíg az LC-diszplén 1 megjelenik a hét kívánt napja.
Tipp: Tartsa a hét napja gombot (WEEK) 6 kb. 3 má-
sodpercig lenyomva. Így az értékek gyorsított beállítását
éri el. Ezt a gyors beállítást a következő beállítási eljárásoknál is alkalmazhatja.
Utalás: MO = hétfő, TU = kedd, WE = szerda, TH =
csütörtök, FR = péntek, SA = szombat, SU = vasárnap
Nyomja meg annyiszor az órák gombot (HOUR) 9,
amíg az LC-diszplén 1 megjelenik a kívánt óraszám.
Nyomja meg annyiszor a percek gombot (MIN) 2,
amíg az LC-diszplén 1 megjelenik a kívánt percek
száma.
Nyomja meg annyiszor a percek gombot (MIN) 2,
amíg az LC-diszplén 1 megjelenik a kívánt percek száma.
A beállítás tárolásához nyomja meg mégegyszer a
bevitel gombot (SET) 8.
Az aktuális időpontra való visszatéréshez nyomja meg a
kijelzés módus gombot (TIME) 7.
Utalás: Legfeljebb 20 külömböző kapcsolási sorozatot
programozhat be. Ehhez ismételje meg minden alkalommal
az előbb leírt programozási eljárást. Az LC-diszplén 1
minden további tárolási folyamatnál megjelenik a PROG 2
ON „- - : - -” kijelzés.
A kapcsolási idők megváltoztatása
vagy megvizsgálása
A kapcsolási idők megváltoztatásához vagy megvizsgá-
lásához nyomja meg a bevitel-gombot (SET) 8 és akkor
a beprogramozott kapcsolási idők egymásután megjelennek a diszplén.
Eressze el a kijelzés módus gombot (TIME) 7.
Utalás: Ha kb. 10 másodpercig beállításokat nem
végez, a készülék visszavált a normál idő kijelzésre.
Utalás: Most a kapcsolóóra üzemben van. Ezt az
LC-diszplé 1 a kettőspont villogása által jelzi ki.
A nyári- / téli időszámítás aktiválása
Nyomja mindaddig a kijelzés módus gombot (TIME) 7,
amíg az idő kijelzésében a „+1h“ kiegészítés megjelenik
ill. kialszik.
A kapcsolóóra programozása
Bekapcsolási idő:
Nyomja meg egyszer a bevitel-gombot (SET) 8. Az LC-
diszplén 1 megjelenik a PROG 1 ON „- - : - -” kijelzés.
Nyomja meg annyiszor a hét napja gombot (WEEK) 6,
amíg az LC-diszplén 1 megjelenik a hét kívánt napja
vagy a kívánt nap-csoport. A következő heti napok- és
nap-csoportok beállítására van lehetősége:
A napok, órák vagy percek megváltoztatásához járjon
el „A kapcsolóóra programozása“ fejezetben leírtak
szerint.
A kapcsolási idők
aktiválása / deaktiválása
Nyomja meg a bevitel-gombot (SET) 8.
Ezután a beprogramozott kapcsolási idő érvényteleníté-
séhez nyomja meg a visszaállító gombot (RECALL) 5.
A kapcsolási idők a tárolóból nem tlörlődnek, hanem
csak deaktiválódnak. A diszplén megjelenik a „- - : - -”
szimbólum.
Az érvénytelenített kapcsolási idő aktiválásához nyomja
meg újra visszaállító gombot (RECALL) 5.
A kapcsolási idők kézi átugrása
A programozástól függetlenül az egyik következő
kapcsolási időt kézzel átugorhatja.
• MO TU WE TH FR
hétfő – péntek
• SA SU
szombat + vasárnap
• MO TU WE TH FR SA
hétfő – szombat
• MO WE FR
hétfő + szerda + péntek
• TU TH SA
kedd + csütörtök + szombat
• MO TU WE
hétfő – szerda
• TH FR SA
csütörtök – szombat
• MO TU WE TH FR SA SO
hétfő – vasárnap
Utalás: Mihelyt egy bizonyos nap vagy napok kombinációja tárolva van, a készülék a beprogramozott kapcsolási
Ehhez nyomja meg a BE- / AUTO- / KI-gombot (MANUAL)
annyiszor, amíg a kívánt parancs az LC-diszplén 1
3
megjelenik:
OFF: Valamennyi parancs érvényét veszti, a kapcsolóóra
nem vezeti át az áramot a csatlakoztatott készülékekhez.
AUTO OFF: A kapcsolási idők aktivak, a kapcsolóóra
ki van kapcsolva.
ON: Valamennyi parancs érvényét veszti, a kapcsolóóra
továbbra is áramot vezet át a csatlakoztatott készülékekhez.
AUTO ON: A kapcsolási idők aktivak, a kapcsolóóra
be van kapcsolva.
A véletlen módus beállítása
Utalás: Ez a funkció a kapcsolóórát véletlenszerűen kap-
csolja be és ki, és ház betörések megelőzésére szolgál úgy,
hogy a kapcsolási idők rendszertelenségével (pld. lámpáknál)
egy lakott ház benyomását kelti. Az Ön által beprogramozott
kapcsolási parancsok naponta véletlenszerűen legtöbb
HU HU HU HU
30 perccel eltolódnak. Ez a funkció csak abban az esetben
lehetséges, ha egy vagy több kapcsolási parancs van beállítva.
Nyomja le 3 másodpercig az órák-gombot (HOUR) 9.
A kapcsolóóra a véletlen módusra vált. Az LC-diszplén 1
megjelenik az „RND“ szimbólum és a véletlen módus be
van kapcsolva.
A véletlen módus befejezéséhez nyomja le újra 3
másodpercig az órák-gombot (HOUR) 9.
Nyomja meg annyiszor a percek gombot (MIN) 2,
amíg az LC-diszplén 1 megjelenik a kívánt percek száma.
Utalás: A countdown-t 1 perctől 23 óra, 59 percig
tartó időre lehet beállítani.
Nyomja meg el a kijelzés módus gombot (TIME) 7.
A készülék visszatér a normál üzem módusba.
A countdown funkció beindításához nyomja meg
egyidejűleg az órák- (HOUR) 9 és a percek-gombot
(MIN) 2.
A countdown kézi befejezése
A countdown beállítása
A timer-menüre jutáshoz nyomja meg a bevitel-gombot
(SET) 8.
Tartsa a bevitel-gombot (SET) 8 mindaddig lenyomva,
amíg az LC-diszplén 1 megjelenik a „CTD“-ikon.
Nyomja meg annyiszor az órák gombot (HOUR) 9,
amíg az LC-diszplén 1 megjelenik a kívánt óraszám.
HU HU HU HU
66142_Zeitschaltuhr_digital_innen_HU_SI_GB.indd 1 20.07.11 18:18
A countdown leállításához nyomja meg a countdown
ideje alatt a BE- / AUTO- / KI-gombot (MANUAL) 3.
A countdown folytatásához nyomja meg a
BE- / AUTO- / KI-gombot (MANUAL) 3 újra.
A countdown-kijelzésről az aktuális időpontra való vál-
táshoz nyomja meg a kijelzés módus gombot (TIME) 7.
Az aktuális időpont kijelzésről a countdown-kijelzésre
való váltáshoz nyomja meg újra a kijelzés módus
gombot (TIME) 7.
A countdown funkció megszakításához nyomja meg
egyidejűleg az órák- (HOUR) 9 és a percek-gombot
(MIN) 2.
Tisztítás és ápolás
A tisztításhoz semmiképpen se használjon folyadékokat
és tisztítószereket se, mivel azok a készüléket megkárosítják.
A készüléknek csak a külsejét tisztítsa egy puha és
száraz kendővel.
Mentesítés
A csomagolás környezetbarát anyagokból áll,
amelyeket a helyi újraértékesítési helyeken
keresztül mentesíthet.
A kiszolgált termék mentesítésének a lehetőségeit a községe
vagy városa illetékes hivatalánál érdeklődheti meg.
A környezetvédelem érdekében ne dobja a
kiszolgált készüléket a háztartási szemétbe, hanem
juttassa azt el egy szakszerű mentesítéshez. A
gyűjtőhelyeket és azok nyitvatartási idejét az
illetékes hivatalánál érdeklődheti meg.
A termék megnevezése:
Digitális időzítő kapcsoló
Cikk sz.: 97318-4
Modell-sz.: EIM-804 GR
Page 19

Digitalno tedensko časovno stikalo
Uvod
Pred prvim začetkom uporabe se seznanite z
izdelkom. V ta namen preberite sledeča navodila
za uporabo in varnostna opozorila. Napravo
uporabljajte samo skladno z opisom in le za navedena
področja uporabe. Ta navodila dobro shranite. Če napravo
predate tretjim osebam, jim izročite tudi vse dokumente.
Namen uporabe
Ta naprava je namenjena za avtomatsko vklapljanje in
izklapljanje električnih naprav. Napravo se sme uporabljati
samo v zaprtih prostorih. Kakršnekoli spremembe na napravi
niso v skladu z določili in lahko predstavljajo znatno nevarnost nesreč. Proizvajalec ne prevzame jamstva za škodo, ki
je posledica nepravilne uporabe. Ta naprava ni namenjena
za profesionalno uporabo.
Tehnični podatki
Standardna napetost: 240 V ∼, 50 Hz
Standardni tok: AC 10 A
Maksimalna obremenitev: 2.300 vatov
Izhodno stikalo: rele
Natančnost timerja: + / – 1 sekunda / dan pri 20 °C
Najkrajši čas,
ki se ga lahko programira: 1 minuta
navodila. Neupoštevanje varnostnih opozoril in navodil
lahko povzroči požar in / ali hude poškodbe.
VSA VARNOSTNA OPOZORILA IN NAVODILA
SHRANITE ZA PRIHODNJO UPORABO!
Varnost
Preberite vsa varnostna opozorila in
Opis delov
LC prikazovalnik
1
tipka za minute (MIN)
2
tipka VKLOP / AUTO / IZKLOP (MANUAL)
3
tipka za ponastavitev
4
tipka za razveljavitev (RECALL)
5
tipka za dan v tednu (WEEK)
6
tipka za način prikaza (TIME)
7
tipka za vnos (SET)
8
tipka za ure (HOUR)
9
SI SI SI SI
ŽIVLJENJSKA NE-
Splošna varnostna opozorila
VARNOST IN NEVARNOST NESREČ
ZA MALČKE IN OTROKE! Ta izdelek ni
igrača. Otrok z embalažnim materialom nikoli ne pustite
nenadzorovanih. Obstaja nevarnost zadušitve zaradi
embalažnega materiala in življenjska nevarnost zaradi
udara električnega toka.
Ta naprava ni namenjena za to, da jo uporabljajo
osebe (vključno z otroci), ki so omejene v telesnih,
senzoričnih ali duševnih zmogljivostih ali jim primanjkuje
izkušenj in / ali znanja, razen v primeru, če jih nadzira
oseba, odgovorna za njihovo varnost, ali pa so od te
osebe dobili navodila o tem, kako se naprava uporablja.
Otroke je treba nadzorovati, da se prepričate, da se ne
igrajo z napravo.
Napravo uporabljajte samo na strokovno montirani
stenski vtičnici.
POZOR! Digitalne časovne stikalne ure ne priključite
zaporedno. Pri vtičih, ki so priključeni eden na drugega,
obstaja nevarnost mehanskih poškodb.
ŽIVLJENJSKA
NEVARNOST ZARADI UDARA ELEKTRIČNEGA TOKA! Napravo hranite stran
od vlage in se je ne dotikajte z vlažnimi rokami.
Naprave ne izpostavljajte ekstremni vročini oz.
ekstremnemu mrazu.
Naprave ne izpostavljajte ekstremnim temperaturnim
nihanjem. Sicer obstaja nevarnost za nastajanje kondenzacijske vode. Počakajte, da naprava doseže sobno
temperaturo, preden jo začnete uporabljati.
Naprave ne prekrivajte s časopisi, kosi oblačil ali
podobnim, da preprečite nedovoljeno segrevanje.
Pred vsako priključitvijo na omrežje napravo prekontroli-
rajte, ali kaže znake morebitnih poškodb. Naprave nikoli
ne uporabljajte, če odkrijete kakršnekoli poškodbe. V
primeru poškodb, popravil ali drugih težav na napravi,
se obrnite na strokovnjaka.
Ne vtikajte naprav, katerih lastna teže visi na vtiču. Tako
preprečite nedovoljeno segrevanje kot tudi mehanske
poškodbe na stenski vtičnici.
Naprave ne uporabljajte skupaj z vtičnimi letvami s
posameznimi vtičnicami ali podaljševalnimi kabli.
Tipko za način prikaza (TIME) 7 spustite.
Opozorilo: V kolikor pribl. 10 sekund ne izvedete
nobene nastavitve, se naprava vrne nazaj na normalni
prikaz časa.
Opozorilo: Časovna stikalna ura zdaj deluje. To je
prikazano z utripanjem dvopičja na LC prikazovalniku 1.
Aktiviranje poletnega /
zimskega časa
Tolikokrat pritisnite tipko za način prikaza (TIME) 7,
da se v prikazu urnega časa prižge oz. ugasne dodatek
„+1h“.
Programiranje časovne stikalne ure
Vklopni čas:
Enkrat pritisnite tipko za vnos (SET) 8. Na LC prikazo-
valniku 1 se pojavi prikaz PROG 1 ON „- - : - -”.
Tolikokrat pritisnite tipko za dan v tednu (WEEK) 6, da
se na LC prikazovalniku 1 prikaže želen dan ali
Upoštevajte, da je iz garancije izključena škoda, ki je
posledica neustrezne uporabe, neupoštevanja navodila
za uporabo ali posegov s strani nepooblaščenih oseb,
ter deli, ki se hitro obrabijo.
Naprava ni namenjena za preklapljanje induktivnih bre-
men, ki so večja od 10 A (amperov). Iz tega razloga s
to časovno stikalno uro nikoli ne uporabljajte elektromotorjev ali svetilnih cevi s konvencionalnimi predvklopnimi
napravami. Obrnite se na strokovnjaka, če niste sigurni
o induktivni obremenitvi vaše naprave.
Naprave ne odpirajte sami in nikoli sami ne poskušajte
menjavati ali popravljati delov.
Za čiščenje napravo vedno ločite od vtičnice z zaščitnim
kontaktom in iz naprave potegnite vse električne vtiče.
Pazite na to, da je naprava vedno prosto dostopna.
V primeru motenj napravo vedno takoj izvlecite iz vtičnice.
SI SI SI SI
skupina dni v tednu. Možni so naslednji dnevi in skupine
dnui v tednu:
• MO TU WE TH FR
ponedeljek – petek
• SA SU
sobota + nedelja
• MO TU WE TH FR SA
ponedeljek – sobota
• MO WE FR
ponedeljek + sreda + petek
• TU TH SA
torek + četrtek + sobota
• MO TU WE
ponedeljek – sreda
• TH FR SA
četrtek – sobota
• MO TU WE TH FR SA SO
ponedeljek – nedelja
Pred začetkom uporabe
Časovna stikalna ura razpolaga z integriranim akumulatorjem.
Ta je namenjen za ohranjanje shranjenih podatkov kot so
npr. čas, datum in stikalni postopki. Akumulator je potrebno
pred prvo uporabo polniti 24 ur. Med postopkom polnjenja
na napravi že lahko izvajate nastavitve.
Napravo vtaknite v 220–250 V, 50 Hz vtičnico, ki je in-
stalirana skladno s predpisi. Za kratek trenutek se na LC
prikazovalniku 1 pojavijo vsi prikazi. takoj nato se pojavi
prikaz časa.
Opozorilo: V primeru prekinitve oskrbe s tokom akumulator zagotavlja, da je urni čas še naprej prikazan in
da avtomatski stikalni program ostane aktiviran. Napravo
se lahko programira popolnoma brez oskrbe s tokom,
če je akumulator napolnjen.
Opozorilo: Takoj ko sta določen dan ali kombinacija dni
shranjena, se programirano stikalno zaporedje izvede na
vsakem od teh dni v tednu.
Tolikokrat pritisnite tipko za ure (HOUR) 9, da se na
LC prikazovalniku 1 prikaže želena ura.
Tolikokrat pritisnite tipko za minute (MIN) 2, da se na
LC prikazovalniku 1 prikaže želena minuta.
Še enkrat pritisnite tipko za vnos (SET) 8, da shranite
nastavitev.
Na LC prikazovalniku 1 se pojavi prikaz PROG 1 OFF
„- - : - -”.
Izklopni čas:
Tolikokrat pritisnite tipko za dan v tednu (WEEK) 6, da
se na LC prikazovalniku 1 prikaže želen dan ali skupina
dni v tednu.
Tolikokrat pritisnite tipko za ure (HOUR) 9, da se na
LC prikazovalniku 1 prikaže želena ura.
Uporaba
Nastavljanje dneva v tednu in
urnega časa
Pritisnite tipko za način prikaza (TIME) 7 in jo držite
pritisnjeno med naslednjim postopkom programiranja.
Tolikokrat pritisnite tipko za dan v tednu (WEEK) 6, da
se na LC prikazovalniku 1 prikaže želen dan v tednu.
Nasvet: Pritisnite tipko za dan v tednu (WEEK) 6 in
jo držite pritisnjeno pribl. 3 sekunde. Tako dosežete pospešeno nastavljanje vrednosti. To hitro nastavitev lahko
uporabljate tudi za naslednje postopke nastavitve.
Opozorilo: MO= ponedeljek, TU= torek, WE= sreda,
TH= četrtek, FR= petek, SA= sobota, SU= nedelja
Tolikokrat pritisnite tipko za ure (HOUR) 9, da se na
LC prikazovalniku 1 prikaže želena ura.
Tolikokrat pritisnite tipko za minute (MIN) 2, da se na
LC prikazovalniku 1 prikaže želena minuta.
Tolikokrat pritisnite tipko za minute (MIN) 2, da se na
LC prikazovalniku 1 prikaže želena minuta.
Še enkrat pritisnite tipko za vnos (SET) 8, da shranite
nastavitev.
Pritisnite tipko za način prikaza (TIME) 7, da se vrnete
nazaj na aktualni urni čas.
Opozorilo: Programirate lahko do 20 različnih stikalnih
zaporedij. V ta namen vsakokrat ponovite zgoraj opisani
postopek programiranja. Na LC prikazovalniku 1 se pri
vsakem nadaljnjem postopku shranjevanja kontinuirano
pojavlja prikaz PROG 2 ON „- - : - -” itn.
Spreminjanje ali preverjanje
stikalnih časov
Za spreminjanje ali preverjanje stikalnih časov pritisnite
tipko za vnos (SET) 8 in programirani stikalni časi se
zaporedno prikažejo na prikazovalniku.
Za spreminjanje dneva, ure ali minut upoštevajte na-
potke iz poglavja „Programiranje časovne stikalne ure“.
Aktiviranje / deaktiviranje
stikalnih časov
Pritisnite tipko za vnos (SET) 8.
Takoj nato pritisnite tipko za razveljavitev (RECALL) 5,
da razveljavite nastavljeni stikalni čas. Stikalni podatki
se iz pomnilnika ne zbrišejo, temveč so le deaktivirani.
Na prikazovalniku se pojavi simbol „- - : - -”.
Ponovno pritisnite tipko za razveljavitev (RECALL) 5,
da aktivirate razveljavljeni stikalni čas.
Ročno preskakovanje
stikalnih časov
Neodvisno od programiranja lahko kadarkoli ročno
preskočite naslednji stikalni čas.
Čiščenje in nega
Nikakor ne uporabljajte tekočin in čistilnih sredstev, ker
le-ta napravo poškodujejo.
Napravo čistite samo zunanje z mehko suho krpo.
Odstranjevanje odpadnega
materiala
Embalaža sestoji iz okolju prijaznih materialov,
ki jih lahko odvržete v lokalne zbiralnike za
recikliranje odpadkov.
Vse o možnostih za odstranjevanje odsluženega izdelka
boste izvedeli pri vaši občinski ali mestni upravi.
SI SI SI SI
V ta namen tolikokrat pritisnite tipko VKLOP / AUTO /
IZKLOP (MANUAL) 3, da se na LC prikazovalniku 1
prikaže želen ukaz.
OFF: Vsi stikalni časi so razveljavljeni, časovna stikalna
ura ne posreduje toka priklopljenim napravam.
AUTO OFF: Stikalni časi so aktivni, časovna stikalna
ura je izklopljena.
ON: Vsi stikalni časi so razveljavljeni, časovna stikalna
ura posreduje tok priklopljeni napravi.
AUTO ON: Stikalni časi so aktivni, časovna stikalna
ura je vklopljena.
Nastavljanje naključnega načina
Opozorilo: Ta funkcija stikalno časovno uro vklaplja in
izklaplja poljubno in naj bi preprečevala vlome v domove,
tako da z nepravilnostjo stikalnih časov (npr. pri svetilkah)
simulira obljuden dom. Stikalni ukazi, ki ste jih v naprej programirali, se vsak dan premaknejo za do 30 minut. Vendar
SI SI SI SI
V interesu varovanja okolja odslužene naprave
ne odvrzite med hišne odpadke, temveč jo
oddajte v strokovno odstranjevanje. O zbirnih
mestih in njihovem odpiralnem času se lahko
informirate pri pristojni upravi.
Oznaka izdelka:
Digitalno tedensko časovno stikalo
Art. št.: 97318-4
Model št.: EIM-804 GR
pa je ta funkcija možna le, kadar je bil nastavljen en stikalni
ukaz ali več.
Pritisnite tipko za ure (HOUR) 9 in jo držite 3 sekunde.
Časovna stikalna ura preklopi v naključni način. Na LC
prikazovalniku 1 se pojavi simbol „RND“, naključni
način je vklopljen.
Ponovno pritisnite tipko za ure (HOUR) 9 in jo držite
3 sekunde, da naključni način končate.
Nastavljanje odštevanja časa
Pritisnite tipko za vnos (SET) 8, da pridete v meni timerja.
Tipko za vnos (SET) 8 držite pritisnjeno tako dolgo, da
se na LC prikazovalniku 1 pojavi ikona „CTD“.
Tolikokrat pritisnite tipko za ure (HOUR) 9, da se na
LC prikazovalniku 1 prikaže želena ura.
Tolikokrat pritisnite tipko za minute (MIN) 2, da se na
LC prikazovalniku 1 prikaže želena minuta.
Inter-Union Technohandel GmbH
Klaus-von-Klitzing-Str. 2
76829 Landau
Garancijski list
1. S tem garancijskim listom jamčimo Inter-Union Technohandel
GmbH, da bo izdelek v garancijskem roku ob normalni
in pravilni uporabi brezhibno deloval in se zavezujemo,
da bomo ob izpolnjenih spodaj navedenih pogojih
odpravili morebitne pomanjkljivosti in okvare zaradi napak v
materialu ali izdelavi oz. po svoji presoji izdelek zamenjali
ali vrnili kupnino.
2. Garancijski rok za proizvod je 3 leta od dneva nabave.
3. Kupec je dolžan okvaro javiti pooblaščenemu servisu oz.
se informirati o nadaljnih postopkih na zgoraj navedeni
telefonski številki. Svetujemo vam, da pred tem natančno
preberete navodila o sestavi in uporabi izdelka.
4. Kupec je dolžan pooblaščenemu servisu predložiti
Opozorilo: Odštevanje časa se lahko nastavi na čas
med 1 minuto do 23 ur, 59 minut.
Pritisnite tipko za način prikaza (TIME) 7.
Naprava se vrne nazaj v normalen obratovalni način.
Hkrati pritisnite tipko za ure (HOUR) 9 in tipko za
minute (MIN) 2, da začnete z odštevanjem časa.
Ročno končanje odštevanja časa
Med odštevanjem časa pritisnite tipko VKLOP / AUTO /
IZKLOP (MANUAL) 3, da odštevanje časa zaustavite.
Ponovno pritisnite tipko VKLOP / AUTO / IZKLOP
(MANUAL) 3, da odštevanje časa nadaljujete.
Pritisnite tipko za način prikaza (TIME) 7, da se iz pri-
kaza odštevanja časa vrnete nazaj na aktualni urni čas.
Ponovno pritisnite tipko za način prikaza (TIME) 7, da
se iz prikaza aktualnega urnega časa vrnete nazaj na
odštevanja časa.
Hkrati pritisnite tipko za ure (HOUR) 9 in tipko za
minute (MIN) 2, da odštevanje časa prekinete.
garancijski list in račun, kot potrdilo in dokazilo o nakupu.
5. V primeru, da proizvod popravlja nepooblaščeni servis ali
oseba, kupec ne more uveljavljati zahtevkov iz te garancije.
6. Vzroki za okvaro oz. nedelovanje izdelka morajo biti lastnosti stvari same, in ne vzroki, ki so zunaj proizvajalčeve
oz. prodajalčeve sfere. Kupec ne more uveljavljati zahtevkov
iz te garancije, če se ni držal priloženih navodil za sestavo
in uporabo izdelka ali, če je izdelek kakorkoli spremenjen
ali nepravilno vzdrževan.
7. Jamčimo servisiranje in rezervne dele za dobo, ki je
minimalno zahtevana s strani zakonodaje.
8. Obrabni deli oz. potrošni material so izvzeti iz garancije.
9. Vsi potrebni podatki za uveljaljanje garancije se nahajajo
na dveh ločenih dokumentih (garancijski list, račun).
Prodajalec:
Lidl d.o.o.k.d., Žeje pri Komendi 100, SI-1218 Komenda
SI SI SISI
66142_Zeitschaltuhr_digital_innen_HU_SI_GB.indd 2 20.07.11 18:18
Page 20

Digital Weekly Timer
Introduction
Before using the device for the first time, please
make yourself familiar with the way it works.
Please refer in addition to the operating instructions
below and the safety advice. Use the device only as described
and for the indicated purposes. Keep these instructions in a
safe place. If you pass the device on to anyone else, please
ensure that you also pass on all the documentation.
Proper use
This product is intended for the automatic switching on and
off of electrical devices. The device is intended for indoor
use only. Any modification to the device shall be considered
as improper use and can lead to considerable risk of accident.
The manufacturer will not accept liability for loss or damage
GB GB GB GB
arising from improper use. This device is not intended for
commercial use.
Technical data
Designed electrical supply: 240 V ∼, 50 Hz
Designed current: AC 10 A
Maximum load: 2300 watts
Outlet switch: Relay
Timer accuracy: + / – 1 second / day at
20 °C
Shortest programmable time: 1 minute
Description of parts
LC display
1
Minute button (MIN)
2
ON / AUTO / OFF button (MANUAL)
3
Reset button
4
Recall button (RECALL)
5
Day of the week button (WEEK)
6
Display mode button (TIME)
7
Input button (SET)
8
Hour button (HOUR)
9
Safety
Read all the safety advice and instructions.
Failure to observe the safety advice and instructions may
result in fire and / or serious injury.
KEEP ALL THE SAFETY ADVICE AND INSTRUCTIONS IN
A SAFE PLACE FOR FUTURE REFERENCE!
General safety advice
DANGER OF LOSS
OF LIFE OR ACCIDENT TO INFANTS
AND CHILDREN! The product is not a toy.
Never leave children unsupervised with the packaging
material or the device. The packaging material presents
a suffocation hazard and there is a risk of loss of life
from electric shock.
This device is not intended to be used by persons (in-
cluding children) with restricted physical, sensory or
mental abilities or with insufficient experience and / or
knowledge, unless they are supervised by a person who
is responsible for their safety or they have received instruction on how to use the device from such a responsible
person. Children should be supervised in order to ensure
that they do not play with the device.
Use the device only with a properly installed mains
outlet socket.
CAUTION! Do not have one digital time switch in-
serted behind another. There is the danger of mechanical
damage if one adapter plug is inserted behind another.
RISK TO LIFE FROM
ELECTRIC SHOCK! Keep the device away
from moisture and do not touch it with moist
hands.
Do not allow the device to be subjected to extreme heat
or cold.
Do not allow the device to be subjected to extreme
temperature uctuations. Failure to observe this advice
could lead to condensation forming. Wait until the device
has reached the temperature of the room before you
use it.
Do not cover the device with newspapers, articles of
clothing or the like. Otherwise the device may heat up,
which is not permitted.
GB GB GB GB
accelerate the setting process and reach the desired
value more quickly. This quicker method can also be
used for making the following settings.
Note: MO = Monday, TU = Tuesday, WE = Wednesday,
TH = Thursday, FR = Friday, SA = Saturday, SU = Sunday
Press the hour button (HOUR) 9 repeatedly until the
desired hour value appears in the LC display 1.
Press the minute button (MIN) 2 repeatedly until the
desired minute value appears in the LC display 1.
Release the display mode (TIME) button 7.
Note: If approx. 10 seconds pass without any settings
being made, then the device returns to the normal time
display.
Note: The time switch is now in operation. This is indicated by the flashing of the colon in the LC display 1.
Always check the device for damage before plugging it
into a mains outlet socket. Do not use the device if you
discover it is damaged in any way. In the event of damage, repairs or other problems with the device, please
contact a specialist repair shop.
Do not plug in any devices that hang from and exert
their self-weight on the plug. This will prevent any nonpermitted heating up of and mechanical damage to the
mains outlet socket.
Do not use the device with power outlet strips or extension
cables.
Please note that damage arising from improper handling,
non-observance of the operating instructions or interference with the inside of the device by unauthorised persons
is excluded from the warranty.
The device is not suitable for switching inductive loads in
excess of 10 A (amperes). For this reason never operate
electric motors or fluorescent lights fitted with conventional ballasts with this time switch. Ask an electrician or
Activating summer / winter time
Press the display mode button (TIME) 7 until the
additional “+1h” appears in or disappears from the
time indicator.
Programming the time switch
Switching-on time:
Press the input button (SET) 8 once. The PROG 1 ON
“- - : - -” indicator appears in the LC display 1.
Press the day of the week button (WEEK) 6 repeatedly
until the desired day of the week or block of days of the
week appears in the LC display 1. The following days
of the week or blocks of days of the week are possible:
• MO TU WE TH FR
Monday – Friday
• SA SU
Saturday + Sunday
• MO TU WE TH FR SA
Monday – Saturday
other suitable expert if you are in any doubt about the
inductive load of your device.
Do not open the device. Never attempt to replace or
repair parts yourself.
Before cleaning the device, always disconnect it from
the mains outlet socket and pull all mains plugs out of
the device.
Please ensure that the device is always easily accessed.
In the event of malfunctions, pull the device out of the
mains outlet socket.
Before use
The time switch has an integral rechargeable battery. This
serves to retain stored data, e.g. time, date and switching
procedures. The rechargeable battery must be charged for
24 hours before first use. You can make settings on the
device during the charging process.
• MO WE FR
Monday + Wednesday + Friday
• TU TH SA
Tuesday + Thursday + Saturday
• MO TU WE
Monday – Wednesday
• TH FR SA
Thursday – Saturday
• MO TU WE TH FR SA SO
Monday – Sunday
Note: As soon as a particular day or combination of days
has been stored, the device executes the programmed
switching sequence at the same time on each of these days
of the week.
Press the hour button (HOUR) 9 repeatedly until the
desired hour value appears in the LC display 1.
Plug the device into a properly installed 220–250 V, 50 Hz
mains outlet socket. All the indicators in the LC display 1
appear briefly. Then the time indicator appears.
Note: In the event of a power cut, the in-built rechargeable battery ensures that the time is kept going and the
automatic switching program remains activated. The
device is fully programmable without a power supply,
as long as the rechargeable battery is fully charged.
Operation
Setting the day of the week and time
Keep the display mode button (TIME) 7 pressed during
the following programming procedures.
Press the day of the week button (WEEK) 6 repeatedly
until the desired day of the week appears in the LC
display 1.
Tip: By pressing and keeping pressed the day of the
week button (WEEK) 6 for approx. 3 seconds you can
Press the minute button (MIN) 2 repeatedly until the
desired minute value appears in the LC display 1.
Press the input button (SET) 8 again to store the setting.
The PROG 1 OFF “- - : - -” indicator appears in the LC
display 1.
Switch-off time:
Press the day of the week button (WEEK) 6 repeatedly
until the desired day of the week or block of days of the
week appears in the LC display 1.
Press the hour button (HOUR) 9 repeatedly until the
desired hour value appears in the LC display 1.
Press the minute button (MIN) 2 repeatedly until the
desired minute value appears in the LC display 1.
Press the input button (SET) 8 again to store the setting.
Press the display mode button (TIME) 7 to return to the
current time.
Note: You can program up to 20 different switching
sequences. To do this, repeat the above-described programming procedure in each case. The PROG 2 ON “- - : - -”
indicator etc. appears in the LC display 1 when each
further setting is stored.
Changing or checking
switching times
To change or check the switching times, press the input
button (SET) 8 and the programmed switching times
appear one after the other in the display.
To change the days, hours or minutes, proceed as
described in the section “Programming the time switch”.
Activating / deactivating
switching times
Press the input button (SET) 8.
Then press the recall button (RECALL) 5 to cancel the
programmed switching time. The switching data are not
Press the ON / AUTO / OFF button (MANUAL) 3
again to continue the countdown.
Press the display mode button (TIME) 7 to change
from the countdown display to the current time.
Press the display mode button (TIME) 7 to change
from the current time to the countdown display.
Press the hour button (HOUR) 9 and the minute button
(MIN) 2 at the same time to cancel the countdown
function.
Cleaning and care
Never use liquids or cleaning agents, as they may
damage the device.
Clean the outside of the device only with a soft, dry
cloth.
GB GB GB GB
erased from the memory, merely deactivated. The symbol
“- - : - -” appears in the display.
Then press the recall button (RECALL) 5 again to
reactivate the cancelled switching time.
Manually skipping switching times
At any time, and independently of programmed times,
you can skip manually to the next switching time.
To do this, press the ON / AUTO / OFF button
(MANUAL) 3 repeatedly until the desired command
appears in the LC display 1:
OFF: All switching times are cancelled, the time switch
allows no current to pass to the connected devices.
AUTO OFF: Switching times are active, the time switch
is switched off.
ON: All switching times are cancelled, the time switch
allows current to pass continuously to the connected
devices.
GB GB GB GB
Disposal
The packaging is wholly composed of environmentally friendly materials that can be disposed
of at a local recycling centre.
Contact your local refuse disposal authority for more details
of how to dispose of your discarded product.
In the interest of the environment, do not throw
out your discarded device with your household
refuse. Take it to a suitable centre where it can
be disposed of properly. Your local council will
be able to tell you where the collection centres
are located and their opening times.
AUTO ON: Switching times are active, the time switch
is switched on.
Setting the random mode
Note: This function switches the time switch arbitrarily on
and off and is intended to prevent burglaries by simulating
an occupied house with e.g. lights switching on and off at
irregular intervals. Your preprogrammed switching commands
are moved by a random amount up to 30 minutes on each
day. This function is only possible if one or more switching
commands have been set.
Press the hour button (HOUR) 9 for at least 3 seconds.
The time switch changes into random mode. The random
mode symbol “RND” appears in the LC display 1 to
show that the random mode is switched on.
Press the hour button (HOUR) 9 again for 3 seconds
to cancel the random mode.
Product description:
Digital Weekly Timer
Art. No.: 97318-4
Model No.: EIM-804 GR
Setting the countdown
Press the input button (SET) 8 to access the timer menu.
Press and keep pressed the input button (SET) 8 until
the “CTD” icon appears in the LC display 1.
Press the hour button (HOUR) 9 repeatedly until the
desired hour value appears in the LC display 1.
Press the minute button (MIN) 2 repeatedly until the
desired minute value appears in the LC display 1.
Note: The countdown can be set from 1 minute to
11 hours, 59 minutes.
Press the display mode (TIME) button 7.
The device returns to its normal operating mode.
Press the hour button (HOUR) 9 and the minute button
(MIN) 2 at the same time to start the countdown function.
Manually ending the countdown
Press the ON / AUTO / OFF button (MANUAL) 3 to
halt the countdown while it is running.
© by ORFGEN Marketing
IAN 66142
Inter-Union Technohandel GmbH
Klaus-von-Klitzing-Str. 2
D-76829 Landau / Pfalz
GB GB GB
66142_Zeitschaltuhr_digital_innen_HU_SI_GB.indd 3 20.07.11 18:18
Page 21

66142_Zeitschaltuhr_digital_innen_HU_SI_GB.indd 4 20.07.11 18:18
Page 22

1
Programmateur digital hebdomadaire
pour les dégâts issus d’une utilisation non conforme. Cet
appareil n’est pas conçu pour une utilisation commerciale.
Introduction
Touche mode d’affichage (TIME)
7
Touche d’entrée (SET)
8
Touche heures (HOUR)
9
Caractéristiques
Avant la première mise en service, veuillez vous
9
8
7
6
2
3
4
5
de sécurité. L’appareil doit uniquement être utilisé conformément
aux instructions et dans les domaines d’application spécifiés.
Soigneusement conserver ces instructions. Remettez tous les
documents aux utilisateurs lorsque vous prêtez cet appareil.
familiariser avec l’appareil. Veuillez lire pour
cela le mode d’emploi ci-dessous et les consignes
Tension nominale : 240 V ∼, 50 Hz
Courant nominal : AC 10 A
Charge maximale : 2300 watts
Interrupteur de sortie : relais
Précision de la minuterie : + / – 1 seconde / jour à
20 °C
Durée programmable minimale : 1 minute
Sécurité
Veuillez lire toutes les consignes
de sécurité et instructions. Tout manquement aux consignes
de sécurité et aux instructions peut provoquer des brûlures
et / ou de graves blessures.
2
Consignes de sécurité générales
DANGER DE
MORT ET D’ACCIDENT POUR LES ENFANTS EN BAS ÂGE ET LES ENFANTS !
Ce produit n’est pas un jouet. Ne jamais laisser les enfants
manipuler sans surveillance le matériel d’emballage et
l’appareil. Il existe un risque d’étouffement par le matériel
d’emballage et un danger de mort par électrocution.
Cet appareil n’est pas conçu pour être utilisé par des
personnes (enfants compris) dont les aptitudes physiques,
sensorielles ou mentales sont limitées ou manquant
d’expérience et / ou des connaissances requises, sauf
sous la surveillance d’une personne responsable de leur
sécurité ou après avoir été instruit du maniement de
l’appareil. Surveiller les enfants pour garantir qu’ils ne
jouent pas avec l’appareil.
Utilisation conforme
Cet appareil est conçu pour allumer et éteindre automatiquement des appareils électriques. L’appareil doit uniquement
être utilisé dans des locaux fermés. Toutes modifications de
l’appareil ne sont pas conformes et peuvent être sources de
graves accidents. Le fabricant décline toute responsabilité
FR/BE FR/BE FR/BE
Uniquement faire fonctionner l’appareil sur une prise de
courant correctement installée.
PRUDENCE ! Ne pas connecter la minuterie numé-
rique en série. Les adaptateurs enfichés représentent un
risque d’endommagement mécanique.
DANGER DE MORT
PAR ÉLECTROCUTION ! Tenir l’appareil à
l’écart de l’humidité et ne jamais le saisir
avec des mains mouillées.
Ne pas exposer l’appareil à une chaleur ou à un froid
extrêmes.
Ne pas exposer l’appareil à des variations de tempéra-
ture extrêmes. Autrement, il peut se former de l’eau de
condensation. Attendre que l’appareil s’acclimate à la
température ambiante avant de le mettre en marche.
Ne pas recouvrir l’appareil par des journaux, des vête-
ments ou similaires afin d’éviter qu’il chauffe de manière
excessive.
Description des pièces
Affichage à cristaux liquides
1
Touche minutes (MIN)
2
Touche MARCHE / AUTO / ARRÊT (MANUAL)
3
Touche Reset
4
Touche de rappel (RECALL)
5
Touche jour de la semaine (WEEK)
6
Vérifier le parfait état de l’appareil avant chaque raccor-
dement au secteur. Ne jamais utiliser l’appareil si vous
détectez le moindre endommagement. En cas d’endommagement, pour toute réparation ou autre problème
avec l’appareil, veuillez contacter un professionnel.
Ne pas brancher d’appareil dont le poids serait supporté
par la fiche. Ceci évite une surchauffe excessive et un
endommagement mécanique de la prise de courant.
Ne pas utiliser l’appareil avec des multiprises ou des
câbles de rallonge.
Tenir compte que tout endommagement dû à une mani-
pulation incorrecte, au non respect du mode d’emploi
ou à une intervention par des personnes non autorisées
est exclu de la garantie.
L’appareil n’est pas conçu pour commuter des charges
inductives supérieures à 10 A (ampères). Pour cette raison,
cette minuterie ne doit jamais être utilisée pour faire
fonctionner des moteurs électriques ou des tubes fluorescents avec des ballasts conventionnels. Consultez un
CONSERVER TOUTES LES CONSIGNES DE SÉCURITÉ ET
INSTRUCTIONS POUR CONSULTATION ULTÉRIEURE !
professionnel si vous n’êtes pas sûr de la charge inductive
de votre appareil.
Ne pas ouvrir le boîtier et ne jamais tenter de remplacer
vous-même des pièces ou d’effectuer des réparations.
Avant d’effectuer le nettoyage, toujours débrancher
l’appareil de la prise de courant et déconnecter toutes
les fiches secteurs de l’appareil.
Veiller à ce que l’appareil soit toujours aisément accessible.
En cas de panne, immédiatement débrancher l’appareil
de la prise de courant.
Avant la mise en service
La minuterie est équipée d’un accu intégré. Celui-ci sert à
conserver les données mémorisées telles que l’heure, la
date et les commutations. Avant la première utilisation, l’accu
doit être chargé pendant 24 heures. Pendant le chargement,
vous pouvez déjà effectuer les réglages de l’appareil.
FR/BE FR/BE FR/BE FR/BE
Brancher l’appareil dans une prise de courant de
220–250 V, 50 Hz correctement installée. Pendant un
bref instant, tous les témoins apparaissent sur l’affichage
à cristaux liquides 1. L’horloge est ensuite affichée.
Remarque : en cas d’interruption de l’alimentation
électrique, l’accu intégré assure la continuité de l’affichage
de l’heure et du programme de commutation automatique.
L’appareil peut être totalement programmé sans alimentation électrique si l’accu est complètement chargé.
Utilisation
Réglage du jour de la semaine
et de l’heure
Enfoncer la touche du mode d’affichage (TIME) 7
pendant la procédure de programmation suivante.
Appuyer plusieurs fois sur la touche du jour de la se-
maine (WEEK) 6 jusqu’à ce le jour désiré soit indiqué
sur l’affichage à cristaux liquides 1.
FR/BE FR/BE FR/BE FR/BE
Appuyer plusieurs fois sur la touche des heures (HOUR)
jusqu’à ce que l’heure désirée soit indiquée dans
9
l’affichage à cristaux liquides 1.
Appuyer plusieurs fois sur la touche des minutes (MIN) 2
jusqu’à ce que la minute désirée soit indiquée dans
l’affichage à cristaux liquides 1.
Appuyer une fois de plus sur la touche d’entrée (SET) 8
pour mémoriser les réglages.
Le témoin PROG 1 OFF «- - : - -» apparaît dans l’affi-
chage à cristaux liquides 1.
Heure d’extinction :
Appuyer plusieurs fois sur la touche du jour de la semaine
(WEEK) 6 jusqu’à ce que le jour de semaine ou la série
de jour désirée apparaisse dans l’affichage à cristaux
liquides 1.
Appuyer plusieurs fois sur la touche des heures (HOUR)
jusqu’à ce que l’heure désirée apparaisse dans
9
l’affichage à cristaux liquides 1.
Conseil : enfoncer la touche du jour de la semaine
(WEEK) 6 pendant env. 3 secondes. Ceci permet de
régler les valeurs plus rapidement. Vous pouvez aussi
utiliser ce réglage rapide pour les réglages suivants.
Remarque : MO = lundi, TU = mardi, WE = mercredi,
TH = jeudi, FR = vendredi, SA = samedi, SU = dimanche
Appuyer plusieurs fois sur la touche des heures (HOUR)
jusqu’à ce que l’heure désirée soit indiquée sur
9
l’affichage à cristaux liquides 1.
Appuyer plusieurs fois sur la touche des minutes (MIN) 2
jusqu’à ce que la minute désirée soit indiquée sur
l’affichage à cristaux liquides 1.
Relâcher la touche de mode d’affichage (TIME) 7.
Remarque : si aucun réglage n’est effectuer pendant
env. 10 secondes, l’appareil repasse sur l’affichage de
l’heure.
Remarque : la minuterie est à présent en marche.
Ceci est signalé par le clignotement du double point sur
l’affichage à cristaux liquides 1.
Appuyer plusieurs fois sur la touche des minutes (MIN) 2
jusqu’à ce que la minute désirée apparaisse dans
l’affichage à cristaux liquides 1.
Appuyer une fois de plus sur la touche d’entrée (SET) 8
pour mémoriser les réglages.
Appuyer sur la touche du mode d’affichage (TIME) 7
pour retourner à l’heure actuelle.
Remarque : vous pouvez programmer jusque 20 différentes
séquences de commutation. Vous devez pour cela répéter
la procédure de programmation plus haut décrite. L’affichage
à cristaux liquides 1 indique pour chaque autre enregistrement consécutif PROG 2 ON «- - : - -», etc.
Modification ou vérification des
heures de commutation
Pour modifier ou vérifier les heures de commutation,
appuyer sur la touche d’entrée (SET) 8 afin d’afficher
Activation de l’heure d’été / d’hiver
Appuyer plusieurs fois sur la touche de mode d’affichage
(TIME) 7 jusqu’à ce que le témoin «+1h» s’affiche ou
s’éteigne dans l’horloge.
Programmation de la minuterie
Heure d’allumage :
Appuyer une fois sur la touche d’entrée (SET) 8. Le
témoin PROG 1 ON «- - : - -» apparaît dans l’affichage
à cristaux liquides 1.
Appuyer plusieurs fois sur la touche du jour de la semaine
(WEEK) 6 jusqu’à ce que le jour désiré ou la série de
jours apparaisse dans l’affichage à cristaux liquides 1.
Vous disposez des jours et séries de jours suivants :
•MOTUWETHFR
lundi – vendredi
•SASU
samedi + dimanche
consécutivement les heures de commutation programmées
sur l’écran.
Pour modifier les jours, les heures ou les minutes, procéder
comme décrit au chapitre «Programmation de la minuterie».
Activation / désactivation des heures
de commutation
Appuyer sur la touche d’entrée (SET) 8.
Appuyer ensuite sur la touche de rappel (RECALL) 5
pour annuler l’heure de commutation programmée. Les
données de commutation ne seront pas effacées de la
mémoire, mais simplement désactivées. L’écran affiche
le symbole «- - : - -».
Appuyer de nouveau sur la touche de rappel (RECALL) 5
pour réactiver l’heure de commutation annulée.
•MOTUWETHFRSA
lundi – samedi
•MOWEFR
lundi + mercredi + vendredi
•TUTHSA
mardi + jeudi + samedi
•MOTUWE
lundi – mercredi
•THFRSA
jeudi – samedi
•MOTUWETHFRSASO
lundi – dimanche
Remarque : après l’enregistrement d’un jour ou d’une série
de jours, la séquence de commutations programmée est
exécutée aux mêmes heures pour chaque jour de semaine
sélectionné.
Saut manuel des heures de
commutation
Indépendamment de la programmation, vous pouvez à
tout moment sauter manuellement la prochaine heure de
commutation.
Pour cela, appuyer plusieurs fois sur la touche
MARCHE / AUTO / ARRÊT (MANUAL) 3 jusqu’à ce
que l’instruction désirée apparaisse sur l’affichage à
cristaux liquides 1:
OFF : toutes les heures de commutation sont annulées,
l’appareil n’alimente plus les appareils branchés en
courant électrique.
AUTO OFF : les heures de commutations sont actives,
l’appareil est éteint.
ON : toutes les heures de commutation sont annulées,
l’appareil alimente en permanence les appareils branchés
en courant électrique.
AUTO ON : les heures de commutation sont actives,
l’appareil est allumé.
FR/BE FR/BE FR/BE FR/BE
Réglage du mode aléatoire
Remarque : cette fonction assure un allumage et une
extinction arbitraire de la minuterie et est sensée prévenir
contre des cambriolages en simulant une maison habitée
par des heures de commutation (par ex. allumage de lampes)
irréguliers. Les instructions de commutation que vous avez
programmées se décalent chaque jour de manière aléatoire
jusque 30 minutes. Cependant, cette fonction est uniquement
disponible à condition qu’une ou plusieurs instructions de
commutation sont réglées.
Appuyer sur la touche des heures (HOUR) 9 pendant
3 secondes. La minuterie passe en mode aléatoire.
L’affichage à cristaux liquides 1 indique le symbole
«RND», le mode aléatoire est activé.
Appuyer de nouveau sur la touche des heures (HOUR) 9
pendant 3 secondes pour quitter le mode aléatoire.
FR/BE FR/BE FR/BE FR/BE
66142_Zeitschaltuhr_digital_innen_LB2.indd 1 20.07.11 18:09
Réglage du compte à rebours
Appuyer sur la touche d’entrée (SET) 8 pour accéder
au menu de la minuterie.
Enfoncer la touche d’entrée (SET) 8 jusqu’à ce que
l’affichage à cristaux liquides 1 indique le symbole
«CTD».
Appuyer plusieurs fois sur la touche des heures (HOUR)
jusqu’à ce que l’heure désirée apparaisse sur
9
l’affichage à cristaux liquides 1.
Appuyer plusieurs fois sur la touche des minutes (MIN) 2
jusqu’à ce que la minute désirée apparaisse sur l’affichage à cristaux liquides 1.
Remarque : le compte à rebours peut être réglé sur
une durée allant d’1 minute à 23 heures et 59 minutes.
Appuyer sur la touche de mode d’affichage (TIME) 7.
L’appareil repasse en mode de fonctionnement normal.
Appuyer simultanément sur les touches des heures
(HOUR) 9 et des minutes (MIN) 2 pour lancer la
fonction de compte à rebours.
Arrêt manuel du compte à rebours
Pour stopper le compte à rebours pendant son exécution,
appuyer sur la touche MARCHE / AUTO / ARRÊT
(MANUAL) 3.
Appuyer de nouveau sur la touche MARCHE / AUTO /
ARRÊT (MANUAL) 3 pour relancer le compte à rebours.
Appuyer sur la touche de mode d’affichage (TIME) 7
pour passer de l’affichage du compte à rebours à
l’heure actuelle.
Appuyer de nouveau sur la touche de mode d’affichage
(TIME) 7 pour repasser de l’heure actuelle à l’affichage
du compte à rebours.
Appuyer simultanément sur les touches des heures
(HOUR) 9 et des minutes (MIN) 2 pour annuler le
compte à rebours.
Nettoyage et entretien
Ne jamais utiliser des liquides ou des détergents sous
peine d’endommager l’appareil.
Uniquement essuyer les surfaces externes de l’appareil
avec un chiffon sec et doux.
Mise au rebut
L’emballage se compose exclusivement de
matières recyclables qui peuvent être mises au
rebut dans les déchetteries locales.
Renseignez-vous auprès de votre mairie ou de l’administration
municipale concernant les possibilités de mise au rebut du
produit usé.
Page 23

Afin de contribuer à la protection de l’environnement, veuillez ne pas jeter votre appareil usé
dans les ordures ménagères, mais le mettre au
rebut de manière adéquate. Veuillez vous renseigner auprès des autorités responsables concernant
les déchetteries et leurs horaires d’ouverture.
Désignation du produit :
Programmateur digital hebdomadaire
N° d’art. : 97318-2
N° du modèle : EIM-804 FR
Digitale weekschakelklok
Inleiding
Maak u vóór het eerste gebruik vertrouwd met
het apparaat. Lees daarvoor de volgende hand-
leiding en de veiligheidsinstructies zorgvuldig
door. Gebruik het apparaat alleen volgens de beschrijving
en alleen voor de vermelde doeleinden. Bewaar deze gebruiksaanwijzing goed. Geef, als u het apparaat doorgeeft
aan derden, ook alle documenten door.
Doelmatig gebruik
Dit apparaat is geschikt voor het op afstand in- en uitschakelen
van elektrische apparaten. Het apparaat mag alleen worden
gebruikt in gesloten ruimten. Alle veranderingen aan het
apparaat zijn ondoelmatig en kunnen aanzienlijke gevaren
voor ongevallen vormen. De producent is niet aansprakelijk
voor schade die resulteert uit ondoelmatig gebruik. Het
apparaat is niet bestemd voor commercieel gebruik.
Technische gegevens
Nominale spanning: 240 V ∼, 50 Hz
Ontwerpstroom: AC 10 A
Maximale belasting: 2.300 watt
Uitgangsschakelaar: relais
Timernauwkeurigheid: + / – 1 seconde / dag bij 20 °C
Kortst
programmeerbare tijd: 1 minuut
Onderdelenbeschrijving
LC-display
1
Minutentoets (MIN)
2
AAN / AUTO / UIT-toets (MANUAL)
3
Resettoets
4
Terughaaltoets (RECALL)
5
Weekdagtoets (WEEK)
6
Toets weergavemodus (TIME)
7
Insteltoets (SET)
8
Urentoets (HOUR)
9
Veiligheid
Lees alle veiligheidsinstructies
en aanwijzingen door. Nalatigheden bij de naleving van de
veiligheidsinstructies en aanwijzingen kunnen brand en / of
ernstig letsel tot gevolg hebben.
BEWAAR ALLE VEILIGHEIDSINSTRUCTIES EN
AANWIJZINGEN OM DEZE LATER TE KUNNEN
RAADPLEGEN!
FR/BE
Algemene veiligheidsinstructies
LEVENSGE-
VAAR EN GEVAAR VOOR ONGEVALLEN VOOR KLEINERE KINDEREN EN
JONGEREN! Dit product is géén speelgoed. Laat
kinderen nooit zonder toezicht hanteren met het verpakkingsmateriaal en het apparaat. Hier bestaat gevaar
voor verstikking door verpakkingsmateriaal en levensgevaar door elektrische schokken.
Dit apparaat mag niet worden gebruikt door personen
(inclusief kinderen) met beperkte fysieke, sensorische of
geestelijke vermogens of gebrekkige ervaring en / of
kennis, tenzij een voor hun veiligheid verantwoordelijke
persoon toezicht houdt of vooraf instructies heeft gegeven
voor het gebruik van het apparaat. Op kinderen dient
toezicht te worden gehouden om te voorkomen dat ze
met het product spelen.
NL/BE NL/BE NL/BE NL/BE
Sluit het apparaat aan op een correct geïnstalleerde
netcontactdoos met 220–250 V, 50 Hz. Kortstondig verschijnen alle weergaven op het LC-display 1. Vervolgens
verschijnt de tijdweergave.
Opmerking: in geval van een onderbreking van de
stroomverzorging waarborgt de ingebouwde accu dat
de tijd verder wordt aangegeven en het automatische
schakelprogramma geactiveerd blijft. Het apparaat kan
helemaal zonder stroomverzorging worden geprogrammeerd als de accu volledig is opgeladen.
Bediening
Weekdag en tijd instellen
Houd de toets voor de weergavemodus (TIME) 7
ingedrukt tijdens de volgende programmering.
Druk steeds weer op de weekdagtoets (WEEK) 6
totdat de gewenste weekdag op het LC-display 1
verschijnt.
NL/BE NL/BE NL/BE
Sluit het apparaat alléén aan op een vakkundig
geïnstalleerde netcontactdoos.
VOORZICHTIG! Sluit digitale schakelklokken niet achter
elkaar aan. Bij op elkaar aangesloten tussenstekkers
bestaat gevaar voor mechanische schade.
LEVENSGE-
VAAR DOOR ELEKTRISCHE SCHOKKEN! Houd het apparaat verwijderd van
vocht en grijp het niet vast met natte handen.
Stel het apparaat niet bloot aan extreme hitte en niet
aan extreme kou.
Stel het apparaat niet bloot aan extreme temperatuur-
schommelingen. In het andere geval kan condenswater
ontstaan. Wacht totdat het apparaat kamertemperatuur
heeft bereikt, voordat u het in gebruik neemt.
Voorkom ongeoorloofde verwarming en dek het appa-
raat niet af met kranten, kledingstukken of dergelijke.
Controleer het apparaat op eventuele schade voordat u
het op het stroomnet aansluit. Gebruik het product nooit
Tip: houd de weekdagtoets (WEEK) 6 gedurende ca.
3 seconden ingedrukt. Op deze wijze activeert u de
functie voor het snelle instellen van de waarden. De
functie voor het snelle instellen kunt u gebruiken ook
voor de volgende instelprocessen.
Opmerking: MO = maandag, TU = dinsdag,
WE = woensdag, TH = donderdag, FR = vrijdag,
SA = zaterdag, SU = zondag
Druk steeds weer op de urentoets (HOUR) 9 totdat het
gewenste uur op het LC-display 1 verschijnt.
Druk steeds weer op de minutentoets (MIN) 2 totdat
de gewenste minuut op het LC-display 1 verschijnt.
Laat de toets voor de weergavemodus (TIME) 7 los.
Opmerking: als u gedurende ca. 10 seconden geen
instellingen uitvoert, schakelt het apparaat terug naar
de normale tijdweergave.
Opmerking: de schakelklok is nu in gebruik. Dit wordt
ook aangegeven door het knipperen van de dubbele
punt op het LC-display 1.
wanneer u ongeacht welke beschadiging ook hebt
geconstateerd. Neem in geval van beschadigingen,
reparaties of andere problemen aan het product contact
op met een vakman.
Sluit geen apparaten aan die met hun eigengewicht
aan de steker hangen. Zo voorkomt u ongeoorloofde
verwarming en mechanische schade aan de netcontactdoos.
Gebruik het apparaat niet samen met verdeeldozen of
verlengkabels.
Beschadigingen door ondeskundig gebruik, negeren van
de handleiding of ingrepen door niet-geautoriseerde
personen zijn van de garantieverlening uitgesloten.
Het apparaat is niet geschikt om inductieve lasten te
schakelen die groter zijn dan 10 A (ampère). Gebruik
om deze redenen nooit elektromotoren of tl-buizen met
conventionele voorschakelapparaten in combinatie met
deze schakelklok. Neem contact op met een vakman
Zomer- / wintertijd activeren
Druk op de toets voor de weergavemodus (TIME) 7
totdat de aanvulling “+1h” in de tijdweergave verschijnt
resp. dooft.
Schakelklok programmeren
Inschakeltijd:
Druk één keer op de insteltoets (SET) 8. Op het LC-dis-
play 1 verschijnt de weergave PROG 1 ON “- - : - -”.
Druk steeds weer op de weekdagtoets (WEEK) 6
totdat de gewenste weekdag of daggroep op het
LC-display 1 verschijnt. De volgende weekdagen en
daggroepen kunnen worden ingesteld:
•MOTUWETHFR
maandag – vrijdag
•SASU
zaterdag + zondag
•MOTUWETHFRSA
maandag – zaterdag
als u twijfelt over de inductieve belasting van uw
apparaat.
Open het apparaat nooit zelf en tracht nooit om
onderdelen zelf te vervangen of te repareren.
Onderbreek vóór de reiniging altijd de verbinding van het
apparaat naar de netcontactdoos en trek alle netstekers
uit het apparaat.
Waarborg dat het apparaat altijd vrij toegankelijk is.
Trek de steker van het apparaat in geval van storingen
onmiddellijk uit de netcontactdoos.
Vóór de ingebruikname
De schakelklok beschikt over een geïntegreerde accu. Deze
accu is bedoeld voor het behoud van de opgeslagen gegevens zoals bijv. tijd, datum en schakelprocessen. De accu
moet vóór het eerste gebruik 24 uur lang worden opgeladen.
Tijdens het laadproces kunt u al instellingen aan het apparaat
uitvoeren.
•MOWEFR
maandag + woensdag + vrijdag
•TUTHSA
dinsdag + donderdag + zaterdag
•MOTUWE
maandag – woensdag
•THFRSA
donderdag – zaterdag
•MOTUWETHFRSASO
maandag – zondag
Opmerking: zodra een bepaalde dag of een combinatie
van dagen is opgeslagen, wordt de geprogrammeerde
schakelvolgorde op iedere ingestelde weekdag op hetzelfde
tijdstip uitgevoerd.
Druk steeds weer op de urentoets (HOUR) 9 totdat het
gewenste uur op het LC-display 1 verschijnt.
NL/BE NL/BE NL/BE NL/BE
Druk steeds weer op de minutentoets (MIN) 2 totdat
de gewenste minuut op het LC-display 1 verschijnt.
Druk nogmaals op de insteltoets (SET) 8 om de
instelling op te slaan.
Op het LC-display 1 verschijnt de weergave PROG 1
OFF “- - : - -”.
Uitschakeltijd:
Druk steeds weer op de weekdagtoets (WEEK) 6 totdat
de gewenste weekdag of daggroep op het LC-display 1
verschijnt.
Druk steeds weer op de urentoets (HOUR) 9 totdat het
gewenste uur op het LC-display 1 verschijnt.
Druk steeds weer op de minutentoets (MIN) 2 totdat
de gewenste minuut op het LC-display 1 verschijnt.
Druk nogmaals op de insteltoets (SET) 8 om de instelling
op te slaan.
Druk op de toets weergavemodus (TIME) 7 om terug
te keren naar de actuele tijd.
NL/BE NL/BE NL/BE NL/BE
Druk opnieuw gedurende 3 seconden op de urentoets
(HOUR) 9 om de toevallige modus te beëindigen.
Countdown instellen
Druk op de insteltoets (SET) 8 om naar het timermenu
te schakelen.
Houd de insteltoets (SET) 8 ingedrukt totdat het “CDT”-
icon op het LC-display 1 verschijnt.
Druk steeds weer op de urentoets (HOUR) 9 totdat het
gewenste uur op het LC-display 1 verschijnt.
Druk steeds weer op de minutentoets (MIN) 2 totdat
de gewenste minuut op het LC-display 1 verschijnt.
Opmerking: de countdown kan worden ingesteld op
een tijd tussen 1 minuut en 23 uur en 59 minuten.
Druk op de toets weergavemodus (TIME) 7.
Het apparaat keert terug naar de normale bedrijfsmodus.
Druk tegelijkertijd op de uren- (HOUR) 9 en de minu-
tentoets (MIN) 2 om de countdown-functie te starten.
Opmerking: u kunt tot 20 verschillende schakelvolgorden
programmeren. Herhaal daarvoor telkens het tevoren
beschreven programmeerproces. Op het LC-display 1
verschijnt een volgnummer voor iedere opgeslagen programmering, bijv. PROG 2 ON “- - : - -” enz.
Schakeltijden veranderen of
controleren
Druk op de insteltoets (SET) 8 om de schakeltijden
achter elkaar op te roepen en de geprogrammeerde
schakeltijden desgewenst te wijzigen of te controleren.
Ga voor het wijzigen van de dagen, uren of minuten te
werk zoals in het hoofdstuk “schakelklok programmeren”
beschreven staat.
Schakeltijden
activeren / deactiveren
Druk op de insteltoets (SET) 8.
Countdown handmatig beëindigen
Druk tijdens de countdown op de AAN / AUTO / UIT-toets
(MANUAL) 3 om de countdown te stoppen.
Druk opnieuw op de AAN / AUTO / UIT-toets
(MANUAL) 3 om de countdown voort te zetten.
Druk op de toets weergavemodus (TIME) 7 om van de
countdown-weergave terug te keren naar de actuele tijd.
Druk opnieuw op de toets weergavemodus (TIME) 7
om van de actuele tijd over te schakelen naar de countdown-weergave.
Druk tegelijkertijd op de uren- (HOUR) 9 en de minuten-
toets (MIN) 2 om de countdown te annuleren.
Reiniging en onderhoud
Gebruik in geen geval vloeistoffen en ook geen reini-
gingsmiddelen omdat deze het apparaat aantasten.
Reinig het apparaat alleen aan de buitenzijde met een
zachte, droge doek.
Druk vervolgens op de terughaaltoets (RECALL) 5 om
de geprogrammeerde schakeltijd op te heffen. De
schakelgegevens worden gedeactiveerd, maar blijven in
het geheugen opgeslagen. Op het display verschijnt het
symbool “- - : - -”.
Druk vervolgens op de terughaaltoets (RECALL) 5 om
de opgeheven schakeltijd te activeren.
Schakeltijden handmatig overslaan
Onafhankelijk van de programmering kunt u te allen
tijde de navolgende schakeltijd handmatig overslaan.
Druk daarvoor op de AAN / AUTO / UIT-toets
(MANUAL) 3 totdat het gewenste commando op het
LC-display 1 verschijnt:
OFF: alle schakeltijden zijn opgeheven, de schakelklok
verzorgt de aangesloten apparaten niet met stroom.
AUTO OFF: schakeltijden zijn actief, de schakelklok is
uitgeschakeld.
ON: alle schakeltijden zijn opgeheven, de schakelklok
Afvoer
De verpakking bestaat uit milieuvriendelijke
materialen die u via de plaatselijke recyclingdiensten kunt afvoeren.
Informeer bij uw gemeente naar mogelijkheden voor de
afvoer van dit uitgediende product.
Voer het apparaat omwille van het milieu niet af
via het huisafval, maar geef het af bij het daarvoor bestemde depot of het gemeentelijke milieupark. Voor meer informatie over inzamelpunten
en openingstijden kunt u contact opnemen met
uw gemeente.
verzorgt de aangesloten apparaten voortdurend met
stroom.
AUTO ON: de schakeltijden zijn actief, de schakelklok
is ingeschakeld.
Toevallige modus instellen
Opmerking: deze functie schakelt de schakelklok wille-
keurig in en uit en moet inbraakpogingen voorkomen doordat door de onregelmatigheden van de schakeltijden (bijv.
bij lampen) een bewoond huis wordt gesuggereerd. De
door u voorgeprogrammeerde schakelcommando’s
verschuiven dagelijks toevallig met max. 30 minuten. Deze
functie is echter alleen mogelijk als een of meerdere schakelcommando’s worden ingesteld.
Druk gedurende 3 seconden op de urentoets (HOUR) 9.
De schakelklok schakelt naar de toevallige modus. Op
het LC-display 1 verschijnt het symbool “RND”, de
toevallige modus is ingeschakeld.
Productbenaming
Digitale weekschakelklok
Artikelnr.: 97318-2
Modelnr.: EIM-804 FR
NL/BE NL/BE NL/BE NL/BE
66142_Zeitschaltuhr_digital_innen_LB2.indd 2 20.07.11 18:09
Page 24

Digitale Wochenzeitschaltuhr
Einleitung
Machen Sie sich vor der ersten Inbetriebnahme
mit dem Gerät vertraut. Lesen Sie hierzu die
nachfolgende Bedienungsanleitung und die Sicherheitshinweise. Benutzen Sie das Gerät nur wie beschrieben
und für die angegebenen Einsatzbereiche. Bewahren Sie
diese Anleitung gut auf. Händigen Sie alle Unterlagen bei
Weitergabe des Geräts an Dritte ebenfalls mit aus.
Bestimmungsgemäße Verwendung
Dieses Gerät ist zum automatischen Ein- und Ausschalten von
Elektrogeräten bestimmt. Das Gerät darf nur in geschlossenen
Räumen verwendet werden. Alle Veränderungen des Geräts
sind nicht bestimmungsgemäß und können erhebliche Unfallgefahren bedeuten. Der Hersteller übernimmt für aus
bestimmungswidriger Verwendung entstandene Schäden
DE/AT/CH DE/AT/CH DE/AT/CH DE/AT/CH
keine Haftung. Dieses Gerät ist nicht für den gewerblichen
Einsatz bestimmt.
Technische Daten
Bemessungsspannung: 240 V ∼, 50 Hz
Bemessungsstrom: AC 10 A
Maximale Last: 2300 Watt
Ausgangsschalter: Relais
Timer-Genauigkeit: + /– 1 Sekunde / Tag bei 20 °C
Kürzeste,
programmierbare Zeit: 1 Minute
Teilebeschreibung
LC-Display
1
Minuten-Taste (MIN)
2
EIN- / AUTO- / AUS-Taste (MANUAL)
3
Reset-Taste
4
Rückruf-Taste (RECALL)
5
Wochentag-Taste (WEEK)
6
Taste Anzeigemodus (TIME)
7
Eingabe-Taste (SET)
8
Stunden-Taste (HOUR)
9
Sicherheit
Lesen Sie alle Sicherheitshinweise und
Anweisungen. Versäumnisse bei der Einhaltung der Sicherheitshinweise und Anweisungen können Brand und / oder
schwere Verletzungen verursachen.
BEWAHREN SIE ALLE SICHERHEITSHINWEISE UND
ANWEISUNGEN FÜR DIE ZUKUNFT AUF!
Allgemeine Sicherheitshinweise
LEBENS- UND UN-
FALLGEFAHR FÜR KLEINKINDER UND
KINDER! Das Produkt ist kein Spielzeug.
Lassen Sie Kinder niemals unbeaufsichtigt mit Verpackungsmaterial und Gerät. Es besteht Erstickungsgefahr durch
Verpackungsmaterial und Lebensgefahr durch elektrischen
Schlag.
Dieses Gerät ist nicht dafür bestimmt, durch Personen
(einschließlich Kinder) mit eingeschränkten physischen,
sensorischen oder geistigen Fähigkeiten oder mangels
Erfahrung und / oder mangels Wissen benutzt zu werden,
es sei denn, sie werden durch eine für ihre Sicherheit
zuständige Person beaufsichtigt oder erhielten von ihr
Anweisungen, wie das Gerät zu benutzen ist. Kinder
sollten beaufsichtigt werden, um sicherzustellen, dass sie
nicht mit dem Gerät spielen.
Betreiben Sie das Gerät nur an einer fachgerecht
installierten Netzsteckdose.
VORSICHT! Stecken Sie die digitale Zeitschaltuhr
nicht hintereinander. Bei aufeinander gesteckten
Zwischensteckern besteht die Gefahr einer mechanischen
Beschädigung.
LEBENSGEFAHR
DURCH ELEKTRISCHEN SCHLAG! Halten
Sie das Gerät von Feuchtigkeit fern und fassen
Sie es nicht mit feuchten Händen an.
Setzen Sie das Gerät keiner extremen Hitze bzw. keiner
extremen Kälte aus.
Setzen Sie das Gerät keinen extremen Temperatur-
schwankungen aus. Andernfalls besteht die Gefahr, dass
sich Kondenswasser bildet. Warten Sie ab, bis das
Gerät Zimmertemperatur erreicht hat, bevor Sie es in
Betrieb nehmen.
DE/AT/CH DE/AT/CH DE/AT/CH DE/AT/CH
Bedienung
Wochentag und Uhr einstellen
Halten Sie die Taste Anzeigemodus (TIME) 7 während
des folgenden Programmiervorgangs gedrückt.
Drücken Sie so häufig die Wochentag-Taste (WEEK) 6,
bis der gewünschte Wochentag im LC-Display 1 erscheint.
Tipp: Halten Sie die Wochentag-Taste (WEEK) 6 für
ca. 3 Sekunden gedrückt. So erreichen Sie ein beschleunigtes Einstellen der Werte. Diese Schnelleinstellung
können Sie auch für die folgenden Einstellvorgänge nutzen.
Hinweis: MO = Montag, TU = Dienstag,
WE = Mittwoch, TH = Donnerstag, FR = Freitag,
SA = Samstag, SU = Sonntag
Drücken Sie so häufig die Stunden-Taste (HOUR) 9,
bis die gewünschte Stunde im LC-Display 1 erscheint.
Drücken Sie so häufig die Minuten-Taste (MIN) 2, bis
die gewünschte Minute im LC-Display 1 erscheint.
Decken Sie das Gerät nicht mit Zeitungen, Kleidungs-
stücken oder Ähnlichem ab, um eine unzulässige
Erwärmung zu vermeiden.
Überprüfen Sie das Gerät vor jedem Netzanschluss auf
etwaige Beschädigungen. Benutzen Sie das Gerät niemals, wenn Sie irgendwelche Beschädigungen feststellen.
Bei Beschädigungen, Reparaturen oder anderen Problemen am Gerät wenden Sie sich an eine Fachkraft.
Stecken Sie keine Geräte ein, deren Eigengewicht am
Stecker hängt. So vermeiden Sie eine unzulässige
Erwärmung sowie mechanische Beschädigungen an der
Netzsteckdose.
Verwenden Sie das Gerät nicht zusammen mit Steckdosen-
leisten oder Verlängerungskabeln.
Beachten Sie, dass Beschädigungen durch unsachge-
mäße Handhabung, Nichtbeachtung der Bedienungsanleitung oder Eingriff durch nicht autorisierte Personen
von der Garantie ausgeschlossen sind.
Lassen Sie die Taste Anzeigemodus (TIME) 7 los.
Hinweis: Die Zeitschaltuhr ist nun in Betrieb. Dieses
wird durch Blinken des Doppelpunkts im LC-Display 1
angezeigt.
Sommer- / Winterzeit aktivieren
Drücken Sie so lange die Taste Anzeigemodus (TIME) 7,
bis der Zusatz „+1h“ in der Zeitanzeige erscheint bzw.
erlischt.
Zeitschaltuhr programmieren
Einschaltzeit:
Drücken Sie einmal die Eingabe-Taste (SET) 8. Im LC-
Display 1 erscheint die Anzeige PROG 1 ON „- - : - -”.
Drücken Sie so häufig die Wochentag-Taste (WEEK) 6,
bis der gewünschte Wochentag oder Tagesblock im
LC-Display 1 erscheint. Folgende Wochen- und Tagesblöcke sind möglich:
Das Gerät ist nicht geeignet, induktive Lasten, die größer
als 10 A (Ampere) sind, zu schalten. Betreiben Sie aus
diesem Grunde niemals Elektromotoren oder Leuchtstoffröhren mit konventionellen Vorschaltgeräten mit dieser
Zeitschaltuhr. Wenden Sie sich an eine Fachkraft, falls
Sie sich nicht über die induktive Belastung Ihres Gerätes
sicher sind.
Öffnen Sie das Gerät nicht selbst und versuchen Sie
niemals, Teile selbst auszuwechseln oder zu reparieren.
Trennen Sie das Gerät für die Reinigung immer von der
Netzsteckdose und ziehen Sie alle Netzstecker aus dem
Gerät.
Achten Sie darauf, dass das Gerät immer frei
zugänglich ist.
Ziehen Sie das Gerät bei Störungen sofort aus der
Netzsteckdose.
•MOTUWETHFR
Montag – Freitag
•SASU
Samstag + Sonntag
•MOTUWETHFRSA
Montag – Samstag
•MOWEFR
Montag + Mittwoch + Freitag
•TUTHSA
Dienstag + Donnerstag + Samstag
•MOTUWE
Montag – Mittwoch
•THFRSA
Donnerstag – Samstag
•MOTUWETHFRSASO
Montag – Sonntag
Hinweis: Sobald ein bestimmter Tag oder eine Kombination
von Tagen eingespeichert worden ist, wird die programmierte
Vor der Inbetriebnahme
Die Zeitschaltuhr verfügt über einen integrierten Akku. Dieser
dient zum Erhalt der gespeicherten Daten wie z.B. Zeit,
Datum und Schaltvorgänge. Der Akku muss vor dem ersten
Gebrauch 24 Stunden aufgeladen werden. Während des
Ladevorgangs können Sie bereits Einstellungen am Gerät
vornehmen.
Stecken Sie das Gerät in eine vorschriftsmäßig installierte
220–250 V, 50 Hz Netzsteckdose. Für einen kurzen
Moment erscheinen alle Anzeigen im LC-Display 1. Anschließend erscheint die Zeitanzeige.
Hinweis: Im Falle einer Unterbrechung der Stromversorgung sichert der eingebaute Akku, dass die Uhrzeit
weiter angegeben wird und das automatische Schaltprogramm aktiviert bleibt. Das Gerät kann vollständig
ohne Stromversorgung programmiert werden, sofern der
Akku voll geladen ist.
Schaltfolge an jedem dieser Wochentage zur selben Zeit
ausgeführt.
Hinweis: Sofern ca. 10 Sekunden keine Einstellungen vorgenommen werden, wechselt das Gerät zur normalen Zeitanzeige zurück.
Drücken Sie so häufig die Stunden-Taste (HOUR) 9,
bis die gewünschte Stunde im LC-Display 1 erscheint.
Drücken Sie so häufig die Minuten-Taste (MIN) 2, bis
die gewünschte Minute im LC-Display 1 erscheint.
Drücken Sie nochmals die Eingabe-Taste (SET) 8, um
mit der Einstellung fortzufahren.
Im LC-Display 1 erscheint die Anzeige PROG 1 OFF
„- - : - -”.
Ausschaltzeit:
Drücken Sie so häufig die Wochentag-Taste (WEEK) 6,
bis der gewünschte Wochentag oder Tagesblock im
LC-Display 1 erscheint.
DE/AT/CH DE/AT/CH DE/AT/CH DE/AT/CH
Drücken Sie so häufig die Stunden-Taste (HOUR) 9,
bis die gewünschte Stunde im LC-Display 1 erscheint.
Drücken Sie so häufig die Minuten-Taste (MIN) 2, bis
die gewünschte Minute im LC-Display 1 erscheint.
Drücken Sie nochmals die Eingabe-Taste (SET) 8, um
die Einstellung zu speichern.
Drücken Sie die Taste Anzeigemodus (TIME) 7, um zur
aktuellen Uhrzeit zurückzukehren.
Hinweis: Sie können bis zu 20 unterschiedliche Schaltfolgen
programmieren. Wiederholen Sie dazu jeweils den zuvor
beschriebenen Programmiervorgang. Im LC-Display 1
erscheint bei jedem weiteren Speichervorgang fortlaufend
PROG 2 ON „- - : - -” usw.
Schaltzeiten ändern oder prüfen
Drücken Sie zum Ändern oder Prüfen der Schaltzeiten
die Eingabe-Taste (SET) 8 und die einprogrammierten
Schaltzeiten erscheinen nacheinander im Display.
DE/AT/CH DE/AT/CH DE/AT/CH DE/AT/CH
Hinweis: Das „CTD“-Icon erscheint nach dem 20.
Speicherplatz.
Drücken Sie so häufig die Stunden-Taste (HOUR) 9,
bis die gewünschte Stunde im LC-Display 1 erscheint.
Drücken Sie so häufig die Minuten-Taste (MIN) 2, bis
die gewünschte Minute im LC-Display 1 erscheint.
Hinweis: Der Countdown kann von 1 Minute bis
23 Stunden, 59 Minuten, eingestellt werden.
Drücken Sie die Taste Anzeigemodus (TIME) 7.
Das Gerät kehrt in den normalen Betriebsmodus zurück.
Drücken Sie gleichzeitig die Stunden- (HOUR) 9 und
die Minuten-Taste (MIN) 2, um die Countdown-Funktion
zu starten.
Countdown manuell beenden
Drücken Sie während des Countdowns die EIN- / AUTO- /
AUS-Taste (MANUAL) 3, um diesen anzuhalten.
Drücken Sie die EIN- / AUTO- / AUS-Taste (MANUAL) 3
erneut, um den Countdown fortzusetzen.
Gehen Sie zum Ändern der Tage, Stunden oder Minuten
vor, wie im Kapitel „Zeitschaltuhr programmieren“
beschrieben.
Schaltzeiten aktivieren /
deaktivieren
Drücken Sie die Eingabe-Taste (SET) 8 so oft, bis die
gewünschte Schaltzeit gewählt ist.
Drücken Sie anschließend die Rückruf-Taste (RECALL) 5,
um die programmierte Schaltzeit aufzuheben. Die Schaltdaten werden nicht aus dem Speicher gelöscht, sondern
lediglich deaktiviert. Im Display erscheint das Symbol
“- - : - -”.
Drücken Sie erneut die Rückruf-Taste (RECALL) 5, um
die aufgehobene Schaltzeit zu aktivieren.
Schaltzeiten manuell überspringen
Unabhängig von der Programmierung können Sie jeder-
zeit eine nachfolgende Schaltzeit manuell überspringen.
Drücken Sie die Taste Anzeigemodus (TIME) 7, um
von der Countdown-Anzeige zur aktuellen Uhrzeit zu
wechseln.
Drücken Sie Taste Anzeigemodus (TIME) 7 erneut, um
von der aktuellen Uhrzeit zur Countdown-Anzeige zu
wechseln.
Drücken Sie gleichzeitig die Stunden- (HOUR) 9 und
die Minuten-Taste (MIN) 2, um den Countdown abzubrechen.
Reinigung und Pflege
Verwenden Sie in keinem Fall Flüssigkeiten und keine
Reinigungsmittel, da diese das Gerät beschädigen.
Reinigen Sie das Gerät nur äußerlich mit einem weichen
trockenen Tuch.
Drücken Sie dazu die EIN-/AUTO-/AUS-Taste (MANUAL)
so häufig, bis der gewünschte Befehl im LC-Display 1
3
erscheint:
OFF: Alle Schaltzeiten sind aufgehoben, die Zeitschaltuhr
leitet keinen Strom an angeschlossene Geräte weiter.
AUTO OFF: Schaltzeiten aktiv, die Zeitschaltuhr ist
ausgeschaltet.
ON: Alle Schaltzeiten sind aufgehoben, das die Zeitschaltuhr leitet dauerhaft Strom an das angeschlossene
Gerät weiter.
AUTO ON: Schaltzeiten aktiv, die Zeitschaltuhr ist
eingeschaltet.
Zufallsmodus einstellen
Hinweis: Diese Funktion schaltet die Zeitschaltuhr willkürlich
ein und aus und soll Hauseinbrüchen vorbeugen, indem durch
die Unregelmäßigkeit der Schaltzeiten (z. B. bei Lampen)
ein bewohntes Haus vorgetäuscht wird. Die von Ihnen
vorprogrammierten Schaltbefehle verschieben sich täglich
Entsorgung
Die Verpackung besteht aus umweltfreundlichen
Materialien, die Sie über die örtlichen Recyclingstellen entsorgen können.
Möglichkeiten zur Entsorgung des ausgedienten Produkts
erfahren Sie bei Ihrer Gemeinde- oder Stadtverwaltung.
Werfen Sie Ihr Gerät, wenn es ausgedient hat,
im Interesse des Umweltschutzes nicht in den
Hausmüll, sondern führen Sie es einer fachgerechten Entsorgung zu. Über Sammelstellen und
deren Öffnungszeiten können Sie sich bei Ihrer
zuständigen Verwaltung informieren.
zufällig um bis zu 30 Minuten. Diese Funktion ist jedoch nur
möglich, wenn ein oder mehrere Schaltbefehle eingestellt
worden sind.
Drücken Sie die Stunden-Taste (HOUR) 9 für 3 Sekunden.
Die Zeitschaltuhr wechselt in den Zufallsmodus. Auf dem
LC-Display 1 erscheint das Symbol „RND“, der Zufallsmodus ist eingeschaltet.
Drücken Sie die Stunden-Taste (HOUR) 9 erneut für 3
Sekunden, um den Zufallsmodus zu beenden.
Countdown einstellen
Hinweis: Mittels des Countdowns können Sie die Zeitspanne
bis zum Ausschalten der Stromversorgung regulieren.
Drücken Sie die Eingabe-Taste (SET) 8, um in das
Timer-Menü zu gelangen.
Halten Sie so lange die Eingabe-Taste (SET) 8 gedrückt,
bis im LC-Display 1 das „CTD“-Icon erscheint.
Produktbezeichnung:
Digitale Wochenzeitschaltuhr
Art.-Nr.: 97318-2
Modell-Nr.: EIM-804 FR
DE/AT/CH DE/AT/CH DE/AT/CH DE/AT/CH
66142_Zeitschaltuhr_digital_innen_LB2.indd 3 20.07.11 18:09
Page 25

© by ORFGEN Marketing
IAN 66142
Inter-Union Technohandel GmbH
Klaus-von-Klitzing-Str. 2
D-76829 Landau / Pfalz
66142_Zeitschaltuhr_digital_innen_LB2.indd 4 20.07.11 18:09
Page 26
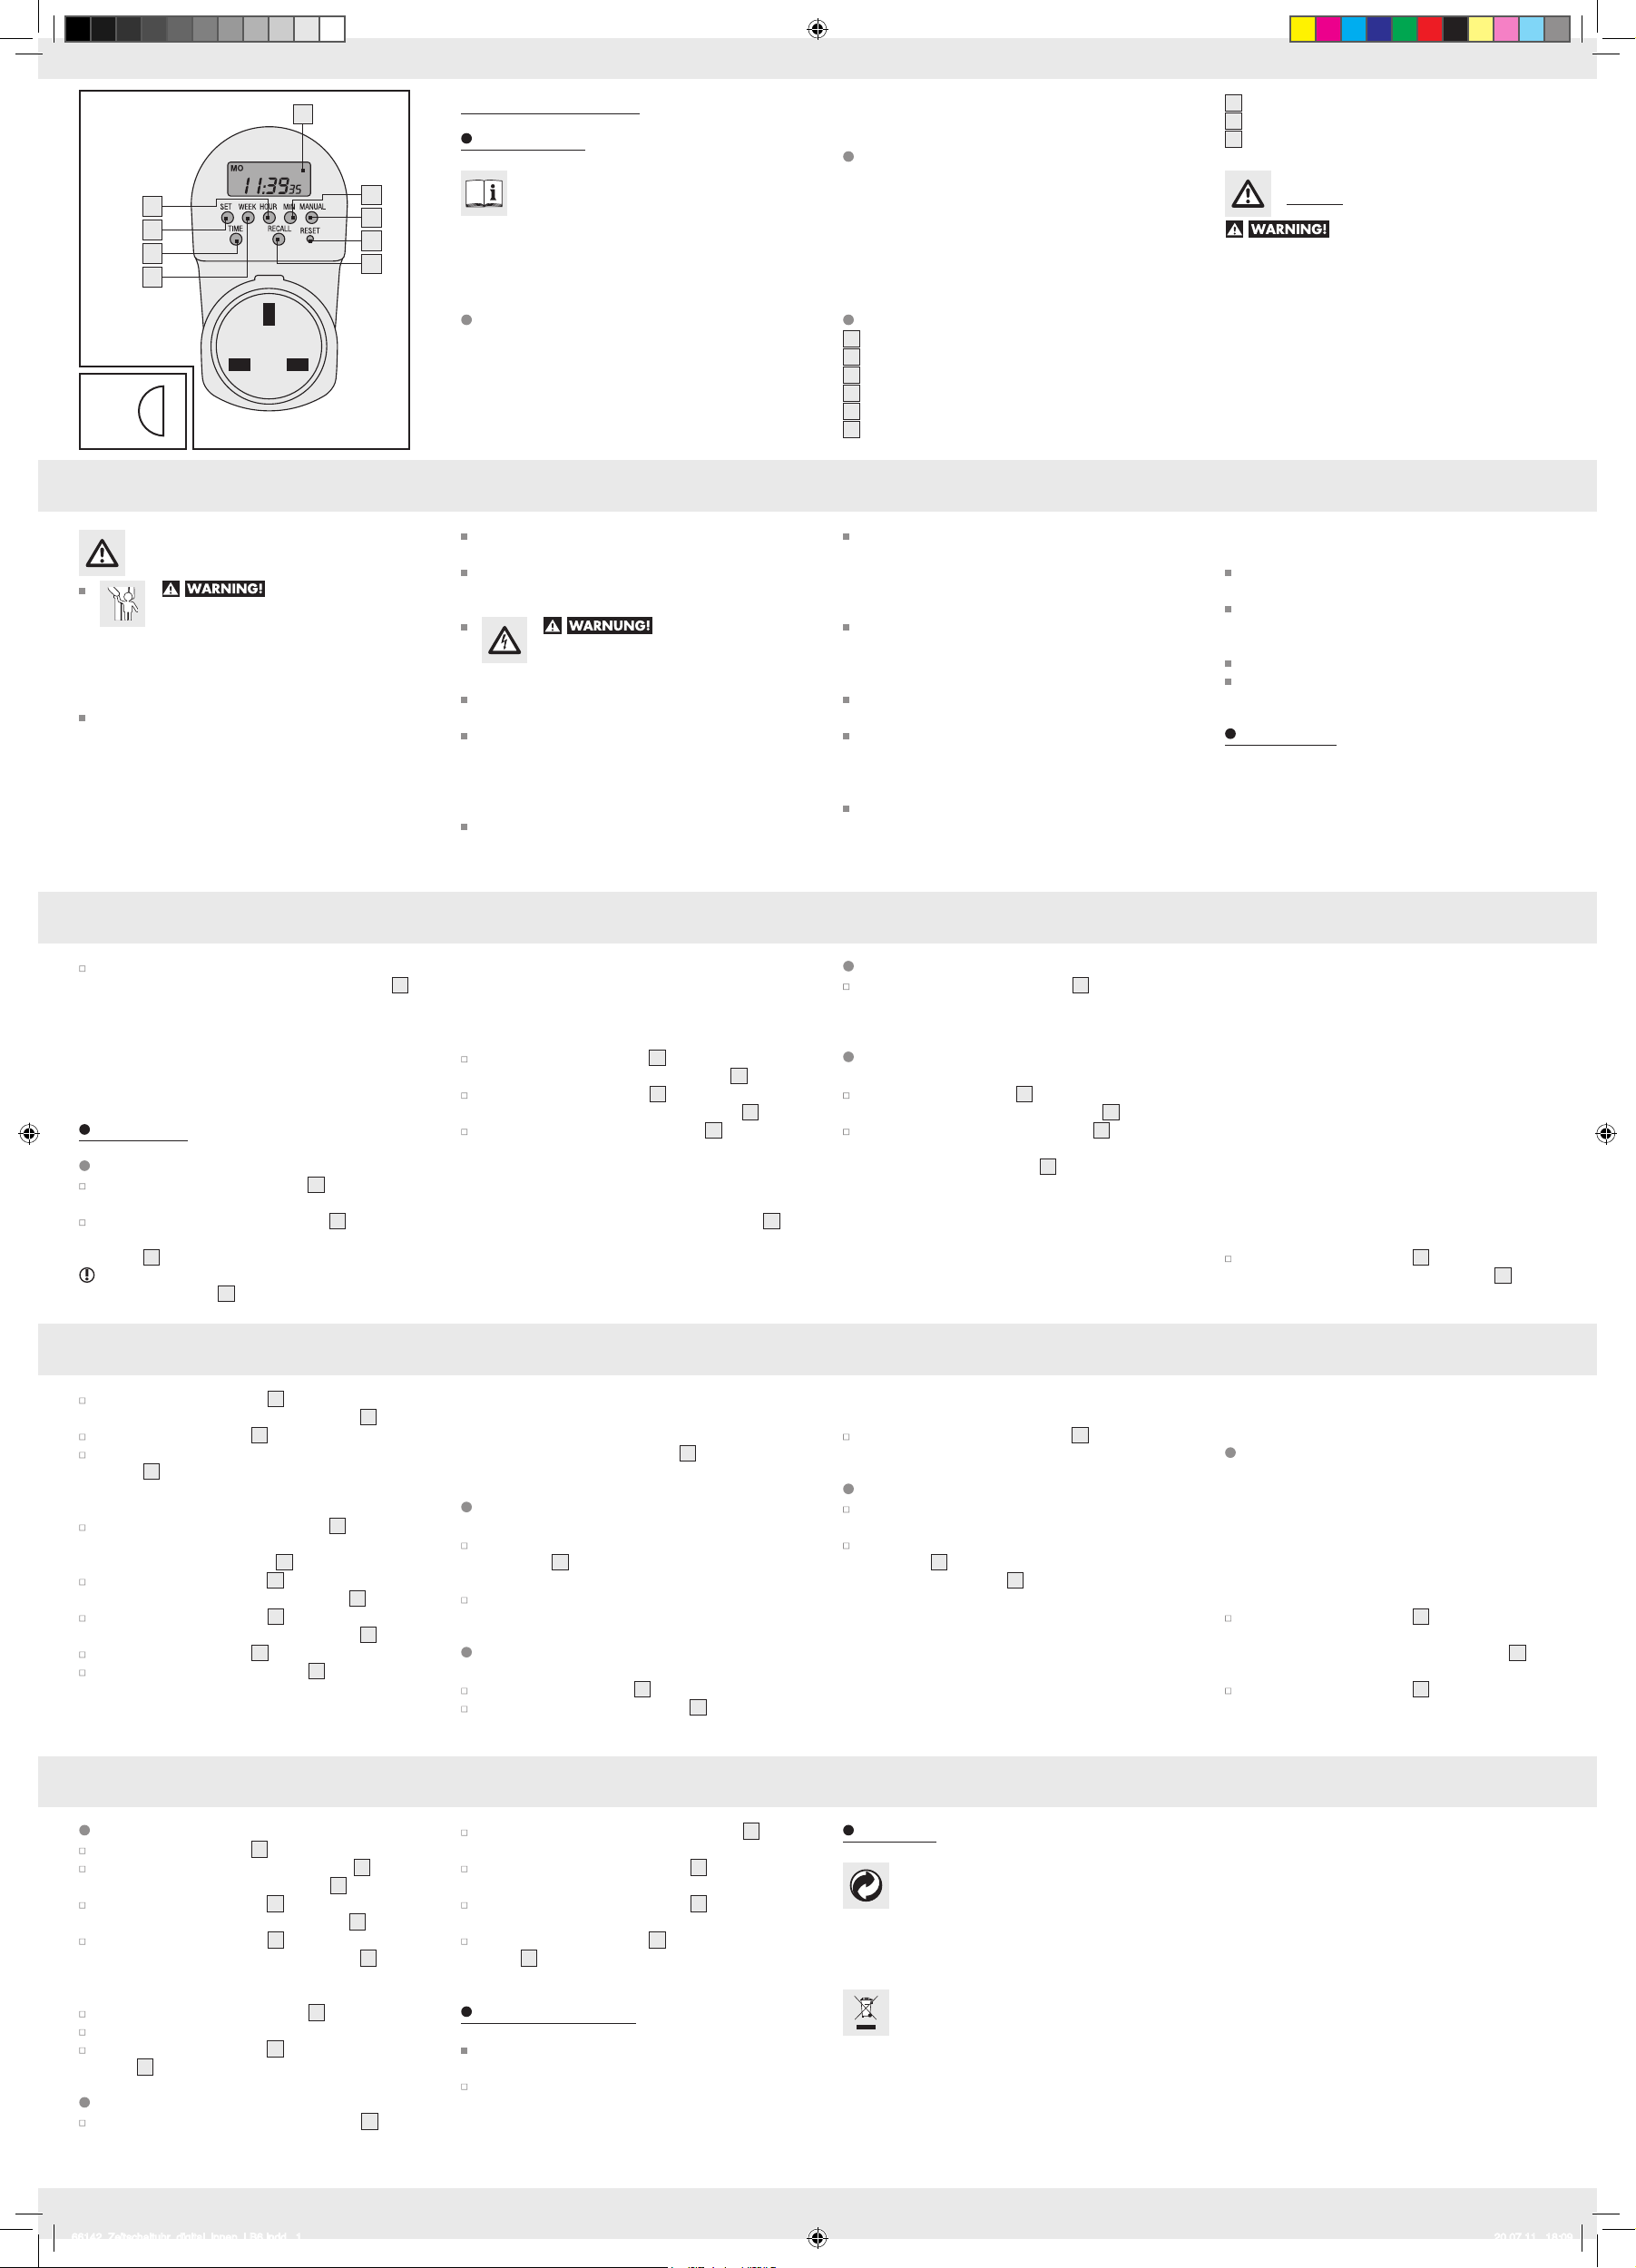
6
1
Digital Weekly Timer
arising from improper use. This device is not intended for
commercial use.
Introduction
Display mode button (TIME)
7
Input button (SET)
8
Hour button (HOUR)
9
Technical data
Before using the device for the first time, please
9
8
7
6
2
3
4
5
below and the safety advice. Use the device only as described
and for the indicated purposes. Keep these instructions in a
safe place. If you pass the device on to anyone else, please
ensure that you also pass on all the documentation.
make yourself familiar with the way it works.
Please refer in addition to the operating instructions
Proper use
This product is intended for the automatic switching on and
off of electrical devices. The device is intended for indoor
use only. Any modification to the device shall be considered
as improper use and can lead to considerable risk of accident.
The manufacturer will not accept liability for loss or damage
GB/IE GB/IE GB/IE
Designed electrical supply: 240 V ∼, 50 Hz
Designed current: AC 10 A
Maximum load: 2300 watts
Outlet switch: Relay
Timer accuracy: + / – 1 second / day at
20 °C
Shortest programmable time: 1 minute
Description of parts
LC display
1
Minute button (MIN)
2
ON / AUTO / OFF button (MANUAL)
3
Reset button
4
Recall button (RECALL)
5
Day of the week button (WEEK)
6
Safety
Read all the safety advice and instructions.
Failure to observe the safety advice and instructions may
result in fire and / or serious injury.
KEEP ALL THE SAFETY ADVICE AND INSTRUCTIONS IN
A SAFE PLACE FOR FUTURE REFERENCE!
General safety advice
DANGER OF LOSS
OF LIFE OR ACCIDENT TO INFANTS
AND CHILDREN! The product is not a toy.
Never leave children unsupervised with the packaging
material or the device. The packaging material presents
a suffocation hazard and there is a risk of loss of life
from electric shock.
This device is not intended to be used by persons (in-
cluding children) with restricted physical, sensory or
mental abilities or with insufficient experience and / or
knowledge, unless they are supervised by a person who
is responsible for their safety or they have received instruction on how to use the device from such a responsible
person. Children should be supervised in order to ensure
that they do not play with the device.
GB/IE GB/IE GB/IE GB/IE
Plug the device into a properly installed 220–250 V, 50 Hz
mains outlet socket. All the indicators in the LC display 1
appear briefly. Then the time indicator appears.
Note: In the event of a power cut, the in-built rechargeable battery ensures that the time is kept going and the
automatic switching program remains activated. The
device is fully programmable without a power supply,
as long as the rechargeable battery is fully charged.
Operation
Setting the day of the week and time
Keep the display mode button (TIME) 7 pressed during
the following programming procedures.
Press the day of the week button (WEEK) 6 repeatedly
until the desired day of the week appears in the LC
display 1.
Tip: By pressing and keeping pressed the day of the
week button (WEEK) 6 for approx. 3 seconds you can
Use the device only with a properly installed mains
outlet socket.
CAUTION! Do not have one digital time switch in-
serted behind another. There is the danger of mechanical
damage if one adapter plug is inserted behind another.
RISK TO LIFE FROM
ELECTRIC SHOCK! Keep the device away
from moisture and do not touch it with moist
hands.
Do not allow the device to be subjected to extreme heat
or cold.
Do not allow the device to be subjected to extreme
temperature fluctuations. Failure to observe this advice
could lead to condensation forming. Wait until the device
has reached the temperature of the room before you
use it.
Do not cover the device with newspapers, articles of
clothing or the like. Otherwise the device may heat up,
which is not permitted.
accelerate the setting process and reach the desired
value more quickly. This quicker method can also be
used for making the following settings.
Note: MO = Monday, TU = Tuesday, WE = Wednesday,
TH = Thursday, FR = Friday, SA = Saturday, SU = Sunday
Press the hour button (HOUR) 9 repeatedly until the
desired hour value appears in the LC display 1.
Press the minute button (MIN) 2 repeatedly until the
desired minute value appears in the LC display 1.
Release the display mode (TIME) button 7.
Note: If approx. 10 seconds pass without any settings
being made, then the device returns to the normal time
display.
Note: The time switch is now in operation. This is indicated by the flashing of the colon in the LC display 1.
Always check the device for damage before plugging it
into a mains outlet socket. Do not use the device if you
discover it is damaged in any way. In the event of damage, repairs or other problems with the device, please
contact a specialist repair shop.
Do not plug in any devices that hang from and exert
their self-weight on the plug. This will prevent any nonpermitted heating up of and mechanical damage to the
mains outlet socket.
Do not use the device with power outlet strips or extension
cables.
Please note that damage arising from improper handling,
non-observance of the operating instructions or interference with the inside of the device by unauthorised persons
is excluded from the warranty.
The device is not suitable for switching inductive loads in
excess of 10 A (amperes). For this reason never operate
electric motors or fluorescent lights fitted with conventional ballasts with this time switch. Ask an electrician or
Activating summer / winter time
Press the display mode button (TIME) 7 until the
additional “+1h” appears in or disappears from the
time indicator.
Programming the time switch
Switching-on time:
Press the input button (SET) 8 once. The PROG 1 ON
“- - : - -” indicator appears in the LC display 1.
Press the day of the week button (WEEK) 6 repeatedly
until the desired day of the week or block of days of the
week appears in the LC display 1. The following days
of the week or blocks of days of the week are possible:
•MOTUWETHFR
Monday – Friday
•SASU
Saturday + Sunday
•MOTUWETHFRSA
Monday – Saturday
other suitable expert if you are in any doubt about the
inductive load of your device.
Do not open the device. Never attempt to replace or
repair parts yourself.
Before cleaning the device, always disconnect it from
the mains outlet socket and pull all mains plugs out of
the device.
Please ensure that the device is always easily accessed.
In the event of malfunctions, pull the device out of the
mains outlet socket.
Before use
The time switch has an integral rechargeable battery. This
serves to retain stored data, e.g. time, date and switching
procedures. The rechargeable battery must be charged for
24 hours before first use. You can make settings on the
device during the charging process.
•MOWEFR
Monday + Wednesday + Friday
•TUTHSA
Tuesday + Thursday + Saturday
•MOTUWE
Monday – Wednesday
•THFRSA
Thursday – Saturday
•MOTUWETHFRSASO
Monday – Sunday
Note: As soon as a particular day or combination of days
has been stored, the device executes the programmed
switching sequence at the same time on each of these days
of the week.
Press the hour button (HOUR) 9 repeatedly until the
desired hour value appears in the LC display 1.
GB/IE GB/IE GB/IE GB/IE
Press the minute button (MIN) 2 repeatedly until the
desired minute value appears in the LC display 1.
Press the input button (SET) 8 again to store the setting.
The PROG 1 OFF “- - : - -” indicator appears in the LC
display 1.
Switch-off time:
Press the day of the week button (WEEK) 6 repeatedly
until the desired day of the week or block of days of the
week appears in the LC display 1.
Press the hour button (HOUR) 9 repeatedly until the
desired hour value appears in the LC display 1.
Press the minute button (MIN) 2 repeatedly until the
desired minute value appears in the LC display 1.
Press the input button (SET) 8 again to store the setting.
Press the display mode button (TIME) 7 to return to the
current time.
GB/IE GB/IE GB/IE GB/IE
Setting the countdown
Press the input button (SET) 8 to access the timer menu.
Press and keep pressed the input button (SET) 8 until
the “CTD” icon appears in the LC display 1.
Press the hour button (HOUR) 9 repeatedly until the
desired hour value appears in the LC display 1.
Press the minute button (MIN) 2 repeatedly until the
desired minute value appears in the LC display 1.
Note: The countdown can be set from 1 minute to
11 hours, 59 minutes.
Press the display mode (TIME) button 7.
The device returns to its normal operating mode.
Press the hour button (HOUR) 9 and the minute button
(MIN) 2 at the same time to start the countdown function.
Manually ending the countdown
Press the ON / AUTO / OFF button (MANUAL) 3 to
halt the countdown while it is running.
Note: You can program up to 20 different switching
sequences. To do this, repeat the above-described programming procedure in each case. The PROG 2 ON “- - : - -”
indicator etc. appears in the LC display 1 when each
further setting is stored.
Changing or checking
switching times
To change or check the switching times, press the input
button (SET) 8 and the programmed switching times
appear one after the other in the display.
To change the days, hours or minutes, proceed as
described in the section “Programming the time switch”.
Activating / deactivating
switching times
Press the input button (SET) 8.
Then press the recall button (RECALL) 5 to cancel the
programmed switching time. The switching data are not
Press the ON / AUTO / OFF button (MANUAL) 3
again to continue the countdown.
Press the display mode button (TIME) 7 to change
from the countdown display to the current time.
Press the display mode button (TIME) 7 to change
from the current time to the countdown display.
Press the hour button (HOUR) 9 and the minute button
(MIN) 2 at the same time to cancel the countdown
function.
Cleaning and care
Never use liquids or cleaning agents, as they may
damage the device.
Clean the outside of the device only with a soft, dry
cloth.
erased from the memory, merely deactivated. The symbol
“- - : - -” appears in the display.
Then press the recall button (RECALL) 5 again to
reactivate the cancelled switching time.
Manually skipping switching times
At any time, and independently of programmed times,
you can skip manually to the next switching time.
To do this, press the ON / AUTO / OFF button
(MANUAL) 3 repeatedly until the desired command
appears in the LC display 1:
OFF: All switching times are cancelled, the time switch
allows no current to pass to the connected devices.
AUTO OFF: Switching times are active, the time switch
is switched off.
ON: All switching times are cancelled, the time switch
allows current to pass continuously to the connected
devices.
Disposal
The packaging is wholly composed of environmentally friendly materials that can be disposed
of at a local recycling centre.
Contact your local refuse disposal authority for more details
of how to dispose of your discarded product.
In the interest of the environment, do not throw
out your discarded device with your household
refuse. Take it to a suitable centre where it can
be disposed of properly. Your local council will
be able to tell you where the collection centres
are located and their opening times.
AUTO ON: Switching times are active, the time switch
is switched on.
Setting the random mode
Note: This function switches the time switch arbitrarily on
and off and is intended to prevent burglaries by simulating
an occupied house with e.g. lights switching on and off at
irregular intervals. Your preprogrammed switching commands
are moved by a random amount up to 30 minutes on each
day. This function is only possible if one or more switching
commands have been set.
Press the hour button (HOUR) 9 for at least 3 seconds.
The time switch changes into random mode. The random
mode symbol “RND” appears in the LC display 1 to
show that the random mode is switched on.
Press the hour button (HOUR) 9 again for 3 seconds
to cancel the random mode.
Product description:
Digital Weekly Timer
Art. No.: 97318-6
Model No.: EIM-804 UK
GB/IE GB/IE GB/IE GB/IE
66142_Zeitschaltuhr_digital_innen_LB6.indd 1 20.07.11 18:09
Page 27

© by ORFGEN Marketing
IAN 66142
Inter-Union Technohandel GmbH
Klaus-von-Klitzing-Str. 2
D-76829 Landau / Pfalz
66142_Zeitschaltuhr_digital_innen_LB6.indd 2 20.07.11 18:09
Page 28
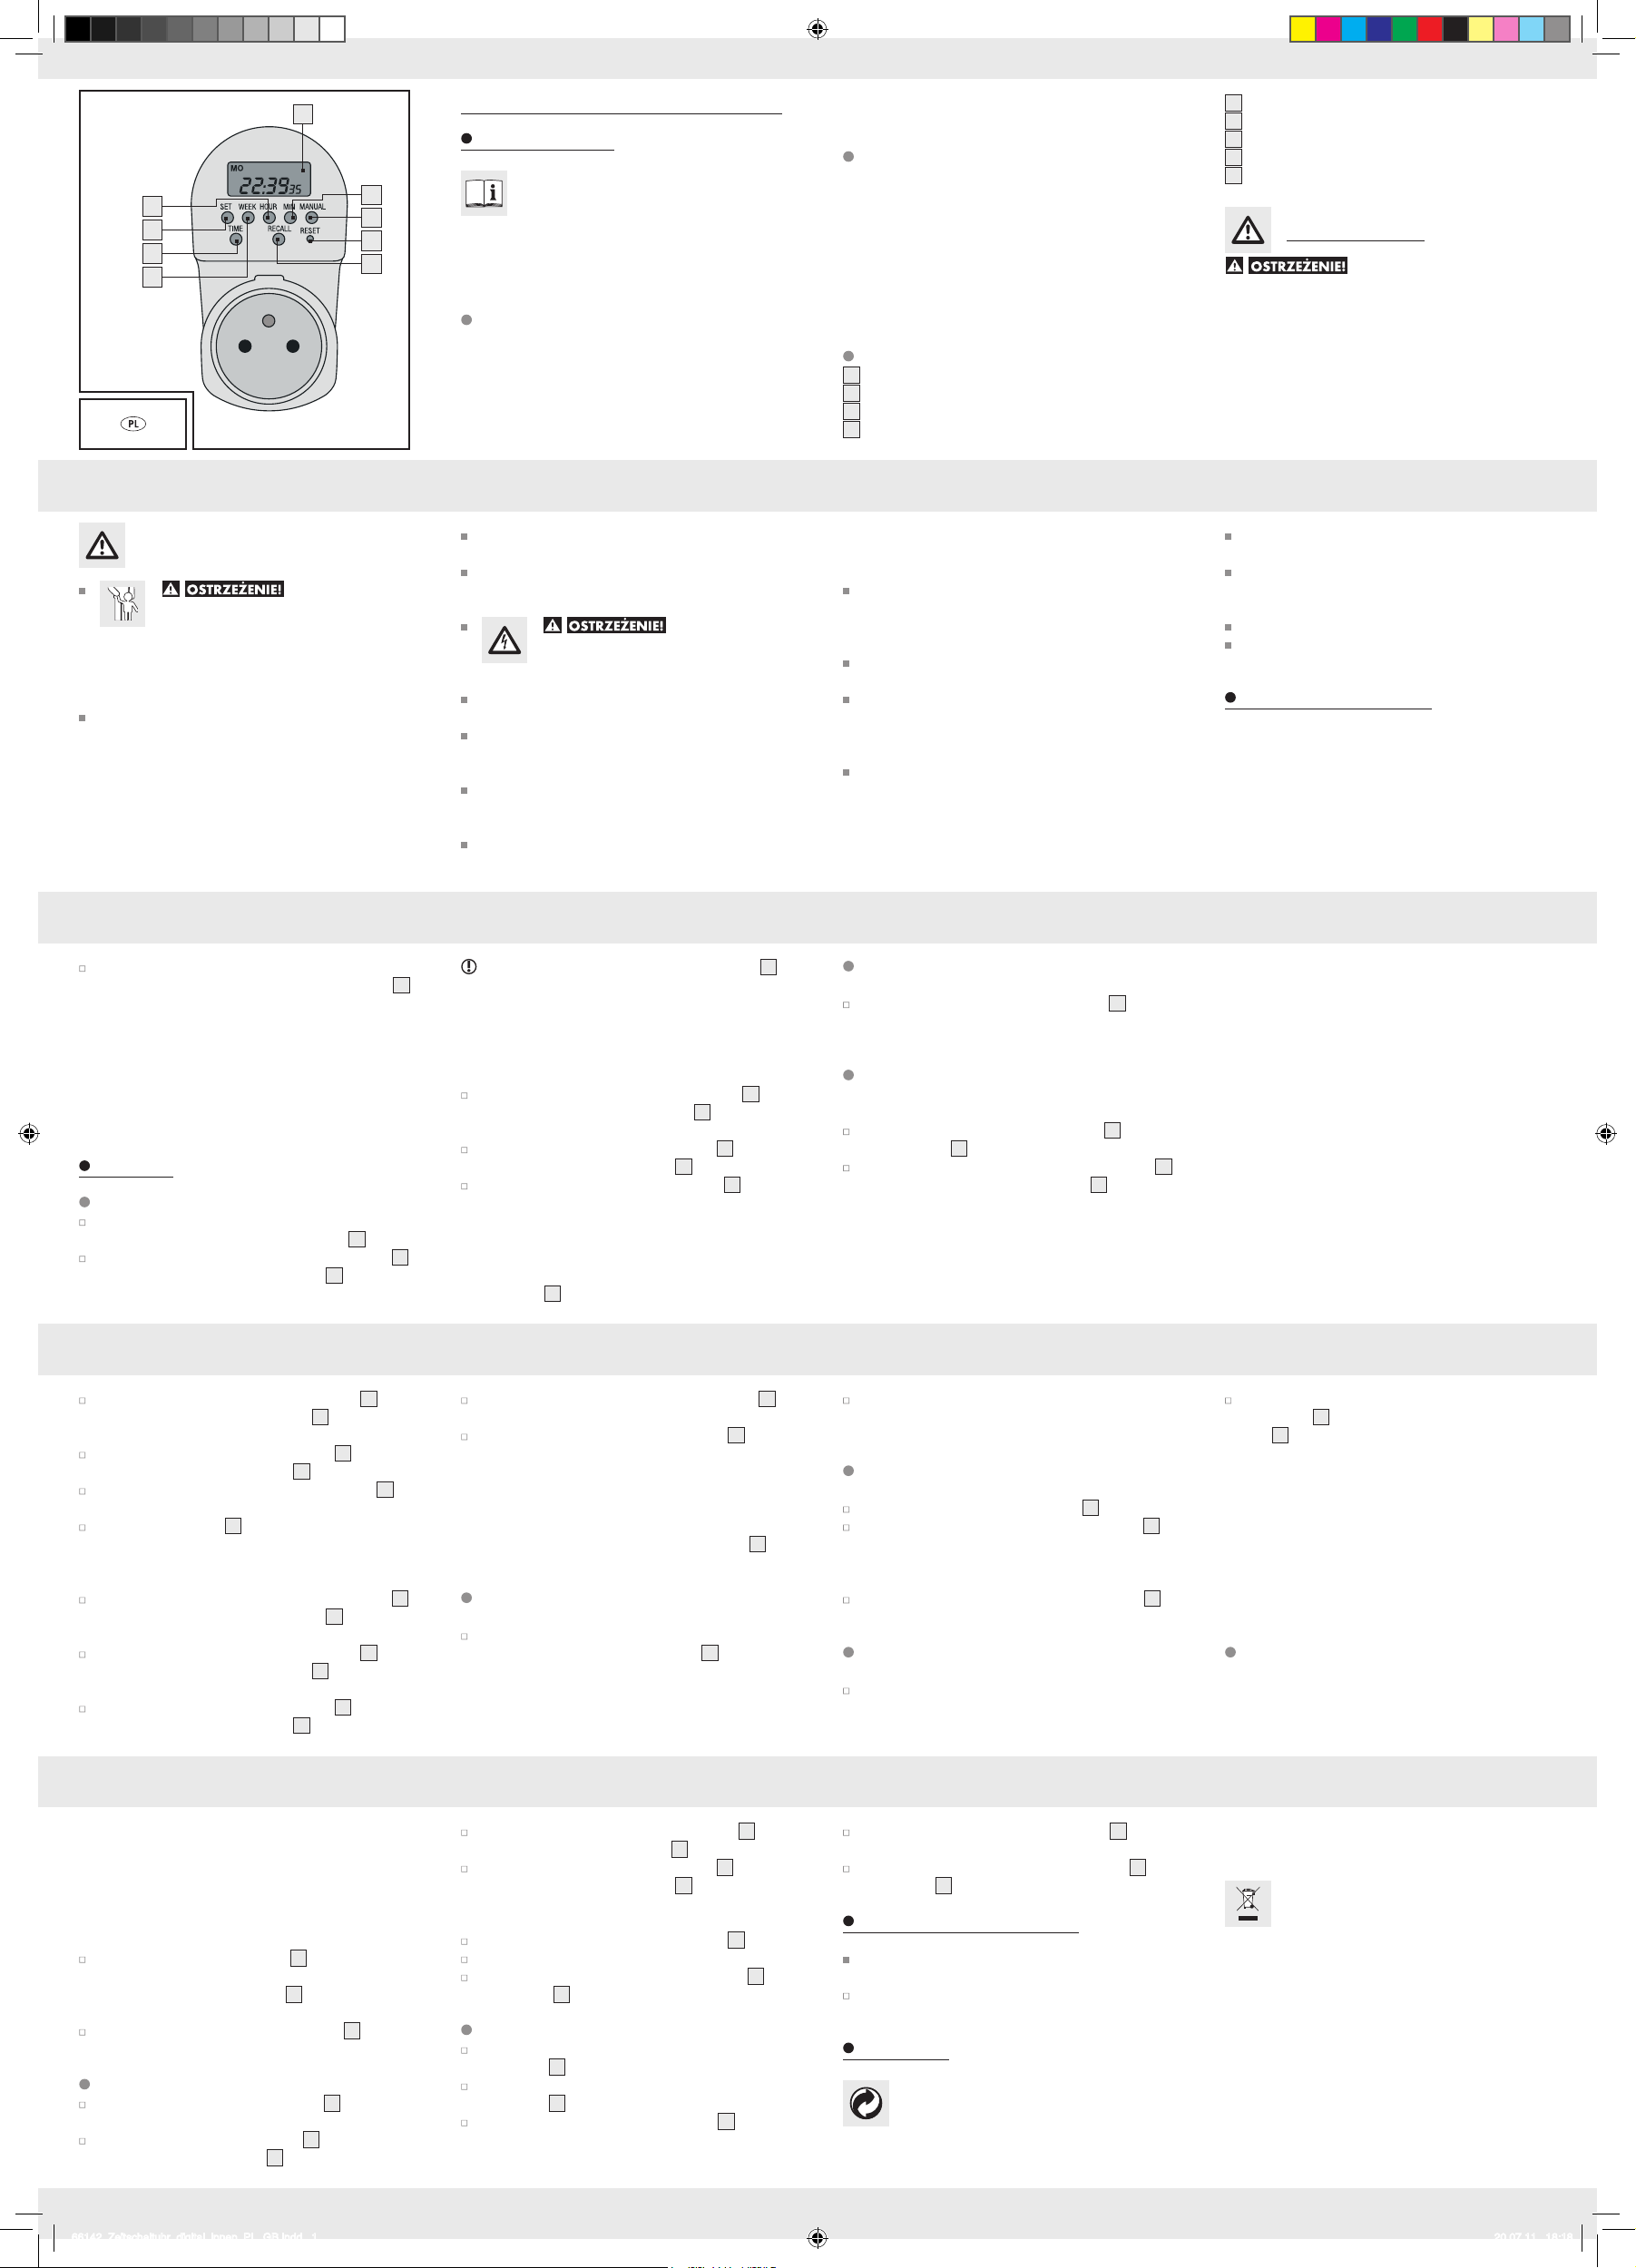
1
Cyfrowy tygodniowy zegar sterujący
wynikające z użycia niezgodnego z przeznaczeniem. Urządzenie nie jest przeznaczone do zastosowań zarobkowych.
Wprowadzenie
Parametry techniczne
Przed pierwszym uruchomieniem należy zazna-
9
8
7
6
2
3
4
5
bezpieczeństwa. Używać urządzenia wyłącznie w sposób
opisany w instrukcji i do wymienionych zastosowań. Instrukcję
należy starannie przechować. Przekazując urządzenie innej
osobie, należy również przekazać wszystkie dokumenty.
jomić się z urządzeniem. W tym celu zapoznać
się z niniejszą instrukcją obsługi i zasadami
Użycie zgodne z przeznaczeniem
To urządzenie jest przeznaczone do automatycznego
włączania i wyłączania urządzeń elektrycznych. Urządzenie
może być używane tylko w zamkniętych pomieszczeniach.
Wprowadzanie jakichkolwiek zmian w urządzeniu jest
niezgodne z przeznaczeniem i zwiększa ryzyko wypadku.
Producent nie ponosi odpowiedzialności za szkody
PL PL PL
Napięcie znamionowe: 240 V ∼, 50 Hz
Prąd znamionowy: AC 10 A
Maksymalne obciążenie: 2300 W
Wyłącznik wyjściowy: Przekaźnik
Dokładność
programat ora: + / – 1 s / dzień pr zy temperatu-
rze 20 °C
Najkrótszy
programowany czas: 1 minuta
Opis części
Wyświetlacz LCD
1
Przycisk minut (MIN)
2
Przycisk WŁ. / AUTO / WYŁ. (MANUAL)
3
Przycisk resetowania
4
Przycisk anulowania (RECALL)
5
Przycisk dnia tygodnia (WEEK)
6
Przycisk trybu wyświetlania (TIME)
7
Przycisk wprowadzania (SET)
8
Przycisk godzin (HOUR)
9
Bezpieczeństwo
Zapoznać się ze wskazówkami
bezpieczeństwa i instrukcją. Nieprzestrzeganie wskazówek
bezpieczeństwa i instrukcji może spowodować pożar i / lub
ciężkie obrażenia.
PRZECHOWAĆ WSZYSTKIE ZASADY BEZPIECZEŃSTWA
I INSTRUKCJE; ABY MOŻNA BYŁO Z NICH SKORZYSTAĆ
W PRZYSZŁOŚCI!
Ogólne zasady
bezpieczeństwa
ZAGROŻENIE
ŻYCIA I NIEBEZPIECZEŃSTWO OBRAŻEŃ DLA DZIECI! Produkt nie jest zabawką!
Nie pozostawiać dzieci z materiałami opakowaniowymi
i urządzeniem bez nadzoru. Niebezpieczeństwo
uduszenia materiałami opakowaniowymi i zagrożenie
życia przez porażenie elektryczne.
To urządzenie nie może być używane przez osoby (w
tym dzieci) o ograniczonych możliwościach fizycznych,
motorycznych lub umysłowych lub nie posiadające niezbędnego doświadczenia i / lub wiedzy. Użytkowanie
urządzenia przez takie osoby jest możliwe wyłącznie
pod nadzorem opiekuna lub po otrzymaniu wskazówek
dotyczących używania urządzenia. Nie pozwalaj
dzieciom bawić się urządzeniem.
Włożyć urządzenie w prawidłowo zainstalowane gniazdo
sieciowe 220–250 V / 50 Hz. Na wyświetlaczu LCD 1
na moment ukażą się wszystkie wskazania. Następnie
zostanie wyświetlona godzina.
Uwaga: W razie przerwy w zasilaniu wbudowany
akumulator umożliwia dalsze wskazywanie czasu i
kontynuację automatycznego programu włączania /
wyłączania. Jeżeli akumulator jest całkowicie naładowany, urządzenie można programować bez zasilania
prądowego.
Obsługa
Ustawianie dnia tygodnia i godziny
Podczas następującej procedury programowania trzymać
wciśnięty przycisk trybu wyświetlania (TIME) 7.
Wciskać kilkakrotnie przycisk dnia tygodnia (WEEK) 6
aż do ukazania się na wyświetlaczu LCD 1 wybranego
dnia tygodnia.
Podłączać urządzenie wyłącznie do fachowo zamonto-
wanego gniazda sieciowego.
OSTROŻNIE! Nie podłączać cyfrowego programatora
zegarowego w sposób szeregowy. Połączone ze sobą
przejściówki mogą ulec mechanicznym uszkodzeniom.
ZAGROŻENIE DLA
ŻYCIA PRZEZ PORAŻENIE ELEKTRYCZNE! Trzymać urządzenie z daleka
od wilgoci i nie chwytać wilgotnymi rękami.
Nie narażać urządzenia na działanie skrajnie wysokich
lub niskich temperatur.
Nie narażać urządzenia na skrajne wahania temperatury.
Grozi powstawaniem skroplin. Przed uruchomieniem zaczekać, aż urządzenie osiągnie temperaturę pokojową.
Nie przykrywać urządzenia gazetami, odzieżą lub
podobnymi przedmiotami, aby uniknąć szkodliwego
rozgrzewania.
Przed każdym podłączeniem do sieci sprawdzić, czy
urządzenie nie jest uszkodzone. Nie używać urządzenia
PL PL PL PL
Porada: Przytrzymać przycisk tygodnia (WEEK) 6
wciśnięty przez ok. 3 sekundy. W ten sposób przestawianie wartości zostanie przyspieszone. Funkcji szybkiego ustawiania można używać również podczas
wprowadzania następujących ustawień.
Uwaga: MO = poniedziałek, TU = wtorek, WE = środa,
TH = czwartek, FR = piątek, SA = sobota, SU = niedziela.
Wciskać kilkakrotnie przycisk godziny (HOUR) 9 aż
do ukazania się na wyświetlaczu LCD 1 wybranej
godziny.
Wciskać kilkakrotnie przycisk minut (MIN) 2 aż do
ukazania się na wyświetlaczu LCD 1 wybranej minuty.
Zwolnić przycisk trybu wyświetlania (TIME) 7.
Uwaga: Jeżeli przez ok. 10 sekund nie zostaną wprowadzone żadne ustawienia, urządzenie przełączy się
do standardowego wskazywania godziny.
Uwaga: Programator zegarowy jest włączony.
Informuje o tym migająca podwójna kropka na wyświetlaczu LCD 1.
w razie stwierdzenia jakichkolwiek uszkodzeń. W razie
stwierdzenia uszkodzeń, konieczności wykonania naprawy
lub innych problemów zwrócić się do specjalisty.
Nie podłączać urządzeń, których ciężar własny obciąża
wtyczkę. W ten sposób można uniknąć szkodliwego
rozgrzewania oraz uszkodzeń mechanicznych gniazda
sieciowego.
Nie używać urządzenia z listwami wtykowymi ani
kablami przedłużającymi.
Należy pamiętać o tym, że uszkodzenia wynikające z
nienależytego obchodzenia się, nieprzestrzegania
instrukcji obsługi lub ingerencji ze strony nieupoważnionych osób nie są objęte gwarancją.
Urządzenie nie nadaje się do przełączania indukcyjnych
obciążeń większych niż 10 A (ampery). Z tego powodu
do programatora nie należy podłączać silników elektrycznych ani świetlówek ze statecznikami. Konwencjonalnymi
w razie wątpliwości dotyczących indukcyjnego obciążenia
urządzenia zwrócić się do specjalisty.
Włączanie czasu
letniego / zimowego
Wciskać przycisk trybu wyświetlania (TIME) 7 do mo-
mentu, aż ukaże się lub zniknie dodatkowe oznaczenie
„+1h”.
Programowanie programatora
zegarowego
Czas włączenia:
Wcisnąć raz przycisk wprowadzania (SET) 8. Na wy-
świetlaczu LCD 1 ukaże się tekst PROG 1 ON „- - : - -”.
Wciskać kilkakrotnie przycisk dnia tygodnia (WEEK) 6
aż do ukazania się na wyświetlaczu LCD 1 wybranego
dnia tygodnia lub bloku dni. Można ustawiać następujące tygodnie i bloki dni:
•MOTUWETHFR
Poniedziałek – piątek
•SASU
Sobota + niedziela
Nie otwierać samodzielnie urządzenia, nie próbować
go naprawiać i nie wymieniać części.
Przed czyszczeniem odłączyć urządzenie od gniazda
sieciowego i wyciągnąć z niego wszystkie wtyczki
sieciowe.
Zapewnić stały i swobodny dostęp do urządzenia.
W razie zakłóceń natychmiast wyciągnąć urządzenie z
gniazda sieciowego.
Przed uruchomieniem
Programator zegarowy jest wyposażony we wbudowany
akumulator. Akumulator służy do przechowywania zapisanych
danych, takich jak godzina, data i operacje łączeniowe.
Przed pierwszym użyciem akumulator należy ładować przez
24 godziny. Podczas ładowania w urządzeniu można
wprowadzać ustawienia.
•MOTUWETHFRSA
Poniedziałek – sobota
•MOWEFR
Poniedziałek + środa + piątek
•TUTHSA
Wtorek + czwartek + sobota
•MOTUWE
Poniedziałek – środa
•THFRSA
Czwartek – sobota
•MOTUWETHFRSASO
Poniedziałek – niedziela
Uwaga: Po zapisaniu określonego dnia lub kombinacji
dni zaprogramowana kolejność włączania jest wykonywana
każdego dnia w tych samych godzinach.
Wciskać kilkakrotnie przycisk godziny (HOUR) 9 aż
do ukazania się na wyświetlaczu LCD 1 wybranej
godziny.
Wciskać kilkakrotnie przycisk minut (MIN) 2 aż do
ukazania się na wyświetlaczu LCD 1 wybranej minuty.
Wcisnąć ponownie przycisk wprowadzania (SET) 8 w
celu zapisania ustawienia.
Na wyświetlaczu LCD 1 ukaże się tekst PROG 1 OFF
„- - : - -”.
Czas wyłączenia:
Wciskać kilkakrotnie przycisk dnia tygodnia (WEEK) 6
aż do ukazania się na wyświetlaczu LCD 1 wybranego
dnia tygodnia lub bloku dni.
Wciskać kilkakrotnie przycisk godziny (HOUR) 9 aż
do ukazania się na wyświetlaczu LCD 1 wybranej
godziny.
Wciskać kilkakrotnie przycisk minut (MIN) 2 aż do
ukazania się na wyświetlaczu LCD 1 wybranej minuty.
na włączaniu urządzeń, np. lamp, w nieregularnych
odstępach czasu. Polecenia włączania / wyłączania zaprogramowane przez użytkownika są codziennie przesuwane
przypadkowo o czas do 30 minut. Tej funkcji można użyć
tylko wtedy, gdy jest ustawione jedno lub kilka poleceń
włączania.
Wcisnąć przycisk godzin (HOUR) 9 na 3 sekundy.
Programator zegarowy zostanie przełączony do trybu
losowego. Na wyświetlaczu LCD 1 ukaże się symbol
„RND”, tryb losowy jest włączony.
Ponownie wcisnąć przycisk godzin (HOUR) 9 na
3 sekundy, aby zakończyć tryb losowy.
Ustawianie odliczania
Nacisnąć przycisk wprowadzania (SET) 8, aby
przejść do menu programatora.
Trzymać przycisk wprowadzania (SET) 8 wciśnięty do mo-
mentu, aż na wyświetlaczu LCD 1 ukaże się ikona „CTD”.
PL PL PL PL
Wcisnąć ponownie przycisk wprowadzania (SET) 8 w
celu zapisania ustawienia.
Wcisnąć przycisk trybu wyświetlania (TIME) 7, aby
powrócić do aktualnego czasu.
Aby zmienić dni, godziny lub minuty, postępować
zgodnie z instrukcją zawartą w części „Programowanie
programatora zegarowego”.
Włączanie / wyłączanie czasów
Uwaga: Można zaprogramować do 20 różnych cykli
włączania / wyłączania. W tym celu powtórzyć procedurę
programowania opisaną powyżej. Podczas zapisywania
każdego kolejnego programu na wyświetlaczu LCD 1
będzie pojawiać się wskazanie PROG 2 ON „- - : - -” itd.
Zmiana lub sprawdzanie czasów
włączenia
W celu zmiany lub sprawdzenia czasów włączenia
nacisnąć przycisk wprowadzania (SET) 8. Zaprogramowane czasy włączenia ukażą się jeden po drugim
na wyświetlaczu.
PL PL PL PL
Wciskać kilkakrotnie przycisk godziny (HOUR) 9 aż do
ukazania się na wyświetlaczu LCD 1 wybranej godziny.
Wciskać kilkakrotnie przycisk minut (MIN) 2 aż do
ukazania się na wyświetlaczu LCD 1 wybranej minuty.
Uwaga: Czas odliczania może trwać od 1 minuty do
23 godzin, 59 minut.
Wcisnąć przycisk trybu wyświetlania (TIME) 7.
Urządzenie powróci do normalnego trybu pracy.
Wcisnąć jednocześnie przycisk godzin (HOUR) 9 i
minut (MIN) 2 w celu uruchomienia funkcji odliczania.
włączenia
Wcisnąć przycisk wprowadzania (SET) 8.
Następnie wcisnąć przycisk anulowania (RECALL) 5,
aby anulować zaprogramowany czas włączenia. Dane
włączania nie zostaną skasowane z pamięci, tylko
wstrzymane. Na wyświetlaczu ukaże się symbol „- - : - -”.
Wcisnąć ponownie przycisk anulowania (RECALL) 5,
aby aktywować zaprogramowany czas włączenia.
Ręczne pomijanie czasów
włączenia
Niezależnie od programu kolejny czas włączenia
można pominąć ręcznie.
Wcisnąć przycisk trybu wyświetlania (TIME) 7, aby
przejść ze wskazania aktualnego czasu do odliczania.
Wcisnąć jednocześnie przycisk godzin (HOUR) 9 i
minut (MIN) 2, aby przerwać odliczanie.
Czyszczenie i pielęgnacja
Nie używać płynów i środków czyszczących, ponieważ
mogą uszkodzić urządzenie.
Obudowę urządzenia należy czyścić wyłącznie miękką
suchą szmatką.
Ręczne kończenie odliczania
Podczas odliczania wcisnąć przycisk WŁ. / AUTO / WYŁ.
(MANUAL) 3, aby je zatrzymać.
Wcisnąć ponownie przycisk WŁ. / AUTO / WYŁ.
(MANUAL) 3, aby kontynuować odliczanie.
Wcisnąć przycisk trybu wyświetlania (TIME) 7, aby prze-
łączyć się ze wskaźnika odliczania na aktualną godzinę.
Utylizacja
Opakowanie jest wykonane z ekologicznych
materiałów, które można oddać do recyklingu w
odpowiednich lokalnych punktach zbiórki.
W tym celu wciskać przycisk WŁ. / AUTO / WYŁ.
(MANUAL) 3 aż do ukazania się na wyświetlaczu
LCD 1 odpowiedniego polecenia:
OFF: Wszystkie czasy włączenia są wstrzymane,
programator nie doprowadza prądu do podłączonych
do niego urządzeń.
AUTO OFF: Czasy włączenia są aktywne, programator
zegarowy jest wyłączony.
ON: Wszystkie czasy włączenia są wstrzymane,
programator doprowadza nieprzerwanie prąd do podłączonych urządzeń.
AUTO ON: Czasy włączenia są aktywne, programator
zegarowy jest włączony.
Ustawianie trybu losowego
włączania / wyłączania
Uwaga: Włączenie tej funkcji powoduje losowe włączanie
i wyłączanie programatora. Jej celem jest zapobieganie
włamaniom przez symulację obecności w domu, polegającą
Informacji na temat możliwości utylizacji wyeksploatowanego
produktu udziela urząd gminy lub miasta.
W celu ochrony środowiska naturalnego nie
należy wyrzucać wyeksploatowanego produktu
razem z odpadami domowymi, lecz przekazać
go do utylizacji w specjalistycznym zakładzie.
Informacji na temat punktów zbiorczych i godzin
otwarcia udzielają właściwe urzędy.
Nazwa produktu:
Cyfrowy tygodniowy zegar sterujący
Nr art.: 97318-44
Nr modelu: EIM-804 FR
PL PL PL PL
66142_Zeitschaltuhr_digital_innen_PL_GB.indd 1 20.07.11 18:18
Page 29

Digital Weekly Timer
Introduction
Before using the device for the first time, please
make yourself familiar with the way it works.
Please refer in addition to the operating instructions
below and the safety advice. Use the device only as described
and for the indicated purposes. Keep these instructions in a
safe place. If you pass the device on to anyone else, please
ensure that you also pass on all the documentation.
Proper use
This product is intended for the automatic switching on and
off of electrical devices. The device is intended for indoor
use only. Any modification to the device shall be considered
as improper use and can lead to considerable risk of accident.
The manufacturer will not accept liability for loss or damage
arising from improper use. This device is not intended for
commercial use.
Technical data
Designed electrical supply: 240 V ∼, 50 Hz
Designed current: AC 10 A
Maximum load: 2300 watts
Outlet switch: Relay
Timer accuracy: + / – 1 second / day at
20 °C
Shortest programmable time: 1 minute
Description of parts
LC display
1
Minute button (MIN)
2
ON / AUTO / OFF button (MANUAL)
3
Reset button
4
Recall button (RECALL)
5
Day of the week button (WEEK)
6
Display mode button (TIME)
7
Input button (SET)
8
Hour button (HOUR)
9
Safety
Read all the safety advice and instructions.
Failure to observe the safety advice and instructions may
result in fire and / or serious injury.
KEEP ALL THE SAFETY ADVICE AND INSTRUCTIONS IN
A SAFE PLACE FOR FUTURE REFERENCE!
General safety advice
DANGER OF LOSS
OF LIFE OR ACCIDENT TO INFANTS
AND CHILDREN! The product is not a toy.
Never leave children unsupervised with the packaging
material or the device. The packaging material presents
a suffocation hazard and there is a risk of loss of life
from electric shock.
This device is not intended to be used by persons (in-
cluding children) with restricted physical, sensory or
mental abilities or with insufficient experience and / or
knowledge, unless they are supervised by a person who
is responsible for their safety or they have received instruction on how to use the device from such a responsible
person. Children should be supervised in order to ensure
that they do not play with the device.
GB
Use the device only with a properly installed mains
outlet socket.
CAUTION! Do not have one digital time switch in-
serted behind another. There is the danger of mechanical
damage if one adapter plug is inserted behind another.
RISK TO LIFE FROM
ELECTRIC SHOCK! Keep the device away
from moisture and do not touch it with moist
hands.
Do not allow the device to be subjected to extreme heat
or cold.
Do not allow the device to be subjected to extreme
temperature fluctuations. Failure to observe this advice
could lead to condensation forming. Wait until the device
has reached the temperature of the room before you
use it.
Do not cover the device with newspapers, articles of
clothing or the like. Otherwise the device may heat up,
which is not permitted.
GB GB GB GB
accelerate the setting process and reach the desired
value more quickly. This quicker method can also be
used for making the following settings.
Note: MO = Monday, TU = Tuesday, WE = Wednesday,
TH = Thursday, FR = Friday, SA = Saturday, SU = Sunday
Press the hour button (HOUR) 9 repeatedly until the
desired hour value appears in the LC display 1.
Press the minute button (MIN) 2 repeatedly until the
desired minute value appears in the LC display 1.
Release the display mode (TIME) button 7.
Note: If approx. 10 seconds pass without any settings
being made, then the device returns to the normal time
display.
Note: The time switch is now in operation. This is indicated by the flashing of the colon in the LC display 1.
Always check the device for damage before plugging it
into a mains outlet socket. Do not use the device if you
discover it is damaged in any way. In the event of damage, repairs or other problems with the device, please
contact a specialist repair shop.
Do not plug in any devices that hang from and exert
their self-weight on the plug. This will prevent any nonpermitted heating up of and mechanical damage to the
mains outlet socket.
Do not use the device with power outlet strips or extension
cables.
Please note that damage arising from improper handling,
non-observance of the operating instructions or interference with the inside of the device by unauthorised persons
is excluded from the warranty.
The device is not suitable for switching inductive loads in
excess of 10 A (amperes). For this reason never operate
electric motors or fluorescent lights fitted with conventional ballasts with this time switch. Ask an electrician or
Activating summer / winter time
Press the display mode button (TIME) 7 until the
additional “+1h” appears in or disappears from the
time indicator.
Programming the time switch
Switching-on time:
Press the input button (SET) 8 once. The PROG 1 ON
“- - : - -” indicator appears in the LC display 1.
Press the day of the week button (WEEK) 6 repeatedly
until the desired day of the week or block of days of the
week appears in the LC display 1. The following days
of the week or blocks of days of the week are possible:
•MOTUWETHFR
Monday – Friday
•SASU
Saturday + Sunday
•MOTUWETHFRSA
Monday – Saturday
GB GB GB
other suitable expert if you are in any doubt about the
inductive load of your device.
Do not open the device. Never attempt to replace or
repair parts yourself.
Before cleaning the device, always disconnect it from
the mains outlet socket and pull all mains plugs out of
the device.
Please ensure that the device is always easily accessed.
In the event of malfunctions, pull the device out of the
mains outlet socket.
Before use
The time switch has an integral rechargeable battery. This
serves to retain stored data, e.g. time, date and switching
procedures. The rechargeable battery must be charged for
24 hours before first use. You can make settings on the
device during the charging process.
•MOWEFR
Monday + Wednesday + Friday
•TUTHSA
Tuesday + Thursday + Saturday
•MOTUWE
Monday – Wednesday
•THFRSA
Thursday – Saturday
•MOTUWETHFRSASO
Monday – Sunday
Note: As soon as a particular day or combination of days
has been stored, the device executes the programmed
switching sequence at the same time on each of these days
of the week.
Press the hour button (HOUR) 9 repeatedly until the
desired hour value appears in the LC display 1.
Plug the device into a properly installed 220–250 V, 50 Hz
mains outlet socket. All the indicators in the LC display 1
appear briefly. Then the time indicator appears.
Note: In the event of a power cut, the in-built rechargeable battery ensures that the time is kept going and the
automatic switching program remains activated. The
device is fully programmable without a power supply,
as long as the rechargeable battery is fully charged.
Operation
Setting the day of the week and time
Keep the display mode button (TIME) 7 pressed during
the following programming procedures.
Press the day of the week button (WEEK) 6 repeatedly
until the desired day of the week appears in the LC
display 1.
Tip: By pressing and keeping pressed the day of the
week button (WEEK) 6 for approx. 3 seconds you can
Press the minute button (MIN) 2 repeatedly until the
desired minute value appears in the LC display 1.
Press the input button (SET) 8 again to store the setting.
The PROG 1 OFF “- - : - -” indicator appears in the LC
display 1.
Switch-off time:
Press the day of the week button (WEEK) 6 repeatedly
until the desired day of the week or block of days of the
week appears in the LC display 1.
Press the hour button (HOUR) 9 repeatedly until the
desired hour value appears in the LC display 1.
Press the minute button (MIN) 2 repeatedly until the
desired minute value appears in the LC display 1.
Press the input button (SET) 8 again to store the setting.
Press the display mode button (TIME) 7 to return to the
current time.
Note: You can program up to 20 different switching
sequences. To do this, repeat the above-described programming procedure in each case. The PROG 2 ON “- - : - -”
indicator etc. appears in the LC display 1 when each
further setting is stored.
Changing or checking
switching times
To change or check the switching times, press the input
button (SET) 8 and the programmed switching times
appear one after the other in the display.
To change the days, hours or minutes, proceed as
described in the section “Programming the time switch”.
Activating / deactivating
switching times
Press the input button (SET) 8.
Then press the recall button (RECALL) 5 to cancel the
programmed switching time. The switching data are not
Press the ON / AUTO / OFF button (MANUAL) 3
again to continue the countdown.
Press the display mode button (TIME) 7 to change
from the countdown display to the current time.
Press the display mode button (TIME) 7 to change
from the current time to the countdown display.
Press the hour button (HOUR) 9 and the minute button
(MIN) 2 at the same time to cancel the countdown
function.
Cleaning and care
Never use liquids or cleaning agents, as they may
damage the device.
Clean the outside of the device only with a soft, dry
cloth.
GB GB GB GB
erased from the memory, merely deactivated. The symbol
“- - : - -” appears in the display.
Then press the recall button (RECALL) 5 again to
reactivate the cancelled switching time.
Manually skipping switching times
At any time, and independently of programmed times,
you can skip manually to the next switching time.
To do this, press the ON / AUTO / OFF button
(MANUAL) 3 repeatedly until the desired command
appears in the LC display 1:
OFF: All switching times are cancelled, the time switch
allows no current to pass to the connected devices.
AUTO OFF: Switching times are active, the time switch
is switched off.
ON: All switching times are cancelled, the time switch
allows current to pass continuously to the connected
devices.
GB GB GB GB
Disposal
The packaging is wholly composed of environmentally friendly materials that can be disposed
of at a local recycling centre.
Contact your local refuse disposal authority for more details
of how to dispose of your discarded product.
In the interest of the environment, do not throw
out your discarded device with your household
refuse. Take it to a suitable centre where it can
be disposed of properly. Your local council will
be able to tell you where the collection centres
are located and their opening times.
AUTO ON: Switching times are active, the time switch
is switched on.
Setting the random mode
Note: This function switches the time switch arbitrarily on
and off and is intended to prevent burglaries by simulating
an occupied house with e.g. lights switching on and off at
irregular intervals. Your preprogrammed switching commands
are moved by a random amount up to 30 minutes on each
day. This function is only possible if one or more switching
commands have been set.
Press the hour button (HOUR) 9 for at least 3 seconds.
The time switch changes into random mode. The random
mode symbol “RND” appears in the LC display 1 to
show that the random mode is switched on.
Press the hour button (HOUR) 9 again for 3 seconds
to cancel the random mode.
Product description:
Digital Weekly Timer
Art. No.: 97318-44
Model No.: EIM-804 FR
Setting the countdown
Press the input button (SET) 8 to access the timer menu.
Press and keep pressed the input button (SET) 8 until
the “CTD” icon appears in the LC display 1.
Press the hour button (HOUR) 9 repeatedly until the
desired hour value appears in the LC display 1.
Press the minute button (MIN) 2 repeatedly until the
desired minute value appears in the LC display 1.
Note: The countdown can be set from 1 minute to
11 hours, 59 minutes.
Press the display mode (TIME) button 7.
The device returns to its normal operating mode.
Press the hour button (HOUR) 9 and the minute button
(MIN) 2 at the same time to start the countdown function.
Manually ending the countdown
Press the ON / AUTO / OFF button (MANUAL) 3 to
halt the countdown while it is running.
© by ORFGEN Marketing
IAN 66142
Inter-Union Technohandel GmbH
Klaus-von-Klitzing-Str. 2
D-76829 Landau / Pfalz
GB GB GB
66142_Zeitschaltuhr_digital_innen_PL_GB.indd 2 20.07.11 18:18
Page 30

1
Priză digitală programabilă
săptămânal
sabilitate pentru daunele cauzate de o utilizare
necorespunzătoare. Acest aparat nu este destinat utilizării
comerciale.
Introducere
Tastă pentru ziua săptămânii (WEEK)
6
Tastă pentru modul de afişare (TIME)
7
Tastă pentru setare (SET)
8
Tastă pentru ore (HOUR)
9
Specificaţii tehnice
9
8
7
6
2
3
4
5
Folosiţi aparatul numai în modul descris şi numai în domeniile
de utilizare indicate. Păstraţi aceste instrucţiuni. În caz că,
daţi dispozitivul mai departe la terţi, înmânaţi de asemenea
şi documentaţia acestuia.
Înainte de prima utilizare informaţi-vă cu privire
la dispozitiv. Pentru aceasta citiţi cu atenţie următorul manual de utilizare şi indicaţiile de siguranţă.
Utilizare corespunzătoare scopului
Acest aparat este prevăzut pentru pornirea şi oprirea automată a aparatelor electrice. Aparatul are voie să fie folosit
numai în spaţii închise. Toate modificările aparatului nu sunt
corespunzătoare scopului şi pot reprezenta pericole considerabile de accidente. Producătorul nu preia nicio respon-
RO RO RO
Tensiune nominală: 240 V ∼, 50 Hz
Curent nominal: AC 10 A
Putere maximă: 2300 Waţi
Comutator de ieşire: relais
Precizie temporizator: + / – 1 secundă / zi la 20 °C
Cel mai scurt interval
de timp programabil: 1 minut
Descrierea componentelor
Afişaj LCD
1
Tastă pentru minute (MIN)
2
Tastă PORNIT / AUTO / OPRIT (MANUAL)
3
Tastă Reset
4
Tastă de retragere (RECALL)
5
Siguranţă
Citiţi toate indicaţiile de siguranţă şi
instrucţiunile. Nerespectarea indicaţiilor de siguranţă şi a
instrucţiunilor pot cauza incendii şi / sau accidente grave.
PĂSTRAŢI TOATE INDICAŢIILE DE SIGURANŢĂ ŞI
INSTRUCŢIUNILE PENTRU VIITOR!
Indicaţii generale de siguranţă
PERICOL DE
MOARTE ŞI DE ACCIDENTARE PENTRU
SUGARI ŞI COPII! Acest produs nu este o
jucărie. Nu lăsaţi niciodată copii nesupravegheaţi în
apropierea materialului de ambalaj şi aparatului. Există
pericol de asifixiere datorită materialului de ambalaj şi
pericol de moarte prin electrocutare.
Acest dispozitiv nu este destinat utilizării de către persoane
(inclusiv copii) cu capacităţi fizice, senzoriale sau psihice
limitate sau cu lipsă de experienţă sau cunoştinţe doar
dacă, sunt supravegheate de către o persoană responsabilă de siguranţa acestora sau au primit instrucţiuni de
folosire ale aparatului. Copii trebuie supravegheaţi pentru
a nu se juca cu aparatul.
Utilizaţi dispozitivul numai conectat la o priză corespun-
zător montată.
RO RO RO RO
toţi indicatorii pe afişajul LCD 1. Ulterior, apare afişajul
timpului.
Indicaţie: În cazul unei întreruperi de alimentare cu
energie electrică, acumulatorul integrat asigură indicarea
în continuare a timpului şi asigură ca programul automat de comutare să rămână activ. Dispozitivul poate fi
programat foarte bine şi în lipsa alimentării cu energie
electrică, dacă acumulatorul este complet încărcat.
Utilizare
Setarea zilei săptămânii şi a orei
Ţineţi apăsată tasta pentru modul de afişare (TIME) 7
în timpul operaţiunii de programare.
Apăsaţi tasta pentru ziua săptămânii (WEEK) 6 de
atâtea ori, până când, pe afişajul LCD 1 apare ziua
săptămânii dorită.
Indiciu: Ţineţi apăsată tasta pentru ziua săptămânii
(WEEK) 6 pentru cca. 3 secunde. Asftel obţineţi o
ATENŢIE! Nu conectaţi temporiztorul digital în serie.
La ştecăre intermediare suprapuse există pericolul unei
deteriorări mecanice.
PERICOL DE
MOARTE PRIN ELECTROCUTARE! Ţineţi
aparatul la distanţă faţă de umiditate şi nu îl
atingeţi cu mâini umede.
Nu expuneţi dispozitivul la temperaturi ridicate respectiv
joase excesive.
Nu expuneţi dispozitivul la oscilaţii extreme de tempera-
tură. În caz contrar există pericolul formării apei de condens. Aşteptaţi până când, aparatul atinge temperatura
ambientului, înainte de a-l pune în funcţiune.
Pentru a împiedica o încălzire nepermisă, nu acoperiţi
dispozitivul cu ziare, îmbrăcăminte sau altele similare.
Verificaţi aparatul înainte de fiecare conectare la reţea
cu privire la eventuale deteriorări. Nu folosiţi niciodată
produsul dacă, aţi identificat deteriorări. În caz de dete-
setare mai rapidă a valorilor. Setarea rapidă o puteţi
folosi şi pentru următoarele procedee de setare.
Indicaţie: MO = Luni, TU = Marţi, WE = Miercuri,
TH = Joi, FR = Vineri, SA = Sâmbătă, SU = Duminică
Apăsaţi tasta pentru ore (HOUR) 9 de atâtea ori,
până când, pe afişajul LCD 1 apare ora dorită.
Apăsaţi tasta pentru minute (MIN) 2 de atâtea ori,
până când, pe afişajul LCD 1 apare minutul dorit.
Eliberaţi tasta pentru modul de afişare (TIME) 7.
Indicaţie: Dacă în cca. 10 secunde nu sunt făcute
setările, aparatul revine la modul normal de afişare al
timpului.
Indicaţie: Distribuitor de aprindere este acum în
funcţiune. Acest lucru este indicat de clipirea celor două
puncte de pe afişajul LCD 1.
riorări, reparaţii sau alte probleme la aparat,
adresaţi-vă unei persoane calificate.
Nu introduceţi aparate a căror greutate proprie este
suspendată de ştecăr. Astfel evitaţi o încălzire nepermisă
precum şi deteriorarea mecanică a prizei.
Nu folosiţi aparatul împreună cu prelungitoare sau cabluri
de prelungire.
Aveţi în vedere faptul că, deteriorarea datorită utilizării
necorespunzătoare, nerespectării manualului de utilizare
sau intervenţiei de către persoane neautorizate este
exclusă de la garanţie.
Dispozitivul nu este prevăzut pentru a comuta sarcini
inductive mai mari decât 10 A (amperi). Din acest motiv
nu folosiţi niciodată motoare electrice sau tuburi fluorescente cu mecanisme de comandă conevnţionale cu
acest temporizator. Adresaţi-vă unei persoane calificate
dacă, nu sunteţi sigur cu privire la solicitarea inductivă a
aparatului dvs.
Activarea timpului de vară /
timpului de iarnă
Ţineţi apăsată tasta pentru modul de afişare (TIME) 7,
până când apare în plus, respectiv dispare „+1h“, de
pe afişajul timpului.
Programare distribuitor de
aprindere
Timpul de pornire:
Apăsaţi o dată tasta pentru setare (SET) 8. Pe afişajul
LCD 1 apare PROG 1 ON „- - : - -”.
Apăsaţi tasta pentru ziua săptămânii (WEEK) 6 de
atâtea ori, până când, pe afişajul LCD 1 apare ziua
săptămânii dorită sau calendarul. Următoarele săptămâni
sau calendare sunt posibile:
•MOTUWETHFR
Luni – Vineri
•SASU
Sâmbătă + Duminică
Nu deschideţi pe proprie răspundere aparatul şi nu
încercaţi niciodată să schimbaţi sau să reparaţi componentele.
Întotdeauna, pentru curăţare, scoateţi dispozitivul din
priză şi deconectaţi toate cablurile de alimentare de la
aparat.
Aveţi grijă ca aparatul să fie întotdeauna accesibil.
În caz de defecţiuni, scoateţi imediat aparatul din priză.
Înainte de punerea în funcţiune
Temporizatorul deţine un acumulator integrat. Acesta serveşte
la salvarea datelor memorate ca de ex.: ora, data, şi procesele de comutare. Acumulatorul trebuie încărcat înainte de
prima utilizare 24 de ore. În timpul procesului de încărcare
puteţi efectua deja setări la aparat.
Introduceţi dispozitivul într-o priză de 220–250 V, 50 Hz
corect instalată. Pentru o perioadă scurtă de timp apar
•MOTUWETHFR
Luni – Sâmbătă
•MOWEFR
Luni + Miercuri + Vineri
•TUTHSA
Marţi + Joi + Sâmbătă
•MOTUWE
Luni – Miercuri
•THFRSA
Joi – Sâmbătă
•MOTUWETHFR
Luni – Duminică
Indicaţie: Imediat după ce, o zi sau o combinaţie de zile
este salvată, secvenţa de comutare programată are loc în
fiecare din acele zile ale săptămînii, la aceeaşi oră.
Apăsaţi tasta pentru ore (HOUR) 9 de atâtea ori,
până când, pe afişajul LCD 1 apare ora dorită.
Apăsaţi tasta pentru minute (MIN) 2 de atâtea ori,
până când, pe afişajul LCD 1 apare minutul dorit.
Apăsaţi încă o dată tastă pentru setare (SET) 8, pentru
a salva setarea.
Pe afişajul LCD 1 aparePROG 1 OFF „- - : - -”.
Timpul de oprire:
Apăsaţi tasta pentru ziua săptămânii (WEEK) 6 de
atâtea ori, până când, pe afişajul LCD 1 apare ziua
săptămânii dorită sau calendarul.
Apăsaţi tasta pentru ore (HOUR) 9 de atâtea ori,
până când, pe afişajul LCD 1 apare ora dorită.
Apăsaţi tasta pentru minute (MIN) 2 de atâtea ori,
până când, pe afişajul LCD 1 apare minutul dorit.
Apăsaţi încă o dată tasta pentru setare (SET) 8, pentru
a salva setarea.
Apăsaţi tasta pentru modul de afişare (TIME) 7, pentru
a reveni la ora curentă.
afişajul LCD 1 apare simbolul „RND“, modul aleatoriu
este pornit.
Apăsaţi din nou tasta pentru ore (HOUR) 9 timp de 3
secunde, pentru a opri modul aleatoriu.
Setarea numărătoarei inverse
Apăsaţi tasta pentru setare (SET) 8, pentru a intra în
meniul temporizatorului.
Ţineţi apăsată tasta pentru setare (SET) 8, până când
pe afişajul LCD 1 apare icoana „CTD“.
Apăsaţi tasta pentru ore (HOUR) 9 de atâtea ori,
până când, pe afişajul LCD 1 apare ora dorită.
Apăsaţi tasta pentru minute (MIN) 2 de atâtea ori,
până când, pe afişajul LCD 1 apare minutul dorit.
Indicaţie: Numărătoarea inversă poate fi setată de la
1 minut până la 23 ore, 59 minute.
Apăsaţi tasta pentru modul de afişare (TIME) 7.
Dispozitivul revine la modul normal de operare.
RO RO RO RO
Indicaţie: Puteţi programa până la 20 de secvenţe de
comutare diferite. Pentru aceasta repetaţi fiecare din procedura de programare descrisă mai sus. Pe afişajul LCD 1
apare la fiecare alt proces de salvare, în continuare PROG
2 ON „- - : - -” etc.
Apoi apăsaţi tasta de retragere (RECALL) 5, pentru a
anula timpii de comutare programaţi. Datele de comutare
nu vor fi şterse din memorie, ci doar dezactivate. Pe afişaj
apare simbolul „- - : - -”.
Apăsaţi din nou tasta de retragere (RECALL) 5, pentru
a activa timpii de comutare anulaţi.
Schimbarea sau verificarea timpilor
de comutare
Pentru schimbarea sau verificarea timpilor de comutare
apăsaţi tasta pentru setare (SET) 8 şi timpii de comutare
programaţi apar secvenţial pe afişaj.
Pentru schimbarea zilelor, orelor sau minutelor, urmaţi
paşii descrişi în capitolul „Programare distribuitor de
aprindere“.
Activare / dezactivare timpi de
comutare
Apăsaţi tasta pentru setare (SET) 8.
RO RO RO RO
Apăsaţi simultan tasta pentru ore (HOUR) 9 şi tasta
pentru minute (MIN) 2, pentru a activa funcţia de
numărătoare inversă.
Oprirea manuală numărătoarei
inverse
În timpul numărătoarei inverse apăsaţi tasta PORNIT /
AUTO / OPRIT (MANUAL) 3, pentru a opri numărătoare
inversă.
Apăsaţi din nou tasta PORNIT / AUTO / OPRIT
(MANUAL) 3, pentru a relua numărătoare inversă.
Apăsaţi tasta pentru modul de afişare (TIME) 7, pentru
a trece de la afişarea numărătoarei inverse la ora curentă.
Apăsaţi din nou tasta pentru modul de afişare (TIME) 7,
pentru a trece de la ora curentă la afişarea numărătoarei
inverse.
Apăsaţi simultan tasta pentru ore (HOUR) 9 şi tasta
pentru minute (MIN) 2, pentru a anula numărătoarea
inversă.
Sărirea manuală peste timpii de
comutare
Indiferent de programare, puteţi oricând sări manual la
următorul timp de comutare.
Pentru aceasta apăsaţi tasta PORNIT / AUTO / OPRIT
(MANUAL) 3 de atâtea ori, până când pe afişajul
LCD 1 apare comanda dorită:
OFF: Toţi timpii de comutare sunt anulaţi, distribuitorul
de aprindere nu transmite mai departe energie electrică
la dispozitivele conectate.
AUTO OFF: Timpii de comutare sunt activi, distribuitorul
de aprindere este oprit.
Curăţare şi întreţinere
În niciun caz nu folosiţi lichide sau substanţe de curăţare,
deoarece acestea pot deteriora aparatul.
Curăţaţi aparatul numai în exterior cu o lavetă moale şi
uscată.
Înlăturare
Ambalajul este din materiale ecologice, care pot
fi înlăturate în punctele locale de reciclare.
Posibilităţi de înlăturare ale produsului dvs. le puteţi afla în
localitatea dvs. sau la administraţia locală.
ON: Toţi timpii de comutare sunt anulaţi, distribuitorul
de aprindere transmite mai departe energie electrică
continuă la dispozitivele conectate.
AUTO ON: Timpii de comutare sunt activi, distribuitorul
de aprindere este pornit.
Setarea modului aleatoriu
Indicaţie: Această funcţie porneşte şi opreşte distribuitorul
de aprindere în mod aleator şi are scopul de a preveni
spargerile de locuinţe, astfel ca prin neregularitatea timpilor
de comutare (de ex. la lămpi) o casă locuită este prevenită.
Comenzile de comutare programate înainte de dvs. se
schimbă zilnic în mod aleator cu până la 30 de minute.
Această funcţie este totuşi posibilă, numai în cazul în care
au fost setate una sau mai multe comenzi de comutare.
Apăsaţi tasta pentru ore (HOUR) 9 timp de 3 secunde.
Distribuitorul de oprire revine la modul aleatoriu. Pe
Pentru a proteja mediul înconjurător nu aruncaţi
aparatul dvs. la gunoiul menajer atunci când nu
mai poate fi folosit, ci duceţi-l la punct corespunzător de salubrizare. Vă puteţi informa cu privire
la punctele de colectare şi orarul acestora la o
instituţie competentă.
Denumire produs:
Priză digitală programabilă săptămânal
Nr.art.: 97318-7
Nr. model: EIM-804 GR
RO RO RO RO
66142_Zeitschaltuhr_digital_innen_RO_GR_GB.indd 1 20.07.11 18:19
Page 31

Ψηφιακός χρονοδιακόπτης
εβδομαδιαίου προγραμματισμού
Εισαγωγή
Εξοικειωθείτε με τη συσκευή πριν από την πρώτη
θέση σε λειτουργία. Για το σκοπό αυτό διαβάστε
τις παρακάτω οδηγίες λειτουργίας και τις υποδείξεις ασφάλειας. Χρησιμοποιήστε τη συσκευή μόνο με τον
τρόπο που περιγράφεται εδώ και για τον τομέα εφαρμογής
που αναφέρεται. Φυλάξτε τις οδηγίες αυτές. Παραδώστε
όλα τα έγγραφα κατά τη μεταβίβαση συσκευής σε τρίτο.
Χρήση σύμφωνα με τους
κανονισμούς
Η συσκευή αυτή προορίζεται για αυτόματη ενεργοποίηση
και απενεργοποίηση ηλεκτρικών συσκευών. Η λειτουργία
της συσκευής επιτρέπεται μόνο μέσα σε κλειστούς χώρους.
Άλλες τροποποιήσεις συσκευής δεν είναι σύμφωνες με τους
GR/CY GR/CY GR/CY GR/CY
κανονισμούς και ίσως να εγκυμονούν σοβαρούς κινδύνους
ατυχήματος. Ο κατασκευαστής δεν αναλαμβάνει καμία
ευθύνη για βλάβες που οφείλονται σε μη ορθή χρήση. Η
συσκευή αυτή δεν προορίζεται για επαγγελματική χρήση.
Τεχνικά στοιχεία
Ονομαστική τάση: 240 V ∼, 50 Hz
Ονομαστικό ρεύμα: AC 10 A
Μέγιστο φορτίο: 2300 Watt
Διακόπτης εξόδου: Ρελέ
Ακρίβεια
χρονομέτρου: + / – 1 δευτερόλεπτο /
ημέρα στους 20 °C
Συντομότερος,
προγραμματιζόμενος χρόνος: 1 λεπτό
Περιγραφή εξαρτημάτων
Οθόνη LCD
1
Πλήκτρο λεπτών (MIN)
2
Πλήκτρο ΕΝΤΟΣ / AUTO / ΕΚΤΟΣ (MANUAL)
3
Πλήκτρο Reset
4
Πλήκτρο επανάκλησης (RECALL)
5
Πλήκτρο ημέρας εβδομάδας (WEEK)
6
Πλήκτρο είδους ένδειξης (TIME)
7
Πλήκτρο καταχώρησης (SET)
8
Πλήκτρο ωρών (HOUR)
9
Ασφάλεια
Διαβάστε όλες τις υποδείξεις
ασφάλειας και τις οδηγίες. Αδυναμία τήρησης των
υποδείξεων ασφάλειας και των οδηγιών που αναφέρονται
παρακάτω μπορεί να προκαλέσει πυρκαγιά και / ή σοβαρούς
τραυματισμούς.
ΦΥΛΑΞΤΕ ΟΛΕΣ ΤΙΣ ΥΠΟΔΕΙΞΕΙΣ ΑΣΦΑΛΕΙΑΣ ΚΑΙ
ΤΙΣ ΟΔΗΓΙΕΣ ΓΙΑ ΜΕΛΛΟΝΤΙΚΗ ΧΡΗΣΗ!
Γενικές υποδείξεις ασφάλειας
ΚΙΝΔΥΝΟΣ
ΓΙΑ ΤΗ ΖΩΗ ΚΑΙ ΑΤΥΧΗΜΑΤΩΝ ΓΙΑ
ΜΙΚΡΑ ΠΑΙΔΙΑ ΚΑΙ ΠΑΙΔΙΑ! Αυτό το
προϊόν δεν είναι παιχνίδι. Μην αφήνετε ποτέ τα παιδιά
χωρίς επίβλεψη με το υλικό συσκευασίας και τη συσκευή.
Υφίσταται κίνδυνος πνιγμού από το υλικό συσκευασίας
και κίνδυνος για τη ζωή από ηλεκτροπληξία.
Η λειτουργία της συσκευής αυτής απαγορεύεται σε
άτομα (συμπεριλαμβανομένων των παιδιών) με περιορισμένες φυσικές, διανοητικές ή πνευματικές ικανότητες ή
έλλειψη εμπειρίας και / ή έλλειψη γνώσης, εκτός και αν
για τη δική τους ασφάλεια, χρησιμοποιούν τη συσκευή
υπό την επίβλεψη ή την καθοδήγηση, σχετικά με τον
τρόπο χειρισμού, υπεύθυνων ατόμων. Τα παιδιά πρέπει
να βρίσκονται υπό την επίβλεψή σας, έτσι ώστε να διασφαλίζεται το γεγονός ό,τι δεν παίζουν με τη συσκευή.
Λειτουργείτε πάντα τη συσκευή μόνο σε κατάλληλα
εγκατεστημένη ηλεκτρική πρίζα.
ΠΡΟΣΟΧΗ! Απαγορεύεται η σύνδεση του ψηφιακού
χρονομέτρου σε σειρά. Σε περίπτωση διαδοχικής
σύνδεσης ενδιάμεσων βυσμάτων υπάρχει κίνδυνος
μηχανικής βλάβης.
ΚΙΝΔΥΝΟΣ
ΓΙΑ ΤΗ ΖΩΗ ΛΟΓΩ ΗΛΕΚΤΡΟΠΛΗΞΙΑΣ! Κρατήστε τη συσκευή μακριά από
υγρασία και μην την αγγίζετε με υγρά χέρια.
Απαγορεύεται η έκθεση της συσκευής σε μεγάλη
θερμότητα ή μεγάλο ψύχος.
Απαγορεύεται η έκθεση της συσκευής σε πολύ μεγάλες
διακυμάνσεις θερμοκρασίας. Σε διαφορετική περίπτωση
υπάρχει κίνδυνος δημιουργίας νερού συμπυκνώματος.
Περιμένετε έως ότου η συσκευή φτάσει σε θερμοκρασία
δωματίου, προτού τη θέσετε σε λειτουργία.
GR/CY GR/CY GR/CY GR/CY
γραμματιστεί πλήρως χωρίς ηλεκτρική τροφοδοσία,
αμέσως μόλις ο συσσωρευτής φορτιστεί ολοκληρωτικά.
Χειρισμός
Ρύθμιση ημέρας εβδομάδας και ώρας
Κρατήστε πατημένο το πλήκτρο είδους ένδειξης (TIME) 7
κατά τη διάρκεια της παρακάτω διαδικασίας προγραμματισμού.
Πατήστε τόσο συχνά το πλήκτρο ημέρας εβδομάδας
(WEEK) 6, έως ότου εμφανιστεί η επιθυμητή ημέρα
εβδομάδας στην οθόνη LCD 1.
Συμβουλή: Κρατήστε πατημένο το πλήκτρο ημέρας
εβδομάδας (WEEK) 6 για περ. 3 δευτερόλεπτα. Με τον
τρόπο αυτό επιτυγχάνετε ταχύτερη ρύθμιση των τιμών.
Αυτή την ταχεία ρύθμιση μπορείτε να χρησιμοποιήσετε
και για τις παρακάτω διαδικασίες ρύθμισης.
Υπόδειξη: MO = Δευτέρα, TU = Τρίτη, WE = Τετάρτη,
Μην καλύπτετε τη συσκευή με αγωγούς τροφοδοσίας,
ρούχα ή παρόμοια αντικείμενα, προς αποφυγή ανάπτυξης
ανεπίτρεπτης θέρμανσης.
Πριν από κάθε σύνδεση σε δίκτυο, ελέγχετε τη συσκευή
για ενδεχόμενες βλάβες. Απαγορεύεται αυστηρά η
χρήση της συσκευής, σε περίπτωση που εντοπίσετε
οποιεσδήποτε βλάβες. Σε περίπτωση που υπάρχουν
βλάβες, χρειαστούν επιδιορθώσεις ή προκύψουν άλλα
προβλήματα στη συσκευή, απευθυνθείτε σε ειδικό.
Απαγορεύεται η σύνδεση συσκευών, των οποίων το
βάρος θα εφαρμόζεται στο βύσμα. Με τον τρόπο αυτό
μπορείτε να αποφύγετε την ανεπίτρεπτη θέρμανση καθώς
και την πρόκληση μηχανικών βλαβών στην ηλεκτρική
πρίζα.
Απαγορεύεται η χρήση της συσκευής σε συνδυασμό με
πολύπριζα ή καλώδια προέκτασης.
Λάβετε υπόψη σας ότι οι βλάβες λόγω μη ορθής
χρήσης, μη τήρησης των οδηγιών λειτουργίας ή
TH = Πέμπτη, FR = Παρασκευή, SA = Σάββατο,
SU = Κυριακή
Πατήστε τόσο συχνά το πλήκτρο ωρών (HOUR) 9, έως
ότου στην οθόνη LCD 1 εμφανιστεί η επιθυμητή ώρα.
Πατήστε τόσο συχνά το πλήκτρο λεπτών (MIN) 2,
έως ότου στην οθόνη LCD 1 εμφανιστεί ο επιθυμητός
αριθμός λεπτών.
Αφήστε ελεύθερο το πλήκτρο είδους ένδειξης (TIME) 7.
Υπόδειξη: Σε περίπτωση που δεν προβείτε σε καμία
ρύθμιση εντός περ. 10 δευτερολέπτων, η συσκευή
επιστρέφει σε κανονική ένδειξη ώρας.
Υπόδειξη: Στο σημείο αυτό το χρονόμετρο βρίσκεται
σε λειτουργία. Το γεγονός αυτό υποδεικνύεται με αναβόσβησμα της άνω και κάτω τελείας στην οθόνη LCD 1.
πρόσβασης από μη εξουσιοδοτημένα άτομα αποκλείονται
από την εγγύηση.
Η συσκευή δεν είναι κατάλληλη να άγει επαγωγικά φορτία,
μεγαλύτερα από 10 A (αμπέρ). Για το λόγο αυτό, απαγορεύεται αυστηρά η λειτουργία ηλεκτροκινητήρων ή
σωλήνων φθορισμού με συμβατικές συσκευές μεταγωγής
σε συνδυασμό με αυτό το χρονόμετρο. Απευθυνθείτε σε
εδικό, σε περίπτωση που δεν είσαστε βέβαιοι σε ό,τι
αφορά στο επαγωγικό φορτίο της συσκευής σας.
Μην ανοίγετε ποτέ μόνοι τη συσκευή και μην προσπα-
θήσετε ποτέ να αντικαταστήσετε ή να επιδιορθώσετε
εξαρτήματα.
Για τον καθαρισμό, αποσυνδέετε πάντα τη συσκευή από
την ηλεκτρική πρίζα και αποσυνδέετε όλα τα βύσματα
δικτύου από τη συσκευή.
Βεβαιωθείτε ότι η συσκευή είναι πάντα ελεύθερα
προσβάσιμη.
Αποσυνδέετε αμέσως τη συσκευή από την ηλεκτρική
πρίζα, σε περίπτωση που εμφανιστούν βλάβες!
Ενεργοποίηση θερινής / χειμερινής
ώρας
Πατήστε τόση ώρα το πλήκτρο ένδειξης (TIME) 7, έως
ότου το πρόθεμα «+1h» εμφανιστεί ή εξαφανιστεί από
την ένδειξη ώρας.
Προγραμματισμός χρονομέτρου
Ώρα ενεργοποίησης:
Πατήστε μία φορά το πλήκτρο καταχώρησης (SET) 8.
Στην οθόνη LCD 1 εμφανίζεται η ένδειξη PROG 1 ON
«- - : - -».
Πατήστε τόσο συχνά το πλήκτρο ημέρας εβδομάδας
(WEEK) 6, έως ότου εμφανιστεί η επιθυμητή ημέρα
εβδομάδας ή ομάδα ημερών στην οθόνη LCD 1.
Δυνατές είναι οι παρακάτω ομάδες εβδομάδων και
ημερών:
•MOTUWETHFR
Δευτέρα – Παρασκευή
Πριν από τη θέση σε λειτουργία
Το χρονόμετρο διαθέτει έναν ενσωματωμένο συσσωρευτή.
Αυτός χρησιμεύει στη διατήρηση των αποθηκευμένων
δεδομένων, π.χ. ώρα, ημερομηνία και διαδικασίες μεταγωγής.
Ο συσσωρευτής πρέπει να φορτιστεί πριν από την πρώτη
χρήση για 24 ώρες. Κατά τη διάρκεια της διαδικασίας φόρτισης μπορείτε να πραγματοποιήσετε ρυθμίσεις στη συσκευή.
Συνδέστε τη συσκευή σε ηλεκτρική πρίζα 220–250 V,
50 Hz που έχει εγκατασταθεί σύμφωνα με τις προδιαγραφές. Για μία στιγμή, εμφανίζονται όλες οι ενδείξεις
στην οθόνη LCD 1. Τελικά εμφανίζεται η ένδειξη ώρας.
Υπόδειξη: Σε περίπτωση διακοπής της ηλεκτρικής
τροφοδοσίας, ο ενσωματωμένος συσσωρευτής διασφαλίζει το γεγονός ό,τι η ώρα θα παραμείνει αποθηκευμένη
και το αυτόματο πρόγραμμα μεταγωγής θα συνεχίσει
να είναι ενεργοποιημένο. Η συσκευή μπορεί να προ-
•SASU
Σάββατο + Κυριακή
•MOTUWETHFRSA
Δευτέρα – Σάββατο
•MOWEFR
Δευτέρα + Τετάρτη + Παρασκευή
•TUTHSA
Τρίτη + Πέμπτη + Σάββατο
•MOTUWE
Δευτέρα – Τετάρτη
•THFRSA
Πέμπτη – Σάββατο
•MOTUWETHFRSASO
Δευτέρα – Κυριακή
Υπόδειξη: Αμέσως μόλις αποθηκευτεί μία συγκεκριμένη
ημέρα ή ένας συνδυασμός ημερών, πραγματοποιείται αλληλουχία μεταγωγής σε κάθε ημέρα εβδομάδας την ίδια ώρα.
GR/CY GR/CY GR/CY GR/CY
Πατήστε τόσο συχνά το πλήκτρο ωρών (HOUR) 9, έως
ότου στην οθόνη LCD 1 εμφανιστεί η επιθυμητή ώρα.
Πατήστε τόσο συχνά το πλήκτρο λεπτών (MIN) 2,
έως ότου στην οθόνη LCD 1 εμφανιστεί ο επιθυμητός
αριθμός λεπτών.
Πατήστε εκ νέου το πλήκτρο καταχώρησης (SET) 8,
για να αποθηκεύσετε τη ρύθμιση.
Στην οθόνη LCD 1 εμφανίζεται η ένδειξη PROG 1 OFF
«- - : - -».
Ώρα απενεργοποίησης:
Πατήστε τόσο συχνά το πλήκτρο ημέρας εβδομάδας
(WEEK) 6, έως ότου εμφανιστεί η επιθυμητή ημέρα
εβδομάδας ή η ομάδα ημερών στην οθόνη LCD 1.
Πατήστε τόσο συχνά το πλήκτρο ωρών (HOUR) 9, έως
ότου στην οθόνη LCD 1 εμφανιστεί η επιθυμητή ώρα.
Πατήστε τόσο συχνά το πλήκτρο λεπτών (MIN) 2,
έως ότου στην οθόνη LCD 1 εμφανιστεί ο επιθυμητός
αριθμός λεπτών.
GR/CY GR/CY GR/CY GR/CY
Πιέστε το πλήκτρο ωρών (HOUR) 9 για 3 δευτερόλεπτα.
Το χρονόμετρο μεταβαίνει σε είδος τυχαίας λειτουργίας.
Στην οθόνη LCD 1 εμφανίζεται το σύμβολο «RND», το
είδος τυχαίας λειτουργίας ενεργοποιείται.
Πατήστε το πλήκτρο ωρών (HOUR) 9 εκ νέου για 3
δευτερόλεπτα, για να ολοκληρώσετε το είδος τυχαίας
λειτουργίας.
Ρύθμιση αντίστροφης μέτρησης
(Countdown)
Πατήστε το πλήκτρο καταχώρησης (SET) 8, για να
καταλήξετε στο μενού χρονομέτρου.
Κρατήστε πατημένο το πλήκτρο καταχώρησης (SET) 8,
έως ότου στην οθόνη LCD 1 εμφανιστεί το εικονίδιο
«CTD».
Πατήστε τόσο συχνά το πλήκτρο ωρών (HOUR) 9, έως
ότου στην οθόνη LCD 1 εμφανιστεί η επιθυμητή ώρα.
Πατήστε εκ νέου το πλήκτρο καταχώρησης (SET) 8,
για να αποθηκεύσετε τη ρύθμιση.
Πατήστε το πλήκτρο είδους ένδειξης (TIME) 7, για να
επιστρέψετε στην επίκαιρη ώρα.
Υπόδειξη: Μπορείτε να προγραμματίσετε έως 20 διαφορετικές αλληλουχίες μεταγωγής. Για το σκοπό αυτό, επαναλάβετε τη διαδικασία προγραμματισμού που περιγράφηκε
προηγουμένως. Στην οθόνη LCD 1 εμφανίζεται, με προοδευτική αύξηση, σε κάθε επόμενη διαδικασία αποθήκευσης
η ένδειξη PROG 2 ON «- - : - -» κ.τ.λ.
Αλλαγή ή έλεγχος ωρών μεταγωγής
Για αλλαγή ή έλεγχο των ωρών μεταγωγής πατήστε το
πλήκτρο καταχώρησης (SET) 8 και στην οθόνη εμφανίζονται διαδοχικά οι προγραμματισμένες ώρες μεταγωγής.
Για την αλλαγή ημερών, ωρών ή λεπτών, ενεργήστε
όπως περιγράφεται στο κεφάλαιο «Προγραμματισμός
χρονομέτρου».
Πατήστε τόσο συχνά το πλήκτρο λεπτών (MIN) 2,
έως ότου στην οθόνη LCD 1 εμφανιστεί ο επιθυμητός
αριθμός λεπτών.
Υπόδειξη: Η αντίστροφη μέτρηση μπορεί να ρυθμιστεί
από 1 λεπτό έως 23 ώρες, 59 λεπτά.
Πατήστε το πλήκτρο είδους ένδειξης (TIME) 7.
Η συσκευή επιστρέφει σε κανονικό είδος λειτουργίας.
Πατήστε ταυτόχρονα τα πλήκτρα ωρών (HOUR) 9
και λεπτών (MIN) 2, για την εκκίνηση της λειτουργίας
αντίστροφης μέτρησης.
Χειροκίνητος τερματισμός
αντίστροφης μέτρησης
Κατά τη διάρκεια της αντίστροφης μέτρησης, πατήστε το
πλήκτρο ΕΝΤΟΣ / AUTO / ΕΚΤΟΣ (ΧΕΙΡΟΚΙΝΗΤΑ) 3,
για να τη διακόψετε.
Πατήστε εκ νέου το πλήκτρο ΕΝΤΟΣ / AUTO / ΕΚΤΟΣ
(MANUAL) 3, για να συνεχίσετε την αντίστροφη
μέτρηση.
Ενεργοποίηση / απενεργοποίηση
ωρών μεταγωγής
Πατήστε το πλήκτρο καταχώρησης (SET) 8.
Τελικά πατήστε το πλήκτρο επανάκλησης (RECALL) 5,
για κατάργηση της προγραμματισμένης ώρας μεταγωγής.
Τα δεδομένα μεταγωγής δεν διαγράφονται από τη μνήμη,
απλά απενεργοποιούνται προσωρινά. Στην οθόνη
εμφανίζεται το σύμβολο «- - : - -».
Πατήστε εκ νέου το πλήκτρο επανάκλησης (RECALL) 5,
για να ενεργοποιήσετε την καταργημένη ώρα μεταγωγής.
Χειροκίνητη παράληψη ωρών
μεταγωγής
Ανεξάρτητα από τον προγραμματισμό, μπορείτε να
παραλείψετε ανά πάσα στιγμή χειροκίνητα μία επόμενη
ώρα μεταγωγής.
Για το σκοπό αυτό πατήστε το πλήκτρο ΕΝΤΟΣ / AUTO /
ΕΚΤΟΣ (MANUAL) 3 τόσο συχνά, έως ότου στην οθόνη
LCD 1 εμφανιστεί η επιθυμητή εντολή:
Πατήστε το πλήκτρο είδους ένδειξης (TIME) 7, για να
μεταβείτε σε επίκαιρη ώρα από την ένδειξη αντίστροφης
μέτρησης.
Πατήστε το πλήκτρο είδους ένδειξης (TIME) 7 εκ νέου,
για να μεταβείτε σε ένδειξη αντίστροφης μέτρησης από
την επίκαιρη ώρα.
Πατήστε ταυτόχρονα τα πλήκτρα ωρών (HOUR) 9
και λεπτών (MIN) 2, για να διακόψετε την αντίστροφη
μέτρηση.
Καθαρισμός και φροντίδα
Απαγορεύεται αυστηρά η χρήση υγρών και καθαριστικών
μέσων, τα οποία ίσως φθείρουν τη συσκευή.
Καθαρίζετε μόνο εξωτερικά τη συσκευή με ένα μαλακό,
στεγνό πανί.
OFF: Ακύρωση όλων των ωρών μεταγωγής, το χρονόμετρο δεν άγει ρεύμα στις συνδεδεμένες συσκευές.
AUTO OFF: Ενεργές ώρες μεταγωγής, το χρονόμετρο
είναι απενεργοποιημένο.
ON: Ακύρωση όλων των ωρών μεταγωγής, ώστε το
χρονόμετρο να άγει διαρκώς ρεύμα στη συνδεδεμένη
συσκευή.
AUTO ON: Ενεργές ώρες μεταγωγής, το χρονόμετρο
είναι ενεργοποιημένο.
Ρύθμιση είδους τυχαίας λειτουργίας
Υπόδειξη: Με τη λειτουργία αυτή, το χρονόμετρο ενεργο-
ποιεί και απενεργοποιεί αυθαίρετα το χρονόμετρο και στοχεύει στην αποτροπή παραβιάσεων σπιτιών, διότι λόγω της
μη τακτικότητας των ωρών μεταγωγής (π.χ. φώτα) δίνεται η
εντύπωση ότι το σπίτι κατοικείται. Οι εντολές που έχετε προγραμματίσει μετατοπίζονται καθημερινά σε διάστημα έως
και 30 λεπτών. Η λειτουργία αυτή είναι δυνατή μόνο όταν
έχει ρυθμιστεί μία ή περισσότερες εντολές μεταγωγής.
Απόρριψη
Η συσκευασία αποτελείται αποκλειστικά από
υλικά που σέβονται το περιβάλλον. Αποσύρετέ
τη με τη βοήθεια των κατά τόπους υπηρεσιών
ανακύκλωσης.
Δυνατότητες απόσυρσης των χρησιμοποιημένων προϊόντων
θα πληροφορηθείτε από τη διαχείριση κοινότητας ή πόλης
σας.
Μην πετάτε τη συσκευή στα οικιακά απορρίμματα
όταν αυτή καταστραφεί αλλά παραδώστε τη σε
ορθή διαδικασία απόρριψης για το καλό του
περιβάλλοντος. Σε ό,τι αφορά σε θέσεις συλλογής
και στις ώρες λειτουργίας τους μπορείτε να
απευθυνθείτε στην αρμόδια επιχείρηση διαχείρισης.
GR/CY GR/CY GR/CY GR/CY
66142_Zeitschaltuhr_digital_innen_RO_GR_GB.indd 2 20.07.11 18:20
Page 32

Χαρακτηρισμός προϊόντος:
Ψηφιακός χρονοδιακόπτης εβδομαδιαίου
προγραμματισμού
Αρ. τεμ.: 97318-7
Αρ. μοντέλου: EIM-804 GR
Digital Weekly Timer
Introduction
Before using the device for the first time, please
make yourself familiar with the way it works.
Please refer in addition to the operating instructions
below and the safety advice. Use the device only as described
and for the indicated purposes. Keep these instructions in a
safe place. If you pass the device on to anyone else, please
ensure that you also pass on all the documentation.
Proper use
This product is intended for the automatic switching on and
off of electrical devices. The device is intended for indoor
use only. Any modification to the device shall be considered
as improper use and can lead to considerable risk of accident.
The manufacturer will not accept liability for loss or damage
arising from improper use. This device is not intended for
commercial use.
Technical data
Designed electrical supply: 240 V ∼, 50 Hz
Designed current: AC 10 A
Maximum load: 2300 watts
Outlet switch: Relay
Timer accuracy: + / – 1 second / day at
20 °C
Shortest programmable time: 1 minute
Description of parts
LC display
1
Minute button (MIN)
2
ON / AUTO / OFF button (MANUAL)
3
Reset button
4
Recall button (RECALL)
5
Day of the week button (WEEK)
6
Display mode button (TIME)
7
Input button (SET)
8
Hour button (HOUR)
9
Safety
Read all the safety advice and instructions.
Failure to observe the safety advice and instructions may
result in fire and / or serious injury.
KEEP ALL THE SAFETY ADVICE AND INSTRUCTIONS IN
A SAFE PLACE FOR FUTURE REFERENCE!
GR/CY
General safety advice
DANGER OF LOSS
OF LIFE OR ACCIDENT TO INFANTS
AND CHILDREN! The product is not a toy.
Never leave children unsupervised with the packaging
material or the device. The packaging material presents
a suffocation hazard and there is a risk of loss of life
from electric shock.
This device is not intended to be used by persons (in-
cluding children) with restricted physical, sensory or
mental abilities or with insufficient experience and / or
knowledge, unless they are supervised by a person who
is responsible for their safety or they have received instruction on how to use the device from such a responsible
person. Children should be supervised in order to ensure
that they do not play with the device.
GB/CY GB/CY GB/CY GB/CY
Plug the device into a properly installed 220–250 V, 50 Hz
mains outlet socket. All the indicators in the LC display 1
appear briefly. Then the time indicator appears.
Note: In the event of a power cut, the in-built rechargeable battery ensures that the time is kept going and the
automatic switching program remains activated. The
device is fully programmable without a power supply,
as long as the rechargeable battery is fully charged.
Operation
Setting the day of the week and time
Keep the display mode button (TIME) 7 pressed during
the following programming procedures.
Press the day of the week button (WEEK) 6 repeatedly
until the desired day of the week appears in the LC
display 1.
Tip: By pressing and keeping pressed the day of the
week button (WEEK) 6 for approx. 3 seconds you can
GB/CY GB/CY GB/CY
Use the device only with a properly installed mains
outlet socket.
CAUTION! Do not have one digital time switch in-
serted behind another. There is the danger of mechanical
damage if one adapter plug is inserted behind another.
RISK TO LIFE FROM
ELECTRIC SHOCK! Keep the device away
from moisture and do not touch it with moist
hands.
Do not allow the device to be subjected to extreme heat
or cold.
Do not allow the device to be subjected to extreme
temperature fluctuations. Failure to observe this advice
could lead to condensation forming. Wait until the device
has reached the temperature of the room before you
use it.
Do not cover the device with newspapers, articles of
clothing or the like. Otherwise the device may heat up,
which is not permitted.
accelerate the setting process and reach the desired
value more quickly. This quicker method can also be
used for making the following settings.
Note: MO = Monday, TU = Tuesday, WE = Wednesday,
TH = Thursday, FR = Friday, SA = Saturday, SU = Sunday
Press the hour button (HOUR) 9 repeatedly until the
desired hour value appears in the LC display 1.
Press the minute button (MIN) 2 repeatedly until the
desired minute value appears in the LC display 1.
Release the display mode (TIME) button 7.
Note: If approx. 10 seconds pass without any settings
being made, then the device returns to the normal time
display.
Note: The time switch is now in operation. This is indicated by the flashing of the colon in the LC display 1.
Always check the device for damage before plugging it
into a mains outlet socket. Do not use the device if you
discover it is damaged in any way. In the event of damage, repairs or other problems with the device, please
contact a specialist repair shop.
Do not plug in any devices that hang from and exert
their self-weight on the plug. This will prevent any nonpermitted heating up of and mechanical damage to the
mains outlet socket.
Do not use the device with power outlet strips or extension
cables.
Please note that damage arising from improper handling,
non-observance of the operating instructions or interference with the inside of the device by unauthorised persons
is excluded from the warranty.
The device is not suitable for switching inductive loads in
excess of 10 A (amperes). For this reason never operate
electric motors or fluorescent lights fitted with conventional ballasts with this time switch. Ask an electrician or
Activating summer / winter time
Press the display mode button (TIME) 7 until the
additional “+1h” appears in or disappears from the
time indicator.
Programming the time switch
Switching-on time:
Press the input button (SET) 8 once. The PROG 1 ON
“- - : - -” indicator appears in the LC display 1.
Press the day of the week button (WEEK) 6 repeatedly
until the desired day of the week or block of days of the
week appears in the LC display 1. The following days
of the week or blocks of days of the week are possible:
•MOTUWETHFR
Monday – Friday
•SASU
Saturday + Sunday
•MOTUWETHFRSA
Monday – Saturday
other suitable expert if you are in any doubt about the
inductive load of your device.
Do not open the device. Never attempt to replace or
repair parts yourself.
Before cleaning the device, always disconnect it from
the mains outlet socket and pull all mains plugs out of
the device.
Please ensure that the device is always easily accessed.
In the event of malfunctions, pull the device out of the
mains outlet socket.
Before use
The time switch has an integral rechargeable battery. This
serves to retain stored data, e.g. time, date and switching
procedures. The rechargeable battery must be charged for
24 hours before first use. You can make settings on the
device during the charging process.
•MOWEFR
Monday + Wednesday + Friday
•TUTHSA
Tuesday + Thursday + Saturday
•MOTUWE
Monday – Wednesday
•THFRSA
Thursday – Saturday
•MOTUWETHFRSASO
Monday – Sunday
Note: As soon as a particular day or combination of days
has been stored, the device executes the programmed
switching sequence at the same time on each of these days
of the week.
Press the hour button (HOUR) 9 repeatedly until the
desired hour value appears in the LC display 1.
GB/CY GB/CY GB/CY GB/CY
Press the minute button (MIN) 2 repeatedly until the
desired minute value appears in the LC display 1.
Press the input button (SET) 8 again to store the setting.
The PROG 1 OFF “- - : - -” indicator appears in the LC
display 1.
Switch-off time:
Press the day of the week button (WEEK) 6 repeatedly
until the desired day of the week or block of days of the
week appears in the LC display 1.
Press the hour button (HOUR) 9 repeatedly until the
desired hour value appears in the LC display 1.
Press the minute button (MIN) 2 repeatedly until the
desired minute value appears in the LC display 1.
Press the input button (SET) 8 again to store the setting.
Press the display mode button (TIME) 7 to return to the
current time.
GB/CY GB/CY GB/CY GB/CY
Setting the countdown
Press the input button (SET) 8 to access the timer menu.
Press and keep pressed the input button (SET) 8 until
the “CTD” icon appears in the LC display 1.
Press the hour button (HOUR) 9 repeatedly until the
desired hour value appears in the LC display 1.
Press the minute button (MIN) 2 repeatedly until the
desired minute value appears in the LC display 1.
Note: The countdown can be set from 1 minute to
11 hours, 59 minutes.
Press the display mode (TIME) button 7.
The device returns to its normal operating mode.
Press the hour button (HOUR) 9 and the minute button
(MIN) 2 at the same time to start the countdown function.
Manually ending the countdown
Press the ON / AUTO / OFF button (MANUAL) 3 to
halt the countdown while it is running.
Note: You can program up to 20 different switching
sequences. To do this, repeat the above-described programming procedure in each case. The PROG 2 ON “- - : - -”
indicator etc. appears in the LC display 1 when each
further setting is stored.
Changing or checking
switching times
To change or check the switching times, press the input
button (SET) 8 and the programmed switching times
appear one after the other in the display.
To change the days, hours or minutes, proceed as
described in the section “Programming the time switch”.
Activating / deactivating
switching times
Press the input button (SET) 8.
Then press the recall button (RECALL) 5 to cancel the
programmed switching time. The switching data are not
Press the ON / AUTO / OFF button (MANUAL) 3
again to continue the countdown.
Press the display mode button (TIME) 7 to change
from the countdown display to the current time.
Press the display mode button (TIME) 7 to change
from the current time to the countdown display.
Press the hour button (HOUR) 9 and the minute button
(MIN) 2 at the same time to cancel the countdown
function.
Cleaning and care
Never use liquids or cleaning agents, as they may
damage the device.
Clean the outside of the device only with a soft, dry
cloth.
erased from the memory, merely deactivated. The symbol
“- - : - -” appears in the display.
Then press the recall button (RECALL) 5 again to
reactivate the cancelled switching time.
Manually skipping switching times
At any time, and independently of programmed times,
you can skip manually to the next switching time.
To do this, press the ON / AUTO / OFF button
(MANUAL) 3 repeatedly until the desired command
appears in the LC display 1:
OFF: All switching times are cancelled, the time switch
allows no current to pass to the connected devices.
AUTO OFF: Switching times are active, the time switch
is switched off.
ON: All switching times are cancelled, the time switch
allows current to pass continuously to the connected
devices.
Disposal
The packaging is wholly composed of environmentally friendly materials that can be disposed
of at a local recycling centre.
Contact your local refuse disposal authority for more details
of how to dispose of your discarded product.
In the interest of the environment, do not throw
out your discarded device with your household
refuse. Take it to a suitable centre where it can
be disposed of properly. Your local council will
be able to tell you where the collection centres
are located and their opening times.
AUTO ON: Switching times are active, the time switch
is switched on.
Setting the random mode
Note: This function switches the time switch arbitrarily on
and off and is intended to prevent burglaries by simulating
an occupied house with e.g. lights switching on and off at
irregular intervals. Your preprogrammed switching commands
are moved by a random amount up to 30 minutes on each
day. This function is only possible if one or more switching
commands have been set.
Press the hour button (HOUR) 9 for at least 3 seconds.
The time switch changes into random mode. The random
mode symbol “RND” appears in the LC display 1 to
show that the random mode is switched on.
Press the hour button (HOUR) 9 again for 3 seconds
to cancel the random mode.
Product description:
Digital Weekly Timer
Art. No.: 97318-7
Model No.: EIM-804 GR
GB/CY GB/CY GB/CY GB/CY
66142_Zeitschaltuhr_digital_innen_RO_GR_GB.indd 3 20.07.11 18:20
Page 33

© by ORFGEN Marketing
IAN 66142
Inter-Union Technohandel GmbH
Klaus-von-Klitzing-Str. 2
D-76829 Landau / Pfalz
66142_Zeitschaltuhr_digital_innen_RO_GR_GB.indd 4 20.07.11 18:20
 Loading...