

Page 1

Preliminary notes
Thank you for selecting our digital MP3 player SilverCrest DM-67.
In order for you to utilize this device and all its options, we recommend that you read the corresponding instructions in this manual before the initial use of the device, even if you’re familiar with
handling electronic devices. Pay special attention to chapter
“Important safety instructions“ on page 5. Store this manual in a
safe location for future reference. If you sell or transfer this device,
please be sure to pass along these instructions as well.
Copyright
The contents of this manual may not be reproduced, copied or
otherwise duplicated in electronic, mechanical, magnetic, optical,
chemical, manual, or any other form without the permission of our
company, nor may it be stored in a search engine nor translated
into another language.
Declaration
The descriptions and features in this manual only serve as general guidelines and do not represent a guarantee. In order to offer
you a product of the highest quality, we reserve the right to make
possible improvements or changes without prior notification.
For all product descriptions and user instructions, the German
version is the ultimately valid reference in the event of possible
deviations in other languages.
English
Norsk
1
Page 2

Manufacturer information
English Norsk
JNC Datum Tech GmbH
Benzstraße 33
71083 Herrenberg
Germany
2
Page 3

Table of contents
Preliminary notes .................................................................................................... 1
Copyright.................................................................................................................. 1
Declaration ............................................................................................................... 1
Manufacturer information....................................................................................... 2
Table of contents..................................................................................................... 3
Important safety instructions................................................................................. 5
Scope of delivery..................................................................................................... 9
Operating elements............................................................................................... 10
Display.................................................................................................................... 11
Basic functions...................................................................................................... 11
Charging the internal battery ...............................................................................12
Turning the device on 14
Turning the device off 14
Key lock 15
Navigation 16
Volume 17
Music ...................................................................................................................... 18
Playback / pause 18
Next title / previous title 18
Fast forward / rewind 18
Music playback display 19
Selection and search of music titles 19
Searching for music titles according to artist 21
Searching for music titles according to album 23
Searching for music titles according to title 25
Searching for music titles according to genre 26
Searching for music titles according to year of release 27
Random sequence 27
Repeat 28
Pictures .................................................................................................................. 28
Videos..................................................................................................................... 29
Creating video files 30
Favorites................................................................................................................. 33
English
Norsk
3
Page 4

Voice recordings ...................................................................................................35
Voice recording 36
English Norsk
Playing back the voice recordings 37
Deleting voice recordings 38
Menu .......................................................................................................................39
Shuffle 39
Repeat 40
DSP 40
Slideshow 41
Adding to Favorites 42
Clearing Favorites 42
Settings 43
Customize menu 43
Brightness 44
Screen save (“ScreenSave“) 44
Saving power (“PowerSave“) 45
Language 45
Standard setting (“Restore Defaults“) 46
System information (”System info“) 46
Usage with a computer ......................................................................................... 47
System requirements 47
Connection with the computer 48
Microsoft Windows ME, 2000, XP, Vista installation 48
Microsoft Windows 98 SE installation 49
Copying files 51
File structure 51
Disconnecting from the computer 52
Formatting the memory 52
Resetting your MP3 player 53
Technical data ....................................................................................................... 54
Disposal.................................................................................................................. 55
Device 55
Troubleshooting.................................................................................................... 56
4
Page 5

Important safety instructions
Please read and strictly observe the following instructions!
The MP3 player and the provided accessories, such as
e.g. the external power adapter may not be disassembled,
modified or repaired by you.
If the MP3 player has been dropped or if the casing has
been damaged, turn it off.
Do not give your MP3 player and especially the accesso-
ries to children. Never let your children use electrical devices
without supervision. Children are not always able to recognize
potential hazards. Batteries can be fatal if swallowed. Store the
batteries out of reach of small children. If a battery has been
swallowed, medical help has to be obtained immediately. Also
keep the packaging films away from children. There is a danger
of suffocation.
The MP3 player and the accompanying components may
not be exposed to dripping or sprayed water. Additionally,
no objects or containers containing liquids, such as vases or
glasses, may be placed on top of the device. Pay special attention to the device when it rains, snows, at the beach, or in the
vicinity of water.
Do not use the MP3 player in environments with high hu-
midity, large amounts of steam, smoke, or dust.
Don’t leave the MP3 player in locations where the tem-
perature can rise to a large degree (e.g. inside a vehicle).
This could damage the casing and interior parts and cause a
fire.
English
Norsk
5
Page 6

Only place the MP3 player on stable surfaces. Otherwise
the MP3 player could drop or topple, cause injuries or sustain
English Norsk
damage. Don’t let the MP3 player drop or bump against anything and take great care when using it.
Make sure that the display is not exposed to any bumps.
This could damage the glass of the monitor or cause the liquid
to leak out. If the liquid gets into the eyes, on the skin or the
clothes, it has to be rinsed off immediately with clear water. If
the liquid gets into the eyes, consult your physician immediately.
Only use the MP3 player with the included headphones
(SilverCrest DM-67).
Don’t use the MP3 player at an excessive volume. This
poses a risk to your hearing.
Articles 44.5 and 44.6 of the law about public health mainte-
nance, modified by article 2 of the law from May 28, 1996, prescribe a restriction of the sound pressure at a maximum of 100
dB(A). The headphones (SilverCrest DM-67) and the device
comply with these legal regulations to their full extent. Longer
listening periods at a full volume of the device may cause hearing damage to the user.
Use particular care in potentially dangerous situations
(e.g. while driving, riding a bicycle, jogging, etc.) or discontinue the use of the headphones temporarily. Even if your
headphones are designed in such a way that you can continue
to perceive external sounds, you should set the volume only so
high that you can still perceive your environment.
6
Page 7

We advise against the use of headphones while driving a
car or other vehicle. Please drive carefully and attentively. If
you notice that the device distracts or impedes you while you
are driving, switch it off.
Be careful with the external power adapter: Always touch
the external power adapter by its casing. Don’t pull on the actual cable and never touch the adapter with wet hands, since
this could cause a short circuit or an electrical shock. Don’t
place the device or any furniture or similar items on the adapter
and the power cable. Make sure that the power cable doesn’t
get pinched. Never tie a knot into the power cable and don't tie
it together with other cables. The power cable should be laid in
such a way that no one will step on it. A damaged power cable
may cause a fire or an electrical shock. Check the power cable
from time to time. If it is damaged, contact your nearest authorized customer service centre or your vendor for a replacement.
Caution: Information about disconnecting from the power
supply: To completely disconnect the device from the power
supply, the external power adapter has to be pulled out of the
power socket. Therefore the device should be positioned in
such a way that unobstructed access to the power socket can
be ensured at any time, so that the power adapter may immediately be pulled out in an emergency situation. To prevent the
risk of fire, the external power adapter should always be disconnected from the power socket before a longer period of disuse of the device, such as during a vacation.
English
Norsk
7
Page 8
Risk of explosion! Never toss the device into fire, since the
built-in battery may explode. The improper handling of lithium-
English Norsk
ion batteries may lead to an explosion or fire. Therefore only
use the battery for its intended purpose!
Only operate the device with the electrical parts that are
included in the scope of delivery.
Dispose of your camera and the batteries
in compliance with the Directive 2002/96/EC
(see p. 55). In particular, the device does not
belong into household trash.
8
Page 9
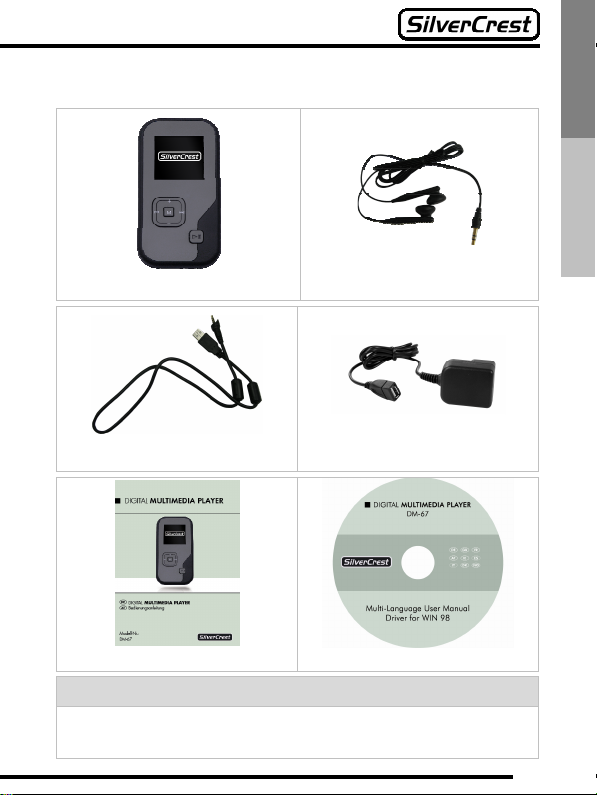
Scope of delivery
1. MP3 player DM-67 2. Headphones
English
Norsk
3. USB cable 4. External power adapter
5. Manual 6. Driver CD
Note:
The design and technical data are subject to change without any
notification.
9
Page 10
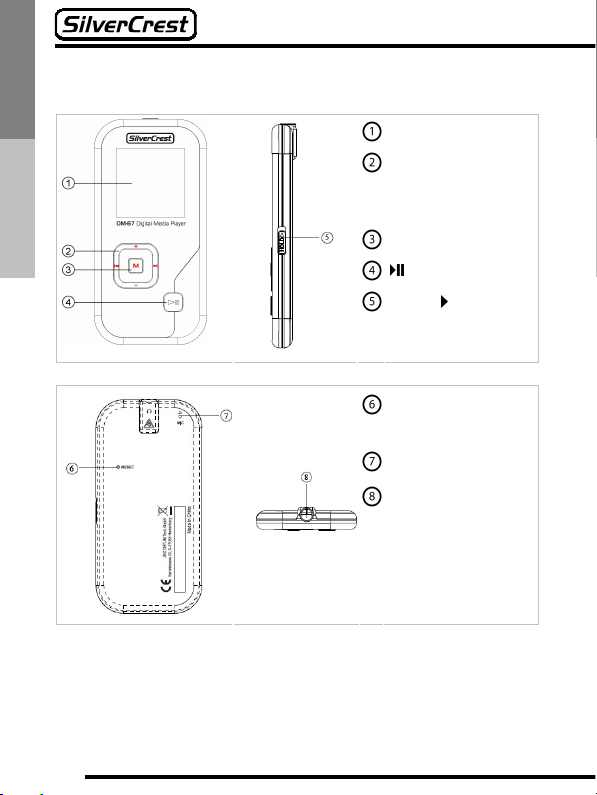
Operating elements
English Norsk
Display
+/- (Volume)
(back) / (forward)
M (Menu)
(Play / pause)
HOLD (Key lock)
RESET (Reset but-
ton)
MIC (Microphone)
Headphone jack /
USB cable input
10
Page 11
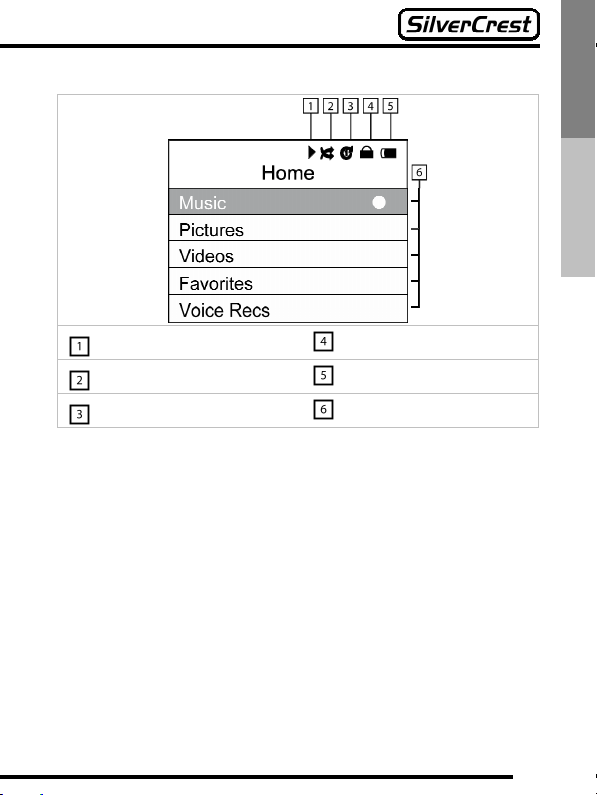
Display
Now playing / pause
Random playback
Repeat
Keys locked
Battery charge level
Different playback modes
Basic functions
With the MP3 player DM-67, you can listen to music, make voice
recordings, and view videos and pictures. How you use these
functions is described starting on p. 18. But first you will receive
an introduction to basic functions such as charging the internal
batteries, turning the device on and off, using the key lock, navigation, and volume control.
English
Norsk
11
Page 12
Charging the internal battery
English Norsk
Your MP3 player has an integrated rechargeable lithium-ion battery. This has to be completely charged before the first use of the
device (min. 3 hours) and then completely discharged in order to
guarantee the optimum lifespan of the battery. This requires that
the device is not freshly charged before its complete discharge.
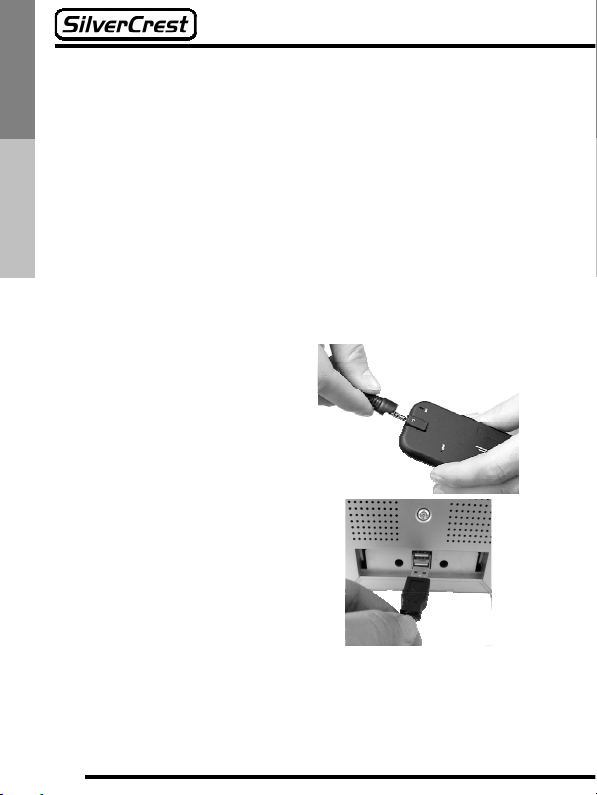
The internal battery can be charged either by connecting the MP3
player to a USB port on your computer or through the provided
external power adapter with an external power source.
To charge the device with your
computer, connect the device
to a USB port on your computer by using the provided
USB cable. The MP3 player
switches on automatically and
the charging process begins.
12
Page 13
To charge the device through
an external power source, connect your MP3 player with an
electrical outlet by using the
provided USB cable and the
external power adapter.
A charging battery will appear
on the display and the battery
will be charged.
Note:
The battery symbol in the right upper corner of the display informs you about the current energy level of the battery.
Note:
To extend the operation of your battery, you can save energy in
the following ways:
Reduce the brightness of the background illumination (page 44).
Set the display to turn off automatically (page 44).
Use the energy saving function (page 45).
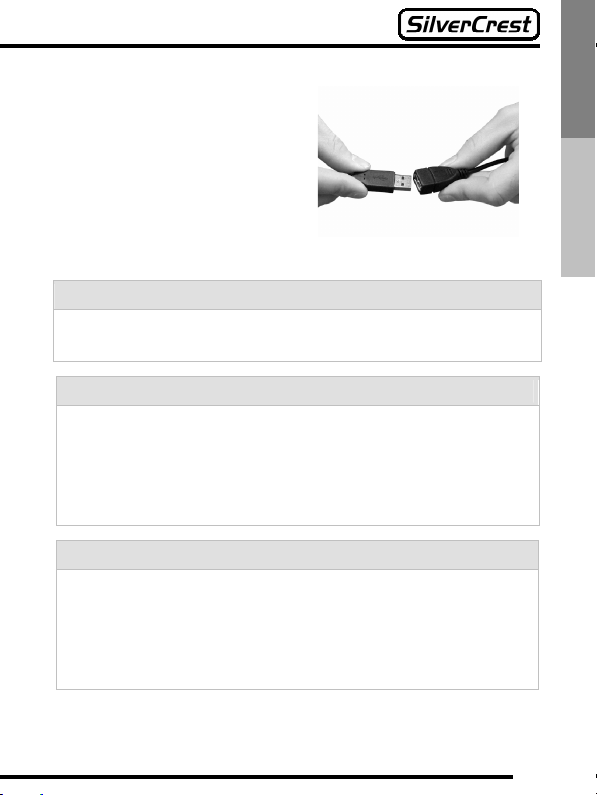
Caution:
The provided USB cable is only intended for your MP3 player.
Don’t use any other USB cable to charge your device.
Don’t use the provided USB cable for other devices. The USB
cable can damage other devices if it is connected to their
headphone jacks.
English
Norsk
13
Page 14
Turning the device on
English Norsk
To turn on your MP3 player, press the button until the Silvercrest logo appears on the display. After a brief loading time, the
device is operational.
Note:
If the MP3 player turns off during the starting process and dis-
plays the message "HOLD", you have to disable the key lock.
For more information about this, read p. 15.
If the MP3 player switches off the charging process without a
message, the battery is too weak and has to be charged. For
more information about this, read p. 12.
Turning the device off
You can turn off your device by pressing the button until the
message “Shutting down” appears and the device automatically
switches off.
Note:
To turn off your device, the key lock (p. 15) has to be deacti-
vated.
Your MP3 player can turn off automatically to save energy. For
more information about this, read p. 45.
14
Page 15
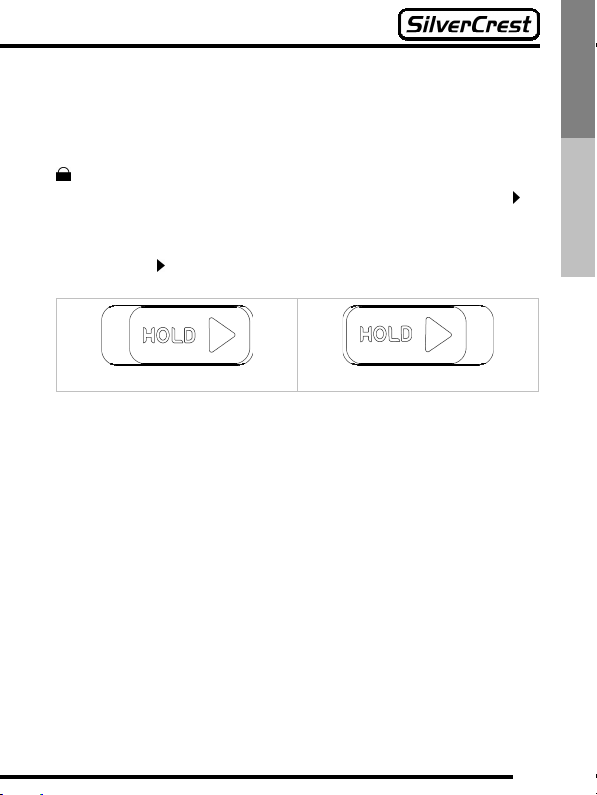
Key lock
The key lock prevents an unintentional operation of your MP3
player - for example during transport. If the key lock on your MP3
player is activated, all entries are ignored and the key lock symbol
appears.
To activate the key lock, you have to slide the HOLD button
the direction of the arrow and the key lock symbol will appear on
the display. To deactivate the key lock, you have to slide the
HOLD button
in the opposite direction of the arrow.
in
English
Norsk
Key lock activated
Key lock deactivated
15
Page 16
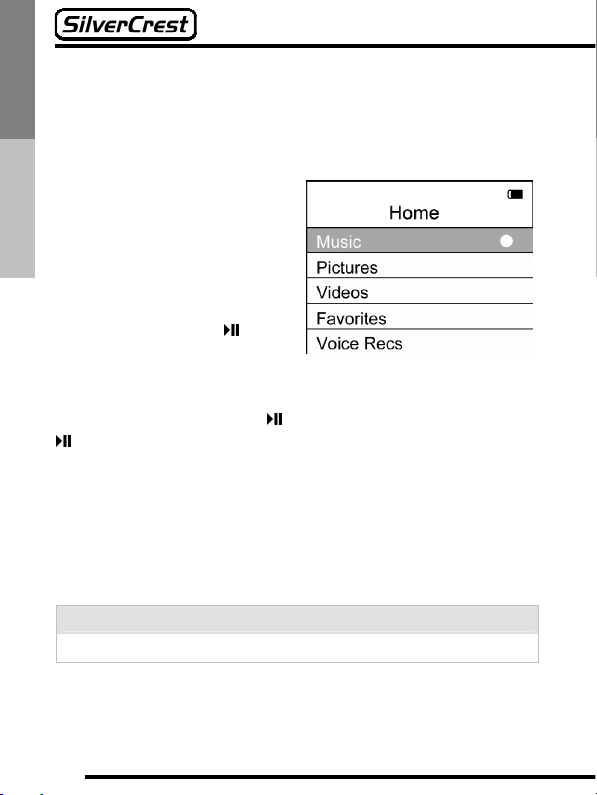
Navigation
English Norsk
When you switch on the MP3 player, you will reach the home
screen. There you can select the following menu items with the
buttons + and – and activate them with the
Now playing (menu item only available during active playback)
Music (page 18)
Pictures (page 28)
Video (page 29)
Favorites(page 33)
Voice recordings (page 35)
By pressing the M button, you will enter the menu of your MP3
player. There you can select the following menu items with the
buttons + and – and activate them with the
Shuffle (page 39)
Repeat (page 40)
DSP (page 40)
Slideshow (page 41)
Add to Favorites (page 42)
Clear Favorites (page 42)
Settings (page 43)
System info (page 46)
16
button:
button:
Page 17
Note:
If you are in the playback mode, you can reach the menu dis-
play by pressing the M button once. If you press the M button
twice, you will reach the home screen.
If you are currently in one of the playback modes, the device
will automatically jump back from the menu displays to the
playback display after a brief period.
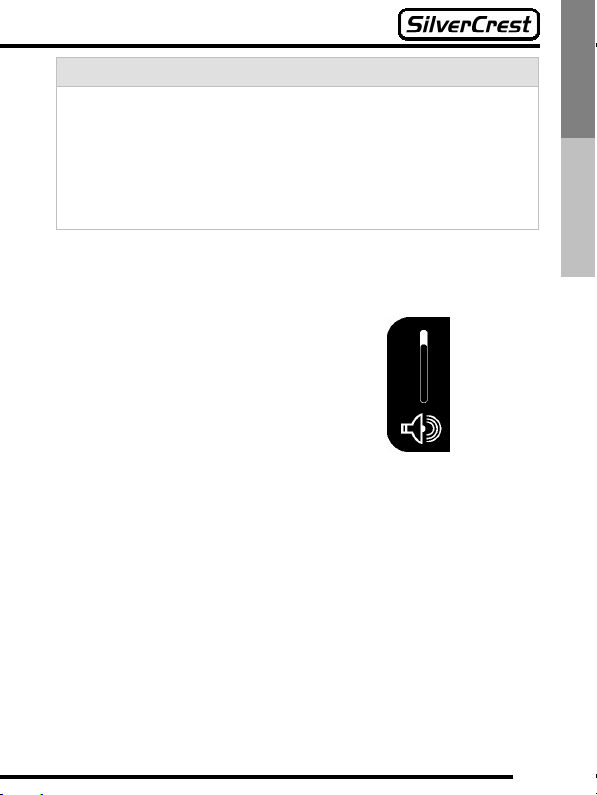
Volume
During the playback of music
titles, voice recordings and
videos, you can regulate the
volume of the device with the +
and – buttons. The selected
volume level will be briefly
faded in on the right edge of
the display.
English
Norsk
17
Page 18
Music
English Norsk
In the music mode, you can play back MP3, WMA and WAV music titles.
When you are at the home
screen, you can switch between the different menu items
by pressing the buttons + and
–. To change to the music
mode, select the menu item
“Music” and press the
button.
Playback / pause
The playback is started with . The playback can be paused with
and then started again.
Next title / previous title
During the playback or while pausing, you can return to the start
of the played back title by pressing the button once. You can
select the previous title by pressing the button twice. You can
select the next saved title by pressing the button.
Note:
The sequence of the titles is determined by the file names.
Fast forward / rewind
If you keep the buttons or pressed during playback, you
can fast forward or rewind within a title.
18
Page 19

Music playback display
The number of the current
title and the total amount of
the selected songs are
displayed.
Name of the currently
played title
Name of the respective
artist
Name of the respective
album
Time the track has been
playing
English
Norsk
Shows the progress of the
playback.
Total length of the music
title
File format
Transfer rate
Selection and search of music titles
In the music mode, you can find your music titles by means of
different search criteria. For example, you can first search for
artists, then for the albums of the selected artist, and then the
titles. Or you can display all music titles sorted according to year
or genre.
19
Page 20

Note:
English Norsk
The red dot behind the search criteria shows that the search
criterion can be narrowed even further.
Note:
To effectively use the search function in the music mode, your
music titles need to have additional information (MP3 or WMA
tags). This is generally the case if you purchase music online.
In the following menus, you can set the search criteria with the
and buttons. Confirm your selection with the
The following sorting options
are available in the main menu
of the music mode:
Artist Æ album Æ title
Albums Æ title
Title
Genres
Year
Note:
If you press on the home screen without selecting one of the
sorting sequences, all music titles saved on the player will be
played.
button.
20
Page 21

Searching for music titles according to artist
Select the menu item “music”. If a red dot appears behind the
menu item, you can have different search criteria displayed
through the button. If you select the search criterion “artist”
and again press the button, all artists who have a music title
saved on the MP3 player are displayed. If you have selected an
artist with the buttons + and -, you can
play back all music titles by this artist by pressing (the sub-
sequent play list will have as many titles as are saved by the
selected artist).
display all albums by the selected artist by pressing the
button.
return to each previous search criterion by pressing the
button.
English
Norsk
21
Page 22

The album selection displays
all albums by the previously
English Norsk
selected artist by whom music
titles are saved on the MP3
player. If you have selected an
album with the buttons + and -,
you can
play back all music titles on this album by pressing the but-
ton (the subsequent play list will have as many titles as are
saved on the album by the previously selected artist).
display all titles on the selected album by pressing the
button.
return to each previous search criterion by pressing the
button.
The title selection displays all
titles on the previously selected
album that are saved on the
MP3 player. If you have selected a title with the buttons +
and -, you can
play back this music title by pressing the button (the subse-
quent play list will have exactly one title).
return to the album selection by pressing the button.
22
Page 23

Searching for music titles according to album
Select the menu item “music”. If a red dot appears behind the
menu item, you can have different search criteria displayed
through the button. If you select the search criterion “albums”
and again press the button, all albums are displayed which
have a music title saved on the MP3 player. If you have selected
an album with the buttons + and –, you can
play back all music titles on this album by pressing the but-
ton (the subsequent play list will have as many titles as are
saved on the selected album).
display all titles on the selected album by pressing the
button.
return to each previous search criterion by pressing the
button.
English
Norsk
23
Page 24

The title selection displays all
titles on the previously selected
English Norsk
album that are saved on the
MP3 player. If you have selected a title with the buttons +
and -, you can
play back this music title by pressing the button (the subse-
quent play list will have exactly one title).
return to each previous search criterion by pressing the
button.
24
Page 25

Searching for music titles according to title
English
Norsk
Select the menu item “music”. If a red dot appears behind the
menu item, you can have different search criteria displayed
through the button. If you select the search criterion “titles”
and again press the button, all music titles are displayed that
are saved on the MP3 player. If you have selected a title with the
buttons + and –, you can
play back the desired title by pressing .
return to each previous search criterion by pressing the
button.
25
Page 26

Searching for music titles according to genre
English Norsk
Select the menu item “music”. If a red dot appears behind the
menu item, you can have different search criteria displayed
through the button. If you select the search criterion “genres”
and again press the button, all music genres are displayed
that are saved on the MP3 player. If you have selected a genre
with the buttons + and –, you can
play back the desired music genre by pressing .
display all titles in the selected genre by pressing the but-
ton.
return to each previous search criterion by pressing the
button.
26
Page 27

Searching for music titles according to year of release
Select the menu item “music”. If a red dot appears behind the
menu item, you can have different search criteria displayed
through the button. If you select the search criterion “years”
and again press the button, all music titles that are saved on
the MP3 player are displayed in the sequence of their year of
release. If you have selected a year of release with the buttons +
and –, you can
play back the desired year by pressing .
display all titles from the selected year by pressing the
button.
return to each previous search criterion by pressing the
button.
Random sequence
English
Norsk
You have the option of playing your selected titles in random sequence. You can do so by pressing the M button. You will access
the menu, where you can activate the random sequence by pressing the
button (“on“). For more information about this, read the
chapter „Shuffle“ on page 39.
27
Page 28

Repeat
English Norsk
You can repeat individual music titles or your entire title selection.
For more information about this, read the chapter „Repeat“ on
page 40.
Pictures
When you are at the home
screen, you can switch between the different menu items
by pressing the buttons + and
-. To access the picture mode,
select the menu item “pictures”
and press the
By pressing the button, you
can display all pictures that are
available on your MP3 player.
You can select these through
the buttons + and – and have
them displayed by pressing the
button.
If you have activated the setting “Slideshow” (see page 41), a
slideshow of all pictures will be started automatically. If you haven’t activated a slideshow, you can switch between your pictures
with the and buttons.
button.
28
Page 29

Note:
Only the pictures inside the folder “pictures” in the memory are
displayed.
The pictures have to be in .jpg or .bmp format.
To exit the picture mode, press M twice and you will access the
home screen again. Here you can select a different playback
mode.
Videos
When you are at the home
screen, you can switch between the different menu items
by pressing the buttons + and
-. To access the video mode,
select the menu item “videos”
and press the
By pressing the button, you
can display all videos that are
available on your MP3 player.
You can select these through
the buttons + and – and can
play them by pressing the
button.
button.
English
Norsk
In the video mode, you can view video files in .avi format. By
briefly pressing the buttons and , you can switch between
your video files. By pressing the buttons and longer, you
29
Page 30

can activate fast forward/rewind. By pressing the button, you
can start or pause your video.
English Norsk
Note:
Only the videos inside the folder “videos” in the memory are
displayed.
Videos have to be in .avi format (p. 30).
Creating video files
In order for you to be able to watch a video file on your MP3
player, it has to be in the .avi format. You can convert video files
to this format by using the software on the provided CD. To do
this, insert the provided CD in your computer. The installation will
begin automatically. Follow the instructions on the monitor to install the conversion program.
After the successful installation, you can start the conversion program and connect your device to the computer with the provided
USB cable (p. 48).
30
Page 31

To convert your video files, follow the instructions below.
English
Norsk
1. Start the installed conversion
program.
2. Select a video file to be converted. Click on it with your
mouse and keep the mouse
button pressed. Now drag the
file into the task list of your
3. When you have entered the
desired files in the list, press
the start button. The conversion will start.
conversion program.
4. Once the conversion has
been completed, the message
“transcoding completed” will
appear and the progress bar
will be completely filled.
31
Page 32

English Norsk
5. Now you can copy the converted files to your device.
Click on the symbol of your
6. Once this is open, drag the
converted files into the folder
“videos”.
MP3 player in “My Computer”.
You can copy the created .avi file into the “videos” folder on your
MP3 player and then watch them.
32
Page 33

Favorites
Your MP3 player will give you the option of creating a list with your
favorite titles and playing it back.
When you are at the home
screen, you can switch between the different menu items
by pressing the buttons + and
-. To access the titles you have
selected, select the menu item
“Favorites” and press the
button. Now your device will
play back the titles you have
selected.
By pressing the button, you
can display all files saved under “Favorites“.
You can select these through
the buttons + and – and can
play them by pressing the
button.
English
Norsk
33
Page 34

Adding titles to “Favorites”
To add a title to the list of your
English Norsk
own selections, please select
the desired title and play it
back.
Now press the M button and
you will access the menu. Select the menu item “Add to
Favorites” through the buttons
+ and –. By pressing the
button, the title will be added
into the list at “Favorites“. If the
title was added successfully,
the message “Add
to Favorites” appears on the
display. Repeat this process to
add additional titles.
Clearing “Favorites”:
To clear the list of your favorite
titles, please select the menu
item “ClearFavorites” in the
menu selection and press the
button. The message
“Cleared successfully” will appear on the display and your
list has been cleared.
34
Page 35

Note:
The “Favorites” list can’t be modified. The list can only be
cleared in its entirety.
English
Voice recordings
In the voice mode, you can basically carry out the same functions
(PLAY / PAUSE / Next title / Previous title / Fast forward / Rewind)
as in the music playback mode (see p. 18) and also make music
or voice recordings in .wav format through the internal microphone.
When you are at the home
screen, you can switch between the different menu items
by pressing the buttons + and
-. To access the voice recordings mode, select the
menu item “Voice recs” and
press the
Now you have the option to
make recordings through the
integrated microphone or playing back recordings that have
already been created. To do
this, use the buttons + and – to
select between the menu items
“Record” and “Play back”.
button.
Norsk
35
Page 36

Voice recording
English Norsk
If you want to make a voice
recording, select the menu item
“Record” with the buttons + and
– and confirm the selection with
the
button. The display shows
“Ready” and the recording can
be started by pressing the
button again.
After a short time, the recording
window will appear on the
display and the recording starts.
By pressing the
recording is paused and can be
continued by pressing the
button again.
Voicexxx.Wav indicates the file
name under which the recording
is made and saved after
completion. To the left beneath
the progress bar, the temporary
recording length is displayed.
To the right beneath the
progress bar, the maximum
recording time is shown.
button, the
36
Page 37

By pressing the M button, the
recording is stopped and saved.
Now the device is ready for a
new recording, which can again
be started by pressing the
button. If you don’t wish to make
another recording, you can
return to the home screen by
pressing the button.
Playing back the voice recordings
If you want to play back a voice
recording, select the menu item
“Play back” with the buttons +
and - and confirm the selection
with the
recordings will be played in the
sequence in which they were
recorded.
To select a particular voice
recording, press the button.
All saved recordings are listed
and you can select the desired
recording through the buttons +
and – and play them back by
pressing the
button. Now the
button.
English
Norsk
37
Page 38

Deleting voice recordings
English Norsk
To delete a voice recording,
press the button M while it is
being played back. The display
will show the voice recording
menu. Now select the menu
item “Delete file”.
Note:
In the voice mode, you can play back all titles that are in the
“Record” folder (see p. 51). Voice recordings will be saved
here automatically.
The recording can only be made in the .wav format, not the
MP3 format.
During the recording, the duration of the recording in progress
is shown on the display, along with the length of time that is
still available for the recording. This depends on how much
memory is free.
To achieve the best possible recording result, direct the
microphone input towards the source at a distance of approx.
10 – 15 cm and avoid interfering sounds.
38
Page 39

Menu
In the menu of your MP3 player, you have the option of
switching particular functions of your device on and off
and changing the settings on your device.
Note:
During the playback of a file, you can access the menu by
pressing the M button. Then you can select the desired menu
item through the buttons + and –.
Shuffle
With this setting you can
change the playback sequence
of the music titles.
“Off”: Playback in alphabetical
sequence
“On”: Playback in random
sequence.
Select the desired value by
pressing
of the shuffle, the icon
pears.
. After the activation
ap-
English
Norsk
39
Page 40

Repeat
English Norsk
With this setting you can determine whether music tracks will
be played repeatedly.
“Off”: Play back once
“On”: Repetition of the current
title
“All”: When all titles have been
played back, all titles will be
repeated
Select the desired value by
pressing
. After activating the
repeat function, the corresponding icon
will appear.
DSP
With the DSP setting you can
change the sound
characteristics of your MP3
player. Six settings are
available (flat, bass, graph.,
pop, rock, jazz). “Flat”
corresponds to an unmodified
reproduction of the sound.
40
Page 41

If you select the “Graph.”
setting, you have the option of
changing the signal strength of
the different frequencies. To do
this, press the button and
you will enter the graphic EQ
menu. Here you can select the
individual frequencies with the
and buttons and change
the signal strengths with the +
and – buttons.
Slideshow
With this setting, you can determine whether a slideshow will
be shown in the picture mode
and how long a picture will be
displayed.
“Off”: No slideshow
“3s“, „5s“, “10s“, “15s“: A slide-
show with the specified dis-
play length is activated.
Select the desired value by
pressing
.
English
Norsk
41
Page 42

Adding to Favorites
English Norsk
With this setting, you can assemble music titles and voice
recordings into an individual list.
By pressing the button, the
currently played title will be
added to the list at “Favorites“.
If the title was added successfully, the message “Add to Fa-
vorites” appears on the display.
Repeat this process to add
additional titles.
Clearing Favorites
With this setting, you can clear
the music titles saved under
“Favorites". Confirm the clearing
process with
move the list. The message
“Cleared successfully” will appear on the display.
in order to re-
Note:
The “Favorites” list can’t be modified. The list can only be
cleared in its entirety.
42
Page 43

y
g
Settings
Under the menu item “Settings” you have the option of changing
the device settings of your MP3 player.
To do this, select the menu item “Settings” and activate it by
pressing the
button. Now you have the option of changing different characteristics of the device. To do this, use the buttons +
and – to select the corresponding menu item.
Customize menu
This setting makes it possible for
ou to deactivate individual
search criteria.
Select the menu item “Customize
menu” and press the button.
The search criteria that are supported by the device will be displayed. These can now be selected through the buttons +
– and switched on or off throu
the
button.
and
h
English
Norsk
43
Page 44

Brightness
English Norsk
With this setting you can
determine the brightness of the
display in eight steps from 1 (the
darkest) to 8 (the brightest)
Press the button
until you
have reached the desired
brightness.
Screen save (“ScreenSave“)
This setting allows you to choose
the time after which your device
turns off the display. You have
the option of automatically activating the screen save after
10sec, 20sec, 30sec or 1min.
This saves energy and achieves
a longer battery life. Select the
desired value by pressing the
button.
44
Page 45

Saving power (“PowerSave“)
With this setting you can determine whether the MP3 player
should automatically turn off
when there is no playback or
recording and no buttons are
pushed. This saves energy and
achieves a longer battery life.
“Off”: The MP3 player isn’t
turned off.
”1min“, ”2min“, ”5min“, “10min“:
Time after which the MP3
player is automatically turned
off
Select the desired value by
pressing
.
Language
With this setting you can determine the language of the display. German, English, Spanish,
Italian, French and Norwegian
are available. Set the desired
language by pressing
.
English
Norsk
45
Page 46

Standard setting (“Restore Defaults“)
English Norsk
This setting makes it possible for
you to reset all settings to the
factory default condition.
Select the menu item “Restore
defaults” and press the
button.
The display will indicate “Re-
stored successfully” and the
device is reset to the standard
settings.
System information (”System info“)
The first line of the system information displays the version
number of the firmware (operating software of the MP3 player).
The two following lines show
you how much of the internal
memory has been used. Here
the first number indicates the
amount of the free, still available memory in megabytes (MB
= megabyte) and the second
number shows the size of the
total memory.
You can access this information
by selecting the menu item
“System info” and activating it
by pressing the
46
button.
Page 47

Note:
You can also have information about the memory displayed
when your MP3 player is connected to your computer. Click with
the right mouse button on the corresponding drive on “My computer” and select the item “Properties” in the menu. Then the
used and free memory as well as the entire memory capacity will
be displayed to you.
Usage with a computer
System requirements
Operating system: Windows® 98SE, Me, 2000, XP or Vista
CPU: Pentium III 500 MHz or higher
RAM: 128 RAM (256 MB recommended)
Hard drive: 250 MB free memory
Interface: USB 2.0 (USB 1.1 compatible)
For the installation of the video conversion
CD-ROM drive:
program and in case you use the operating
system Windows® 98 SE.
English
Norsk
47
Page 48

Connection with the computer
English Norsk
You can connect your MP3 player to a free USB connection on
your computer by using the provided USB extension cable.
Note:
If you use a USB hub (a distributor of USB sockets), it may
happen that the MP3 player is not recognized by your computer. In that case connect the USB extension cable directly to
your computer.
Microsoft Windows ME, 2000, XP, Vista installation
If you use Microsoft Windows ME, Microsoft Windows 2000, Microsoft Windows XP or Microsoft Windows Vista as your operating
system, no manual driver installation is required after you connect
your MP3 player with your PC. The driver installation happens
automatically during the first use and may take some time depending on the computer. After the successful recognition of the
MP3 player, a new “removable drive” or “handheld device” with
the name “OPAL” will appear on “My Computer”. It may be possible that the notification area of your taskbar will show a new icon
(“safely remove hardware”).
48
Page 49

Caution:
If you use Microsoft Windows ME, Microsoft Windows 2000,
Microsoft Windows XP or Microsoft Windows Vista as your operating system, a manual driver installation from the provided
CD-ROM is not required.
The attempt to install the drivers for Windows 98 SE on an
operating system other than Windows 98 SE can damage the
system or make it unusable.
Microsoft Windows 98 SE installation
If you would like to use your MP3 player on a computer with
Microsoft Windows 98 SE as the operating system, you have to
install the drivers from the included CD-ROM.
First connect the MP3 player to your computer with the USB cable. Afterwards, follow the steps listed below.
English
Norsk
49
Page 50

English Norsk
1. The above window appears.
Now insert the included driver
CD-ROM and click on [Next >].
3. Now select “CD-ROM drive”
and click on [Next >].
2. Select “Search for the best
driver for the device” and click
on [Next >].
4. Click on [Next >]
5. The installation is finished.
6. My computer.
Click on [Finish].
50
Page 51

g
g
Now the MP3 player is recognized and a new removable drive
appears on “My computer”. The letters of the drive can be different depending on the number of hard drives on your system.
English
Copying files
Once you have properly connected your MP3 player with your
computer, a new removable drive appears on “My Computer”.
Now you can use this removable drive like a regular drive and
copy, delete or rename files as usual. If required, read the user
manual of your operating system.
Depending on the operation that you are carrying out, one of the
following messages will appear on the display of your MP3 player:
USB connected Do not disconnect USB Transferring
The MP3 player
is ready.
The device may not be
removed from the com-
Readin
puter.
Caution:
To prevent data loss, you should never disconnect your MP3
player from your computer during a reading or writing process.
To disconnect the player from your computer, follow the instructions in the section below.
File structure
You can copy music titles into any desired folder on your MP3
player and also create any new folders as you prefer. However,
you should avoid special characters.
Norsk
and writin
process
51
Page 52

The internal memory of the MP3 player contains the following
special folders:
English Norsk
“Pictures“: all pictures that will be shown in the picture mode
have to be saved here
“Videos“: all videos that will be shown in the video mode have to
be saved here
“Record“: all voice recordings are saved here
Disconnecting from the computer
You can remove your MP3 player from your computer without first
turning it off.
Caution:
Never disconnect your MP3 player from your computer during
the data transfer.
Formatting the memory
If you would like to remove the entire contents of your MP3 player
or if files on your MP3 player have been damaged, it may be advisable to format the internal drive.
To format the drive, connect your MP3 player to your computer
and open “My Computer”. Click on the corresponding symbol of
your device (“OPAL”) and open it. Now the internal memory (“Internal storage”) will be displayed on your computer. Right-click on
the symbol and select “format”. A warning message will appear to
notify you that all files and settings will be lost by the formatting.
Press “OK” to start the formatting process.
52
Page 53

Caution:
If you are uncertain about any of the steps described above,
read the help section for your operating system or ask a specialist. An operating error during formatting can make the computer
unusable.
Resetting your MP3 player
If your MP3 player doesn’t respond to your entries, you can reset
your device as follows:
Note:
If your MP3 player is still connected to your computer, first disconnect it from your computer (see page 52).
Connect your MP3 player with an electrical socket through the
provided external power adapter to make sure that your device
has enough power.
Press the
turns off. Then you can turn it on again. The MP3 player should
now work again without any problems.
If the MP3 player doesn’t turn off by itself, use a pointy object to
press the reset button (RESET)
player. Your device will shut off by itself and immediately turn on
again.
button and keep it pressed until your MP3 player
on the bottom of the MP3
English
Norsk
53
Page 54

g
Technical data
English Norsk
Internal memory: 2GB
Audio formats: mp3, wma, wav
Picture formats: jpeg
Video formats: avi
DRM: Yes, Windows Media DRM10
Voice recording: wav format (AD-PCM, 8kHz, mono)
Installed microphone: Yes
Line-in recording: wav format (AD-PCM, 16-44,1kHz, stereo)
USB 2.0 standard: High speed / 1.1 compatible
Display: Colour LCD (65,000 colours)
Equalizer: 5 presets
Headphones: SilverCrest DM-67, 3.5 mm stereo jack;
Sound pressure level in connection with
DM-67 < 100dB(A)
Max. Output volta
headphone jack:
Power supply: 3.7 V integrated lithium-ion battery
Operating conditions: Max. temp. 45°C; Max. humidity 95%
External power
adapter:
Dimensions: 91 x 45 x 8mm
Weight: 37.5g
e of
6mW
SilverCrest DM-67;
PRI:100-240V~50/60Hz; 0,2A
SEC: 5V
0,5A
54
Page 55

Disposal
Device
English
Please consider that your electronic entertainment device is subject to the European guideline 2002/96/EC for the reduction of
electronic waste.
You are therefore not permitted
to dispose of your device in your
household waste.
You can receive information
regarding the disposal of old devices at the municipal administration, the waste disposal administration and the store where
you purchased this product.
You can drop off your device
free of charge at communal collection points.
With the proper disposal of old
devices you prevent environmental damage and don’t damage your health.
Norsk
55
Page 56

Troubleshooting
English Norsk
Problem Possible reason: Suggested solution
The battery is empty. Charge the battery (p.12).
The device
doesn’t
turn on.
The headphones
don’t
transmit
sound.
The buttons don’t
work.
The key lock is acti-
vated.
The operating system
has crashed.
The headphone cable
is loose.
The volume is at “0”.
The battery is empty. Charge the battery (p.12).
The headphones are
defective.
The MP3 or WMA file
has errors.
The battery is too
weak or empty.
The key lock is acti-
vated.
Deactivate the key lock (p.
15).
Press the reset button (p.
53).
Properly connect the
headphones.
Increase the volume with
+.
Clean the headphone jack
Contact the hotline (see
the back page of the manual).
Reinstall the files.
Charge the battery (p.12).
Deactivate the key lock (p.
15).
56
Page 57

Problem Possible reason: Suggested solution
Set it to the correct language (p. 45).
Contact the customer hotline (see the back page of
the manual).
The reason may be the
screen saver which turns
off the display after the
period set by you. By
pressing a button, the dis-
The LCD
display
doesn’t
show the
text properly.
The language isn’t set
correctly.
The display is defec-
tive.
The display turns off
automatically.
play is activated again (p.
45).
The battery is empty. Charge the device (p. 12).
The MP3
player
doesn’t
transfer
any MP3 /
WMA files.
The device
plays no
video files.
The USB cable is not
connected.
The USB cable is
defective.
The memory is full.
The video format isn’t
compatible.
Connect the USB cable.
Contact the customer hotline (see the back page of
the manual).
Delete files to make room
on the drive.
Test the file on your computer. When the file is
played back, save it under
a compatible format.
English
Norsk
57
Page 58

Problem Possible reason: Suggested solution
English Norsk
Files can’t
be placed
onto the
Digital
Media
Player.
The operating system
isn’t supported by the
device.
The USB drivers
weren’t properly in-
stalled with Windows
98.
The USB cable isn’t
properly connected.
The memory is full.
A USB hub (a USB
socket distributor) is
interposed.
The battery is empty. Charge the device (p. 12).
Make sure that your computer operates with Windows 98/2000/ME/XP or a
new version or Macintosh
OS X.
Reinstall the USB driver (p.
49).
Make sure that the USB
cable is properly connected.
Delete files on your device
to make space for new
files.
Directly connect your MP3
player to the computer and
remove all USB hubs from
your computer if necessary.
The device
turns off
automatically.
58
The USB cable was
connected.
The energy saving
function is turned on.
Electrostatic interfer-
ence.
Disconnect it from the
computer.
For more information about
this, read p. 45.
Restart the device.
Page 59

Problem Possible reason: Suggested solution
Directly connect your MP3
The MP3
player isn’t
recognized
by the
computer.
A USB hub (a USB
socket distributor) is
interposed.
The jack plug on the
MP3 player has a
loose connection.
player to the computer and
remove all USB hubs from
your computer if necessary.
Disconnect it and reconnect the MP3 player. Turn
the jack plug slightly.
The device
doesn’t
function
The operating system
has crashed.
Press the reset button (p.
53).
properly.
English
Norsk
59
 Loading...