

Page 1

optiPoint 500
System-Specific Telephones
Key Modules, Adapters, Accessories
Service Providers
Service Manual
P31003-E8400-A100-3-7620
Page 2
*1PP31003-E8400-A100-3-7620*
1P P31003-E8400-A100-3-7620
The information in this document contains general descriptions of the technical options available, which do not always have to be present in individual cases.
The required features should therefore be specified in each individual case at the time
of closing the contract.
The device conforms to the EU guideline 1999/5/EG, as attested by the CE
mark.
This device has been manufactured in accordance with our certified environmental management system (ISO 14001). This process ensures that energy consumption and the use of primary raw materials are kept to a minimum, thus reducing waste production.
Siemens AG 2003
Reference No.: P31003-E8400-A100-3-7620
Printed in the Federal Republic of Germany.
Subject to availability. Right of modification reserved.
●
Information and Communication Networks, Hofmannstraße 51, D-81359 München, Germany
●
Page 3

Contents 0
Figures . . . . . . . . . . . . . . . . . . . . . . . . . . . . . . . . . . . . . . . . . . . . . . . . . . . . . . . . . . . . . . . . 0-1
Tables . . . . . . . . . . . . . . . . . . . . . . . . . . . . . . . . . . . . . . . . . . . . . . . . . . . . . . . . . . . . . . . . 0-1
1 General Service Information . . . . . . . . . . . . . . . . . . . . . . . . . . . . . . . . . . . . . . . . . . . . 1-1
1.1 Service Concept . . . . . . . . . . . . . . . . . . . . . . . . . . . . . . . . . . . . . . . . . . . . . . . . . . . . . 1-1
1.2 Safety Information . . . . . . . . . . . . . . . . . . . . . . . . . . . . . . . . . . . . . . . . . . . . . . . . . . . . 1-1
1.3 Safety Symbols . . . . . . . . . . . . . . . . . . . . . . . . . . . . . . . . . . . . . . . . . . . . . . . . . . . . . . 1-2
2 Product Description . . . . . . . . . . . . . . . . . . . . . . . . . . . . . . . . . . . . . . . . . . . . . . . . . . . 2-1
2.1 optiPoint 500 Features at Hicom/HiPath . . . . . . . . . . . . . . . . . . . . . . . . . . . . . . . . . . . 2-2
2.2 Configuration Notes. . . . . . . . . . . . . . . . . . . . . . . . . . . . . . . . . . . . . . . . . . . . . . . . . . . 2-3
2.3 Telephones . . . . . . . . . . . . . . . . . . . . . . . . . . . . . . . . . . . . . . . . . . . . . . . . . . . . . . . . . 2-4
2.3.1 optiPoint 500 entry . . . . . . . . . . . . . . . . . . . . . . . . . . . . . . . . . . . . . . . . . . . . . . . . 2-4
2.3.2 optiPoint 500 economy . . . . . . . . . . . . . . . . . . . . . . . . . . . . . . . . . . . . . . . . . . . . . 2-5
2.3.3 optiPoint 500 basic . . . . . . . . . . . . . . . . . . . . . . . . . . . . . . . . . . . . . . . . . . . . . . . . 2-6
2.3.4 optiPoint 500 standard . . . . . . . . . . . . . . . . . . . . . . . . . . . . . . . . . . . . . . . . . . . . . 2-7
2.3.5 optiPoint 500 advance. . . . . . . . . . . . . . . . . . . . . . . . . . . . . . . . . . . . . . . . . . . . . . 2-8
2.4 Module Options . . . . . . . . . . . . . . . . . . . . . . . . . . . . . . . . . . . . . . . . . . . . . . . . . . . . . . 2-9
2.4.1 optiPoint 500 key module . . . . . . . . . . . . . . . . . . . . . . . . . . . . . . . . . . . . . . . . . . 2-10
2.4.2 Busy Lamp Field BLF . . . . . . . . . . . . . . . . . . . . . . . . . . . . . . . . . . . . . . . . . . . . . 2-11
2.4.2.1 Power Supply . . . . . . . . . . . . . . . . . . . . . . . . . . . . . . . . . . . . . . . . . . . . . . . . 2-11
2.4.2.2 Connection to the Terminal . . . . . . . . . . . . . . . . . . . . . . . . . . . . . . . . . . . . . 2-13
2.4.3 optiPoint 500 signature module (HiPath 4000 only) . . . . . . . . . . . . . . . . . . . . . . 2-15
2.5 Accessories . . . . . . . . . . . . . . . . . . . . . . . . . . . . . . . . . . . . . . . . . . . . . . . . . . . . . . . . 2-16
2.5.1 External Speaker/Desk Microphone . . . . . . . . . . . . . . . . . . . . . . . . . . . . . . . . . . 2-16
2.5.2 optiPoint Headsets . . . . . . . . . . . . . . . . . . . . . . . . . . . . . . . . . . . . . . . . . . . . . . . 2-17
2.5.3 Local Power Supply Unit. . . . . . . . . . . . . . . . . . . . . . . . . . . . . . . . . . . . . . . . . . . 2-18
2.5.4 Accessory Pack. . . . . . . . . . . . . . . . . . . . . . . . . . . . . . . . . . . . . . . . . . . . . . . . . . 2-19
2.5.5 Online Key Labeling Tool . . . . . . . . . . . . . . . . . . . . . . . . . . . . . . . . . . . . . . . . . . 2-19
2.5.6 Wall Mounting . . . . . . . . . . . . . . . . . . . . . . . . . . . . . . . . . . . . . . . . . . . . . . . . . . . 2-19
2.6 Technical Data. . . . . . . . . . . . . . . . . . . . . . . . . . . . . . . . . . . . . . . . . . . . . . . . . . . . . . 2-20
2.6.1 Asset ID. . . . . . . . . . . . . . . . . . . . . . . . . . . . . . . . . . . . . . . . . . . . . . . . . . . . . . . . 2-20
2.6.2 Environmental Conditions . . . . . . . . . . . . . . . . . . . . . . . . . . . . . . . . . . . . . . . . . . 2-20
2.6.3 Ranges . . . . . . . . . . . . . . . . . . . . . . . . . . . . . . . . . . . . . . . . . . . . . . . . . . . . . . . . 2-21
2.6.4 UP0/E Interface. . . . . . . . . . . . . . . . . . . . . . . . . . . . . . . . . . . . . . . . . . . . . . . . . . 2-21
2.6.5 USB 1.1 Interface . . . . . . . . . . . . . . . . . . . . . . . . . . . . . . . . . . . . . . . . . . . . . . . . 2-21
3 Startup . . . . . . . . . . . . . . . . . . . . . . . . . . . . . . . . . . . . . . . . . . . . . . . . . . . . . . . . . . . . . . 3-1
3.1 Unpacking the Box. . . . . . . . . . . . . . . . . . . . . . . . . . . . . . . . . . . . . . . . . . . . . . . . . . . . 3-1
3.2 Setting Up the Telephone . . . . . . . . . . . . . . . . . . . . . . . . . . . . . . . . . . . . . . . . . . . . . . 3-1
3.3 Keypad and Control Panel. . . . . . . . . . . . . . . . . . . . . . . . . . . . . . . . . . . . . . . . . . . . . . 3-1
P31003-E8400-A100-3-7620
Service Manual
0-1
Page 4

3.4 Date and Time Indicator . . . . . . . . . . . . . . . . . . . . . . . . . . . . . . . . . . . . . . . . . . . . . . . . 3-2
3.5 Ports on the Underside of the Telephone . . . . . . . . . . . . . . . . . . . . . . . . . . . . . . . . . . . 3-3
3.6 Telephone Tests . . . . . . . . . . . . . . . . . . . . . . . . . . . . . . . . . . . . . . . . . . . . . . . . . . . . . . 3-4
3.7 Block Diagrams. . . . . . . . . . . . . . . . . . . . . . . . . . . . . . . . . . . . . . . . . . . . . . . . . . . . . . . 3-7
4 Private Network Termination Units . . . . . . . . . . . . . . . . . . . . . . . . . . . . . . . . . . . . . . . 4-1
4.1 PNT Private Network Termination. . . . . . . . . . . . . . . . . . . . . . . . . . . . . . . . . . . . . . . . . 4-2
4.2 PNT E Private Network Termination . . . . . . . . . . . . . . . . . . . . . . . . . . . . . . . . . . . . . . . 4-2
4.3 PNT Q Private Network Termination. . . . . . . . . . . . . . . . . . . . . . . . . . . . . . . . . . . . . . . 4-2
4.4 Distance Adapter (UCON S and M) at Hicom 300/300 E and HiPath 4000 . . . . . . . . . 4-2
5 Option Adapters and Ports . . . . . . . . . . . . . . . . . . . . . . . . . . . . . . . . . . . . . . . . . . . . . . 5-1
5.1 Adapter Slots. . . . . . . . . . . . . . . . . . . . . . . . . . . . . . . . . . . . . . . . . . . . . . . . . . . . . . . . . 5-3
5.2 optiPoint 500 acoustic adapter . . . . . . . . . . . . . . . . . . . . . . . . . . . . . . . . . . . . . . . . . . . 5-4
5.2.1 Electrical Requirements of the Headset . . . . . . . . . . . . . . . . . . . . . . . . . . . . . . . . . 5-6
5.2.2 Floating Contacts . . . . . . . . . . . . . . . . . . . . . . . . . . . . . . . . . . . . . . . . . . . . . . . . . . 5-7
5.3 optiPoint 500 Analog Adapters . . . . . . . . . . . . . . . . . . . . . . . . . . . . . . . . . . . . . . . . . . . 5-8
5.4 optiPoint 500 ISDN Adapter . . . . . . . . . . . . . . . . . . . . . . . . . . . . . . . . . . . . . . . . . . . . 5-10
5.5 optiPoint 500 Phone Adapter (Host/Client) . . . . . . . . . . . . . . . . . . . . . . . . . . . . . . . . . 5-11
5.6 optiPoint 500 recorder adapter . . . . . . . . . . . . . . . . . . . . . . . . . . . . . . . . . . . . . . . . . . 5-12
5.7 Port Overview . . . . . . . . . . . . . . . . . . . . . . . . . . . . . . . . . . . . . . . . . . . . . . . . . . . . . . . 5-15
6 CallBridge . . . . . . . . . . . . . . . . . . . . . . . . . . . . . . . . . . . . . . . . . . . . . . . . . . . . . . . . . . . . 6-1
6.1 CallBridge TU . . . . . . . . . . . . . . . . . . . . . . . . . . . . . . . . . . . . . . . . . . . . . . . . . . . . . . . . 6-1
6.2 CallBridge for Data . . . . . . . . . . . . . . . . . . . . . . . . . . . . . . . . . . . . . . . . . . . . . . . . . . . . 6-2
7 IP Adapter . . . . . . . . . . . . . . . . . . . . . . . . . . . . . . . . . . . . . . . . . . . . . . . . . . . . . . . . . . . . 7-1
7.1 optiPoint IPadapter Installation . . . . . . . . . . . . . . . . . . . . . . . . . . . . . . . . . . . . . . . . . . . 7-2
7.2 Connection to the Terminal. . . . . . . . . . . . . . . . . . . . . . . . . . . . . . . . . . . . . . . . . . . . . . 7-3
7.3 Connection to the System . . . . . . . . . . . . . . . . . . . . . . . . . . . . . . . . . . . . . . . . . . . . . . . 7-4
7.4 Administration Via the Web Browser. . . . . . . . . . . . . . . . . . . . . . . . . . . . . . . . . . . . . . . 7-5
7.5 Administration via optiPoint 500 . . . . . . . . . . . . . . . . . . . . . . . . . . . . . . . . . . . . . . . . . 7-22
7.6 Configuration Examples . . . . . . . . . . . . . . . . . . . . . . . . . . . . . . . . . . . . . . . . . . . . . . . 7-31
8 Troubleshooting. . . . . . . . . . . . . . . . . . . . . . . . . . . . . . . . . . . . . . . . . . . . . . . . . . . . . . . 8-1
8.1 Test Loops 3 and 4 . . . . . . . . . . . . . . . . . . . . . . . . . . . . . . . . . . . . . . . . . . . . . . . . . . . . 8-1
8.2 Reboot. . . . . . . . . . . . . . . . . . . . . . . . . . . . . . . . . . . . . . . . . . . . . . . . . . . . . . . . . . . . . . 8-1
9 Ordering Information . . . . . . . . . . . . . . . . . . . . . . . . . . . . . . . . . . . . . . . . . . . . . . . . . . . 9-1
9.1 Products and Spare Parts. . . . . . . . . . . . . . . . . . . . . . . . . . . . . . . . . . . . . . . . . . . . . . . 9-1
9.1.1 Initial Equipment: Telephone Models, Optiset E Key Modules, and Adapters . . . . 9-1
9.1.2 Accessories, Spare Parts, Miscellaneous . . . . . . . . . . . . . . . . . . . . . . . . . . . . . . . 9-3
9.2 Documentation . . . . . . . . . . . . . . . . . . . . . . . . . . . . . . . . . . . . . . . . . . . . . . . . . . . . . . . 9-6
9.3 Order Addresses. . . . . . . . . . . . . . . . . . . . . . . . . . . . . . . . . . . . . . . . . . . . . . . . . . . . . . 9-7
9.4 After-Sales Service and Repair. . . . . . . . . . . . . . . . . . . . . . . . . . . . . . . . . . . . . . . . . . . 9-8
9.5 Intranet Addresses . . . . . . . . . . . . . . . . . . . . . . . . . . . . . . . . . . . . . . . . . . . . . . . . . . . . 9-9
Abbreviations . . . . . . . . . . . . . . . . . . . . . . . . . . . . . . . . . . . . . . . . . . . . . . . . . . . . . . . . . . Y-1
P31003-E8400-A100-3-7620
0-2 Service Manual
Page 5

Index . . . . . . . . . . . . . . . . . . . . . . . . . . . . . . . . . . . . . . . . . . . . . . . . . . . . . . . . . . . . . . . . . Z-1
P31003-E8400-A100-3-7620
Service Manual
0-3
Page 6

P31003-E8400-A100-3-7620
0-4 Service Manual
Page 7

Figures 0
Figure 2-1 optiPoint 500 entry. . . . . . . . . . . . . . . . . . . . . . . . . . . . . . . . . . . . . . . . . . . . . . . 2-4
Figure 2-2 optiPoint 500 economy . . . . . . . . . . . . . . . . . . . . . . . . . . . . . . . . . . . . . . . . . . . 2-5
Figure 2-3 optiPoint 500 basic . . . . . . . . . . . . . . . . . . . . . . . . . . . . . . . . . . . . . . . . . . . . . . 2-6
Figure 2-4 optiPoint 500 standard. . . . . . . . . . . . . . . . . . . . . . . . . . . . . . . . . . . . . . . . . . . . 2-7
Figure 2-5 optiPoint 500 advance . . . . . . . . . . . . . . . . . . . . . . . . . . . . . . . . . . . . . . . . . . . . 2-8
Figure 2-6 Power supply to BLF . . . . . . . . . . . . . . . . . . . . . . . . . . . . . . . . . . . . . . . . . . . . 2-12
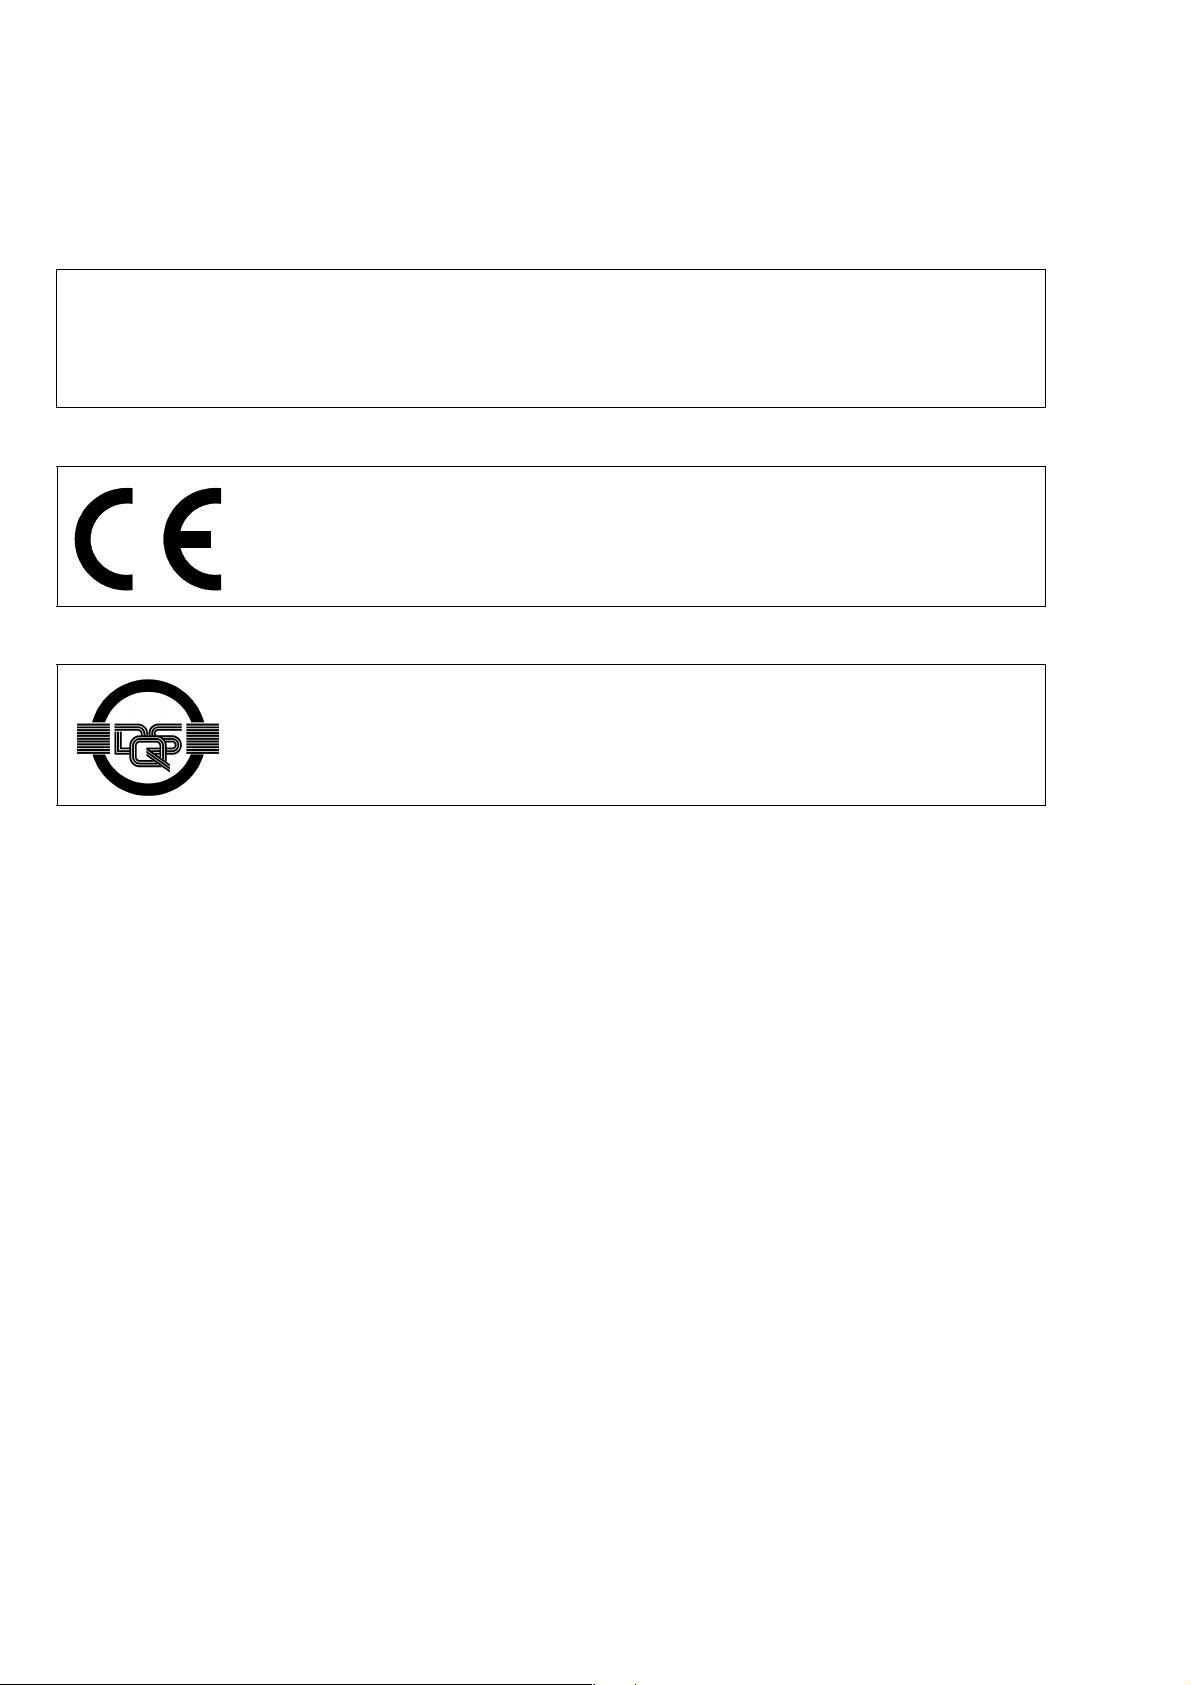
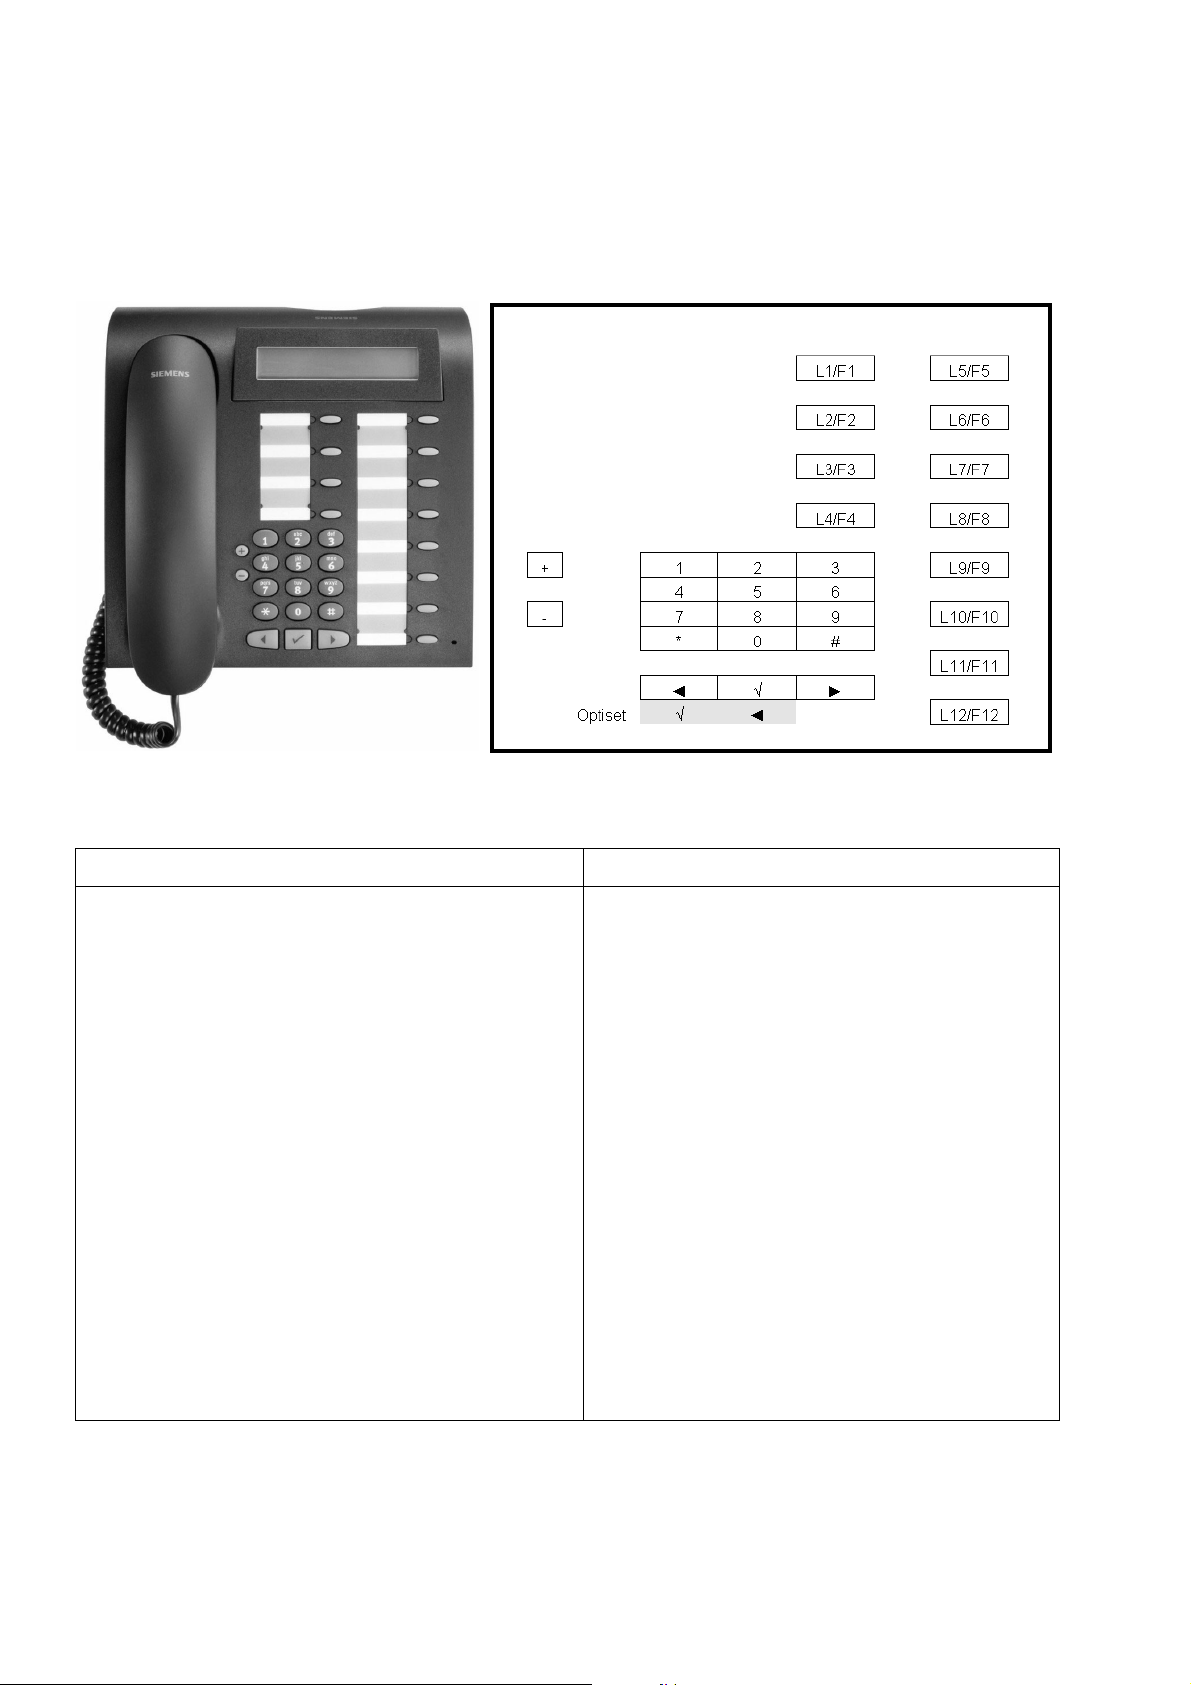
Figure 3-1 Keypad and control panel (optiPoint 500 standard). . . . . . . . . . . . . . . . . . . . . . 3-1
Figure 3-2 Jacks on the underside of the telephone (optiPoint 500 advance) . . . . . . . . . . 3-3
Figure 3-3 optiPoint 500 entry, economy block diagram. . . . . . . . . . . . . . . . . . . . . . . . . . . 3-7
Figure 3-4 optiPoint 500 basic, standard and advance block diagram . . . . . . . . . . . . . . . . 3-8
Figure 4-1 Private network termination units. . . . . . . . . . . . . . . . . . . . . . . . . . . . . . . . . . . . 4-1
Figure 5-1 Jacks on the underside of the telephone (optiPoint 500 advance) . . . . . . . . . . 5-3
Figure 5-2 Recorder adapter. . . . . . . . . . . . . . . . . . . . . . . . . . . . . . . . . . . . . . . . . . . . . . . 5-12
Figure 5-3 Connection example: host, SPA, Client, 2 SNG - Power supply unit dependent on
the configuration5-14
Figure 7-1 System connection of optiPoint IPadapter. . . . . . . . . . . . . . . . . . . . . . . . . . . . . 7-2
Figure 7-2 Overview: connecting an optiPoint IPadapter to the terminal . . . . . . . . . . . . . . 7-3
Figure 7-3 Overview: connecting an optiPoint IPadapter to the system . . . . . . . . . . . . . . . 7-4
Figure 7-4 Electrical connection of the optiPoint IPadapter . . . . . . . . . . . . . . . . . . . . . . . . 7-4
Figure 7-5 Faults shown on optiPoint display . . . . . . . . . . . . . . . . . . . . . . . . . . . . . . . . . . 7-23
Figure 7-6 Error codes for configuration settings . . . . . . . . . . . . . . . . . . . . . . . . . . . . . . . 7-24
Figure 7-7 WEB access to the IPadapter . . . . . . . . . . . . . . . . . . . . . . . . . . . . . . . . . . . . . 7-32
Figure 7-8 WEB page administration . . . . . . . . . . . . . . . . . . . . . . . . . . . . . . . . . . . . . . . . 7-33
Figure 7-9 IP address and routing. . . . . . . . . . . . . . . . . . . . . . . . . . . . . . . . . . . . . . . . . . . 7-34
Figure 7-10Settings in Assistant Office. . . . . . . . . . . . . . . . . . . . . . . . . . . . . . . . . . . . . . . 7-35
Figure 7-11optiPoint IPadapter homepage. . . . . . . . . . . . . . . . . . . . . . . . . . . . . . . . . . . . 7-36
Figure 7-12WEB page administration. . . . . . . . . . . . . . . . . . . . . . . . . . . . . . . . . . . . . . . . 7-37
Figure 7-13IP address and routing . . . . . . . . . . . . . . . . . . . . . . . . . . . . . . . . . . . . . . . . . . 7-38
P31003-E8400-A100-3-7620
Service Manual
0-1
Page 8

P31003-E8400-A100-3-7620
0-2 Service Manual
Page 9

Tables 0
Table 2-1 Features of optiPoint 500 entry . . . . . . . . . . . . . . . . . . . . . . . . . . . . . . . 2-4
Table 2-2 Features of optiPoint 500 economy . . . . . . . . . . . . . . . . . . . . . . . . . . . . 2-5
Table 2-3 Features of optiPoint 500 basic . . . . . . . . . . . . . . . . . . . . . . . . . . . . . . . 2-6
Table 2-4 Features of optiPoint 500 standard . . . . . . . . . . . . . . . . . . . . . . . . . . . . 2-7
Table 2-5 Features of optiPoint 500 advance . . . . . . . . . . . . . . . . . . . . . . . . . . . . . 2-8
Table 2-6 Headsets . . . . . . . . . . . . . . . . . . . . . . . . . . . . . . . . . . . . . . . . . . . . . . . 2-17
Table 2-7 Environmental conditions . . . . . . . . . . . . . . . . . . . . . . . . . . . . . . . . . . . 2-20
Table 2-8 UP0/E interfaces: technical data . . . . . . . . . . . . . . . . . . . . . . . . . . . . . 2-21
Table 3-1 Telephone test for HiPath 4000/Hicom 300 H . . . . . . . . . . . . . . . . . . . . 3-4
Table 7-1 Pin assignment . . . . . . . . . . . . . . . . . . . . . . . . . . . . . . . . . . . . . . . . . . . . 7-4
Table 7-2 FTP parameters . . . . . . . . . . . . . . . . . . . . . . . . . . . . . . . . . . . . . . . . . . 7-14
Table 7-3 Error messages . . . . . . . . . . . . . . . . . . . . . . . . . . . . . . . . . . . . . . . . . . 7-15
Table 9-1 opiPoint 500 models . . . . . . . . . . . . . . . . . . . . . . . . . . . . . . . . . . . . . . . . 9-1
Table 9-2 optiPoint 500 adapters . . . . . . . . . . . . . . . . . . . . . . . . . . . . . . . . . . . . . . 9-1
Table 9-3 optiPoint 500 without HS . . . . . . . . . . . . . . . . . . . . . . . . . . . . . . . . . . . . 9-2
Table 9-4 optiPoint 500 handset with/without logo . . . . . . . . . . . . . . . . . . . . . . . . . 9-3
Table 9-5 optiPoint 500 more spare parts . . . . . . . . . . . . . . . . . . . . . . . . . . . . . . . 9-3
Table 9-7 Order addresses . . . . . . . . . . . . . . . . . . . . . . . . . . . . . . . . . . . . . . . . . . . 9-7
Table 9-8 Intranet addresses . . . . . . . . . . . . . . . . . . . . . . . . . . . . . . . . . . . . . . . . . 9-9
P31003-E8400-A100-3-7620
Service Manual
0-1
Page 10

P31003-E8400-A100-3-7620
0-2 Service Manual
Page 11

General Service Information
Service Concept
1 General Service Information
1.1 Service Concept
Faulty terminals and adaptors can be debugged on site by exchanging components/adaptors
or replacing individual faulty elements, such as handsets, cords, covering panels, etc.
1.2 Safety Information
Setting Up the Equipment
The equipment is set up by the user or service technician. Training or orientation on how to use
optiPoint500 device parts is not neccessary.
A mains socket may be necessary for operating telephones and options, depending on the
scope of the configuration.
If more telephones are to be added later on, make sure that an adequate number of mains
sockets are available for connecting the required local power supply units.
Damage to the Equipment
Only use tools and testers suitable for the job. Do not put devices with external damage into
service.
Laying Cables
Lay the power and connection cables in such a way as to avoid accidents (no tripping) and
damage to the cables.
Troubleshooting and Replacing Boards
Note the following when replacing boards:
● Service tasks should only be carried out by authorized personnel.
● Always replace boards with original spare parts.
● Always disconnect the system from the power source before replacing boards.
● Always following the instructions and take the proper precautions when handling boards
that contain electrostatically sensitive devices.
Protecting Electrostatically Sensitive Devices
To protect electrostatically sensitive devices (ESD):
● Always put on an earthed wristband before performing any work on PC boards.
P31003-E8400-A100-3-7620
Service Manual
1-1
Page 12

General Service Information Nur für den internen Gebrauch
Safety Symbols
● Transport PC boards only in suitable protective packaging.
● When working on PC boards, always ensure that they are placed on a grounded conduct-
ing base.
● Always use soldering iron for soldering.
1.3 Safety Symbols
The following symbols are used in this manual to identify possible sources of danger.
Data Protection and Data Security
Helpful suggestions
>
Hazards that can cause damage to the hardware and software and even
7
destroy it.
General heat dissipation
3
Electrostatically sensitive devices
4
Using Personal Data
In Germany, the processing and use of personal data are subject to various regulations, including the regulations of the Federal Data Protection Law (Bundesdatenschutzgesetz = BDSG).
For other countries, please follow the appropriate national laws.
The aim of data protection is to protect the rights of individuals being affected by use of their
personal data.
Guidelines for Members of Siemens Staff
Siemens staff are required to observe business and data secrecy as a result of the company’s
work rules.
In order to ensure that the statutory requirements during service - whether during "on-site service" or during "remote service" - are consistently met, you should always observe the following
rules. You will not only maintain the interests of your and our customers, you will also avoid
personal consequences.
P31003-E8400-A100-3-7620
1-2 Service Manual
Page 13

Nur für den internen Gebrauch
General Service Information
Safety Symbols
Guidelines for Using Data
Conscious action helps maintain data protection and data security:
● Ensure that only appropriately authorized persons have access to customer data.
● Take full advantage of password assignment options; do not allow unauthorized persons
to gain access to passwords by writing them down on a piece of paper or through other
means.
● Ensure that no unauthorized person is able to process (store, modify, transmit, disable, de-
lete) or use customer data in any way.
● Prevent unauthorized persons from gaining access to data media, e.g. on backup disks or
printed reports. This applies to service calls as well as to storage and transport.
● Ensure that data media which are no longer required are completely destroyed. Ensure
that no papers remain generally available.
● Work together with your contacts at the customer’s company: This creates mutual confi-
dence and reduces your own workload.
P31003-E8400-A100-3-7620
Service Manual
1-3
Page 14

General Service Information Nur für den internen Gebrauch
Safety Symbols
P31003-E8400-A100-3-7620
1-4 Service Manual
Page 15

Product Description
2 Product Description
OptiPoint 500 telephones are designed to facilitate access to the features of HiPath 3000/Hicom 150H and HiPath 4000/Hicom 300/300H. See the chapter on “Startup” for configuration
information.
The operating principle is characterized by three dialog keys, which in conjunction with the display, facilitate interactive user prompting. In addition, the key LED principle indicates activated
functions.
The numerous control functions are clearly laid out in submenus and can be read on the display
(excluding "entry" model). Features can also be selected directly via the service key using a
code. Important functions can be programmed on individual function keys.
optiPoint 500 telephones
entry
Function keys with LEDs 8 12 12 12 19
12-key keypad • • • • •
2 keys (plus/minus) • • • • •
Open listening • • •
Full duplex speakerphone mode • •
Adapter slots 1 1 2
USB 1.1 Interface • • •
Headset port (121 TR9-5) •
3 dialog keys • • • •
Display (characters) 2 x 24 2 x 24 2 x 24 2 x 24
Display background lighting •
Interface for max. 2 key modules
2 key modules or
1 key module and 1 signature module
Wall mounting • • • • •
economy
basic
•
•
standard
•
•
advance
•
•
P31003-E8400-A100-3-7620
Service Manual
2-1
Page 16

Product Description
optiPoint 500 Features at Hicom/HiPath
2.1 optiPoint 500 Features at Hicom/HiPath
Features when Connecting to Hicom and HiPath
Optiset E IDs for telephones and options must be used when connecting optiPoint500 to one
of the following systems:
● HiPath AllServe 150
● HiPath 3000
● Hicom 150 E/150 H
● Hicom 150 E/H Office
● Hicom 300 E/300 H
Features
● optiset E/optiPoint 500 mixed mode possible at SLMO.
● optiset E/optiPoint 500 mixed mode possible for host/client configuration with phone adapt-
ers.
● PC connection via integrated USB 1.1 interface (excluding entry) and special USB (client)
cables with right-angle plug.
● CTI applications based on CallBridge TU for TAPI 2.1 available free of charge on the intra-
net (prerequisite: Windows 98 SE or Windows 2000).
● In optiPoint 500 advance, only 12 of the 19 Hicom/HiPath function keys are configurable.
The remaining function keys can however be assigned destination call numbers via the optiPoint menu.
Additional Features when Connecting optiPoint 500 to HiPath 4000
● Support for the new optiPoint 500 IDs
● Additional ring tones (16 instead of 8)
● Call acceptance/cleardown function for “cordless” headsets
● Mobile station” for optiPoint signature module
● Busy lamp/door-opener control via a programmable key
● Adjustable display contrast (4 levels)
P31003-E8400-A100-3-7620
2-2 Service Manual
Page 17

Product Description
Configuration Notes
Modules (Add-On Components) and Adapters
● Modules (see Section 2.4 on page 2-9)
The optiPoint 500 operating panel (basic model and later versions) can be expanded
– using key modules with function keys
– a signature module or
– a busy lamp field
● Adapters (see Section 5)
By using adapters in conjunction with telephones, specific workstation requirements can
be satisfied.
Additional devices can be directly connected to the workstation (e.g. PC, fax machines, telephones, headsets) by simply adding different adapters to the underside of the telephone.
2.2 Configuration Notes
● Mixed optiset E/optiPoint 500 telephone configurations possible on U
● Mixed optiset E/optiPoint 500 host/client configuration (phone adapter) possible
● The options (key modules, adapters) for optiset E (5-volt technology) and optiPoint 500
telephones (3.3-volt technology) are not interchangeable
● PC connection to optiPoint 500 via USB1.1 interface (except for the “entry” and “economy”
models)
– only possible with Windows 98 SE or Windows 2000 with USB support
– optiPoint 500 USB client interface, conforming to USB Specification 1.1
– USB cable with right-angle plug available for optiPoint 500 basic/standard/advance
– integrated USB1.1 interface replaces optiset E control/data adapter for CTI functions
– integrated USB1.1 interface replaces optiset E with ISDN adapter for modem, NDIS-
WAN miniport, and CAPI applications
● CallBridge TU (PC software available free of charge) offers CTI platform for TAPI 2.1-
based CTI applications; CallBridge TA is also still available for optiset E adapter
P0/E
CallBridge for Data offers NDISWAN miniport, CAPI 2.0, and ComPort/modem interface for
data applications
No firewall has been implemented - there could be a security risk if both a LAN port
7
P31003-E8400-A100-3-7620
Service Manual
and CallBridge for Data are installed.
2-3
Page 18

Product Description
Telephones
2.3 Telephones
2.3.1 optiPoint 500 entry
For stations at which a display is not required (e.g. lifts, entrance halls, etc.)
Figure 2-1 optiPoint 500 entry
Controls Connectivity
● 8 function keys with LEDs
● 2 adjustable keys (plus/minus) for
– ringer volume
– ringer pitch
– alerting tone
– open listening (not speakerphone mode)
● Suitable for wall mounting
Table 2-1 Features of optiPoint 500 entry
no adapter slots
P31003-E8400-A100-3-7620
2-4 Service Manual
Page 19

2.3.2 optiPoint 500 economy
Product Description
Telephones
Figure 2-2 optiPoint 500 economy
Controls Connectivity
● 12 function keys with LEDs
● Open listening
● Alphanumeric LCD display with
two lines and 24 characters per line, tiltable.
● 3 dialog keys for interactive user prompting: “Yes”,
“Back” and “Next”
● 2 adjustable keys (plus/minus) for
– ringer volume,
– ringer pitch,
– alerting tone,
– display contrast
● Suitable for wall mounting
None
Table 2-2 Features of optiPoint 500 economy
P31003-E8400-A100-3-7620
Service Manual
2-5
Page 20
Product Description
Telephones
2.3.3 optiPoint 500 basic
Figure 2-3 optiPoint 500 basic
Controls Connectivity
● 12 function keys with LEDs
● Open listening
● Tiltable alphanumeric LCD display with
2 lines and 24 characters per line.
● 3 dialog keys for interactive user prompts:
"Yes", "Back" and "Continue"
● 2 adjustable keys (plus/minus) for
– ringer volume
– ringer pitch
– alerting tone
– display contrast
● Suitable for wall mounting
● USB 1.1 interface
● 1 adapter slot
● 1 interface for max. 2 key modules
– optiPoint 500 Key Module
– optiPoint 500 Signature Module
Table 2-3 Features of optiPoint 500 basic
P31003-E8400-A100-3-7620
2-6 Service Manual
Page 21
2.3.4 optiPoint 500 standard
Product Description
Telephones
Figure 2-4 optiPoint 500 standard
Controls Special Features
● 12 function keys with LEDs
● Full duplex speakerphone mode with
echo suppression for room adaptation
● Tiltable alphanumeric LCD display with
2 lines and 24 characters per line.
● 3 dialog keys for interactive user prompts:
Yes, Back, and Continue
● 2 adjustable keys (plus/minus) for
– ringer volume
– ringer pitch
– handsfree quality
– alerting tone
– display contrast
● USB 1.1 interface
● 1 adapter slot
● 1 interface for max. 2 key modules
– optiPoint 500 key module
– optiPoint 500 signature module
● Suitable for wall mounting
Table 2-4 Features of optiPoint 500 standard
P31003-E8400-A100-3-7620
Service Manual
2-7
Page 22
Product Description
Telephones
2.3.5 optiPoint 500 advance
Figure 2-5 optiPoint 500 advance
Controls Special Features
19 function keys with LEDs
● USB 1.1 interface
Full duplex speakerphone mode with echo suppression for room adaptation
Tiltable alphanumeric LCD display with 2 lines
and 24 characters per line.
● 2 adapter slots
● 1 headset port (121 TR9-5)
● 1 interface for max. 2 key modules
additional with background lighting,
remains lit for approx. 5 s.
3 dialog keys for interactive user prompts: Yes,
– optiPoint key module
– optiPoint signature module
Back, and Continue
2 adjustable keys (plus/minus) for ringer volume, ringer pitch, handsfree quality, alerting
tone and display contrast
Suitable for wall mounting
Table 2-5 Features of optiPoint 500 advance
If optiPoint 500 advance is connected to Hicom or HiPath 3000 or AllServe 150, only 12 function keys can be configured via Hicom/HiPath.
The remaining function keys can be configured as call destination keys via the optiPoint500 advance menu.
P31003-E8400-A100-3-7620
2-8 Service Manual
Page 23

Product Description
Module Options
2.4 Module Options
Adapters facilitate flexible expansion of the telephone workstation at optiPoint 500 basic, standard and advance system telephones, by means of individual add-on components.
Configuration Notes
● Connection of max. 2 modules (key modules) to the basic, standard and
advance models.
● A local power supply unit may be necessary, depending on the range and number of key
modules (max 2).
Use the optiPoint 500 "Telephone Test"/"Feeding Range" service menu items to check if
the power supply is sufficient.
● optiPoint 500 entry cannot be configured as the primary telephone in a primary/client con-
figuration
(see Section 5.5 on page 5-11).
● Whenever making changes to the configuration, disconnect the primary telephone from Hi-
com/HiPath. Doing so triggers a reset when the device is connected again, providing the
system with the new configuration in the setup message.
● Only one headset/acoustic adapter is permitted per telephone.
P31003-E8400-A100-3-7620
Service Manual
2-9
Page 24
Product Description
Module Options
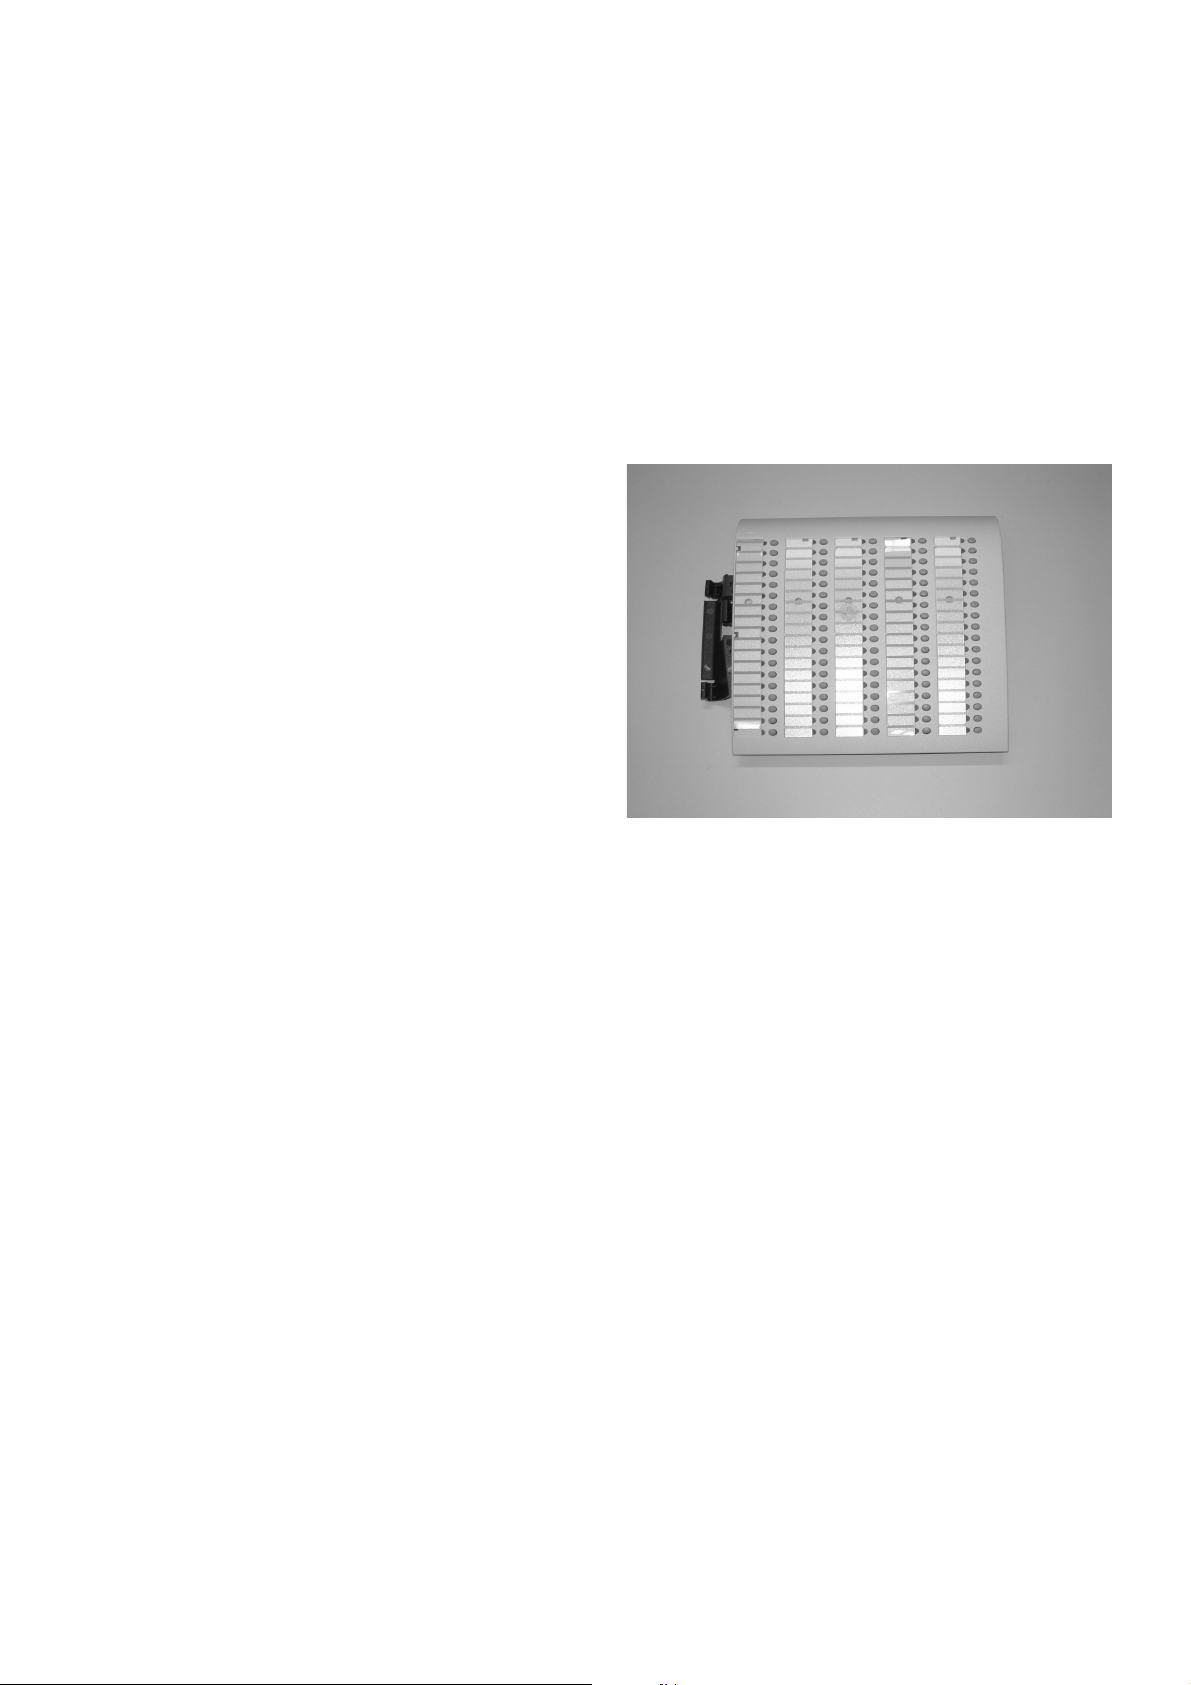
2.4.1 optiPoint 500 key module
The key module on the basic, standard and advance models is used for saving call numbers and
functions (e.g. callback, conference, last number
redial, etc.)
It features:
● 16 function keys
● 16 LEDs for visual signaling of the activated
functions and keys.
Shift key
One of the keys is assigned the shift function. 30
name destination keys can be programmed using
the shift key.
Physical mounting
16 function keys
16 LEDs
Max. 2 key modules can be connected to optiPoint 500.
P31003-E8400-A100-3-7620
2-10 Service Manual
Page 25
Product Description
Module Options
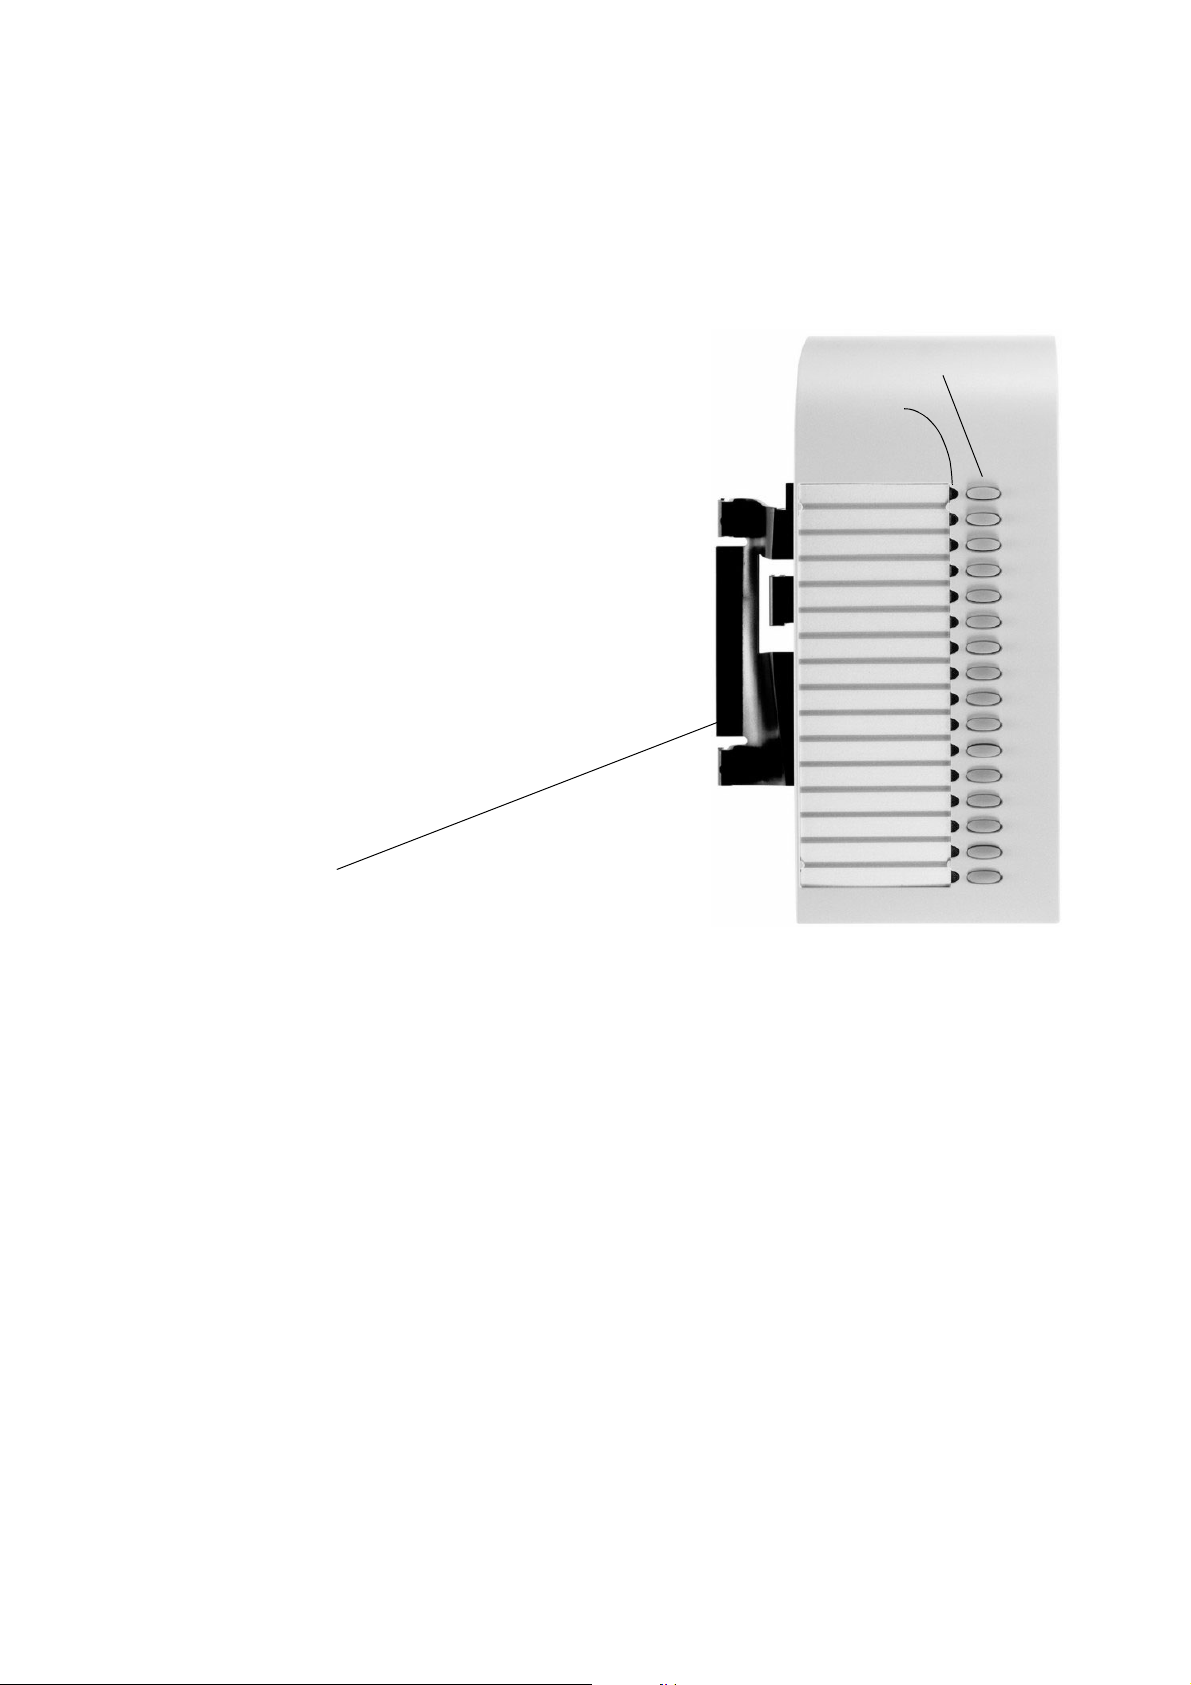
2.4.2 Busy Lamp Field BLF
The BLF is a key module for optiPoint 500 and 600 that can be connected to the telephone over
an 8-pin RJ45 communications port.
It can be used in the HiPath 3000/Hicom 150E/H and HiPath AllServe 150 systems and has
the same functions as the existing BLF on optiset E telephones.
The BLF on the basic, standard and advance
models allows phone numbers and functions
to be saved (e.g. callback, conference, last
number redial, etc.)
It has
● 90 function keys,
● 90 LEDs for visual signaling of the activat-
ed functions and keys.
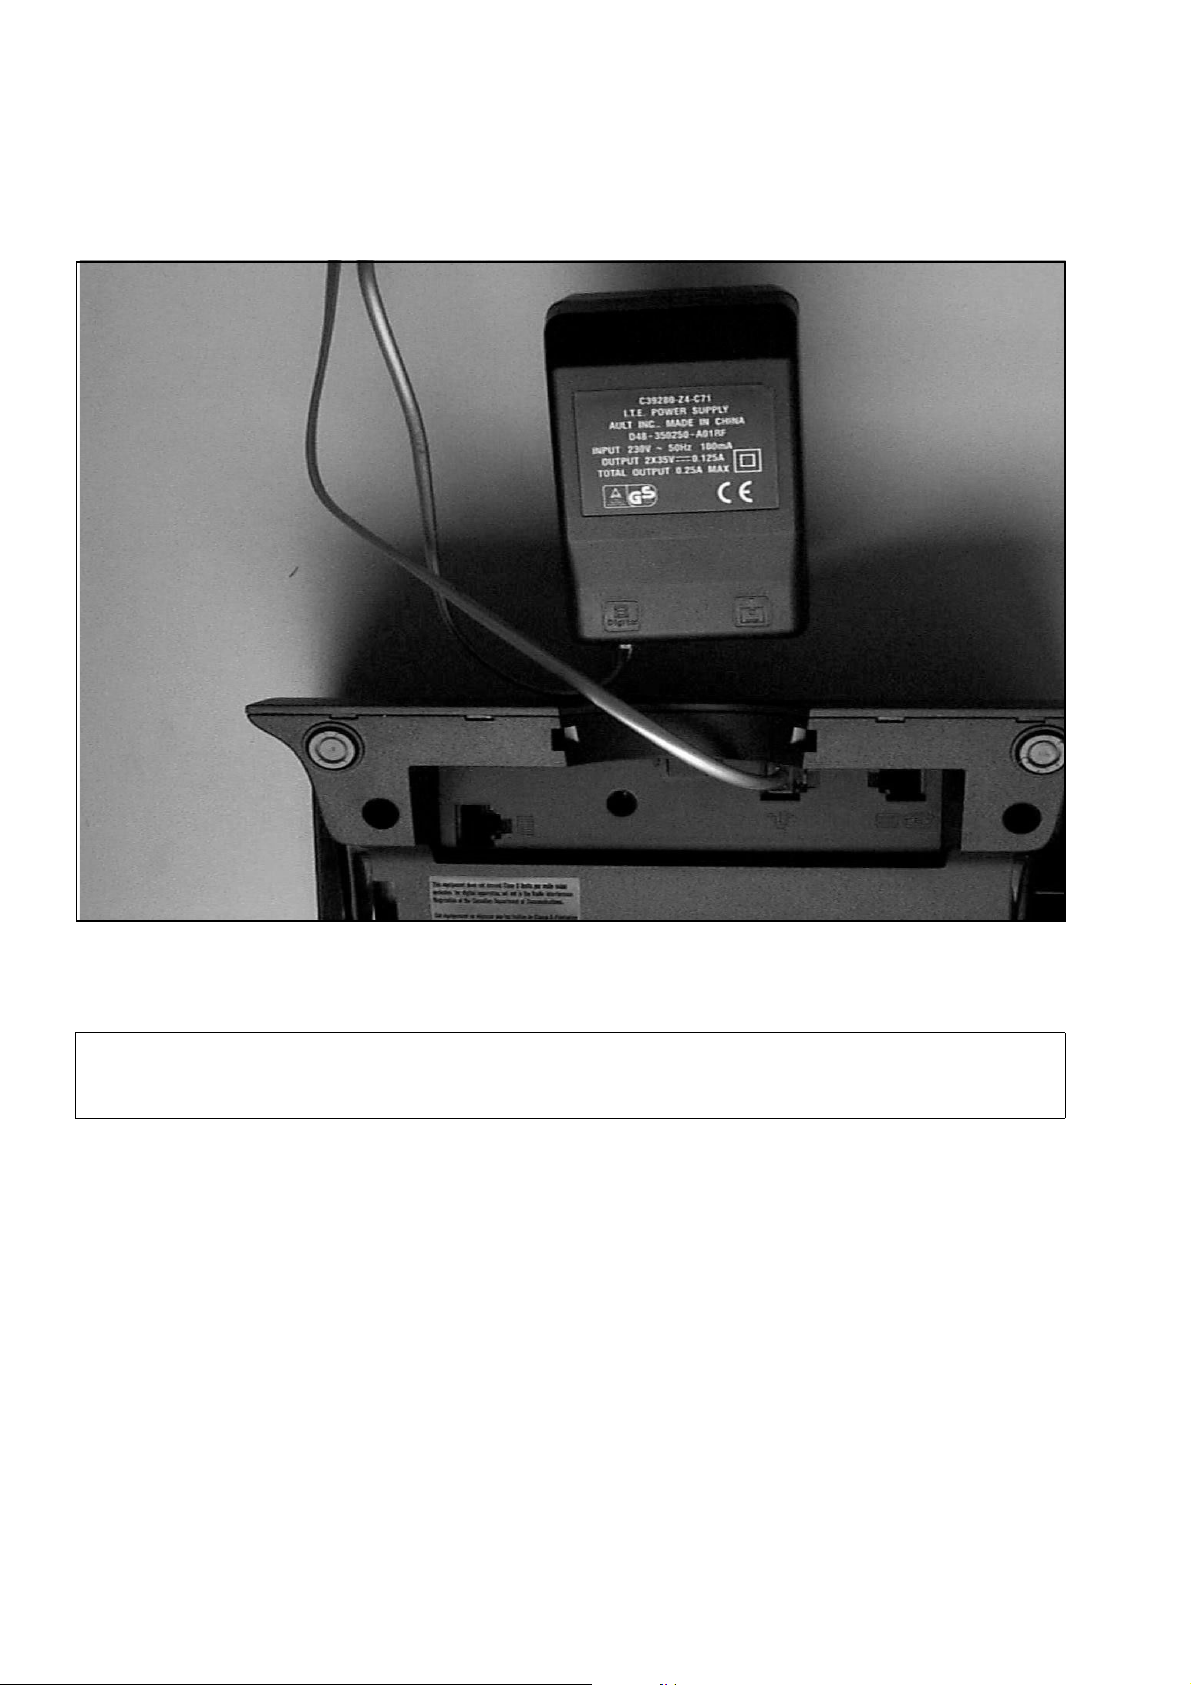
2.4.2.1 Power Supply
The BLF has its own local power supply. If you want to connect two BLFs, you need only one
local power supply for them both (i.e. the power supply of the first BLF can be used for the second BLF as well).
The BLF uses the same power supply (power supply unit 2x35V) and connector as the optiPoint
500 a/b adapter (also see chapter “Accessories“ --> “Mains adapter“).
The output of power supply must be connected directly with the optiPoint BLF.
P31003-E8400-A100-3-7620
Service Manual
2-11
Page 26
Product Description
Module Options
Figure 2-6 Power supply to BLF
When connecting the BLF the configuration should be checked to ensure that it cor-
>
2-12 Service Manual
responds with the telephones/auxiliary modules which are connected..
P31003-E8400-A100-3-7620
Page 27
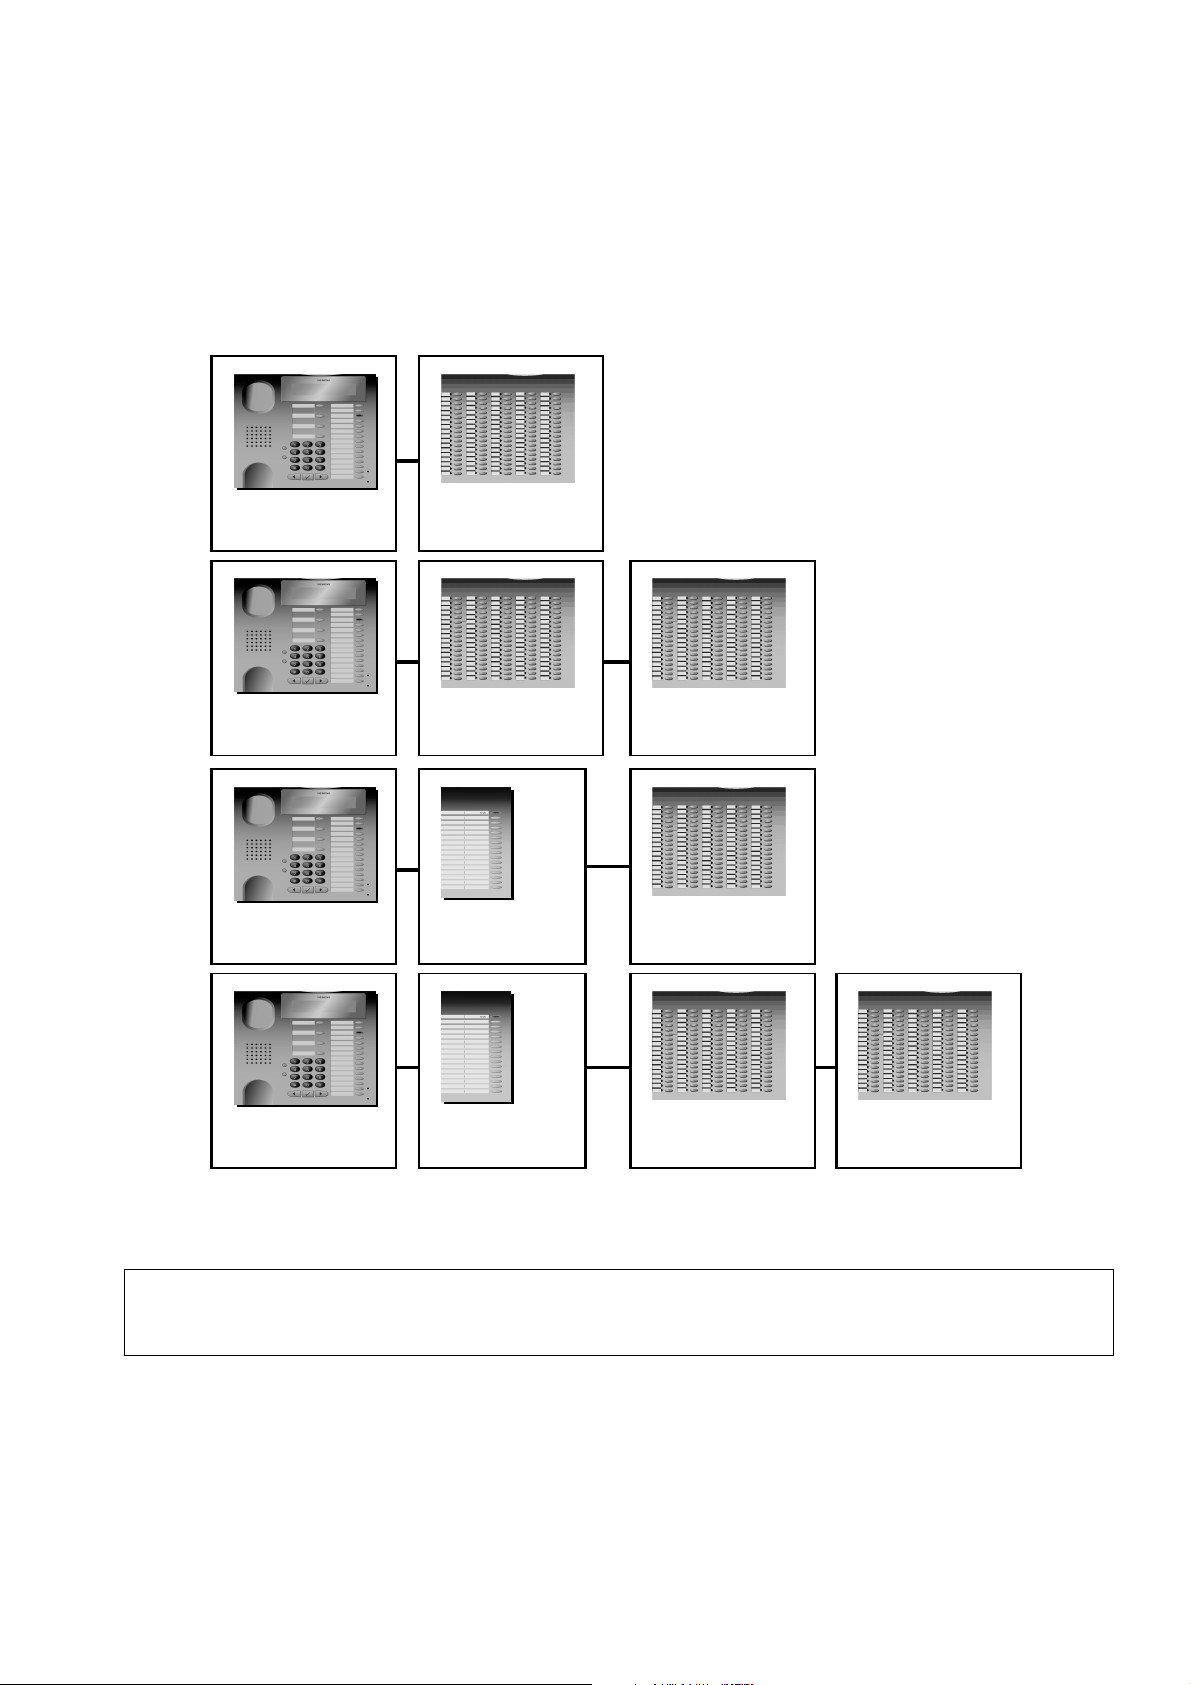
2.4.2.2 Connection to the Terminal
The following connection configurations A - D are possible:
Product Description
Module Options
A
B
C
optiPoint 500
Phone
optiPoint 500
Phone
optiPoint 500
Phone
optiPoint BLF
optiPoint BLF
optiPoint
Key Module
optiPoint BLF
optiPoint BLF
D
optiPoint 500
Phone
optiPoint
Key Module
optiPoint BLF
optiPoint BLF
You can also connect the BLF to the terminal first in combination C and D in connection with a
key module.
With releases lower than 3.0, it is not possible to use an optiPoint 500 advance with
>
P31003-E8400-A100-3-7620
Service Manual
the connection configurations C and D.
2-13
Page 28

Product Description
Module Options
Interface Description: MW8/8 (RJ45)
Pin 1 Pin 2 Pin 3 Pin 4 Pin 5 Pin 6 Pin 7 Pin 8
side car CSSPI master
out/slave in
nc + 3,3V nc DGND SPI clock SPI master in/
slave out
P31003-E8400-A100-3-7620
2-14 Service Manual
Page 29
Product Description
2.4.3 optiPoint 500 signature module (HiPath 4000 only)
The optiPoint 500 signature module is a chip card
reader add-on device for the basic, standard and
advance models.
The key module is a simple option for upgrading
an existing telephone to chip card technology.
Module Options
Physical mounting
I2C Bus Memory Cards
Customized, programmable I2C cards are required for using signature modules. These can be
obtained from Siemens AG: Rainer.eickholt@fthw.siemens.de (see Section 9.3)
P31003-E8400-A100-3-7620
Service Manual
2-15
Page 30
Product Description
Accessories
2.5 Accessories
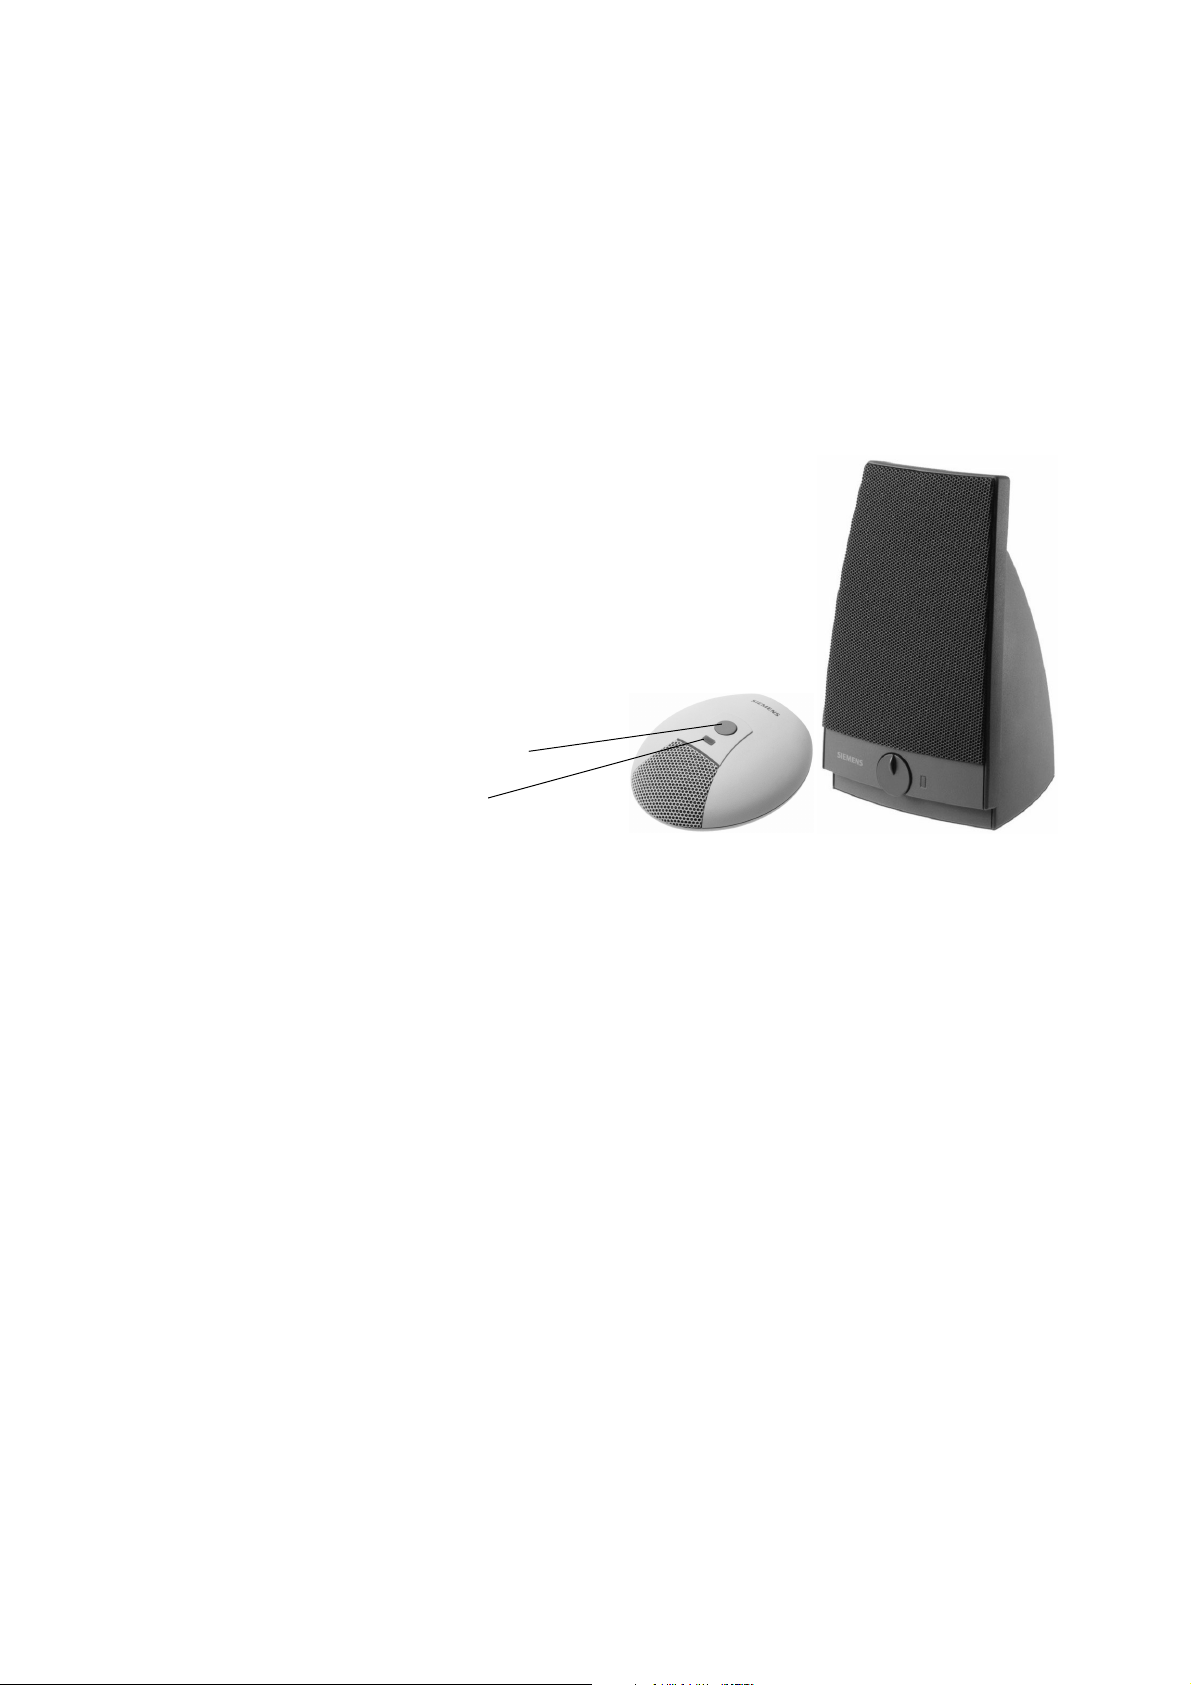
2.5.1 External Speaker/Desk Microphone
These parts feature magnetic shielding to protect magnetic data media and monitors as well
as a device to protect against incoming radiation for electromagnetic compatibility (especially
in conjunction with mobile phones).
To avoid feedback, position the desk microphone
and the external speaker as far away from each
other as possible.
Mute key
LED for on/off display
Desk Microphone
The desk microphone replaces the microphone that is integrated in the telephone and assists
in optimizing the "speakerphone" function in poor acoustic conditions.
If the external speaker button on the telephone is pressed, an LED lights up on the microphone
to show that the microphone is now ready to record.
The microphone can be switched off by pressing the mute key. Deactivation is confirmed when
the LED goes out.
optiset E External Speaker
The active external speaker enhances the speaker already integrated in the telephone and improves the acoustic features and is therefore most suitable for telephone conferences.
When the external speaker is connected to the power network, an LED lights up to show that
is operational. The external speaker button on the telephone activates this function.
The base volume can be adjusted in line with the given room conditions using the automatic
volume control key on the front of the telephone. Volume control during a call is controlled via
the volume key on the telephone.
P31003-E8400-A100-3-7620
2-16 Service Manual
Page 31

Product Description
Accessories
2.5.2 optiPoint Headsets
The headset replaces the telephone handset, i.e. the user’s hands are free during the call. This
add-on device is particularly useful for frequent telephone users (switch operators, tele-marketing personnel).
Connecting the Headset to an 121TR9-5 Interface
The following headsets can be connected to the optiPoint acoustic adapter and the optiPoint
500 advance telephone:
Headset Order Number Connect to
Encore monaural L30460-X1282-X1
Encore binaural L30460-X1282-X2
optiPoint 500 advance
or
Tristar L30460-X1282-X3
Supra L30460-X1282-X4
2100 Flex Boom NC
L30220-F600-H184
optiPoint 500 basic with acoustic adapter
or
optiPoint standard 500 with acoustic adapter
Mono
2100 Flex Boom NC
L30220-F600-H185
Duo
Profile monaural L30460-X1283-X1
Profile binaural L30460-X1283-X2
Duo Set L30560-X1282-X5
The acoustic adapter also supports the extended cordless 121TR9-5* interface.
Table 2-6 Headsets
Spare parts and accessories, such as ear cushions, earpieces, clothing clips, adapter sets for
glasses, fast-on clips, head clips, and extension cords are available from your Siemens consultant.
P31003-E8400-A100-3-7620
Service Manual
2-17
Page 32

Product Description
Accessories
2.5.3 Local Power Supply Unit
You may need to use an optiset E local power supply unit to extend the range or operate additional options. The local power supply unit has two RJ11 jacks and is packaged with the connecting cable.
If the supply voltage exceeds 21 V, all devices are reset and any calls in progress released.
Name Value
Line voltage 220 (230) V
AC line frequency 47-53 Hz
Max. output voltage 50 V
Min. output voltage 30 V
Max. output current 250 mA
Pin Assignment
1 Not used
2 - pole
3Tip
4 Ring
5 + pole
6 Not used
Primary/Client Configuration (see Section 5.5 on page 5-11)
The local power supply can be looped into the connecting line of the primary or client telephone.
If a local power supply is connected in front of the client telephone, the phone adapter detects
this local power supply
(via pins 2+5) and turns off the power to the client telephone.
In this case, only the signals are received via the U
interface.
P0/E
If the power to the client fails, the phone adapter reactivates the power supply.
If the local power supply unit is connected in front of a primary telephone, the supplementary
power is fed via a diode. Because the optiset E local power supply unit has a higher voltage, it
supplies the power to the equipment.
P31003-E8400-A100-3-7620
2-18 Service Manual
Page 33

Product Description
Accessories
2.5.4 Accessory Pack
Each telephone/key module is supplied with:
● general user information
● sourcing options for user/installation instructions (a printed version of the user instructions
can be ordered and is subject to charges).
● Safety information
● two emergency call number labels
● a label strip (neutral) for each model.
For each system order/upgrade, a CD-ROM for is supplied to the administrator via the PC network for provision to the user (available in 7 languages):
● electronic user instructions, brief instruction
● key labeling tool for the user (Word)
● installation instructions for all options
● additional system-specific instructions (optiset E, Cordless E, etc.)
Further CDs can be ordered at a charge.
Up-to-date documents (CD contents) on the Internet: www.hipath.com
2.5.5 Online Key Labeling Tool
This tool is used for labeling the optiPoint 500 telephone keys. It offers:
● key labeling with user-specified text or a selection from the features lists
● printing of a PDF file on company paper with cutting marks or on pre-cut key labeling
sheets (ordered via Witten).
optiPoint key labeling sheet order units include:
● 40 pre-cut sheets for basic/standard/advance (for every 5 telephones)
● 10 pre-cut sheets for entry (for every 15 telephones)
Order Number A31003-H8400-B990-*-6Z19
2.5.6 Wall Mounting
Wall brackets can be used for all optiPoint 500 telephones, apart from with add-on devices, if
a USB 1.1 interface or an adapter is plugged in.
P31003-E8400-A100-3-7620
Service Manual
2-19
Page 34

Product Description
Technical Data
2.6 Technical Data
2.6.1 Asset ID
All telephones have a 32-bit asset ID, which is an electronically encoded serial number that is
set in the factory during final inspection. This number, combined with the phone ID (telephone
type), clearly identifies the telephone.
The asset ID is stored in four bytes, each composed of eight bits.
Significance of the bit field
Year Week Day Design Factory Test bay Serial no.
4 bits 6 bits 3 bits 3 bits 2 bits 2 bits 12 bits
32 MSB
* MSB = most significant bit
** LSB = least significant bit
*
LSB** 1
2.6.2 Environmental Conditions
Environmental conditions apply to all optiPoint telephones, adapters and key modules:
Ambient temperature Relative humidity
Operation 5°C to 40°C 5% to 85%
Transport (short-term) -40°C to +70°C 95% at 45°C
Storage -5°C to +45°C 5% to 95%
Table 2-7 Environmental conditions
P31003-E8400-A100-3-7620
2-20 Service Manual
Page 35

Product Description
Technical Data
2.6.3 Ranges
The transmission range with a 0.6 mm PVC cable is at least 1,000 meters (100 meters from
primary to client device).
The feeding range can be checked via the optiPoint menu item "Service", "Line Test". This test
activates all LEDs for 3 or 5 seconds (depending on the system type), turns on the ringer for 1
second, and blanks the display.
Detailed range data for the individual cable types can be found in the ICN TI Hicom 150 E/ Hicom 300 E and in the ICCS Manual, Volume 2 (order no.: A30951-V6200-*-7620/Lieferzentrum
Fürth).
2.6.4 U
The U
interface is a vendor-specific ISDN interface that uses the CorNet TS protocol and a
P0/E
Interface
P0/E
powered two-wire interface for connecting the optiPoint500 telephones.
U
interface
P0/E
Data transmission based on time-division multiplexing with AMI codes 250 µs frame
Bit clock 384 kHz
Net bit rate 144 kbps
Aggregate bit rate 152 kbps
Center frequency 192 kHz
Characteristic impedance at 192 kHz 100 ohms
Table 2-8 U
interfaces: technical data
P0/E
2.6.5 USB 1.1 Interface
optiPoint 500 telephones are upgraded with a USB interface (with the exception of optiPoint 500
entry). This is the basis for:
● PC-supported telephony (TAPI)
CallBridge TU and CallBridge for data are TAPI Service Providers for CTI solutions.
Telephones can communicate with the PC using these.
● Data transmission via the PC’s USB interface using CAPI (e.g. direct Internet access, fax
transmission, e-mail, etc.). When the CAPI software is installed, PCs gain direct access to
the Internet via the USB interface, without requiring an additional adapter. This software is
subject to charges.
TAPI and CAPI can be used in parallel (e.g. you can receive a large e-mail or download data,
etc. while setting up calls via a CTI application).
P31003-E8400-A100-3-7620
Service Manual
2-21
Page 36

Product Description
Technical Data
P31003-E8400-A100-3-7620
2-22 Service Manual
Page 37

Startup
Unpacking the Box
3Startup
3.1 Unpacking the Box
Before unpacking the telephone, check the box to see if there is any visible damage caused
during transport. Then open the box and check its contents to make sure they are complete
and undamaged.
3.2 Setting Up the Telephone
Due to the many different kinds of varnishes and polishes used on furniture, the possibility of
housing components being damaged or leaving unsightly marks cannot be completely ruled
out. Siemens does not assume any liability for any damage associated with where the telephone set is mounted.
When setting up the telephones, make sure that they are not exposed to direct sunlight and are
not in the direct vicinity of a heat source.
3.3 Keypad and Control Panel
Numeric/dialing keys
Plus/minus keys
Label
(covered by handset)
Labeling space
Function/name
keys with LED
Dialog keys
Figure 3-1 Keypad and control panel (optiPoint 500 standard)
P31003-E8400-A100-3-7620
Service Manual
3-1
Page 38

Startup Nur für den internen Gebrauch
Date and Time Indicator
Keypad Polling
The software polling cycle time is 32 ms. After determining that a key was pressed, the telephone does not poll any other keys until the user releases the pressed key.
Pressing the Plus/Minus Key Simultaneously
A specific feature can be configured in Hicom/HiPath (e.g. volume control) when the plus and
minus keys are pressed at the same time.
3.4 Date and Time Indicator
All optiPoint 500 telephones with displays (economy, basic, standard, advance) have a date/
time indicator.
As indicated in CorNet-TS, the telephone only maintains the clock, while Hicom/HiPath are responsible for setting the time, activating the telephone to display the time, and controlling the
call duration timer.
P31003-E8400-A100-3-7620
3-2 Service Manual
Page 39

Nur für den internen Gebrauch
Ports on the Underside of the Telephone
3.5 Ports on the Underside of the Telephone
When changing or expanding an existing configuration, first unplug the host,
7
USB
RJ45 jack for
● key modules or
● signature modules
connect the extension, and then plug the host back in.
Startup
RJ11 Hicom jacks
Above: RJ8 headset (advance
only)
Below: RJ8 handset
Adapter slots
● 1 x basic and standard
● 2 x advance
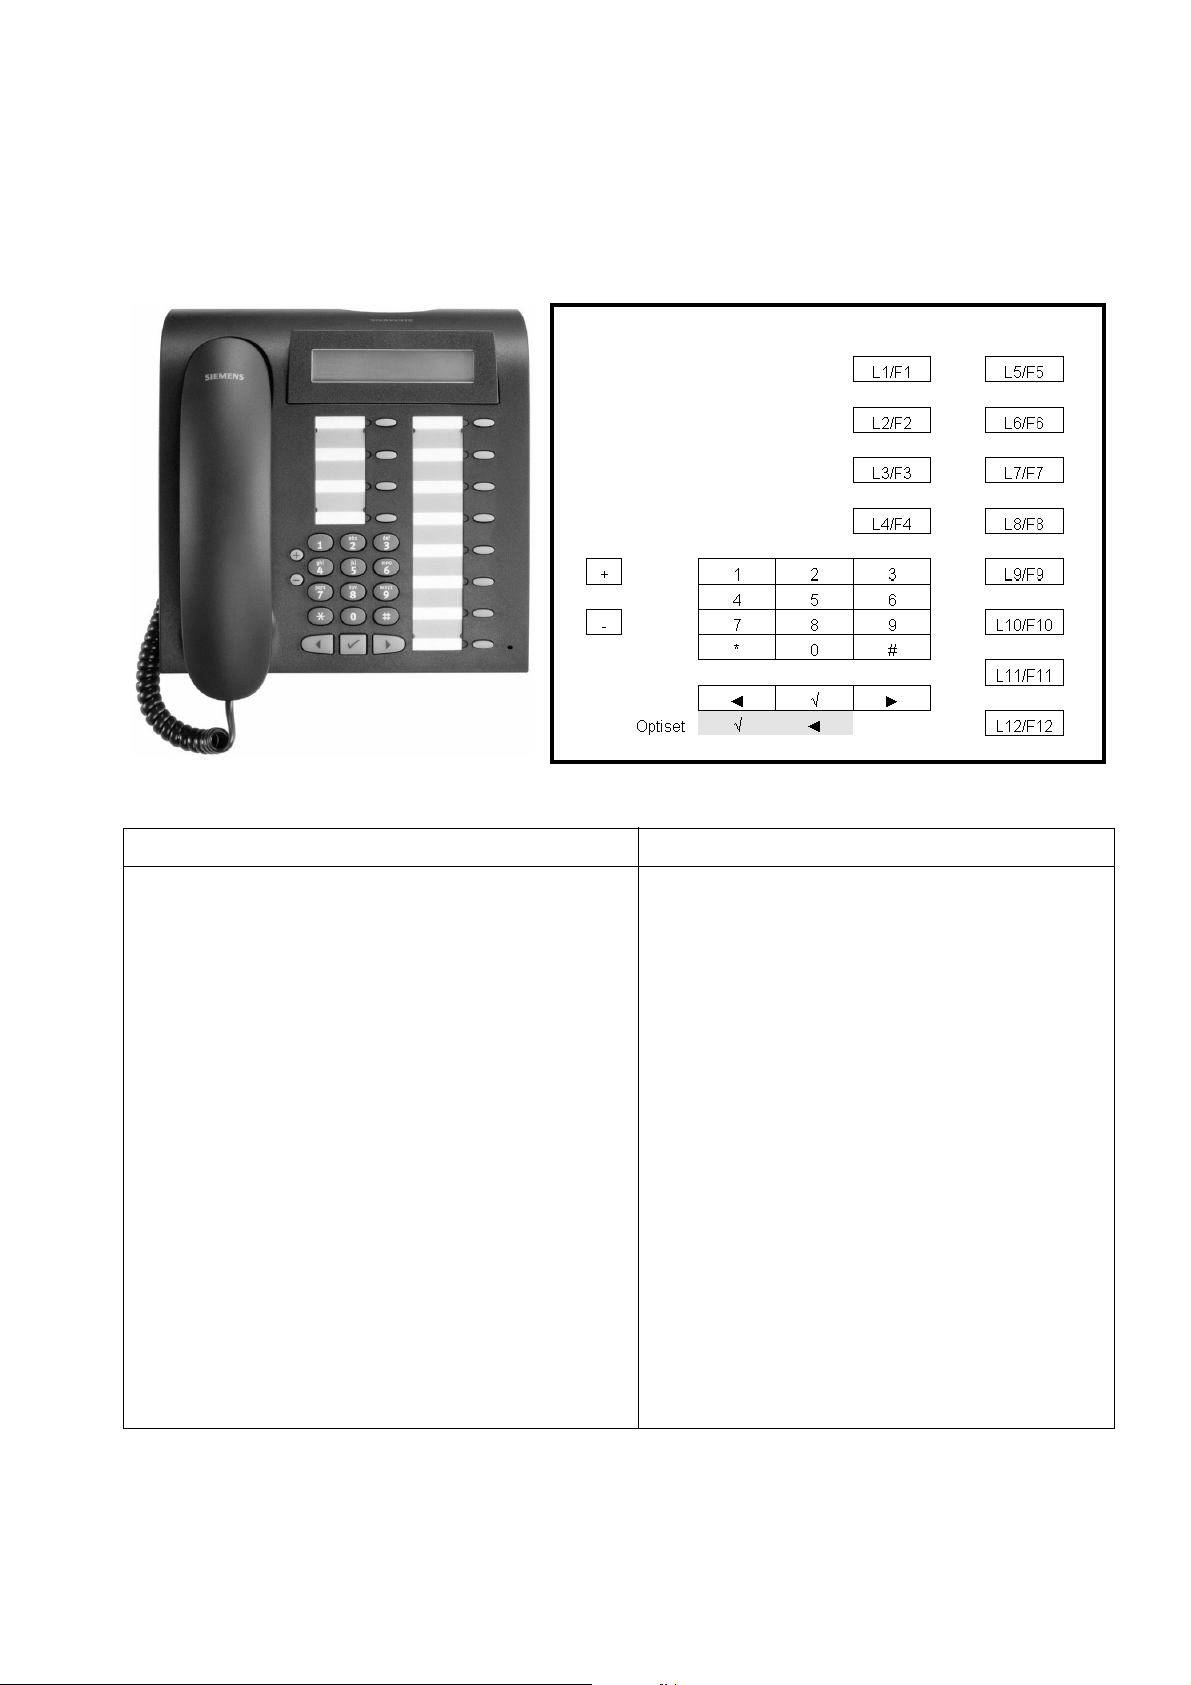
Figure 3-2 Jacks on the underside of the telephone (optiPoint 500 advance)
P31003-E8400-A100-3-7620
Service Manual
3-3
Page 40

Startup Nur für den internen Gebrauch
Te l e p h o n e Tes t s
3.6 Telephone Tests
Accessing the Telephone Test
The telephone test is started by pressing the "service key" and entering the "code number".
● Tests run for approx. 10 s. These are followed by a timeout.
● Tests can be stopped at any time by pressing the pound key .
Code
Menu text Action after pressing OK
number
91 LED Start the LED test
92 Screen Start the screen tests
93 Keys Start the key test
94 Audio Go to the audio test/submenu
941 Speaker Test the speaker volume (7 levels)
942 Handset Test the handset volume (7 levels)
943 Ringer volume Change the ringer volume (7 levels)
944 Ringer pitch Change the ringer pitch (7 levels)
945 Alerting tone Change the volume of the alerting tone (7 levels)
946 Speakerphone mode Handsfree function (3 levels):
normal, loud, noisy room
940 Back Return to the audio test
95 Asset ID Display the asset ID
96 Software version Display the telephone SW version
97 Feeding range Start the feeding range test
90 Back Return to the telephone test
Table 3-1 Telephone test for HiPath 4000/Hicom 300 H
optiPoint 500 Models with Display (economy, basic, standard and advance)
● You can browse and display individual tests in the Service menu.
● Display individual call numbers
● Activate LEDs and calls.
● Display showing if power supply is sufficient
– if sufficient power is being supplied, a light grey pixel pattern is visible
P31003-E8400-A100-3-7620
3-4 Service Manual
Page 41

Nur für den internen Gebrauch
Startup
Telephone Tests
– if no power is being supplied, the pattern is not discernible in the display window.
Test Function Not Working
If the test function does not work, you may need to connect an additional power supply unit to
the telephone.
If the date and time do not appear on the screen after startup, either the telephone or the line
is defective.
HiPath 4000/Hicom 300H
optiPoint 500 telephones on Hicom 300 H are recognized as optiset E IDs.
optiPoint 500 telephone
optiPoint 500 entry
optiPoint 500 economy
Generation/recognition by Hicom 300 H
--> optiset E basic
--> optiset E advance
optiPoint 500 basic --> optiset E advance plus/comfort
optiPoint 500 standard --> optiset E advance plus/comfort
optiPoint 500 advance --> optiset E advance plus/comfort + optiset E key module
Only HiPath 4000 V1.0 and later recognize the optiPoint 500 IDs.
HiPath 3000/Hicom 150 H
The location of the Service key and the code assignments can be freely programmed in Hicom
150 H.
optiPoint 500 telephones are not recognized automatically by HiPath 3000 V3.0/V3.0 and earlier and Hicom 150 H; instead they are treated like optiset E telephones. optiPoint 500
advance telephones are not released for sale on HiPath 3000 Version 3.0 and earlier. Only
HiPath 3000 V3.0 and later fully support the optiPoint 500 IDs.
optiPoint 500 telephone
Generation/recognition by HiPath 3000/Hicom 150 H and
HiPath 3000 Manager E/Hicom Assistant E Office
optiPoint 500 entry
optiPoint 500 economy
--> optiset E basic
--> optiset E advance
optiPoint 500 basic --> optiset E advance plus/comfort
optiPoint 500 standard --> optiset E advance plus/comfort
optiPoint 500 advance --> optiset E advance plus/comfort + optiset E key module
P31003-E8400-A100-3-7620
Service Manual
3-5
Page 42

Startup Nur für den internen Gebrauch
Te l e p h o n e Tes t s
Because the optiPoint 500 advance has more function keys (4 + 15) than all optiset E telephones (max. 4 + 8), the system generates an optiset E advance plus/comfort with optiset E
key module for the optiPoint 500 advance. This combination is also recognized by HiPath 3000
Manager E/Hicom Assistant E Office.
The 4 + 8 function keys of the optiset E advance plus/comfort and the first 7 keys of the optiset
E key module are used for programming the 4 + 15 function keys of the optiPoint 500 advance.
P31003-E8400-A100-3-7620
3-6 Service Manual
Page 43

Nur für den internen Gebrauch
3.7 Block Diagrams
Startup
Block Diagrams
Figure 3-3 optiPoint 500 entry, economy block diagram
P31003-E8400-A100-3-7620
Service Manual
3-7
Page 44

Startup Nur für den internen Gebrauch
Block Diagrams
Figure 3-4 optiPoint 500 basic, standard and advance block diagram
P31003-E8400-A100-3-7620
3-8 Service Manual
Page 45

Private Network Termination Units
4 Private Network Termination Units
PNT 520
S -Bus
0
8
up to 8 telephones
max. 8 Endgeräte
Video communication
Video-Kommunikation
S -Bus
0
8
up to 8 telephones
max. 8 Endgeräte
U
P0
2
S
0
2
set 551
optiset E ISDN adapter
optiset E
optiPoint 500
U
(U )
2B1Q
PNT
(PNTQ)
P0
U
P0/E
Hicom
U
P0/E
U
2B1Q
PC mit ISDN-Karte
PC with ISDN card
optiset E
optiPoint 500
S
0
PNT E
U
P0/E
optiset E distance adapter
Figure 4-1 Private network termination units
Private network termination units convert the two-wire UP0/U
es of the HiPath system to the user’s four-wire S0 interface.
P31003-E8400-A100-3-7620
Service Manual
P0/E
HiPath
Hicom
and U
subscriber interfac-
2B1Q
4-1
Page 46

Private Network Termination Units Nur für den internen Gebrauch
PNT Private Network Termination
4.1 PNT Private Network Termination
PNT converts the two-wire UP0 interface to the four-wire S0 interface and extends the range.
This gives you the advantages of the S0 and S0 bus interfaces at great distances from the Hicom system (connecting up to eight telephones and using fewer cables and system ports).
The desktop model can also be mounted on the wall. Power is supplied by an optiset E local
power supply unit.
4.2 PNT E Private Network Termination
The PNT E converts the two-wire U
interface to the S0 interface to connect up to two S0
P0/E
terminals (such as a PC and fax) to Hicom.
A local power supply is available for the PNT E if the connected devices need to receive power
from the S0 interface.
4.3 PNT Q Private Network Termination
PNT Q converts the two-wire U
range. This gives you the advantages of the S0 and S0 bus interfaces at great distances from
the Hicom system (connecting up to eight telephones and using fewer cables and system
ports).
interface to the four-wire S0 interface and extends the
2B1Q
4.4 Distance Adapter (UCON S and M) at Hicom 300/300 E and HiPath
4000
Distance adapters increase the optiPoint 500 telephone range from 1,000 m to a total of 8,000
m, depending on the cable type. The range between the optiPoint 500 distance adapter and
telephone is limited to 100 m (depending on the cable type and diameter).
To connect this adapter, an SLMQ line card (U
TS must be provided in Hicom 300/300 E.
Power is supplied to the distance adapter via a local power supply unit. An 8-pin RJ 45 plug is
used as the mains power supply. This is the same as the plug used for PNT.
The stacked UCON S or M housing is suitable for desktop installation or mounting on the wall.
interface, 16 ports) with LAP-S and CorNet-
2B1Q
Distance Adapter S (single) - UCON S
UCON S has a 6-pin RJ 11 entry and exit port. It serves as the connection between an optiPoint
500 telephone and its options via the U
interface (2-wire).
2B1Q
Distance Adapter M (multiple) - UCON M
UCON M is available via four 6-pin RJ 11 entry (4x U
) and exit interfaces (4x U
2B1Q
P0/E
). This
adapter is used for connecting four telephones and their options.
P31003-E8400-A100-3-7620
4-2 Service Manual
Page 47
Option Adapters and Ports
5 Option Adapters and Ports
The optiPoint 500 adapter concept facilitates the flexible extension of the optiPoint 500 basic,
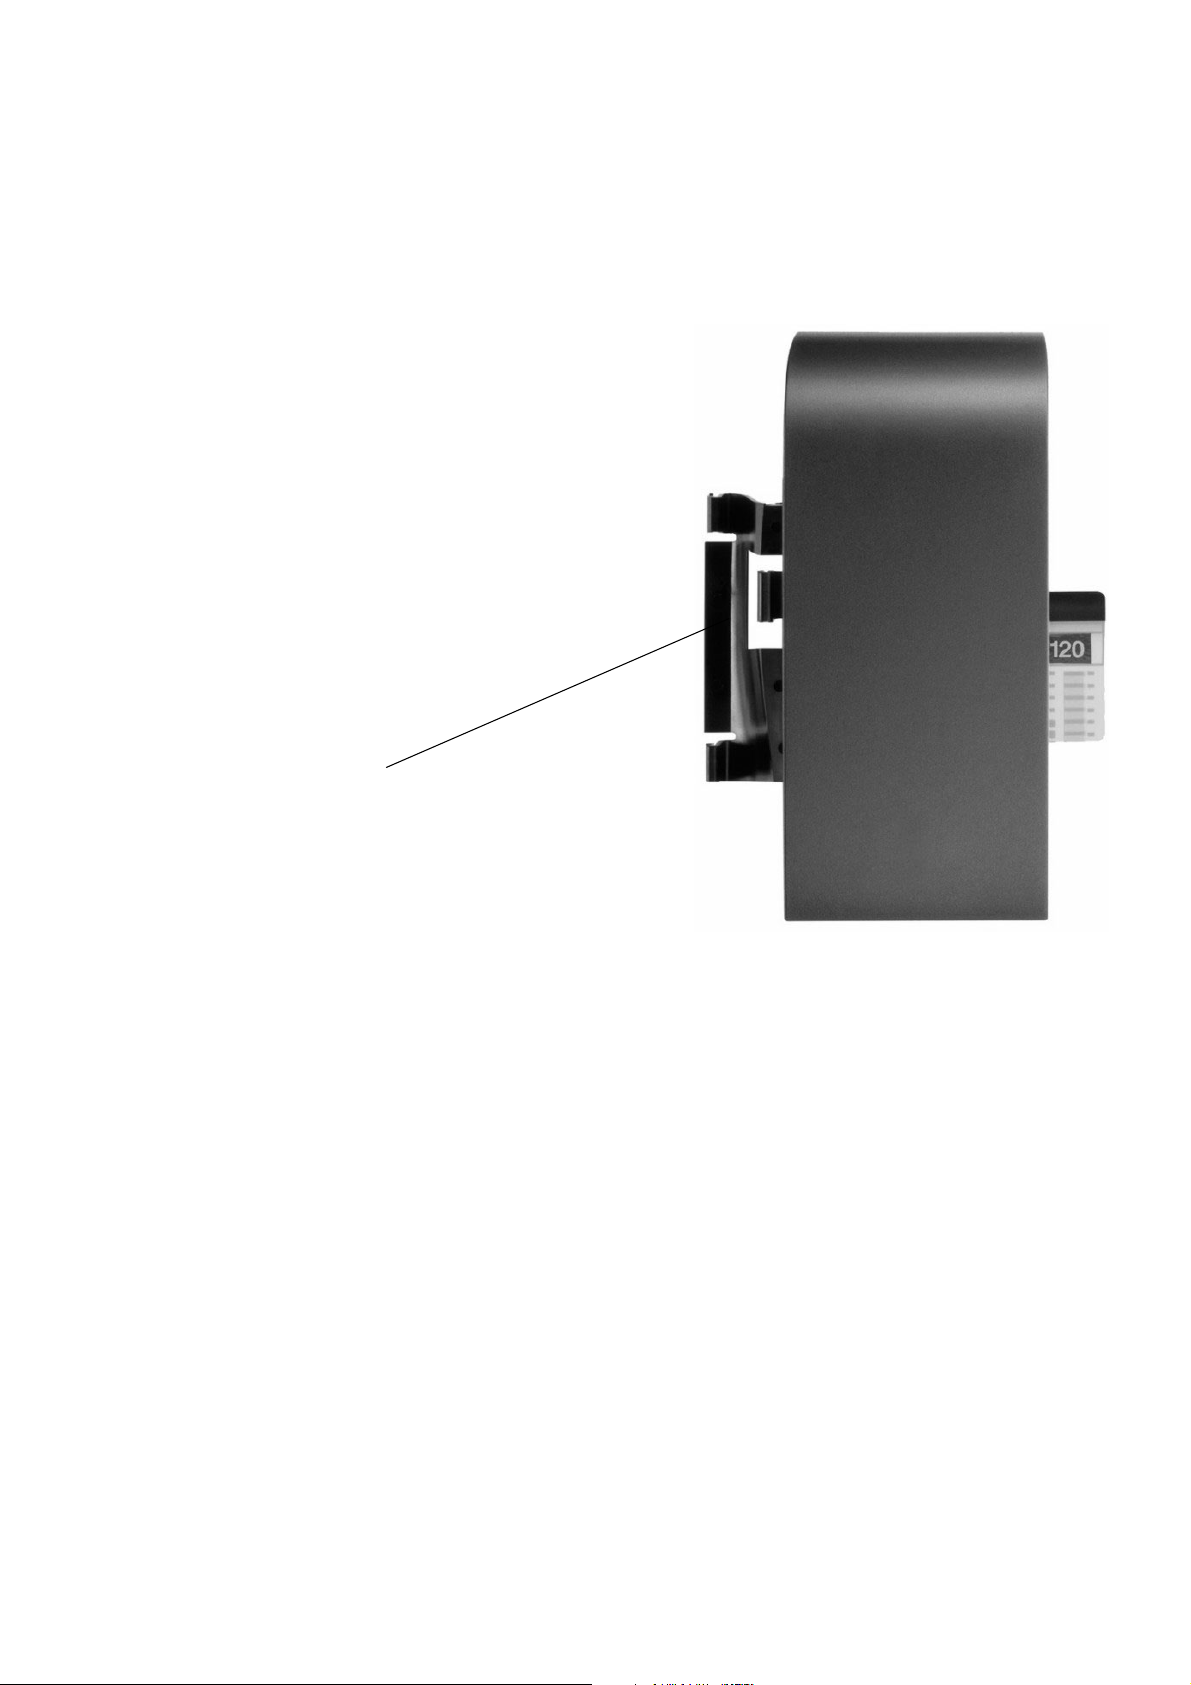
standard and advance system telephones.
Comparison of optiset E Adapters and optiPoint Option Adapters
* Local power supply unit recommended
** Local power supply unit required
P31003-E8400-A100-3-7620
Service Manual
5-1
Page 48

Option Adapters and Ports Nur für den internen Gebrauch
Configuration Notes
● In large configurations, it may be necessary to use local power supply units, depending on
the power consumption.
● Phone and analog adapters cannot be used together.
● Phone adapters, ISDN adapters, and analog adapters can only be connected to the host.
● optiPoint 500 entry cannot be configured as the host in a host/client configuration in Hicom
150/HiPath 3000 (including ISDN).
● Whenever making changes to the configuration, disconnect the host telephone from Hi-
com/HiPath. Doing so triggers a reset when the adapter is connected again, providing the
system with the new configuration in the setup message.
● A powered telephone can be connected to the ISDN adapter. When connecting a terminal
that does not have a separate power supply, an additional power supply unit is required.
● By default, the following are not possible in conjunction with a distance adapter (UCON S/
UCON M) in a Hicom 300 or Hicom 300E system:
– client configurations
– configurations with analog adapters and ISDN adapters.
● Only one headset/acoustic adapter is permitted per telephone.
● USB CAPI can only be connected to the host.
P31003-E8400-A100-3-7620
5-2 Service Manual
Page 49

Nur für den internen Gebrauch
5.1 Adapter Slots
When changing or expanding an existing configuration, first unplug the host,
7
connect the extension, and then plug the host back in.
Option Adapters and Ports
Adapter Slots
Adapter slots
● 1 x basic and standard
● 2 x advance
Figure 5-1 Jacks on the underside of the telephone (optiPoint 500 advance)
You can plug adapters into slots on the underside of the telephones.
P31003-E8400-A100-3-7620
Service Manual
5-3
Page 50

Option Adapters and Ports Nur für den internen Gebrauch
optiPoint 500 acoustic adapter
5.2 optiPoint 500 acoustic adapter
A local power supply unit is required when using the acoustic adapter.
>
You can connect the following to this adapter:
● External speakers and desk microphone over Y cable,
● Cord-connected headset (121 TR9-5) or
● Cordless headset
(121 TR 9-5*) with call acceptance/cleardown function from mobile units,
● Floating contact
to busy display/door opener and secondary bell/visual paging with own power supply.
It is intended for use with the following systems:
basic standard advance
Hicom150 E/150 H
HiPath AllServe 150
HiPath 3000
Hicom 300 H/300 E
HiPath 4000
●●
●●
●●●
●●●
●●●
Note on the advance Model
This model has an integrated headset port on the underside of the device.
Notes on the acoustic adapter
● When using an external microphone and an external speaker, the internal components are
switched off in speakerphone mode (sense lead).
● The type of telephone determines the handsfree operation. Microphones which are con-
nected to the acoustic Adapter will not be supported by optiPoint 500 basic. Except for call
signaling, external devices have priority over internal devices.
● In the mute audio function, the internal microphone, the transmitter insets, and a micro-
phone connected to the acoustic adapter are switched to mute.
P31003-E8400-A100-3-7620
5-4 Service Manual
Page 51

Nur für den internen Gebrauch
Option Adapters and Ports
optiPoint 500 acoustic adapter
● Ringing, alerting, and key tones are switched to the basic speaker (and not to the external
speaker port).
● You can use the volume keys on the telephone to adjust the volume level of both the inter-
nal and external speakers.
You can also use the volume control on the external amplifier to adjust the volume of the
external speaker.
Y cable MW8/8
1 2 3 4 5 6 7 8
for connecting
speaker and microphone
Floating contact
(MW6/6)
Headset MW8/8
Pin assignments, Desk Microphone and External Speaker: MW 8/8
Pin 1 Pin 2 Pin 3 Pin 4 Pin 5 Pin 6 Pin 7 Pin 8
+U GND NF Sens LS_SENS LSP NC DGND
External Speaker:
RJ45
Internal resistance: 0 ohms; 10 µF
Level (with PCM -20dBm): -4.8 dBm (at volume level 8; 0.775 V = 0 dBm)
Sense lead to GND: Int. speaker deactivated, active for ringer only
P31003-E8400-A100-3-7620
Service Manual
5-5
Page 52

Option Adapters and Ports Nur für den internen Gebrauch
optiPoint 500 acoustic adapter
Desk Microphone:
Input level -50 dBm: -12 dBm PCM signal
Input resistance: 150k parallel with 220 nF in series with 36K
Sense lead to GND: Internal microphone deactivated
Pin assignment Headset: MW 8/8
Pin 1 Pin 2 Pin 3 Pin 4 Pin 5 Pin 6 Pin 7 Pin 8
TX GND TX_AUD RX_AUD RX_AUD TX_AUD - RX_BUS
The electrical values comply with FTZ 121TR9-5.
Pin assignment Floating contact: MW6/6
Pin 1 Pin 2 Pin 3 Pin 4 Pin 5 Pin 6
NA ACT1 RING RING ACT2 NA
5.2.1 Electrical Requirements of the Headset
●
The electrical values comply with FTZ 121TR9-5
●
Audio transmission from one headset is routed to the other headset (recommended
by Plantronics).
●
The way in which this option interacts with the telephone and the CS is described by
the CorNet-TS layer 3 specification for Symphony.
The CS can detect a headset after it has been plugged into this option.
●
Microphone (Elektret interface):
Max. current: ≤ 400 µA
Supply voltage: 5 V±10%
Series resistance: 5 kΩ±10%
●
Audio converter:
Impedance: 150 Ω±10%
EBD: 13 dB±2.5dB
P31003-E8400-A100-3-7620
5-6 Service Manual
Page 53

Nur für den internen Gebrauch
Option Adapters and Ports
optiPoint 500 acoustic adapter
5.2.2 Floating Contacts
In addition, the acoustic adapter also provides two floating contacts. This allows the control of
a busy lamp and a secondary bell.
1. First contact (PIN 2 and 3)
This signals the active telephone states:
● Handset offhook/trunk key activated
● Speaker on/headset active
An external lamp can be used to indicate these states. When the lamp lights up, one of the
above-mentioned states is active. However you cannot provide a separate lamp for each
of this states.
The lamp receives power from an external source rather than from the telephone itself.
However, to prevent this lamp from causing irreversible damage to the optiset telephone
or optiset contact adapter, the power supply must range from 24 volts to a maximum of 60
volts, and the lamp itself should not exceed 5 watts. (You can, of course, connect a relay
instead of the lamp, taking care not to exceed the connection values mentioned above).
2. Second contact (PIN 4 and 5)
This provides the ring input status.
This contact can provide an external signaling mechanism when the telephone rings. This
is important when connecting a secondary bell or similar device. Once again, observe the
electrical connection values for this connector as well (24 V - 60 V, 5 W; do not connect an
inductive load without surge protection). However, you can also connect a relay instead of
the lamp, with this relay then controlling the 220 V secondary bell.
The “busy display“ and “door opener“ functions cannot take place simultaneously.
>
The “door opener“ function is currently only applicable for HiPath 4000 (later also for
HiPath 3000 V4.0).
Contact Load
Both contacts can carry the following load:
5 W with 24 V a.c. or 60 V d.c.
P31003-E8400-A100-3-7620
Service Manual
5-7
Page 54

Option Adapters and Ports Nur für den internen Gebrauch
optiPoint 500 Analog Adapters
5.3 optiPoint 500 Analog Adapters
This type of adapter is used for connecting an analog terminal (e.g. telephone, group 3 fax, modem, cordless telephone) to the system telephone.
A local power supply unit is required when using an analog adapter.
>
Only DTMF terminals can be connected to an analog adapter
(no dial pulsing).
MW6/6
Pin 1Pin 2Pin 3Pin 4Pin 5Pin 6
NC NC TIP + RING NC NC
RJ11
654321
Functions
● The connected analog equipment can use this interface to send and receive calls indepen-
dently of the voice call status of the basic device, provided that a B channel is available.
● During adapter initialization, country-specific information (such as impedance and flash
signal duration) is loaded.
● You can connect an external ringer (secondary bell for the telephone) via TA a/b.
The AC bell, which can be connected instead of an analog terminal, is treated like a "physical device" (source) and receives signals from the system.
Administration is in MULAP form.
P31003-E8400-A100-3-7620
5-8 Service Manual
Page 55

Nur für den internen Gebrauch
Analog Interface
● Standard analog interface for
– analog telephones
– cordless telephones
– fax machines or other
– analog equipment with an analog interface
● Supply current 30 mA
● Busy signal if both B-channel lines are busy
● Ring sequence: 2.2
● Supports only DTMF with flash
● No ground signaling allowed
Option Adapters and Ports
optiPoint 500 Analog Adapters
● MW 6/4 (RJ11/8) connector
The adapter does not support the following functions:
● Voice mail servers with analog interface
● Message waiting LED
● Dictation equipment
● Speaker
● Announcement device (such as start/stop)
● Screen keys (PC connected to RS232) and
● A, B, C, D keys on the enhanced telephone.
●
Telephone active: Handset off-hook, speakerphone mode, open listening, headset
active
●
Ringer on: Contact opens and closes with the ring cadence
P31003-E8400-A100-3-7620
Service Manual
5-9
Page 56

Option Adapters and Ports Nur für den internen Gebrauch
optiPoint 500 ISDN Adapter
5.4 optiPoint 500 ISDN Adapter
The ISDN adapter converts a UP0 => S0.
This permits the connection of default ISDN terminals with their own power supply unit (e.g.
group 4 fax machines, ISDN data terminals, ISDN telephones as well as video communication
equipment, such as a video set or video kit for example).
MW8/8
Pin 1 Pin 2 Pin 3 Pin 4 Pin 5 Pin 6 Pin 7 Pin 8
NC NC SR1 SX1 SX2 SR2 NC NC
RJ45
8 7 6 5 4 3 2 1
Functions
● ISDN
● MW 8/8 connector according to CCITT Recommendation I.430
● Pin assignment in accordance with ISO 8877
● Support for point-to-point and passive bus connections
● Wired for short passive bus configurations
● Cable lengths
network terminating point with support for 2B+D channels.
– cables can be a maximum of 100 meters long with a cable impedance of 75 ohms.
– They can be up to 200 meters with a cable impedance of 150 ohms according to
CCITT Recommendation I.430
● NT terminating resistors are integrated into the ISDN adapter.
Additional terminating resistors come with the unit.
P31003-E8400-A100-3-7620
5-10 Service Manual
Page 57

Nur für den internen Gebrauch
optiPoint 500 Phone Adapter (Host/Client)
5.5 optiPoint 500 Phone Adapter (Host/Client)
Option Adapters and Ports
The phone adapter facilitates the connection of a second U
supply unit (client) for using the second B-channel.
The connected client phone can send and receive calls independently of the host telephone’s
connection status.
If you need to extend the range or operate additional options a local power supply
>
unit is required (see chapter „Local Power Supply Unit“.
MW6/6
Pin 1Pin 2Pin 3Pin 4Pin 5Pin 6
NC AUX - UP0 -UP0 +AUX + NC
RJ11
6 5 4 3 2 1
terminal with its own power
P0/E
Functional Description
The phone adapter has a single MW6 modular connector with 4 pins that supply the interface
for the client phone.
Restriction:
Range limited to 100 meters.
P31003-E8400-A100-3-7620
Service Manual
5-11
Page 58
Option Adapters and Ports Nur für den internen Gebrauch
optiPoint 500 recorder adapter
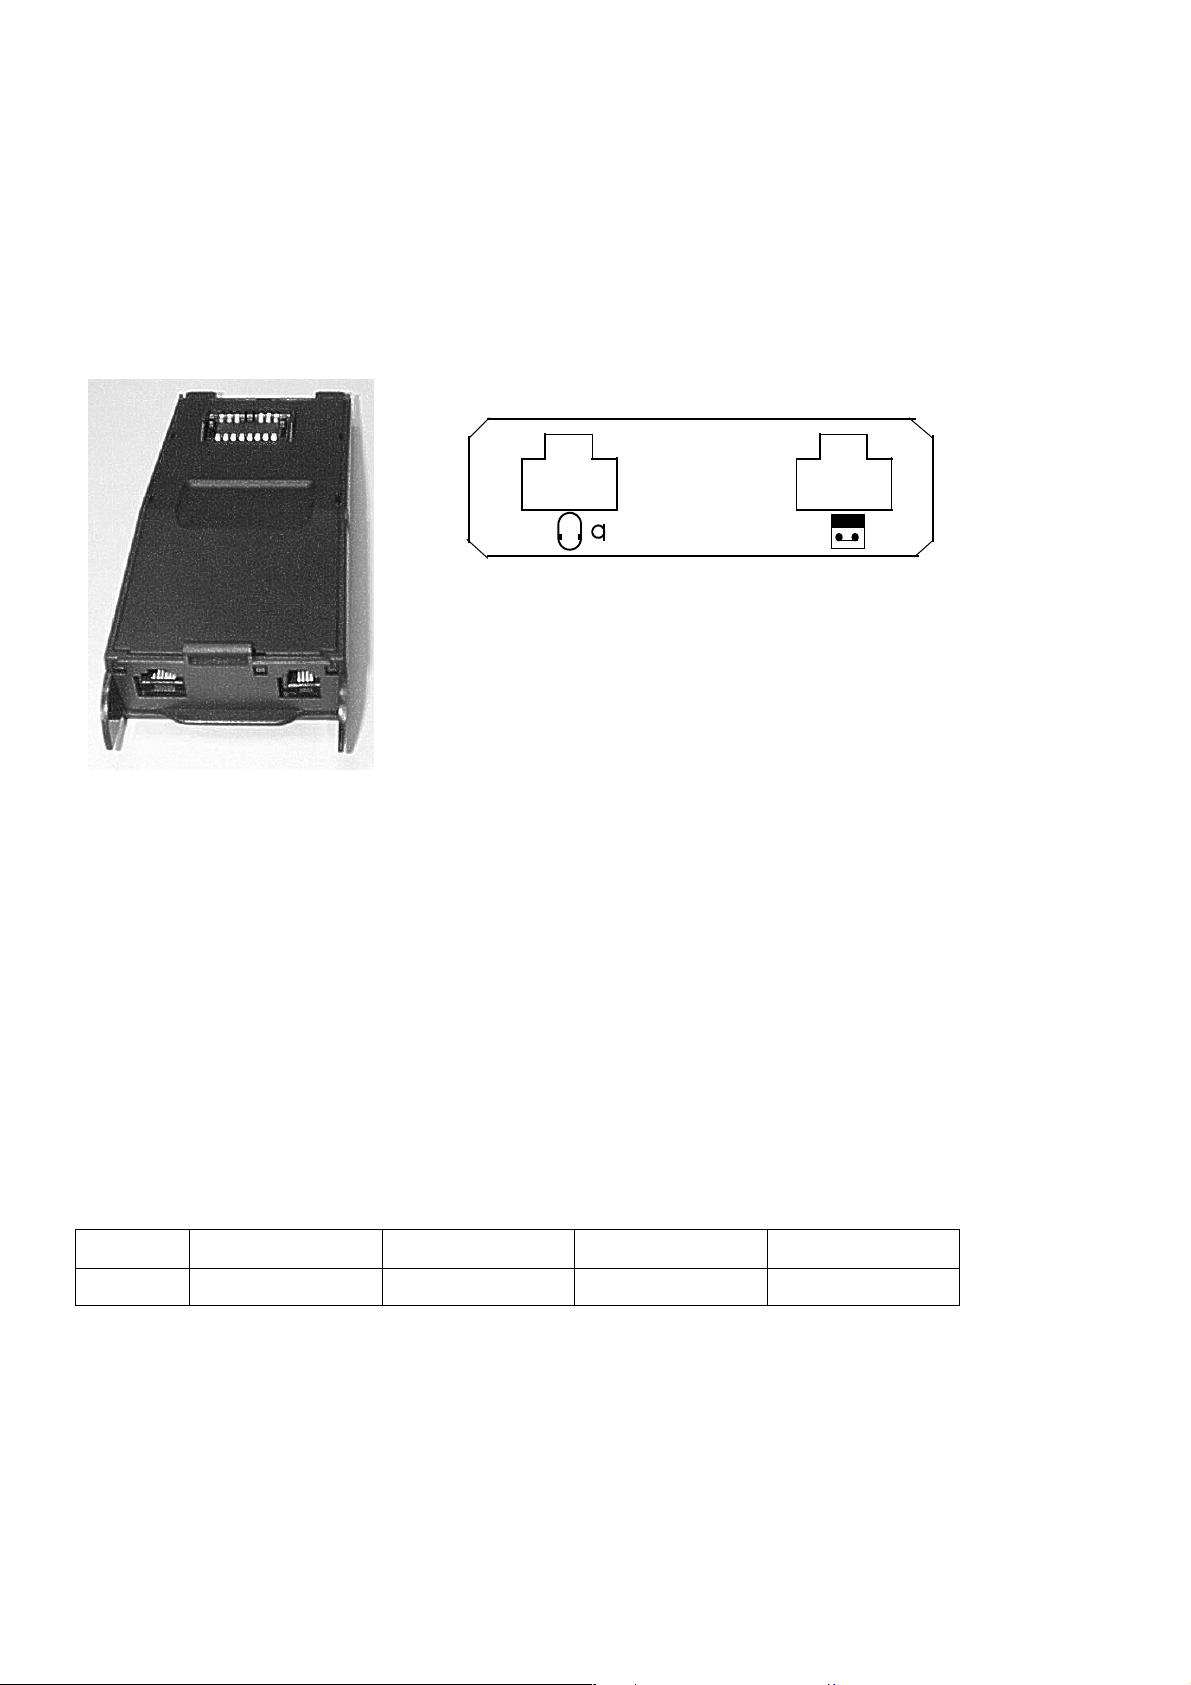
5.6 optiPoint 500 recorder adapter
Interfaces
Headset
Figure 5-2 Recorder adapter
The recorder adapter has an interface for a second headset and a recorder interface.
The way in which the headset plus adapter interacts with the telephone and the CS is described
by the CorNet-TS layer 3 specification for Symphony. The CS can detect a second headset after it has been plugged into this option.
Interface Description
When a second handset is connected, the uplink beep capability is provided by adding the
beep and uplink audio during the beep. A beep detection circuit activates the uplink beep when
the switch recorder generates the beep signal, thus maximizing the echo reflection attenuation.
The users hear the uplink beep in the secondary tone path.
Second Handset: MW 4/4
Pin 1234
-NF+NF- -
Internal resistance: 1k in series with 10µF
Level (input resistance 10 K): -23dBm at a PCM level of -10 dBm
P31003-E8400-A100-3-7620
5-12 Service Manual
Page 59

Nur für den internen Gebrauch
Option Adapters and Ports
optiPoint 500 recorder adapter
Recorder port: MW 6/4
Pin 123456
NC NF+ NF+ NF NF NA
Ports 2 and 3 and ports 4 and 5 are connected to each other.
Recorder port
1 2 3 4 5 6
Electrical Requirements
Headsets that are connected to the headset plus adapter must meet the same requirements
as those connected to the headset adapter.
Recorders that are connected to the headset plus adapter must meet the following requirements:
●
Input impedance: >10 kohm
●
Frequency variation: 300 to 3,000 Hz ± 3 dB
●
Beep level: -26 dBm to -18 dBm with a 600-ohm load
●
Max. input level: 650 mVeff from a 600-ohm source
The headset plus adapter already contains an electrical isolator for the recorder port.
P31003-E8400-A100-3-7620
Service Manual
5-13
Page 60

Option Adapters and Ports Nur für den internen Gebrauch
optiPoint 500 recorder adapter
Connection Example
Plastic clamps
RJ 11
RJ 45
2-wire to 1000 m
to Hicom
U
P0E
2 4
MWxx wall outlet
Local power
supply unit
connecting cord,
line cord (of telephones)
Host
optiPoint 500 with phone adapter
Bu 1 Bu 2
4-wire U
P0E
to 100 m
Line cord
SPA
Client
Plug- transparent green
Local power supply unit
optiPoint 500
MWxx wall outlet
Line cord, twisted (1:1 assignment)
Ferrule
Bu1
54
3687 21
Bu2
8
721S
Connector to telephone
+ba-
to HiPath/Hicom
23 4 5
(transparent green)
+ab-
Figure 5-3 Connection example: host, SPA, Client, 2 SNG - Power supply unit dependent
on the configuration
P31003-E8400-A100-3-7620
5-14 Service Manual
Page 61

Nur für den internen Gebrauch
Option Adapters and Ports
5.7 Port Overview
Phone
Pin Nr Up0 HA HS Side out Bay out USB
MW6/4 MW4/4 MW4/4 MW8/8 B2B USB Typ B
1 not asse MIN1(DGND) MIN2(DGND) MRST LPWR+ USB_VCC
2 LGND HAP HSP DGND LGND D3 Up0_La HAN HSN SCLK APWR+ D+
4 Up0_La MIP1+ MIP2+ (RX_INCA) not asse DGND
5 AUX+ (TX_INCA) not asse
6 not asse SPI_CS DGND
7 +3V3 DCL
8 MTSR +3V3
9 DD
10 OPT_RESN
11 DU
12 FSC
13 SCLK
14 MTSR
15 MRST
16 OPT_CSN
Por t Overview
not asse not assembled
nc not connected
(xx_xx) connection only during developement
res reserved
ISDN Slave Analog Recorder
Pin Nr S0 Up0 a/b 2-nd Ear Record
MW8/8 MW6/6 MW6/6 MW4/4 MW6/6
1 nc nc nc nc nc
2 nc AUX- nc HOP RECP
3 SR1 Up0- TIP+ HON RECP
4 SX1 Up0+ RING nc RECN
5 SX2 AUX+ nc RECN
6 SR2 nc nc nc
7 nc
8 nc
P31003-E8400-A100-3-7620
Service Manual
5-15
Page 62

Option Adapters and Ports Nur für den internen Gebrauch
Por t Overview
Akustik Key Signature BLF
Pin Nr Audio Head Contact Side in Side Out Card Power
MW8/8 MW8/8 cod MW6/6 MW8/8 MW8/8 CCR MW6/6
1 MIC_POW+ HS_RXD ACT1 MTSR MRST SC_VCC nc
2 MIC_DGND DGND ACT2 +3V3 DGND SC_RSTN POW3 MIP MIN RING1 SC_CS SCLKO SC_CLK nc
4 MIC_SENSN HSP RING2 (VPP) nc nc nc
5 LS_SENSN HSN (RESETN) nc DGND POW+
6 LSP MIP+ SCLK CS_OUT nc nc
7 (BOOT) +3V3 DGND +3V3 SC_I/O
8 AGND HS_TXD MRST MTSR SC_AUX
P31003-E8400-A100-3-7620
5-16 Service Manual
Page 63

CallBridge
CallBridge TU
6CallBridge
optiPoint 500 basic, standard and advance models are equipped with a USB interface. This
provides a USB 1.1 (client) "plug and play" port on a PC with MS Windows 98SE/2000.
The USB cable (S30267-Z360-A30-*) with right-angle plug is required for connecting
>
6.1 CallBridge TU
The "Callbridge TU" program is ready for downloading. It sets up the connection from the PC
to optiPoint 500 and offers PC-supported telephony. The telephone user should contact his
system administrator for information on installing this program. This program is not installed by
default by the Siemens technician.
optiPoint 500 to a Windows PC. This cable is not supplied with optiPoint 500.
● Callbridge TU software contains all TSP drivers for CorNet-TS, WS protocol and the TAPI
3.0 interface as the basis for customer-specific applications.
The documentation for CallBridge you can find under following link adress:
http://netinfo2.icn.siemens.de/e_doku/en/index.htm#hcab
P31003-E8400-A100-3-7620
Service Manual
6-1
Page 64

CallBridge Nur für den internen Gebrauch
CallBridge for Data
6.2 CallBridge for Data
Data communication with PCs over optiPoint 500 system telephones.
CallBridge for Data is a software solution for PC data communication with the new optiPoint
500 telephone family.
The connection to ISDN transforms a PC into a communications workstation, especially when
there is no LAN or when the LAN, without a gateway to the outside, allows data communication
only within the company.
CallBridge for Data sets up the access to the Internet or fax and also allows additional data
communication relationships to other data devices, both in analog telephone networks and with
ISDN.
It takes only one USB cable to connect the PC to the telephone. CallBridge for Data thus replaces hardware components that would otherwise be necessary, such as an ISDN card in the
PC and an ISDN adapter on the modular telephone.
The delivery consists of a CD-ROM with the CallBridge for Data software and accompanying
electronic documentation. The USB cable must be ordered separately.
P31003-E8400-A100-3-7620
6-2 Service Manual
Page 65

IP Adapter
7IP Adapter
An IP adapter provides voice communication via LAN connections.
The optiPoint IP adapter is an external adapter for optiset E terminals, which can be configured
in the following system environment:
● Hicom 150 E Office/Hicom Xpress@ LAN
● Hicom 150 H
● HiPath Allserve 150 with HiPath HG1500
● HiPath 3000
● Hicom 300 E and Hicom 300 H
● HiPath 4000
IP Adapter Administration
The optiPoint IP adapter can be administered both via the telephone connected to the U
P0/E
port (basic settings only) and a LAN-based PC (web browser = HTTP client - all settings, e.g.
Upload new firmware, Save configuration files, etc.).
Administration via telephone is essential for initial commissioning if DHCP support (Dynamic
Host Configuration Protocol) is not available. DHCP support is activated by default in the case
of optiPoint IPadapter. If DHCP is supported, the optiPoint IPadapter is automatically recognized in the LAN and can immediately be administered via the web browser.
For information on the administration of the LAN environment at Hicom Xpress @LAN, please
refer to the administration manual for HiPath HG 1500/Hicom Xpress @LAN (reference no.:
A31003-K5020-B811-*-7619).
Note:
>
● A voice client setting must be configured for Assistant I.
● The extensions must be set manually as TFA clients for Assistant 300E.
P31003-E8400-A100-3-7620
Service Manual
7-1
Page 66
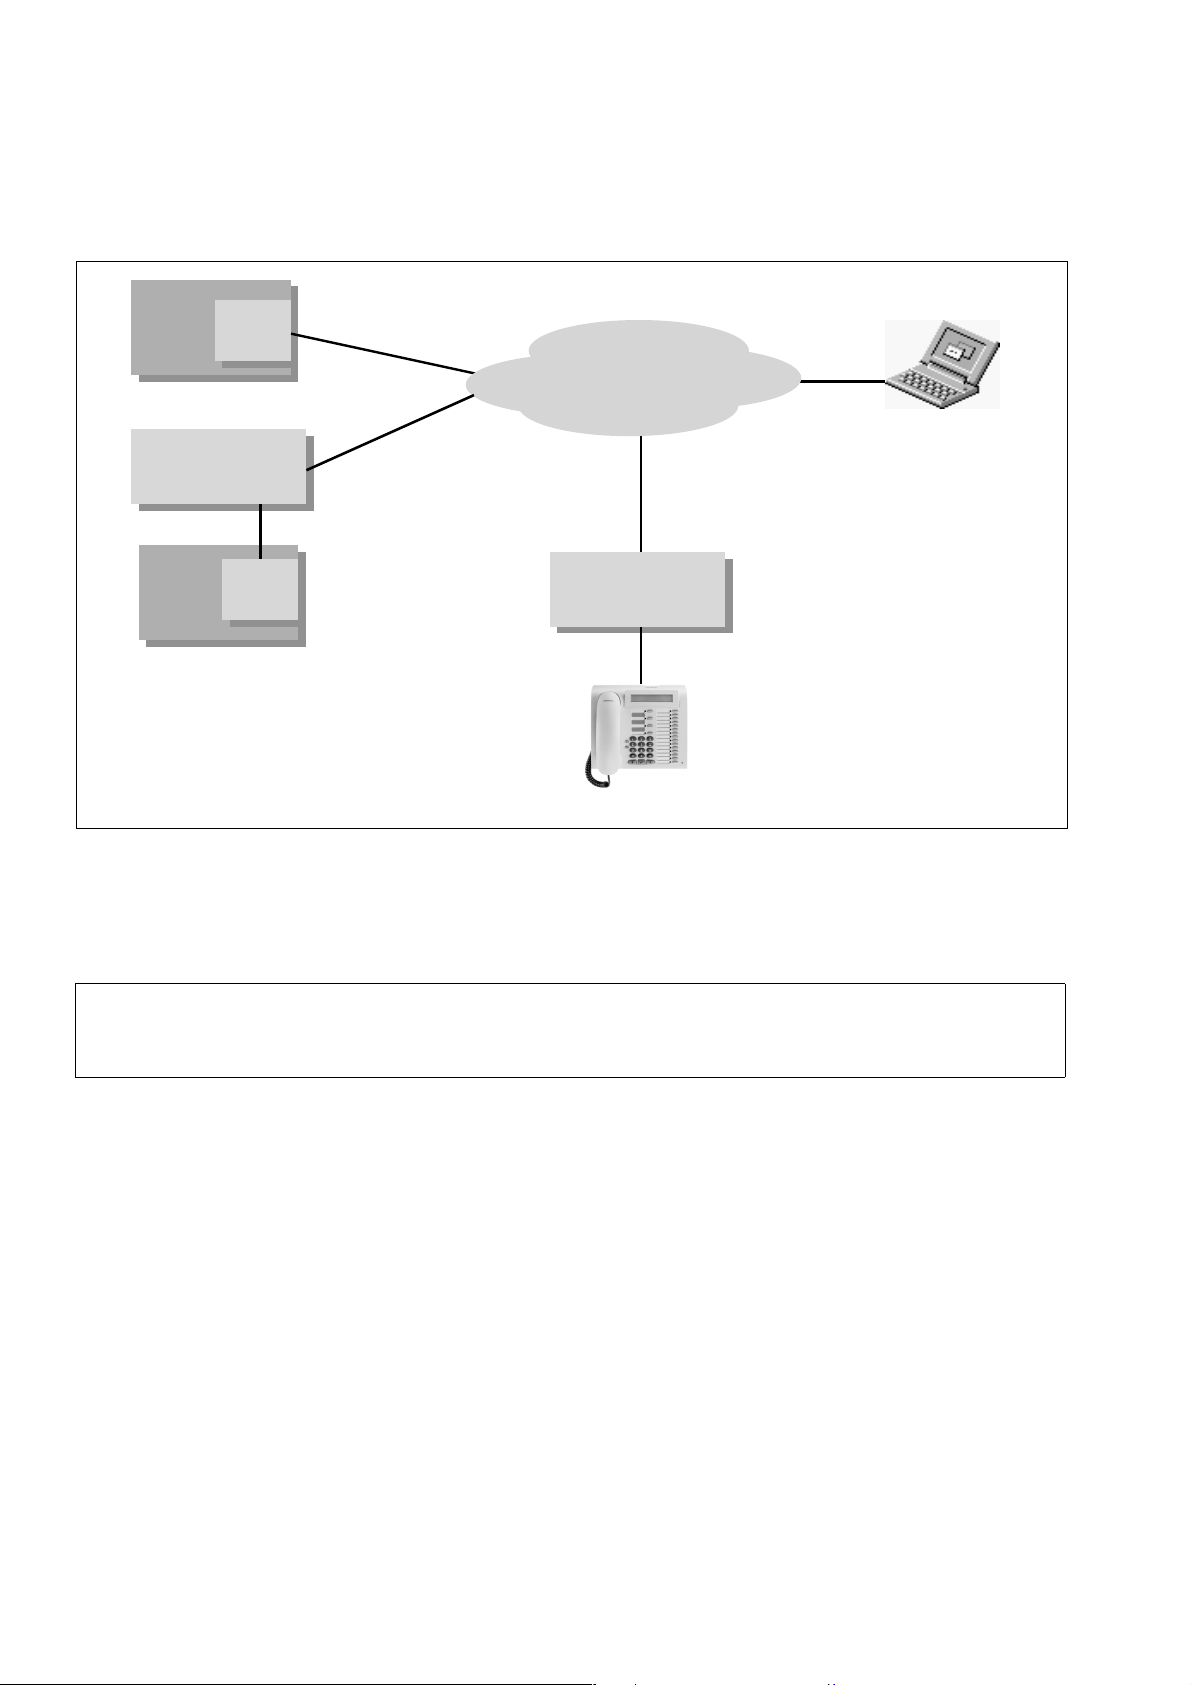
IP Adapter Nur für den internen Gebrauch
optiPoint IPadapter Installation
HiPath
HiPath
Allserve
Allserve
150
150
HG1500
HG1500
V1.0
V1.0
(Xpress
(Xpress
@LAN)
@LAN)
LAN
LAN
LAN
LAN
LAN
optiPoint
optiPoint
IPadapter
IPadapter
Hicom
Hicom
300 E/H
300 E/H
or
Hicom
Hicom
150 E
150 E
SLMO
or
SLMO
‚system-side‘ mode
‚system-side‘ mode
U
P0/E
LAN
LAN
optiPoint
optiPoint
IPadapter
IPadapter
U
P0/E
optiPoint
Figure 7-1 System connection of optiPoint IPadapter
‚phone-side‘ mode
‚phone-side‘ mode
500
HTTP client
DHCP server
7.1 optiPoint IPadapter Installation
Note:
>
After connecting the IPadapter, it may take a moment for something to appear on the
terminal display.
P31003-E8400-A100-3-7620
7-2 Service Manual
Page 67

Nur für den internen Gebrauch
7.2 Connection to the Terminal
AB
optiPoint
1
IP Adapter
Connection to the Terminal
(A) To the terminal
(B) To IPadapter
P0/E
B
port
IPadapter
2
Figure 7-2 Overview: connecting an optiPoint IPadapter to the terminal
Connect the optiPoint IPadapter to the terminal in the following sequence (please also note the
diagram "Electrical connection of the optiPoint IPadapter"):
1. First of all, connect the U
on the IPadapter. Use the cable supplied with the local power supply unit for this (cable
features RJ-11 Mini-Western connectors (point 1)).
2. Connect the IPadapter to the LAN network. Use the LAN network cable (max. 3 m) supplied for this (cable features 3 RJ-45 Mini-Western connector (point 2)).
3. Connect the local power supply unit at the socket provided.
telephone via the power supply unit (A;B) to the U
P0/E
A
P31003-E8400-A100-3-7620
Service Manual
7-3
Page 68

IP Adapter Nur für den internen Gebrauch
Connection to the System
7.3 Connection to the System
Hicom/
HiPath
(SLMO
board)
Figure 7-3 Overview: connecting an optiPoint IPadapter to the system
Connect the optiPoint IPadapter to the Hicom system in the following sequence (please also
note the diagram "Electrical connection of the optiPoint IPadapter"):
1. First of all, connect the U
Use the cable supplied with RJ-11 Mini-Western connectors (point 1).
2. Connect the IPadapter to the LAN network. Use the LAN network cable (max. 3 m) supplied for this (cable features 3 RJ-45 Mini-Western connector (point 2)).
The optiPoint IPadapter can be operated as a desktop unit or can be mounted on the wall with
a screw. The wall attachment can be found on the back of the IPadapter (point 3).
U
P0/E
12
port of the IPadapter to the Hicom system (SLMO board).
P0/E
optiPoint
IPadapter
LAN - I/F
10 Base T
1
2
3
Figure 7-4 Electrical connection of the optiPoint IPadapter
PIN assignments on the IPadapter
Connector/ jack Pin 1 Pin 2 Pin 3 Pin 4 Pin 5 Pin 6 Pin 7 Pin 8
U
RJ11 NC DC- a(U
P0/E
LAN RJ 45 TDX+ TCD- RXD+ NC NC RXD: NC NC
Table 7-1 Pin assignment
7-4 Service Manual
P0/E
)b(U
P0/E
) DC+ NC
P31003-E8400-A100-3-7620
Page 69

Nur für den internen Gebrauch
IP Adapter
Administration Via the Web Browser
7.4 Administration Via the Web Browser
With the help of a PC (web browser) connected to the LAN network, you can start up/register
the U
settings automatically.
Structural overview
The following structural overview shows how you can navigate through the various web pages
by clicking the relevant links.
>
Frameset
http://[ipway]/index.html
telephone via the LAN. A DHCP server is necessary in order to configure the LAN
P0/E
Note:
The "ipway" string in the URL functions as placeholder for the address of the
IPadapter.
IP-way Banner 1
http://[ipway]/banner1.html
IP-way Banner 2
General
information
http://[ipway]/
general_info.html
IP Address
& Routing
http://[ipway]/
admin/IP.html
admin/
Administrator
Settings
http://[ipway]/
admin/
settings.html
Comet TC
parameters
http://[ipway]/
admin/
tc_info.html
Load
application
http://[ipway]/
admin/
dl_app.html
http://[ipway]/banner2.html
Homepage
http://[ipway]/
home_page.html
Load
configuration
http://[ipway]/
admin/
restore_config.html
Speech
parameters
http://[ipway]/
admin/
speech.html
Administration
Save
configuration
http://[ipway]/
admin/
save_config.html
Save history
information
save_history.html
File transfer
http://[ipway]/
admin/file_
transver.html
http://[ipway]/
admin/index.html
View history
information
http://[ipway]/
save_history.html
http://[ipway]/
admin/
FTP user
& password
http://[ipway]/
admin/ftp_
uname_pwd.html
Administration Login
http://[ipway]/
local_admin_login.html
admin/
Restart
terminal
http://[ipway]/
admin/
restart.html
Diagnostics
http://[ipway]/
admin/
diagnostics.html
Change
administrator
password
http://[ipway]/
admin/change_
admin_pwd.html
P31003-E8400-A100-3-7620
Service Manual
7-5
Page 70

IP Adapter Nur für den internen Gebrauch
Administration Via the Web Browser
Note:
>
The configuration data entered (IP address) is retained by the IPadapter even:
● if the connection to the LAN is cleared down
● if the optiset E local power supply crashes
● if the U
The IPadapter/U
telephone is disconnected
P0/E
telephone automatically goes back into operation as soon as
P0/E
LAN crashes/malfunctions are repaired.
The IPadapter is ready for operation as soon as it is plugged back in or relocated on
the LAN; no additional administration/configuration is required.
The login procedure with password entry and authentication is performed by an encryption algorithm to guarantee LAN security.
The local power supply unit required for operation is identical to the 3 power supply
units supplied for the optiset E telephones (FRG/IM; UK and US).
Fault signaling:
Depending on the type of fault, an error message describing the fault that occurred appears
when an incorrect entry is made in the web page (see the following example).
Error example:
An incorrect phone number ("123abc") was entered.
The submitted data contained an error:
y
Invalid Phone number: 123abc
Changing any of these parameters will require to
subsequently restart the terminal to activate the new values
CorNet TC parameters
Phone number:
CorNet TC login password:
(optional)
Operation mode:
Return to Administrator settings
WARNING -
123456
phone-side
Submit Reset
Home
Options are:
y
phone-side
y
system-side
The following error message may appear on every web page in which parameters can be
changed. The administrator is informed if no parameters can be modified.
P31003-E8400-A100-3-7620
7-6 Service Manual
Page 71

Nur für den internen Gebrauch
IP Adapter
Administration Via the Web Browser
● "Sorry the submission could currently not be accepted due to modification by another ad-
ministrator"
The following error message appears when the administrator attempts to restart or download
an application when the telephone is not idle. This is designed to prevent ongoing calls from
being interrupted.
● "Sorry the submission could currently not be accepted"
This error message may appear on every web page when local administration of the IPadapter
is implemented via an optiset E terminal.
Information on setting options can be found in the Windows help or the HTML file on the web
browser.
To perform administration via the web browser, open the Administration menu.
To log on, proceed as follows:
1. Start the browser
2. Enter the relevant IP address
3. The optiPoint IPadapter homepage is displayed
optiPoint IPadapter
Home Page Administration Partner: 19.10.34.195
IP address:
Tel.:
Mode: phone-side
19.10.34.194
53323
P31003-E8400-A100-3-7620
Service Manual
7-7
Page 72

IP Adapter Nur für den internen Gebrauch
Administration Via the Web Browser
optiPoint IPadapter Home Page
The optiPoint IPadapter web server allows the administrator to:
y
configure the administrator settings
y
perform diagnostic tests
y
download new software
y
save and restore the terminal configuration
Leads to
Administration page
(via Administrator
Login if necessary)
4. Perform login for initial administration.
The password is “123456”. For data protection reasons, the password should be changed after
it has been entered.
optiPoint IPadapter administrator login
******Password:
Login Cancel
Leads to
requested page if
password OK,
otherwise this
page again
Leads to
home page
P31003-E8400-A100-3-7620
7-8 Service Manual
Page 73

Nur für den internen Gebrauch
5. The “Administration” mask appears.
Administration
y
General Information
y
Administrator settings
y
Load (download from file server) application
y
Load (download from file server) configuration
y
Save (upload to file server) configuration
y
Save (upload to file server) history information
y
View history information
y
Restart terminal
y
Diagnostics
y
Change administrator password
Home
IP Adapter
Administration Via the Web Browser
6. Click General Information to check the MAC address and the file transfer status.
General information
MAC address:
Versions:
BIOS: 0.20
Application: 0.21.1
Web content: 0.16
File transfer status:
Application download
Configuration download
Configuration upload
Return to Administration Home
76:A1:45:09:1D:02
11:23, 5 Oct 1999
9:05, 1 Oct 1999
Last
never
Status
failed
OK
-
P31003-E8400-A100-3-7620
Service Manual
7-9
Page 74

IP Adapter Nur für den internen Gebrauch
Administration Via the Web Browser
This page shows the MAC address, the versions of the various software components and the
status of the last data transfer action between the data server and the optiPoint IPadapter.
● "BIOS" contains the initialization software and factory test.
● "Application" contains the software with all the administrator functions for the optiPoint IP-
adapter. This component can be updated via file transfer (configured on the website).
● "Web content" contains information on the version of the web interface.
7. Return to the “Administration” mask and click Administrator settings.
Administrator settings
y
IP address and routing
y
CorNet TC parameters
y
Speech parameters
y
File transfer
y
FTP username & password
Return to Administration Home
P31003-E8400-A100-3-7620
7-10 Service Manual
Page 75

Nur für den internen Gebrauch
IP Adapter
Administration Via the Web Browser
8. Click “IP address and routing” and enter the following addresses:
IP address and subnet mask of OIP-2, the IP address of the IP partner --> HG1500 V1.0
(Xpress@LAN) or optiPoint IPadapter in "peer-to-peer" mode)
WARNING -
Changing any of these parameters will require to
subsequently restart the terminal to activate the new values
IP address and routing
DHCP 10.144.233.62IP address:
255.0.0.0Subnet mask:
0.0.0.0 IP partner address:
IP Routing:
0.0.0.0Default gateway:
0.0.0.0Route 1:
0.0.0.0Gateway 1:
255.0.0.0Mask 1:
Submit
Return to Administrator settings
Reset
Home
0.0.0.0Route 2:
0.0.0.0Gateway 2:
255.0.0.0Mask 2:
You also have the option of entering additional routing information. If the file server for uploading/downloading, the OIP-2 and the IP partner are located in different subnets and therefore
cannot be addressed via a single subnet mask, this additional IP routing gateway must be entered.
P31003-E8400-A100-3-7620
Service Manual
7-11
Page 76

IP Adapter Nur für den internen Gebrauch
Administration Via the Web Browser
9. Click "CorNet TC parameters" and enter the phone number, the CorNet TC password and
the operation mode. The operation mode must be entered. A maximum of 24 characters
are permitted for the first two input fields.
If more than 24 characters are input, the following message appears:
– "The submitted data contained an error: Invalid Phone number: <invalid value>"
– "The submitted data contained an error: Invalid CorNet TC login password: <invalid
value>"
WARNING -
Changing any of these parameters will require to
subsequently restart the terminal to activate the new values
CorNet TC parameters
Phone number:
CorNet TC login password:
(optional)
Operation mode:
Submit Reset
Return to Administrator settings
Home
123456
phone-side
Options are:
y
phone-side
y
system-side
10. Click "Speech parameters" and select the appropriate audio parameters.
The setting of the jitter buffer depends on the properties of the customer network (LAN) in each
case. Depending on the quality of the network, a zero speech delay ("Short" setting) or a significant speech delay ("Long" setting) may occur.
P31003-E8400-A100-3-7620
7-12 Service Manual
Page 77

Nur für den internen Gebrauch
IP Adapter
Administration Via the Web Browser
Speech parameters
Jitter buffer:
Audio mode: G711
Submit Reset
Return to Administrator settings Home
Normal
Options are:
y
Short
y
Normal
y
Long
P31003-E8400-A100-3-7620
Service Manual
7-13
Page 78

IP Adapter Nur für den internen Gebrauch
Administration Via the Web Browser
11. Click “File transfer” and enter all appropriate parameters.
File transfer
19.34.56.1Fileserver IP address:
OIP_1_0.appApplication fileserver filename:
database.iniConfig fileserver filename:
history.txtHistory fileserver filename:
c:\Fileserver path:
No transferAction on submit:
Submit Reset
Configuration of FTP username & password is on a separate page.
Return to Administrator settings
Home
Options are:
y
No transfer
y
Upload configuration
y
Download configuration
y
Download application
y
Upload history
The parameters that are needed to download configurations from the server and to upload
them to a server, or to download applications from a server and to upload history files are entered in this mask.
Note:
>
Ensure that the FTP server directory which contains the download software or
configuration is enabled in the server configuration for the FTP user specified in
optiPoint IPadapter.
The default parameters are displayed in the following table.
FTP parameter Default
File Server IP address ’0.0.0.0’
Application file server file name ’oip.app’
Config file server file name ’oip.cfg’
History file server file name ’history.txt’
Table 7-2 FTP parameters
P31003-E8400-A100-3-7620
7-14 Service Manual
Page 79
Nur für den internen Gebrauch
IP Adapter
Administration Via the Web Browser
FTP parameter Default
File server path empty field
Table 7-2 FTP parameters
The default setting for “Action on submit” is "No transfer" every time you open this mask.
The following error messages appear if incorrect entries are made:
Cause of fault Fault description
wrong file server IP address No connection to server
file server not availlable No connection to server
wrong file name for download No file on server
invalid file name No Access on server
Table 7-3 Error messages
12. Go to "FTP username & password" and enter the appropriate values for file transfer.
FTP username & password
fredUsername:
*************New password:
*************Confirm new password:
Submit Reset
Return to Administrator settings Home
The fields displayed are empty each time you log into this page.
The following errors may occur:
● When blanks are inserted in the “Username” field (not permitted!)
– "The submitted data contained an error: Invalid Username”
● When various new passwords are entered
P31003-E8400-A100-3-7620
Service Manual
7-15
Page 80

IP Adapter Nur für den internen Gebrauch
Administration Via the Web Browser
– "The submitted data contained an error: Inconsistent confirmation password"
● When an invalid password is entered to the "New password" field (at least one character
must be entered)
– "The submitted data contained an error: Invalid new password"
13. Now return to the “Administration” mask and select “Load (download from fileserver) application” or “Load (download from fileserver) configuration” to download an appropriate application or configuration from a file server.
Load (download from fileserver) application
This operation will FTP a new application program file from a fileserver
according to the details in the File transfer
is downloaded it will be validated. If valid, the new file will replace the
existing program file and
the terminal will auto-restart
page. After the application
.
Download
FTP Settings:
y
Server:
y
Filename:
y
Path:
y
Account:
Return to Administration Home
19.34.56.1
OIP_1_0.app
c:\
oip
During the download, the following message is shown on the terminal display:
– OIP: Download started ...
– OIP: Programming ...
– OIP: Restart ...
P31003-E8400-A100-3-7620
7-16 Service Manual
Page 81

Nur für den internen Gebrauch
Load (download from fileserver) configuration
This operation will FTP a new configuration file from a fileserver according to
the details in the File transfer
it is required to subsequently restart the terminal to activate the new values.
FTP Settings:
y
Server:
y
Filename:
y
Path:
y
Account:
IP Adapter
Administration Via the Web Browser
page. After the configuration data is downloaded
Download
19.34.56.1
database.ini
c:\
oip
Return to Administration Home
14. Select "Save (upload to fileserver) configuration" to save an existing configuration on a file
server
Save (upload to fileserver) configuration
This operation will FTP the current configuration data to a fileserver according to
the details in the File transfer
FTP Settings:
y
Server:
y
Filename:
y
Path:
y
Account:
19.34.56.1
database.ini
c:\
oip
page.
Save
Return to Administration Home
P31003-E8400-A100-3-7620
Service Manual
7-17
Page 82

IP Adapter Nur für den internen Gebrauch
Administration Via the Web Browser
15. With "Save (upload to fileserver) history information" you can save current history data to
a file server
Save (upload to fileserver) configuration
This operation will FTP the current history information to a fileserver according to
the details in the File transfer
FTP Settings:
y
Server:
y
Filename:
y
Path:
y
Account:
19.34.56.1
history.txt
c:\
oip
page.
Save
Return to Administration Home
16. System messages are saved to the history file. In this way you can determine when the
last data transfer action was implemented.
History file
13 day(s) ago, 17:53:31 TC_LOGON
4 day(s) ago, 21:12:10 TC_LOGOFF
4 day(s) ago, 21:12:23 TC_LOGON
Empty history
Return to Administration
Home
P31003-E8400-A100-3-7620
7-18 Service Manual
Page 83

Nur für den internen Gebrauch
Administration Via the Web Browser
17. Select “Restart terminal” to initiate a terminal restart directly
Restart terminal
This operation will restart the terminal immediately.
(You will loose your web connection to the terminal.)
Restart
IP Adapter
Return to Administration
Home
P31003-E8400-A100-3-7620
Service Manual
7-19
Page 84

IP Adapter Nur für den internen Gebrauch
Administration Via the Web Browser
18. Click “Diagnostic” and test whether the line connection configured can be set up.
Diagnostics
The tests on this page do not require assistance from a local user.
Invoke tests
Select which tests to invoke:
Ping
RAM test
ROM test
This page will be reloaded with the updated
test results after the tests have been invoked.
Invoke Reset
Test results
Ping: Last run at 17:40, 25 Feb 1999
Address pinged: 19.24,.34.198
Result: successful;
response received after 28mS
RAM test: Last run at 17:40, 25 Feb 1999
Result: failed
ROM test: Last run at 9:33, 4 Jan 1999
Result: passed
Return to Administration
19.24.34.198-- IP address:
Home
P31003-E8400-A100-3-7620
7-20 Service Manual
Page 85

Nur für den internen Gebrauch
IP Adapter
Administration Via the Web Browser
19. Click “Change administrator password” if you want to change the administrator password.
Change administrator password
******Current admin password:
******New password:
******Confirm new password:
Submit Reset
Return to Administration Home
The following error messages appear if incorrect entries are made:
● If an invalid administrator password is entered
– "The submitted data contained an error: Incorrect administrator password"
● When an invalid password is entered in the "New password" field (at least six characters
must be entered)
– "The submitted data contained an error: Invalid new password"
● When various new passwords are entered
– "The submitted data contained an error: Inconsistent confirmation password"
P31003-E8400-A100-3-7620
Service Manual
7-21
Page 86

IP Adapter Nur für den internen Gebrauch
Administration via optiPoint 500
7.5 Administration via optiPoint 500
Telephone-based administration is only possible at optiPoint terminals with display (i.e. not with
entry, basic and signature).
Note:
>
If, however, you want to connect a telephone without display, then administration must first be
performed with a display telephone. This telephone can then be disconnected.
The administration operation is menu-driven, i.e. all available settings are listed on the terminal’s display. You can navigate between the various settings with the dialog keys. Once you
have made all settings, select “Start phone?”. The Administration mask closes and a connection between the terminal and the system is set up. Once optiset E has been started, you can
only access the Administration menu again by unplugging and reconnecting the line (booting
the IPadapter).
Only IPadapters on the telephone side may be administrated with optiset E. With IPadapters on the system side, initial administration (configuration of the LAN parameters) can be implemented via optiset E. However once the operation mode on the
system side is switched, administration is only possible via a web browser.
Fault signaling:
Faults that occur when operating the optiPoint IPadapter are displayed as follows:
● a short signal tone is emitted
● all available LEDs on the terminals begin flashing.
If the terminal has a display, an appropriate error message appears on the display. If multiple
faults occur at the same time, the fault with the highest priority is displayed (see the following
diagram).
P31003-E8400-A100-3-7620
7-22 Service Manual
Page 87

Nur für den internen Gebrauch
y
y
y
y
y
y
y
NO DHCP response
Press an
key? >
Ping to Gateway failed
Press an
key? >
Ping to Partner failed
Press an
key? >
Generic socket error
Press an
key? >
IP Adapter
Administration via optiPoint 500
highest priori ty
TC Login Error
Press an
key? >
Error connecting partner
Press an
key? >
Unknown Error
Press an
Figure 7-5 Faults shown on optiPoint display
Once a fault occurs, press any key on the terminal to open the optiPoint IPadapter administration menu. You can resolve the fault there by modifying the appropriate settings.
If a parameter is invalid or not set correctly, the following error messages are also displayed for
the configuration setting:
’CFG error Oxnnnn’
Example:
key? >
lowest priority
If an invalid Partner_IP address is entered or if the partner IP address is not set, the following
error code appears: ’0x1000’ (see figure below)
P31003-E8400-A100-3-7620
Service Manual
7-23
Page 88

IP Adapter Nur für den internen Gebrauch
Administration via optiPoint 500
-
ERROR_FLASH 0x0001
-
ERROR_TFFS_DRV 0x0002
-
ERROR_TFFS_DRIVE 0x0004
-
ERROR_TFFS_CREATE 0x0008
-
ERROR_DOS_OPT 0x0010
-
ERROR_DOS_INIT 0x0020
-
ERROR_FACTORY_RESET 0x0040
-
ERROR_HISTORY_CREATE 0x0080
-
ERROR_HISTORY_OPEN 0x0100
-
ERROR_NO_INI_FILE 0x0200
-
ERROR_INI_FILE_EXPAND 0x0400
-
ERROR_INI_CHECK_TERM_IP 0x0800
-
ERROR_INI_CHECK_PARTNER_IP 0x1000
-
ERROR_INI_CHECK_GATEWAY 0x2000
-
ERROR_INI_CHECK_E164 0x4000
Figure 7-6 Error codes for configuration settings
P31003-E8400-A100-3-7620
7-24 Service Manual
Page 89

Nur für den internen Gebrauch
IP Adapter
Administration via optiPoint 500
To perform administration via the telephone, proceed as follows:
1. Use the arrow keys to go to the "Administration" mask and log in for initial administration.
The password is “123456”. Once you have entered the password for the first time, it should
be changed to ensure data security (you will need a web browser).
Entry
Start phone? >
Administration? >
No valid
password
entered
Exit
Password
input
Valid
password
entered
Secured menu
P31003-E8400-A100-3-7620
Service Manual
7-25
Page 90

IP Adapter Nur für den internen Gebrauch
Administration via optiPoint 500
2. Enter the appropriate password for “Secured menu”.
Entry
No valid
Password
entered
Password:
...
0 9
...
0 9
or
Password
Abort? >
Password:
*
or
Password:
Abort? >
or
or
No valid
Password
entered
No valid
Password
entered
Valid
Password
entered
Exit
Exit
No valid
Password
entered
Exit
and so on
until the line is full ...
(when line is full
no more entries are accepted)
P31003-E8400-A100-3-7620
7-26 Service Manual
Page 91

Nur für den internen Gebrauch
p
p
p
p
p
p
p
p
IP Adapter
Administration via optiPoint 500
3. Enter the values shown in the following diagram one after the other in “Secured menu”.
Secured menu
Valid
password
entered
DHCP? >
OIP IP address? >
OIP subnet mask? >
IP Gateway IP address?>
Phone number? >
TC Login password? >
DHCP
ut
in
Property
in
ut
Property
in
ut
Property
in
ut
Property
in
ut
Property
in
ut
IP partner IP address?>
Operation mode? >
Start phone? >
Property
ut
in
Mode
ut
In
Exit
P31003-E8400-A100-3-7620
Service Manual
7-27
Page 92

IP Adapter Nur für den internen Gebrauch
Administration via optiPoint 500
Example: “DHCP Input”
Entry
No change
DHCP:
enable? >
DHCP:
of value
Exit
Save changed value
Exit
disable? >
DHCP:
abort? >
No change
of value
Exit
P31003-E8400-A100-3-7620
7-28 Service Manual
Page 93

Nur für den internen Gebrauch
O
Example: "OIP IP address"
IP IP address:
Entry
10.144.233.62
IP Adapter
Administration via optiPoint 500
Exit
... , ,
0 9 * #
for instance
... , ,
0 9 * #
for instance
or
7
OIP IP address:
Abort? >
... , ,
0 9 * #
for instance
OIP IP address:
7
or
*
OIP IP address:
Abort? >
or
No
change
of value
Exit
Sound ringer tone
7
Display unchanged
If syntax check fails
Exit
If syntax check succeeds
save changed value
or
No change of
value
Exit
OIP IP address:
7.
... , ,
0 9 * #
and so on
until the line is full ...
(when line is full
no more entries are accepted)
P31003-E8400-A100-3-7620
Service Manual
Sound ringer tone
Display unchanged
If syntax check succeeds
or
save changed value
or
OIP IP address:
Abort? >
If syntax check fails
Exit
No change of
value
Exit
7-29
Page 94
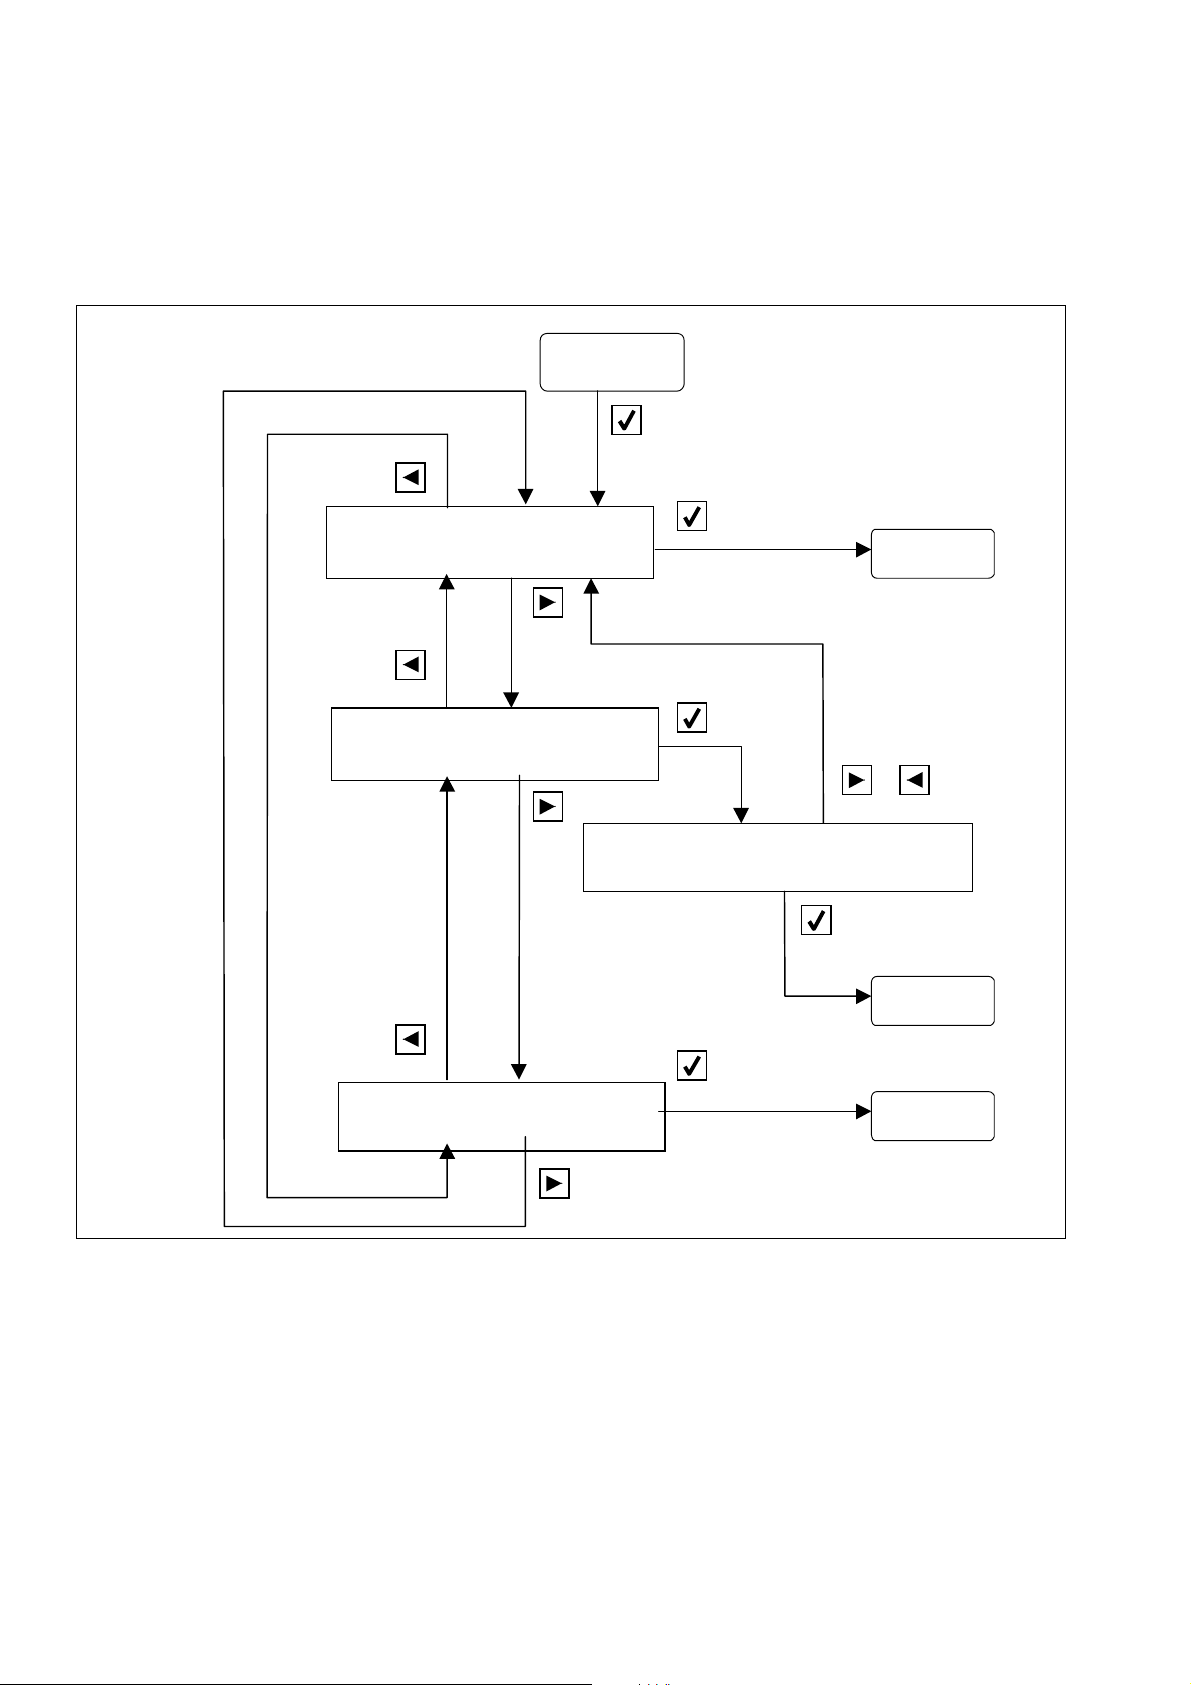
IP Adapter Nur für den internen Gebrauch
Administration via optiPoint 500
Example "Mode Input"
Entry
No change of
value
Operation mode:
phone-side? >
Exit
Operation mode:
system-side? >
‘system-side‘ cannot be
undone - Change anyway?>
Operation mode:
abort? >
Save changed
value
Exit
No change
of value
Exit
P31003-E8400-A100-3-7620
7-30 Service Manual
Page 95

Nur für den internen Gebrauch
Configuration Examples
IP Adapter
7.6 Configuration Examples
When you restart the computer, the IPadapter is set to "phone-side" by default as on
>
Configuring the optiPoint IPadapter (peer to peer) for connection to HG 1500
(Xpress@LAN) with Hicom 150 Office
Configuring the IPadapter at Hicom:
1. The IP address must be configured using a telephone with display if a DHCP server is not
2. The adapter can then be accessed via the Web Client:
optiPoint 500.
available when putting the IPadapter into service for the first time (see Section "Administration via optiset E").
P31003-E8400-A100-3-7620
Service Manual
7-31
Page 96

IP Adapter Nur für den internen Gebrauch
Configuration Examples
optiPoint side
Phone number
Adapter IP address
Partner IP address (HG 1500 IP address)
HG 1500 cannot be configured via the WEB interface.
Figure 7-7 WEB access to the IPadapter
P31003-E8400-A100-3-7620
7-32 Service Manual
Page 97

Nur für den internen Gebrauch
3. Click Administration. The administrator password must be entered.
IP Adapter
Configuration Examples
Figure 7-8 WEB page administration
P31003-E8400-A100-3-7620
Service Manual
The IP address, default gateway,
etc. are set here.
7-33
Page 98

IP Adapter Nur für den internen Gebrauch
Configuration Examples
4. Enter the following addresses:
IP address, subnet mask, IP partner address and default gateway.
Configuration of the default gateway (the
def. gateway must always be entered,
even if it is in the same subnet). This is
usually the same as the HG 1500 IP ad-
Partner IP address (the IP address for the
HG 1500 - LAN interface in this case).
Figure 7-9 IP address and routing
P31003-E8400-A100-3-7620
7-34 Service Manual
Page 99

Nur für den internen Gebrauch
IP Adapter
Configuration Examples
● Configuration in HG 1500 and Office:
In HG 1500, a voice client is configured for the optiPoint IPadapter in the same way as for Opticlient 130 (see also the HG 1500 Service Manual).
The phone number for the IPadapter must already be available in Office. The optiPoint IPadapter phone number must be activated as the TFA Client after configuration in HG 1500 (see following screenshot).
Figure 7-10 Settings in Assistant Office
P31003-E8400-A100-3-7620
Service Manual
7-35
Page 100
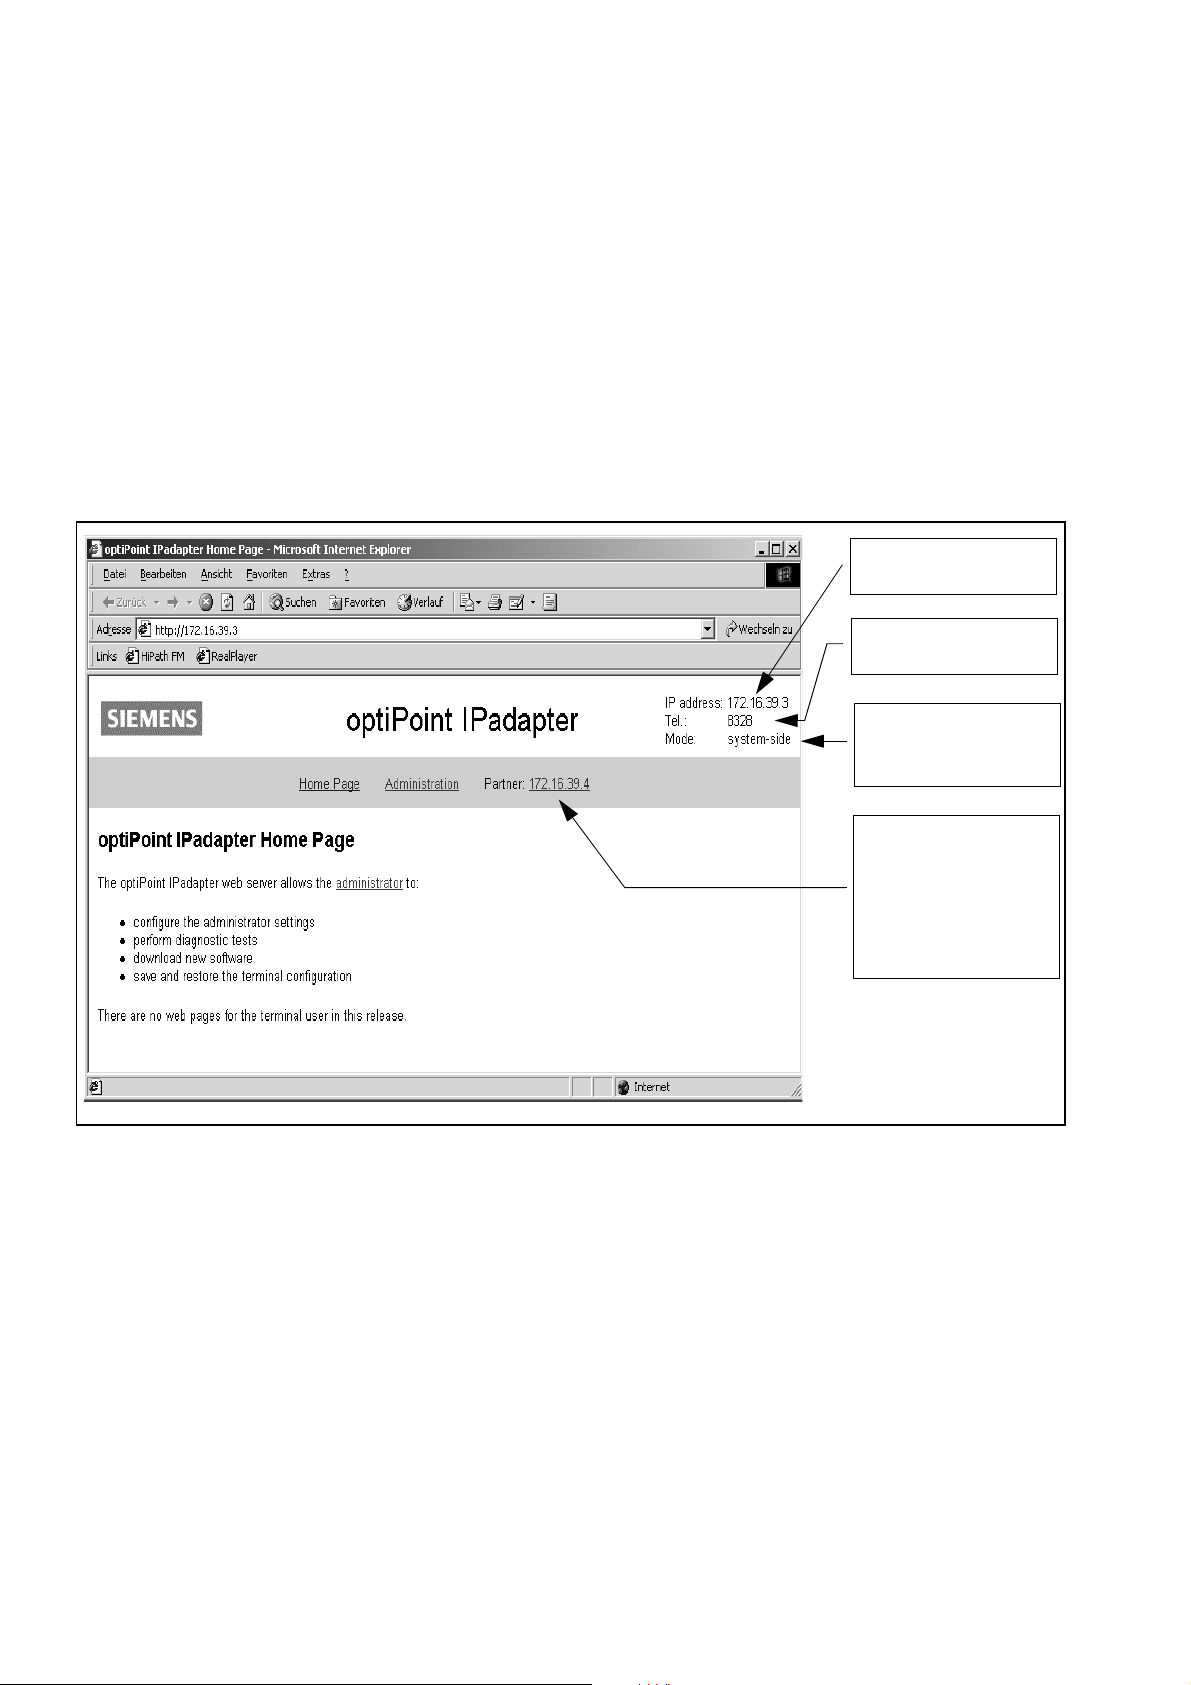
IP Adapter Nur für den internen Gebrauch
Configuration Examples
Configuring the optiPoint IPadapter (peer to peer) for connection to the U
P0E
port of
Hicom 150 E and Hicom 300E
● Configuring the IPadapter at Hicom:
1. The IP address must be configured using a telephone with display if a DHCP server is not
available when putting the IPadapter into service for the first time (see Section "Administration via optiset E").
2. The adapter can then be accessed via the Web Client:
Adapter IP address
Subscriber phone
number
Hicom side
or
Optiset side
Partner IP address
(this is the IPadapter IP address)
phone-side
Figure 7-11 optiPoint IPadapter homepage
P31003-E8400-A100-3-7620
7-36 Service Manual
 Loading...