

Page 1
MODEL
UX-CC500
Page 2

WARNING - FCC Regulations st ate that any unauthorized changes or modifications to this equipment
not expressl y approved by th e manufacturer could void the user’s authority to operat e this equipment.
Note: This equipment has been tested and f ound t o comply with t he limits f or a Class B di gital
device, pursuant to Part 15 of the FCC Rules.
These limits are designed to provide reasonable protection against harmful interference in a
residential installation.
This equipment generates, uses and can radiate radio frequency energy and, if not installed
and used in accordance with the instruc tions, may cause harmful interference to radio
communications. However, there is no guarantee that interference will not occur in a
particular installation. If this equipment does cause harmful interf erence to radio or television
reception, which can be determined by turning the equipment off and on, the user is
encouraged to try to correct the interference b y one or more of the following measures:
- Reorient or relocate the receiving antenna.
- Increase the separation between the equipment and the receiver.
- Connect the equipment into an outlet on a circuit different from that to which th e receiver is
connected.
- Consult the dealer or an ex perienced radio/TV technician for help.
IMPORTANT NOTICE
Fax machine
FCC Radiati o n Exposure State m ent:
This equipment complies with FCC radiat ion exposure limits set forth f or at uncontrolled
equipment.
This equipment should be installe d and operated with minimum distance at least 20cm
between the radiator and persons body (excluding extremities: hands, wrists, feet and legs)
and must not be co-located or operated with any other antenna or transmitter.
Cordless handset
For body wo rn operati on, this p hone ha s bee n t est ed and meet s FCC RF exposure gudelines
when used with an accessory that contains no metal and that positions the handset a
minimum of 1.5cm from the body.
Use of other accessories may not ens ure c ompliance with FCC RF exposure guideli nes.
ABOUT THE TELEPHONE CONSUMER PROTECTION ACT OF 1991
"The Telephone Consu mer Protection Act of 1991 makes it unlawful for any person to use a
computer or other electronic device to send any message via a telephone facsimile machine
unless such message clearly contains in a margin at the top or bottom of each transmitted
page or on the first page of the transmission the following information:
(1) The date and time of transmission.
(2) Identificatio n of either the busines s, business entity or individual sending the message.
(3) Telephone number of either the sending machine, business, business entity or individual.
In order to program th is in formation into your facsimile machine, please refer to the
appropriate instructions in the operation manual."
ENERGY STAR
As an
determined that this product meets the
STAR
guidelines for energy efficiency.
partne r, SHARP has
ENERGY
Page 3

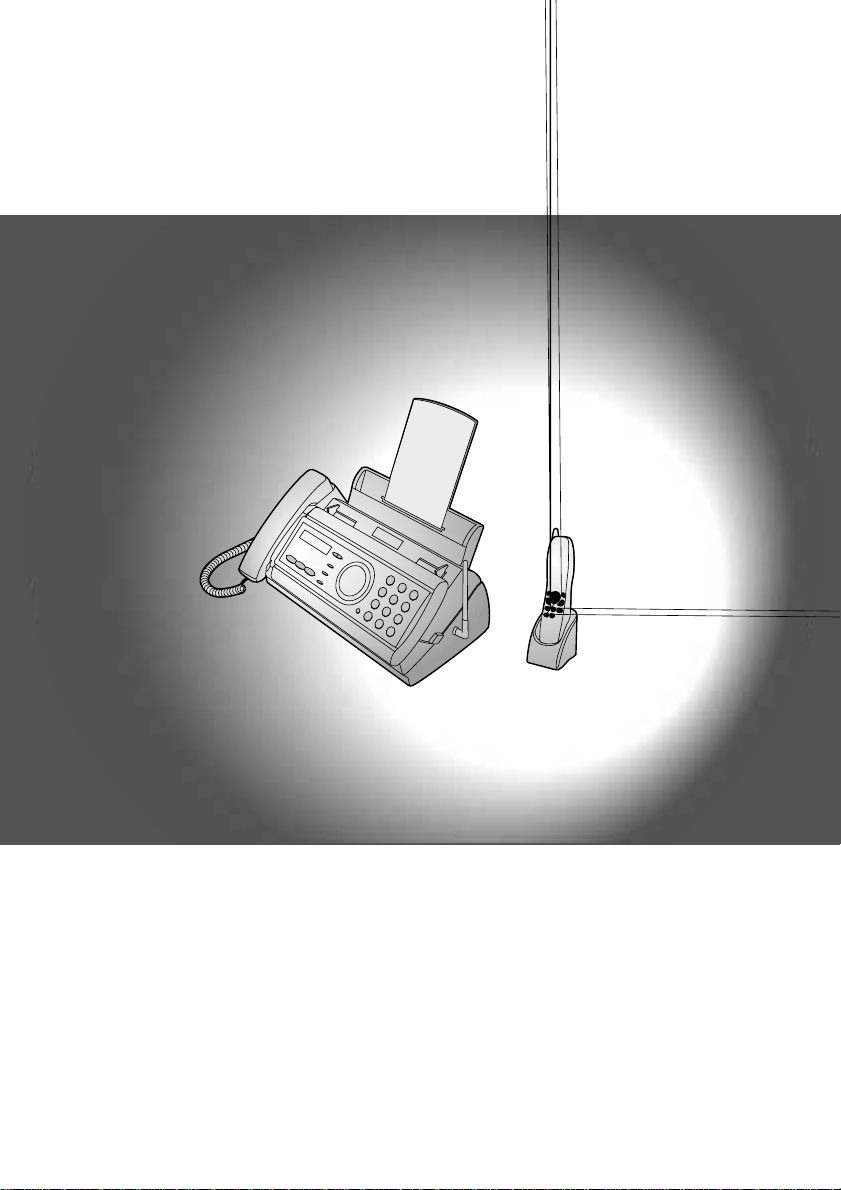
Introduction
Welcome, and thank
you for choosing a
SHARP UX-CC Series
fax machine and
cordless handset!
In addition to the cordless handset
that comes with the f ax machine , you
can purchase up to three accessory
cordless handsets . The co rdle ss
handsets can be used as an
intercom system, and each cordless
handset has its own personal box in
the answering system.
Fax machine and general specifications.
Automatic dialing Common book: 40 numbers
Private book: 5 numbers (each cordless
handset has 1 private book)
Imaging film Initial starter roll (included with machine):
32 ft. (10 m) (approx. 30 letter-size pages)
Replacement roll (not included):
UX-5CR 164 ft. (50 m) (one roll yields
approx. 150 letter-size pages)
Memory size* 448 KB (approx. 24 average pages with no
voice messages recorded, or 20 minutes of
voice messages (including OGMs) with no
faxes in memory)
Modem speed 14,400 bps with automatic fallback to lower
speeds.
Transmission time* Approx. 6 seconds (only when ECM is on)
Resolution Horizontal: 203 pels/inch (8 pels/mm)
Vertical:
Standard: 98 lines/inch (3.85 lines/mm)
Fine /Halftone: 196 lines/inch (7.7 lines/mm)
Super fine: 391 lines/inch (15.4 lines/mm)
Automatic document feeder 10 pages max. (letter/A4, 20 lb paper)
Recording system Thermal transfer recording
Display 16-digit LCD display
*Based on Sharp Standard No. 1 Chart at standard resolution in Sharp special mode,
excluding time for protocol signals (i.e., ITU-T phase C time only).
1
Page 4

Halftone (grayscale) 64 levels
Compression scheme MR, MH, MMR
Applicable telephone line Public switched telephone network
Paper tray capacity Letter: Approx. 50 sheets (20-lb. copier paper
at room temperature; maximum stack height
should not be higher than the line on the tray)
Legal: 5 sheets
Recommended paper weight: 20-lb. Copy
Bond
Compatibility ITU-T (CCITT) G3 mode
Input document size Automatic feeding:
Width: 5.8 to 8.5" (148 to 216 mm)
Length: 5.5 to 11" (140 to 279 mm)
Manual feeding:
Width: 5.8 to 8.5" (148 to 216 mm)
Length: 5.5 to 23.6" (140 to 600 mm)
Effective scanning width 8.3" (210 mm) max.
Effective printing width 8.3" (210 mm) max.
Contrast control Automatic/Dark selectable
Reception modes TEL/FAX/TAD
Copy function Single / Multi (99 copies/page)
Telephone function Yes (cannot be used if power fails)
Power requirements 120 V AC, 60 Hz
Operating temperature 41 - 95°F (5 - 35°C)
Humidity 25 - 85% RH
Power consumption Standby: 4.3 W
Maximum: 100 W
Dimensions (without
attachments)
Weight (without
attachments)
Width: 13.9" (353 mm)
Depth: 7.6" (193 mm)
Height: 6.9" (174 mm)
Approx. 6.2 lbs. (2.8 kg)
2
Page 5

Cordless handset specifications
Frequency 2.4 GHz (2.405 to 2.475 GHz)
Dimensions Width: 1.8" (46 mm)
Depth: 1.7" (42 mm)
Height: 7.1" (180 mm) (not including antenna)
Weight Approx. 0.3 lbs. (115 g) (without battery)
Battery 3.6 V Ni-MH battery; capacity: 850 mAh
Power consumption
Initial charging
Battery life
Battery life in standby
mode
Approx. 1.0 W (in standby mode)
Approx. 10 hours for initial charge
Approx. 4 hours (240 minutes) (at room temp.)
Approx. 3 days with one full charge (at room
temperature)
Battery life (both normal and in standby mode)
may vary depending on usage, range from
base machine, and environmental conditions
such as temperature.
Accessory cordless handset UX-K01 (up to 3 handsets can be added)
As a part of our policy of continuous improvement, SHARP reserves the right to make design
and specification changes for product improvement without prior notice. The performance
specification figures indicated are nominal values of production units. There may be some
deviations from these values in individual units.
Important: This fax machine is not designed for use on a line which has call waiting, call
forwarding, or certain other special services offered by your telephone company. If you
attempt to use the fax machine in conjunction with any of these services, you may experience
errors during transmission and reception of facsimile messages. The fax machine is not
compatible with digital telephone systems.
Important safety information
Do not disassemble this machine or attempt any procedures not described in this manual.
Refer all servicing to qualified service personnel.
Do not install or use the machine near water, or when you are wet. F or example, do not use
the machine near a bath tub, wash bowl, kitchen sink or laundry tub, in a wet basement, or
near a swimming pool. Take care not to spill any liquids on the machine.
Unplug the machine from the power outlet and telephone jack and consult a qualified service
representative if any of the following situations occur:
- Liquid has been spilled into the machine or the machine has been
exposed to rain or water.
3
Page 6

- The machine produces odors, smoke, or unusual noises.
- The power cord is frayed or damaged.
- The machine has been dropped or the housing damaged.
Do not allow anything to rest on the power cord, and do not install the machine where people
may walk on the power cord.
This machine must only be connected to a 120 V, 60 Hz, grounded (3-prong) outlet.
Connecting it to any other kind of outlet will damage the machine and invalidate the warranty.
Never insert objects of any kind into slots or openings on the machine. This could create a risk
of fire or electric shock. If an object falls into the machine that you cannot remove, unplug the
machine and consult a qualified service representative.
Do not place this machine on an unstable cart, stand or table. The machine could be seriously
damaged if it falls.
Never install telephone wiring during a lightning storm.
Never install telephone jacks in wet locations unless the jack is specifically designed for wet
locations.
Never touch bare telephone wires or terminals unless the telephone line has been
disconnected at the network interface.
Use caution when installing or modifying telephone lines.
Avoid using a telephone (other than a cordless type) during an electrical storm. There may be
a remote risk of electric shock from lightning.
Do not use a telephone to report a gas leak in the vicinity of the leak.
The power outlet must be installed near the equipment and must be easily accessible.
Battery
Use only the battery specified in this manual. Use only the provided charger to charge the
battery.
Do not open or mutilate the battery pack. Corrosive fluid may leak out and cause injury or
burns to the eyes and skin. The fluid may be toxic if swallowed. In case of contact with eyes,
flush with clean water (do not rub), and seek medical attention immediately.
Do not store or carry the battery with other metal objects such as keys or pins. These may
short the battery and cause it to overheat.
Do not allow the battery to become wet.
Do not dispose of the battery in a fire or heat the battery. The battery may explode.
Health care facilities and equipment
Radio frequency energy emitted from the cordless handset equipment may cause medical
equipment to malfunction. Verify that any personal medical equipment you are using is
adequately shielded from external radio frequency energy before using the cordless handset
equipment. Do not use the cordless handset equipment in health care facilities where such
use is prohibited.
4
Page 7

Table of Contents
A Look at the Operation Panel 7
1. Installation 12
Unpacking Checklist. . . . . . . . . . . . . . . . . . . . . . . . . . . . . . . . . . . . . 12
Setting Up. . . . . . . . . . . . . . . . . . . . . . . . . . . . . . . . . . . . . . . . . . . . . 13
Loading the Imaging Film . . . . . . . . . . . . . . . . . . . . . . . . . . . . . . . . . 22
Loading Printing Paper. . . . . . . . . . . . . . . . . . . . . . . . . . . . . . . . . . . 24
Entering Your Name and Fax Number. . . . . . . . . . . . . . . . . . . . . . . 26
Setting the Date and Time . . . . . . . . . . . . . . . . . . . . . . . . . . . . . . . . 28
Setting the Reception Mode . . . . . . . . . . . . . . . . . . . . . . . . . . . . . . . 30
Volume Adjustment - Fax Machine. . . . . . . . . . . . . . . . . . . . . . . . . . 31
Volume Adjustment - Cordless Handset. . . . . . . . . . . . . . . . . . . . . . 32
2. Using the Cordless Handset 34
Making a Phone Call . . . . . . . . . . . . . . . . . . . . . . . . . . . . . . . . . . . . 34
Receiving a Phone Call . . . . . . . . . . . . . . . . . . . . . . . . . . . . . . . . . . 35
Receiving a Fax Using the Cordless Handset . . . . . . . . . . . . . . . . . 36
Storing and Using Auto-Dial Numbers . . . . . . . . . . . . . . . . . . . . . . . 36
Redial . . . . . . . . . . . . . . . . . . . . . . . . . . . . . . . . . . . . . . . . . . . . . . . . 41
Using the Intercom Feature . . . . . . . . . . . . . . . . . . . . . . . . . . . . . . . 41
Transferring Calls. . . . . . . . . . . . . . . . . . . . . . . . . . . . . . . . . . . . . . . 44
3. Using the Answering System 47
Recording an Outgoing Message. . . . . . . . . . . . . . . . . . . . . . . . . . . 48
Setting a Passcode for a Personal Box . . . . . . . . . . . . . . . . . . . . . . 49
Operating the Answering System. . . . . . . . . . . . . . . . . . . . . . . . . . . 50
Optional Answering System Settings . . . . . . . . . . . . . . . . . . . . . . . . 56
Transfer Function . . . . . . . . . . . . . . . . . . . . . . . . . . . . . . . . . . . . . . . 59
Remote Operations . . . . . . . . . . . . . . . . . . . . . . . . . . . . . . . . . . . . . 62
4. Sending Faxes 69
Transmittable Documents. . . . . . . . . . . . . . . . . . . . . . . . . . . . . . . . . 69
Loading the Document . . . . . . . . . . . . . . . . . . . . . . . . . . . . . . . . . . . 70
Adjusting the Resolution and Contrast . . . . . . . . . . . . . . . . . . . . . . . 71
Sending a Fax by Normal Dialing. . . . . . . . . . . . . . . . . . . . . . . . . . . 73
5
Page 8

Table of Contents
Sending a Fax by Automatic Dialing. . . . . . . . . . . . . . . . . . . . . . . . . 74
Sending a Fax From Memory . . . . . . . . . . . . . . . . . . . . . . . . . . . . . .81
5. Receiving Faxes 83
Using FAX Mode. . . . . . . . . . . . . . . . . . . . . . . . . . . . . . . . . . . . . . . .83
Using TEL Mode . . . . . . . . . . . . . . . . . . . . . . . . . . . . . . . . . . . . . . . . 84
Optional Reception Settings . . . . . . . . . . . . . . . . . . . . . . . . . . . . . . .86
Substitute Reception to Memory. . . . . . . . . . . . . . . . . . . . . . . . . . . .88
6. Making Copies 89
7. Special Functions 91
Caller ID (Requires Subscription to Service) . . . . . . . . . . . . . . . . . .91
Distinctive Ring (Requires Subscription to Service) . . . . . . . . . . . . . 97
Blocking Reception of Unwanted Faxes . . . . . . . . . . . . . . . . . . . . . . 98
8. Printing Lists 99
9. Maintenance 103
Replacing the Cordless Handset Battery . . . . . . . . . . . . . . . . . . . . 106
10. Troubleshooting 108
Problems and Solutions . . . . . . . . . . . . . . . . . . . . . . . . . . . . . . . . . 108
Messages and Signals . . . . . . . . . . . . . . . . . . . . . . . . . . . . . . . . . .114
Clearing Paper Jams . . . . . . . . . . . . . . . . . . . . . . . . . . . . . . . . . . .119
Ordering Parts. . . . . . . . . . . . . . . . . . . . . . . . . . . . . . . . . . . . . . . . . 121
FCC Regulatory Information . . . . . . . . . . . . . . . . . . . . . . . . . . . . . .122
Quick Reference Guide 125
Guía de referencia rápida 127
Index 129
6
Page 9
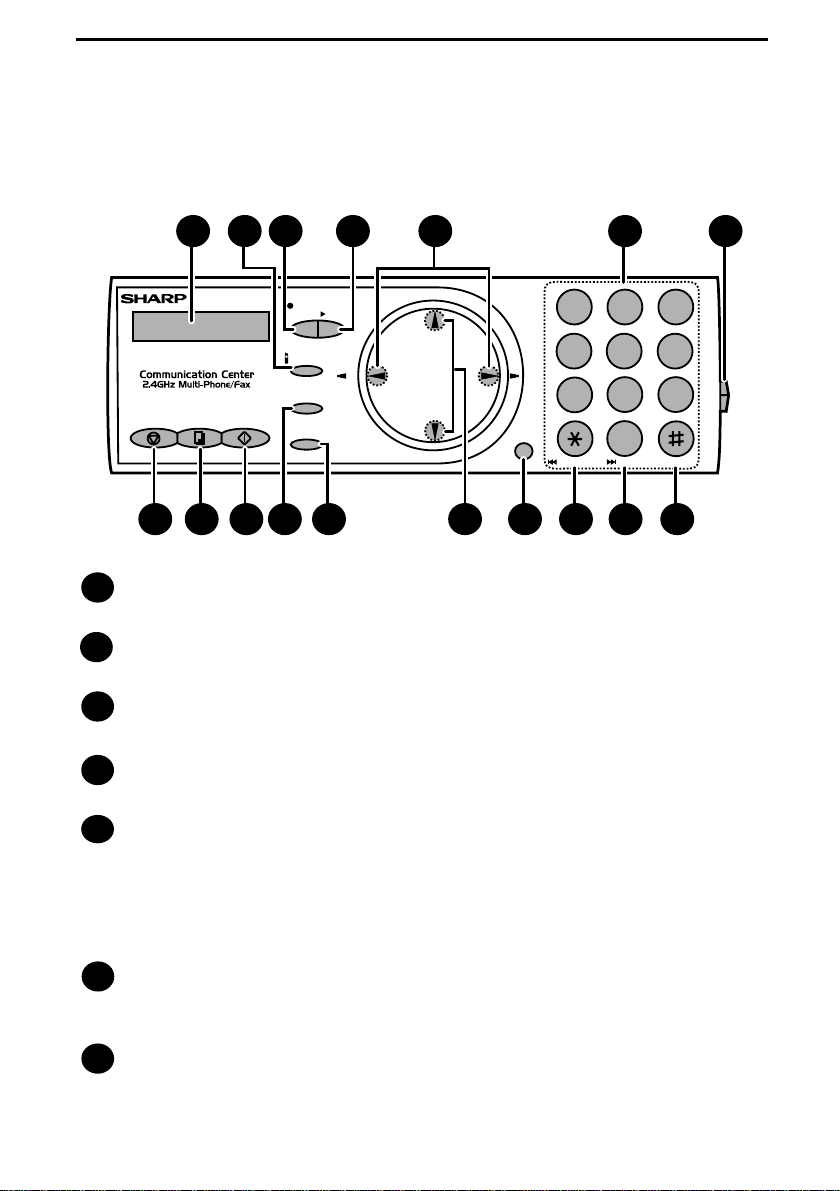
A Look at the Operation Panel
Fax machine
1
STOP
COPY/HELP
8 9 10 12 14
Display
1
32 4
REC/
TEL
FAX
TAD
STAR T/MEMORY
PLAY
MEMO
INTERCOM
Z A
REDIAL
RESOLUTION/
RECEPTION MODE
FUNCTION
11 15 16 17
5 6 7
P
U
ABC1DEF
2 3
GHI
JKL
4
5
TUV
PQRS
8
7
SPEAKER
D
N
O
W
REPEAT
0
SKIP
13
This displays messages and prompts to help you operate the machine.
INTERCOM key
2
Press this key to page or locate the cordless handset.
REC/MEMO key
3
Press this key to record an outgoing message, phone conversation, or memo.
PLAY key
4
Press this key to play reco rded messages.
MNO
6
WXYZ
9
DELETE
Left and right arrow keys
5
Auto-dial numb er s: When sendi ng a f ax o r ma king a phone c all, p ress th ese
keys to sc rol l th rou gh your auto-dial nu mbers, the “REVIEW CALLS” list (o nly
available if you have Caller ID), and the last number dialed (redial).
FUNCTION key settings: Press the right arrow key a fte r s cro lli ng w ith t he up
and down arrow keys to select a FUNCTION key setting.
Number keys
6
Use these keys to dial numbers, and enter numbers and letters when storing
auto-dial numbers.
Panel release
7
Press this release to open the operation panel.
7
Page 10

STOP key
8
Press this key to cancel an operation before it is completed.
COPY/HELP key
9
When a document is in the fee der, press this key to make a copy of a
document. At any other time, press this key to print out the Help List, a quick
reference guide to the operation of your fax machine.
START/MEMORY key
10
Press this key after dialing to begin fax transmissi on. Press this key before
dialing to send a f ax through memory. The key can also be pressed i n the date
and time display to show the percentage of memory currently used.
RESOLUTION / RECEPTION MODE key
11
When a document is in the fee der, press this key to adjust the resolution f or
faxing or copying. At any other time, press this key to select the reception
mode (an arrow in the display will point to the currently selected reception
mode).
FUNCTION key
12
Press this key followed by the arrow keys to select special functions and
settings.
UP and DOWN arrow keys
13
Enlarge/reduce setting: When making a copy of a document, press these
keys to select an enlarge/reduce setting.
Volume setting: When a document is not in the feeder, press these keys to
change the handset volume when the handset is lifted, the speaker volume
when the SPEAKER key has bee n presse d, or the ringer v olume at an y othe r
time.
FUNCTION key settings: Press these keys after pressing the FUNCTION
key to scroll through the FUNCTION MODE settings.
SPEAKER key
14
Press this key to listen to the line and fax tones through the speaker when
faxing a document.
Note: This is not a spea kerp hone. You must pic k up the ha nds et to talk with
the other party.
REPEAT key
15
Press this key while listening to a message to play it again.
SKIP key
16
Press this key while listening to a message to skip to the next message.
DELETE key
17
Press this key to erase recorded messages.
8
Page 11
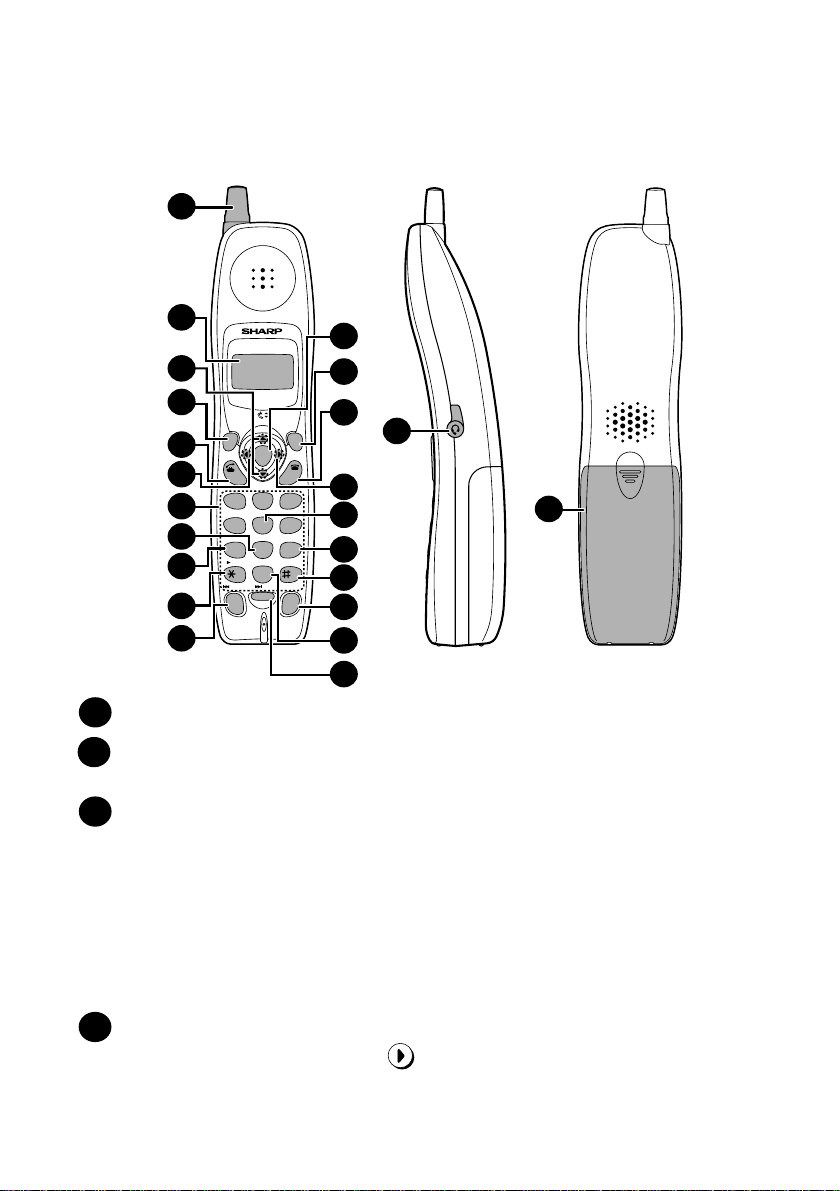
Cordless handset
1
2
12
3
4
5
6
7
8
9
10
11
UP
FUNCTION
/PAUSE
REVIEW
START
TALK
DOWN
ABC DEF
1
23
JKLGHI MNO
456
RECEPTION
TUVPQRS WXYZ
789
PLAY NEW
PLAY
0
REPEAT SKIP DELETE
REDIAL
INTER
COM
REMOTE
/FLASH
SEARCH
OFF
STOP
HOLD
ERASE
13
14
15
16
17
18
19
20
22
23
21
Antenna
1
Display
2
This displays messages and prompts to help you use the cordless handset.
UP and DOWN arrow keys
3
Receiver volume: When talking on the cordles s handset, pre ss these k eys to
adjust the receiver volume. This also adjusts the volume when using a
headset (purchased separately) connected to the cordless handset.
Ringer volume: When not talking on the cordless handset, press these keys
to adjust the cordless handset ringer volume.
Scroll through numbers: Press these keys to scroll when searching for an
auto-dial number or reviewing received calls (only available when you have
Caller ID).
FUNCTION/PAUSE key
4
Press this key to after pressing to store a new auto dial number.
SEARCH
When entering an auto-dial n umb er, press this k ey to insert a pause between
digits.
9
Page 12

TALK key
5
Press this key to make or answer a call.
REVIEW (left) arrow key
6
Press the REVIEW arrow key and then the UP or DOWN arrow k ey to scroll
through your 30 most recent calls (only available if you have Caller ID). This
key ca n al so be u se d to move the cur sor left when entering or editin g an autodial number or name.
Number keys
7
Use these keys to dial numbers, and enter numbers and letters when storing
auto-dial numbers.
PLAY NEW key
8
Press this key after pressing to listen to new messages recorded in the
personal box corresponding to the cordless handset.
PLAY key
9
Press this key after pressing to listen to all messages recorded in the
personal box corresponding to the cordless handset.
REPEAT key
10
Press this key while listening to a message to play it again.
INTERCOM key
11
Press this key to page the fax machine or another cordless handset.
REMOTE
/FLASH
REMOTE
/FLASH
START key
12
Press this key to start fax re ce pti on from the c ordl ess ha nds et, or to complete
entries when storing, editin g, or deleting auto-dial numbers.
REMOTE/FLASH key
13
Press this key to perform remote op erations on the fax machine. The key is
also used to access special services from your phone company that require
subscription (contact your phone company for details).
OFF key
14
Press this key to end a call.
SEARCH (right) arrow key
15
Press the SEARCH arrow key and then the UP or DOWN arrow key to scroll
through your aut o-dial nu mbers. Thi s ke y ca n also be used t o mo ve the cursor
right when entering or editing an auto-dial number or name.
10
Page 13

RECEPTION key
16
Press this key after pressing to change the reception mode on the fax
machine.
STOP key
17
Press this key to stop playback of messages.
DELETE
18
Press this key while listening to a message to delete it. To delete all your
messages, press this key after playback ends (while the display shows
REMOTE MODE), followed by .
HOLD/ERASE key
19
Hold: Press this key during a call to put the other party on hold.
Erase: Press this k ey t o delete a phone n umber when sea rchin g through y our
recently received calls (only when you have Caller ID), or when searching
through your auto-dial numbers. Press the key to delete a digit or character
when storing or editing an auto-dial number.
SKIP key
20
Press this key while listening to your messages to skip to the next message.
REDIAL key
21
Press this key to redial the last number dialed using the cordless handset.
Headset jack
22
This jack lets you connect a headset (purchased separately) to the cordless
handset.
REMOTE
/FLASH
START
Battery cover
23
Remove this cover to install or replace the handset battery.
11
Page 14
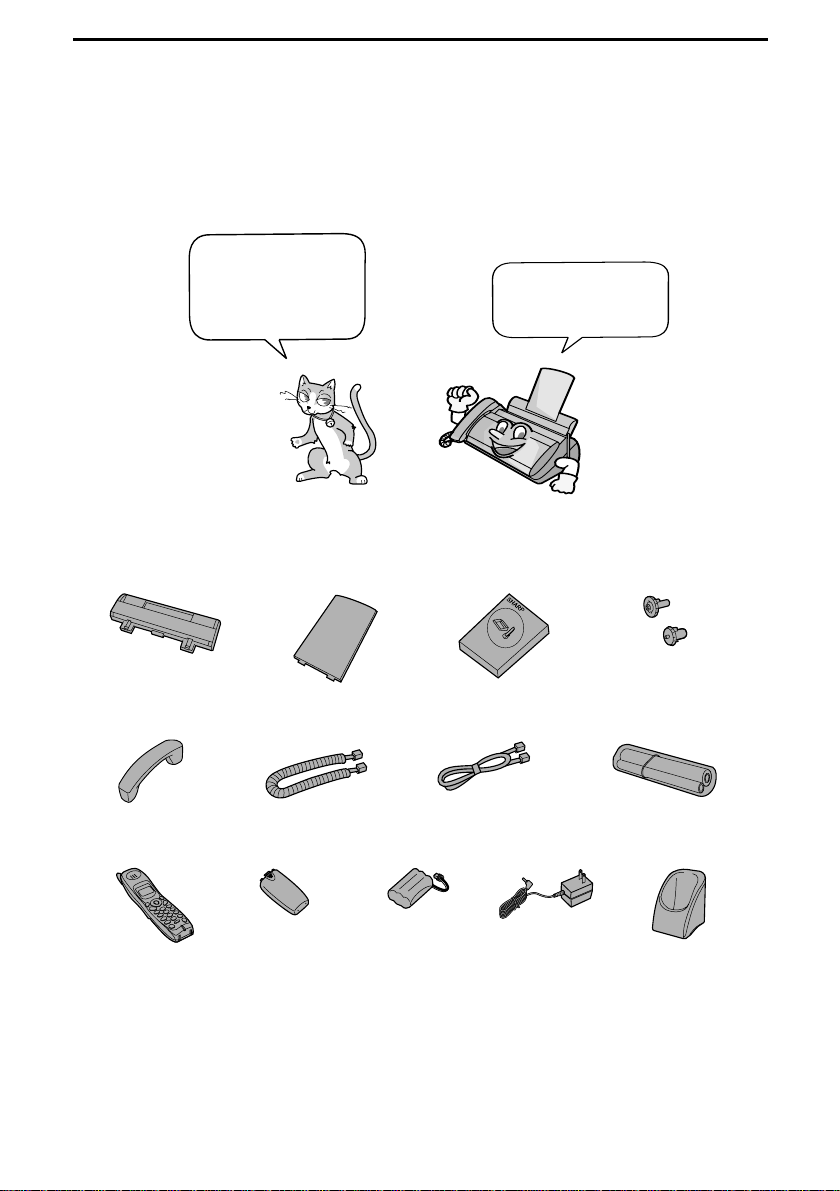
1. Installation
Unpacking Checklist
Before setting up,
make s ure you
have all of the
following items.
If any are missing,
contact your
dealer or retailer.
Paper tray Paper tray
Handset Handset
Cordless
handset
extension
cord
Battery
cover
Battery
pack
Operation
manual
Telephone
line cord
AC adapter
Gears (2)
Imaging film
(initial starter roll)
Cordless
handset charger
12
Page 15

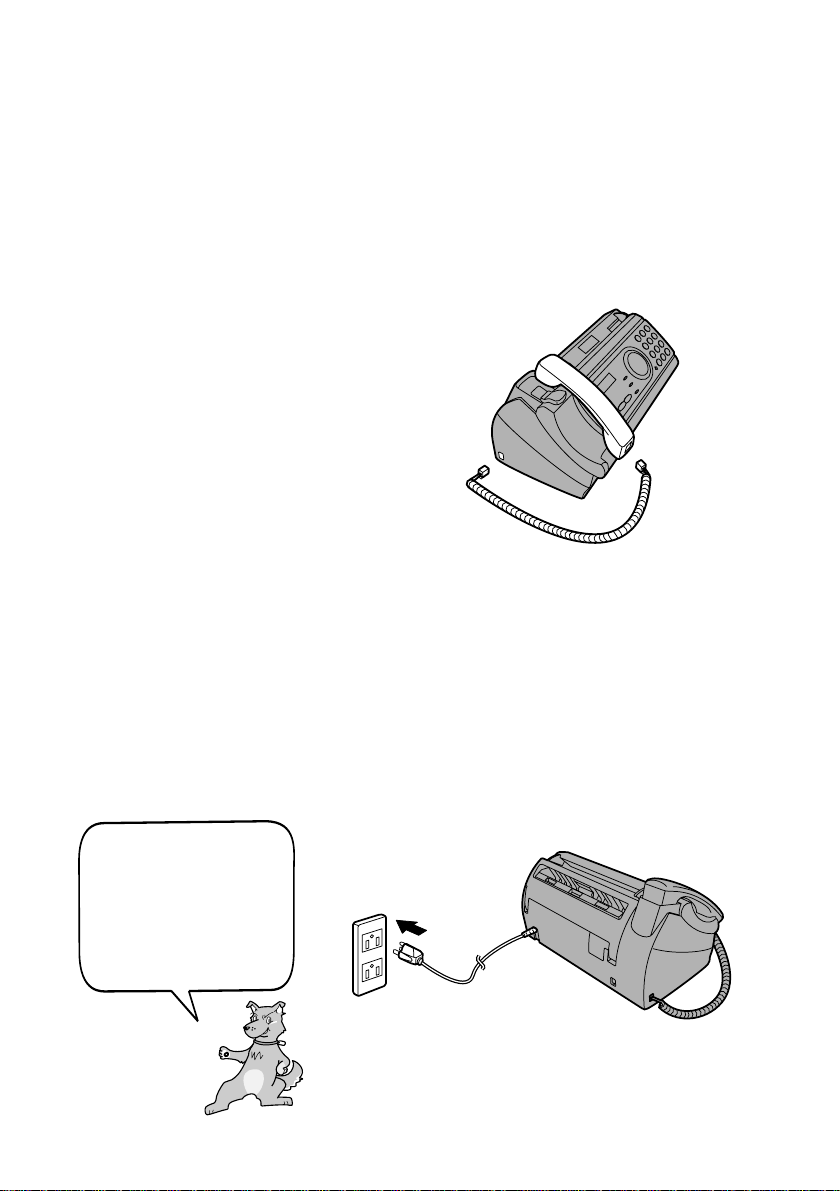
Setting Up
Setting Up
Selecting a location for the fax machine
To maximize the talking range of the cordless handset, we recommend
installing the fax machine in a high and central location away from
obstructions such as walls.
1. Installation
Do not place the
machine in direct
sunlight.
Do not place the
machine near
heaters or air
conditioners.
Keep dus t a way from
the machine.
Keep the area
around the
machine clear.
13
Page 16
Setting Up
Connecting the power cord
Plug the power cord into a 120 V, 60 Hz, grounded AC (3-prong) outlet.
Caution!
Do not plug the power cord into any other kind of outlet. This will damage the
machine and is not covered under the warranty.
The machine does n ot
have a power on/off
switch, so the po wer is
turned on and off by
simply plugging in or
unplugging the power
cord.
14
Page 17
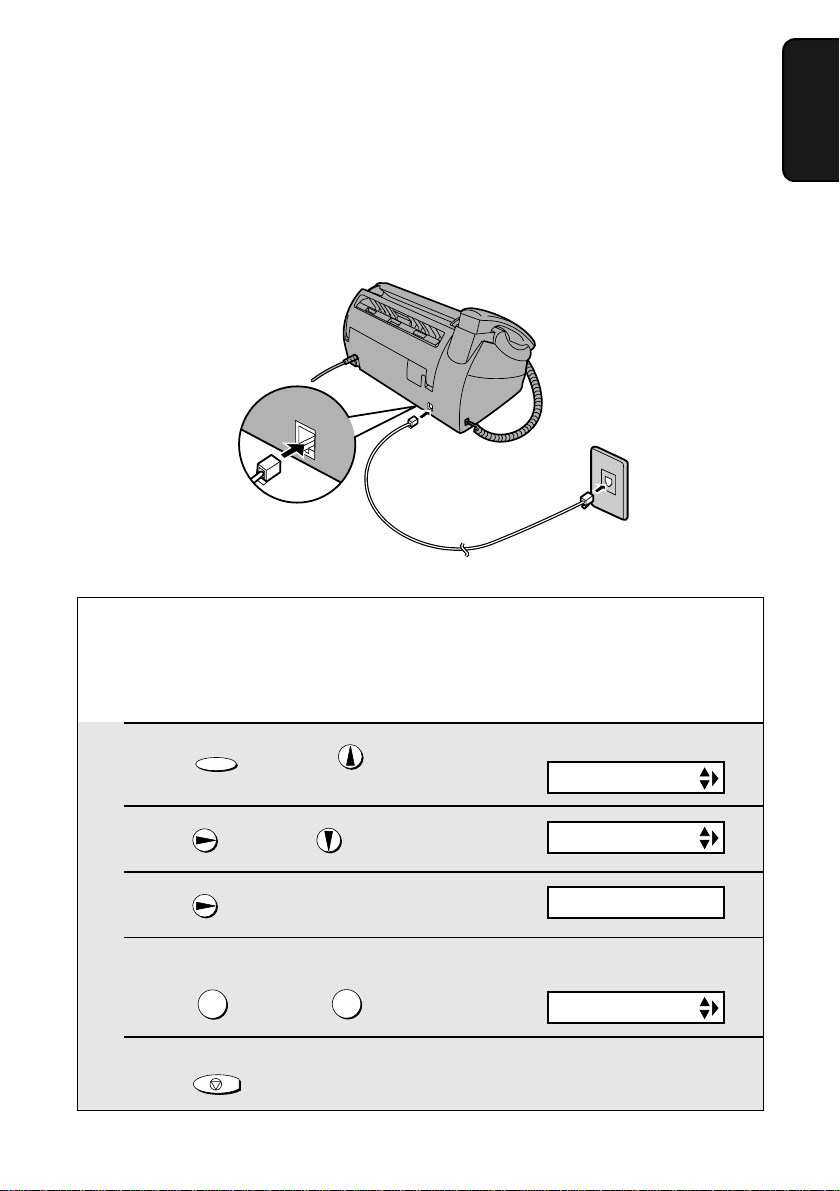
Connecting the telephone line cord
Insert one end of the line cord into the jack on the back of the machine
marked TEL. LINE. Insert the other end into a standard (RJ11C) single-line
wall telephone jack.
TEL.LINE
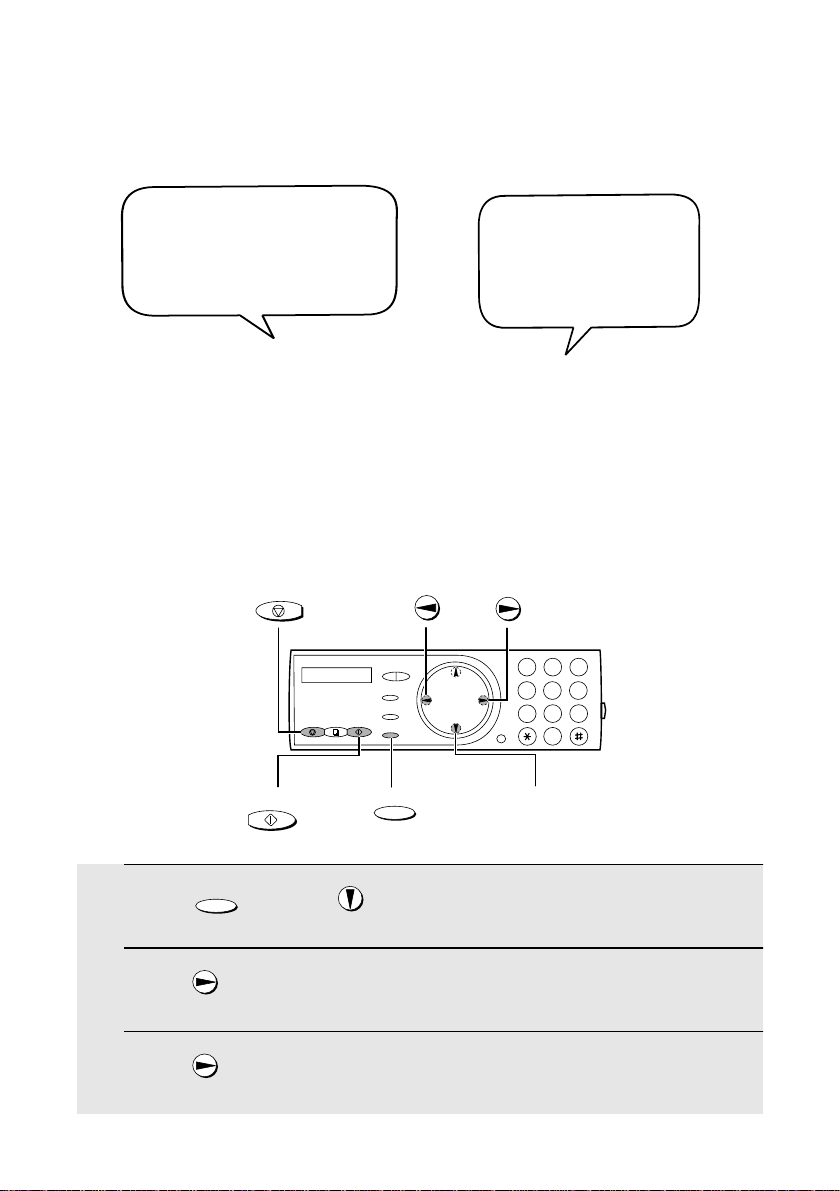
Setting the dial mode
Setting Up
1. Installation
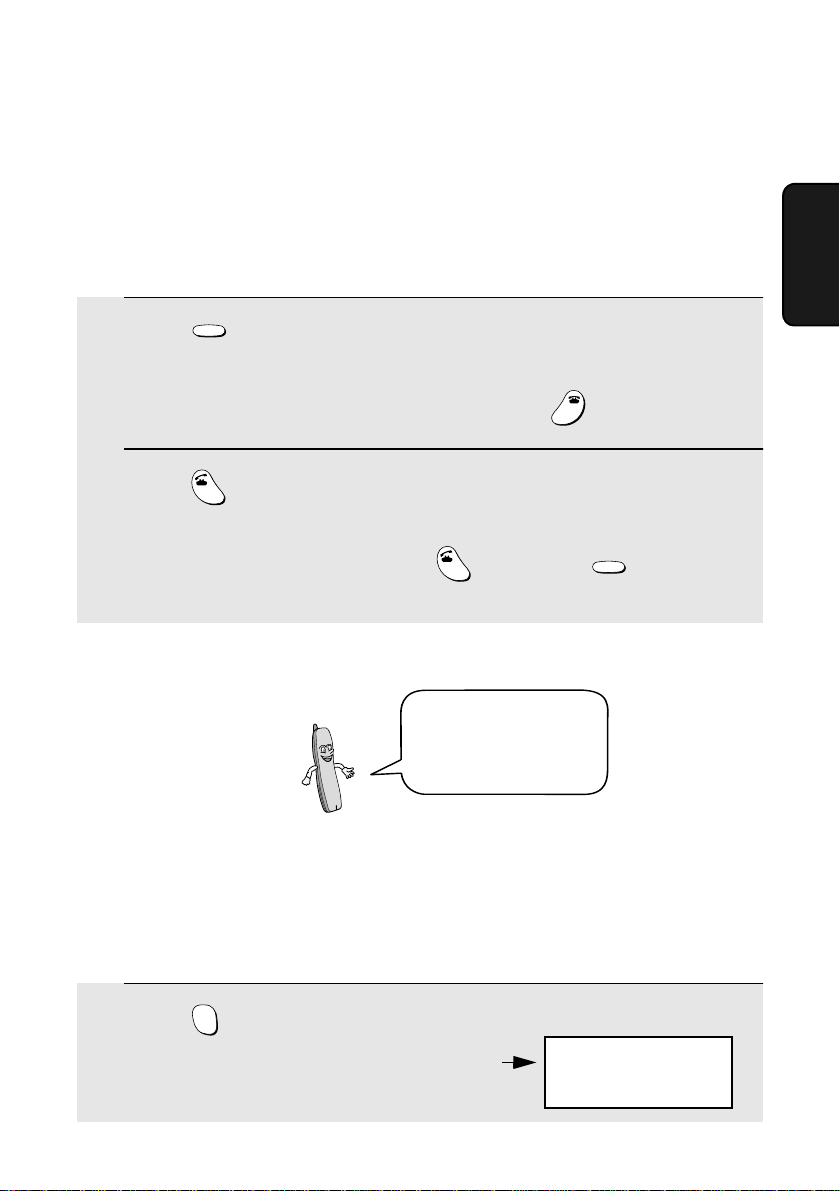
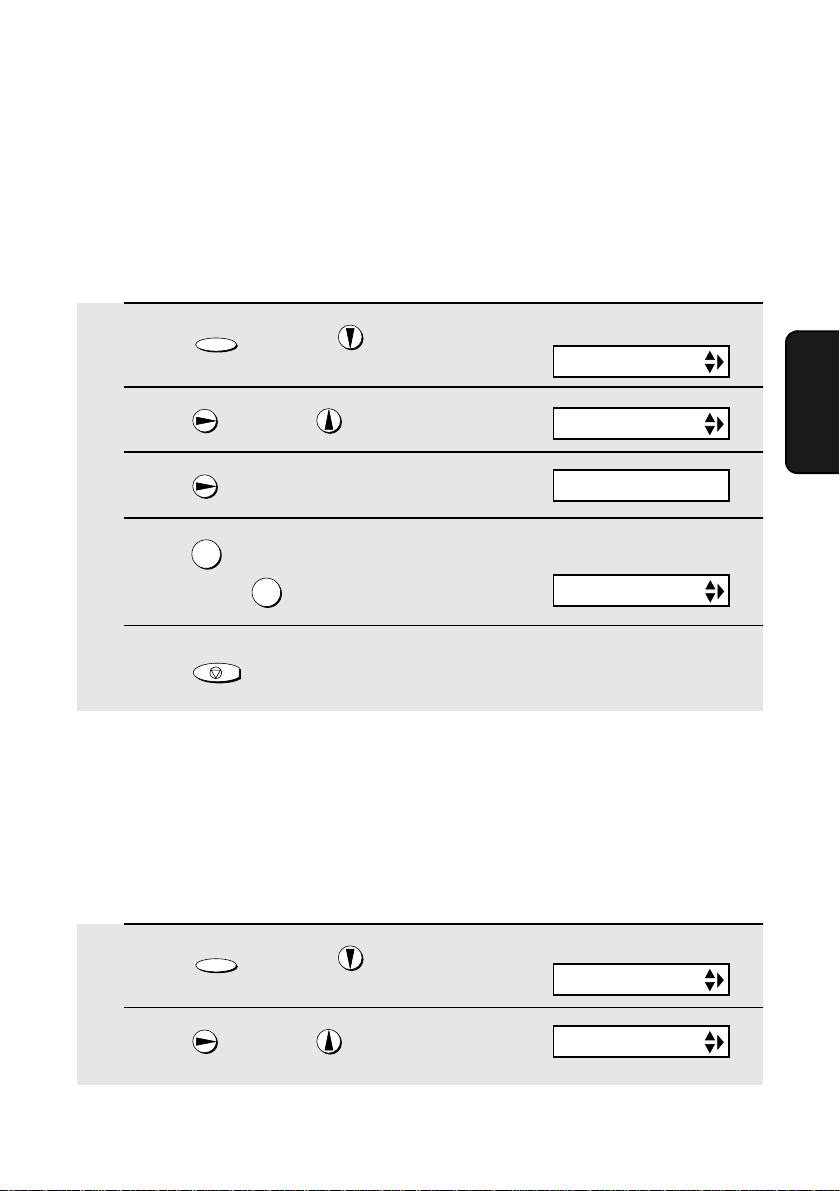
The fax machi ne is set f or to ne dialing . If yo u are on a pul se dial l ine, y ou mus t
set the fax machine for pulse dialing. Press the panel keys as follows:
1 Press once and once.
FUNCTION
2 Press once and twice.
3 Press once.
4 Select the dial mode:
TONE: PULSE:
5 Press to exit.
1
STOP
2
Display:
OPTION SETTING
DIAL MODE
1=TONE , 2=PULSE
The display briefly shows
your selection, then:
DISTINCTIVE
15
Page 18
Setting Up
Note: If your area experiences a high incidence of lightning or power surges,
we recommend that you install surge protectors for the power and telephone
lines. Surge protectors can be purchased at most telephone specialty stores.
About condensation
If the machine is moved from a cold to a war m pl ace, it is possible that
condensation may form on the scanning glass, preventing proper scanning of
documents for transmission. To remove the condensation, turn on the power and
wait approximately two hours before using the machine.
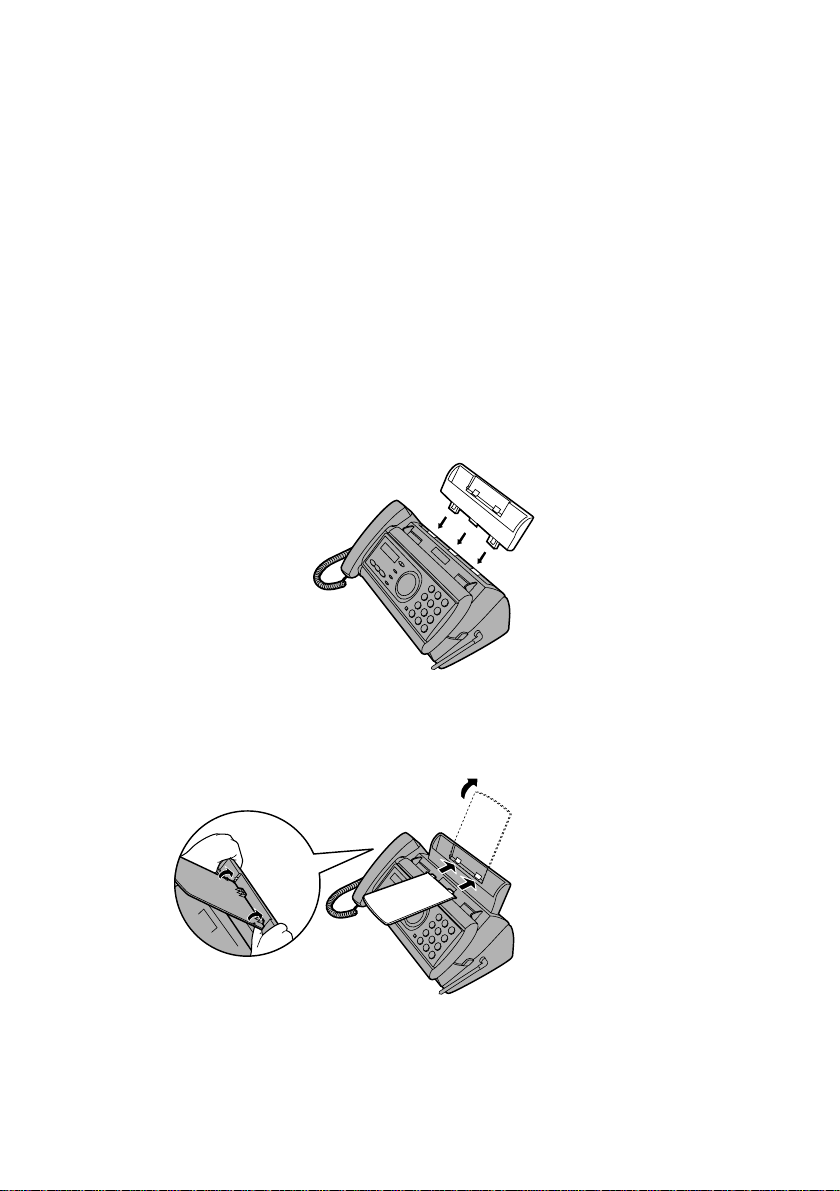
Attach the paper tray and paper tray extension
Attach the paper tray.
Attach the paper tray extension.
16
Click!
Note: The paper tray extension has a top side
and a bottom side. If the tabs do not go into
the holes, turn the support over.
Insert
horizontally
and rotate up
Page 19
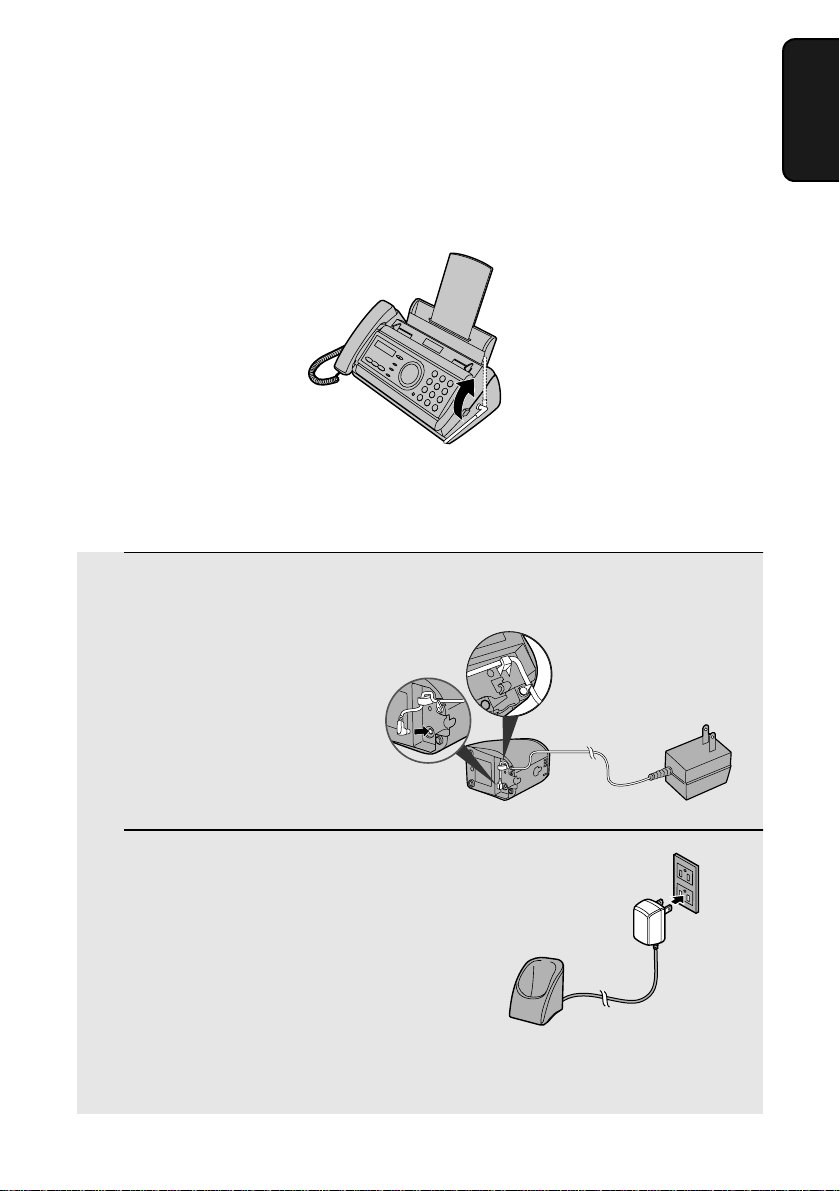
Setting Up
Raising the base antenna
Raise the base antenna to ensure clear communication with the cordless
handset.
Connecting the cordless handset charger
1 Connect the AC adapte r to the cor dless
handset charger.
Fit the cord into
the holders.
1. Installation
2 Plug the AC adapter into a standard
120 V AC outlet.
Important: Never cover the charger and AC adapter with a blanket, cloth, or
other material. Excessive heating may result and cause fire.
17
Page 20
Setting Up
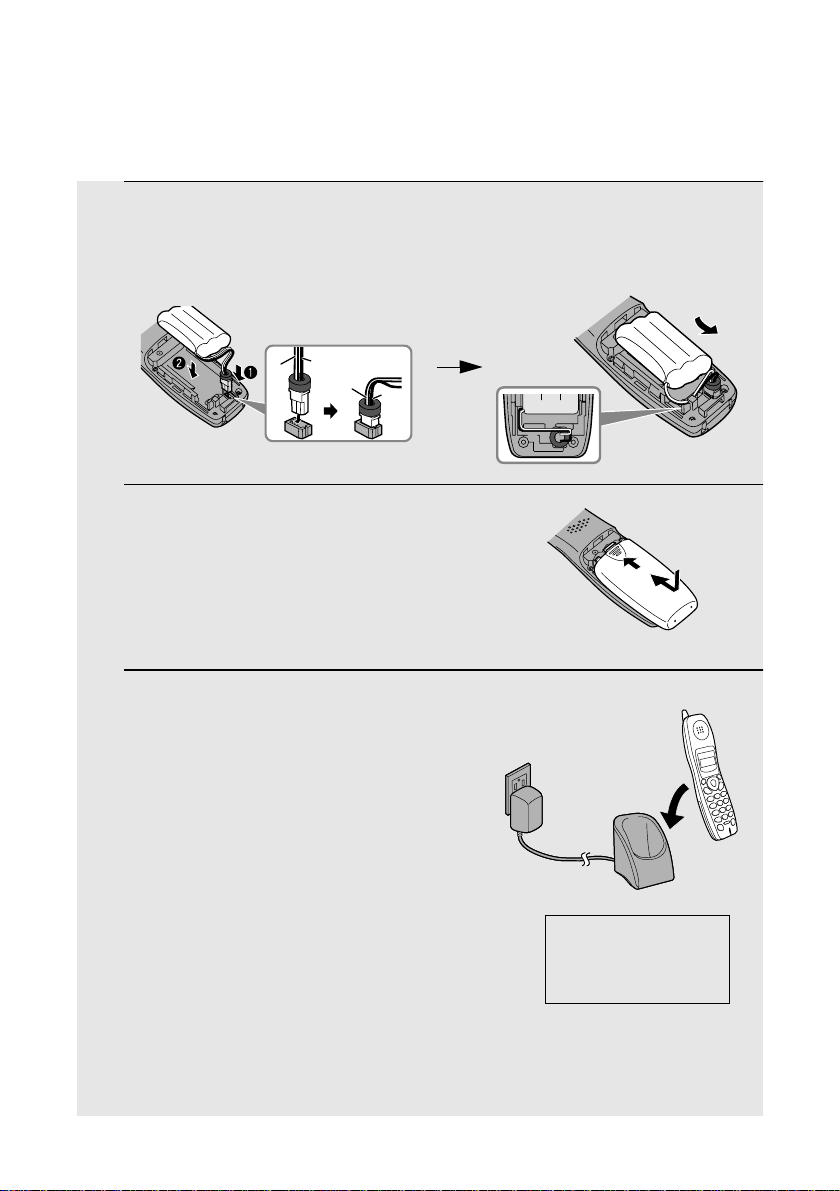
Installing the battery and charging the cordless handset
1 Connect the battery connector ➊1 Connect the battery connector ➊, and then pla ce th e ba ttery pack in the
cordless handset.
• Place the wires as shown.
Black
Red
Red
Black
2 Place the battery cover on the cordle ss
handset, making sure it snaps firmly
into place.
• Make sure the wires are not caught or
pinched by the cover.
3 Place the cordless handset in the
charger with the dial pad f acing
forward.
• Important! The dial pad must face
forward, or the battery will not charge.
• The battery charges automatically while
the cordless handset is in the ch arge r.
While charging, the display shows
CHARGING. When charging is
completed, the display shows IN
CHARGER.
• The cordless handset and c harg er m ay
feel warm while charging. This is
normal.
The battery cannot be overcharged. When not using the cordless handset,
keep it in the charger to ensure that it is always charged.
18
Charge the battery
at least
the first time!
10 hours
Page 21
Setting Up
When the battery needs charging, LOW BATTERY will appear in the display
and you will hear beeps during a phon e co n versation. If you need to co nti nue
the conversation, press to transfer the call to the fax machine. Place the
cordless handset in the charger and let it charge.
Note: If the battery is extrem ely lo w, nothing may appear in the dis pla y during
the first several minutes that the cordless handset is in the charger. The
battery will begin to charge normally after several minutes.
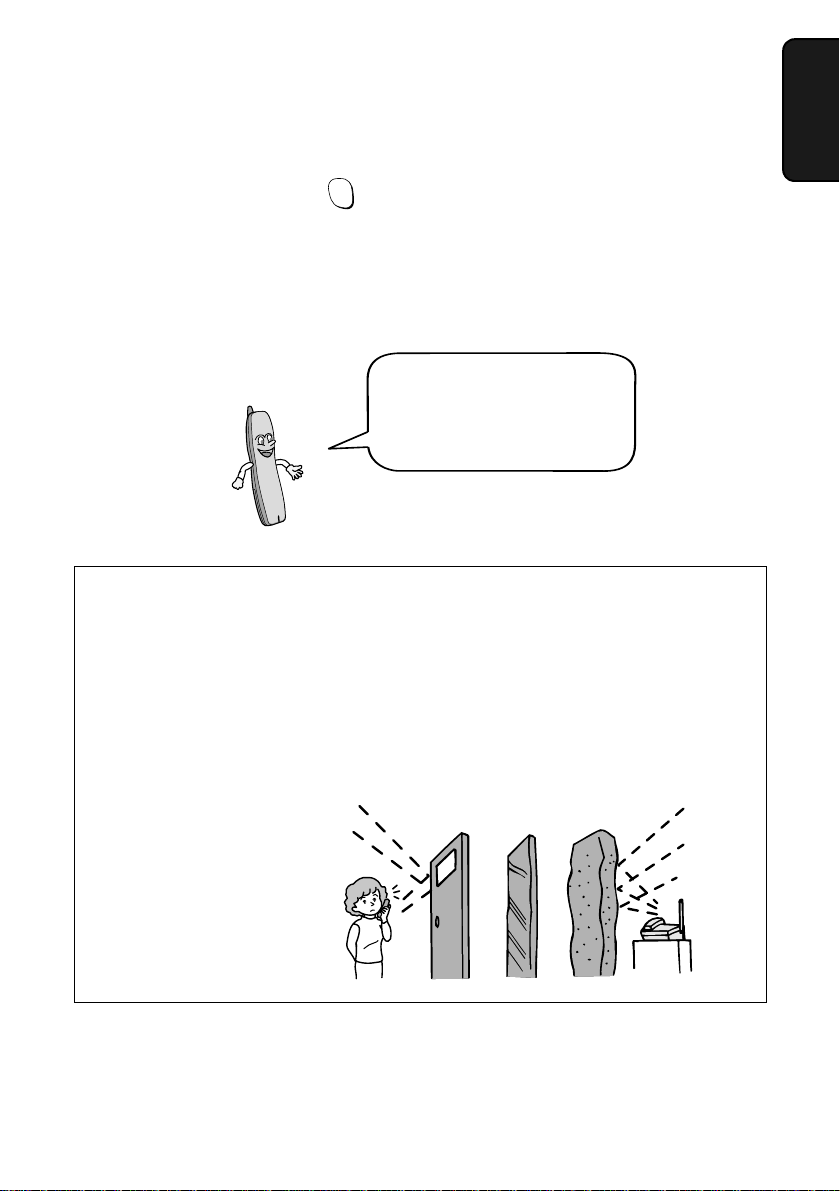
Talking range
The talking range of the cordless handset is approximately 1200 ft. (400 m)
(line of sight). If you hear noise or interference while talking on the cordless
handset, move closer to the fax machine.
INTER
COM
To ensure that the battery
charges properly, wipe the
charger contacts once a
month with a cotton swab.
1. Installation
♦ When outside the talkin g ra nge , OUT OF R ANGE a ppears in th e dis pla y. If
you move out of the talking range while talking on the cordless handset,
the handset will beep and you may hear interference.
Reinforced concreteMetalAluminum sash
Large metal objects,
metal structures, and
thick walls reduce the
talking range.
19
Page 22
Setting Up
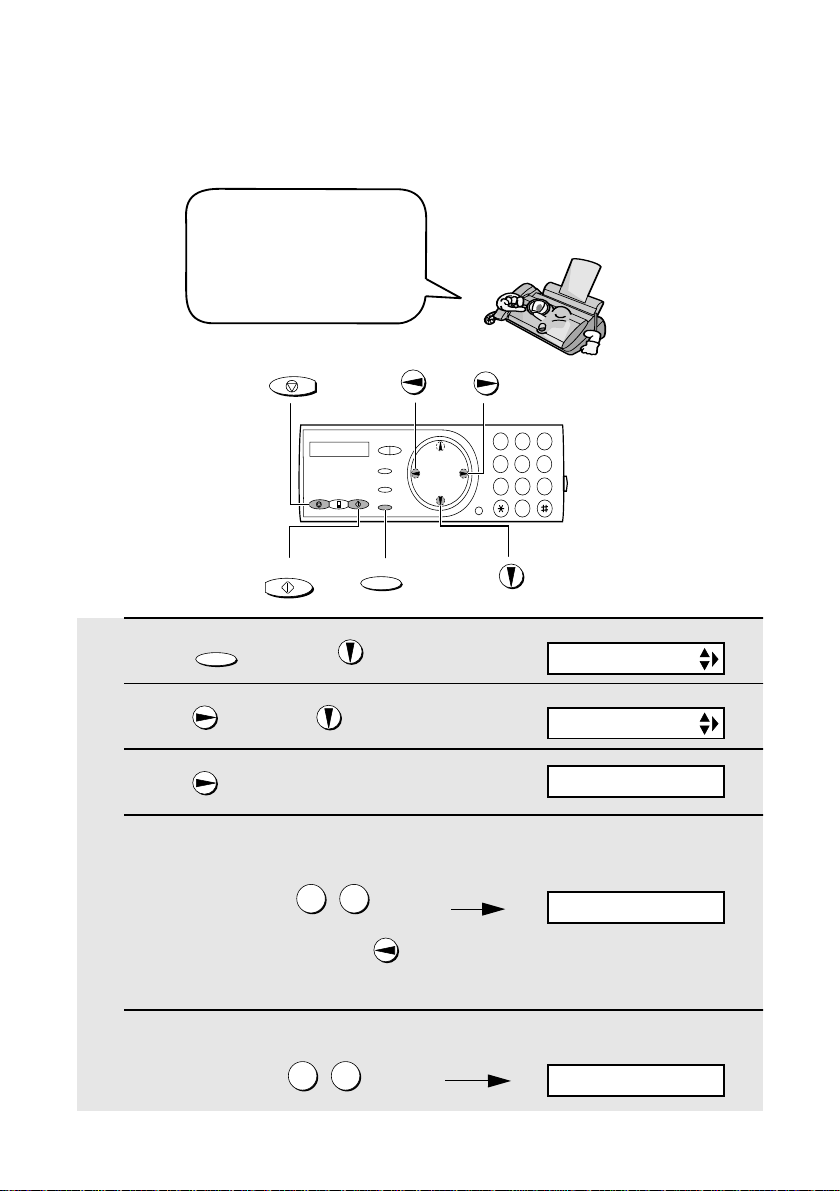
Entering a name for the cordless handset
You can enter a name for the cordless handset in the fax machine.
♦ The fax machine will transmit the name that you enter to your cordless
handset. The name will appear in the cordless handset’s display.
1 Press once and 3 times on
FUNCTION
the fax machine.
2 Press once and once.
3 Press once.
4 Press to select SET.
5 Press . (“1” is the ID number of the
1
1
Fax machine display:
ENTRY MODE
HS NAME SET
1=SET, 2=CLEAR
SELECT HS NO.
SELECT ID NO. 1
cordless handset that came with the
fax machine.)
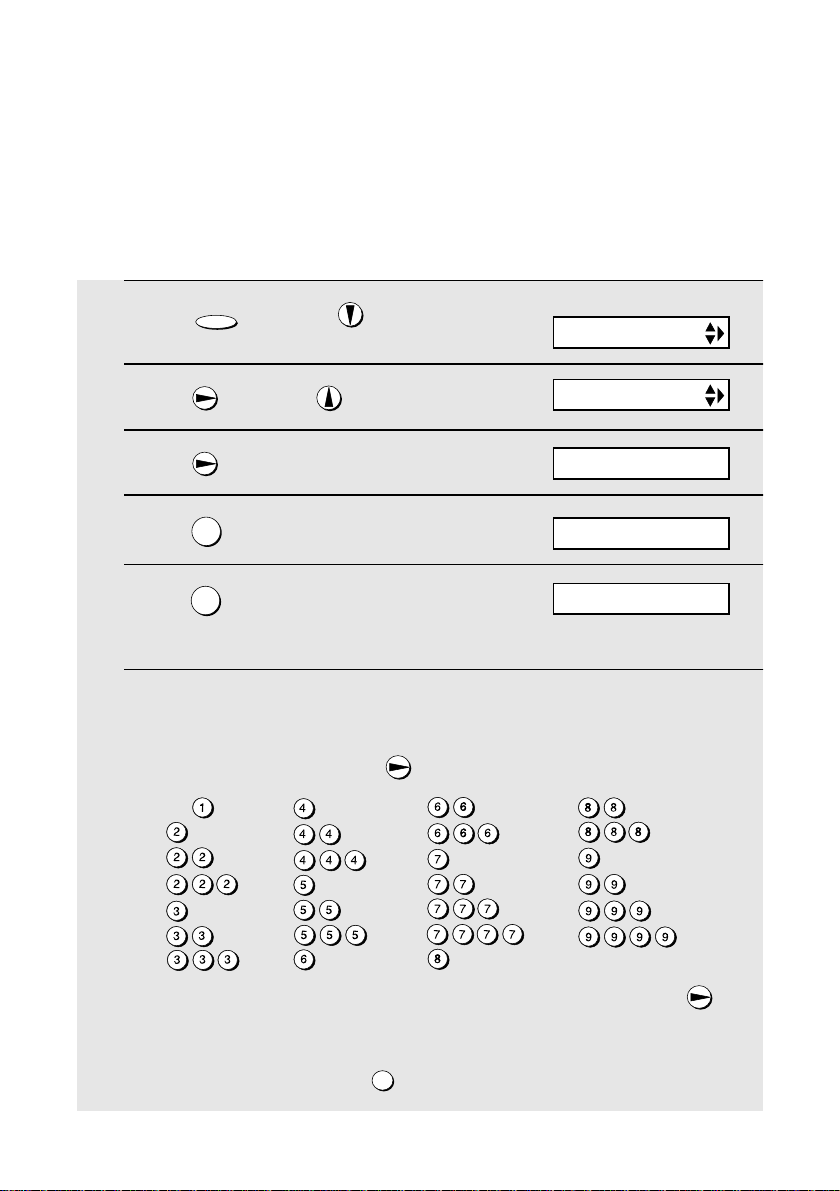
6 Enter the name by pressing number keys for each letter as shown in the
chart below. Up to 10 characters can be ente red.
Example: BILL = 22 444 555 555
SPACE =
A =
B =
C =
D =
E =
F =
G =
H =
I =
J =
K =
L =
M =
N =
O =
P =
Q =
R =
S =
T =
U =
V =
W =
X =
Y =
Z =
♦ To enter two letters in succession that require the same key, press
after entering the first letter.
♦ To clear a mistake, press .
20
SPEAKER
Page 23
Setting Up
♦ To enter a lower case letter , co ntin ue press ing the k e y for the letter until the
lower case letter appe ars.
♦ To enter one of the following symbols, press or repeatedly:
. / ! " # $ % & ’ ( ) + + , - : ; < = > ? @ [ ¥ ] ^ _ ' { | }
) (
1. Installation
7 Press to store the name.
8 Press to exit.
START/MEMORY
STOP
The handset number
and name appear in
the standby display of
the cordless handset
Display:
OWN NUMBER SET
HANDSET1
BILL
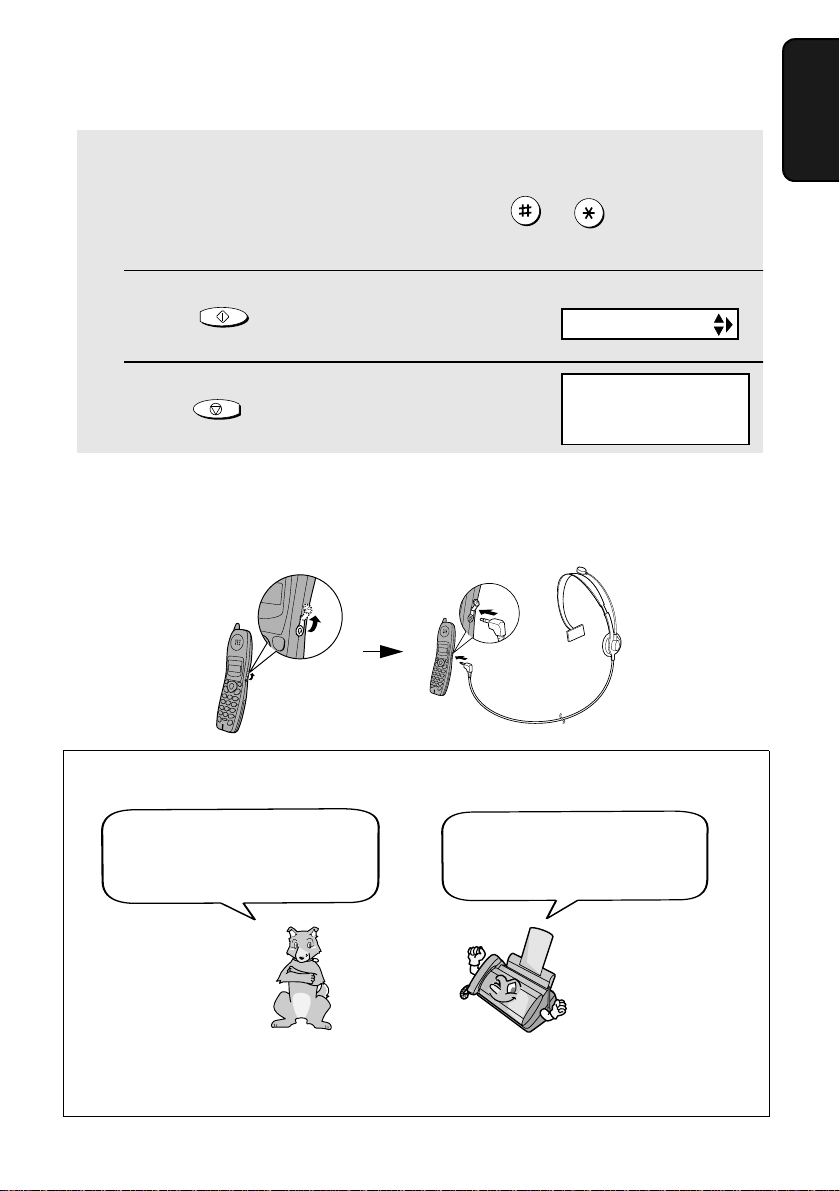
Connecting a headset
You can connect a headset (purchased separately) to the headset jack.
Remove the cap and insert the connector as shown.
Accessory cordless handsets
You can use up to 3 additional
UX-K01 cordless handsets
with the fax machine.
Please purchase accessory
UX-K01 handsets at your
dealer or retailer .
For information on setting up an accessory cordless handset for use with the
fax machine, see the manual that accompanies the accessory handset.
21
Page 24
Loading the Imaging Film
Loading the Imaging Film
Your fax uses a roll of imaging film to create print ed te xt and images . The print
head in the fax applies heat to the imaging film to transfer ink to the paper.
Follow the steps below to load or replace the film.
The initial starter roll of
imaging film incl uded with
your fax can print about
30 letter-size pages.
When replacing the film,
use a roll of Sharp UX-
5CR imaging film. One
roll can print about 150
letter-size pages.
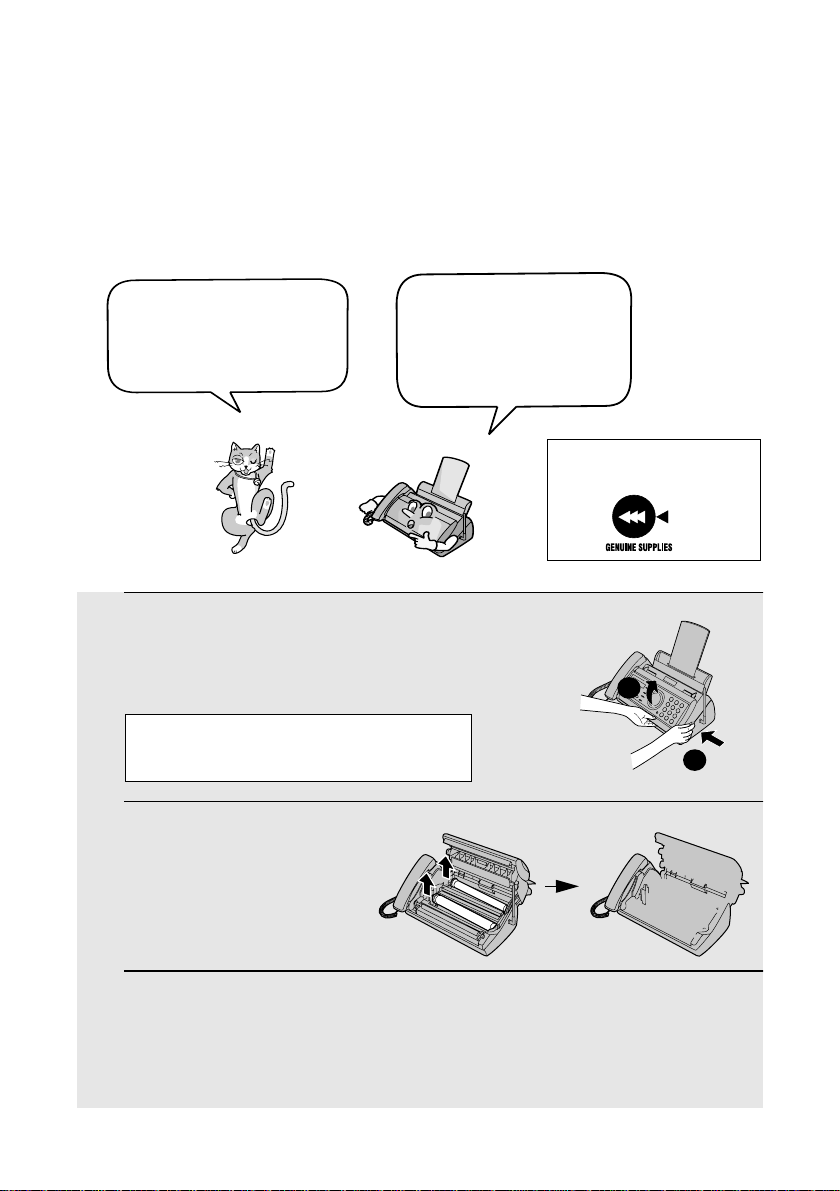
1 Remove the paper from the paper tray
and open the operation panel (press
➊).
If you are lo ading th e i magi ng film fo r
the first time, go to Step 4.
2 Remove the used film and
empty spool.
Use only Sharp Genuine
Supplies with this logo:
2
1
3 Remove the two green gears from the
spools.
DO NOT DISCARD THE TWO GREEN
GEARS!
22
Page 25
Loading the Imaging Film
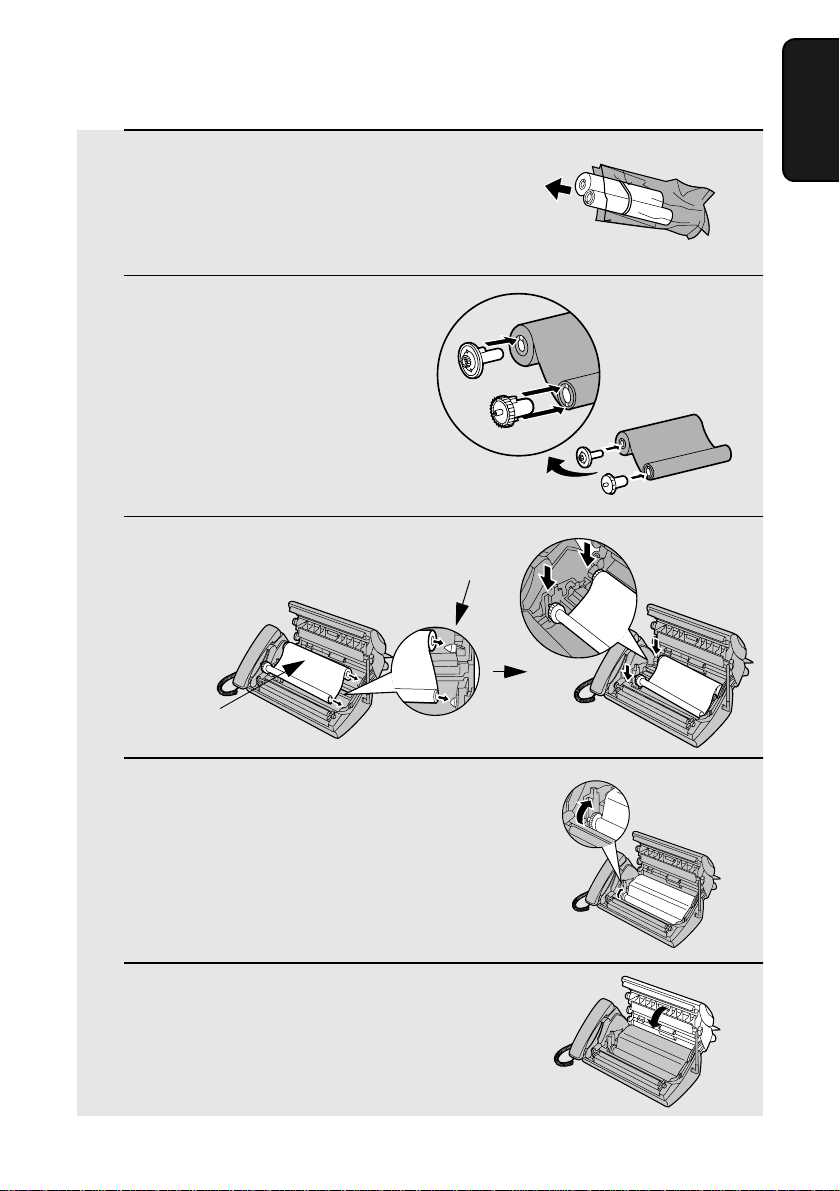
4 Remove the new roll of imaging film
from its packaging.
• Cut the band that holds the rolls
together.
5 Insert the green gears.
Make sure the
gears fit into the
slots in the ends
of the rolls.
6 Insert the film into the print
compartment.
Thick roll
to rear
Fit ends of rolls
onto hubs
1. Installation
1 slot
2 slots
7 Rotate the front gear as shown until
the film is taut.
8 Close the operation panel (press down
on both sides to make sure it clicks
into place).
23
Page 26
Loading Printing Paper
Loading Printing Paper
You can load letter or legal s ize paper in the pap er t ray. Recommended paper
weight is 20-lb. Copy Bond. The maximum number of sheets is as follows:
Letter size:
Legal size: 5 sheets
Approx. 50 sheets (20-Ib. copier paper at room temperature;
maximum stack he ight sh ould not be hi gher than the li ne on the
tray)
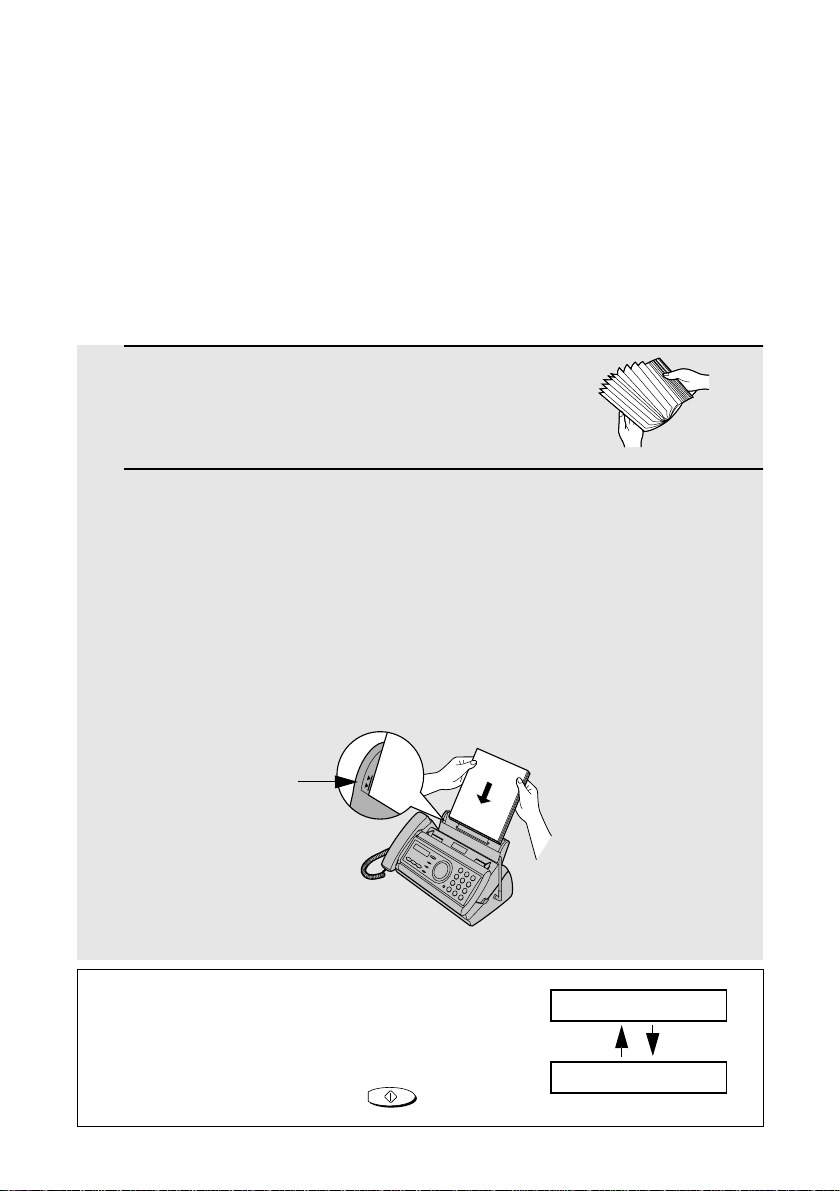
1 Fan the paper, and then tap the edge
against a flat surface to even the stack.
Make sure the stack edges are even.
2 Insert the stack of paper into the tray, PRINT SIDE DOWN.
• If paper remains in the tray, take it out and combine it into a single stack
with the new paper.
• Be sure to load the paper so that printing takes place on the print side of
the paper. Printing on the reverse side may result in poor print quality.
• GENTLY LOAD PAPER INTO THE PAPER TRAY.
• DO NOT FORCE IT DOWN INTO THE FEED SLOT.
The stack
should not
be higher
than this line
Note: Do not use paper that has alrea dy been printed on, or paper that is curled.
Note: If at any time the display shows the
alternating messages at right, check the printing
paper. If the tray is empty, add paper. If there is
paper in the tray, take it out and then reinser t it.
When you are f i nished, press
START/MEMORY
.
ADD PAPER &
PRESS START KEY
24
Page 27
Loading Printing Paper
1. Installation
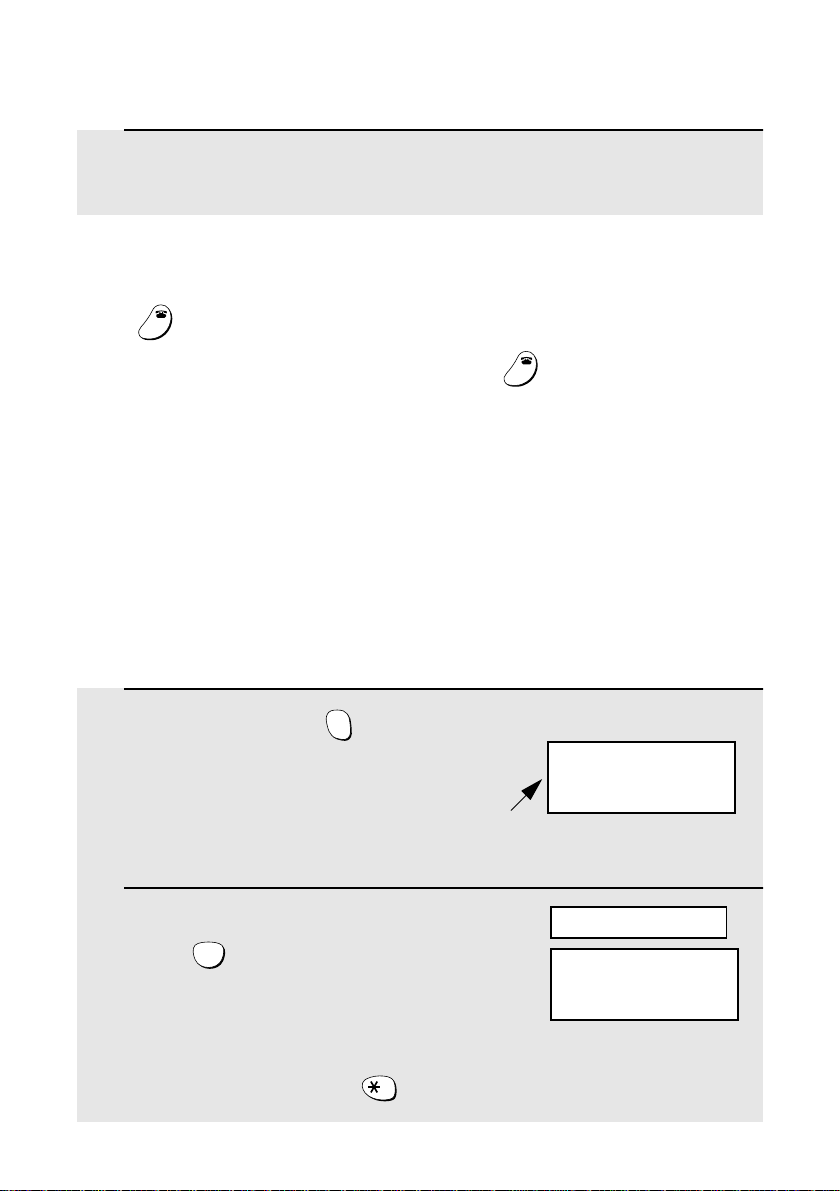
1 Press once and once.
FUNCTION
2 Press once and twice.
3 Press once.
4 Select the paper size:
LETTER: LEGAL:
5 Press to return to the date and time display.
1
STOP
Print contrast setting
Your fax has been set at the factory to print at normal contrast. If desired, you
can change the print contrast setting to LIGHT.
1 Press once and once.
FUNCTION
2
The display briefly shows
your selection, then:
2 Press once and 3 times.
3 Press once.
4 Select the print contrast:
NORMAL: LIGHT:
5 Press to return to the date and time display.
25
Page 28
Entering Your Name and Fax Number
Entering Your Name and Fax Number
Before you can begin sending
faxe s , you must enter your
name and fax (telephone)
number. You also need to set
the date and time.
Important!
FCC regulations require tha t your name, tele phone/fax number, and the date and
time appear on each fax message you send. Enter your name and fax number
here and set the date and time as explained in the following section to have the fax
machine include this infor m at io n automatically at the top of your fax messages.
STOP
Once you enter this
information, it will
automatically appear at
the top of each fax pag e
you send.
1
2 3
4
5 6
9
8
7
0
START/MEMORY
1 Press once and 3 times.
FUNCTION
FUNCTION
2 Press once.
3 Press once.
26
Page 29

Entering Your Name and Fax Number
4 Ente r your fax number by pressing the number keys (max. 20 digits).
• To insert a space between digits, press .
• To clear a mistake, press .
5 Press to enter the fax number in memory.
START/MEMORY
SPEAKER
6 Enter your name by pressing number keys for each letter as shown in
the chart below. Up to 24 charac ters can be ente red.
Example: SHARP = 7777 44 2 777 7
A =
B =
C =
D =
E =
♦ To enter two letters in succession that require the same key, press
after entering the first letter.
1. Installation
♦ To clear a mistake, press .
SPEAKER
♦ To enter a lower case letter , co ntin ue press ing the k e y for the letter until the
lower case letter ap pears. To enter one of the follo wing symbols , press
or repeatedly: . / ! " # $ % & ’ ( ) + + , - : ; < = > ? @ [ ¥ ] ^ _ ' { | }
7 Press .
8 Press to return to the date and time display.
START/MEMORY
STOP
Display:
DATE&TIME SET
) (
27
Page 30
Setting the Date and Time
Setting the Date and Time
The date and time app ear
in the display and are
printed at the top of every
page you f ax. Set th e date
and time as shown below.
STOP
1
2 3
4
5 6
9
8
7
0
START/MEMORY
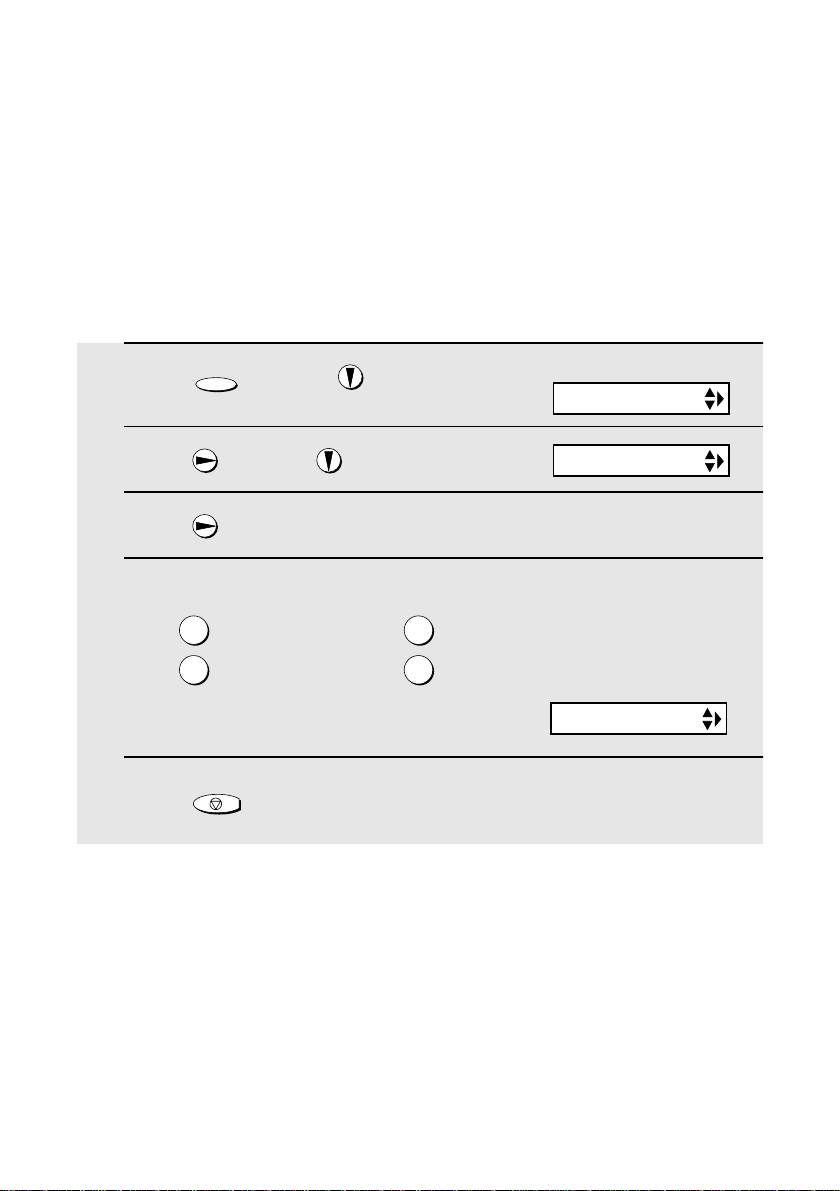
1 Press once and 3 times.
FUNCTION
2 Press once and once.
3 Press .
FUNCTION
Display:
The currently set date
appears (example):
ENTRY MODE
DATE&TIME SET
DATE 08-15-2002
4 Enter a two-digit number for the month (“01” for January, “02” for
February, “12” for December, etc.).
Example: January
0 1
DATE 01-15-2002
• T o c orrect a m istake , pres s to move the cursor back to the m istake and
then enter the correct number.
5 Enter a two-digit number for the day (“01” to “31”).
th
Example: the 5
28
0 5
DATE 01-05-2002
Page 31
Setting the Date and Time
6 Enter the year (four digits).
Example: 2002
2
0 0
2
The currently set time
appears (example):
TIME 12:19 PM
7 Enter a two-digit number for the hour (“01” to “12”) and a two-digit
number for the minute (“00” to “59”).
Example: 9:25
0 9
2
5
TIME 09:25 PM
8 Press to select A.M. or to select P.M.
9 Press to start the clock.
10 Press to return to the date and time display.
START/MEMORY
STOP
Daylight Saving Time
If desired, you can set the clock to move forward and backward automatically
at the beginning and end of Daylight Saving Time. Follow these steps:
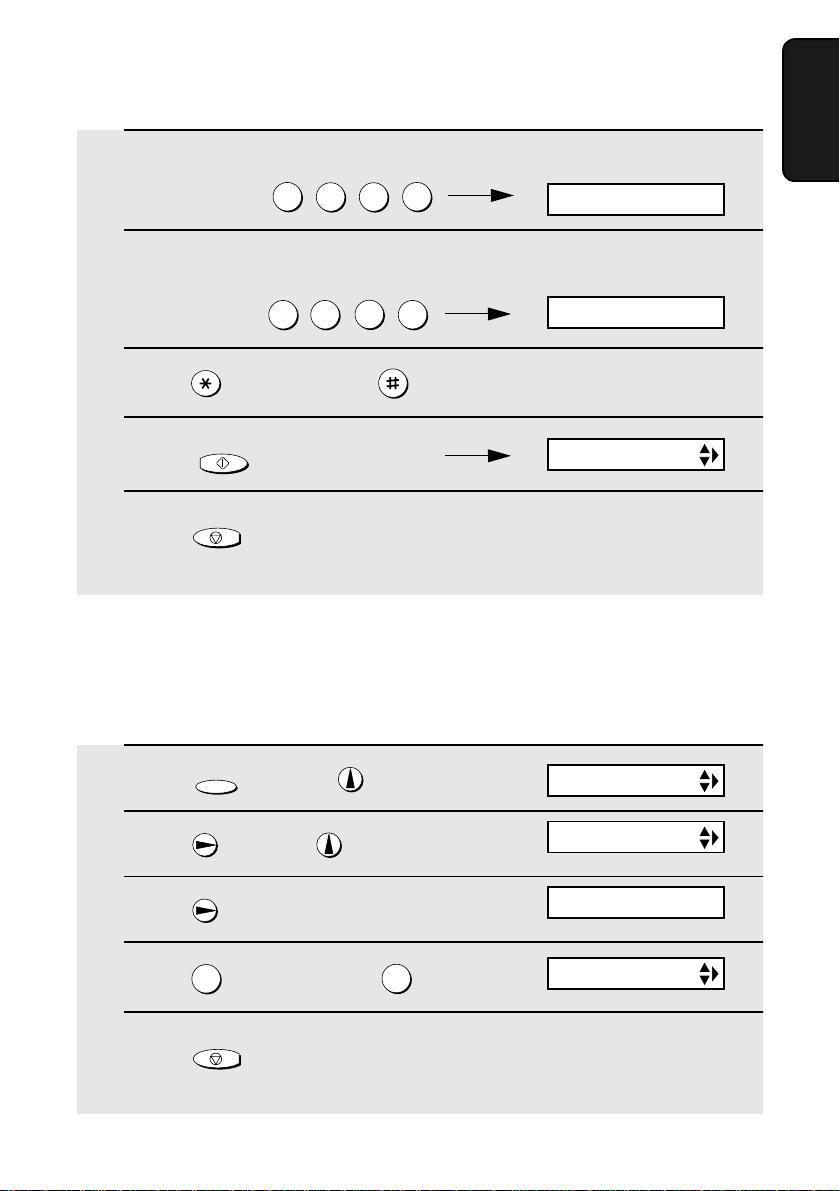
ANTI JUNK #
1. Installation
1 Press once and once.
FUNCTION
2 Press once and 5 times.
3 Press once.
4 Press to select YES, or to select NO.
5 Press to return to the date and time display.
1
STOP
2
OPTION SETTING
DAY LIGHT SAVE
1=YES, 2=NO
RECEIVE RATIO
29
Page 32

Setting the Reception Mode
Setting the Reception Mode
Your fax has three modes for receiving incoming faxes:
FAX mode:
Select this mode when you only want to receive faxes on your line. The fax
machine will automatically answer all calls on four rings and receive incoming
faxes.
TEL mode:
Select this mode when you want to recei ve both phone calls and faxes on the
line connected to the fax machine. All calls, including faxes, must be
answered by pic king up the fax machin e's handse t or an extensio n pho ne
connected to the same line.
TAD mode:
Select this mode when you go out and want the answering system to answer
all calls. Voice messages will be recorded, and fax messag es wi ll be received
automatically (“TAD” stands for “Telephone Answering Device”.)
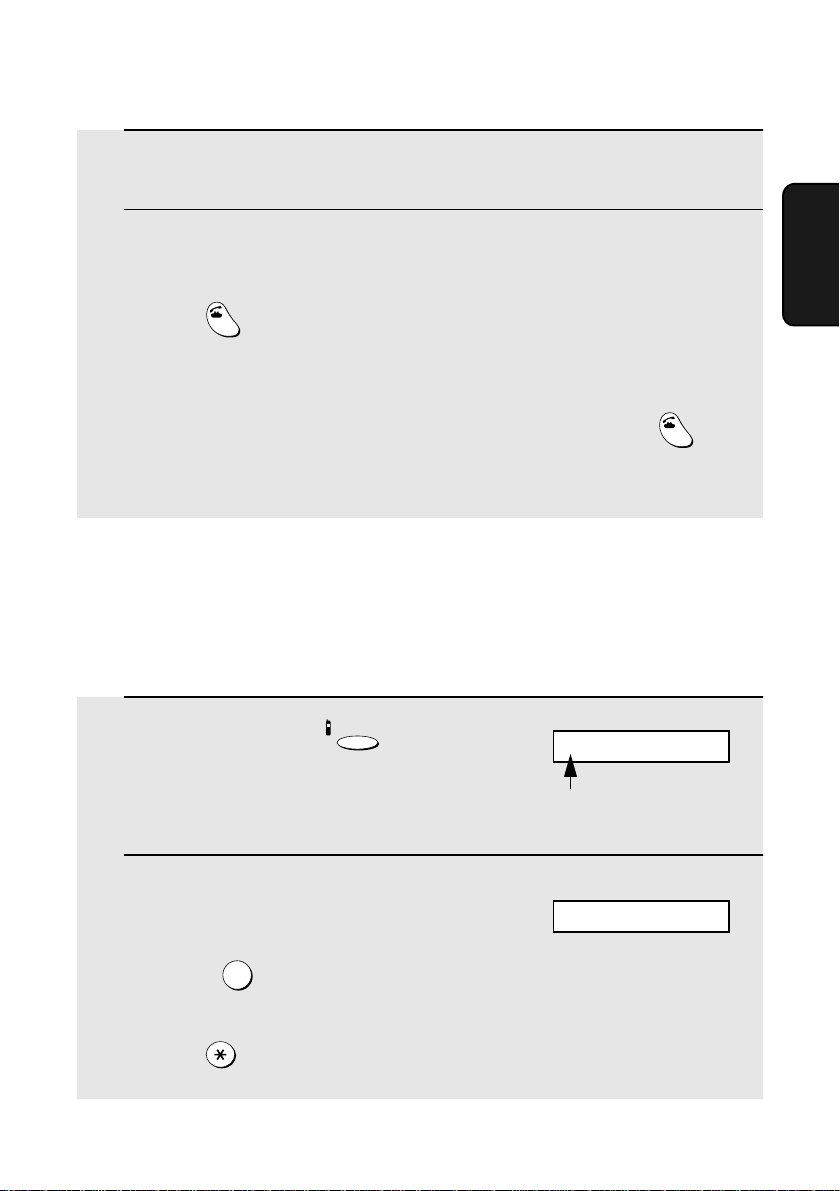
Setting the reception mode
Make sure a document is not loaded in the document feeder, and then
RESOLUTION/
RECEPTION MODE
press until the arrow in the display points to the desired mode.
JAN-02 10:30
1
2 3
4
5 6
9
8
7
0
RESOLUTION/
RECEPTION MODE
JAN-02 10:30
JAN-02 10:30
Note: TAD mode cannot be selected un les s a g ene ra l o utg oin g m es sa ge has
been recorded as explained on page 48.
For more information on receiving faxes in FAX and TEL modes, see Chapter
5, Receivin g Faxe s . F or m ore information on using TAD mode, see C hapt er 3,
Using the Answering System.
30
TEL
TEL
TEL
FAX
TAD
FAX
TAD
FAX
TAD
Page 33

Volume Adjustment - Fax Machine
Volume Adjustment - Fax Machine
1
2 3
4
5 6
9
8
7
0
SPEAKER
Speaker
1 Press .
SPEAKER
2 Press or to select the desired volume level.
• Press again to turn off the speaker.
SPEAKER
Y ou c an adjust the v olume
of the speaker, handset,
and ringer using the up
and down arrow keys.
1. Installation
Fax machine handset
1 When talking through the handset,
press or to select the desired
volume level.
• Note: The volume reverts to MIDDLE
each time you replace the handset.
Display:
RECEIVER: HIGH
RECEIVER: MIDDLE
RECEIVER: LOW
31
Page 34

Volume Adjustment - Cordless Handset
Fax machine ringer
1 Press or to select the desired
volume level.
(Make sure has not been
pressed, the handset is not lifted, and a
document is not loaded in the feeder.)
• The ringer rings once at the selected
level, and then the date and time
reappear in the display.
SPEAKER
Display:
RINGER: HIGH
RINGER: MIDDLE
RINGER: LOW
RINGER: OFF OK ?
2 If you selected “RINGER: OFF OK ?” to
turn off the ringer, press .
START/MEMORY
Volume Adjustment - Cordless Handset
32
Y ou ca n adjust the v olume
of the ringer and handset,
receiver using the up and
down arrow keys.
Page 35

Volume Adjustment - Cordless Handset
Cordless handset receiver volume
1 When talking on the cordless handset,
press or to select the desired
volume level.
• Note: The volume reverts to MIDDLE
each time you hang up (press ).
Cordless handset ringer
OFF
OFF
1. Installation
Cordless handset display:
RECEIVER: HIGH
RECEIVER: MIDDLE
RECEIVER: LOW
1 When you are not talking on the
cordless handset, press or to
select the desired ringer volume level.
• The ringer will ring once at the sel ect ed
level.
2 If you selected “RINGER: OFF OK ?” to
turn off the ringer, press .
START
Cordless handset display:
RINGER: HIGH
RINGER: MIDDLE
RINGER: LOW
RINGER: OFF OK ?
OK: PRESS START
33
Page 36

2. Using the Cordless Handset
Making a Phone Call
OFF
TALK
OFF
1 Pick up the cordless handset and
press .
TALK
2 When you hear the dial tone, dial the
number.
3 When you are ready to end the call, press .
Cordless handset display:
TALK
1
GHI4JKL5MNO
RECEPTION
PQRS
7
PLAY
PLAY NEW0STOP
REPEAT SKIP DELETE
OFF
OFF
• You can also end the call by simply placing the cordless handset in the
charger.
If the display shows FAX BUSY,
you must wait until the fax
machine is no longer in use to
use the cordless handset.
ABC2DEF
3
6
TUV8WXYZ
9
34
Page 37

Receiving a Phone Call
You can also dial by entering the phone
number first and then pre ssing .
Check the number in the display before pressing . If there is a mistake,
HOLD
press to clear the mistake and then enter th e correct digits.
ERASE
TALK
TALK
Note: If a pause is needed between any of the digits to access an outside
FUNCTION
line or a special service, press . The pause will appear as a hyphen (-).
/PAUSE
Receiving a Phone Call
1 When the cordless handset rings, pick it up and press any key (except
) to answer. Talk to the other party.
OFF
OFF
• If the cordless handset is in the ch arger, simply pic k it up to ans w er (y ou do
not need to press a key).
2 When you are ready to end the call, press .
OFF
OFF
Handset
2. Cordless
• You can also end the call by simply placing the cordless handset in the
charger.
Putting a Call on Hold
To put the other party on hold during a call, press . The cordless handset
will beep while the call is on hold. When you are ready to resume the call,
HOLD
press once again. Note that placing the cordless handset in the charger
will not break the connection while a call is on hold, and thus phone charges
may continue to apply.
HOLD
35
Page 38

Receiving a Fax Using the Cordless Handset
36
Page 39

Storing and Using Auto-Dial Numbers
FUNCTION
3 Press .
/PAUSE
ENTER TEL #
4 Enter the number by p ressing the number keys.
(Note: A space cannot be entered.)
• To clear a mistake, press .
HOLD
ERASE
• If a pause is required between any of the digits to access a special service
FUNCTION
or an outside line, press . The pause appears as a hyphen (two
seconds per pause). Several pauses can be entered in a row.
5 Press .
START
/PAUSE
6 Enter a name by pressing number keys for each letter as shown in the
chart below. Up to 15 characters can be entered. (If you do not wish to
enter a name, go directly to Step 7.)
Example: SHARP = 7777 44 2 777 7
SPACE =
A =
2
B =
C =
D =
3
E =
F =
1
ABC
ABC2ABC
2
ABC2ABC2ABC
2
DEF
DEF3DEF
3
DEF3DEF3DEF
3
G =
H =
I =
J =
K =
L =
M =
GHI
4
GHI4GHI
4
GHI4GHI4GHI
JKL
5
JKL5JKL
5
JKL5JKL5JKL
MNO
6
N =
O =
P =
4
Q =
R =
5
S =
T =
MNO
MNO
6
6
MNO6MNO
MNO
6
7
8
6
PQRS
PQRS7PQRS
7
PQRS7PQRS7PQRS
7
PQRS7PQRS7PQRS7PQRS
TUV
TUV8TUV
U =
V =
W =
X =
Y =
Z =
7
8
TUV
TUV8TUV
8
9
8
WXYZ
WXYZ9WXYZ
9
WXYZ9WXYZ9WXYZ
9
WXYZ9WXYZ9WXYZ9WXYZ
9
Handset
2. Cordless
♦ To enter two letters in succession that require the same key, press
after entering the first letter.
♦ To clear a mistake, press .
HOLD
ERASE
37
Page 40

Storing and Using Auto-Dial Numbers
♦ To enter a lower case letter , co ntin ue press ing the k e y for the letter until the
lower case letter appe ars.
♦ To enter one of the following symbols, press or repeatedly:
. / ! " # $ % & ’ ( ) + + , - : ; < = > ? @ [ ¥ ] ^ _ ' { | }
) (
7 Press .
8 Return to Step 2 to store another number, or press to exit.
START
SELECT SEARCH
▲: COMMON
▼: PRIVATE
OFF
OFF
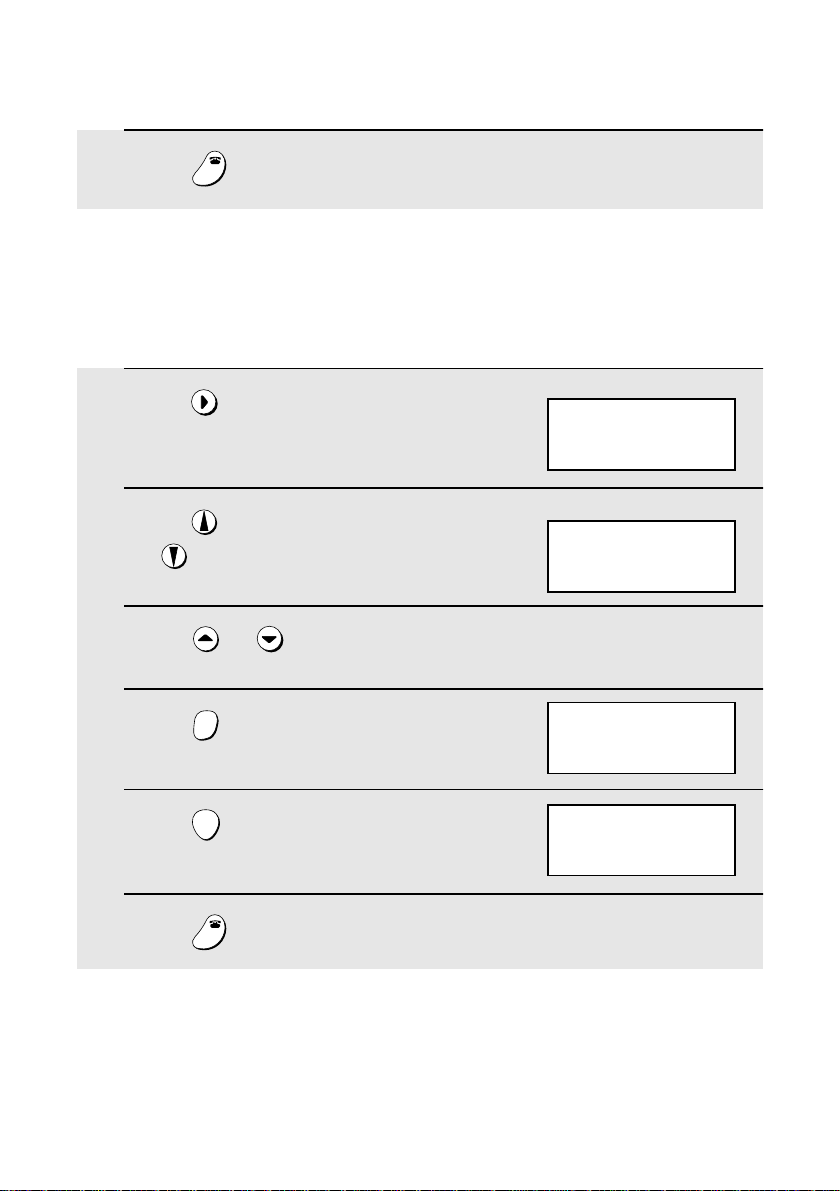
Dialing an auto-dial number
1 Press once.
SEARCH
2 Press to select the Common book,
or to select the Private book.
Cordless handset display:
SELECT SEARCH
▲: COMMON
▼: PRIVATE
Example: Common book selected
COMMON DIAL
▲▼: SEARCH
FUNCTION: ENTRY
3 Press or until the number you wish to dial appears in the
display.
4 Press .
TALK
• The number is automatically diale d.
38
Page 41

Storing and Using Auto-Dial Numbers
Editing an auto-dial number
If you need to make changes to a previously stored auto-dial number, follow
these steps:
Cordless handset display:
1 Press once.
SEARCH
SELECT SEARCH
▲: COMMON
▼: PRIVATE
Handset
2. Cordless
2 Press to select the Common book,
or to select the Private book.
Example: Common book selected
COMMON DIAL
▲▼: SEARCH
FUNCTION: ENTRY
3 Press or until the number you wish to edit appears in the
display.
FUNCTION
4 Press once.
/PAUSE
5 Press the number keys to enter the new number.
• To clear a mistake, press . If a pause is required between any of the
digits to access a special service or an outside line, press .
• If you do not wish to change the number, go directly to Step 6.
6 Press .
START
HOLD
ERASE
FUNCTION
/PAUSE
7 Press the number keys to enter the new name (see Step 6 on page 37 ).
• If you do not wish to change the name, go directly to Step 8.
8 Press .
START
SELECT SEARCH
▲: COMMON
▼: PRIVATE
39
Page 42
Storing and Using Auto-Dial Numbers
9 Press to exit.
OFF
OFF
Clearing an auto-dial number
If you need to clear an auto-dial num ber, follow these steps:
1 Press once.
SEARCH
2 Press to select the Common book,
or to select the Private book.
Cordless handset display:
SELECT SEARCH
▲: COMMON
▼: PRIVATE
Example: Common book selected
COMMON DIAL
▲▼: SEARCH
FUNCTION: ENTRY
3 Press or until the number you wish to clear appears in the
display.
4 Press .
HOLD
ERASE
ERASE?
PRESS START KEY
5 Press .
6 Press to exit.
START
OFF
OFF
40
SELECT SEARCH
▲: COMMON
▼: PRIVATE
Page 43
Redial
You can automatically redial the last number dialed on the cordless handset.
Note: The fax machin e and cord less handse ts each retain the ir own s epara te
redial numbers. Note that the cordless handset redial numbers will be lost if
the fax machine is unplugged or an interruption occurs in the power supply.
1 Press .
• Check the display to mak e sure the n umb er that appears is the n umber y ou
REDIAL
Redial
Handset
2. Cordless
wish to dial. (If the wrong number appears, press to clear it.)
2 Press . The number is automatically dialed.
Note: You can also redial by pre ssing first and then . Note that th is
method does not allow you to check the number before dialing begins.
TALK
TALK
OFF
OFF
REDIAL
Using the Intercom Feature
You can use the fax
machine and cordle ss
handsets as an
intercom system.
♦ When using the Intercom feature, you will not hear your voice through the
handset receiver when you speak.
♦ It ma y not be poss ib le t o p age a nother co rdless han dset o r t he f a x ma chi ne
when other cordless handsets or the fax machine are already in use.
Paging the fax machine from a cordless handset
1 Press on the cordless handset.
INTER
COM
The numbers and names of the other cordless
handsets appear (even the numbers of cordless
handsets that are not registered)
Cordless handset
display example:
2: BILL
3: SUE
4:
41
Page 44

Using the Intercom Feature
2 Press on the cordless handset to
select the fax machine.
0
Cordless handset display:
INTERCOM
0: BASE STAT ION
3 The fax machine rings.
Number and name
of calling handset
Fax machine display:
INTERCOM
1: BOB
4 The other person picks up the fax machine handset to answer.
5 Talk wi th the other person. When you are read y to e nd the conversation,
press .
Paging a cordless handset from another cordless handset
(walkie-talkie feature)
The cordless handsets can be used for walkie-talkie like communication The
talking range of the cordless handsets is ???? ft. (??? m), and there is no
need to be in the talking range of the fax machine.
1 Press on the cordless handset.
OFF
OFF
INTER
COM
The numbers and names of the other cordless
handsets appear (even the numbers of cordless
handsets that are not registered)
Cordless handset
display example:
2: BILL
3: SUE
4:
2 Enter the number of the cordless
handset that you wish to page.
Example:
• To page all cordless handsets and the fax machine, press .
42
ABC
2
INTERCOM
2: BILL
Page 45

Using the Intercom Feature
3 The selected cordless handset rings.
Number and name
of calling handset
4 The other person presses any key (exce pt ) on the cordless
handset to answer.
Display of paged handset:
INTERCOM
1: BOB
OFF
OFF
5 Talk wi th the other person. When you are read y to e nd the conversation,
press .
Paging a cordless handset from the fax machine
(cordless handset locator)
You can use this procedure to page a cordless hand set, or locat e a handset in
the event that you misplace it.
OFF
OFF
1 Pick up the fax machine handset.
2 Press on the fax machine, and
enter the number of the cordless
handset that you wish to page.
INTERCOM
Fax machine display:
INTERCOM
Handset
2. Cordless
Example:
3
3: SUE
• To page all of the cordless handsets, press .
Display of selected
3 The selected cordless handset rings.
• This allows you to locate the cordless
handset if you h ave misplaced it.
4 The other person presses any key (exce pt ) on the cordless
handset to answer.
cordless handset:
INTERCOM
0: BASE STAT ION
OFF
OFF
43
Page 46
Transferring Calls
5 Talk wi th the other person. When you are read y to e nd the conversation,
replace the handset.
If a call comes in while the Intercom feature is being used
If an outside call comes in while you are using the Intercom feature, the
person who wishes to take the call should first stop the Intercom call (press
on the cordless handset or replace the fax machine handset), and then
OFF
OFF
answer the outside call (press any key except on the cordless handset
or pick up the fax machine handset).
OFF
OFF
Transferring Calls
You can transfer a call to the fax machine or to a cordless handset.
Note: It is not possible to talk to the recipient of a transfer call before
transferring.
Transferring a call from a cordless handset to the fax
machine or to another cordless handset
1 During the call, press on the
cordless handset.
INTER
COM
• The call is placed on hold.
The numbers and names of the other cordless
handsets appear (even the numbers of
cordless handsets that are not registered)
2 To transfer the call to the fax machine,
press .
To transfer the call to a cordless
handset, enter the number of the
handset.
• To page the fax machine and all
0
cordless handsets, press
Cordless handset
display example:
2: BILL
3: SUE
4:
CALL TRANSFER
CALL TRANSFER
The fax machine and cordless
handsets all show the above
message, regardless of which
is selected.
44
Page 47
Transferring Calls
3 The selected cordless handset or fax machine rings.
4 The other person answers on the cordless handset or fax machine.
• To ans wer on a co rdless ha ndset other tha n th e selecte d cordl ess h andse t,
press on that cordless handset. To answer on the fax machine when
not selected, pick up the fax machine handset.
TALK
• If nobody answers for one minute when you page the cordless handset or
fax machine, your cordless handset will ring to alert you. Press to
return to the initial caller. (Note that if yo u tak e no ac tion afte r y our cordles s
handset r ings, the initial caller will be disconn ected.)
TALK
Transferring a call from the fax machine to a cordless
handset
1 During the call, press on the
fax machine.
INTERCOM
• The call is placed on hold.
Fax machine display:
PRESS HANDSET #
This message alternates with
the numbers and names of
the cordless handsets
Handset
2. Cordless
2 Enter the number of the cordless
handset to which you wish to transfer
the call.
Example: .
• To page all of the cordless handsets,
press .
3
Fax machine display:
REPLACE HANDSET
45
Page 48

Transferring Calls
3 Repl ace the fax m achine handse t. The
selected cordless handset rings.
4 The other person presses any key (exce pt ) on the cordless
Fax machine display:
CALL TRANSFER
Displays of all
cordless handsets
CALL TRANSFER
OFF
OFF
handset to answer.
• To ans wer on a co rdless ha ndset other tha n th e selecte d cordl ess h andse t,
press on the other cordless handset.
TALK
• If no one answer s for one minut e whe n you page the cordle ss han ds et, th e
fax mach ine wil l ring to ale rt you. Pic k up the fax machine h andse t to return
to the initial caller. (Note that if you take no action after the fax machine
rings, the initial caller will be disconnected.)
Note: When a cordless handset is paged, it will continue ringing until the
paging is answered, even if is pressed on the cordless handset or the
cordless ha ndset is placed in the charger.
OFF
OFF
Changing the reception mode on the fax machine
REMOTE
1 Press .
2 Press until the desired reception
/FLASH
JKL
5
RECEPTION
mode appears in the display.
REMOTE
3 Press or to exit REMOTE MODE.
/FLASH
OFF
OFF
46
Cordless handset display:
REMOTE MODE
Example: FAX mode
RECEPTION
FAX
Page 49

3. Using the Answering System
The answering system allows you to receive both voice messages and faxes
while you are out.
Machine
3. Answering
47
Page 50

Recording an Outgoing Message
Recording an Outgoing Message
The outgoing message (OGM) is the greeting that the system plays after
answering a call to i nf orm callers that the y can le av e a me ssage or s end a f ax.
Follow the steps below to record an outgoing message for the general box,
and an outgoing message for each personal box that you wish to use.
Example of general outgoing message:
“Hello. You've reac hed _____ _ . No one is a v ailab le to ta ke y our ca ll right no w .
If you would like to leave a general message, please speak after the beep. If
you would like to leave a personal message, press 1 for Sus an, 2 for Bob, 3
for George, or 4 for Ann now. To send a fax, please press your facsimile Start
key now. Thank you for calling.”
Example of personal outgoing message:
“This is Susan’s personal box. Please leave a message after the beep.”
Note: Do not lift the handset until Step 3 below.
REC/
1 Press .
MEMO
2 Press until the message you wish
to record appears in the display.
(“OGM (GENERAL)” for the general
box, “OGM (BOX 1)” for perso nal box 1,
“OGM (BOX 2) for personal box 2, etc.)
Note: MEMO RECORDING is for recording a
memo (page 53), and OGM (TRANSFER) is
for the Transfer function (page 59).
3 Press once.
• (If you have already recorded a
message and wish to check it,
PLAY
press .)
Display:
MEMO RECORDING
MEMO RECORDING
OGM (GENERAL)
OGM (BOX 1)
OGM (BOX 4)
OGM (TRANSFER)
LIFT HANDSET OR
PLAY: PLAYBACK
48
Page 51

4 Lift the handset.
Setting a Passcode for a Personal Box
5 Press and speak into the handset to record the message.
START/MEMORY
• While recording, the display will show the time left to record.
6 When finished, replace the handset or press .
STOP
To listen to an outgoing message
To listen to an outgoing message, follow Steps 1 and 2 of the above
procedure and then press . Note that the general outgoing message
cannot be erased. If you need to change it, simply repeat the recording
procedure.
PLAY
Setting a Passcode for a Personal Box
You can set a 3-digit passcode for each personal box. When this is done, the
passcode must be entered to listen to messages in a personal box at the fax
machine.
(Note: When listening to the messages in a personal box from its
corresponding cordless handset, is not necessary to enter the passcode. )
Machine
3. Answering
1 Press once and once.
FUNCTION
2 Press once and once.
3 Press .
Display:
T.A.D. SETTING
BOX PASSCODE
1=SET, 2=CLEAR
49
Page 52

Operating the Answering System
4 Press to set a passcode.
(To clear a previously set passcode,
press .)
5 Enter the number of the personal box
for which you wish to set a passcode.
Example: for Box 1
(If you are clearing a passcode, enter
the number of the box and go to Step
7.)
1
2
1
ENTER BOX # (1-4)
ENTER PASSCODE
6 Enter a 3-digit number for the passcode. The first digit of the number
must be 0, 5, 6, 7, 8, or 9.
7 Press .
START/MEMORY
8 Return to Step 5 to set another passcode, or press to return to
the date and time display.
ENTER BOX # (1-4)
STOP
Note: If you wish to change a passcode, cle ar th e passcode and then ente r a
new passcode. If you forget a passcode, clear it and enter a new passcode.
Operating the Answering System
Activating the answering system
To turn on the answering system so that callers can leave messages, press
RESOLUTION/
RECEPTION MODE
“Telephone Answering Device”.)
50
until the arrow in the display points to TAD. (TAD stands for
RESOLUTION/
RECEPTION MODE
TEL
FAX
TAD
Page 53

Operating the Answering System
♦ Each outgoing message will play (to stop playback, press ).
STOP
♦ It will not be poss ible to set the recep tion mod e to TAD if a general outgoing
message has not been recorded.
Note: In TAD mode, the machine will automat ica ll y switch to fax reception if it
detects 6 seconds of silen ce after an swering a call. F or thi s reas on , if a cal ler
pauses for this length of time while leaving a message, they will be cut off.
Number of rings in TAD mode (Toll Saver function)
The number of rings on which the machine answers incoming calls in TAD
mode depends on whether the Toll Saver function is turned on, and if it is on,
whether you have messages.
♦ The Toll Saver function is initially turned on.
Toll Saver Toll Saver
No received messages
ON
Received messages
OFF
Machine
3. Answering
NOTHING
4 Rings
Ring
Ring
R
ing
Ring
Hi!
2 Rings
Ring
To turn off the Toll Saver
function, see page 63.
Hello!
Hi!
(Answer according to
R
NUMBER OF RINGS setting)
ing
Ring
Ring
R
ing
Ring
To adjust the
NUMBER OF RINGS
setting, see page 83.
51
Page 54

Operating the Answering System
Listening to received messages (at the fax machine)
When you return, the fax machine display will show the number of messages
recorded in each box. Follow the steps below to listen to your messages.
1 Press .
PLAY
• If you only want to listen to new messages (messages not previously
listened to), continue to hold down for at least two seconds.
PLAY
2 If you wish to listen to the messages in a personal box, press the
number of the box.
Example: for Box 1
1
3 Enter the passcode of the personal box.
Example:
5 5 1
4 The messages will play.
• As each message pla ys, the date and time of record ing will a ppear briefly in
the display. If no messages were received, NO MESSAGES will appear.
• Repeat: To listen to a message a second time, press before
playback of that message ends. To move back to the previous message,
REPEAT
press within 3 seconds of the beginning of the current message.
• Skip: To skip forward to the next message, press .
Note: Playbac k will stop if you receive a call, lift the han ds et, or p res s .
REPEAT
0
SKIP
♦ You can print out a list of your received messages that shows the date and
time that each was received. See page 99.
52
STOP
Page 55

Operating the Answering System
Erasing receiv ed messages
It is important to erase received messages after you listen to them to ensure
that the memory does not become full.
♦ Erasing all messages in the general box: To erase all messages in the
general box, press , , and then .
FUNCTION
DELETE
♦ Erasing all messages in a personal box: To erase all messages in a
START/MEMORY
personal box, press , , enter the number of the box, enter the
passcode, and then press .
♦ Erasing a single message: To erase a single message, press
while the message is being played.
FUNCTION
DELETE
START/MEMORY
DELETE
Recording memos
You can record memos for yourself and other users of the machine. These
are recorded in the general box, and will be played back together with
incoming messages when the key is pressed.
REC/
1 Press once and once.
MEMO
2 Pick up the handset, press , and speak into the handset.
PLAY
START/MEMORY
3 When you have finished speaking, replace the handset or press .
Machine
3. Answering
STOP
53
Page 56

Operating the Answering System
Recording phone conversations
REC/
To record a phone conversation, hold down the key during the
MEMO
conver sa tio n you want to record. Wh en you are finished, rele ase the key. The
conve rsation is recorded in th e gener al bo x, and wil l be pla y ed bac k when t he
PLAY
key is pressed.
Listening to messages from a cordless handset
You can use your cordless handset to listen to messages received in your
personal box (the personal box with the same number as your cordless
handset), or messages received in the general box.
♦ When you have received new messages in your personal box, NEW
MESSAGES appears in your cordless handset display.
REMOTE
1 Press .
/FLASH
2 If you wish to listen to messages in the general box, press .
Cordless handset display:
REMOTE MODE
0
(Otherwise, go directly to Step 3.)
PQRS
3 Press to listen to all messages in the box, or to listen to only
7
PLAY
TUV
8
PLAY NEW
new messages.
4 While listening to your messages, you can do any of the following:
• Repeat: To repeat a message, press .
• Skip: To skip forward, press .
0
SKIP
• Delete: To delete the message you are currently listening to, press .
54
REPEAT
DELETE
Page 57

Operating the Answering System
WXYZ
• Stop: To stop playback, press .
5 To return to the STAND-BY display, press or .
9
STOP
OFF
OFF
REMOTE
/FLASH
• If a call comes in while you are listening to your messages, playback will
stop automatically. Press any key to answer.
• If you take no action for 60 seconds in REMOTE MODE, the cordless
handset will automatically return to the STAND-BY display.
Deleting all messages from a cordless handset
You can use your cordless handset to delete all messages in your personal
box, or all messages in the general box.
Machine
3. Answering
REMOTE
1 Press .
/FLASH
Cordless handset display:
REMOTE MODE
(Note: This step is not necessary if y ou
are already in REMOTE MODE.)
2 If you wish to delete all messages in the general box, press .
0
(Otherwise, go directly to Step 3.)
REMOTE MODE
3 Press .
4 Press to delete the messages, and then or to return to
DELETE
START
DELETE ALL?
PRESS START KEY
REMOTE
OFF
OFF
/FLASH
the STAND-BY display.
REMOTE
WXYZ
• To cancel, press , , or .
9
STOP
OFF
OFF
/FLASH
55
Page 58
Optional Answering System Settings
Optional Answering System Settings
Setting ICM time
Incoming messages (ICMs) are the messages which callers leave for you in
the answering system. The answering system is set at the factory to allow
each caller a maximum of 4 minutes to leave a message. If desired, you can
change this setting to 15, 30, or 60 seconds.
1 Press once and once.
FUNCTION
2 Press once and once.
Display:
T.A.D. SETTING
RECORDING TIME
3 Press .
4 Press a number from 1 to 4 to select the desired ICM recording time.
15 seconds 60 seconds
1
30 seconds 4 minutes
2
5 Press to return to the date and time display.
STOP
Fax reception on TAD failure
If the memory for recording incoming messages becomes full while you are
out, the ans wering syste m w ill no long er be a b le to re cord m ess ages . The ON
TAD FAILURE setting is used to choose the response of the machine to
incoming calls when this happens:
3
4
The display briefly shows
your selection, then:
REMOTE CODE
♦ Automatic fax receptio n NO: The machine will answer after 20 rings, after
which it will wait to receive a remote command. Most callers will hang up
before it answers; however, when you call th e machine from a remote
location, you can wait until it answers, listen to your messages, and then
erase them (see Remote Operations on page 62).
56
Page 59
Optional Answering System Settings
♦ Automatic fax reception YES: The reception mode will switch to F AX mode,
allowing the machine to continue to receive faxes automatically. With this
setting, you can still use the remote commands to listen to your messages
and then erase them (see Remote Operations on page 62).
Automatic f ax rec eption is set to NO at the fact ory before shipping. If y ou want
to set it to YES, press the panel keys as follows:
1 Press once and once.
FUNCTION
2 Press once and 4 times.
3 Press .
4 Press to turn on automatic fax
reception, or to turn it off.
5 Press to return to the date and time display.
1
2
STOP
Display:
T.A.D. SETTING
ON TAD FAILURE
1=YES, 2=NO
The display briefly shows
your selection, then:
OGM ONLY MODE
OGM only mode
If needed, y ou ca n turn off re cordin g of i ncom ing m essages . I n this cas e, y our
outgoing message will play, but callers will not be able to leave a message
(this applies to all boxes). The machine will still receive faxes sent by
automatic dialing.
Machine
3. Answering
1 Press once and once.
FUNCTION
2 Press once and 3 times.
Display:
T.A.D. SETTING
OGM ONLY MODE
57
Page 60

Optional Answering System Settings
3 Press .
4 Press to turn on OGM only mode,
or to turn it off.
5 Press to return to the date and time display.
1
2
STOP
1=YES, 2=NO
The display briefly shows
your selection, then:
CPC DETECTION
CPC Detecti o n
When a caller hangs up, the central telephone exchange issues a CPC
(Calling P arty Control) signal . When the ans w ering syst em detects this signal,
it stops recording so that periods of silence are not recorded.
However, if you subscribe to special services such as Call Waiting or Call
Forwarding, signals used by these services may be mistaken for a CPC
signal, causing the answering system to hang up during a call. If you
experience this problem, follow these steps to turn off CPC Detection.
1 Press once and once.
FUNCTION
Display:
T.A.D. SETTING
2 Press once and twice.
3 Press .
4 Press to turn on CPC Detection,
or to turn it off.
5 Press to return to the date and time display.
58
1
2
STOP
CPC DETECTION
1=YES, 2=NO
The display briefly shows
your selection, then:
BOX PASSCODE#
Page 61

Transfer Function
Transfer Function
The Transfer function is used to have the machine automatically call you at a
specified number every time it receives an incoming message in a specified
box. This lets you hear your messages immediately after they come in, even
when you are at a remote location.
To use the Transfer fu nct ion , you must first prog ram the number tha t you wish
the machine to call (the transfer number), and record the transfer message
that plays when you answer the phone at the remote location.
When you go out and wish to use the transfer function, turn it on. When you
return and no longer wish to use the transfer function, turn it off.
Programming the transfer number
To use the Transfer function, you must first give the machine the number to
call (the transfer number).
Machine
3. Answering
1 Press once and once.
FUNCTION
2 Press once and 3 times.
3 Press .
Display:
T.A.D. SETTING
TRANSFER TEL #
ENTER TEL #
4 Pres s the number keys to enter the transfer number.
• To insert a pause between any two digits of the number, press .
5 Press .
6 Press to return to the date and time display.
START/MEMORY
STOP
FUNCTION
59
Page 62

Transfer Function
Recording the transf er mes sage
The transf er mes sage p la ys when y ou a ns w er th e telep hone , and i nf orms y ou
that the call is a transfer call. The following is an example:
“Hello. This is a transfer call for (YOUR NAME). Enter your remote code
number now.”
Note: Do not lift the handset until Step 3 below.
REC/
1 Press once and once.
MEMO
Display:
OGM (TRANSFER)
2 Press once.
• If you hav e already record ed a me ssage , y ou can pre ss to listen to the
message, or press to delete the message.
DELETE
PLAY
3 Lift the handset.
4 Press and speak into the handset to record the message.
5 When finished, replace the handset or press .
START/MEMORY
• The transfer message can be up to 15 seconds long. While recording, the
display will show the time left to record.
STOP
Checking or erasing the tran sfer message
To check or erase the transfer message, follow Steps 1 and 2 of the above
procedure, and then press to check the message , or to erase the
message.
60
PLAY
DELETE
Page 63
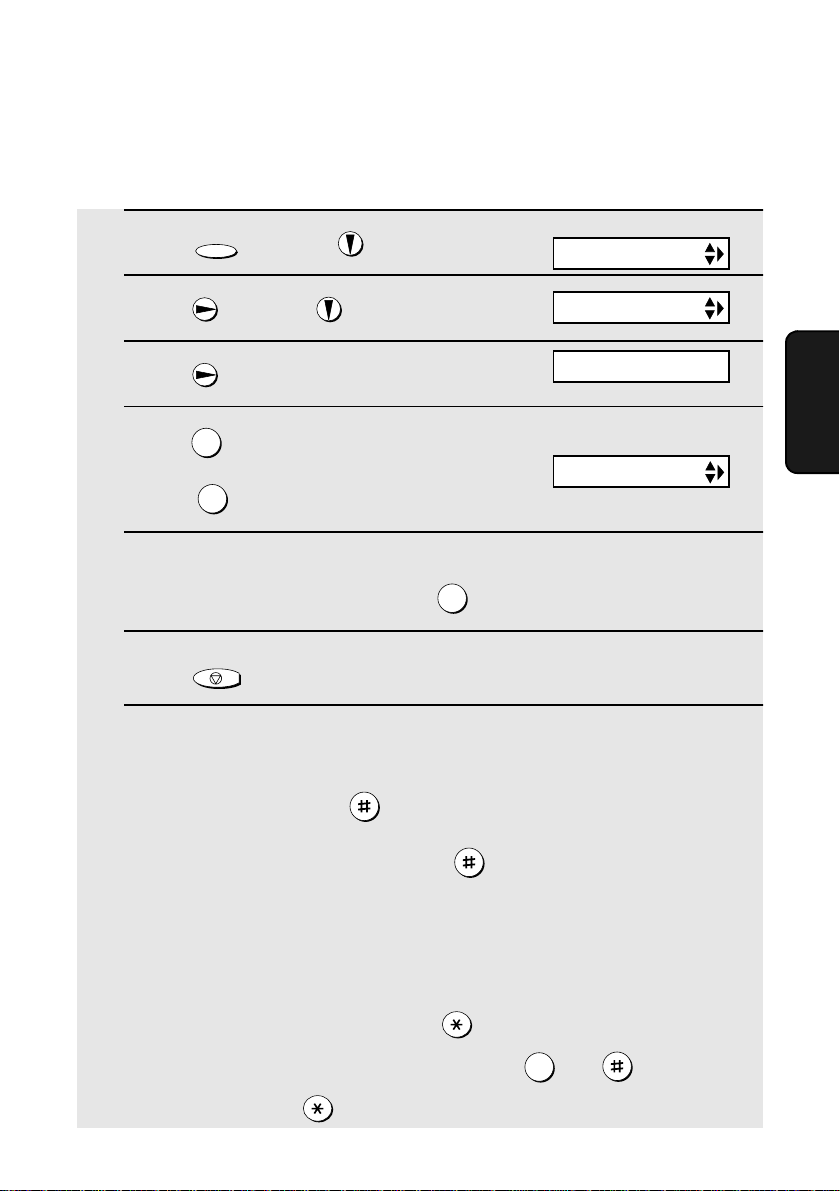
Turning the Transfer function on and off
When you go out and wish to use the Transfer function, turn it on as follows:
Transfer Function
1 Press once and once.
FUNCTION
2 Press once and 4 times.
3 Press .
4 Press to turn on the Transfer
function.
(Press to turn the function off.)
1
2
Display:
T.A.D. SETTING
TRANSFER FU NC
1=YES, 2=NO
The display briefly shows
your selection, then:
ON TAD FAILURE
5 Press the number of the bo x f o r whic h you want the Transfer function to
operate (for the general box, press ).
6 Press to return to the date and time display.
STOP
0
7 Each time the machine receives an incoming message, it will call your
programmed transfer number. When you answer, you will hear your
recorded message telling you that the call is a transfer call. On the dial
pad of your phone, enter , your remote code n umber (see page 62 ) if
the general box wa s s ele cted in Step 5, or the box passcode number if a
personal box was selected, and then . Your messages will play.
Machine
3. Answering
• You can also perform any of the remote operations described in Remote
Operations later in this chapter (see page 62).
Note: When you hang up after a transfer call, the machine will not
immediately resum e normal oper ation. If you want the mach ine to acce pt calls
immediately after a transfer call, enter twice before hanging up (if
hanging up during message playback, first enter and to stop
playback, then enter twice).
0
61
Page 64

Remote Operations
Remote Operations
When you are out, you can call the machine from any touch-tone telephone
and play back your mes sa ges us in g th e re mo te c om m and s . You can also use
these commands to change the reception mode and other settings.
Remote code number
After calling the machine, you must enter your remote code number to listen
to messages in the general box, or to messages in a personal box that does
not have a passcode.
The remote code number has been set to "001" at the factory. To change the
number, follow the steps below.
1 Press once and once.
FUNCTION
2 Press once and twice.
Display:
T.A.D. SETTING
REMOTE CODE
3 Press .
4 Press the number keys to enter a 3-digit remote code numb er.
5 Press to store the remote
6 Press to return to the date and time display.
START/MEMORY
number.
STOP
TRANSFER TEL #
62
Page 65

Remote Operations
Toll Saver
When you call th e m ac hin e to li ste n to your messag es, it will ans w er a fte r two
rings if it has received at least one message in any of the boxes, or after four
rings if it has not received any messages.
Machine
3. Answering
63
Page 66

Remote Operations
Retrieving your messages
Note: You can only access one box per call. If you wish to access more than
one box, you must make a separate call for each box.
1 Call the machine from a touch-tone telephone. When the general
outgoing message begins, press on the telephone.
• You will hear a short beep, and the outgoing message will stop.
2 If you wish to listen to the messa ges in a per sonal bo x, en ter the numb er
of that box (otherwise, go directly to Step 3).
Example: for Box 1
1
3 If you are accessing the general box, enter your remote code.
If you are acces sing a per sonal bo x, enter the passc ode of the bo x (if th e
box does not have a passcode, enter your remote code).
When finished, press .
• You will hear a series of beeps equal to the number of messages recorded
in the box, or one long beep if four or more messages have been received.
The machine will the n pl ay back t he mes sa ges, beeping once at th e e nd o f
each message . When all me ssage s h a v e been pla y ed bac k, y o u will hear a
long beep.
• If no messages have been received, you will hear a short beep. You can
either hang up, or perform any of the operations described in the following
section, O ther remote operations.
64
Page 67

Remote Operations
4 While the messages are playing, you can do any of the following:
• Repeat: To listen to a m essage a secon d time , pre ss and on the
telephone before that message ends. To move back to the previous
message, press and during the first 3 seconds of the current
message.
2
• Skip forward: To skip forward to the next message, press and
on the telephone.
• Stop: To stop playback, press and on the telephone. After this,
you can enter any of the commands described in the following section,
Other remote operations.
0
2
5
• Play new messages: To listen to only your new messages, first stop
playback by pressing and , and then press and .
0 6
• Erase a message: To erase the message you are currently listening to,
press and before it ends.
3
5 When you have finished listening to your messages, you can do any of
the following:
• Erase all messages: Press , , and .
3 3
Machine
3. Answering
• Repeat playback: Press and .
7
• Perform other operations: You can enter any of t he comma nds de scribed
in the following section, Other remote operatio ns.
• Hang up: If you do not erase your messages first, they will be saved and
any new messages will be recorded after them. If you want the machine to
resume normal operation immediately, press twice before hanging up
(in some cases, particularly when the Transfer function is used, the
machine may not accept ne w call s fo r one or two m inutes after you hang up
unless you press twice).
65
Page 68

Remote Operations
Note: You can also call the machin e a nd perform remote opera tions when the
reception mode is set to FAX. In this case, when you call the machine, press
immediately after it answers (before you hear the fax tone), and then
continue from Step 2 above.
Comments:
♦ When a remote command is accepted by the machine, you will hear one
beep. If an incorrect command is entered, you will hear four beeps. In the
latter case, re-enter the correct command.
♦ When entering a comm and, do no t pause lo nger tha n 10 seco nds bet ween
each digit. If you do, you will hear a 4-beep error signal and the digits
entered up to that point will be cleared. In this case, re-enter the command
from the beginning.
♦ If you pause for longer than 10 seconds before entering a command, or
make two errors while entering your remote code number, the line will be
disconnected. (This prevents unauthorized people from attempting to
guess your remote code number.)
Other remote operations
After listening to your messages, you can perform any of the following
operations by pressing the appropriate keys on the telephone.
Note: The foll o w in g co mm an ds can not be entered while mess age s are being
played back. If you do not want to wait until playback ends to enter a
command, first stop playback by pressing and , and then enter the
command.
0
Changing the fax reception mode
Select a new reception mode by pressing the keys as follows:
♦ TAD mode: , , and .
♦ FAX mode: , , and .
♦ TEL mode: , , and .
66
Page 69

Remote Operations
Recording a new outgoing message
Note: You can only record a new outgoi ng mess age for the box y ou acc essed
at the beginning of the call.
1 Press and on the telephone.
4
2 When you hear a short beep, speak into the telepho ne to rec ord the ne w
message.
• The message can be up to 15 seconds long. After 15 seconds (or earlier if
the machine detects silence after you finish speaking), you will hear a
beep, and the new message will be played back.
Turning the Transfer function on or off
To turn Transfer on: Press , , and on the telephone, followed
by the number of the box for which you want the Transfer function to operate
(press for the general box) and .
To turn Transfer off: Press , , and on the telephone.
0
Changing the transfer telephone number
9 1
9
2
Machine
3. Answering
1 Press , , and on the telephone.
9 0
2 After you hear a short beep, enter the new telephone number. When
finished, press .
• To insert a pause between any two digits of the number, press .
67
Page 70

Remote Operations
Recording a new transfer message
1 Press , , and on the telephone.
9 3
2 When you hear a short beep, speak into the telepho ne to rec ord the ne w
message.
• The time for the transfer message is fixed at 15 seconds. After 15 seconds
(or earlier if the machine detects silence after you finish speaking), you will
hear a beep, and the new message will be played back automatically.
Recording a memo
You can record a memo for y ourself or other user s of th e mach ine . Th e mem o
will be recorded in the general box.
1 Press and on the telephone.
2 When you hear a short beep, speak into the telephone to record the
memo.
3 When you are finished, press and on the telephone.
• If the machine detects silence, it will stop recording automatically.
0
OGM only mode
To turn on OGM only mode: Press , , and on the telephone.
(Outgoing messages will play, but callers will not be able to record a
message. Faxes sent by automatic dialling will be received)
To turn off OGM only mode: Press , , and on the telephone.
68
1 1
1
2
Page 71

4. Sending Faxes
Transmittable Documents
Size and weight
The size and weight of documents that you can load in the document feeder
depend on whether you load one page at a time or several pages at once.
Loading one page at a time:
Minimum size
5.8"
(148 mm)
5.5"
(140 mm)
Maximum size
8.5"
(216 mm)
23.6"
(600 mm)
Minimum weight Maximum weight
14 lbs.
(52 g/m² )
42 lbs.
(157 g/m²)
Loading up to 10 pages at once:
Minimum size Maximum size
5.8"
(148 mm)
5.5"
(140 mm)
8.5"
(216 mm)
Minimum weight Maximum weight
14 lbs.
(52 g/m² )
21.5 lbs.
(80 g/m²)
Note: Letters or graphics on the edges of a document will not be scanned.
0.2"(5 mm)
Letters in the
shaded area wil l
not be scanned.
11"
(279 mm)
Faxes
4. Sending
0.16"(4 mm)
0.2"(5 mm)
0.16"(4 mm)
The illustration shows the
scanning margins for lettersize document s. The scan ning
width is 8.3” (210 mm). The
horizontal margins decrease
for smaller-width documents.
69
Page 72

Loading the Document
Other restrictions
♦ The scanner cannot recognize yellow, greenish yellow, or light blue ink.
♦ Ink, glue, and correcting fluid on documents must be dry before they pass
through the document feeder.
♦ All clips, s taples, an d pins must be remov ed from docum ents bef ore loading
in the feeder. If these are not removed, they may damage the machine.
♦ Documents which a re pa tched , taped, torn, smal ler than the mi nim um si ze ,
carbon backed, easily smudged, or have a slick coated surface should be
photocopied, and the copy loaded in the feeder.
Loading the Document
Up to 10 pages can be placed in the feeder at one time. The pages will
automatically feed into the machine starting from the bottom page.
♦ If you ne ed to send or cop y mor e than 10 pa ges, pl ace the addi tional page s
gently and carefully in the feeder just before the last page is scanned. Do
not try to force them in, as this may cause double-feeding or jamming.
♦ If your document consists of several large or thick pages which must be
loaded one at a tim e, i nsert each page i nto the f eeder as t he pre v ious page
is being scanned. Insert gently to prevent double-feeding.
1 Adjust the document guides to the
width of your document.
2 Insert the document face down in the
document feeder. The top edge of the
document should enter the feeder first.
• READY TO SEND will appear in the
display.
70
Page 73

Adjusting the Resolution and Contrast
3 Adjust the resolution and/or contrast settings as explained in
Resolution and Contrast below, then dial the receiving machine as
explained on page 72.
Adjusting the Resolution and Contrast
If desired, you can adjust the resolution and contrast before sending a
document.
The default resolution
setting is STANDARD
and the def ault contra st
setting is AUTO.
Note: The resolution and contrast setti ngs are only effective for sending a
document. They are not effective for receiving a docum ent .
You must adjust the
settings each time
you don’t wa nt to use
the default settings.
Resolution settings
STANDARD Use STANDARD for ordinary documents. This
FINE Use FINE f or documents containing sm all letters
SUPER FINE Use SUPER FINE for documents containing
HALF TONE Use HALF TONE for photographs and
setting gives you the fastest and most
economical trans mi ss io n.
or fine drawings.
very small letters or very fine drawings.
illustrations. The original will be reproduced in
64 shades of gray.
Faxes
4. Sending
71
Page 74
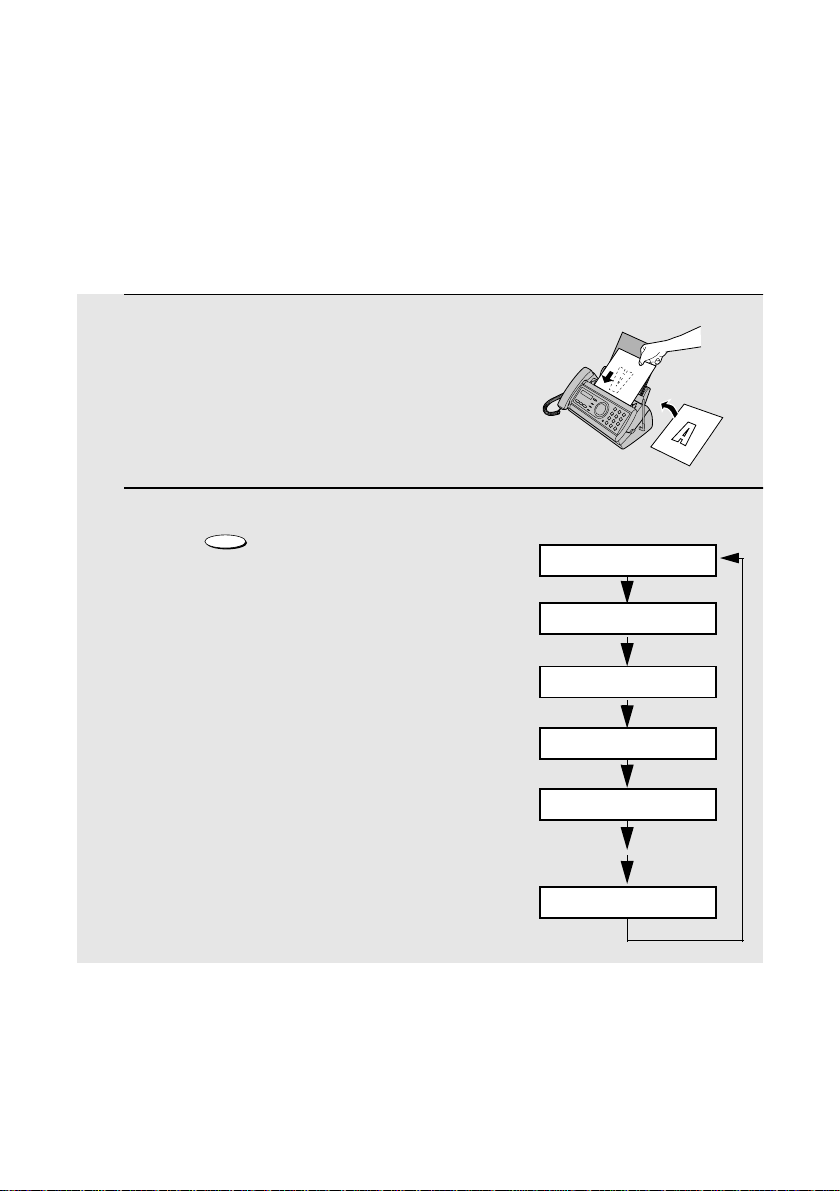
Adjusting the Resolution and Contrast
Contrast settings
AUTO Use AUTO for normal documents.
DARK Use DARK for faint documents.
1 Load the document(s).
• The document must be loaded before
the resolution and contrast can be
adjusted.
RESOLUTION/
2 Press one or more times until
RECEPTION MODE
the desired resolution and contrast
settings appear in the display.
• The first time you move through the list
of resolution settings, the contrast
setting AUTO will appear next to each
resolution settin g. The s econ d time y ou
move through the list, the contrast
setting DARK will appear.
Note: In order to transmit in SUPER FINE resolut i on , the r eceiving fax machine
must also have that resolution. If it doesn’t, your machine will autom atically step
down to the next best available setting.
Display:
STANDARD :AUTO
FINE :AUTO
SUPER FINE :AUTO
HALF TONE :AUTO
STANDARD :DARK
HALF TONE :DARK
72
Page 75

1 Load the document(s).
RESOLUTION/
• If desired, press to set the
resolution and/or contrast.
RECEPTION MODE
Sending a Fax by Normal Dialing
Faxes
4. Sending
2 Pick up the handset or press .
Listen for the dial tone.
SPEAKER
3 Dial the number of the receiving
machine by pressing the number keys.
4 Wait for the connection. Depending on the setting of the receiving
machine, you will either hear a fax tone or the other person will answer.
• If the other party answers, a sk the m to pres s th eir Start ke y (if you pressed
, pick up the handset to speak with them). This causes the receiving
machine to issue a fax tone.
73
Page 76

Sending a Fax by Automatic Dialing
5 When you hear the fax tone, press . Replace the handset.
START/MEMORY
• If the transmission is completed successfully, the fax will beep once.
• If an error occurs, the fax will beep three times and print a Transaction
Report to inform you of the problem (see page 101).
Note: If the transm ission is unsu ccessful and DO CUMENT JAMM ED appears
in the display, remove the document as explained on page 119. (This may
occur if the other fax machine doesn’t respond properly when you attempt to
send the document.)
Sending a Fax by Automatic Dialing
You can store your most frequently dialed fax or phone numbers in the
machine for automatic dialing.
♦ Auto-dial numbers can be stored using either the fax machine or the
cordless handset (to store a number using the cordless handset, see page
36).
♦ Numbers stored using the fax machine are stored in the Common book. A
total of 40 numbers can be stored.
Storing fax and phone numbers for automatic dialing
1 Press once and once.
FUNCTION
2 Press once.
Display:
<NEW NUMBER>
ENTER FAX #
3 Enter the fax or voice number by pressing the number keys.
(Note: A space cannot be entered.)
• To clear a mistake, press .
• If a pause is required between any of the digits to access a special service
or an outside line, press . The pause appears as a hyphen (two
seconds per pause). Several pauses can be entered in a row.
74
SPEAKER
FUNCTION
Page 77
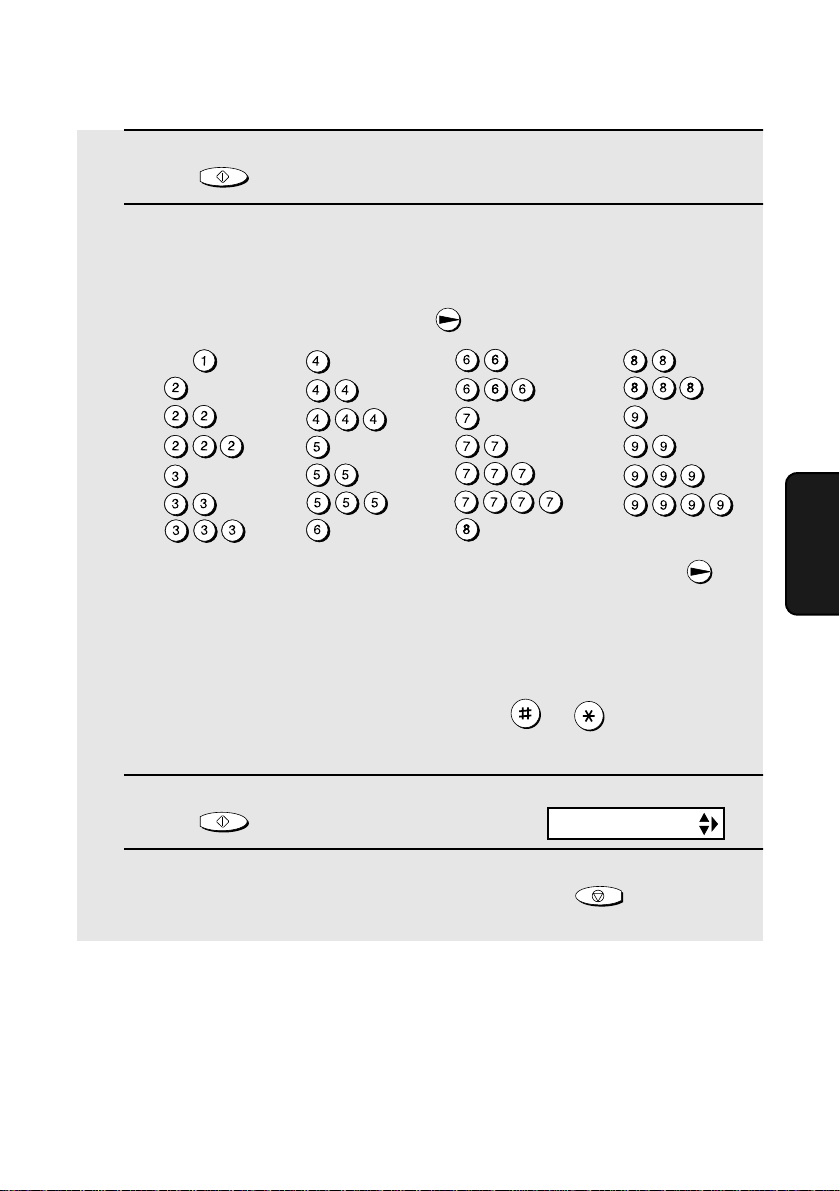
Sending a Fax by Automatic Dialing
4 Press .
START/MEMORY
5 Enter a name by pressing number keys for each letter as shown in the
chart below. Up to 15 characters can be entered. (If you do not wish to
enter a name, go directly to Step 6.)
Example: SHARP = 7777 44 2 777 7
SPACE =
A =
B =
C =
D =
E =
F =
G =
H =
I =
J =
K =
L =
M =
♦ To enter two letters in succession that require the same key, press
after entering the first letter.
♦ To enter a lower case letter , co ntin ue press ing the k e y for the letter until the
lower case letter appe ars.
♦ To enter one of the following symbols, press or repeatedly:
. / ! " # $ % & ’ ( ) + + , - : ; < = > ? @ [ ¥ ] ^ _ ' { | }
N =
O =
P =
Q =
R =
S =
T =
U =
V =
W =
X =
Y =
Z =
) (
Faxes
4. Sending
6 Press .
START/MEMORY
7 Return to Step 2 to store another number, or press to return to
Display:
<NEW NUMBER>
STOP
the date and time display.
Note: The fax machine uses a lithium battery to keep automatic dialing numbers
and other programmed inform ati on in memory when th e power is turned off.
Battery power is consu m ed primarily when th e power is off. With the power kept
continuously off, the life of the battery is ab out 5 years. If the b at te ry dies, have
your dealer or retailer replace it . Do not try to replace it yoursel f.
75
Page 78
Sending a Fax by Automatic Dialing
Editing and clearing auto-dial numbers
If you need to ma ke changes to a previously sto red auto-dial numb er, or clea r
a number , follow these steps:
1 Press once and once.
FUNCTION
2 Press or until the number you wish to edit or clear appears in
the display.
3 Press .
4 Press for EDIT or for CLEAR.
• If you selected CLEAR, go to Step 8.
5 If you selected EDIT, make the desired changes to the number.
• Press or to move the cursor to the digit or digits you wish to
change, and then enter the new digit. The new digit will replace the old
digit.
• If you do not wish to change the number, go directly to Step 6.
6 Press .
7 Make the desired changes to the name.
• Press or to move the cursor to the letter or letters you wish to
change, and then press the appropriate number key repeatedly until the
desired letter appears (see Step 5 on page 75). The new letter will replace
the old letter.
• If you do not wish to change the name, go directly to Step 8.
76
Page 79
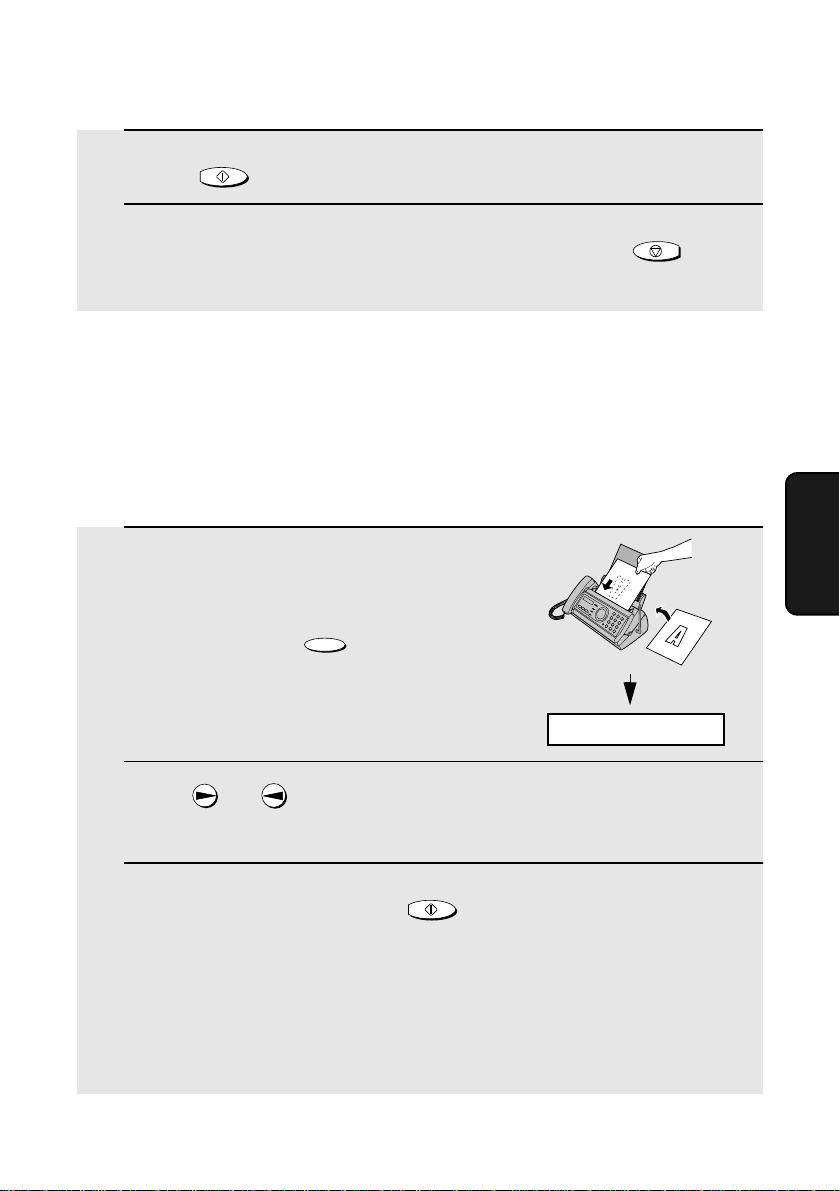
Sending a Fax by Automatic Dialing
8 Press .
9 Return to Step 2 to edit or clear another number, or press to
START/MEMORY
STOP
return to the date and time display.
Using an auto-dial number
Once you have stored a fax or phone number, you can use it to send a fax or
make a phone call.
1 If you are sending a fax, load the
document(s).
RESOLUTION/
• If desired, press to set the
resolution and/or contrast.
RECEPTION MODE
READY TO SEND
Faxes
4. Sending
2 Press (or ) until the name of the other party appears in the
display (if no name was stored, the number will appear).
3 If you are sending a fax, press . Dialing and transmission
begins.
• If the transmission is completed successfully, the fax will beep once.
• If an error occurs, the fax will beep three times and print a Transaction
Report to inform you of the problem (see page 101).
If you are making a phone call, lift the handset. Dialing begins.
START/MEMORY
77
Page 80

Sending a Fax by Automatic Dialing
Sending a fax by Direct Keypad Dialing
Yo u can also enter a full number with the number keys and then press the
START/MEMORY
when you don't need to speak to the other party before faxing.
key to begin dialing. You can use this method to dial a full number
1 Load the document(s).
RESOLUTION/
• If desired, press to set the
resolution and/or contrast.
RECEPTION MODE
READY TO SEND
2 Enter the number of the receiving machine by pressing the number
keys.
• If a pause is required between any of the digits to access a special service
or an outside line, press . The pause will appear as a hyphen (two
seconds per pause). Several pauses can be entered in a row.
FUNCTION
3 Check the display. If the number of the receivi ng machine shown is
correct, press .
• If the number is not correct, press to backspace and clear one digit
at a time, and then re-enter the correct digit(s).
78
START/MEMORY
STOP
Page 81

Sending a Fax by Automatic Dialing
Redial
You can automatically redial the last number dialed on the fax machine. This
procedure can be used to send a fax or make a phone call.
Note: The fax machine and the cordless handset each retain their own
separate redial num ber s .
1 If you are sending a fax, load the
document(s).
RESOLUTION/
• If desired, press to set the
resolution and/or contrast.
RECEPTION MODE
2 Press once. <REDIAL> appears in the display, followed by the last
number dialed. Make sure the number that appears is the number you
wish to dial.
Faxes
4. Sending
3 If you are sending a fax, press . Dialing begins.
If you are making a phone call, lift the handset. Dialing begins.
Note: If a fax transmission is unsuccessful and DOCUMENT JAMMED
appears in the d ispla y, remove the docum ent as e xp lained o n page 11 9. (This
may occur if the other fax machine doesn’t respond properly when you
attempt to send the document.)
START/MEMORY
Automatic redialing
If you use automatic dialing (including Direct Keypad Dialing) to send a fax
and the line is b usy, the fax machine wil l au tom ati ca lly red ial the number. Th e
fax machine w ill mak e three re dial attem pts at inte rvals of fiv e m inutes . During
this time, RECALLING will appear in the display, followed by a two-digit
number assigned to the fax job. You will not be able to dial any other locations
while the message appears.
79
Page 82

Sending a Fax by Automatic Dialing
♦ You can press to clear the message and stop automatic redialing.
STOP
♦ Under certain conditions (for example if a person answers the call on a
telephone), automatic redialing may stop before three redialing attempts
are made.
Error Correction Mode
The fax machine is set to automatically correct any distortions in a
transmission due to noise on the telephone line before printing at the
receiving end. This function is called Error Correction Mode (ECM). ECM is
effective for bo th t ransmissions and re cep t io ns, and is only effectiv e wh en the
other fax machine has ECM as well.
If desired, you can turn ECM off. This will increase slightly the amount of
memory available for memory transmission and reception.
1 Press once and once.
2 Press once and 6 times.
FUNCTION
OPTION SETTING
ECM MODE
3 Press once.
4 Press to select YES, or to
select NO.
5 Press to return to the date and
time display.
1
STOP
80
2
1=YES, 2=NO
The display briefly shows
your selection, then:
DAY LIGHT SAVE
Page 83

Sending a Fax From Memory
Sending a Fax From Memory
You can scan a document into the fax ’s memory and send the docu ment f rom
memory. This increases transmission speed and allows you to send a fax to
multiple des tinations in a s ingle op eration . After transmi ssion, the docu ment is
automatically cleared from memory.
Note: If a power f ai lure occu rs whil e sendin g a f ax f rom memo ry, you will need
to repeat the operation.
Broadcasting (sending a fax to multiple destinations)
This function allows you to send the same fax to as many as 20 different
destinations in just one operation.
♦ When sendin g to mu ltiple d estin ations , only auto-d ial n umb ers c an b e us ed
to dial the numbers of the receiving mac hines.
1 Load the document(s).
RESOLUTION/
• If desired, press to set the
resolution and/or contrast.
2 Press .
START/MEMORY
RECEPTION MODE
3 Press (or ) until the name of the destination appears in the
display (if no name was stored, the number will appear).
4 Press to select the destination.
5 Repeat Steps 3 and 4 for each of the other destinations to which you
wish to send the fax (maximum of 20).
• To check your selected destinations, press to scroll through them. To
delete a destination, scroll to the destination and then press .
STOP
Faxes
4. Sending
81
Page 84

Sending a Fax From Memory
6 When you are ready to begin transmission, press .
START/MEMORY
• A Transaction Report is automatically printed out after Broadcasting is
completed. Check the "Note" column of the report to see if any of the
destinations are marked "Busy" or have a communication error code. If so,
send the document to those destinations again.
Memory transmission
You can also send a fax through memory when sending to a single
destination. This is co n venient when sending to destinations w he re the line is
often busy, as it saves you from waiting to pick up the original document and
frees the feeder for other operations.
To send a fax through memory, load the document, press , and then
dial using one of the following methods:
♦ Press the number keys to enter the fax number and then press .
♦ Press repeatedly to select an auto-dial number and press .
♦ Press once to select the last number dialed and press .
START/MEMORY
START/MEMORY
START/MEMORY
START/MEMORY
If the memory becomes full...
If the memory becomes full while the document is being scanned, MEMORY
IS FULL and SEE MANUAL will alternately appear in the display.
♦ Press if you want to transmi t the page s which hav e be en stor ed up
♦ Press if you want to cancel the entire transmission.
82
START/MEMORY
to that point in memory. The remaining pages will be ejected from the
feeder . Af ter tra nsmission, th e memory will be cle ared and y ou can transmi t
the remaining pages. You will also need to transmit the page which was
being scanned when the memory filled up.
STOP
Page 85

5. Receiving Faxes
Using FAX Mode
RESOLUTION/
RECEPTION MODE
When the reception mode is set to FAX, the fax machine will automatically
answer all calls on four rings and receive incoming faxes.
♦ If you pick up the handset before the machine answers, you can talk to the
other party and/or receive a fax as explained in Using TEL Mode on page
84.
4 rings Fax recepti on
83
Faxes
5. Receiving
Page 86

Using TEL Mode
2 Press once.
3 Press once.
4 Enter the desired number of rings (any
number from 2 to 5).
Example: 3 rings
5 Press to return to the date and time display.
Note: If you are using Distinctive Ring, the fax machine will answer calls after two
rings regar dl ess of the above setti ng.
STOP
3
NUMBER OF RING
ENTER (2 -5) (4)
The display briefly shows
your selection, then:
TRANSACTION
Using TEL Mode
To select TEL mode, press
RESOLUTION/
RECEPTION MODE
the display points to TEL.
RESOLUTION/
RECEPTION MODE
When the reception mode is set to TEL, you must answer all calls by picking
up the fax machine’s handset or an extension phone connected to the same
line.
until the arrow in
TEL
FAX
TAD
84
Page 87

Answering with the fax’s handset
1 When the fax machine rings, pick up
the handset.
Using TEL Mode
2 If you hear a fax tone, wait until the
display shows RECEIVING and then
replace the handset.
Note: If you have set the Fax Signal Receive
setting to NO, press to begin reception.
Beep
RECEIVING
START/MEMORY
3 If the other party first speaks with you
and then wants to send a fax, press
START/MEMORY
the sender presses their Start key.)
after speaking. (Press before
• When RECEIVING appears in the
display, hang up.
Answering on an extension phone connected to the same
line
START/MEMORY
RECEIVING
Faxes
5. Receiving
1 Answer the extension phone when it
rings.
85
Page 88

Optional Reception Settings
2 If you hear a soft fax tone, wait until your fax responds (you will hear
pronounced, high-pitched tones), then hang up.
Beep
Pronounced, high-pitched
tones
3 If the fax doesn't respond, or if the other party first talks to y ou and then
wants to send a fax, set the phone down (do not hang up), walk over to
the fax, lift the fax’s handset, and press .
START/MEMORY
• The above step is neces sary if you have set the F ax Sig nal Receiv e setting
to NO.
Optional Reception Settings
Fax Signal Receive
Your fax will automatically begin reception if you hear a soft fax tone after
answering a call on your fax or an extension phone . If you use a c om pu ter fax
modem to send do cumen ts on t he sam e lin e, y o u m ust turn this functi on off i n
order to prevent your fax from mistakenly attempting to receive documents
from the computer fax modem. Follow the steps below to change the setting.
1 Press once and once.
FUNCTION
2 Press once and 4 times.
3 Press once.
86
Display:
OPTION SETTING
FAX SIGNAL RX
1=YES, 2=NO
Page 89

Optional Reception Settings
4 Press to turn on the function, or
5 Press to return to the date and time display.
1
to turn it off.
2
STOP
The display briefly shows
your selection, then:
CALLER-ID
Reception Ratio
The fax has been set at the factory to automatically reduce the size of
received documents to fit the size of the printing paper. This ensures that data
on the edges of the document are not cut off. If desired, you can turn this
function off and have received documents printed at full size.
♦ If a document is too long to fit on the printing paper, the remainder will be
printed on a second page. In this case, the cut-off point may occur in the
middle of a line.
♦ Automatic reduction may not be possible if the received document is too
large, contains too many fine graphics or images, or is sent at high
resolution. In this case, the remainder of the document will be printed on a
second page.
1 Press once and once.
FUNCTION
Display:
OPTION SETTING
Faxes
5. Receiving
2 Press once and 4 times.
3 Press once.
4 Press to select AUTO, or to
select 100%.
1
2
RECEIVE RATIO
1=AUTO, 2=100%
The display briefly shows
your selection, then:
PRINT CONTRAST
87
Page 90

Substitute Reception to Memory
5 Press to return to the date and time display.
STOP
Substitute Reception to Memory
In situations where printing is not possible, such as when your fax runs out of
paper, the imaging fi lm needs rep lacemen t, or the paper jam s, inco ming f ax es
will be received to memory.
When you hav e received a document in memory, FAX RX IN MEMORY wi ll
appear in the display, alternating with ADD PAPER & PRESS START KEY or
CHECK FILM / CHECK CO VER / CHECK PAPER JAM. When you add p ape r
(and press ), replace the imaging film, or clear the jam, the stored
documents will automatically print out.
♦ If you received documents in memory because the fax ran out of paper, be
sure to add paper which is the same size as the paper previously used. If
not, the document print-out size may not match the size of the printing
paper.
START/MEMORY
88
Page 91

6. Making Copies
Your fax machine ca n also be used to mak e c opies. Single and m ultiple copies
(up to 99 per original) can be made, enabling your fax to double as a
convenience office copier.
1 Load the document(s) face down.
(Maximum of 10 pages.)
RESOLUTION/
• If desired, press to set the
resolution and/or contrast.
(The default resolution setting for
copying is FINE.)
2 If desired, select an enlarge/reduce setting, and/or select the number of
copies per original:
• ENLARGE/REDUCE: Press or until the desired setting appears
in the display. Settings a re 10 0%, 125%, 135%, 5 0%, 73%, 88%, 94%, a nd
AUTO (auto size adjustment to match the size of the paper). The default
setting is 100%.
Example: Press twice
RECEPTION MODE
READY TO SEND
RATIO: 125%
• Number of copies per original: Press the number keys to enter a number
from 1 to 99. The default setting is 1.
Example: Press for five copies
5
3 When you are ready to begin copying, press .
If MEMORY IS FULL appears...
If the memory become s f ull w hil e a doc um en t is being scanned, MEMO RY IS
FULL and SEE MANUAL will alternately appear in the display and the
document will automatical ly feed out. This may hap pen if the resolu tio n is set
to SUPER FINE, or if you selected an enlarge/reduce setting, or if you are
making more than one copy per original. To avoid using memory, use
STANDARD or FINE for the resolution, 100% for the enlarge/reduce setting,
and make only one copy per original.
5
COPY/HELP
89
Copies
6. Making
Page 92

Making Copies
Copy Cut-off
When making a c op y o f a doc ument that is longe r than the prin ting pa per, use
the copy cut-off setting to select whether the remaining part of the document
will be cut off or printed on a second page. The initial setting is YES (cut off
the remainder). To change the setting, follow the steps below.
1 Press once and once.
FUNCTION
Display:
2 Press once and once.
3 Press once.
4 Press to set copy cut-off to YES
(the remaining part of the document
will not be printed), or to set copy
cut-off to NO (the remaining part will
be printed on a second page).
5 Press to return to the date and time display.
1
2
STOP
The display briefly shows
your selection, then:
OPTION SETTING
COPY CUT-OFF
1=YES, 2=NO
NUMBER OF RING
90
Page 93

7. Special Functions
Caller ID (Requires Subscription to Service)
If you subscribe to a caller identific ati on service from your telephone
company, you can hav e the fax mac hin e and the cordless handset display the
name and number of the caller when you receive a call.
Important:
♦ To use this function, you must subscribe to a caller identification service
from your telephone company. Note that your fax may not be compatible
with some caller identification services.
♦ Area Code mode: This step is needed if your telephone exchange cannot
dial a local phone number (within your calling area code) when the area
code is dialed with the phone number (see Step 5).
1 Press once and once on
FUNCTION
the fax machine.
2 Press once and 5 times.
3 Press once.
4 Press (YES) to turn on Caller ID.
(T o turn off Calle r ID, p ress and go
to Step 8.)
5 Press to select SET.
(To clear a previously set area code,
press and go to Step 8.)
Note: Entering your area code in this step causes it to be automatically removed
from local numbers in the Caller ID list (page 93). This is only required if you need
to eliminate dialing of the area code when dialing a local numb er from t he l ist .
Example (using the area code “123”): If Step 5 is skipped, the Caller I D display will
show 123-444-1234, and the number that will dial from the Caller ID list is 123444-1234. If the area code 123 is entered in Step 5, the Caller ID displa y will sho w
444-1234, and the number that will dial from the Caller ID list is 444-1234.
1
2
1
2
Display:
OPTION SETTING
CALLER-ID
1=YES, 2=NO
AREA CODE # MODE
1=SET, 2=CLEAR
ENTER AREA CODE
7. Special
Functions
91
Page 94
Caller ID (Requires Subscription to Service)
6 Enter the three digits of your area code.
7 Press to store your area code.
8 Press to return to the date and time display.
START/MEMORY
STOP
ECM MODE
How Caller ID operates
When you receiv e a call , the name an d phone nu mber of the calle r will app ear
in the fax mac hine displ a y an d co rdless hand set disp la y, beginning just before
the second ring. The information will continue to be displayed until the line is
disconnected.
Display example (fax machine display)
JOHN DOE 525-8693
Caller’s name Caller’s number
Note: Some caller ID services may not provide the name of the caller. In this case,
only the phone number will appear.
Display messages
One of the following messages will appear while the fax rings if caller
information is not available.
NO SERVICE No caller information was receive d from your t elephone
CALLER-ID ERROR Noise on the telephone line prevented reception of
OUT OF AREA The call was made from an area which doe s not ha v e a
PRIVATE CALL Caller information was not provided by the telephone
company. Make sure that the telephone company has
activated your service.
caller information.
caller identificati on se rvice, or th e cal ler’s service is not
compatible with that of your local phone company.
company at the caller’s request.
92
Page 95
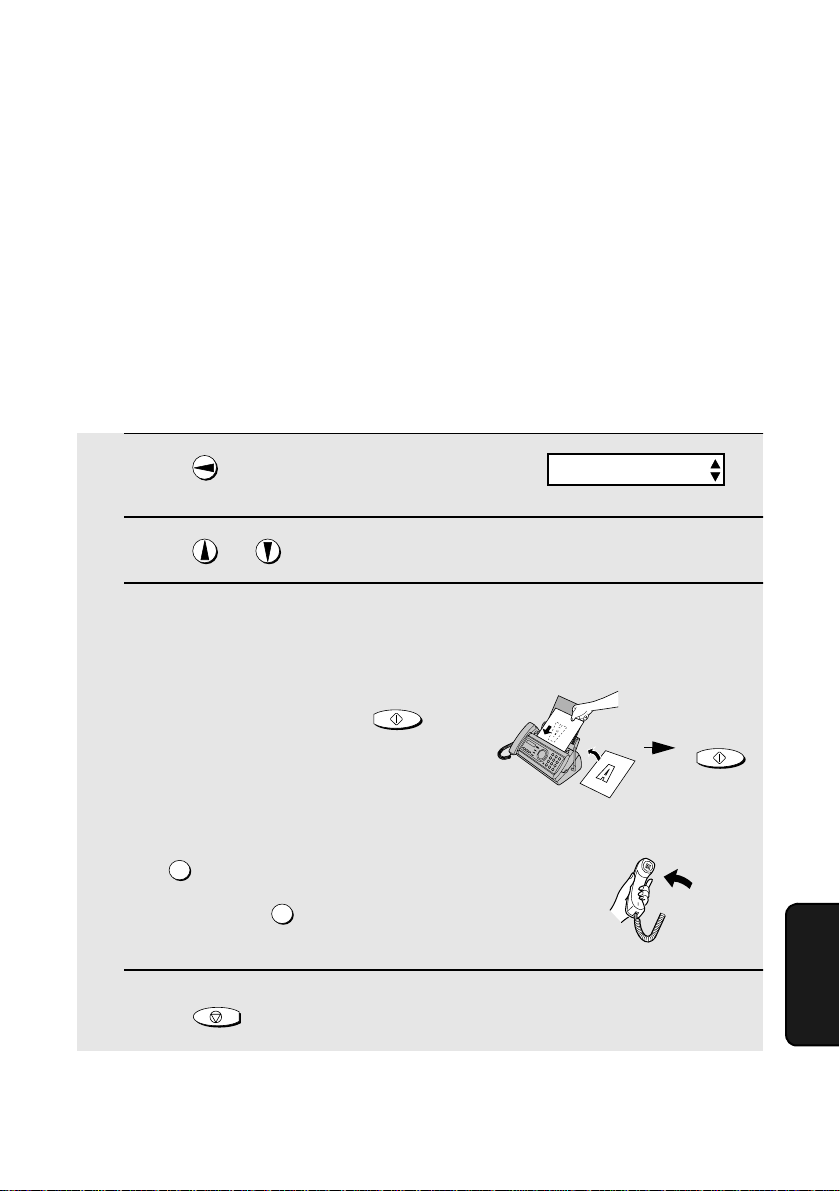
Caller ID (Requires Subscription to Service)
Viewing the Caller ID list
If you subscribe to a Caller ID service and have turned on the Caller ID
function, your fax machine will keep information on the most recent 30 calls
and faxes you have received. You can view this inf ormation, which consists o f
the name and number of each caller, in the Caller ID List.
♦ After you have received 30 calls, each new call will delete the oldest call.
♦ All calls will be erased if you unplug the fax or a power failure occurs.
Follow the steps below to view the Caller ID List in the fax machine display. If
desired, you can immediately dial a number when it appears.
1 Press twice.
<REVIEW CALLS>
2 Press or to scroll through the list.
3 If you wish to dial one of the numbers in the list, scroll through the list
until the number appears in the display.
• Fax: If you wish to send a fax, load the
document and then press .
Dialing and transmission begin.
• Voice call: If you wish to make a voice
call, pick up the handset (or press
SPEAKER
). Dialing begins autom atically. (If
you pressed , pick up the
handset when the othe r party ans w ers.)
4 Press when you have finished viewing the list.
STOP
SPEAKER
START/MEMORY
Fax:
START/MEMORY
Voice
call:
7. Special
Functions
93
Page 96

Caller ID (Requires Subscription to Service)
To delete calls from the Caller ID list
If you want to delete a single call from the caller list, press while the call
appears in the display. If you want to delete all calls from the list, hold
down for at least 3 seconds while you are viewing any number in the list.
0
Viewing the Caller ID list from the cordless handset
You can also view the Caller ID list in the cordless handset display, and
automatically dia l a n um ber from the list . (No te tha t the co rdle ss handset and
the fax machine share the same list.)
1 Press .
REVIEW
Cordless handset display:
REVIEW CALLS
▲▼: REVIEW
2 Press or to scroll through the numbers in the list.
3 While viewing the list, you can do the following:
• Dial a number: Scroll to the desired number and then press . (Note:
You can only make a phone call from the cordless handset; you cannot
start a fax transmission.)
0
TALK
• Erase a call: Scroll to the call you wish to erase, press , and then
START
press .
4 Press when you have finished viewing the list.
94
OFF
OFF
HOLD
ERASE
Page 97

Caller ID (Requires Subscription to Service)
Erasing all calls using the cordless handset
Follow these steps to erase all calls from the Caller ID list using the cordless
handset.
1 Press .
2 Press .
3 Press .
REVIEW
HOLD
ERASE
START
• To cancel, press .
OFF
OFF
Cordless handset display:
REVIEW CALLS
▲▼: REVIEW
ERASE ALL?
PRESS START KEY
Priority Call
If you have turned on Caller ID, you can set the machine to make a special
ringing sound when yo u rec ei ve a call from a designated phone number. This
lets you kno w im m edi atel y w ho is c al lin g w ith out h a v in g to lo ok at the display.
To use this function, enter the desired phone number by following the steps
below (only one phone number can be entered).
1 Press once and 3 times.
FUNCTION
2 Press once and twice.
3 Press once.
Display:
ENTRY MODE
PRIORITY #
1=SET, 2=CLEAR
95
7. Special
Functions
Page 98

Caller ID (Requires Subscription to Service)
4 Press to store a number.
(To clear a previously stored number, press and go to Step 6.)
1
2
5 Ente r the number by p ressing the number keys (max. 20 digits).
6 Press to store (or clear) the number.
7 Press to return to the date and time display.
START/MEMORY
STOP
Blocking voice calls
If you have turned on Caller ID, you can use the Anti Junk Fax function
described in Blocking Reception of Unwanted Faxes in this chapter to block
voice calls as well as faxes from your specified Anti Junk Number.
In this case, whe n a v oice call or a fax tran smission c omes in fro m the nu mber
you have specified as a "Junk Number", your fax will break the connection as
soon as it rece ive s the calli ng ph one numbe r from the caller I D service (be fore
the second ring).
HS NAME SET
To use this function, enter the number that you wish to block as explained in
Blocking Reception of Unwanted Faxes (see page 98). Only one number can
be blocked.
Note: This function cannot be used if you are using the Distinctive Ring function.
96
Page 99

Distinctive Ring (Requires Subscription to Service)
Distinctive Ring (Requires Subscription to
Service)
Important:
♦ To use distinctive ring, you must subscribe to a distinctive ring
service from your local phone company.
♦ Your fax machine may not be compatible with some distinctive ring
services.
Distinctive ring is a service offered by some local telephone companies
whereby they assign an additional second number to your regular single line.
The second nu mber rings differently from your normal number.
If you subscribe to a distinctive ring service, you can set the fax machine to
automatically answer when your second number is called. This allows you to
use the second number as an excl usive fax number. To have your fax
automatically answer when your second number is called, follow the steps
below:
1 Press once and once.
2 Press once and 3 times.
3 Press once.
4 Press a number from 1 to 3 to select the ring patte rn belo w that ma tche s
your second number’s ring pattern. Or, press 4 to have your fax
automatically ans w er your normal telephone n um ber. Press 5 to turn off
the distinctive ring function.
RING PATTERN 1 Two short rings
RING PATTERN 2 One short, one long, and o ne s ho rt ring
RING PATTER
97
7. Special
Functions
Page 100

Blocking Reception of Unwanted Faxes
The display briefly shows
your selection, then:
5 Press to return to the date and time display.
6 Set the reception mode to FAX.
STOP
RESOLUTION/
RECEPTION MODE
F A X SIGNAL RX
♦ When using distinctive ring, you must set the reception mode of your fax
machine to FAX. When your designated fax number is dialed, your fax will
automatically answer and begin reception after two rings. Note that other
devices on the sam e lin e will als o ring until y o ur fax answers. If one of your
other numbers is dialed, the fax will ring; however, it will not answer.
Blocking Reception of Unwanted Faxes
The Anti Junk Fax functi on a ll o ws you to bloc k reception of fa xes from a party
that you specify. This saves paper by not printing out unwanted "junk" faxes.
To use th is function, fol low t he steps b elow to enter the f a x number fro m which
you do not wish to receive faxes. One fax number can be entered.
1 Press once and 3 times.
FUNCTION
Display:
ENTRY MODE
TEL
FAX
TAD
2 Press once and twice.
3 Press once.
4 Press to store an Anti Junk number, or to clear a previously
stored number (if you are clearing a number, go to Step 6).
1
ANTI JUNK #
1=SET, 2=CLEAR
2
5 Enter the fax number by pressing the number keys (max. 20 digits).
6 Press and then press to return to the date and time
START/MEMORY
display.
98
STOP
 Loading...