

Page 1

MODEL
UX-470
FACSIMILE
OPERATION MANUAL
1. Installation
2. Using the Answering Machine
3. Sending Documents
4. Receiving Documents
5. Making Copies
6. Making Telephone Calls
7. Special Functions
8. Option Settings
9. Printing Reports and Lists
10. Maintenance
11. Troubleshooting
Page 2
Sending a Fax by Automatic Dialling
Speed Dialling
Speed Dialling can be used to dial any numb er that has been stored for
Automatic Dial ling.
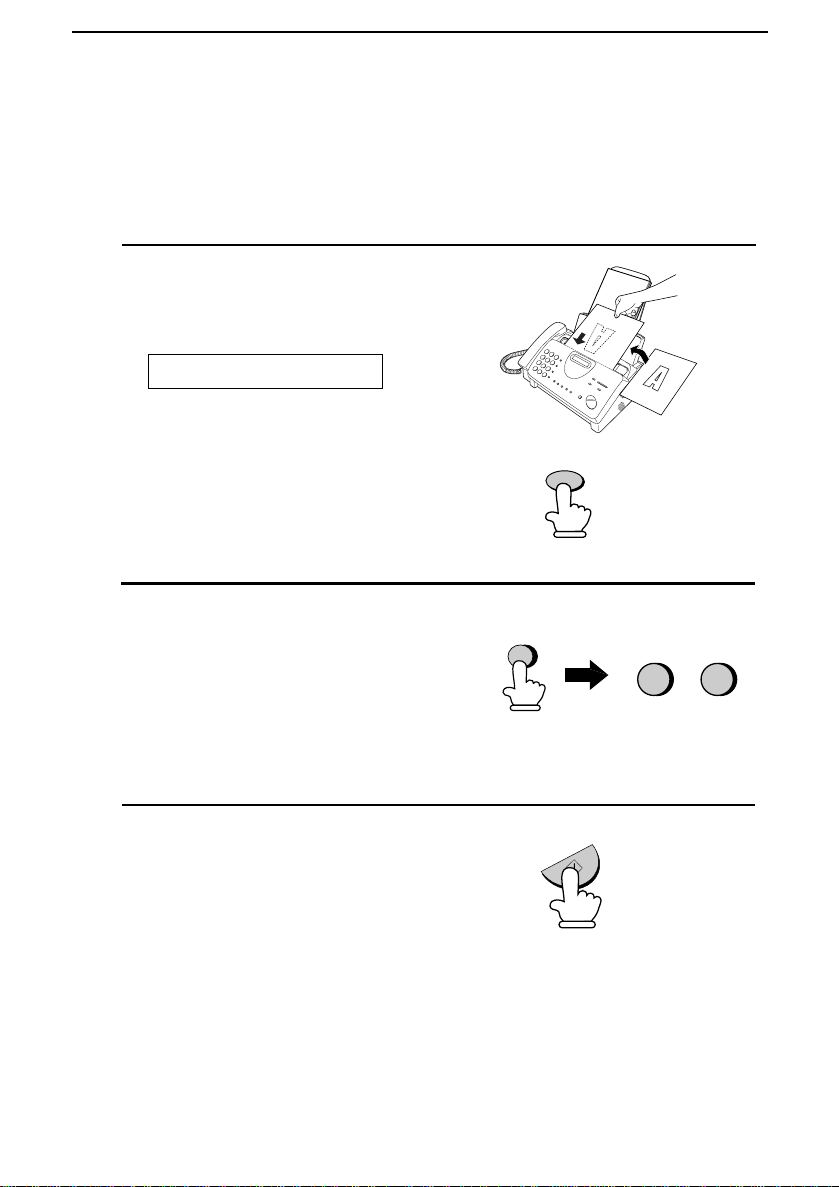
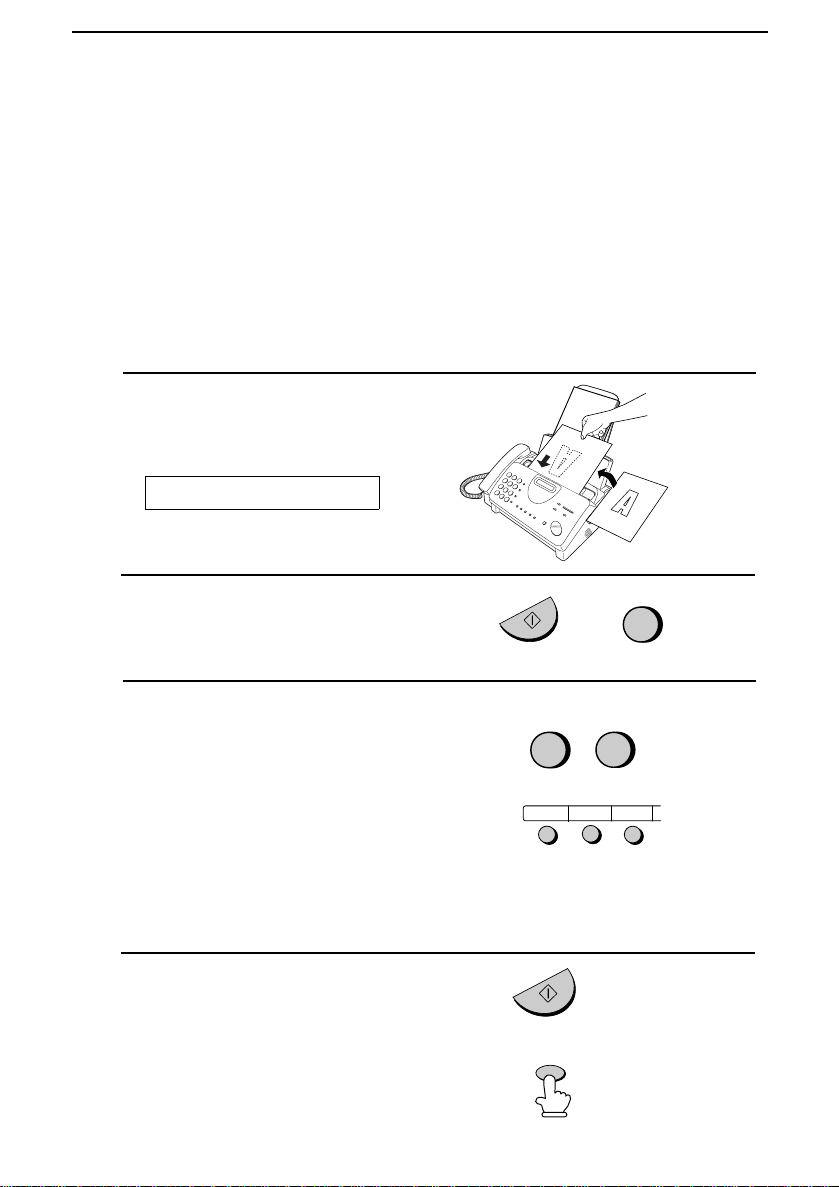
1
Load the document(s).
The display will show:
READY TO SEND
Set the resolution and/or contrast if
••
desired.
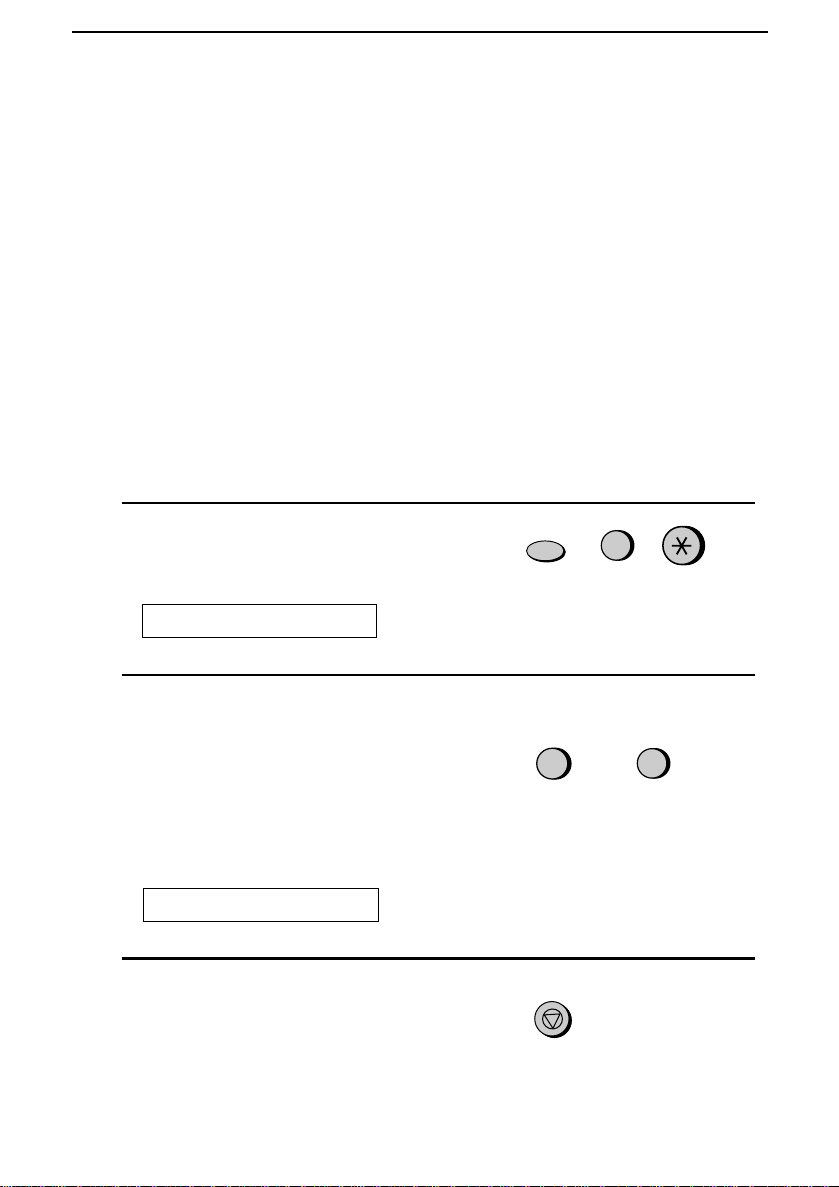
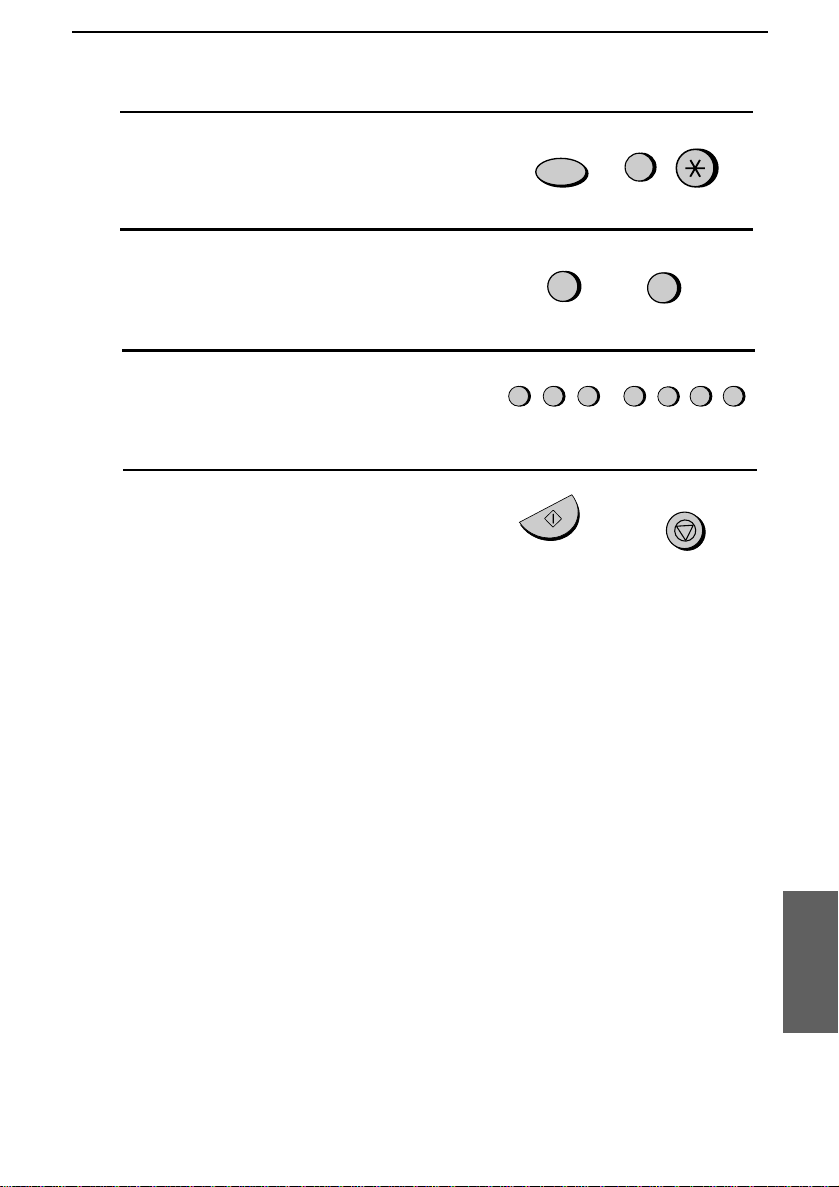
2
Press the SPEED DIAL key and then
enter the two digits of the Speed Dial
RESOLUTION
SPEED DIAL
number by pressing the number keys.
•• To enter nu mbers 1 through 9, firs t
enter 0 and then the number.
2 0
(Example)
3
Check the display. If the name or
number shown is correct, press the
START/MEMORY key. (If not,
press the STOP key and then repeat
Step 2.)
74
START/MEMORY
Page 3
Sending a Fax by Automat ic Dialling
Direct Keypad Dialling
You can also enter a full number with th e number keys and th en press
the START/MEMORY key to begin di all ing . You can use this
method to dial a full number when you don’t need to speak to the
other party before faxing.
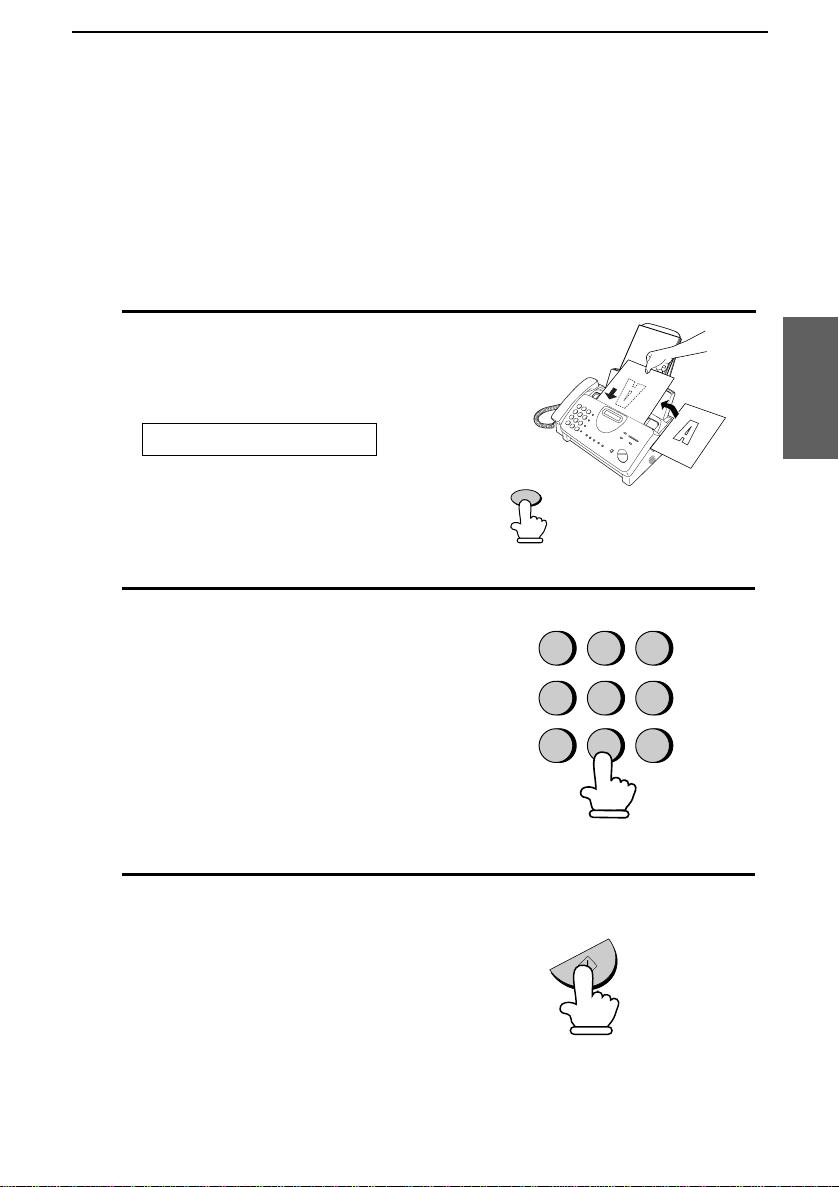
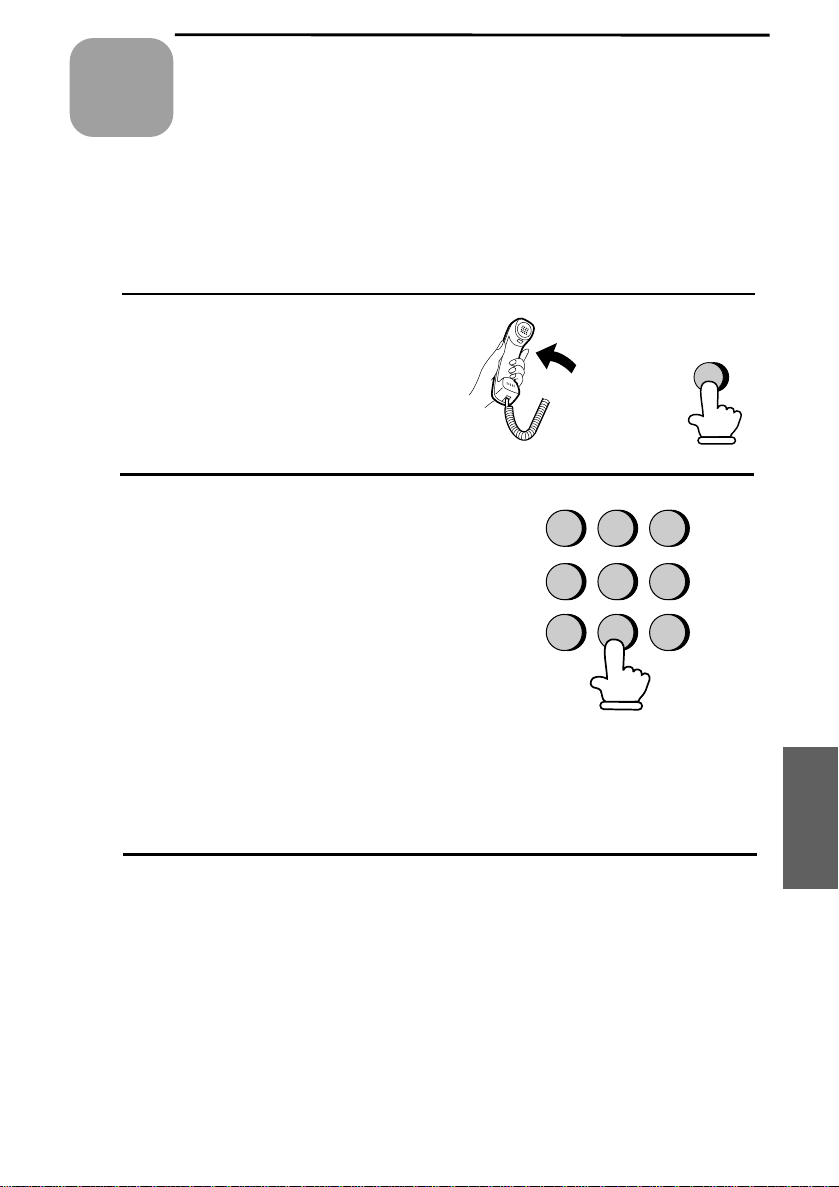
1
Load the document(s).
The display will show:
READY TO SEND
3. Sending
Documents
Set the resolution and/or contrast if
••
desired.
2
Enter the number of the receiving
machine by pressing the numeric keys.
•• If a pause is required between any
of the digits to access a special
service or an outside line, press the
REDIAL key. The pause will
appear as a hyphen. Several pauses
can be entere d in a row.
3
Check the display. If the number of the
receiving machine shown is correct,
press the START/MEMORY key.
•• If it is not correct, pr ess the STOP
key to backspace and clear one digit
at a time, and then re-enter the
correct digit(s).
RESOLUTION
GHI
PQRS
ABC
DEF
2
1
JKL
MNO
4
5
TUV
WXYZ
7
8
STAR T/MEMORY
3
6
9
75
Page 4
Sending a Fax by Automatic Dialling
Using the SEARCH/R key
If you can’t remember the Rapi d Key or Speed Dial number in whic h
you have stored a particular fax number, you can se arch for the
number by followi ng th e steps below. Once you have found the
number, you can dial i t and transmit the load ed document by simpl y
pressing the START/MEMORY key.
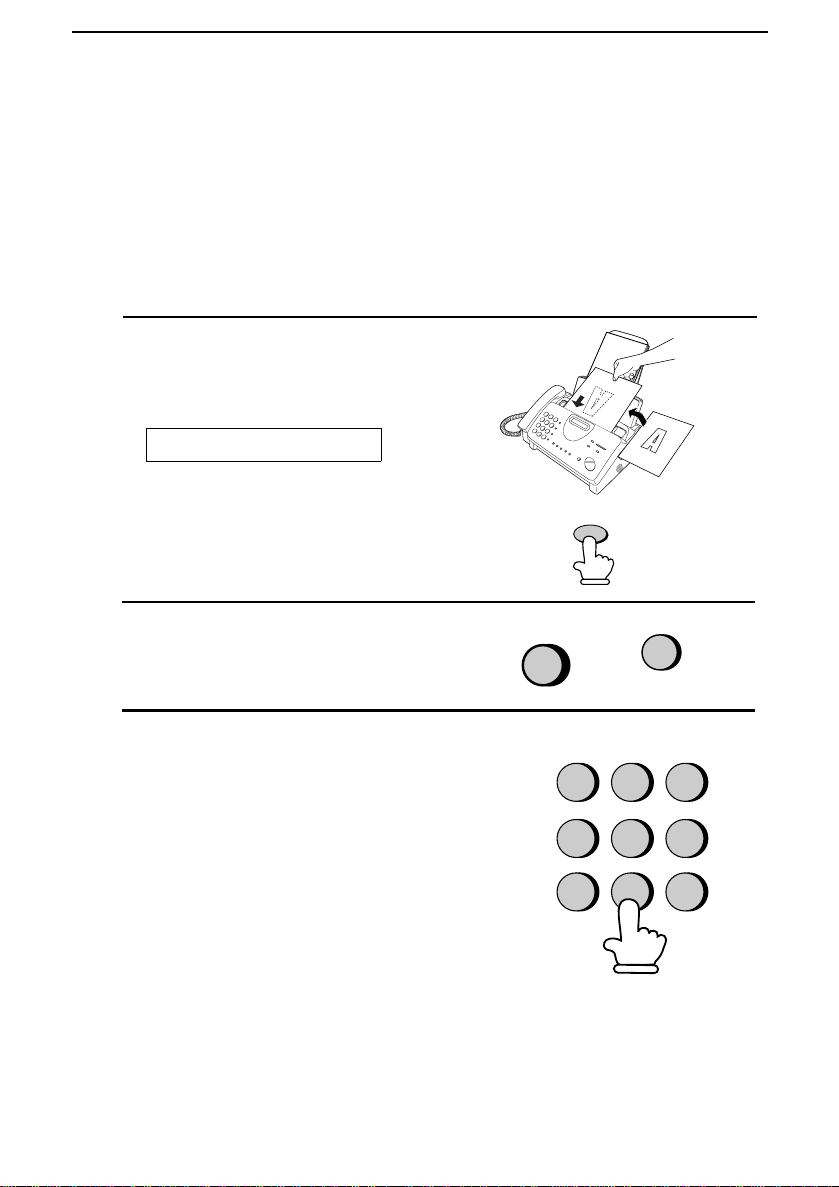
1
Load the document(s).
The display will show:
READY TO SEND
••
Set the resolution and/or contrast if
desired.
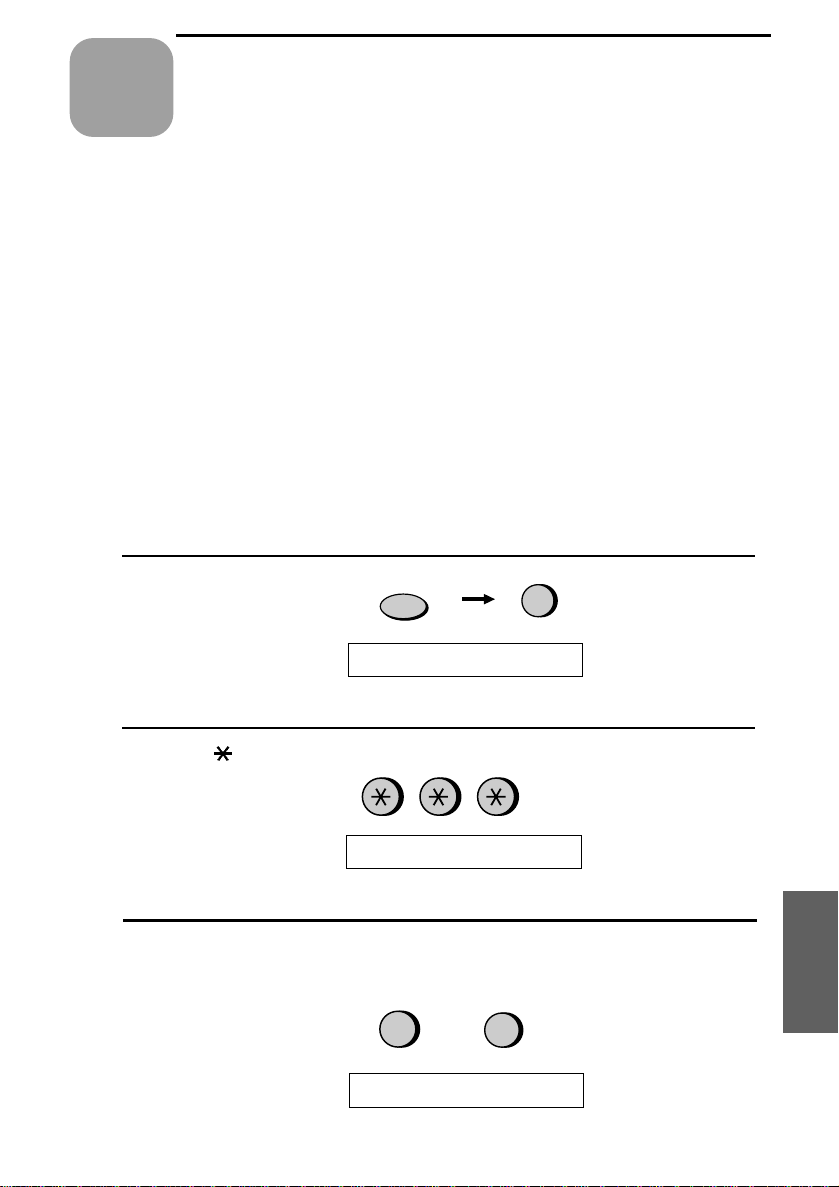
2
Press the SEARCH/R key and then
the 1 key.
3
Enter the first letter of the stored name
by pressing the appropriate number
key (the key which corresponds to the
required letter) one or more times until
the letter appears in the display. If the
name begins with a special character or
number, press 1.
•• If you can’t remember the first
letter, go to Step 4 (you will scroll
through the list from the beginning).
•• If a name wasn’t stored for the
number, press 0. This will cause
numbers, not names, to appear when
you scroll.
RESOLUTION
SEARCH
1
GHI
4
PQRS
7
ABC
JKL
TUV
1
DEF
3
2
MNO
6
5
WXYZ
9
8
R
76
Page 5
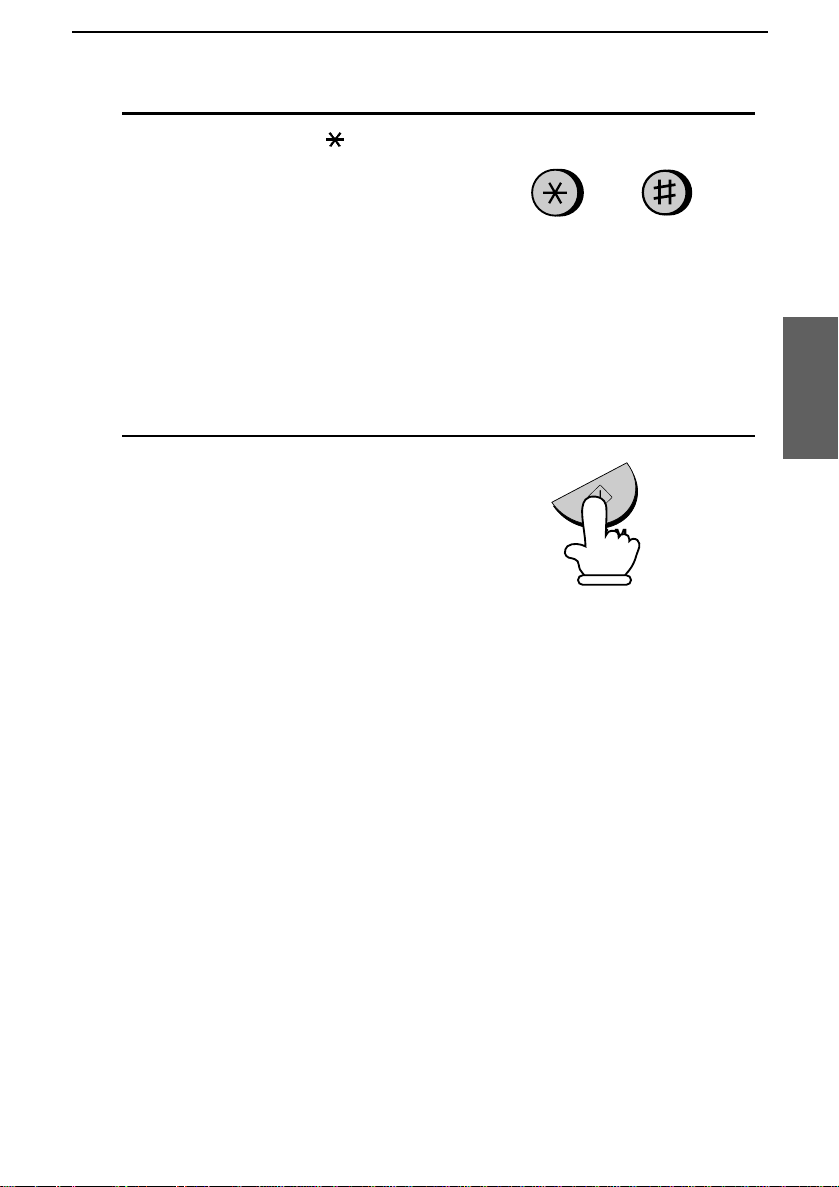
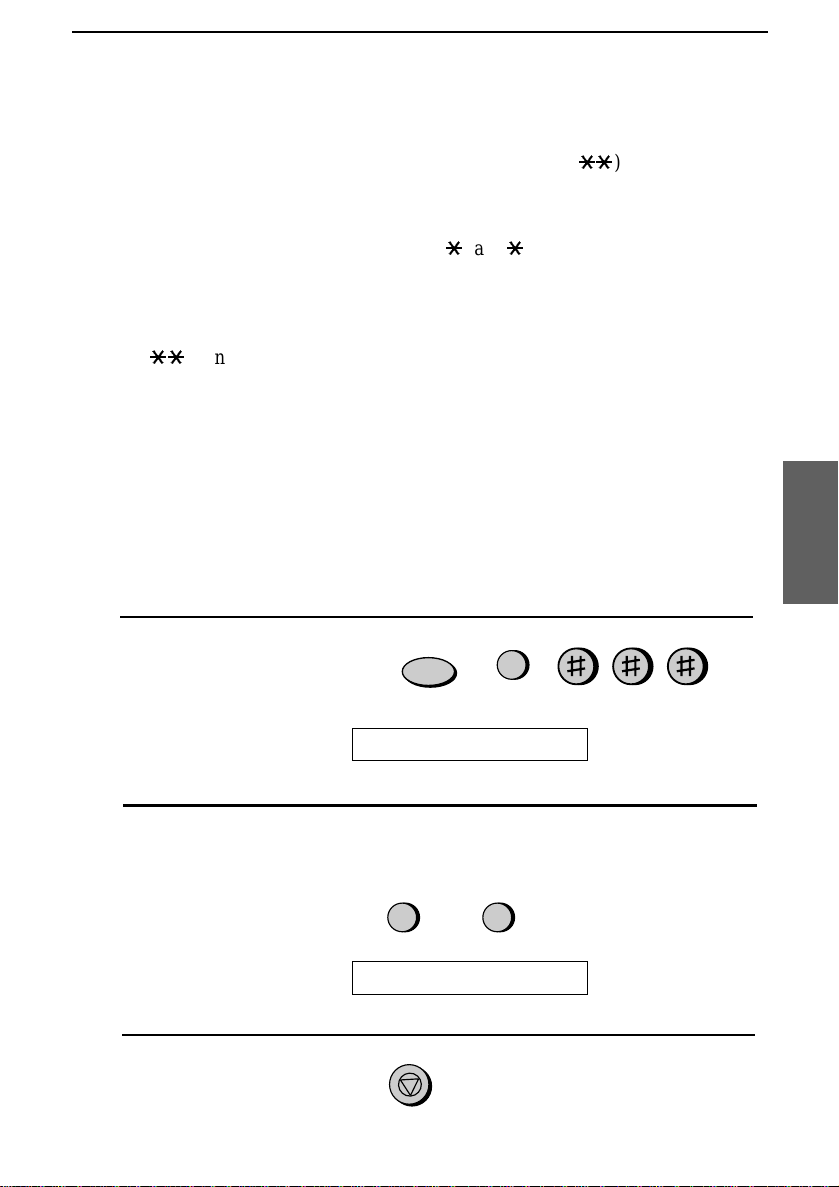
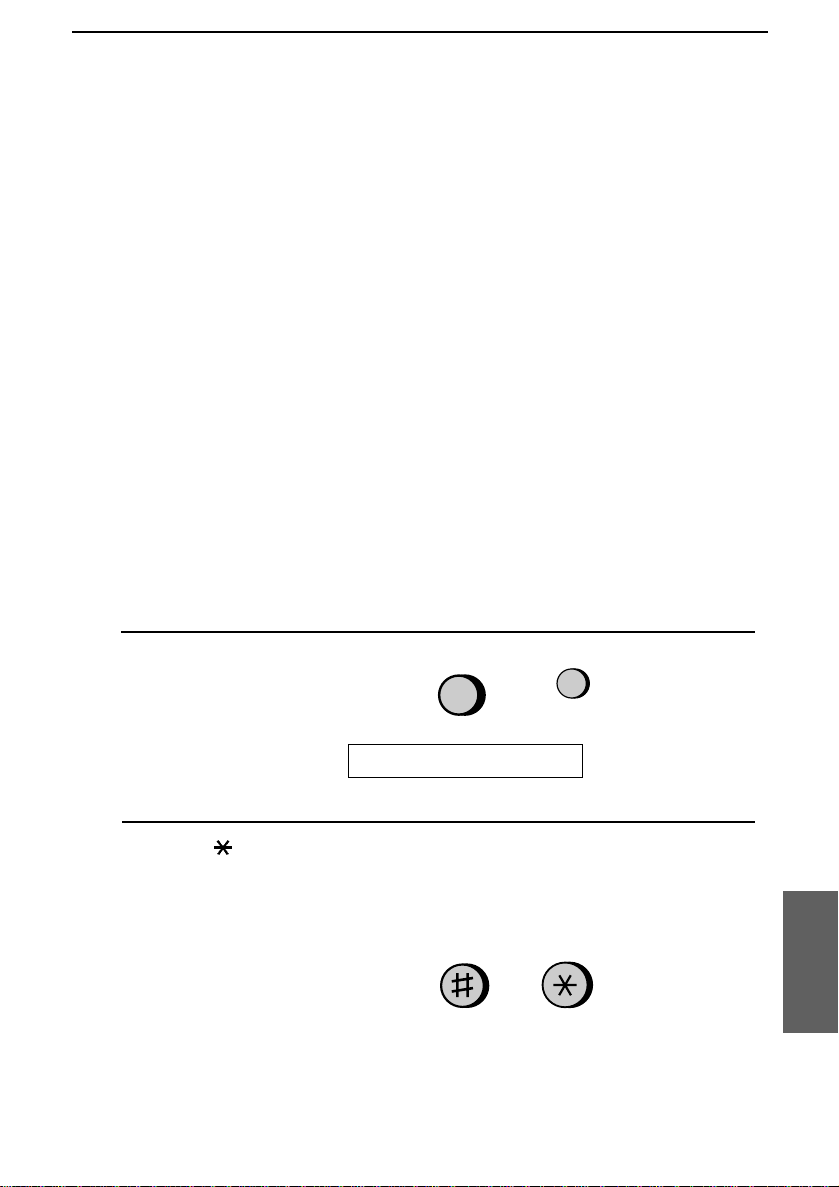
4
Press the # key or the * key to scroll
through the names (numbers if you
pressed 0). Stop when the desired
name appears in the display.
•• If no names have been stored that
begin with the entered letter, you
will scroll from the next name, in
alphabetical order, in the list. If no
names/numbers have been stored at
all, NO DATA will appear.
5
Press the START/MEMORY key.
The document will be automatically
transmitted once the connection is
made.
Sending a Fax by Automat ic Dialling
or
START/MEMORY
3. Sending
Documents
Automatic redia ll ing
If you use automatic diallin g (inclu din g Direct Keypad Diallin g) and
the line is busy, the machine wil l aut omat icall y redial th e number. Up
to 2 redialling attemp ts will be made at intervals of 5 minutes.
♦ To stop automatic redialling, press the STOP key.
♦ If desired, you can change the number of times the machine
redials with Optio n Setting 5, and the inte rval at which redialling
takes place with Option Setting 4. See Chapter 8, Option Settings.
77
Page 6

Receiving
4
Chapter
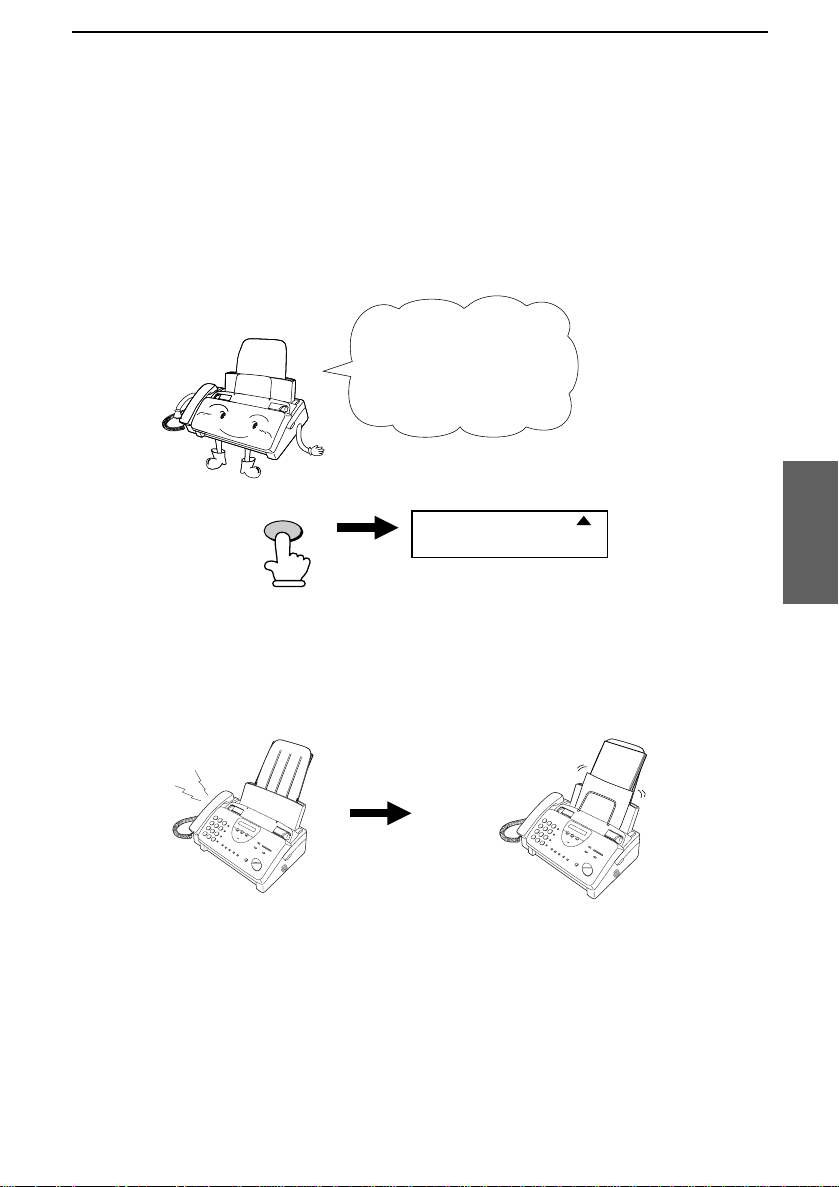
Using TEL/FAX Mode
Documents
Press the
RECEPTION MODE
key until the arrow in
the display points to
TEL/FAX.
RECEPTION
MODE
TEL/FAX
TEL
FAX
A.M.
When the reception mode is set to TEL/FAX, your fax automat icall y
answers all calls on 1 ring. After answering, your fax monitors t he lin e
for about 5 seconds to see if a fax tone is being sent.
♦ If your fax detects a fax tone (this means that the call is an
automatically dialled fax), it will automa tically begin re ception of
the incoming document.
♦ If your fax doesn’t detect a fax tone (this means that the call is a
voice call or manually dialled fax), it will make a ringing sound
(called p seudo ringing) for 15 seconds to alert you to answer. I f
you don’t answer within this time, your fax will send a fax tone to
the other machine to allow the calling party to send a fax manually
if they desire.
Comments:
•• Only the fax wil l alert yo u to voice call s or m anu ally di alle d faxes by pseudo
ringing. An extensi on phone connecte d to the same line wi ll not ring a fte r th e
connecti on ha s bee n m ade . The han dset of a para ll el extension telephone can,
however, be picked up to answer the call . To stop pseu do ringi ng onc e the
handset is li fted, press "#" key on the dial pad of t he phone (this is onl y
possible from a tone dial phone) . If pseud o rin gin g is not cance lled in this
way, the fax mach ine wil l send fax tones down t he line , renderi ng
conversation impossible.
•• The durati on of pseud o ringin g ca n be adju ste d with Opti on Se tt ing 10. See
Chapte r 8, Opti on Setting s.
78
Page 7
Receiving Documents
•• You can change the number of rings on which the machine answers calls by
changing Option Setting 3. (See Chapter 8, Option Setting s.)
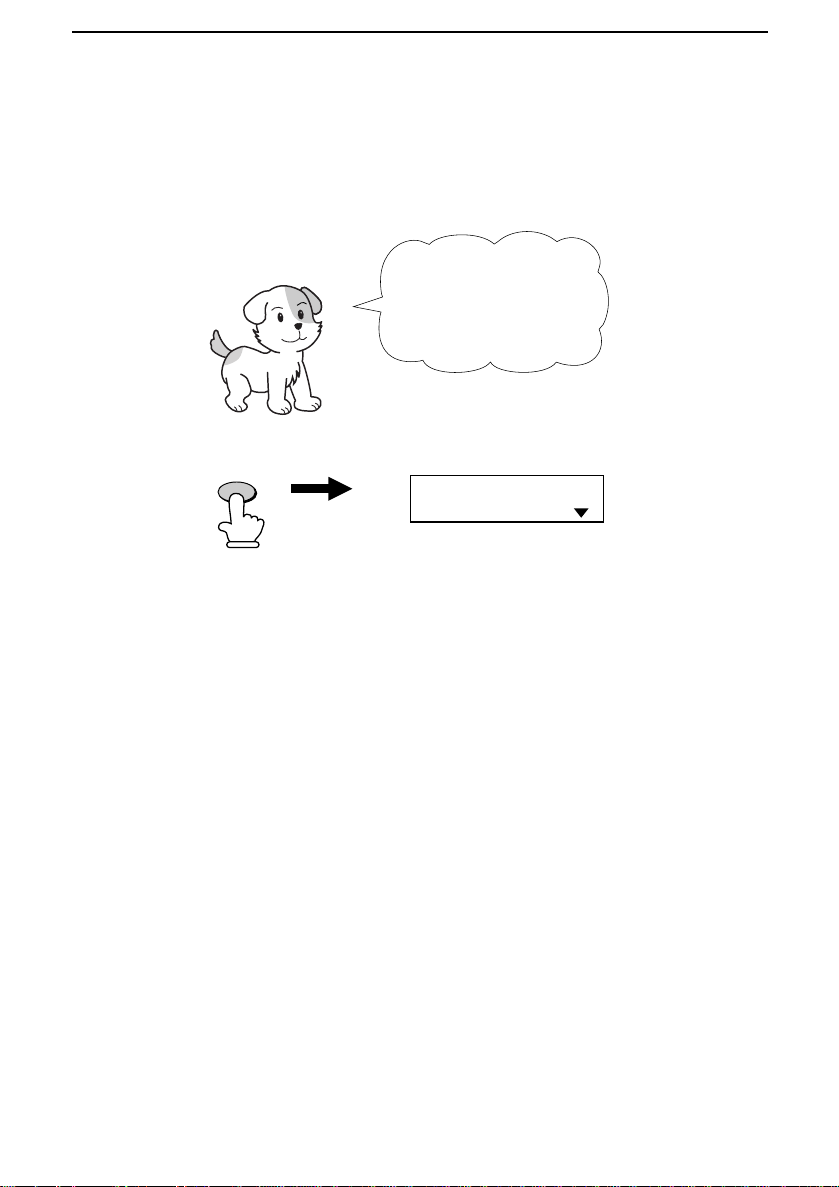
Using FAX Mode
Press the
RECEPTION MODE
key until the arrow in
the display points to
FAX.
RECEPTION
MODE
TEL/FAX
TEL
FAX
A.M.
When the reception mode is set to FAX, the machine wil l
automatically answer all calls on 1 ring and receive incoming faxes.
1 ring Fax reception
♦
You can change the number of rings on which the machine
answers calls by changing Option Setting 3. (See Chapter 8,
Option Settings.)
♦ If you pick up the handset before the machine answers , you can
talk to the other party and/or receive a document as described in
Using TEL mode.
Documen ts
4. R e c eivin g
79
Page 8
Receiving Documents
Using A.M. Mode
Press the
RECEPTION MODE
key until the arrow in
the display points to
A.M.
RECEPTION
MODE
TEL/FAX
TEL
FAX
A.M.
In A.M. mode, your fax machine will automati cal ly receive voice
messages and faxes. See Chapter 2 for more details.
80
Page 9
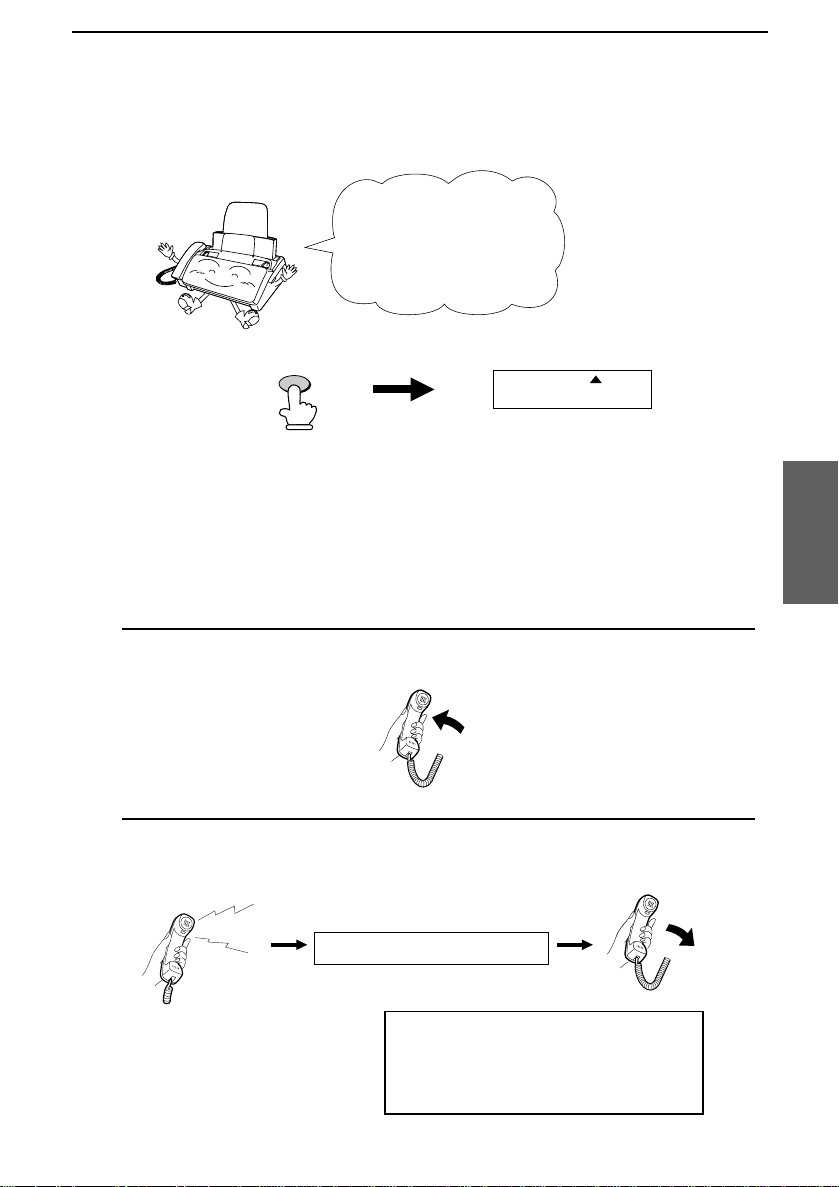
Using TEL Mode
Receiving Documents
Press the
RECEPTION MODE
key until the arrow in
the display points to
TEL.
RECEPTION
MODE
TEL
TEL/FAX
When the reception mode is set to TEL, you must answer all calls
using the fax machine’s hands et or an extensio n phon e connected to
the same line.
Answer ing wi th the fax’ s ha ndse t
1
Pick up the handset when the machine rings.
2
If you hear a fax tone, wait until the display shows RECEIVI NG and
then replace the handset.
Beep
RECEIVING
FAX
A.M.
Documen ts
4. R e c eivin g
Note: If you have set Option
Setting 12 (Fax signal receive) to
NO, press the
START/MEM ORY
key to begin reception.
81
Page 10
Receiving Documents
3
If the other party first talks and then wants to send a fax, press the
START/MEMORY key after speaking (press your
START/MEMORY key before the sender presses their Start key).
•• Make sure that the display shows RECEIVING, then replace the
handset.
START/MEMORY
RECEIVING
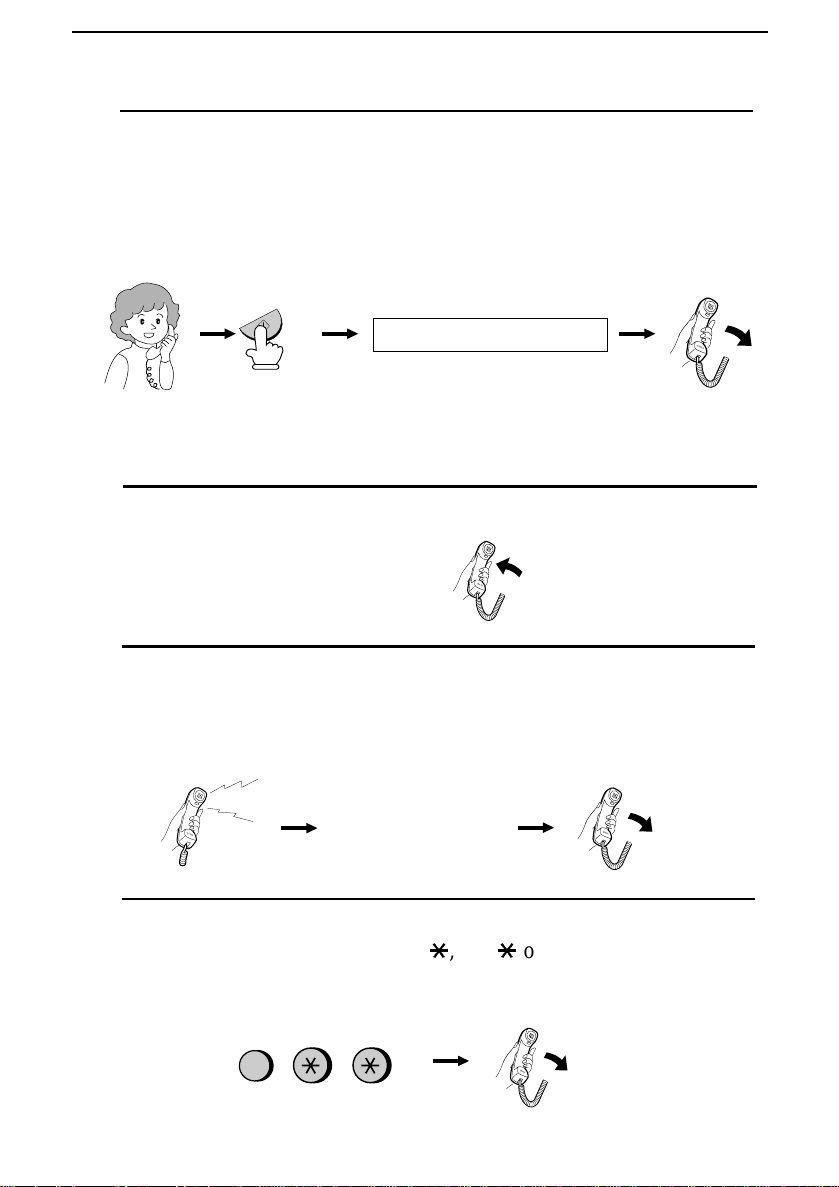
Answering wi th an extens ion phone
1
Answer the extension phone when it rings.
2
If you hear a soft fax tone, wa it until your fax responds (the
extension phone will go dead if it is connected to your fax, or you
will hear pronounced, high-pitched tones if the phone is connected to
a separate wall socket), then hang up.
Beep
Phone goes dead
or pronounced,
high-pitched tones
3
If the fax doesn’t respond, or if the other party first talks to you and
then wants to send a fax, press 5, *, and * on the extension phone
(only on a tone dial phone). This signals the fax to begin reception.
Hang up.
5
82
Page 11
Comments:
Receiving Documents
•• Your fax will not accept the signa l to beg in rece pt ion (5
loaded in its feeder.
**
) if a document is
•• If you have set Option Set ti ng 12 to NO and hear a fax tone when you a nswer
the extension phone, you must press 5, *, and * if you are on a tone dial
phone, or walk ov er to the fax , pick up the handset , and press th e
START/MEMORY key if you ar e on a pulse dia l only ph one .
•• The code us e d to act iv at e fa x rec eption fro m a tone dia l extension phone
(5**) can be changed if de sir ed. See Opti on Se tt ing 6 (Tel/ Fax Remot e
Number) in Chapter 8, Option Settings .
2 in 1 Print
To save paper, you can have the size of your incoming faxes reduced
by 55%. This will allow you to receive, for example, a 2-page
document on one page (note that th is may not be possib le if the
document pages are longer than your printing paper). To t urn on this
function, foll ow the st ep s below.
1
Press these keys:
FUNCTION
6
Documen ts
4. R e c eivin g
The display will show:
2
Press 1 to turn on the function, or 2 to turn it off.
The display will show:
3
Press the STOP key.
2 IN 1 PRINT
YES NO
or
1 2
PRINT CONTRAST
STOP
83
Page 12
Receiving Documents
Reception Ratio
The fax has been set at the factory to automaticall y r educ e the size of
received documents to fit the size of the printing paper. This ensures
that data on the edges of the document are not cut off. If desired, you
can turn this function off and have received documents printed at full
size.
Note: If a document is too long to fit on the printing paper, the remainder
will be printed on a second page. In this case, the cut-off point may occur
in the middle of a line.
Note: Automatic reduction may not be possibl e if the received document is
too large, contains too many fine graphics or images, or is sent at high
resolution. In this case , the remainder of the document will be printed on a
second page.
1
Press these keys:
FUNCTION
6
The display will show:
2
Press 1 to turn automatic reduction on, or 2 to turn it off.
RECEPTION RATIO
AUTO 100%
or
1 2
If you selected AUTO, go to Step 3. If you selected 100%, go to Step
4.
3
If you selected AUTO, select the reception ratio to be used in the
event that the memory becomes full (automatic reduction is not
possible when the memory is full). Press 1 for 93% or 2 for 100%.
93% 100%
or
1 2
84
Page 13

Receiving Documents
4
Press the STOP key.
STOP
Substitute Reception to Memory
In situations where printing is not possi bl e, such as when your fax runs
out of paper, the imaging film needs replacement, or the paper jams,
incoming faxes will be received to memory.
When you have received a document in memory, FAX RX IN
MEMORY will appear in the display, alte rnatin g wit h OUT OF
PAPER, FILM END, or PAPER JAMM ED. When you add paper,
replace the imaging film, or clear the jam, the stored documents will
automatically prin t out.
♦ If you received documents in memory because the fax ran out of
paper, be sure to add pape r which is the same size as the paper
previously used. If not, the document print-out siz e may not match
the size of the printing paper.
Documen ts
4. R e c eivin g
85
Page 14
Making
5
Chapter
Your fax can also be used to make copies. Single and multipl e copies
(up to 99 per original) can be made, enabling your fax to double as a
convenient office copier.
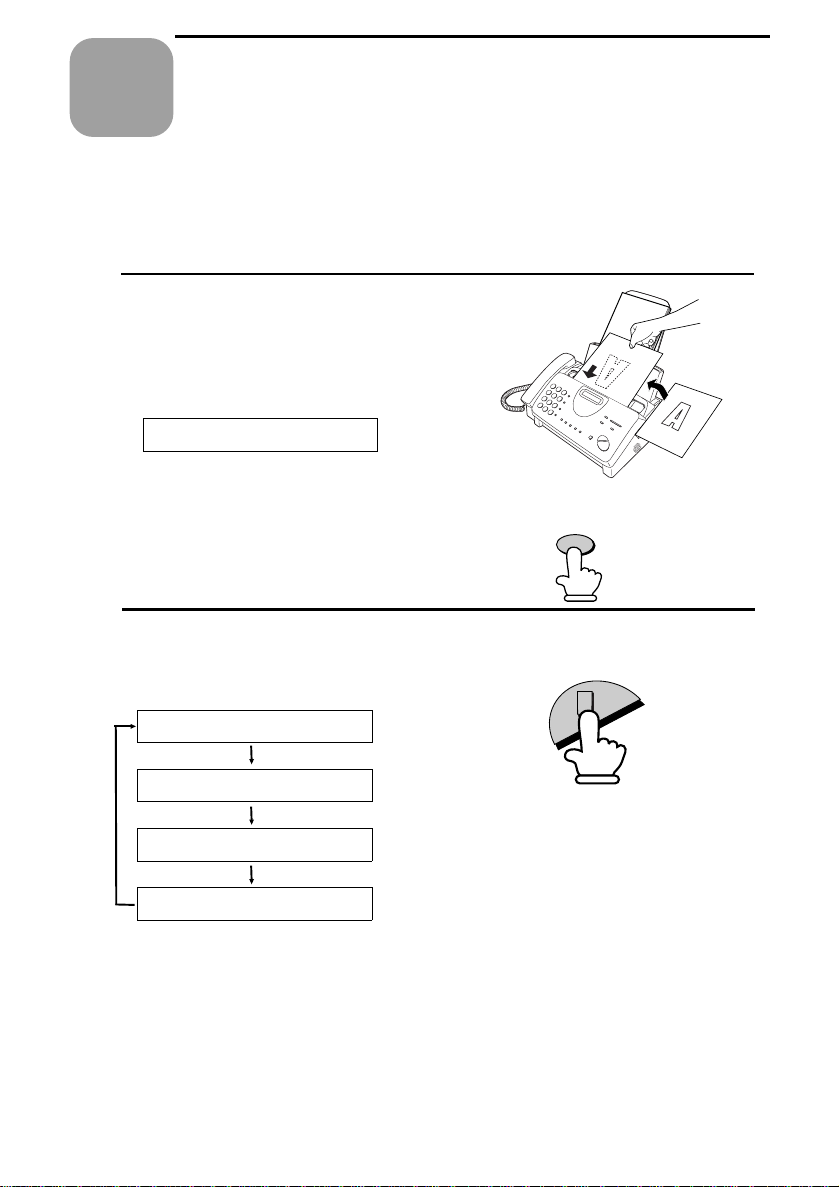
1
Load the document(s) face down.
(Maximum of 10 pages.)
The display will show:
Copies
READY TO SEND
Set the resolution and/or contrast if
••
desired. (The default setting for
copying is SUPER FINE.)
2
Press the COPY/HELP key.
The display will show:
COPY MOD E
1: MULTI COPY
2: SORT COPY
START: COPY
♦ If you are only making one copy of the original (or of each
original) and don’t want to make a reduction or enla rgement
setting, press the START/MEMORY key twice. Copying will
begin.
♦ If you are only making one copy of the original (or of each
original) and want to make an enlargement or reduction setting,
press the START/MEMORY key and go to Step 5.
86
RESOLUTION
COPY/HELP
Page 15
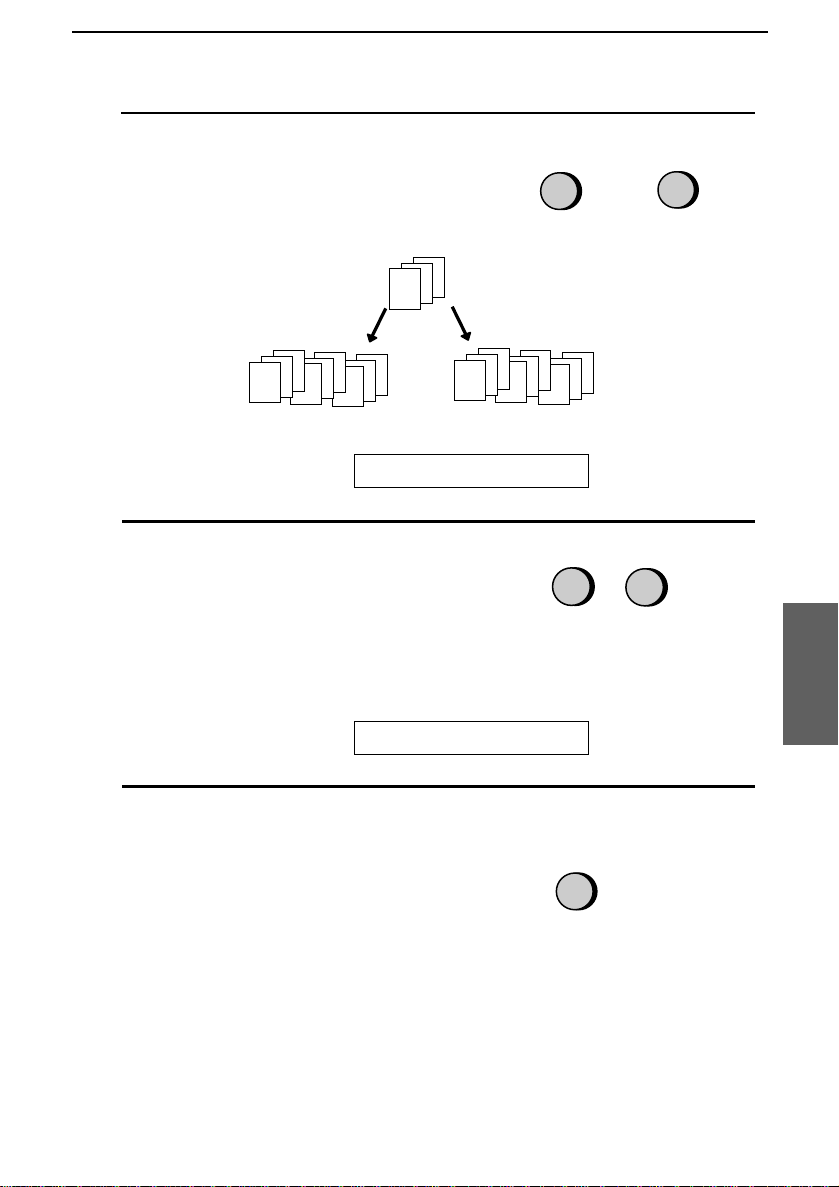
3
Press 1 (MULTI COPY) if you do not
want the copies sorted. Pr ess 2 (SORT
COPY) if you want the copies sorted.
MULTI
1
Making Copies
SORT
or
2
Example of three
copies each of three
originals
Sorted
(SORT COPY)
C
B
A
The display will show:
4
If you are making one copy per
C
C
B
B
A
A
ENTER # (01-99)
original, pre ss the START/MEMORY
key. If you are making multiple copies
per original, enter the number of copies
per origina l (if the number is less than
10, enter a "0" before the number).
The display will show:
5
Set the amount of reduction or
COPY RATIO
enlargement by entering a number
from 1 to 5 as shown below (or press
the START/MEMORY key to
automatically select 100%). Copying
will begin.
1: AUTO (automatic size adjustment to
match the size of the printing paper)
2: 50%
3: 100% (no reduction or enlargement)
4: 125%
5: 135%
Originals
C
B
A
Not sorted
A
A
A
B
B
B
(MULTI COPY)
C
C
C
0
9
Example: Nine
copies per original
Copies
5. Making
2
Example: 50%
87
Page 16
Making Copies
Note: If you place a large number of originals in the feeder, the memory
may become full before all of them can be scanned (MEMORY IS FULL
will appear in the display). If this happ ens, press the START/MEMORY
key to copy the originals which have been scanned, and then repeat the
copy procedure for the remaining originals, including the original which
was being scanned when the memory became full.
Copy Cut-off
When making a copy of a document that is longer than the printi ng
paper, use the copy cut-off sett ing to select whether the remaini ng part
of the document will be cut off or printed on a second page. The intial
setting is YES (cut off the r emaind er). To change the setti ng, follo w
the steps below.
1
Press these keys:
FUNCTION
6
The display will show:
COPY CUT -O FF
2
Press 1 to set copy cut-off to YES (the
remaining part of the document will
not be printed), or 2 to set copy cut-off
to NO (the remaining part will be
printed on a second page).
The display will show:
INITIALIZE FILM
3
Press the STOP k ey to return to the
date and time display.
88
YES
1
STOP
NO
or
2
Page 17
Making
6
Chapter
Your fax can be used like a regular telephone to make and receive
voice calls.
♦ To make or receive a phone call, the power must be on.
1
Pick up the handset or press the
SPEAKER key. Listen for the dial
tone.
2
Dial the number using one of the
following methods:
•• Normal Dialling: Enter the full
•• Rapid Key Dialling: Press the
Telephone Calls
telephone number with the numeric
keys.
appropriate Rapid Key.
GHI
PQRS
or
ABC
2
1
JKL
4
5
TUV
7
8
SPEAKER
DEF
3
MNO
6
WXYZ
9
•• Speed Dialling: Press the SPEED
DIAL key, and enter the 2-digit
Speed Dial number with the
numeric keys.
3
Speak with the other party when they
answer.
•• If you pressed the SPEAKER key,
pick up the handset to talk.
89
6. Making
Phone Calls
Page 18

Making Telephone Calls
Comments:
•• While the handset of the fax is lifted (off hook), an exten sion phone
connect ed dire ctly to the fax cannot be used to spea k wit h the oth er party.
•• The fax may interru pt a voice call rece ived on a n exten sion phone if the
recept ion mod e is set to A.M. and there i s a period of silence durin g the
conversa tion. If you are on a tone dial phone, you can preve nt this by
pressing an y three keys on the phone imm edi atel y afte r you answer . (Note :
Do not enter the code to activate fax reception: 5, *, *.)
Chain Diall ing
After lifting the handset, you can dial any comb inat ion of Normal
Dialling, Rapid K ey Dialling and Speed Dialli ng numbers. For
example, if you have stored an area code or an access code for a
special service in a Rapid Key, you can press the Rapid Key for that
area code or access code, th en dial t he remainder of the number by
pressing a Rapid Key, pressing num ber key s, or pressing t he SPEED
DIAL key and entering a two-digi t Spe ed Dial num ber.
Using the SEARCH/R key
You can use the SEARCH/R key to search for a Rapid Key or Speed
Dial number. First search for the number as described in Using t h e
SEARCH/R key in Sen din g a Fax by Automatic Dia ll ing in Chapter 3,
then pick up the han dset or press th e SPEAKER key. The number
will be dialled aut omat icall y (do not press the START/ MEMORY
key).
Redial
The last number called can be redialled by pressing the REDIAL key
(it is not necessary to pick up the handset or press the SPEAKER
key). When the other party answers, pick up the han dset t o talk.
90
Page 19

Making Telephone Calls
Issuing tone signa ls
If you are on a pulse dial line, you c an use the "*" key to temporarily
issue tone signals when you press t he numeric keys. This allo ws you
to use certain telephone services which require entering tone signals.
When you need to enter one or more tone sign als, pr ess the "*" key
and then press the appropriate numeric keys.
To change back to pulse mode, simpl y hang up (the diall in g mod e
automatic ally changes back to the sett ing of Option S etting 9 when
you hang up).
PBX operations
If your fax is connected to a PBX, you can use it to perform the
following operations:
♦ Making enquiry calls: During a call, you can put the othe r party
on hold, make a further call to a third party, and then go back to
your original caller.
♦ Transferring calls: You can transfer a call to another number on
the same PBX without operator assistance.
Your fax is also fully compatibl e with British Telecom Network
Services and Telecom Eireann Phone Plus Services an d can be used in
conjunction with any facili ty that requires a recall command .
Note: To perform PBX operations, Option Setting 11 must be set to the
appropriate recall mode for your PBX (see Chapter 8, Optional Settings).
Check your PBX manual or consult your supplier for the correct recall
mode. If you are using British Telecom Network Services or Telecomm
Eireann Phone Plus Services, Option Setting 11 must be set to time-break
recall. (This is the initial factory setting).
91
6. Making
Phone Calls
Page 20

Making Telephone Calls
Making enquiry calls
1
During the telephone conversation,
press the SEARCH/R key. This puts
the other party on hold.
2
When you hear the dial tone, dial the
number of the third party for the
enquiry call.
3
When you have finished the enquiry
call, you will be automatically returned
to the original caller as soon as the
third party hangs up.
SEARCH
R
Transferring calls
1
During the telephone conversation,
press the SEARCH/R key. This puts
the other party on hold.
2
When you hear the dial tone, dial the
number to which you want to transfer
the call. When the other party answers,
hang up, and the call will be
transferred.
•• If the other party does not answer,
press the SEARCH/R key again to
return to the original caller.
92
SEARCH
R
Page 21
Special
7
Chapter
Caller ID
If you subscribe to a caller identification service from your telephone
company, you can set your fax to display t he name and numb er of the
caller while the fax rings.
Important:
•• To use this function, you must subs cribe to a calle r identification
•• Your fax may not be compatible with some caller iden tific atio n
•• Caller ID may not function if th e machine is connect ed to a PBX.
Functions
service from your telephone company.
services.
1
Press these keys:
The display will show:
2
Press the * key three times.
The display will show:
3
Press 1 to turn on Caller ID, or 2 to turn
it off.
FUNCTION
OPTION SETTING
CALLER-ID
YES
1
The display will show:
COVER SHEET MODE
or
NO
2
4
Functions
7. Special
93
Page 22

Caller ID
4
Press the STOP key to return to the
STOP
date and time display.
♦ Set Option Setting 3 (Number of Rings to Answer) to 2 or more
rings (see Chapter 8).
How Caller ID oper ate s
When you receive a call, the name and/o r phone number of the call er
will alternately appe ar in the display, beginni ng ju st before the second
ring. The informat ion will continue to be displayed until you pick up
the handset, or until the f ax answers aut omat icall y if it is in FAX
mode.
Note: At present most caller-id equipped teleph one networks only
supply the caller’s number, t herefore the caller’s name will only
appear providing that the caller’s name and number have been
programmed i nto memory.
Display example:
DOE JOHN 444-555-6666
Caller’s name Caller’s number
Display messages
One of the following messages will appear while the fax rings if caller
information is not available.
NO SERVICE No caller information was received from your
telephone company. Make sure that the telephone
company has activated your service.
CALLER-ID
ERROR
Noise on the telephone line prevented reception
of caller information.
WITHHELD Caller information was not provided by the
telephone company at the caller’s request.
94
Page 23
Viewing the Call er ID list
If you subscribe to a Caller ID service and have turned on the Caller
ID function, your fax machine will keep information on the most
recent 20 calls and faxes you have received. You can view this
information, which consi st s of the name and numbe r of each caller, in
the Caller ID List.
♦ After you have received 20 calls, each new call will delete the
oldest call.
Note: At present most caller-id equipped telephone netwo rks only
supply the caller’s number, therefore the caller’s name will only
appear providing that the caller’s name and numbe r have been
programmed into memory.
Follow the step s below to view th e Caller ID List in the di spl ay . If
desired, you can immediately di al a numb er when it app ears.
To print out the list, see Chapter 9, Printi ng Report s and Lists .
Caller ID
1
Press these keys:
The display will show:
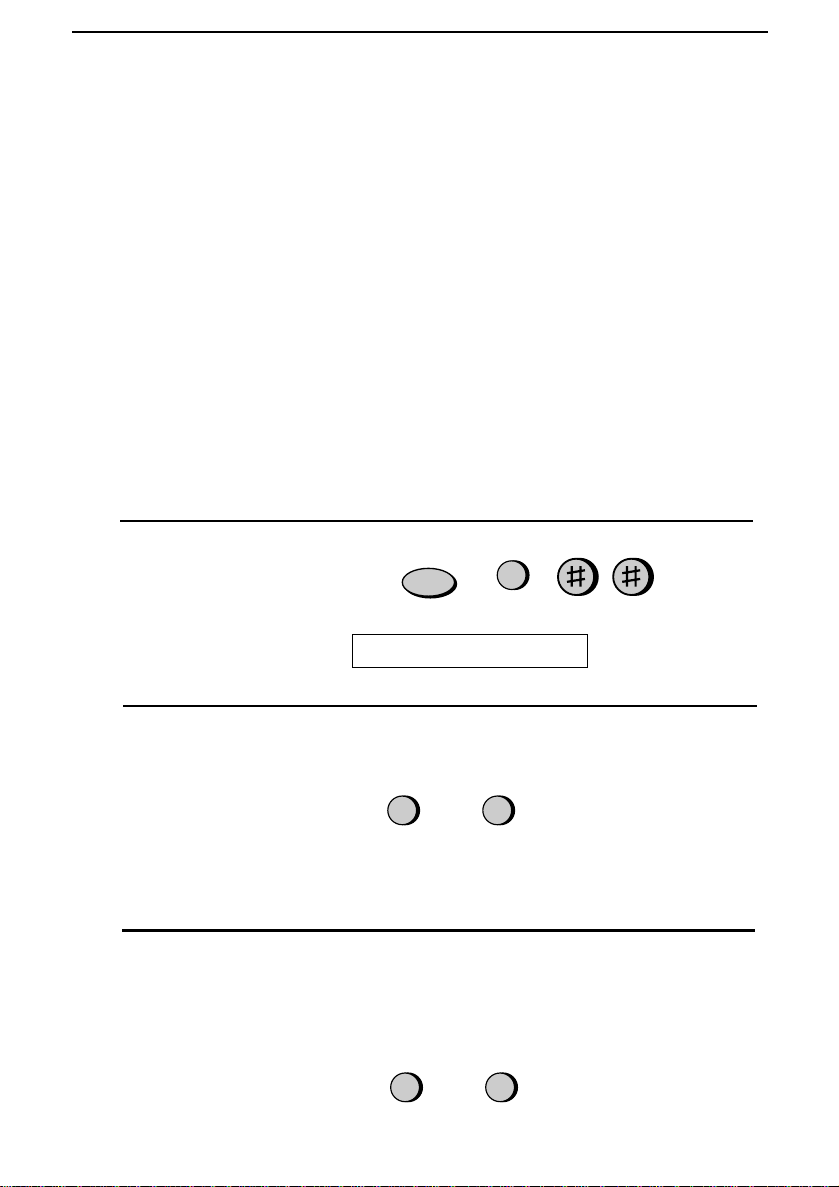
2
Press the * key to scroll through the
REVIEWING CALLS
list from the most recent call, or the #
key to scroll through the list from the
oldest call.
SEARCH
or
2
Functions
7. Special
95
R
Page 24

Caller ID
3
If you want to dial one of the numbers
in the list, scroll through the list until
the number appears in the display.
•• If you want to send a fax, load the
document an d t hen press the
START/MEMORY key.
•• If you want to make a voice call,
pick up the handset or press the
SPEAKER key. Dialing will begin
automatically. (If you pressed the
SPEAKER key, pick up the handset
when the other party answers.)
4
Press the STOP key when you have
finished viewing the list.
START/MEMORY
STOP
To delete calls from the calle r lis t
If you want to delete a single call from the caller list, press the "0" key
while the call appears in the display. If you want to delete all calls
from the list, hold the "0" key down for at least 3 seconds while you
are viewing any number in the list.
Priority Cal l
If desired, you can set your fax to make a special ringing sound when
you receive a call from a designated pho ne numb er. This lets yo u
know immediatel y who is callin g wit hout having to look at t he disp lay.
To use this function, enter the desi red phone num b er by follo wing the
steps below (only one phone number can be entered).
96
Page 25
1
Press the keys shown at right.
PRIORITY CALL # will appear in the
FUNCTION
3
display.
2
Press 1 to enter a number, or 2 to clear
a number. (If you pressed 2, go to Step
1
or
4.)
3
Enter the phone number, including the
area code, by pressing the number keys
(max. of 20 digits).
4
Press the START/MEMORY key and
5 5 5 1
(Example)
then the STOP key.
START/MEMOR Y
Note: This facility will not work if the calli ng party has instructed th e
telephone network to withhol d thei r Caller ID information.
2
2
STOP
Caller ID
3 4
Blocking voice c alls
With Caller ID turned on, you can use the Ant i Junk Fax funct ion
described in Blocking Reception of Unwanted Faxes in this chapte r to
prevent voice calls as well as fax receptions (the Anti Junk Fax
function can normally only prevent faxes).
In this case, when a voice call or a fax transmission comes in from a
number you hav e speci fied as a "Junk Num ber", your f ax will br eak
the connection as soon as it receives the calling pho ne numb er from
the caller ID service (before the second ring).
To use this function, set Opt ion Settin g 13 to YES as described in
Chapter 8, Option Setti ngs, and then ente r the number in the Anti Junk
Number List as explain ed in Blocking Reception of Unwanted Faxes in
this chapter.
Note: This function wil l not blo ck a call from a numb er which has
been entered into the ma chine as the Pri orit y Call num ber.
97
Functions
7. Special
Page 26
Broadcasting
Broadcasting
This function allo ws you t o send th e same docu ment to as many as 20
different locations with just one operation. First sto re the document in
memory, then enter the numbers of the receiving machines. The
document will be transmitted t o each location .
♦ You can only use Rapid Keys or Speed Dial numbers to dia l the
numbers of the receiving machines.
1
Load the document(s).
The display will show:
READY TO SEND
2
Press the START/MEMORY key and
then 2.
START/MEMORY
2
3
Dial the receiving machines by using
one or both of the following methods.
(a maximum of 20 stations can be
selected).
•• Enter one or more Speed Dial
numbers by pressing the numeric
keys.
•• Press one or more Rapid Keys.
4
Press the START/MEMORY key.
Set the resolution and/or contrast if
••
desired.
98
2
01 02 03
START/MEMORY
RESOLUTION
2
(Example)
Page 27

5
Press the START/MEMORY key.
Transmission will begin.
Broadcasting
•• A Transaction Report is
automatica lly printed out after
Broadcasting is completed. Check
the "Note" column of the report to
see if any of the locations are
marked "Busy" or have a
communication error code. If so,
send the document to those locations
again.
STAR T/MEMORY
99
Functions
7. Special
Page 28
Cover Sheet
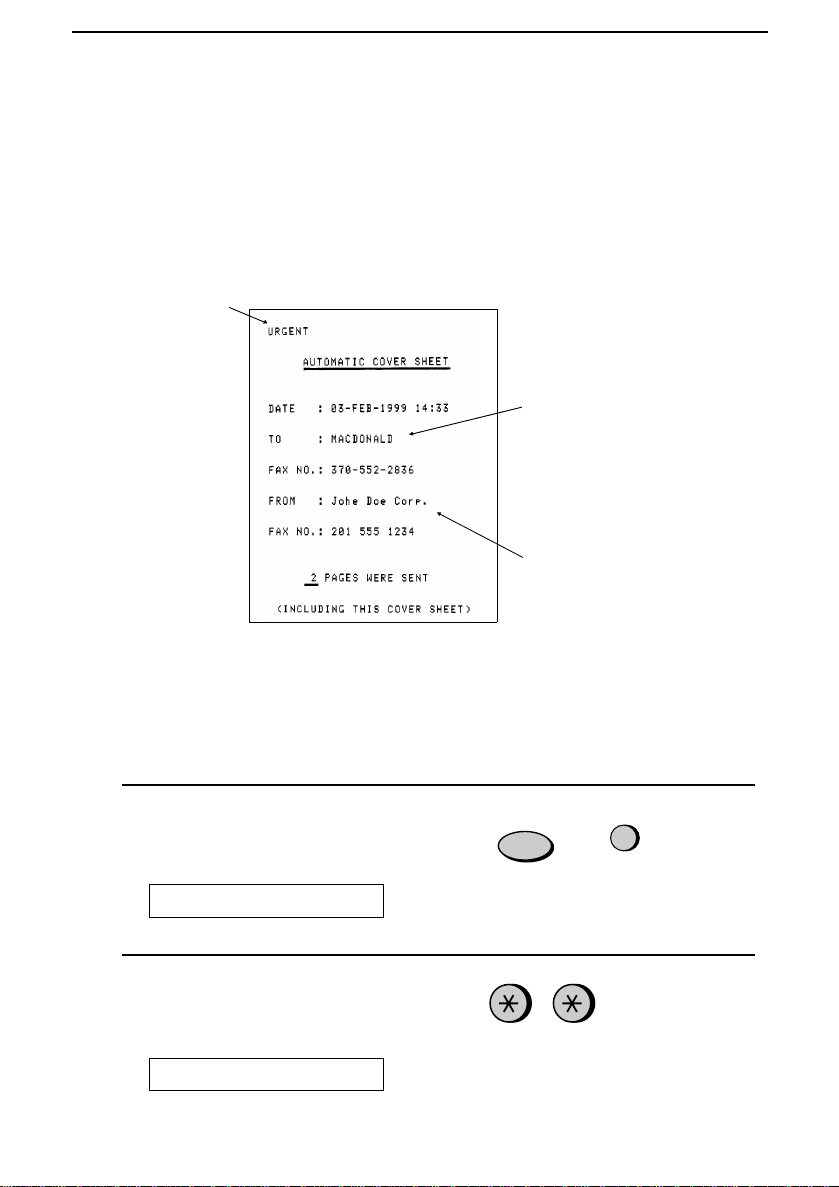
Cover Sheet
You can have the Fax generate a cover sheet and send it as the last
page of each of your fax transmis sions.
You can select a
message.
For the recipient’s name
to appear, you must dial
using a Speed Dial or
Rapid Key number with
the name programmed.
Your name and number
must be programmed as
explained in Chapter 1.
Follow the steps below to turn on the cover sheet function . Once the
cover sheet function is turned on, cover sheets will be included wit h all
tranmissi ons until you turn it off.
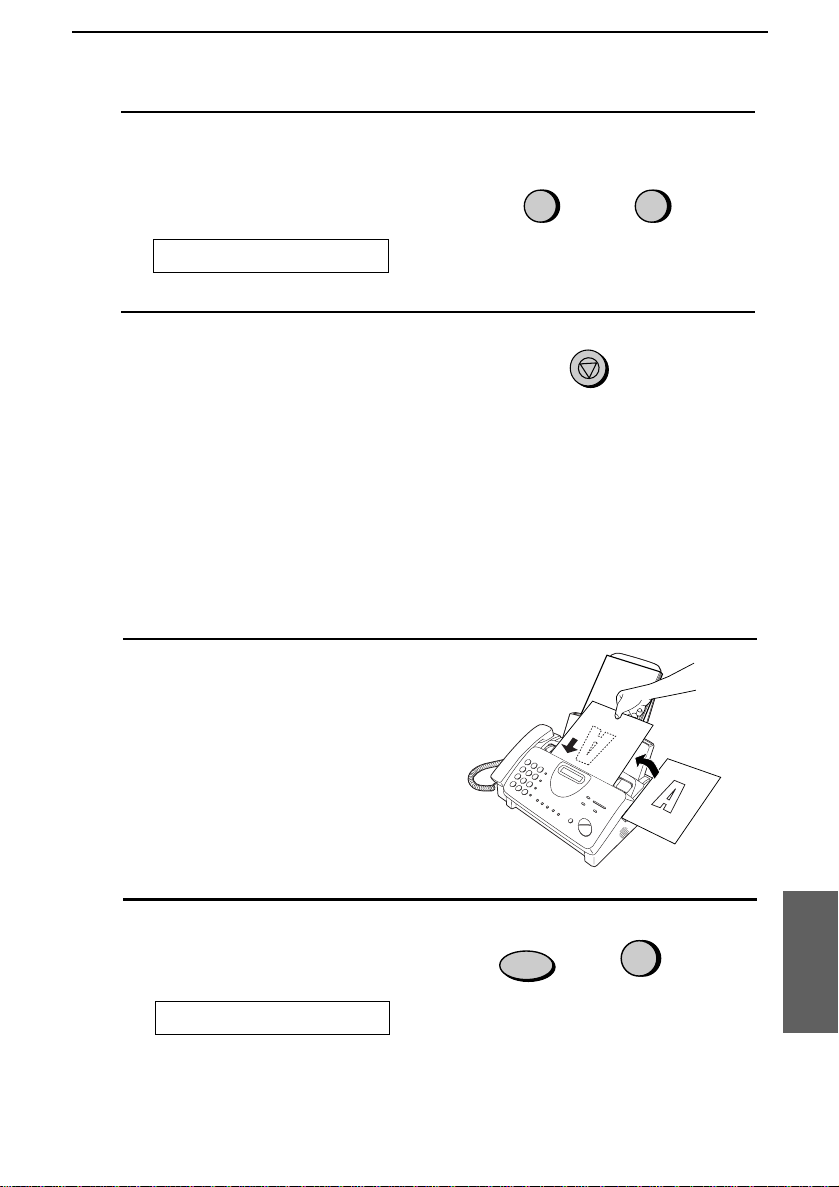
1
Press these keys:
FUNCTION
4
The display will show:
OPTION SETTING
2
Press these keys:
The display will show:
COVER SHEET MODE
100
Page 29
3
Press 1 (YES) to turn on the cover
sheet function, or 2 (NO) to turn it off.
The display will show:
AUTO PRINT OUT
YES NO
or
1
2
Cover Sheet
4
Press the STOP key to return to the
date and time display.
STOP
Selecting a header message (optional)
When the cover sheet function is turned on, you can also select a
message which will appear as a header at the top of the cover sheet.
Note that the message selection is onl y effective for one transmission .
1
Load the document(s).
•• The document must be loaded
before a message can be selected.
•• The cover sheet function must be
turned on.
2
Press these keys:
The display will show:
COVER SHEET HEAD
FUNCTION
5
Functions
7. Special
101
Page 30

Cover Sheet
3
Select a message by entering a number
from 1 to 4:
1: URGENT
2: IMPORTANT
3: CONFIDENTIAL
4: PLS. DISTRIBUTE
4
Dial the receiving machine and
transmit the document.
Note: To cancel a cover sheet header setting, press the STOP key or
remove the document from the feeder.
1
(Example)
102
Page 31

Batch Page Numbering
Batch Page Numbering
You can change the page numbering of the transmit ted docum ent from
simple numbering ("P.0 1", "P.02" , etc.) to batch numberi ng, which
means that a slash and the total number of pages being sent are added
after each page number (for example, "P. 01/ 05" , "P.02 /05 ", etc.). This
allows the receiver to check for missing pages.
1
Load the document(s).
•• The document must be loaded
before batch page numbering can be
set.
2
Press these keys:
The display will show:
FUNCTION
PAGE COUNTER SET
3
Enter the total number of pages ("01"
to "99") by pressing the number keys.
•• If you are sending a cover sheet, do
not include it in the total number of
pages (the number will be adjusted
automatically).
4
Dial the receiving machine and
transmit the document.
0
8
Example:
Eight pages
103
Functions
7. Special
Page 32

Batch Page Numbering
Comments:
•• If you nee d to cancel a batch num ber entry, re move the document from the
feeder or press th e STOP key.
•• If the number of pages actually transmitted does not coincide with the batch
number entered, the alarm will sound and PAGE COUNT ERROR will
appear in the display . PAGE E. will also appe ar in the NOTE colum n of the
Transac ti on Re port if it ha s bee n set to print out.
104
Page 33

Blocking Reception of Unwanted Faxes
Blocking Reception of Unwanted Faxes
The Anti Junk Fax function all ows you to block recepti on of faxes
from parties which you speci fy . This saves paper by not printing out
unwanted "junk" faxes.
To use this function, first turn it on by set ti ng Opt ion Settin g 13 to
YES as explained in Chapter 8, and then ent er the fax numb ers from
which you do not want to receive faxes as shown below.
Comments:
•• Up to 5 numbers can be entered in the Anti Junk Num be r List .
•• The Anti Junk function will not operate for a number which has also been
stored as a Priori ty Ca ll num be r.
•• To clear a number from the Anti Junk Number List , you need to know the
1-digit numb er which identifi es it . If you have forgo tten t his nu mber, print
out the Anti Junk Numbe r L ist as expla ined in Chap ter 9.
1
Press the keys shown at right.
STORE JUNK # will appear in the
display.
FUNCTION
3
2
Press 1 to store a number in the Anti
Junk Numbe r List, or 2 to clear a
number from the list.
3
Storing: Enter a 1-digit number from
1 to 5. This number identifies the
fax/voice number you will store in the
next st e p.
Clearing: Enter the number which
identifies the fax/voice number you
want to clear, and go to Step 5.
SET CLEAR
or
1
1
2
(Example)
105
Functions
7. Special
Page 34

Blocking Reception of Unwanted Faxes
4
Enter the full number you want to
block (max. of 20 digits).
5
Press the START/MEMORY key.
5
5
5
START/MEMORY
21
3
(Example)
4
6
Return to Step 3 to enter (or clear)
another number, or press STOP to exit.
STOP
Step 3 or
106
Page 35

Sending Documents From Memory
Sending Documents From Memory
With this function, the original document is scanned immediatel y,
stored in memory, and then transmit ted once the connecti on to the
receiving machine is made. This is convenient when transmittin g to
places where the line is often busy, as it saves you from waiting to
pick up the original document and frees the feeder for other
operations. After transmission, the document will be cleared from
memory.
♦ Only one memory transmission can be set at a time.
♦ The amount of memory currently occupied appears as a
percentage in the display while the document is being scanned .
1
Load the document(s).
The display will show:
READY TO SEND
••
Set the resolution and/or contrast if
desired.
2
Press the START/MEMORY key and
then 1.
The display will sho w:
ENTER STATION #
RESOLUTION
START/MEMORY
1
Functions
7. Special
107
Page 36

Sending Documents From Memory
3
Enter the number of the receiving
machine using one of the following
methods:
01 02 03
•• Press a Ra pid Key.
•• Press the SPEED DIAL key and
enter a Speed Dial number.
•• Enter a full telephone number by
pressing the number keys.
4
Press the START/MEMORY key if
you entered a Speed Dial number or a
full number.
•• The document will be scanned and
START/MEMORY
stored in memory. Your fax will
then dial the receiving machine and
transmit the document (redialling
will be done automatically if
necessary).
If the memory becomes full...
If the memory becomes full while the docum en t is being scanned,
MEMORY IS FULL will app ear in the dis play.
(Example)
♦ Press the START/MEMORY key if you want to transmit the
pages which have been stored up to that point in memory. The
remaining pages will be ejected from the feeder. After
transmission, the memory will be cleared and you can transmit the
remaining pages. You will also need to transmit the page which
was being scanned when the memory filled up.
♦ Press the STOP key if you want to cancel the entire transmission.
108
Page 37

Polling (Requesting a Fax Trans mission)
Polling (Requesting a Fax Transmission)
Polling allows you to call anoth er fax machine and have it send a
document (previously loaded in its feeder) to your machine without
operator assistance. In other words, the receiving fax machine, not the
transmitting fax machine, ini ti ates the transmission. You can use your
machine to both poll and be polled by ot hers.
To use the polling function , you mus t first set Rapi d Key 05/POLL fo r
use as a polling key. This is done by ch angin g Opti on S ett ing 14, as
described in Chapter 8, Option Settings. (Note that when Rapid Key
05/POLL is set as a polling key, it c annot be used for Rapid Ke y
Dialling.)
Requesting transm iss ion
Note: Rapid Dial Keys cannot be used for polling. To dial a Rapid Dial
location, press the SPEED DIAL key and then enter the 2-digit number
corresponding to the Rapid Key.
1
Dial the fax machine you want to poll
using one of the following methods:
•• Pick up the handset (or press the
SPEAKER key) and dial the full
number. Wait for the fax
answerback tone.
•• Press the SPEED DIAL key and
enter a 2-digit Speed Dial number.
•• Enter the full number using the
numeric keys.
2
Press Rapid Key 05/POLL.
•• If you used the handset, replace it
when POLLING appears in the
display. Reception will begin.
05/POLL
GHI
PQRS
(Example)
ABC
DEF
3
2
1
JKL
MNO
6
4
5
TUV
WXYZ
9
7
8
Functions
7. Special
109
Page 38

Polling (Requesting a Fax Transmission)
Being polled (polling standby)
To let another fax machine poll your machine, si mp ly set the reception
mode to FAX, and load the docum ent(s) to be sent .
Transmission will take place when the other fax machine calls your
machine and activates polling. Aut omat ic reception is poss ible whilst
your fax is on polling standb y.
Polling security
Polling Security allo ws you t o preven t unauthori zed po ll ing of your
machine. When this function is turned on, polling will only take place
when the fax number of the polling fax machine has been entered in
your machine’s list of permitted fax num bers (called "passcode
numbers"). The number of the polling fax must also be correctly
programmed into itself for identificati on.
To use Polling Security, follo w the steps below to turn the function
on, and then enter permitt ed numbers as sho wn on th e followi ng page.
1
Press the keys shown at right.
ENTRY MODE will appear in the
display.
2
Press the # key three times.
SECURITY SELECT will appear in
the display.
3
Press 1 to turn polling secu rity on, or 2
to turn it off.
4
Press the START/MEMORY key and
then the STOP key.
110
FUNCTION
1
START/MEMORY
or
3
2
STOP
Page 39

Polling (Requesting a Fax Trans mission)
Storing and clearing fax numbers for polling permission
You can store up to 10 fax numbers in your machine’s l ist of permit ted
numbers.
1
Press the keys shown at right.
ENTRY MODE will appear in the
display.
2
Press the # key four times.
PASSCODE # MODE will appear in
the display.
3
Press 1 to store a number, or 2 to clear
a number.
4
Storing: Enter a 2-digit number from
01 to 10. This number identifies the
fax number you will store in the next
step.
Clearing: Enter the number which
identifies the fax number you want to
clear, and go to Ste p 6.
FUNCTION
1
0
3
or
1
(Example)
2
5
Enter the fax number (max. of 20
digits).
6
Press the START/MEMORY key.
7
Return to Step 4 to enter (or clear)
another number, or press STOP to exit.
0
6 2 1 3
START/MEMORY
Step 4 or
(Example)
STOP
3
7
Functions
7. Special
111
Page 40

Timer Operations
Timer Operations
The Timer function allows you to set a transmiss ion and/or pol li ng
operation to be performed automatically at a time you specify . One
transmission ope ration and one polling operation can be set at the
same time, and the times th ey will be performed can be specified up to
24 hours in advance.
As an example, you can use this function t o take advantage o f
off-peak telephone rates without having to be there when the operation
is performed.
Note: Only a Speed Dial number can be used to dial the receiving machine.
Setting a timer operation
1
Press the keys shown at right.
TIMER MODE w ill appear in the
display.
FUNCTION
1
2
Press # to set a transmission operation
(SEND MODE), or * to set a polling
operation (POLLING MODE).
3
Press 1 to select SET.
4
Enter the time at which you w ant the
operation to take place in 24-hour
format (2 digits for the hour and 2
digits for the minute).
5
Press the START/MEMORY key.
112
1
0
START/MEMORY
or
9
2
Example: 9:25
5
Page 41

6
Enter the Speed Dial number of the
receiving fax machine.
Timer Operations
0
5
•• If this is a polling op era tion, go to
Step 9.
7
Press the START/MEMORY key.
8
Adjust the resolution and/or contrast if
START/MEMORY
RESOLUTION
(Example)
desired (skip to the next step if you
don’t want to change settings).
9
Press the START/MEMORY key and
then the STOP key. If this is a
START/MEMORY
transmission operation, load the
document in the feeder sometime
before the specified time of
transmission.
To cancel an operation
If you need to cancel an operation after it has been set, follow the steps
below.
1
Press the keys shown at right.
FUNCTION
TIMER MODE w ill appear in the
display.
STOP
1
2
Press # to cancel a transmission
operation, or * to cancel a polling
operation.
3
Press 2 to select CLEAR.
4
Press the START/MEMORY key and
then the STOP key.
2
START/MEMORY
or
STOP
113
Functions
7. Special
Page 42

Option
8
Chapter
The option setti ngs let you custom ise you r fax to better suit your needs.
An initial sett in g has been made for each option at th e factory. You can
change a setting by following th e steps described for each option below.
Settings
FUNCTION
Firs t press
FUNCTION and 4,
then press
scroll through the
options.
# or
*
to
4
or
Setting 1: FINE RESOLUTION PRIORITY
This opti on set s the def aul t resolution (the resol ut ion used if a setting is not
made with the RESOLUTIO N key) for t ran smi tt in g docum ent s. Press 1
(YES) to set the default resolutio n to FINE, or 2 (NO) to set it to STANDARD.
• Initial setting: 2
FUNCTION
4
YES NO
or
1
2
Setting 2: GREY SCALE SETTING
This sets the gre y sca le used fo r the HALF TONE resolution sett in g. Press 1
for 16 levels (this gives lower qualit y and fast er tran smission) or 2 for 64
levels (this gi ves hi ghe r qua lity and sl ower transm issi on).
Display
will show:
GRAY SCALE LEVEL
FINE PRIO RI T Y
STOP
• Initial setting: 2
FUNCTION
114
4
16 64
or
1
2
Press
NUMBER OF RINGS
until
display
shows:
GRAY SCALE LEVEL
STOP
Page 43

Option Settings
Setting 3: NUMBER O F RINGS AUTO RECEPTIO N
This sets the number of rin gs your fax allows bef ore answerin g an inco mi ng
call in FAX and TEL/FAX reception modes. Enter any number from 1 to 5.
• In itial setti ng: 1
Settings
8. Option
FUNCTION
4
Press
until
display
NUMBER OF RINGS
shows:
Enter a num ber
from
1 to 5
RECALL INTERVAL
STOP
Setting 4: RECALL INTERVAL
This set s the amount of tim e you r fax will wai t betwe en a uto mati c redials
when the line is busy. Enter 01 for 1 minute, 02 for 2 minu tes, e tc ., up to a
maxim um of 15 minutes.
• In itial setti ng: 05
FUNCTION
4
Press
until
display
RECALL INTERVAL
shows:
Enter a num ber
from
01 to 15
RECALL TIMES
STOP
Setting 5: RECALL TIMES
This sets the maximum number of times your fax will automatically redial if
the line is busy. Enter any number from 00 to 04. (In Ei re, enter an y num ber
from 00 to 03).
• In itial setti ng: 02
FUNCTION
4
Enter a num ber
from
00 to 04
Press
until
display
shows:
REMOTE RECEPTION
RECALL TIMES
STOP
115
Page 44

Option Settings
Setting 6: TEL/FAX REMOTE NUMBER (TRANSFER CODE)
If you hear a fax tone when you answer a call on a tone dial extension phone
connect ed t o the same line as th e fa x, you ca n m ake the fax begi n reception by
pressing 5, *, and * on the phone. Use this sett in g if you want to use a
number ot her tha n 5 to begin fax reception. You can enter any number from 0
to 9.
• Initial setting: 5
FUNCTION
Enter a num ber
from
0 to 9
4
Press
REMOTE RECEPTION
until
display
shows:
TEL/FAX REMOTE #
STOP
Setting 7: REMOTE RECEP TIO N SELECT
If you don’t intend to use the above TEL/FAX REMOTE NUMBER, you can
turn detection of the number off. This wi ll ensure th at the fax neve r mistakenly
attempts to beg in rece ption if it detects a signal similar to the TEL /FAX
REMOTE NUMBER while you a re talkin g on an extension ph one . Press 1 to
turn detection on, or 2 to turn detect io n off.
• Initial setting: 1
FUNCTION
YES
1
or
Press
NO
2
4
until
display
shows:
TRANSACTION LIST
REMOTE RECEPTION
STOP
Setting 8: TRANSACTION REPORT PRINT SELECT
This sets th e co ndi ti on for prin ti ng out a Tran sac ti on Re port . Enter a number
from 1 to 5 as follow s:
1 (ALWAYS PRINT): A report will be printed after each transmission,
reception, or error.
2 (ERR/TIMER/MEM) : A report will be printed after an error, timer
operation, or memory operation.
3 (SEND ONLY): A report will be printed only after a transmission.
4 (NEVER PRINT ): A report will never be printed.
5 (ERROR ONLY): A report will be printed only after an error occurs.
• Initial setting: 3
FUNCTION
Ente r a nu m b er
from
1 to 5
4
Press
DIAL MODE
until
display
shows:
TRANSACTION LIST
STOP
116
Page 45

Option Settings
Setting 9: DIAL MODE
This sets the mo de of diall ing . Pre ss 1 if you are on a tone dial line, or 2 if you
are on a pulse dial line.
• Initial setting: 1
FUNCTION
4
Press
until
display
DIAL MOD E
shows:
TONE
PULSE
2
or
1
PSEUDO RING DUR.
STOP
Setting 10: PSEUDO RING ING DURATION
This sets the dura ti on of pseud o ringin g when the rec eptio n mo de is set to
TEL/FAX. Enter a numb er from 1 to 4 as follows:
Eire: Settings 3 and 4 are not available.
1 (15 SEC.): 15 seconds
2 (30 SEC.): 30 seconds
3 (60 SEC.): 60 seconds
4 (120 SEC.): 120 seconds
• Initial setting: 1
FUNCTION
Enter a numbe r
from
4
1 to 4
Press
PBX RECALL
until
display
shows:
PSEUDO RING DUR.
STOP
Settings
8. Option
117
Page 46

Option Settings
Setting 11: PBX RECALL
This sets the recall mode used for transf err ing calls on a PBX or utilisi ng BT
Network servi ces. Re fe r to your PBX manu al or consult your suppl ier for t he
correct sett ing if the fact ory se tt ing is ina ppr opri at e. E nte r 1 for earth re call , 2
for time brea k rec all, or 3 fo r no operation.
1: Earth
2: Time break recall
3: No operation
• Initial setting: 2
FUNCTION
Enter a num ber
from
1 to 3
4
Press
FAX SIGNAL RX
until
display
shows:
PBX RECALL
STOP
Setting 12: FAX SIGNAL RECEIVE
Your fax will automatically begin reception if you hear a high-pitched fax tone
after answering a call. If you use a comput er fax mode m on the same line, you
must turn this fu nct io n off in orde r to prevent your fax from mista ken ly
attempting t o recei ve docu ment s sent from the compu te r fax modem . Press 1 to
turn the function on, or 2 to turn it off.
• Initial setting: 1
FUNCTION
4
YES NO
or
1
2
Press
JUNK # CHECK
until
display
shows:
FAX SIGNAL RX
STOP
118
Page 47

Option Settings
Setting 13: JUNK NUMBE R CHECK
Press 1 to prevent re ception from fax nu mb ers e nte re d in the Ant i Jun k
Number List. Press 2 to allow reception from all num be rs.
• Initial setting: 2
Settings
8. Option
FUNCTION
4
Press
until
display
JUNK # CHECK
shows:
YES NO
or
1
2
POLLING
STOP
Setting 14: POLLING
Press 1 if you want to use Rapid Key 05/POL L as a polling key. Press 2 if you
want to use it as a regular Rapid Key.
• Initial setting: 2
FUNCTION
4
Press
until
display
POLLING
shows:
YES NO
or
1
2
CALLER-ID
STOP
Setting 15: CALLER ID
If you subscrib e to a caller ID service and want to use the Caller ID func tion,
press 1. To turn Ca ll er ID off, pre ss 2. (C al le r ID is explained i n more detail in
Ca ll er ID in Cha pte r 7.)
• Initial setting: 2
FUNCTION
4
YES NO
1
until
Press
display
CALLER-ID
shows:
STOP
or
2
COVER SHEET MODE
119
Page 48

Option Settings
Setting 16: AUTO COVER SH EET
Press 1 (YES) to hav e th e fa x aut omatically generate a cover s he et and send i t
as the last page of each transmissio n. Press 2 (NO) to tur n the functi on of f.
• Initial setting: 2
FUNCTION
4
Press
until
display
COVER SHEET MODE
shows:
YES NO
or
1
2
AUTO PRINT OU T
STOP
Setting 17: ACTIVITY REPORT AUTO PRINT OUT
Press 1 to have your fa x aut om at ical ly prin t out an Acti vit y Re port onc e ev ery
30 operations. (T he list can sti ll be print ed ou t on dem and when desired.) Press
2 to turn automatic print-out off.
• Initial setting: 2
FUNCTION
4
YES NO
or
1
2
Display
will
AUTO PRINT OU T
show:
FINE PRIORITY
STOP
120
Page 49

9
Printing
Chapter
You can print out lists showing setti ngs and information entered in the
fax. You can also have the fax automatically print out a report on
transactions after they are made. The lists and the report are described
below.
Printing a list
1
Press these keys:
Reports and Lists
FUNCTION
2
Lists
9. Printing
The display will show:
2
Press the # key or the * key until the desired list appears in the
display.
3
Press the START/MEMORY key.
Activi ty Repor t
This report shows informati on on your most recently performed send
and receive operations (a combined maximum of 30 operations can
appear). The report is divi ded in to two pa rts: the TRANSMIS S IONS
ACTIVITY REPORT, which sho ws inform ation on transm issio ns, and
the RECEPTIONS ACTIVITY REPORT, which sh ows in formati on
on receptions.
LISTING MODE
or
START/MEMORY
121
Page 50

Printing Reports and Lists
♦ If Option Setting 1 7 (Auto Print Out) is set to YES, a report will
be automatically printed out whenever information on 30
operations has accumulated. (A report can still be printed on
demand at an y time.)
♦ All information is erased after a report is printed out. If automatic
print-out is disabled and print-out has not been performed
manually for 30 ope rations, the information on the oldest
operation will be overwritten each time a new operation is
performed.
Explanation of headin gs
SENDER/
RECEIVER
PAGES Number of pages transmitted or received.
NOTE
The fax numb e r of th e ot her machine in volved in the tr ansact i on. I n the case
of a transmission, the number dialled appears. In the case of a reception, the
prog ramme d I D o f t he se ndi ng ma chin e a ppe ars. I f th is machi ne doe s n ot
have an ID function, the communication mode will appear (for example,
"G3").
OK - Transmission/reception was normal.
P.FAIL - A power failure occurred. If you have power and the problem
persi sts , t ry a di ffe ren t ou tle t. I f ne ce ssar y, have an ele ct ric ian ch eck yo ur
power lines.
JAM - A problem with the paper or original document occurred. Make sure
the paper or document is loaded properly. Make sure the operation panel is
shut secure ly.
NO PAPER - You ran out of paper during rece ptio n.
122
Page 51

COM.E-0 to COM.E-7 - A telephone line error prevented the transaction.
See Line E r ro r i n Chap te r 11.
CANCEL - Transmission was cancelled because the STOP key was
pressed, no document was in the feeder, or the other machine requested
transmission using a function which your fax does not have. If you were
attempting to fax, make sure a document is in the feeder. If you were
receiving, contact the faxing party to see how they are trying to send to you.
Timer List
This list shows the timer operations which are currently set.
Printing Reports and Lists
Lists
9. Printing
Telephone Numbe r Lis t
This list shows the fax and voice num be rs which have been stored fo r
automati c di alling.
123
Page 52

Printing Reports and Lists
Passcode List
This list shows setting s made for polling security, you r name and
fax/telephone number as entered in the machine, and a sample of the
header printed at th e top of every page you transmi t (HEADER
PRINT).
Option Setting List
This list shows the current status of the option sett ing s.
124
Page 53

Printing Reports and Lists
Anti Junk Number List
This list shows the numbers that are blocked by the Anti Junk functio n.
Caller ID Lis t
This list shows informatio n about your most recent calls (maxi mum of
20 calls). (This list is only available if you are using the Caller ID
function.)
Lists
9. Printing
125
Page 54

Printing Reports and Lists
A.M. Program List
This list shows the settin gs and codes programmed fo r the answering
machine.
Messa ge Lis t
This list shows information about the messages currently recorded in
the answering machine, including the date and tim e of recording, the
length, and the type (ICM or memo).
126
Page 55

Printing Reports and Lists
Print Setup List
This list shows the current status of the printing sett ings a ccessed by
pressing the FUNCTION key and th e 6 key.
Transaction Report
This report is printed out autom aticall y afte r an operation is complete d
to allow you to check t he result. The fax is set at th e factory to print
out the report after every transmission, but you can change the setting
to have it printed out under a variety of other condition s. This is done
by changing Opti on Sett ing 8 as described in Chapter 8.
Lists
9. Printing
♦ The same headings appear in the Transaction Report as in the
Activity Report. See Activity Report in this chapter for an
explanation of the headings.
♦ The Transaction report cannot be printed out manually.
127
Page 56

10
Chapter
Fax print head
Clean the printing head freq uentl y to assu re opti mum printing
performance.
1
First unplug the telephone line, then unplug the power lead.
2
Pull the paper release plate forward and remove the paper.
Maintenance
3
Open the operation panel (grasp the finger hold and pull up), a nd
then pull the release on the right side of the machine forward to open
the print compartment cover.
128
Page 57

4
Take the imaging film cartridge out of the print compartment and
place it on a sheet of paper.
5
Wipe the print head and roller with isopropyl alc ohol.
Roller
Maintenance
10.
Mainenance
Print head
Caution!
•• Do not use benze ne or thinne r. Avoid touc hi ng th e pri nt head wit h har d
objects.
•• The print he ad ma y be hot if your fa x mac hin e ha s just recei ved a large
number of documents. If this is the case, allow the pri nt head to cool pr ior to
cleaning.
129
Page 58

Maintenance
6
Place the imaging film cartridge back in the print compartment.
7
Gently close the print compartment cover (press down on both sides
to make sure it clicks into place), and then close the operation panel.
8
Reinsert the paper in the pape r tray and push the paper release plate
back down.
130
Page 59

Scanning glass and rolle rs
Clean the scanning glass and rollers frequent ly to ensure the quality of
transmitted images and copies. Open th e operation panel (grasp th e
finger hold and pull up), and wipe th e scanning gl ass and roll ers with a
soft cloth.
♦ Make sure that all dirt and stains (such as correcting fluid) are
removed, as dirt and stains will cause vertical lines on transmitted
images and copies.
Maintenance
♦ Adhesive cellophane tape is useful for removal of debris from the
rollers. (Take care not to leave any pieces of tape on the rollers.)
Document
rollers
Caution: When wiping,
take care not to damage
any of the protruding
parts on the underside of
the operation panel.
Scanning glass
The housing
10.
Mainenance
Wipe the external parts and surface of the machine with a dry cloth.
Caution!
•• Do not use benze ne or thinne r. These solvents may damag e or discolour the
machine.
131
Page 60

11
Chapter
Troubleshooting
Problems and Solutions
Line error
Problem Check and remedy
LINE ERROR a ppears in
the display and/or a
transaction report is print ed
out with COM. E- and a
numbe r fr o m 0 to 1, 2, 3, 4,
5, 6, or 7 in t he NOTE
column.
•• Try the transac tion again. If the er r or per sist s,
check the following:
•• Check the connection. The cord from the TEL.
LINE socket to the wall socket should be no
longer than two meters.
•• Make sure there are no modem devices sharing
the same telephone line.
•• Check with the other party to make sure their f ax
machine is functioning prop er ly.
•• Have your telephone line check ed for line noise.
•• Try connecting yo ur fax to a different te lephon e
line.
•• If the problem still occurs, your fax m ac hine may
need service.
Dialing and trans mis s ion proble m s
Problem Check and remedy
No dial tone when you pick
up the handset or press the
SPEAKER key.
Dialling is not possible.
132
•• Make sure the handset cor d is connect ed to the
correct socket . See
Chapter 1.
•• Make sure the power cord is pr ope rly plug ged
into a power outlet.
•• Make sure that the telephone line is prope rly
connected to both the TEL. LI N E socket and the
wall socket.
Handset
in
Connection s
in
Page 61

Problems and Solutions
•• Make sure that the fax is set to the correct
dialling mode for your telephone line. See
Option Setting 9 in Chapt er 8.
The power is on, but no
transmission takes place.
•• Make sure that the receiving m ach ine has fax
paper.
•• Make sure that the telephone line cord is
plugged into the TEL. LI N E sock et, an d not th e
TEL. SET socket.
•• If the receiving machine is in manual mode with
no attendant, reception will not be possible.
•• If the receiving machine is not a Sharp model,
make sur e it is G 3 com p at ib le .
•• Check the display for error messages.
•• Pick up the handset and chec k for a dial tone.
Call the receiving machine by norma l (manual)
dialling, and confirm its res ponse.
Nothing is printed at the
receiving end.
A distorted ima ge i s
received at the other end.
•• Make sure that the document for transmission is
placed face down in the feeder .
•• Noise on the telephone line may cause
distortion. Try send ing the docu ment again.
•• Make a copy of the doc um ent on your fax . If the
copy is also distor ted, your fax m ay ha ve a
problem. If the pro blem persists, call for ser vice.
Reception and copyi ng proble ms
shooting
11.Trouble-
Problem Check and remedy
The power is on, but no
reception takes place.
The printing paper comes
out blank when you try to
receive a document.
•• Make sure the wall socket is connected to the
TEL. LINE socket, and not t he TEL. S E T soc ket .
•• Make sure that the docum e nt is loaded prope rly
in the feeder of the tra nsm it ting machine. Prin t a
report or make a co py t o conf ir m the print in g
ability of your machine.
133
Page 62

Problems and Solutions
General print quality is poor.
•• It is important to select a pape r that is
appropriate for the thermal transfer printer in
your fax. We recomm e nd using laser quality
paper that has a very smooth finish. Copier
paper will work, but it sometimes tends to yield a
lighter print quality.
The received documen t is
faint.
Received images are
distorted.
The quality of copies is poor
and/or black spots appear .
Reception/copyin g is
inter ru pted.
A received document or
copy prints out in strips.
•• Ask the other party to sen d higher con tras t
documents. If the contrast is still too low, your
fax may have a pr ob le m . Print a rep or t or make
a copy to check your fax’s pr int in g ability.
•• Noise on the telephone line may cause
distortion. Have the othe r party tr y sendin g the
document again.
•• The print hea d m ay be dir ty. See
in Chapter 10.
Fax print head
•• Make a copy of another document on your fax. If
the copy is also distor t ed, your f ax may h a ve a
problem. If the pro blem persists, call for ser vice.
•• Any dirt or material on the sca nning glas s will
cause spots to appea r on copies an d
transmit ted f axes . Clean the fax print hea d and
the scanning glass as explained in Chapter 10.
•• If reception or copying takes place continuously
for a long time, the pr int head may over he at.
Turn off the power and let it cool down.
•• Make sure the operat ion pa nel and t he print er
compart m ent cover un der the oper ation p a nel
are completely closed (press down on both
sides of each). (To close t he print er
compart m ent cover, grasp the top of the
operation pane l and pull to open it, and then
press down on both sides of the pr int er
compart m ent cover.)
134
Page 63

General proble m s
Problem Check and remedy
Information cann ot be
programmed in the fax.
Problems and Solutions
•• Make sure the fax is plugged in and the imaging
film and paper have been loaded. (Programming
is not possible if the imaging fi lm and prin ting
paper have not been loaded.) See
and
Imaging Film
Chapter 1.
Loading Printing Paper
Loading the
in
Nothing appear s in the
display.
The machine does not
respond when you press
any of its keys.
Autom at ic do c um ent
feeding does not work for
transmission or copying.
Voice calls taken on an
extension phone are
interru pt ed by t he fax.
No reception occur s whe n
polling is attempted.
•• Make sure the power cord is pr ope rly plug ged
into a power outlet.
•• Connect another electrical applian ce to the
outlet to confir m that it has power.
•• If a beep sound is not made wh e n you pres s th e
keys, unplug the power cord and then plug it
back in several seconds later.
•• Check the size and weight of the document (see
Transmittable documents
in Chapter 3).
•• The fax may interrupt during a voice call if the
receptio n mode is set to A.M. To prev ent
interrupt ion on a tone dial exte nsion ph one,
press any three ke ys on the ex te nsion ph one
after answering . (Note: Do not enter the code to
activate fax reception.)
•• Make sure you ha ve not r un out of paper.
•• Make sure the transmitting m ac hine is in
automatic reception mode.
•• If the transmitt ing machine has polling secur ity,
make sur e that your fax num b er has been
entered bot h in your m ach ine and in the
transmit tin g machine .
shooting
11.Trouble-
135
Page 64

Display Messages
Messages and Signals
Display messages
Note: If you have turned on the Caller ID function , s ee Caller ID in
Chapter 7 for display messages related to Caller ID.
The answering mach in e’s tran sf er fun ctio n has be en
A.M. TRANSFER
COVER OPEN
turned on as explained in
Chapter 2.
The print com p a rt m ent cover (under t he operation
panel) is open. Open the oper ation p a nel (gra sp t he
top and pull toward you ), and the n press do wn fir m ly
on both sides of the print com p ar tme nt cover to close
it.
Transfer Function
in
DOCUMENT JAMM E D
FAX RX IN MEMORY
FILM E ND
FUNCTION MODE The FUNCTION key has been press ed.
LINE ERROR
LINE IS IN USE
The original document is jam med. See the f ol low ing
section,
A fax has been received in memory because the
imaging film needs replacem ent, you have run out of
printing paper, or the paper is ja m m ed. The fax will
print out automat ica lly when t he problem is fix ed.
The imaging film may need replacement. Check the
film and replace if necessa ry.
Transmiss io n or recept ion was n o t succes sful. Pr ess
STOP to clear the messag e, and then t ry again. If the
error persists , se e
Solutions
An extension phone connect ed to the fax is being
used. Do not lift the fax’s han dset or atte mpt
transmission at this time, as this will inter ru pt the
conversation on t he ex te nsion ph one.
Clearing Paper Jams
Line Error
in this chapter .
.
in
Problems and
136
Page 65

MEMORY IS FULL
Display Messages
The memory is full. This may occur durin g fax
reception if too much d a ta is rece ived bef or e th e
pages can be pr in ted out. If faxes h a ve be e n
received to memor y beca use print ing is not poss ible
(an additional message will indicate the problem),
resolve the problem so that printing can continue
Substitue Recept ion to M emor y
(see
you are attempting to transmit from memory, see
Sending Document s from Memo ry
in Chapter 4). If
in Chapter 7.
MEMORY PRINTING
NO DATA
NO # STORE D
OUT OF PAPER
ON HOOK DIAL
OVER HEAT
PAPER JAMMED
READY TO SEND
The fax is prep ar in g or print ing o u t a docum ent from
memory.
This appears if you att em pt to search f or an
automatic dialling num b er when non e have been
stored.
You have tried to dial or clear a Rapid Key or Speed
Dial number that hasn’t bee n progr am m ed (a ful l
number hasn’t been assigned to it).
You are out of printing paper (or the paper release
plate is open). Load paper as described in
Printing Paper
The SPEAKER key has been pr ess ed and the fax is
waiting for you to dial. (To ret urn to the dat e and tim e
display, press the SPEAKER key again.)
The print head has ov erheat e d . Opera tion may be
continued once it cools .
The printing pa per is jamm e d. See th e following
section,
A document has be en loade d and the fax is wait in g
for transmission or copyin g instru ctio ns.
in Chapter 1.
Clearing Paper Jams
.
Loading
shooting
11.Trouble-
RECALLING
This appears if you attem pt to send a fax by
automatic dialling and the line is busy or the
receiving fax machine does not answer . Your fax
machine will automat ically r eat tem pt the call. (S ee
Automatic Redialling
in Chapter 3.)
Dialling
in
Sending a Fax by Automatic
137
Page 66

Display Messages
The SEARCH/R key has been pressed. Press # or
to search for an autom atic dialling num ber , or press
SEARCH DIAL
TOTAL PAGE(S) 01 Number of pages transmit ted, rec eived, or copied.
STOP to return to the data and t ime display. (See
Using the SEARCH/R key
Automatic Dialling
in Chapter 3.)
in
Sending a Fax by
Audible signa ls
Indicates the end of
Continuous tone 3 seconds
Intermittent tone
(3 beeps)
Rapid intermittent tone
5 seconds
(1 second on,
1 second off)
35 seconds
(0.7 seconds on,
0.3 seconds off)
transmission, reception, or
copying.
Indicates incomplet e
transmission, reception, or
copying.
Indicates that the han dset is
off hook.
*
138
Page 67

Clearing Paper Jams
Clearing Paper Jams
Clearing a jam med docum e nt
If the original document doesn’t feed properly during transmission or
copying, or DOCUMENT JAM MED appears in the disp lay, first t ry
pressing the START /MEMO RY key. If it doesn’t f eed out, remove it
as follows:
Important:
Do not try to remove a document without opening the operation
panel. This may damage the feeder mechanism.
1
Open the operation pane l by grasping
the finger hold and pulling up.
shooting
11.Trouble-
2
Remove the document.
3
Close the operation panel, making sure
it clicks into place.
Click!
139
Page 68

Clearing Paper Jams
Clearing ja mm e d printing pape r
1
Pull the paper release plate forward
and remove the paper.
2
Open the operation panel (grasp the
finger hold and pull up), and then pull
the release on the right side of the
machine forward to open the print
compartment cover.
3
Gently pull the jammed paper out of
the machine , making sure no torn
pieces of paper remain in the print
compartme nt or rollers.
140
Page 69

4
Gently close the print compartment
cover (press down on both sides to
make sure it clic ks into place), and
then close the operation panel.
5
Reinsert the paper in the paper tray and
push the paper release plate back down.
Clearing Paper Jams
shooting
11.Trouble-
141
Page 70

QUICK REF ERENCE GUIDE
INSTALLATION
1
2
TEL.
SET
TEL.
LINE
3
1. Connect the handset as shown.
2. Plug the power lead into an earthed, 230 V
outlet.
3. Plug one end of th e telephone lin e into the
TEL. LINE socket on the rear of the fax, and
the other end into your telephone wall socket.
RECORDING AN OUTGOING
MESSAGE
1. Press:
FUNCTION
Display shows:
2. Press:
3.
Press
START/MEMORY
1 (GENERAL) to record an outgoing
message for the answering machin e. Press
(TRANSFER) to record an outgoing message
for the Transfer function.
4.
Press the
facing the
REC/MEMO key, and then speak
MIC mark on the lower left corne r of
the machine at a distance of about 30 cm.
5.
When finished, press the
place the handset.
6. Press:
142
0
OGM RECORDING
STOP key or re-
STOP STOP
ENTERING YOUR NAME
AND NUMBER
Imaging film and paper must be loaded
Note:
to perform the following operation.
1. Press:
Display shows:
2. Press:
3. Enter your fax number (max. of 20 digits) by
♦If you make a mistake, press the SEARCH/R
key to move the cursor back to the mistake, then
enter the correct number or letter.
4. Press:
5. Enter your name by pressing the appropriate
♦To enter two letters in succession that require the
same key, press the
ing the first let ter.
A =
B =
C =
D =
E =
F =
G =
H =
I =
2
GHI
PQRS
Press either key one or more times to select
and enter a symbol.
6. When finished, press:
FUNCTION
3
OWN NUMBER SET
START/MEMORY
pressing the numb er keys .
START/MEMORY
number keys as shown below.
SPEAKER key after enter-
J =
K =
L =
M =
N =
O =
P =
Q =
R =
DEF
ABC
JKL
TUV
SYMBOLS
MNO
WXYZ
SPEED DIAL
REDIAL
SEARCH
SPEAKER
Delet e s
highlighted letter.
Upper/lower
case shift key.
Moves cursor to
R
the lef t.
Moves cursor to
the right.
START/MEMORY
S =
T =
U =
V =
W =
X =
Y =
Z =
SPACE =
STOP
Page 71

SETTING THE DATE AND TIME
SENDING DOCUMENTS
Imaging film and paper must be
Note:
loaded to perform the follo wing
operation.
Press:
Press the
FUNCTION
Display shows:
START/MEMORY key:
3
DATE & TIME SET
START/MEMORY
Enter two digits for the Day (01 through 31).
Enter two digits for the Mont h (01 thro ug h 12).
Enter four digit s for the Year (Ex: 1999).
Enter two digits for the Hou r (00 throu gh 23).
Enter two digits for the Minu te (00 throu gh 59).
When finished, press:
START/MEMORY
STOP
STORING AND CLEARING
NUMBERS FOR AUTO
DIALLING
Imaging film and paper must be
Note:
loaded to perform the follo wing
operation.
1. Pre ss:
Display shows:
2.
3. Enter a 2-digit Speed Dial number (from 01 to
4. En ter the full tel ep ho ne /fa x numb er.
5. Pre ss:
6. En ter the name of the loca tion by pressin g
7. Press:
FUNCTION
3
FAX/TEL # MODE
Press
1 to store a number or 2 to clear a num-
ber.
05 for Rapid Key Dial lin g, or 06 to 45 for
Speed Dialling). (If you are clearing a number,
go to Step 7.
START/MEMORY
number keys (max. of 20 characters). (Refer
to the letter entry table in ENTERING YOUR
NAME AND NUMBER.)
STOP
START/MEMORY
Place your document
(up to 10 pages) face
down in the document
feeder.
Normal Dialling
1. Lift the handset or press
SPEAKER
2. Dial the fax number.
3. Wait for the reception tone (if a person answers, ask them to press their Start key)
4. Press:
START/MEMORY
Rapid Key Dialling
Press the appropriate Rapid Key. Transmission
will begin automatica lly.
Speed Dialling
1. Press:
SPEED DIAL
2. Enter 2-digit Speed Dial number.
3. Press:
START/MEMORY
RECEIVING DOCUMENTS
FAX
TEL
14 FEB 10:30
TEL/FAX
A.M.
FAX
TEL
Fax
tone
14 FEB 10:30
TEL/FAX
14 FEB 10:30
14 FEB 10:30
TEL/FAX
A.M.
FAX
TEL
A.M.TEL/FAX
FAX
TEL
A.M.
START/MEMORY
RECEPTION
Press:
MODE
FAX mode: The fax automatically answers and
receives the incoming document .
TEL mode:
RECEIVING
TEL/FAX mode:
The fax machine automatically answers on one
ring and receives faxes. Voice calls (including
manually dialled fax transmi ssions) are signal led
by a special ringing sound.
A.M. mode: Select this mode when you go out to
receive both voice messages and faxes.
143
Page 72

Index
A
A.M. Pro gra m List, 126
A.M. reception mode, 32, 39, 80
Activit y Rep ort , 121
Automatic printin g, 120
Anti junk fax, 105
Anti Junk Fax (Anti Junk Number), 119
Anti Junk Number List, 125
Audible signals, 138
Auto cover sheet, 120
Automatic dialling, 73
Automat ic dia lling, storing numbe rs, 70
B
Batch pag e numbe ring, 103
Broadcasting, 98
C
Call er I D, 93
Call er ID List, 95
Calling Pa rty Control detection, 45
Chain Dialling, 90
Cleaning, 128, 131
Contrast, 65
Copies, 86
Copy cut-off setti ng, 88
Copy/Help key, 12, 86
Cover sheet, 120
D
Date, set ti ng, 29
Delete ke y, 12
Dial mode, 117
Diallin g
Direct Keypad, 75
Normal, 67, 89
Rapid Key, 73, 89
Search, 76, 90
Speed, 74, 89
Direct Keypad Dialling, 75
Display, 10
Display messages, 136
Document feeder, 63
Document guides, 63
Document restrict ions, 62
Docum ent rollers, 131
Docum ent sizes, 61
Docum ent, maximum scanning size, 62
E
Extension telepho ne
Connecting, 18
Using, 82
F
FAX reception mode, 32, 79
Fax reception on A.M. fa il ure, 44
Fax Signal Receive, 118
Fine Resolution Pri ori ty, 114
Function key, 11
H
Halftone , 65
Handset, 14
Housing, cleaning, 131
I
Imaging film, loadi ng a nd re placing, 19
Incoming message time, 43
J
Jams, clearing, 139
Junk Number Check, 119
L
Letters, enter in g, 27
Line error, 132
Loading prin ting paper, 24
Loading the docu me nt , 63
144
Page 73

Index
M
Memory
Sending documents from, 107
Substitute reception to, 85
Message List, 126
Messages
Checking da te and time , 42
Erasing, 41
Listeni ng to , 40
Listening to remotely, 54
Setting allo wed t im e, 43
N
Network Services, 91
Normal Dialling, 67, 89
Numbe r key s, 1 1
Number of rings in auto answe r mode ,
115
O
Option Setting List, 124
Outgoing messa ge, 36
Override Ringing, 50
P
Panel release, 11
Paper jams, clearing, 140
Passcode List, 124
Pauses in automat ic dialling, 70, 75
PBX setting (Recall mode), 118
Phone Plus Services, 91
Play/Skip key, 10, 40
Polling, 109 - 111
Polling key, setting, 119
Print cont rast setting, 25
Print he ad , c le ani ng, 12 8
Print Setup List, 127
Priority Call , 96
Pseudo ring duration, 117
R
Rapid Dial keys, 11
Rapid Key Dia ll in g, 73, 89
Rec/Memo key, 11
Recall tim e s, 11 5
Recall Wait Interval, 115
Recepti on m ode
A.M. mode, 32, 39, 80
FAX mode, 32, 79
Setting, 33
TEL mode, 32, 81
TEL/FAX mode, 32, 78
Recepti on m ode key , 11, 33
Recepti on Ra ti o setting, 84
Redial key, 10, 68, 90
Redialling, 77, 90
Remote code number, 52
Remote operations, 52
Remote Reception Select, 116
Removing original document, 64
Repeat key, 10
Resolution, 65
Resolution key, 11
Ringing volume, 35
Rollers, cleaning, 131
S
Scanning glass, cleani ng, 131
Search Dia ll ing , 76, 90
SEARCH/R key, 11, 90
Sender ’s name and numb er, en te rin g, 26
Speaker key, 11, 34, 67, 89
Speaker volume, 34
Speed Dial key, 10, 74, 89
Speed Dialling, 74, 89
START/MEMORY key, 12
Stop key, 12
145
Page 74

Index
T
TEL reception mode, 32, 81
TEL. LINE jack, 16
TEL. SET socket, 18
TEL/FAX reception mo de, 32, 78
Tel/Fa x Rem ote Numbe r, 116
Telephone line cord, 16
Telephone Number List, 123
Telephone, using as, 89
Time, setting, 29
Timer List, 123
Timer oper at ion s, 11 2
Transac ti on Re port , 127
Transac tion Re port Prin t Selec t, 116
Transfer function, 47
Two-in-on e print ing , 83
V
Volume keys, 11, 34
146
Page 75

REMOTE OPERATION CARD
The card below is provided as a quick guide to remote operation. Cut it
out and carry it with you when yo u go out.
Remote Operation Guide
1. Ca ll your fax from a touch- tone telephone , and
press when the outgoing message be gins.
2. Enter your rem ote code: .
3. Press .
4. After list ening to your messages, you can eit her
hang up to save t hem , or enter one of the
comman d s on the r ever se side.
#
#
147
Page 76

REMOTE COMMANDS
••
PLAYBACK
Play messages. . . . . . . . . .
Move backward/repeat. . . .
Skip forward. . . . . . . . . . . .
Stop . . . . . . . . . . . . . . . . . .
Play new messages only. .
(first stop playback)
•• ERASING MESSAGES
Erase single messa ge. . . .
Erase all messages . . . . . .
•• RECORDING A MEMO
Start . . . . . . . . . . . . . . . . . . *
End. . . . . . . . . . . . . . . . . . .
•• RECORDING A NEW OGM
Start . . . . . . . . . . . . . . . . . . *
•• FAX RECEPTION MODES
##7
2
5
0
6
3#33#
0
4
A.M. mode . . . . . . . . . . . . .
FAX mode . . . . . . . . . . . . .
TEL mode. . . . . . . . . . . . . .
#
TEL/FAX mode. . . . . . . . . .
#
#
•• TRANSFER FUNCTION
Turn on. . . . . . . . . . . . . . . .
Turn off. . . . . . . . . . . . . . . .
New transfer number . . . . .
#
Record transfer OGM. . . . .
#
To quickly disconnect. . . . . * *
•• OGM ONLY MODE
Turn on. . . . . . . . . . . . . . . .
Turn off. . . . . . . . . . . . . . . .
8
8
8
9
9
9
1
2
3
1
2
(Tel.#)
#
#
#
#
#48
#
##0
#9 3
#11
#1 2
148
Page 77

SHARP ELECTRONICS (U.K.) LT D.
Sharp House, Thorp Road , Newton Heath, Manchest er, M 40 5BE
SHARP CORPORATION
PRINTED IN SPAIN
(TINSE3979FFZZ)
Page 78

MAINS PLUG WIRING INSTRUCTIONS
This equipment is fitted with a moulded type mains plug which incorporates a detachable fuse
cover, under no cir cum s tances should the plug be used withou t the f use cover fitt ed.
In the unlikely event of the socke t outlet in your home not being com patible with the plug supplied,
cut off the mains plug and fit an appropr iate type observin g the wiring co de below.
DANGER: The fuse from the cut-off plug should be removed and the plug should be disposed
of in a safe manner. Under no circumstances should the cut-off plug be inserted into a socket
outlet as a seriou s electr ic shock may occu r.
If you are not sure how to do this, get help fr om a qualified elect ric ian.
IMPORT ANT
The wires in this mains lead are coloured in accordanc e with the following code:
GREEN-AND-YELLOW: Earth
BLUE: Neutral
BROWN: Live
As the colours of the wires in the mains lead of this apparatus may not correspond with the
coloured markings identifying the terminals in you r plug, proceed as follows:
The wire which is coloured GREEN-AND-YELLOW must be co nnec te d to t he t er minal i n th e
plug which is marked by the letter E, or by the safety earth symbol , or coloured green or
green-and-yellow.
The wire which is coloured BLUE must be connected to the terminal which is marked with the
letter N or coloured black.
The wire which is coloured BROWN mus t be con nected to th e term inal which is mar ked with the
letter L or colour ed red.
This apparat us mu st be prot ected by a 13A fuse in th e mains plug or distr ibut ion boar d.
"WARNING: THIS APPARATUS MUST BE EARTHED"
This equipment complies with the requirements of Directives 89/336/EEC and 73/23/EEC as amended by 93/68/EEC.
Dieses Gerät entspricht den Anforderungen der EG-Richtlinien 89/336/EWG und 73/23/EWG mit Änderung 93/68/EWG.
Ce matériel répond aux exigences contenues dans les directives 89/336/CEE et 73/23/CEE modifiées par la directive
93/68/CEE.
Dit apparaat voldoet aan de eisen van de richtlijnen 89/336/EEG en 73/23/EEG, gewijzigd door 93/68/EEG.
Dette udstyr overholder kravene i direktiv nr. 89/336/EEC og 73/23/EEC med tillæg nr. 93/68/EEC.
Quest’ apparecchio è conforme ai requisiti delle direttive 89/336/EEC e 73/23/EEC, come emendata dalla direttiva
93/68/EEC.
Este equipamento obedece às exigências das directivas 89/336/CEE e 73/23/CEE, na s ua versão corrigida pe la directiva
93/68/CEE.
Este aparato satisface las exigencias de las Directivas 89/336/CEE y 73/23/CEE, modificadas por medio de la 93/68/CEE.
Denna utrustning uppfyller kraven enligt riktlinjerna 89/336/EEC och 73/23/EEC så som kompletteras av 93/68/EEC.
Dette produktet oppfyller betingelsene i direktivene 89/336/EEC og 73/23/EEC i endringen 93/68/EEC.
Tämä laite täyttää direktiivien 89/336/EEC ja 73/23/EEC vaatimukset, joita on muutettu direktiivillä 93/68/EEC.
89/336/EEC : EMC directive 73/23/EEC : Low voltade directive 93/68/EEC : CE Mark regulation
This equipmen t is not desig ned fo r makin g emergency telephony calls
when the power fails. Alternative arrangements should be made for
access to emergency services.
Page 79

Introduction
Welcome, and thank you for
choosing a Sharp facsimile!
The features and
specifications of your new
Sharp fax are shown below.
Automa tic dialling Rapid Key Dialling: 5 numbers
Speed Dia ll ing : 40 numb ers
Imagi ng fi lm Initia l starter fil m (i nc luded with fa x m ac hin e):
10 m roll (approx. 30 A4 pages)
Replacement fi lm :
UX-3CR 30 m roll (two rolls in
package, one roll yields ap prox . 95 A4
pages)
Automatic document
feeder
Memor y siz e* : 512 KB (approx. 30 avera ge page s with no voi ce
Modem speed 9600 bps with automatic fallback to 7200, 4800,
Transmissi on time * Approx. 15 seconds (Sha rp spe cial mo de)
Reception mode s FAX, TEL, TE L /FAX, A.M.
Resolutio n
10 sheets m ax .
messages rec ord ed, or 24 minut es of voic e messages (including OGMs) with no documents in
memory)
or 2400 bps
Horizontal:
8 lines/mm
Vertical:
Standard: 3.85 lines/mm
Fine/Halfto ne: 7.7 lines/mm
Super fine: 15.4 li nes/mm
Note: The facsimile machine is Year 2000 compliant.
* Based on ITU-T Test Chart #1 at standa rd re solu tion in Sharp specia l mode ,
excluding time for protocol signals (i.e., ITU-T phase C time only).
1
Page 80

Display 16-digit LCD display
Recording system Thermal tran sfer recordi ng
Halftone (greyscale) 64 levels
Applicable telephone line Public switched telepho ne netwo rk / PBX
Compatibil ity IT U-T (CCI TT) G3 mode
Compression sc hem e MH, MR, Sharp
Scanning metho d Sheet-feeder CIS (Cont ac t Image Sensor)
Effective printing width 204 mm max.
Input document size
Automatic feeding:
Width: 148 to 210 mm
Lengt h: 140 to 297 mm
Manual feeding:
Width: 148 to 210 mm
Lengt h: 140 to 600 mm
Effective scanning wi d th 210 mm max.
Contrast control Automat ic /Da rk sel ec ta bl e
Copy function Single/Multi-copy/Sort-copy (99 copies/page)
Telephone function Standard (C ann ot be used for incom ing/outgoing
if power fails)
Power requir em ents 230 V AC, 50 Hz
Operati ng tem per atur e 5 to 35°C
Humidity Maximum: 85 %
Power consumption Stand-by: 3.0 W
Maximum: 115 W
Dimensions Width: 343 mm
Depth: 313 m m
Height: 312 mm
Weigh t Approx. 3.4 kg
As a part of our policy of continuou s improv em ent, SHARP reserve s the right
to make desi gn a nd spe ci fic at io n cha nge s for pr oduct improvem ent wit hout
prior not ice. The perfor ma nc e speci fic atio n fig ure s indi cate d ar e nomi nal
values of produ ct ion units. There may be some deviatio ns from th ese values
in indiv idu al unit s.
2
Page 81

Important safety information
• Do not disassemb le this machine or attempt any procedures not described
in this manual. Refer all servicing to qualified service personnel.
• This machine must only be connected to a 230 V, 50 Hz, earthed
(3-prong) outlet. Connecting it to any other kind of outlet may damage
the machine.
• Do not install or use the machine near water, or when you ar e wet. Take
care not to spill any liqui ds on t he ma chine.
• Unplug the ma chine from t he telephone so cket and t hen the power out let
and consult a qualified service representative if any of the following
situation s occur:
- Liquid has been spilled into the machi ne or the machine has been
exposed to rain or water.
- The machine produces odors, smoke, or unusual noi ses.
- The power cord is frayed or damaged.
- The machine has been dropped or the housing damaged.
• Do not allow anything to rest on the power lead, and do not install the
machine where people may walk on the power lead.
• Never insert objects of any kind into slots or openings on the machine.
This could create a risk of fire or electric shock. If an object falls into the
machine that you cannot safely remove, unplug the machine and consult
a qualified service representative.
• Do not pl ace this machine on an unstable ca rt, stand or table. The machine
could be seriously damaged if it falls.
• Never instal l tel ephone wiri ng duri ng a lig htn ing storm.
• Never install telephone sockets in wet locations unless the socket is
specifically designed for wet locations .
3
Page 82

• Never touch uninsulated telephone wires or terminals unless the tele-
phone line has been disconnected at the network interface.
• Use caution when installing or modifying telephone lines.
• Avoid using a telep hone (ot her than a cordless typ e) during an electri cal
storm. There may be a remote risk of electric shock from lightning .
• Do not use a telephone to report a gas leak in the vicinit y of the leak.
• The socket-outlet m ust be installed near the equipment and must be easily
accessible.
Important:
•• This facsimile machine is not designed for use on a lin e which has cal l
waiting, call forwarding, or certain other special services offered by
your telephone company. If you attemp t to use the fax machine on a
telephone line usi ng any of these services, you may experi ence errors
during transmissio n and reception of facsimi le mess ages.
•• This facsimile machine is not compati ble wit h di gital tel ep hone
systems.
4
Page 83

Regulatory informa tion
♦ This facsimile machine is only designed to operate in the country
where approved.
Your Sharp UX-470 Fa csimi le Transce iver is approved for connection t o the Public
Switched Telephone Netwo rk (PSTN), it is also appro ved for connect ion via a
Private Branch Exchange (PBX), and can be used with either Loop Disconne ct (LD)
or Dual Tone Multi-Fre quen cy (DTMF) signalling.
Your facsimile ma chine is not suitable as an extens ion to some pay phon es or for
use on shared se rvic e line s.
REN
The Ringer Equivalence Nu m ber (REN) of your fax mach in e is 1.
The total numbe r of instr ument s that can be connect ed to an ex clusive line is
determined by adding the REN value s of each instr um en t. The total sho uld not
exceed 4.0. A telephone provided by BT is assumed to have a REN of 1 unless
otherwise marked .
Satisfactor y ringer oper ation can not be guar an te ed in inst alla tions cons isting of
mixed apparat us types , even if the REN value does no t exceed 4.
Emergency services
Emergency services (999) can be called from this appara tus. Please display on the
telephone the num be r requ ired to access tha t servic e, tog ether w ith the num ber of
the telephone, using the label provided.
♦
Private branch exchange (PBX) connection
Your facsimile ma chine is app roved f or conn ection t o the Public Telephone Net wor k
(PSTN) via compatible PBX system s. Cons ult yo ur supplier for a list of suitable PBX
systems. It canno t be guar ant ee d that this facsimile m ach in e will operat e co rrec tly
under all possible conditions of con nect ion to com p at ible PBX syst ems.
This facsimile machine has been approv ed for use of the following facilities:
Simple telephone
Tone dialling (DTMF)
Loop disconnect (Pulse dialling)
5
Page 84

Memory dialling
Loudspeaking (Call Progress Monitor)
On-hook dialling
Automatic answering
Automatic dialling
Automatic clear in g
Last numb er redial
Time break or Ear t h recall
Series connection of extens ion tele phone( s)
Any other usage wi ll invalidate the ap proval of the facsim i le if as a result it then
ceases to comply with the standards against which appr oval was granted.
Series connection
When connected via series appa ratu s, difficult ies may occasiona lly be experienc ed
when making calls to the PSTN and by both parties durin g telephon e conv ersations.
If difficulties are experienced, cont act t he sup p l ier or m aint ainer of the series
apparatus in the first instance.
While operation may be po ssible initially, chan ges to or m odernisa tion of the
network taking place in the nor mal cour se of eve nts may result in the facsim ile
equipment being con nect ed to a network service with which it was not designed to
be compatible . Failure of the f acsim ile / series apparat us to work under these
circumstanc es m ay no t be the fault of th e networ k ope ra tor.
The voltage drop int roduce d by your facs imile bet wee n the PSTN and the
associated appar at us at a current of 40mA d. c. is 2 volts, theref ore no ad dition al
series equipm ent may be connec te d.
6
Page 85

Table of Contents
1 Installation 9
Unpacking Checklist. . . . . . . . . . . . . . . . . . . . . . . . . . . . . . . . . . . . . . . . 9
A Look at the Operation Panel . . . . . . . . . . . . . . . . . . . . . . . . . . . . . . . 10
Connections. . . . . . . . . . . . . . . . . . . . . . . . . . . . . . . . . . . . . . . . . . . . . . 13
Loading the Imaging Film. . . . . . . . . . . . . . . . . . . . . . . . . . . . . . . . . . . 19
Loading Printing Paper . . . . . . . . . . . . . . . . . . . . . . . . . . . . . . . . . . . . . 24
Entering Your Name and Fax Num ber. . . . . . . . . . . . . . . . . . . . . . . . . 26
Setting the Date and Tim e. . . . . . . . . . . . . . . . . . . . . . . . . . . . . . . . . . . 29
Selecting the Recepti on Mode . . . . . . . . . . . . . . . . . . . . . . . . . . . . . . . 32
Volume Adjust ment . . . . . . . . . . . . . . . . . . . . . . . . . . . . . . . . . . . . . . . 34
2 Using the Answering Machine 36
Recording an Outgoing Message . . . . . . . . . . . . . . . . . . . . . . . . . . . . . 36
Operating the Answering Machine. . . . . . . . . . . . . . . . . . . . . . . . . . . . 39
Recording Memos and Telephone Conversation s . . . . . . . . . . . . . . . . 41
Optional Answering Machine Settings. . . . . . . . . . . . . . . . . . . . . . . . . 43
Transfer Function . . . . . . . . . . . . . . . . . . . . . . . . . . . . . . . . . . . . . . . . . 47
Override Ringing. . . . . . . . . . . . . . . . . . . . . . . . . . . . . . . . . . . . . . . . . . 50
Remote Operations . . . . . . . . . . . . . . . . . . . . . . . . . . . . . . . . . . . . . . . . 52
3 Sending Documents 61
Transmittable Documents. . . . . . . . . . . . . . . . . . . . . . . . . . . . . . . . . . . 61
Loading the Document . . . . . . . . . . . . . . . . . . . . . . . . . . . . . . . . . . . . . 63
Resolution and Contrast . . . . . . . . . . . . . . . . . . . . . . . . . . . . . . . . . . . . 65
Sending a Fax by Normal Dialling. . . . . . . . . . . . . . . . . . . . . . . . . . . . 67
Sending a Fax by Automatic Dialling. . . . . . . . . . . . . . . . . . . . . . . . . . 69
4 Receiving Documents 78
Using TEL/FAX Mo d e . . . . . . . . . . . . . . . . . . . . . . . . . . . . . . . . . . . . . 78
Using FAX Mode . . . . . . . . . . . . . . . . . . . . . . . . . . . . . . . . . . . . . . . . . 79
Using A.M. Mode . . . . . . . . . . . . . . . . . . . . . . . . . . . . . . . . . . . . . . . . . 80
Using TEL Mode. . . . . . . . . . . . . . . . . . . . . . . . . . . . . . . . . . . . . . . . . . 81
Substitute Reception to Memory. . . . . . . . . . . . . . . . . . . . . . . . . . . . . . 85
7
Page 86

5 Making Copies 86
6 Making Telephone Calls 89
7 Special Functions 93
Caller ID . . . . . . . . . . . . . . . . . . . . . . . . . . . . . . . . . . . . . . . . . . . . . . . . 93
Broadcasting . . . . . . . . . . . . . . . . . . . . . . . . . . . . . . . . . . . . . . . . . . . . . 98
Cover Sheet. . . . . . . . . . . . . . . . . . . . . . . . . . . . . . . . . . . . . . . . . . . . . 100
Batch Page Numbering. . . . . . . . . . . . . . . . . . . . . . . . . . . . . . . . . . . . 103
Blocking Reception of Unwanted Faxes . . . . . . . . . . . . . . . . . . . . . . 105
Sending Docu ments From Memory. . . . . . . . . . . . . . . . . . . . . . . . . . 107
Polling (R eq uesting a Fax Transmission). . . . . . . . . . . . . . . . . . . . . . 109
Timer Operations . . . . . . . . . . . . . . . . . . . . . . . . . . . . . . . . . . . . . . . . 112
8 Option Settings 114
9 Printing Reports and Lists 121
10 Maintenance 128
11 Troubleshooting 132
Problems and Solut ion s . . . . . . . . . . . . . . . . . . . . . . . . . . . . . . . . . . . 132
Messages and Signals. . . . . . . . . . . . . . . . . . . . . . . . . . . . . . . . . . . . . 136
Clearing Paper Jams . . . . . . . . . . . . . . . . . . . . . . . . . . . . . . . . . . . . . . 139
Quick Reference Guide 142
Index 144
8
Page 87

1
Chapter
Installation
Unpacking Checklist
1. Installation
Original
document
support
Handset
Handset
lead
Gear s (4)
Before setting up,
make sure you have
all of the following
items.
If any are missing,
contact your dealer
or retailer.
Paper tray
extension
Rapid key
labels
Operatio n
manual
Telephone
line cord
Imaging film
(initial starter
roll)
Imaging
film
cartrid g e
Emergency
labels
9
Page 88

A Look at the Operation Panel
A Look at the Operation Panel
2
SPEED DIAL key
1
GHI
PQRS
1
DEF
MNO
WXYZ
SPEED
DIAL
3
REDIAL
6
SEARCH
R
9
SPEAKER
12
13
ABC
1
2
JKL
4
5
TUV
7
8
SYMBOLS
0
11
43
ANSWERING
DIGITAL
SYSTEM
REPEAT REC/MEMO PLAY/SKIP
DELETE
14 16
15
TEL/FAX
5 6
TEL FAX
A.M.
05/POLL04030201
Press this key to dial a 2-digi t Sp eed Dial num ber.
REDIAL key
2
Press this key to automati c ally redial the last num ber diall ed .
7
VOLUME
RECEPTION
DOWN UP
MODE
RESOLUTION FUNCTION
COPY/HELP
STOP
START/MEMORY
18
17
8
9
10
19
3
REPEAT key
Press this key to repeat playback of a message.
Display
4
This displays mes sages and promp ts during op erati on and
programming.
5
PLAY/SKIP key
Press this key to play recorded messages. During playb ack, press it to
skip forward to the next message.
10
Page 89

A Look at the Operation Panel
6
RECEPTION MO DE ke y
Press this key to select the reception mode. An arrow in the displ ay
will point to the currently selected reception mode.
7
RESOLUTI ON k ey
Press this key to adjust the resolution and contrast before sendin g or
copying a document.
8
VOLUME keys
Press these keys to adjust the volume of the speaker when the
SPEAKER key has been pressed, or the volum e of the ringer at all
other times.
9
FUNCTION key
Press this key to select various special functions.
10
Panel release
Grasp this finger hold and pull toward you to open the operation panel.
11
Number keys
Use these keys to dial numbers, and enter n umb ers and letters duri ng
number/name storing procedures.
1. Installation
12
SEARCH/R key
Press this key to search for an automatic dialling number, or, if you are
on a P.B.X. extension, press this key to transfer a call.
13
SPEAKER ke y
Press this key to hear the line and fax tones through the speaker before
sending a document, or dialling a voice number.
Note: This i s no t a sp ea k e rp h on e . You must pick up the handset to
talk with the other party.
14
REC/MEMO key
Press this key to record a phone conversation or a message.
15
Rapid Dial Keys
Press one of these keys to dial a fax or voice number automatically.
(Note that you must atta ch the Rapi d Key labels.)
11
Page 90

A Look at the Operation Panel
16
DELETE key
Press this key to erase recorded messages.
17
STOP key
Press this key to cancel operat ion s befo re they are completed.
18
START/MEMORY key
Press this key to send or receive a document, or to scan a document
into memory befo re sending i t.
19
COPY/HELP key
When a document is in the feeder, press this key to make a copy. At
any other time, pr ess this key to print out the Help List, a quick
reference guide to the operation of your fax.
12
Page 91

Connections
Connections
Points to keep in mind w hen setting u p
Do not place the machine in
direct sunlight.
Do not place the machine near
heaters or air conditioners.
1. Installation
Keep dust away from the
machine.
Keep the area around the
machine clear.
About condensation
If the machine is moved from a cold to a warm place, it is possibl e that
condensation may form on the scann ing glass, preventi ng prop er
scanning of documents for transmission . To remove the condensation,
turn on the power and wait approximately two hours before usin g the
machine.
13
Page 92

Connections
Handset
Connect the handset as shown and pla ce it on th e handset r est.
♦ The ends of the handset lead are identical, so they will go into
either socket.
Make sure the handset
lead goes into the
socket marked with a
handset symbol on the
side of the machine!
14
Use the handset to
make ordinary phone
calls, or to transmit
and receive
documents manually.
Page 93

Power le a d
Plug the pow er lead into a 230 V, 50 Hz, ea rthed (3-prong) AC outl et .
Caution:The mains outlet (socket outlet) should be installed near the
equipment and be easily accessable.
Connections
1. Installation
The machine does not
have a power on/off switch,
so the power is turned on
and off by simply plugging
or unplugging the power
lead.
Note: If your area experiences a high incidence of lightning or power
surges, we recommend that you install surge protectors for the
power and telephone lines. Surge protectors can be purchased
from your dealer or at most telephone specialty stores.
15
Page 94

Connections
Telephone li ne c ord
Insert one end of the line cord into the socket on the back of the
machine marked TE L. LINE . In se rt the other end into a wall
telephone socket.
TEL.
SET
TEL.
LINE
Be sure to insert the
telephone line cord into
the
TEL. LINE socket.
Do not insert it into the
TEL. SET socket.
Comments:
•• Your fa x is set for t one diall ing . If you ar e on a pulse only dia l l ine , you must
set the fax for pulse dialling by chan gin g Opti on Se tt ing 9. Thi s proc edu re is
described in Cha pt er 8, Option Settings.
•• If you are connect in g the fax to a PBX, you may need to reset the fax to the
appropriate recall mode for the PBX. This is do ne by settin g Option Se tting
11 as described in Chapter 8.
•• If you inte nd t o use a com put er fax mode m on the sam e phone lin e, you m ust
reset Optio n Setti ng 12 (Fa x Sig nal Rec ei ve ) to NO in orde r to preve nt
transmission a nd rece ption e rror s. Thi s proc edu re is desc rib ed in Cha pte r 8,
Option Settings.
•• The facsimi le machine will not ring in response to inco ming c alls an d cannot
be used to make outgo ing calls in the absenc e of mai ns powe r to the ma chine .
For this reason it is recom mende d th at the fax is not left as the only telephone
instrume nt on line when in this st at e.
•• Your fax cannot be used on a key system withou t the necessary adaptation of
the system. Plea se co nsul t the insta ll ers of the syste m if thi s is re qui red .
16
Page 95

Trays
Attach the paper tray extension.
♦ Pull the paper release plate forward. Insert the paper tray
extension horizontally into the notches in the paper tray. Rotate
the paper tray extension up until it snaps into place.
Connections
1. Installation
Attach the ori ginal document support.
Note: The original
document support
has a top side and a
bottom side. If you
cannot insert the
tabs on the support
into the holes, turn
the support over.
17
Page 96

Connections
Other devices
If desired, you can connect an extension t elephon e to the same line as
your fax. This can be used to make and receive calls as normal. For
details on initiati ng the receipt of faxes from an extension phone, see
"Receiving Dcouments " in Chapter 4.
Comments:
•• More t han one e xte n si on te le p ho ne m ay be connect ed t o the sam e line as th e
fax, provided the total REN value does not exceed 4.
•• The TEL.SET socke t (se al ed with a protec ti ve cover) has been provid ed on
the back of the un it . The safe ty st at us of th is soc ket is T NV, and is provided
for the connectio n of ap prov ed tel eph one equipm en t onl y where a ppro pri ate.
To ensure continued safety compliance, do not connect any other equipment
to this socket.
18
Page 97

Loading the Imaging Film
Loading the Imaging Film
Your fax uses a roll of imaging film to create printed text and images.
The print head in the fax applies heat to the imaging film to transfer
ink to the paper. Follow the steps below to load or replace the film.
The initial starter roll
of imaging film
included with your
fax can print about
30 A4 pages.
Note: If there is paper in the paper tray, pull the paper release plate
forward and remove the paper before loadin g the imaging film.
1
Open the operation panel by grasping the finger hold and pulling up.
When replacing the
film, use a roll of Sharp
UX-3CR imaging film.
One roll can print about
95 A4 pages.
1. Installation
2
Pull the green rele ase on the right side of the machine forward, and
open the print compartment cover.
19
Page 98

Loading the Imaging Film
If you are installi ng the imaging film for t he first
time, go to Step 6.
3
Remove the imaging film cartridge from the print co mpartment
(grasp the handle at the front of the cartridge) and turn it over.
4
Remove the used film from the cartridge.
5
Remove the four green gears from the used film.
DO NOT DISCARD THE FOUR GR EEN GEARS!
20
Page 99

Loading the Imaging Film
6
Remove the new roll of imaging film from its packaging.
•• Do not yet remove the band that holds the rolls together.
7
Insert the large gear into the green end of the empty spool. Make
sure the two protrusions on the large gear f it firmly into the slots in
the end of the spool.
Insert the remaining three gears into the spools, making sure the
protrusion on each gear fits firmly into one of the slots in the end of
each spool.
1. Installation
•• If needed, pull the spools apart slightly to allow the gears to fit (the
band will stre tch).
Slot
Large gear
Protrusion
21
Page 100

Loading the Imaging Film
8
Insert the la rge gear into the large holder on the imaging film
cartridge (make sure it clicks into place), and then insert the smal l
gear on the other end of the spool into its holder.
9
Cut the band that holds the two spools together. Unroll the film
slightly and insert the small gears into their holders.
10
Turn the cartridge over, grasp the handle, and insert the cartridge
into the print compartment.
22
 Loading...