

Page 1
UX-51/UX-238/UX-258FACSIMILE
MODEL
UX-51
UX-238
UX-258
FACSIMILE
OPERATION MANUAL
1. Installation
2. Using the Answering Machine
3. Sending Documents
4. Receiving Documents
5. Making Copies
6. Making Telephone Calls
7. Special Functions
8. Option Settings
9. Printing Reports and Lists
10. Maintenance
11. Troubleshooting
Page 2

Introduction
Welcome, and than k you for choosing a Shar p facs imile! The feat ures and
specifications of your new Shar p fax are shown below.
Important safety information
• Do not disa ssemble thi s machine or att empt any pro cedures not de scribed in t his
manual. Re fer all servicing to qualifi ed service perso nnel.
• This machine must only be connected to a 220-230 V, 50 Hz, grounded (2-pro ng)
outlet. Connec ti ng it to any other kind of out let may da mage the mach ine .
• Do not install or use the machine near water, or when you are wet. Take care
not to spill any liquids on the machine.
• Unplug the machine from the power outlet and telephone socket and consult a
qualified ser vic e repre sen ta tive if any of the fol lowi ng si tua tions oc cu r:
- Liquid has been spilled into the machine or the machine has been exposed to
rain or water.
- The machine produces odors, smok e, or unu sual noises.
- The power cord is frayed or damaged.
- The machine has been drop ped or the housing da m aged.
• Do not allow anything to rest on t he power cord, and do not i nstall the machine
where people may walk on the power cord.
• Never inser t objects of any ki nd into slots or openings on t he machine. Th is could
create a risk of fire or electric shock. If an object falls into the machi ne that you
cannot safely remove, unplug the machine and consult a qualified service
representative.
• Do not place this machine o n an unst able car t, stand o r table. The m achine cou ld
be seriously damag ed if it falls.
Page 3

• Never insta ll telep hone wiri ng du rin g a light ni ng sto rm .
• Never install telephone jacks in wet locations unless the jack is specifically
designed for wet location s.
• Never touch unin sula ted tele pho ne wi res or termina ls unl ess t he tel ep hone line
has been disconn ecte d at the network i nterfa ce .
• Use caution when insta ll ing or m odi fyi ng te lepho ne line s.
• Avoid using a tel eph one (ot her t han a cor dless t ype ) du rin g an ele ctric al storm .
There may be a remo te risk of electri c shoc k from lightning.
• Do not use a teleph one to report a gas leak in the vicini ty of the leak.
• The socket-outlet must be installed near the equipment and must be easily
accessible.
Important:
•• This facsi mile mach ine is only de sign ed for use i n the cou ntr y wher e
purchased.
Page 4

Table of Contents
1 Installation 1
Unpacking Checklist. . . . . . . . . . . . . . . . . . . . . . . . . . . . . . . . . . . . . . . . 1
Connections. . . . . . . . . . . . . . . . . . . . . . . . . . . . . . . . . . . . . . . . . . . . . . . 2
Original Document Suppo rt . . . . . . . . . . . . . . . . . . . . . . . . . . . . . . . . . . 7
Loading the Fax Paper . . . . . . . . . . . . . . . . . . . . . . . . . . . . . . . . . . . . . . 7
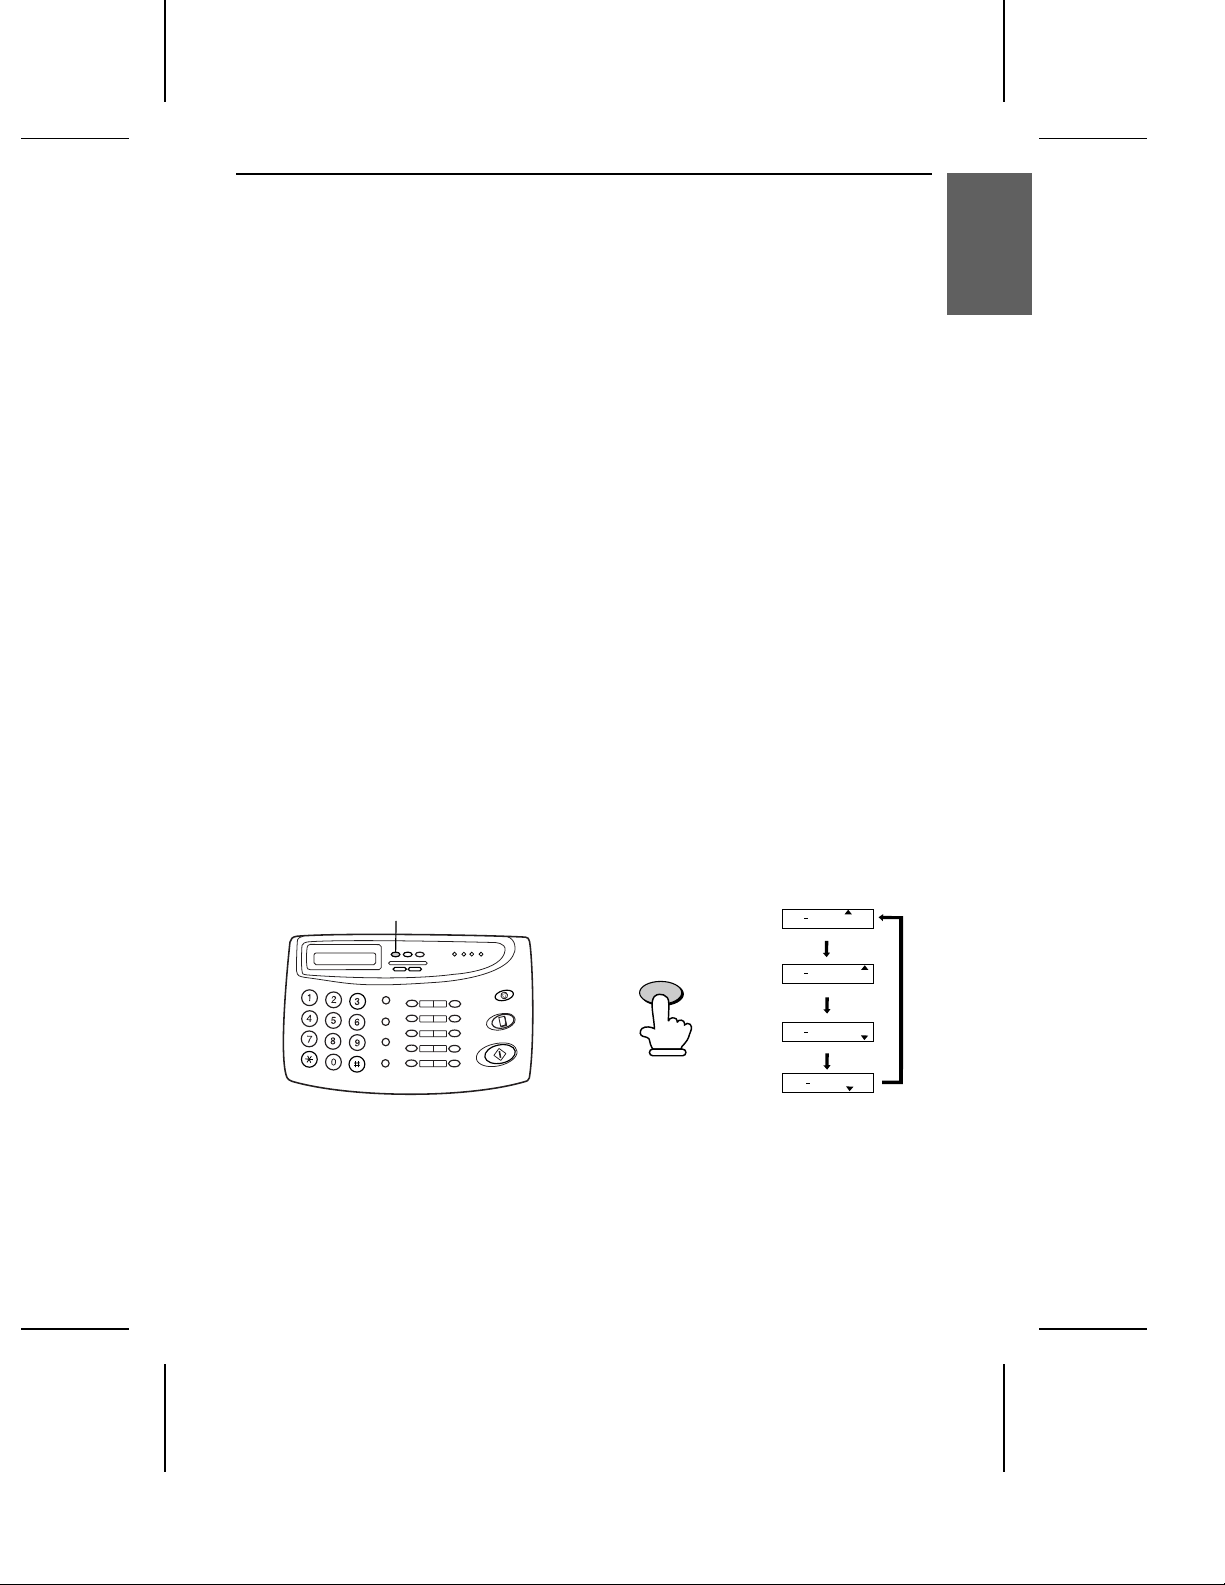
A Look at the Operation Panel . . . . . . . . . . . . . . . . . . . . . . . . . . . . . . . 11
Entering Your Name and Fax Number. . . . . . . . . . . . . . . . . . . . . . . . . 14
Setting the Date and Time. . . . . . . . . . . . . . . . . . . . . . . . . . . . . . . . . . . 17
Selecting the Reception Mode . . . . . . . . . . . . . . . . . . . . . . . . . . . . . . . 19
Volume Adjustment . . . . . . . . . . . . . . . . . . . . . . . . . . . . . . . . . . . . . . . 20
2 Using the Answering Machine 22
Recording an Outgoing Message . . . . . . . . . . . . . . . . . . . . . . . . . . . . . 22
Operating the Answering Machine. . . . . . . . . . . . . . . . . . . . . . . . . . . . 25
Optional Answering Machine Set ti ngs. . . . . . . . . . . . . . . . . . . . . . . . . 29
Transfer Function . . . . . . . . . . . . . . . . . . . . . . . . . . . . . . . . . . . . . . . . . 33
Override Ringing. . . . . . . . . . . . . . . . . . . . . . . . . . . . . . . . . . . . . . . . . . 36
Remote Operations . . . . . . . . . . . . . . . . . . . . . . . . . . . . . . . . . . . . . . . . 38
3 Sending Documents 46
Transmittable Documents. . . . . . . . . . . . . . . . . . . . . . . . . . . . . . . . . . . 46
Loading the Document . . . . . . . . . . . . . . . . . . . . . . . . . . . . . . . . . . . . . 48
Resolution and Contr ast . . . . . . . . . . . . . . . . . . . . . . . . . . . . . . . . . . . . 50
Sending a Fax by Normal Dialling. . . . . . . . . . . . . . . . . . . . . . . . . . . . 52
Sending a Fax by Automati c Diall ing. . . . . . . . . . . . . . . . . . . . . . . . . . 54
4 Receiving Documents 63
Using TEL/FAX Mode. . . . . . . . . . . . . . . . . . . . . . . . . . . . . . . . . . . . . 63
Using ANRUFB. Mode . . . . . . . . . . . . . . . . . . . . . . . . . . . . . . . . . . . . 64
Using FAX Mode . . . . . . . . . . . . . . . . . . . . . . . . . . . . . . . . . . . . . . . . . 64
Using TEL Mode . . . . . . . . . . . . . . . . . . . . . . . . . . . . . . . . . . . . . . . . . 65
5 Making Copies 67
6 Making Telephone Calls 68
Page 5

7 Special Functio ns 71
Blocking Reception of Unwanted Faxes . . . . . . . . . . . . . . . . . . . . . . . 71
Memory. . . . . . . . . . . . . . . . . . . . . . . . . . . . . . . . . . . . . . . . . . . . . . . . . 73
Broadcasting . . . . . . . . . . . . . . . . . . . . . . . . . . . . . . . . . . . . . . . . . . . . . 76
Polling (Req uesti ng a Fax Transm iss ion ). . . . . . . . . . . . . . . . . . . . . . . 78
Timer Operations . . . . . . . . . . . . . . . . . . . . . . . . . . . . . . . . . . . . . . . . . 80
8 Option Settings 82
9 Printing Reports and Lists 89
10 Maintenance 92
11 Troubleshooting 94
Problems and Sol utions. . . . . . . . . . . . . . . . . . . . . . . . . . . . . . . . . . . . . 94
Messages and Signals . . . . . . . . . . . . . . . . . . . . . . . . . . . . . . . . . . . . . . 98
Clearing Paper Jams . . . . . . . . . . . . . . . . . . . . . . . . . . . . . . . . . . . . . . 100
Specifications 102
Quick Reference Guide 104
Page 6

1
Chapter
Installation
Unpacking Checklist
Before setting up, make sure you have all of the following ite m s.
If any are missing, contac t your dealer or retailer.
Handset
Handset
lead
Fax pap er
(sample roll)
1. Installation
Rapid key
labels
Operation
manual
Telephone
line cord
1
Page 7
Connections
Connections
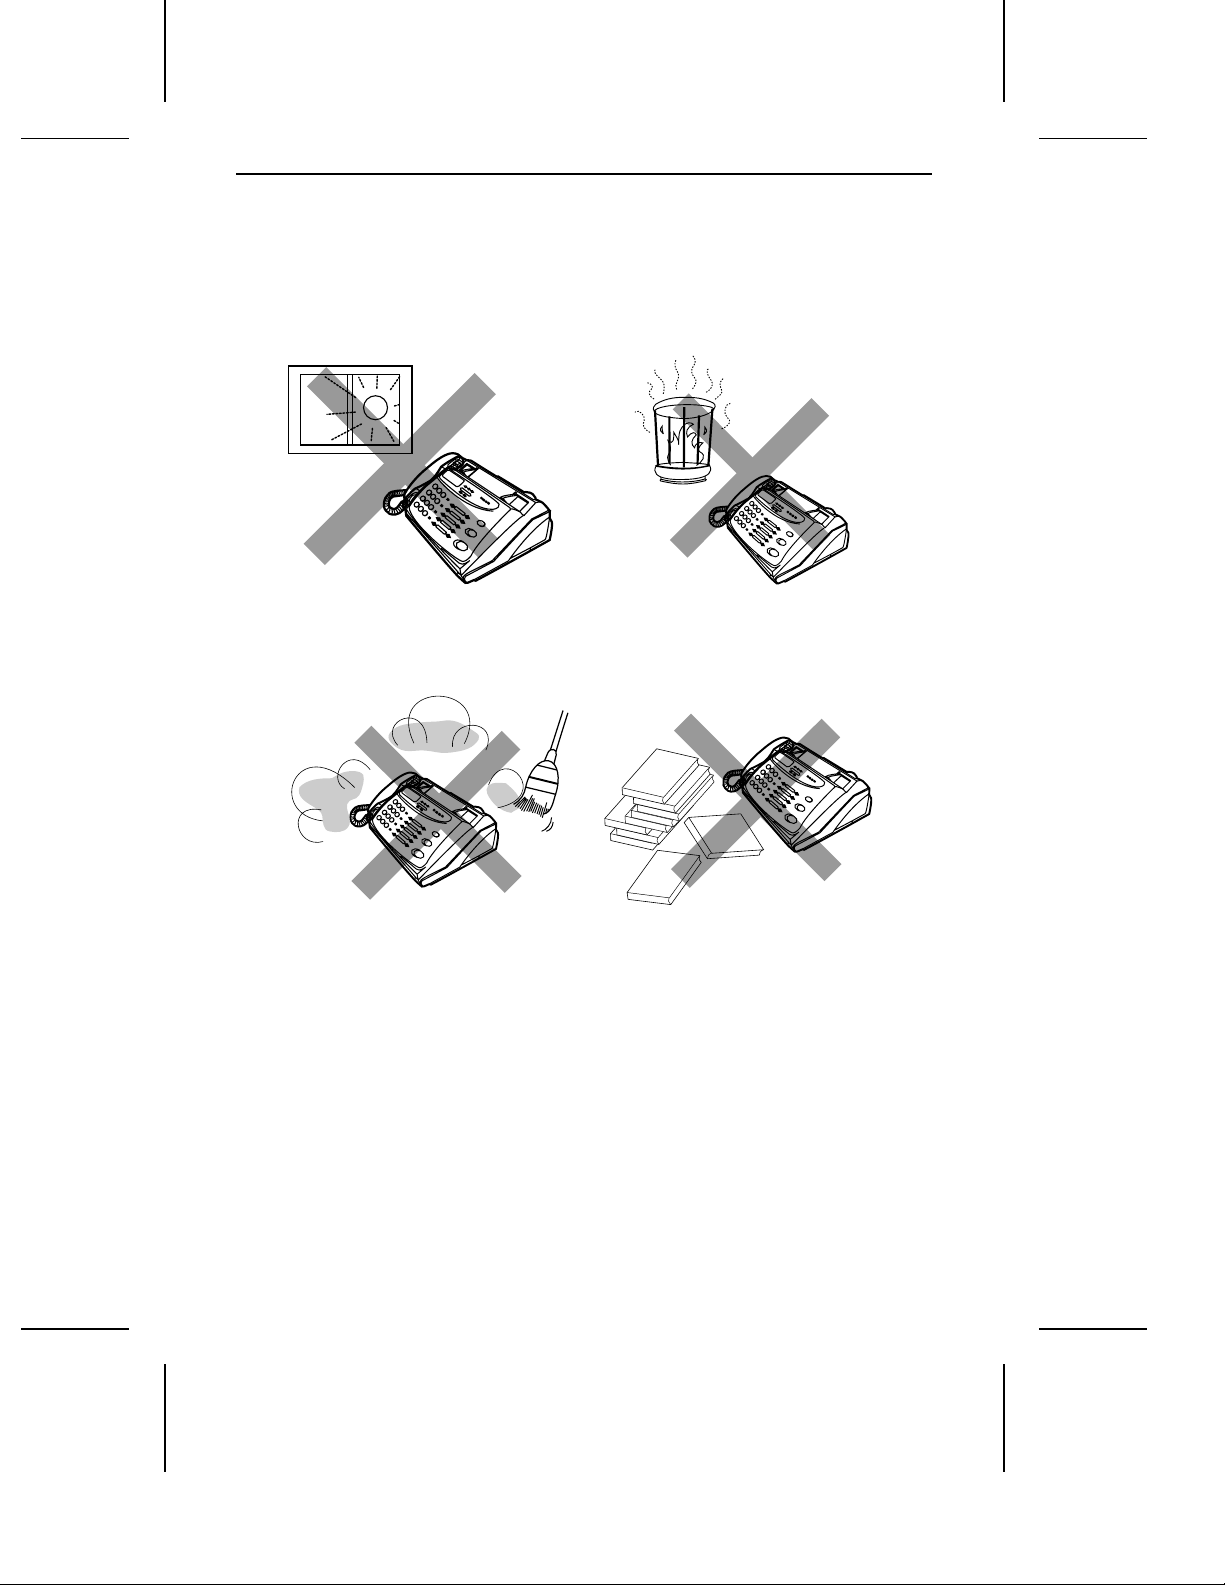
Points to keep in mind w hen setting u p
Do not place the machine in dire ct
sunlight.
Keep dust away from the m achine .
Do not place the machine near
heaters or air conditioners.
Keep the area around the machine
clear.
About condensation
If the machine is moved from a cold to a warm place, it is possible that
condensat io n may form on the scannin g gla ss, prevent in g proper sc ann ing of
documen ts for transmissi on. To remove the condensation, turn on the power
and wait approxim ately two hours befor e usi ng the machin e.
2
Page 8
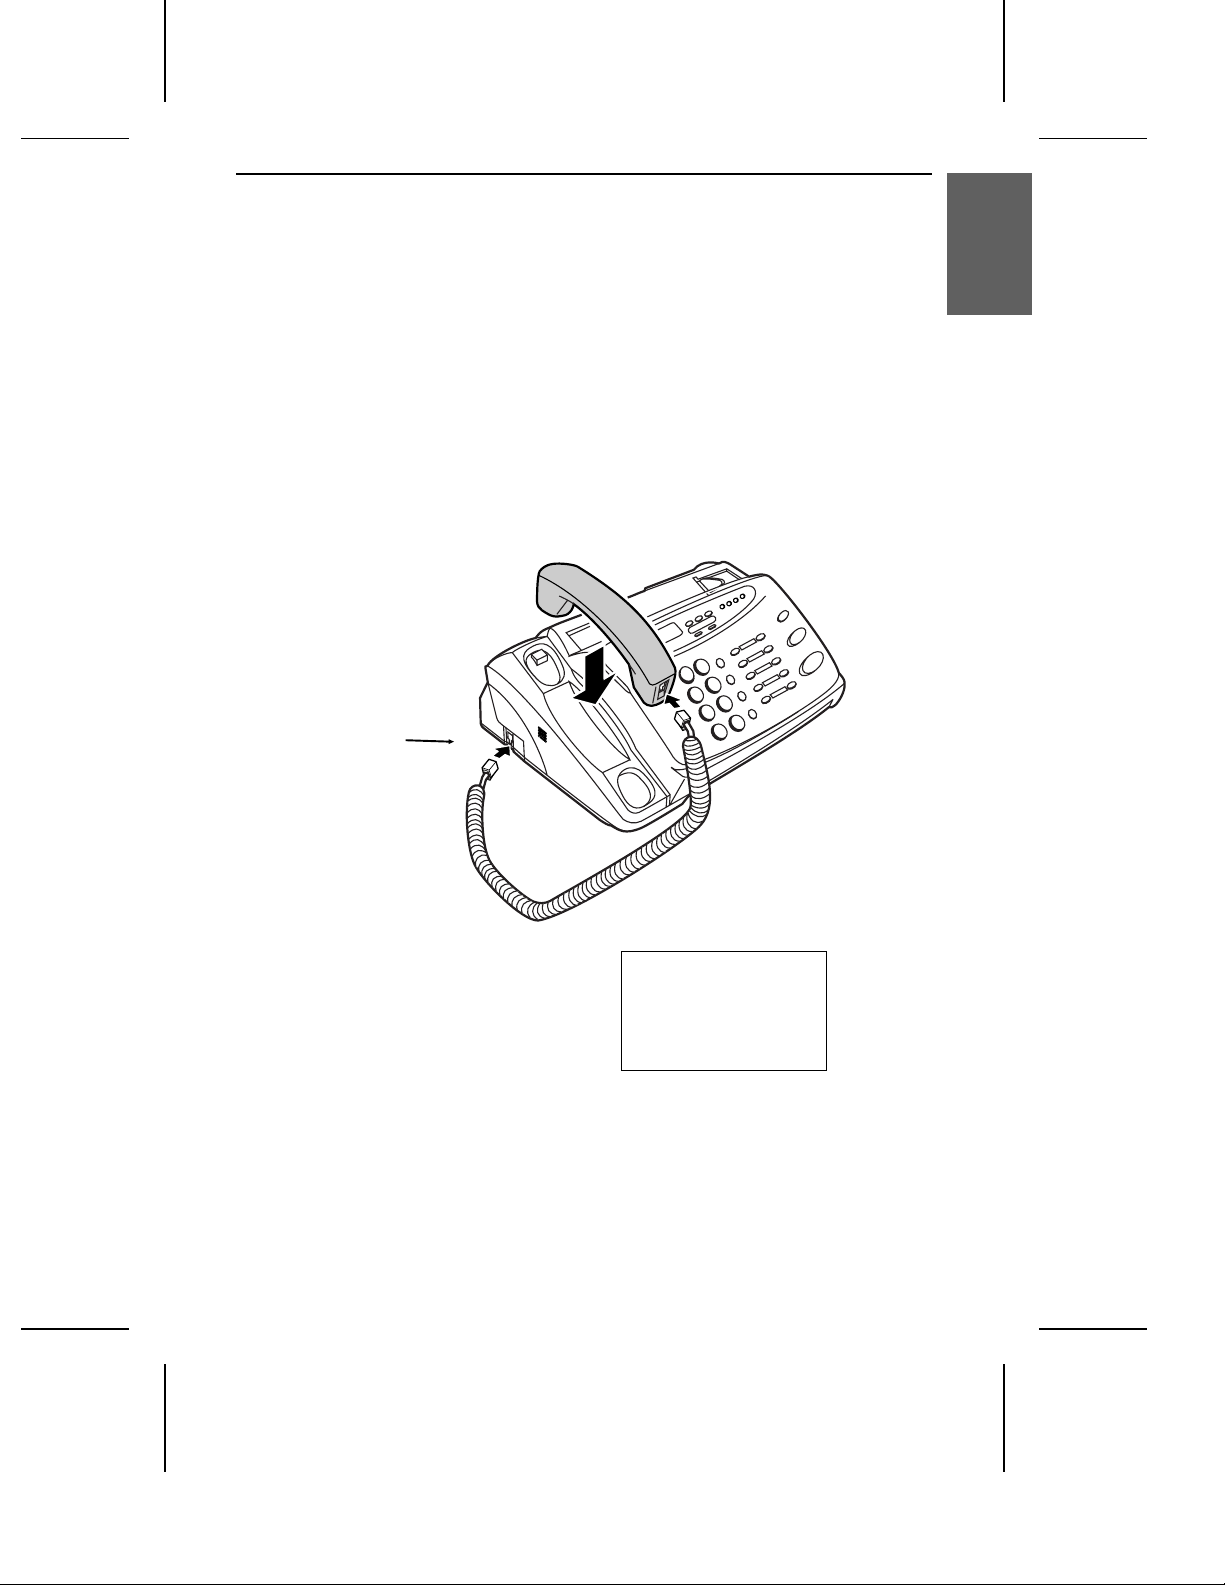
Handset
Connections
Connect the handse t as shown and place it on the handset rest.
♦ The ends of the handset lead are iden tical, so they will go into either
socket.
Make sure the
handset cord goes
into the unma rk ed
jack on the side of
the machine!
1. Installation
Use th e ha ndset to
make ordinary phone
calls, or to transmit
and receive
docume nt s man ua lly.
3
Page 9
Connections
Power le a d
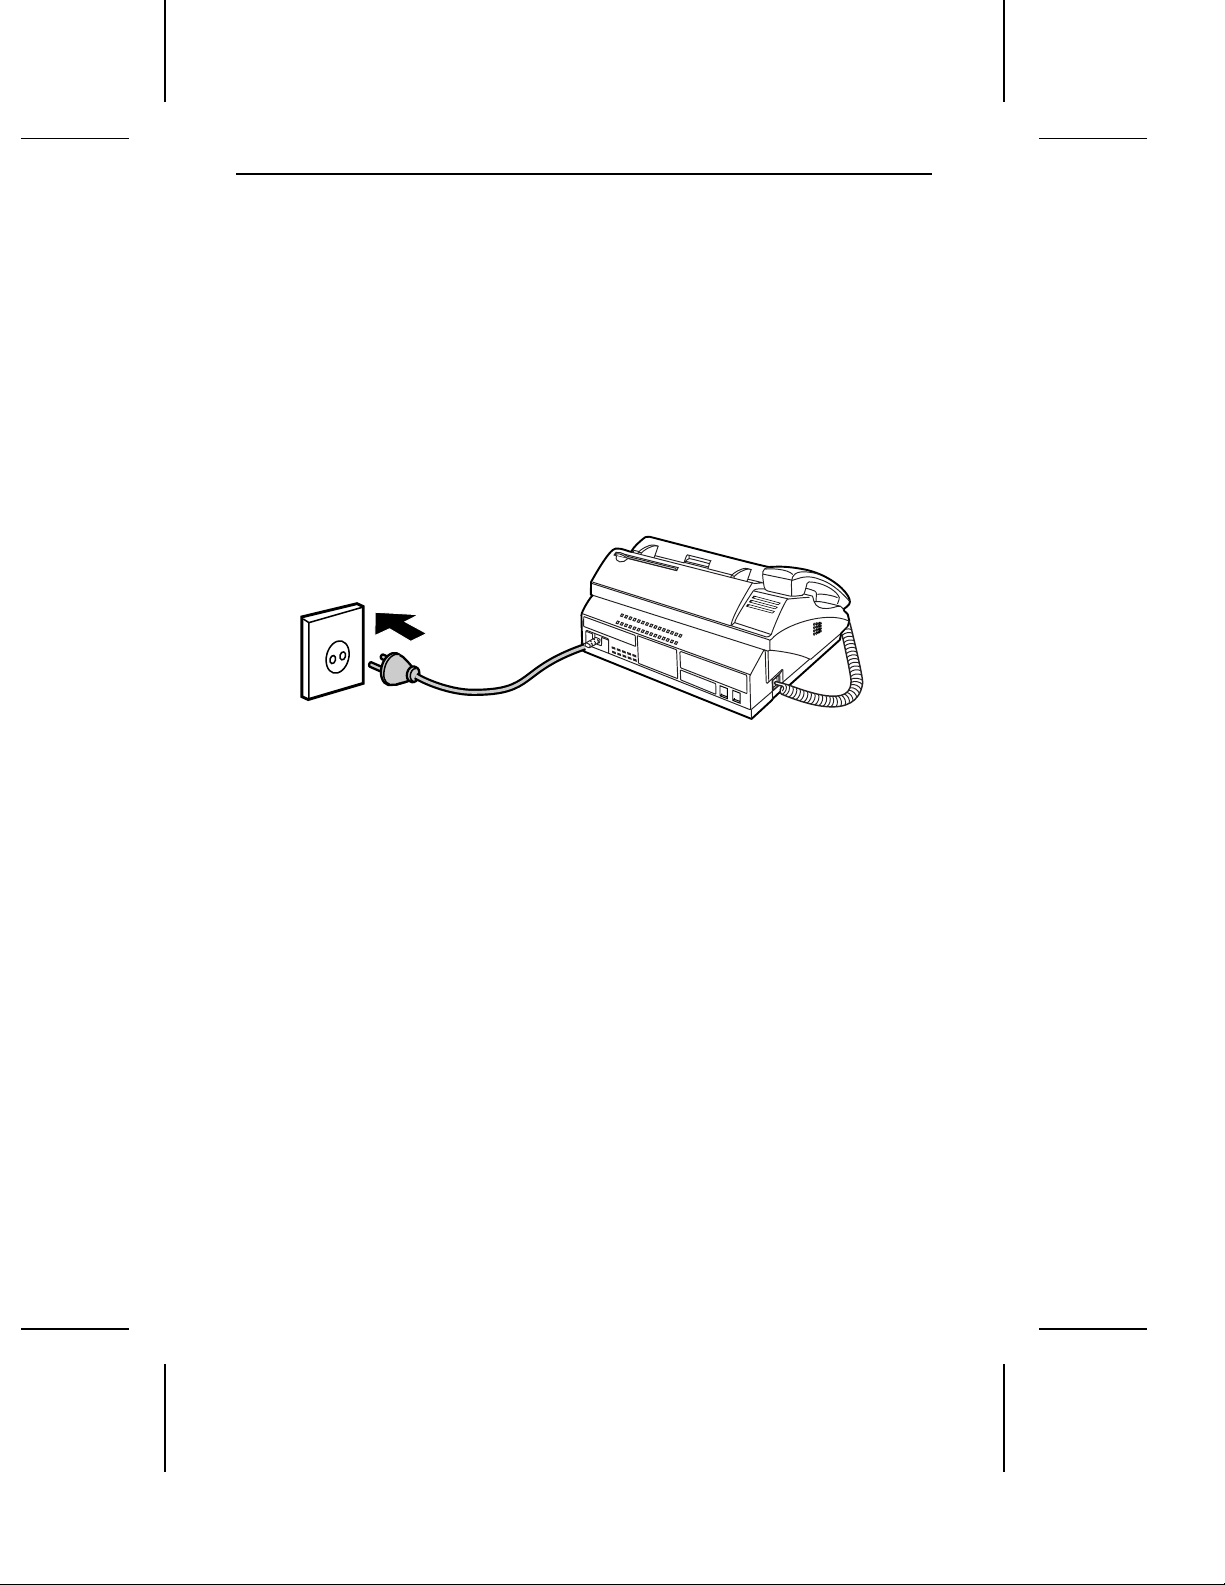
Plug the power l ead into a 220-23 0 V, 50 Hz, earthe d (2-pron g) AC out le t.
♦ Caution: The mains outlet (socket outlet) should be installed near the
equipment and be easily accessable.
The machine does not hav e a power on/of f
switch, so the power is turned on and off by
simply plugging or unplugging the power lead.
Note: If your area experiences a high incidence of lightning or power
surges, we recommend that you install surge protectors for the power and
telephone lines. Surge protectors can be purchased from your dealer or at
most telephone specialty stores.
4
Page 10
Telephone li ne c ord
Connections
Insert one end of the line cord i nto the socke t on the back of the m achin e
marke d TEL. LINE. Insert the other end into a wall telep hone jack.
TEL.
SET
TEL.
LINE
1. Installation
Comments:
•• In Germany, the machin e is suppli ed with a N-coded line cabl e, enabl ing
you to use an extension (cor dless) te lepho ne on the same line . If you don ’t
have the standard NFN-outlet of TELEKOM, you can purchase an
NFN-adapter at your retailer.
•• Your fa x is set for tone dia lling. If you are on a pulse only dia l line, you must
set the fax for pulse dialling by changing Option Setting 7. Thi s proc edu re i s
described in Chapt er 8, "Opt ion Settin gs".
•• If you are c onne ct in g the machine to a PBX, yo u wil l ne ed to ma ke
appropria te sett in gs for Opt io n Setti ng 10. See Chapte r 8, "Opti ona l se tting s".
•• If you inte nd t o use a comput er fax modem on the sam e phone line, you must
reset Option Setti ng 11 (Fax Sig nal Receive ) to OFF in order to preve nt
transmission a nd rece ption e rror s. Thi s proc edu re is desc rib ed in Cha pte r 8,
"Option Settings".
5
Page 11

Connections
Other devices
If desired, you can use anot her te lephon e on the sa me line as your fa x. The
telephone can be connect ed to the TEL . SET socke t on the your fa x (no te
that this soc ket is not avail ab le in some count ries), or to the wall soc ket .
♦ You can use an extension phone connected to the fax or a wall socket to
make and receive calls like any normal telephone. For details on
receiving faxes from the extension phone, see Chapter 4.
Germany:
We recomme nd t hat you pl ug a (e.g.: cordless) telephone int o the midd le
connector of the TAE wall ou tl et and the fa x line cord into the left connector.
Switzerland, Austria:
•• An extension phone cannot be used.
France:
•• The TEL. SET soc ke t is no t avai la ble on th e fax. To conne ct an exte nsi on
telephone to a wall soc ket, a special cabl e is requ ire d. For more det ails,
consult your dealer.
6
Page 12
Original Document Support
Loading the Fax Paper
Rotate the original docume nt sup port so tha t it poi nt s stra igh t out .
Loading the Fax Paper
Your fax machine prints incom ing faxes on a special kind of paper called therm al
paper.
The fax’s print head cre ates t ext and image s by app lyin g heat to th e ther ma l
paper.
Note: The power must be on (plug in the power cord) when
loading fax paper in the fax machine.
1. Installlation
1
Pull the release marked PANEL RELEASE toward you and open the
operation panel.
7
Page 13

Loading the Fax Paper
2
Remove the packing paper from the paper compartment.
Schutzpapier und
Klebestreifen
entfernen
3
Make sure the ends of the guide wire are inserted in the holes. (If the guide
wire is not inseted correctly, out-of-paper detection will not be possible.)
Nur UX-51/UX-238:
Klebestreifen
entfernen
4
Unwrap the roll of fax paper and place it in the compartment.
•• Important: The roll must be placed so that the leading edge of the paper
unrolls as shown. (The paper is only coated on one side for printing. If
the roll is placed backwards, the paper will come out blank af ter
printing.)
NEIN!
JA
8
Page 14
Loading the Fax Paper
5
Insert the leading edge of the paper into the paper inlet. Continue to push
the paper through the inlet until it comes out of the opening in the front of
the fax.
Paper inlet
The paper will rea ppear he re. Mak e sure it is
aligned bet we e n the arro ws on eac h side of
the guide, and then passes unde r the plate
and out the f ro nt of the fax.
1. Installlation
6
Close the operation panel, making sure it clicks into place.
Zum Schließen hier drü cken
2
1
9
Page 15

Loading the Fax Paper
7
UX-51/238: A short length of the fax paper will feed out. Grasp the paper
by the edge and pull upward to tear it off.
UX-258: A short length of the fax paper will feed out and be cut off. (If
this doesn’t happen, repeat the load ing procedure.)
Note: The UX-258 has a built-in anti-curl mechanism that will help to
reduce paper curling problems. The anti-curl mechanism is more effective
at the beginning of the paper rol l and less effective toward the end.
Replacing the fax paper
When the paper runs out, KEIN PAPIER will appear in the display.
Reception and cop yin g wil l no longer be possible . To repla ce the pap er, fi rst
take out th e ol d rol l, the n lo ad t he new roll as de scribed ab ove .
To assure a long life for your fax and obtain the best reproduction quality, we
recommend that you use the fol lo wing Sharp fax (therm al ) paper whi ch is
available from your dealer:
UX-51/238: FO-2 0PR THE RMAL PAPER (30 m roll)
UX-238/258: FO-40P R THERM AL PAP ER (5 0 m roll)
♦ The use of any other paper may result in poor copy quality and
excessive build-up of residue on the head. This is due to the different
thermal reactive characteristics of each manufacturer’s paper.
Handling fax pape r
Do not unpack the pa pe r unt il you ar e re ady to use it. It may bec om e
discoloure d if :
♦ It is stored a t high humidity or high temperature.
♦ It is exposed to direct sunlight.
♦ It comes in contact with glue, thinner, or a freshly cop ied blueprint.
♦ A rubber eraser or adhesive tape is used on it, or it is scratched.
10
Page 16

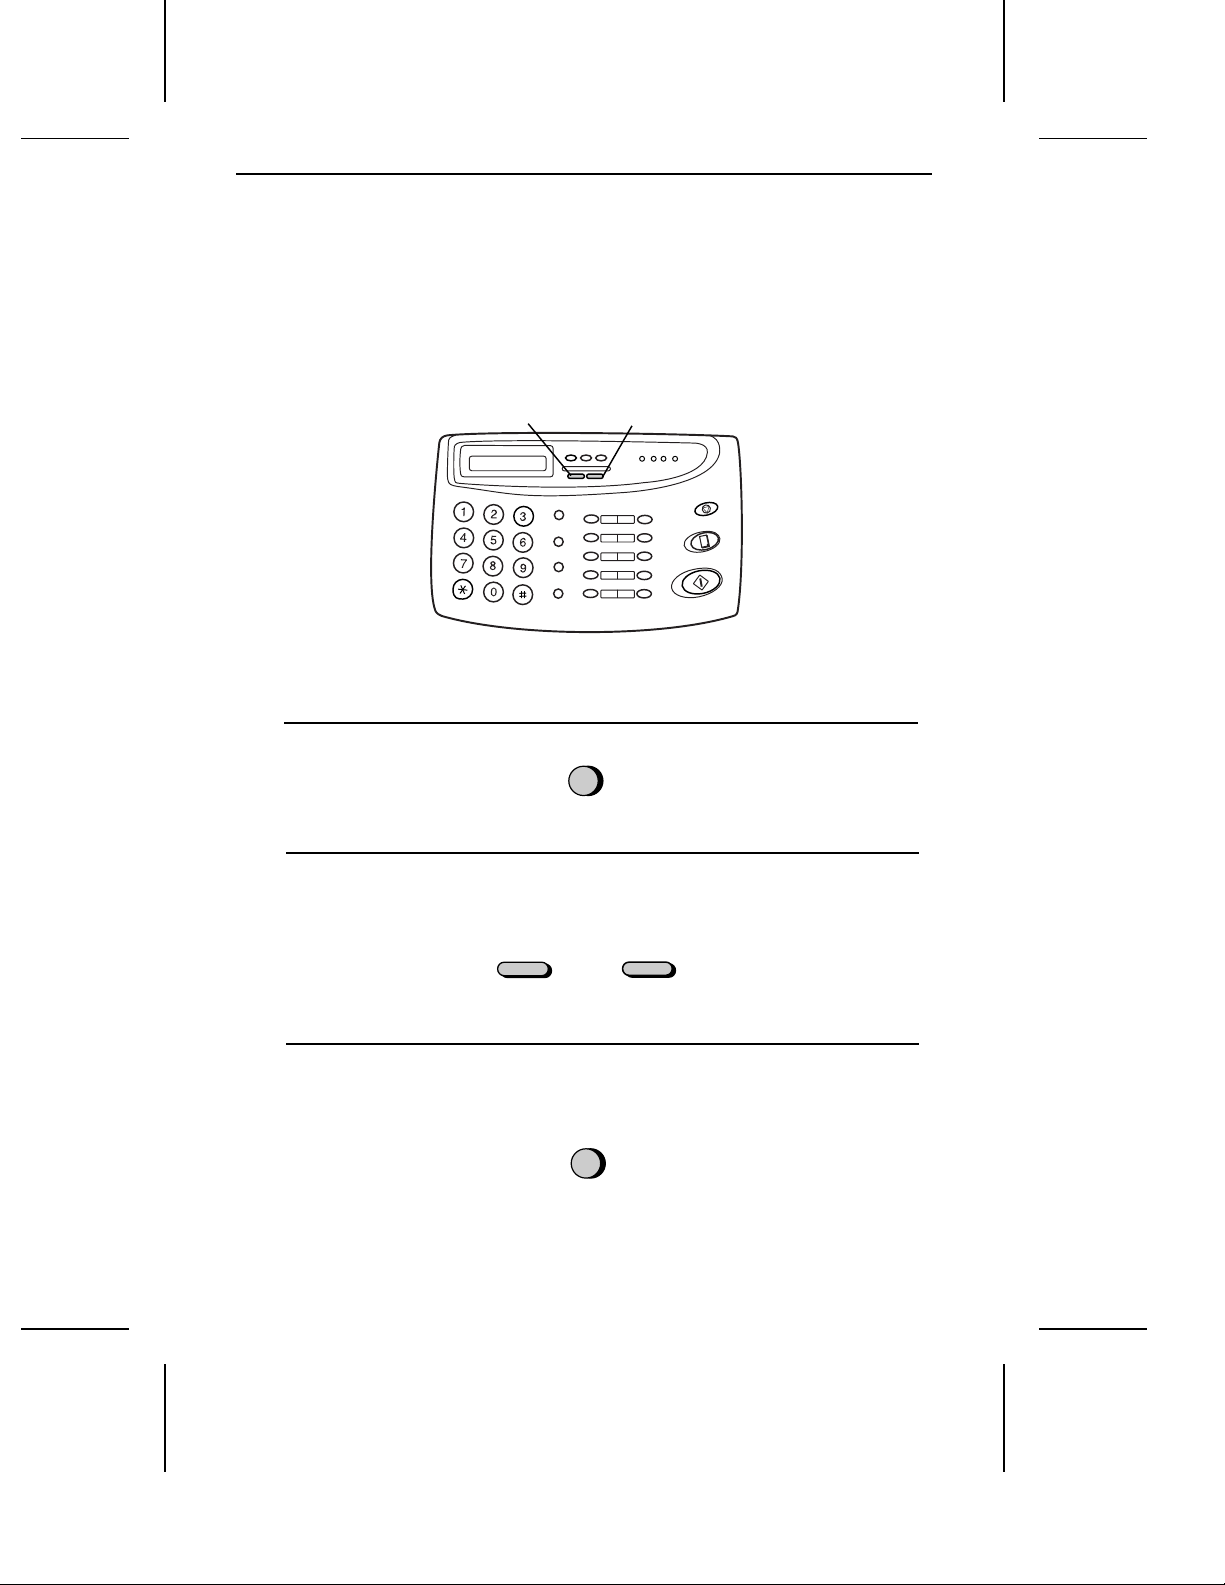
A Look at the Operation Panel
A Look at the Operation Panel
1. Installation
GHI
PQRS
MIC
SLOW PLAY FAST PLAY
12 13
ABC
JKL
TUV
SYMBOL
1
DEF
MNO
WXYZ
14
TEL/FAX
TEL FAX
15
2
A.M.
SPEED DIAL
SPEAKER
RECEPTION
MODE
DOWN VOLUME UP
REDIAL
SEARCH
R
17
3
18
5
4
RESOLUTIONFUNCTION
DIGITAL
01
02
03
04
06
05
08
07
10/POLL
09
19
7
6
REPEAT
REC
ANSWERING
SYSTEM
8
DELETE
PLAY/SKIP
COPY/HELP
START
20
9
STOP
10
11
21
16
Display
1
This displa ys messages and promp ts dur ing oper at ion and progra m mi ng.
2
PANEL RELEASE
Pull this release t owar d you t o open the operat io n pan el.
RECEPTION MODE ke y
3
Press this key to select the recep ti on m ode . An arrow in the displa y wil l point
to the current ly sele ct ed rece pt ion mod e.
4
FUNCTION key
Press this key to select variou s spec ial fun ction s.
11
Page 17

A Look at the Operation Panel
5
RESOLUTION key
Press this key to adjust t he resol uti on a nd co ntr ast befo re sendi ng or
copying a document.
VOLUME keys
6
Press these keys to adjust the volum e of the speak er whe n the SPEAK ER
key has been presse d, or the volum e of the ringe r at all other time s.
REC key
7
Press this key to record a phone conver sation or a message.
REPEAT key
8
Press this key to repeat playba ck of a message.
PLAY/SKIP key
9
Press this key to play recorded messa ge s. Dur ing playba ck, pre ss it to skip
forward to the next messa ge.
10
DELETE key
Press this key to erase re cor ded message s.
11
STOP key
Press this key to stop op erati ons be for e they are com plete d.
SLOW PLAY key
12
Press this key to reduce the speed of m essa ge play back.
FAST PLAY key
13
Press this key to increase the speed of messag e playb ack.
Number keys
14
Use these keys t o dia l numb ers, and enter num ber s and l et ters during
number/n am e storing procedure s.
SPEED DIAL key
15
Press this key to dial a 2-digit Speed Dia l numbe r.
REDIAL key
16
Press this key to autom atic ally redi al the last num ber dia lled .
SPEAKER key
17
Press this key to hear the li ne and fa x tones th roug h the speake r bef ore
sending a docum ent , or diall in g a voice num be r.
Note: This is not a speakerphone. You must pick up the handset to talk
with the other party.
12
Page 18

A Look at the Operation Panel
SEARCH/R key
18
Press this key to sear ch fo r an auto ma tic di alli ng nu mb er, or, if you ar e on a
P.B.X. exte nsio n, press t his ke y to transfer or put the other part y on hol d.
Rapid Dial Keys
19
Press one of these key s to dial a fax or voice number autom at ical ly. (Note
that you must atta ch the Rapi d K ey lab el s .)
START/MEMORY key
20
Press this key to send or recei ve a docu ment manua ll y when off hook.
21
COPY/HELP key
When a docu me nt is in t he fe ed er, press thi s key to make a copy. At an y
other time, pres s thi s key to pri nt out the He lp List, a quick refe ren ce guid e
to the operati on of your fa x.
1. Installation
13
Page 19
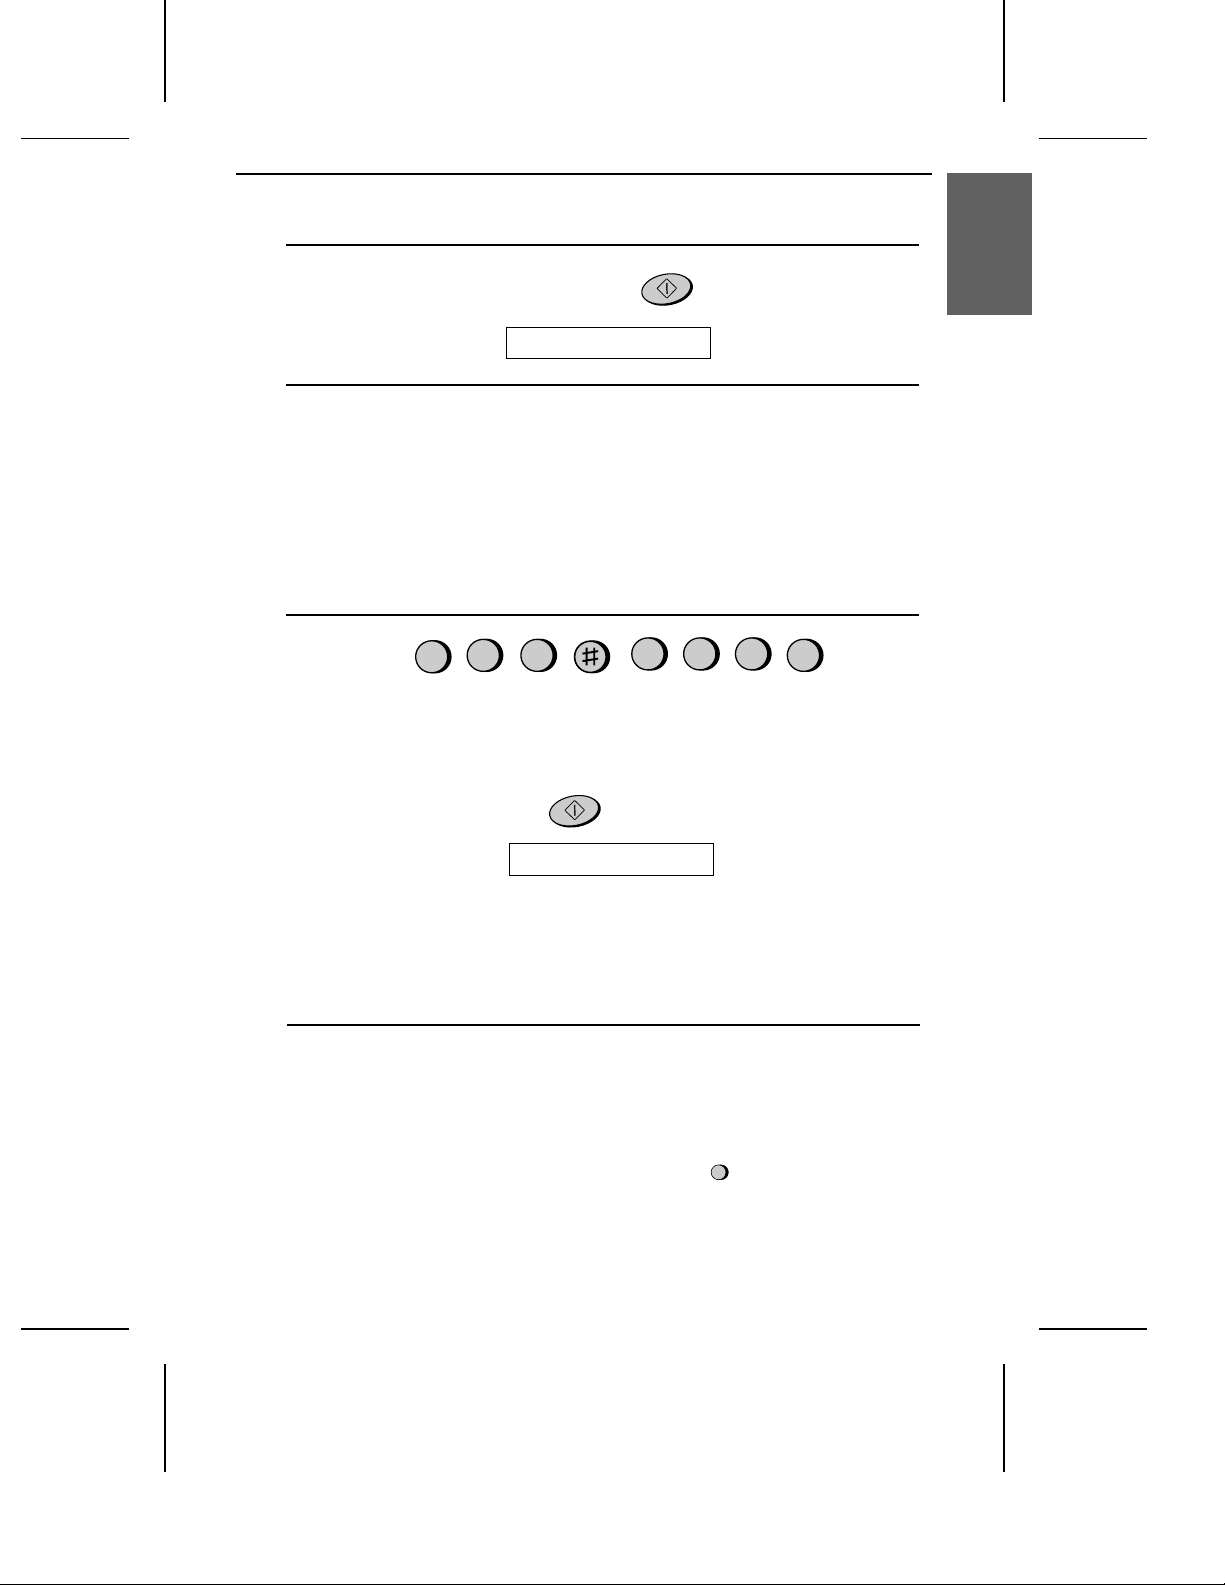
Entering Your Name and Fax Number
Entering Your Name and Fax Number
Before you can begin us in g your fax, you ne ed to ent er your name and t he
telephone numbe r of your fax. You also need to set the dat e and time.
Once you enter this infor mat ion, it will automatically appear at the top of
each fax page you send.
1
Press these keys:
The display will show:
2
Press the # key twice:
3 key
# key
FUNCTION
ENTRY MODE
FUNCTION key
STOP key
START/MEMORY
key
3
The display will show: OWN NUMBER SET
14
Page 20
Entering Your Name and Number
3
Press the START/MEMORY key.
The display will show:
4
Enter your fax number by pressing the number keys. Up to 20 digits can be
entered.
•• To insert a space between digits, press the # key. To insert a "+", press
the * key.
•• If you make a mistake, press the SEARCH/R key to move the cursor
back to the mistake and then enter the correct number. The new number
will replace the old number.
5
Example:
Press START/MEMORY to enter the fax number in memory.
5
ENTER FAX #
55
START/MEMOR Y
START/MEMOR Y
21
3
4
1. Installation
The display will show: ENTER YO UR NAME
Cursor: A dark squar e mark in the di spla y that indica tes wher e a numb er or
letter will be entered.
6
Enter your name by pressing the number keys as shown in the chart below.
Up to 24 characters can be entered.
•• To enter two letters in succession that require the same key, press the
SPEAKER key after entering the first letter to advance the cursor.
Example: SHARP = 7 7 7 7 7 4 4 4 2 2 7 7 7 7 7 7
SPEAKER
15
Page 21
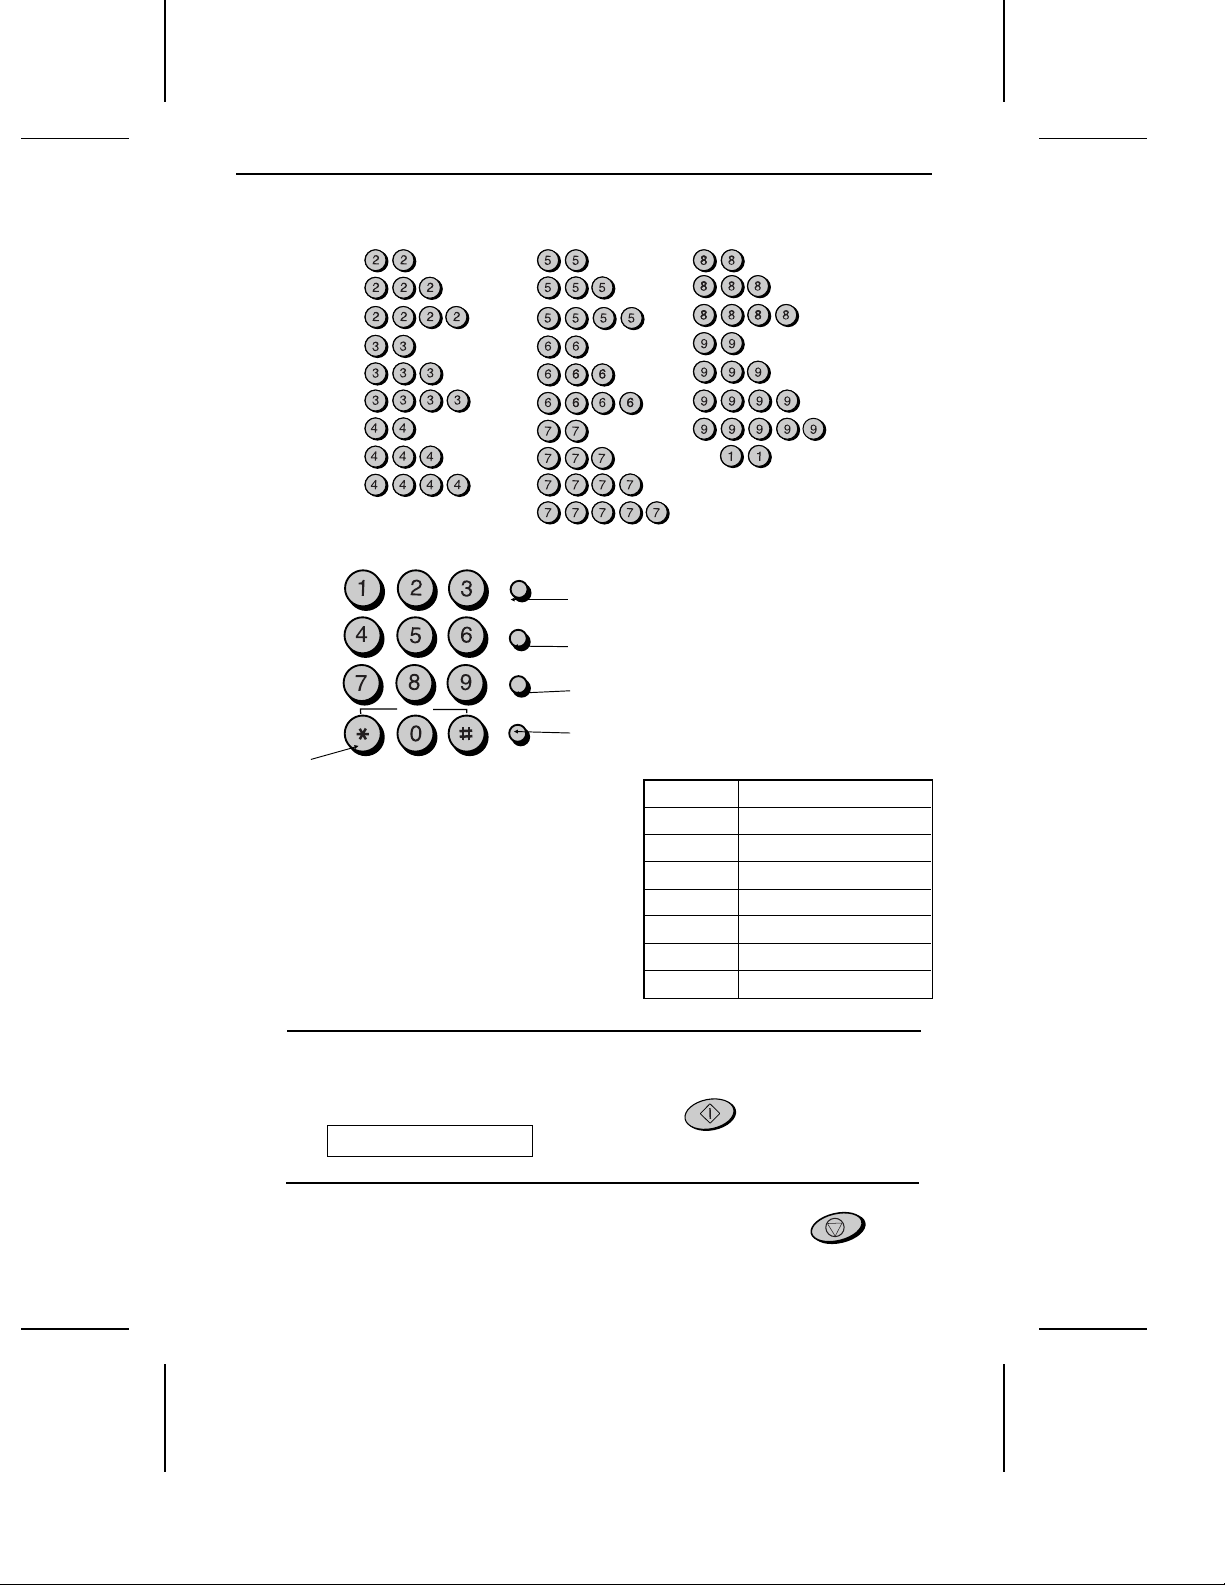
Entering Your Name and Fax Number
A =
B =
C =
D =
E =
F =
G =
H =
I =
ABC DEF
J =
K =
L =
M =
N =
O =
P =
Q =
R =
S =
SPEED DIAL
Press this key to delete the
letter highlighted by the cur sor.
PQRS
JKL MNOGHI
TUV WXYZ
SYMBOL
REDIAL
SEARCH
SPEAKER
Press this key to move t he
cursor to the left.
R
Press this key to cha nge
case.
Press this key to move t he
cursor to the right.
Press either key repeat edly t o selec t one of
the follo w ing sym b o ls :
./!"#$%&’()++, - :; < =>?@[ ¥]^_p{|}→←
At the end of the list, letters particular to the
language curren tly se lect ed with Op tion Setting
13 will appear. These are as fo llows:
Note: Not all of the languages shown may be
available for selec tion on your machin e.
T =
U =
V =
W =
X =
Y =
Z =
SPACE =
German ДЦЬдць
French авйип ы
Swedish Å Ä Ö å ä ö
Finnish Å Ä Ö å ä ö
Spanish Ñ ñáéí ó
Italian йищтм а
Danish Æ Ø Å æ ø å
Dutch ÿ
7
Press the START/MEMORY key to save your name in memory.
The display will show:
START/MEMORY
SECURITY SELECT
8
Press the STOP key to return to the date and time display.
16
STOP
Page 22
Datum und Uhrzeit einstellen
Setting the Date and Time
The date and time appear in the displa y and repo rts, and are printed at the top of
every page you transm it.
FUNCTION key
STOP key
START/MEMORY
key
1. Installation
1
Press these keys:
The display will show:
2
Press the * key 2 times.
The display will show:
3
Press the START/MEMORY key.
•• The currently set date will appear in the display .
FUNCTION
ENTRY MODE
DATE & TIME SET
3
START/MEMORY
17
Page 23
Datum und Uhrzeit einstellen
4
Enter a two-digit number for the day ("01" to "31").
•• To correct a mistake, press the SPEED DIAL key to move the cursor
back to the mistake, and then enter the correct number.
Example: th e 5t h
5
Enter a two-digit number for the month ("01" for January, "02" for
February, "12" for December, etc.).
Example: January
6
Enter the year (four digits).
Example: 1998
7
Enter a two-digit number for the hour ("00" to "23") and a two-digit
number for the minute ("00" to "59").
Example: 9:25
8
Press the START/MEMORY key to start the clock.
0
0
1
0
5
1
9
9
9
2
START/MEMORY
8
5
The display will show:
9
Press the STOP key to return to the date and time display.
♦ The time setting will change automatically at the beginning and end of
summertime.
18
STORE JUNK #
STOP
Page 24
Selecting the Reception Mode
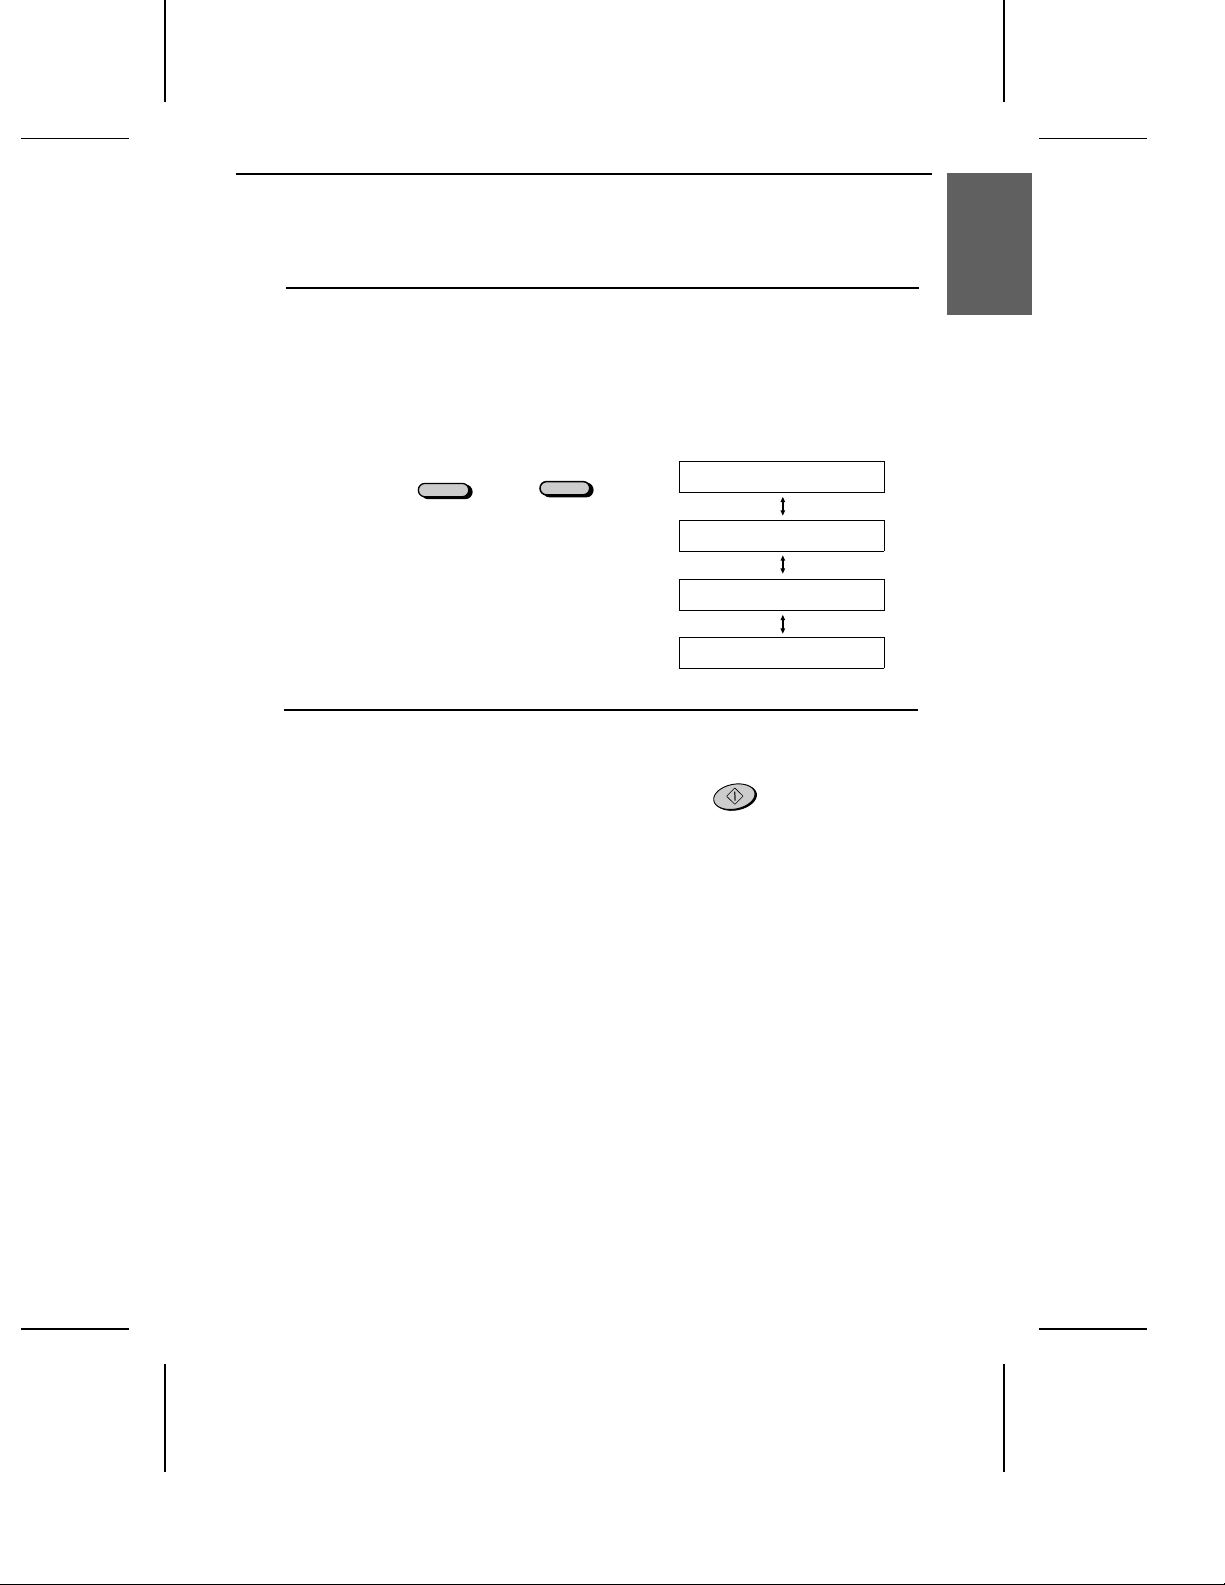
Selecting the Reception Mode
Your fax has four mode s for re ce iv ing inc om ing calls and fa xes:
TEL mode:
This is the most conveni en t mode for re ceivi ng ph one calls. You can also
receive faxes; ho weve r, all call s mu st fi rst be answe re d by pi cking up the
fax’s handset or an extensi on ph one conn ecte d to the same line.
FAX mode:
Select this m ode when yo u onl y want to rece iv e faxes on your line. The fax
will automati call y answer all cal ls and rec eive incom ing faxes.
TEL/FAX mode:
This mode is con ven ie nt fo r rec ei vi ng bot h fa xes a nd voi ce call s. W he n a call
comes in, the fax will detec t whether i t is a voic e c all (i ncl uding man ual ly
dialled fax transmissions), or an aut omat ical ly dial led fax. If it is a voice call,
the fax will make a special ringi ng sound to alert you to answer. If it is an
automatical ly dia lled fax tr ansm ission, reception will begin auto ma ti call y.
A.M. mode: Selec t this m ode when you are out and want the built- in
answering mac hin e to answer all call s. Voice messa ges wi ll be recor ded , and
fax messages wil l be recei ved autom at ical ly.
Setting the reception mode
Press the RECEPTIO N M ODE key until the arrow in the display points to
the desired mode.
1. Installation
RECEPTION MODE key
RECEPTION
MODE
FEB 1 10:30
FEB 1 10:30
FEB 1 10:30
FEB 1 10:30
TEL/FAX
TEL/FAX
TEL/FAX
TEL/FAX
TEL
A.M.
FAX
TEL
A.M.
FAX
TEL
A.M.
FAX
TEL
A.M.
FAX
Note: A.M. mode cannot be sel ecte d unl ess a gene ral outgoi ng m essa ge has
been rec ord ed as described in Cha pte r 2.
For more information on receiving faxes in TEL, TEL/FAX mo de and FAX
mode, see Chap ter 4, "Recei vin g Docume nt s". Fo r more information on usi ng
A.M. mode, see Chapter 2.
19
Page 25
Volume Adjustment
Volume Adjustment
You can adjust th e volum e of the speaker and ri nge r using th e UP and
DOWN keys on the operati on panel.
Spea ker
1
Press the SPEAKER key.
2
Press the UP or DOWN key.
DOWN key
DOWN
SPEAKER
or
UP key
UP
3
When the display shows the desired volume level, press the SPEAKER
key to turn off the speaker.
SPEAKER
20
Page 26
Volume Adjustment
Ringer
1
Press the UP or DOWN key. (Make sure the SPEAKER key has not been
pressed and the handset is not lifted.)
•• The ringer will ring once at the selected level, then the date and time will
reappear in the display.
Display:
DOWN
2
If you selected RINGER OFF: OK?, press the START/MEMORY key.
or
UP
RINGER: HI GH
RINGER: MI DDLE
RINGER: LO W
RINGER OFF: OK?
1. Installation
START/MEMORY
21
Page 27
2
Using the
Chapter
The UX-238/51’s built-in answe ring mac hine allows you to receive both
voice messages and fax tran smi ssio ns whil e yo u are out.
When the reception mode is set to A.M., the answering machine will
automatical ly answe r incom in g calls and pl ay your outgo ing message. Voice
callers can leave a message just as wit h any reg ula r answeri ng m ac hi ne. If the
call is a fax transmission, the UX-238/51 will automatically receive it.
Recording an Outgoing Message
The outgoing messa ge (OGM) is the gre etin g whic h is play ed after th e
machine answers a call to inform callers th at they can leave a message or
send a fax.
The answering m achi ne has a ge ner al message box a nd th ree per sona l
message boxes. To use the answering machine, you must record an OGM for
the general box. To use a persona l box, you must re co rd an OGM for that box.
Example of an OGM for the general box:
"Hello, this is t he Jon es fa mily . We are not at hom e right now. If you would
like to leave a general message , please speak aft er the beep. If you wou ld like
to leave a private messa ge, press "1" for J oh n, "2" for Jan e, or "3" for Billy
before the beep. If you wou ld l ike to send a fa x, press y our fa csi m il e Start
button."
Answering Machine
Machine
2. Answering
Example of an OGM for a personal box:
"This is Jane’ s perso nal box. Please leave a messa ge afte r the beep. "
1
Press these keys:
The display will show:
2
Press the # key.
The display will show:
22
FUNCTION
0
A.M. SETTINGS
OGM RECORDING
Page 28
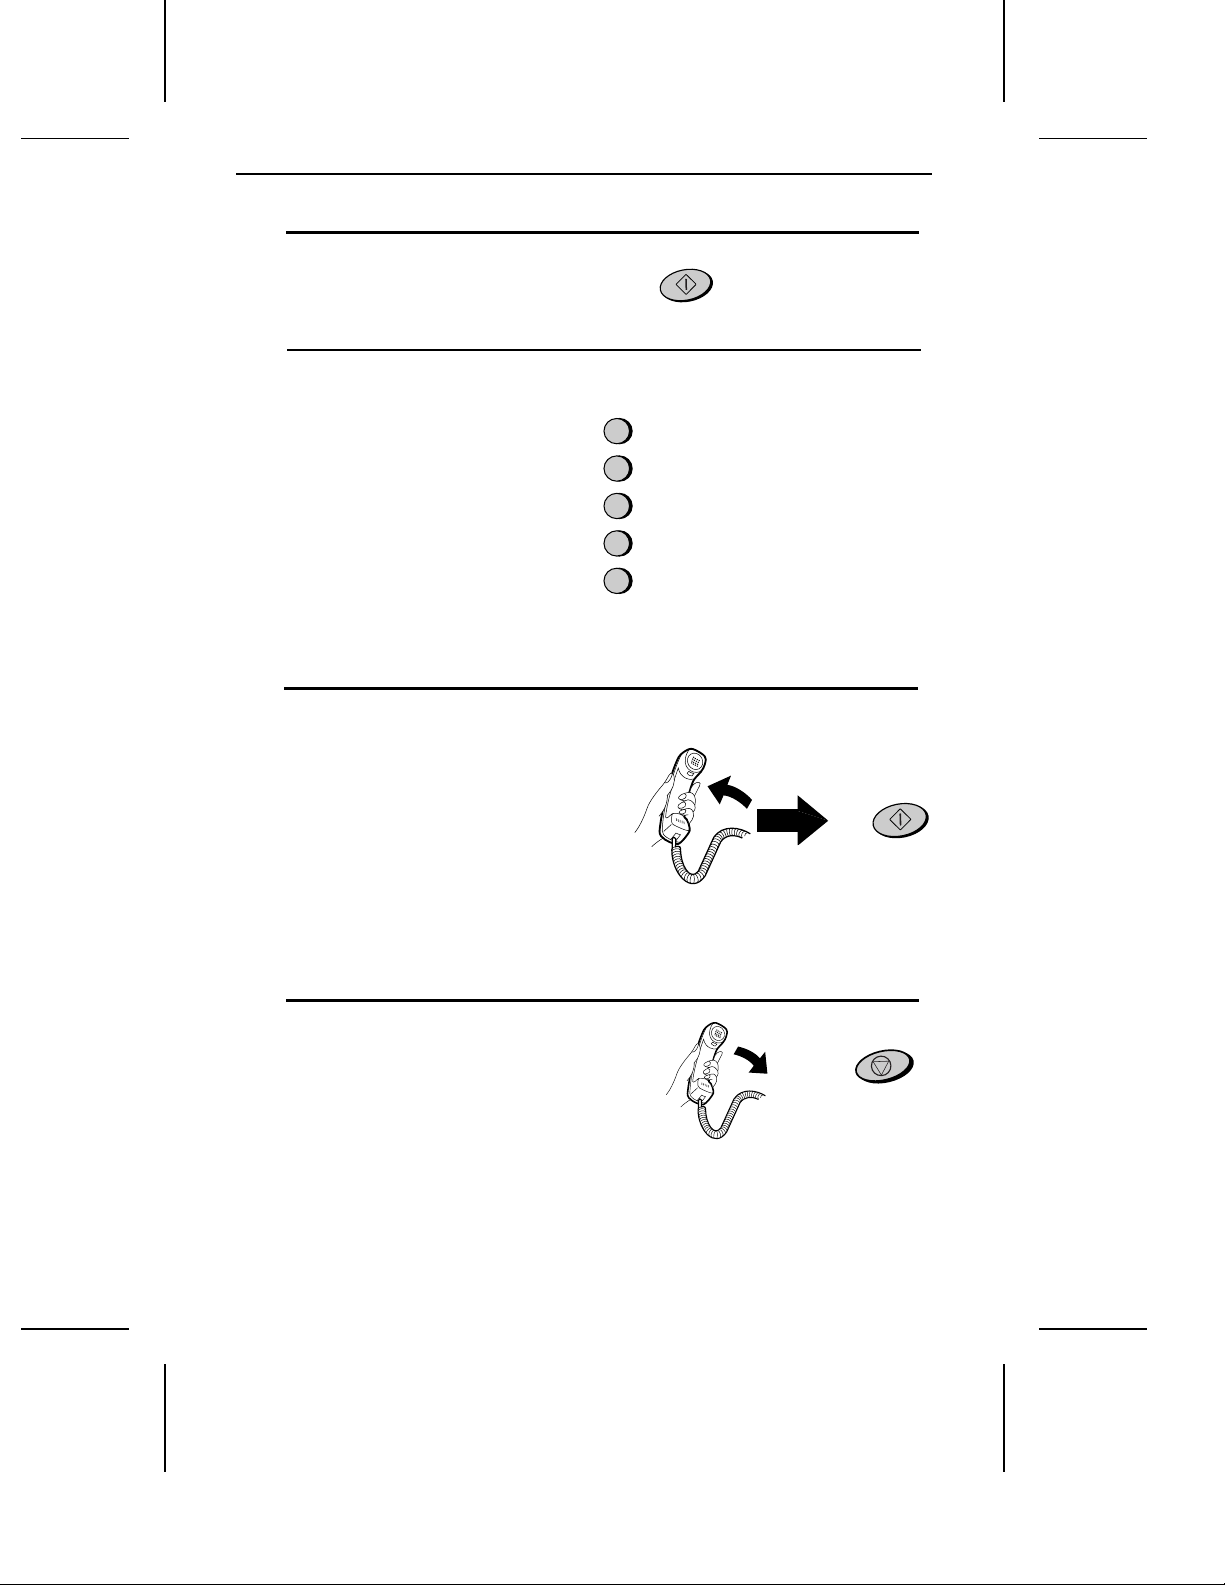
3
Press the START/MEMORY key.
4
Press a numeric key to select the outgoing
message you want to record:
•• 0: General outgoing message
Recording an Outgoing Message
START/MEMORY
0
•• 1: Box 1 outgoing mes sage
•• 2: Box 2 outgoing message
•• 3: Box 3 outgoing message
•• 4: Transfer outgoing message
(This is used for the Transfer
function, which is described in Transfer
Function in this Chapter.)
5
Pick up the handset, press the
START/MEMORY key, and speak into
the handset.
•• The general outgoing mess age can be
up to 60 seconds long. A pers onal
outgoing message can be up to 30
seconds long.
•• While recording, the display will show
the time remaining to record.
6
When finished, replace the handset or
press the STOP key.
•• If your message exceeds the time limit
or more than 6 seconds of silence is
detected, recording will stop
automatically.
1
2
3
4
START/MEMORY
STOP
or
23
Page 29

Recording an Outgoing Message
7
Go back to Step 4 to record an outgoing
message for another box, or press th e
STOP key twice to return to the date and
time display.
STOP STOP
To listen to or erase an outgoing message
To listen to or erase an outgoi ng m essa ge, fo llow Ste ps 1 thr ough 4 of the
above procedure to sele ct the message , and then press the PLAY/ SKIP key
to listen to it, or the DELETE to erase it. To ret urn t o the date a nd ti m e
display , press the STOP key twic e. Note that the ge ne ral out goi ng m essa ge
cannot be erased. If you need to ch ang e it, sim ply repe at the rec ord ing
procedu re.
Note: If an extension phone is connected to the UX-238/51, an outgoing
message cannot be recorded, played, or deleted while the extens ion phone
is being used (while LINE IS IN USE appears in the display).
24
Page 30
Optional Answering Machine Settings
Optional Answering Machine Settings
Programming a passcode
A 3-digit passcode can be progra mme d for e ach of th e boxes. If th is is do ne,
the passcode must be ente red bef ore message s in the bo x can be list ened to or
erased. Prog ram a new passc ode or clear a previousl y progra mm e d passcode
by pressing the panel keys as shown below.
♦ The numbers "1", "2", and " 3" cannot be selected for the first digit of the
passcode.
Machine
2. Answering
1
Press these keys:
The display will show:
2
Press 1 to enter a passcode, or 2 to clear a
previously programmed passcode.
3
Enter the number of the box for which
you want to program or clear a passcode
by pressing the appropriate numeric key.
If you are clearing a passcode, go to Step
5.
4
Enter a 3-digit passcode by pressing the
number keys.
5
Press the START/MEMORY key and
then the STOP key.
FUNCTION
BOX PASSCODE
0
1 2
4 1 2
START/MEMORY
or
1
(Example)
(Example)
STOP
Note: To ensure confidentiality, passcodes cannot be checked. If you have
forgotten a passcode, clear it and program a new one.
29
Page 31

Optional Answering Machine Settings
Fax reception in boxe s
If desired, you can tu rn on t he Fax Box fu nct ion to rece iv e faxes i n persona l
boxes.
When a fax is sent to a personal box, it will not be printe d out imm ediat ely.
Instead , it will pr int out when yo u play back t he messa ge s lef t in the box. If
you progra m a passc ode for th e box, you wil l be able to receive c onfi de ntial
faxes. When a fa x is sen t to the Gene ral Box, it will be prin te d out
immedi atel y unless a passco de ha s been pro gra mme d for the Ge ner al Box, in
which case it wil l be prin te d out after m essa ge playba ck.
If the caller wants to send a fax to a personal box, they should enter the
number of the box ("1 " for Box 1, "2" for Box 2, or "3" fo r Box 3) by
pressing t he appro pri ate ke y on thei r telephon e before the beep. Th e outgoi ng
message for t he select ed box wil l play, and the call er can then press thei r
Sta rt ke y t o s end a fax.
Foll ow the ste ps bel ow to turn the Fax b ox func ti on on o r off (i t ha s bee n
turned off at the factory).
1
Press these keys:
The display will show:
2
Press these keys:
The display will show:
3
Press 1 to turn the Fax box function on, or
2 to turn it off.
4
Press the STOP key.
30
FUNCTION
A.M. SETTINGS
FAX BOX
1 2
STOP
0
or
Page 32

Optional Answering Machine Settings
Setting ICM time
Incoming m essa ge s (ICMs) are the messa ge s whic h callers l eave for you on
the built-in answering machine. The answering machine is set at the factory
to allow each caller a maximu m of 4 minut es to leave a message. If desire d,
you can ch ang e this setting to 15, 30, or 60 se con ds.
1
Press these keys:
The display will show:
2
Press these keys:
The display will show:
3
Press a numeric key to select the desired
ICM recording time:
•• 1: 15 seconds
•• 2: 30 seconds
•• 3: 60 seconds
A.M. SETTINGS
ICM RECORD TIME
1
2
3
FUNCTION
0
4
Press the STOP key.
STOP
31
Page 33

Optional Answering Machine Settings
Fax reception on A.M. fa ilure
If the memory fo r record ing incom ing message s bec omes full while you are
out, the answering machine will no longer be able to record messages. The
ON A.M. FAILURE setting is used to choose the response of the machine to
incoming calls when this happens:
♦ Automatic fax reception NO: The UX-238/51 will answer after 20 rings,
after which it will wait to receive a remote command. Most callers will
hang up before it answers; however, when you call the UX-238/51 from
a remote location, you can wait until it answers, listen to your messages,
and then erase them (see Remote Operations in this chapter).
♦ Automatic fax reception YES: The reception mode will switch to FAX
mode, allowing the UX-238/51 to co ntinue to receive faxes
automatically without broadcasting an OGM on answering. With this
setting, you can still use the remote commands to listen to your
messages and erase the message memory (see Remote Operations in this
chapter).
Autom a tic fa x rec ep ti on is se t to NO at the fa ct ory be for e shi ppi ng. If you
want to set it to YES, press th e panel keys as fol lows:
1
Press these keys:
The display will show:
2
Press these keys:
The display will show:
3
Press 1 to turn automatic fax reception on,
or 2 to turn it off.
4
Press the STOP key.
32
FUNCTION
0
A.M. SETTINGS
ON A.M. FAILURE
or
1 2
STOP
Page 34

Transfer Function
The Transfer function is used to make the UX-238/51 automatically call you
at a specified num be r every t im e it rece ive s an inco mi ng m essa ge in a
selected box. T his all ows you t o hear you r messag es imm edia tely a fter th ey
come in, eve n whe n you a re at a rem ote loc at io n.
Transfer Function
When you answer the telephone, you will hear your record ed messa ge telling
you that the call is a transfer cal l. Ente r "#", the box number, the box’s
passcode (or yo ur remo te code num be r if the box has no passc ode ), and "#".
The UX-238/51 will then play back your messages. You can also perform
any of the remote operations de scr ibed in Remote Operations in this chapte r.
Note: When you hang up after a transfer call, the UX-238/5 1 will not
immediately resume normal operation. If you want the UX -238/51 to
accept calls immediately after a transfer call, enter "*" twice before
hanging up (if you want to hang up during message playback, first enter "
0" and " #" to stop playback, then enter "*" twice).
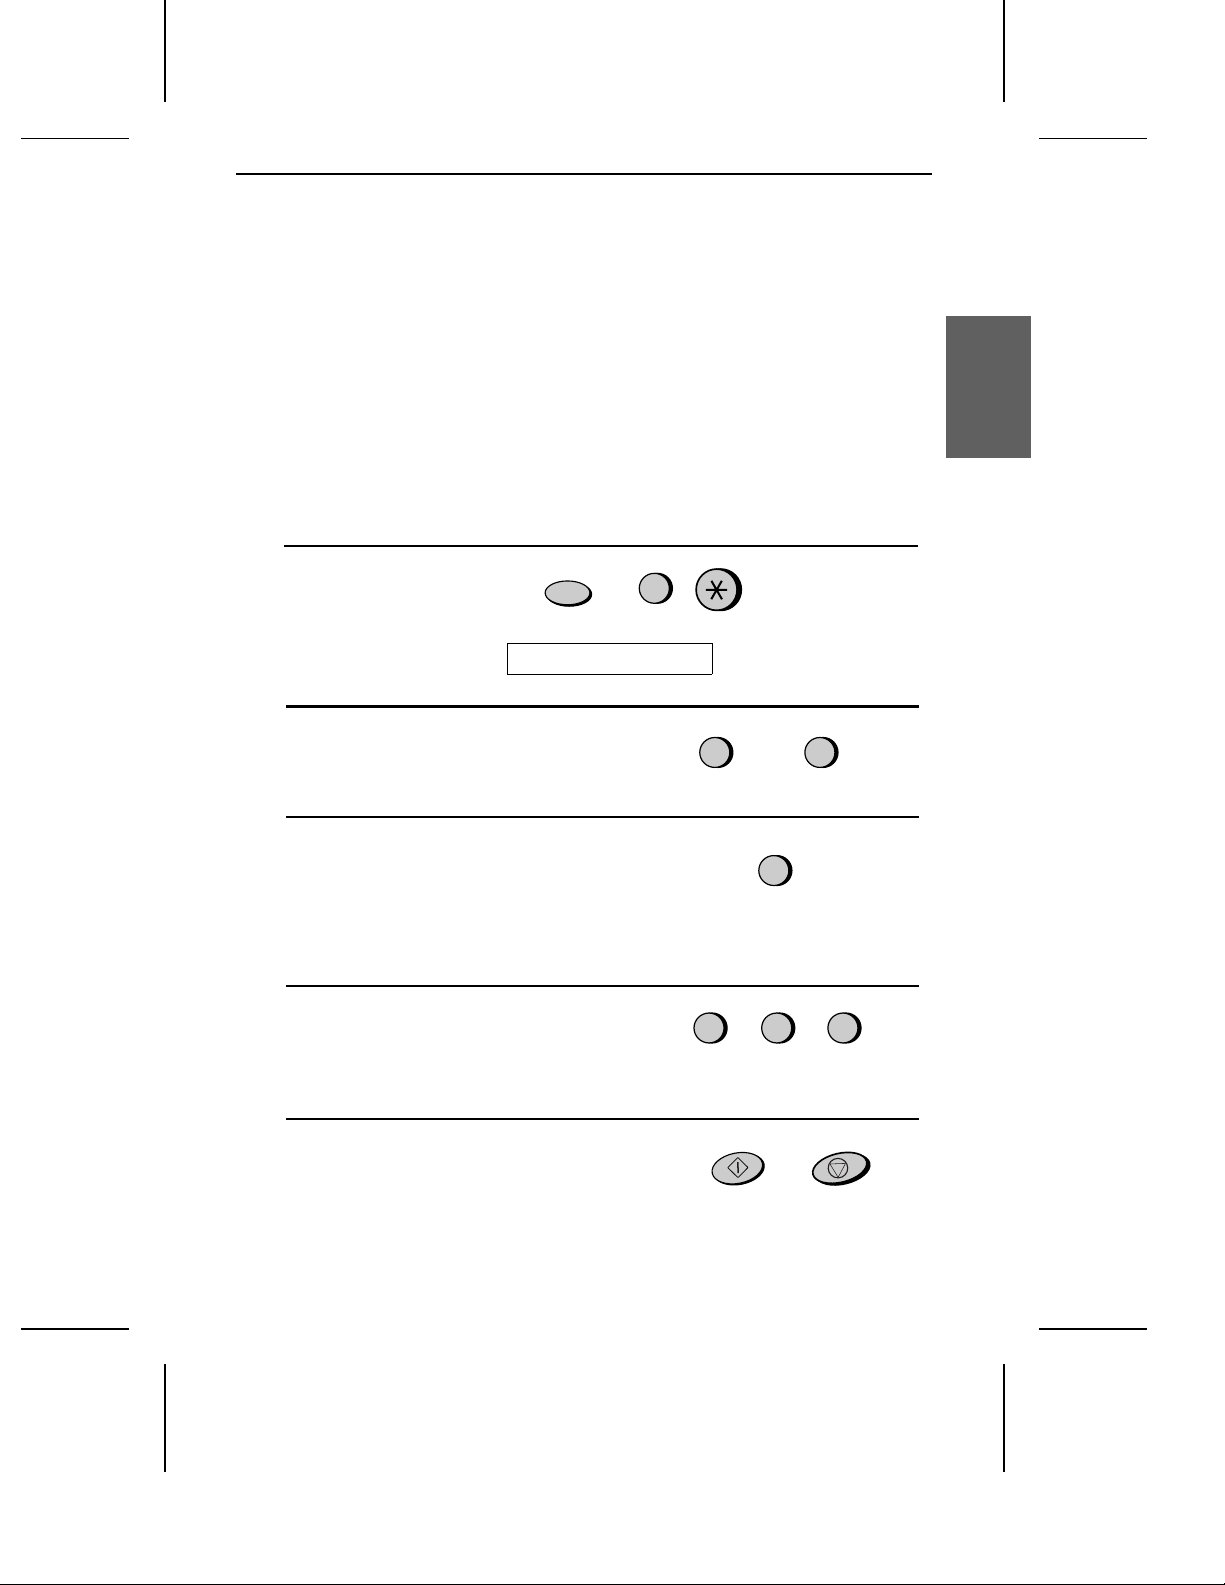
Programming the transfer number
To use the Transfer func tion, you must first giv e the UX-238/5 1 the num be r
to call (the transfer number ). This is don e by pressi ng the panel key s as
follows:
1
Press these keys:
The display will show:
A.M. SETTINGS
FUNCTION
0
Machine
2. Answering
2
Press these keys:
The display will show:
TRANSFER # ENTRY
33
Page 35

Transfer Function
3
Press the START/MEMORY key.
4
Enter a transfer number (max. of 32 digits
including pauses ) by pressing the number
keys.
5
Press the START/MEMORY key and
then the STOP key.
5
5
START/MEMORY
START/MEMORY
1
5
2
3
(Example)
STOP
4
Recording the transfer message
The transfer messa ge plays when you answer t he tel eph one , and informs you
that the call is a transfer call. It can be up to 15 secon ds lon g. To reco rd a
transfer message, follow the steps described in Recor d ing an Outgoing
Message in this chapter. The following is an example:
"Hello. This is a transfe r call for (YOUR NAME ). Ente r your remot e code
number now."
34
Page 36

Turning the Transfe r function on and o ff
Transfer Function
1
Press these keys:
The display will show:
2
Press these keys:
The display will show:
3
Press "1" to turn the Transfer function on,
or "2" to turn it off. (If you pressed "2",
go to Step 5.)
4
Enter the number of the box for which
you want the Transfer function to operate
(for the General Box, enter "0").
A.M. SETTINGS
TRANSFER FUNC
FUNCTION
0
or
1 2
1
(Example)
Machine
2. Answering
5
Press the STOP key.
STOP
35
Page 37

Override Ringing
Override Ringing
This function allows sel ec ted call ers using a tone dial telephone to overr ide
the answering mac hin e’s ou tgo ing message and cause the UX-238/51 to
make a specia l ringing sou nd, alert ing you that the y ar e call in g. Thi s is use ful
when you are near the mac hine bu t only wan t to talk wit h cert ai n callers,
taking all other calls on the answering machine.
Programming the override code
To overrid e the answeri ng m achi ne, your ca llers m ust enter a 3-digit ove rri de
code from thei r tele pho ne. This c ode has be en set to "009" at the factory. If
you want to change it, press th e panel keys as shown be lo w.
Important!
•• Make sure the over rid e code is diff ere nt from the remot e code or any
passcodes pro gra mme d for bo xes.
1
Press these keys:
The display will show:
2
Press these keys:
The display will show:
3
Enter a 3-digit code number by pressing
the number keys. ("1","2" and "3" cannot
be selected for the first digit.)
4
Press the START key and then the STOP
key.
A.M. SETTINGS
OVERRIDE CODE
FUNCTION
0
5
5
(Example)
START/MEMORY
4
STOP
36
Page 38

Overriding the answ er ing ma c hine
Your callers should fol lo w the steps bel ow to overr ide the answe ri ng
machine.
1
Your caller calls the UX-238/51 from a
tone dial telephone. When the outgoing
message begins, they should press the "#"
key on their telephone.
•• The caller will hear a short beep, and
the outgoing message will stop.
2
The caller should enter the override code
and "#" by pressing the appropriate keys
on their telephone.
•• If an incorrect code is entered, the
caller will hear four beeps. He or she
must re-enter the correct code within
60 seconds or the line will be
disconnected.
5
Override Ringing
45
(Example)
Machine
2. Answering
3
The UX-238/51 will make a special
ringing sound. Pick up the handset to
answer the call. (Note that an extension
telephone connected to the same line will
not ring.)
•• If you do n ot answer within 30 seconds,
the outgoing message will play again
and the caller can then leave a message.
37
Page 39

Remote Operations
Remote Operations
You can call the UX-238/51 from any tone dial tel eph one and play back your
messages using the remote commands. You can also use these commands to
change the recep ti on m ode and othe r set ti ngs.
Remote code numbe r
When you call the UX-238/ 51, you must enter the passcode for the box you
want to listen t o, or a remote code number if the box does not ha ve a
passcode. One remo te code numbe r can be pr ogra m med, and it is used t o
access all boxes whic h do not have pa ssco des. This pr eve nt s unau tho riz ed
people from liste ni ng to your m essa ge s. You can use an y 3-di git num be r as
the remot e code number .
The remote code numbe r has be en set to "001" at the fact ory. If yo u want to
change it, press the pa nel key s as shown belo w.
1
Press these keys:
FUNCTION
0
The display will show:
2
Press these keys:
The display will show:
3
Enter a 3-digit number by pressing the
number keys. ("1","2" and "3" cannot be
selected for the first digit.)
4
Press the START key and then the STOP
key.
38
A.M. SETTINGS
REMOTE CODE
2 2
START/MEMORY
2
(Example)
STOP
Page 40

Remote Operations
Toll Saver
When you call the UX-238/ 51 t o listen to your messages, it will answer a fte r
two rings if it has rece ived at least one messa ge in any of the boxes, or af ter
four rings if no message s are received .
This allo ws you to save mon ey on tel ep hone cha rge s, part ic ul arly if you are
calling long dist anc e. If t he machi ne do es not answe r afte r the sec ond ri ng,
you can simply hang up befo re it answers, sav ing yourself the cost of that call.
If you do not want to use the Toll Sa ver func ti on, you can turn i t off by
following t he steps be lo w. In this case , the UX-238/ 51 wi ll answer aft er the
number of ri ngs set with Opti on Se tt ing 3 (see Chap ter 8), the rin g set ti ng for
FAX reception mode.
1
Press these keys:
FUNCTION
0
Machine
2. Answering
The display will show:
2
Press these keys:
The display will show:
3
Press "1" to turn Toll Saver on, or "2" to
turn it off.
4
Press the STOP key.
A.M. SETTINGS
TOLL SAVER
1
STOP
or
2
39
Page 41

Remote Operations
Retrieving your messages
Follow the steps be low t o liste n to your m essa ges fr om a remot e locati on.
Note that you can only access o ne box per call; if you want to access more
than one box, you must ma ke a separate cal l for each box.
Note: You can also access the UX-238/51 for remote operation when the
reception mode is set to FAX or TEL/FAX. In this case, call the
UX-238/51, press the "#" key immediately after it answers, or during
pseudo ringing in TEL/FAX mode (before you hear the fax tone in either
case), and then continue from Step 2 below.
1
Call the UX-238/51 from a touch-tone
telephone. When your outgoing message
begins, press the "#" key on the telephone.
•• You will hear a short beep, and the
outgoing message will stop.
2
Enter the number of the box you want to
listen to. If you want to listen to the
General Box, skip this step.
2
(Example)
3
Enter the box’s passcode, or your remote
code number if the box does not have a
passcode. When finished, press "#" on the
telephone.
•• You will hear a series of beeps equal to
the number of messages recorded in the
box, or one long beep if four o r more
messages have been received. The
machine will then play back the
messages, beeping once at the end of
each message. When all messages have
been played back, you will hear a long
beep.
40
25
2
(Example)
Page 42

•• If no messages have been received in
the box, you will hear a short beep.
You can either hang up, or perform any
of the operations described in the
following section "Other remote
operations".
4
While the messages are playing, you can
do any of the following:
•• Repeat: To listen to a message a
second time, press "2" and "#" on the
telephone before that message ends. To
move back to the previous message,
press "2" and "#" within the first 3
seconds of the current message .
Remote Operations
Machine
2. Answering
2
•• Skip forw ard: To skip forward to the
next message, press "5" and "#" on the
telephone.
•• Stop: To stop playback, press "0" and
"#" on the telephone. After this, you
can enter any of the commands
described in the following section,
"Other remote operations".
•• Play new messages: To listen to only
your new messages , first stop playback
by pressing "0" and "#", and then press
"6" and "#".
•• Erase a message: To erase the
message you are currently listening to,
press "3" and "#" before it ends.
5
0
0
6
3
41
Page 43

Remote Operations
5
When you have finished listening to your
messages, you can do any o f the
following:
•• Erase all mes sages: To erase all of the
messages in the box, press "3", "3",
and "#".
3
3
•• Repeat playback: To listen to your
messages again, press "7 " and "#".
•• Perform other operations: You can
enter any of the commands described in
the following section, "Other remote
operations".
•• Hang up: If you do not erase your
messages first, they will be saved and
any new messages will be recorded
after them. If you want the UX-238/51
to resume normal operation
immediately, press "*" twice before
hanging up (in some cases, particularly
when the Transfer function is us ed, the
UX-238/51 may not accept new calls
for one or two minutes after y ou hang
up unless you first press "*" twice).
Comments:
7
•• When a rem ot e co mm a nd is a cc ept ed by the mach ine, you will he ar one
beep. If an inc orrect comm and is e ntered, you wil l hear four beep s. In the
latter case , re-enter the correct com m an d.
•• When ente ri ng a com ma nd, do not pa use l onge r than 10 seco nds be twe en
each digit. If you do, a 4-beep error signal will be issued and the digits
entered up to that point wi ll be disreg ard ed. In this c ase , re-e nte r the
comma nd from the beginning.
•• If you make two errors (c ausi ng t wo 4-be ep signa ls t o be issued) whil e
entering your remote code numb er, the line will be disco nne cted. This
prevents un author iz ed peopl e from attem ptin g to guess you r rem ote code
number.
•• If you pause for longe r than 60 seco nds be fore enter ing a comman d, you wil l
be disconnected.
42
Page 44

Remote Operations
Other remote opera tions
After listening t o your message s, you can do any of the operations de scr ibe d
below by pressing t he appro pri at e keys on th e telepho ne.
Note: The following commands cannot be entered while messages a r e
being played back. If you do not want to wait until playback end s to enter a
command, first stop playback by p ressing "0" and "#", and then enter the
command.
Changing the fax reception mode
Select a new reception mode by pressing
the keys as follows:
•• A.M. mode: "8", "1 ", and "#".
8
Machine
2. Answering
1
•• FAX mode: "8", "2", and "#".
•• TEL mode: "8", "3", and "#"
•• TEL/FAX mode: "8" , "4" and "#"
Recording a new outgoing message
Note: A new outgoing message can only be recorded for the box you
selected at the beginning of the remote operation procedure.
1
Press "4" and "*" on the telephone.
4
2
When you hear a short beep, speak into
the telephone to record the new message.
•• The message (including the general
outgoing message) can be up to 15
seconds long. After 15 seconds (or
earlier if the machine detects silence
after you finish speaking), you will
hear a beep, and the new message will
be played back.
(Example)
43
Page 45

Remote Operations
Turning the Transfer function on or off
To turn Transfer on: Press "9", "1", and
"#", followed by the number of the bo x
("0" for the General Box) and "#".
To turn Transfer off: P ress "9", "2", and
"#" on the telephone.
Changing the transfer telephone number
1
Press "9", "0", and "#" on the telephone.
2
After you hear a short beep, enter the new
telephone number. When finished, press
"#".
•• To insert a pause between any tw o
digits of the number, press "*".
5
Recording a new transfer message
9
1
1
(Example)
1
0
1
3
(Example)
4
9
6
4
1
Press "9", "3", and "#" on the telephone.
2
When you hear a short beep, speak into
the telephone to record the new message.
•• The time for the transfer message is
fixed at 15 seconds. After 15 s econds
(or earlier if the machine detects
silence after you finish speaking), you
will hear a beep, and the new message
will be played back automatically.
44
9
3
Page 46

Remote Operations
Recording a "Memo"
You can leave a "memo" for your sel f or other users of the machine . It wil l be
recorded in the Genera l Box, and pl ayed ba ck when m essa ges in tha t box are
listened to.
1
Press "*" and "#" on the telephone.
2
When you hear a short beep, speak into
the telephone to record the memo.
3
When you are finished, press "0" and "#".
•• If the UX-238/51 detects a certain
period of silence, it will stop recording
automatically.
0
Machine
2. Answering
45
Page 47

3
Sending
Chapter
Transmittable Documents
Size and weight
The size and weight of documents that you can load in the document feeder
depend on w hether you lo ad one page at a time or seve ral pages at once.
Loading one page at a time:
Documents
Minimum size
148 mm
140 mm
Maximum size
216 mm
600 mm
Minimum weight
52 g/m²
Loading seve ra l pages at onc e:
Minimum size
148 mm
140 mm
Minimum weight
52 g/m²
Maximum weight
Maximum size
Maximum weight
157 g/m²
216 mm
80 g/m²
297 mm
46
Page 48

Transmittable Documents
Note: Letters or graphics on th e edges of a document will not be scanned.
Letters in the
shaded area will
not be scanned.
4 mm
4 mm
Other restrictions
♦ The scanner cannot recognise yellow, greenish yellow, or light blue ink.
3. Sending
Documents
♦ Ink, glue, and correcting fluid on documents must be dry before they
pass through the document feeder.
♦ All clips, staples, and pins must be removed from documents before
loading in the feeder. If these are not removed, they may damage the
machine.
♦ Documents which are patched, taped, torn, smaller than the minimum
size, carbon backed, or easily smudged should be photocopied, and the
copy loaded in the feeder.
47
Page 49

Loading the Document
Loading the Document
Up to 10 pages (UX-51: 5 pages) c an be placed in the feeder at one time. Th e
pages wil l be aut om at ic ally fe d in to t he mac hi ne st art ing from the pa ge on
the bottom.
♦ If you need to send or copy more than 10 pages (UX-51: 5 pages), place
the additional pages gently and carefully in the feeder just before the last
page is scanned. Do not try to force them in, as this may cause
double-feeding or jamming.
♦ If your document consists of s everal large or thick pages which must be
loaded one at a time, insert each page into the feeder as the previous
page is being scanned. Insert gently to prevent double-feeding.
1
Adjust the document guides to the width
of your document.
2
Place the document face down and push it
gently into the document feeder. The top
edge of the document should enter the
machine first.
•• The feeder will draw the leading edge
of the document into the machine. The
display will show:
SEND READY
3
Adjust the resolution an d/or contrast
setting (if desired) as described in the
section "Resolution and Contrast", then
dial the receiving machine as described in
"Sending a Fax by Normal Dialing".
48
RESOLUTION
Page 50

Loading the Document
Removi ng a document from the feede r
If you need to remove a docume nt from the f eeder, open the oper ation pa nel.
Important:
Do not try to remove a document without opening the operation panel. This
may damage the feeder mechanism.
1
Pull the release marked PANEL
RELEASE toward you and open the
operation panel.
2
Remove the document.
3. Sending
Documents
3
Close the operation panel, making sure it
clicks into place.
Click!
49
Page 51

<P=001>
Resolution and Contrast
Resolution and Contrast
If desired, you can adjust t he re sol uti on a nd co ntr ast befo re se ndi ng a
document.
The default resolution settin g is STANDARD and the default contras t setting is
AUTOM..
You must adjust the setting s each time you don’t want to use the default sett ings.
Note: The resolution and contras t settings are only effective for
transmitting a document. They are not effective for receiving a document.
Resolution settings
STANDARD: Use STANDARD for ordinary documents. This setting
gives you the fastest and most economical transmission.
FINE: Use FINE for documents containing small letters or fine
drawings.
SUPER FINE
(UX-238 only):
HALF TONE: Use HALF TONE for photographs and illustrations. The
Use SUPER FINE for documents containing very small
letters or very fine drawings.
original will be reproduced in 64 shades (UX-51: 16
shades) of grey.
Note: In order to transmit in FEIN or SUPERFEIN resolution, the
receiving fax machine must also have that resolution. If it doesn’t, your
machine will automatically step down to the next best available setting.
Contrast settings
AUTOM. Use AUTOM. for normal documents.
DUNKEL Use DUNKEL for faint documents.
50
Page 52

<P=002>
1
Load the document(s).
•• The document must be loaded befor e
the resolution and contrast can be
adjusted.
2
Press the AUFLÖSUNG key one or more
times until the desired resolution and
contrast settings appear in the display.
•• The first time you move through the list
of resolution settings, the contrast
setting AUTOM. will appear next to
each resolution setting. The second time
you move through the list , the contrast
setting DUNKEL will appear.
Resolution and Contrast
RESOLUTION
Display:
3. Sending
Documents
STANDARD :AUTOM.
FEIN :AUTOM.
SUPERFEIN :AUTOM.
HALBTON :AUTOM.
STANDARD :DUNKEL
FEIN : DUNKEL
SUPERFEIN:DUNKEL
HALBTON :DUNKEL
51
Page 53

Sending a Fax by Normal Dialing
Sending a Fax by Normal Dialling
With Normal Dialling, you pick up the handset (or press the SPEAK E R ke y )
and dial by pressing the num be r keys.
♦ If a person answers, you can talk with them through the handset before
sending the fax. (If you pressed the SPEAKER key, you must pick up
the handset to talk.)
♦ Normal Dialling allows you to listen to the line and make sure the other
fax machine is responding.
1
Load the document(s).
The display will show:
SENDEBEREIT
•• Set the resolution and/or contrast if
desired.
RESOLUTION
2
Pick up the handset or press the
SPEAKER key. Listen for the dial tone.
3
Dial the number of the receiving machine
by pressing the numeric keys.
52
GHI
PQRS
SPEAKER
or
ABC
DEF
3
2
1
JKL
MNO
TUV
6
5
WXYZ
9
8
4
7
Page 54

Sending a Fax by Norm al Dialing
4
Wait for the connection. Depending on
the setting of the receiving machine, you
will either hear a facsimile reception tone
or the other person will answer.
•• If the other party answers, (lift the
handset if the SPEAKER key w as
pressed) ask them to pres s their
START key. This causes the receiving
machine to issue a reception tone.
Facsimile recepti on tone : This i s a pronounc ed , high- pitch ed tone tha t the
receiving machi ne sends to the transm it ting m achi ne t o indic ate th at it is
ready to receiv e.
Beep
3. Sending
Documents
5
When you hear the reception tone, press
the START/MEMORY key. Replace the
handset if you used it.
•• When transmission is completed, the
fax will beep once.
START/MEMORY
Using the REDIAL ke y
You can press the REDIAL key to redi al the last num ber dial le d. To se nd a
documen t, procee d fro m Step 4 of Norm al Dialli ng. Not e that the spea ker
will be automatical ly activ ated whe n you press the REDIAL.
53
Page 55

Sending a Fax by Automatic Dialing
Sending a Fax by Automatic Dialling
You can dial a fax or telephone num ber by si mp ly pressi ng a Rapi d Key, or
by pressing the SPEED DIAL key and ente ri ng a 2- dig it num ber .
♦ To use Automatic Dialling, you must first store the full fax or telephone
number in your fax machine.
♦ When you store a fax or telephone number, you select a 2-digit Speed
Dial number for it. 30 Speed Dial numbers(UX-51:20) are available.
Speed Dial numbers
01 through 10 are
for Rapid Key
(one-touch) Dialling.
Speed Dial numbers 11
through 30(UX- 51 :1 1
through 20) are f or
dialling with the
SPEED DIAL key.
SPEED DIAL key
Rapid keys
SPEED DIAL
01
START/MEMORY
1 1
Attach each strip of Rapid Key
labels between the Rapid Keys.
When you store a num ber in a
Rapid Key, write the name of the
party on the label.
54
Page 56

Sending a Fax by Automatic Dialing
Storing fax and telephone numbers for Automatic Dialling
1
Press these keys:
The display will show:
2
Press 1 to select EING..
The display will show:
3
Enter a two-digit Speed Dial number by pressing the number keys (01 to
10 for Rapid Key Dialling, 11 to 30 for Speed Dialling).
4
Enter the fax or voice number by pressing the number keys (max. of 32
digits including pauses). (Note: A space cannot be entered.)
•• Press the SPEED DIAL key to clear a mistake.
•• If a pause is required between any of the digits to access a special service
or an outside line, press the REDIAL key. The pause will appear as a
hyphen. Several pauses can be entered in a row.
FUNCTION
3
FAX/TEL. NUMM E RN
1
FAX/TEL. NR. EING.
KURZW. NR. EING .
0
1
(Example)
3. Sending
Documents
•• If you are on a PBX, do not enter the access code for the public line. If
the number is within your PBX, enter an R before the number.
5
5
5
Press the START/MEMORY key.
1
5
5
START/MEMORY
3
2
4
(Example)
55
Page 57

Sending a Fax by Automatic Dialing
6
Enter the name of the party by pressing the number keys as shown in the
chart below. Up to 10 characters can be entered.
•• If you don’t want to enter a name, skip this step.
•• To enter two letters in succession that require the same key, press the
SPEAKER key after entering the first letter to advance the cursor.
Example: SHARP = 7 7 7 7 7 4 4 4 2 2 7 7 7 7 7 7
A =
B =
C =
D =
E =
F =
G =
H =
I =
7
Press the START/MEMORY key.
8
Return to Step 3 to store another number, or press STOP to exit. If the
J =
K =
L =
M =
N =
O =
P =
Q =
R =
S =
START/MEMORY
SPEAKER
T =
U =
V =
W =
X =
Y =
Z =
SPACE =
number will be used for Rapid Key Dialling , yo u can write the name on the
appropriate Rapid Key label.
Step 3 or
STOP
Storing area codes and a cc es s codes
You can also store an area code or access c ode in a Rapid Key or Spee d Dial
number . To use this num ber to dial, se e "Chain Dialin g" in Ch apt er 5,
"Making T el eph one Calls".
Note: An area code or access code stored in a Rapid Key or Speed Dial
number can only be used if the handset is lifted or the SPEAKER key
pressed before dialling.
56
Page 58

Clearing numbe rs
Sending a Fax by Automatic Dialing
1
Press these keys:
The display will show:
2
Press 2 to select LÖSCH..
3
Enter the Speed Dial number that you want to clear by pressing the number
keys.
4
Press the START/MEMORY key.
5
Return to Step 3 to clear another number, or press STOP to exit.
FUNCTION
FAX/TEL. NUMM E RN
2
0
1
START/MEMOR Y
STOP
Step 3 or
3
(Example)
3. Sending
Documents
Making change s
To make changes in a number pre vio usly stored, repeat th e storin g proc ed ure .
Select the Spee d Dial nu mb er fo r whic h you want to make cha nge s in St ep 3,
and then change the num ber and/ or na m e when the y appea r in the displ ay
(Steps 4 and 6, respectively).
♦ A lithium battery kee ps autom ati c diall ing number s in memo ry
The machine uses a lithi um batte ry to keep autom at ic dia ling nu mb ers a nd
other progra mm ed dat a in mem ory whe n the power is t urne d off . Batter y
power is consum ed prim aril y when the power is off. Wit h the power kep t
continuousl y off , the life of the battery is abo ut 5 years. If the battery di es,
have your deale r or reta il er repl ace it. Do not try to replace it you rsel f.
57
Page 59

Sending a Fax by Automatic Dialing
Rapid Key Dialling
If the numbe r you want to dial has be en st ore d for Aut om at ic Dia ll ing as a
Speed Dial numb er from 01 to 10, you can dial it by pressi ng th e
correspondi ng Ra pi d Key.
1
Load the document(s).
The display will show:
SENDEBEREIT
•• Set the resolution and/or contrast if
desired.
2
Press the Rapid Key corr esponding to the
desired Speed Dial number.
•• The name of the receiving party will
appear in the display. If no name was
stored, the fax number will appear. (If
the name or number is incorrect, press
the STOP key.)
RESOLUTION
01
03
02
04
06
•• The document will be automatically
transmitted once the connection is
made.
58
Example: To dial Speed
Dial number 03, press Rapid
Key 03.
Page 60

Sending a Fax by Automatic Dialing
Speed Dialling
Speed Dialli ng c an be used to dial any numb er t hat has be en store d for
Automat ic Dialling.
1
Load the document(s).
The display will show:
SENDEBEREIT
•• Set the resolution and/or contrast if
desired.
2
Press the SPEED DIAL key and then
enter the two digits of the Speed Dial
number by pressing the number k eys.
•• To enter numbers 1 through 9, first
enter 0 and then the number.
SPEED DIAL
RESOLUTION
2 0
3. Sending
Documents
3
Check the display. If the name or number
shown is correct, press the
START/MEMORY key. (If not, press
the STOP key and then repeat Step 2.)
(Example)
START/MEMORY
59
Page 61

Sending a Fax by Automatic Dialing
Direct Keypad Dialling
You can also enter a full num be r with the numbe r key s and t hen press the
START/MEMORY key to begin dial ling. You c an use this me th od to dial a
full number when yo u don’t ne ed to spea k to the othe r party befo re faxi ng.
Note: Direct Keypad Dialling cannot be used to dial a number within the
same PBX as your fax machine. To send a document to a fax machine in
your PBX, use Normal Dialling.
1
Load the document(s).
The display will show:
SENDEBEREIT
•• Set the resolution and/or contrast if
desired.
2
Enter the number of the receiving
machine by pressing the numeric keys.
•• If a pause is required between any of
the digits to access a special service or
an outside line, press the REDIAL key.
The pause will appear as a hyphen.
Several pauses can be entered in a row.
3
Check the display. If the number of the
receiving machine shown is correct, press
the START/MEMORY key.
•• If it is not correct, press the STOP key
to backspace and clear one digit at a
time, and then re-enter the correct
digit(s).
RESOLUTION
1
GHI
4
PQRS
7
START/MEMORY
ABC
JKL
TUV
DEF
3
2
MNO
6
5
WXYZ
9
8
60
Page 62

Sending a Fax by Automatic Dialing
Using the SEARCH/R key
If you don’t remembe r the Rapid Ke y or Speed Dial num ber in which you
have store d a pa rt ic ula r fa x num be r, you ca n sea rc h for t he nu mb er by
following the steps bel ow. Once you ha ve found the num ber , you can dial it
and transm it the lo aded doc um en t by simp ly pr essi ng th e
START/MEMORY key.
1
Load the document(s).
The display will show:
SENDEBEREIT
•• Set the resolution and/or contrast if
desired.
2
Press the SEARCH/R key.
3
Enter the first letter of the stored name by
pressing the appropriate number key (the
key which corresponds to the required
letter) one or more times until the letter
appears in the display. If the name begins
with a special character or number, press 1.
•• If you don’t remember the first letter, go
to Step 4 (you will scroll through the list
from the beginning).
RESOLUTION
SEARCH
1
GHI
4
PQRS
7
3. Sending
Documents
R
ABC
DEF
3
2
JKL
MNO
6
5
TUV
WXYZ
9
8
•• If a name wasn’t stored for the number,
press 0. This will cause numbers, not
names, to appear when you scroll.
61
Page 63

Sending a Fax by Automatic Dialing
4
Press the # key or the * key to scroll
through the names (numbers if you
pressed 0) . Stop when the desired name
appears in the display.
•• If no names have been stored that begin
with the entered letter, you will scroll
from the next name, in alphabetical
order, in the list. If no names/numbers
have been stored at all, NO DATA will
appear.
or
5
Press the START/MEMORY key. The
document will be automatically
transmitted once the connection is made.
START/MEMORY
Automatic redia ll ing
If you use autom atic diall ing (inclu din g Dire ct Keypad Di alli ng) a nd th e line
is busy, the mach ine will autom a ti call y redia l the num be r. Up to 2 redi alli ng
attempts will be made at intervals of 2.5 minutes.
♦ To stop automatic redialling, pres s the STOP key.
62
Page 64

4
Receiving
Chapter
Using TEL/FAX Mode
Press the EMPFANGSART key until the arrow in the display points to
TEL/FAX.
Documents
RECEPTION
MODE
TEL
FAX
TEL/FAX
When the reception mode is set to TEL/FAX, your fax au toma tica lly answe rs
all calls on 1 or 2 rings. After an sweri ng, you r fax monit ors th e line for ab out
5 seconds to see if a fax ton e is bein g sent .
♦ If your fax detects a fax tone (this means that the call is an automatically
dialled fax), it will automatically begin reception of the incoming
document.
♦ If your fax doesn’t detect a fax ton e (this means that the call is a voice
call or manually dialled fax), it will make a ringing sound (called ps eudo
ringing) for 15 second s to alert you to answer. If you don’t answer
within this time, your fax will send a fax tone to the oth er machine to
allow the calling party to send a fax manually if they desire.
Comments:
A.M.
•• Only the fax wil l alert yo u to voic e calls or m anu al ly dial led fa xes by pseud o
ringing. An extensi on phone connec ted to the sa me line wi ll not ri ng after the
connecti on has been m ade .
•• The duration of pseudo rin gin g can be adju ste d wit h Option Setting 8. See
Chapter 8, "Optiona l Se tting s".
Documen ts
4. R e c eiving
63
Page 65

Receiving Documents
Using ANRUFB. Mode
Press the EMPFANGSART key until the arrow in the display points to FAX.
RECEPTION
MODE
In ANRUFB. mode, your fax will automatically receive voice and fax
messages.
Using FAX Mode
Press the EMPFANGSART key until the arrow in the display points to FAX.
RECEPTION
MODE
TEL
FAX
TEL/FAX
A.M.
When the reception mode is set to FAX, the machine will automatically
answer all calls on 1 rings an d receive incom ing faxes.
1 rings
Fax reception
♦ You can change the number of rings on which the machine answers calls
by changing Option Setting 3. (See Chapter 8, Option Settings.)
♦ If you pick up the hand set before the machine answers, you can talk to
the other party and/or receive a document as described in Using TEL
mode.
64
Page 66

Receiving Documents
Using TEL Mode
Press the EMPFANGSART key until the arrow in the display points to TEL.
RECEPTION
MODE
When the reception mode is set to TEL, you must answer all calls usi ng the
fax machi ne’ s hand set or an exte nsi on phone connected to the same line.
Answer ing wi th the fax’ s ha ndse t
1
Pick up the handset when the machine rin gs.
2
If you hear a fax tone, wait until the display shows EMPFANGEN and then
replace the handset.
TEL
TEL/FAX
FAX
A.M.
Documen ts
4. R e c eiving
Beep
EMPFANGEN
Note: If you have set O ption Set t in g 11 (Fax
signal receive) to NEI N, press the
START/MEMORY key to begin reception.
3
If the other party first talks and then wants to send a fax, press the
START/MEMORY key after speaking (press your START/MEMORY
key before the sender presses their Start key).
•• Make sure that the display shows EMPFANGEN , then replace the
handset.
START/MEMOR Y
EMPFANG EN
65
Page 67

Receiving Documents
Answering with an ex tens i on phone
1
Answer the extension phone when it rings.
2
If you hear a fax tone when you answer an extension phone, wait until your
fax answers (the extension phone will go dead), and then hang up.
Beep
3
If the fax doesn’t respond, or if the other party first talks to you and then
wants to send a fax, press 5, *, and * on the extension phone (only on a
tone dial phone). Hang up.
Phone goes
dead
5
Comments:
•• Your fa x wil l not acce pt the si gnal to begin re ce pti on (5**) i f a doc um ent is
loaded in its feede r.
•• If you have set Option Setti ng 11 t o NEI N and he ar a fax tone when you
answer the extension phon e, you m ust press 5, *, and * if you are on a tone
dial phone, or walk over to the fax, pic k up the handse t, and press the
START/MEMORY key if y o u are on a pulse dial onl y ph o ne.
•• The code used to activate fax receptio n from a tone dial ex tensio n phon e
(5**) can be changed if desire d. See Opti on Set ti ng 4 ("T e l/Fax Remote
Number") in Chapter 8, "Option Set tings".
Paper cutting
UX-51: After rec ei vi ng a document, grasp th e pa per by the edg e and pull
upward to tear it off.
UX-238: After rece ivi ng a docu me nt , your fax will autom a ti ca ll y cut each
page to a length slightl y lo nger than th e ori gi nal pag es.
66
Page 68

5
Making
Chapter
Your fax can also be used to ma ke copi es. You can use this func ti on to ma ke
a sample copy of a docum ent bef ore transm it ti ng it to se e if the resol ut ion or
contrast ne ed s adj ustm e nt.
♦ The default resolution fo r copying is FINE.
1
Load the document(s) face down. (Maximum of 10 pages, UX-51: 5 pages.)
The display will show:
•• Set the resolution and/or contrast if desired. (The default setting for
Copies
SENDEBEREIT
copying is FINE.)
RESOLUTION
4. Making
Copies
2
Press the COPY/HELP key.
Incoming cal ls during c opyi ng
The fax go es into man ual rec ep ti on m ode duri ng copying, so if a cal l com e s
in at this time, pick up the handset to answer.
To rece ive a docum ent, press the START/M EMO RY key after c opyi ng i s
finished. If you want to begin reception i mme diately , press th e STOP key to
stop copyi ng, and then pre ss the START/M EMO R Y key as soon as the
docume nt ha s fed out and th e fa x has re tu rne d to st and by m ode .
COPY/HELP
67
Page 69

6
Making
Chapter
Your fax can be used like a regul ar tel eph one to make and recei ve vo ice call s.
♦ To make or receive a phone call, the power must be on.
1
Pick up the handset or press the
SPEAKER key. Listen for the dial tone.
2
Dial the number using one of the
following methods:
•• Normal Dialling: Enter the full
•• Rapid Key Dialling: Press the
Telephone Calls
telephone number with the numeri c
keys.
appropriate Rapid Ke y .
GHI
PQRS
or
ABC
DEF
3
2
1
JKL
MNO
4
TUV
7
6
5
WXYZ
9
8
SPEAKER
•• Speed Dialling: Press the SPEED
DIAL key, and enter the 2-digit Speed
Dial number with the numeric keys.
3
Speak with the other party when they
answer.
•• If you pressed the SPEAKER key, pick
up the handset to talk.
Comments:
•• While the han dset of th e fax is li ft ed (o ff hoo k), an exte nsion phone
connected direc tly to the fax cann ot be used to speak wi th the othe r party.
68
Page 70

Making Telephone Calls
Chain Diall ing
After liftin g the han dset , you can di al any combination of Normal Dia lling ,
Rapid Key Dia ll in g and Spee d Dia lling numbers. F or exa mp le , if you ha ve
stored an area code or an access c ode for a special serv ice in a Rapid Key,
you can press the Rapid Key fo r that area code or acc ess code, then dial the
remainder of the numbe r by pressing a Rapid Key, pressing number keys, or
pressing the SPEED DIAL key and entering a two-digit Speed Dial number .
Using the SEARCH/R key
You can use the SEARCH/R key to search for a Rapi d Key or Speed Dia l
number. First search for the number as descr ibed in Using the SEARCH/R
key in Sending a Fax by Automatic Dialling in Cha pte r 3, then pi ck up the
handset or press the SPEAK ER key . The num ber will be dial led
automa ti call y (do no t pre ss the START/MEMORY ke y).
Redial
The last number called can be redial led by pressi ng th e REDIAL key (it is
not necessary to pick up the handse t or press the SPEAK E R key). When the
other party answers, pi ck up the hand set to talk.
Issuing tone signa ls
If you are on a pulse dial line , yo u can use t he "*" key to tempora ri ly issue
tone signals whe n you pr ess th e nume ric key s. Thi s allows you to use certa in
telephone services which require entering tone signals.
When you need to enter one or more tone signals, press the "*" key and then
press the appropr ia te numeri c keys.
To change bac k to pulse mode, sim pl y ha ng up (the diall ing mod e
automatica lly cha nge s back to the settin g of Option Settin g 7 when you ha ng
up).
Calls
6. Making Pho ne
69
Page 71

Making Telephone Calls
PBX operations
If your fax is conne ct ed to a PBX, you can use it to perfor m the fo llowin g
operations:
♦ Making enquiry calls: During a call, you can put the other party on
hold, make a further call to a third party, and then go back to your
original caller.
♦ Transferring calls: Yo u can transfer a call to another number on the
same PBX without operator assistance.
Note: Make sure that the correct setting is selected for Option Setting 10-4
(see Chapter 8, Option Settings).
Making enquiry calls
1
During the telephone conversation, press
the SEARCH/R key. This puts the other
party on hold.
2
When you hear the dial tone, dial the
number of the third party for th e enquiry
call.
SEARCH
R
3
When you have finished the enquiry call,
you will be automatically returned to the
original caller as soon as the third party
hangs up.
Transferring calls
1
During the telephone conversation, press
the SEARCH/R key. This puts the other
party on hold.
2
When you hear the dial tone, dial the
number to which you want to transfer the
call. When the other party answers, hang
up, and the call will be transferred.
70
SEARCH
R
Page 72

7
Special
Chapter
Blocking Reception of Unwanted Faxes
The Anti Junk Fax function allows you to block receptio n of faxes fr om
parties which yo u spec ify. This save s pap er by not printin g out unwante d
"junk" faxes.
To use this function, first turn it on by setting Option Settin g 12 (Junk Fax #
Check) to YES as described in Chapt er 8, an d then en te r the fax num ber s
from which you do not want to rece iv e faxes a s shown be low.
Comments:
•• Up to 5 numbers can be enter ed in the Anti Junk Num be r List .
•• To clear a number from th e Anti Junk Numb er List , you need to know the
1
Press the keys shown at right.
JUNK FAX # MODE will appear in the
display.
Functions
1-digit numb er which identifi es it . If you have forgo tten t his nu mber, print
out the Anti Junk Numbe r L ist as descri bed in Chapt er 9.
FUNCTION
3
2
Press 1 to store a number in the Anti Junk
Number List, or 2 to clear a number from
the list.
3
Storing: Enter a 1-digit number from 1 to
5. This number identifies the fax number
you will store in the next step.
Clearing: Enter the number which
identifies the fax number you want to
clear, and go to Step 5.
1
1
or
2
(Example)
71
Functions
7. Special
Page 73

<P=002>
Blocking Reception of Unwanted Faxes
4
Enter the full number you want to block
(max. of 20 digits).
5
5
5
21
3
(Example)
4
5
Press the START/MEMORY key.
6
Return to Step 3 to enter (or clear)
another number, or press STOP to exit.
START/MEMORY
STOP
Step 3 or
72
Page 74

Memory
Your fax has a memory whi ch can be used to tem por arily store bot h
incoming and outgoing documents.
♦ Approximately 20 pages of average content can be held in memory
when no voice messages (including outgoing messages) have been
recorded. Less can be held if any pages were scanned using fine or
halftone resolution.
♦ To see the percentage of memory that is currently occupied, press the
START/MEMORY key with no document in the feeder. The
percentage will appear in the display.
Sending documents from me m ory
With this f unction, the original docu me nt is scanne d im m ediately, stor ed in
memory, and the n tr ansm i tt ed on ce the conn ecti on to the recei vin g ma ch ine
is made. This is co nve nie nt when tran smi tt ing to plac es where the lin e is
often bus y, as it saves you fro m wait ing to collect th e ori gi nal doc um ent and
frees the feede r for othe r opera ti ons.
♦ Only one memory transmission can be set at a time.
Memory
♦ The amount of memory currently occupied appears as a percentage in
the display while the document is being scanned.
1
Load the document(s).
•• Set the resolution and/or contrast if
desired.
RESOLUTION
2
Press the START/MEMORY key and
then 1.
START/MEMORY
Functions
7. Special
1
73
Page 75

Memory
3
Enter the number of the receiving
machine using one of the follo wing
methods:
•• Press a Rapid Key.
•• Press the SPEED DIAL key and enter
a Speed Dial number.
•• Enter a full telephone number by
pressing the number keys.
4
Press the START/MEMORY key if you
entered a Speed Dial number or a full
number.
•• The document is first scanned and
stored in memory. The other machine is
then dialled (redialling will be
performed automatically if necessary).
When the connection is made,
transmission begins. Afterwards, the
document is cleared from memory and
your fax returns to standby mode.
010302
04
06
(Example)
START/MEMORY
If the memory becom e s full ...
If the memory becomes full while the document is being scanned, MEMORY
IS FULL will appear in the di spla y.
♦ Press the START/MEMORY key if you want to transmit the pages
which have been stored up to that point in memory. The remaining pages
will be ejected from the feeder. After transmission, the memory will be
cleared and you can transmit the remaining pages. You will also need to
transmit the page which was being scanned when the memory filled up.
♦ Press the STOP key if you want to cancel the entire transmission.
74
Page 76

Substitute recepti on in to memory
This is a back-up functi on whi ch is aut om atic ally a ctiva ted if your fax run s
out of paper or the paper jams.
When you have received a document in memory, FAX RX IN MEMOR Y
will appear in the display, altern ating with OUT OF PAPER or PAPER
JAMMED. When you add paper or clear the paper jam, the stored documents
will autom a ti ca ll y be printed out.
Memory
75
Functions
7. Special
Page 77

Broadcasting
Broadcasting
This function allows you to send the sam e docume nt to as many as 10
different loc at io ns wit h just one oper at ion . First store the docu ment in
memory, then e nte r th e num be rs of t he re ce iv ing ma chi ne s. T he docu me nt
will be tra ns m it te d to e ac h locatio n.
♦ You can only use Rapid Keys or Speed Dial numbers to dial the
numbers of the receiving machines.
1
Load the document(s).
2
Press the START/MEMORY key and
then 2.
3
Dial the receiving machines by using one
or both of the following methods. (a
maximum of 10 stations can be selected)
•• Enter one or more Speed Dial numbers
by pressing the nu mer ic keys.
•• Press one or more Rapid Keys.
4
Press the START/MEMORY key.
•• Set the resolution and /or contrast if
desired.
76
START/MEMORY
2
010302
START/MEMORY
RESOLUTION
2
2
04
06
(Example)
Page 78

5
Press the START/MEMORY key.
Transmission will begin.
•• A Transaction Report is automatically
printed out after Broadcasting is
completed. Check the "Note" column of
the report to see if any of the locations
are marked "Busy" or have a
communication error code. If so, send
the document to those locations again.
Broadcasting
START/MEMORY
77
Functions
7. Special
Page 79

Polling (Requesting a Fax Transmission)
Polling (Requesting a Fax Transmission)
Polling allows yo u to call anoth er fax m achin e and hav e it send a docum ent
(previousl y loade d in its fe eder) t o your machi ne without oper at or assi sta nc e.
In other words, the rec eivi ng fa x ma ch ine , not the t ran smi tt in g fax ma chine ,
initiates the transmissio n. You can use yo ur m achin e to both poll and be
polled by ot her s.
To use the polling fu nct io n, you must fi rst set Rapi d Key 10 /POL L for use as
a polling key. Th is is do ne by changing Option Sett in g 13, as described in
Chapte r 8, Opti on Setting s. (No te that when Rap id Key 10/ POLL is set as a
polling key, it cannot be used for Ra pid Key Diall in g. )
Requesting transm iss ion
Note: Rapid Dial Keys cannot be used for polling. To dial a Rapid Dial
location, press the SPEED DIAL key and then enter the 2-digit number
corresponding to the Rapid Key.
1
Dial the fax machine you want to poll
using one of the follo wing methods:
•• Pick up the handset (or press the
SPEAKER key) and dial the full
number. Wait for the fax answerback
tone.
SPEED DIAL
(Example)
0 1
•• Press the SPEED DIAL key and enter
a 2-digit Speed Dial number.
•• Enter the full number us ing the numeric
keys.
78
Page 80

2
Press Rapid Key 10/POLL.
•• If you used the handset , rep lace it when
POLLING appears in the display.
Reception will begin.
Polling (Requesting a Fax Trans mission)
10/POLL
79
Functions
7. Special
Page 81

Timer Operations
Timer Operations
The Timer func tion allo ws you to set a transmission and/or pol ling ope ra tion
to be performed autom at ical ly at a time you specify. One tran smi ssio n
operation and one polling operation can be set at the same time, and the times
they will be perform e d can be speci fi ed up to 24 hours in adva nc e.
As an example, you can use this func ti on t o take adva nta ge of off-pea k
telephone rates with out havi ng to be ther e when the ope rat ion is performed.
Note: Only a Speed Dial number can be used to dial the receiving machine.
Setting a timer operation
1
Press the keys shown at right.
TIMER MODUS will appear in the
display.
2
Press # to set a transmiss ion operation
(SENDEN), or * to set a polling
operation (ABRUF-FUNKTION).
3
Press 1 to select EING..
4
Enter the time at which you want the
operation to take place in 24-hour format
(2 digits for the hour and 2 digits for the
minute).
5
Press the START/MEMORY key.
FUNCTION
1
0
START/MEMORY
1
or
9
Example: 9:25
2
5
80
Page 82

6
Enter the Speed Dial number of the
receiving fax machine.
•• If this is a polling operation, go to Step
9.
0
Timer Operations
5
(Example)
7
Press the START/MEMORY key.
8
Adjust the resolution and /or contrast if
desired (skip to the next step if you don’t
want to change settings).
9
Press the START/MEMORY key and
then the STOP key. If this is a
transmission operation, load the
document in the feeder sometime before
the specified time of transmission.
START/MEMORY
RESOLUTION
START/MEMORY
To cancel an operation
If you need to cancel an operation after it has been set, follow the steps below.
1
Press the keys shown at right.
TIMER MODUS will appear in the
display.
FUNCTION
STOP
1
2
Press # to cancel a transmission
operation, or * to cancel a polling
operation.
3
Press 2 to select LÖSCH..
4
Press the START/MEMORY key and
then the STOP key.
2
START/MEMORY
or
Functions
7. Special
STOP
81
Page 83

8
Option
Chapter
The option setti ngs let yo u custom ise your fax to better sui t your needs. An
initial set ting ha s bee n made for ea ch option a t the fa ctory. You c an chan ge a
setting by fo llowing the steps desc ri bed for each opti on be lo w.
First press FUNCTION and 4, then press # or * to scroll th ro ugh the op tion s.
Settings
FUNCTION
4
or
Setting 1: FINE RESOLUTION PRIORITY
This opti on set s the def aul t resolution (t he resol ut ion used i f a setti ng i s not
made with the RESO LUTIO N key ) for t ran smi ttin g doc um ent s. Press 1
(YES) to set the default resolutio n to FINE, or 2 (NO) to set it to STANDARD.
• Initial setting: 2
FUNCTION
JA
4
NEIN
or
1
2
Display will
show:
GRAUSTUFENANZAHL
GRUNDEINST. FEIN
STOP
Setting 2: GREY SCALE SETTING (UX-238 Only)
This sets the gre y sca le used fo r the HALF TONE resolution sett ing. Press 1
for 16 levels (this gives lower qual ity and fast er tran smi ssio n) or 2 fo r 64
levels (this gi ves hi ghe r qua lity and sl ower transm issi on).
• Initial setting: 2
FUNCTION
16
1
82
or
until display
shows:
GRAUSTUFENANZAHL
STOP
64
2
Press
ANZAHL DER RUFE
4
Page 84

Optionale Einstellungen
Setting 3: NUMBER OF RINGS TO ANSWER
This sets the number of rings the fax machine waits before answering an
incoming call in FAX and TEL/FAX reception modes. Enter any number from
1 to 5.
• Init ial se tting: 1
Note:In some countries, the lowest possible setting is 2.
FUNCTION
4
Press
until display
shows:
ANZAHL DER RUFE
8. Optionale
Einstellungen
Enter a number from 1
to 5
TEL/FAX FERNNR.
STOP
Setting 4: TEL/FAX REM OTE NUM BER (TRANSF ER CO DE)
If you hear a fax tone when you an swer a call on a tone dial ext ensi on ph one
conn ec te d to t he s a me li ne a s the fax, you can ma ke t he fa x begin rec eption by
pressing 5, *, and * on the phone. Use this set ting i f you wa nt to use a
number other th an 5 t o begin fa x rece ption. You c an ente r any num be r from 0
to 9.
• Initial s etti ng: 5
FUNCTION
4
Enter a number from 1 to
9
Press
FERNNUMMER
until
display
shows:
TEL/FAX FERNNR.
STOP
83
Page 85

Optionale Einstellungen
Setting 5: REMOTE RECEPTION SELECT
If you don’t intend to use the above TEL/FAX RE MOTE NUMBER, you can
turn detection of the num ber off. This wil l ensure that the fa x never mistakenly
attempts to begin reception if it detects a signal similar to the TEL/FAX
REMOTE NUMBER while you are talking on an extension phone. Pre ss 1 to
turn detection on , or 2 to turn de te ct ion off.
• Initial setting: 1
FUNCTION
JA
Press
4
NEIN
or
1
2
until
display
shows:
ÜBERTR. BERICHT
FERNNUMMER
STOP
Setting 6: TRANSACTION REPO RT PRINT SELECT
This set s the condit ion for pri nt ing out a Transaction Repo rt. Ente r a number
from 1 to 4 a s follows:
1 (EINZELBERICHT): A report will be prin ted after each transmission,
reception, or error.
2 (FEHL./TMR./SP.): A report will be printed after an error or a timer
operation.
3 (SENDEBERICHT): A report will be printed only after a transmission.
4 (FEHLERAUSDRUCK):A report will never be printed.
• Ini t ial se tting: 2
FUNCTION
4
Press
until
display
shows:
ÜBERTR. BERICHT
Enter a number from 1 to
4
84
STOP
WÄHLMODUS
Page 86

Optionale Einstellungen
Setting 7: DIAL MODE
This sets the mo de of diall ing . Pre ss 1 if you are on a tone dial line, or 2 if you
are on a pulse dial line.
• Initial setting: 1
8. Optionale
Einstellungen
FUNCTION
TON
4
or
Press
IMPULS
21
until
display
shows:
RUFDAUER
WÄHLMODUS
STOP
Setting 8: PSEUDO RINGING DURATIO N
This sets the dura ti on of pseud o ringin g when the rec eptio n mo de is set to
TEL/FAX. Enter a numb er from 1 to 4 as follows:
1 (15 SEC.): 15 seconds
2 (30 SEC.): 30 seconds
3 (60 SEC.): 60 seconds
4 (120 SEC.): 120 seconds
• Initial setting: 1
FUNCTION
4
Enter a number from 1
to 4
Press
until
display
shows:
SPRACHWAHL
RUFDAUER
STOP
85
Page 87

Optionale Einstellungen
Setting 9: LANGUAGE SEL ECT
This sets the langua ge used in disp lay messag es, rep ort s, and lists. Pre ss the
START key, the # key or the * key one or more tim es un ti l the de sire d
language appears in the displa y, and then the START key again.
FUNCTION
START/MEMORY
STOP
4
Press
or
until
display
shows:
START/MEMORY
SPRACHWAHL
NEBENSTELLE
Setting 10-1: PBX CO NNECTIO N
Press 1 (YES) if the machine is connected to a PBX. Press 2 (NO) if it is
connecte d to a regular pu b li c li ne .
• Initial setting: 2
FUNCTION
JA
4
Press
NEIN
or
1
2
until
display
shows:
NEBENSTELLE
(If you select 1, Setting 10-2 will
subsequen tl y app ear in the displ ay. If
you selec t 2, Setting 11 will appear.)
Setting 10-2: PBX TYPE
Press 1 if you are on a normal PBX line, Press 2 if your PBX line is an IS DN
line.
• Initial setting: 1
NORMAL
1
ISDN
or
2
AMTSHOL. NEBENST.
86
Page 88

Optionale Einstellungen
Setting 10-3: P BX SELE CT
This sets the mode use d for conn ecti ng calls from a PBX to an outsi de line .
Refer to your PBX manual or consult your suppli er for the correct sett ing.
Make the selec ti on by e nte ring a number fr om 1 to 3 as follows:
1: Earth
2: Flash
3:ID
•Initial setting: 3
(If you select 3, Set ting 10- 4 will subseque nt ly appe ar in the disp lay. If you
select 1 or 2, Setting 10-5 will appear. )
Setting 10-4: PBX ID NO.
If you set Opti on Set ti ng 10 -3 to 3 (PBX ID digit mode), use this setting to
enter your PBX ID number (maxi mu m of 3 digits). Press the START ke y
when finishe d.
• Initial Setting: 0
(Note: The ID number is autom atically dia lled for access to the public line when
Rapid Key or Speed Dia lling is used . Do no t store it as pa rt of the number when
storing a Ra pi d Key or Speed Dia ll ing num ber .)
8. Optionale
Einstellungen
Setting 10-5: REGISTER RECALL
This sets the reca ll mod e used for spe cial functi ons of some PTT’s (e . g.
Germany, Sweden) , as well as transf err ing calls on a PBX. Refer to your PBX
manual or consult your su pplier for the c orrect setting. Make the selection by
enterin g a numbe r fro m 1 to 3 as follows:
1: Earth
2: Flash
3: No operation
• Initial setting: 2
87
Page 89

Optionale Einstellungen
Setting 11: FAX SIGNAL RECEIVE
Your fa x is wil l a uto ma ti ca ll y begin reception if you hear a hig h- pitched fa x
tone after answe rin g a call. If you use a compute r fax modem on the sa me line,
you must turn t his fu nct io n off in orde r to prev ent your fax fr om mista ken ly
attempting to receive documents sent from the computer fax modem. Press 1 to
turn the func ti on on, or 2 to tur n it off.
• Ini t ial se tting: 1
FUNCTION
4
Press
until
display
FAX SIGNAL EMPF.
shows:
JA
1
NEIN
or
2
FREMDFAXNR. PR Ü
STOP
Setting 12: JUNK NUMBER CHE CK
Press 1 to prevent re ce pt ion from fax numbers entere d in the Anti Junk Num ber
List. Press 2 to allow reception from all numbers.
• Initial set ti ng: 2
FUNCTION
JA
4
Press
NEIN
or
1
2
ABRUF
until
display
shows:
FREMDFAXNR. PRÜ
STOP
Setting 13: POLL ING
Press 1 if you want to use Rapid Key 10/ABRUF as a polling key. Press 2 if
you want to use it as a regu lar Rap id Ke y.
• Initial setting: 2
FUNCTION
88
4
JA NEIN
or
1
2
Press
until
display
shows:
GRUNDEINST. FEIN
ABRUF
STOP
Page 90

9
Printing
Chapter
You can print out lists sh owin g setti ngs an d inform at io n enter ed in the fax .
You can also have the fax automa ti call y print ou t a report on tran sac ti ons
after the y are made . T he lists and the report a re described be low.
Printing a list
1
Press these keys:
Reports and Lists
FUNCTION
2
9. Printing
Reports and Lists
The display will show:
2
Press the # key or the * key until the desired list appears in the display.
3
Press the START key.
AUSDRUCKE
or
START/MEMORY
89
Page 91

Printing Reports and Lists
Transaction Repor t
This report is pri nt ed ou t automatica ll y after an operation is perform ed to
allow you to chec k th e result . Your fa x is set at the factor y to pr int out the
report after a time r ope ratio n or whe n an error occurs. If de sire d, you can
change the set ting to have it prin te d out unde r a varie ty of oth er condi ti ons.
This is done by changing Option Sett in g 6 as described in Chapt er 8.
♦ The Transaction report cannot be printed out manually.
Explanation of heading s
SENDER/
EMPFÄNGER
SEITEN Number of pages tr a nsm i t t ed or r ec ei ved.
ANM.
The fax number of the other machine involved in the transaction. In the case
of a transmission, the number dialled appears. In the case of a reception, the
prog ramm ed ID of th e send ing machin e app ears . If th is mach ine do es no t
have an ID fun ctio n, th e co mmuni catio n mo de wil l a ppear ( for exampl e,
"G3").
OK - Transmission/reception was normal.
AUSFALL - A power failure occurre d. If you have power and the problem
persi sts , try a differ ent ou tle t. If nece ssar y, ha ve an electric ian ch eck your
power lines.
PAP. STAU - A problem with the paper or original document occurred.
Make sure the paper or document is loaded properly. Make sure the operation
panel is shut securely.
KEIN PAP. - You ran out of paper during reception.
COM.E-0 to COM.E-7 - A te lephone l i ne erro r preven te d the t ransact ion.
Line Error in Problems and Solutions in Chapter 12.
See
ABBRUCH - Tran smission was canc elled bec ause the STOP key was
press ed, no docu ment was in the fe eder, or th e oth er mach ine re queste d
transmission using a function which your fax does not have. If you were
attempting to fax, make sure a document is in the feeder. If you were
receivi ng, contact the faxin g party t o see how they are tr ying to send t o you.
90
Page 92

Printing Reports and Lists
Timer list
This list shows the time r ope rat io ns whic h ar e cu rre ntl y set .
Telephone Numbe r Lis t
This list shows the fax and voi ce numbers which ha ve been stored for
automatic dia lling.
Passcode List
This list shows settin gs made for polling se curity, your na m e and
fax/tel eph one number as entered in the mach ine, and a sample of the heade r
printed at the top of eve ry pa ge you transm it (KOPFZEILE).
Option Setting List
This list sho ws t he current sta tus of the opti on se tt ing s.
Anti Junk Number List
This list shows the numbers that are blocked by the Anti Junk function.
9. Printing
Reports and Lists
A.M. Program List
This list shows the settin gs and codes prog ramm ed for the answeri ng
machine.
Messa ge Lis t
This list sho ws info rm at ion about the m essa ges currently recorded in the
answering mac hin e, inc lu din g the date and ti me of reco rdi ng, the le ngt h, and
the type (IC M or me m o).
Help List
This list sh o ws a bri ef op eration ov erv ie w.
♦ Press the COPY/HELP key to print this list.
91
Page 93

10
Chapter
Fax print head
Clean the print head frequ ent ly to ensure optim um prin ti ng perfor ma nc e. To
clean the print head , first disc onne ct the telephon e line , then unpl ug th e
power lead, open th e opera ti on panel (pul l the rele ase marke d PANEL
RELEASE toward you), and remove the fax paper.
Wipe the print head with a soft cloth
dampened with denatured alcohol.
Maintenance
Print head
Caution!
•• Do not use benzene or thinne r. Avoid tou chi ng the print head wit h hard
objects.
•• The print head may be hot if your fax mac hi ne has just recei ve d a large
number of do cum e nts. If t his i s the case, allow th e pri nt head to c ool prio r to
cleani ng.
92
Page 94

Scanning glass and rolle rs
Clean the scannin g glass and roller s freq uen tl y to ensure the quali ty of
transmit te d ima ges a nd co pie s. Op en the op era ti on pa ne l (pu ll the rel ease
marked PANEL RELE ASE towa rd yo u), and wipe the scanning gla ss and
rollers wit h a soft cloth .
♦ Make sure that all dirt and stains (such as correcting fluid) are removed,
as dirt and stains will cause vertical lines on transmitted images and
copies.
♦ Adhesive cellophane tape is useful for removal of debris from the rollers.
Document
rollers
Maintenance
10. Mainenance
Scanning glass
The housing
Wipe the e xte rna l pa rt s and su r fac e of the machi ne with a dry cloth.
Caution!
•• Do not use ben zene or thinner. These sol ve nts m ay damag e or discolour the
machine.
93
Page 95

11
Chapter
Troubleshooting
Problems and Solutions
Line error
Problem Check and remedy
E appears in the display
and/or a transactio n repor t
is prin ted out with COM.
E-1, 2, 3, 4, 5, 6, or 7 in th e
NOTE column.
•• Try the transaction again. If the er ror per sists,
check the following:
•• Check the hookup. The cord from the TEL. LINE
socket to the wall socket should be no long er
than six feet.
•• Make sure there are no modem devices sharing
the same telephone line.
•• Check with the other party to make sure their fax
machine is functioning prop er ly.
•• Have your telephone line checked for line noise.
•• Try connecting your fax to a different tele phon e
line.
•• If the problem still occurs, your fax ma chine m ay
need service.
94
Page 96

Dialing and transmission problems
Problem Check and remedy
Problems and Solutions
No dial tone when you pick
up the handset or pr ess th e
LAUTSPR. key.
Dialling is not possible.
The power is on, bu t no
transmission takes place.
•• Make sure the handset cord is conne cted t o the
correct so cket. See
Chapter 1.
Handset
in
Connections
in
•• Make sure the power cord is proper ly plugg ed
into a power outlet.
•• Make sure that the telephone line is proper l y
connected to both the TEL. LINE socket an d the
wall socket.
•• Make sure that the f ax is set to th e cor r ect
dialling mode for your telephone line. See Opt ion
Setting 7 in Chapter 8.
•• Make sure that the receivin g machine has fax
paper.
•• Make sure that the telephone line cor d is
plugged into the TEL. LINE socket, and not the
TEL. SET socket .
•• If the receiving machine is in manual mode with
no attendant , recept ion w i ll not be possible.
•• If the receiving machine is not a Sharp model,
make sure it is G3 compa tible.
•• Check the display for error messages.
•• Pick up the handset and check for a dial tone.
Call the receiving machine by norm al (m anua l)
dialling, and confirm its response.
shooting
11.Trouble-
Nothing is printed at the
receiving end.
A distorted image is
received at the other end.
•• Make sure that the docum en t for tran sm ission is
placed face down in the feeder.
•• Make sure that the fax p a per is pro per ly loa ded
at the receiving machine.
•• Noise on the telephone line may cause
distortion. Try sending the document again.
•• Make a copy of the docum ent on your fax. If the
copy is also distorte d, your fax m ay hav e a
problem. I f the pr oblem persists, call for ser vice.
95
Page 97

Problems and Solutions
Reception and copyi ng proble ms
Problem Check and remedy
The power is on, but no
reception takes place.
The fax paper does not
come out.
The fax paper comes out
blank when you try to
receive or copy a document.
The received documen t is
faint.
Received images are
distorted.
•• Make sure the wall socket is connected t o th e
TEL. LINE socket, and not t he TEL. S E T soc ket .
•• The fax paper may be jammed. See "Clearing
jammed fax paper" in this chapter.
•• Make sure that the fax paper is proper ly loaded
in your fax. (If the roll has been loaded
backward, not hing will be printed.)
•• For reception, make sur e that the docu ment for
transmiss io n is loaded face down in the fe eder
of the tra nsmitting ma chine.
•• Make sure that you are using the recommended
fax paper. See "Loading the Fax Paper" in
Chapter 1.
•• Ask the other party to send higher contras t
documents. If the contrast is still too low, your
fax may have a prob le m . Mak e a copy to check
it.
•• Noise on the telephone line may cause
distortion. Have the othe r party tr y sendin g the
document again.
•• The print head may be dirty. See "Fax pr int
head" in Chapter 10.
Copies are distorted.
96
•• Make a copy of another document on your fax. If
the copy is also distor t ed, your f ax may h a ve a
problem. If the pro blem persists, call for ser vice.
•• Make sure that you are using the recommended
fax paper. See "Loading the Fax Paper" in
Chapter 1.
•• Make sure that the fax paper is properly loade d
in your machine.
•• The print head may be dirty. See "Fax pr int
head" in Chapter 10.
Page 98

Problems and Solutions
Reception/copyin g is
inter ru pted.
A received document or
copy prints out in strips.
General problems
Problem Check and remedy
Nothing appears in the
display.
The machine does not
respond when you press
any of its keys.
Automatic docu m ent
feeding does not work for
transmission or copying.
•• If reception or copying has been done
continuously for a long time, the print hea d may
have become overh eat ed. Turn off the power
and let it cool down.
•• Make sure the operation pa nel is complet ely
closed (press do wn on bot h side s).
•• Make sure the power cord is proper ly plugg ed
into a power outlet.
•• Connect another electrical appliance to the outlet
to confirm that it has power.
•• If a beep sound is not made when you press the
keys, unplug the power cord and then plug it
back in several seconds later .
•• Check the size and weight of the document (see
Transmittable do cumen ts
in Chapter 3).
shooting
11.Trouble-
Voice calls taken on an
extension phone are
interr up ted by the fax.
No reception occur s when
polling is attempted.
•• The fax may interr upt dur ing a voic e call if the
reception mode is set to ANRUFB.. To prevent
interruptio n on a tone dial exten sion pho ne,
press any three keys on the ext en sion pho ne
after answering. (Note: Do not enter the code to
activate fax r ece pt ion. )
•• Make sure you have not ru n out of paper .
•• Make sure the transmitt ing mach in e is in
automa tic r ece pt ion m ode.
•• If the transmitting machine has polling security,
make sure that your fax number has been
entered both in your machine and in the
transmitting machine.
97
Page 99

Messages and Signals
Display messages
The answering mach in e’s tran sf er fun ctio n has be en
A.M. TRANSFER
turned on as described in "Other Func tions" in
Chapter 2.
Display Messages
ORIGINALSTAU
FUNKTIONEN The FUNKTION key has been pressed.
E
LEITUNG BELEGT
KEINE DATEN
KEINE NR. GESP.
KEIN PAPIER
AUFGEL. WÄHLE N
The original document is jam med. See the f ol low ing
section,
Transmiss io n or recept ion was n o t succes sful. Pr ess
STOP to clear the messag e, and then t ry again. If the
error persists, see "Lin e Error" in "Problem s and
Solutions" in this chapter .
An extension phone connect ed to the fax is being
used. Do not lift the fax’s han dset or atte mpt
transmission at this time, as this will inter ru pt the
conversation on t he ex te nsion ph one.
This appears if you attem pt to search for an
automatic dialling number when none have been
stored.
You have tried to dial or clear a Rapid Key or Speed
Dial number that hasn’t been programm ed ( a f u ll
number hasn’t been as signed to it).
You have run out of fax paper. Load a new roll of fax
paper as described in "Loading the Fax Paper" in
Chapter 1.
The SPEAKER key has been presse d and the fax i s
waiting for you to dial. (To return to the date and time
display, press the SPEAKER key again. )
Clearing Paper Jams
.
shooting
11.Trouble-
ÜBERHITZUNG
The print head has overh eat ed. Oper ation m ay be
continued once it cools.
98
Page 100

Display Messages
PAPIERSTAU
SENDEBEREIT
WAHL WDH.
TEL. NR. SUCHEN
_ SEITEN GESAMT Number of page s transmitted , receiv ed, or copied.
OGM NOT RECORDED
The fax paper is jammed. See the following section,
"Clearing Paper Jams". (UX-238 only)
A document has been loaded and the f ax is waiting
for transmission or copying instruc tions.
This appears if you attem pt to send a fax by
automatic dialling and the line is busy or the
receiving fax machine does not answe r. Your fax
machine will automatically reattempt the call. (See
Automatic Redialling
in Chapter 2.)
Dialling
The ALPHAWAHL/R key has been pre ssed . Press
# or * to search f or an autom a tic dialling num b er , or
press STOP to r etur n to the data and tim e display.
(See
Using the ALPHAWAHL/R key
Fax by Automatic Dialling
The reception m ode ca nnot be set to A.M . becaus e a
general outgoing mess age ha s not been recor ded.
To record a general out going messag e, see
Recording an outgoing message
in
Sending a Fax by Automat ic
in
Sending a
in Chapter 2.)
in Chapter 2.
Audible signa ls
Continuous tone 1 seconds
3 seconds
35 seconds
Rapid intermittent tone
99
(0.7 seconds on,
0.3 seconds off)
Indicates the end of
transmission, reception, or
copying.
Indicates incomplet e
transmission, reception, or
copying.
Indicates that the han dset is
off hook.
 Loading...