

Page 1
DATA SECURITY KIT
ENGLISH
MX-FR10U
This manual contains very important
information. Please keep the manual in a safe
place where it will not be lost.
KIT DE SEGURIDAD DE
DATOS
KIT DE SECURITE DES
DONNEES
DATEN-SICHERHEITSPAKET
KIT DI PROTEZIONE DEI DATI
GEGEVENSBEVEILIGINGSKIT
DATASÄKERHETSPROGRAM
DATASIKKERHETSPROGRAM
TIETOTURVAMODUULI
DATA SIKKERHEDSKIT
КЙФ БУЦБЛЕЙБУ
ДЕДПМЕНЩН
ESPAÑOL
FRANÇAIS
DEUTSCH
ITALIANO
NEDERLANDS
SVENSKA
NORSK
SUOMI
DANSK
ЕЛЛЗНЙКЗ
MX-FR10U
APPLICATION
NUMBER
MACHINE SERIAL
NUMBER
PRODUCT KEY
MODUŁ OCHRONY
DANYCH
ADATBIZTONSÁGI KÉSZLET
SADA OCHRANY DAT
¤”fl–‘›¤◊
Δ›Ÿ”–œÃ‚”Ã◊À ’œ‚‚‹ˇ
BEZPEČNOSTNÁ SADA
ÚDAJOV
VERÝ GÜVENLÝK KÝTÝ
KIT DE SEGURANÇA DE
DADOS
KIT DE SECURITATE A
DATELOR
POLSKI
MAGYAR
ČEŠTINA
—ŒÃäÀ⁄
SLOVENSKY
TÜRKÇE
PORTUGUÊS
ROMÂNÃ
Page 2
For users in the USA
This device complies with Part 15 of the FCC Rules. Operation is subject to the following
two conditions: (1) This device may not cause harmful interference, and (2) this device
must accept any interference received, including interference that may cause undesired
operation.
WARNING:
FCC Regulations state that any unauthorized changes or modifications to this
equipment not expressly approved by the manufacturer could void the user’s authority to
operate this equipment.
NOTE:
This equipment has been tested and found to comply with the limits for a Class A digital
device, pursuant to Part 15 of the FCC Rules. These limits are designed to provide
reasonable protection against harmful interference when the equipment is operated in a
commercial environment. This equipment generates, uses, and can radiate radio
frequency energy and, if not installed and used in accordance with the instruction
manual, may cause harmful interference to radio communications. Operation of this
equipment in a residential area is likely to cause harmful interference in which case the
user will be required to correct the interference at his own expense.
For users in Canada
This Class A digital apparatus complies with Canadian ICES-003.
Cet appareil numérique de la classe A est conforme à la norme NMB-003 du Canada.
Page 3
ENGLISH
Warranty
While every effort has been made to make this document as accurate and helpful as possible,
SHARP Corporation makes no warranty of any kind with regard to its content. All information
included herein is subject to change without notice. SHARP is not responsible for any loss or
damages, direct or indirect, arising from or related to the use of this operation manual.
© Copyright SHARP Corporation 2008. All rights reserved. Reproduction, adaptation or
translation without prior written permission is prohibited, except as allowed under copyright laws.
Note:
● "System Settings (Administrator)" in this manual refers to the system settings that require
logging in with administrator rights, and "System Settings (General)" refers to the system
settings that can be configured by general users (including the administrator).
● In this manual, G models and N models refer to the following models:
G models: MX-2600G, MX-3100G
N models: MX-2600N, MX-3100N
Where screens appear in this manual, screens of N models appear on the left side and
screens of G models appear on the right side.
Icons used in the manuals
The icons in this manual indicate the following types of information:
This provides a supplemental explanation of a function or procedure.
This explains how to cancel or correct an operation.
The display screens, messages, and key names shown in the manual may differ from
those on the actual machine due to product improvements and modifications.
Contents
Introduction ...........................................................................................................................2
When the data security kit is installed...................................................................................4
● System settings of the data security kit...........................................................................4
● Document control function...............................................................................................4
● Document Filing ..............................................................................................................4
● Authority group registration screen..................................................................................5
● Protecting passwords ......................................................................................................6
● Restrictions on tandem copying and tandem printing......................................................7
● Security Settings in the Web pages................................................................................. 8
● Transferring copied data .................................................................................................. 8
System settings.....................................................................................................................9
● Using the System Settings (Administrator)......................................................................9
● System settings for security.............................................................................................9
● Jobs Completed List Display Setting .............................................................................17
● Job Status Display Setting.............................................................................................18
● Release Lock on File/Folder Operation .........................................................................18
● Product Key...................................................................................................................18
Document Control Setting ...................................................................................................19
● Document control ..........................................................................................................19
● Modes to which the document control function can be added.......................................20
● Enabling the document control function ........................................................................20
● Using the document control function .............................................................................26
1
Page 4

ENGLISH
Introduction
The MX-FR10U adds a security function to the SHARP Digital Full Color Multifunctional
System.
When the copy function, printer function, network scanner function, or fax function of a SHARP
Digital Full
generated for the job is encrypted, and when the job is finished, the encrypted data is immediately
erased from memory and the hard disk.
■ Note:
To ensure that the data security function of the machine provides maximum security,
observe the following:
● The administrator plays an important role in maintaining security. Exercise appropriate
● Be sure to change the administrator password immediately each time a new person
● Change the administrator
● Do not select a password that can be easily guessed for the administrator
● The system settings (administrator) are very important for security management. If
● The customer bears responsibility for control of copies of documents made on the
● Even when the data security kit is installed, note that fax data in the polling memory
Color
Multifunctional System with the security function is used, the image data that is
care in selecting the person that will assume the job of administrator.
takes over as administrator.
password
you leave the machine when using the system settings (administrator), be sure to
touch the [Logout] key to quit the system settings (administrator). The administrator of
the machine should inform users that they are not to access the system settings
(administrator) without permission.
machine and faxes received on the machine.
box used by the facsimile
function
on a regular basis (at least once every 60 days).
password
can be read.
.
2
Page 5
ENGLISH
■ Backing up and clearing data stored with the document filing
function
When the data security kit is installed, data previously stored in the machine with the
document filing function is cleared. For this reason, any data that you need to keep is
copied to a computer before the data security kit is installed, and then returned to the
machine after installation and clearing of the previous data. (This work is normally
performed by a service technician at the time of installation of the data security kit.)
Only confidential folders can be used to return data from a computer to the machine
after installation of the data security kit. Before returning data from a computer to the
machine, create confidential folders if needed. For the procedure for storing data on a
computer and returning data from a computer to the machine, see document filing help
in the Web pages of the machine.
■ About passwords for the Web page
If an incorrect "users" or "admin" password is entered 3 times in a row when attempting
to access the Web pages of a machine that has the data security kit installed, access to
pages that require entry of the "users" or "admin" password will be prohibited for 5
minutes.
Some of the procedures for operating the machine change when the data
security kit is installed. The manuals for the machine ( "OPERATION
MANUALS AND HOW TO USE THEM" in the Quick Start Guide) explain the
procedures for operating the machine when data security kit is not installed. This
manual explains the changes to those procedures when the data security kit is
installed.
☞
3
Page 6
When the data security kit is
1
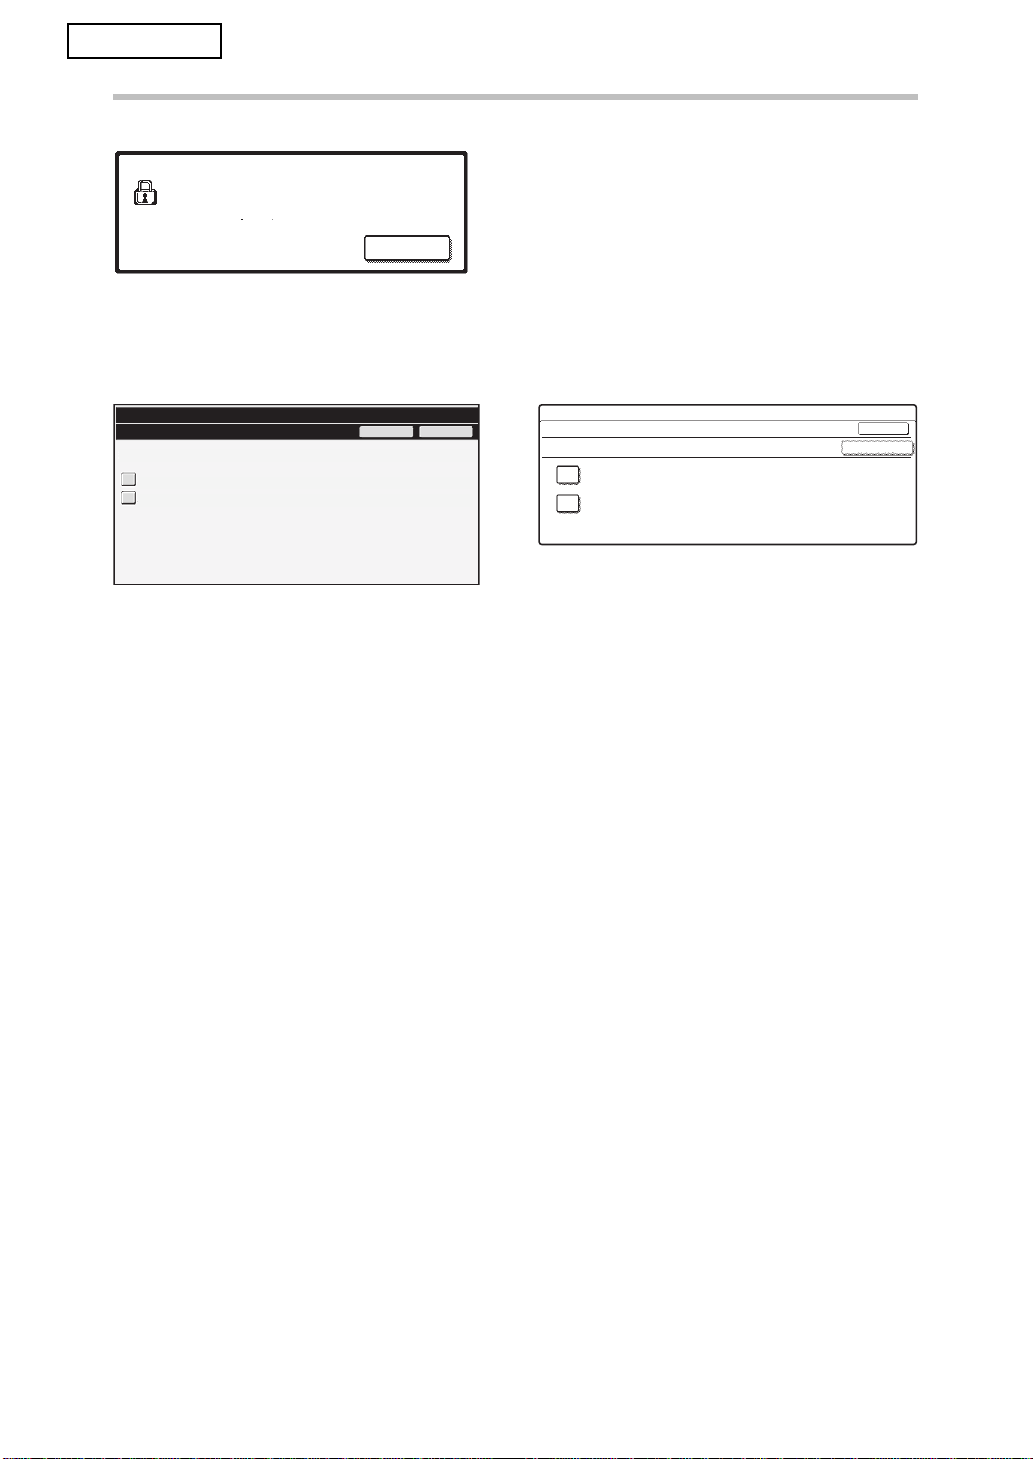
When the data security kit is installed, the following icon appears on the touch panel.
Touch the icon ( ) to view information on the data security kit version.
When the data security kit is installed, data remaining in the machine is automatically
erased after each job.
When data clearing begins, the following message appears for 6 seconds
* The duration of the message display can be changed with "Message Time Setting" in
the system settings (administrator).
N models: ➞ System Settings (Administrator) > "Operation Settings" > "Other
(
Settings" > "Message Time Setting"
"Operation Settings" > "Message Time Setting")
installed
*
.
Data is being cleared.
G models: System Settings (Administrator) >
If the machine power is turned off while image data is being cleared from the
hard disk drive or before a job is finished, the data may not be completely
erased. If you do not wish to leave partially cleared data when the power is
turned off, it is recommended that you use the program "Clear All Memory"
(page 11 of this manual), to complete data clearing before turning off the power.
System settings of the data security kit
When the data security kit is installed, settings to enhance security can be added to the system
settings (administrator) of the machine. See "
System settings
" (page 9 of this manual) for details.
Document control function
The document control function is used to embed a document control pattern on the paper
when print jobs, copies, and received faxes are printed.
The embedded document control pattern prevents secondary copying, faxing and other
operations of a printed document. For more information, see "Document Control Setting"
(page 19 of this manual).
Document Filing
To use the document filing function to store jobs in the machine when the data security kit is
installed, set the file property to "Confidential".
Files set to the "Sharing" or "Protect" properties cannot be stored. In addition, to print from a
computer using the retention function, enter a password in the printer driver settings (when
the factory default setting is in effect).
4
Page 7
ENGLISH
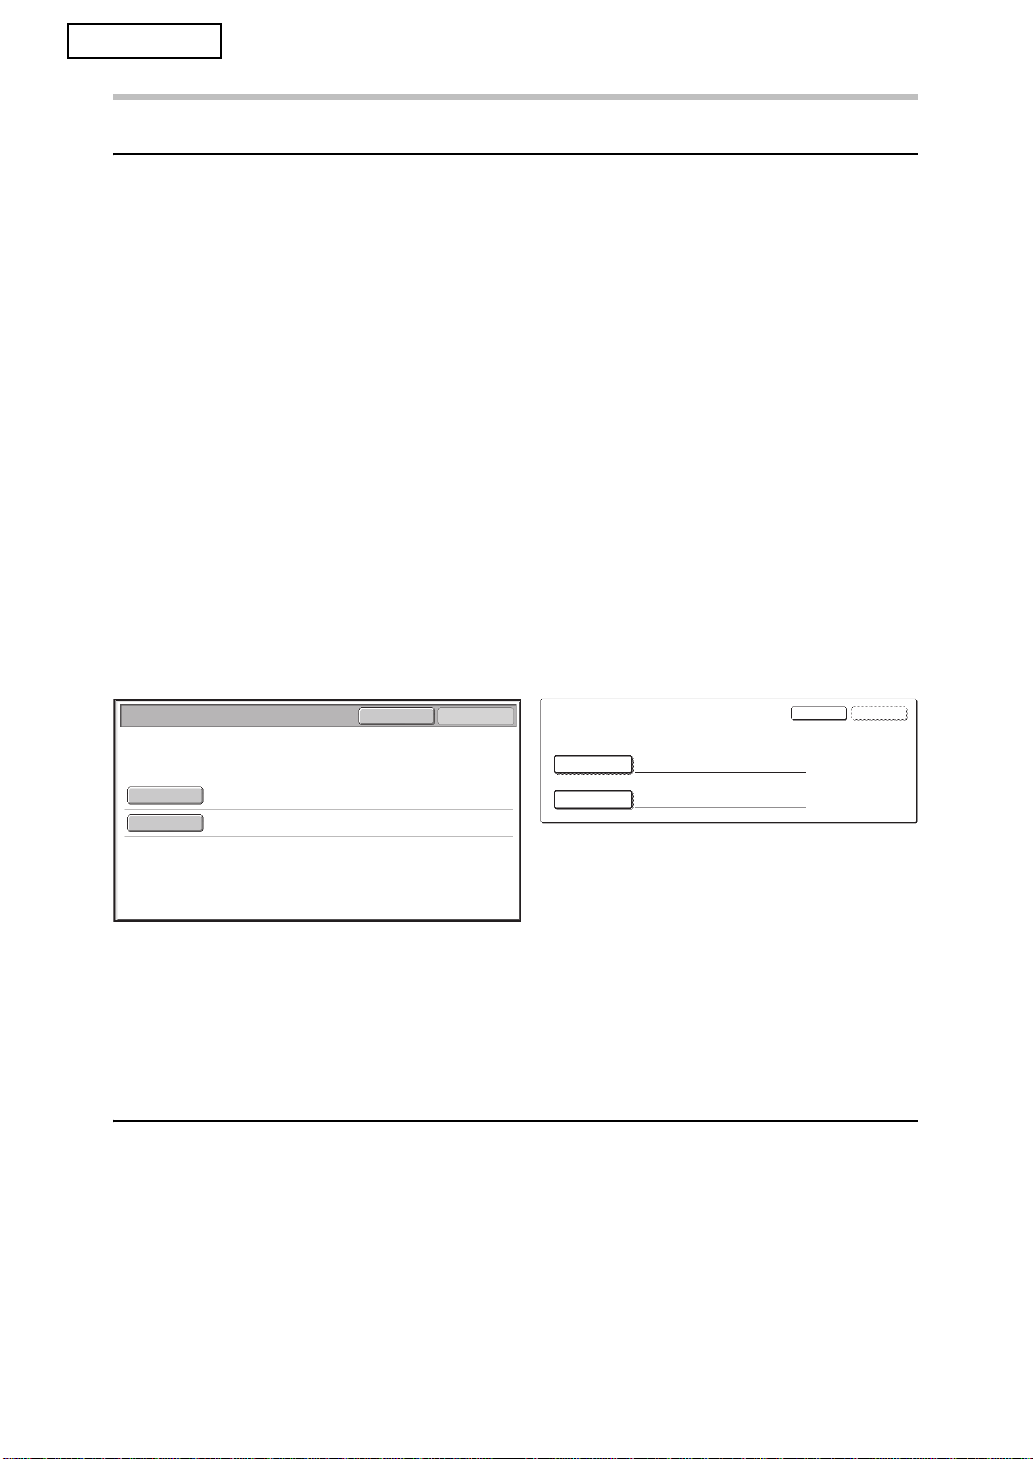
When the data security kit is installed
Authority group registration screen
When the data security kit is installed, the [Security] key is added to the "Authority Group
Registration" menu screen in the system settings (administrator). On N models, this screen
is displayed by selecting "User Control" > "Authority Group List". On G models, this screen
is displayed by selecting "User Control" > "Authority Group Registration".
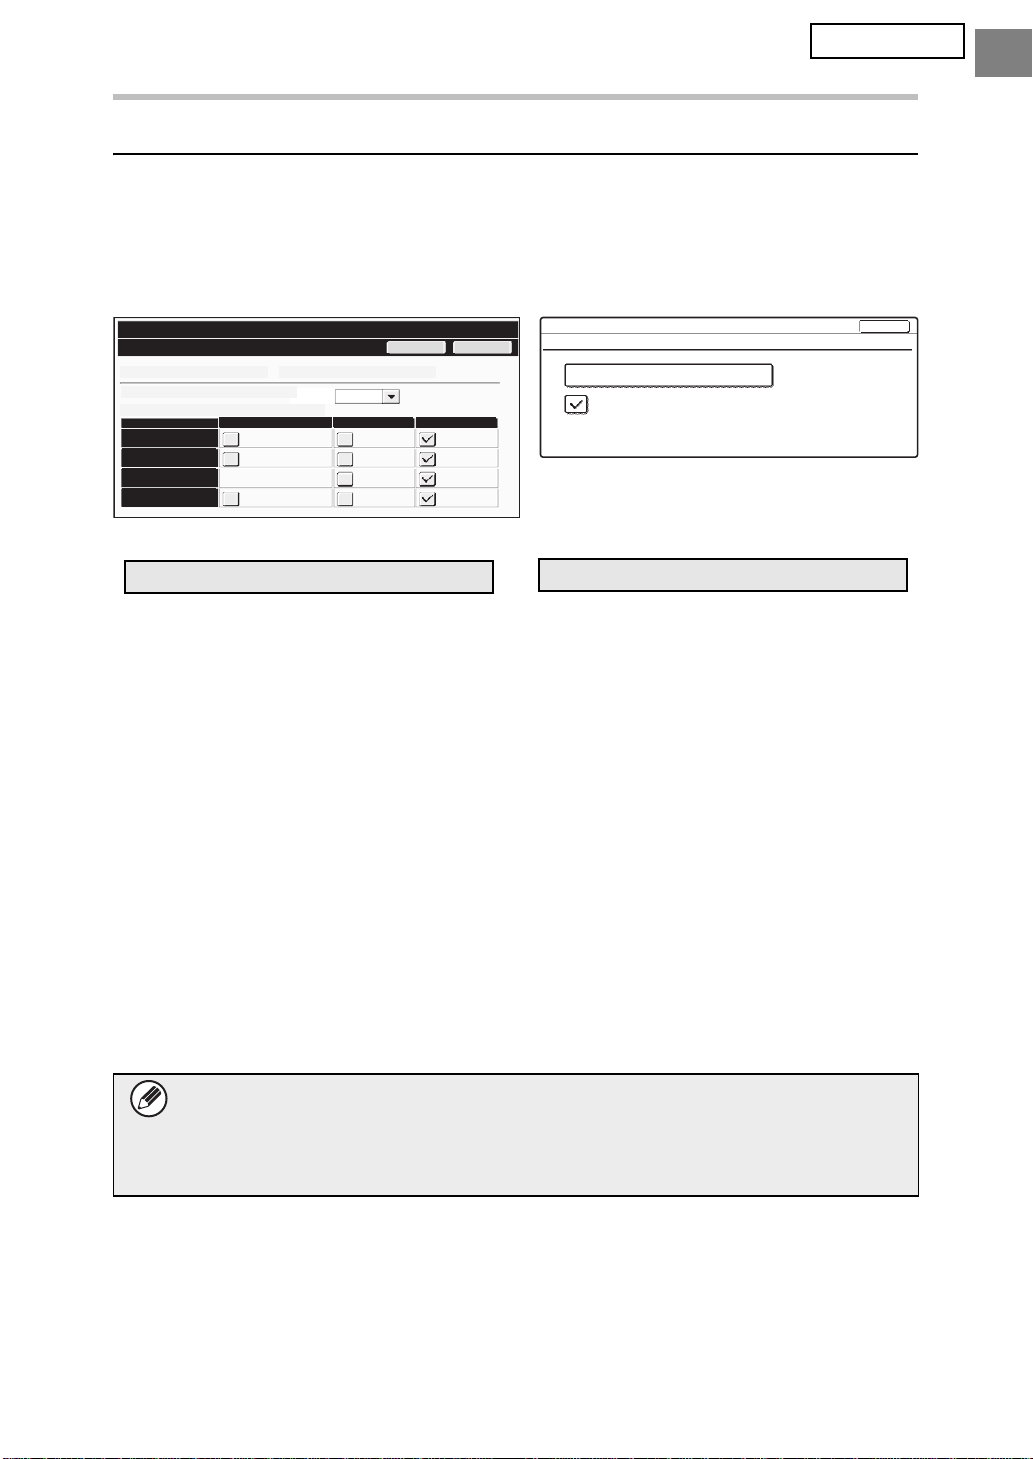
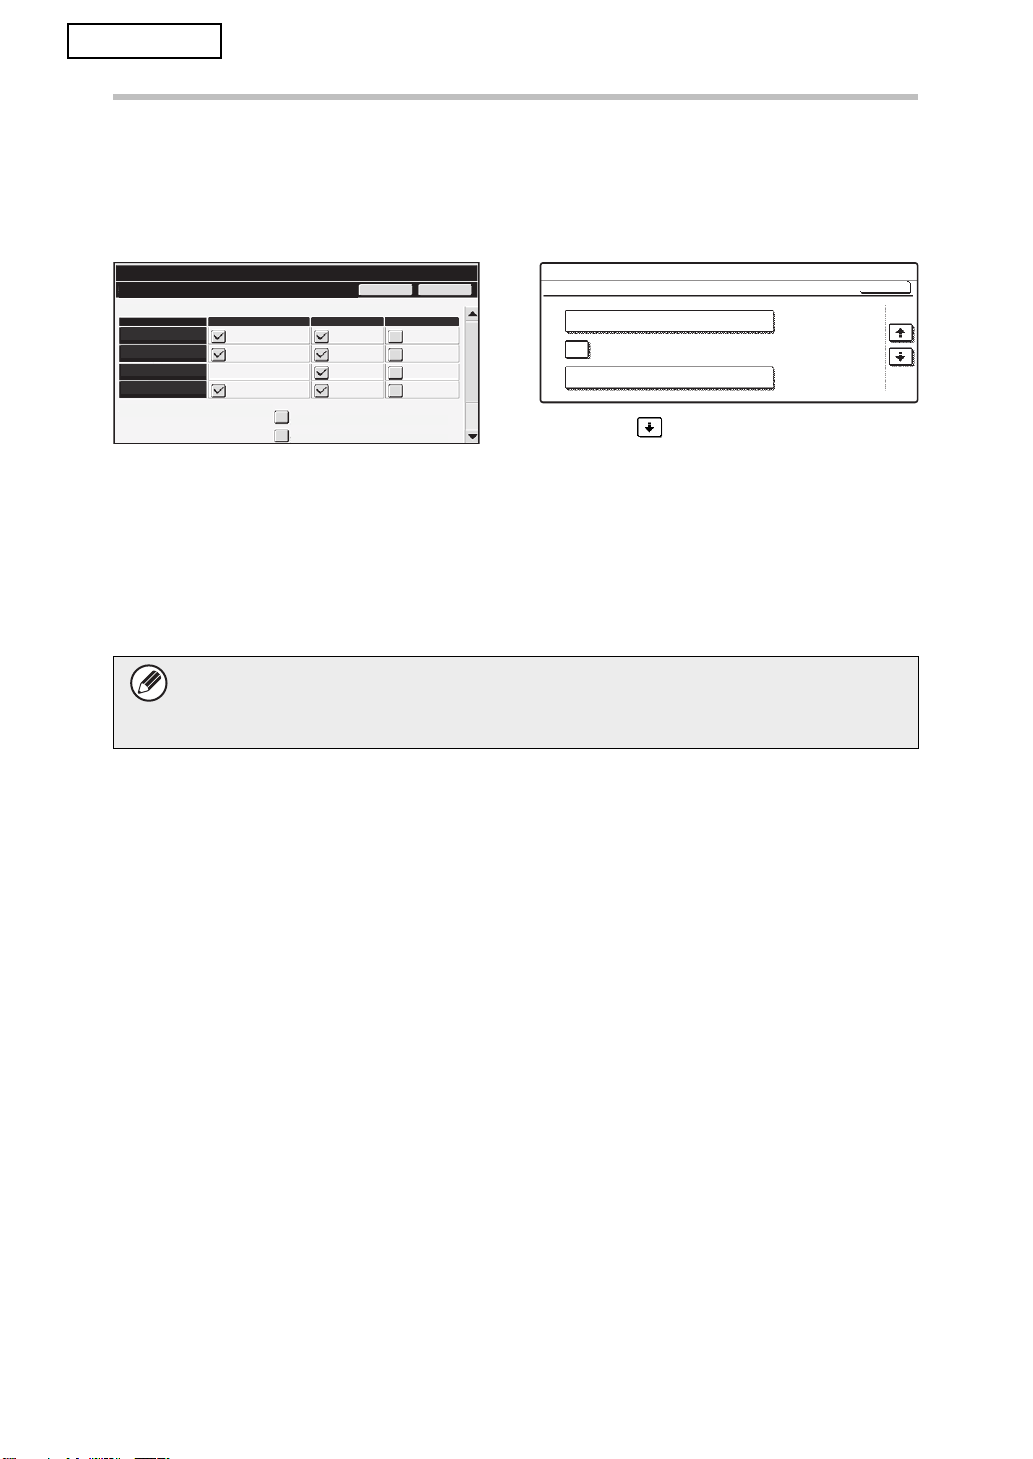
When this key is touched, the following screen for configuring items appears.
System Settings
Security
Group Name : Guest
Print Jobs Other than Print Hold Job:
Document Filing Approval Setting :
Copy
Printer
Scan to HDD
Image Send
Quick File Mode
Allowed
Sharing Mode
Cancel
Confidential
Document Filing Approval Setting
OK
No.01 group01
Document Filing Approval Setting
Approve Print Jobs other than Print Hold Job
OK
N models
● Print Jobs Other than Print Hold Job
When [Allowed] is selected and the
[OK] key is touched, print jobs other
than hold jobs are allowed in
authority group registration when
user authentication is enabled.
● Document Filing Approval Setting
When storing an authority group for
user authentication, touch this key to
select whether or not document filing
is allowed in each filing mode and for
each job type.
To enable a filing mode, touch the
checkbox of the mode to select it.
After selecting the desired
checkboxes, touch the [OK] key.
Document filing must be allowed in the following settings.
By default, document filing is only allowed in confidential mode.
● Allow document filing in authority group registration (this setting)
● Disabling of Document Filing in the system settings (page 16 of this manual)
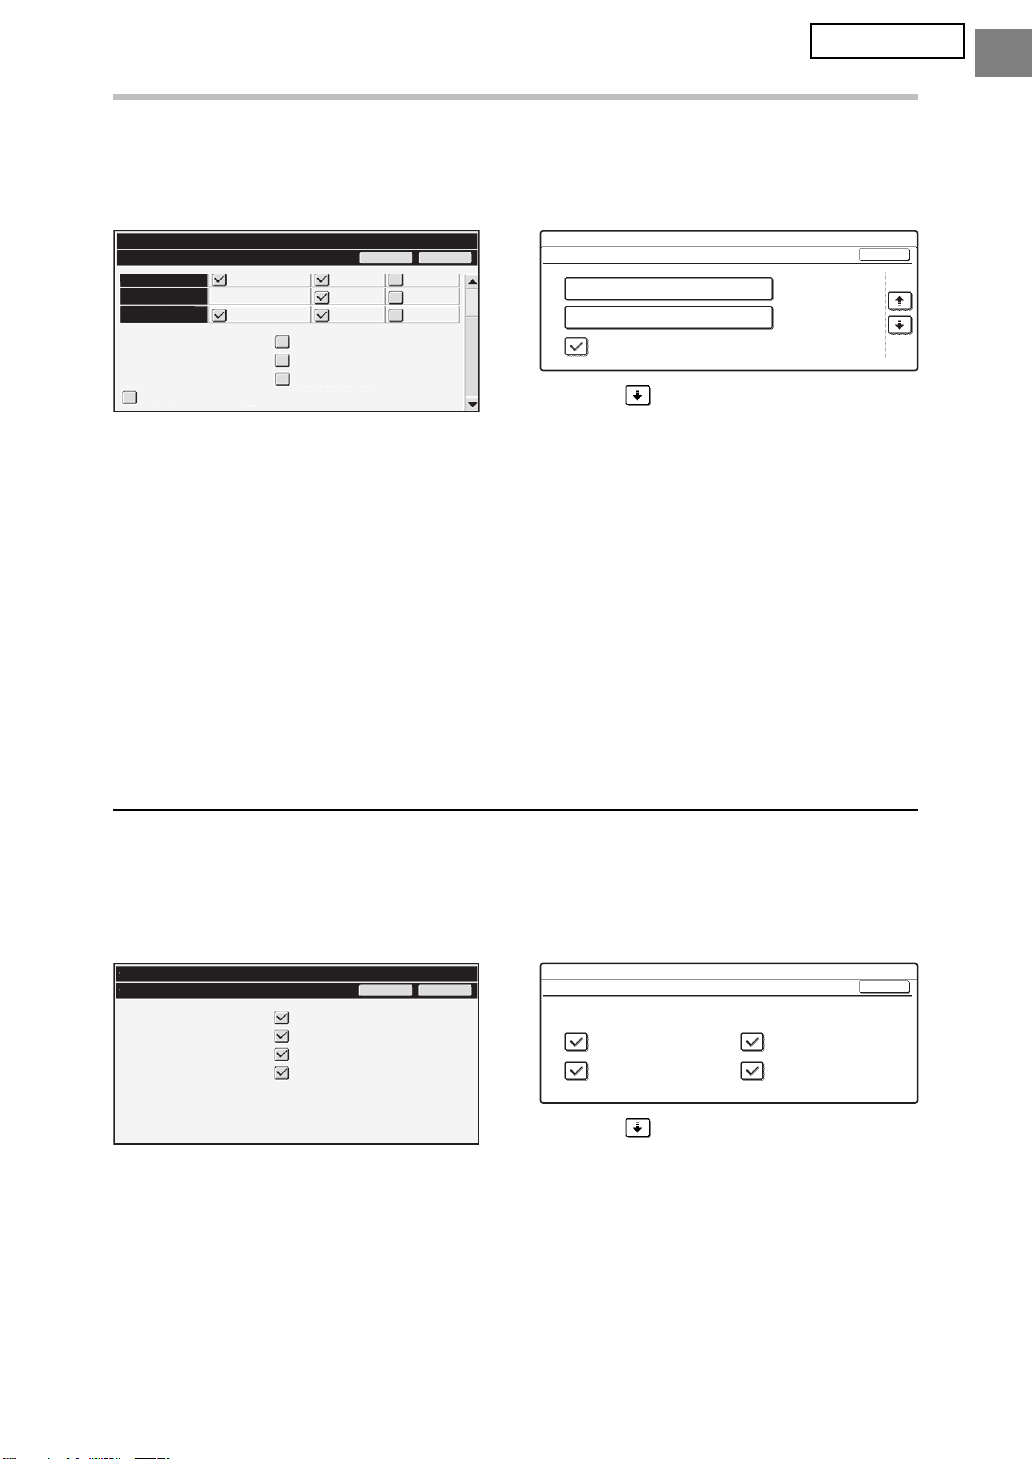
G models
● [Document Filing Approval Setting] key
When storing an authority group for
user authentication, touch this key to
select whether or not document filing
is allowed in each filing mode and for
each job type.
● [Approve Print Jobs other than Print
Hold Job] checkbox
When storing an authority group for
user authentication, select this
checkbox to allow print jobs other
than print hold jobs.
5
Page 8
ENGLISH
When the data security kit is installed
Protecting passwords
When the data security kit is installed, passwords entered from the operation panel of the
machine or the Web pages can be protected.
■ Administrator Password/User Password
When the data security kit is installed, password entry will be locked for 5 minutes if an incorrect administrator
password is entered 3 times in a row when the user authentication function is not enabled, or if an incorrect
user password is entered 3 times in a row when the user authentication function is enabled.
■
Confidential folders and confidential files of the document filing function
If an incorrect password is entered 3 times in a row for a specific confidential folder or
file, the folder or file will be locked. To unlock the folder or file, use "Release Lock on File/
Folder Operation" (page 18 of this manual).
● All files with the same user name and password can be printed at once using
the Batch Print feature of the document filing function ( Operation Guide
"BATCH PRINTING" in "6. DOCUMENT FILING".)
Files that have a password different from the password that was entered at the
time of the search will be treated as files for which an incorrect password was
entered. For this reason, it is recommended that you avoid executing searches
using [All Users] and [User Unknown] in so far as is possible.
● When the use of a file is prohibited, the following will apply when the document
filing function is used:
● When batch print is performed, a prohibited file will not be printed even if it
matches the search conditions.
☞
■ File search screen of document filing
When the data security kit is installed, the password entry setting will not appear in the
document filing search screen.
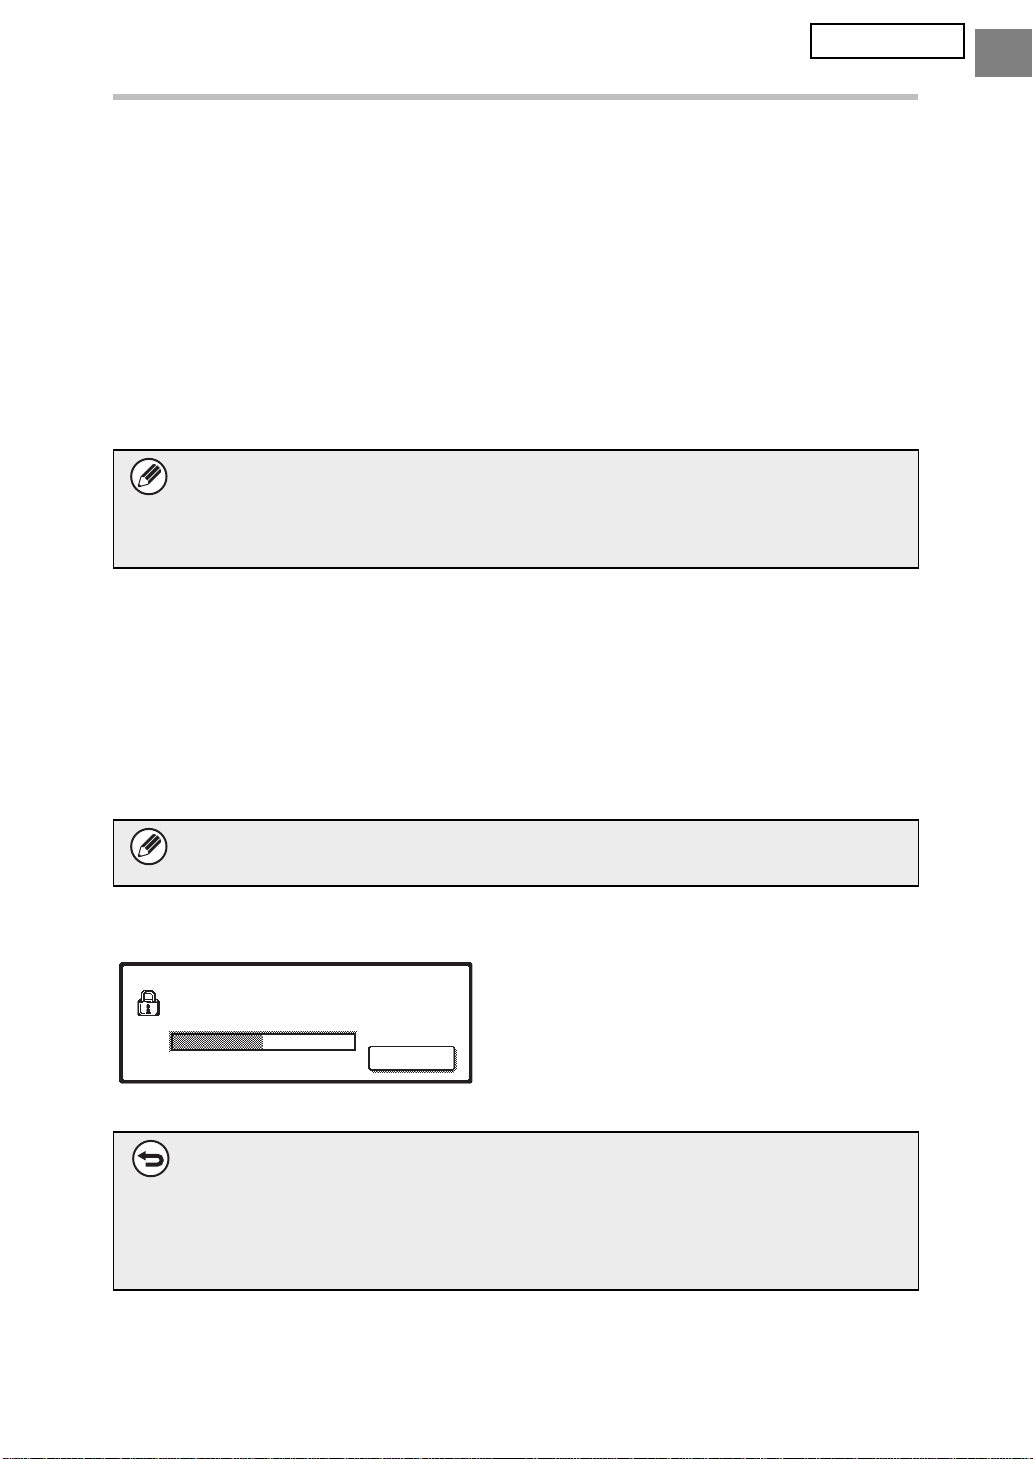
■ Encrypt PDF
When a job is printed by encrypted PDF direct printing (when the PS3 expansion kit is
installed), the job will appear in the spool queue of the job status screen and a password
must be entered to begin printing.
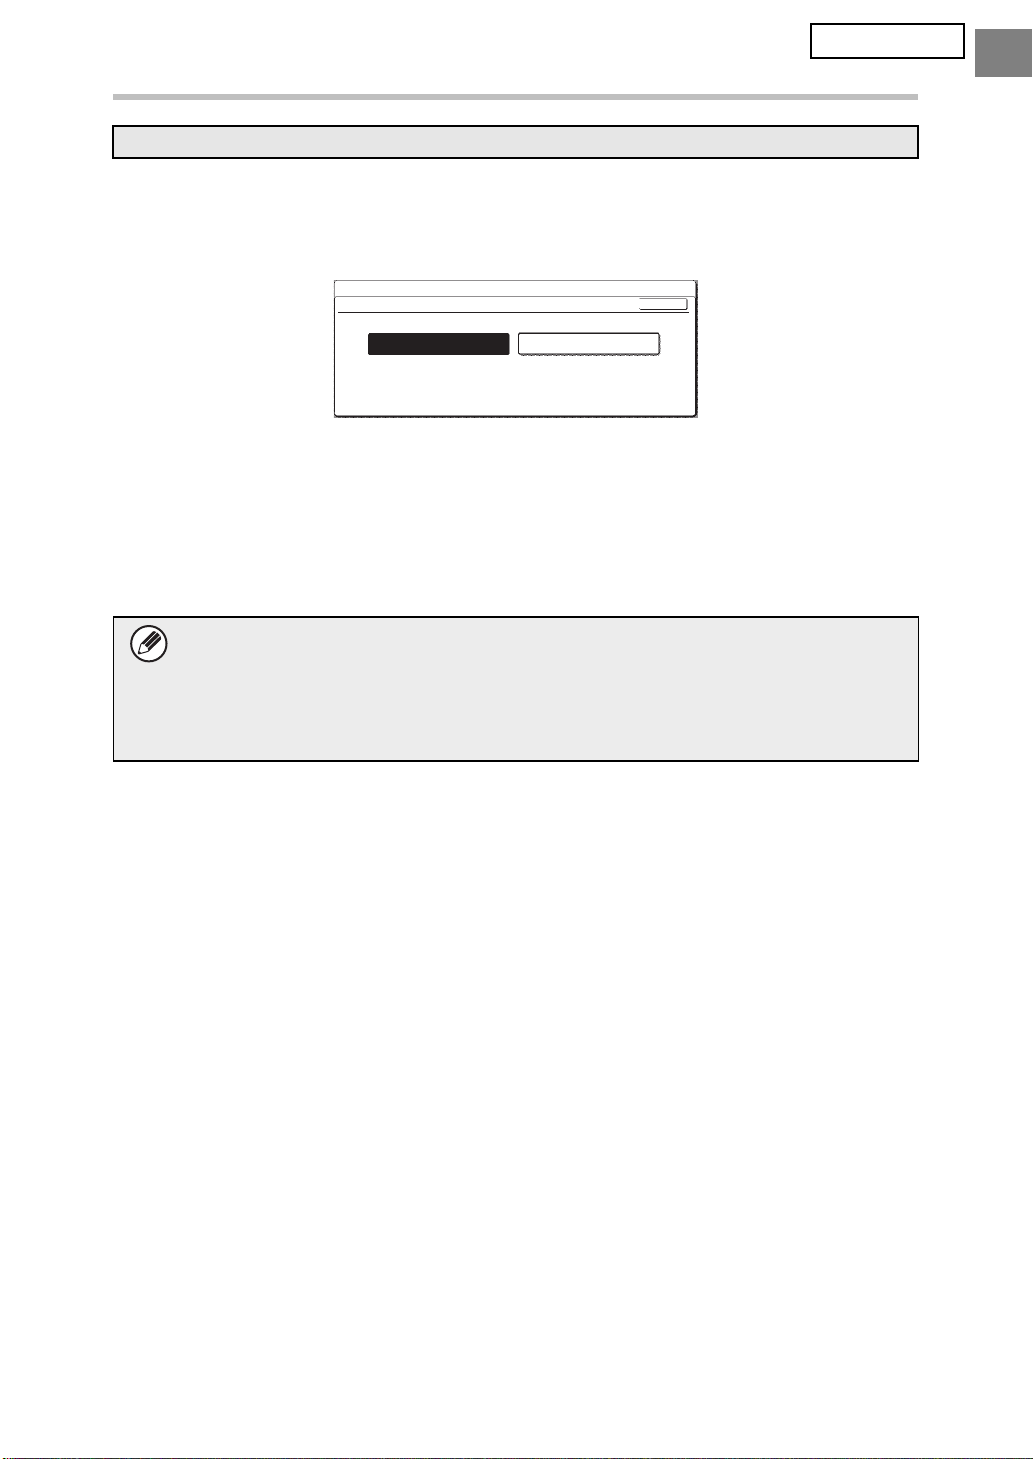
If an incorrect password is entered 3 times in a row when the data security kit installed,
the message "Operation is disabled. Please see your administrator for your assistance."
will be displayed for 6 seconds and printing will be locked.
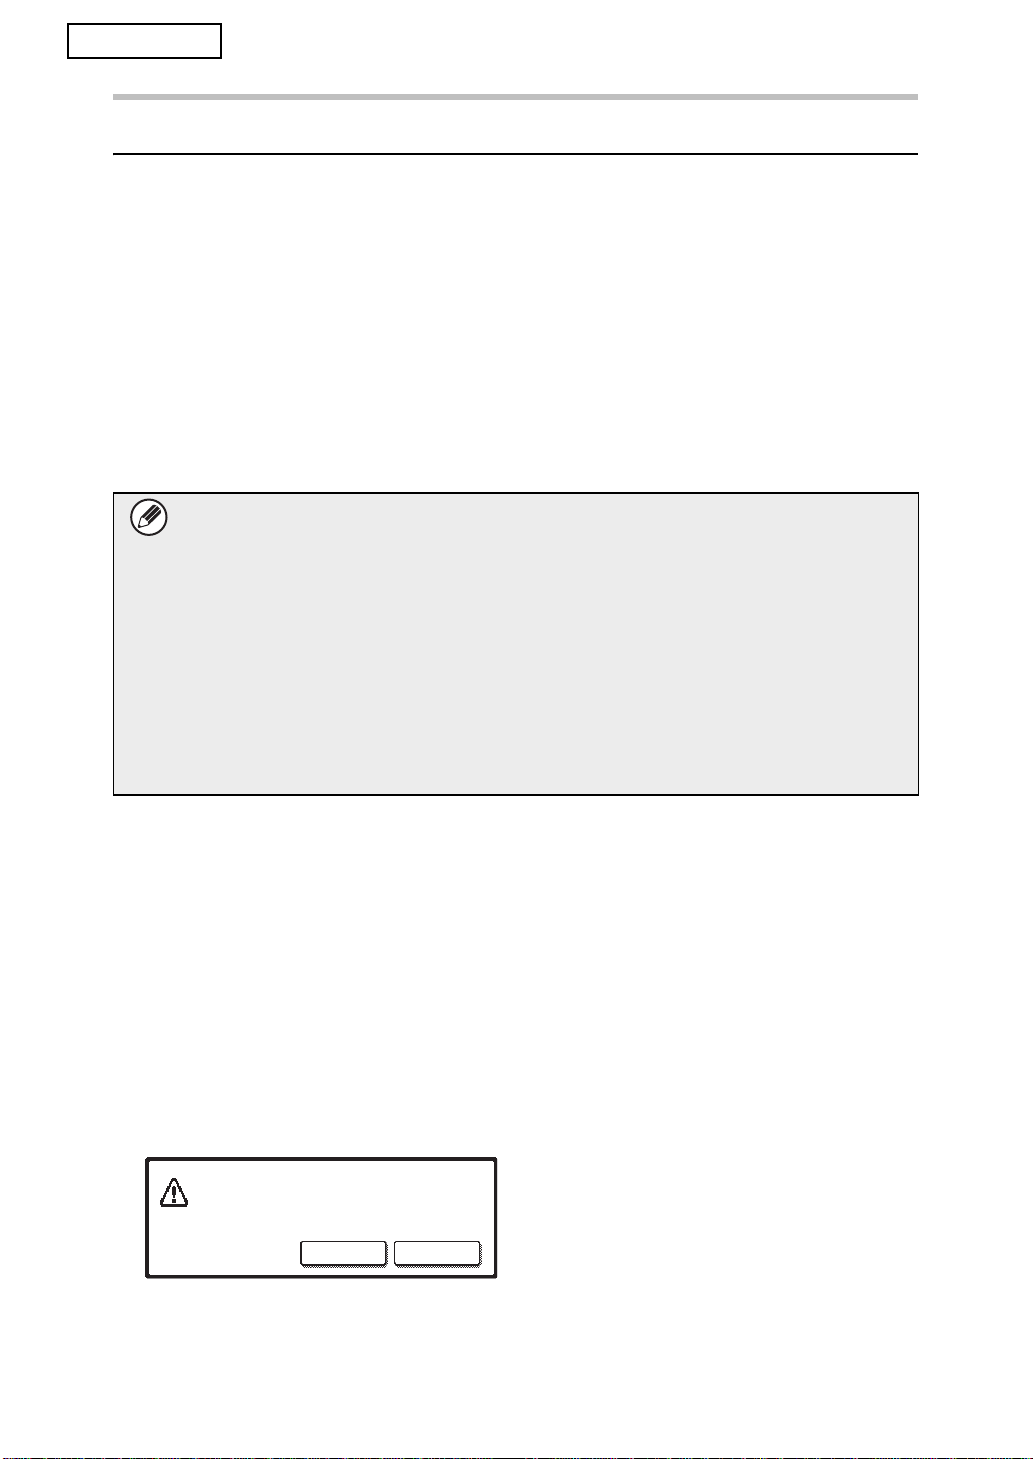
If you touch a file in the spool screen for which an incorrect password was entered 3
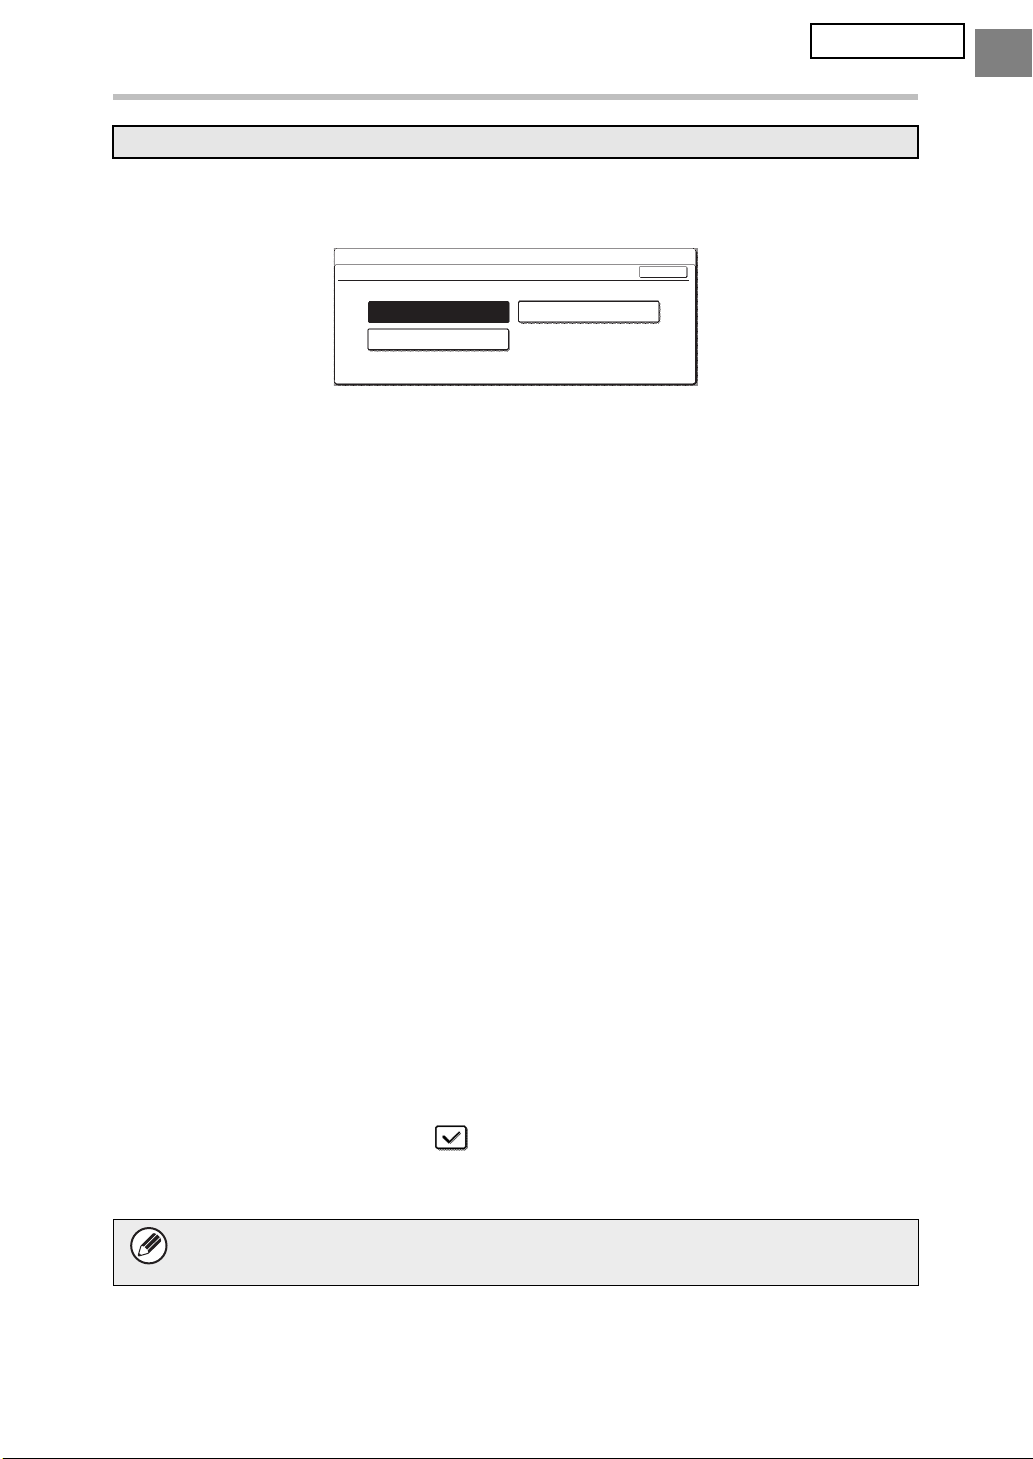
times, the following screen will appear.
●
The print of this job is disabled.
Delete the job?
No Yes
To unlock the print job, use "
Release Lock on File/Folder Operation
Touch the [Yes] button to delete the print job.
● Touch the [No] button to cancel deletion of
the job.
" (page 18 of this manual).
6
Page 9
ENGLISH
When the data security kit is installed
■ FTP Pull Print
When the FTP Pull Print function is used to directly print a file on an FTP server, a "User
Name" and "Password" must be entered when the FTP server is selected. When the
data security kit is installed, entry will be locked for 5 minutes if an incorrect "User Name"
or "Password" is entered 3 times in a row.
■ Login when user authentication is enabled
When "User Authentication Settings" in the system settings (administrator) ( "USER
AUTHENTICATION" in the Quick Start Guide) is enabled, login is required in the login
screen before the machine can be used. When "A Warning when Login Fails" is enabled
in the system settings (administrator), the machine will lock for 5 minutes if login fails 3
times in a row.
The "A Warning when Login Fails" setting is always enabled when the data security kit
installed.
☞
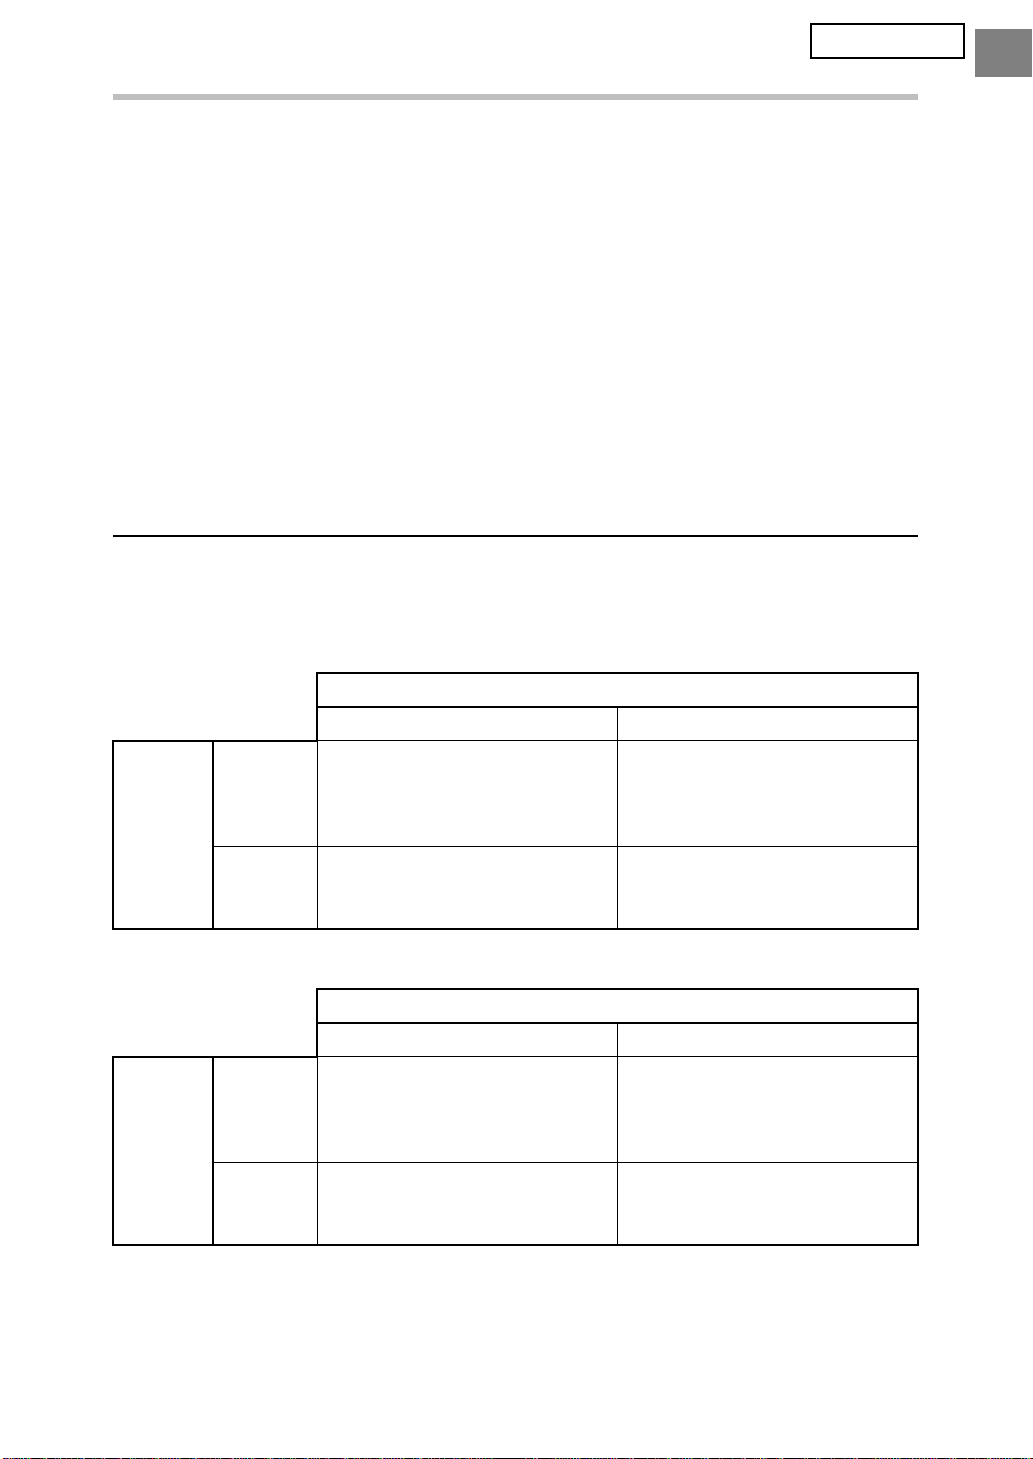
Restrictions on tandem copying and tandem printing
Tandem copying and tandem printing operate as shown below based on the configuration of
the master machine and slave machine (whether or not the data security kit is installed).
■ Tandem copying
Data
security
kit: Yes
Data
security
Master machine
kit: No
■ Tandem printing
Data
security
kit: Yes
Data
security
Master machine
kit: No
Slave machine
Data security kit: Yes Data security kit: No
The tandem function can be
used. Data is cleared from
both the master and slave
machines.
The tandem function can be
used. Data is cleared from the
slave machine.
Slave machine
Data security kit: Yes Data security kit: No
The tandem function can be
used. Data is cleared from
both the master and slave
machines.
The tandem function can be
used. Data is cleared from the
slave machine.
The tandem function cannot
be used.
The regular tandem function
can be used.
The tandem function can be
used. Data is cleared from the
master machine.
The regular tandem function
can be used.
7
Page 10
ENGLISH
User Name
Password
OKCancel
Enter the user name and password for FTP server.
When the data security kit is installed
Security Settings in the Web pages
When the machine is used as a network printer and the FTP Pull Print function is used, the
data security kit enables authentication of the user by means of a "User Name" and
"Password" for the FTP server. (The Pull Print function allows a file on a previously stored
FTP server to be printed directly from the operation panel of the machine without using the
printer driver; see Operation Guide "DIRECTLY PRINTING A FILE ON AN FTP SERVER" in
"3. PRINTER".)
User authentication is enabled by selecting the [Enable User Authentication] checkbox on
the machine's Web page for configuring FTP Pull Print settings. This checkbox appears
when the data security kit is installed, and is initially selected (a checkmark appears).
System requirements and the procedure for accessing the Web pages are explained in
"ACCESSING THE WEB SERVER IN THE MACHINE" in the Quick Start Guide.
■
Procedure for directly printing a file on an FTP server (when user
authentication is enabled)
Your user name and password must be entered following selection of the FTP server that
contains the file to be printed from the touch panel of the machine.
When the FTP server is selected in step 2 of "DIRECTLY PRINTING A FILE ON AN FTP
SERVER" in "3. PRINTER" in the Operation Guide, a screen will appear prompting you
to enter your user name and password for the FTP server.
FTP Server Authentication
Enter the user name and password for FTP server.
User Name
Password
Cancel
OK
Touch the [User Name] key to enter your user name and the [Password] key to enter your
password. A letter entry screen will appear in each case.
When you have finished entering your user name/password, touch the [OK] key.
After entering your user name and password, continue from step 3 of "DIRECTLY
PRINTING A FILE ON AN FTP SERVER" in "3. PRINTER" in the Operation Guide.
Transferring copied data
When the data security kit is installed and the Web pages are used to copy data stored with
the document filing function to a computer, the copied data can only be transferred back to
the original machine from which it was copied.
The data cannot be transferred to another machine even if the machine conditions are the
same.
The [Restore from PC] key will only appear on the Web page and transfer of data back to
the machine will only be possible when a confidential folder is selected.
8
Page 11
System settings
2
This section explains system settings that are related to the security function.
The following explanations assume that the machine has the printer, fax, and
network scanner functions.
Using the System Settings (Administrator)
Follow the procedure in "SYSTEM SETTINGS (ADMINISTRATOR)" in "7. SYSTEM
SETTINGS" of the Operation Guide to configure the settings in the system settings
(administrator).
For explanations of each of the settings, see the following pages.
If an incorrect administrator password is entered 3 times in a row on a machine
that has the data security kit installed, entry of the administrator password will be
locked for 5 minutes.
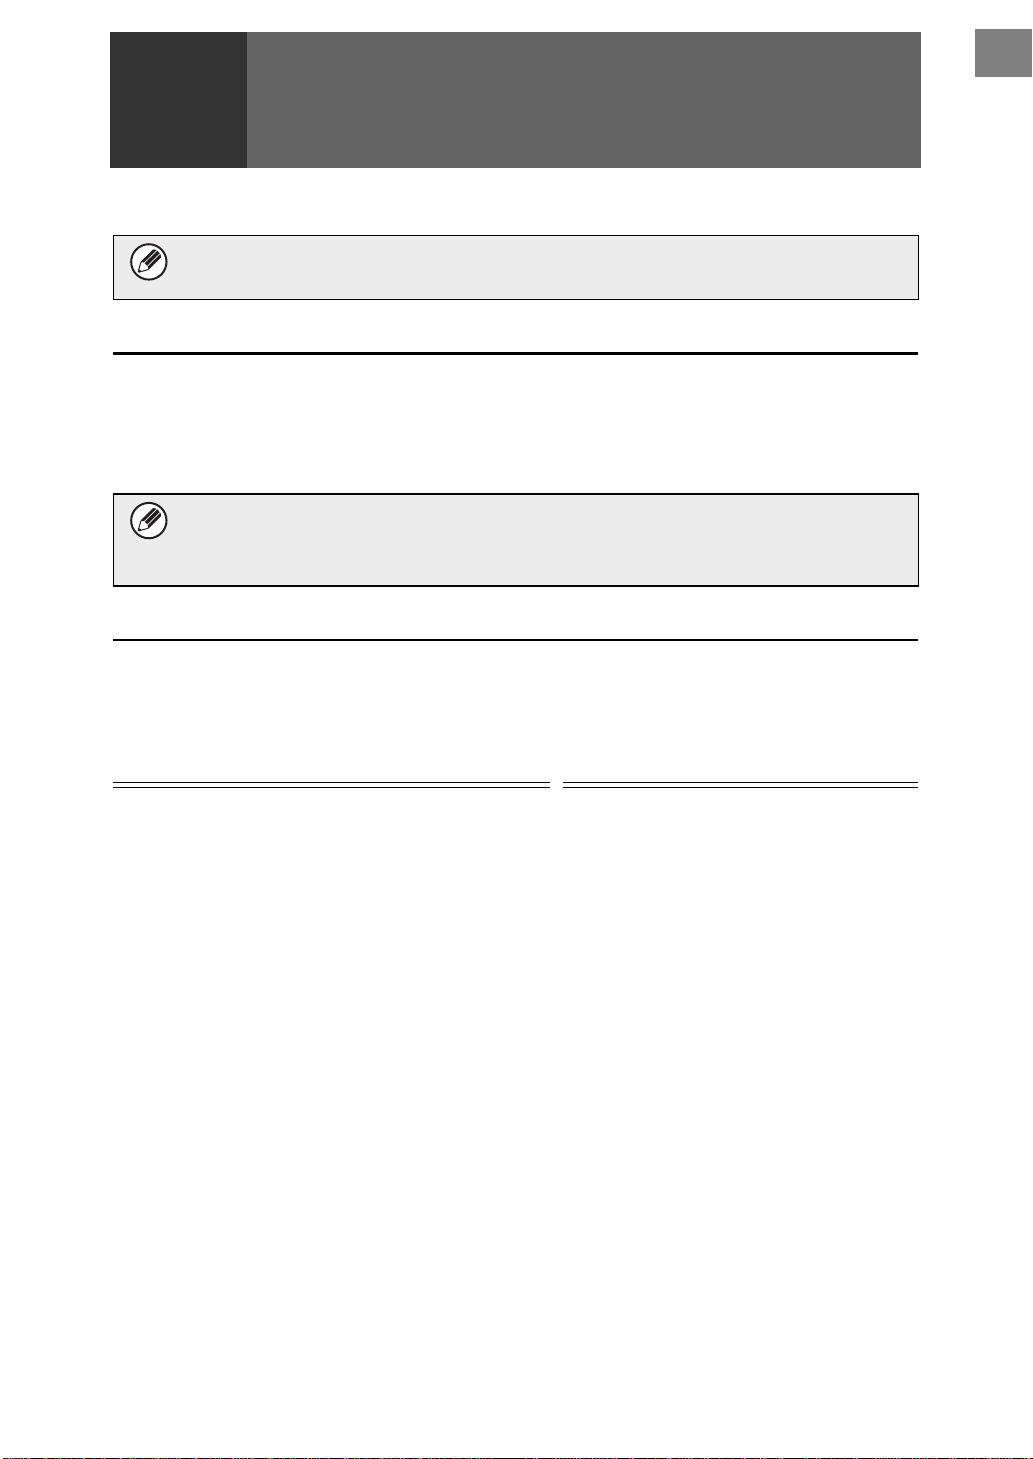
System settings for security
When the data security kit is installed, settings related to security (with the exception of [SSL
Settings]) are added to the settings that appear when the [Security Settings] key is touched.
Setting
Clear All Memory
Clear Document Filing Data
Clear All Data in Jobs Completed List
Clear Address Book and
Registered Data
Power Up Auto Clear
● Number of Times Data Clear is
Repeated
●
Number of Times Power Up Auto
Clear Program is Repeated
●
Number of Times Auto Clear at
Job End Program is Repeated
Disabling of Document Filing 16
Disabling of List Print 16
Disabling of Print Jobs Other Than
Print Hold Job
*1
*1
*1
*1
*1
*1
*1
*1
Page
11
12
12
13
14
15
15
15
17
Explanation
Select data clear items and the
number of data clear times. Use this
to manually clear stored data from
each area of the machine's memory
and hard drive.
Set the items that you wish to
disable. Use this to disable specific
operations to prevent the output of
sensitive document data.
9
Page 12
ENGLISH
System settings
Setting
Jobs Completed List Display
Setting
Page
Explanation
17 Use this to select whether or not the
job status completed job screen is
displayed.
Job Status Display Setting 18 Use this to select whether or not
filenames of print jobs and
destination names of image send
jobs are displayed in the job status
screen.
Release Lock on File/Folder
Operation
Product Key
*1
When user authentication is enabled, a user cannot configure this setting even when the
*2
18 Use this to release locked files and
folders.
18 Register the product key.
authority group gives the user the authority to configure security settings.
(This operation can only be performed by an administrator.)
*2
This will not appear when the product key is entered and the security function is enabled.
System Settings
Security Settings
SSL Settings
IPsec Settings
IEEE802.1X Setting
Data Clearance Settings
Enable/Disable Settings
Jobs Completed List Display Settings
Back
System Settings
Security Settings
Data Clearance Settings
IPsec Settings
IEEE802.1X Setting
The security settings menu consists of
several screens.
Touch the key in the lower right corner
of the screen to move to the next screen.
Back
1/6
10
● The above system settings can also be configured in the Web page of the
machine. However, the product key for the data security kit cannot be entered
in the Web page. Use the touch panel of the machine to enter the product key.
● When the data security kit is installed, the "IP Address Setting" does not
appear in the system settings.
Page 13
ENGLISH
System settings
■ Clear All Memory
This program is used to manually clear all data from the memory and hard disk of the machine.
Note, however, that the following types of data are not cleared with this setting. Use
"Clear Address Book and Registered Data" (page 13 of this manual) to clear the
following types of data.
● User Information
● Individual/Group/Program/Relay Broadcast Memory Box
● Polling Memory/Confidential Memory Box
●
Sender Data
● Allow/Reject Reception Setting Data (including polling passcode number)
● Forward Information
*
Image data stored in a memory box is cleared by executing "Clear All Memory".
*
In the event that the data security kit or a machine with the data security kit installed
will be disposed of or ownership will change, the administrator should be sure to
execute this function. When executing the function, the administrator should not
leave the machine until it has been verified that data clearing has been completed.
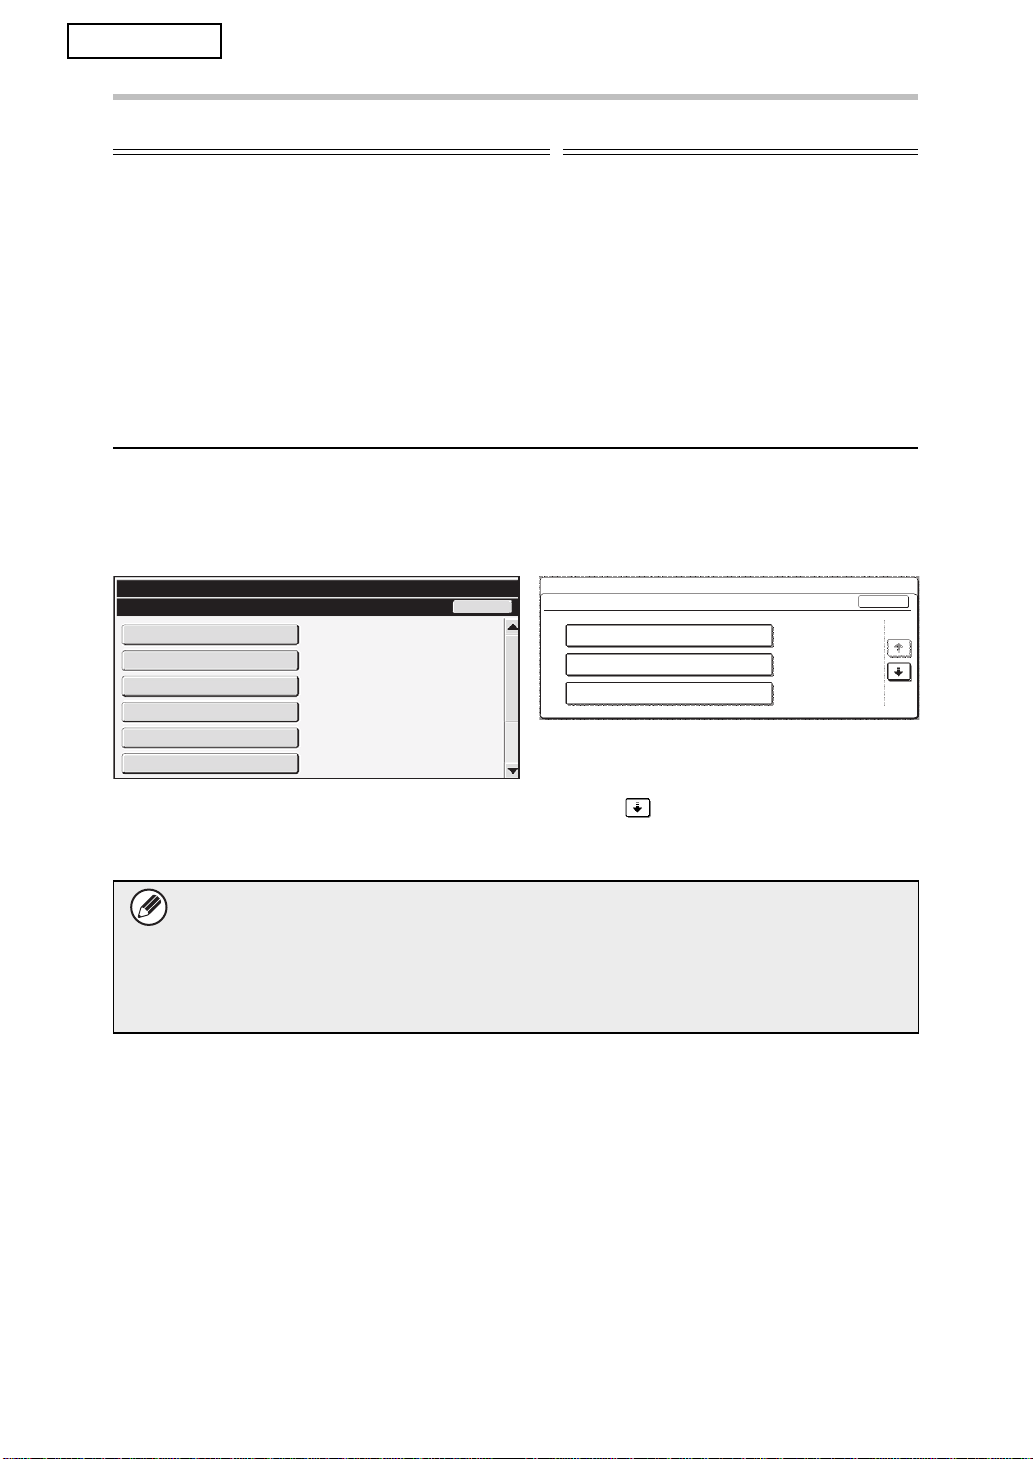
When the [Clear All Memory] key is touched, a confirmation screen will appear as shown below.
*
/Forward Information
[Clear screen 1]
The confirmation message "Clear all memory. (Exclusive of address book/user list data.)"
will appear.
● To return to the previous menu screen, touch the [No] key.
● To clear all memory, touch the [Yes] key. "Please wait." appears, and then the following
screen is displayed.
If a print job is in progress when "Clear All Memory" is executed, the print job will
be canceled. Print jobs in progress and in the job queue are also erased.
[Clear screen 2]
● During clearing, progress will be shown as a
Clearing all memor y.
(50.0%) (1/1 Time)
Cancel
100%50%0%
percentage together with the number of
repetitions.
● When clearing is completed, the following
screen will appear for confirmation.
If you wish to cancel data clearing...
Touch the [Cancel] key. The administrator password entry screen will appear. Enter the
administrator password. As soon as the correct password is entered, data clearing will
stop and the power will turn off briefly and then turn back on automatically. Note that
any data cleared prior to entry of the password will not be restored.
11
Page 14
ENGLISH
System settings
[Clear screen 3]
Touch the [OK] key to restart the machine.
Clearing memor y h as been completed.
Reboot is implemented.
OK
■ Clear Document Filing Data
This function is used to clear data stored using the document filing function.
Data whose property is set to "Protect" or "Confidential" is also cleared.
System Settings
Clear Document Filing Data
Select the data to be cleared and press [Clear].
File Data(Including protected/confidential files)
Quick File Data(Including protected files)
● [File Data (Including protected/confidential files)] checkbox:
Clear
Back
Select this checkbox to clear all files stored using "File" in the main folder and in custom folders.
● [Quick File Data (Including protected files)] checkbox:
Select this checkbox to clear all files stored using " Quick File ".
Step 1: Touch the [Clear] key.
A confirmation message prompting you to select "Yes" or "No" will appear.
Step 2: Touch the [Yes] key.
The selected data is cleared.
(Operation during clearing is the same as when "Clear All Memory" (page 11 of this manual) is performed.)
System Settings
Clear Document Filing Data
Select the data to be cleared and press [Clear].
File Data(Including protected/confidential files)
Quick File Data(Including protected files)
OK
Clear
■ Clear All Data in Jobs Completed List
Use this when you wish to clear all data of the items below, which appear in the job
status jobs completed screen.
(The job status jobs completed screen appears when the [Complete] key (job status
screen selector key) of the job status screen is touched.)
● Printer user names
● Image send destinations
● Senders of faxes that are received
Step 1: Touch the [Clear All Data in Jobs Completed List] key.
A confirmation message prompting you to select "Yes" or "No" will appear.
Step 2: Touch the [Yes] key.
Data clearing is executed.
(Operation during clearing is the same as "Clear All Memory" (page 11 of this manual).
However, it is not possible to cancel during clearing.)
12
Page 15

System settings
■ Clear Address Book and Registered Data
This function is used to clear the items indicated below, which cannot be cleared or
initialized using "Clear All Memory" (page 11 of this manual) or "Restore Factory
Defaults" (
"Restore Factory Defaults").
System Settings
Clear Address Book and Registered Data
Select the data to be cleared and press [Clear].
User Information
Individual/Group/Program/Relay Broadcast Memory Box
Polling Memory/Confidential Memory Box
Sender Data
Allow/Reject Reception Setting Data(Including polling passcode number)
Forward Information
➞ System Settings (Administrator) > "Storing/Calling of System Settings" >
System Settings
BackClear
Clear Address Book and Registered Data
Select the data to be cleared and press [Clear].
User Information
Individual/Group/Program/Relay Broadcast Memory Box
Polling Memory/Confidential Memory Box
Touch the key in the lower right corner
of the screen to move to the next screen.
ENGLISH
OK
Clear
1/2
●User Information
●Individual/Group/Program/Relay Broadcast Memory Box/Forward Information
●
Polling Memory/Confidential Memory Box
●
Sender Data
●Allow/Reject Reception Setting Data (including polling passcode number)
●
Forward Information
*1
The name may vary depending on the options that are installed.
*2
Can only be selected when the fax function is enabled.
*3
Can be selected when either the fax function or the Internet fax function is in use.
*4
*2
*1
*1,*3
("including polling passcode number" is displayed only when the fax function is
enabled.)
*4
Select this when you only wish to erase stored forwarding information.
Step 1: Select the checkbox of each item that you wish to clear.
(On G models, touch the keys as needed to change the screen.)
Step 2: Touch the [Clear] key.
A confirmation message prompting you to select "Yes" or "No" will appear.
Step 3: Touch the [Yes] key.
The selected data is cleared.
(Operation during clearing is the same as "Clear All Memory" (page 11 of this manual).
However, it is not possible to cancel during clearing.)
13
Page 16

ENGLISH
System settings
■ Power Up Auto Clear
This function is used to automatically clear all data in the machine when the power
switch is turned on.
System Settings
Power Up Auto Clear
Select the data to be cleared at power up.
All Memory
File Data(Including protected/confidential files)
Quick File Data(Including protected files)
Job Status Jobs Completed List
OKCancel
The following types of data can be cleared.
● "All Memory"
● "File Data(Including protected/confidential files)"
● "Quick File Data(Including protected files)"
● "Job Status Jobs Completed List"
Select the checkboxes of the data to be automatically cleared when the power switch is
switched on. (On G models, touch the keys as needed to change the screen.) When you
have finished selecting the checkboxes, touch the [OK] key.
No checkboxes are initially selected.
System Settings
Power Up Auto Clear
Select the data to be cleared at power up.
All Memory
File Data(Including protected/confidential files)
Quick File Data(Including protected files)
Touch the key in the lower right corner
of the screen to move to the next screen.
OK
1/2
When there is a stored image send job (fax, network scanning, or Internet fax
*
job)
, "Power Up Auto Clear" will not take place when the power is turned on.
*
This includes received faxes and Internet faxes that have not yet been printed;
however, it does not include data in a fax memory box (except confidential
memory box).
If you wish to cancel data clearing...
See the explanations in "Clear screen 2" and "If you wish to cancel data
clearing..." in "Clear All Memory" on page 11 of this manual.
14
Page 17

ENGLISH
System settings
■ Clearance Time Settings
To further strengthen the security settings, you can have data clearing repeated a set
number of times in each area.
N models
Touch the select box of each item and select the number of times that you wish data
clearing to be repeated. When finished, touch the [OK] key.
G models
Touch the key, and set the desired number of times with the or key.
System Settings
Clearance Time Settings
Number of Times Data Clear is Repeated:
Number of Times Power Up Auto Clear Program is
Repeated:
Number of Times Auto Clear at Job End Program
is Repeated:
● Number of Times Data Clear is Repeated
Cancel
1
Time(s)
1
Time(s)
1
Time(s)
OK
System Settings
Number of Times Data Clear is Repeated
Set the number of times the program is repeated.Setting Range:Between 1 and 7)
The number of times data clearing is repeated when "Clear All Memory", "Clear
Document Filing Data", "Clear All Data in Jobs Completed List", or "Clear Address
Book and Registered Data" is executed can be set to any number from 1 to 7. The
factory setting is 1.
● Number of Times Power Up Auto Clear Program is Repeated
The number of times "Power Up Auto Clear" is repeated can be set to any number
from 1 to 7. The factory setting is 1.
This setting is only enabled when the [Power Up Auto Clear] checkbox is
selected.
● Number of Times Auto Clear at Job End Program is Repeated
The number of times auto clear is repeated after each job is completed can be set to
any number from 1 to 7. The factory setting is 1.
OK
About the repeat setting
When the repeat setting (number of repetitions) is increased to enhance the security
function, the time required for data clearing increases.
It is recommended that you select repeat settings for "Number of Times Data Clear is
Repeated", "Number of Times Power Up Auto Clear Program is Repeated", and
"Number of Times Auto Clear at Job End Program is Repeated" that are suitable for
your security needs and conditions of use.
15
Page 18
ENGLISH
System settings
■ Disabling of Document Filing
This program is used to restrict the filing modes of the document filing function.
Document filing modes (Quick File Mode, Sharing Mode, and Confidential Mode) can be
separately disabled in each mode in which document filing operates (Copy, Printer, Scan
to HDD, and Image Send mode).
System Settings
Enable/Disable Settings
Disabling of Document Filing:
Copy
Printer
Scan to HDD
Image Send
Disabling of List Print:
● Touch the checkboxes of filing modes that you wish to disable. (On G models, touch
Quick File Mode Sharing Mode
All Custom Setting List
Sending Address List
Cancel
OK
Confidential Mode
the keys as needed to change the screen.) When you have finished selecting the
checkboxes, touch the [OK] key.
● The property of a file that is already stored cannot be changed using "Property
Change" ( Operation Guide "CHANGING THE PROPERTY" in "6. DOCUMENT
☞
FILING") to a disabled filing mode.
System Settings
Disabling of Document Filing
Disabling of List Print
Disabling of Print Jobs
Other than Print Hold Job
Jobs Completed List Display Settings
Touch the key in the lower right corner
of the screen to move to the next screen.
OK
5/6
If a certain property is disabled in "Disabling of Document Filing" and a file exists
that was previously stored with this property, the property of the stored file can
be changed to another property.
When printing with the printer function, even formats for storing files that have been
disabled with this program will appear in the Job Handling screen of the printer driver
( Operation Guide "SAVING AND USING PRINT FILES (Retention/Document
☞
Filing)" in "3. PRINTER"). However, if a disabled file format is selected when printing a
file, the file will not be stored (only printing will take place).
■ Disabling of List Print
This program is used to disable printing of any of the following lists that are printed using
"List Print (User)" in the system settings (general).
"All Custom Setting List", "Sending Address List", "Document Filing Folder List"
Select the checkboxes of the lists for which you wish to disable printing. After selecting
the desired checkboxes, touch the [OK] key.
16
Page 19
ENGLISH
Print
System settings
■ Disabling of Print Jobs Other Than Print Hold Job
Printing in print mode other than from the operation panel of the machine can be
prohibited. This setting can be used to prevent sensitive documents left on the output tray
from being taken by a third party, which could result in the leaking of sensitive information.
System Settings
Enable/Disable Settings
er
Scan to HDD
Image Send
Disabling of List Print:
Disabling of Print Jobs Other Than Print Hold Job
All Custom Setting List
Sending Address List
Document Filing Folder List
Cancel
OK
● To prohibit printing other than from the operation panel, select the checkbox. To print
when the prohibit setting has been selected, follow the steps below.
Step 1: Set the " Retention " setting in the printer driver to [Hold Only] and select
the print command.
The print job will appear on the operation panel of the machine.
Step 2: Select your print job and execute printing. ( Operation Guide
"PRINTING A STORED FILE" in "6. DOCUMENT FILING")
If "Hold After Print" or "Sample Print" is selected before the print command is
executed, printing will not take place. However, the job will be held in the
machine and can be printed from the operation panel using the document filing
function in the same way as a "Hold Only" job.
System Settings
Security Settings
Document Filing Approval Setting
Disabling of List Print
Disabling of Print Jobs Other Than Print Hold Job
Touch the key in the lower right corner
of the screen to move to the next screen.
☞
OK
4/5
Jobs Completed List Display Setting
You can select whether or not the job status completed jobs screen (job status screen
selector key) is displayed.
If you prefer not to have the information (print mode user names, image send destinations,
senders of faxes that are received, etc.) that is stored and shown in the job status
completed jobs screen be displayed for security reasons, use this setting to hide the screen.
System Settings
Jobs Completed List Display Settings
Job Status Jobs Completed List
Display Setting:
OKCancel
Print
Scan
Fax
Internet Fax
System Settings
Jobs Completed List Display Settings
Select the job mode to be displayed on the jobs completed list.
Print
Fax
Scan
Internet Fax
OK
Touch the key in the lower right corner
of the screen to move to the next screen.
● To hide the job status jobs completed screen, touch the checkbox of each mode
([Print], [Scan], [Fax], and [Internet Fax]) to remove the checkmarks.
When finished, touch the [OK] key.
17
Page 20
ENGLISH
System settings
Job Status Display Setting
You can select whether or not filenames of print jobs and destination names of image send
jobs are displayed in the job status screen of the touch panel. If you do not want to display
this information, select the appropriate checkboxes.
Release Lock on File/Folder Operation
This function is used to release document filing folders and files and encrypted PDF
files, that are locked due to the entry of an incorrect password.
Touch the [Release Lock on File/Folder Operation] key and then the [Release] key to
release all locked items. After this is done, the items can be manipulated. When no items
are locked, the [Release Lock on File/Folder Operation] key is grayed out.
Product Key
To initially enable the security function, you must use system settings (administrator) to
enter the product key (password). The name of the system setting used for this purpose is
"DATA SECURITY KIT". Please ask your dealer for the product key.
To register the product key, touch the inside of the frame below the data security kit display,
press the numeric keys to enter the product key number, and touch the [Submit] key.
● If an incorrect number is entered...
A message will appear instructing you to check the product key number again.
● If the correct number is entered...
A message will appear instructing you to turn the power off and then on. Touch the [OK]
key when you have finished reading the message.
Turn off the power key first and then turn off the main power switch. The security function
will be enabled when the power is turned on again.
Once the security function is enabled, the "Data Security Kit" will no longer appear in the
product key entry screen.
After the product key is entered, it will not be possible to perform the following operations
until the machine is restarted.
● All access from the network or fax line is prohibited.
● Keys that change the screen display such as the [CLEAR ALL] key cannot be used.
● The [Back] key of [Product Key] in the system settings will be grayed out to prevent
switching to other screens.
18
Page 21
Document Control Setting
3
Document control
The document control function is used to embed a document control pattern on the paper
when a copy, print job, or received fax is printed.
If a person attempts to scan a document with an embedded document control pattern on a SHARP
machine that has the document control function enabled, the message "Document control pattern
is detected. This job is canceled." will appear and an e-mail will be sent to the administrator.
This prevents secondary copying and faxing of sensitive documents.
Document control may not be effective when certain original sizes or types,
certain paper sizes or types, or certain settings are used.
To enable effective operation of the document control function, observe the
following points.
● Original
● The function may not operate correctly if the original consists of large
proportion of photographs.
● The document control function is intended to protect text data, and thus it
may not operate correctly if used to protect graphic data.
● Color of document control pattern
● Select a color in a color family that is different from the paper color.
● Paper on which the document control pattern is printed
● To allow selection of the colors black, cyan, and yellow, use Sharp
recommended paper.
● White paper is recommended. If paper other than white paper is used, the
document control pattern may not be detected and the function may not
operate correctly.
● Use B5 or larger size paper.
The following paper sizes can be used:
A3W (12" x 18"), A3, B4, A4, B5, 11" x 17", 8-1/2" x 14", 8-1/2" x 13",
8-1/2" x 11", 7-1/4" x 10-1/2"R, 8K, 16K
(When the paper size is A4 or smaller, the paper can be used in both the
horizontal and vertical orientations.)
Disclaimer
Sharp does not guarantee that the document control function will always operate
effectively. There may be some instances in which the document control function does
not operate effectively.
19
Page 22
ENGLISH
Document Control Setting
Modes to which the document control function can be added
The document control function can be used to print with an embedded document control
pattern in the following modes:
● Copy (color / black and white)
● Printer (color / black and white)
● Document Filing Print (color / black and white)
● Internet Fax Receive (black and white only)
● Fax Receive (black and white only)
● List Print (black and white only)
Enabling the document control function
To enable the document control function, follow these steps.
N models
Press the [SYSTEM SETTINGS] key, then touch the [Security Settings] key, and the
[Document Control Setting] key to display the document control settings screen, and
configure the settings. When finished, touch the [OK] key.
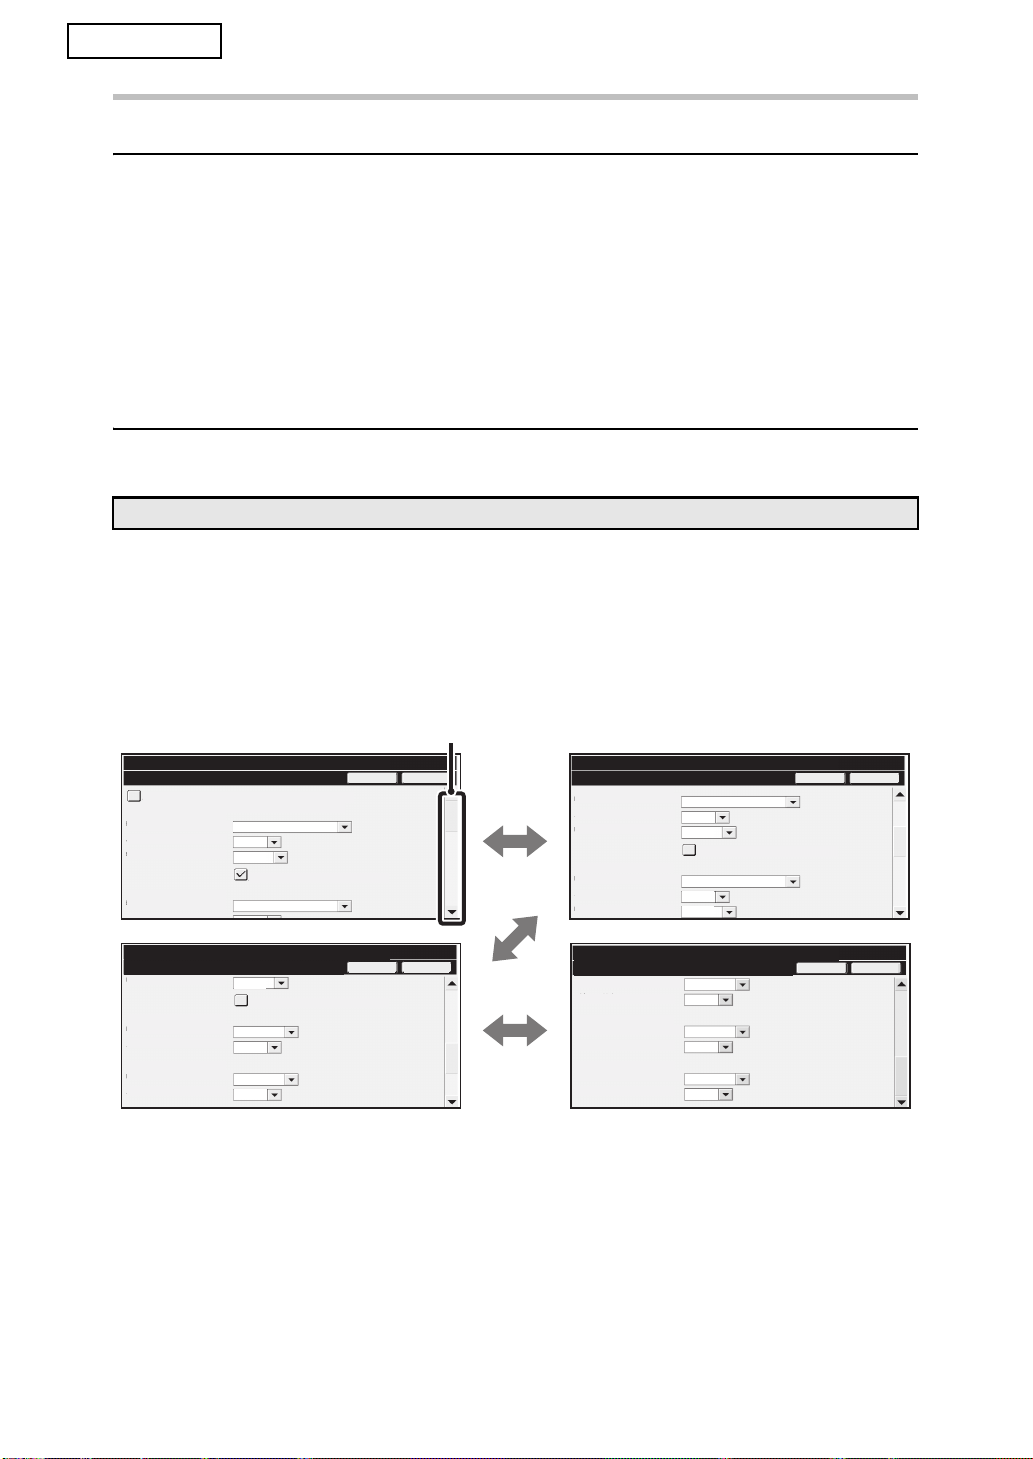
Document control setting screen
Touch the scroll bar and slide it up or down to change the screen.
Scroll bar
System Settings
Document Control Setting
Always Add the Pattern if You Print with it at Stored
Copier:
Document Control Print Select:
Print Pattern Setting:
Print Color Setting:
Printer:
Copier:
System Settings
Document Control Setting
Print Color Setting
Internet Fax Receive:
Document Control Print Select:
Print Pattern Setting:
Fax Receive:
Document Control Print Select:
Print Pattern Setting:
Not Printing
Pattern 1
Bk(Black)
Allow User to Select the Print ColorAllow User to Select the Print Color
Not Printing
Bk(Black)
Allow User to Select the Print Color
Not Printing
Pattern 1
Always Print
Pattern 1
Cancel OK
Cancel OK
System Settings
Document Control Setting
Printer:
Document Control Print Select:
Print Pattern Setting:
Print Color Setting:
Prints (Document Filing):
Document Control Print Select:
Print Pattern Setting:
Print Color Setting:
System Settings
Document Control Setting
Document Control Print SelectDocument Control Print Select:
Print Pattern Setting:
Fax Receive
Document Control Print Select
Document Control Print Select:
Print Pattern Setting:
List Prints
Document Control Print Select Document Control Print Select:
Print Pattern Setting:
Not Printing
Pattern 1
Bk(Black)
Allow User to Select the Print Color
Not Printing
Pattern 1
Bk(Black)
Not Printing
Pattern 1
Always Print
Not Printing
Pattern 1
Pattern 1
Not Printing
Pattern 1
Cancel OK
Cancel OK
20
Page 23
ENGLISH
Document Control Setting
G models
[SYSTEM SETTINGS] key - [Document Control Setting] key - Touch each mode key to
select the setting for that mode.
When you have finished configuring the settings, touch the [OK] key.
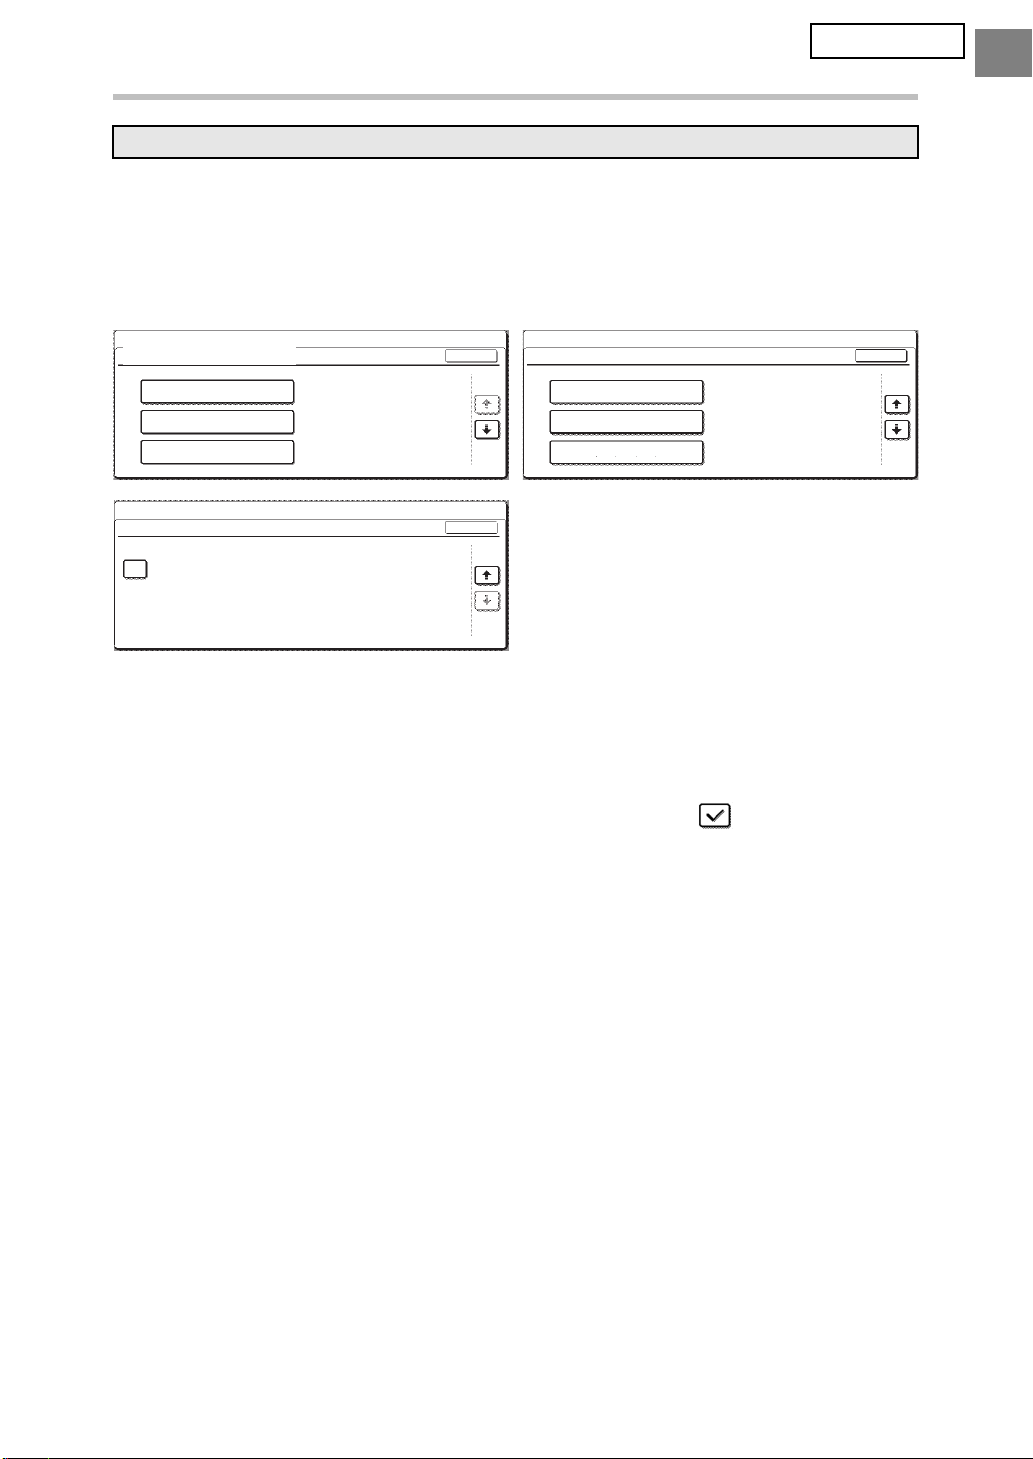
Document control setting screen
The current setting for each mode appears to the right of each mode key.
stem Settings
1/3
3/3
3/3
Sy
Document Control Setting
Internet Fax Receive
Fax Receive
List Prints
Not Printing
Not Printing
Not Printing
System Settings
Document Control Setting
Copier
Printer
Prints (Document Filing)
System Settings
Document Control Setting
Always Add the Pattern if You Print with it at Stored
Not Printing
Not Printing
Not Printing
OK
OK
OK
2/3
■ Settings for printing files stored by document filing
These settings are for printing the data of copy jobs, scan send jobs, and print jobs that
have been stored on the machine's hard drive using the document filing function. To
have a document control pattern always printed when a stored file is printed if a
document control pattern was printed when the job was originally executed, select the
[Always Add the Pattern if You Print with it at Stored] checkbox .
21
Page 24
ENGLISH
Document Control Setting
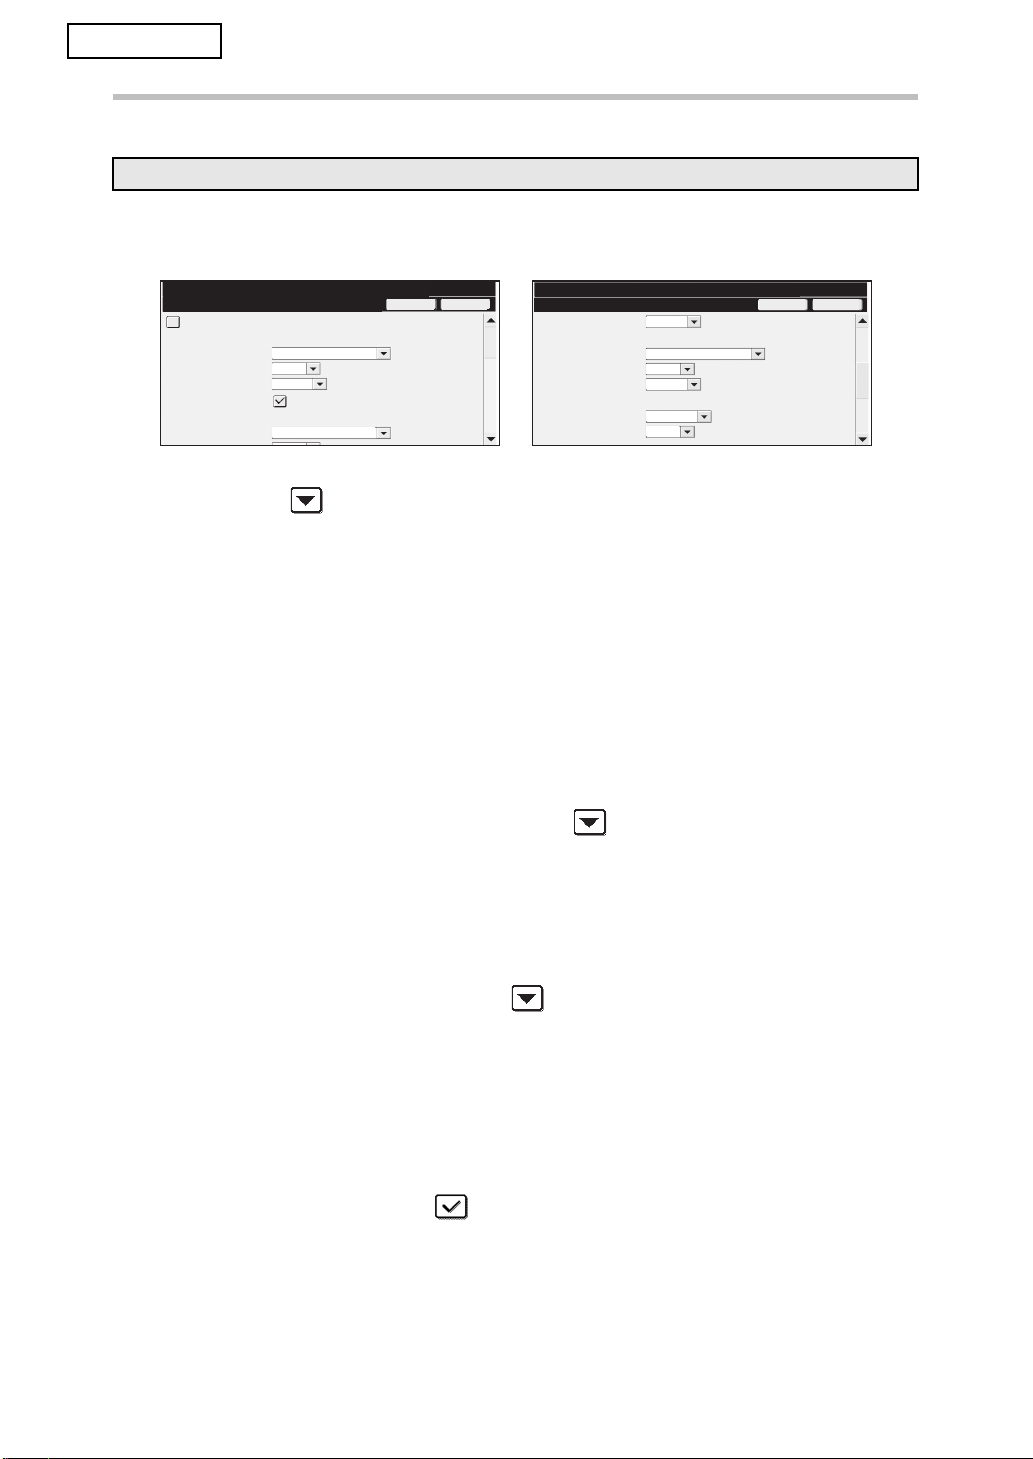
■ Settings related to Copy/Printer/Document Filing Print modes
N models
Settings related to copy, print, and document filing print modes can be configured
in the "Copy", "Printer", and "Prints (Document Filing)" fields of the document control
setting screen.
System Settings
Document Control Setting
Always Add the Pattern if You Print with it at Stored
Copier:
Document Control Print Select:
Print Pattern Setting:
Print Color Setting:
Printer:
Copier:
Not Printing
Pattern 1
Bk(Black)
Allow User to Select the Print Color
Not Printing
Cancel OK
● Document Control Print Select (Select the printing method)
Touch the select box to display the list of items, and then touch one of the items to select it.
Not Printing:
The document control pattern is not printed.
Always Print:
The document control pattern is always printed.
Allow User to Select:
The user can select whether or not the document control pattern is printed each time he
or she sets up a print job.
System Settings
Document Control Setting
Print Color Setting
Prints (Document Filing):
Document Control Print Select:
Print Pattern Setting:
Print Color Setting:
Internet Fax Receive:
Document Control Print
Print Pattern Setting:
Bk(Black)
Not Printing
Pattern 1
Bk(Black)
Not Printing
Pattern 1
Cancel OK
● Print Pattern Setting (Select the pattern to be printed)
"Always Print" or "Allow User to Select" can be selected in "Document Control Print Select"
to select a pattern setting.
To select one of patterns 1 to 5, touch the select box . Touch one of the items to select it.
If you find that the document control function cannot be used for a particular printed image,
try changing the pattern setting (patterns 1 to 5). (Factory default setting: Pattern 1)
● Print Color Setting (Select the color)
"Always Print" or "Allow User to Select" can be selected in "Document Control Print Select"
to select print color settings.
To select the print color, touch the select box . Touch one of the items to select it.
[Bk(Black)] :
The document control pattern is always printed in black.
[C(Cyan)] :
The document control pattern is always printed in cyan (Only when color mode is selected).
[Y(Yellow)] :
The document control pattern is always printed in yellow (Only when color mode is selected).
[Allow User to Select the Print Color] checkbox:
When this checkbox is selected ( ), the color selected here will be the initially
selected default color for the document control pattern. The user can change the color
each time he or she executes a print job.
22
Page 25
ENGLISH
Document Control Setting
G models
Touch the [Copy] key, the [Printer] key or the [Document Filing Print] key, and then touch the [Document Control
Print Select] key to configure settings related to Copy mode, Printer mode, or Document Filing Print mode.
Step 1: Select the printing method
System Settings
Document Control Print Select
(Copier)
OK
Not Printing
Allow User to Select
Not Printing
Touch one of the following keys so that it is highlighted.
Not Printing:
The document control pattern is not printed.
Always Print:
The document control pattern is always printed.
Allow User to Select:
The user can select whether or not the document control pattern is printed each time he
or she sets up a print job.
When you have finished configuring the settings, touch the [OK] key.
Step 2: Select the pattern to be printed
If [Always Print] or [Allow User to Select] was selected in step 1, the pattern can be selected.
Touch the [Print Pattern Setting] key to select one of patterns 1 to 5. Touch one of the keys
so that it is highlighted, and touch the [OK] key.
If you find that the document control function cannot be used for a particular printed image,
try changing the pattern setting (patterns 1 to 5). (Factory default setting: Pattern 1)
Step 3: Select the color
If [Always Print] or [Allow User to Select] was selected in step 1, the print color can be selected.
Touch the [Print Color Setting] key to select a print color. Touch one of the keys so that it is
highlighted, and touch the [OK] key.
[Bk(Black)] key:
The document control pattern is always printed in black.
[C(Cyan)] key:
The document control pattern is always printed in cyan. (Only when color mode is selected)
[Y(Yellow)] key:
The document control pattern is always printed in yellow. (Only when color mode is selected)
Allow User to Select the Print Color:
When this checkbox is selected ( ), the color highlighted here will be the initially
selected default color for the document control pattern. The user can change the color
each time he or she executes a print job.
If the [C(Cyan)] key or the [Y(Yellow)] key is touched, the message "All jobs of
this mode are printed in full color when this color is selected." will appear.
23
Page 26

ENGLISH
Document Control Setting
■
Settings related to Internet Fax Receive/Fax Receive/List Print modes
N models
Settings related to Internet fax reception, fax reception, and list print modes can be
configured in the " Internet Fax Receive", " Fax Receive", and " List Print" fields of the
document control setting screen.
System Settings
Document Control Setting
Print Color Setting
Prints (Document Filing):
Document Control Print Select:
Print Pattern Setting:
Print Color Setting:
Internet Fax Receive:
Document Control Print Select:
Print Pattern Setting:
Bk(Black)
Not Printing
Pattern 1
Bk(Black)
Not Printing
Pattern 1
Cancel OK
System Settings
Document Control Setting
Fax Receive
Document Control Print SelectDocument Control Print Select:
Print Pattern Setting:
List Prints
Document Control Print Select Document Control Print Select:
Print Pattern Setting:
Notice:
The document control pattern can be printed in the selected color, only when it is a
full-color job. Disable data forwarding function if you want to manage this function exactly.
Not Printing
Pattern 1
Not Printing
Pattern 1
Cancel OK
● Document Control Print Select (Select the printing method)
Touch the select box to display the list of items, and then touch one of the items to
select it.
Not Printing:
The document control pattern is not printed.
Always Print:
The document control pattern is always printed.
If "Always Print" is selected for Internet fax reception / fax reception mode, it is
recommended that the forwarding functions of each be disabled. (See
"4. FACSIMILE" in the Operation Guide for details.)
● Print Pattern Setting (Select the pattern to be printed)
If "Always Print" is selected in "Document Control Print Select", a pattern setting can be
selected.
To select one of patterns 1 to 5, touch the select box . Touch one of the items to select it.
If you find that the document control function cannot be used for a particular printed image,
try changing the pattern setting (patterns 1 to 5). (Factory default setting: Pattern 1)
24
Page 27
Document Control Setting
G models
Touch the [Internet Fax Receive] key, the [Fax Receive] key or the [List Print] key, and
then touch the [Document Control Print Select] key to configure settings related to
Internet Fax Receive mode, Fax Receive mode, or List Print mode.
Step 1: Select the printing method
System Settings
Document Control Print Select
(Internet Fax Receive)
OK
ENGLISH
Not Printing
Not Printing
Touch one of the following keys so that it is highlighted.
Not Printing:
The document control pattern is not printed.
Always Print:
The document control pattern is always printed.
When you have finished configuring the settings, touch the [OK] key.
If the [Always Print] key is touched in Internet Fax Receive mode or Fax Receive
mode, the message "Disable data forwarding function if you want to manage this
function exactly." will appear. After touching the [OK] key, it is recommended that
you disable the data forwarding function of either or both modes as appropriate.
(See "4. FACSIMILE" in the Operation Guide for details.)
Step 2: Select the pattern to be printed
If [Always Print] is selected in step 1, the pattern can be selected.
Touch the [Print Pattern Setting] key to select one of patterns 1 to 5. Touch one of the keys
so that it is highlighted, and touch the [OK] key.
If you find that the document control function cannot be used for a particular printed image,
try changing the pattern setting (patterns 1 to 5). (Factory default setting: Pattern 1)
25
Page 28
ENGLISH
Document Control Setting
Using the document control function
When the document control function is used, a document control pattern is printed on the
paper on which copies, print jobs, and received faxes are printed.
■
Pages on which a document control pattern is printed (all modes)
●
The document control pattern is printed on all pages output by a Sharp machine that has the
document control function, including the back side of pages printed by 2-sided printing.
● When a blank page is output because an odd number of pages were printed by 2-sided
printing, a document control pattern will not be printed on the blank page.
● When using the covers/inserts function (including transparency inserts), a document
control pattern will be printed only on covers and inserts that are copied on. A
document control pattern is not printed when a copy is not made on a cover or insert.
After enabling the document control function in the system settings, follow these steps to
use the function.
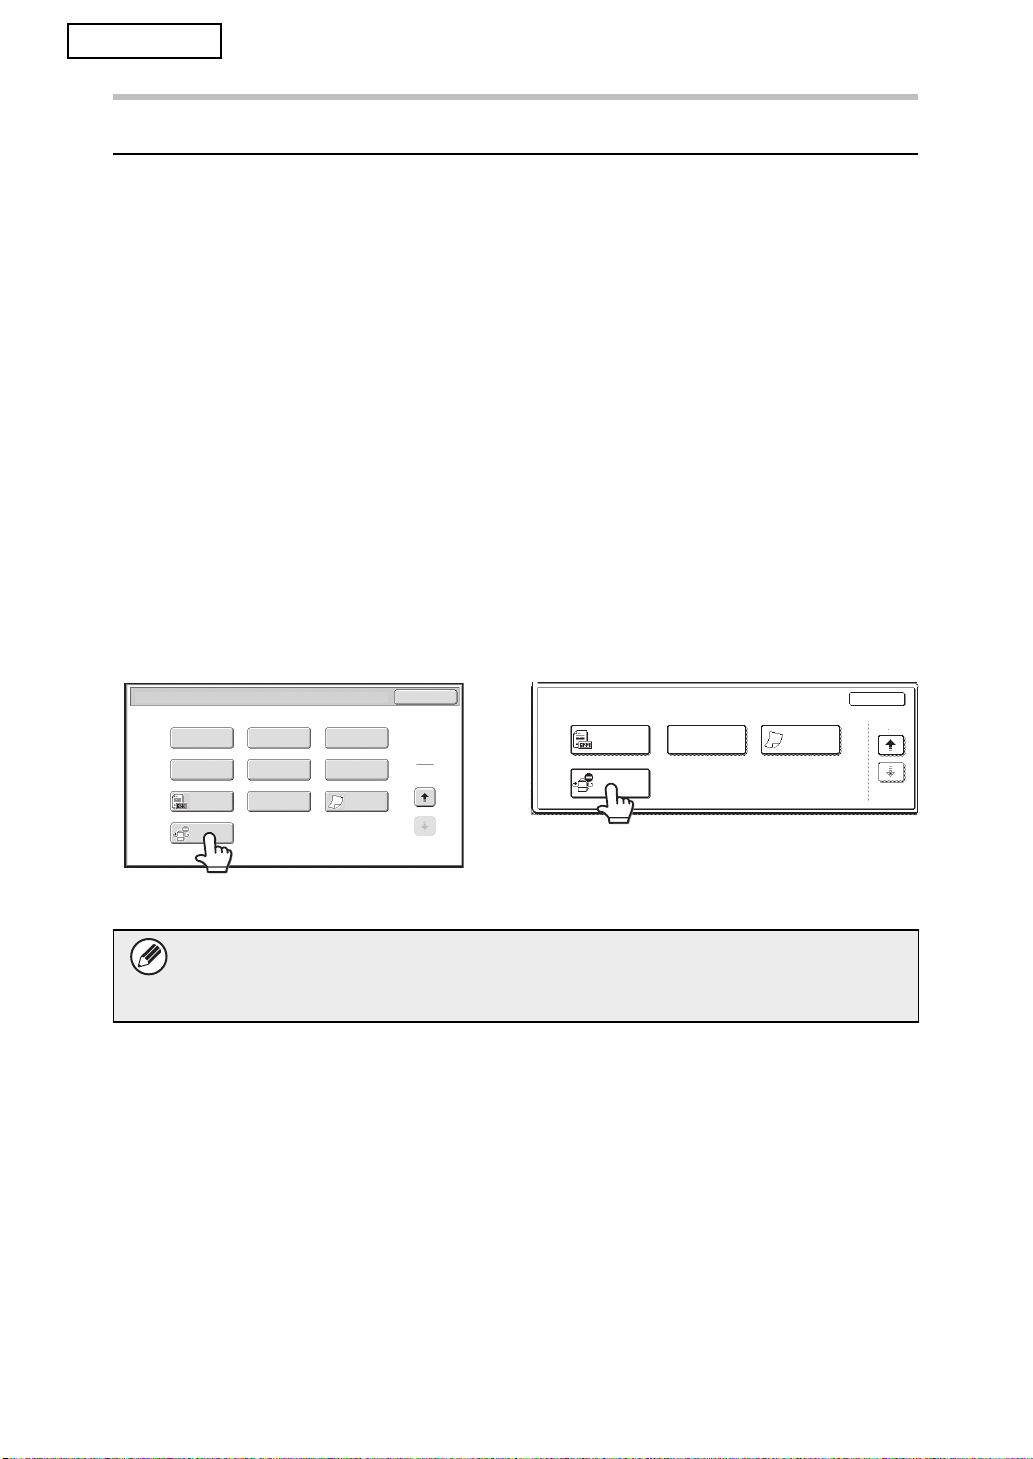
■ Using document control in copy mode
Touch the [Special Modes] key in copy mode and go to the 2nd screen on N models, or
the 4th screen on G models. (See "2. COPIER" in the Operation Guide for details.)
Step 1: Touch the [Document Control] key.
Special Modes
Stamp Image Edit
Quick File
Count
Mixed Size
Original
Original
Document
Control
Color
Adjustments
File Proof Copy
Slow Scan
Mode
OK
2
2
Special Modes
Original
Document
Control
Count
Mixed Size
Original
Slow Scan
Mode
The display of the [Document Control] key and the steps that follow vary
depending on the settings configured for the document control function in the
system settings.
OK
4/4
26
Page 29
ENGLISH
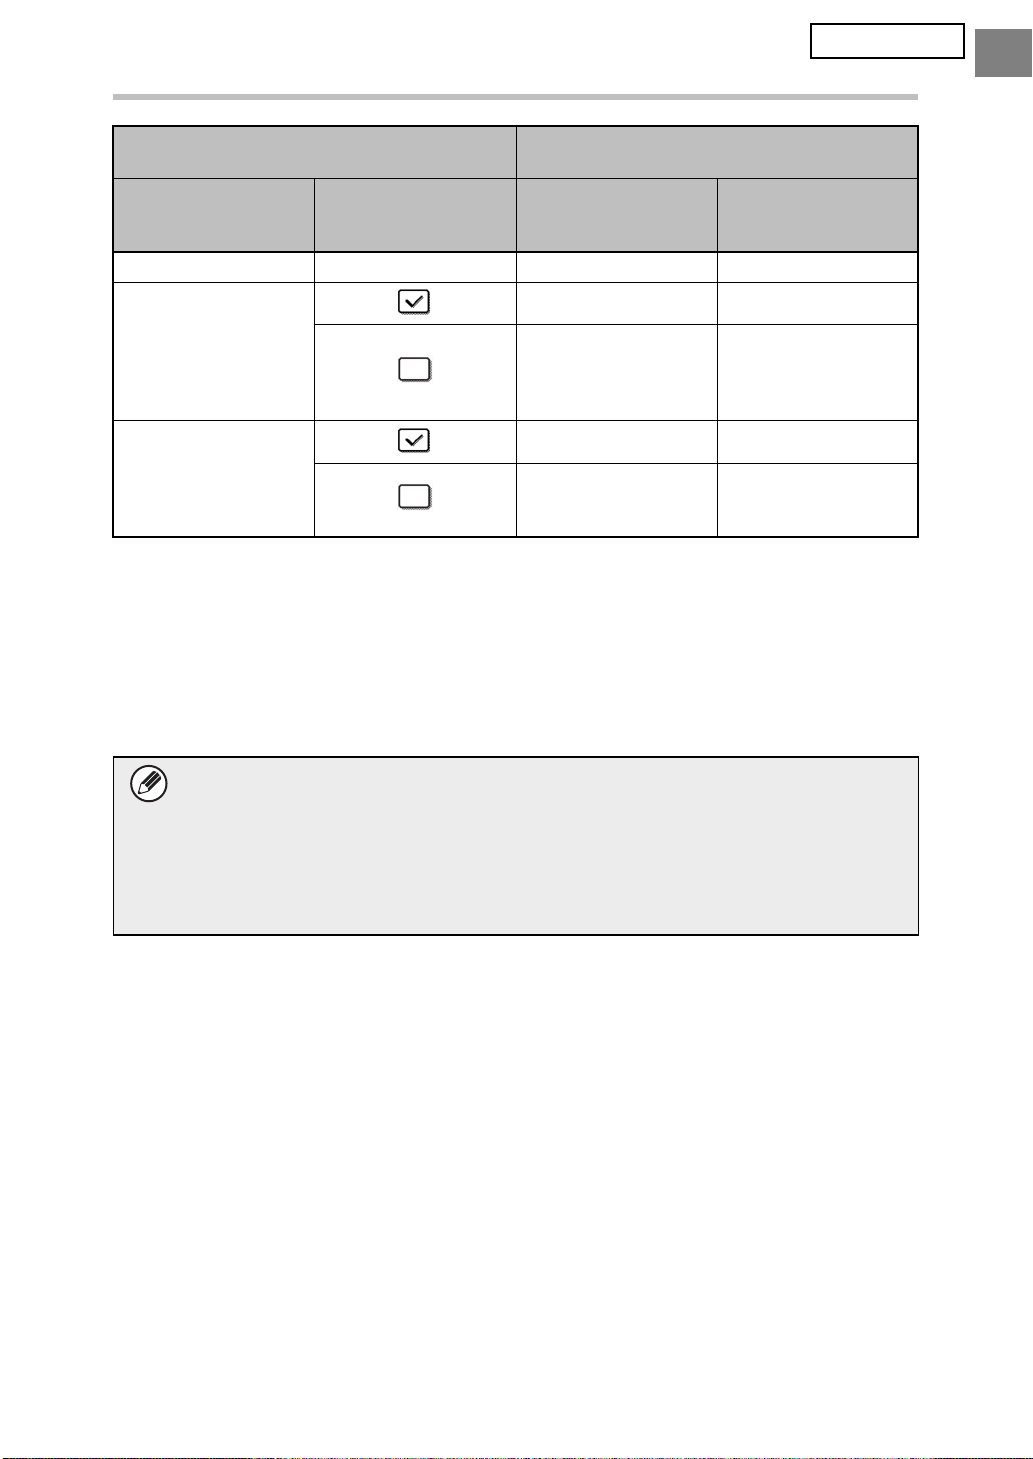
Document Control Setting
Settings for the document control
function in the system settings.
Document Control
Print Select
(Copy) setting
[Not Printing] - Grayed out Not available
[Always Print] Highlighted Go to step 2
[Allow User to Select] Normal display Go to step 2
State of the Print Color
Settings (copy)
checkbox
[Document Control]
key display
Highlighted When the key is
Normal display When touched, the key
Special Modes screen
Following steps
touched, a beep
sounds to indicate that
the key is not available.
is highlighted and the
function is enabled.
Step 2: Touch the [Bk(Black)] key, [C(Cyan)] key or [Y(Yellow)] key.
The key of the color set in the print color setting of the system settings is initially highlighted.
After touching one of the keys, touch the lower [OK] key to return to the special modes
menu screen.
Step 3:
Select settings as desired from the special modes menu screen and then press
the [COLOR START] key or the [BLACK & WHITE START] key.
● If either the [C(Cyan)] key or the [Y(Yellow)] key is touched in step 2, the
[BLACK & WHITE START] key cannot be pressed.
When the color mode is set to any mode other than full color, the [COLOR
START] key cannot be pressed.
● When the color mode is single color, document control pattern printing is not
possible.
27
Page 30
ENGLISH
Document Control Setting
Combining the document control function with other functions
Function
combined with
document control
Exposure The pattern is always printed at the same exposure regardless of the exposure
setting.
Copy Ratio The pattern is always printed at the same ratio regardless of the ratio setting.
Duplex The pattern is printed on the back side as well as the front side when 2-sided
copy is performed. (The orientation of the original, tablet or book, is not taken
into account.)
Rotation Copy
setting
Margin Shift The position of the pattern does not change when margin shift is used. (The
Erase The pattern is printed normally on the edge or center that is erased.
Dual Page Copy Printing of the pattern takes place based on the paper, and thus the pattern is
Pamphlet Copy Printed based on the paper used for pamphlet copy.
Job Build The pattern is printed normally.
Tandem Copy The pattern is printed normally on both the master machine and the slave
Covers/Inserts The pattern is printed normally when copying on covers and inserts. When a
Transparency
Inserts
2in1/4in1 Printed based on the paper. When 2in1 is selected, 2 original pages are printed
Book Copy When book copy is performed, the pattern is printed based on the paper.
Tab Co py The position of the pattern does not change when tab copy is performed. (The
Card Shot The pattern is printed once each time the front side and the back side of the
Stamp If the pattern and the stamp item overlap, the pattern is given priority.
Photo Repeat The pattern is printed once for one scan of a photo.
Multi-Page
Enlargement
Mirror Image The pattern is printed in the normal orientation without being inverted.
A3 Full Bleed The printed area of the pattern is enlarged to match the A3 Full Bleed setting.
Centering The pattern is printed normally.
B/W Reverse Patterns are printed normally without black/white inversion.
Other functions The pattern is printed normally when RGB Adjust, Sharpness, Suppress
The pattern does not change when rotation copy is used. (The orientation of
the pattern depends on the orientation of the paper in the tray.)
margin width does not affect the position of the pattern.)
printed on both pages, each of which is half the size of the original.
machine. (If the slave machine does not have the data security kit installed,
tandem copy cannot be used.)
cover or insert is not copied on, the pattern is not printed.
The pattern is printed normally. (When an insert is copied on, the pattern is
printed in the same way as on a transparency.)
on 1 sheet of paper. The pattern is printed normally on the sheet of paper even
when 2in1 or 4in1 printing is performed.
image shift width for tab copy does not affect the position of the pattern.)
Copying speed becomes slower when copying on tab papers using the
document control function.
original are scanned.
The pattern is printed on each page of the multi-page enlargement.
Background, Color Balance, Brightness and/or Intensity settings are used.
Operation of document control pattern printing
28
Page 31

ENGLISH
Document Control Setting
■ Using the document control function in printer mode
● When [Always Print] is enabled in [Document Control Print Select] in the system
settings, a document control pattern is always printed.
●
If [Allow User to Select] is enabled, follow the procedure below to print a document control
pattern.
Step 1: Select the [Data Security Kit] checkbox in the initial settings screen
(properties screen) of the printer driver.
See the Software Setup Guide for detailed information on the initial settings of the printer driver.
Step 2: Before executing printing, click the [Advanced] tab of the printer driver
properties window and click the [Document Control] button.
See "3. Printer" in the Operation Guide for detailed information on printing.
Step 3: Select the [Document Control] checkbox and select [Black], [Cyan], or
[Yellow] from [Print Color].
■ Using the document control function in document filing mode
After a file has been stored by document filing using the settings configured in
"Document Control Setting" in the system settings, follow the steps below to print a
document control pattern. (For information on using files stored by document filing, see
"USING STORED FILES" in "6. DOCUMENT FILING" in the Operation Guide.)
Document Control Print Select
When [Allow User to Select] is selected, the [Document Control] key can be touched to
select whether or not a document control pattern is printed. However, if the [Always Add
the Pattern if You Print with it at Stored] checkbox is selected, document control pattern
printing cannot be canceled regardless of whether [Allow User to Select] is selected or not.
Step 1: Touch the [Special Modes] key in the print settings screen, and touch the
[Document Control] key.
Special Modes
Edge
Job
Build
Original
Count
Dual Page
Scan
Mixed Size
Original
Document
Control
Card Shot
Slow Scan
Mode
OK
Special Modes
Original
Count
Document
Control
If "Not Printing" is selected in "Document Control Print Select" in the system settings,
the [Document Control] key is grayed out to prevent selection. (However, for files that
had document control patterns printed when the files were saved, the [Document
Control] key can be touched if the [Always Add the Pattern if You Print with it at
Stored] checkbox has been selected in the system settings.)
OK
2/2
29
Page 32

ENGLISH
Document Control Setting
Step 2: If the [Allow User to Select the Print Color] checkbox is selected in [Document
Control Print Select] in the system settings, touch the [Bk (Black)] key, the [C
(Cyan)] key or the [Y (Yellow)] key.
The key of the color selected in [Print Color Setting] in the system settings is initially
selected. However, if the color mode of the stored file is set to a mode other than full color,
[Bk(Black)] will be selected and it will not be possible to change the setting to [C(Cyan)] or
[Y(Yellow)].
After touching one of the keys, touch the upper [OK] key.
Step 3: Touch the [Print and Delete the Data] key or the [Print and Save the Data] key.
■ Using the document control function in Internet Fax Receive/
Fax Receive/List Print modes
No special operation is required. When printing takes place, a black and white document
control pattern is embedded according to the document control function settings in the
system settings.
■ Body text commands for E-mail Direct Print
The command below can be entered in the body text of a direct print e-mail to specify
whether or not a document control pattern is to be printed.
Function Command name Value Entry example
Pattern printing
ON/OFF
DOCUMENTCONTROL ON
OFF
Warning
This is a Class A product. In a domestic
environment this product may cause
radio interference in which case the
user may be required to take adequate
measures.
DOCUMENTCONTROL=ON
30
Page 33

ESPAÑOL
Garantía
Aunque el presente documento se ha elaborado con gran esmero y con la mayor precisión
posible, SHARP Corporation no ofrece ninguna garantía de ningún tipo en relación con su
contenido. Toda la información aquí contenida está sujeta a modificaciones sin previo aviso.
SHARP no se responsabiliza de ninguna pérdida o daño, directo o indirecto, que se pueda
derivar del uso del presente manual de instrucciones o que esté relacionado con el mismo.
© Copyright SHARP Corporation 2008. Todos los derechos reservados. Queda prohibida
toda reproducción, adaptación o traducción sin el consentimiento previo y por escrito, a
excepción de los permisos que pueda conceder la legislación de propiedad intelectual.
Nota:
●
"Configuraciones del sistema (Administrador)" en este manual hace referencia a la
configuración del sistema que requiere un inicio de sesión con derechos de administrador, y
"Configuraciones del sistema (General)" hace referencia a la configuración del sistema que
puede definir cualquier usuario (incluido el administrador).
● En este manual, los modelos G y N hacen referencia a los siguientes modelos:
Modelos G: MX-2600G, MX-3100G
Modelos N: MX-2600N, MX-3100N
Cuando aparecen pantallas en este manual, las pantallas de los modelos N aparecen a
la izquierda y las pantallas de los modelos G aparecen a la derecha.
Iconos utilizados en los manuales
Los iconos del presente manual remiten a los siguientes tipos de información:
Proporciona una explicación adicional de una función o procedimiento.
Explica cómo cancelar o corregir una operación.
Las pantallas, mensajes y nombres de teclas mostrados en el manual pueden diferir de los
que aparecen en la máquina adquirida debido a mejoras y modificaciones en el producto.
Contenido
Introducción...........................................................................................................................2
Si el kit de seguridad de datos está instalado.......................................................................4
● Configuración del sistema del kit de seguridad de datos ................................................4
● Función de control de documentos .................................................................................4
● Archivo de Documentos ..................................................................................................4
● Pantalla de registro del grupo de autoridad.....................................................................5
● Protección de las contraseñas ........................................................................................6
● Restricciones en la copia en tándem y la impresión en tándem .....................................7
● Configuración de seguridad en las páginas Web............................................................8
● Transferir datos copiados ................................................................................................8
Configuraciones del sistema .................................................................................................9
● Utilizar Configuraciones del sistema (Administrador)......................................................9
● Configuraciones del sistema de seguridad .....................................................................9
● Ajustes de pantalla de la lista estado de trabajos terminados ......................................17
● Configurar Visualización Estado Trabajo ....................................................................... 18
● Desbloquee operación de archivo/carpeta ....................................................................18
● Clave de Producto .........................................................................................................18
Ajuste de control de documentos........................................................................................19
● Control de documentos .................................................................................................19
● Modos que permiten la función de control de documentos...........................................20
● Habilitar la función de control de documentos...............................................................20
● Utilizar la función de control de documentos.................................................................26
1
Page 34

ESPAÑOL
Introducción
La unidad MX-FR10U incorpora una función de seguridad en el sistema multifuncional
digital color de SHARP.
Cuando se emplea la función de copiadora, de impresora, de escáner de red o de fax de un
sistema multifuncional digital
generados para el trabajo se cifran y, una vez finalizado el trabajo, los datos cifrados se borran
inmediatamente de la memoria y del disco duro.
■ Nota:
Para garantizar que la función de seguridad de datos de la máquina ofrece la máxima
seguridad, siga las indicaciones descritas a continuación:
● El administrador desempeña una función importante en el mantenimiento de la
seguridad. Seleccione con cuidado a la persona que desempeñará la función de
administrador.
● Cambie la contraseña del administrador sin falta cada vez que nombre a un nuevo
administrador.
● Cambie la
● No seleccione una
● La configuración del sistema (administrador) es fundamental para la administración
de la seguridad. Si se aleja de la máquina tras haber accedido a la configuración del
sistema (administrador), no olvide pulsar la tecla [Cerrar sesión] para salir de la
configuración del sistema (administrador). El administrador de la máquina debería
informar a los usuarios de que no deben acceder a la configuración del sistema
(administrador) sin permiso.
● El cliente será el único responsable de controlar las copias de documentos realizadas
en la máquina y los faxes recibidos.
● Aunque esté instalado el kit de seguridad de datos, observe que los datos de fax del
buzón de memoria de polling utilizados por la
contraseña
color
de SHARP con la función de seguridad, los datos de imagen
del administrador regularmente (como mínimo cada 60 días).
contraseña
de administrador que pueda adivinarse fácilmente.
función
de fax pueden leerse.
2
Page 35

ESPAÑOL
■ Realizar una copia de seguridad y borrar los datos
almacenados con la función de archivo de documentos
Si el kit de seguridad de datos está instalado, los datos almacenados anteriormente en
la máquina con la función de archivo de documentos se borran. Por este motivo,
cualquier dato que necesite guardar se almacena en un ordenador antes de que se
instale el kit de seguridad de datos y, posteriormente, se copia de nuevo en la máquina
tras la instalación y borrado de los datos anteriores. (Esta operación suele realizarla un
técnico de servicio en el momento de la instalación del kit de seguridad de datos.)
Sólo se pueden utilizar las carpetas confidenciales para devolver datos desde un
ordenador a la máquina tras la instalación del kit de seguridad de datos. Antes de copiar
los datos de un ordenador a la máquina, cree carpetas confidenciales en caso
necesario. Para conocer el procedimiento de almacenamiento de datos en un ordenador
y la devolución de datos desde un ordenador a la máquina, consulte la ayuda sobre el
archivo de documentos en las páginas Web de la máquina.
■ Acerca de las contraseñas para la página Web
Si introduce una contraseña incorrecta de "users" o "admin" tres veces consecutivas al
intentar acceder a las páginas Web de una máquina que tiene instalado el kit de
seguridad de datos, el acceso a las páginas que requieran la introducción de una
contraseña de "users" o "admin" quedará prohibido durante 5 minutos.
Algunos de los procedimientos para utilizar la máquina cambian cuando está
instalado el kit de seguridad de datos. En los manuales de la máquina
( "MANUALES DE FUNCIONAMIENTO Y CÓMO CONSULTARLOS" de la
☞
Guía de inicio rápido) se describen los procedimientos de utilización de la
máquina cuando no hay instalado ningún kit de seguridad de datos. En este
manual se describen los cambios en los procedimientos cuando el kit de
seguridad de datos está instalado.
3
Page 36

Si el kit de seguridad de datos
1
Si el kit de seguridad de datos está instalado, se mostrará el siguiente icono en el
panel táctil. Pulse el icono ( ) para ver la información sobre la versión del kit de
seguridad de datos.
Si el kit de seguridad de datos está instalado, los datos presentes en la máquina se
borran automáticamente tras cada trabajo.
Cuando comienza el borrado de los datos, aparece el siguiente mensaje durante 6
segundos
* La duración del mensaje mostrado en pantalla puede modificarse mediante la opción
"Configuración de La Duración del Mensaje" de la configuración del sistema
(administrador).
(Modelos N: ➞ Configuraciones del sistema (Administrador) > "Configuración de
Operaciones" > "Otras Configuraciones" > "Configuración de La Duración del
Mensaje" Modelos G: ➞ Configuraciones del sistema (Administrador) >
"Configuración de Operaciones" > "Configuración de La Duración del Mensaje")
está instalado
*
.
Los datos se están borrando
Si la máquina se desconecta mientras se borran los datos de imagen de la
unidad de disco duro o antes de que se finalice un trabajo, los datos no se
borrarán por completo. Si no desea que los datos queden parcialmente
borrados cuando se desconecta la alimentación, se recomienda utilizar el
programa "Borrar Toda La Memoria" (página 11 de este manual) para completar
el borrado de datos antes de desconectar la alimentación.
Configuración del sistema del kit de seguridad de datos
Cuando el kit de seguridad de datos está instalado, pueden definirse opciones adicionales
para aumentar la seguridad en la configuración del sistema (administrador) de la máquina.
Consulte "Configuraciones del sistema" (página 9 de este manual) para obtener más detalles.
Función de control de documentos
La función de control de documentos se utiliza para insertar un patrón de control de
documentos en el papel cuando se imprimen trabajos de impresión, copias y faxes recibidos.
El patrón de control de documentos incrustado evita que se realicen copias adicionales, envíos
por fax y otras operaciones a partir de un documento impreso. Para obtener información
adicional, consulte "Ajuste de control de documentos" (página 19 del presente manual).
Archivo de Documentos
Para utilizar la función de archivo de documentos para guardar trabajos en la máquina cuando
está instalado el kit de seguridad de datos, defina la propiedad del archivo en "Confidencial".
Los archivos que tienen las propiedades "Compartiendo" o "Proteger" definidas no pueden
guardarse. Además, para imprimir desde un ordenador utilizando la función de retención,
deberá introducir una contraseña en la configuración del controlador de impresora (cuando
se aplique la configuración predeterminada de fábrica).
4
Page 37

ESPAÑOL
Si el kit de seguridad de datos está instalado
Pantalla de registro del grupo de autoridad
Cuando se instala el juego de seguridad de datos, se agrega la opción [Seguridad] a la pantalla
de menú "Reg. de grupo de autoridad" en las configuraciones del sistema (administrador). En
los modelos N, esta pantalla se exhibe seleccionando "Control de Usuario" > "Lista de grupo de
autor". En los modelos G, esta pantalla se exhibe seleccionando "Control de usuario" > "Reg. de
grupo de autoridad".
Cuando se selecciona esta opción, aparece la siguiente pantalla para configurar elementos.
Configuraciones del sistema
Seguridad
Nombre de Grupo: Invitado
Imprimir Trabajos que no sean Espera de Trabajo
de Impresión :
Configuración de la Aprobación del Archivo de Documentos :
Copia
Impresora
Escanear a disco duro
Env. Imágen
Modo de Archivo Rápido
Permitido
Modo Compartido
Cancelar
OK
Modo Confidencial
Configuración de la Aprobación del Archivo de Documentos
No.01 group01
Configuración de la Aprobación
del Archivo de Documentos
Aprobar la op. Impr. Trab. en lugar
de la op. de Impr. Trab. en Espera
OK
Modelos N
● Imprimir Trabajos que no sean Espera
de Trabajo de Impresión
Si se selecciona [Permitido] y se
pulsa la tecla [OK], todos los trabajos
de impresión excepto los trabajos en
espera están permitidos en el registro
del grupo de autoridad cuando se
habilite la autenticación de usuario.
● Configuración de la Aprobación del
Archivo de Documentos
Cuando almacene un grupo de
autoridad para la autenticación de
usuario, pulse esta tecla para
seleccionar si desea permitir el archivo
de documentos en los diferentes
modos de archivo y tipos de trabajo.
Para habilitar un modo de archivo,
pulse la casilla de verificación del
modo para activarla.
Una vez activadas las casillas de
verificación deseadas, pulse la tecla
[OK]. checkbox of the mode to select it.
After selecting the desired
checkboxes, touch the [OK] key.
Modelos G
● Tecla [Configuración de la Aprobación
del Archivo de Documentos]
Cuando almacene un grupo de
autoridad para la autenticación de
usuario, pulse esta tecla para
seleccionar si desea permitir el
archivo de documentos en los
diferentes modos de archivo y tipos
de trabajo.
● Casilla de verificación [Aprobar la op.
Impr. Trab. en lugar de la op. de Impr.
Trab. en Espera]
Cuando almacene un grupo de
autoridad para la autenticación de
usuario, active esta casilla de
verificación para permitir la
impresión de trabajos, excepto los
trabajos en espera.
El archivo de documentos deberá permitirse en las siguientes opciones de configuración.
De manera predeterminada, el archivo de documentos sólo está permitido en el
modo confidencial.
● Permitir archivo de documentos en el registro del grupo de autoridad (esta
opción de configuración)
● Desactivar el archivo de documentos en la configuración del sistema (página
16 del presente manual)
5
Page 38

ESPAÑOL
Si el kit de seguridad de datos está instalado
Protección de las contraseñas
Cuando el kit de seguridad de datos está instalado, las contraseñas introducidas desde el
panel de control de la máquina o las páginas Web pueden protegerse.
■ Contraseña de Administrador/Contraseña de Usuario
Cuando el kit de seguridad de datos está instalado, la introducción de la contraseña se
bloquea durante 5 minutos si se ha introducido 3 veces consecutivas una contraseña de
administrador incorrecta si la función de autenticación de usuario no está habilitada, o si
se ha introducido 3 veces consecutivas una contraseña de usuario incorrecta si la
función de autenticación de usuario está habilitada.
■ Carpetas confidenciales y archivos confidenciales de la
función de archivo de documentos
Si se introduce una contraseña incorrecta 3 veces consecutivas para una carpeta o archivo
confidencial específico, dicha carpeta o archivo se bloquean. Para desbloquear la carpeta
o el archivo, utilice "Desbloquee operación de archivo/carpeta" (página 18 de este manual).
●
Todos los archivos con el mismo nombre de usuario y contraseña pueden
imprimirse a la vez utilizando la opción Impr. lote incluida en la función de archivo
de documentos ( Guía de funcionamiento "IMPRESIÓN POR LOTES" en la
"6. ARCHIVO DE DOCUMENTOS").
Los archivos cuya contraseña difiere de la contraseña introducida en el momento
de la búsqueda se considerarán como archivos para los que se ha introducido
una contraseña incorrecta. Por este motivo, se recomienda no realizar búsquedas
con [Tod Usuarios] y [Usuario descon.] en la medida de lo posible.
● Cuando se prohíbe el uso de un archivo, se aplicarán las siguientes
condiciones cuando se utilice la función de archivo de documentos:
● Cuando se realiza una impresión por lotes, no se imprimirán los archivos
prohibidos, aunque cumplan los criterios de la búsqueda.
☞
■ Pantalla de búsqueda de archivos de la función de archivo de
documentos
Cuando está instalado el kit de seguridad de datos, no se muestra la opción de
introducción de la contraseña en la pantalla de búsqueda de archivo de documentos.
■ Codificar PDF
Cuando un trabajo se imprime mediante la impresión directa de PDF cifrado (si está
instalado el kit de expansión PS3), el trabajo aparecerá en la cola de impresión de la pantalla
de estado de trabajos y deberá introducirse una contraseña para iniciar la impresión.
Si se introduce una contraseña incorrecta 3 veces consecutivas cuando el kit de seguridad
de datos está instalado, se mostrará el mensaje "La operación está desactivada. Contacte
con su administrador." durante 6 segundos y la impresión se bloqueará.
Si se ha introducido una contraseña incorrecta de un archivo 3 veces y se pulsa sobre
ese archivo en la pantalla de la cola de trabajos, aparecerá la siguiente pantalla.
●Pulse el botón [Sí] para eliminar el trabajo
La impresión de este trabajo está
desactivada.
¿Borrar el trabajo?
No Sí
Para desbloquear el archivo de impresión, utilice "Desbloquee operación de archivo/
carpeta" (página 18 de este manual).
de impresión.
●Pulse el botón [No] para cancelar la
eliminación del trabajo.
6
Page 39

ESPAÑOL
Si el kit de seguridad de datos está instalado
■ Impresión Pull de FTP
Cuando se utiliza la función Impresión Pull de FTP para imprimir directamente un
archivo en un servidor FTP, deberá introducirse el "Nombre Usuario" y la "Contraseña"
cuando se seleccione el servidor FTP. Si el kit de seguridad de datos está instalado, la
introducción de datos se bloqueará durante 5 minutos si se introduce un "Nombre
Usuario" o una "Contraseña" incorrecto 3 veces consecutivas.
■ Inicio de sesión cuando la autenticación de usuario está
habilitada
Si la opción "Configuración de Autentificación de Usuario" en la configuración del
sistema (administrador) ( "AUTENTICACIÓN DEL USUARIO" en la Guía de inicio
rápido) está habilitada, se requiere un inicio de sesión en la pantalla de inicio de sesión
para poder utilizar la máquina. Si la opción "Una Advertencia cuando no se Inicia
Sesión" está habilitada en la configuración del sistema (administrador), la máquina se
bloqueará durante 5 minutos si el inicio de sesión falla 3 veces consecutivas.
La opción "Una Advertencia cuando no se Inicia Sesión" está siempre habilitada cuando
está instalado el kit de seguridad de datos.
☞
Restricciones en la copia en tándem y la impresión
en tándem
La copia y la impresión en tándem funcionan según se describe a continuación de acuerdo
con la configuración del equipo principal y el equipo secundario (tanto si está instalado el
kit de seguridad de datos como si no).
■ Copia en tándem
Kit de seguridad de datos: Sí Kit de seguridad de datos: No
Equipo principal
Kit de
seguridad
de datos:
Sí
Kit de
seguridad
de datos:
No
Puede utilizarse la función
tándem. Los datos se borran
en los equipos principal y
secundario.
La función tándem puede
utilizarse. Los datos se borran
del equipo secundario.
■ Impresión en tándem
Kit de seguridad de datos: Sí Kit de seguridad de datos: No
Equipo principal
Kit de
segurida
d de
datos: Sí
Kit de
segurida
d de
datos: No
La función tándem puede
utilizarse. Los datos se borran
en los equipos principal y
secundario.
La función tándem puede
utilizarse. Los datos se borran
del equipo secundario.
Equipo secundario
La función tándem no puede
utilizarse.
Puede utilizarse la función
tándem regular.
Equipo secundario
La función tándem puede
utilizarse.
Los datos se borran del
equipo principal.
La función tándem regular
puede utilizarse.
7
Page 40

ESPAÑOL
Nombre Usuario
Contraseña
OKCancelar
Introducir el nombre de usuario y la contraseña para el servidor FTP.
Si el kit de seguridad de datos está instalado
Configuración de seguridad en las páginas Web
Cuando la máquina se utiliza como una impresora de red y se emplea la función Impresión Pull
de FTP, el kit de seguridad de datos habilita la autenticación de usuario mediante un "Nombre de
Usuario" y una "Contraseña" para el servidor FTP. (La función Impresión Pull de FTP permite
imprimir directamente un archivo de un servidor FTP almacenado previamente desde el panel de
control de la máquina sin utilizar el controlador de impresora; consulte la Guía de funcionamiento
IMPRESIÓN DIRECTA DE UN ARCHIVO DE UN SERVIDOR FTP
"
La autenticación de usuario se habilita activando la casilla de verificación [Habilitar autenticación
de usuario] en la página Web de la máquina para configurar los ajustes de Impresión Pull de
FTP. Esta casilla de verificación aparece cuando el kit de seguridad de datos está instalado, y se
encuentra activada (con una marca de verificación) de manera predeterminada.
Los requisitos del sistema y el procedimiento para acceder a las páginas Web se describen
en "ACCESO AL SERVIDOR WEB DE LA MÁQUINA" en la Guía de inicio rápido.
■
Procedimiento para imprimir directamente un archivo de un
servidor FTP (cuando la autenticación de usuario está habilitada)
Deberá introducir su nombre de usuario y contraseña tras seleccionar el servidor FTP
que contiene el archivo que va a imprimirse desde el panel táctil de la máquina.
Cuando se selecciona el servidor FTP en el paso 2 de "
ARCHIVO DE UN SERVIDOR FTP
" en "3. IMPRESORA" en la Guía de funcionamiento,
aparecerá una pantalla indicando ingresar su nombre de usuario y contraseña para el
servidor FTP.
IMPRESIÓN DIRECTA DE UN
" en "3. IMPRESORA".)
Autenticación del servidor FTP
Introducir el nombre de usuario y la contraseña para el servidor FTP.
Nombre Usuario
Contraseña
Cancelar
OK
Pulse la tecla [Nombre Usuario] para introducir el nombre de usuario y la tecla
[Contraseña] para introducir la contraseña. Aparecerá una pantalla de introducción de
caracteres en cada caso.
Una vez que haya introducido el nombre de usuario/contraseña, pulse la tecla [OK].
Después de ingresar su nombre de usuario contraseña, continúe a partir del paso 3 de
"IMPRESIÓN DIRECTA DE UN ARCHIVO DE UN SERVIDOR FTP" en
"3. IMPRESORA" en la Guía de funcionamiento.
Transferir datos copiados
Cuando el kit de seguridad de datos está instalado y se utilizan las páginas Web para copiar
datos almacenados mediante la función de archivo de documentos en un equipo, los datos
copiados sólo podrán transferirse de nuevo a la máquina original desde la que se han copiado.
Los datos no pueden transferirse a otra máquina, aunque las condiciones de la máquina
sean idénticas.
La tecla [Restaurar desde el PC] sólo aparecerá en la página Web y la transferencia de datos
de vuelta a la máquina sólo será posible cuando se seleccione una carpeta confidencial.
8
Page 41

Configuraciones del sistema
2
En esta sección se describe la configuración del sistema relacionada con la función de
seguridad.
En las siguientes explicaciones se presupone que la máquina dispone de las
funciones de impresora, fax y escáner de red.
Utilizar Configuraciones del sistema (Administrador)
Siga el procedimiento en "CONFIGURACIONES DEL SISTEMA (ADMINISTRADOR)" en
"
7. CONFIGURACIONES DEL SISTEMA" de la Guía de funcionamiento para configurar los
ajustes en las configuraciones del sistema (administrador).
Para obtener una descripción de cada una de las opciones, consulte las páginas siguientes.
Si se introduce una contraseña de administrador incorrecta 3 veces consecutivas
en una máquina con el kit de seguridad de datos instalado, la introducción de la
contraseña del administrador se bloqueará durante 5 minutos.
Configuraciones del sistema de seguridad
Cuando el kit de seguridad de datos está instalado, se añaden opciones relativas a la
seguridad (excepto [Ajustes SSL]) cuando se pulsa la tecla [Configuración de Seguridad].
Opción
Borrar Toda La Memoria
Borrar Datos del Archivo de
Documento
Borrar todos datos de lista trab.
term.
Borrar libreta de direc. y datos
regist.
Borrado Automático Al Encender
● Número de veces que se repite el
borrado de datos
● No. veces que repite programa
de borrado autom. al encender
● N. veces que repite borrado
autom. al finalizar trabajo
Desactivar el archivo de
documentos
Desactivar la impresión de listados 16
Desactivar trabajos de impresión
que distintos a la impresión en
espera
*1
*1
*1
*1
*1
*1
*1
*1
Página
11
12
12
13
14
15
15
15
16
17
Explicación
Seleccione las opciones de borrado
de datos y el número de veces que
se borrarán los datos. Utilice esta
opción para borrar manualmente los
datos almacenados en cada área de
la memoria y disco duro de la
máquina.
Defina los elementos que desea
deshabilitar. Utilice esta opción para
deshabilitar operaciones específicas
e impedir la impresión de datos de
documentos confidenciales.
9
Page 42

ESPAÑOL
Configuraciones del sistema
Opción
Ajustes de pantalla de la lista
estado de trabajos terminados
Página
Explicación
17 Utilice esta opción para
seleccionar si la pantalla de
trabajos con estado completado se
muestra.
Configurar Visualización Estado
Trabajo
18 Utilice esta opción para
seleccionar si desea que se
muestren o no los nombres de
archivo de los trabajos de
impresión y los nombres de
destino de los trabajos de envío de
imágenes en la pantalla de estado
de trabajos.
Desbloquee operación de archivo/
carpeta
Clave de Producto
*1
Si la autenticación de usuario está habilitada, un usuario no puede configurar este
*2
18 Utilice esta opción para
desbloquear archivos y carpetas.
18 Registre la clave de producto.
ajuste aunque el grupo de autoridad permita al usuario definir la configuración de
seguridad.
(Esta operación sólo puede realizarla un administrador.)
*2
Esta opción no aparecerá cuando se introduzca la clave del producto y la función de
seguridad esté habilitada.
Configuraciones del sistema
Configuración de Seguridad
Ajustes SSL
Ajustes IPsec
Configuración de IEEE802.1X
Ajustes de borrado de datos
Activar/Desactivar Configuraciones
Ajustes de Pant. de lista trab. termin.
Atrás
Configuraciones del sistema
Configuración de Seguridad
Ajustes SSL
Ajustes IPsec
Configuración de IEEE802.1X
El menú de configuración de seguridad
consta de varias pantallas.
Pulse la tecla en la esquina inferior
derecha de la pantalla para desplazarse
a la siguiente pantalla.
Atrás
1/6
10
● Las opciones de configuración del sistema anteriores también puede definirse
en la página Web de la máquina. Sin embargo, la clave del producto para el kit
de seguridad de datos no puede introducirse en la página Web. Utilice el
panel táctil de la máquina para introducir la clave del producto.
● Si el kit de seguridad de datos está instalado, la opción "Configuración
dirección IP" no aparecerá en la configuración del sistema.
Page 43

ESPAÑOL
Configuraciones del sistema
■ Borrar Toda La Memoria
Este programa se utiliza para borrar manualmente todos los datos de la memoria y del
disco duro de la máquina.
No obstante, observe que los siguientes tipos de datos no se borran con este ajuste.
Utilice "Borrar libreta de direc. y datos regist." (página 13 de este manual) para borrar
los siguientes tipos de datos.
● Información del Usuario
● Buzón de Emisión Relé/Individual/Grupo/Programa
● Memoria Polling/Buzón Confidencial
● Datos del Remitente
● Permitir/rechazar recepción de datos de ajuste (incluyendo el número del código de
*
acceso de solicitud de impresora)
● Reenvío de información
*
Los datos de imagen almacenados en el buzón de memoria se borran mediante
"Borrar Toda La Memoria".
En el caso de que el kit de seguridad de datos o la máquina en la que está
instalado el kit de seguridad de datos se venda o cambie de propietario, el
administrador deberá encargarse de ejecutar esta función. Cuando ejecute la
función, el administrador no debería abandonar la máquina hasta haber
comprobado que la eliminación de datos ha finalizado.
Al pulsar la tecla [Borrar Toda La Memoria], se mostrará la siguiente pantalla de
confirmación.
*
/Reenvío de información
[Pantalla de borrado 1]
Se mostrará el mensaje de confirmación "Borrar toda la memoria. (Excepto el libro de
direcciones / información de usuario)".
● Para volver a la pantalla de menú anterior, seleccione la opción [No].
● Para borrar toda la memoria, pulse la tecla [Sí]. Aparecerá el mensaje "Espere por favor."
y, a continuación, se mostrará la siguiente pantalla.
Si hay un trabajo de impresión en curso cuando se ejecuta "Borrar Toda La
Memoria", el trabajo de impresión se cancelará. Los trabajos de impresión en
curso y en la cola de trabajos también se borrarán.
[Pantalla de borrado 2]
Borrando toda la mem oria.
(50.0%) (1/1 tiempo)
100%50%0%
Cancel ar
● El progreso de la operación de borrado se
mostrará mediante un porcentaje junto con el
número de repeticiones.
● Una vez finalizada la operación de borrado,
aparecerá la siguiente pantalla de
confirmación.
Si desea cancelar el borrado de datos...
Pulse la tecla [Cancelar]. Aparecerá la pantalla de introducción de la contraseña
del administrador. Introduzca la contraseña del administrador. El borrado de
datos se detendrá en cuanto se introduzca la contraseña correcta y la máquina
se reiniciará automáticamente.
Observe que los datos que se hayan borrado antes de introducir la contraseña
no podrán restaurarse.
11
Page 44

ESPAÑOL
Configuraciones del sistema
[Pantalla de borrado 3]
Se ha borrado toda la m emori a .
Se reiniciará el equipo.
OK
Pulse la tecla [OK] para reiniciar la máquina.
■ Borrar Datos del Archivo de Documento
Esta función se utiliza para borrar datos almacenados mediante la función de archivo de
documentos.
Los datos cuyas propiedades se han definido en "Proteger" o "Confidencial" también se borran.
Configuraciones del sistema
Borrar Datos del Archivo de Documento
Seleccionar los datos que se van a borrar y pulsar [Clear]
Datos de archivo (incluyendo archivos protegidos/confidenciales)
Datos de archivo rápido(incluyendo los archivos protegidos)
●
Casilla de verificación [Datos de archivo (incluyendo archivos protegidos/confidenciales)]:
Borrar
Atrás
Active esta casilla de verificación para borrar todos los archivos almacenados
utilizando "Archivo" en la carpeta principal y en las carpetas personalizadas.
●
Casilla de verificación [Datos de archivo rápido (incluyendo los archivos protegidos)]:
Active esta casilla de verificación para borrar todos los archivos almacenados
mediante "Archivo Rápido".
Paso 1: Pulse la tecla [Borrar].
Aparecerá un mensaje de confirmación solicitándole que seleccione "Sí" o "No".
Paso 2: Pulse la tecla [Sí].
Los datos seleccionados se borrarán.
(La operación efectuada durante el borrado coincide con la que se realiza al "Borrar
Toda La Memoria" (página 11 del presente manual).)
Configuraciones del sistema
Borrar Datos Archivo de Documentos
Seleccionar los datos que se van a borrar y pulsar [Clear]
Datos de archivo (incluyendo archivos
protegidos/confidenciales)
Datos de archivo rápido
(incluyendo los archivos protegidos)
OK
Borrar
■
Borrar todos datos de lista trab. term.
Utilice esta opción cuando desee borrar todos los datos de los elementos siguientes,
que aparecen en la pantalla de trabajos con estado completado. (La pantalla de trabajos
con estado completado se muestra cuando se pulsa la tecla [Completo] (tecla selectora
de la pantalla de estado de los trabajos) de la pantalla de estado de los trabajos.)
● Nombres de usuario de la impresora
● Destinos de envío de imágenes
● Remitentes de los faxes recibidos
Paso 1: Pulse la tecla [Borrar todos datos de lista trab. term.].
Aparecerá un mensaje de confirmación indicándole que seleccione "Sí" o "No".
Paso 2: Pulse la tecla [Sí].
Aparecerá un mensaje de confirmación solicitándole que seleccione " Sí" o "No".
(La operación efectuada durante el borrado coincide con la que se realiza al "Borrar
Toda La Memoria" (página 11 del presente manual). Sin embargo, no es posible
cancelarla una vez iniciada.)
12
Page 45

ESPAÑOL
Configuraciones del sistema
■ Borrar libreta de direc. y datos regist.
Esta función se utiliza para borrar los elementos indicados a continuación, que no
pueden borrarse o inicializarse mediante "Borrar Toda La Memoria" (página 11 de este
manual) o "Restaurar Valores Predeterminados de Fábrica" (
sistema (Administrador) > "Retención/Llamada de Conf. del Sist." > "Restaurar Valores
Predeterminados de Fábrica").
Configuraciones del sistema
Borrar libreta de direc. y datos regist.
Seleccionar los datos que se van a borrar y pulsar [Clear]
Información del Usuario
Buzón de Emisión Relé Individual/Grupo/Programa
Memoria Polling/Buzón Confidencial
Datos del Remitente
Permitir/rechazar recepción de datos de ajuste (incluyendo el número del código de
acceso de solicitud de impresora)
Reenvío de información
AtrásBorrar
Configuraciones del sistema
Borrar libreta de direc. y datos regist.
Seleccionar los datos que se van a borrar y pulsar [Clear]
Información del Usuario
Buzón de Emisión
Relé/Individual/Grupo/Programa
Memoria Polling/Buzón Confidencial
Pulse la tecla en la esquina inferior
derecha de la pantalla para desplazarse
a la siguiente pantalla.
●Información del Usuario
●Buzón de Emisión Relé/Individual/Grupo/Programa/Reenvío de información
●
Memoria Polling/Buzón Confidencial
●
Datos del Remitente
●Permitir/rechazar recepción de datos de ajuste (incluyendo el número del código de
acceso de solicitud de impresora)
●
Reenvío de información
*1
El nombre puede variar segun las opciones que esten instaladas.
*2
Solamente puede seleccionarse si está habilitada la función de fax.
*3
Puede seleccionarse cuando se está utilizando la función de fax o la función de
*4
*2
*1, *3
Internet Fax. ("incluidos los números de códigos de acceso de polling" se muestra
solamente cuando la función de fax está habilitada.)
*4
Seleccione esta opción si sólo desea borrar la información de reenvío almacenada.
➞ Configuraciones del
*1
OK
Borrar
1/2
Paso 1: Active la casilla de verificación de los elementos que desea borrar.
(En los modelos G, seleccione las opciones según sea necesario para cambiar la
pantalla.)
Paso 2: Pulse la tecla [Borrar].
Aparecerá un mensaje de confirmación solicitándole que seleccione "Sí" o "No".
Paso 3: Pulse la tecla [Sí].
Los datos seleccionados se borrarán.
(La operación efectuada durante el borrado coincide con la que se realiza al "Borrar
Toda La Memoria" (página 11 del presente manual). Sin embargo, no es posible
cancelarla una vez iniciada.)
13
Page 46

ESPAÑOL
Configuraciones del sistema
■ Borrado Automático Al Encender
Esta función se utiliza para borrar automáticamente todos los datos de la máquina cuando
el interruptor de encendido se activa.
Configuraciones del sistema
Borrado Automatico Al Encender
Seleccionar los datos que se borrarán al encender.
Toda La Memoria
Datos de archivo (incluyendo archivos protegidos/confidenciales)
Datos de archivo rápido(incluyendo los archivos protegidos)
Lista de Estado de Trabajos Terminados
Es posible borrar los siguientes tipos de datos:
● "Toda La Memoria"
● "Datos de archivo (incluyendo archivos protegidos/confidenciales)"
● "Datos de archivo rápido (incluyendo los archivos protegidos)"
● "Lista de Estado de Trabajos Terminados"
Seleccione los cuadros de verificación de datos que se borrarán automáticamente
cuando se active el interruptor de alimentación. (En los modelos G, es necesario
seleccionar las opciones para cambiar la pantalla.) Cuando haya terminado de
seleccionar los cuadros de verificación, seleccione la opción [OK].
No hay ninguna casilla de verificación activada de manera predeterminada.
Configuraciones del sistema
OKCancelar
Borrado Automatico Al Encender
Seleccionar los datos que se borrarán al encender.
Toda La Memoria
Datos de archivo (incluyendo archivos
protegidos/confidenciales)
Datos de archivo rápido
(incluyendo los archivos protegidos)
OK
1/2
Pulse la tecla en la esquina inferior
derecha de la pantalla para desplazarse
a la siguiente pantalla.
Si hay un trabajo de envío de imágenes almacenado (fax, escáner de red o
trabajo de fax a través de Internet)
*
, la operación "Borrado Automático Al
Encender" no se efectuará cuando se active la alimentación.
*
Esto incluye faxes recibidos y faxes a través de Internet que todavía no se han
imprimido; no obstante, no incluye los datos del buzón de memoria de fax
(excepto el buzón de memoria confidencial).
Si desea cancelar el borrado de datos...
Consulte las explicaciones del apartado "Pantalla de borrado 2" y "Si desea cancelar
el borrado de datos..." en "Borrar Toda La Memoria" en la página 11 de este manual.
14
Page 47

ESPAÑOL
Configuraciones del sistema
■ Ajustes de tiempo de borrado
Para reforzar la seguridad, puede repetir el borrado de datos un determinado número de
veces en cada área.
Modelos N
Pulse el cuadro de selección de cada elemento e indique el número de veces que
desea que se repita el borrado de datos. Cuando finalice, pulse la tecla [OK].
Modelos G
Seleccione la opción, y ajuste el número deseado de veces con la opción o .
Configuraciones del sistema
Ajustes de tiempo de borrado
Número de veces que se repite el borrado de datos:
No. veces que repite programa de borrado autom. al
encender:
N. veces que repite borrado autom. al finalizar
trabajo:
Cancelar
1
Horas
1
Horas
1
Horas
OK
Configuraciones del sistema
Número de veces que se repite el borrado de datos
Ajuste de número de veces que se repite el programa
(Margen de ajuste:entre 1 y 7)
1
OK
● Número de veces que se repite el borrado de datos
El número de veces que se repite el borrado de datos cuando se ejecuta "Borrar Toda
La Memoria", "Borrar Datos del Archivo de Documento", "Borrar todos datos de lista
trab. term.", o bien "Borrar libreta de direc. y datos regist." puede definirse en
cualquier número entre 1 y 7. El ajuste de fábrica es 1.
● No. veces que repite programa de borrado autom. al encender
El número de veces que se repite "Borrado Automático Al Encender" puede definirse
en cualquier número entre 1 y 7. El ajuste de fábrica es 1.
Esta opción solamente se habilita con la casilla de verificación [Borrado
Automático Al Encender] activada.
● N. veces que repite borrado autom. al finalizar trabajo
El número de veces que se repite el borrado automático al encender después de que
se complete cada trabajo puede definirse en cualquier número entre 1 y 7. El ajuste
de fábrica es 1.
Acerca del ajuste de repetición
Cuando el ajuste de repetición (número de repeticiones) se incrementa para optimizar
la función de seguridad, el tiempo necesario para el borrado de datos es superior.
Es recomendable que seleccione las opciones de repetición en "Número de veces que
se repite el borrado de datos", "No. veces que repite programa de borrado autom. al
encender" y "N. veces que repite borrado autom. al finalizar trabajo" que sean
adecuadas para las necesidades de seguridad y las condiciones de uso.
15
Page 48

ESPAÑOL
Configuraciones del sistema
■ Desactivar el archivo de documentos
Esta función se utiliza para limitar los modos de archivo de la función de archivo de
documentos.
Los modos de archivo de documentos (Modo de Archivo Rápido, Modo Compartido y
Modo Confidencial) pueden deshabilitarse por separado en cada modo donde opera el
archivo de documentos (modos Copia, Impresora, Escanear a disco duro y Env. Imágen).
Configuraciones del sistema
Activar/Desactivar Configuraciones
Desactivar el archivo de documentos:
Copia
Impresora
Escanear a disco duro
Env. Imágen
Desactivar la impresión de listados:
● Seleccione los cuadros de verificación de modos de archivo que desea deshabilitar.
Modo de Archivo Rápido Modo Compartido
Listado de todos los Valores Personalizados
Listado de Direcciones de Envío
Cancelar
Modo Confidencial
(En los modelos G, seleccione las opciones según sea necesario para cambiar la
pantalla.) Cuando haya terminado de seleccionar los cuadros de verificación,
seleccione la opción [OK].
● Las propiedades de un archivo que ya está almacenado no pueden cambiarse
mediante "Cambio de Propiedad" ( Guía de funcionamiento "CAMBIO DE
PROPIEDAD" en la 6. ARCHIVO DE DOCUMENTOS) a un modo de archivo
desactivado.
OK
☞
Configuraciones del sistema
Desactivar el archivo de documentos
Desactivar la impresión de listados
Desactivar la impresión de listadosdistintos a la
impresi en espera
Ajustes de Pant. de lista trab. termin.
OK
5/6
Pulse la tecla en la esquina inferior
derecha de la pantalla para desplazarse
a la siguiente pantalla.
Si se deshabilita una determinada propiedad en "Desactivar el archivo de
documentos" y existe un archivo almacenado con esa propiedad, la propiedad
del archivo almacenado puede modificarse.
Cuando se imprime con la función de impresora, incluso los formatos para almacenar
archivos que se hayan deshabilitado en el programa aparecerán en la pantalla Gestión
de trabajos del controlador de impresora ( Guía de funcionamiento "GUARDAR Y
☞
UTILIZAR ARCHIVOS DE IMPRESIÓN (Retención/Archivo de documentos)" en la
"3. IMPRESORA"). No obstante, si se selecciona un formato de archivo deshabilitado al
imprimir un archivo, el archivo no se guardará (solamente se efectuará la impresión).
■ Desactivar la impresión de listados
Este programa se utiliza para deshabilitar la impresión de cualquiera de los siguientes
listados que se imprimen mediante "Lista de Impr. (Usuario)" en la configuración del
sistema (general).
"Listado de todos los Valores Personalizados", "Listado de Direcciones de Envío", "Lista
de carp. de archiv. de doc."
Active las casillas de verificación de las listas cuya impresión desea deshabilitar. Una
vez activadas las casillas de verificación deseadas, pulse la tecla [OK].
16
Page 49

ESPAÑOL
I
Configuraciones del sistema
■
Desactivar trabajos de impresión que distintos a la impresión en espera
Es posible prohibir la impresión fuera del panel de control de la máquina. Este ajuste
puede utilizarse para evitar que una tercera persona pueda tener acceso a documentos
confidenciales depositados en la bandeja de salida y que se produzcan filtraciones de
información reservada.
Configuraciones del sistema
Activar/Desactivar Configuraciones
mpresora
Escanear a disco duro
Env. Imágen
Desactivar la impresión de listados:
Desactivar trabajos de impresión que distintos a la impresión en espera
Listado de todos los Valores Personalizados
Listado de Direcciones de Envío
Lista de carp. de archiv. de doc.
Cancelar
OK
● Para prohibir la impresión fuera del panel de control, active la casilla de verificación.
Para imprimir cuando está activada la prohibición de impresión, siga los pasos
descritos a continuación.
Paso 1:Defina el parámetro "Retención" del controlador de impresora en [Sólo
retener] y seleccione el comando de impresión.
El trabajo de impresión se muestra en el panel de control de la máquina.
Paso 2: Seleccione el trabajo de impresión y ejecute la impresión. ( Guía de
funcionamiento "IMPRESIÓN DE UN ARCHIVO ALMACENADO" en la
"6. ARCHIVO DE DOCUMENTOS)
Si se selecciona "Retener tras imprimir" o "Impresión de prueba" antes de ejecutar el
comando de impresión, la impresión no se llevará a cabo. No obstante, el trabajo se
mantendrá en espera en la máquina y podrá imprimirse desde el panel de control utilizando
la función de archivo de documentos del mismo modo que un trabajo "Sólo retener".
Configuraciones del sistema
Configuración de Seguridad
Configuración de la Aprobación
del Archivo de Documentos
Desactivar la impresión de
listados
Desactivar trabajos de impresión que
distintos a la impresión en espera
Pulse la tecla en la esquina inferior
derecha de la pantalla para desplazarse
a la siguiente pantalla.
☞
OK
4/5
Ajustes de pantalla de la lista estado de trabajos terminados
Puede seleccionar si se muestra o no la pantalla de trabajos con estado completado (tecla
selectora de la pantalla de estado de los trabajos).
Si prefiere que la información almacenada (nombres de usuario de modo de impresión,
destinos de envío de imágenes, remitentes de faxes recibidos, etc.) no se muestre en la
pantalla de trabajos con estado completado por motivos de seguridad, utilice esta opción
de configuración para ocultar la pantalla
.
Configuraciones del sistema
Ajustes de Pant. de lista trab. termin.
Ajustes de pantalla de la lista estado
de trabajos terminados:
OKCancelar
Imprimir
Digitalizar
En. fax
Internet-Fax
Configuraciones del sistema
Ajustes de Pantalla de La Lista Estado de Trab. Terminados
Seleccionar el modo de trabajo que se visualizará
en la lista de trabajos terminados.
Imprimir
En. fax
Digitalizar
Internet-Fax
OK
● Para ocultar la pantalla de trabajos con estado completado, pulse la casilla de
verificación de cada modo ([Imprimir], [Digitalizar], [En. fax] e [Internet-Fax]) para
eliminar las marcas de verificación.
Cuando finalice, pulse la tecla [OK].
17
Page 50

ESPAÑOL
Configuraciones del sistema
Configurar Visualización Estado Trabajo
Puede seleccionar si desea que se muestren o no los nombres de archivo de los trabajos
de impresión y los nombres de destino de los trabajos de envío de imágenes en la pantalla
de estado de trabajos del panel táctil. Si no desea que se muestre esta información, active
las casillas de verificación correspondientes.
Desbloquee operación de archivo/carpeta
Esta función se utiliza para desbloquear carpetas de documentos y archivos, así como
los archivos PDF cifrados, que se han bloqueado debido a la introducción incorrecta de la
contraseña.
Pulse la tecla [Desbloquee operación de archivo/carpeta] y, a continuación, la tecla
[Liberar] para desbloquear todos los elementos bloqueados. A continuación, los
elementos podrán manipularse. Si no hay ningún elemento bloqueado, la tecla
[Desbloquee operación de archivo/carpeta] aparecerá atenuada.
Clave de Producto
Para habilitar inicialmente la función de seguridad, deberá acceder a la configuración del
sistema (administrador) para introducir la clave del producto (contraseña). El nombre de la
configuración del sistema utilizado para esta finalidad es "KIT DE SEGURIDAD DE
DATOS". Solicite a su distribuidor la clave del producto.
Para registrar la clave del producto, pulse en el interior del marco situado debajo de la
pantalla del kit de seguridad de datos, pulse las teclas numéricas correspondientes para
introducir el número de la clave del producto y pulse la tecla [Someter].
● Si introduce un número incorrecto...
Aparecerá un mensaje indicándole que compruebe de nuevo la clave del producto.
● Si introduce el número correcto...
Aparecerá un mensaje indicándole que apague la máquina y la vuelva a encender. Pulse
la tecla [OK] cuando haya terminado de leer el mensaje.
Primero apague la tecla de alimentación y, a continuación, apague la tecla de
alimentación principal. La función de seguridad estará habilitada cuando vuelva a
encender la máquina.
Cuando la función de seguridad se habilita, la "Kit de Seguridad de Datos" de la pantalla
de introducción de la clave del producto no podrá utilizarse.
Una vez introducida la clave del producto, no será posible realizar las siguientes
operaciones hasta que se reinicie la máquina.
● Se prohíbe todo acceso desde la red o línea de fax.
● Las teclas que cambian la visualización de pantalla, como la tecla [BORRAR TODO], no
pueden utilizarse.
● La tecla [Atrás] de [Clave de Producto] en la configuración del sistema aparecerá
atenuada para evitar que se cambie a una pantalla diferente.
18
Page 51

Ajuste de control de documentos
3
Control de documentos
La función de control de documentos se utiliza para insertar un patrón de control de documentos
en el papel cuando se imprime una copia, un trabajo de impresión o un fax recibido.
Si se intenta escanear un documento con un patrón de control de documentos insertado en
una máquina SHARP que tiene habilitada la función de control de documentos, se mostrará
el mensaje "Detect. patrón de control de doc. Trab.cancelado." y se enviará un mensaje de
correo electrónico de alerta al administrador.
De este modo, se impide una segunda copia o envío por fax de documentos confidenciales.
El control de documentos puede no funcionar correctamente con determinados
tamaños o tipos de originales, de papel o determinados ajustes de
configuración.
Para que la función de control de documentos funcione correctamente, deberán
observarse los siguientes puntos.
● Original
● Puede que la función no funcione correctamente si el original está formado
principalmente por fotografías.
● La función de control de documentos está pensada para proteger datos de
texto, por lo que puede que no funcione correctamente si se utiliza para
proteger datos gráficos.
● Color del patrón de control de documentos
●
Seleccione un color de una familia de colores que sea diferente al color del papel.
● Papel con el patrón de control de documentos impreso
● Para permitir la selección de los colores negro, cian y amarillo, utilice papel
recomendado por Sharp.
● Se recomienda utilizar papel blanco. Si se utiliza un papel que no es blanco,
es posible que no se detecte el patrón de control de documentos y que la
función no funcione correctamente.
●
Utilice papel B5 o de mayor tamaño.
Pueden utilizarse los siguientes tamaños de papel:
A3W (12" x 18"), A3, B4, A4, B5, 11" x 17", 8-1/2" x 14", 8-1/2" x 13",
8-1/2" x 11", 7-1/4" x 10-1/2"R, 8K, 16K
(Si el tamaño del papel es A4 o inferior, el papel puede utilizarse tanto en
orientación horizontal como vertical.)
Renuncia
Sharp no garantiza que la función de control de documentos funcione siempre
correctamente. Puede que se den determinadas situaciones en las que la función de
control de documentos no funcione como es debido.
19
Page 52

ESPAÑOL
Ajuste de control de documentos
Modos que permiten la función de control de documentos
La función de control de documentos puede utilizarse para imprimir con un patrón de
control de documentos insertado en los siguientes modos:
● Copia (en color/en blanco y negro)
● Impresora (en color/en blanco y negro)
● Impr. de Archivo de Documentos (en color/en blanco y negro)
● Recepción Fax Internet (en blanco y negro solamente)
● Recepción de Fax (en blanco y negro solamente)
● Imprimir lista (en blanco y negro solamente)
Habilitar la función de control de documentos
Para habilitar la función de control de documentos, siga los pasos descritos a continuación.
Modelos N
Pulse la tecla [SISTEMA AJUSTES], la tecla [Configuración de Seguridad] y, a
continuación, la tecla [Ajuste de control de documentos] para mostrar la pantalla de
configuración de control de documentos y configure los parámetros. Cuando finalice, pulse
la tecla [OK].
Ajuste de control de doc.
Pulse sobre la barra de desplazamiento y deslícela hacia arriba o abajo para cambiar la
pantalla.
Barra de desplazamiento
Configuraciones del sistema
Ajuste de control de doc.
Añadir siempre el patrón si imprime en Guardados
Copiadora:
Selecc. Imprim. Control de doc
Aj. de patrón de doc.:
Aj. de color de impr.:
Impresora:
Copiadora:
Configuraciones del sistema
Ajuste de control de doc.
Aj. de color de impr.
Recepción Fax Internet:
Selecc. Imprim. Control de doc.:
Aj. de patrón de doc.:
Recibir fax:
Selecc. Imprim. Control de doc.:
Aj. de patrón de doc.:
.:
No imprimir
Patrón 1
Bk (Negro)
Permitir al us. selecc. el color de imp.Permitir al us. selecc. el color de imp.
No imprimir
Bk (Negro)
Permitir al us. selecc. el color de imp.
No imprimir
Patrón 1
Imprimir siempre
Patrón 1
Cancelar OK
Cancelar OK
Configuraciones del sistema
Ajuste de control de doc.
Impresora:
Selecc. Imprim. Control de doc.:
Aj. de patrón de doc.:
Aj. de color de impr.:
Impres. (Archivo Docum.):
Selecc. Imprim. Control de doc.:
Aj. de patrón de doc.:
Aj. de color de impr.:
Configuraciones del sistema
Ajuste de control de doc.
Selecc. Imprim. Control de doc.:
Aj. de patrón de doc.:
Recibir fax
Selecc. Imprim. Control de doc.
Aj. de patrón de doc.:
Lista de Impres.
Selecc. Imprim. Control de doc.:
Aj. de patrón de doc.:
No imprimir
Patrón 1
Bk (Negro)
No imprimir
Patrón 1
Bk (Negro)
Permitir al us. selecc. el color de imp.
No imprimir
Patrón 1
No imprimir
Patrón 1
Patrón 1
No imprimir
Patrón 1
Cancelar OK
Cancelar OK
20
Page 53

ESPAÑOL
Ajuste de control de documentos
Modelos G
Tecla [SISTEMA AJUSTES] - Tecla [Ajuste de control de documentos] - Pulse la tecla de un
modo para seleccionar la opción de ese modo.
Cuando termine de configurar las opciones, pulse la tecla [OK].
Ajuste de control de doc.
La configuración actual de cada modo se muestra a la derecha de las teclas de modo.
Configuraciones del sistema
Ajuste de control de doc.
COPIAR
Impresora
Impres. (Archivo Docum.)
Configuraciones del sistema
Ajuste de control de doc.
Añadir siempre el patrón si imprime en Guardados
No imprimir
No imprimir
No imprimir
OK
OK
3/3
3/3
Configuraciones del sistema
Ajuste de control de doc.
1/3
Recibir I-Fax
Recibir fax
Lista de Impres.
No imprimir
No imprimir
No imprimir
Si se activa esta casilla de verificación
( ), los documentos que se han
imprimido en algún momento con un patrón
de control de documentos, incluirán
siempre dicho patrón.
OK
2/3
■ Opciones de configuración para imprimir archivos
almacenados mediante el archivo de documentos
Estas opciones de configuración sirven para la impresión de datos de trabajos de copia,
de envío de escaneado y de impresión que se han almacenado en el disco duro de la
máquina utilizando la función de archivo de documentos. Para que se imprima siempre
un patrón de control de documentos en un archivo almacenado si dicho patrón se
imprimió cuando el trabajo se efectuó por primera vez, active la casilla de
verificación [Añadir siempre el patrón si imprime en Guardados].
21
Page 54

ESPAÑOL
Ajuste de control de documentos
■ Opciones relativas a los modos Copia/Impresora/Impr. de
Archivo de Documentos
Modelos N
Las opciones de configuración relativas a los modos de copia, impresión y archivo de
documentos pueden configurarse en los campos "Copia", "Impresora" e "Impres.
(Archivo Docum.)" de la pantalla de configuración de control de documentos.
Configuraciones del sistema
Ajuste de control de doc.
Añadir siempre el patrón si imprime en Guardados
Copiadora:
Selecc. Imprim. Control de doc
Aj. de patrón de doc.:
Aj. de color de impr.:
Impresora:
Copiadora:
No imprimir
.:
Patrón 1
Bk (Negro)
Permitir al us. selecc. el color de imp.
No imprimir
Cancelar OK
● Selecc. Imprim. Control de doc. (Seleccione el método de impresión)
Pulse el cuadro de selección para mostrar la lista de elementos y, a continuación,
pulse sobre uno de los elementos para seleccionarlo.
No imprimir:
El patrón de control de documentos no se imprime.
Imprimir siempre:
El patrón de control de documentos se imprime siempre.
Permitir al us. selecc.:
El usuario puede seleccionar si el patrón de control de documentos se imprime o no
cada vez que configura un trabajo de impresión.
Configuraciones del sistema
Ajuste de control de doc.
Aj. de color de impr.
Impres. (Archivo Docum.):
Selecc. Imprim. Control de doc
Aj. de patrón de doc.:
Aj. de color de impr.:
Recepción Fax Internet:
Selecc. Imprim. Control de doc.:
Aj. de patrón de doc.:
Bk (Negro)
.:
No imprimir
Patrón 1
Bk (Negro)
No imprimir
Patrón 1
Cancelar OK
● Aj. de patrón de doc. (Seleccione el patrón que desea que se imprima)
Es posible seleccionar "Imprimir siempre" o "Permitir al us. selecc." en "Selecc. Imprim.
Control de doc." para seleccionar una configuración del patrón.
Para seleccionar uno de los patrones de 1 a 5, pulse el cuadro de selección . Pulse
sobre uno de los elementos para seleccionarlo.
Si considera que la función de control de documentos no puede utilizarse para una imagen
impresa en particular, intente cambiar la configuración del patrón (patrones 1 a 5).
(Configuración predeterminada de fábrica: Patrón 1)
● Aj. de color de impr. (Seleccione el color)
Es posible seleccionar "Imprimir siempre" o "Permitir al us. selecc." en "Selecc. Imprim.
Control de doc." para seleccionar la configuración del color de impresión.
Pulse el cuadro de selección para mostrar la lista de elementos y, a continuación,
pulse sobre uno de los elementos para seleccionarlo.
[Bk (Negro)]:
El patrón de control de documentos se imprime siempre en negro.
[C (Cian)]:
El patrón de control de documentos se imprime siempre en cian (Sólo cuando se
selecciona el modo de color).
[Y (Amarillo)]:
El patrón de control de documentos se imprime siempre en amarillo (Sólo cuando se
selecciona el modo de color).
Casilla de verificación [Permitir al us. selecc. el color de imp.]:
Si se activa esta casilla de verificación ( ), el color aquí seleccionado será el color
predeterminado para el patrón de control de documentos. El usuario puede cambiar el
color cada vez que realiza un trabajo de impresión.
22
Page 55

ESPAÑOL
Ajuste de control de documentos
Modelos G
Pulse la tecla [Copia], [Impresora] o [Impr. de Archivo de Documentos] y, a continuación,
pulse la tecla [Selecc. Imprim. Control de doc.] para configurar las opciones relativas a
los modos Copia, Impresora o Impr. de Archivo de Documentos.
Paso 1: Seleccione el método de impresión
Configuraciones del sistema
Selecc. Imprim. Control de doc.(Copiar)
OK
No imprimir
Permitir al us. selecc.
No imprimir
Pulse una de las siguientes teclas para seleccionarla.
No imprimir:
El patrón de control de documentos no se imprime.
Imprimir siempre:
El patrón de control de documentos se imprime siempre.
Permitir al us. selecc.:
El usuario puede seleccionar si el patrón de control de documentos se imprime o no
cada vez que configura un trabajo de impresión.
Cuando termine de configurar las opciones, pulse la tecla [OK].
Paso 2: Seleccione el patrón que desea que se imprima
Si se ha seleccionado [Imprimir siempre] o [Permitir al us. selecc.] en el paso 1, el patrón
puede seleccionarse.
Pulse la tecla [Aj. de patrón de doc.] para seleccionar un patrón del 1 al 5. Pulse una de las
teclas para seleccionarla y, a continuación, pulse la tecla [OK].
Si considera que la función de control de documentos no puede utilizarse para una imagen
impresa en particular, intente cambiar la configuración del patrón (patrones 1 a 5).
(Configuración predeterminada de fábrica: Patrón 1)
Paso 3: Seleccione el color
Si se ha seleccionado [Imprimir siempre] o [Permitir al us. selecc.] en el paso 1, el color de
impresión puede seleccionarse.
Pulse la tecla [Aj. de color de impr.] para seleccionar un color de impresión. Pulse una de
las teclas para seleccionarla y, a continuación, pulse la tecla [OK].
Tecla [Bk (Negro)]:
El patrón de control de documentos se imprime siempre en negro.
Tecla [C (Cian)]:
El patrón de control de documentos se imprime siempre en cian (Sólo cuando se
selecciona el modo de color).
Tecla [Y (Amarillo)]:
El patrón de control de documentos se imprime siempre en amarillo (Sólo cuando se
selecciona el modo de color).
Permitir al us. selecc. el color de imp.:
Si se activa ( ) esta casilla de verificación, el color aquí seleccionado será el color
predeterminado para el patrón de control de documentos. El usuario puede cambiar el
color cada vez que realiza un trabajo de impresión.
Si se pulsa la tecla [C (Cian)] o [Y (Amarillo)], aparecerá el mensaje "Los trab.
se impr.a todo color cuando éste se sel.".
23
Page 56

ESPAÑOL
Ajuste de control de documentos
■ Opciones relativas a los modos Recepción Fax Internet/
Recepción de Fax/Imprimir lista
Modelos N
La configuración relativa a los modos de recepción de fax por Internet, recepción de fax
e impresión de listas puede definirse en los campos "Recepción Fax Internet",
"Recepción de Fax" e "Imprimir lista" en la pantalla de configuración de control de
documentos.
Configuraciones del sistema
Ajuste de control de doc.
Aj. de color de impr.
Impres. (Archivo Docum.):
Selecc. Imprim. Control de doc.:
Aj. de patrón de doc.:
Aj. de color de impr.:
Recepción Fax Internet:
Selecc. Imprim. Control de doc.:
Aj. de patrón de doc.:
Bk (Negro)
No imprimir
Patrón 1
Bk (Negro)
No imprimir
Patrón 1
Cancelar OK
Configuraciones del sistema
Ajuste de control de doc.
Recibir fax
Selecc. Imprim. Control de doc.
Aj. de patrón de doc.:
Lista de Impres.
Selecc. Imprim. Control de doc.
Aj. de patrón de doc.:
Aviso
Es posible impr. el modelo de control de documento en el color selec., sólo cuando es un trab.
a todo color.
Desactivar la función de reenvío de datos si quiere gestionar esta función con precisión.
No imprimir
Patrón 1
No imprimir
Patrón 1
Cancelar OK
● Selecc. Imprim. Control de doc. (Seleccione el método de impresión)
Pulse el cuadro de selección para mostrar la lista de elementos y, a continuación,
pulse sobre uno de los elementos para seleccionarlo.
No imprimir:
El patrón de control de documentos no se imprime.
Imprimir siempre:
El patrón de control de documentos se imprime siempre.
Si se selecciona "Imprimir siempre" para el modo de recepción de fax por
Internet/recepción de fax, se recomienda deshabilitar la función de reenvío en
cada modo. (Consulte "4. FACSÍMIL" en la Guía de funcionamiento por más
detalles.)
● Aj. de patrón de doc. (Seleccione el patrón que desea que se imprima)
Si se selecciona "Imprimir siempre" en "Selecc. Imprim. Control de doc.", puede
seleccionarse una configuración del patrón.
Para seleccionar uno de los patrones de 1 a 5, pulse el cuadro de selección . Pulse
sobre uno de los elementos para seleccionarlo.
Si considera que la función de control de documentos no puede utilizarse para una imagen
impresa en particular, intente cambiar la configuración del patrón (patrones 1 a 5).
(Configuración predeterminada de fábrica: Patrón 1)
24
Page 57

ESPAÑOL
Ajuste de control de documentos
Modelos G
Pulse la tecla [Recepción Fax Internet], [Recepción de Fax] o [Imprimir lista] y, a
continuación, pulse la tecla [Selecc. Imprim. Control de doc.] para configurar las
opciones relativas al modo Recepción Fax Internet, Recepción de Fax o Imprimir lista.
Paso 1: Seleccione el método de impresión
Configuraciones del sistema
Selecc. Imprim. Control de doc.(Recibir I-Fax)
OK
No imprimir
No imprimir
Pulse una de las siguientes teclas para seleccionarla.
No imprimir:
El patrón de control de documentos no se imprime.
Imprimir siempre:
El patrón de control de documentos se imprime siempre.
Cuando termine de configurar las opciones, pulse la tecla [OK].
Si se pulsa la tecla [Imprimir siempre] en el modo Recepción Fax Internet o
Recepción de Fax, aparecerá el mensaje "Des. la func. de reenv. de datos para
gest. la func. con precisión.". Después de pulsar la tecla [OK], se recomienda
deshabilitar la función de reenvío de datos de uno o ambos modos, según
corresponda. (Consulte "4. FACSÍMIL" en la Guía de funcionamiento por más
detalles.)
Paso 2: Seleccione el patrón que desea que se imprima
Si se selecciona [Imprimir siempre] en el paso 1, puede seleccionarse el patrón.
Pulse la tecla [Aj. de patrón de doc.] para seleccionar un patrón del 1 al 5. Pulse una de las
teclas para seleccionarla y, a continuación, pulse la tecla [OK].
Si considera que la función de control de documentos no puede utilizarse para una imagen
impresa en particular, intente cambiar la configuración del patrón (patrones 1 a 5).
(Configuración predeterminada de fábrica: Patrón 1)
25
Page 58

ESPAÑOL
Ajuste de control de documentos
Utilizar la función de control de documentos
Cuando se utiliza la función de control de documentos, se imprime un patrón de control de
documentos en el papel de las copias, trabajos de impresión y faxes recibidos.
■
Páginas donde se imprime un patrón de control de documentos
(todos los modos)
● El patrón de control de documentos se imprime en todas las páginas impresas en una
máquina Sharp que incorpore la función de control de documentos, incluso en el
reverso de las páginas impresas a dos caras.
● En el caso de una página en blanco debido a un número impar de páginas impresas a
dos caras, el patrón de control de documentos no se imprimirá en la página en blanco.
● Cuando se utilice la función de portadas/encartes (incluida la inserción de
transparencias), el patrón de control de documentos se imprimirá solamente en las
portadas y encartes impresos, pero no en los que se dejen en blanco.
Una vez habilitada la función de control de documentos en la configuración del sistema,
siga los pasos descritos a continuación para utilizar la función.
■ Utilizar el control de documentos en el modo de copia
Seleccione la opción [Modos Especiales] en el modo de copia y vaya hasta la segunda
pantalla en los modelos N, o la cuarta pantalla en los modelos G. (Consulte
"2. COPIADORA" en la Guía de funcionamiento por más detalles.)
Paso 1: Pulse la tecla [Contr. de doc.]
Modos Especiales
Archivo
Rápido
Mixto
Ajustes de
Color
Modo
Esc
.
Lento
Sello Edic. Imagen
Archivo Copia Prueba
Recuent.
Orgn.
Contr.
de doc.
Original
Tam
.
La tecla [Contr. de doc.] y los pasos siguientes pueden variar según las
opciones configuradas para la función de control de documentos en la
configuración del sistema.
OK
2
2
Modos Especiales
Recuent.
Orgn.
Contr.
de doc.
Original
Tam. Mixto
Esc
Modo
.
Lento
OK
4/4
26
Page 59

Ajuste de control de documentos
Opciones para la función de control de
documentos
en la configuración del sistema.
Opción Selecc. Imprim.
Control de doc.
(Copia)
[No imprimir] - Atenuada No disponible
[Imprimir siempre] Seleccionada Ir al paso 2
Estado de la casilla de
verificación Aj. de
color de impr. (Copia)
Visualización de la
tecla [Contr. de doc.]
Pantalla Modos Especiales
Pasos siguientes
ESPAÑOL
Cuando se pulsa la
tecla, se emite un pitido
que indica que la tecla
no está disponible.
tecla queda
seleccionada y la
función se habilita.
[Permitir al us.
selecc.]
Seleccionada
Visualización normal Ir al paso 2
Visualización normal Cuando se pulsa, la
Paso 2: Pulse la tecla [Bk (Negro)], [C (Cian)] o [Y (Amarillo)].
La tecla del color definido en la opción del color de impresión de la configuración del
sistema se muestra seleccionada de manera predeterminada.
Después de pulsar una de las teclas, pulse la tecla [OK] inferior para regresar a la pantalla
del menú de modos especiales.
Paso 3:
Seleccione las opciones que desee en la pantalla del menú de modos
especiales y, a continuación, pulse la tecla [INICIO COLOR] o la tecla [INICIO
BLANCO Y NEGRO].
● Si se pulsa la tecla [C (Cian)] o [Y (Amarillo)] en el paso 2, la tecla [INICIO
BLANCO Y NEGRO] no podrá pulsarse.
Cuando el modo de color se defina a un modo diferente de a todo color, la
tecla [INICIO COLOR] no podrá pulsarse.
● Si el modo de color es un color único, la impresión del patrón de control de
documentos no será posible.
27
Page 60

ESPAÑOL
Ajuste de control de documentos
Combinar la función de control de documentos con otras funciones
Función combinada
con el control de
documentos
Exposición El patrón se imprime siempre con la misma exposición, independientemente
Ratio de Copia El patrón se imprime siempre con el mismo porcentaje, independientemente
Dúplex
Configuración de
Copia de Rotación
Desplazamiento
del Margen
Borrar El patrón se imprime normalmente en el borde o en el centro que se borra.
Copia a Doble
Pág.
Copia de Folleto Se imprime según el tipo de papel utilizado para la copia de folleto.
Creación Trabajos El patrón se imprime con normalidad.
Copia En Tándem El patrón se imprime con normalidad en la máquina principal y en la máquina
Portadas/
Inserciones
Fondo de
Transparencias
2in1/4in1 Se imprime según el papel. Cuando se selecciona 2en1, se imprimen 2
Copia Libro Cuando se realiza una copia en formato libro, el patrón se imprime
Copia Pestaña La posición del patrón no cambia cuando se utiliza papel con pestañas. (El
Perf. Tarjeta El patrón se imprime una vez cuando se escanea el anverso y el reverso del
Sello Si el patrón y el sello coinciden, se concede prioridad al patrón.
Repet. Foto El patrón se imprime una vez en cada escaneado de una fotografía.
Alargamiento
Multipágina
Imagen En Espejo El patrón se imprime en la orientación normal sin invertirse.
A3 Sangrado
Completo
Centrar El patrón se imprime con normalidad.
Dorso B/N Los patrones se imprimen por lo general sin inversión blanco/negro.
Otras funciones El patrón se imprime normalmente con las opciones Ajuste de RVA, Nitidez,
Operación de impresión del patrón de control de documentos
del ajuste de exposición.
del ajuste de porcentaje.
El patrón se imprime en el reverso y en el anverso cuando se realiza una copia a 2
caras. (La orientación del original, en formato bloc o libro, no se tiene en cuenta.)
El patrón no cambia cuando se utiliza la copia de rotación. (La orientación del
patrón depende de la orientación del papel en la bandeja.)
La posición del patrón no cambia cuando se desplaza el margen. (El ancho de
margen no afecta a la posición del patrón.)
La impresión del patrón se efectúa de acuerdo con el papel y, por lo tanto, el
patrón se imprime en ambas páginas, cada una de las cuales tiene un tamaño
que corresponde a la mitad del original.
secundaria. (Si la máquina secundaria no tiene instalado el kit de seguridad de
datos, la función de copia en tándem no puede utilizarse.)
El patrón se imprime con normalidad en las portadas y encartes impresos. Si
una portada o encarte queda en blanco, el patrón no se imprime.
El patrón se imprime con normalidad. (Cuando se copia un fondo de
transparencias, el patrón se imprime del mismo modo que en una transparencia.)
páginas del original en 1 hoja de papel. El patrón se imprime del modo habitual
en la hoja de papel aunque se efectúe una impresión 2en1 o 4en1.
dependiendo del tipo de papel.
ancho de desplazamiento de la imagen en el papel con pestañas no afecta a la
posición del patrón.)
La velocidad de copia se reduce cuando se copia en papel con pestañas con
la función de control de documentos.
original en una misma página.
El patrón se imprime en todas las páginas de la ampliación en varias páginas.
El área impresa del patrón se amplía de manera que coincida con el ajuste A3
Sangrado Completo.
Supresión Fondo, Balance de Color, Brillo e Intensidad.
28
Page 61

ESPAÑOL
Ajuste de control de documentos
■ Utilizar la función de control de documentos en el modo de
impresora
● Si se habilita [Imprimir siempre] en [Selecc. Imprim. Control de doc.] en la
configuración del sistema, se imprime siempre un patrón de control de documentos.
● Si se habilita [Permitir al us. selecc.], siga el procedimiento descrito a continuación
para imprimir un patrón de control de documentos.
Paso 1: Active la casilla de verificación [Kit de datos de seguridad] en la pantalla de
configuración inicial (pantalla de propiedades) del controlador de impresora.
Consulte la Guía de instalación del software para obtener información adicional sobre la
configuración inicial del controlador de impresora.
Paso 2: Antes de iniciar la impresión, haga clic en la ficha [Avanzado] en la ventana
de propiedades del controlador de impresora y haga clic en el botón [Control
de documento].
Consulte de "3. IMPRESORA" de la guía de funcionamiento para obtener información
adicional sobre la impresión.
Paso 3: Active la casilla de verificación [Control de documento] y seleccione
[Negro], [Cian] o [Amarillo] en [Color de impresión].
■ Utilizar la función de control de documentos en el modo de
archivo de documentos
Después de haber almacenado un archivo mediante la función de archivo de documentos y
utilizando las opciones configuradas en "Ajuste de control de documentos" en la
configuración del sistema, siga los pasos descritos a continuación para imprimir un patrón de
control de documentos. (Por información sobre el uso de archivo guardados mediante
archivo de documentos, consulte "UTILIZACIÓN DE ARCHIVOS ALMACENADOS" en
"6. ARCHIVO DE DOCUMENTOS" en la Guía de funcionamiento.)
Selecc. Imprim. Control de doc.
Si se selecciona [Permitir al us. selecc.], puede pulsarse la tecla [Contr. de doc.]
para determinar si se imprime un patrón de control de documentos o no. No
obstante, si la casilla de verificación [Añadir siempre el patrón si imprime en
Guardados] se activa, la impresión del patrón de control de documentos no puede
cancelarse independientemente de si se selecciona [Permitir al us. selecc.] o no.
Paso 1: Pulse la tecla [Modos Especiales] en la pantalla de configuración de la
impresión y, a continuación, pulse la tecla [Contr. de doc.].
Lento
OK
Modos Especiales
Recuent.
Orgn.
Contr.
de doc.
Modos Especiales
Borrar
Borde
Creación
Trabajos
Recuent.
Orgn.
Escaneo
Doble
Original
Tam
.
Mixto
Contr.
de doc.
Pág.
Perf. Tarjeta
Modo
Esc
.
Si se selecciona "No imprimir" en "Selecc. Imprim. Control de doc." en la
configuración del sistema, la tecla [Contr. de doc.] se muestra atenuada para
evitar su selección. (Sin embargo, en el caso de los archivos que tenían
patrones de control de documento impresos cuando se guardaron los archivos,
se puede seleccionar la opción [Contr. de doc.] si se ha seleccionado el cuadro
de verificación [Añadir siempre el patrón si imprime en Guardados] en las
configuraciones del sistema.)
OK
2/2
29
Page 62

ESPAÑOL
Ajuste de control de documentos
Paso 2: Si la casilla de verificación [Permitir al us. selecc. el color de imp.] está
activada en [Selecc. Imprim. Control de doc.] en la configuración del
sistema, pulse la tecla [Bk (Negro)], [C (Cian)] o [Y (Amarillo)].
La tecla del color definido en [Aj. de color de impr.] de la configuración del sistema se
muestra seleccionada de manera predeterminada. No obstante, si el modo de color del
archivo almacenado está definido en un modo diferente del modo a todo color, se
seleccionará [Bk (Negro)] y no será posible cambiar el ajuste a [C (Cian)] ni [Y (Amarillo)].
Después de pulsar una de las teclas, pulse la tecla [OK] superior.
Paso 3: Toque las teclas [Imprimir y borrar los datos] o [Imprimir y guardar los
datos].
■ Utilizar la función de control de documentos en los modos
Recepción Fax Internet/Recepción de Fax/Imprimir lista
No se requiere ninguna operación especial. Cuando se efectúa la impresión, se inserta
un patrón de control de documentos en blanco y negro de acuerdo con las opciones de
la función de control de documentos definidas en la configuración del sistema.
■ Comandos de texto para la impresión directa de mensajes de
correo electrónico
El comando mostrado abajo puede introducirse en el cuerpo de un mensaje de correo
electrónico de impresión directa para especificar si se debe imprimir un patrón de
control de documentos o no.
Función Nombre del comando Valor Ejemplo
Impresión del
patrón
ON/OFF
DOCUMENTCONTROL ON
OFF
Advertencia
Este es un producto Clase A. En un
entorno doméstico este producto
puede causar radiointerferencias, en
cuyo caso el usuario debe tomar las
medidas oportunas.
DOCUMENTCONTROL=ON
30
Page 63

FRANÇAIS
Garantie
Une attention toute particulière a été portée à ce document de manière à ce qu'il soit le plus
exact et le plus pratique possible. En outre, SHARP Corporation ne peut en aucun cas être
tenu responsable du contenu de ce document. Le contenu du présent manuel est susceptible
d'être modifié sans avis préalable. SHARP ne peut en aucun cas être tenu responsable de
pertes ou dommages, directs ou indirects, consécutifs à l'utilisation de ce manuel d'utilisation.
© Copyright SHARP Corporation 2008. Tous droits réservés. La reproduction, l'adaptation et
la traduction du contenu du présent manuel sont interdites sans autorisation écrite préalable,
sauf dans le cadre permis par la loi sur les droits d'auteur.
Remarque :
●
Dans ce manuel, "Réglages système (Administrateur)" font référence aux réglages système
que vous ne pouvez configurer qu'en vous connectant en tant qu'administrateur. Quant aux
"Réglages système (Général)", ils font référence aux réglages système que n'importe quel
utilisateur peut configurer (y compris l'administrateur).
●
Dans le présent manuel, les modèles G et les modèles N se réfèrent aux modèles suivants:
Modèles G: MX-2600G, MX-3100G
Modèles N: MX-2600N, MX-3100N
Aux endroits où les écrans apparaissent dans ce manuel, les écrans des modèles N
apparaissent sur le côté gauche, et les écrans des modèles G apparaissent sur le côté droit.
Icônes utilisées dans les différents manuels
Les icônes utilisées dans les différents manuels indiquent les informations suivantes :
Fournit une explication complémentaire au sujet d'une fonction ou d'une
procédure.
Explique comment annuler ou modifier une opération.
Le contenu des photos écran, les messages et les noms des touches utilisés dans le
manuel pourraient être différents de ceux utilisés sur la machine en cas d'améliorations
ou de modifications du produit.
Description
Introduction ...........................................................................................................................2
Lorsque le kit de sécurité des données est installé ..............................................................4
● Réglages système du kit de sécurité des données .........................................................4
● Fonction Contrôle de document ......................................................................................4
● Archivage de documents .................................................................................................4
● Ecran d'enregistrement du groupe d'autorité...................................................................5
● Protection des mots de passe .........................................................................................6
● Restrictions concernant la copie et l'impression en tandem ...........................................7
● Réglages de sécurité des pages Web.............................................................................8
● Transfert de données copiées .........................................................................................8
Réglages système.................................................................................................................9
● Utilisation des Réglages système (Administrateur).........................................................9
● Paramètres du système pour la sécurité .........................................................................9
● Régl. d'affichage liste travaux terminés .........................................................................17
● Réglage affichage de l'état des travaux.........................................................................18
● Déverrouiller le fichier/dossier .......................................................................................18
● Clés produit ...................................................................................................................18
Réglage du contrôle de document ......................................................................................19
● Contrôle de document ...................................................................................................19
● Modes auxquels la fonction de contrôle de document peut être ajoutée ......................20
● Activation de la fonction de contrôle de document ........................................................20
● Utilisation de la fonction de contrôle de document........................................................26
1
Page 64

FRANÇAIS
Introduction
Le kit MX-FR10U propose en plus une fonction de sécurité au multifonction numérique
couleur SHARP.
Lors de l'utilisation de la fonction copieur, imprimante, scanner réseau ou fax d'un multifonction
numérique couleur SHARP avec la fonction de sécurité, les données d'image générées pour le
travail correspondant sont codées et une fois le travail terminé, ces données codées sont
immédiatement effacées de la mémoire et du disque dur.
■ Remarque :
Afin de vous assurer que la fonction de sécurité des données de la machine offre le
maximum de sécurité, veuillez respecter ce qui suit :
● L'administrateur joue un rôle majeur dans le maintien d'une sécurité constante.
Apportez un soin particulier quant aux choix de la personne qui assumera le rôle
d'administrateur.
● Veillez à changer le mot de passe de l'administrateur chaque fois qu'une nouvelle
personne est nommée administrateur.
● Modifiez régulièrement le
jours).
● Ne choisissez pas un
● Les réglages système (administrateur) occupent une place importante dans la gestion
de la sécurité. Si vous arrêtez d'utiliser la machine alors que vous êtes en train de
configurer les réglages système (administrateur), veillez à appuyer sur la touche
[LOGOUT] pour quitter les réglages systèmes (administrateur). L'administrateur de la
machine doit signifier aux utilisateurs qu'il ne leur est pas permis d'accéder aux
réglages système (administrateur) sans autorisation.
● Le client est considéré comme responsable du contrôle des copies de documents
effectuées avec la machine ainsi que des fax reçus sur celle-ci.
● Même une fois le kit de sécurité des données installé, les données de fax contenues
dans la boîte mémoire de relève utilisées par la
mot de passe
mot de passe
de l'administrateur (au moins tous les 60
administrateur qui puisse facilement être deviné.
fonction
fax peuvent être lues.
2
Page 65

FRANÇAIS
■ Restaurer et effacer les données enregistrées à l'aide de la
fonction d'archivage de document
Lors de l'installation du kit de sécurité des données, les données préalablement
enregistrées dans la machine à l'aide de la fonction d'archivage de document sont
effacées. C'est pourquoi toutes les données que vous avez besoin de conserver sont
copiées vers un ordinateur avant l'installation du kit de sécurité des données. Après
l'installation et la suppression des données antérieures, celles-ci sont renvoyées vers la
machine (cette opération est normalement effectuée par un technicien au moment de
l'installation du kit de sécurité des données).
Après l'installation du kit de sécurité des données, seuls les dossiers confidentiels
peuvent être utilisés pour renvoyer les données de l'ordinateur sur la machine. Avant de
renvoyer les données d'un ordinateur sur la machine, créez des dossiers confidentiels si
nécessaire. Reportez-vous à l'aide sur l'archivage de document sur les pages Web de la
machine qui décrit la procédure de mémorisation de données sur un ordinateur et le
renvoi de données de l'ordinateur sur la machine.
■ A propos des mots de passe pour la page Web
Si les mots de passe "users" et/ou "admin" incorrects sont entrés au maximum trois fois
de suite lorsque vous essayez d'accéder aux pages Web de la machine équipée d'un kit
de sécurité des données, alors l'accès aux pages nécessitant la saisie d'un mot de
passe "users" ou "admin" sera interdit pendant 5 minutes.
Certaines procédures d'utilisation de la machine sont différentes une fois le kit
de sécurité des données installé. Les manuels de la machine ( "MANUELS
OPERATEUR ET UTILISATION" du guide de démarrage rapide) expliquent les
procédures d'utilisation de la machine avant installation du kit de sécurité des
données. Ce manuel décrit les modifications des dites procédures après
installation du kit de sécurité des données.
☞
3
Page 66

Lorsque le kit de sécurité des
1
Une fois le kit de sécurité des données installé, l'icône suivante apparaît sur l'écran
tactile. Le fait d'appuyer sur l'icône ( ) permet d'afficher les informations concernant
la version du kit de sécurité des données.
Une fois le kit de sécurité des données installé, les données conservées dans la machine
sont automatiquement effacées après chaque travail.
Lors de la suppression de ces données, le message suivant apparaît à l'écran pendant
6 secondes
Le temps d'affichage de cet écran peut être modifié via "Réglage durée des
*
messages" dans les réglages système (administrateur).
(Modèles N:
>"Autres réglages" > "Réglage durée des messages" Modèles G:
(Administrateur) > "Réglages de fonctionnement" > "Réglage durée des messages")
données est installé
*
.
Les données sont effacées.
➞
Réglages système (Administrateur) > "Réglages de fonctionnement"
➞
Réglages système
Si la machine est mise hors tension alors que des données d'image sont en cours
de suppression du disque dur ou avant que le travail en cours soit terminé, il est
possible que les données ne soient pas totalement effacées. Si vous ne souhaitez
pas que les données ne soient que partiellement effacées, il est conseillé d'utiliser
le programme "Effacer toute la mémoire" (page 11 de ce manuel) afin que les
données soient intégralement supprimées avant la mise hors tension.
Réglages système du kit de sécurité des données
Lorsque le kit de sécurité des données est installé, des réglages permettant d'améliorer la
sécurité peuvent être ajoutés aux réglages système (administrateur) de la machine. Pour
plus d'informations, reportez-vous à la section "Paramètres du système pour la sécurité"
(page 9 de ce manuel).
Fonction Contrôle de document
La fonction de contrôle de document est utilisée pour appliquer un modèle de contrôle de
document sur le papier pendant une copie ou une impression (de fax, par exemple).
Le modèle de contrôle de document intégré empêche le lancement d'une seconde copie,
d'un second fax et de toute autre opération pour un document imprimé. Pour plus
d'informations, consultez "Réglage du contrôle de document" (page 19 de ce manuel).
Archivage de documents
Pour utiliser la fonction archivage de documents afin de stocker des travaux d'impression
dans la machine lorsque le kit de sécurité des données est installé, définissez la propriété
du fichier sur "Confidentiel".
Les fichiers définis selon les propriétés "Partage" ou "Protéger" ne peuvent pas être
stockés. En outre, pour lancer une impression à partir d'un ordinateur à l'aide de la fonction
rétention, saisissez un mot de passe dans les réglages du pilote d'imprimante (lorsque le
réglage usine par défaut est activé).
4
Page 67

FRANÇAIS
Lorsque le kit de sécurité des données est installé
Ecran d'enregistrement du groupe d'autorité
Lorsque le kit de sécurité des données est installé, le bouton [Sécurité] est ajouté à l'écran du
menu "Enregistrement de groupe d'autorité" dans les paramètres du système (administrateur).
Sur les modèles N, vous pouvez faire apparaître cet écran en sélectionnant "Contrôle de
l'utilisateur" > "Liste des groupes d'autorité". Sur les modèles G, vous pouvez faire apparaître
cet écran en sélectionnant "Contrôle de l'utilisateur" > " Enregistrement de groupe d'autorité".
Lorsque vous pressez ce bouton, l'écran suivant pour la configuration des éléments apparaît.
Réglages système
Sécurité
Nom du groupe: Invité
Travaux d'impression autres que les travaux
maintenus :
Réglage de l'autorisation de l'archivage de document :
Copie
Imprimante
Num. vers disque dur
Env. d'image
Mode fichier temp.
Autorisé
Mode de partage
Annuler
Mode confidentiel
Réglage de l'autorisation de l'archivage de document
OK
No.01 group01
Réglage de l'autorisation
de l'archivage de document
Autoriser des travaux d'imp. autres
que les travaux maintenus.
OK
Modelos N
● Travaux d'impression autres que les
travaux maintenus
Si [Autorisé] est sélectionné et que
vous appuyez sur la touche [OK], les
travaux d'impression autres que les
travaux maintenus sont autorisés
dans l'enregistrement d'un groupe
d'autorité lorsque la fonction
authentification utilisateur est
activée.
● Réglage de l'autorisation de l'archivage
de document
Lors de l'enregistrement d'un groupe
d'autorité pour l'authentification
utilisateur, appuyez sur cette touche
pour sélectionner l'autorisation ou
non de l'archivage de document pour
chaque mode d'archivage et pour
chaque type de travail.
Pour activer un mode d'archivage,
cochez la case du mode de votre
choix pour la sélectionner.
Une fois les cases de votre choix
cochées, appuyez sur la touche [OK].
Modelos G
● Touche [Réglage de l'autorisation de
l'archivage de document]
Lors de l'enregistrement d'un groupe
d'autorité pour l'authentification
utilisateur, appuyez sur cette touche
pour sélectionner l'autorisation ou
non de l'archivage de document pour
chaque mode d'archivage et pour
chaque type de travail.
● Case [Autoriser des travaux d'imp.
autres que les travaux maintenus.]
Lors de l'enregistrement d'un groupe
d'autorité pour l'authentification
utilisateur, cochez cette case afin
d'autoriser les travaux d'impression
autres que les travaux en attente
d'impression.
L'archivage de document doit être autorisé dans les réglages suivants.
Par défaut, l'archivage de document n'est autorisé qu'en mode confidentiel.
● Autoriser l'archivage de document lors de l'enregistrement du groupe
d'autorité (ce réglage)
● Désactiver l'archivage de documents dans les réglages système (page 16 de
ce manuel)
5
Page 68

FRANÇAIS
Lorsque le kit de sécurité des données est installé
Protection des mots de passe
Lorsque le kit de sécurité des données est installé, les mots de passe entrés sur le tableau
de bord de la machine ou sur les pages Web peuvent être protégés.
■ Mot de passe administrateur/Mot de passe utilisateur
Lorsque le kit de sécurité des données est installé, la saisie du mot de passe est
bloquée pendant 5 minutes si un mot de passe administrateur incorrect est entré 3 fois
de suite et que la fonction Authentification utilisateur est activée ou pas.
■ Dossiers confidentiels et fichiers confidentiels de la fonction
d'archivage de document
Si un mot de passe incorrect d'un dossier ou d'un fichier confidentiel est entré 3 fois de
suite, le dossier ou le fichier est verrouillé. Pour déverrouiller le dossier ou le fichier,
consultez la section "Déverrouiller le fichier/dossier" (page 18 de ce manuel).
● Tous les fichiers avec le même nom d'utilisateur et le même mot de passe
peuvent être imprimés simultanément via Impression par lots de la fonction
d'archivage de document (
du "6. ARCHIVAGE DE DOCUMENTS").
Les fichiers dont le mot de passe est différent de celui entré au moment de la
recherche seront traités comme des fichiers pour lesquels un mot de passe
incorrect a été entré. C'est pourquoi, il est recommandé de limiter au
maximum les recherches si vous avez appuyé sur les touches [Tous util.] et
[Utilis. inconnu].
● Lorsque l'utilisation d'un fichier est interdite, les conditions suivantes
s'appliquent, avec la fonction d'archivage de document activée :
● Lors d'une impression par lots, le fichier interdit n'est pas imprimé sauf s'il
correspond aux critères de recherche.
Guide d'utilisation
☞
"IMPRESSION PAR LOTS"
■ Ecran de recherche de fichier pour l'archivage de document
Lorsque le kit de sécurité des données est installé, le réglage de saisie du mot de passe
n'apparaît pas dans l'écran de recherche de l'archivage de document.
■ PDF crypté
Lorsqu'un PDF crypté est imprimé par impression directe (lorsque le kit d'extension PS3
est installé), le travail apparaît dans la liste des travaux différés de l'écran d'état des
travaux et vous devez entrer un mot de passe pour lancer l'impression.
Si un mot de passe incorrect est entré 3 fois de suite lorsque le kit de sécurité des données
est installé, le message "Opération désactivée. Veuillez consultez votre administrateur pour
assistance." s'affiche pendant 6 secondes et l'impression est verrouillée.
Si vous appuyez sur la touche d'un fichier de l'écran des travaux différés pour lequel un
mot de passe incorrect a été entré 3 fois, l'écran suivant apparaît.
●Appuyez sur la touche [Oui] pour supprimer
Impression de ce travail désactivée.
Effacer le travail ?
Non Oui
Pour déverrouiller l'impression, consultez la section "Déverrouiller le fichier/dossier"
(page 18 de ce manuel).
l'impression.
●Appuyez sur la touche [Non] pour annuler la
suppression de l'impression.
6
Page 69

FRANÇAIS
Lorsque le kit de sécurité des données est installé
■ Impression FTP
Lorsque la fonction Impression FTP est utilisée pour imprimer directement un fichier
depuis un serveur FTP, un "Nom d'util." et un "Mot de passe" doivent être entrés une fois
le serveur FTP sélectionné. Lorsque le kit de sécurité des données est installé, la saisie
est verrouillée pendant 5 minutes si un "Nom d'util." ou un "Mot de passe" incorrect est
entré trois fois de suite.
■ Identification lorsque Authentification utilisateur est activée
Lorsque "Réglages d'authentification utilisateur" dans les réglages systèmes
(administrateur) ( "AUTHENTIFICATION DE L'UTILISATEUR" du guide de
démarrage rapide) est activée, vous devez vous identifier dans l'écran de connexion
pour pouvoir utiliser la machine. Si le réglage "Un avertissement quand la connexion
échoue" est activé dans les réglages système (administrateur), la machine se bloque
pendant 5 minutes si la connexion échoue 3 fois de suite.
Le réglage "Un avertissement quand la connexion échoue" est toujours activé lorsque le
kit de sécurité des données est installé.
☞
Restrictions concernant la copie et l'impression en tandem
La copie et l'impression en tandem fonctionnent de la manière suivante selon la
configuration de la machine maître et de la machine esclave (que le kit de sécurité des
données soit installé ou non).
■ Copie en tandem
Kit de sécurité des données :
Kit de
sécurité des
données :
Oui
Kit de
sécurité des
données :
Machine maître
Non
La fonction tandem peut être
utilisée. Les données sont
supprimées des machines
maître et esclave.
La fonction tandem peut être
utilisée. Les données sont
supprimées de la machine
esclave.
■ Impression en tandem
Kit de sécurité des données :
Kit de
sécurité des
données :
Oui
Kit de
sécurité des
données :
Machine maître
Non
La fonction tandem peut être
utilisée. Les données sont
supprimées des machines
maître et esclave.
La fonction tandem peut être
utilisée. Les données sont
supprimées de la machine
esclave.
Oui
Oui
Machine esclave
Kit de sécurité des données :
Non
La fonction tandem ne peut
pas être utilisée.
La fonction tandem de base
peut être utilisée.
Machine esclave
Kit de sécurité des données :
Non
La fonction tandem peut être
utilisée.
Les données sont supprimées
de la machine maître.
La fonction tandem de base
peut être utilisée.
7
Page 70

FRANÇAIS
Nom d'util.
Mot de passe
OKAnnuler
Entrer le nom et le mot de passe pour le serveur FTP.
Lorsque le kit de sécurité des données est installé
Réglages de sécurité des pages Web
Lorsque la machine sert d'imprimante réseau et que la fonction Impression FTP est utilisée,
le kit de sécurité des données active l'authentification de l'utilisateur via la saisie d'un "Nom
d'util." et d'un "Mot de passe" pour accéder au serveur FTP (la fonction Impression FTP
permet d'imprimer directement un fichier stocké sur un serveur FTP depuis le tableau de
bord de la machine sans utiliser le pilote d'imprimante; reportez-vous au Guide d'utilisation
"IMPRIMER DIRECTEMENT UN FICHIER A PARTIR D'UN SERVEUR FTP" dans
"3. IMPRIMANTE").
L'authentification de l'utilisateur est activée en cochant la case [Activer l'authentification de
l'utilisateur] sur la page Web de la machine afin de configurer les réglages d'impression
FTP. La coche apparaît lorsque le kit de sécurité des données est installé et la case est
sélectionnée par défaut (une coche apparaît).
La configuration système requise ainsi que la procédure d'accès à la page Web dans
laquelle figure cette case à cocher sont décrites dans la section "ACCEDER AU SERVEUR
WEB DE LA MACHINE" du guide de démarrage rapide.
■
Procédure d'impression directe d'un fichier depuis un serveur
FTP (une fois Authentification utilisateur activée)
Après sélection du serveur FTP contenant le fichier à imprimer à partir de l'écran tactile
de la machine, vous devez entrer votre nom d'utilisateur ainsi que votre mot de passe.
Lorsque le serveur FTP est sélectionné à l'étape 2 de "
FICHIER A PARTIR D'UN SERVEUR FTP
" dans "3. IMPRIMANTE" du Guide d'utilisation,
un écran apparaît pour vous inviter à entrer votre nom d'utilisateur et votre mot de passe
pour les serveur FTP.
IMPRIMER DIRECTEMENT UN
Authentification du serveur FTP
Entrer le nom et le mot de passe pour le serveur FTP.
Nom d'util.
Mot de passe
Annuler
Appuyez sur la touche [Nom d'util.] afin d'entrer ce dernier puis sur la touche [Mot de
passe] pour entrer votre mot de passe. Un écran de saisie s'affiche à chaque fois.
Une fois votre nom d'utilisateur et votre mot de passe entrés, appuyez sur la touche [OK].
Après avoir entré votre nom d'utilisateur et votre mot de passe, continuez à partir de
l'étape 3 de "IMPRIMER DIRECTEMENT UN FICHIER A PARTIR D'UN SERVEUR
FTP" dans "3. IMPRIMANTE" dans le Guide d'utilisation.
Transfert de données copiées
Lorsque le kit de sécurité des données est installé et que la page Web est utilisée afin de
copier les données mémorisées à l'aide de la fonction d'archivage de document vers un
ordinateur, les données copiées peuvent uniquement être renvoyées vers la machine d'origine.
Elles ne peuvent pas être transférées vers une autre machine même si cette dernière est de
configuration identique.
La touche [Restitution depuis le PC] s'affiche uniquement sur la page Web et le renvoi des
données sur la machine sera uniquement possible si un dossier confidentiel est sélectionné.
8
OK
Page 71

Réglages système
2
Cette section explique les réglages système en rapport avec la fonction de sécurité.
Dans les explications qui suivent, on considère que la machine dispose des
fonctions d'impression, fax et scanner réseau.
Utilisation des Réglages système (Administrateur)
Suivez la procédure de "Réglages système (Administrateur)" dans "7. REGLAGES SYSTEME"
du Guide d'utilisation pour configurer les paramètres du système (administrateur).
Pour plus d'informations concernant chaque réglage, reportez-vous aux pages suivantes.
Si un mot de passe administrateur incorrect est entré 3 fois de suite sur une
machine équipée du kit de sécurité des données, la saisie du mot de passe
administrateur est verrouillée pendant 5 minutes.
Paramètres du système pour la sécurité
Lorsque le kit de sécurité des données est installé, les réglages en rapport avec la sécurité
(sauf les [Paramètres SSL]) sont ajoutés aux réglages qui apparaissent après avoir appuyé
sur la touche [Réglages de sécurité].
Réglage
Effacer toute la mémoire
Effacer les données d'archivage de
documents
Eff. données de liste travaux
terminés
Eff. répertoire et données
enregistrées
Retour à l'état initial à la mise sous
tension
● Nombre de répétition de
l'effacement des données
●
Nombre de répét. du prog
d'effacement auto au démarrage
● Nombre de répét. du prog. d'eff.
auto. en fin de tâche
Désactiver l'archivage de
documents
Désactiver l'impression de liste 16
Désactiver les travaux
d'impression autres que les
travaux maintenus
*1
*1
*1
*1
*1
*1
*1
*1
Page
11
12
12
13
14
15
15
15
16
17
Réglage
Sélectionnez les éléments et le
nombre de répétitions pour
l'effacement des données. permet
d'effacer manuellement les données
enregistrées dans chaque zone de
la mémoire et du disque dur de la
machine.
Définissez les éléments que vous
souhaitez désactiver. permet de
désactiver des opérations spécifiques
afin d'empêcher l'impression de
données sensibles.
9
Page 72

FRANÇAIS
Réglages système
Réglage
Régl. d'affichage liste travaux
terminés
Page
Réglage
17 permet de sélectionner si l'écran
d'état des travaux terminés doit ou
non s'afficher.
Réglage affichage de l'état des
travaux
18 permet de sélectionner si les noms
de fichier des travaux d'impression
et les noms de destination des
travaux d'envoi d'images
s'affichent ou non dans l'écran
d'état des travaux.
Déverrouiller le fichier/dossier 18 permet de déverrouiller les fichiers
et les dossiers.
Clés produit
*1
Lorsque l'authentification de l'utilisateur est activée, il est impossible qu'un utilisateur
*2
18 Enregistrez la clé du produit.
configure ce réglage, même lorsque le groupe d'autorité lui a accordé l'autorité de
configuration des réglages de sécurité.
(Cette opération peut être uniquement effectuée par un administrateur.)
*2
Elles n'apparaissent pas lorsque la clé produit est entrée et que la fonction de sécurité
est activée.
Réglages système
Réglages de sécurité
Paramètres SSL
Réglages IPsec
Réglage IEEE802.1X
Réglages d'effacement des données
Activer/Désactiver les réglages
Régl. d'affichage liste travaux terminés
Précédent
Réglages système
Réglages de sécurité
Paramètres SSL
Réglages IPsec
Réglage IEEE802.1X
Le menu des réglages de sécurité est
composé de plusieurs écrans.
Appuyez sur la touche située dans
l'angle inférieur droit pour passer à
l'écran suivant.
Précédent
1/6
10
● Les réglages système ci-dessus peuvent être également configurés via la
page Web de la machine. Cependant, la clé produit pour le kit de sécurité des
données ne peut pas être entrée sur la page Web. Utilisez l'écran tactile de la
machine pour entrer la clé produit.
● Lorsque le kit de sécurité des données est installé, l'option "Réglage adresse
IP" n'apparaît pas dans les réglages système.
Page 73

FRANÇAIS
Réglages système
■ Effacer toute la mémoire
Ce programme sert à supprimer manuellement toutes les données de la mémoire et du
disque dur de la machine.
Cependant, avec ce réglage, les types de données suivants ne sont pas supprimés.
Consultez la section "Eff. répertoire et données enregistrées" (page 13 de ce manuel)
pour savoir comment effacer les types de données suivants.
● Informations utilisateur
● Boîte mémoire d'émission relais Individuel/Groupe/Programme
l'information
● Boîte mémoire relève/Boîte mémoire confidentielle
●
Données émetteur
● Permettre/Rejeter les données de réglage de réception(y compris numéro de mot de
*
passe d'invitation à émettre)
● Faire suivre l'information
*
Les données d'image enregistrées dans la boîte mémoire sont supprimées via l'option
"Effacer toute la mémoire".
Dans le cas où le kit de sécurité des données ou une machine équipée du kit de
sécurité des données serait mis au rebut ou changerait de propriétaire, l'administrateur
devra exécuter cette fonction. Lors de l'exécution de la fonction, il ne devra pas quitter
la machine tant que l'effacement des données n'a pas été terminé et vérifié.
*
/Faire suivre
Lorsque vous appuyez sur la touche [Effacer toute la mémoire], un écran de confirmation
apparaît tel que décrit ci-dessous.
[Ecran d'effacement 1]
Le message de confirmation "Effacer toute la mémoire. (sauf répertoire/informations
utilisateur)" apparaît.
● Pour revenir à l'écran du menu précédent, pressez le bouton [Non].
● Pour effacer toute la mémoire, appuyez sur [Oui]. Le message "Veuillez patienter" puis
l'écran suivant s'affichent.
Lorsque la fonction "Effacer toute la mémoire" est exécutée alors qu'un travail
d'impression est en cours, ce dernier est annulé. Les travaux d'impression en
cours et ceux en file d'attente sont également effacés.
[Ecran d'effacement 2]
● L'avancement de la suppression est
Effacement de toute l a mém o ire.
(50.0%) (temps 1/1)
Annuler
100%50%0%
représenté par un pourcentage ainsi que le
nombre de répétitions.
● Lorsque l'effacement est terminé, l'écran de
confirmation suivant apparaît.
Si vous souhaitez annuler l'effacement des données...
Appuyez sur la touche [Annuler]. L'écran de saisie du mot de passe
administrateur apparaît. Entrez le mot de passe administrateur. Dès que le mot
de passe correct a été entré, l'effacement des données s'arrête et la machine
est mise brièvement hors tension, puis remise sous tension.
Les données effacées avant la saisie du mot de passe ne peuvent pas être
récupérées.
11
Page 74

FRANÇAIS
Réglages système
[Ecran d'effacement 3]
Appuyez sur la touche [OK] pour redémarrer la
Effacement de la m émoire réussi.
Redémarra ge en cours.
OK
machine.
■ Effacer les données d'archivage de documents
Cette fonction sert à effacer les données enregistrées avec la fonction d'archivage de document.
Les données dont la propriété est définie sur "Protéger" ou "Confidentiel" sont
également effacées.
Réglages système
Effacer les données d'archivage de documents
Sélectionner les données à effacer et appuyer sur [Effacer].
Données d'archivage (y compris fichiers protégés/confidentiels)
Données de fichier temporaire(y compris les fichiers protégés)
Effacer
Précédent
Réglages système
Effacer données d'archivage de documents
Sélectionner les données à effacer et appuyer sur [Effacer].
Données d'archivage (y compris
fichiers protégés/confidentiels)
Données de fichier temporaire
(y compris les fichiers protégés)
OK
Effacer
● Case [Données d'archivage (y compris fichiers protégés/confidentiels)] :
Sélectionnez cette case pour effacer tous les fichiers enregistrés avec la fonction
"Fichier" dans le dossier principal et les dossiers personnalisés.
● Case [Données de fichier temporaire (y compris les fichiers protégés)] :
Sélectionnez cette case pour effacer tous les fichiers enregistrés avec "Fichier temp.".
Etape 1 : Appuyez sur la touche [Effacer].
Un message de confirmation vous invite à sélectionner "Oui" ou "Non".
Etape 2 : Appuyez sur la touche [Oui].
Les données sélectionnées sont effacées.
(L'opération est la même que lorsque "Effacer toute la mémoire" (page 11 de ce manuel)
est sélectionné.)
■
Eff. données de liste travaux terminés
Utilisez cette fonction pour effacer toutes les données des éléments ci-dessous qui
apparaissent dans l'écran d'état des travaux terminés. (Pour ouvrir l'écran d'état des
travaux terminés, appuyez sur la touche [Terminé] de l'écran d'état des travaux (touche
de sélection de l'écran d'état des travaux).)
● Noms des utilisateurs du mode imprimante
● Destinataires des images envoyées
● Expéditeurs des fax reçus
Etape 1 : Appuyez sur la touche [Eff. données de liste travaux terminés].
Un message de confirmation vous invite à sélectionner "Oui" ou "Non".
Etape 2 : Appuyez sur la touche [Oui].
Les données sont effacées.
(L'opération est la même que lorsque "Effacer toute la mémoire" (page 11 de ce manuel)
est sélectionné. Toutefois, il n'est pas possible d'annuler l'opération pendant qu'elle est
en cours.)
12
Page 75

FRANÇAIS
Réglages système
■ Eff. répertoire et données enregistrées
Cette fonction sert à effacer les éléments ci-dessous, ne pouvant pas être effacés ou
initialisés avec le programme "Effacer toute la mémoire" (page 11 de ce manuel) ou
"Rétablir les réglages par défaut" (
Appel des régl. système" > "Rétablir les réglages par défaut").
Réglages système
Eff. répertoire et données enregistrées
Sélectionner les données à effacer et appuyer sur [Effacer].
Informations utilisateur
Boîte mémoire d'émission relais Individuel/Groupe/Programme
Boîte mémoire reléve/Boîte mémoire confidentielle
Données émetteur
Permettre/Rejeter les données de réglage de réception(y compris numéro de mot de
passe d'invitation à émettre)
Faire suivre l'information
●Informations utilisateur
●Boîte mémoire d'émission relais Individuel/Groupe/Programme/Faire suivre
l'information
●Boîte mémoire relève/Boîte mémoire confidentielle
●Données émetteur
●Permettre/Rejeter les données de réglage de réception(y compris numéro de mot de
*1
passe d'invitation à émettre)
●Faire suivre l'information
*1
Le nom peut varier en fonction des options installées.
*2
Peut uniquement être sélectionnée lorsque la fonction fax est activée.
3
*
Peut être sélectionné lorsque la fonction fax ou la fonction fax internet est activée.
*4
("notamment les numéros de mot de passe d'invitation à émettre" s'affiche uniquement
lorsque la fonction fax est activée.)
*4
Sélectionnez cette option lorsque vous souhaitez uniquement effacer les informations
de suivi stockées.
➞
Réglages système (Administrateur) > "Rétention/
Réglages système
PrécédentEffacer
Eff. répertoire et données enregistrées
Sélectionner les données à effacer et appuyer sur [Effacer
Informations utilisateur
Boîte mémoire d'émission relais/
individuel/groupe/programme
Boîte mémoire relève/boîte mémoire confidentielle
Appuyez sur la touche située dans
l'angle inférieur droit pour passer à
l'écran suivant.
*2
*1, *3
].
OK
Effacer
1/2
Etape 1 : Sélectionnez les cases des éléments que vous souhaitez effacer.
(Sur les modèles G, pressez les boutons voulus pour changer l'écran.)
Etape 2 : Appuyez sur la touche [Effacer].
Un message de confirmation vous invite à sélectionner "Oui" ou "Non".
Etape 3 : Appuyez sur la touche [Oui].
Les données sélectionnées sont effacées.
(L'opération est la même que lorsque "Effacer toute la mémoire" (page 11 de ce manuel)
est sélectionné. Toutefois, il n'est pas possible d'annuler l'opération pendant qu'elle est
en cours.)
13
Page 76

FRANÇAIS
Réglages système
■ Retour à l'état initial à la mise sous tension
Cette fonction sert à effacer automatiquement toutes les données de la machine lors de
la mise sous tension.
Réglages système
Retour à l'état initial à la mise sous tension
Sélection des données à effacer au démarrage.
Toute la mémoire
Données d'archivage (y compris fichiers protégés/confidentiels)
Données de fichier temporaire(y compris les fichiers protégés)
Liste d'état des travaux terminés
OKAnnuler
Les types de données suivants peuvent être effacés.
● "Toute la mémoire"
● "Données d'archivage (y compris fichiers protégés/confidentiels)"
● "Données de fichier temporaire (y compris les fichiers protégés)"
● "Liste d'état des travaux terminés"
Réglages système
Retour à l'état initial à la mise sous tension
Sélection des données à effacer au démarrage.
Toute la mémoire
Données d'archivage (y compris
fichiers protégés/confidentiels)
Données de fichier temporaire
(y compris les fichiers protégés)
Appuyez sur la touche située dans
l'angle inférieur droit pour passer à
l'écran suivant.
OK
1/2
Sélectionnez les cases à cocher des données devant être effacées automatiquement au
moment où l'interrupteur d'alimentation est mis en position de marche. (Sur les modèles
G, pressez les boutons voulus pour changer l'écran.) Une fois que vous avez fini de
sélectionner les cases à cocher, pressez le bouton [OK].
Aucune case n'est sélectionnée par défaut.
Lorsqu'un travail d'envoi d'image est enregistré (fax, scanner réseau, ou I-fax)*,
le "Retour à l'état initial à la mise sous tension" ne se produit pas
automatiquement lors de la mise sous tension.
*
Cela inclut les fax reçus, les I-fax qui n'ont pas encore été imprimés, mais pas
les données d'une boîte mémoire de fax (sauf boîte mémoire confidentielle).
Si vous souhaitez annuler l'effacement des données...
Reportez-vous aux explications de "Ecran d'effacement 2" et "Si vous souhaitez
annuler l'effacement des données..." de la section "Effacer toute la mémoire",
page 11 de ce manuel.
14
Page 77

FRANÇAIS
Réglages système
■ Réglages du nombre d'effacements
Pour renforcer les réglages de sécurité, vous pouvez répéter l'effacement des données
un certain nombre de fois dans chaque zone.
Modèles N
Appuyez sur la touche de chaque élément et sélectionnez le nombre de répétitions
souhaité pour l'effacement des données. Quand vous avez terminé, appuyez sur la
touche [OK].
Modèles G
Pressez le bouton, et réglez le nombre de fois voulu à l'aide du bouton ou .
Réglages système
Réglages du nombre d'effacements
Nombre de répétition de l'effacement des données:
Nombre de répét. du prog d'effacement auto. au
démarrage:
Nombre de répét. du prog. d'effacement auto. en fin de
tâche:
● Nombre de répétition de l'effacement des données
Annuler
1
Fois
1
Fois
1
Fois
OK
Réglages système
Nombre de répétition de l'effacement des données
Régler le nombre de répétitions du programme.
(Plage de réglage : entre 1 et 7)
1
Le nombre de répétitions de l'effacement des données lors de l'exécution de "Effacer
toute la mémoire", "Effacer les données d'archivage de documents", "Eff. données de
liste travaux terminés" ou "Eff. répertoire et données enregistrées" peut varier de 1 à
7. Le réglage par défaut est 1.
● Nombre de répét. du prog d'effacement auto au démarrage
Le nombre de répétitions de "Retour à l'état initial à la mise sous tension" peut être
défini de 1 à 7. Le réglage par défaut est 1.
Ce réglage est actif uniquement lorsque la case à cocher [Retour à l'état initial à
la mise sous tension] est sélectionnée.
● Nombre de répét. du prog. d'eff. auto. en fin de tâche
Le nombre de répétitions de l'effacement automatique après chaque travail peut être
défini de 1 à 7. Le réglage par défaut est 1.
OK
A propos du réglage de répétition
Lorsque le réglage de répétition (nombre de répétitions) est augmenté afin d'accroître la
fonction de sécurité, le temps nécessaire à l'effacement des données augmente.
Il est conseillé de sélectionner des réglages de répétition pour "Nombre de répétition de
l'effacement des données", "Nombre de répét. du prog d'effacement auto au
démarrage" et "Nombre de répét. du prog. d'eff. auto. en fin de tâche" adaptés à vos
besoins de sécurité et conditions d'utilisation.
15
Page 78

FRANÇAIS
Réglages système
■ Désactiver l'archivage de documents
Ce programme sert à restreindre les modes d'archivage de la fonction d'archivage de
document.
Les modes d'archivage de document (Mode fichier temp., Mode de partage et Mode
confidentiel) peuvent être désactivés pour chaque mode dans lequel l'archivage se fait
(Copie, Imprimante, Num. vers disque dur, et Env. d'image).
Réglages système
Activer/Désactiver les réglages
Désactiver l'archivage de document:
Copie
Imprimante
Num. vers disque dur
Env. d'image
Désactiver l'impression de liste:
● Pressez les cases à cocher des modes d'archivage que vous voulez désactiver. (Sur
Mode fichier temp. Mode de partage
Liste des réglages personnalisés
Liste des adresses d'envoi
Annuler
Mode confidentiel
les modèles G, pressez les boutons voulus pour changer l'écran.) Une fois que vous
avez fini de sélectionner les cases à cocher, pressez le bouton [OK].
● La propriété d'un fichier déjà stocké ne peut être définie via "Changement de
propriété" (
Guide d'utilisation
☞
"6. ARCHIVAGE DE DOCUMENTS") sur un mode d'archivage désactivé.
OK
"MODIFICATION DE LA PROPRIETE" du
Réglages système
Réglages de sécurité
Désactiver l'impression de liste
Désactiver les travaux d'impression
autres que les travaux maintenus
Régl. d'affichage liste travaux terminés
OK
Appuyez sur la touche située dans
l'angle inférieur droit pour passer à
l'écran suivant.
5/6
Si une certaine propriété est désactivée dans "Désactiver l'archivage de
documents" et qu'un fichier a été enregistré avec cette propriété, celle du fichier
stocké peut être modifiée.
Lorsque vous imprimez à l'aide de la fonction imprimante, même les formats de
stockage de fichiers qui ont été désactivés avec ce programme apparaissent dans
l'écran Gestion travaux du pilote d'imprimante (voir Guide d'utilisation
☞
"ENREGISTREMENT ET UTILISATION DES FICHIERS D'IMPRESSION (Rétention/
Archivage de documents)" du "3. IMPRIMANTE"). Cependant, si un format de fichier
désactivé est sélectionné lors de l'impression d'un fichier, il ne sera pas enregistré (seule
l'impression a lieu).
■ Désactiver l'impression de liste
Ce programme sert à désactiver l'impression d'une des listes suivantes imprimées via
"Impression listes (utilis.)" dans les réglages système (général)
"Liste des réglages personnalisés", "Liste des adresses d'envoi", "Liste des dossiers
d'archivage de document"
Sélectionnez les cases à cocher des listes pour lesquelles vous souhaitez désactiver
l'impression. Une fois les cases sélectionnées, appuyez sur la touche [OK].
16
Page 79

FRANÇAIS
Réglages système
■
Désactiver les travaux d'impression autres que les travaux maintenus
Il est possible d'interdire les travaux d'impression en mode imprimante autres que ceux
effectués à partir du tableau de bord de la machine. Ce réglage permet d'éviter que
n'importe qui puisse prendre des documents sensibles restés sur le plateau de sortie et
divulguer ces informations.
Réglages système
Activer/Désactiver les réglages
Imprimante
Num. vers disque dur
Env. d'image
Désactiver l'impression de liste:
Désactiver les travaux d'impression autres que les travaux maintenus
Liste des réglages personnalisés
Liste des adresses d'envoi
Liste des dossiers d'archivage de
document
Annuler
OK
● Pour interdire les travaux d'impression autres que ceux effectués à partir du tableau de
bord, sélectionnez cette case. Pour imprimer un travail lorsque ce réglage est activé,
procédez comme suit.
Etape 1:Sélectionnez [Maintien uniquement] dans le champ "Rétention" du pilote
d'imprimante puis exécutez l'impression.
Le travail d'impression s'affiche sur le tableau de bord de la machine.
Etape 2: Sélectionnez le travail souhaité et lancez l'impression.
( Guide d'utilisation"IMPRESSION D'UN FICHIER ENREGISTRE" du
☞
"6. DOKUMENTENABLAGE")
Si "Maintien après impression" ou "Impression de contrôle" est sélectionné avant
exécution de la commande d'impression, l'impression n'a pas lieu. Cependant, le travail
est maintenu dans la machine et peut être imprimé à partir du tableau de bord à l'aide
de la fonction d'archivage de document comme avec "Maintien uniquement".
Réglages système
Réglages de sécurité
Réglage de l'autorisation
de l'archivage de document
Désactiver l'impression de liste
Désactiver les travaux d'impression
autres que les travaux maintenus
Appuyez sur la touche située dans
l'angle inférieur droit pour passer à
l'écran suivant.
OK
4/5
Régl. d'affichage liste travaux terminés
Vous pouvez sélectionner si l'écran d'état des travaux terminés (touche de sélection de
l'écran d'état des travaux) doit ou non s'afficher.
Si, pour des raisons de sécurité, vous ne souhaitez pas que les informations enregistrées et
affichées dans l'écran d'état des travaux terminés (noms des utilisateurs du mode
imprimante, destinataires des images envoyées, expéditeurs des fax reçus, etc.)
apparaissent, utilisez ce réglage pour masquer l'écran.
Réglages système
Régl. d'affichage liste travaux terminés
Réglage de l'affichage de la liste
d'état des travaux terminés:
Imprimer
Numérisation
Fax
I-Fax
OKAnnuler
Réglages système
Régl. d'affichage liste travaux terminés
Sélection du mode de travail à afficher
sur liste d'état des travaux terminés.
Imprimer
Fax
Numérisation
I-Fax
OK
Appuyez sur la touche située dans
l'angle inférieur droit pour passer à
l'écran suivant.
● Pour masquer l'écran d'état des travaux terminés, appuyez sur la case de chaque
mode ([Imprimer], [Numérisation], [Fax] et [I-Fax]) pour la décocher.
Quand vous avez terminé, appuyez sur la touche [OK].
17
Page 80

FRANÇAIS
Réglages système
Réglage affichage de l'état des travaux
Vous pouvez sélectionner si les noms de fichier des travaux d'impression et les noms de
destination des travaux d'envoi d'images s'affichent ou non dans l'écran d'état des travaux
de l'écran tactile. Si vous ne voulez pas que ces informations s'affichent, décochez les
cases appropriées.
Déverrouiller le fichier/dossier
Cette fonction sert à déverrouiller les dossiers et les fichiers d'archivage de document, ainsi
que les PDF cryptés, verrouillés suite à la saisie d'un mot de passe incorrect.
Appuyez sur la touche [Déverrouiller le fichier/dossier] puis sur [Déverrouiller] pour
débloquer tous les éléments verrouillés. Une fois déverrouillés, les éléments peuvent être
manipulés. Lorsqu'ils ne sont pas verrouillés, la touche [Déverrouiller le fichier/dossier] est
grisée.
Clés produit
Pour activer la fonction de sécurité des données, vous devez utiliser les réglages système
(administrateur) afin d'entrer la clé produit (mot de passe). Le réglage système
correspondant s'appelle "KIT DE SECURITE DES DONNEES". Veuillez demander la clé
produit à votre revendeur.
Pour enregistrer la clé produit, appuyez à l'intérieur du cadre sous kit de sécurité des
données, entrez la clé produit en utilisant les touches numériques et appuyez ensuite sur la
touche [Soumettre].
● Si un numéro incorrect a été entré ...
Un message vous demande de vérifier à nouveau le numéro de la clé produit.
● Si un numéro correct a été entré ...
Un message vous demandant d'arrêter et de remettre en route la machine s'affiche.
Appuyez sur la touche [OK] lorsque vous avez fini de lire ce message.
Arrêtez tout d'abord l'interrupteur général et ensuite l'interrupteur principal. La fonction de
sécurité sera activée lorsque la machine est remise sous tension.
Une fois la fonction de sécurité activée, "Kit de sécurité des données" n'apparaît plus sur
l'écran de saisie de clé produit.
Après avoir entré la clé produit, il ne sera plus possible d'effectuer les opérations suivantes
jusqu'au redémarrage de la machine.
● Tout accès via le réseau ou la ligne fax est interdit.
● Les touches qui modifient l'affichage de l'écran, telles que la touche [EFFACER TOUT],
ne peuvent pas être utilisées.
● La touche [Précédent] de [Clés produit] dans les réglages système sera grisée pour
empêcher le basculement entre écrans.
18
Page 81

Réglage du contrôle de document
3
Contrôle de document
La fonction de contrôle de document est utilisée pour appliquer un modèle de contrôle de
document sur le papier pendant une copie, une impression ou la réception d'un fax.
Si une personne tente de numériser un document muni d'un modèle de contrôle de
document intégré sur une machine SHARP, où la fonction de contrôle de document est
activée, le message "Le modèle de contrôle de document a été détecté. Ce travail est
annulé." apparaît et un e-mail est envoyé à l'administrateur.
Cela empêche le lancement d'une seconde copie ou d'un second fax de documents importants.
Le contrôle de document peut ne pas être efficace si certains types, formats
d'origine, types ou formats de papier ou certains réglages sont utilisés.
Pour effectuer un contrôle de document efficace, veuillez respecter ce qui suit.
● Original
● Cette fonction peut ne pas s'exécuter correctement si le document original
consiste en un grand nombre de photographies.
● La fonction de contrôle de document vise à protéger les données texte. Elle
peut donc rencontrer des dysfonctionnements dans le cas d'une protection
de données graphiques.
● Couleur du modèle de contrôle de document
● Sélectionnez une couleur dans une famille de couleurs différente de la
couleur du papier.
● Papier sur lequel est imprimé le modèle de contrôle de document
● Pour autoriser la sélection des couleurs noir, cyan et jaune, utilisez le papier
recommandé par Sharp.
● Le papier blanc est recommandé. Si vous utilisez un autre papier, il est
possible que le modèle de contrôle de document ne soit pas détecté et que
la fonction ne s'exécute pas correctement.
● Utilisez le format B5 ou tout autre format de papier supérieur.
Vous pouvez également utiliser les formats suivants :
A3+ (12" x 18"), A3, B4, A4, B5, 11" x 17", 8-1/2" x 14", 8-1/2" x 13",
8-1/2" x 11", 7-1/4" x 10-1/2"R, 8K, 16K
(lorsque vous utilisez un format A4 ou tout autre format inférieur, vous
pouvez orienter votre feuille aussi bien horizontalement que verticalement).
Avis de non-responsabilité
Sharp ne garantit pas la bonne exécution continue de la fonction de contrôle de document.
Cette fonction peut connaître des dysfonctionnements dans certaines instances.
19
Page 82

FRANÇAIS
Réglage du contrôle de document
Modes auxquels la fonction de contrôle de document
peut être ajoutée
La fonction de contrôle de document peut être utilisée pour imprimer avec un modèle de
contrôle de document intégré dans les modes suivants :
● Copie (couleur / noir et blanc)
● Imprimante (couleur / noir et blanc)
● Impression archivage doc. (couleur / noir et blanc)
● Réception fax internet (noir et blanc uniquement)
● Réception fax (noir et blanc uniquement)
● Impression listes (noir et blanc uniquement)
Activation de la fonction de contrôle de document
Pour activer la fonction de contrôle de document, suivez ces étapes.
Modèles N
Appuyez sur la touche [RÉGLAGES PERSONNALISÉS] puis appuyez sur les touches
[Réglages de sécurité] et [Réglage du contrôle de document] pour afficher l'écran de
réglage du contrôle de document et configurer les réglages. Quand vous avez terminé,
appuyez sur la touche [OK].
Réglage de contrôle de document
Appuyez sur la barre de défilement et faites-la glisser vers le haut ou vers le bas pour
naviguer entre les écrans.
Barre de défilement
Réglages système
Réglage de contrôle de document
Toujours ajouter le modèle si vous imprimez tel qu'il est enregistré.
Copieur:
Sélection d'impression de
contrôle de document:
Réglage du modèle d'impression:
Réglage de la couleur
d'impression:
Imprimante:
Copieur:
Réglages système
Réglage de contrôle de document
Réglage de la couleur
d'impression
Réception fax internet:
Sélection d'impression de
contrôle de document:
Réglage du modèle d'impression:
Réception de fax:
Sélection d'impression de
contrôle de document:
Réglage du modèle d'impression:
Pas d'impression
Modèle 1
Bk(Noir)
Autoriser l'utilisateur à choisir la couleur
d'impression
Pas d'impression
Bk(Noir)
Autoriser l'utilisateur à choisir la
couleur d'impression
Pas d'impression
Modèle 1
Toujours imprimer
Modèle 1
Annuler OK
Annuler OK
Réglages système
Réglage de contrôle de document
Imprimante:
Sélection d'impression de
contrôle de document:
Réglage du modèle d'impression:
Réglage de la couleur
d'impression:
Impr. (Archiv. doc.):
Sélection d'impression de
contrôle de document:
Réglage du modèle d'impression:
Réglage de la couleur
d'impression:
Réglages système
Réglage de contrôle de document
Sélection d'impression de
contrôle de document:
Réglage du modèle d'impression:
Réception de fax
Sélection d'impression de
contrôle de document
Réglage du modèle d'impression:
Impressions listes
Sélection d'impression de
contrôle de document:
Réglage du modèle d'impression:
Pas d'impression
Modèle 1
Bk(Noir)
Autoriser l'utilisateur à choisir la
couleur d'impression
Pas d'impression
Modèle 1
Bk(Noir)
Pas d'impression
Modèle 1
Pas d'impression
Modèle 1
Modèle 1
Pas d'impression
Modèle 1
Annuler OK
Annuler OK
20
Page 83

FRANÇAIS
Réglage du contrôle de document
Modèles G
Touche [RÉGLAGES PERSONNALISÉS] - touche [Réglage du contrôle de document] Appuyez sur la touche de chaque mode pour sélectionner le réglage de ce mode.
Une fois les réglages configurés, appuyez sur la touche [OK].
Réglage de contrôle de document
Le réglage actuel de chaque mode apparaît à droite de la touche de chaque mode.
Réglages système
Réglage de contrôle de document
COPIE
Imprimante
Impr. (Archiv. doc.)
Réglages système
Réglage de contrôle de document
Toujours ajouter le modèle si vous imprimez tel qu'il
est enregistré.
Pas d'impression
Pas d'impression
Pas d'impression
OK
OK
3/3
3/3
Réglages système
Réglage de contrôle de document
1/3
Réception i-fax
Réception de fax
Impressions listes
Pas d'impression
Pas d'impression
Pas d'impression
Lorsque cette case est cochée ( ), tout
document précédemment imprimé avec un
modèle de contrôle de document sera
OK
toujours réimprimé avec un modèle de
contrôle de document.
■ Réglages de l'impression des fichiers stockés via la fonction
archivage de document
Ces réglages concernent l'impression des données des travaux de copie, d'envoi de
numérisation et d'impression ayant été enregistrés sur le disque dur de la machine via la
fonction archivage de document. Pour toujours imprimer un modèle de contrôle de
document lorsqu'un fichier enregistré est imprimé et qu'un modèle de contrôle de
document était imprimé lorsque le travail a été exécuté au départ, sélectionnez la case
[Toujours ajouter le modèle si vous imprimez tel qu'il est enregistré.] .
2/3
21
Page 84

FRANÇAIS
Réglage du contrôle de document
■
Réglages des modes Copie/Imprimante/Impression archivage doc.
Modèles N
Vous pouvez configurer les réglages des modes Copie, Imprimante et Impression
d'archivage de document dans les champs "Copie", "Imprimante" et "Impr. (Archiv.
doc.)" de l'écran de réglage du contrôle de document.
Réglages système
Réglage de contrôle de document
Toujours ajouter le modèle si vous imprimez tel qu'il est enregistré.
Copieur:
Sélection d'impression de
contrôle de document:
Réglage du modèle d'impression:
Réglage de la couleur
d'impression:
Imprimante:
Copieur:
Pas d'impression
Modèle 1
Bk(Noir)
Autoriser l'utilisateur à choisir la couleur d'impression
Pas d'impression
'
Annuler OK
● Sélection d'impression de contrôle de document (Sélectionnez la méthode
d'impression)
Appuyez sur la touche pour afficher la liste des éléments, puis appuyez sur l'un des
éléments pour le sélectionner.
Pas d'impression :
Le modèle de contrôle de document n'est pas imprimé.
Toujours imprimer :
Le modèle de contrôle de document est toujours imprimé.
Permettre à l'utilisateur de sélectionner :
L'utilisateur peut décider d'imprimer le modèle de contrôle de document chaque fois qu'il
configure un travail d'impression.
● Réglage du modèle d'impression (Sélectionnez le modèle à imprimer)
Vous pouvez sélectionner "Toujours imprimer" ou "Permettre à l'utilisateur de sélectionner"
dans "Sélection d'impression de contrôle de document" pour sélectionner un modèle.
Pour sélectionner un des modèles allant de 1 à 5, appuyez sur la touche . Appuyez sur
l'un des éléments pour le sélectionner.
Si vous ne parvenez pas à utiliser la fonction de contrôle de document pour une image
imprimée spécifique, essayez de modifier les réglages du modèle (modèles 1 à 5).
(Réglage par défaut : modèle 1)
● Réglage de la couleur d'impression (Sélectionnez la couleur)
Vous pouvez sélectionner "Toujours imprimer" ou "Permettre à l'utilisateur de sélectionner" dans
"Sélection d'impression de contrôle de document" pour sélectionner la couleur d'impression.
Pour sélectionner la couleur d'impression, appuyez sur la touche . Appuyez sur l'un des
éléments pour le sélectionner.
Touche [Bk(Noir)] :
Le modèle de contrôle de document est toujours imprimé en noir.
Touche [C(Cyan)] :
Le modèle de contrôle de document est toujours imprimé en cyan (Uniquement si le
mode couleur est sélectionné).
Touche [Y(Jaune)] :
Le modèle de contrôle de document est toujours imprimé en jaune (Uniquement si le
mode couleur est sélectionné).
Case [Autoriser utilisateur sélec. couleur d'impression] :
Lorsque cette case est cochée ( ), la couleur sélectionnée sera celle du modèle de
contrôle de document sélectionnée par défaut. L'utilisateur peut modifier la couleur
chaque fois qu'il exécute un travail d'impression.
Réglages système
Réglage de contrôle de document
Réglage de la couleur
d'impression
Impr. (Archiv. doc.):
Sélection d'impression de
contrôle de document:
Réglage du modèle d'impression:
Réglage de la couleur
d'impression:
Réception fax internet:
Sélection d'impression de
contrôle de document:
Réglage du modèle d'impression:
Bk(Noir)
Pas d'impression
Modèle 1
Bk(Noir)
Pas d'impression
Modèle 1
Annuler
OK
22
Page 85

FRANÇAIS
Réglage du contrôle de document
Modèles G
Appuyez sur la touche [Copie], [Imprimante] ou [Impression archivage doc.], puis
appuyez sur la touche [Sélection d'impression de contrôle de document] pour configurer
les réglages des modes Copie, Imprimante ou Impression d'archivage de document.
Etape 1 : Sélectionnez la méthode d'impression.
Réglages système
Sélec. impression du contrôle de document
OK
Pas d'impression
Permettre à l'utilisateur de
sélectionner
Pas d'impression
Appuyez sur une de ces touches pour qu'elle apparaisse en surbrillance.
Pas d'impression :
Le modèle de contrôle de document n'est pas imprimé.
Toujours imprimer :
Le modèle de contrôle de document est toujours imprimé.
Permettre à l'utilisateur de sélectionner :
L'utilisateur peut décider d'imprimer le modèle de contrôle de document chaque fois qu'il
ou elle configure un travail d'impression.
Une fois les réglages configurés, appuyez sur la touche [OK].
Etape 2 : Sélectionnez le modèle à imprimer
Si [Toujours imprimer] ou [Permettre à l'utilisateur de sélectionner] est sélectionné à l'étape
1, le modèle peut être sélectionné.
Appuyez sur la touche [Réglage du modèle d'impression] pour sélectionner un des modèles allant
de 1 à 5. Appuyez sur une des touches pour qu'elle apparaisse en surbrillance, puis sur [OK].
Si vous ne parvenez pas à utiliser la fonction de contrôle de document pour une image imprimée
spécifique, essayez de modifier les réglages du modèle (modèles 1 à 5). (Réglage par défaut : modèle 1)
Etape 3 : Sélectionnez la couleur
Si [Toujours imprimer] ou [Permettre à l'utilisateur de sélectionner] est sélectionné à l'étape
1, la couleur d'impression peut être sélectionnée.
Appuyez sur la touche [Réglage de la couleur d'impression] pour sélectionner une couleur
d'impression. Appuyez sur une de ces touches pour qu'elle apparaisse en surbrillance, puis sur [OK].
Touche [Bk(Noir)] :
Le modèle de contrôle de document est toujours imprimé en noir.
Touche [C(Cyan)] :
Le modèle de contrôle de document est toujours imprimé en cyan (Uniquement si le
mode couleur est sélectionné).
Touche [Y(Jaune)] :
Le modèle de contrôle de document est toujours imprimé en jaune (Uniquement si le
mode couleur est sélectionné).
Autoriser l'utilisateur à choisir la couleur d'impression :
Lorsque cette case est sélectionnée ( ), la couleur en surbrillance sera celle du
modèle de contrôle de document sélectionnée par défaut. L'utilisateur peut modifier la
couleur chaque fois qu'il ou elle exécute un travail d'impression.
Si vous appuyez sur la touche [C(Cyan)] ou [Y(Jaune)], le message "Tous les travaux
de ce mode sont imprimés en couleur lorsque cette couleur est sélectionnée" apparaît.
23
Page 86

FRANÇAIS
Réglage du contrôle de document
■ Réglages des modes Réception fax internet/Réception fax/
Impression listes
Modèles N
Vous pouvez configurer les réglages des modes Réception fax internet, Réception fax et
Impression listes dans les champs "Réception fax internet", "Réception fax" et
"Impression listes" de l'écran de réglage du contrôle de document.
Réglages système
Réglage de contrôle de document
Réglage de la couleur
d'impression
Impr. (Archiv. doc.):
Sélection d'impression de
contrôle de document:
Réglage du modèle d'impression:
Réglage de la couleur
d'impression:
Réception fax internet:
Sélection d'impression de
contrôle de document:
Réglage du modèle d'impression:
Bk(Noir)
Pas d'impression
Modèle 1
Bk(Noir)
Pas d'impression
Modèle 1
Annuler OK
● Sélection d'impression de contrôle de document (Sélectionnez la méthode
d'impression)
Appuyez sur la touche pour afficher la liste des éléments, puis appuyez sur l'un des
éléments pour le sélectionner.
Pas d'impression :
Le modèle de contrôle de document n'est pas imprimé.
Toujours imprimer :
Le modèle de contrôle de document est toujours imprimé.
Réglages système
Réglage de contrôle de document
Réception de fax
Sélection d'impression de
contrôle de document:
Réglage du modèle d'impression:
Impressions listes
Sélection d'impression de
contrôle de document:
Réglage du modèle d'impression
Avertissement
Le modèle de contrôle de document peut être imprimé dans la couleur sélect., uniquement lors
d'un travail couleur.
Désactiver la fonction de transfert de données si vous voulez entièrement gérer cette
fonction.
Pas d'impression
Modèle 1
Pas d'impression
Modèle 1
Annuler OK
Si "Toujours imprimer" est activé en mode Réception fax internet / Réception
fax, il est recommandé de désactiver la fonction de suivi de chaque mode. (Pour
plus de détails, reportez-vous à "4. TELECOPIEUR" dans le Guide d'utilisation.)
● Réglage du modèle d'impression (Sélectionnez le modèle à imprimer)
Si "Toujours imprimer" est activé dans "Sélection d'impression de contrôle de document",
vous pouvez sélectionner un modèle.
Pour sélectionner un des modèles allant de 1 à 5, appuyez sur la touche . Appuyez sur
l'un des éléments pour le sélectionner.
Si vous ne parvenez pas à utiliser la fonction de contrôle de document pour une image
imprimée spécifique, essayez de modifier les réglages du modèle (modèles 1 à 5).
(Réglage par défaut : modèle 1)
24
Page 87

FRANÇAIS
Réglage du contrôle de document
Modèles G
Appuyez sur la touche [Réception fax internet], [Réception fax] ou [Impression listes],
puis appuyez sur la touche [Sélection d'impression de contrôle de document] pour
configurer les réglages des modes Réception fax internet, Réception fax ou Liste
d'impression.
Etape 1 : Sélectionnez la méthode d'impression.
Réglages système
Sélec. impression du contrôle de document
OK
Pas d'impression
Pas d'impression
Appuyez sur une de ces touches pour qu'elle apparaisse en surbrillance.
Pas d'impression :
Le modèle de contrôle de document n'est pas imprimé.
Toujours imprimer :
Le modèle de contrôle de document est toujours imprimé.
Une fois les réglages configurés, appuyez sur la touche [OK].
Si vous appuyez sur la touche [Toujours imprimer] en mode Réception fax
internet ou Réception fax, le message "Désactiver la fonction de transfert de
données si vous voulez entièrement gérer cette fonction" apparaît. Après avoir
appuyé sur la touche [OK], il est recommandé de désactiver la fonction de suivi
des données d'un ou des deux modes en fonction de vos besoins. (Pour plus de
détails, reportez-vous à "4. TELECOPIEUR" dans le Guide d'utilisation.)
Etape 2 : Sélectionnez le modèle à imprimer
Si [Toujours imprimer] est sélectionné à l'étape 1, le modèle peut être sélectionné.
Appuyez sur la touche [Réglage du modèle d'impression] pour sélectionner un des modèles
allant de 1 à 5. Appuyez sur une des touches pour qu'elle apparaisse en surbrillance, puis
sur [OK].
Si vous ne parvenez pas à utiliser la fonction de contrôle de document pour une image
imprimée spécifique, essayez de modifier les réglages du modèle (modèles 1 à 5).
(Réglage par défaut : modèle 1)
25
Page 88

FRANÇAIS
Réglage du contrôle de document
Utilisation de la fonction de contrôle de document
Lorsque la fonction de contrôle de document est utilisée, un modèle de contrôle de
document est imprimé sur le papier sur lequel la copie ou le fax est imprimé.
■
Pages sur lesquelles un modèle de contrôle de document est
imprimé (tout mode confondu)
● Le modèle de contrôle de document est imprimé sur toutes les pages si la machine
Sharp est équipée de la fonction de contrôle de document, y compris le verso si vous
imprimez en recto verso.
●
Lorsqu'une page blanche sort car vous avez imprimé en mode recto verso un nombre de
pages impair, aucun modèle de contrôle de document n'est imprimé sur la page blanche.
●
Lors de l'utilisation de la fonction couvertures/intercalaires (y compris les intercalaires
pour transparents), un modèle de contrôle de document n'est imprimé que sur les
couvertures et les intercalaires sur lesquels du texte est copié. Si ce n'est pas le cas,
aucun modèle de contrôle de document n'est imprimé sur la couverture ou l'intercalaire.
Après avoir activé la fonction de contrôle de document dans les réglages système, suivez
ces étapes pour utiliser la fonction.
■ Utilisation du contrôle de document en mode copie
Pressez le bouton [Modes spéciaux] en mode de copie et passez au 2ème écran sur les
modèles N, ou au 4ème écran sur les modèles G. (Pour plus de détails, reportez-vous à
"2. COPIEUR" dans le Guide d'utilisation.)
Etape 1 : Appuyez sur la touche [Contrôle document].
lente
OK
2
2
Modes spéciaux
Compteur
originaux
Contrôle
document
Original
form. mix.
num
Mode
.
lente
Modes spéciaux
Tampon Editer image
Fichier temp.
Réglages des
couleurs
Fichier Epreuve
Compteur
originaux
Contrôle
document
Original
form. mix.
Mode
num
.
L'affichage de la touche [Contrôle document] et les étapes qui suivent varient en
fonction des réglages configurés pour la fonction de contrôle de document dans
les réglages système.
OK
4/4
26
Page 89

FRANÇAIS
Réglage du contrôle de document
Réglages de la fonction de contrôle
de document des réglages système
Réglage Sélection
d'impression de
contrôle de
document (Copie)
[Pas d
'impression] - Grisé Pas disponible
[Toujours imprimer] En surbrillance Passez à l'étape 2
[Permettre à
l'utilisateur de
sélectionner]
Etat de la case
Paramètres de couleur
d'impression (copie)
Affichage de la touche
[Contrôle document]
En surbrillance Lorsqu'une touche est
Affichage normal Passez à l'étape 2
Affichage normal
Ecran Modes spéciaux
Etapes suivantes
sélectionnée, un signal
sonore est émis pour
indiquer que la touche
n'est pas disponible.
Lorsque vous appuyez
sur cette touche, elle est
mise en surbrillance et
la fonction est activée.
Etape 2 : Appuyez sur la touche [Bk(Noir)], [C(Cyan)] ou [Y(Jaune)].
La touche de la couleur définie dans le réglage de couleur d'impression des réglages
système est mise en surbrillance par défaut.
Après avoir appuyé sur une des touches, appuyez sur la touche inférieure [OK] pour revenir
à l'écran de menu des modes spéciaux.
Etape 3 :
Configurez les réglages de l'écran de menu des modes spéciaux et appuyez
sur la touche [COULEUR] ou [NOIR ET BLANC].
● Si vous appuyez sur la touche [C(Cyan)] ou [Y(Jaune)] à l'étape 2, la touche
[NOIR ET BLANC] ne peut pas être sélectionnée.
Lorsque le mode de couleur n'est pas défini sur couleur, la touche
[COULEUR] ne peut pas être sélectionnée.
● Lorsque le mode de couleur est défini sur une couleur unique, l'impression du
modèle de contrôle de document est impossible.
27
Page 90

FRANÇAIS
Réglage du contrôle de document
Association de la fonction de contrôle de document à d'autres fonctions
Fonction associée
au contrôle de
document
Exposition Le modèle est toujours imprimé à la même exposition quel que soit le réglage
de l'exposition.
Taux de repro. Le modèle est toujours imprimé au même taux quel que soit le réglage du taux
de reproduction.
Recto verso Le modèle est imprimé au recto et au verso du papier lors d'une copie recto
verso. (L'orientation de l'original, bloc-notes ou livre n'est pas prise en compte.)
Réglage de la
rotation de copie
Décalage de la
marge
Effacement Le modèle est imprimé normalement sur le bord ou le centre effacé.
Copie sur deux
pages
Copie en brochure Impression basée sur le papier utilisé pour la copie en brochure.
Const. travail Le modèle est imprimé normalement.
Copie en tandem Le modèle est imprimé normalement à la fois sur la machine maître et esclave.
Couvertures/
Intercalaires
Interc. pour
transparents
2en1/4en1
Copie de livre Lors d'une copie livre, le modèle est imprimé suivant le papier utilisé.
Copie sur onglets La position du modèle ne change pas lorsque la copie sur onglets est utilisée.
Card Shot Le modèle est imprimé une fois, chaque fois que le recto et le verso du
Tampo n Si le modèle et le tampon se superposent, le modèle est prioritaire.
Répétition photo Le modèle est imprimé une fois à chaque fois que la photo est numérisée.
Agrandissement
multi-pages
Image miroir Le modèle est imprimé dans l'orientation normale sans être inversée.
A3 pleine page
Centrage Le modèle est imprimé normalement
N/B inversé Les modèles sont imprimés normalement sans inversion noir/blanc.
Autres fonctions Le modèle est imprimé normalement lorsque les réglages Réglage RVB,
Le modèle ne change pas lorsque la rotation de la copie est utilisée.
(L'orientation du modèle varie en fonction de celle du papier dans le magasin.)
La position du modèle ne change pas lorsque le décalage de la marge est
utilisé. (La largeur de marge n'a aucun effet sur la position du modèle.)
Le modèle est imprimé sur les deux pages, chacune représentant la moitié du
document original.
(Si la machine esclave n'est pas équipée du kit de sécurité des données, la
copie en tandem est impossible.)
Le modèle est imprimé normalement lors de la copie sur des couvertures ou
des intercalaires. Lorsque la copie ne concerne ni une couverture ni un
intercalaire, le modèle n'est pas imprimé.
Le modèle est imprimé normalement. (Lorsque du texte est copié sur un
intercalaire, le modèle est imprimé de la même manière que sur un transparent.)
Impression basée sur le papier. Lorsque l'option 2en1 est sélectionnée, 2 pages
orginales sont imprimées sur 1 seule feuille de papier. Le modèle est imprimé
normalement sur la feuille de papier même en cas d'impression 2en1 ou 4en1.
(La largeur de décalage de l'image pour la copie sur onglets n'a aucun effet sur
la position du modèle.)
La vitesse d'une copie diminue pour une opération sur papier à onglets en
utilisant la fonction de contrôle de document.
document original sont numérisés.
Le modèle est imprimé sur chaque page de l'agrandissement multi-pages.
La zone imprimée du modèle est agrandie pour répondre au réglage A3 pleine page.
Netteté, Suppression du fond, Balance des couleurs, Luminosité et/ou Intensité
sont utilisés.
Impression du modèle de contrôle de document
28
Page 91

FRANÇAIS
Réglage du contrôle de document
■ Utilisation de la fonction de contrôle de document en mode
imprimante
● Lorsque l'option [Toujours imprimer] est activée dans [Sélection d'impression de
contrôle de document] des réglages système, un modèle de contrôle de document est
toujours imprimé.
● Si [Permettre à l'utilisateur de sélectionner] est activé, suivez la procédure ci-dessous
pour imprimer un modèle de contrôle de document.
Etape 1 : Sélectionnez la case [Kit de sécurité des données] dans l'écran des
réglages initiaux (écran des propriétés) du pilote d'imprimante.
Pour plus d'informations sur les réglages initiaux du pilote d'imprimante, consultez le guide
d'installation du logiciel.
Etape 2 : Avant de lancer l'impression, cliquez sur l'onglet [Avancé] de la fenêtre des
propriétés du pilote d'imprimante et cliquez sur le bouton [Contrôle de
document].
Pour "3. IMPRIMANTE" du Guide d'utilisation, consultez le guide de l'imprimante.
Etape 3 : Cochez la case [Contrôle de document] et sélectionnez [Noir], [Cyan], ou
[Jaune] à partir de l'option [Couleur d'impression].
■ Utilisation de la fonction de contrôle de document en mode
archivage de document
Une fois un fichier stocké par archivage de document via les réglages configurés dans
"Réglages de contrôle de document" des réglages système, suivez les étapes ci-dessous
pour imprimer un modèle de contrôle de document. (Pour plus de détails concernant
l'utilisation des fichiers mémorisés par l'archivage de documents, reportez-vous à "USING
STORED FILES" dans "6. ARCHIVAGE DE DOCUMENTS" dans le Guide d'utilisation.)
Sélection d'impression de contrôle de document
Si la case [Permettre à l'utilisateur de sélectionner] est cochée, la touche
[Contrôle document] peut être sélectionnée pour imprimer ou pas le modèle de
contrôle de document. Toutefois, si la case [Toujours ajouter le modèle si vous
imprimez tel qu'il est enregistré] est cochée, l'impression du modèle de contrôle
de document ne peut pas être annulée, que [Permettre à l'utilisateur de
sélectionner] soit sélectionné ou pas.
Etape 1 : Appuyez sur la touche [Modes spéciaux] dans l'écran des réglages
d'impression et sur la touche [Contrôle document].
lente
OK
Modes spéciaux
Compteur
originaux
Contrôle
document
Modes spéciaux
Effacement
des bords
Const.
travail
Compteur
originaux
Numéris.
2 pages
Original
form
.
Contrôle
document
mix.
Card Shot
Mode
num
.
Lorsque "Pas d'impression" est sélectionné dans "Sélection d'impression de
contrôle de document" dans les réglages système, la touche [Contrôle document]
est grisée pour empêcher la sélection.
(Toutefois, pour les fichiers sur lesquels des modèles de contrôle de document ont
été imprimés lorsque les fichiers ont été sauvegardés, vous pouvez presser le bouton
[Contrôle document] si la case à cocher [Toujours ajouter le modèle si vous imprimez
tel qu'il est enregistré.] a été sélectionnée dans les paramètres du système.)
OK
2/2
29
Page 92

FRANÇAIS
Réglage du contrôle de document
Etape 2 : Si la case [Autoriser l'utilisateur à choisir la couleur d'impression] est
sélectionnée dans [Sélection d'impression de contrôle de document] des
réglages système, appuyez sur la touche [Bk(Noir)], [C(Cyan)] ou [Y(Jaune)].
La touche de la couleur sélectionnée dans [Réglage de la couleur d'impression] des réglages
système est mise en surbrillance par défaut. Cependant, si le mode de couleur du fichier
stocké est autre que couleur, la touche [Bk(Noir)] est sélectionnée et il ne sera pas possible
de définir la touche sur [C(Cyan)] ou [Y(Jaune)].
Après avoir appuyé sur une des touches, appuyez sur la touche supérieure [OK].
Etape 3 : Appuyez sur la touche [Imprimer et effacer les données] ou [Imprimer et
sauvegarder les données].
■ Utilisation de la fonction de contrôle de document avec les
modes Réception fax internet/Réception fax/Impression listes
Aucune opération particulière n'est nécessaire. Lors de l'impression d'un document, un
modèle de contrôle de document noir est incorporé selon les réglages de la fonction de
contrôle de document des réglages système.
■
Commandes de corps de texte pour l'impression de courrier
électronique
La commande ci-dessous peut être entrée dans le corps de texte d'un e-mail destiné à être
imprimé directement afin de spécifier ou pas l'impression d'un modèle de contrôle de
document.
Fonction Nom de commande Valeur Exemple de saisie
Impression de
modèle ON/OFF
DOCUMENTCONTROL ON
OFF
Avertissement
Il s'agit d'un produit de classe A qui
risque de provoquer des interférences
radio locales. L'utilisateur doit prendre
les mesures appropriées pour limiter
ces interférences.
DOCUMENTCONTROL=ON
30
Page 93

DEUTSCH
Garantie
Obwohl alles unternommen wurde, um das vorliegende Handbuch so präzise und so
hilfreich wie nur möglich zu gestalten, übernimmt die SHARP Corporation keine Garantie
für seinen Inhalt. Alle hierin enthaltenen Informationen können ohne vorherige
Ankündigung geändert werden. SHARP kann für etwaige direkte oder indirekte Verluste
oder Schäden, die aus der Verwendung dieses Bedienungshandbuches hervorgehen oder
damit zusammenhängen, keine Verantwortung übernehmen.
© Copyright SHARP Corporation 2008. Alle Rechte vorbehalten. Das Reproduzieren,
Adaptieren oder Übersetzen ohne vorherige schriftliche Genehmigung ist mit Ausnahme des
urheberrechtlich erlaubten Umfangs verboten.
Hinweis:
Die Bezeichnung "Systemeinstellungen (Administrator)" in diesem Handbuch bezieht sich
auf jene Systemeinstellungen, für deren Auswahl Sie sich mit Administratorrechten
angemeldet haben müssen, und "Systemeinstellungen (allgemein)" bezieht sich auf jene
Systemeinstellungen, die von allgemeinen Benutzern (einschließlich des Administrators)
konfiguriert werden können.
In diesem Handbuch verwendete Symbole
Die in diesem Handbuch verwendeten Symbole geben Auskunft über:
Dieses Symbol weist auf eine zusätzliche Erklärung einer Funktion oder eines
Verfahrens hin.
Dieses Symbol weist auf eine Erklärung zum Löschen oder Ändern eines
Vorgangs hin.
Die in diesem Handbuch aufgeführten Bildschirmanzeigen, Meldungen und Tastennamen
können aufgrund von Verbesserungen und Änderungen von denen auf dem Gerät abweichen.
Inhalt
Einführung............................................................................................................................. 2
Bei installiertem Daten-Sicherheitspaket ..............................................................................4
● Systemeinstellungen des Daten-Sicherheitspaketes ......................................................4
● Dokumentensteuerungsfunktion......................................................................................4
● Dokumentenablage .........................................................................................................4
● Bildschirm Authentifizierungsgruppe anmelden ..............................................................5
● Passwortschutz ...............................................................................................................5
● Einschränkungen für Tandem-Kopieren und Tandem-Drucken.......................................7
● Sicherheitseinstellungen auf den Webseiten...................................................................8
● Übertragung kopierter Daten...........................................................................................8
Systemeinstellungen .............................................................................................................9
● Verwendung der Systemeinstellungen (Administrator)....................................................9
● Sicherheitssystemeinstellungen ......................................................................................9
● Anzeigeeinstellungen abgeschlossene Jobs.................................................................18
● Einstellung Auftragsstatusanzeige ................................................................................19
● Anmeldedatei/-ordner freigeben ....................................................................................19
● Prod.Schlüss. ................................................................................................................19
Dokumentensteuerungseinstellung.....................................................................................20
● Dokumentensteuerung ..................................................................................................20
● Modi, denen die Dokumentensteuerungsfunktion hinzugefügt werden kann................21
● Aktivierung der Dokumentensteuerungsfunktion...........................................................21
● Verwendung der Dokumentensteuerungsfunktion.........................................................24
1
Page 94

DEUTSCH
Einführung
MX-FR10U erweitert das SHARP Digitale Farb-Multifunktionssystem um eine
Sicherheitsfunktion.
Bei Verwendung der Funktionen Kopieren, Drucken, Netzwerk-Scannen oder Faxen des SHARP
Digitalen
erzeugten Bilddaten verschlüsselt und nach der Fertigstellung des Auftrags werden die
verschlüsselten Daten sofort vom Speicher und der Festplatte gelöscht.
■ Hinweis:
Farb-
Multifunktionssystems mit Sicherheitsfunktion werden die für den Auftrag
Beachten Sie zur Sicherstellung der maximalen Sicherheit durch die
Datensicherheitsfunktion des Geräts Folgendes:
● Der Administrator spielt bei der Aufrechterhaltung der Sicherheit eine entscheidende
Rolle. Wählen Sie die Person, welche die Aufgabe des Administrators übernimmt, mit
entsprechender Umsicht aus.
● Das Administratorpasswort muss sofort geändert werden, wenn eine andere Person
als Administrator eingesetzt wird.
● Ändern Sie regelmäßig das Administrator
● Verwenden Sie für das Administrator
● Die Systemeinstellungen (Administrator) sind für die Sicherheitsverwaltung sehr
wichtig. Wenn Sie sich während der Verwendung der Systemeinstellungen
(Administrator) vom Gerät entfernen, drücken Sie zuvor zum Verlassen der
Systemeinstellungen (Administrator) die Taste [Logout]. Der Geräteadministrator
sollte die Benutzer anweisen, die Systemeinstellungen (Administrator) nicht ohne
dessen Zustimmung zu verwenden.
● Der Kunde trägt die Verantwortung für die Kontrolle der mit dem Gerät kopierten
Dokumente und erhaltenen Faxe.
● Beachten Sie, dass die im Abrufspeicher der Fax-
bei installiertem Daten-Sicherheitspaket gelesen werden können.
passwort
passwort
(mindestens alle 60 Tage einmal).
kein leicht zu erratendes Kennwort.
Funktion
enthaltenen Faxdaten auch
2
Page 95

DEUTSCH
■ Sichern und Löschen von mit der Dokumentenablagefunktion
gespeicherten Daten
Bei installiertem Daten-Sicherheitspaket werden die zuvor mit der
Dokumentenablagefunktion auf dem Gerät gespeicherten Daten gelöscht. Daher
werden Daten, die Sie behalten wollen, auf einen Computer kopiert, bevor das DatenSicherheitspaket installiert wird, und anschließend nach der Installation und dem
Löschen der alten Daten auf das Gerät zurückgegeben. (Diese Arbeiten werden für
gewöhnlich während der Installation des Daten-Sicherheitspaketes durch einen
Servicetechniker durchgeführt.)
Zur Rückgabe von Daten von einem Computer an das Gerät nach der Installation des
Daten-Sicherheitspaketes können nur vertrauliche Ordner verwendet werden. Legen Sie
vor der Rückgabe von Daten von einem Computer an das Gerät nötigenfalls vertrauliche
Ordner an. Informationen über die Vorgehensweise zur Speicherung von Daten auf
einem Computer und die Rückgabe von Daten von dem Computer an das Gerät finden
Sie in der Hilfe zur Dokumentenablage auf den Webseiten des Geräts.
■ Über Passwörter für die Webseite
Wenn beim Versuch des Zugriffs auf die Webseiten eines Gerätes mit installiertem
Daten-Sicherheitspaket das falsche Passwort für "users" oder "admin" dreimal
hintereinander eingegeben wird, wird der Zugriff auf Seiten, bei denen die Passwörter
für "users" oder "admin" erforderlich sind, für 5 Minuten gesperrt.
Einige Vorgehensweisen für die Bedienung des Gerätes ändern sich bei der
Installation des Daten-Sicherheitspaketes. Die Handbücher zum Gerät
( "BEDIENUNGSHANDBÜCHER UND IHRE VERWENDUNG" in der
☞
Kurzanleitung) erläutern die Gerätebedienvorgänge bei nicht installiertem
Daten-Sicherheitspaket. Dieses Handbuch beschreibt die durch die Installation
des Daten-Sicherheitspaketes geänderten Bedienvorgänge.
3
Page 96

Bei installiertem Daten-
1
Bei installiertem Daten-Sicherheitspaket wird das folgende Symbol im Bedienfeld
angezeigt. Durch Berühren des Symbols ( ) werden die Versionsinformationen zum
Daten-Sicherheitspaket aufgerufen.
Bei installiertem Daten-Sicherheitspaket werden die im Gerät verbleibenden Daten
nach jedem Auftrag automatisch gelöscht.
Beim Löschen der Daten erscheint die folgende Meldung für 6 Sekunden
* Die Meldungsanzeigedauer kann mithilfe der Funktion "Meldungszeitdauer
einstellen" in den Systemeinstellungen (Administrator) geändert werden.
(➞ Systemeinstellungen (Administrator) > "Betriebs-Einstellungen" > "Andere
Einstellungen" > "Meldungszeitdauer Einstellen")
Sicherheitspaket
*
.
Daten sind gelöscht.
Wird das Gerät ausgeschaltet, während die Bilddaten von der Festplatte
gelöscht werden oder bevor der Auftrag beendet wurde, werden die Daten unter
Umständen nicht vollständig gelöscht. Um zu verhindern, dass nach dem
Ausschalten des Geräts Daten erhalten bleiben, empfehlen wir, das Programm
"Gesamtspeicher löschen" (Seite 11 in diesem Handbuch) auszuführen, um die
Daten vor dem Ausschalten vollständig zu löschen.
Systemeinstellungen des Daten-Sicherheitspaketes
Bei installiertem Daten-Sicherheitspaket können Einstellungen zur Erhöhung der Sicherheit
zu den Systemeinstellungen (Administrator) des Geräts hinzugefügt werden. Siehe
"Systemeinstellungen" (Seite 9 in diesem Handbuch) für weitere Informationen.
Dokumentensteuerungsfunktion
Mit der Funktion Dokumentensteuerung können Sie beim Drucken von Druckaufträgen, Kopien
und empfangenen Faxen ein Dokumentensteuerungsmuster in die Seite einbetten lassen.
Das eingebettete Dokumentensteuerungsmuster verhindert das erneute Kopieren und Faxen eines
gedruckten Dokumentes bzw. das Durchführen anderer Vorgänge mit diesem. Weitere
Informationen finden Sie unter "Dokumentensteuerungseinstellung" (Seite 20 in diesem Handbuch).
Dokumentenablage
Um die Funktion Dokumentenablage bei installiertem Daten-Sicherheitspaket zum Speichern von
Aufträgen im Gerät zu verwenden, stellen Sie die Eigenschaften der Datei auf "Vertraulich" ein.
Dateien, deren Eigenschaften auf "Gemeinsame Nutzung" oder "Schutz" eingestellt sind,
können nicht gespeichert werden. Geben Sie außerdem zum Drucken von einem Computer
mithilfe der Funktion Speicherung ein Passwort in den Druckertreibereinstellungen ein
(wenn die werkseitige Standardeinstellung in Kraft ist).
4
Page 97

DEUTSCH
Bei installiertem Daten-Sicherheitspaket
Bildschirm Authentifizierungsgruppe anmelden
Wenn das Daten-Sicherheitspaket installiert ist, wird in den Systemeinstellungen
(Administrator) im Menübildschirm "Auth.gruppe anmelden" das Feld [Sicherheit] hinzugefügt.
Beim Berühren dieser Taste erscheint der folgende Konfigurationsbildschirm.
Systemeinstellungen
Sicherheit
Gruppenname: Gast
Andere Jobs außer Jobs im Speicher drucken :
Einstellung Dokumentenablage zulassen :
Kopie
Drucker
Scannen auf Festplatte
Bild senden
● Andere Jobs auser Jobs im Speicher drucken
Modus offene Ablage
Gemeinsamer Modus
Erlaubt
Abbrechen
Vertraulicher Modus
OK
Wenn [Erlaubt] markiert ist und das Feld [OK] berührt wird, werden alle Druckaufträge
außer der Druckwarteschleifen-Jobs bei aktivierter Benutzerauthentifizierung unter
Authentifizierungsgruppe anmelden zugelassen.
● Einstellung Dokumentenablage zulassen
Berühren Sie diese Taste beim Speichern einer Authentifizierungsgruppe für die
Benutzerauthentifizierung, um zu wählen, ob die Dokumentenablage in jedem
Ablagemodus und für jeden Auftragstyp zulässig ist.
Zum Aktivieren eines Ablagemodus berühren Sie das Kontrollkästchen des jeweiligen
Modus, um ihn auszuwählen.
Nachdem Sie die gewünschten Kontrollkästchen markiert haben, berühren Sie die das
Feld [OK].
Die Funktion Dokumentenablage muss in den folgenden Einstellungen zugelassen werden.
Standardmäßig ist die Dokumentenablage nur im vertraulichen Modus zulässig.
● Dokumentenablage in Authentifizierungsgruppe anmelden (die aktuelle
Einstellung) zulassen
● Deaktivierung der Dokumentenablage in den Systemeinstellungen (Seite 17 in
diesem Handbuch)
Passwortschutz
Bei installiertem Daten-Sicherheitspaket können über das Bedienfeld des Geräts oder die
Webseiten eingegebene Passwörter geschützt werden.
■ Administrator Passwort/Benutzerpasswort
Bei installiertem Daten-Sicherheitspaket wird die Passworteingabe für 5 Minuten
gesperrt, wenn bei nicht aktivierter Benutzer-Authentifizierungsfunktion dreimal
hintereinander ein falsches Administratorpasswort eingegeben wird, oder wenn bei
aktivierter Benutzer-Authentifizierungsfunktion dreimal hintereinander ein falsches
Benutzerpasswort eingegeben wird.
5
Page 98

DEUTSCH
Bei installiertem Daten-Sicherheitspaket
■ Vertrauliche Ordner und vertrauliche Dateien der
Dokumentenablage-Funktion
Wenn für einen vertraulichen Ordner oder eine vertrauliche Datei dreimal hintereinander
ein falsches Passwort eingegeben wird, wird dieser Ordner bzw. diese Datei gesperrt.
Um den Ordner oder die Datei wieder zu entsperren, verwenden Sie "Anmeldedatei/ordner freigeben" (Seite 19 in diesem Handbuch).
●
Alle Dateien mit demselben Benutzernamen und Passwort können mithilfe der
Funktion Batch-Druck der Dokumentenablage auf einmal gedruckt werden (
Bedienungsanleitung "STAPELDRUCK" in der "6. DOKUMENTENABLAGE").
Dateien, die ein vom bei der Suche eingegebenen Passwort abweichendes
Passwort haben, werden als Dateien behandelt, für die ein falsches Passwort
eingegeben wurde. Daher wird empfohlen, das Durchführen von Suchen mit
[Alle Benutz.] und [Unbek. Benutzer] nach Möglichkeit zu vermeiden.
● Wenn die Verwendung einer Datei nicht zulässig ist, gilt bei Verwendung der
Dokumentenablagefunktion Folgendes:
● Bei einem Batch-Druck werden nicht zulässige Dateien nicht gedruckt,
auch wenn die den Suchkriterien entsprechen.
■ Bildschirm für die Dateisuche in der Dokumentenablage
Wenn das Daten-Sicherheitspaket installiert ist, wird die Kennworteingabeeinstellung
nicht im Suchbildschirm der Dokumentenablage angezeigt.
☞
■ PDF verschlüsseln
Wenn ein Auftrag per Verschlüsseltes-PDF-direkt-Drucken gedruckt wird (wenn das
PS3-Modul installiert ist)
Auftragsstatusbildschirms angezeigt und zum Starten des Druckvorgangs muss ein
Passwort eingegeben werden.
Wenn bei installiertem Daten-Sicherheitspaket dreimal hintereinander ein falsches
Passwort eingegeben wird, wird die Meldung "Funktion ist ausgeschaltet. Bitte wenden
Sie sich an Ihren Admin." für 6 Sekunden angezeigt und die Druckfunktion wird gesperrt.
Beim Berühren einer Datei im Spulenbildschirm, für die dreimal ein falsches Passwort
eingegeben wurde, wird der folgende Bildschirm angezeigt.
Dieser Druckjob ist deaktiviert.
Job löschen?
Um den Druckauftrag wieder zu entsperren, verwenden Sie "Anmeldedatei/-ordner
freigeben" (Seite 19 in diesem Handbuch).
, wird der Auftrag in der Spulenwarteschlage des
● Berühren Sie zum Löschen des
Druckauftrags die Schaltfläche [Ja].
● Berühren Sie zum Abbrechen des
Nein Ja
Löschvorgangs des Auftrags die
Schaltfläche [Nein].
■ FTP Druck
Wenn die Funktion FTP-Druck für das direkte Drucken einer Datei auf einem FTPServer verwendet wird, müssen bei der Auswahl des FTP-Servers "Benutzername" und
"Kennwort" eingegeben werden. Wenn das Daten-Sicherheitspaket installiert ist, wird
die Eingabe für 5 Minuten gesperrt, wenn dreimal hintereinander ein falscher
"Benutzername" oder ein falsches "Kennwort" eingegeben werden.
6
Page 99

DEUTSCH
Bei installiertem Daten-Sicherheitspaket
■ Anmelden, wenn Benutzerauthentifizier. aktiviert ist
Wenn "Benutzer-Authentifizierung einstellen" in den Systemeinstellungen
(Administrator) ( "BENUTZERAUTHENTIFIZIERUNG" in der Kurzanleitung) aktiviert
ist, ist die Anmeldung über den Anmeldebildschirm erforderlich, bevor das Gerät
verwendet werden kann. Wenn in den Systemeinstellungen (Administrator) die Funktion
"Warnung bei fehlgeschlagenem Login" aktiviert ist und die Anmeldung dreimal
hintereinander fehlschlägt, wird das Gerät für 5 Minuten blockiert.
Die Einstellung "Warnung bei fehlgeschlagenem Login" ist bei installiertem DatenSicherheitspaket stets aktiviert.
☞
Einschränkungen für Tandem-Kopieren und TandemDrucken
Die Funktionen Tandem-Kopieren und Tandem-Drucken werden je nach Konfiguration von
Master- und Slave-Gerät wie unten gezeigt ausgeführt (Daten-Sicherheitspaket installiert/
nicht installiert).
■ Tandem-Kopieren
DatenSicherheitspaket: Ja
DatenSicherheits-
Master-Gerät
paket: Nein
■ Tandem-Drucken
DatenSicherheitspaket: Ja
DatenSicherheits-
Master-Gerät
paket: Nein
Slave-Gerät
Daten-Sicherheitspaket: Ja Daten-Sicherheitspaket: Nein
Die Tandemfunktion ist
verwendbar. Die Daten
werden vom Master- und vom
Slave-Gerät gelöscht.
Die Tandemfunktion ist
verwendbar. Die Daten
werden vom Slave-Gerät
gelöscht.
Slave-Gerät
Daten-Sicherheitspaket: Ja Daten-Sicherheitspaket: Nein
Die Tandemfunktion ist
verwendbar. Die Daten
werden vom Master- und vom
Slave-Gerät gelöscht.
Die Tandemfunktion ist
verwendbar. Die Daten
werden vom Slave-Gerät
gelöscht.
Die Tandemfunktion ist nicht
verwendbar.
Die normale Tandemfunktion
ist verwendbar.
Die Tandemfunktion ist
verwendbar.
Die Daten werden vom
Master-Gerät gelöscht.
Die normale Tandemfunktion
ist verwendbar.
7
Page 100

DEUTSCH
Bei installiertem Daten-Sicherheitspaket
Sicherheitseinstellungen auf den Webseiten
Beim Einsatz des Geräts als Netzwerkdrucker und der Verwendung der Funktion FTP Druck
ermöglicht das Daten-Sicherheitspaket die Authentifizierung des Benutzers über einen
"Benutzername" und ein "Passwort" für den FTP-Server. (Mit der Direkt-Druckfunktion
können Sie eine zuvor auf einem FTP-Server gespeicherte Datei direkt vom Bedienfeld des
Geräts ohne Verwendung des Druckertreibers drucken. Siehe Bedienungsanleitung
"
DIREKTES DRUCKEN EINER DATEI AUF EINEM FTP-SERVER
Aktivieren Sie die Benutzerauthentifizierung durch Markieren des Kontrollkästchens
[Benutzer-Authentifizierung aktivieren] auf der Webseite des Geräts für die Konfigurierung
der Einstellungen für den FTP Druck. Dieses Kontrollkästchen wird bei der Installation des
Daten-Sicherheitspaketes angezeigt und ist anfänglich markiert (Häkchen).
Die Systemanforderungen und die Vorgehensweise für den Zugriff auf die Webseiten werden
unter "ZUGRIFF AUF DEN WEBSERVER IM GERÄT" in der Kurzanleitung beschrieben.
■
So drucken Sie eine Datei direkt von einem FTP-Server (wenn
Benutzerauthentifizier. aktiviert ist)
Wählen Sie im Bedienfeld des Geräts den FTP-Server aus, auf dem die zu druckende
Datei liegt, und geben Sie anschließend Ihren Benutzernamen und Ihr Passwort ein.
Wenn in der Bedienungsanleitung im 2. Schritt von "DIREKTES DRUCKEN EINER DATEI
AUF EINEM FTP-SERVER" IN "3. DRUCKER" der FTP-Server gewählt wird, erscheint ein
Bildschirm, in dem Sie aufgefordert werden den Benutzernamen und das Kennwort für den
FTP-Server einzugeben.
" IN "3 . DRUCKER".)
FTP-Server-Authentifizierung
Benutzername und Passwort für FTP-Server eingeben.
Benutzername
Kennwort
Abbrechen
OK
Berühren Sie zur Eingabe Ihres Benutzernamens das Feld [Benutzername] und zur
Eingabe Ihres Passworts das Feld [Kennwort]. In beiden Fällen wird ein Fenster zur
Eingabe der Buchstaben angezeigt.
Berühren Sie nach der Eingabe von Benutzernamen und Passwort das Feld [OK].
Fahren Sie nach Eingabe des Benutzernamens und des Kennworts in der
Bedienungsanleitung mit dem 3. Schritt von "
EINEM FTP-SERVER
" IN "3. DRUCKER" weiter.
DIREKTES DRUCKEN EINER DATEI AUF
Übertragung kopierter Daten
Wenn das Daten-Sicherheitspaket installiert ist und die Webseiten zum Kopieren von mit
der Dokumentenablagefunktion gespeicherten Daten auf einen Computer verwendet
werden, können die kopierten Daten nur zu dem Gerät zurücktransferiert werden, von dem
sie ursprünglich kopiert wurden.
Die Daten können nicht auf ein anderes Gerät übertragen werden, selbst wenn die
Gerätebedingungen die gleichen sind.
Die Taste [Wiederherstellen vom PC] wird nur auf der Webseite angezeigt und ein Rücktransfer
der Daten zum Gerät ist nur dann möglich, wenn ein vertraulicher Ordner gewählt wird.
8
 Loading...