

Page 1

007SH User Guide
Page 2

Page 3

007SH User Guide Contents
1
Introduction
Introduction.........................................................................3
Getting Started
Package Contents............................................................... 6
Parts & Functions.............................................................. 6
About USIM Card................................................................ 7
SD Card................................................................................ 9
Battery Installation..........................................................12
Charging Battery.............................................................. 14
Handset Power On/Off.................................................... 15
Display Positions.............................................................. 16
Using Handset Keys..........................................................17
Using Touch Panel............................................................ 18
Basic Operations
Handset Interface.............................................................20
Applications.......................................................................22
My Phone Number.............................................................23
Mobile Manners................................................................. 24
Text Entry (Handset Keys).............................................. 25
Text Entry (Touch Panel).................................................26
Using Google Accounts.....................................................28
Android Market.................................................................30
Security Codes.................................................................. 31
USIM PIN............................................................................32
Activating Sleep Mode..................................................... 33
Software Update.............................................................. 33
Handset Interface
Standby Basics..................................................................36
Home Screen Basics..........................................................37
Status Bar......................................................................... 39
Notifications Panel...........................................................40
Customizing Home Screen................................................ 41
Launcher Basics................................................................ 43
Using Sub Display.............................................................44
Phone
Placing/Answering Calls...................................................46
Optional Services..............................................................47
Using Address Book..........................................................52
Messaging & Browser
Mail Types......................................................................... 56
Sending S! Mail/SMS.........................................................56
Receiving & Replying S! Mail/SMS...................................58
Handling S! Mail/SMS....................................................... 59
Creating/Sending Gmail....................................................60
Opening Received Gmail................................................... 61
Email Settings...................................................................62
Creating/Sending Email.................................................... 62
Opening Received Email....................................................63
Browsing the Internet......................................................64
SoftBank 007SH
Page 4

2
Camera
Photo Camera & Video Camera........................................68
Capturing 3D Images........................................................70
Music & Images
Music.................................................................................. 72
Still Images & Video.........................................................72
Connectivity
Connecting to Wi-Fi.........................................................74
Using Bluetooth®..............................................................77
Global Services
Global Roaming................................................................. 82
Calling from Outside Japan.............................................83
Settings
Wireless & Networks........................................................86
Sound Settings..................................................................88
Applications.......................................................................90
Accounts & Sync...............................................................92
Privacy............................................................................... 92
Language & Keyboard....................................................... 93
Date & Time......................................................................94
About Phone......................................................................95
Appendix
Specifications....................................................................98
Customer Service.............................................................. 99
Safety Precautions
Safety Precautions.........................................................102
General Use..................................................................... 109
Handset & Hardware Care............................................. 111
General Notes................................................................. 113
FCC Notice...................................................................... 114
Specific Absorption Rate (SAR).....................................115
Water & Dust Resistance.............................................. 115
Page 5

Introduction
Introduction
Thank you for purchasing SoftBank 007SH.
Guide Usage Notes
・Most operation descriptions are based on default settings.
・Unless noted otherwise, descriptions are for Home Screen.
・Some operation descriptions may be omitted.
・In this guide and on handset, "abroad" means "outside Japan"
with regard to handset/service usage.
・In this guide, microSD/microSDHC Card is referred to as "SD
Card."
Screenshots & Key Labels
Actual handset windows, menus, etc. may differ in appearance.
Key labels are provided for reference only.
3
Introduction
SoftBank 007SH
Page 6

4
Page 7

Getting Started
5
Getting Started
Package Contents............................................................... 6
Parts & Functions.............................................................. 6
About USIM Card................................................................ 7
SD Card................................................................................ 9
Battery Installation..........................................................12
Charging Battery.............................................................. 14
Handset Power On/Off.................................................... 15
Display Positions.............................................................. 16
Using Handset Keys..........................................................17
Using Touch Panel............................................................ 18
SoftBank 007SH
Page 8

6
Package Contents
Package Contents
・Handset (SoftBank 007SH)
・Battery (SHBDU1)
・Desktop Holder (SHEDU1)
・Micro USB Cable (SHDDL1)
・Micro USB Charging Adapter (SHCDL1)
・microSD Card (complimentary sample)
・クイックスタート (Japanese)
・お願いとご注意 (Japanese) with English "Quick Tips"
・Warranty (Japanese)
Parts & Functions
Handset Parts
Earpiece
Display
Microphone
Light Sensor
Sub Display
Indicator Lamp
TV Antenna (retractable)
Speaker
Mobile Light
FeliCa Logo
Battery Cover
HDMI Port
Strap Eyelet
Camera
Infrared Port
Charging Terminals
Battery Cover Notch
External Connector Port
Page 9

7
Handset Keys
Long Press for Power on or Phone options [ ]
Go back/escape [ ]
Open Home Screen [ ]
Open Options menu [ ]
Start Browser* or execute functions at bottom right of
Display [ ]
Select items, move cursor, etc. [ ]
Open Launcher* or execute selected item [ ]
Open Mail folder list* or execute functions at bottom
left of Display [ ]
Delete characters [ ]
Show onscreen dialpad/place call [ ]
Enter numbers or characters [ - , ,
]
Open Search window [ ]
Activate Camera. Long Press to activate/cancel Manner
mode. [ ]
Activate/cancel Sleep mode. Long Press for Phone
options. [ ]
Adjust volume [ ]
Capture images. Long Press for Camera applications.
[ ]
About USIM Card
USIM Card is an IC card containing customer and
authentication information, including handset number.
Getting Started
Inserting USIM Card
Power off first.
Remove Battery Cover
・Use Battery Cover notch to open Cover. Push Cover up as
shown, then lift to remove it.
Remove battery
・Use tab (○) to lift battery.
Pull out Tray
・Use tab to pull Tray straight out.
・*Available in Standby; for key operations in Standby, see
"Major Key Assignments."
・This guide uses the illustrations above to represent handset
keys.
Place USIM Card in Tray
・Slide in Tray with USIM Card IC chip up.
SoftBank 007SH
Page 10

8
Removing USIM Card
Secure Tray
Insert battery
・With recycling symbol up, align battery terminals with
contacts.
Close Battery Cover
Power off first.
Remove Battery Cover
・Use Battery Cover notch to open Cover. Push Cover up as
shown, then lift to remove it.
Remove battery
・Use tab (○) to lift battery.
・Fit Cover top into slots, then press down firmly along edges
as shown.
・Close Battery Cover firmly. Debris trapped between Cover
and base may expose handset to liquid/dust.
Pull out Tray
・Use tab to pull Tray straight out.
Remove USIM Card
・Lift and slide out USIM Card as shown.
Secure Tray
Page 11

Insert battery
9
SD Card
Unmounting SD Card
・With recycling symbol up, align battery terminals with
contacts.
Close Battery Cover
・Fit Cover top into slots, then press down firmly along edges
as shown.
・Close Battery Cover firmly. Debris trapped between Cover
and base may expose handset to liquid/dust.
Always perform Unmount microSD before removing SD Card.
(Complimentary SD Card preinstalled.)
In Standby, Settings
microSD & phone storage
Getting Started
Unmount microSD OK
SD Card is unmounted.
SoftBank 007SH
Page 12

10
Removing SD Card
Before removing SD Card, always perform Unmount microSD,
then power off.
Remove Battery Cover
・Use Battery Cover notch to open Cover. Push Cover up as
shown, then lift to remove it.
Remove battery
・Use tab (○) to lift battery.
Inserting SD Card
Power off first.
Remove Battery Cover
・Use Battery Cover notch to open Cover. Push Cover up as
shown, then lift to remove it.
Remove battery
・Use tab (○) to lift battery.
Remove SD Card
・Gently push in card and release it; card pops out. Pull card
straight out gently.
Insert battery
・With recycling symbol up, align battery terminals with
contacts.
Close Battery Cover
Insert SD Card
・With terminals down, insert SD Card until it stops.
・SD Card Slot is located above USIM Card Slot. Do not insert
SD Card into USIM Card Slot.
Insert battery
・With recycling symbol up, align battery terminals with
contacts.
Close Battery Cover
・Fit Cover top into slots, then press down firmly along edges
as shown.
・Close Battery Cover firmly. Debris trapped between Cover
and base may expose handset to liquid/dust.
・Fit Cover top into slots, then press down firmly along edges
as shown.
・Close Battery Cover firmly. Debris trapped between Cover
and base may expose handset to liquid/dust.
Page 13

11
Complimentary Sample microSD Card
Enjoy complimentary sample files (designed exclusively for
SoftBank 007SH).
・Complimentary sample microSD Card is usable even after
file deletion. Deleted sample files cannot be restored;
not available via the Internet or any other channels.
Warranty does not cover complimentary sample microSD
Card/sample files.
Important SD Card Usage Notes
Inserting & Removing
Do not force SD Card into or out of handset.
General Use
Keep SD Card out of infant's reach; may cause suffocation
if swallowed.
Data Loss/Alteration
SD Card files may be lost/altered accidentally. Keep a copy
of contacts, etc. in a separate place. SoftBank Mobile is
not liable for any damages resulting from accidental loss/
alteration of information.
・Never power off or remove battery while files are being
accessed.
Formatting SD Card
When using a new SD Card for the first time, format it on
handset before trying to save files, etc.
・Formatting deletes all SD Card files, even those created on
other devices.
・Charge battery or install a charged battery beforehand.
In Standby, Settings
microSD & phone storage
Getting Started
Unmount microSD OK
Unmount microSD changes to Mount microSD .
Erase microSD
SoftBank 007SH
Page 14

12
Erase microSD
Enter Handset Code OK
Battery Installation
Inserting Battery
Remove Battery Cover
・Use Battery Cover notch to open Cover. Push Cover up as
shown, then lift to remove it.
Insert battery
Erase everything
Formatting starts.
・With recycling symbol up, align battery terminals with
contacts.
Close Battery Cover
・Fit Cover top into slots, then press down firmly along edges
as shown.
・Close Battery Cover firmly. Debris trapped between Cover
and base may expose handset to liquid/dust.
Page 15

13
Removing Battery
Power off first.
Remove Battery Cover
・Use Battery Cover notch to open Cover. Push Cover up as
shown, then lift to remove it.
Remove battery
・Use tab (○) to lift battery.
Battery Usage Notes
General
Charge battery at least once every six months; uncharged
battery may die or affect files/settings.
Battery Life
Replace battery if operating time shortens noticeably.
・Depending on usage, bulges may appear near end of
battery life; this does not affect safety.
Maintenance
Clean device charging terminals with dry cotton swabs.
Battery Cover
To maintain water/dust resistance, close Battery Cover
properly. Do not apply excessive force to Battery Cover;
damage may result.
・If Battery Cover is damaged, replace it with a new one.
Use of damaged Cover may cause electric shock, battery
corrosion, etc. due to water seepage. (Battery is not
water or dustproofed.)
Getting Started
Close Battery Cover
・Fit Cover top into slots, then press down firmly along edges
as shown.
・Close Battery Cover firmly. Debris trapped between Cover
and base may expose handset to liquid/dust.
Lithium-ion Battery
This product requires a lithium-ion battery. Lithium-ion
batteries are recyclable. To recycle a used lithium-ion
battery, take it to any shop displaying the symbol below.
・To avoid fire or electric shock, do not short-circuit or
disassemble battery.
SoftBank 007SH
Page 16

14
Charging Battery
Battery must be inserted in handset to charge it. (Use
Desktop Holder to prevent ingress of water and dust via
External Connector Port.)
Desktop Holder
Use Desktop Holder with AC Charger ZTDAA1 (sold
separately).
・AC Charger and Desktop Holder are not water or
dustproofed. Do not charge battery while handset is wet.
・AC Charger and handset may warm while charging.
AC Charger
Use Micro USB Charging Adapter with AC Charger ZTDAA1
(sold separately).
・Do not pull, bend, or twist the cord.
Insert Charger Connector into Micro USB Charging Adapter
・With screws down, insert connector until it clicks.
Insert Charger Connector into Desktop Holder
・Insert connector in the correct orientation until it clicks.
Extend blades and plug AC Charger into AC outlet
Push handset as shown until it clicks into place
Open Port Cover and connect Micro USB Charging Adapter to
External Connector Port
Extend blades and plug AC Charger into AC outlet
Indicator Lamp illuminates while charging.
・Indicator Lamp goes out when battery is full. Unplug AC
Charger and retract blades. Remove Micro USB Charging
Adapter and close Port Cover.
Indicator Lamp illuminates while charging.
・Do not let straps, etc. get caught between handset and
Desktop Holder.
・Indicator Lamp goes out when battery is full. Remove
handset from Desktop Holder, then unplug AC Charger and
retract blades.
Page 17

15
USB Charge
Connect handset to a PC via Micro USB Cable.
・Power on handset and PC first.
・
Enable USB battery charge .
・To use Fast transfer mode, install USB Cable driver on the
PC beforehand.
・Battery may not charge or charge slowly depending on PC
status/environment. Battery may not charge if SD Card is
not inserted.
Open Port Cover and connect Micro USB Cable to External
Connector Port
Handset Power On/Off
Power On
Getting Started
Press and hold until SoftBank logo appears
After Power On Graphics, waterproofing/dustproofing
guidance appears.
Connect Micro USB Cable to PC USB port
Indicator Lamp illuminates while charging.
・When finished, remove Micro USB Cable and close Port Cover.
Important USB Charge Usage Note
Handset may power on automatically when connected to a
PC via Micro USB Cable; avoid connection aboard aircraft or
in hospitals, etc. where handset use is prohibited.
Initial setup menu opens.
・If handset is set to skip setup menu at Power on, Standby
appears.
SoftBank 007SH
Page 18

16
Power Off
(Long)
Power off
Display Positions
Set Display in the following positions as needed.
Clamshell Closed
Keep handset closed when not in use; view time, new message
notification, etc. on Sub Display.
Clamshell Open
Open handset to place or answer calls, enter text, etc.
・Use handset keys or Touch Panel.
OK
Handset shuts down.
Viewer Position
Handset is closed with Display outward; use Touch Panel for
operations. Hold handset in landscape to capture images,
watch TV, etc. in widescreen.
・Do not carry handset with Display in Viewer position.
Display may be damaged.
Page 19

17
Using Handset Keys
Use twelve hard keys for text entry, etc. Press function keys
for onscreen dialpad, message folder list, browser, etc. Use
Multi Selector to select items, move cursor, etc.
Major Key Assignments
The following functions are assigned by default.
Open Home Screen
Open Mail folder list
Open received call records
Open Options menu
Show onscreen dialpad
Open Search window
Open Home Screen
Open Address Book
Start Browser
Open Notifications panel
Open list of active applications
Long Press for Power on or Phone options
Activate Camera. Long Press to activate/cancel Manner
mode.
Selection & Execution
Use Multi Selector to highlight item; press Center Key to
execute it.
・Item selection with Multi Selector is disabled in Standby.
In this guide, Multi Selector and Center Key operations are
indicated as follows:
Label Operation
Press center
Press up
Press down
Press left
Press right
Press up/down
Press left/right
Press up/down/left/right
Getting Started
SoftBank 007SH
Page 20

18
Using Touch Panel
Touch Display to navigate menus, open functions, scroll pages,
etc. Available in clamshell open or Viewer position.
Tap
Tap item or key to open or execute corresponding function/
operation.
Long Touch
Swipe/Flick
Swipe or flick to toggle sheets, pages, etc.
Spread & Pinch
Spread or pinch to enlarge or reduce images, etc.
Touch item for 1+ seconds (handset vibrates) to move icon,
open menu, etc.
Drag
Drag item to move it.
Calibrating Touch Panel
Calibrate Touch Panel to improve response. Hold handset
normally during calibration.
In Standby, Settings About phone
Adjust touch panel Tap center of
each circle
Page 21

Basic Operations
19
Basic Operations
Handset Interface.............................................................20
Applications.......................................................................22
My Phone Number.............................................................23
Mobile Manners................................................................. 24
Text Entry (Handset Keys).............................................. 25
Text Entry (Touch Panel).................................................26
Using Google Accounts.....................................................28
Android Market.................................................................30
Security Codes.................................................................. 31
USIM PIN............................................................................32
Activating Sleep Mode..................................................... 33
Software Update.............................................................. 33
SoftBank 007SH
Page 22

20
Handset Interface
Standby
Standby appears at Power on. Access major functions/
applications here; change key shortcuts as needed.
Home Screen
Most operations start here. Home Screen holds up to ten
sheets; add shortcuts, widgets or folders to each sheet.
Handset Keys & Touch Panel
Use hard keys or intuitive Touch Panel interface as needed.
Selection & Execution
Use to select item and press ; menu/window opens or
command is executed. Alternatively, tap item to select and
execute it.
・
Item selection with is disabled in Standby.
Launcher
Applications are saved on each page by category; move icons,
add pages, etc. as needed.
・
Press to return to previous window.
Page 23

21
Options Menu Operations
Press to open Options menu.
・
In some windows, Long Press or Long Touch item, etc.
for Options menu. In Home Screen, Long Touch open area for
Home settings (below).
Portrait and Landscape Orientation
For some functions/windows, Display orientation changes with
handset orientation.
Basic Operations
Handset Customization
In Standby or Home Screen, press , select Settings and
press to change settings.
About Checkbox
Checkbox ( or ) appears beside some options. Select
option and press to check ( ) or cancel ( ) it.
SoftBank 007SH
Page 24

22
Applications
Starting Applications
In Standby,
Launcher (Basic func. 1) appears.
・
To open Launcher from Home Screen, select and press ,
or tap .
Opening Application Properties
In Home Screen or Launcher, Long Touch icon Drag icon
to (Go App Info)
Using Application List
Open list of active applications; toggle or close applications.
In Home Screen or Launcher,
/ Switch pages
Select icon
Application starts.
Active applications appear.
・
Alternatively, Long Press .
・
Press to toggle lists as needed.
Select application
Application starts.
Closing Applications
In application list, select one
・
Alternatively, tap .
・
To close all applications, select and press .
Closing Applications
Press ; application ends and initial window returns. (If
confirmation appears, follow onscreen instructions.)
・
Press for Home Screen. (Applications remain active;
close them in application list.)
Page 25

23
My Phone Number
Confirming Handset Number
In Standby or Home Screen, Settings
Profile
Profile opens.
・Handset number appears in Own phone number field.
・
Alternatively, press → in Standby.
Saving User Information
In Standby or Home Screen, Settings
Profile
Profile opens.
・
Alternatively, press → in Standby.
Edit
Basic Operations
Profile entry window opens.
Select item (entry field)
・
Select (show/add entry field) or (hide/delete) and
press .
Complete field
・Select other items and complete fields as needed.
Save Yes
SoftBank 007SH
Profile is saved.
Page 26

24
Mobile Manners
Mobile Manners
Mute most handset function sounds.
In Standby, Home Screen, Launcher, etc., (Long)
Manner mode activates.
Canceling Manner Mode
Canceling Offline Mode
(Long) Offline mode
(Long)
Important
Shutter click, video recording tones, etc. still sound even in
Manner mode.
Activating Offline Mode
Temporarily suspend all wireless connections.
(Long)
Offline mode
Offline mode activates.
Page 27

25
Text Entry (Handset Keys)
Basics
When cursor appears in text entry field, use keypad to type
characters or press ; operation guide appears at Display
bottom for text entry.
・If cursor does not appear or to enter characters in other
fields, use to select a field.
・
To complete text entry and exit, press when Done
appears.
Switching Entry Modes
In a text entry window,
Basic Operations
Select mode
Window Description
Entry mode indicator
Text entry field
Open list for pictograms, etc.
(Long) Open typing assistance
Complete entry
Cursor
Open entry mode list
(Long) Open text entry settings
Entry mode is switched.
Entry Mode Indicators
Current entry mode indicator-- (Kanji), (Full
Katakana), (Half Alphabet), etc.--appears on Status Bar.
・Operation guide at Display bottom changes upon typing a
character; enter current character, use conversion, etc.
SoftBank 007SH
Page 28

26
Alphabet
Follow these steps to enter Keitai:
In a text entry window,
Half Alphabet
Text Entry (Touch Panel)
Rotate Display to Viewer position to enter characters with
Touch Panel.
Onscreen Keyboards
Use two types of onscreen keyboards to enter characters in
Viewer position:
12-Key: Multiple characters assigned to each key.
QWERTY: Single letters assigned to each key.
・Tap a text entry field for keyboards.
・Default input method: iWnn IME - SH edition.
Switching between 12-Key Keyboard
and QWERTY Keyboard
In any keyboard, Change keyboard (Portrait) or
Change keyboard(Landscape)
(twice: K) (twice: e) (three times:
i) (once: t) (once: a) (three
times: i)
・The first character is capitalized automatically by default.
(Cancel auto capitalization as needed.)
Keitai is entered.
12-Key Keyboard Layout
Entry mode indicator
Enter characters
Reverse toggle character options
Move cursor left
Enter pictograms, symbols, or emoticons; toggle
conversion options
Toggle entry modes
Delete characters
Move cursor right
Open text entry options; convert hiragana or insert
spaces
Insert line breaks; enter current characters
Toggling Case
Type a letter and press to toggle case.
Page 29

27
QWERTY Keyboard Layout
Entry mode indicator
Enter characters
Enter letters
Toggle entry modes
Enter pictograms, symbols, or emoticons
Open text entry options
Delete characters
Insert line breaks; enter current characters
Move cursor right
Move cursor left
Entry Mode Indicators
Current entry mode indicator-- (Kanji), (Full
Katakana), (Half Alphabet), etc.--appears on Status Bar.
Alphabet
Basic Operations
In 12-Key keyboard, follow these steps to enter Keitai:
In a text entry window, Long Touch
Half Alphabet
Switching Entry Modes
Tap to toggle Half Alphabet, Half Numeric, and Kanji
modes. Follow these steps to use other entry modes:
In a text entry window, Long Touch
Tap mode
(twice: K) (twice: e) (three times: i)
(once: t) (once: a) (three times: i)
・The first character is capitalized automatically by default.
(Cancel auto capitalization as needed.)
Keyboard interface changes accordingly.
Keitai is entered.
SoftBank 007SH
Page 30

28
Toggling Case
Type a letter and tap to toggle case.
Flick Input
In 12-Key entry, flick key for target character.
・Long Touch a key for guidance; flick toward target
character. Tap to enter.
Target
Character
P
Q Touch and flick left
R Touch and flick up
S Touch and flick right
7 Touch and flick down
Tap once
Operation
Using Google Accounts
Sign in to a Google Account to use Google services. (Some
applications may be limited or disabled without a Google
Account.)
Creating a New Google Account
In Standby, Settings Accounts &
sync
Add account
Google
Add a Google Account appears.
Next
Page 31

Signing in to a Google Account
29
Create
Enter first name Select Last name field Enter
last name Select Username field Enter user
name Next
For applications requiring a Google Account, Add a Google
Account appears; sign in to use the application.
In Add a Google Account, Next
Basic Operations
Sign in
Enter password Select Confirm password field
Re-enter password Next
Select in Security question field
Enter user name Select Password field Enter
password Sign in
Finish setup
Sign-in is complete.
Select question Select Answer field Enter
answer Select Secondary Email field Enter
secondary mail address Create
Account information is saved.
・Follow onscreen instructions.
SoftBank 007SH
Page 32
30
Android Market
Download various applications via Android Market. (Sign in to
a Google Account beforehand.)
SoftBank Mobile is not liable for any damages resulting from
use of applications obtained from Android Market.
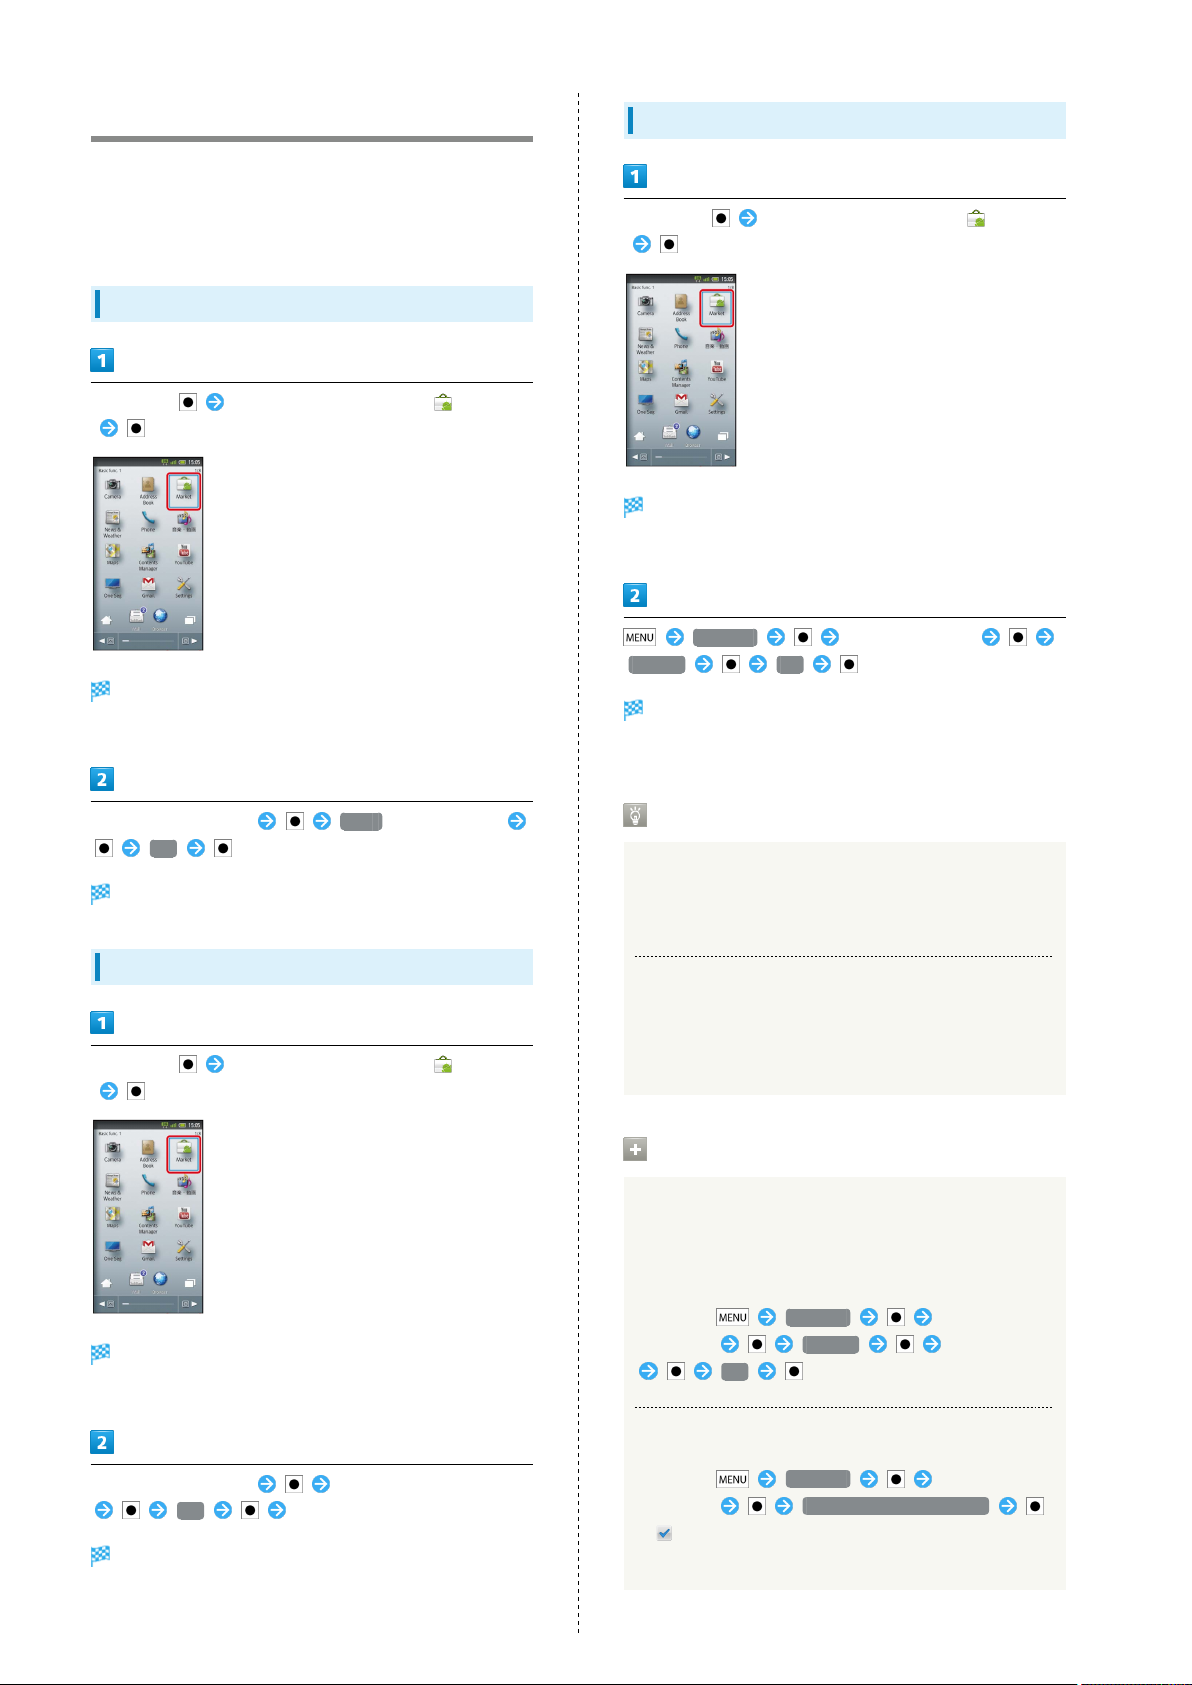
Installing Free Applications
In Standby, In Launcher (Basic func. 1), (Market)
Market opens.
・If confirmation appears, follow onscreen instructions.
Updating Applications
In Standby, In Launcher (Basic func. 1), (Market)
Market opens.
・If confirmation appears, follow onscreen instructions.
My apps Select application
Update OK
Application is updated.
・If confirmation appears, follow onscreen instructions.
Select free application FREE (below Install)
OK
Download (installation) starts.
Purchasing Paid Applications
In Standby, In Launcher (Basic func. 1), (Market)
Market opens.
・If confirmation appears, follow onscreen instructions.
Purchased Applications
Payment
No additional payment required for re-downloads of
uninstalled purchased applications.
Use on Other Android Devices
Install purchased applications on other Android devices
free of charge by using the same Google Account used for
the purchase.
Market Operations
Refund Requests
Request refunds within designated period. Returned
applications are deleted from handset; no payment is
required. (One refund request per application.)
In Market, My apps Select
application Refund Select answer
OK
Select paid application Select price (below Buy)
OK Follow onscreen instructions
Download (installation) starts.
Enabling Automatic Updates
In Market, My apps Select
application Allow automatic updating
( )
・Automatic update is not available for some applications.
Page 33

31
Important
Automatic Updates
Application operations are subject to change due to
automatic updates.
Application Purchase Disclaimer
SoftBank Mobile cannot be held liable for any damages to
self or others that arise from purchase of applications.
Security Codes
Code Types
Among Security Codes, Center Access Code (Network
Password; 4-digit code in contract) is required to use
Optional Services via landlines or subscribe to fee-based
information.
・Write down Handset Code, Administrator Code and Center
Access Code (Network Password). If you forget these codes,
contact us for recovery. For details, contact SoftBank
Customer Support, General Information.
・Do not reveal Handset Code, Administrator Code or Center
Access Code (Network Password). SoftBank Mobile is not
liable for misuse or damages.
・Incoming/outgoing call restriction settings will be locked if
incorrect Center Access Code (Network Password) is entered
three times consecutively during the setting. To resolve,
the code must be changed. For details, contact SoftBank
Customer Support, General Information.
・If you have previously changed Network Password on a
SoftBank handset, enter the latest code to set incoming/
outgoing call restrictions.
Basic Operations
SoftBank 007SH
Page 34
32
USIM PIN
Four to eight-digit code (9999 by default); activate USIM card
lock to restrict handset use.
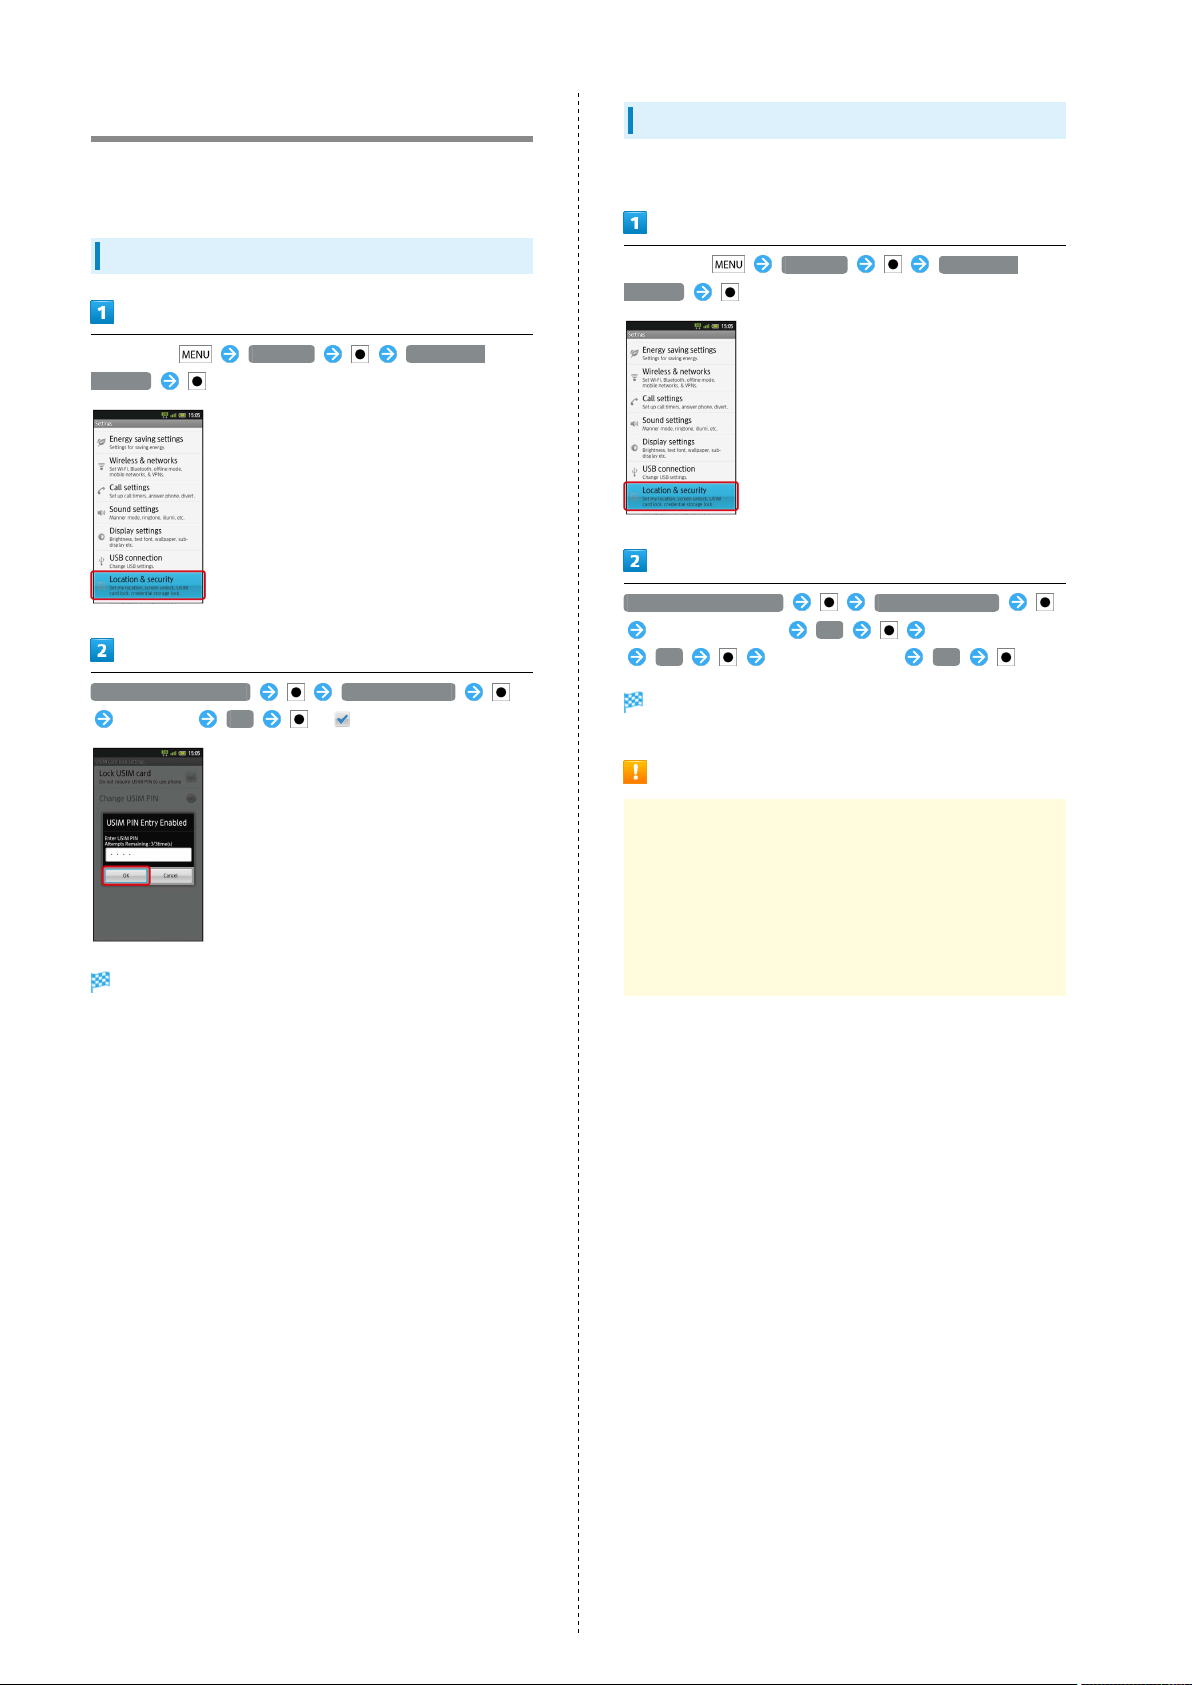
Locking USIM Card
In Standby, Settings Location &
security
Set up USIM card lock Lock USIM card
Enter PIN OK ( )
Changing PIN
Activate USIM card lock first.
In Standby, Settings Location &
security
Set up USIM card lock Change USIM PIN
Enter current PIN OK Enter new PIN
OK Re-enter new PIN OK
PIN is changed.
USIM card lock activates.
Important
Entering incorrect PIN three consecutive times activates
PIN Lock. To cancel, Personal Unblocking Key (PUK Code)
is required; contact SoftBank Customer Support, General
Information. Entering incorrect PUK Code ten consecutive
times activates PUK Lock, disabling handset. For recovery,
USIM Card must be reissued at a SoftBank Shop (fees
apply).
Page 35
33
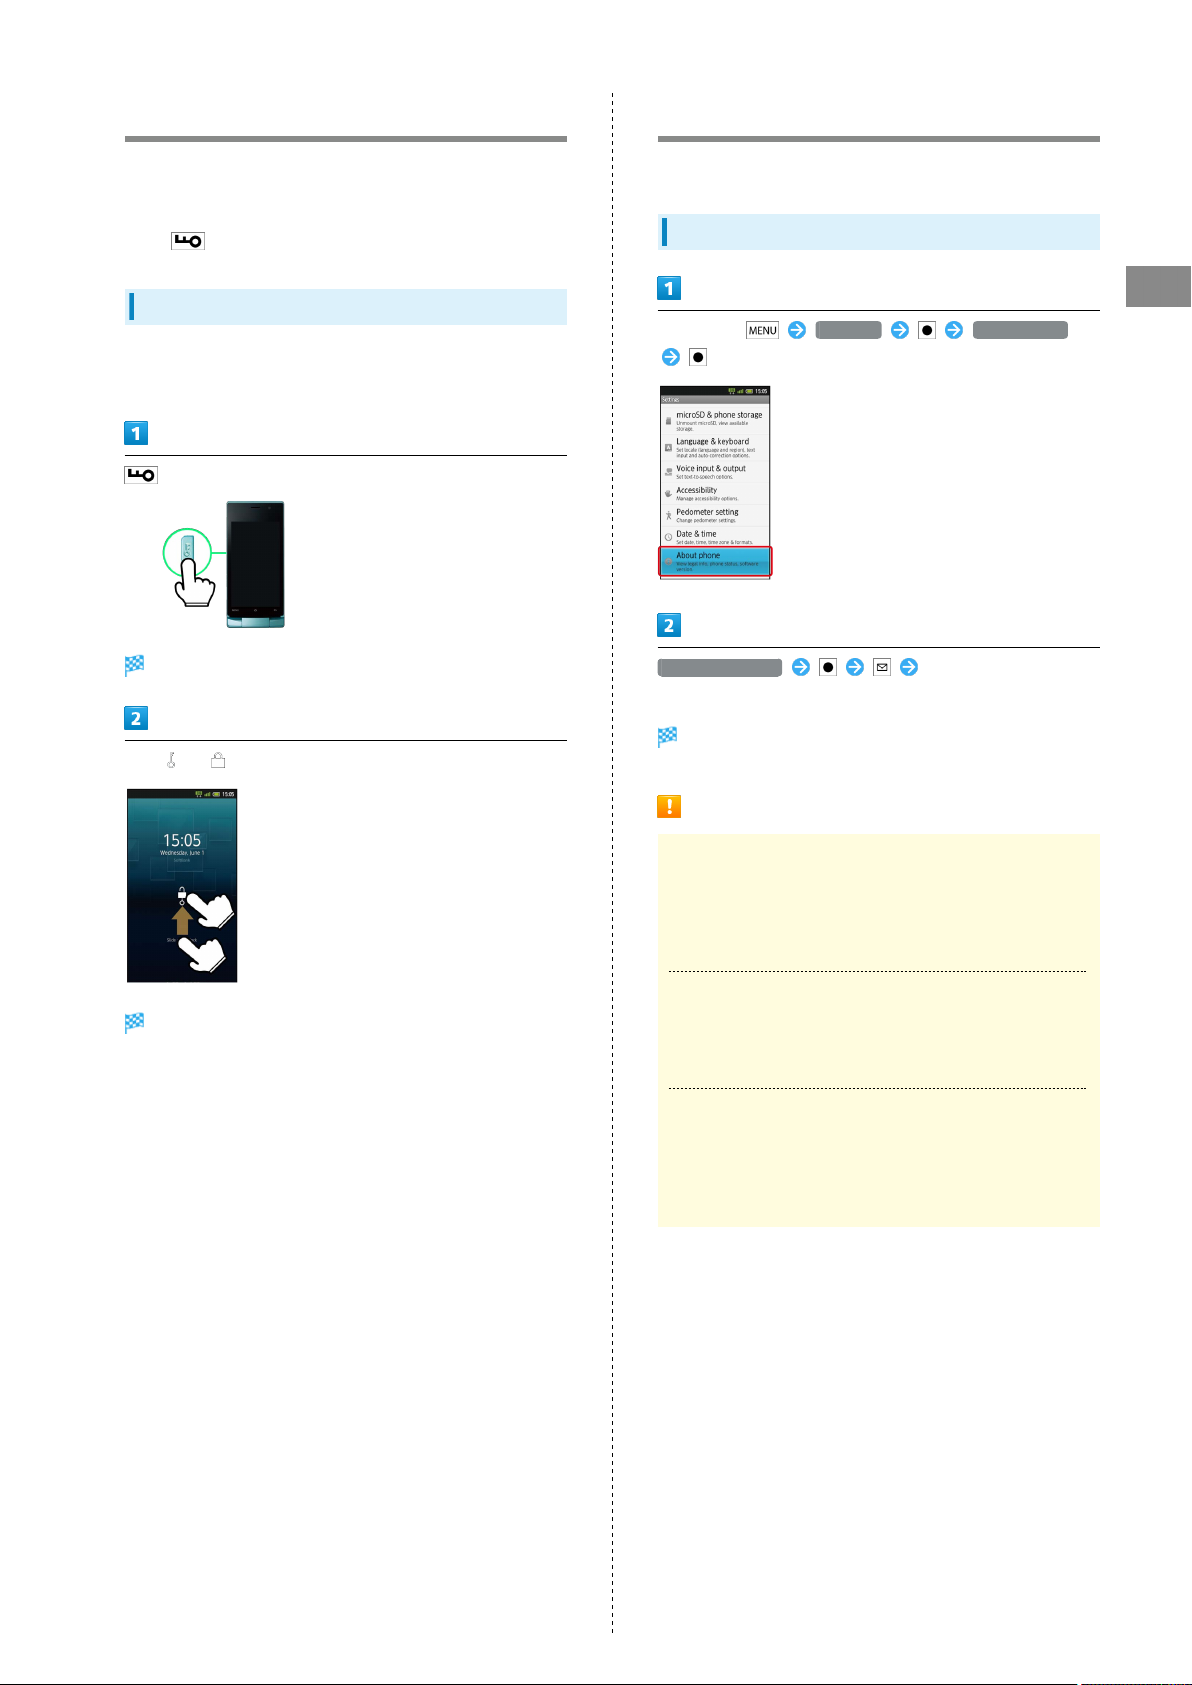
Activating Sleep Mode
In Viewer position, Display goes completely dark and
Sleep mode activates after a period of inactivity. Sleep
mode prevents accidental operation/function activation.
(Press to activate Sleep mode anytime.)
Canceling Sleep Mode
Open handset (clamshell open). To cancel Sleep mode in Viewer
position, follow these steps:
Unlock window appears.
Software Update
Check for firmware updates and download as required.
Updating Software
In Standby, Settings About phone
Software update Follow onscreen
instructions
Basic Operations
Drag to
Sleep mode is canceled.
・When Security Lock is active, unlock it as well.
Software update starts.
Precautions
Handset Files
Always back up important information. SoftBank Mobile
cannot be held liable for damages from lost information,
etc.
During Update
Handset is disabled until update is complete. Update may
take some time.
Signal Conditions
To reduce failure risk, be sure signal is strong and stable,
and charge battery adequately beforehand. Update failure
may disable handset.
SoftBank 007SH
Page 36

34
Page 37

Handset Interface
35
Handset Interface
Standby Basics..................................................................36
Home Screen Basics..........................................................37
Status Bar......................................................................... 39
Notifications Panel...........................................................40
Customizing Home Screen................................................ 41
Launcher Basics................................................................ 43
Using Sub Display.............................................................44
SoftBank 007SH
Page 38
36
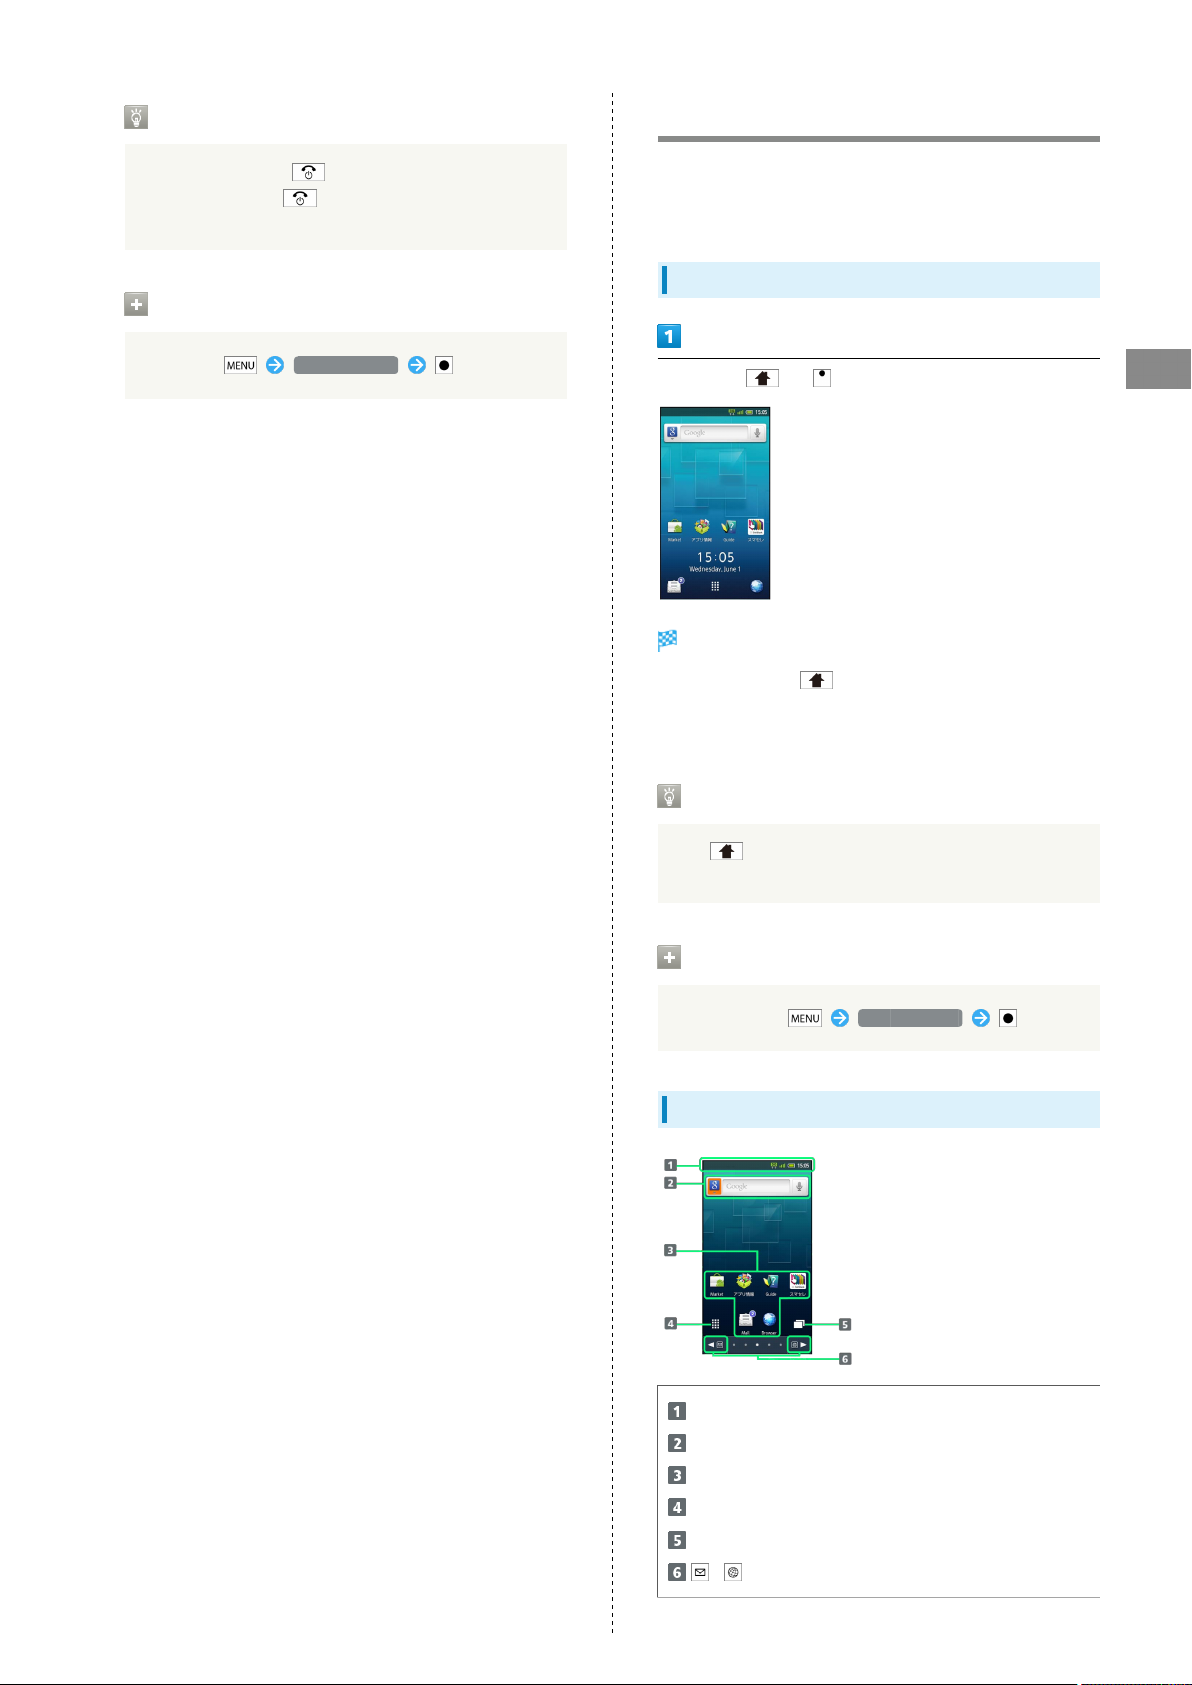
Standby Basics
Standby appears at Power on; most operations start here.
Available in clamshell open. (In Viewer position, Home Screen
appears.)
Window Description
Handset status and notifications (Use to open
Notifications panel)
Open Search window
Tap to start applications
Open Mail folder list
Start Browser
Open Launcher
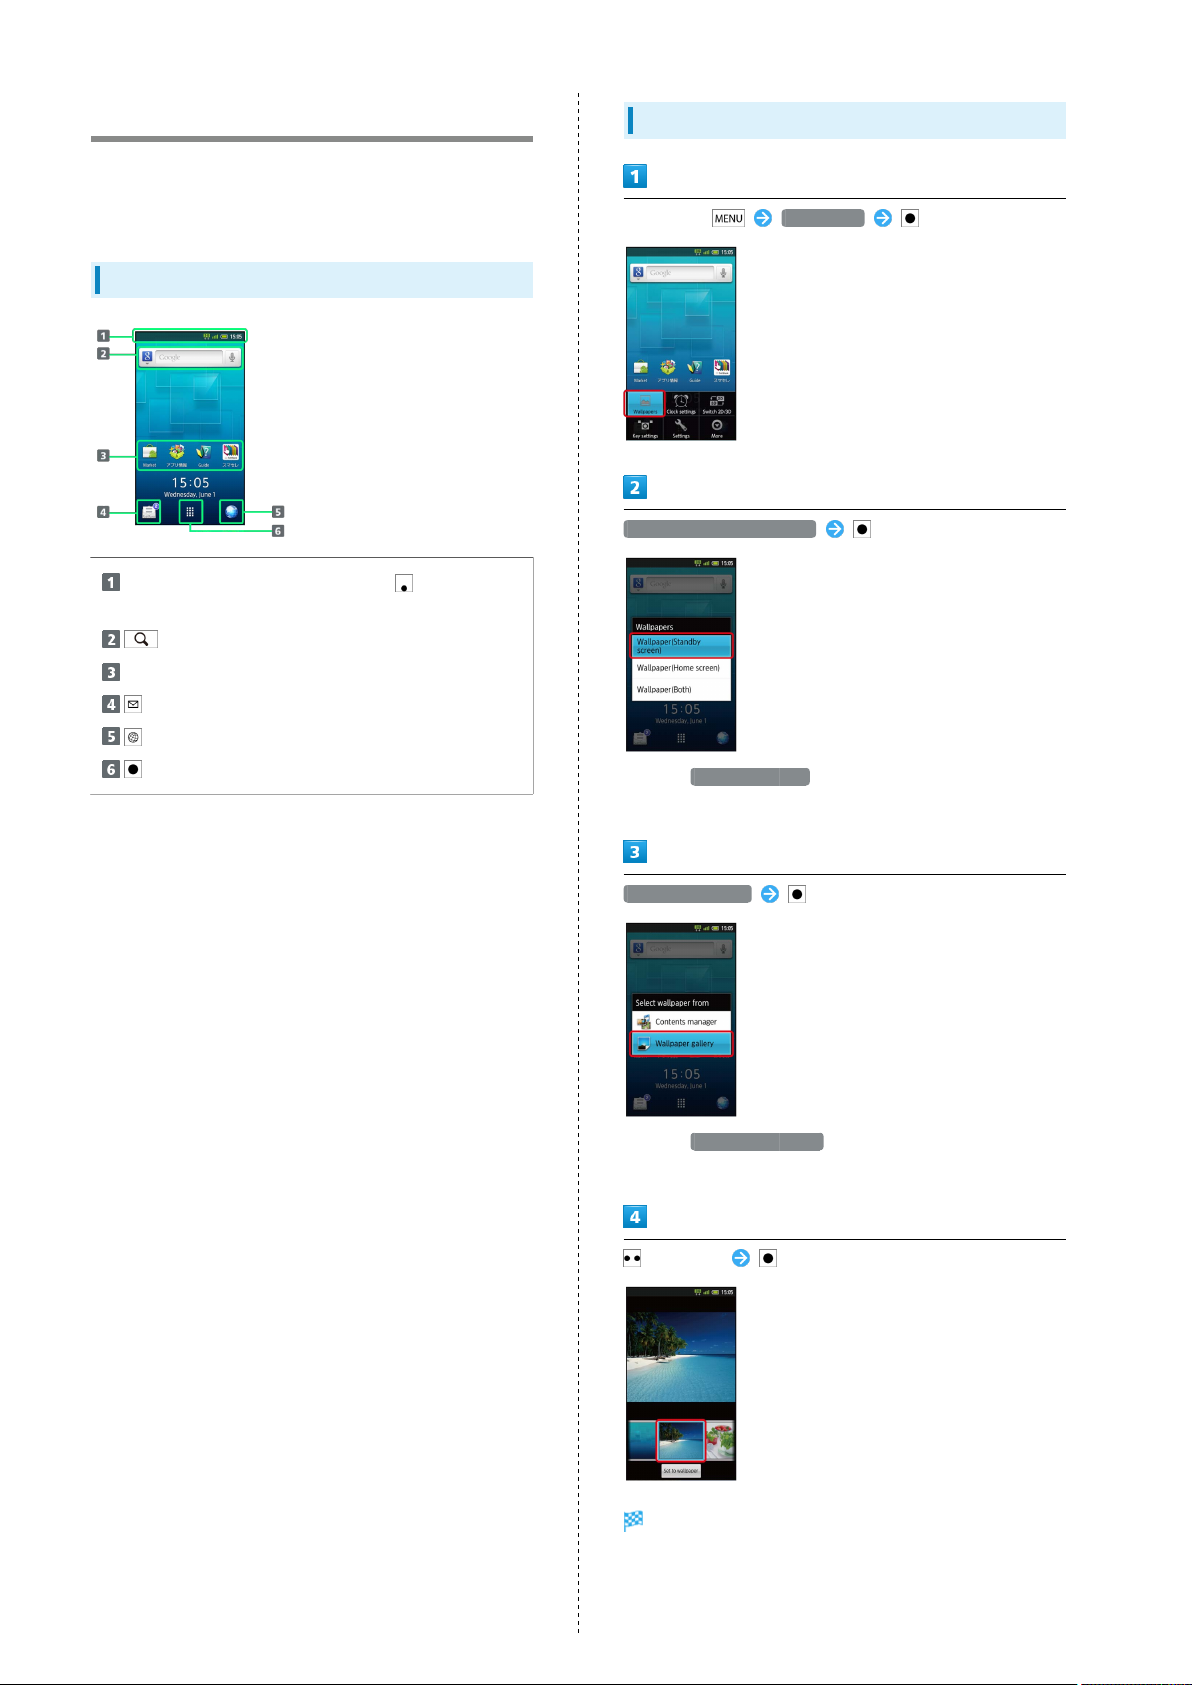
Setting Wallpaper
In Standby, Wallpapers
Wallpaper(Standby screen)
・
Select Wallpaper(Both) to apply the same Wallpaper to
Home Screen.
Wallpaper gallery
・
Select Contents manager to set captured image as
Wallpaper.
Select file
Wallpaper is set.
Page 39
37
Returning to Standby
In Home Screen, press ; active application closes if
any. Repeat to press until Standby returns.
・If confirmation appears, follow onscreen instructions.
Switching between 2D and 3D View
In Standby, Switch 2D/3D
Home Screen Basics
Home Screen includes five sheets by default. Add shortcuts,
widgets or folders to each
sheet.
Opening Home Screen
In Standby, or
Home Screen appears.
・
Alternatively, tap below Display.
・Home Screen appears when Display is rotated to Viewer
position.
Handset Interface
Returning to Home Screen
Press ; Home Screen returns and applications remain
active.
Switching between 2D and 3D View
In Home Screen, Switch 2D/3D
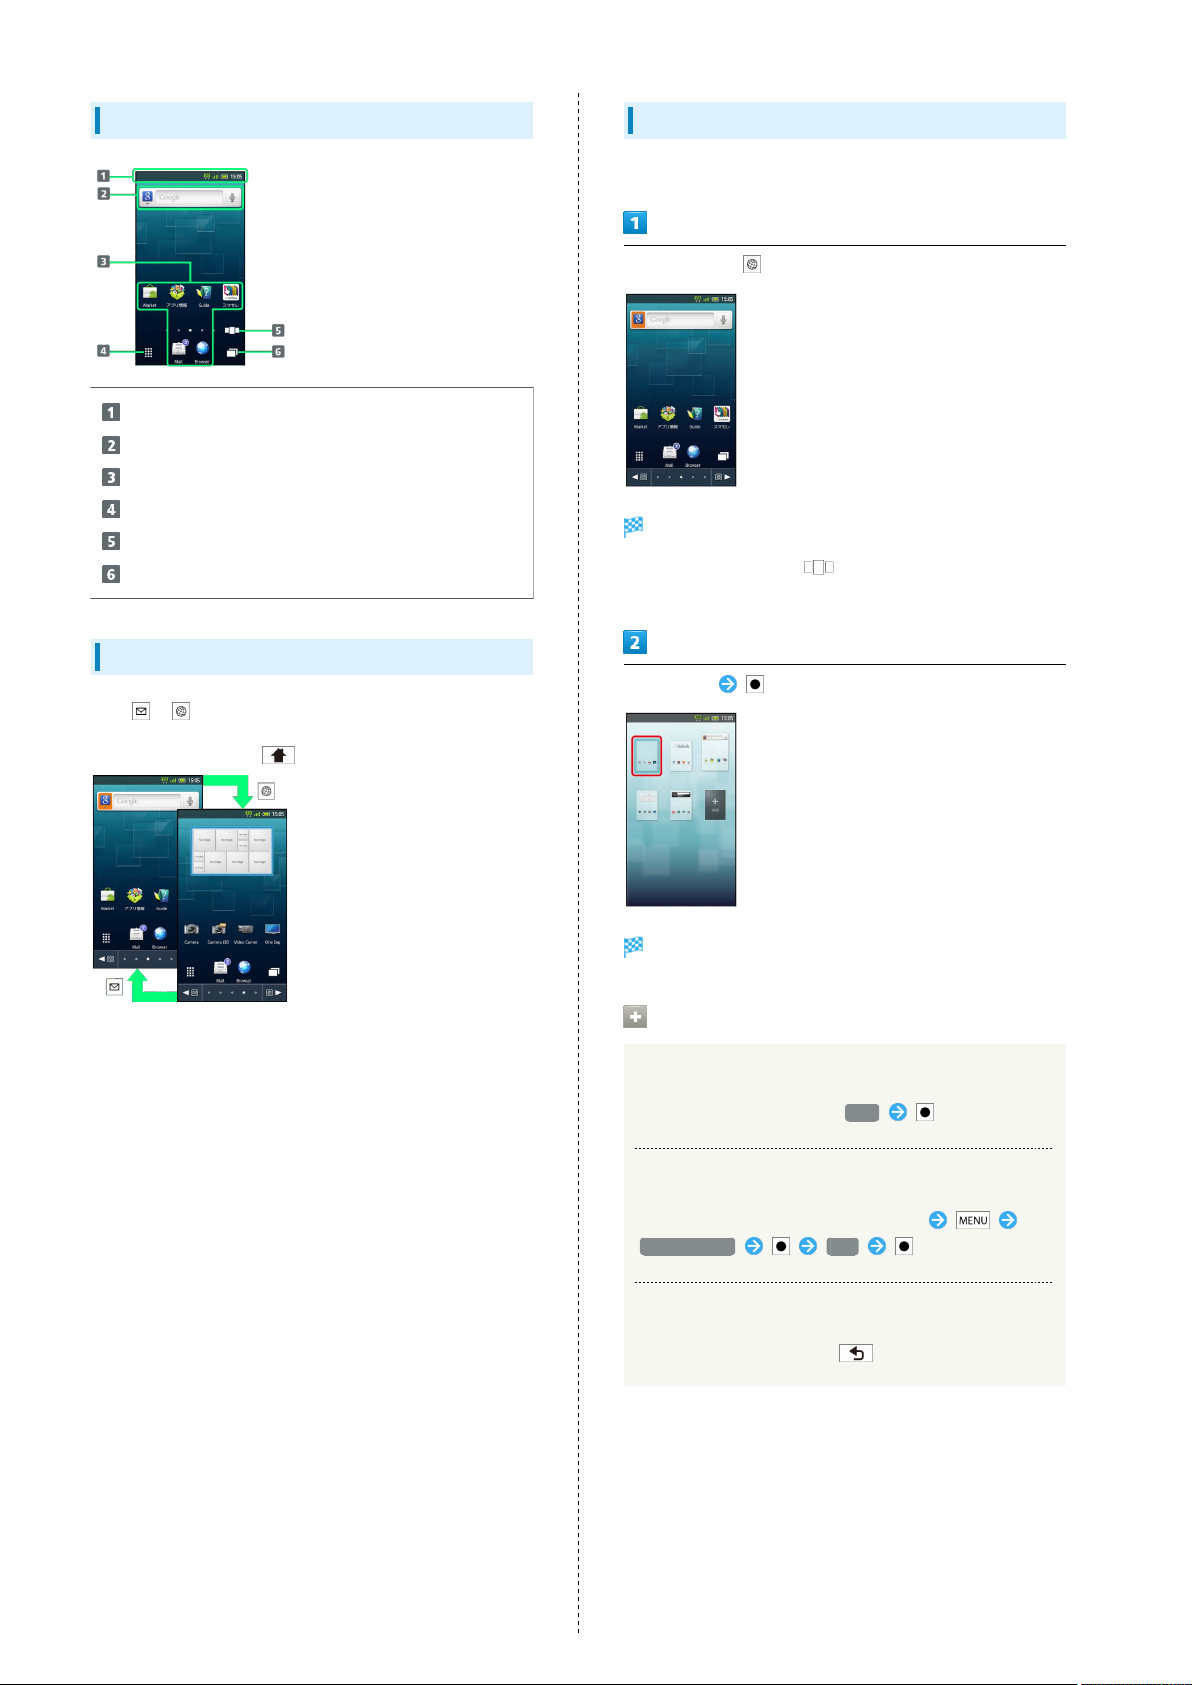
Window Description (Clamshell Open)
Handset status and notifications
Open Search window
Applications
Open Launcher
Open list of active applications
/ Toggle sheets
SoftBank 007SH
Page 40
38
Window Description (Viewer Position)
Handset status and notifications
Open Search window
Applications
Open Launcher
Open Home Screen sheet index
Open list of active applications
Toggling Home Screen Sheets
Press or to toggle Home Screen sheets.
Using Home Screen Sheet Index
Use Home Screen sheet index to switch, add or delete sheets.
In Home Screen, (Long)
Home Screen sheet index appears.
・
In Viewer position, tap to open Home Screen sheet
index.
Select sheet
・
From any sheet, press for first sheet.
・Alternatively, flick open area left/right.
Sheet switches.
Home Screen Sheet Index Operations
Adding Sheets
In Home Screen sheet index, Add
Deleting Sheets
In Home Screen sheet index, select sheet
Delete sheet Yes
Closing Home Screen Sheet Index
In Home Screen sheet index,
Page 41

39
Status Bar
Indicators (new message notification, handset status, etc.)
appear at the top of Display.
Notification Indicators
Notification indicators appear on the left.
Indicator Description
Missed Calls
Answer Phone Message Recorded
New SMS/S! Mail
New Email
New Gmail
Alarm Time Passed
Status Indicators
Status indicators appear on the right.
Handset Interface
Indicator Description
Battery Strength
Signal Strength
No Signal
Offline mode
Roaming
3G Data in Use
GSM Data in Use
Alarm Set
Standard manner mode
Drive manner mode
Silent manner mode
Wi-Fi Connected
Bluetooth® On
Bluetooth® Connected
Answer Phone ( : Message Recorded)
・Some indicators appear in different colors while signed in to
a Google Account.
SoftBank 007SH
Page 42

40
Notifications Panel
Open notifications, check handset status or change various
settings.
Opening Notifications Panel
In Standby,
Notifications panel opens.
・
Press to exit.
Notifications Panel Operations (Out of
Standby)
Touch Panel Operation
Tap Status Bar
・Available when Status Bar appears.
Window Description
Toggle Wi-Fi on/off
Toggle Bluetooth® on/off
Notifications; select Clear and press to delete all
Notifications
Handset status
Open Manner mode options
Toggle VeilView on/off
Adjust Display brightness
Toggle account synchronization on/off
Clock (select and press to open Date & time settings)
Toggle GPS positioning on/off
Toggle Display rotation on/off
Open list of active applications
Open microSD menu
Tap to close Notifications panel
MENU Key Operation
More Notifications
・Available in Home Screen, Launcher and some other
menus/windows.
Page 43

Customizing Home Screen
41
Change Wallpaper or paste shortcuts.
Setting Wallpaper
In Home Screen, Wallpapers
Wallpaper(Home screen)
Select file
Wallpaper is set.
・
For Live wallpapers, select Set wallpaper and press .
・If prompted, follow onscreen instructions.
Handset Interface
・
Select Wallpaper(Both) to apply the same Wallpaper to
Standby.
Live wallpapers or Wallpaper gallery
・
Select Gallery or Contents manager to set captured
image as Wallpaper.
SoftBank 007SH
Page 44

42
Adding Shortcuts
Follow these steps to add an application shortcut:
In Home Screen, (Long)
Home settings opens.
Add shortcut
Managing Shortcuts
Moving Shortcuts
In Home Screen, select shortcut (Long) Move
selected items Change arrangement
Specify target location
・
Select Move other sheet to move shortcut to another
sheet.
Removing Shortcuts
In Home Screen, select shortcut (Long) Delete
selected items Yes
Applications
Application list appears.
・
Use or flick left/right to toggle pages.
Select application
Corresponding icon appears.
Page 45

43
Launcher Basics
Use Launcher to access applications.
Launcher includes eight pages by default; add pages as
needed.
Opening Launcher
In Standby,
Launcher appears.
・
To open Launcher from Home Screen, select and press ,
or tap .
Using Launcher Page Index
Use Launcher page index to switch, add or delete pages.
In Launcher, (Long)
Launcher page index appears.
・
In Viewer position, tap to open Launcher page index.
Select page
Handset Interface
Window Description
Applications
Open Standby or Home Screen
Open list of active applications
/ Toggle pages
Switching Launcher Pages
Press or to switch pages.
Page opens.
Launcher Page Index Operations
Adding Pages
In Launcher page index, Add
Deleting Pages
In Launcher page index, select page Delete
page Yes
・Delete applications on page beforehand.
Closing Launcher Page Index
In Launcher page index,
・Alternatively, flick left/right.
SoftBank 007SH
Page 46

44
Using Sub Display
View signal/battery strength, time, etc. with clamshell
closed. (Not available in clamshell open.)
Sub Display Indicators
Indicator Description
Signal/battery strength and time appear
by default
Manner mode and Answer phone are active
Caller information appears for calls; if
not answered, missed call notification
appears
Sender information appears upon message
arrival
Sub Display Operations
Deactivating/Reactivating Backlight
With clamshell closed,
・
Press to toggle Backlight on/off.
Toggling Sub Display View
With clamshell closed,
・
Press repeatedly as needed.
Hiding Caller Info
In Standby, Settings Display
settings Sub-display settings
Display caller ( )
・
Select Display caller and press to toggle on ( )/
off ( ).
Changing Clock Pattern
In Standby, Settings Display
settings Sub-display settings
Clock display settings Select pattern
OK
Page 47

Phone
45
Phone
Placing/Answering Calls...................................................46
Optional Services..............................................................47
Using Address Book..........................................................52
SoftBank 007SH
Page 48

46
Placing/Answering Calls
See below to dial directly or answer calls. (SoftBank 007SH
does not support Video Call.)
Placing a Call
In Standby, use keypad to enter number
Onscreen dialpad appears with entered number.
・Include area code for landline numbers.
Answering a Call
When a call arrives, or
Call connects.
To end the call,
Handset dials the number.
・Wait for other party to accept the call.
To end the call,
Call ends.
After Calls to/from Unsaved Numbers
Save to Address Book confirmation appears. Select
Register to address book and press then follow
onscreen instructions.
Call ends.
After Calls to/from Unsaved Numbers
Save to Address Book confirmation appears. Select
Register to address book and press then follow
onscreen instructions.
Emergency Location Report
Your location is automatically reported to the
corresponding agency (police, etc.) when you place
emergency calls (110, 119 or 118) with SoftBank 3G
handsets.
・Registration/transmission fees do not apply.
・Positioning accuracy is affected by location/signal
conditions. Always provide your location and purpose on
the phone.
・Location Information is not reported when emergency
calls are placed without Caller ID (such as when
the number is prefixed with 184). However, the
corresponding agency may obtain your Location
Information in a life threatening situation.
・Location Information is not reported during Global
Roaming.
・Emergency calls are restricted when Offline mode and
USIM card lock are active. Long Press and cancel
Offline mode, power off, then restart handset.
Page 49
47
Optional Services
Use these SoftBank Optional Services:
Optional Services
Service Description
Call
Forwarding
Voicemail
Call Waiting
Group Calling
Caller ID
Call Barring
1 A separate contract is required.
Divert all/all unanswered calls to a preset
number
Divert all/unanswered calls to Voicemail
Center; access messages via handset/
touchtone phones
Answer calls or open another line during a
1
call
Switch between open lines/connect
1
multiple lines
Show or hide your number when placing
calls
Restrict incoming/outgoing calls by
conditions
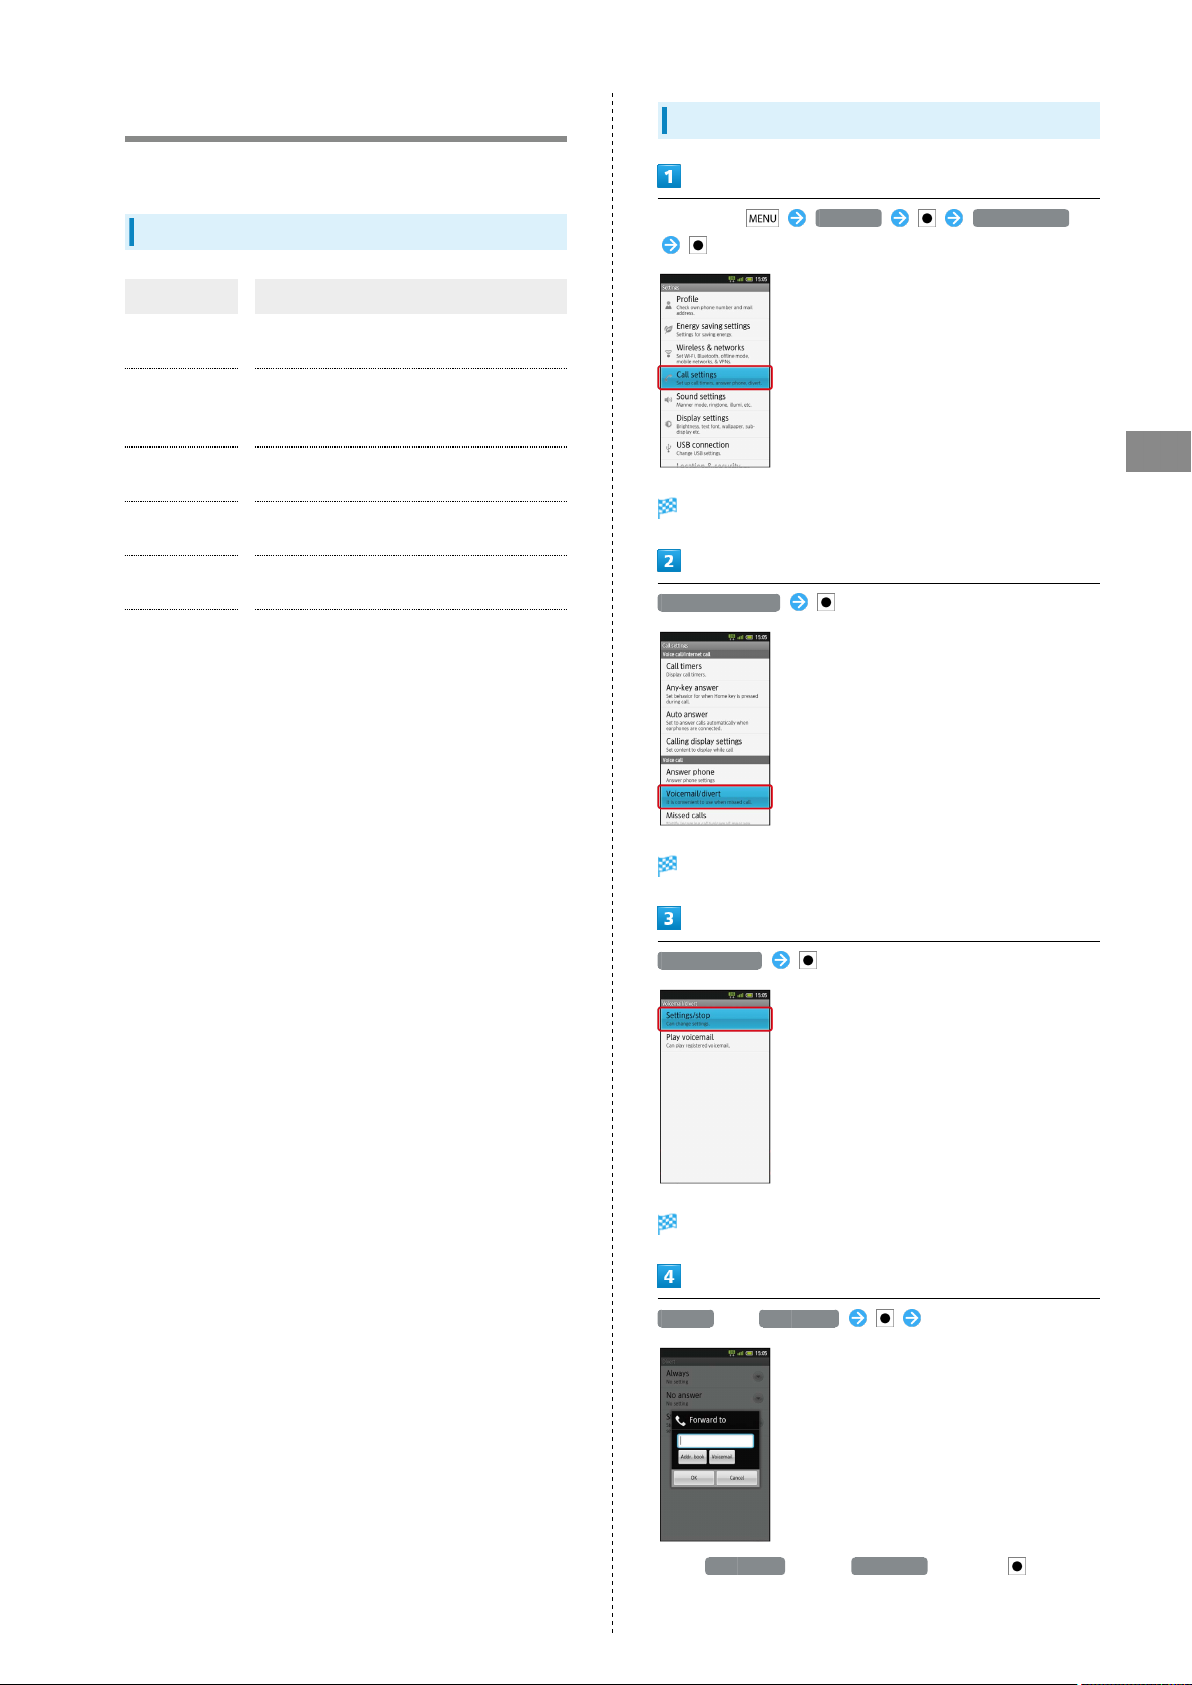
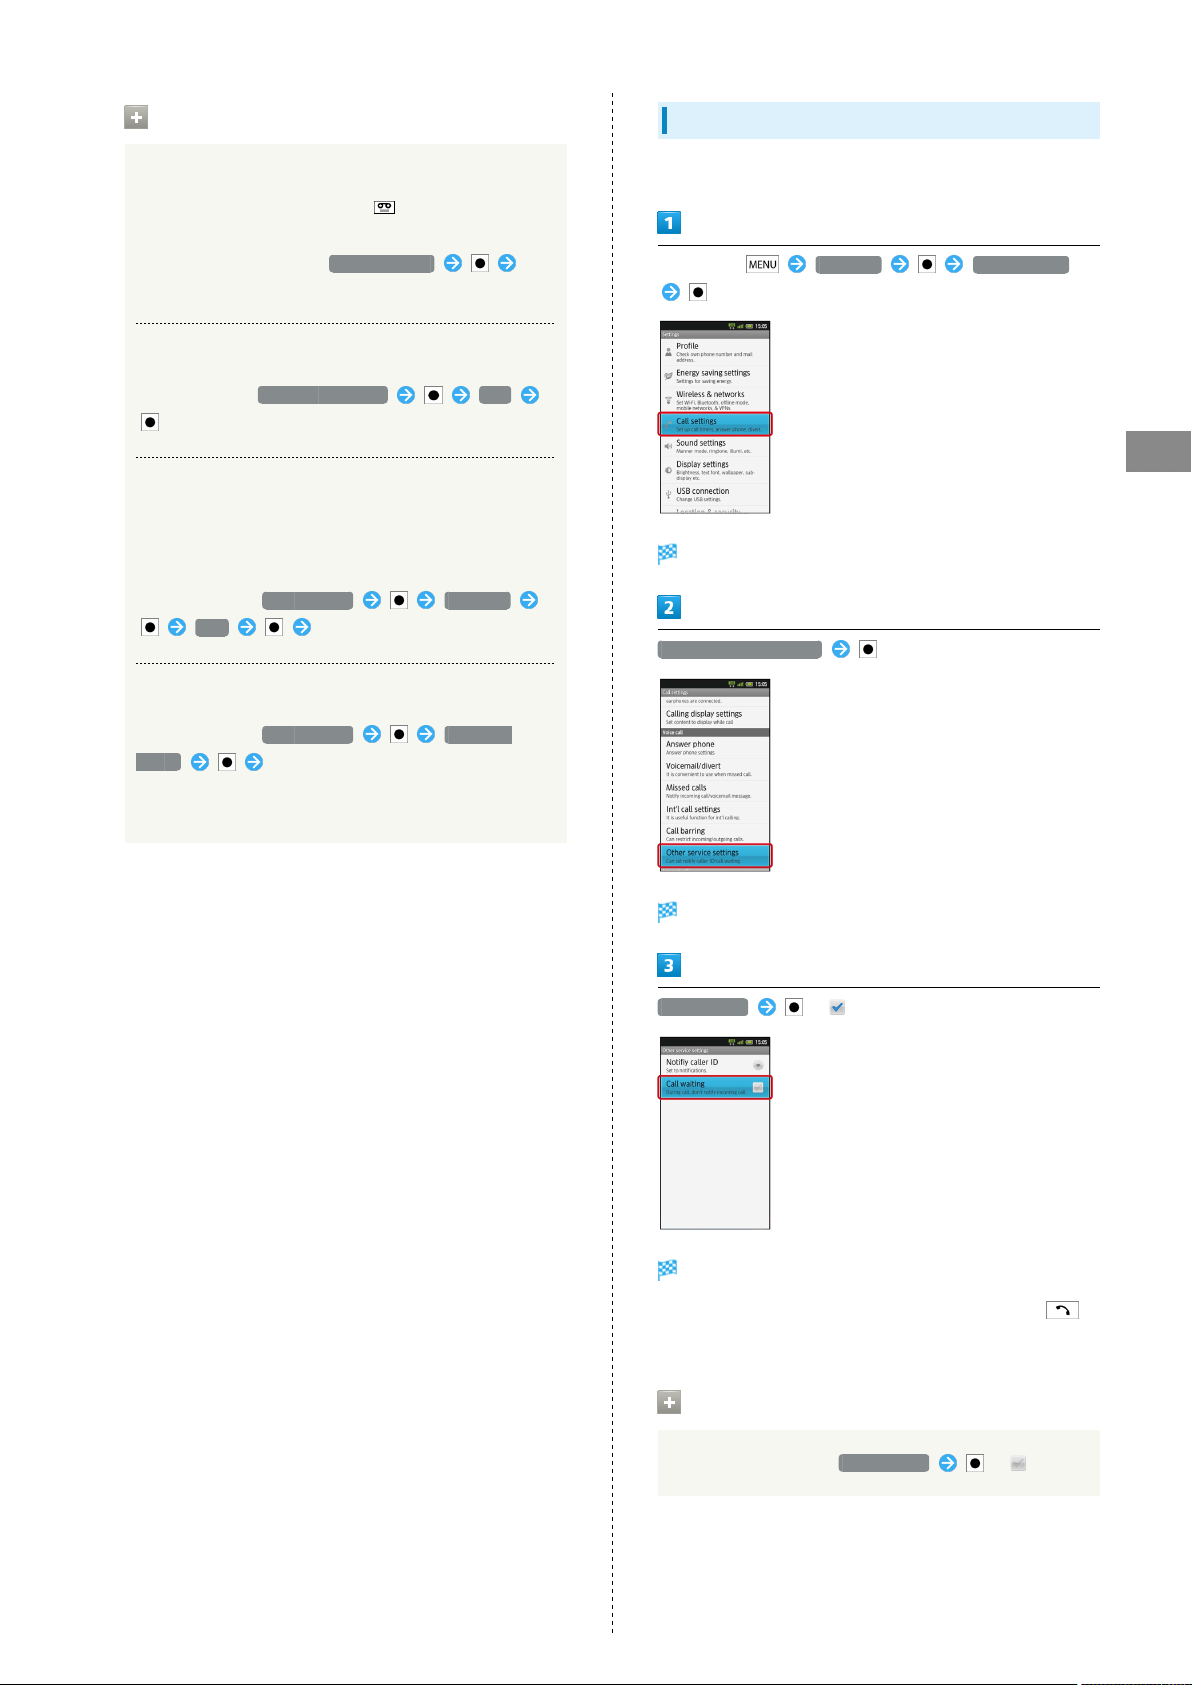
Initiating Call Forwarding
In Standby, Settings Call settings
Phone
Call settings opens.
Voicemail/divert
Voicemail/divert menu opens.
Settings/stop
Divert menu opens.
Always or No answer Enter number
・
For No answer , select Wait time and press then set
ring time.
SoftBank 007SH
Page 50
48
OK
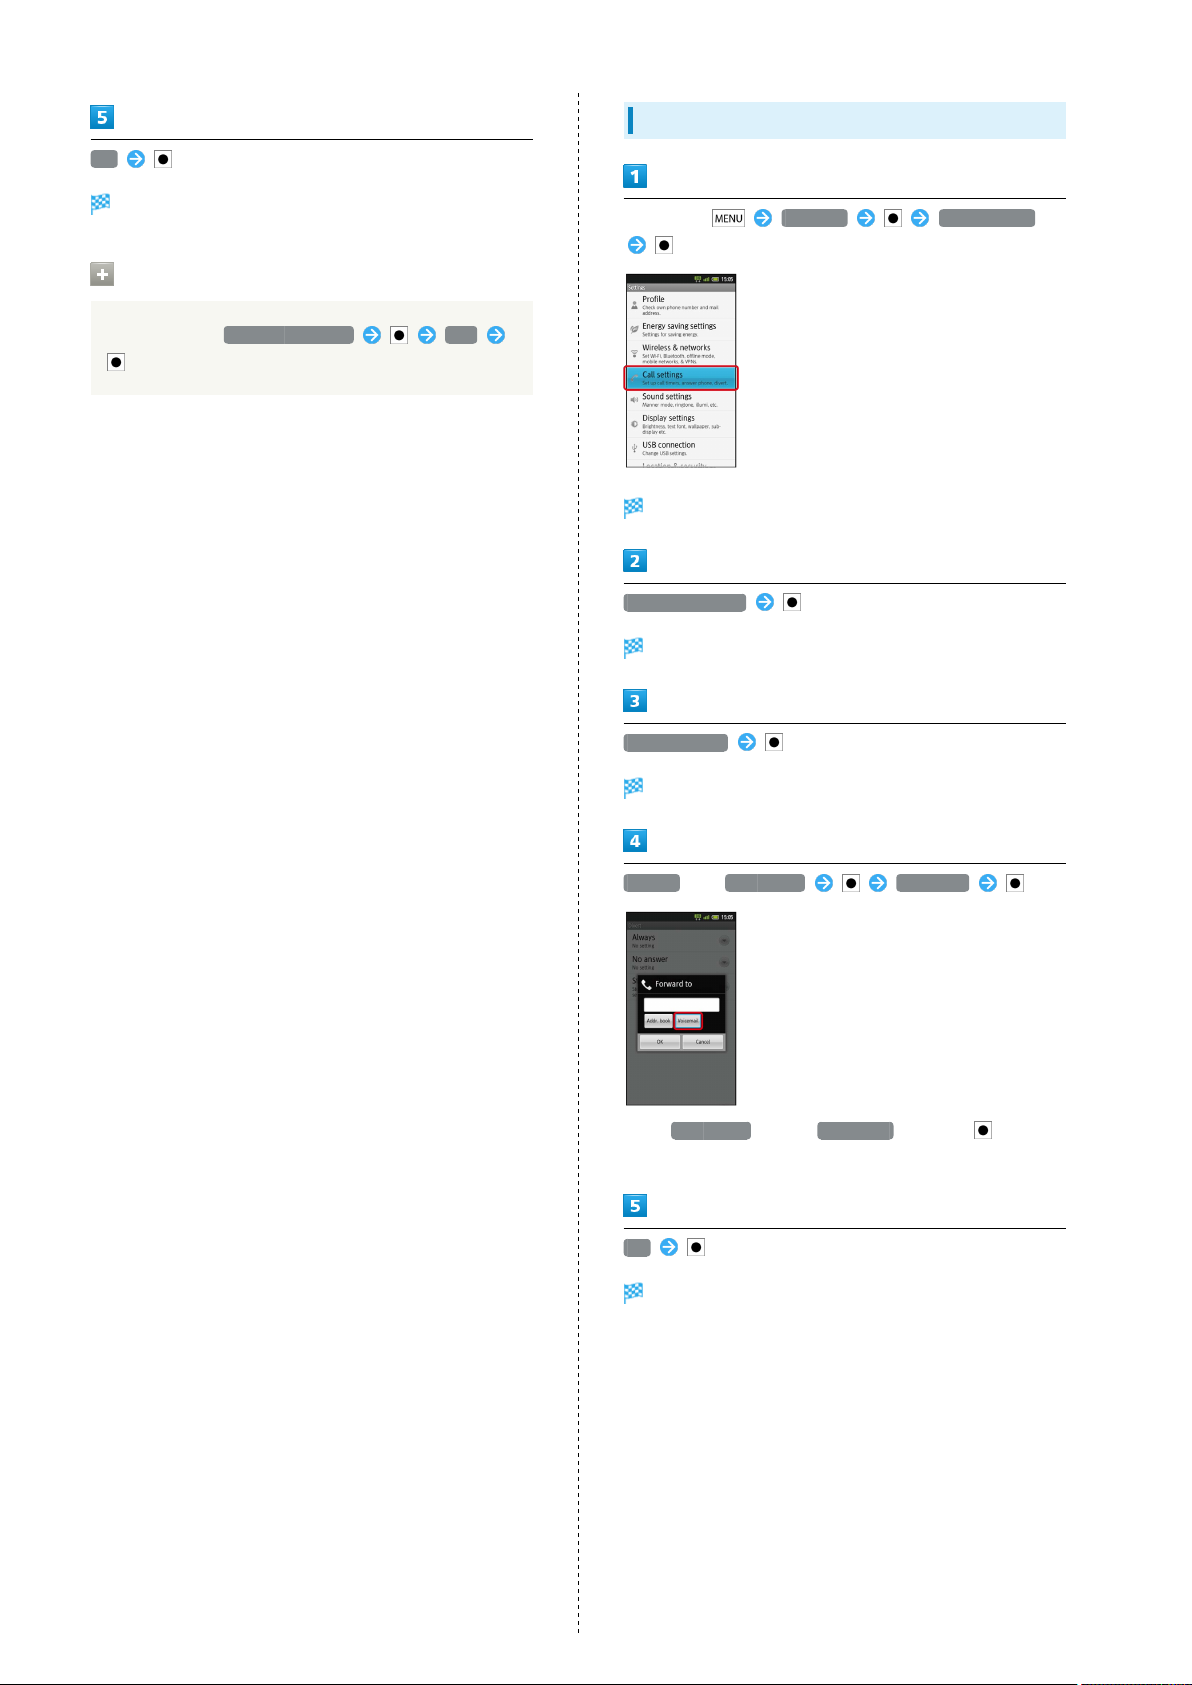
Initiating Voicemail
Call Forwarding activates.
Canceling Call Forwarding
In Divert menu, Stop call forward Yes
In Standby, Settings Call settings
Call settings opens.
Voicemail/divert
Voicemail/divert menu opens.
Settings/stop
Divert menu opens.
Always or No answer Voicemail
・
For No answer , select Wait time and press then set
ring time.
OK
Voicemail activates.
Page 51
49
Voicemail Operations
Playing Voicemail Messages
When a new message is recorded, appears on Status
Bar. To play messages, follow these steps:
In Voicemail/divert menu, Play voicemail
Follow voice guidance
Canceling Voicemail
In Divert menu, Stop call forward Yes
Missed Call Notification
Activate this function for records of calls missed when
handset is off/out-of-range. Activate Voicemail then
follow these steps:
In Call settings, Missed calls Settings
Call Follow voice guidance
Setting Handset Response to Missed Calls
Activating Call Waiting
A separate contract is required.
In Standby, Settings Call settings
Phone
Call settings opens.
Other service settings
In Call settings, Missed calls Sounds &
alerts Set
・Set Missed calls sound, Vibration pattern, Incoming calls
illumi and Ring duration.
Other service settings opens.
Call waiting ( )
Call waiting activates.
・
During a call, a tone sounds for incoming calls; press to
answer.
Canceling Call Waiting
In Other call settings, Call waiting ( )
SoftBank 007SH
Page 52
50
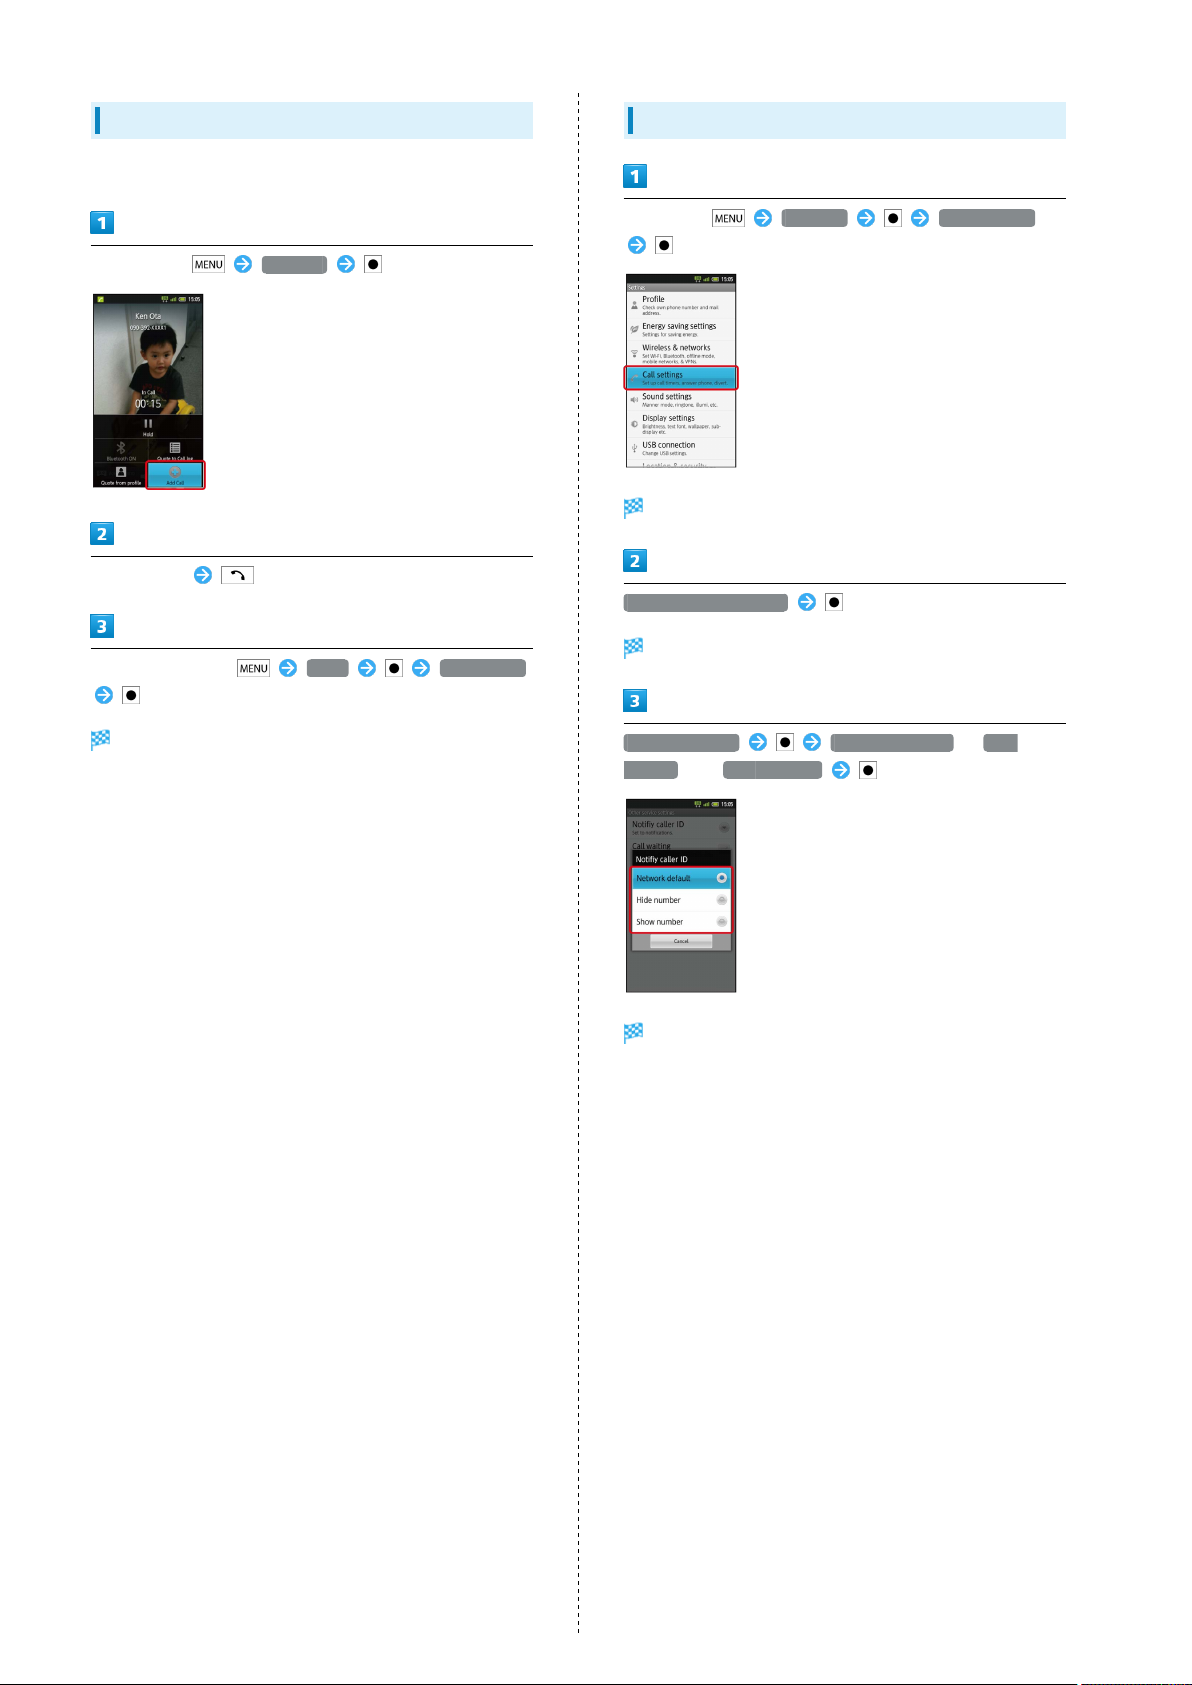
Using Group Calling
A separate contract is required.
During a call, Add Call
Enter number
When call connects, More Merge calls
Using Caller ID
In Standby, Settings Call settings
Call settings opens.
Other service settings
Other service settings opens.
All lines connect to each other.
Notify caller ID Network default , Hide
number or Show number
Caller ID activates.
Page 53
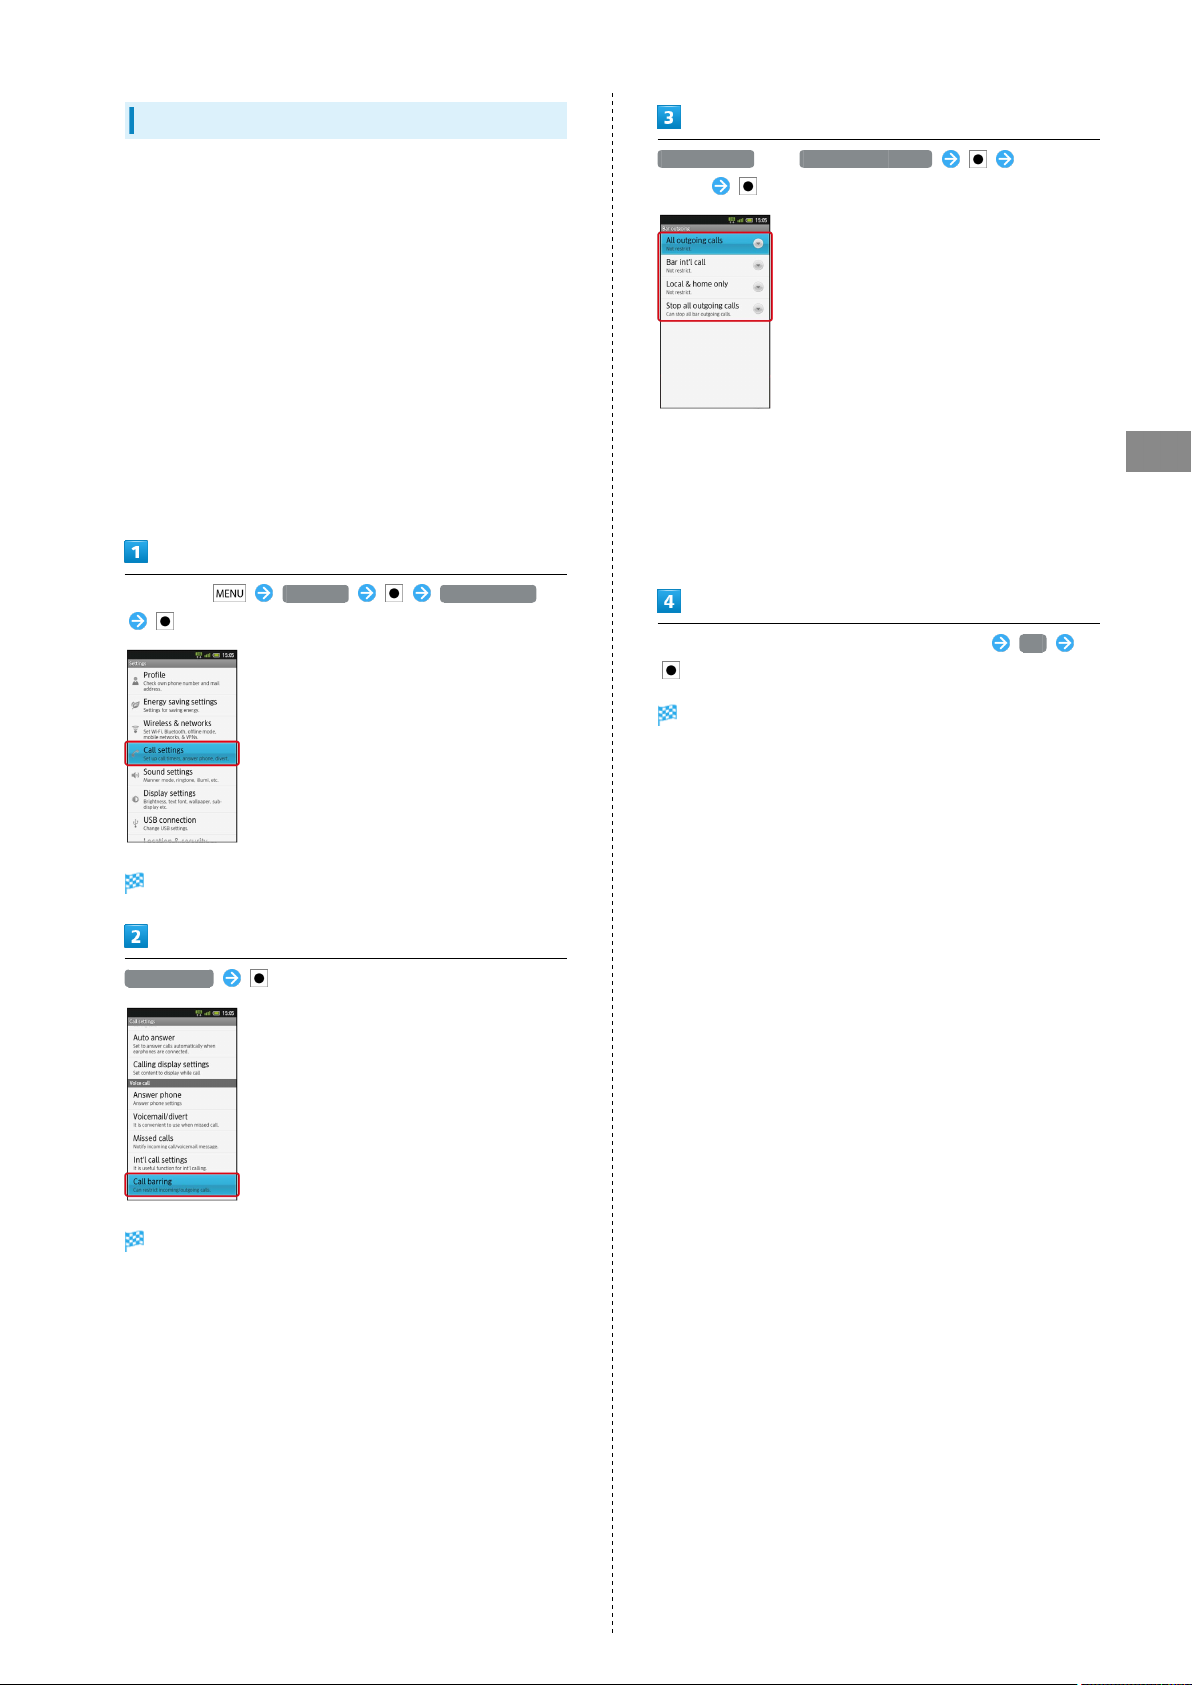
Using Call Barring
51
Restrict outgoing calls or reject calls.
・Center Access Code (Network Password) is required to set
incoming/outgoing call restrictions.
・Incoming/outgoing call restriction settings will be locked if
incorrect Center Access Code (Network Password) is entered
three times consecutively during the setting. To resolve,
the code must be changed. For details, contact SoftBank
Customer Support, General Information.
・If you have previously changed Network Password on a
SoftBank handset, enter the latest code to set incoming/
outgoing call restrictions.
・A call barred message appears if call is attempted with
outgoing call restriction active. It may take longer to appear
in some areas.
In Standby, Settings Call settings
Bar outgoing or Bar incoming calls Select
option
・"All outgoing calls" restricts all non-emergency calls; "Bar
int'l call" restricts all international calls; "Local & home
only" restricts all international calls except calls to Japan.
・"Restrict all incomings" rejects all calls, and "Bar if abroad"
rejects calls while outside Japan.
・This also restricts outgoing/incoming SMS messages.
Enter Center Access Code (Network Password) OK
Restriction is set.
Phone
Call settings opens.
Call barring
Call barring menu opens.
SoftBank 007SH
Page 54
52
Additional Operations
Canceling All Outgoing Call Restrictions
In Call barring menu, Bar outgoing Stop all
outgoing calls Enter Center Access Code
OK
Canceling All Incoming Call Restrictions
In Call barring menu, Bar incoming calls
Stop All incoming calls Enter Center Access
Code OK
Limiting Calls to Numbers Saved in Address
Book
In Call barring menu, Restrict destinations
Enter Handset Code OK Restrict address
book ( )
Limiting Calls to Numbers in Call Permitted
List
Using Address Book
Save contacts including names, phone numbers, mail addresses,
etc.
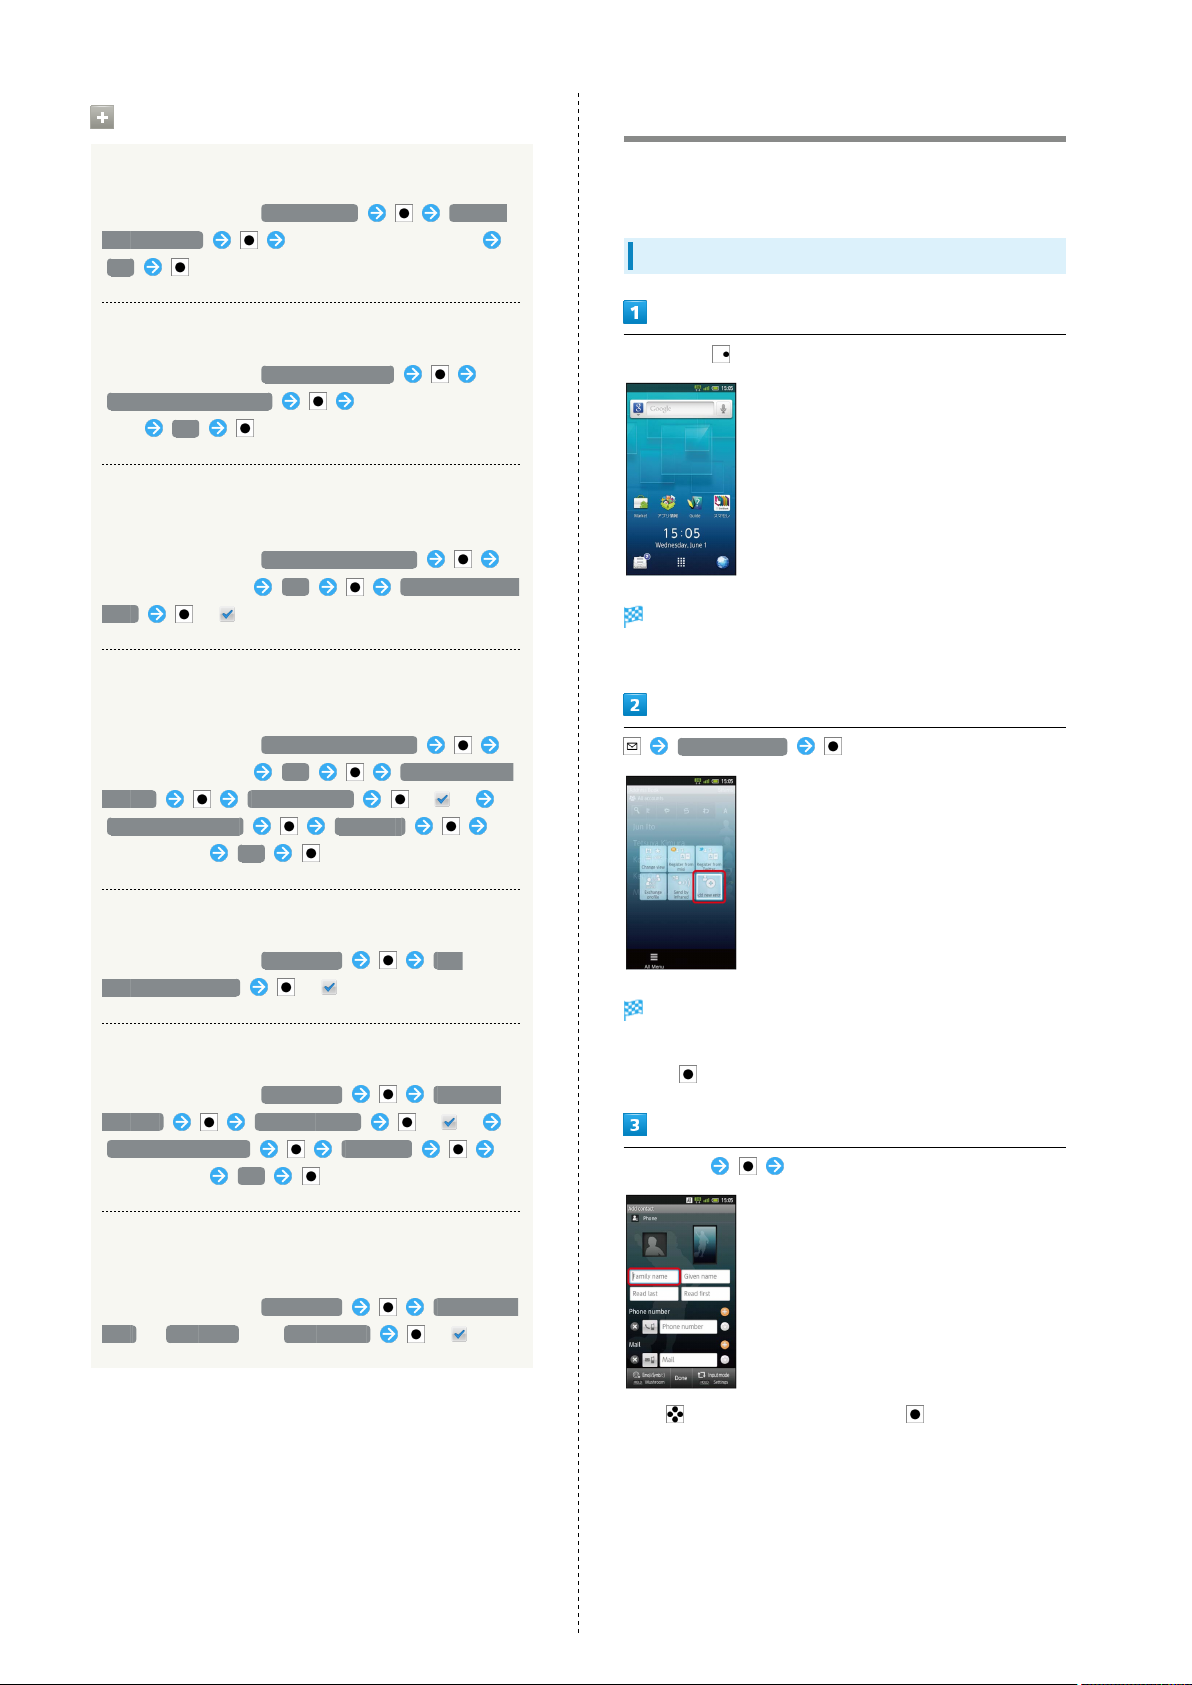
Adding Contacts
In Standby,
Address Book opens.
・If confirmation appears, follow onscreen instructions.
In Call barring menu, Restrict destinations
Enter Handset Code OK Specified phone
number Switch on/off ( )
Call permitted list <Empty>
Enter number OK
Rejecting Calls from Unsaved Numbers
In Call barring menu, Reject call Not
registered numbers ( )
Rejecting Calls from Specified Numbers
In Call barring menu, Reject call Specified
numbers Switch on/off ( )
Reject numbers list <Empty>
Enter number OK
Rejecting Calls with No/Undisplayable Caller ID
or from Payphones
In Call barring menu, Reject call Number not
sent , Payphone or Unavailable ( )
Add new entry
Add contact window opens.
・If account selection window opens, select an account and
press .
Select item Complete entry
・
Use to select entry field and press to enter other
items.
Page 55
Yes
Contact is saved.
53
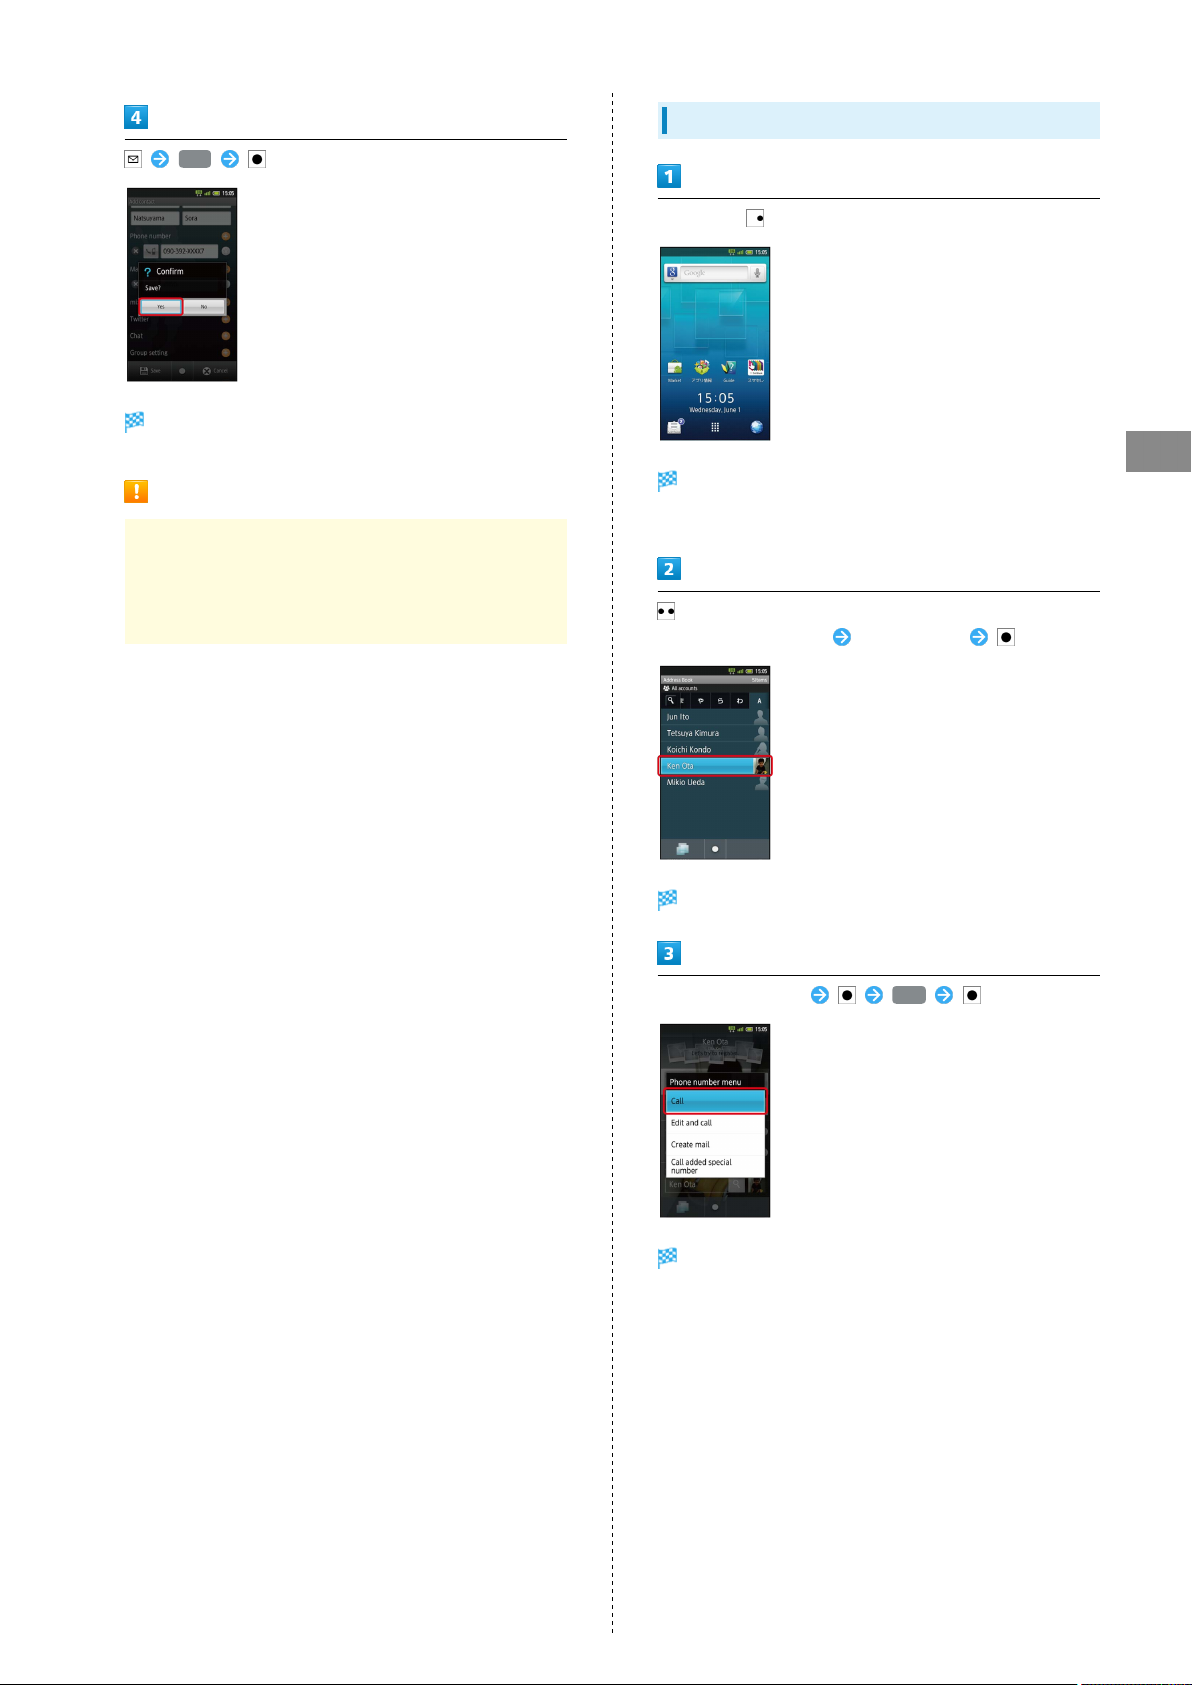
Dialing via Address Book
In Standby,
Back Up Important Information
If handset is left with no battery or an exhausted one,
contacts may be altered/lost; handset damage may also
affect information recovery. SoftBank is not liable for any
resulting damages. Keep separate copies of contacts, etc.
Address Book opens.
・If confirmation appears, follow onscreen instructions.
Select tab (hiragana row, alphabet or ETC) for first
character in "Read last" Select contact
Contact opens.
Select phone number Call
Phone
Handset dials the number.
SoftBank 007SH
Page 56

54
Page 57

55
Messaging & Browser
Mail Types......................................................................... 56
Sending S! Mail/SMS.........................................................56
Receiving & Replying S! Mail/SMS...................................58
Handling S! Mail/SMS....................................................... 59
Creating/Sending Gmail....................................................60
Opening Received Gmail................................................... 61
Email Settings...................................................................62
Creating/Sending Email.................................................... 62
Opening Received Email....................................................63
Browsing the Internet......................................................64
Messaging & Browser
SoftBank 007SH
Page 58

56
Mail Types
S! Mail
Exchange messages with S! Mail-compatible SoftBank handsets
and e-mail compatible devices (other mobiles, PCs, etc.)
beyond SMS character entry limit; attach media files, etc.
SMS
Exchange short messages with mobiles.
Gmail
Google webmail service; synchronize Gmail between handset
and Google server automatically.
Email
Exchange Email (POP3/IMAP4) messages on handset.
Sending S! Mail/SMS
Sending S! Mail
Follow these steps to send S! Mail to a number/address saved
in Address Book:
In Standby,
Folder list opens.
・Set up accounts to use Email.
・Upon Email message retrieval/transmission, accounts are
synchronized between handset and source mail server;
messages are also accessible from PCs.
S! Mail Composition window opens.
Address Book
Address Book opens.
Select tab (hiragana row, alphabet or ETC) for first
character in "Read last" Select contact
Contact opens.
Page 59

Sending SMS
57
Select mail address (or number)
Enter subject Select message text field Enter
message
Follow these steps to send SMS via sent/received mail
records:
In Standby,
Folder list opens.
Change to SMS
Messaging & Browser
S! Mail is sent.
・Failed S! Mail messages are saved in Unsent Folder, with up
to two delivery attempts.
Saving without Sending
In S! Mail Composition window, Save
Save to unsent box Save as New
SMS Composition window opens.
Send/Receive history
Send history or Receive history Select number
Enter message
SMS is sent.
・Failed SMS messages are saved in Unsent Folder, with up to
two delivery attempts.
Saving without Sending
In SMS Composition window,
SoftBank 007SH
Page 60

58
Receiving & Replying S! Mail/SMS
Handset receives S! Mail/SMS messages automatically; set
message retrieval to manual or retrieve Server Mail as needed.
Opening New Messages
When message arrives, ringtone sounds and appears on
Status Bar
In Standby, Select message notification
Message Reception
Clamshell Closed
New message notification appears on Sub Display. Open
handset and select in Information then press ;
message list (Inbox) appears.
Unread Message Notification
Unread message count ( ) appears above application icon.
Retrieving Complete Messages
In message window, Continue to receive
・
Select and press to select item to retrieve.
Important Message Retrieval Notes
Retrieval System
By default, complete message including attachments is
retrieved; transmission fees apply depending on subscribed
price plan.
Message list (Inbox) appears.
Select message
Message window opens.
Retrieval Outside Japan
Message retrieval outside Japan may incur high charges.
Page 61

59
Replying to Messages
To reply from message window, skip ahead to .
In Standby,
Folder list opens.
Select folder in Inbox Select message
Message window opens.
Handling S! Mail/SMS
Opening Messages
Follow these steps to open received messages:
In Standby,
Messaging & Browser
Folder list opens.
Select folder in Inbox
・
Long Press to reply to sender and all recipients.
Enter message
Message is sent.
Message list appears.
・
Press in message list to switch folders.
Select message
Message window opens.
・
Select or and press to open other messages (higher
or lower in message list).
SoftBank 007SH
Page 62

60
Creating/Sending Gmail
Use Google webmail service. Sign in to a Google Account
beforehand.
Creating/Sending Messages
In Standby, In Launcher (Basic func. 1), (Gmail)
Inbox opens.
・If confirmation appears, follow onscreen instructions.
Gmail Composition Operations
Adding Cc/Bcc Recipients
In Mail Composition window, Add Cc/Bcc
Add recipient
Attaching Files
In Mail Composition window, Attach
Select file
・If confirmation appears, follow onscreen instructions.
Saving without Sending
After entering recipient, subject or message text,
・Message is saved to Drafts.
Important Gmail Usage Note
Gmail messages are not received if handset is set to reject
messages sent from PCs.
Compose
Mail Composition window opens.
Complete message
Message is sent.
Page 63

61
Opening Received Gmail
Gmail groups all related messages by subject. (Conversation
view)
Opening New Messages
When message arrives, ringtone sounds and appears on
Status Bar
In Standby, Select message notification
Opening Messages
In Standby, In Launcher (Basic func. 1), (Gmail)
Inbox opens.
Messaging & Browser
Select conversation (subject)
Inbox opens.
Select message
Message window opens.
Message window opens.
Replying to Messages
In message window, Complete message
SoftBank 007SH
Page 64
62
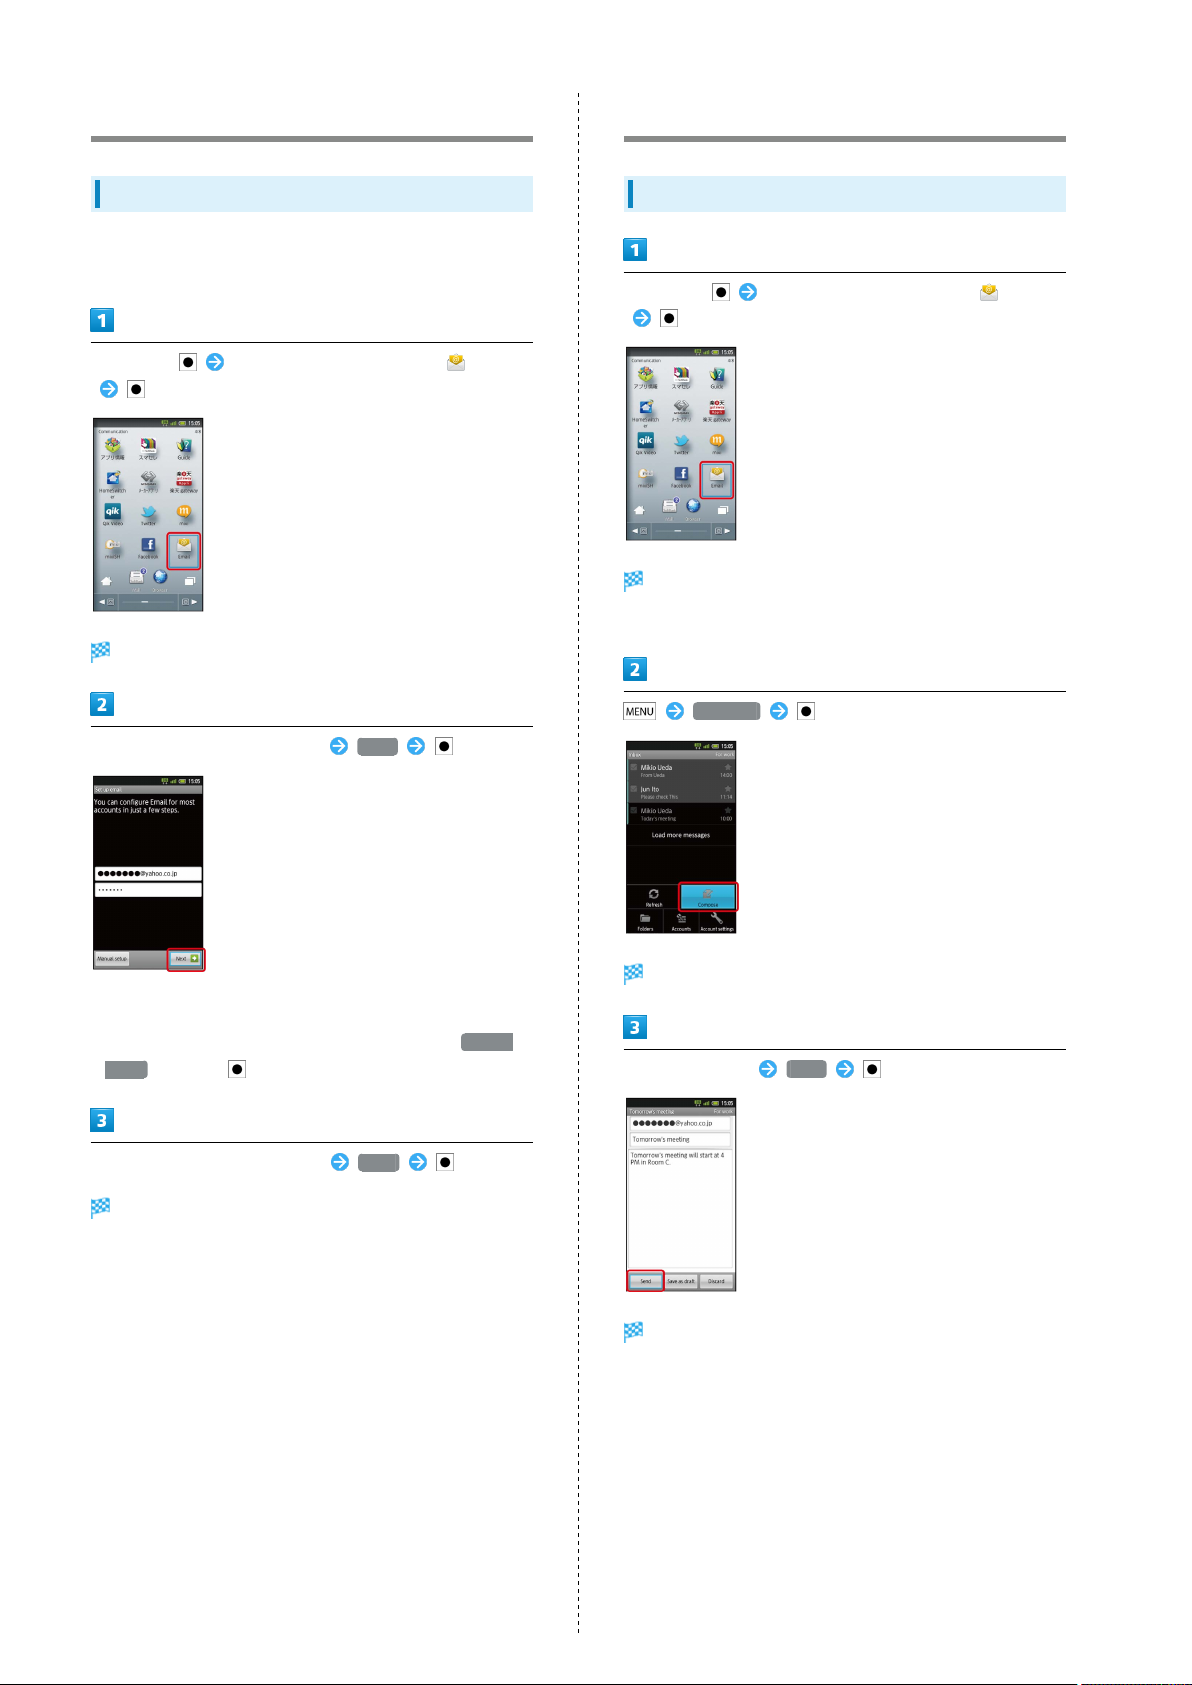
Email Settings
Mail Account Setup
Confirm user name (user ID), password, server name, etc.
beforehand.
In Standby, In Launcher (Communication), (Email)
Account setup menu opens (initial startup).
Creating/Sending Email
Creating/Sending Messages
In Standby, In Launcher (Communication), (Email)
Inbox opens.
・For multiple accounts, Email window opens.
Enter mail address and password Next
・For some mail addresses, incoming/outgoing server settings
may need manual configuration; if so, complete setup
manually. (Alternatively, for manual setup, select Manual
setup and press then proceed.)
Enter account name/sender name Done
Setup is complete.
・Sender name appears on outgoing messages.
Compose
Mail Composition window opens.
Complete message Send
Message is sent.
Page 65
63
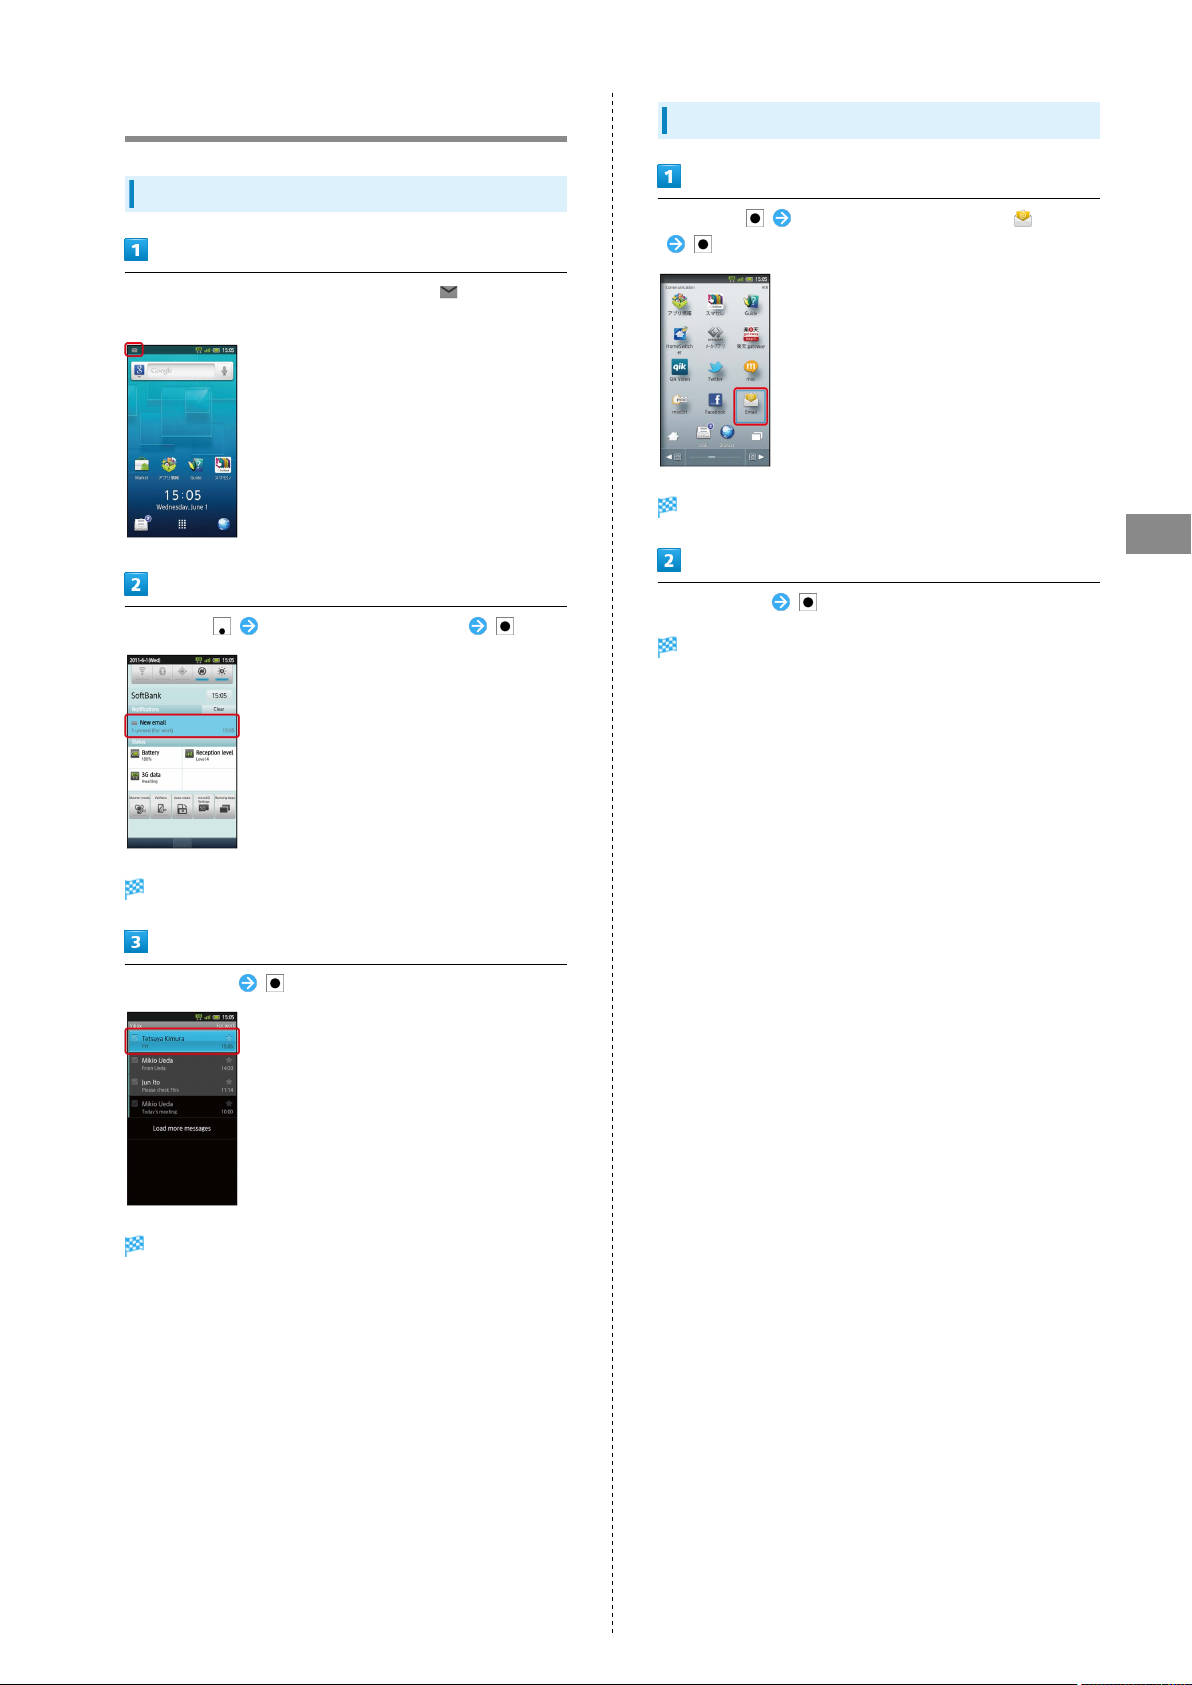
Opening Received Email
Opening New Messages
When message arrives, ringtone sounds and appears on
Status Bar
In Standby, Select message notification
Opening Messages
In Standby, In Launcher (Communication), (Email)
Inbox opens.
Messaging & Browser
Select message
Message window opens.
Inbox opens.
Select message
Message window opens.
SoftBank 007SH
Page 66
64
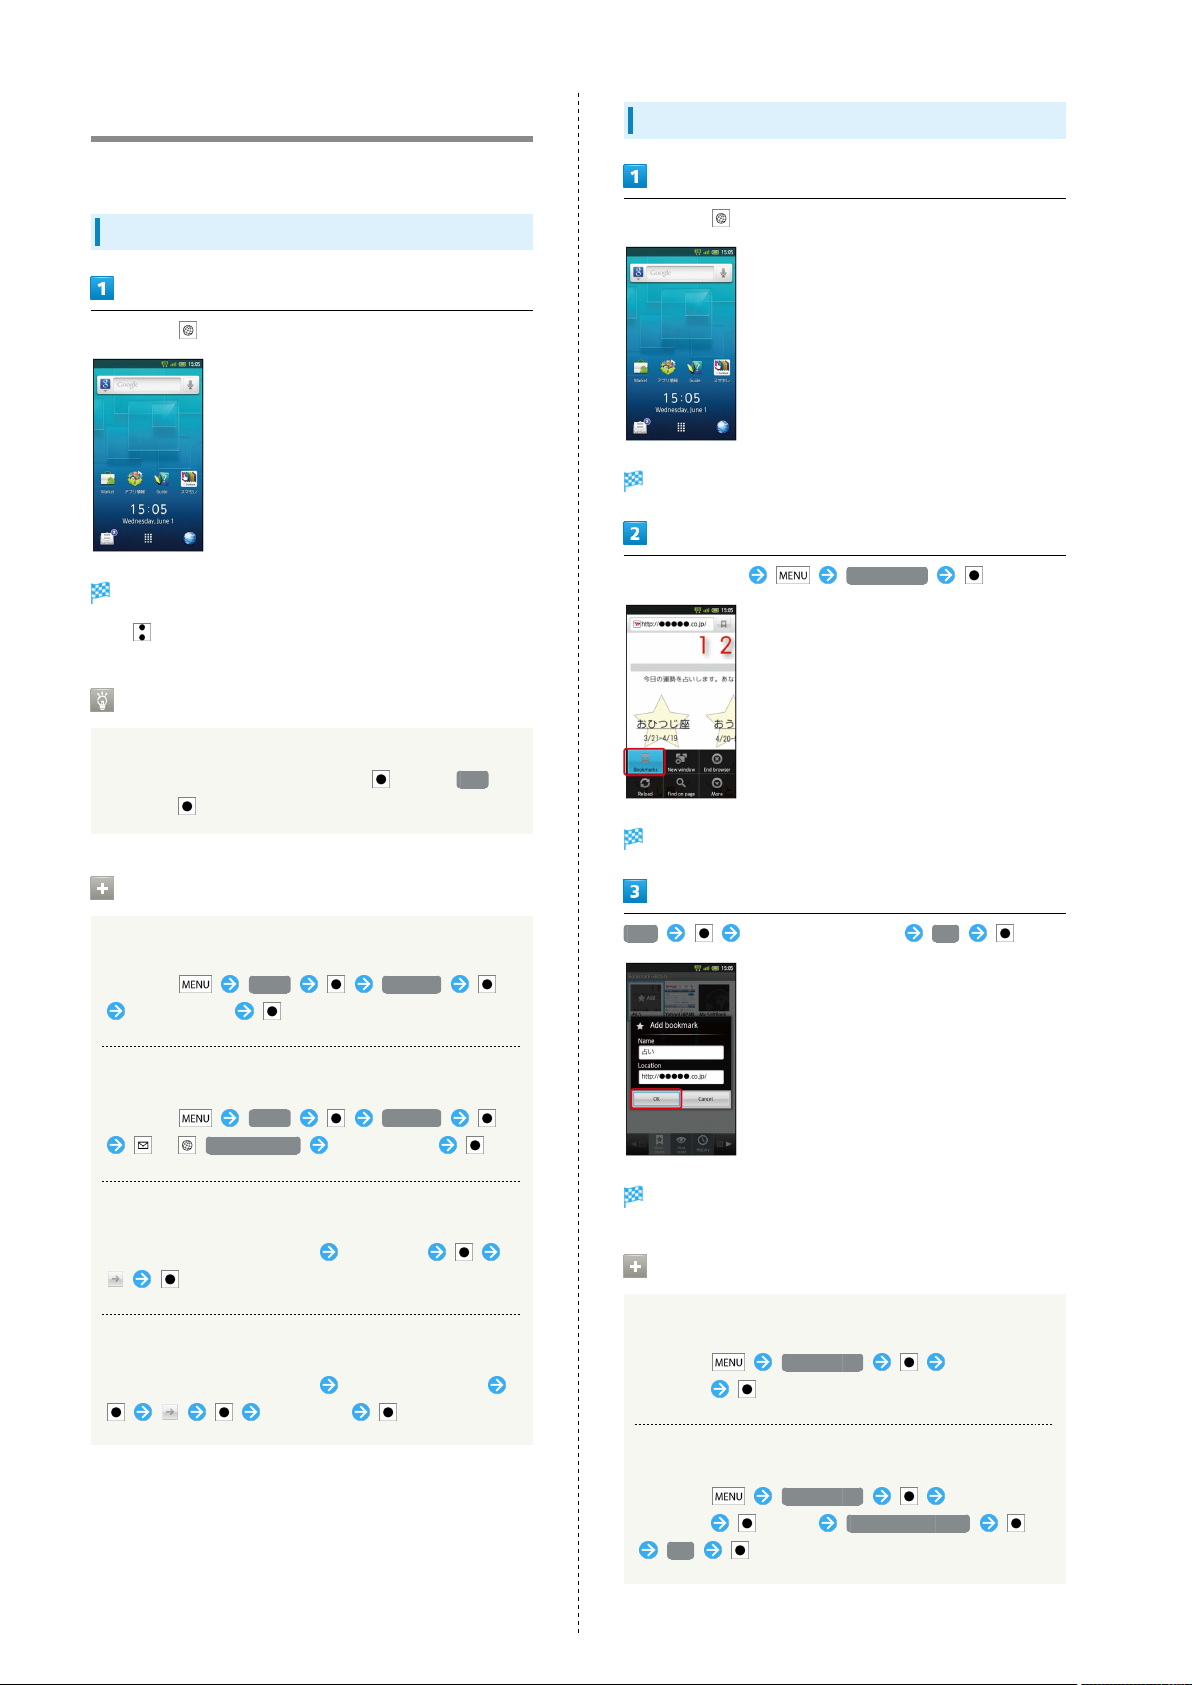
Browsing the Internet
View Internet sites via Browser.
Using Browser
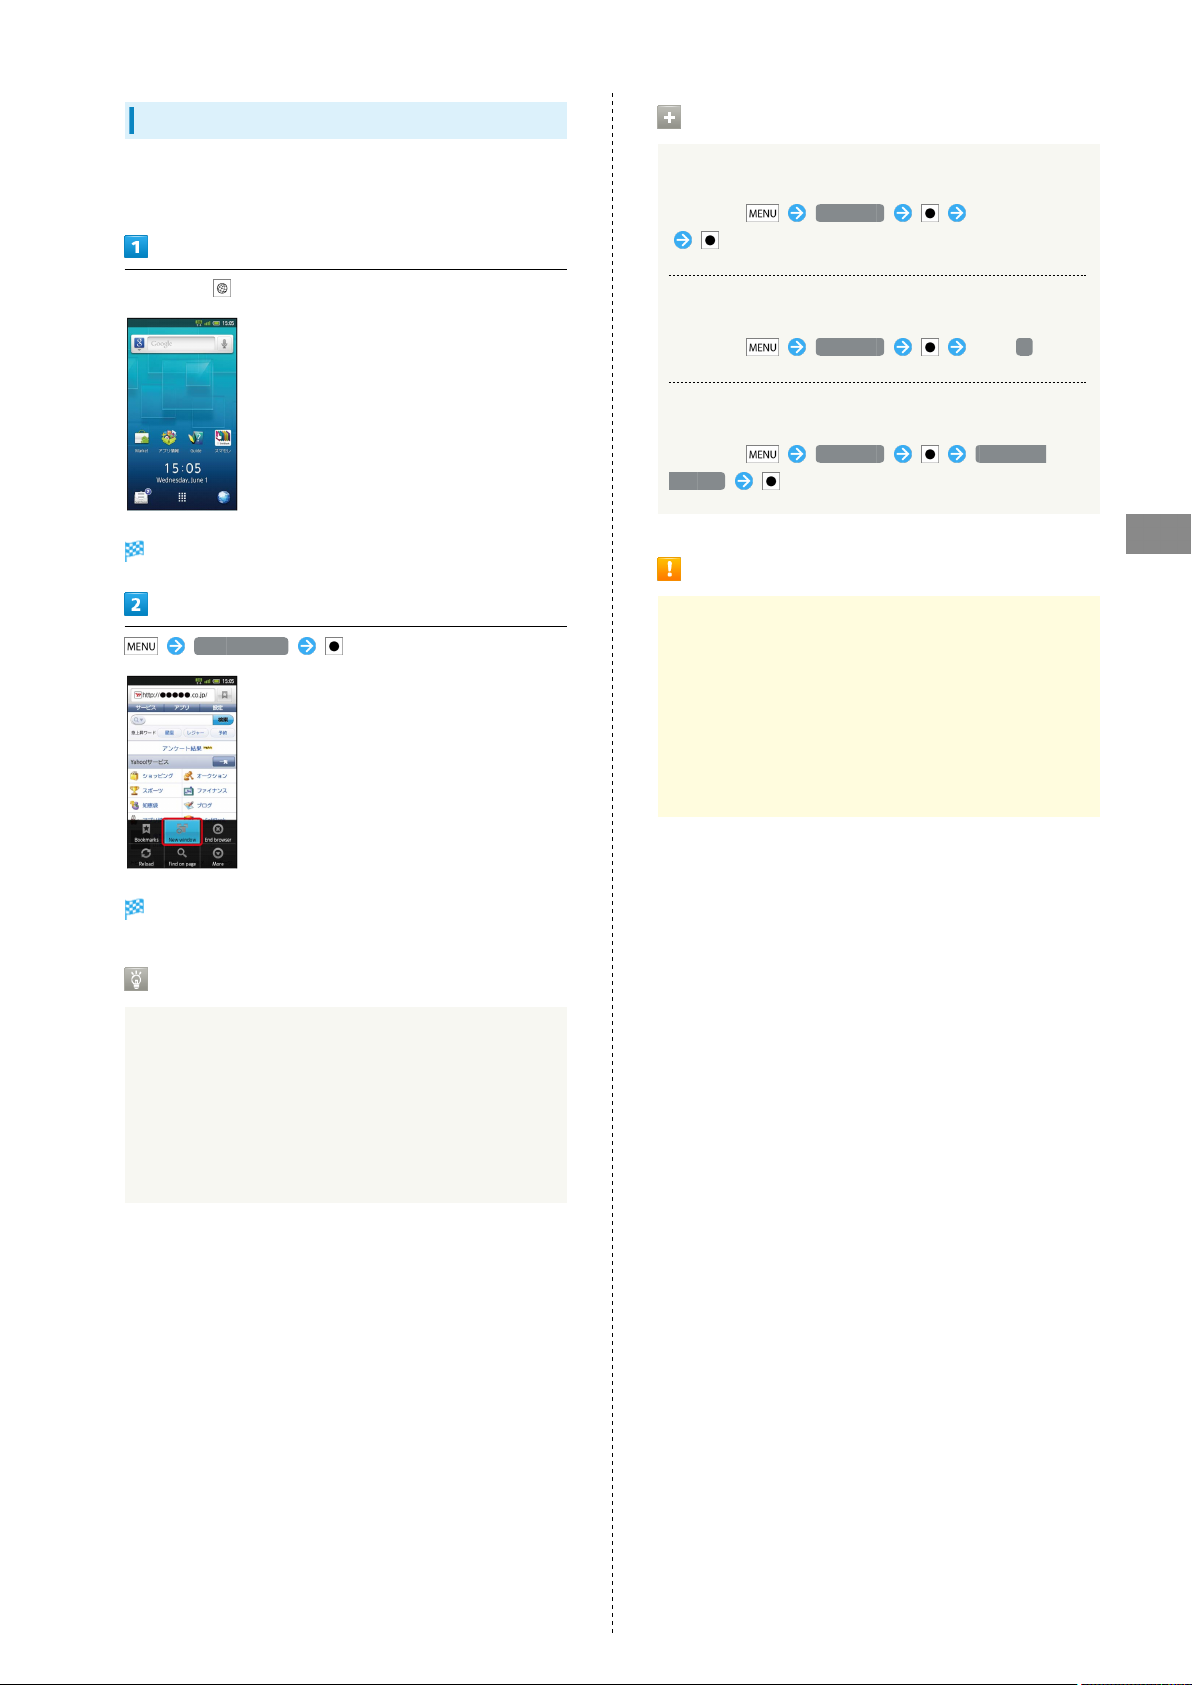
In Standby,
Handset connects to the Internet.
・
Use to scroll pages.
Saving Bookmarks
In Standby,
Handset connects to the Internet.
Open target site Bookmarks
Opening URLs within Message Text
Internet connection confirmation appears upon selecting
URL within message text and pressing ; select Yes
and press to open linked page in Browser.
Browser Operations
Using History
In a page, More History
Select record
Opening Frequently Visited Sites
In a page, More History
/ Most visited Select record
Entering URLs Directly
In a page, tap URL entry field Enter URL
Bookmark・History opens.
Add Check/edit title/URL OK
Current site is saved as a bookmark.
Bookmarks Operations
Searching for Words/Phrases
In a page, tap URL entry field Enter word/phrase
Select link
Opening Bookmarks
In a page, Bookmarks Select
bookmark
Deleting Bookmarks
In a page, Bookmarks Select
bookmark (Long) Delete bookmark
OK
Page 67
65
Opening Additional Windows
Open another page in a new window and switch between
windows.
In Standby,
Handset connects to the Internet.
New window
Window Operations
Switching Windows
In a page, Windows Select window
Closing Windows
In a page, Windows Tap ×
Opening Third & Subsequent Windows
In a page, Windows Open new
window
Disclaimer
When a security notice appears upon opening an Internet
page, subscribers must decide for themselves whether or
not to open the page. Opening secure pages constitutes
agreement to the terms of SSL/TLS usage. SoftBank,
SHARP Corporation, VeriSign Japan, Cybertrust, Entrust
Japan, GMO GlobalSign, RSA Security, SECOM Trust
Systems and Comodo Japan cannot be held liable for any
damages associated with the use of SSL/TLS.
Messaging & Browser
Current page opens in another window.
SSL & TLS
Secure Sockets Layer (SSL) and Transport Layer Security
(TLS) are encryption protocols that secure Internet
transmissions of important/sensitive information such
as credit card numbers and corporate secrets, providing
protection against online threats (eavesdropping,
falsification, impersonation, etc.). Handset is preloaded
with digital certificates issued by certificate authorities.
SoftBank 007SH
Page 68

66
Page 69

67
Camera
Photo Camera & Video Camera........................................68
Capturing 3D Images........................................................70
Camera
SoftBank 007SH
Page 70
68
Photo Camera & Video Camera
Descriptions are for Touch Panel operations in Viewer
position.
Capturing Photos
Capture JPEG images.
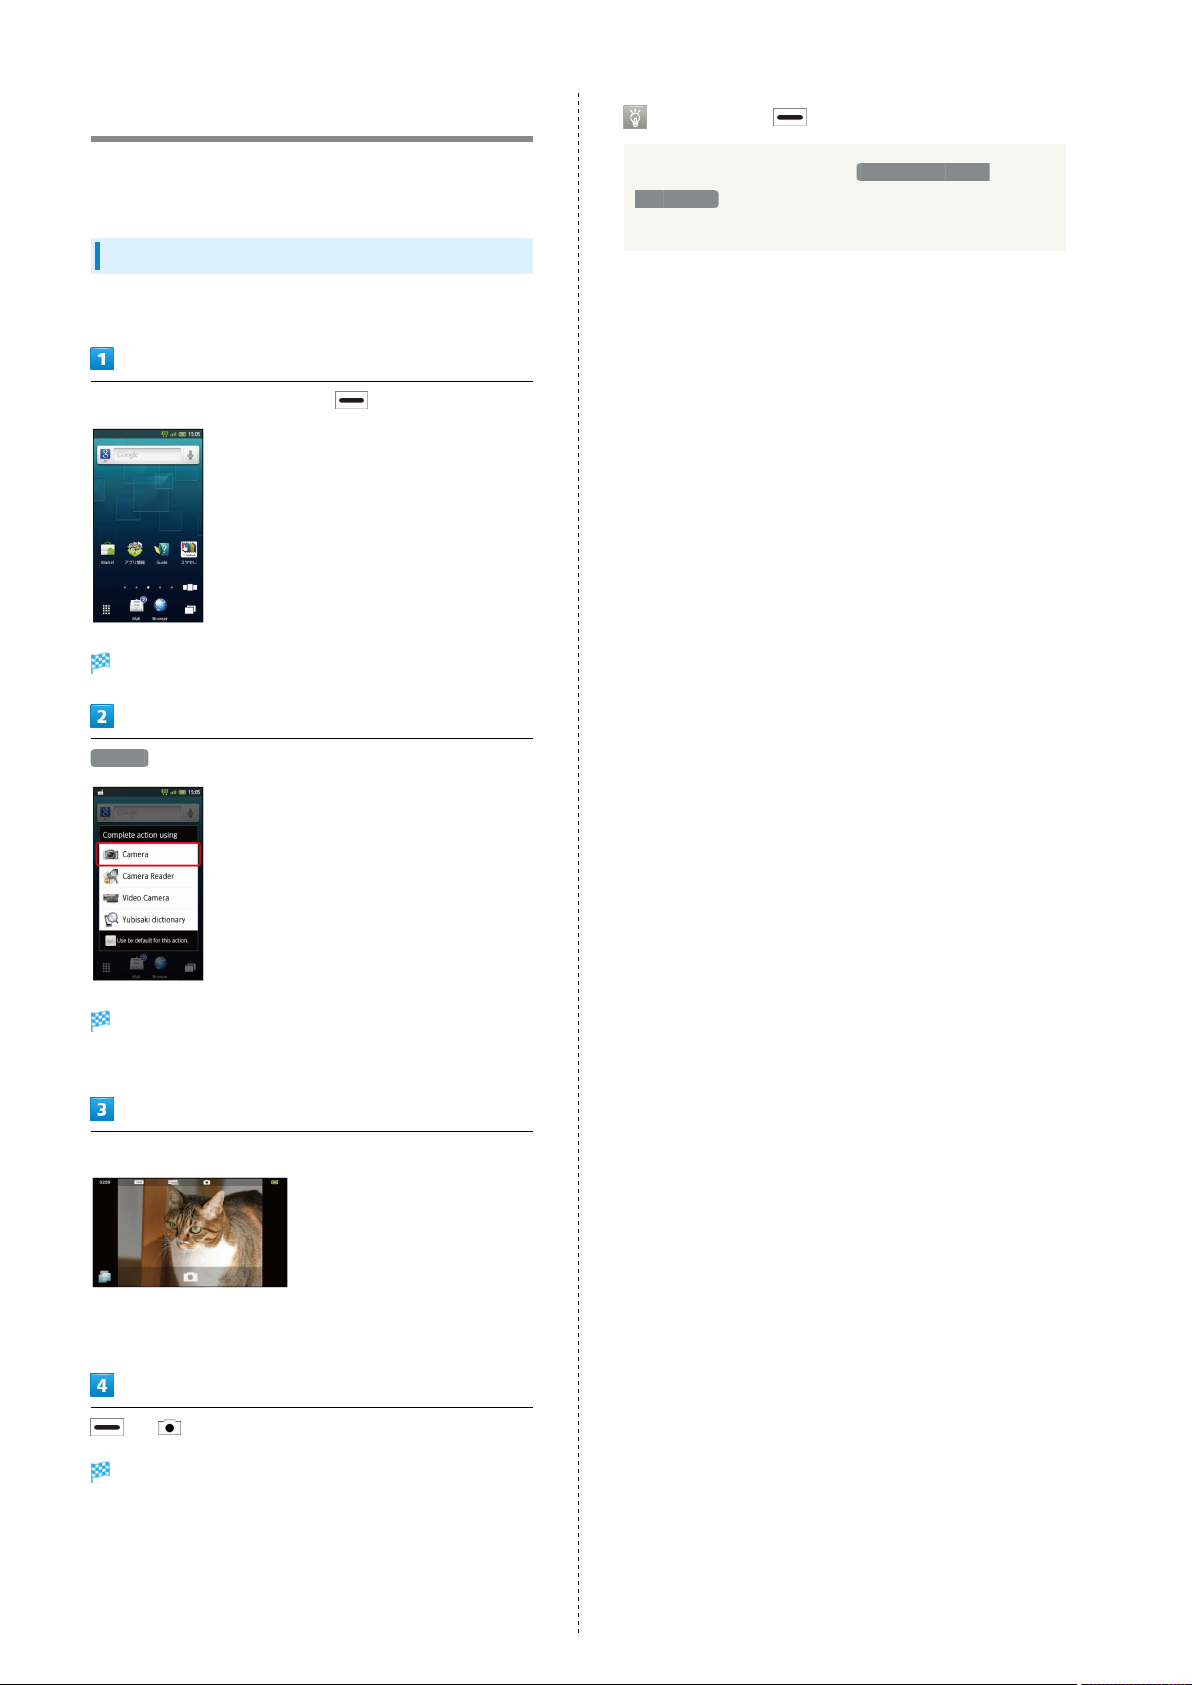
In Home Screen (Viewer position), (Long)
Camera application list appears.
Long Press for Camera Applications
In Camera application list, tap Use by default for
this action. to make selection the default application
thereafter.
Camera
Photo Viewfinder appears.
・If confirmation appears, follow onscreen instructions.
Frame subject on Display
・For people, focus automatically locks on detected face.
(Face AF)
or
Shutter clicks; photo is saved.
Page 71
69
Photo Viewfinder Operations
Adjusting Brightness
In Photo Viewfinder, swipe vertically for Brightness Scale
Adjusting Zoom
In Photo Viewfinder, swipe horizontally for Zoom Slider
Locking Focus
In Photo Viewfinder, tap focus lock target
・Camera continuously focuses on moving subjects.
・To release shutter, tap the subject again.
・Camera uses color to track subjects; may not correctly
track faintly colored subjects or ones similar to
background color.
Opening Captured Photo
After photo capture, tap preview thumbnail
・
Tap to send captured photo via mail or set it as
Wallpaper.
Recording Video
Record MPEG-4 video.
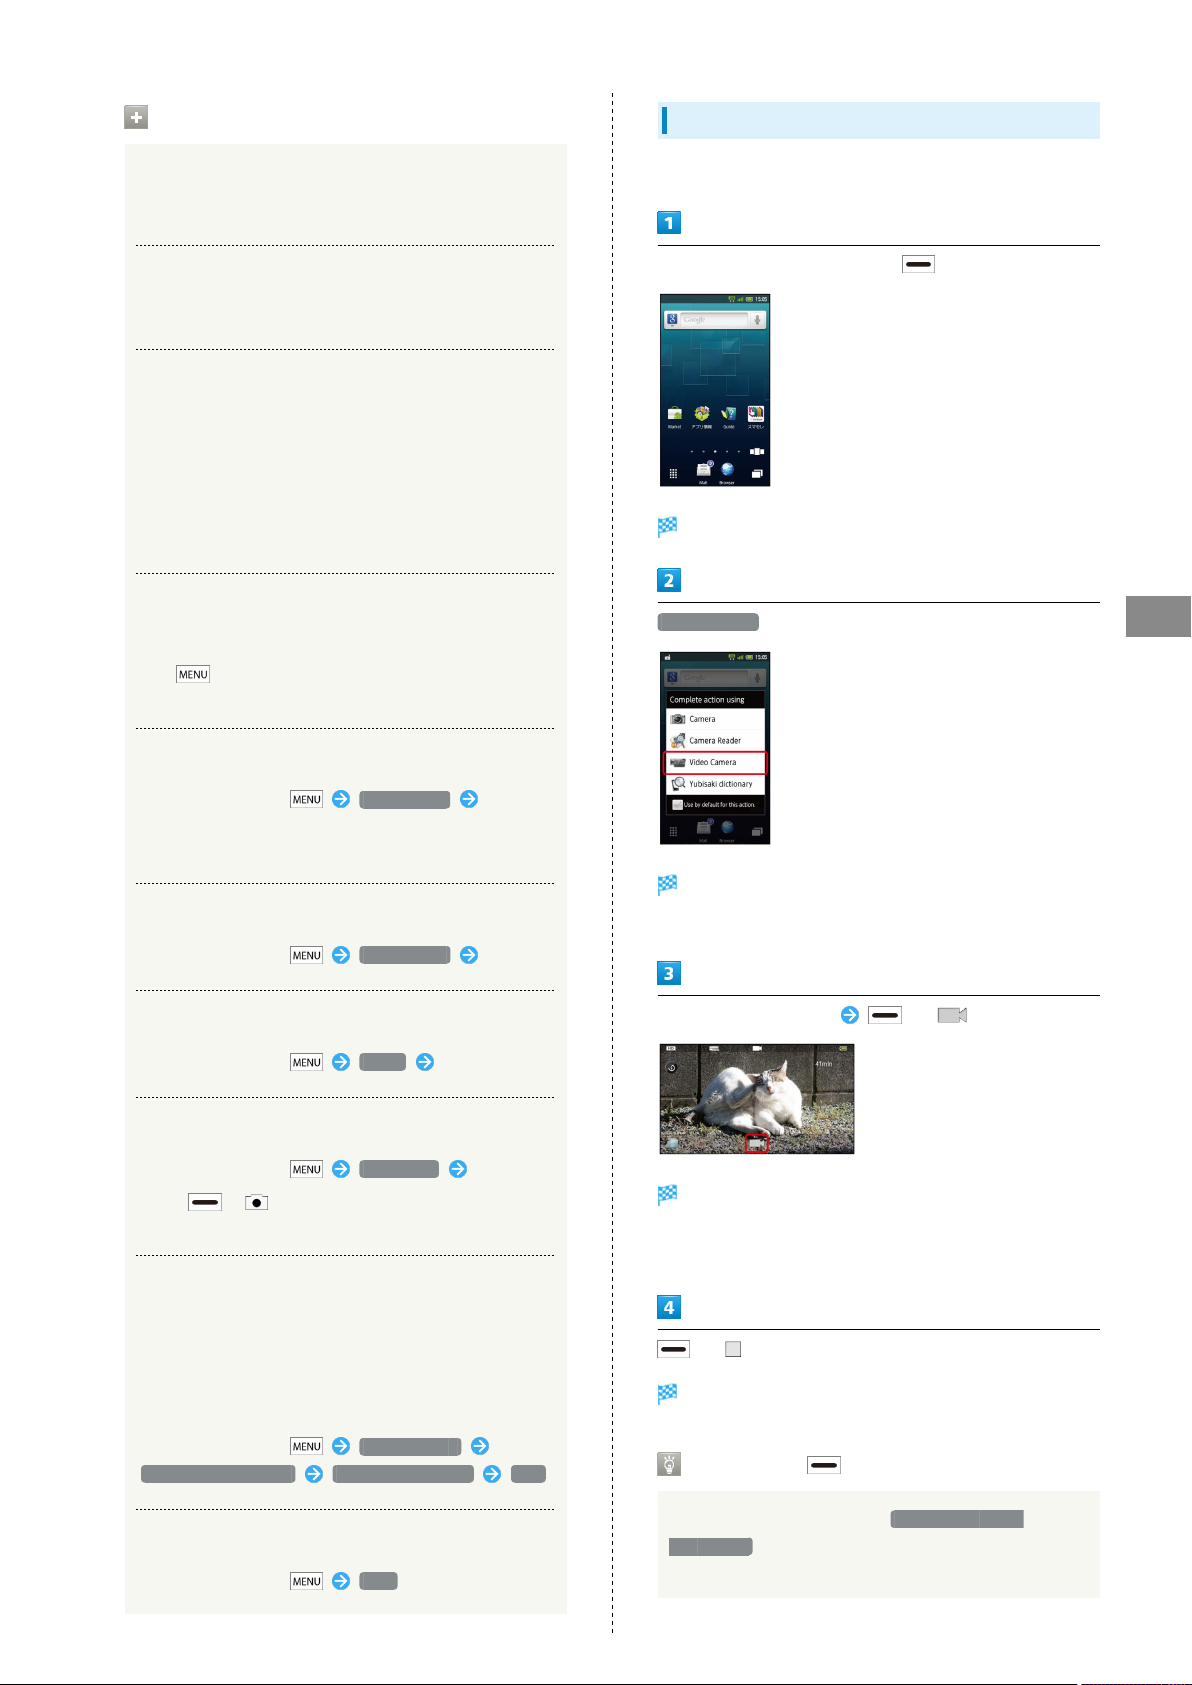
In Home Screen (Viewer position), (Long)
Camera application list appears.
Video Camera
Camera
Selecting Mobile Light Option
In Photo Viewfinder, Mobile light Tap
option
・Do not shine Mobile Light in eyes; may damage eyesight.
Changing Image Size
In Photo Viewfinder, Picture Size Tap size
Changing Scene Setting
In Photo Viewfinder, Scene Tap scene
Using Self-timer
In Photo Viewfinder, Self-timer Tap time
・
Press or ; shutter is released after specified
time elapses.
Disabling Automatic Addition of Location
Information to Photos
Video Viewfinder appears.
・If confirmation appears, follow onscreen instructions.
Frame subject on Display or
Recording starts after a tone.
・For people, focus automatically locks on detected face.
(Face AF)
When handset GPS function is active, Location Information
is added to captured photos automatically. (Location
Information is retained even after uploading photos to the
Internet.) To prevent this, follow these steps:
In Photo Viewfinder, Save settings
Location information Automatic addition OFF
Opening Help
In Photo Viewfinder, Help
or to stop
Recording stops; video is saved.
Long Press for Camera Applications
SoftBank 007SH
In Camera application list, tap Use by default for
this action. to make selection the default application
thereafter.
Page 72
70
Video Viewfinder Operations
Adjusting Brightness
In Video Viewfinder, swipe vertically for Brightness Scale
Adjusting Zoom
In Video Viewfinder, swipe horizontally for Zoom Slider
Locking Focus
In Video Viewfinder, tap focus lock target
・Camera continuously focuses on moving subjects.
・Camera uses color to track subjects; may not correctly
track faintly colored subjects or ones similar to
background color.
Playing Recorded Video
After recording, tap preview thumbnail Tap video
・
Before preview, tap to send recorded video via mail
or create 3D video.
Capturing 3D Images
Descriptions are for Touch Panel operations in Viewer
position.
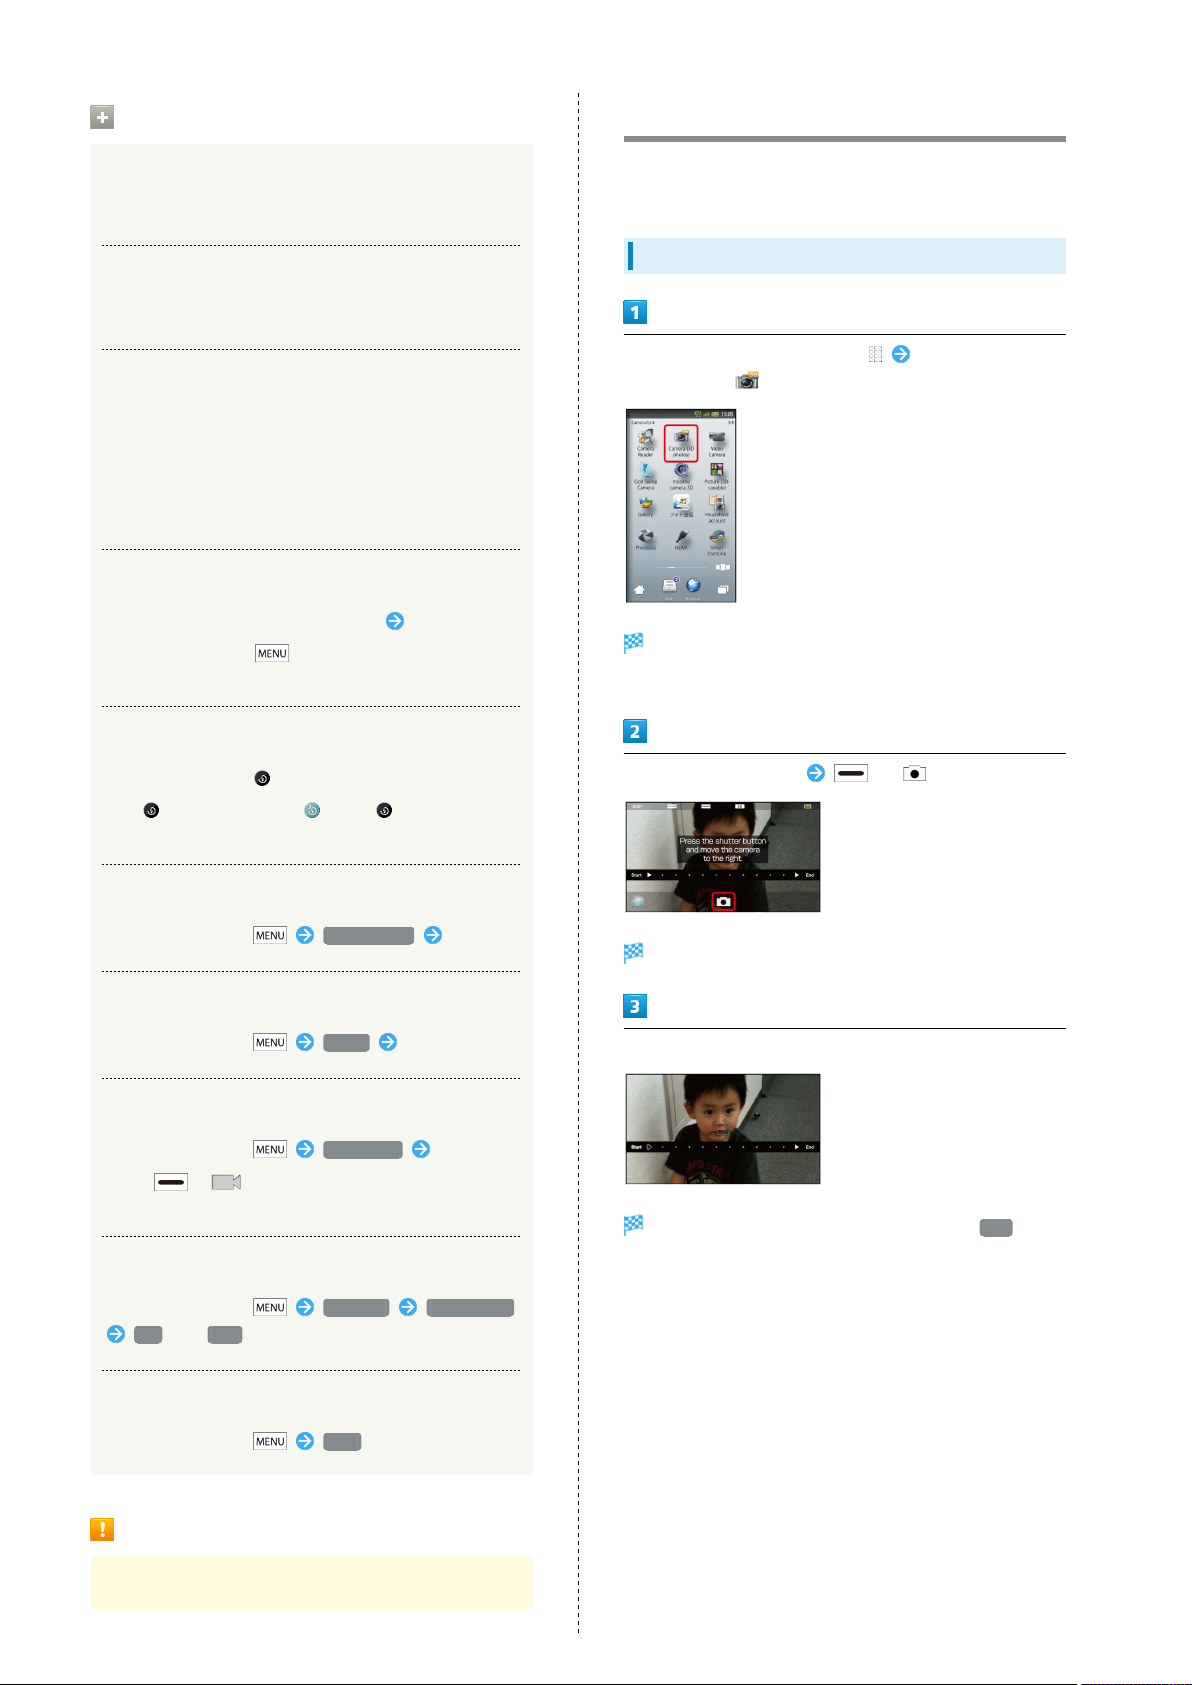
Capturing 3D Photos
In Home Screen (Viewer position), In Launcher
(Camera/Link), (Camera (3D photos))
3D Photo Viewfinder appears.
・If confirmation appears, follow onscreen instructions.
Selecting Mobile Light Option
In Video Viewfinder,
・
Tap to toggle light on ( )/off ( ).
・Do not shine Mobile Light in eyes; may damage eyesight.
Changing Recording Size
In Video Viewfinder, Picture Size Tap size
Changing Scene Setting
In Video Viewfinder, Scene Tap scene
Using Self-timer
In Video Viewfinder, Self-timer Tap time
・
Press or ; recording starts after specified time
elapses.
Enabling/Disabling Microphone
In Video Viewfinder, Settings Mic Setting
ON or OFF
Frame subject on Display or
Shutter clicks.
Move handset to the right
Photo is captured when progress bar reaches End ; saves
automatically.
Opening Help
In Video Viewfinder, Help
Important Mobile Camera Usage Note
Mind your manners when using Camera.
Page 73

Music & Images
71
Music.................................................................................. 72
Still Images & Video.........................................................72
Music & Images
SoftBank 007SH
Page 74

72
Music
Playing Music
In Standby, In Launcher (Music/Games),
(MusicPlayer)
Library opens.
・MusicPlayer opens in the last-used state.
Still Images & Video
View still images and video; use Slideshow or play 2D video in
3D.
Opening/Playing Files
Supported File Formats:
Image File Format
Still Images JPEG, PNG, GIF, BMP, WBMP, MPO
Video 3GPP, 3GPP2, MP4, WMV, ASF, PIFF, WebM
In Standby, In Launcher (Camera/Link), (Gallery)
Select file
File plays.
Albums appear.
Select album (e.g., 100SHARP)
Select file
File opens/plays.
Playback Operations
Slideshow
In still image, tap Slideshow
・
Press to stop.
Playing Video in 3D
During playback, 2D→3D Realtime Convert
Page 75

Connectivity
73
Connecting to Wi-Fi.........................................................74
Using Bluetooth®..............................................................77
Connectivity
SoftBank 007SH
Page 76

74
Connecting to Wi-Fi
Use household Wi-Fi networks, etc. to connect to the Internet.
Connecting Selected Access Points
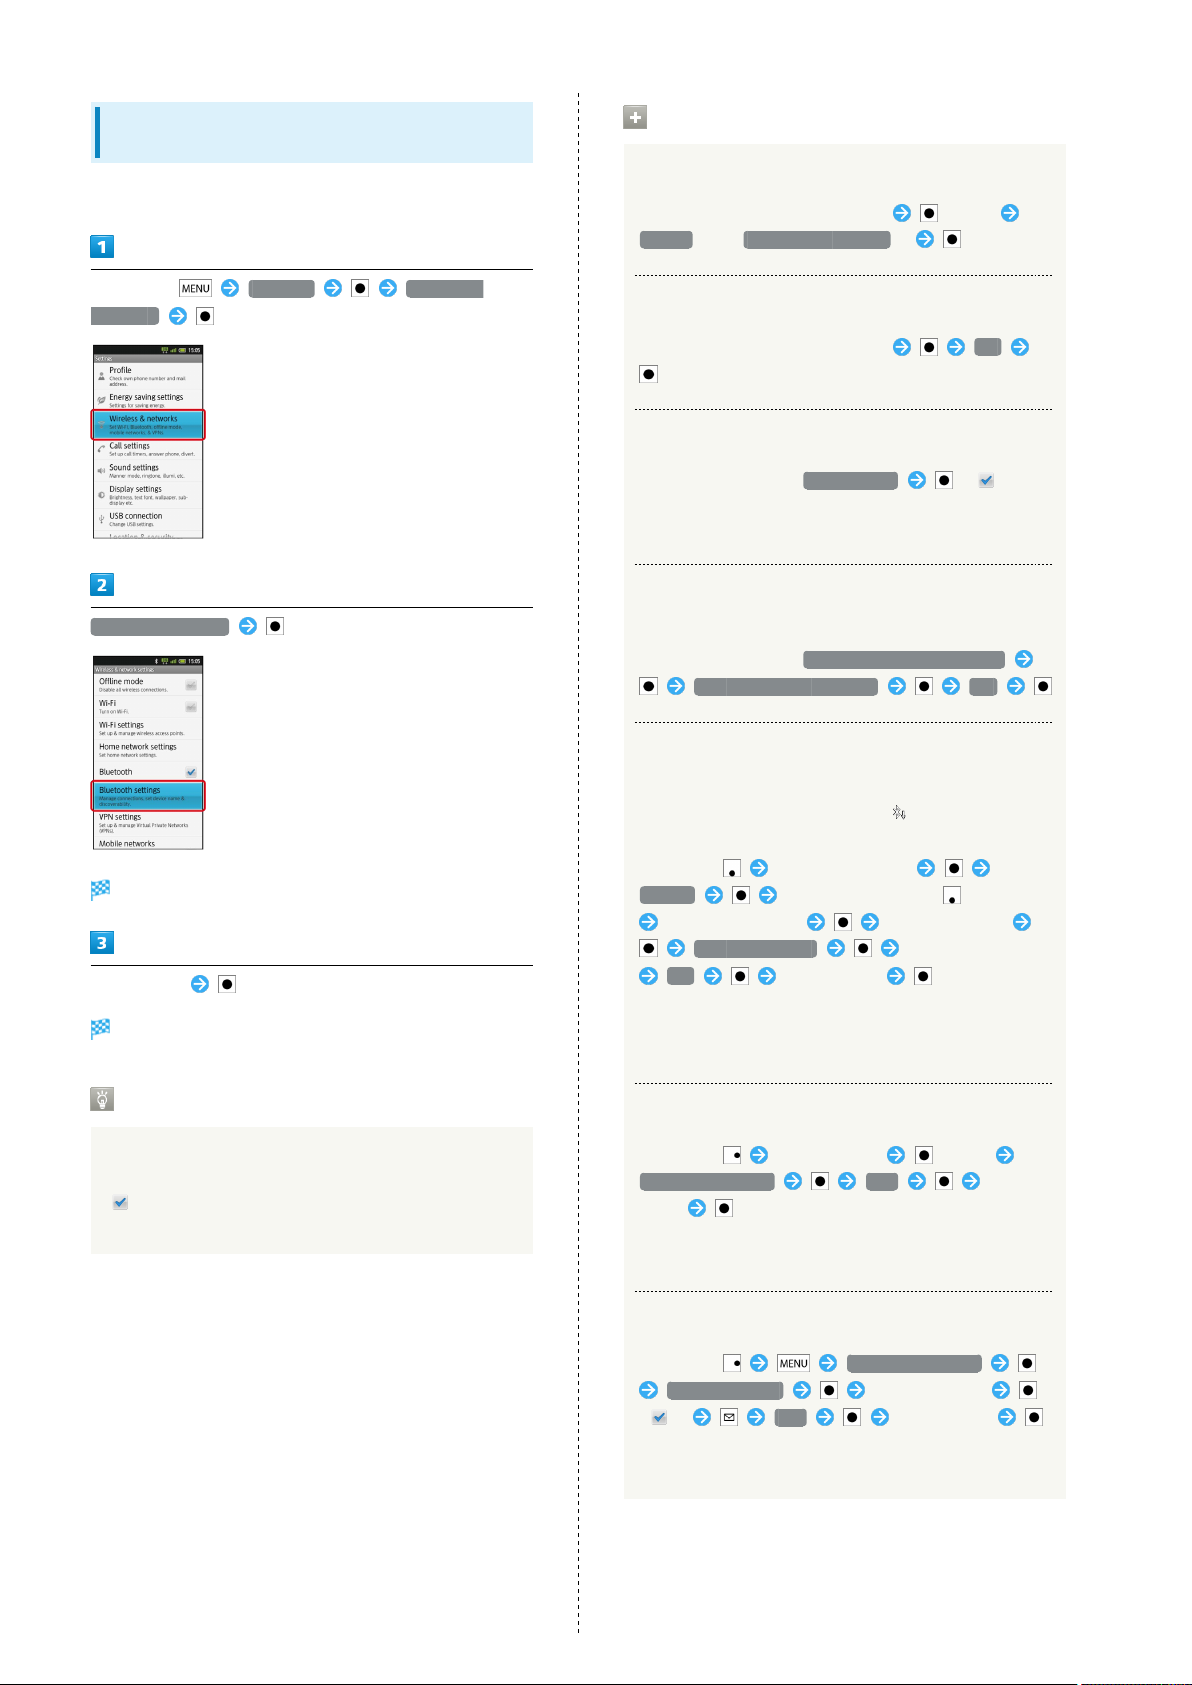
In Standby, Settings Wireless &
networks
Wi-Fi settings
Wi-Fi settings opens.
Wi-Fi Operations
Connecting Access Points Manually
In Wi-Fi settings, Add Wi-Fi network Enter
Network SSID Select security
protocol Select Password field Enter
password Save
・
Omit password entry if security protocol is Open .
Dismissing Access Points
In Wi-Fi settings, select connected access point
Forget
Disconnecting Access Points
In Wi-Fi settings, select access point (Long)
Forget network Yes
Important Easy Wi-Fi Registration
Usage Note
・
If disabled ( ), select Wi-Fi and press to enable it
( ).
Select access point
Enter password
Easy Wi-Fi registration may connect access points
protected by different security protocols. Select an access
point for the selected security protocol.
Connect
Connection is established.
・May omit password entry for some access points.
Page 77

Registering Private Access Points
75
SoftBank 007SH supports AOSS™ and WPS systems/standards
that automatically configure settings for easy Wi-Fi network
access upon establishing a connection on handset.
・Follow these steps to save AOSS™-compatible access points:
In Standby, Settings Wireless &
networks
Wi-Fi settings
AOSS method Yes
Search starts.
・Follow onscreen instructions.
・Connection is established automatically thereafter.
Registering WPS-compatible Access
Points
In Wi-Fi settings, Easy Wi-Fi registration
WPS method Push-button method or PIN
code method Follow onscreen instructions
Wi-Fi settings opens.
・
If disabled ( ), select Wi-Fi and press to enable it
( ).
Easy Wi-Fi registration
Easy Wi-Fi registration opens.
Connectivity
SoftBank 007SH
Page 78

76
Using Public Wireless LAN Services
Follow these steps to connect to BB mobilepoint:
・To use public wireless LAN services, subscription with the
corresponding ISP, etc. is required.
In Standby, Settings Wireless &
networks
Wi-Fi settings
Wi-Fi settings opens.
・
If disabled ( ), select Wi-Fi and press to enable it
( ).
Select Login ID field Enter login ID
Select Password field Enter password
OK
Handset is ready for connection to public wireless LAN
services.
・If confirmation appears, follow onscreen instructions.
・
When Auto-login is set to ON , handset connects to BB
mobilepoint automatically in the service range.
Troubleshooting
Auto login settings
Public wireless LAN account settings opens.
BB MOBILE POINT
Q. Cannot detect access points
A. There may be multiple access points nearby. Handset
may not detect access points correctly if current Wi-
Fi channel is used by other access points at the same
time.
Public Wireless LAN Usage Note
Connection to some public wireless LAN services may not
be possible. Additional charges may apply depending on
service area and price plan.
BB MOBILE POINT opens.
ON or OFF
Page 79

77
Using Bluetooth
Wirelessly transfer files/data between handset and compatible
devices (handsfree devices, etc.).
Activating Bluetooth
In Standby, Settings Wireless &
networks
Bluetooth
®
®
Device Search & Pairing
Search for nearby Bluetooth® devices and pair them with
handset; transfer files to/from paired devices.
・Activate Bluetooth® and make devices to be paired
discoverable first.
In Standby, Settings Wireless &
networks
Bluetooth settings
Bluetooth® activates.
・
Select Bluetooth and press to toggle on ( )/off
( ).
Bluetooth settings opens; found devices are listed.
・
If target device is not found, select Scan for devices and
press .
Select device Follow onscreen instructions to
complete pairing
Pairing completes; handset connects to handsfree devices,
etc. automatically.
・Pairing procedure varies by device.
Connectivity
SoftBank 007SH
Page 80
78
Connecting Paired Handsfree Devices,
Etc.
Activate Bluetooth® first.
In Standby, Settings Wireless &
networks
Bluetooth settings
Bluetooth® Connection Operations
Unpairing Devices
In Bluetooth settings, select device (Long)
Unpair (or Disconnect & unpair )
Disconnecting Handsfree Devices, Etc.
In Bluetooth settings, select device OK
Allowing Other Devices to Detect Handset
In Bluetooth settings, Discoverable ( )
・Discoverable is effective for 120 seconds, then turns off
automatically.
Accepting Connection Requests while Connected
to a Device
In Bluetooth settings, Detailed Bluetooth Settings
Multiple connect standby ON
Bluetooth settings opens.
Select device
The device is connected.
Accepting Connection Requests
Handset automatically accepts connection requests from
paired devices. For unpaired devices, enable Discoverable
( ) first; when connection request arrives, follow
onscreen prompt.
Receiving Files (e.g., Address Book via All File
Transfer)
When file reception request arrives, appears on Status
Bar. Follow these steps to receive files:
In Standby, Select notification
Accept After receiving files, in Standby
Select notification Select file (.vcf)
Register of data Enter Handset Code
OK Select option
・If confirmation appears, follow onscreen instructions.
・Received files are saved to SD Card; open them from
Contents Manager.
Sending Single Files (e.g., Address Book)
In Standby, Select contact (Long)
Send by Bluetooth Yes Select
device
・If an image is set for selected contact, image transfer
confirmation appears.
Sending Selected Files (e.g., Address Book)
In Standby, Send by Bluetooth
Select and send Select contacts
( ) Yes Select device
・If a contact with image is included, image transfer
confirmation appears.
Page 81
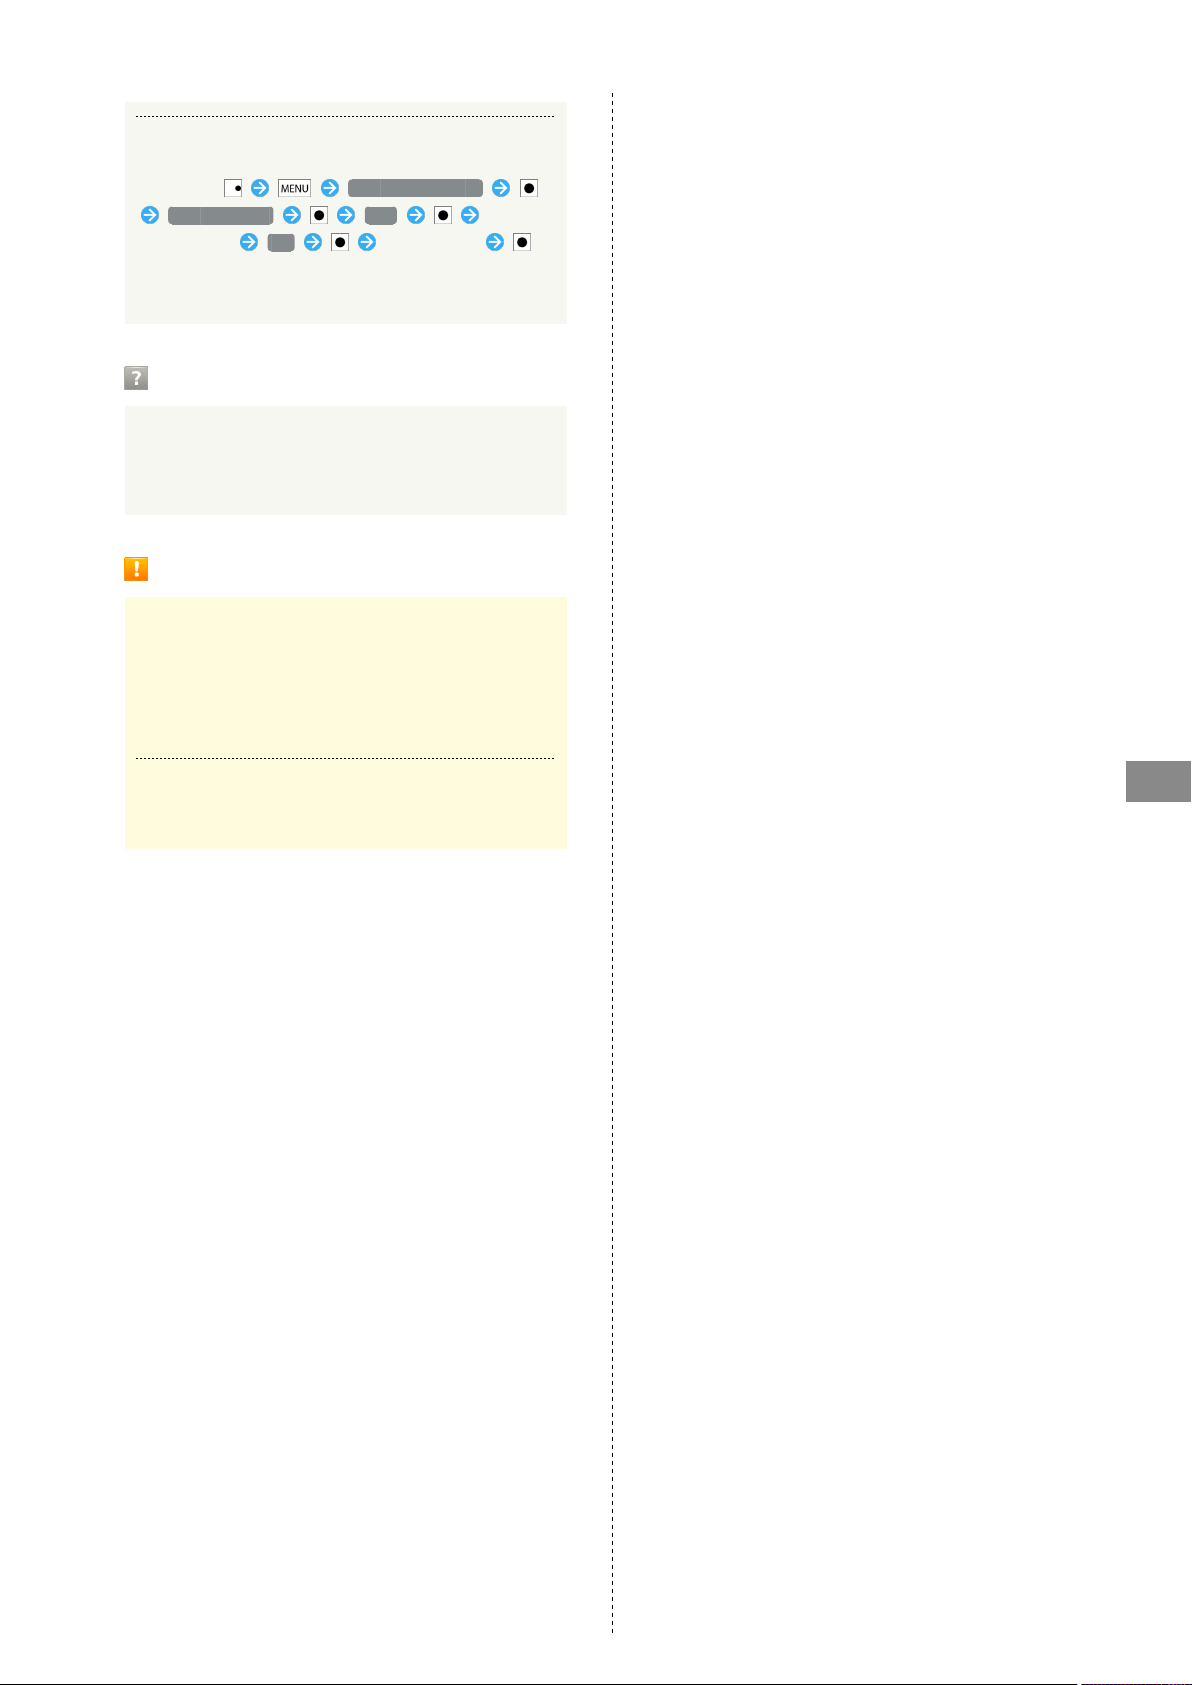
Sending All Files (e.g., Address Book)
In Standby, Send by Bluetooth
Send all items Yes Enter
Handset Code OK Select device
・If a contact with image is included, image transfer
confirmation appears.
Troubleshooting
79
Q. Cannot use Bluetooth
A. Offline mode may be active. Cancel it to use
Bluetooth® functions.
®
Important Bluetooth® Usage Notes
Connection
Bluetooth® connection may not be possible with some
Bluetooth® devices.
・Noise may interfere with wireless or handsfree
conversations.
File Transfer
Files may not appear correctly on recipient devices.
Connectivity
SoftBank 007SH
Page 82

80
Page 83

Global Services
81
Global Roaming................................................................. 82
Calling from Outside Japan.............................................83
Global Services
SoftBank 007SH
Page 84
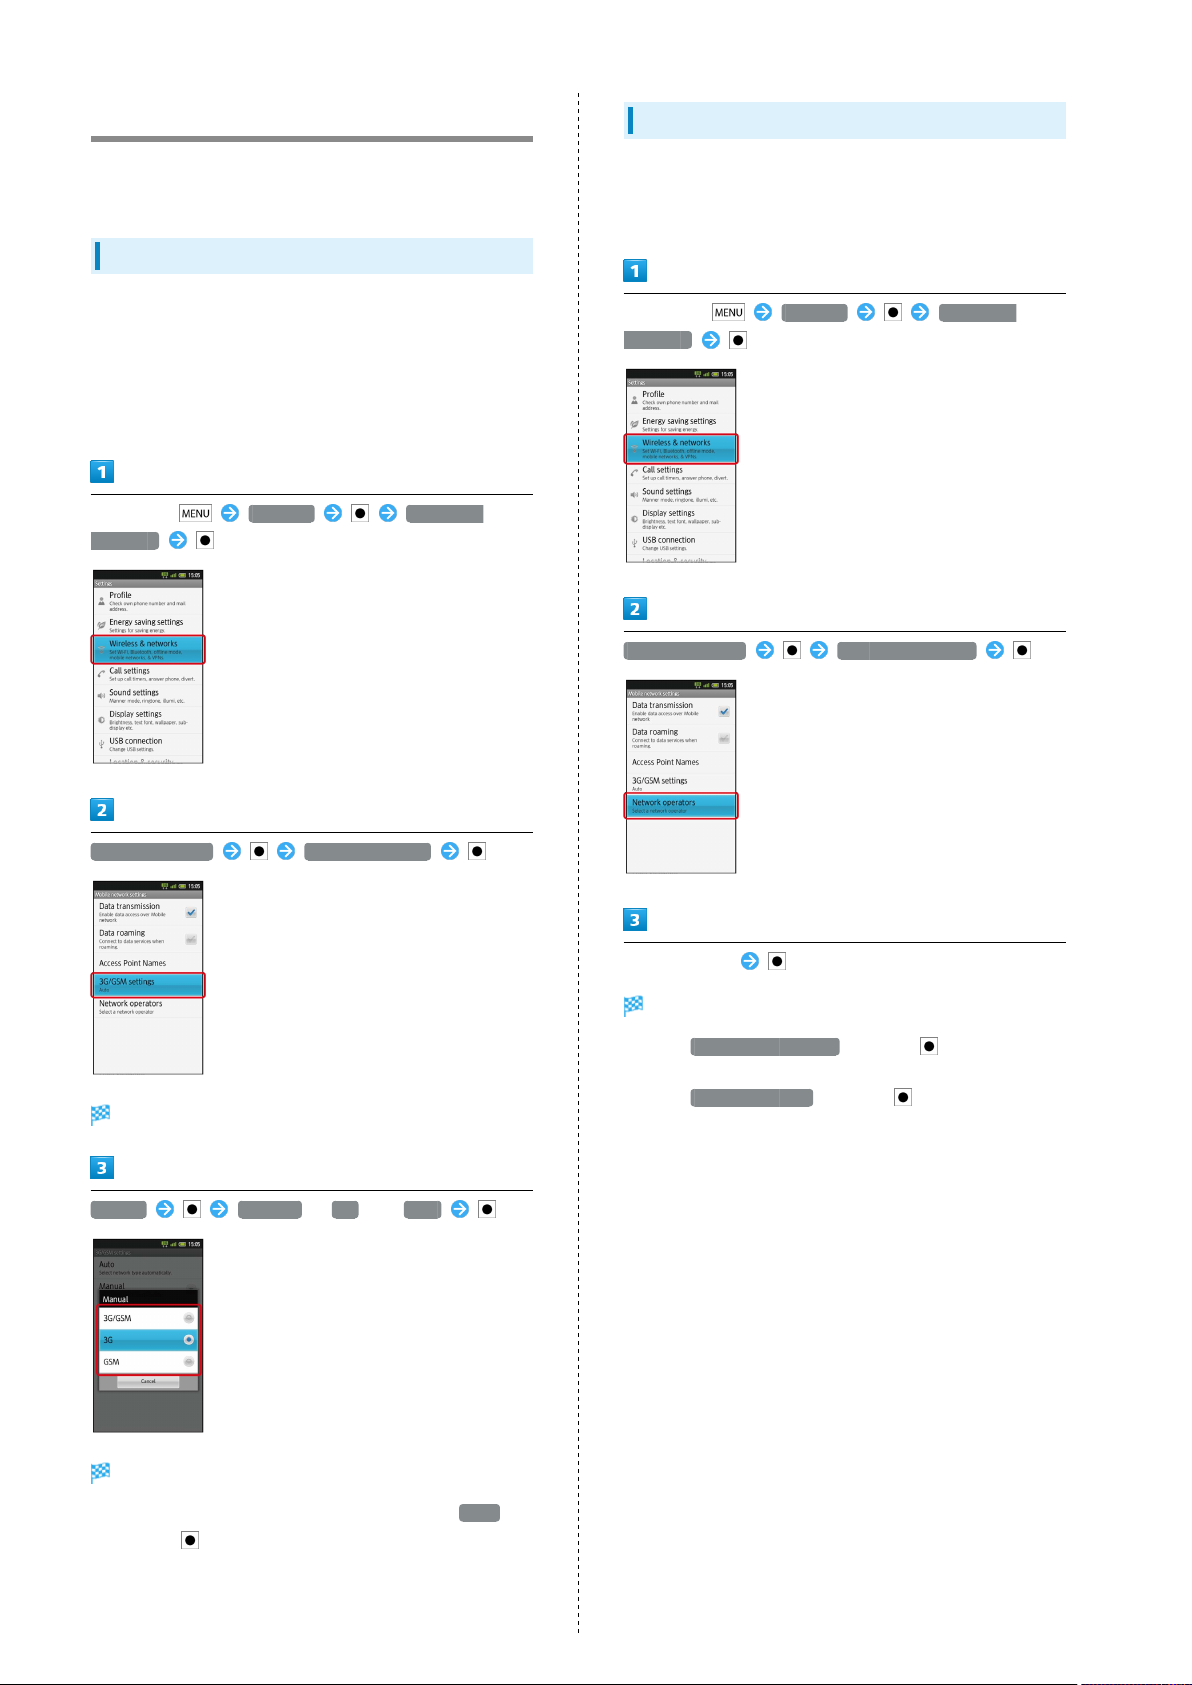
82
Global Roaming
SoftBank 007SH is Global Roaming Service eligible. Use the
same handset number outside Japan.
Switching Network Services
Handset connects to 3G Network automatically by default.
Follow these steps to change setting according to Network
service provided by target network operator outside Japan:
・Use default Network service setting in Japan or other 3G
Network areas.
In Standby, Settings Wireless &
networks
Selecting a Network Operator
Handset connects to an appropriate network operator
automatically by default. Follow these steps to select a
network operator manually:
In Standby, Settings Wireless &
networks
Mobile networks Network operators
Mobile networks 3G/GSM settings
3G/GSM settings opens.
Manual 3G/GSM , 3G or GSM
Select operator
Network operator is set.
・
Select Select automatically and press to set an
appropriate network operator automatically.
・
Select Search networks and press to search for all
available network operators.
Network service is set.
・
To switch Network services automatically, select Auto
and press .
Page 85
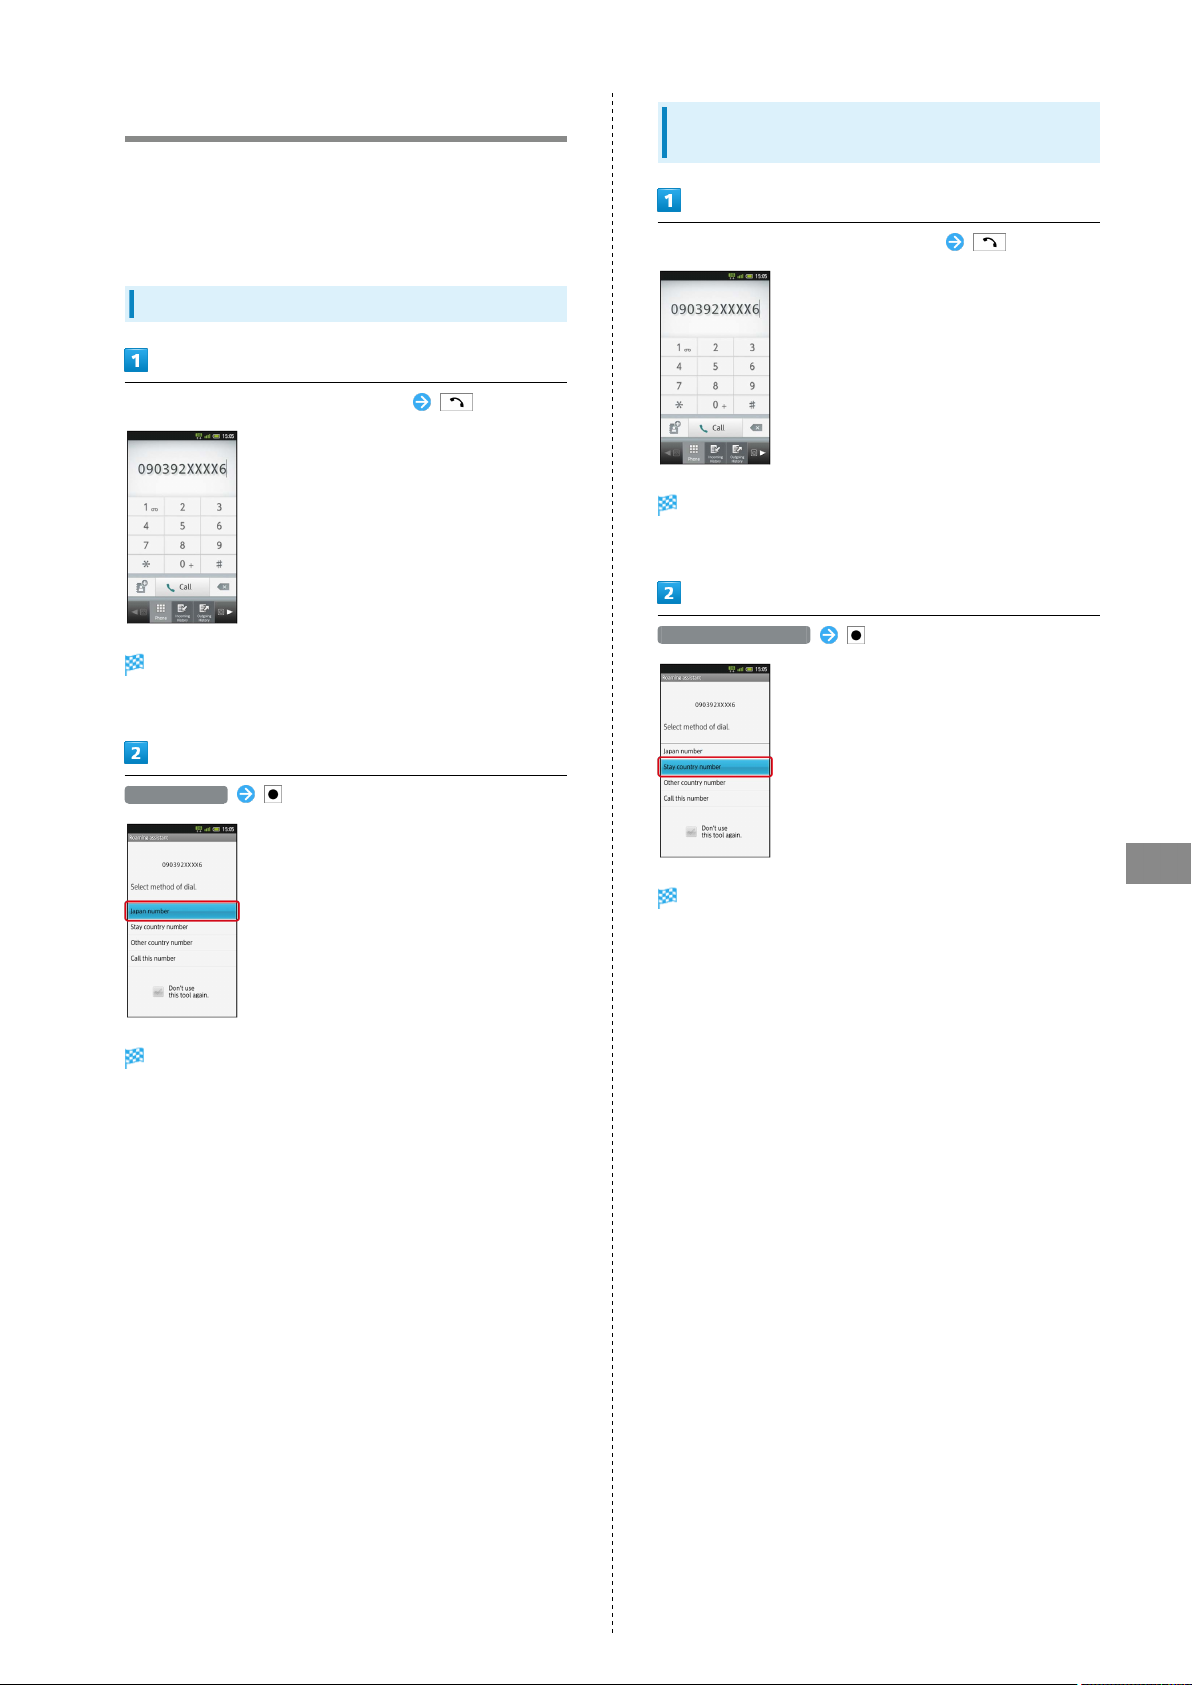
83
Calling from Outside Japan
See SoftBank Mobile Website for details:
http://mb.softbank.jp/en/global_services/
Access roaming area/rate information or print it out to carry
with you while traveling abroad.
Calling Japan
In Standby, use keypad to enter number
Roaming assistant appears.
Calling Landlines & Mobiles within the
Same Country
In Standby, use keypad to enter number
Roaming assistant appears.
・Do not add + before the number.
Stay country number
・Do not add + before the number.
Japan number
Handset dials the number.
Handset dials the number.
Global Services
SoftBank 007SH
Page 86
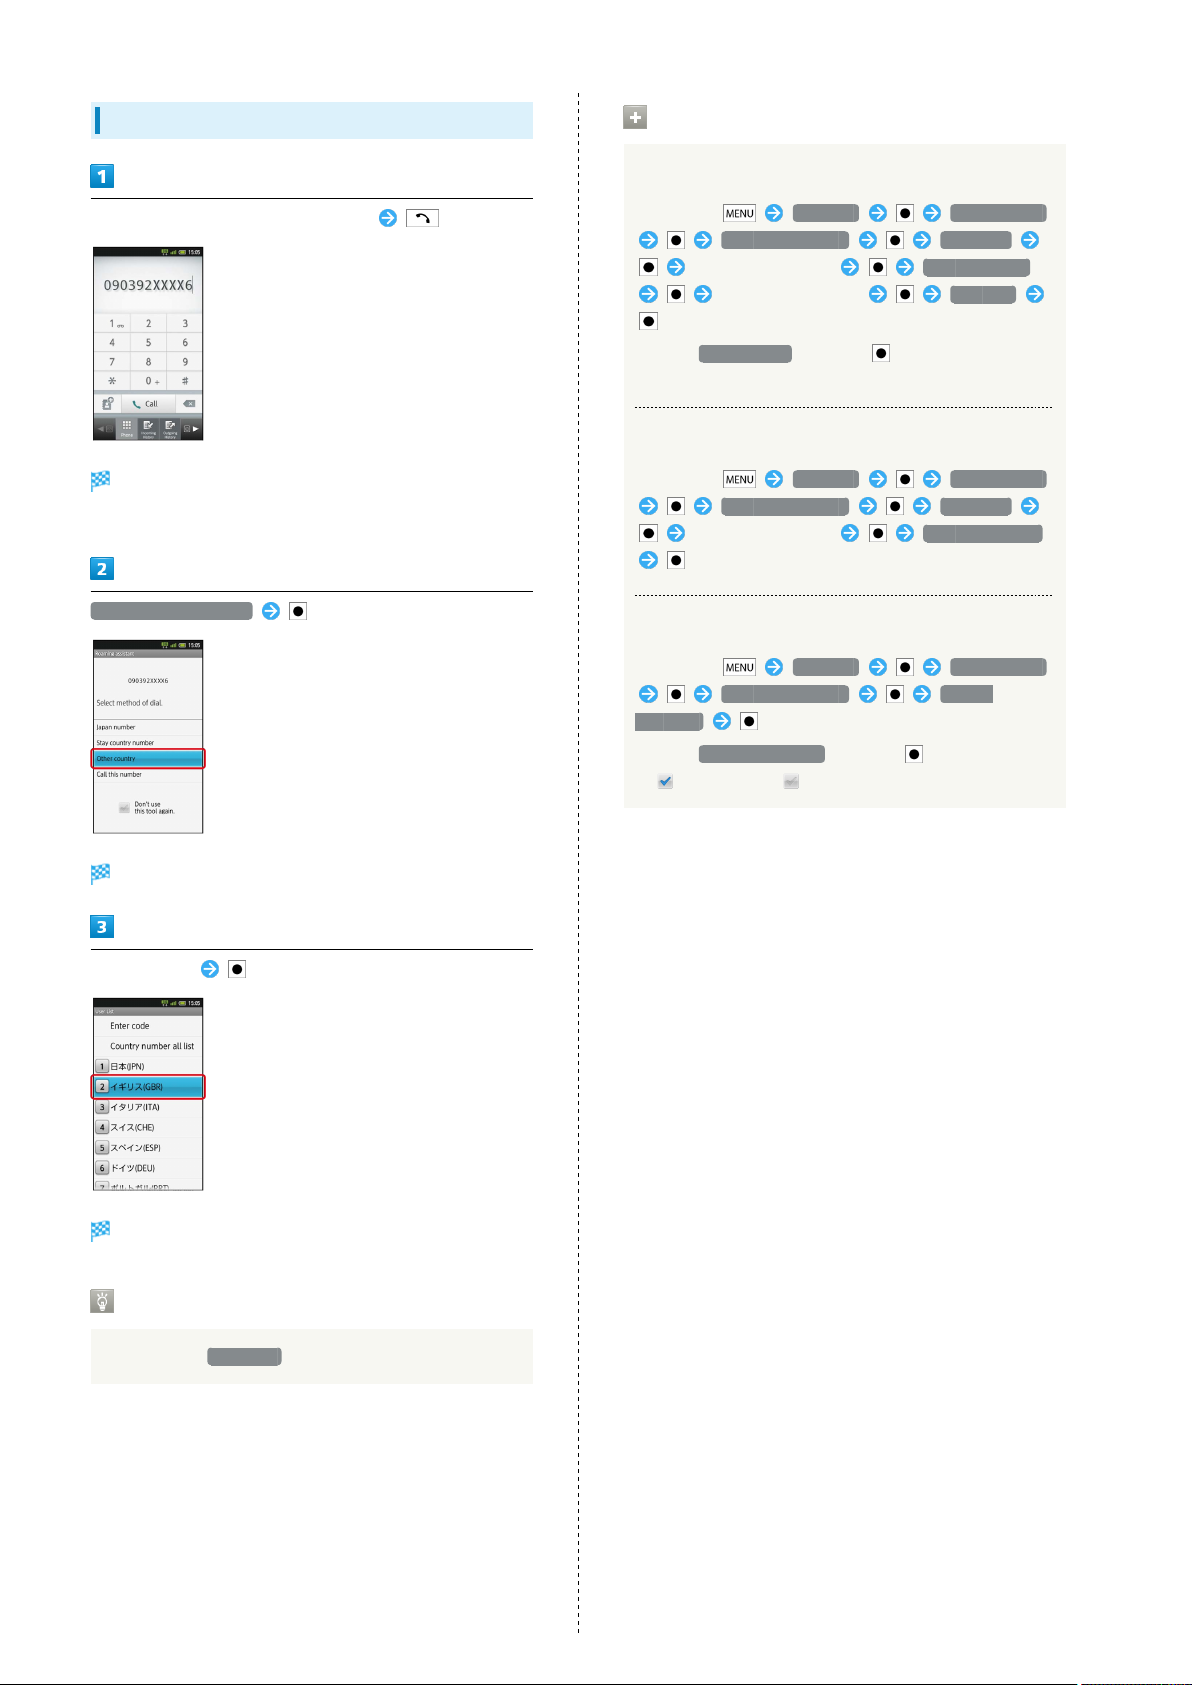
84
Calling Countries except Japan
In Standby, use keypad to enter number
Roaming assistant appears.
・Do not add + before the number.
Other country number
International Call Operations
Changing Country Codes
In Standby, Settings Call settings
Int'l call settings User List
Select country/area Change by list
Select country/area Register
・
Select Entry direct and press to enter country name
and code directly.
Deleting Country Codes
In Standby, Settings Call settings
Int'l call settings User List
Select country/area Delete from list
Enabling/Disabling Abroad Assistant
In Standby, Settings Call settings
Int'l call settings Abroad
assistant
・
Select Abroad assistant and press to toggle Enable
( ) and Disable ( ).
Country code list appears.
Select country
Handset dials the number.
Calling SoftBank Handsets
Always select 日本(JPN) .
Page 87

Settings
85
Wireless & Networks........................................................86
Sound Settings..................................................................88
Applications.......................................................................90
Accounts & Sync...............................................................92
Privacy............................................................................... 92
Language & Keyboard....................................................... 93
Date & Time......................................................................94
About Phone......................................................................95
Settings
SoftBank 007SH
Page 88
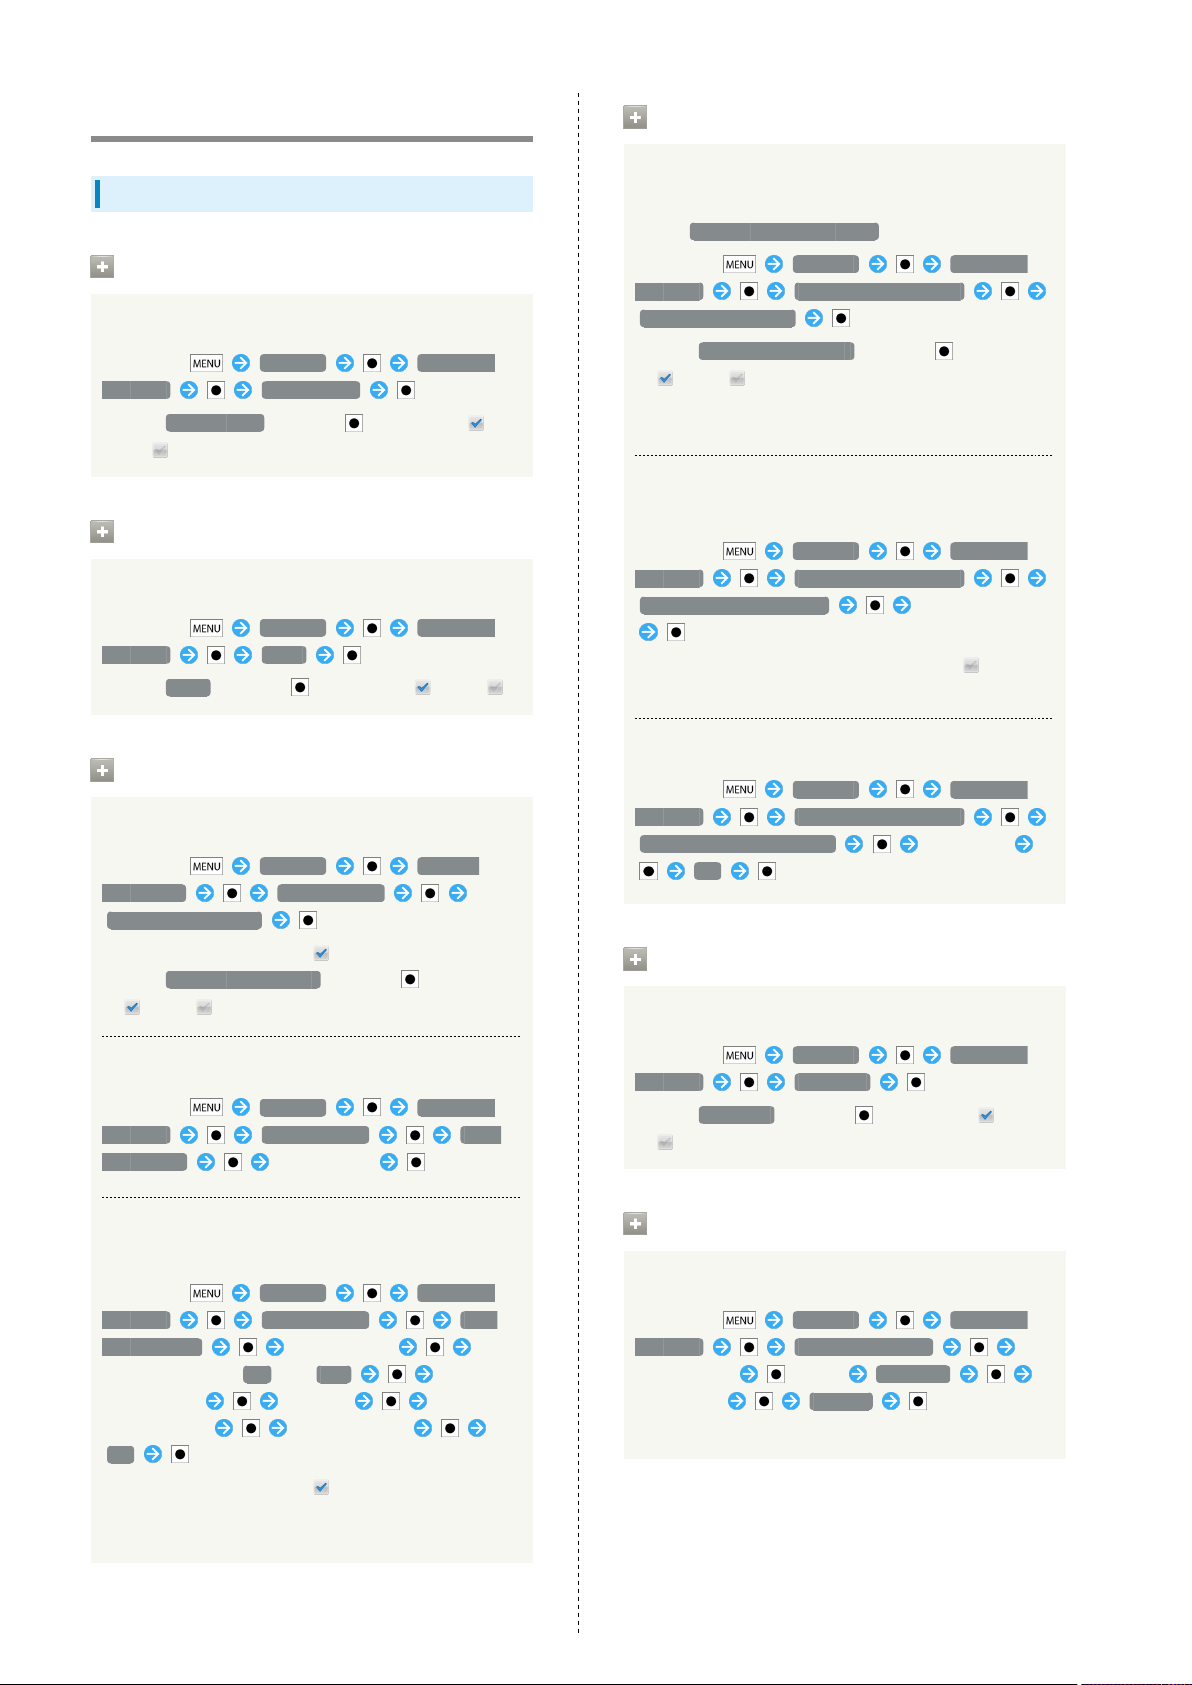
86
Wireless & Networks
Wireless & Network Settings
Offline Mode
Disabling/Enabling All Wireless Connections
In Standby, Settings Wireless &
networks Offline mode
・
Select Offline mode and press to toggle on ( )/
off ( ).
Wi-Fi
Enabling/Disabling Wi-Fi
In Standby, Settings Wireless &
networks Wi-Fi
・
Select Wi-Fi and press to toggle on ( )/off ( ).
Home Network Settings
Enabling/Disabling DLNA Device Media File
Sharing
Set up Wi-Fi for home NW server beforehand.
In Standby, Settings Wireless &
networks Home network settings
Home network server
・
Select Home network server and press to toggle on
( )/off ( ).
・See TV user guide to learn how to connect handset to
DLNA-compatible TV.
Setting up a Network (Wi-Fi Access Point) for
DLNA Service
In Standby, Settings Wireless &
networks Home network settings
Wi-Fi for home NW server Select network
・
Available when Home network server is off ( ).
・If confirmation appears, follow onscreen instructions.
Wi-Fi Settings
Enabling/Disabling Available Network
In Standby, Settings Wireless
& networks Wi-Fi settings
Network notification
・
Available when Wi-Fi is on ( ).
・
Select Network notification and press to toggle on
( )/off ( ).
Selecting a Wi-Fi Sleep Option
In Standby, Settings Wireless &
networks Wi-Fi settings Wi-Fi
sleep policy Select option
Enabling/Disabling Auto-login in Public WLAN
Service Areas
In Standby, Settings Wireless &
networks Wi-Fi settings Auto
login settings Select service
Select Auto-login ON or OFF Select
Login ID field Enter ID Select
Password field Enter password
OK
・
Available when Wi-Fi is on ( ).
・Setup procedure varies by ISP/contract terms.
・If confirmation appears, follow onscreen instructions.
Saving a Name that Appears on DLNA Devices
In Standby, Settings Wireless &
networks Home network settings
Home network server name Enter name
OK
Bluetooth
Activating/Canceling Bluetooth
In Standby, Settings Wireless &
networks Bluetooth
・
Select Bluetooth and press to toggle on ( )/off
( ).
®
Bluetooth Settings
Connecting to Bluetooth® Devices by Service
In Standby, Settings Wireless &
networks Bluetooth settings
Select device (Long) Options...
Select item Connect
・Available for compatible devices only.
Page 89
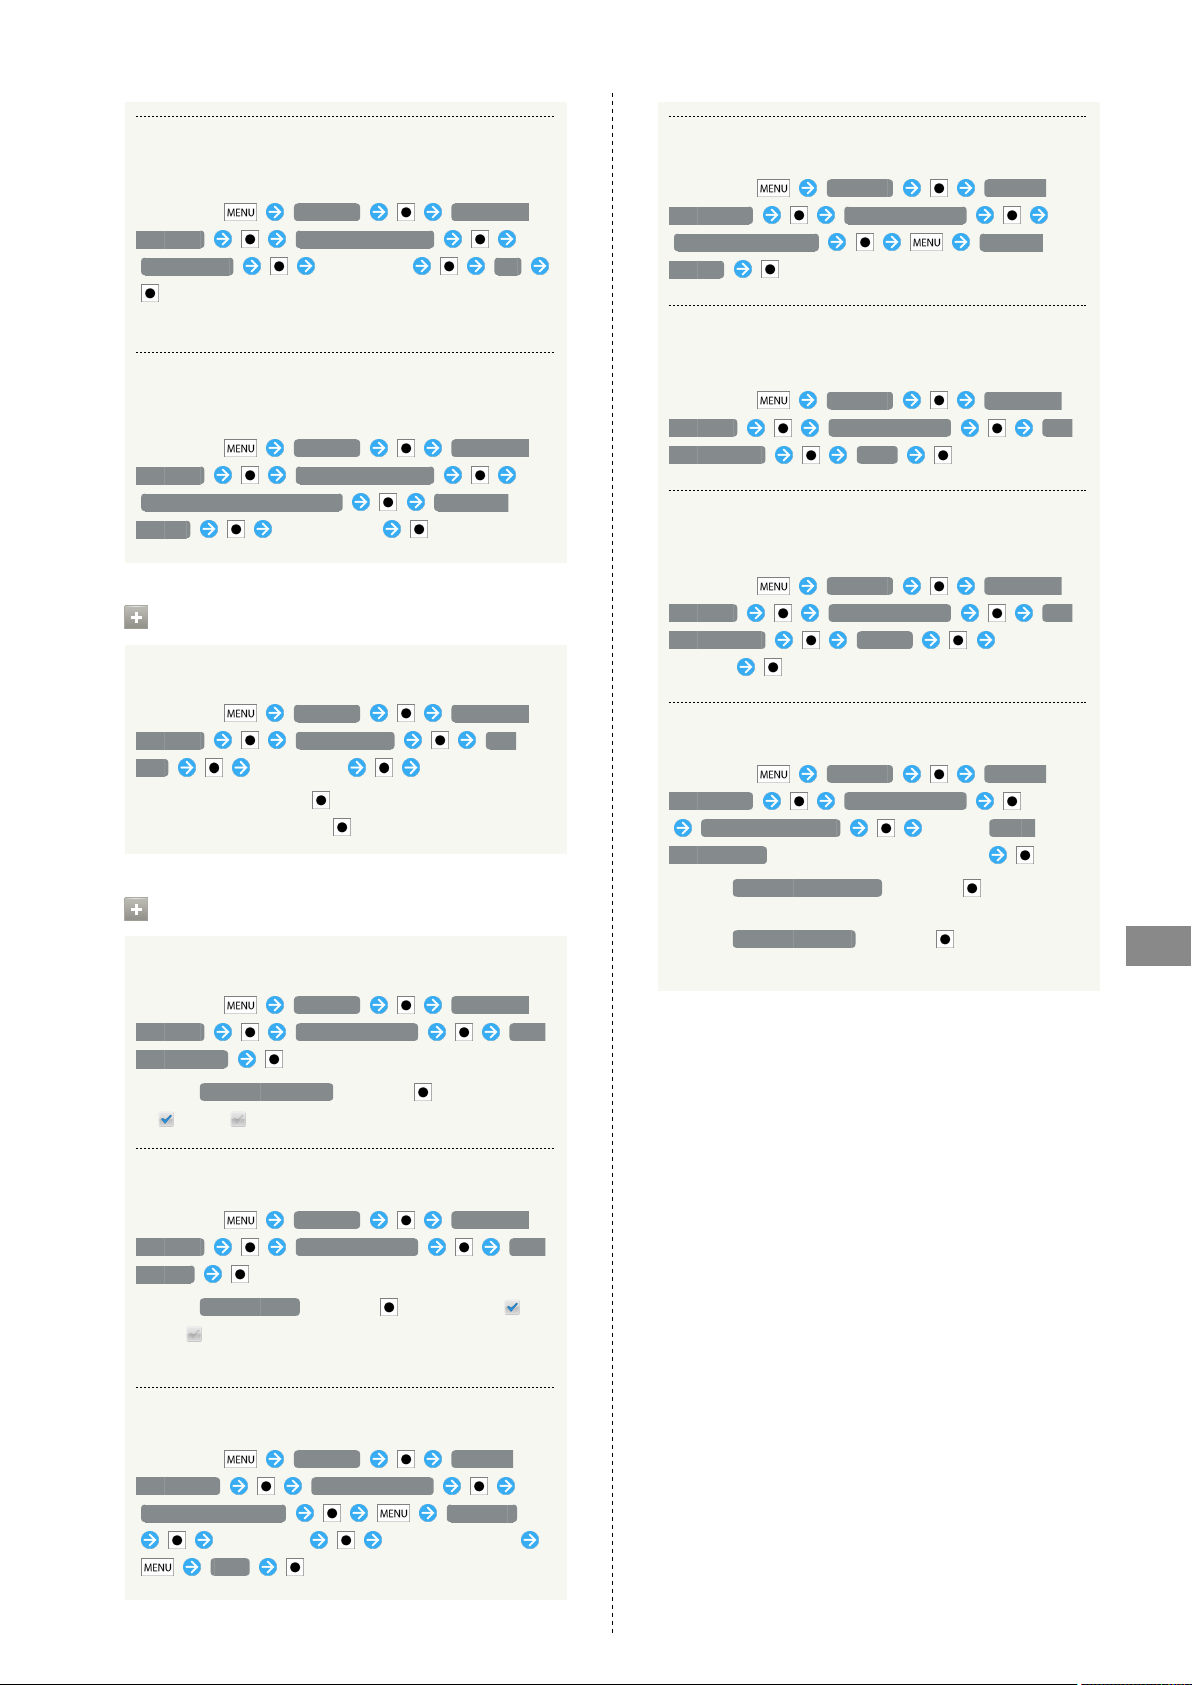
87
Changing Handset Name that Appears on Other
Devices
In Standby, Settings Wireless &
networks Bluetooth settings
Device name Enter name OK
・Pictograms and line breaks are not supported.
Selecting whether to Use Handsfree Device or
Operated Device as Means of Conversation
In Standby, Settings Wireless &
networks Bluetooth settings
Detailed Bluetooth Settings Handsfree
setting Select option
VPN Settings
Adding Virtual Private Networks (VPNs)
In Standby, Settings Wireless &
networks VPN settings Add
VPN Select item Complete setting
・
Select a VPN and press to connect/disconnect it.
Select one and Long Press to edit/delete it.
Mobile Networks
Enabling/Disabling Mobile Data Transmissions
In Standby, Settings Wireless &
networks Mobile networks Data
transmission
・
Select Data transmission and press to toggle on
( )/off ( ).
Restoring Default Settings
In Standby, Settings Wireless
& networks Mobile networks
Access Point Names Reset to
default
Switching between 3G and GSM Networks
Automatically
In Standby, Settings Wireless &
networks Mobile networks 3G/
GSM settings Auto
Switching between 3G and GSM Networks
Manually
In Standby, Settings Wireless &
networks Mobile networks 3G/
GSM settings Manual Select
Network
Selecting a Network Operator
In Standby, Settings Wireless
& networks Mobile networks
Network operators Select Select
automatically (or select operator directly)
・
Select Select automatically and press to set an
appropriate network operator automatically.
・
Select Search networks and press to search for
network operators again.
Settings
Enabling/Disabling Data Roaming
In Standby, Settings Wireless &
networks Mobile networks Data
roaming
・
Select Data roaming and press to toggle on ( )/
off ( ).
・If confirmation appears, follow onscreen instructions.
Adding Access Points
In Standby, Settings Wireless
& networks Mobile networks
Access Point Names New APN
Select item Complete setting
Save
SoftBank 007SH
Page 90
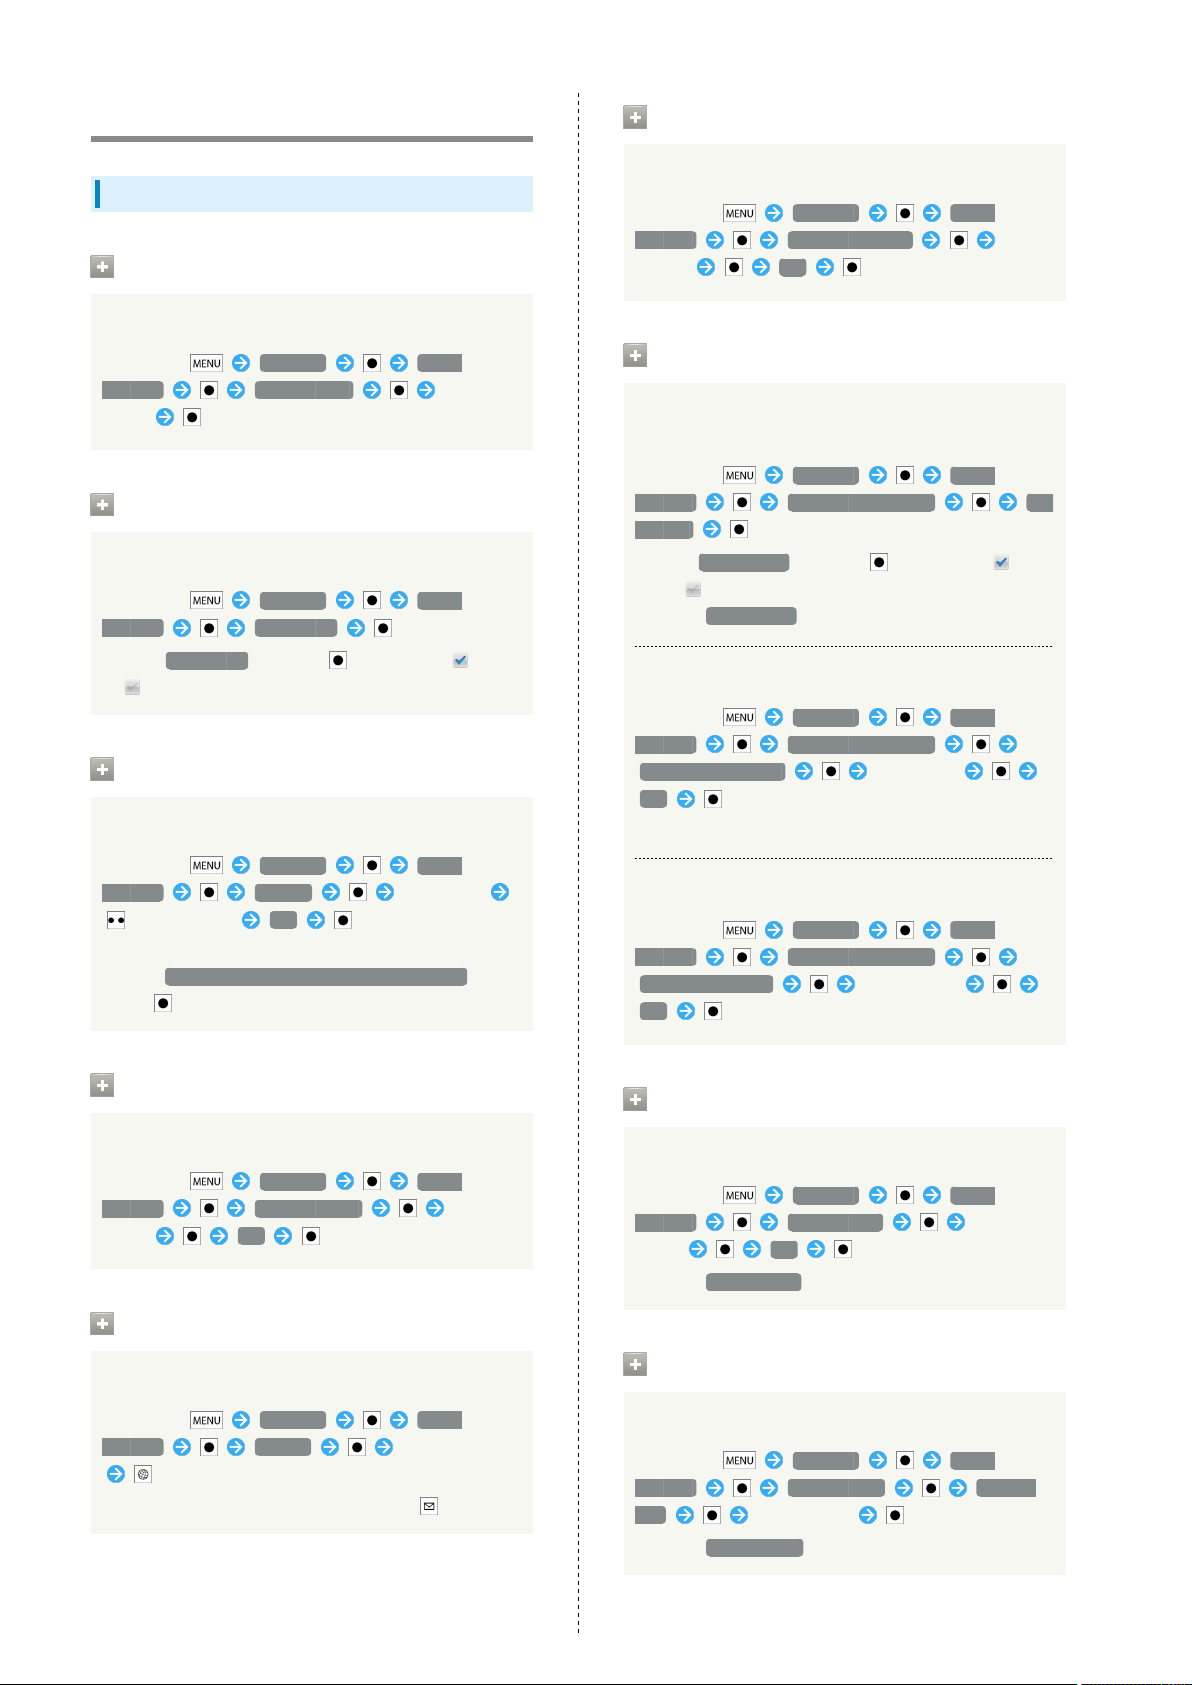
88
Sound Settings
Sound Settings
Manner Mode
Activating Manner Mode
In Standby, Settings Sound
settings Manner mode Select
option
Phone Vibe
Enabling/Disabling Vibration
In Standby, Settings Sound
settings Phone vibe
・
Select Phone vibe and press to toggle on ( )/off
( ).
Volume
Setting Handset Volume
Vibrator Pattern
Changing Vibration Pattern
In Standby, Settings Sound
settings Vibrator Pattern Select
pattern OK
Incoming Calls Illumi
Enabling/Disabling Indicator Lamp and Key
Illumination for Incoming Calls
In Standby, Settings Sound
settings Incoming calls illumi Set
ON/OFF
・
Select Set ON/OFF and press to toggle on ( )/
off ( ).
・
Disable Set ON/OFF to extend Battery Time.
Setting Illumination for Incoming Calls
In Standby, Settings Sound
settings Incoming calls illumi
Illumi pattern/color Select item
OK
・Select color for some illumination patterns.
In Standby, Settings Sound
settings Volume Select item
Adjust volume OK
・To apply ringtone volume level to notification sound,
select Use incoming call volume for notifications and
press .
Earphone Type
Setting Headphone Type
In Standby, Settings Sound
settings Earphone type Select
option OK
Melody
Setting Incoming Ringtone
In Standby, Settings Sound
settings Melody Select tone/file
・
To play tones or files, select one and press .
Changing Key Illumination Patterns
In Standby, Settings Sound
settings Incoming calls illumi
Key illumi pattern Select option
OK
Notice Illumi
Setting Illumination for Notifications
In Standby, Settings Sound
settings Notice illumi Select
option OK
・
Disable Notice illumi to extend Battery Time.
Calling Illumi
Enabling/Disabling In-Call Illumination
In Standby, Settings Sound
settings Calling illumi Set ON/
OFF Select option
・
Disable Calling illumi to extend Battery Time.
Page 91
Setting In-Call Illumination
In Standby, Settings Sound
settings Calling illumi Illumi
pattern/color Select option OK
・Select color for some illumination patterns.
Notification Sound
Changing Notification Sound
In Standby, Settings Sound
settings Notification sound
Select tone/file
・
To play tones or files, select one and press .
Ring Duration
Audible Selection
Enabling/Disabling Selection Sounds
In Standby, Settings Sound
settings Audible selection
・
Select Audible selection and press to toggle on
( )/off ( ).
・
Disable Audible selection to extend Battery Time.
Screen Lock Sounds
Enabling/Disabling Lock/Unlock Sounds for
Sleep Mode
In Standby, Settings Sound
settings Screen lock sounds
・
Select Screen lock sounds and press to toggle on
( )/off ( ).
・
Disable Screen lock sounds to extend Battery Time.
89
Changing Duration for Notification Sound
In Standby, Settings Sound
settings Ring duration Ring time
setting Enter time OK
・
Select Ring single song and press to play selected
tone/file until it ends.
Notify by Illumi Blink
Enabling/Disabling Indicator Lamp for
Notifications
In Standby, Settings Sound
settings Notify by illumi blink
・
Select Notify by illumi blink and press to toggle on
( )/off ( ).
・
Disable Notify by illumi blink to extend Battery Time.
Audible Touch Tones
Enabling/Disabling Onscreen Dialpad Tones
In Standby, Settings Sound
settings Audible touch tones
・
Select Audible touch tones and press to toggle on
( )/off ( ).
・
Disable Audible touch tones to extend Battery Time.
Haptic Feedback
Enabling/Disabling Vibration for Onscreen
Dialpad, Etc.
In Standby, Settings Sound
settings Haptic feedback
・
Select Haptic feedback and press to toggle on
( )/off ( ).
Open/Close
Enabling/Disabling Indicator Lamp and Key
Illumination upon Handset Open/Close
In Standby, Settings Sound
settings Open/close Set ON/
OFF
・
Select Set ON/OFF and press to toggle on ( )/
off ( ).
・
Disable Set ON/OFF to extend Battery Time.
Setting Indicator Lamp for Handset Open/Close
In Standby, Settings Sound
settings Open/close Illumi
pattern/color Select option OK
・Select color for some illumination patterns.
Settings
SoftBank 007SH
Page 92

90
Setting Key Illumination for Handset Open/
Close
In Standby, Settings Sound
settings Open/close Key illumi
pattern Select option OK
Charging Start
Enabling/Disabling Indicator Lamp and Key
Illumination upon Charging Start
In Standby, Settings Sound
settings Charging start Set ON/
OFF
・
Select Set ON/OFF and press to toggle on ( )/
off ( ).
Applications
Application Settings
Unknown Sources
Enabling/Disabling Installation of Non-Android
Market Applications
In Standby, Settings Applications
Unknown sources
・
Select Unknown sources and press to toggle on
( )/off ( ).
・If confirmation appears, follow onscreen instructions.
Preferred Install Location
Setting Indicator Lamp for Charging Start
In Standby, Settings Sound
settings Charging start Illumi
pattern/color Select option OK
・Select color for some illumination patterns.
Setting Key Illumination for Charging Start
In Standby, Settings Sound
settings Charging start Key
illumi pattern Select option OK
Setting Install Location
In Standby, Settings Applications
Preferred install location Select
option
Quick Launch
Assigning Applications to Hard Keys
In Standby, Settings Applications
Quick launch Select number
Select application
・
Press with number key to start assigned application.
・
To delete shortcut, select number and Long Press ,
then select OK and press .
File Transfer Mail Software
Setting Default Mailer for Sending Files
In Standby, Settings Applications
File transfer mail software Set
the mail software Select item
・
Disable Set the mail software ( ) to select a mailer
upon attaching a file.
Home Applications
Setting Home Screen Interface
In Standby, Settings Applications
Home applications Select option
Page 93

Manage Applications
Opening Application Properties
In Standby, Settings Applications
Manage applications Select
application
・Check version/memory usage, uninstall/force-stop
application, etc.
Running Services
Opening List of Active Services
In Standby, Settings Applications
Running services
・
To stop active service, select one and press , then
select Stop and press .
・If confirmation appears, follow onscreen instructions.
Enabling/Disabling Sleep Mode while Charging
In Standby, Settings Applications
Development Stay awake
・
Select Stay awake and press to toggle on ( )/off
( ).
Enabling/Disabling Mock Locations
In Standby, Settings Applications
Development Allow mock
locations
・
Select Allow mock locations and press to toggle on
( )/off ( ).
91
Storage Use
Opening Application Storage Status
In Standby, Settings Applications
Storage use
Battery Use
Checking Battery Status/Usage Time
In Standby, Settings Applications
Battery use Select item
・For some items, related function/setting name (e.g.,
Display settings for Display) appears in details
window; select it and press to access settings.
Development
Enabling/Disabling Debug Mode upon USB
Connection
Settings
In Standby, Settings Applications
Development USB debugging
・
Select USB debugging and press to toggle on ( )/
off ( ).
・If confirmation appears, follow onscreen instructions.
SoftBank 007SH
Page 94

92
Accounts & Sync
Account Synchronization Settings
Background Data
Enabling/Disabling Automatic Application Data
Transmission in Background
In Standby, Settings Accounts &
sync Background data
・
Select Background data and press to toggle on
( )/off ( ).
・If confirmation appears, follow onscreen instructions.
・When enabled, inactive applications are also ready for
automatic data transmission.
・
Disable Background data to extend Battery Time.
Auto-sync
Setting Automatic Application Sync
In Standby, Settings Accounts &
sync Auto-sync
・
Select Auto-sync and press to toggle on ( )/off
( ).
・
Enable Background data ( ) first.
Privacy
Resetting Handset
Reset All
Deleting All Handset Files
In Standby, Settings Privacy
Reset all Enter Handset Code
OK Read message Reset phone
Erase everything
・Handset reboots after Reset all, then Home Screen
interface selection appears; select ホーム (HOME)
or ラウンドホーム (Round home) and press . After
reboot, selection appears each time is pressed. To
hide, select 常にこの操作で使用する (Use by default for
this action) and press .
・
To delete all SD Card files simultaneously, select Erase
microSD and press .
・Reset all deletes all handset files including some
preinstalled applications irreversibly. SD Card files are
also deleted if Erase microSD is selected ( ).
Add Account
Adding Accounts
In Standby, Settings Accounts &
sync Add account Select item
Follow onscreen instructions
Page 95

Language & Keyboard
93
Enabling/Disabling Flick Input
Language & Keyboard Settings
Select Language
Selecting Handset Interface Language
In Standby, Settings Language &
keyboard Select language Select
option
User Dictionary
Saving Words to User Dictionary
In Standby, Settings Language &
keyboard User dictionary
Add Enter word OK
・
Select a saved word and press to edit/delete it.
iWnn IME - SH edition
In Standby, Settings Language &
keyboard iWnn IME - SH edition
Flick input
・Flick Input is to flick key for target character.
・
Select Flick input and press to toggle on ( )/off
( ).
Adjusting Flick Input Sensitivity
In Standby, Settings Language &
keyboard iWnn IME - SH edition
Flick sensitivity Adjust sensitivity
OK
Enabling/Disabling Toggle Input while Flick
Input is Enabled
In Standby, Settings Language &
keyboard iWnn IME - SH edition
Toggle input
・Toggle Input is to toggle characters by tapping keys.
・
Select Toggle input and press to toggle on ( )/
off ( ).
Enabling/Disabling Key Tap Sound
In Standby, Settings Language &
keyboard iWnn IME - SH edition
Sound on key press
・
Select Sound on key press and press to toggle on
( )/off ( ).
Enabling/Disabling Key Tap Vibration
In Standby, Settings Language &
keyboard iWnn IME - SH edition
Vibrate on key press
・
Select Vibrate on key press and press to toggle on
( )/off ( ).
Enabling/Disabling Key Preview (Flick Input
Guidance)
In Standby, Settings Language &
keyboard iWnn IME - SH edition
Key input guide
・
Select Key input guide and press to toggle on ( )/
off ( ).
Selecting Automatic Cursor Movement Option
In Standby, Settings Language &
keyboard iWnn IME - SH edition
Auto cursor move Select option
Settings
Selecting a Keyboard Skin
In Standby, Settings Language &
keyboard iWnn IME - SH edition
Keyboard image Select option
SoftBank 007SH
Page 96
94
Date & Time
Date & Time Settings
Automatic
Setting Date Automatically
In Standby, Settings Date & time
Automatic
・
Select Automatic and press to toggle on ( )/off
( ).
Set Date
Setting Date Manually
In Standby, Settings Date & time
Set date Select/enter date
Set
・
Available when Auto is off ( ).
Select Date Format
Changing Date Format
In Standby, Settings Date & time
Select date format Select option
Select Time Zone
Setting Time Zone Manually
In Standby, Settings Date & time
Select time zone Select area
・
Available when Auto is off ( ).
Set Time
Setting Time Manually
In Standby, Settings Date & time
Set time Select/enter time
Set
・
Available when Auto is off ( ).
Use 24-hour Format
Enabling/Disabling 24-hour Format
In Standby, Settings Date & time
Use 24-hour format
・
Select Use 24-hour format and press to toggle on
( )/off ( ).
Page 97
95
About Phone
Handset Information
Status
Checking Handset Status
In Standby, Settings About phone
Status
Battery Use
Checking Battery Status/Usage Time
In Standby, Settings About phone
Battery use Select item
・For some items, related function/setting name (e.g.,
Display settings for Display) appears in details
window; select it and press to access settings.
Adjust Touch Panel
Calibrating Touch Panel
Major Update
Checking for a New Version of Android
Operating System Manually
In Standby, Settings About phone
Major Update Confirm update
Follow onscreen instructions
Upgrading Android Operating System
Download upgrade data on PC beforehand.
In Standby, connect handset to a PC via Micro USB Cable
Switch USB Connection Mode
Fast transfer mode
Settings About phone Major
Update Start update
・Available when a new version of Android operating
system is released.
Enabling/Disabling Automatic Update Check
In Standby, Settings About
phone Major Update Check for
updates
・
Select Check for updates and press to toggle on
( )/off ( ).
In Standby, Settings About phone
Adjust touch panel Follow
onscreen instructions
Adjust Sensitivity of Sensor
Calibrating Motion & Electromagnetic Sensors
In Standby, Settings About phone
Adjust sensitivity of sensor OK
Follow onscreen instructions (tone sounds
when calibration completes) OK
Software Update
Checking for Firmware Updates & Downloading
as Required
In Standby, Settings About phone
Software update Follow
onscreen instructions
・See "Software Update" beforehand.
Legal Information
Reading Copyright, Usage Terms, Etc.
In Standby, Settings About phone
Legal information Select item
Technical Regulations Conformity
Certification
Opening Technical Regulations Conformity
Certification Information ( , Etc.)
Handset complies with requirements as stipulated by the
Radio Law and Telecommunications
Business Law. Follow these steps to check Technical
Regulations Conformity Certification information ( ,
etc.):
In Standby, Settings About
phone Technical Regulations Conformity
Certification
Settings
SoftBank 007SH
Page 98
96
Model Number
Confirming Model Number
In Standby, Settings About phone
・
See below Model number .
Android Version
Confirming Android Operating System Version
In Standby, Settings About phone
・
See below Android version .
Baseband Version
Confirming Baseband Version
In Standby, Settings About phone
・
See below Baseband version .
Kernel Version
Confirming Kernel Version
In Standby, Settings About phone
・
See below Kernel version .
Build Number
Confirming Build Number
In Standby, Settings About phone
・
See below Build number .
Page 99

Appendix
97
Specifications....................................................................98
Customer Service.............................................................. 99
Appendix
SoftBank 007SH
Page 100
98
Specifications
Handset
Item Description
Weight 123 g (140 g with battery)
Continuous
Talk Time
Continuous
Standby
3
Time
2
230 minutes (3G)
230 minutes (GSM)
300 hours (3G)
240 hours (GSM)
Continuous
One Seg
Reception
4
Time
5 hours
1
Charging Time 140 minutes
Size
Maximum
Output
51.8 x 113 x 16.8-19.3 mm (clamshell
closed, without protruding parts)
0.25 W (3G)
2.0 W (GSM)
1
1
1
1
1
Desktop Holder
Item Description
Input
Voltage/
Current
1
Output
Voltage/
Current
Charging
Temperature
Size 131 x 31 x 47 mm
1 Approximate value.
1
DC 5.4V/700 mA
DC 5.4V/700 mA
5oC to 35oC
1
1 Approximate value.
2 Continuous Talk Time is an average measured with a new,
fully charged battery, in strong signal conditions without
moving handset.
3 Continuous Standby Time is an average measured with a
new, fully charged battery, without calls or operations,
in strong signal conditions without moving handset. The
value is calculated with Data transmission and Quake Alert
disabled. Standby Time may vary with environment (e.g.,
battery strength, ambient temperature), settings, etc.
4 Continuous One Seg Reception Time is measured with a
new, fully charged battery, with AV mode set to Standard,
Brightness (Video setting) set to 10, Sound setting
and Smooth mode set to OFF, using Headphones with
Microphone (sold separately), until battery runs low (10%
of capacity).
・Talk Time, Standby Time and One Seg Reception Time when
Brightness (Display settings) is set to approximately half of
maximum (11 of 21).
・Talk Time/Standby Time/One Seg Reception Time may vary
with location, status, settings, etc.
・Display employs precision technology, however, some pixels
may remain on/off.
Battery
Item Description
Voltage 3.7V
Battery Type Lithium-ion
Capacity 820 mAh
Size
1 Approximate value.
34.2 x 47.1 x 4.6 mm (without protruding
1
parts)
 Loading...