

Sam4s ER-180UDL, ER-180U User Manual
ER-180U /UDL
4
1
0
5
2
00
6
3
•
C
D
E
H
I
J
N
O
M
R
S
T
W
Z
Electronic Cash Register
Quick Setup Guide
1
Get Ready
Unpack the Cash Register
Remove the cash register from the packaging.
Locate the following items:
• 1 power adaptor
• 1 roll of paper
• 1 set of keys (ER-180U - 5 keys in total; ER-180UDL
- 6 keys)
• 1 user manual
• (Optional) Take up spool set.
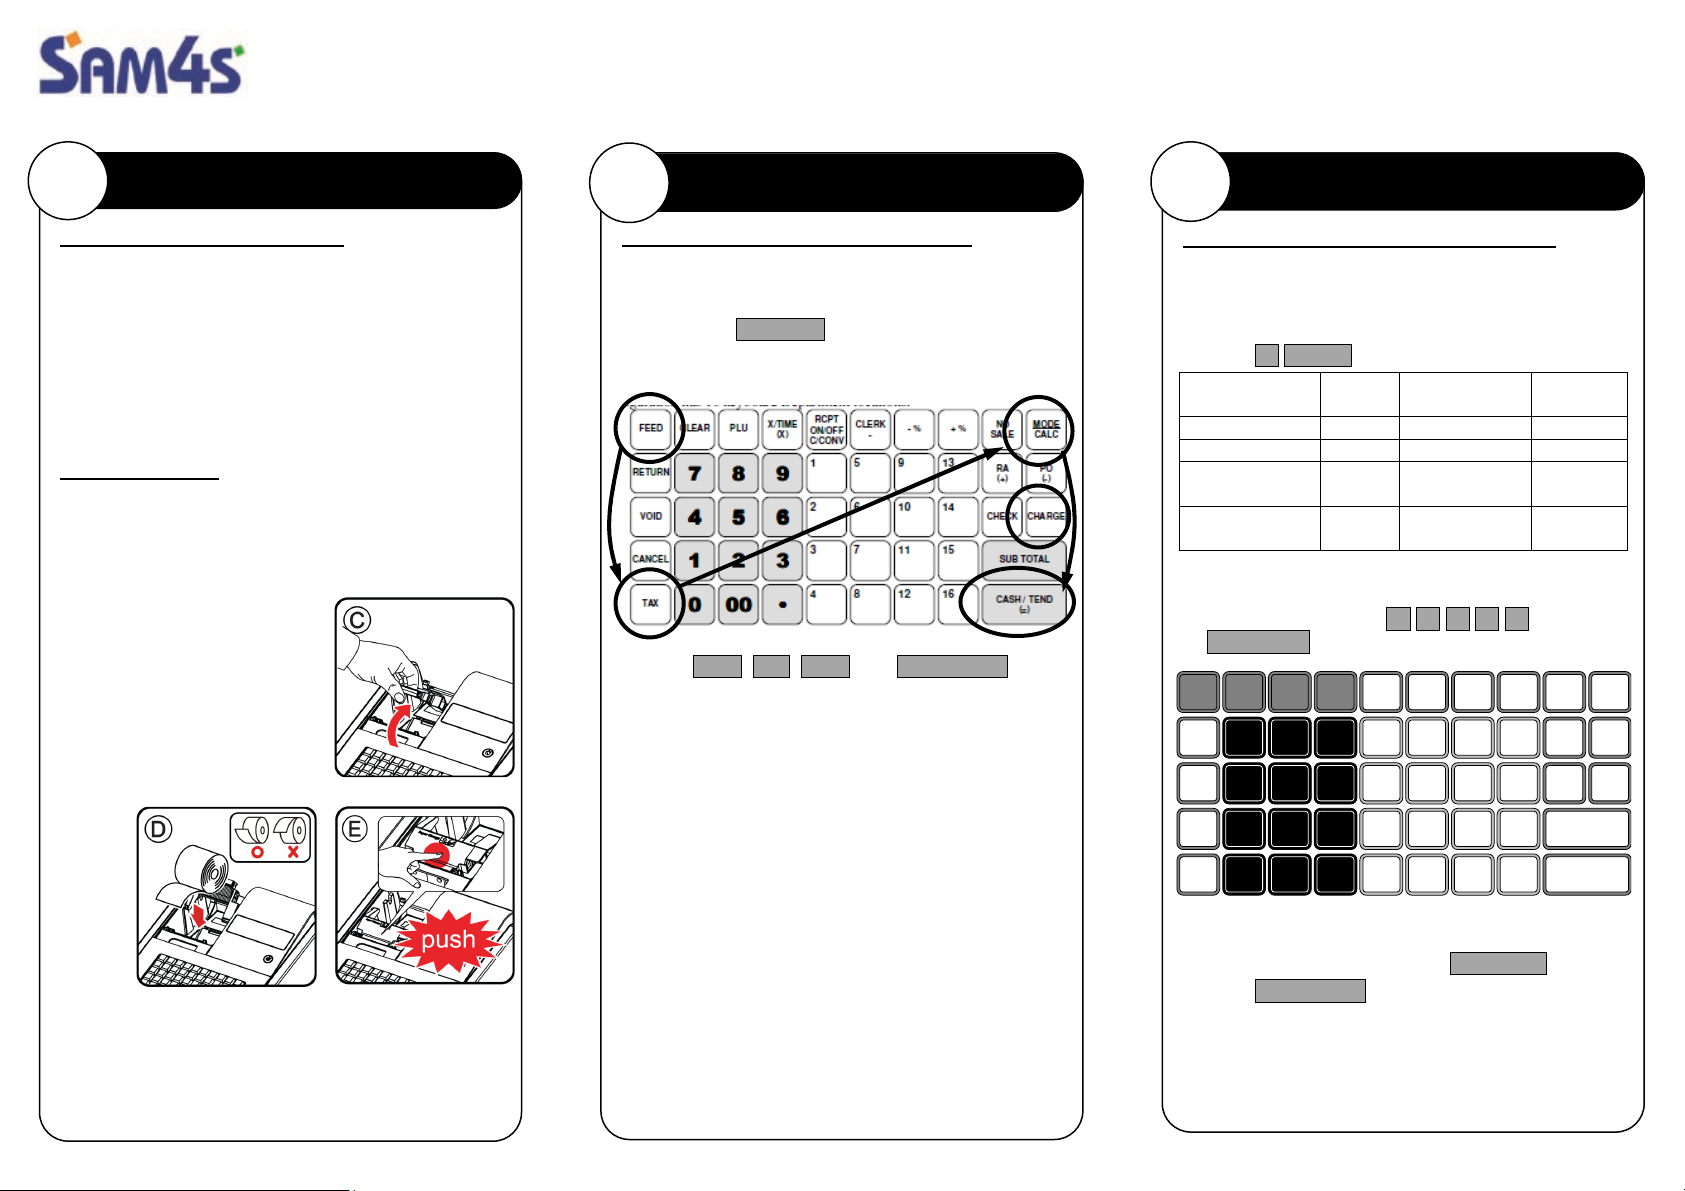
Loading Paper
The ER-180U has a built-in thermal printer and a
57mm thermal paper roll. The printer can be used as a
receipt printer or a journal printer.
• Remove the printer cover
• Open the housing clam cover
(Fig (c))
• Insert the paper roll as
shown on Fig (D)
• Pressing the housing clam
cover (Fig (E))
• Press FEED to advance
paper
• Replace the printer cover
2
RAM All Clear
RAM (Memory) All Clear - Reset
RAM All Clear an ER-180U /UDL and the register will
reset to factory default program. This is recommended
for all new products. To do so:
• Hold down CHARGE button
• Plug in Power Lead then release CHARGE button
after the beep! Sound
• Press FEED, TAX, CALC then CASH/TEND
button in sequence. “RAM ALL CLEAR OK!” will
print on the receipt, the display will show ”= = = = =
= = = = =”. The EPROM info will print at the end of
this procedure.
• Turn key to REG-Mode
• The display should show
“0.00” and be ready for use
At this point, all 16 Departments
and 100 PLUs are preset to 10%
on Tax1 (GST) and OPEN
PRICE (a price must be entered
for an item); at the start, all
PLUs link to Department 1.
3
Programming
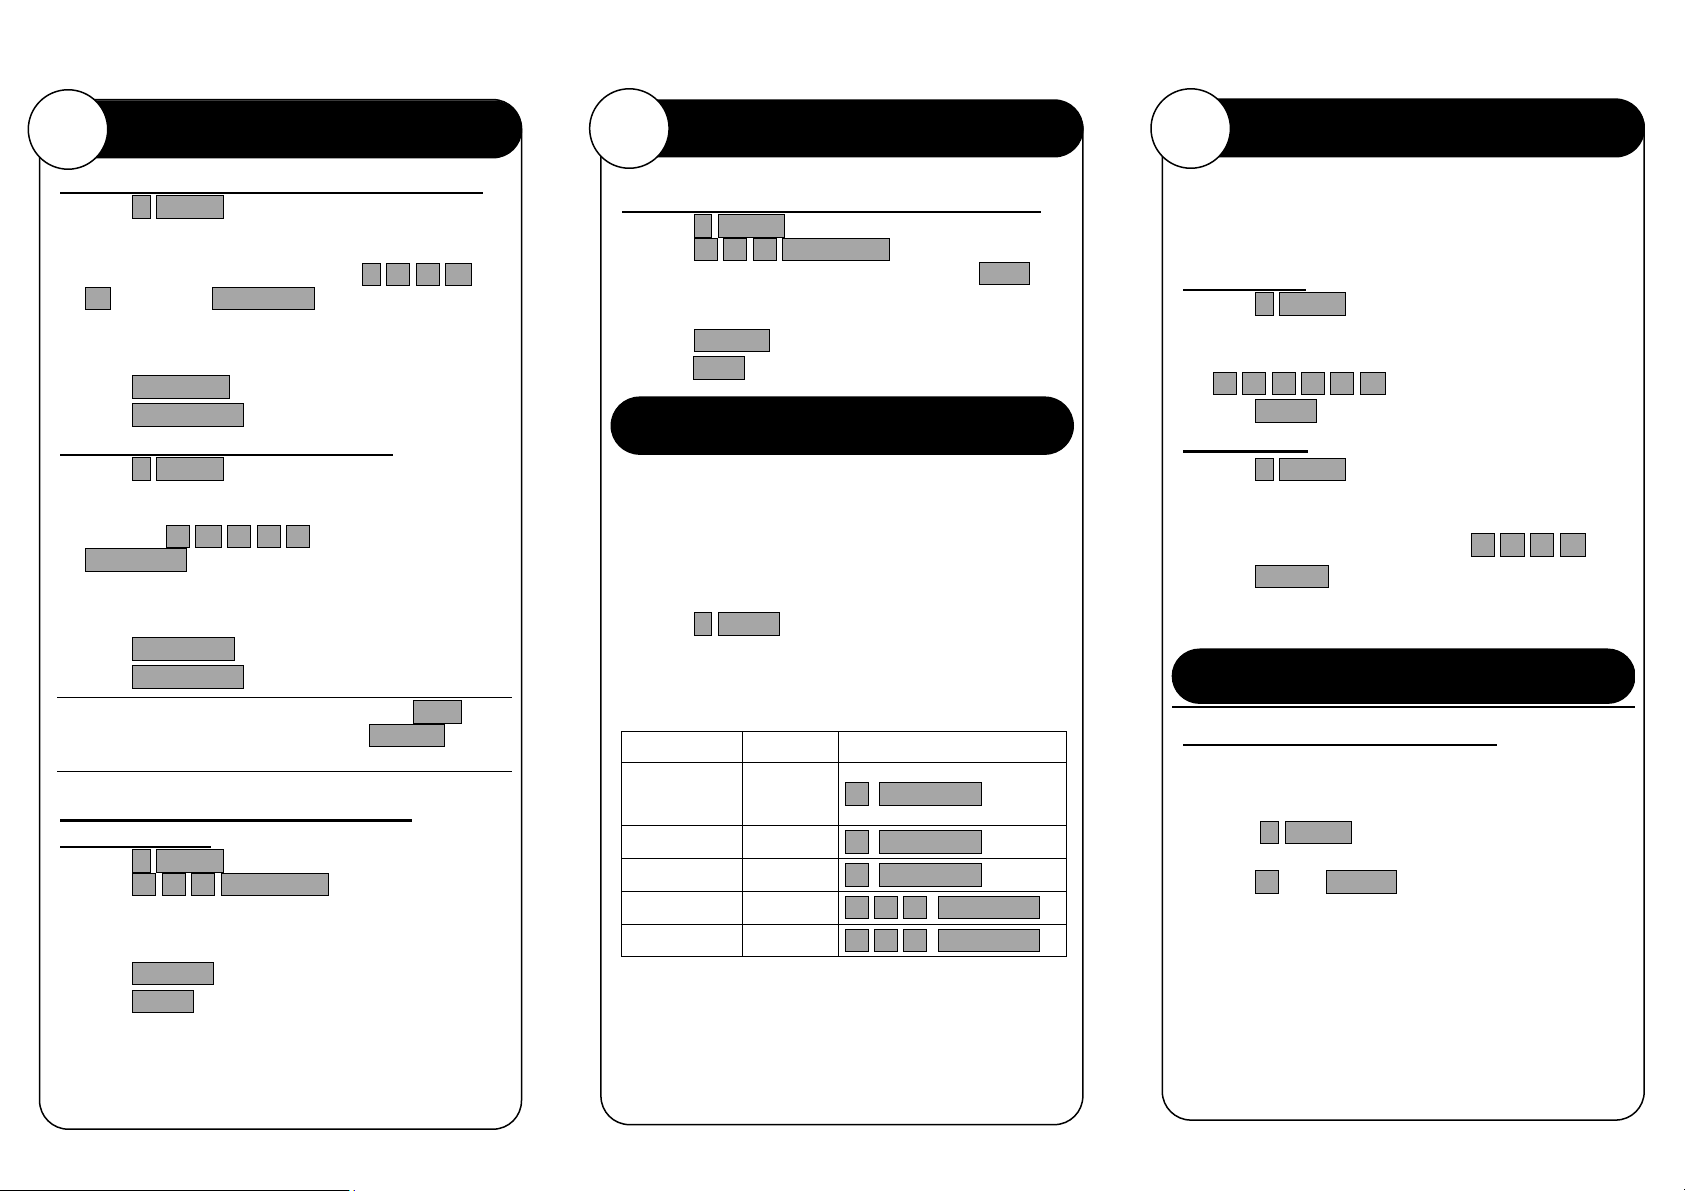
Descriptor Programming Methods
The ER-180U has two different descriptor program
methods - The Alpha Overlay and the Three Digit
Code. To program a description with Alpha Overlay
Entry Method:
• Enter 6 MODE , to go to PGM-Mode
P
Q
Character
Length
12
12
24
24
U
X
V
Y
SUB TOTAL
CASH
Descriptor of Address
Department (16) 1 0001 ~ 0016
PLU (500) 2 0001 ~ 0500
Receipt Header
(6 Lines)
Receipt Footer
(6 Lines)
• Enter Address + Number for the logo descriptor line
you want to program (for example, the 2nd line of
Receipt Header, enter 3 0 0 0 2 ) then press
SUBTOTAL button.
DOUBLE
CAPS
BACK
SPACE
• Enter up to 24 characters; for more detail, please
see Overlay Descriptor Programming Methods
on User Manual. Then press SUBTOTAL button.
• Press CASH/TEND to finalise programming.
7
8
3 0001 ~ 0006
4 0001 ~ 0006
A
9
B
Number
F
G
K
L
4
Programming (Continued)
Departments Descriptor Programming
• Enter 6 MODE to go to PGM-Mode
• Enter Address + Number for the department
descriptor line you want to program (for example,
to program Department 3, enter 1 0 0 0-
-3 ) then press SUBTOTAL button.
• Enter up to 12 characters for the department; for
more detail, please see Overlay Descriptor
Programming Methods on User Manual. Then
press SUBTOTAL button.
• Press CASH/TEND to finalise the programming.
PLUs Descriptor Programming
• Enter 6 MODE to go to PGM-Mode
• Enter Address + Number for the PLU descriptor line
you want to program (for example, to program PLU
20, enter 2 -0 0 2 0 ) then press
SUBTOTAL button.
• Enter up to 12 characters for the PLU; for more
detail, please see Overlay Descriptor
Programming Methods on User Manual. Then
press SUBTOTAL button.
• Press CASH/TEND to finalise programming.
While entering the character, you can press CAPS to
switch case, this feature is stay-down, DOUBLE to
make double size, this only affects the next letter.
Department Entry Limit or Price
Programming
• Enter 6 MODE to go to PGM-Mode
• Enter 5 2 0 SUBTOTAL ,
• Select the Department by press the department
button
• Enter a number up to 7 digits as a Price/HALO, then
press X/TIME button
• Press CASH to finalised programming
5
Programming (Continued)
PLU Entry Limit or Price Programming
• Enter 6 MODE to go to PGM-Mode
• Enter 2 0 0 SUBTOTAL ,
• Enter PLU number of the PLU, then press PLU-
button
• Enter a number up to 7 digits as a Price/HALO, then
press X/TIME button
• Press CASH to finalise programming.
Reporting / Misc. Information
The ER-180U has two reporting modes, one for
printing out the information without clearing any
figures; this is referred to as the X-Mode
The second is for printing and clearing the figures back
to zero ready for next day (End of Day), this is
referred to as the Z-Mode.
• Enter 4 MODE to go to t X-Mode - print reports
without clearing or Z-Mode - print reports and
clear sales.
• Refer to the report and type from table below, enter
the key sequence to print required report
Report Mode Key Sequence
Financial/
Department
All PLU X or Z
All Clerk X or Z
Print EJ X or Z
Reset EJ X or Z
X or Z
1 SUBTOTAL
2 SUBTOTAL
3 SUBTOTAL
3 0 0 SUBTOTAL
3 9 9 SUBTOTAL
6
Setting Date and Time
In some occasions, Date and Time setting maybe
needed; like the change between standard time and
daylight saving time periods.
Setup Date
• Enter 6 MODE to go to PGM-Mode
• To program a date, enter in MMDDYY format.
For example, for 15 Jul 2017, enter
0 7 1 5 1 7-
• Press CASH button to finalise programming
Setup Time
• Enter 6 MODE to go to PGM-Mode
• To program a time, enter HHMM in 24 hours
format.
For example, for 3:28pm, enter 1 5 2 8-
• Press CHECK button to finalise programming
Sign-On Method
Sign-On into ER-180U / UDL
While using ER-180U, the Sign-On procedure may
need when “CLOSEd” appears on the operator
display. To do so:
• Enter 3 MODE to go REG-
Mode
• Press 1 then CLERK button, the display should
show “0.00” and be ready for use
 Loading...