

Page 1
MODEL B 130
Counting Scale
User Manual
p/n AWT35-500632 issue AA July 2010
Page 2
General information and warnings
Special messages
Examples of special messages you will see in this manual are defined below. The
signal words have specific meanings to alert you to additional information or the
relative level of hazard.
DANGER!
THIS IS A DANGER SYMBOL.
DANGER MEANS THAT FAILURE TO FOLLOW SPECIFIC
PRACTICES OR PROCEDURES WILL CAUSE INJURY OR DEATH.
ELECTRICAL WARNING!
THIS IS AN ELECTRICAL WARNING SYMBOL.
ELECTRICAL WARNINGS MEAN THAT FAILURE TO FOLLOW
SPECIFIC PRACTICES OR PROCEDURES MAY RESULT IN
ELECTROCUTION, ARC BURNS, EXPLOSIONS OR OTHER
HAZARDS THAT MAY CAUSE INJURY OR DEATH.
WARNING!
This is a Warning symbol.
Warnings mean that failure to follow specific practices and procedures may
have major consequences such as injury or death.
CAUTION!
This is a Caution symbol.
Cautions give information about procedures that, if not observed, could
result in damage to equipment or corruption to and loss of data.
NOTE: This is a Note symbol. Notes give additional and important information,
hints and tips that help you to use your product.
Page 3
Installation
DANGER: RISK OF ELECTRICAL SHOCK. NO USER SERVICEABLE
PARTS. REFER TO QUALIFIED SERVICE PERSONNEL FOR
SERVICE.
Electrical installation
CAUTION: The power cable must be connected to an earth-grounded
electrical outlet. The electrical supply must have a circuit breaker with an
appropriate rating to protect from over-current conditions.
For your protection, all electrical (110V or 230V) equipment used out of
doors or in wet or damp conditions should be supplied from a correctly
fused power source and protected by an approved ground fault protection
device (RCD, GFCI etc.)
IF IN DOUBT SEEK ADVICE FROM A QUALIFIED ELECTRICIAN.
Pluggable equipment
Pluggable equipment must be installed near an easily accessible socket outlet.
Permanently wired equipment - Isolator requirements
Permanently connected equipment must have a readily accessible disconnect
device incorporated in the fixed wiring such as an isolator or circuit breaker with at
least 3mm contact separation.
The isolator MUST NOT be installed into the flexible power cable supplied with the
unit.
Page 4
Safe handling of equipment with batteries
CAUTION: Danger of explosion if battery is incorrectly replaced. Replace
only with the same or equivalent type recommended by the manufacturer.
Dispose of used batteries according to the manufacturer’s instructions.
ATTENTION: Il y a danger d'explosion s'il y a remplacement incorrect de la
batterie, remplacer uniquement avec une batterie du même type ou d'un
type équivalent recommandé par le constructeur. Mettre au rebut les
batteries usagées conformément aux instructions du fabricant.
Wet conditions
Under wet conditions, the plug must be connected to the final branch circuit via an
appropriate socket / receptacle designed for washdown use.
Installations within the USA should use a cover that meets NEMA 3R
specifications as required by the National Electrical Code under section 410-57.
This allows the unit to be plugged in with a rain tight cover fitted over the plug.
Installations within Europe must use a socket which provides a minimum of IP56
protection to the plug / cable assembly. Care must be taken to make sure that the
degree of protection provided by the socket is suitable for the environment.
Routine maintenance
IMPORTANT: This equipment must be routinely checked for proper
operation and calibration.
Application and usage will determine the frequency of calibration required
for safe operation.
Always turn off the machine and isolate from the power supply before starting any
routine maintenance to avoid the possibility of electric shock.
Make sure that it is placed securely on a flat and level surface.
Page 5
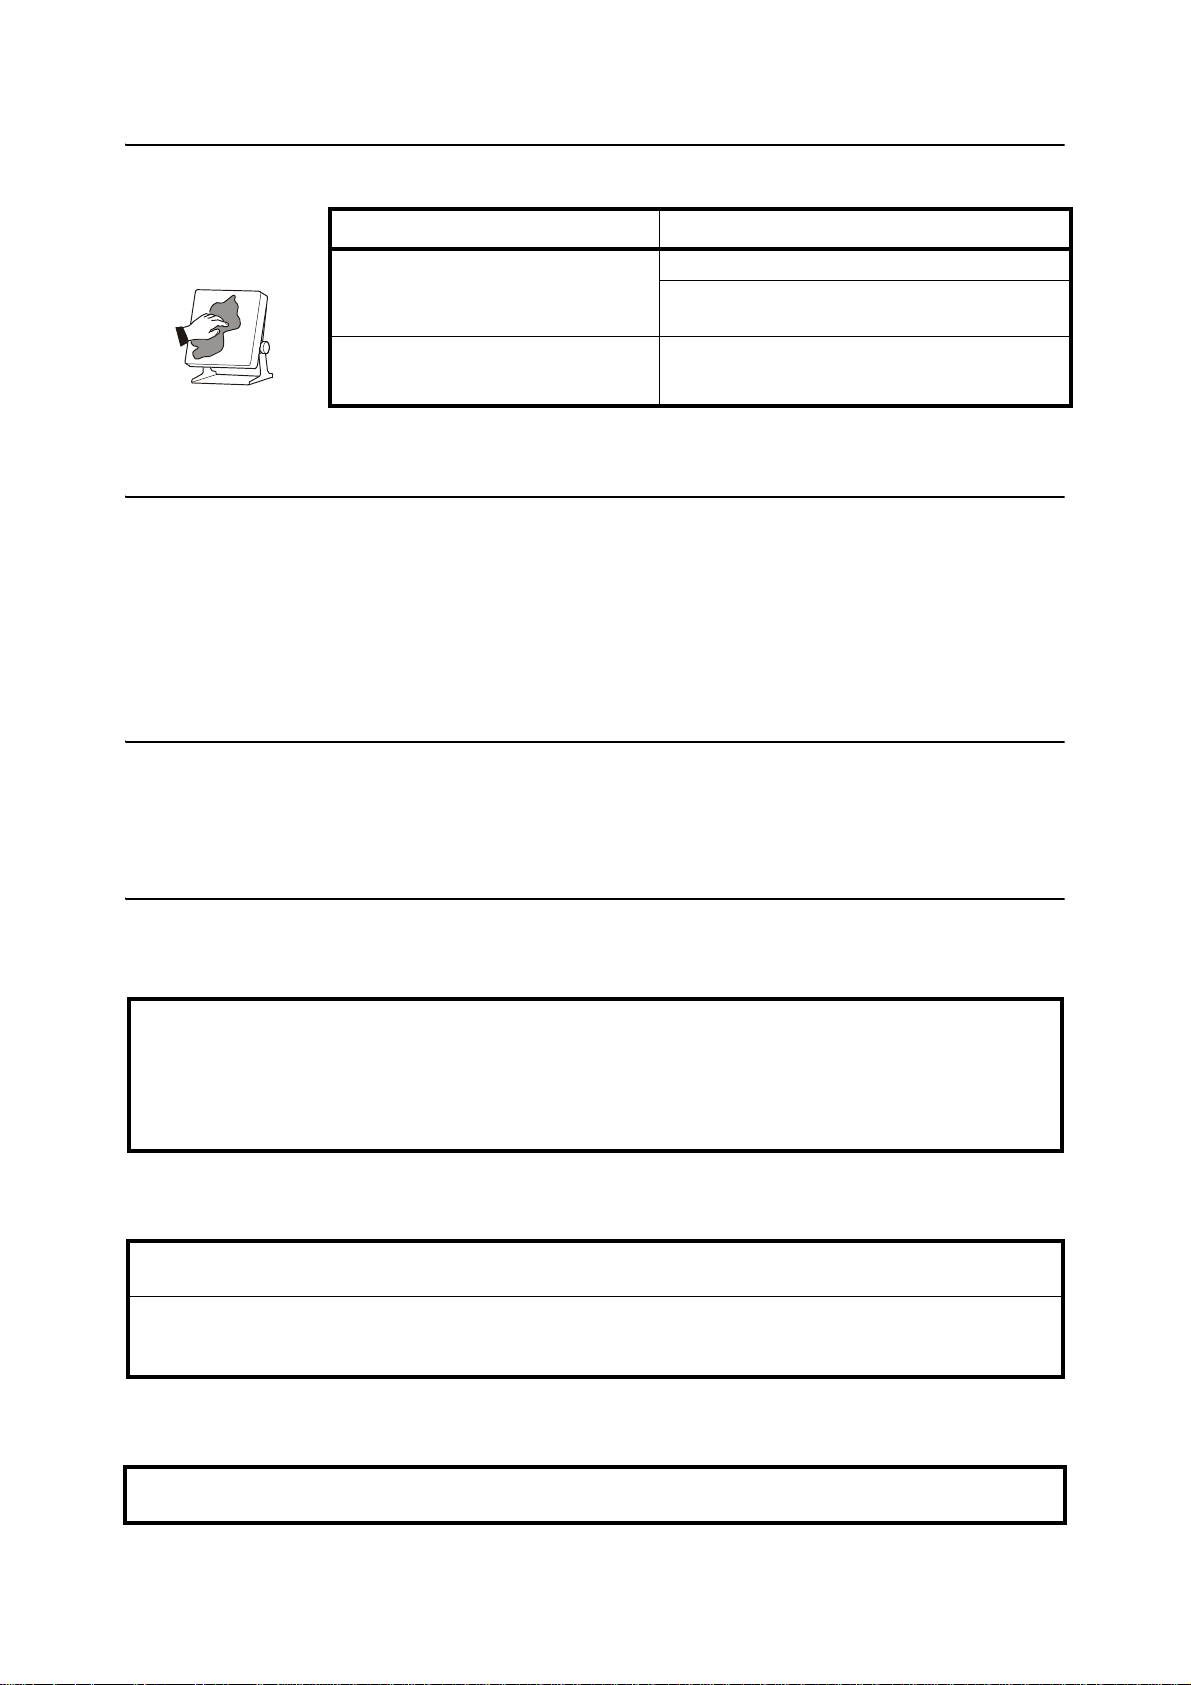
Cleaning the machine
Table 1.1 Cleaning DOs and DON’Ts
DO DO NOT
Training
Sharp objects
Wipe down the outside of standard products
with a clean cloth, moistened with water and
a small amount of mild detergent
Spray the cloth when using a proprietary
cleaning fluid
Do not attempt to operate or complete any procedure on a machine unless you
have received the appropriate training or read the instruction books.
To avoid the risk of RSI (Repetitive Strain Injury), place the machine on a surface
which is ergonomically satisfactory to the user. Take frequent breaks during
prolonged usage.
Do not use sharp objects such as screwdrivers or long fingernails to operate the
keys.
Attempt to clean the inside of the machine
Use harsh abrasives, solvents, scouring cleaners or
alkaline cleaning solutions
Spray any liquid directly on to the display windows
FCC and EMC declarations of compliance
United States
This equipment has been tested and found to comply with the limits for a Class A digital device, pursuant to Part 15 of the FCC
Rules. These limits are designed to provide reasonable protection against harmful interference when the equipment is operated
in a commercial environment. This equipment generates, uses, and can radiate radio frequency energy and, if not installed and
used in accordance with the instruction manual, may cause harmful interference to radio communications. Operation of this
equipment in a residential area is likely to cause harmful interference in which case the user will be required to correct the
interference at his own expense.
Canada
This digital apparatus does not exceed the Class A limits for radio noise emissions from digital apparatus set out in the Radio
Interference Regulations of the Canadian Department of Communications.
Le présent appareil numérique n’émet pas de bruits radioélectriques dépassant les limites applicables aux appareils
numériques de la Classe A prescrites dans le Règlement sur le brouillage radioélectrique edicté par le ministère des
Communications du Canada.
European Countries
WAR NIN G: This is a Class A product. In a domestic environment, this product may cause radio interference in which the user
may be required to take adequate measures.
Page 6
Page 7
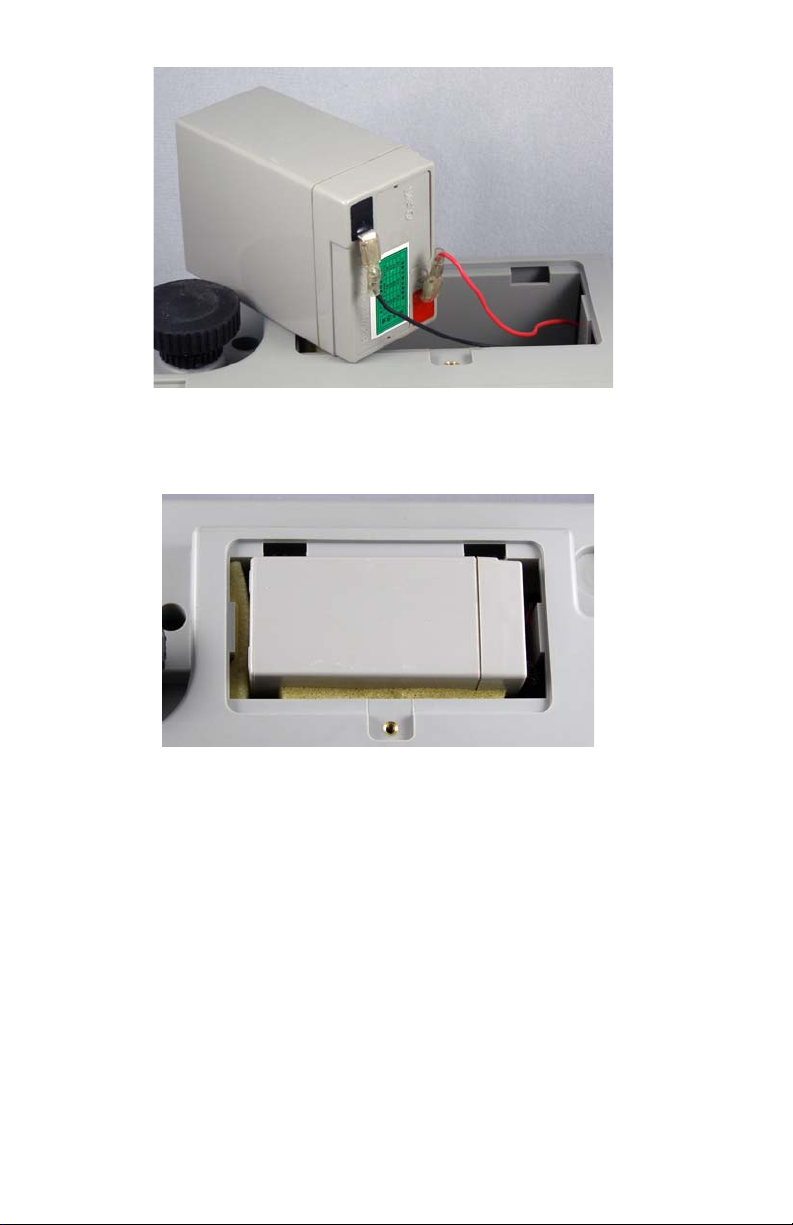
Connect the red wire to the red battery terminal and the black wire to the black
battery terminal.
Place battery in the compartment with the padding placed as shown and
eplace the battery cover and tighten the screw.
r
Note: T
2
o improve battery life, turn off the scale using the power switch.
Page 8

3.0 Front Panel
The front panel, shown in Figure 1, consists of three display windows
(WEIGHT, PIECE WEIGHT, and
the bubble level window.
Figure 1: B130 front panel
Annunciators
Annunciators are bright LEDs next to symbols or text. They appear below the
three displays and each is explained below.
Under the WEIGHT display:
ro This lights when the weight on the scale is at 0.
Ze
Tare This lights when a tare is in effect. Weight displayed is net weight.
COUNT), the keypad, nine annunciators and
B 130
kg This lights when the unit of measure in the WEIGHT display is
kilograms.
lb This lights when the unit of measure in the WEIGHT display is
pounds.
Under the PIECE WEIGHT display:
g This lights when the PIECE WEIGHT unit of measure is grams.
lb This lights when the PIECE WEIGHT unit of measure is pounds.
Under the COUNT display:
Low Batt This lights when the battery power is low. Recharge the battery or
use AC power to continue using the scale.
AC This lights when the AC power is connected to the scale.
CHG This lights when the battery is charging.
3
Page 9

Key Functions
Each of the keys shown in Figure 2 is explained below.
B 130
Figure 2: B 130 keypad
0-
9 Used for keyboard entry of piece weight, sample size, and upper
and lower limit settings.
Units lb/kg Used to switch displayed weights between kg and lb, and piece
weight units between grams and decimal pounds.
Zero Return displayed weights and counts to zero for accurate
weighing and counting. Zero range capability is 5% of scale
capacity.
Enter Used to confirm or save entered data from keyboard.
Tare Used to zero off, up to 100% of capacity, an empty container or
weight, not required in the calculation of an average piece weight.
Use of tare will reduce the scale’s maximum weight capacity, by
the tare value stored.
Accu + Used to add the displayed counts to a piece count accumulator
(Memory +) and only accumulate when there is a percentage of
weight change.
Clear Erase a keyed in value from the display if an error has been
made.
Pcwt (stands for Piece Weight) Used for keyboard entry of a known
average piece weight.
Upper Used to set an upper limit quantity for count check feature.
Lower Used to set lower limit quantity for count check feature.
On/Off Used to turn off display for extended battery life or to reset the
scale to normal weighing mode.
4
Page 10

4.0 Scale Operation
This section covers the various scale operations, such as weighing, counting,
accumulation, etc.
Simple Weighing
1. Turn the scale on and zero the display, if necessary, by pressing the Zero
key. Be sure the scale is displaying weight in your preferred unit of
measure. Change it using the Units key, if necessary.
2. Place item
Weight of the item(s) is displayed in the WEIGHT window.
(s) to be weighed on the scale…
3. Re
move the item(s) from the scale and repeat steps 1-3 to weigh the
next item(s).
Tare Weighing
If you want to do net weighing, such as weighing objects in a container, follow
these steps:
urn the scale on and zero the display, if necessary, by pressing the Zero
1. T
key. Be sure the scale is displaying weight in your preferred unit of
measure. Change it using the Units key, if necessary.
2. Place th
3. Press the Ta
4. Place item
5. T
o remove a tare, remove everything from the scale platform and press
the Tare key…
e item to be tared (usually a container) on the scale…
Weight of the item is displayed in the WEIGHT window.
re key…
The weight is tared, 0 weight is displayed
lights.
(s) to be weighed on the scale…
Net weight of the item(s) is displayed.
0 weight is di
is now in gross weighing mode.
splayed and the Tare annunciator light turns off. The unit
and the Tare annunciator
6. Re
peat the steps above for other tare weighments.
5
Page 11

General Counting Information
If there is no piece weight, the scale will not go into count mode.
Once a piece weight is established, it re
is automatically calculated by a sampling process.
After counting items, remove them and the
press the ZERO key.
mains active until another piece weight
display should return to zero. If not,
A counting scale needs a minimum amount of
accuracy. Salter Brecknell recommends the sample weight be a minimum of
0.1% of scale capacity. The sample weight is the total weight of your sample
items. The table below shows the minimum sample weights recommended to
guarantee the most accurate counts.
Minimum Sample Weight
Scale Capacity LB Grams
6 kg/12 lb 0.02 6
15 kg / 30 lb
30 kg / 60 lb 0.1 30
After entering the number of samples and pressing the Enter
window displays the number entered. If the piece weight window shows SPL
PCS, press the CLEAR key, and increase your sample weight.
weight to calculate counts with
0.05 15
key, the count
Counting by Sampling
Follow these steps to count items using the sampling method.
For count accuracy all items
occur if parts vary in weight.
urn the scale on and zero the display, if necessary, using the Zero key.
1. T
Be sure the scale is displaying weight in your preferred unit of measure.
Change it using the Units key, if necessary.
2. Place a
weight the scale will use to calculate a piece weight…
known number of objects on the scale. This is the sample
should be uniform in weight. Errors in count will
3. Ke
6
Weight of the items is displayed in the
y in the number of objects you placed on the scale…
SPL.PCS is displayed in
you keyed in is displayed in the COUNT window.
the PIECE WEIGHT window and the number
WEIGHT window.
Page 12

4. Press the Enter key to accept the keyed in number. (If you make an
error in keying in the number, press the Clear key to clear the count in
the COUNT window and re-key the correct number.)…
The scale calculates the weight of each piece (the piece weight) and
isplays the count in the COUNT window.
d
5. Place th
6. Re
items of the same piece weight.
7. Re
Note: Piece weigh
pounds.
Note: The original piece weight will be held in memory until a new piece
weight has been determined. Turn the scale off, then on to return to normal
weighing mode.
e items to be counted on the scale…
The total weight, piece weight and count of the items will be shown in
e three display windows respectively.
th
move the items from the scale and repeat steps 5 and 6 to count
peat steps 1-6 to count items of a different piece weight.
t is displayed in grams/decimal grams or LB/decimal
Counting by Entering a Known Piece Weight
You can enter a known piece weight and begin counting without sampling.
This can also be used with the tare function ac
weight, place the item to be tared on the scale, press the Tare key and
continue with counting as described below.
Follow these steps:
tive. After you have set the piece
urn the scale on and zero the display, if necessary, using the Zero key.
1. T
Be sure the scale is displaying weight in your preferred unit of measure.
Change it using the Units key, if necessary.
2. Press the Pcwt key…
PC.t is displaye
the WEIGHT and PIECE WEIGHT windows.
3. T
here is a decimal point already in the PIECE WEIGHT window. Key in
the known piece weight, in decimal pound or grams, using the numeric
keypad so that the piece weight in the PIECE WEIGHT window is
correct, then press the Enter key to accept this piece weight. (If you
make an error in keying in the number, press the Clear key to clear the
number and re-key the correct number.)
The counting mode activates using the entered piece weight.
d in the COUNT window and zeroes are displayed in
7
Page 13

4. Place the items to be counted on the scale…
The total weight, piece weight and count of the items will be shown in
e three display windows respectively.
th
5. Re
6. Re
Counting can also be done while using a tare. After you have set the piece
weight (s
continue with counting as described in step 4.
move the items from the scale and repeat steps 4 and 5 to count
items of the same piece weight.
peat steps 2-5 to count items of a different piece weight.
tep 3), place the item to be tared on the scale, press the Ta
re key and
Counting Using Upper and Lower Count Limits
You can do counting with an alert system to tell you when you have an
acceptable number of items on the scale. This can be handy when you want to
repeatedly fill bags to the same count. Use the instructions below to set an
upper count limit and a lower count limit. When your counts fall between these
numbers (inclusive) a beeper sounds to let you know you’ve hit your target
number.
urn the scale on and zero the display, if necessary, using the Zero key.
1. T
Be sure the scale is displaying weight in your preferred unit of measure.
Change it using the Units key, if necessary.
2. Use
3. Press the Upper key…
sampling or entering a known piece weight to set the piece weight.
uP. PCS is sh
appears in the COUNT window.
own in the PIECE WEIGHT window and a number
4. Press the Clear key
in the upper acceptable count of items. (You can set the upper and
lower limit to the same number to have the alert beeper sound just
on that count.) Press the Enter key to accept this number…
5. Press the Lo
Lo. PCS is shown in th
appears in the COUNT window.
6. Press the Clear key
in the lower acceptable count of items. (You can set the upper and
lower limit to the same number to have the alert beeper sound just
on that count.) Press the Enter key to accept this number…
The scale returns to count mode.
7. Place
8
items to be counted on the scale until you hear the alert beeper…
The count will be within the upper and lower limits you have set.
wer key…
to clear the number from the COUNT window. Key
e PIECE WEIGHT window and a number
to clear the number from the COUNT window. Key
Page 14

8. Remove the items from the scale and repeat steps 7 and 8 to weigh the
next batch of items.
Counting with upper and lower limits can be done while us
have set the piece weight (step 2), place the item to be tared on the scale,
press the Tar
e key and continue with counting as described in step 3.
ing a tare. After you
Note: U
0, by repeating steps 3-6.
pper and lower limits will remain in memory until you reset the limits to
Accumulating Counts
The scale can accumulate the counts from different weighments into a total
value stored in memory. Follow these steps to perform accumulations.
1. Follo
2. Wh
3. Remove the items
4. T
w the different counting methods described in Scale Operation on
page 5 to count items placed on the scale.
en the count is displayed, press the Accu+ key to accumulate the
count to memory…
The count is added into memory, and temporarily, Add is displayed i
the WEIGHT window, the number of accumulations is displayed in
the PIECE WEIGHT window and the accumulated count is shown in
the COUNT window. The display automatically returns to the normal
counting mode.
, allow the scale to return to zero weight and count,
and repeat the process of putting items on the scale and pressing the
Accu+ key to accumulate the counts…
The total of accumulated counts is shown in the COUNT window.
o clear the accumulator, press Accu+ key, then the Clear key while the
accumulated data is displayed…
n
Memory is cleared of the accumulated data and the scale returns to
rmal counting mode.
no
Note: To view the accumulator data, remove all weight from the scale and
press Accu+. The data is temporarily displayed before returning to count
mode.
9
Page 15

5. The scale will not accumulate more than 999,999 times, or show an
accumulated quantity over 16,777,215. If this occurs the display will
show ------. This means over range.
When the accumulated quantity is more than the six digit display can
show (999999), it
digits
H XXXX) then the second four digits (L XXXX). The H stands for
High order numbers and the L for low order numbers.
For example: Whe
COUNT window will alternately flash H 1234 and L 5678.
Note: Remove the counted items from the scale and let the scale return to
stable condition before you can count more items and perform a successful
accumulation again.
will be displayed by alternately flashing the first four
n the accumulate
d quantity is 12,345,678, the
5.0 Calibration
You should periodically calibrate your scale to ensure accuracy. Follow these
steps to calibrate the scale.
Before calibration, at least 10%FS (the 100%FS is the best)
be ready if zero-point and one other point are selected to be calibrated; and, at least
20% (the 100%FS is the best)
other points are slected to be calibrated.
Set the calibration switch to the ON position for calibrating. The switch is
located on the bottom of the scale in a round depression in the base.
Push the slide switch, shown in Figure 3, to the position shown for calibration
mode.
weight should be ready if zero-point and two
weight should
Note: Use of certified calibr
calibration.
Figure 3: Calibration switch
10
ation weights is recommended for proper
Page 16

Access to the calibration switch may be sealed with a lead-wire combination
on the bottom of the scale. Prior to removing the lead seal, check to see if the
test switch is in the correct position by following step 1 below. If you are not
allowed access, remove the lead-wire seal.
Note: Y
ou can exit the calibration procedure at any time by pressin g th e On/
Off key.
o enter calibr
1. T
and On/Off keys
ation mode, while in normal weighing mode, hold the Zero
at the same time until…
The scale beeps and, if the calibration switch is in the ON position,
the WEIGHT window shows CAL. oN. If the display shows CAL.oFF,
change the ca
libration switch position. See Figure 3.
The PIECE WEIGHT window shows Unit. 1 or Unit. 0. If Unit. 1 is
displayed, the calibration unit of measure is pounds. If Unit. 0 is
displayed, the calibration unit of measure is kilograms.
2. Press the Units key to toggle be
tween pounds and kilograms. When the
unit you want is displayed, press the Enter key to accept it…
The scale beeps and unLoAd is displayed in the PIECE WEIGHT
window. A numb
er representing raw A to D counts is displayed in the
WEIGHT window.
3. Remove all
Unit annunciato
weight from the scale, wait for the scale to be stable (the
r stops flashing) and press the Enter key to capture the
zero point…
If the scale successfully captures the zero point, the scale beeps and
LoAd1
means the scale will be calibrated on the 1st point
(load weight #1) is displayed in the PIECE WEIGHT window, it
weight.
4. Load first
test weight that is > 10% of full capacity onto
the center of the weight platter, wait for the scale to be stable (the Unit
annunciator stops flashing) and press the Enter key to capture the
span1 weight.
When the scale captures the span1, InP. Ld is displayed in the PIECE
WEIGHT window and 0.000 is displayed in the COUNT window. InP.
Ld stands for input load weight, input number of the loaded weight by
numerical keys. Press ENTER to confirm the input weight. The input
weight data will be displayed in WEIGHT window.
5.When LoAd2 (load weight #2) is shown in PIECE WEIGHT window, it
means the scale will be calibrated on the 2nd point, weight must
be weight #1 +10% or FS. If don't want to calibrate the scale on this point,
just press ENTER to go to step (6), otherwise; Load weight #2 onto the
center of weight platter and press ENTER to confirm the loaded weight
when the scale is stable and unit announciator is not flashing.
11
Page 17

When the scale displays "InP.Ld" (input load weight) in PIECE WEIGHT
window, 0 in WEIGHT window, input the number of total weight loaded on
scale by numerical keys. Press ENTER to confirm the input weight. The
input weight data will be displayed in WEIGHT window.
6. When unLoAd is displayed in the PIECE WEIGHT window, it means the scale
will confirm the zero point once more. Remove the weight from the scale and
after the scale is stable and unit announciator is not flashing. Press the
ENTER key.
The scale goes through the start up routine and ends in normal
weighing mode.
If there is any error in the calibration, the scale will show CAL. Err.
The scale will try to return to the previous step.
7. If you have p
and try the procedure again.
8. Move the calibration switch back to normal weighing mode.
roblems, press the On/Off key to exit the calibration mode
6.0 View Voltage and A/D Counts
You can view the battery voltage and A to D counts for diagnostic purposes.
Follow these steps:
1. With the calibration switch in the normal weighing mode and the scale in
normal mode, press and hold the On/Off and Tar e keys at the same time
until the scale beeps…
Vol. X.X is displayed in the WEIGHT window, the word codE is
displayed in the PIECE WEIGHT window and the A to D counts
(code) is displayed in the COUNT window.
Vol. stands for voltage and X.X is the current voltage of the battery. If
no battery is installed or the connection is not complete, Vol. 7.2 will
be displayed.
When the current working voltage is lower than 5.7V, the Low Batt
annunciator will light.
When the voltage is lower than 5.5V, the Low Batt annunciator will
light and the beeper will sound for approximately two minutes before
the scale turns itself off.
The A to D counts for an empty scale should be between 5000 and
100,000. This should be a positive number. The A to D counts for a
scale at full capacity should be above 300,000. If the A to D counts
are outside of these ranges or calibration and normal weighing
cannot be done, your scale’s loadcell has been permanently
damaged.
2. To exit this mode, press the On/Off key…
The scale returns to normal mode.
12
Page 18

7.0 Setting the Auto-Off Timer
You can set an auto-off timer so that the scale will power down automatically
after a period of inactivity. This functions only when the scale is powered by the
battery.
1. Fro
m normal mode, press and hold the On/Off and Accu keys at the
same time until the scale beeps…
SEtUP is displayed in the WEIGHT window, A.oFF
the PIECE WEIGHT window and the current value for the auto-off
timer is displayed in the COUNT window. You can choose from 0 to
30 minutes. If you pick 0, auto-off is disabled and the scale will not
power down automatically.
.t is displayed in
2. Ke
y in the number of minutes of scale inactivity that will trigger the auto-
off function and press the Enter key to accept this value…
The scale returns to normal mode.
8.0 Setting LED Brightness
You can set the LED brightness by following these instructions:
normal weighing mode, hold the ON/OFF and ENTER keys at the
1. In
same time until
SETUP is display
brightness) is displayed in the PIECE WEIGHT window, and x (x=1-3)
is displayed in the COUNT window. This means that the LED
brightness is currently set to x.
2. Pre
ss the 1 2 or 3 numerical key to change the brightness level. Three
is the brightest level. When the brightness you want is displayed, press
the ENTER key save this setting.
The scale will auto-reset and return to normal weighing mode.
ed in the WEIGHT window, Led.brn (LEd
13
Page 19

9.0 Displayed Messages
¯ ¯ ¯ ¯ ¯ ¯ Sca le overloaded
- - - - - - Too many accumulations or accumulated counts too high
_ _ _ _ _ _ Weight signal is too small
0¯ ¯ ¯ ¯ ¯ The zero point is too high
0_ _ _ _ _ The zero point is too low
EEP.Er0 The EEPROM can’t be accessed
EEP.Er1 The parameters in EEPROM are not same with backup data
EEP.Er2 The setting parameter(s) is not in normal range, or the parameter
has not been set
CAL.Err There is an error in calibration: maybe the loaded weight is too
small or the input weight is not correct.
Ad¯ ¯ ¯ ¯ Input signal of ADC is over max. range
Ad _ _ _ _ Input signal of ADC is below min. range;
CAP Displaying data relating to capacity
UoL Displaying data relating to voltage
Add The accumulated data
PC.t: Data about piece weight
SPL.PCS Data about sample pieces
uP.PCS Data about upper limit pieces
Lo.PCS Data about lower limit pieces
unLoAd Unload weight on the platter
InP.Ld Input loaded weight’s number
CAL.oN Calibration enable switch is ON
CAL.oFF Calibration enable switch is OFF
14
Page 20

10.0 Specifications
Model B130
Capacity 6kg/12lb
Display
Resolution
Max. Display
Weight
6kg x 0.2g
12lb x 0.0005lb
6.0018kg/
13.2320lb
15kg/30lb 30kg/60lb
15kg x 0.5g
30lb x 0.001lb
15.0045kg/33.079lb 30.009kg/
TARE Range 0-100% of full scale capacity
ZERO Range Power on:calibration zero point±10% of full scale
capacity;
Zero key:power on zero point±2% of full scale capacity
Count Display
0-16777216
Range
Conversion
1Lb=0.45359237kg or 1Kg=2.20462262Lb
factors
used for Kg and
Lb
Power supply
a). 12VDC 500mA output, with positive center, AC adapter
30kg x1g
60lb x 0.002lb
66.160lb
). 6V4A rechargeable lead-acid battery
b
Average working current:
120mA when LED’s brightness is set to 1
200mA when LED’s brightness is set to 2(default)
300mA when LED’s brightness is set to 3
Note: The LED life is shortened when set to level 3.
Note: The rechargeable battery is fully charged after 12 hours and the scale can work
continuously for approximately 20 hours. Once voltage drops below 5.7V, the Low Batt
annunciator lights. Once the voltage drops below 5.5V, the scale beeper will sound and
work for approximately two minutes before powering off.
When the scale is powered by the AC adapter, the AC annunciator will turn on.
When the battery is charging, the CHG annunciator lamp will be on.
15
Page 21

16
Page 22

UK and EUROPE
Salter Brecknell Weighing
P.O, Box 9533
Smethwick
West Midlands
B66 2TE
Tel: +44 (0) 870 444 6132
Fax: +44 (0) 870 010 2241
Email: sales@salterbrecknell.co.uk
Web Site: www.averyweigh-tronix.com
USA
Salter Brecknell Weighing Products USA
1000 Armstrong Drive
Fairmont, MN 56031
Toll free: 800-637-0529 Tel: 507-238-8702 Fax: 507-238-8271
Email: sales@salterbrecknell.com
www.salterbrecknell.com
 Loading...