

Page 1
Technical Information
R1
Date: January 1, 2002
Model: RSX 1065
Subject: Software Upgrade
The procedure to upgrade RSX 1065 software is accomplished with the use of the
Hyper Terminal computer communications program. Please contact your IT manager
if this program is not familiar to you.
Items needed for upgrade:
Computer with serial port connection
•
RS 232 cable with DB-9 to RJ-45 terminations (see attached drawing)
•
Upgrade software from www.Rotel.com
•
1. Make note of the software version that is shown on the front display by pressing
and holding the MUTE button on your remote control for 5 seconds.
2. Power off the RSX 1065 and remove all connections
3. Connect the RS 232 cable between the RSX 1065 and the computer
4. Remove the cover plate to reveal the software upgrade switches
5. Set the two software upgrade dip switches to the ON position
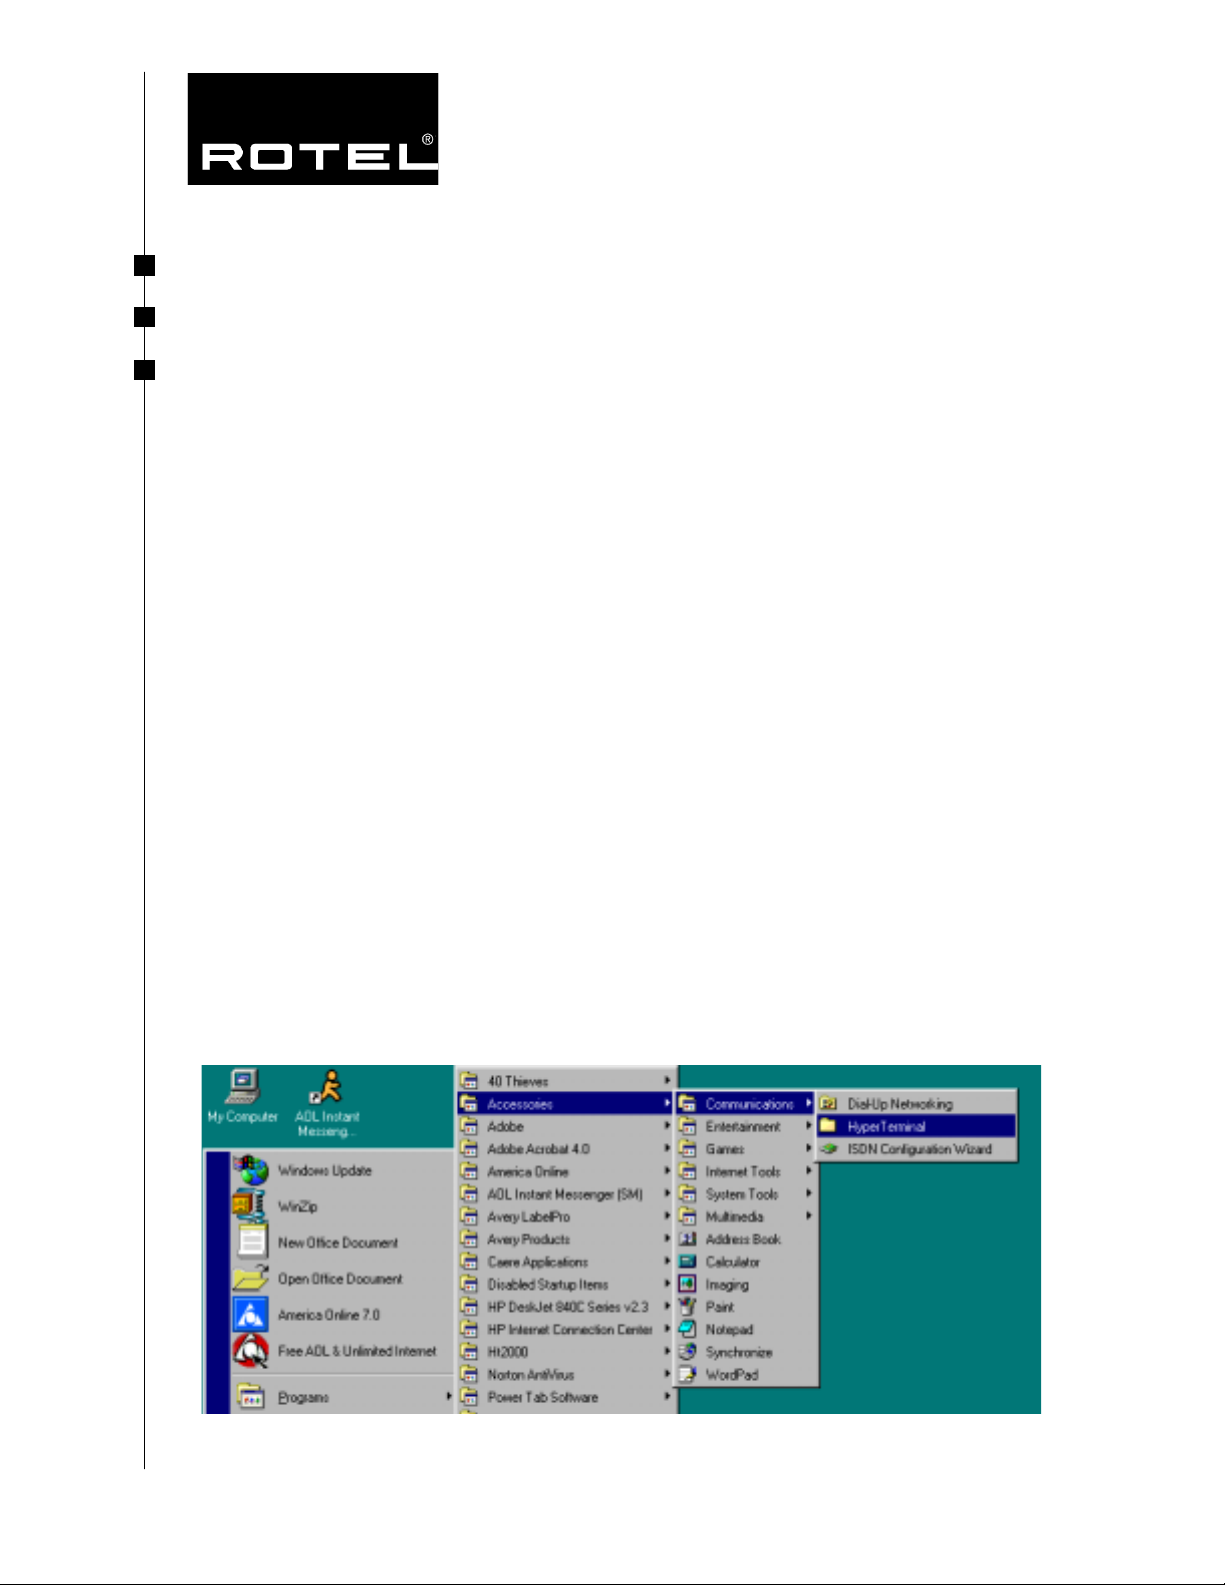
6. Launch the HyperTerminal computer program
OTEL OF AMERICA
R
54 C
ONCORD STREET
ORTH READING
N
, MA 01864 P
HONE
: 800-370-3741 FAX: 978-664-4109
Page 2
11/19/02 - Page 2
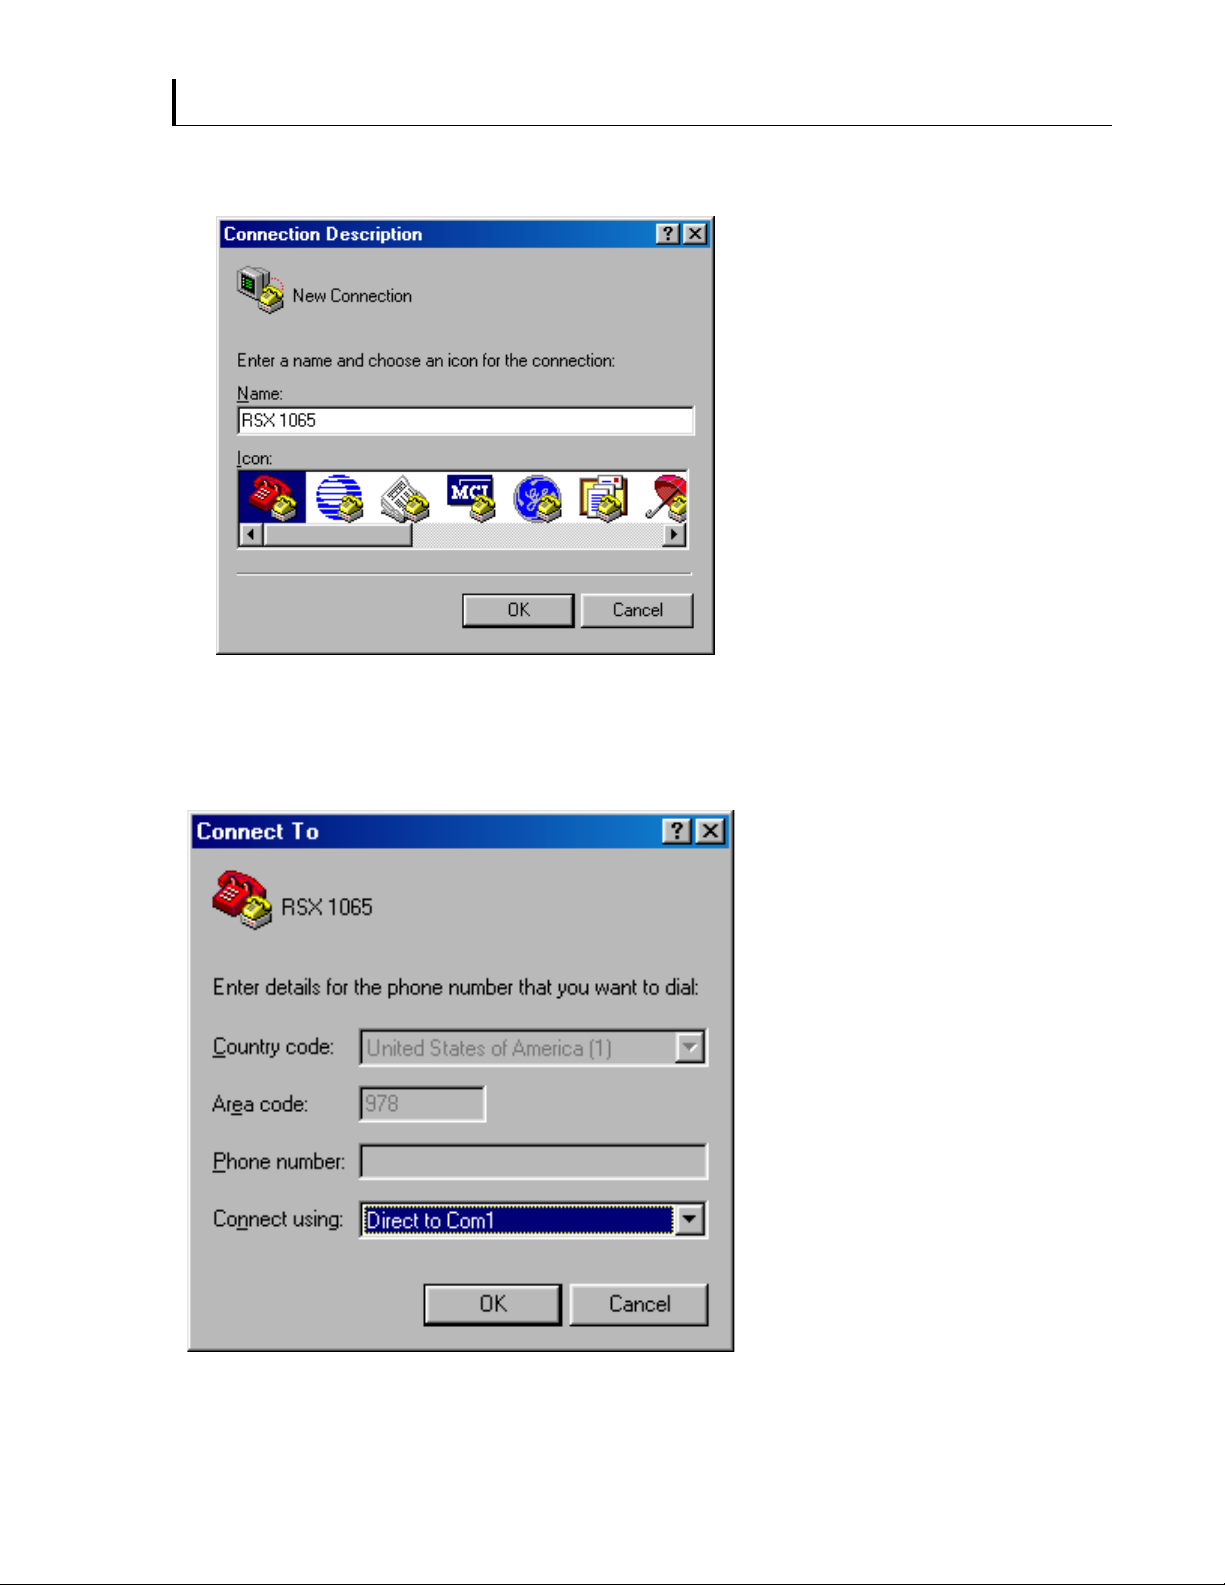
7. In the Connection Description menu, type RSX 1065, select an icon and click OK
8. In the Connect To menu, select Direct to Comm 1 and click OK
Page 3
11/19/02 - Page 3
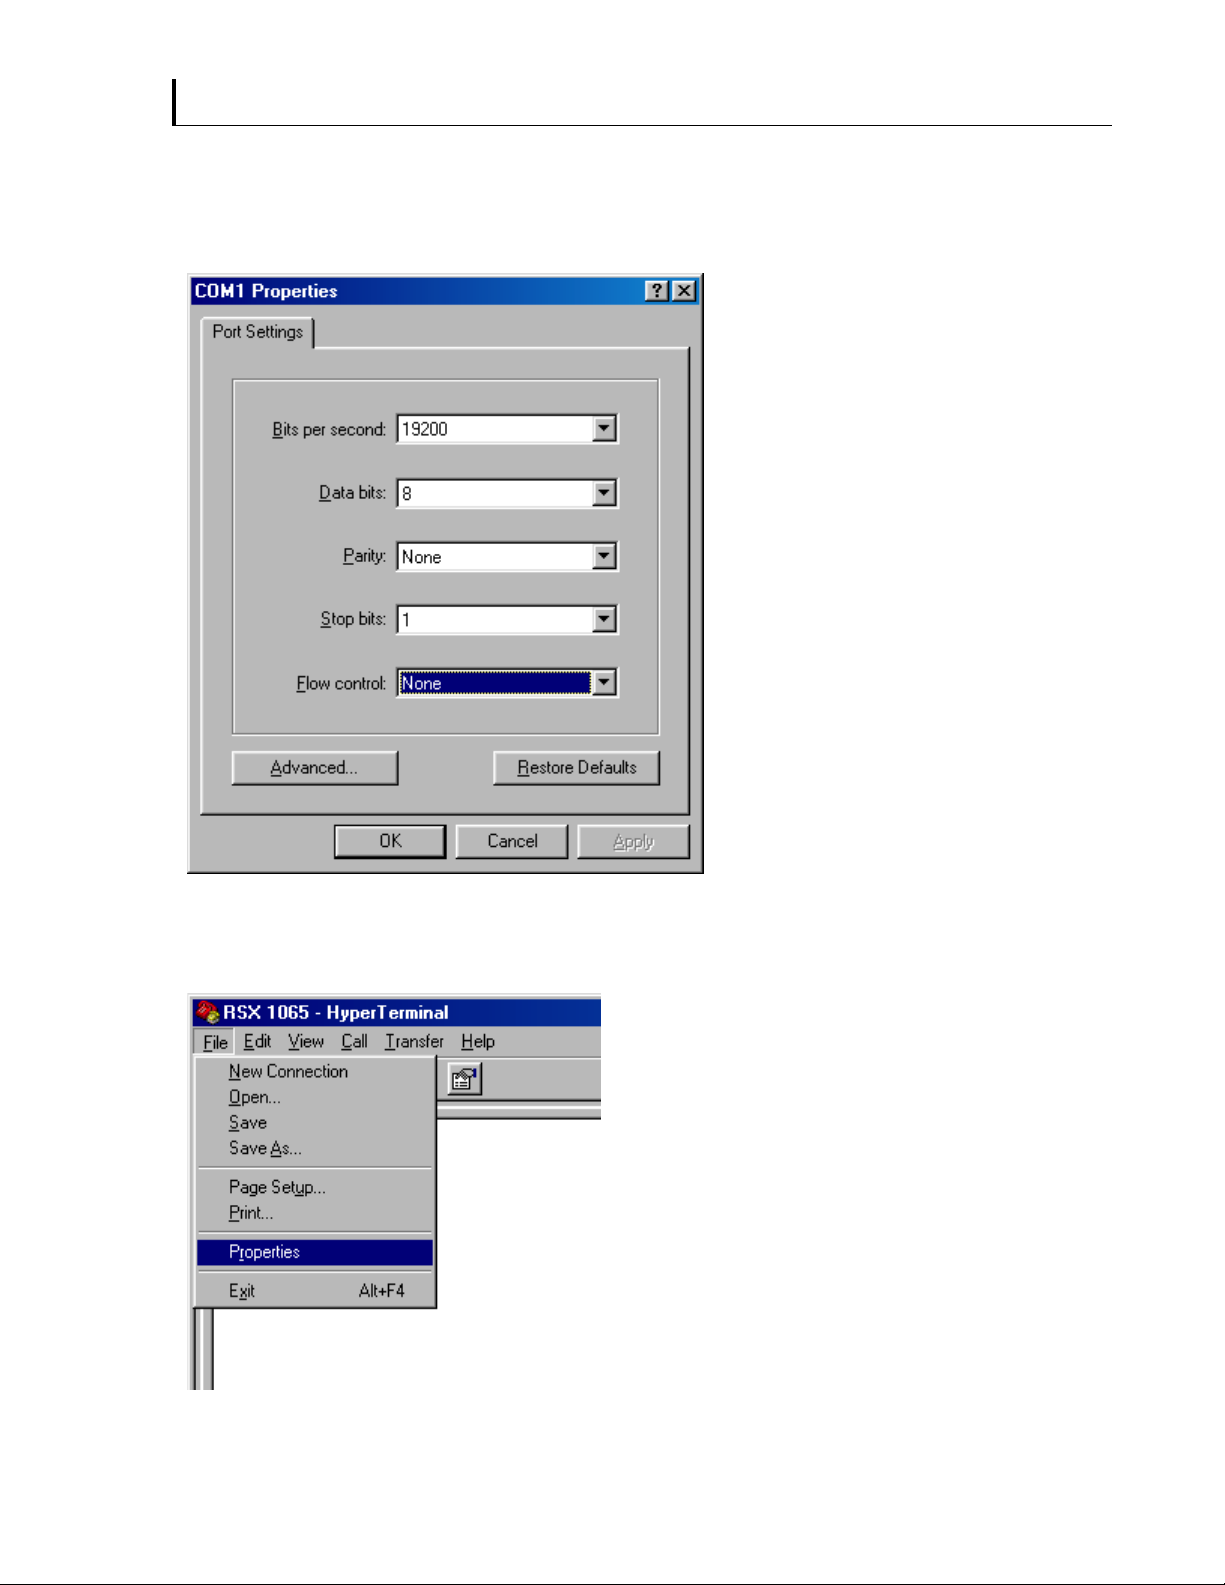
9. In the Comm 1 or 2 Properties menu, select 19200 Bits per second, 8 Data bits,
None Parity, 1 Stop bit, None Flow control and click OK
10. In the RSX 1065 Hyper Terminal window, click File and select Properties
Page 4

11/19/02 - Page 4
11. In the RSX 1065 Properties menu, click the Settings tab, set the Emulation to
VT100, and select ASCII setup
12. Select Append line feeds… and Wrap lines…click OK
Page 5

11/19/02 - Page 5
13. Click OK
14. Power on the RSX 1065 (there will be no front panel display on the receiver)
15. Press 1 on the computer keyboard (memory is erased)
Page 6

11/19/02 - Page 6
16. In the RSX 1065 HyperTerminal menu, click Transfer and select Send Text File
17. Select Look in to find RSX 1065 software file downloaded from the web site
18. Change Files of type to All files (*.*) and select R1065v13_20011205.bin
19. Click Open
Page 7

11/19/02 - Page 7
20. Software update will begin showing three lines of periods across the Hyper
Terminal screen
21. Instructions to verify check sum data will signify completion of the upgrade
22. Power off the RSX 1065 and disconnect the RS-232 cable
23. Return the two software upgrade dip switches to the off position and replace the
switch cover
24. Connect the output of RSX 1065 to a video monitor
25. Power on the RSX 1065 and verify that the software version on the front display
has been updated.
26. Using the DEFAULT menu on the On-Screen menu of the RSX 1065, perform a
factory default before using the newly loaded software. You may wish to write your
settings down prior to the default to save time recalibrating.
 Loading...