

Page 1
E-A7 Ver.2 Supplementary Manual
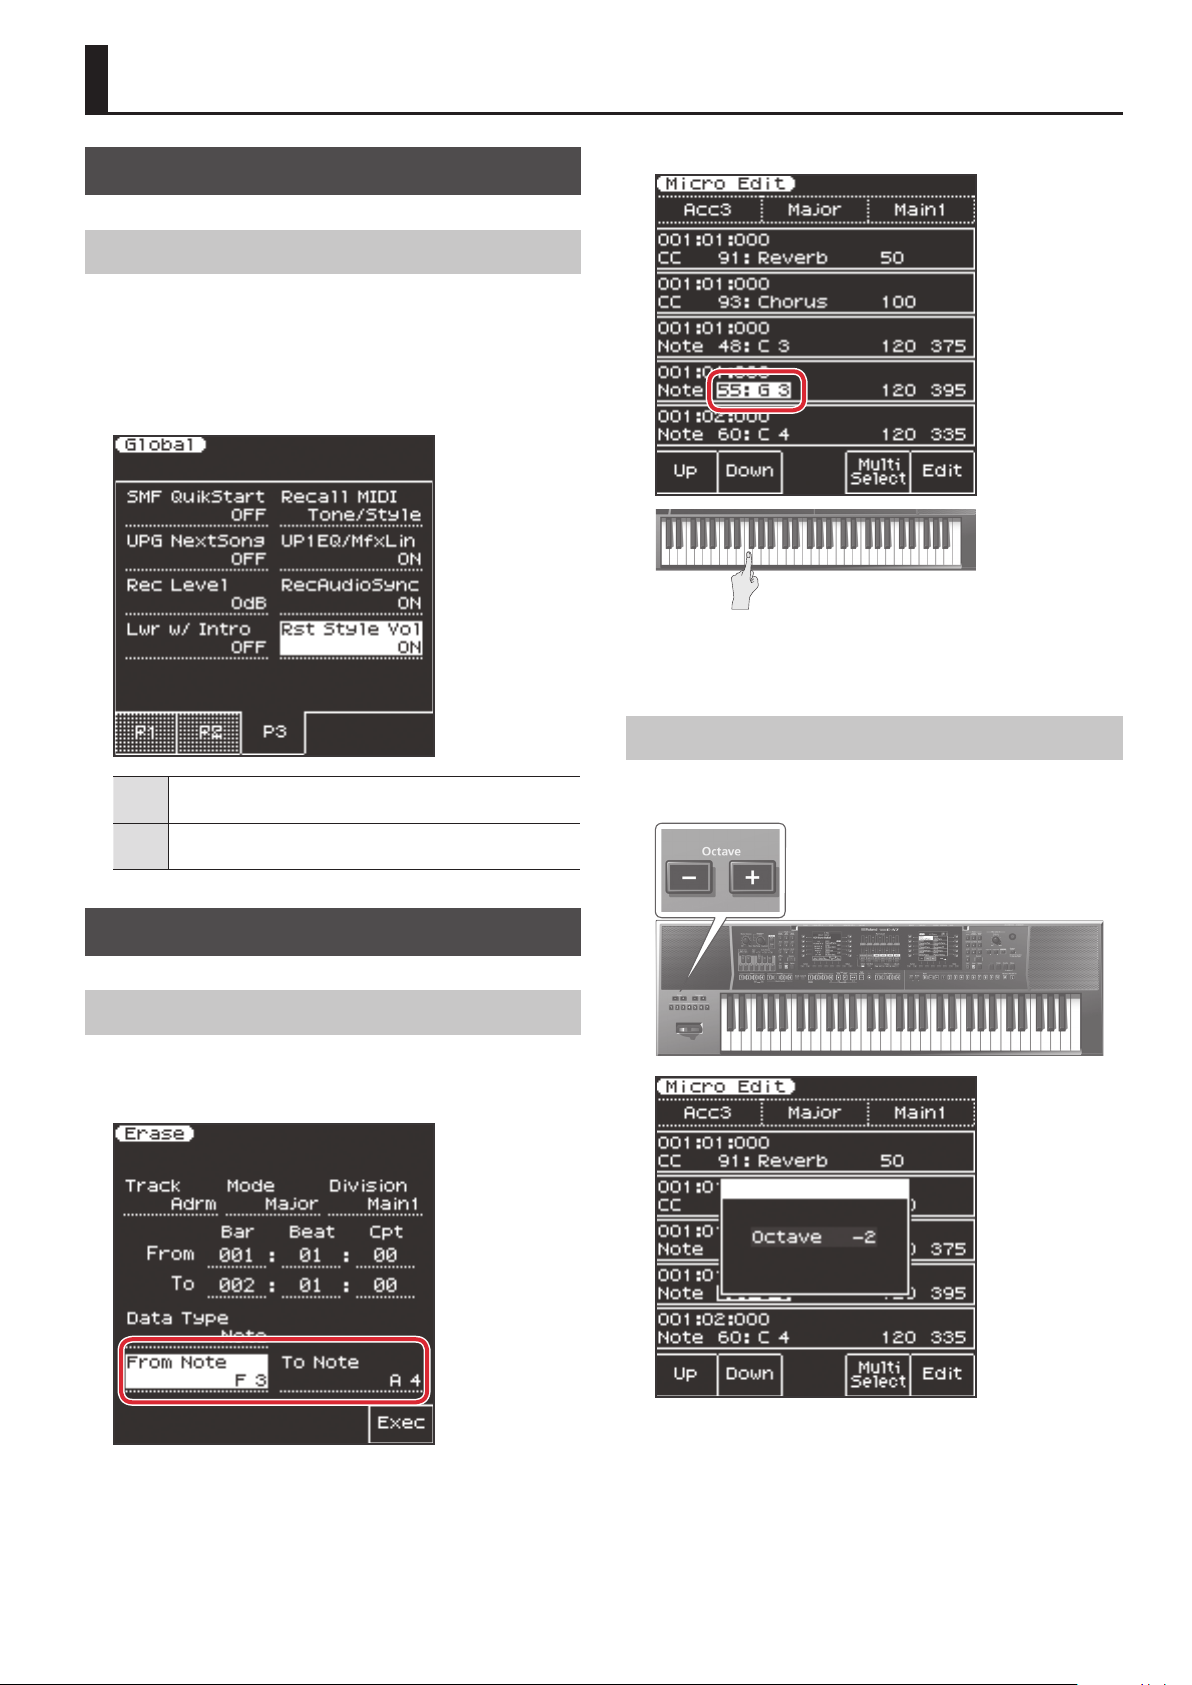
Example: the Micro Edit screen
Automatic Accompaniment (Style)
Resetting the Style Part Level
Now you can specify that the Style Part Level is automatically reset
when you change styles.
1. Press the [Menu] button, and choose
“Global”0“Rst Style Vol.”
2. Use the Value [-][+] buttons to change the setting.
1. While the Note value that you want to specify is
selected, press a key.
When you switch styles, all Style Part Level values are
ON
reset to 100.
When you switch styles, the Style Part Level values do
OFF
not change.
Style Composer
Using the Keyboard to Specify Notes
Now you can use the keyboard of the E-A7 to directly specify a
Note value when using the Style Composer.
Example: the Erase screen
Octave Buttons
Now you can use the Octave [-][+] buttons to change the octave
of the keyboard even while using the Style Composer.
1
01Copyright © 2017 ROLAND CORPORATION
Page 2
E-A7 Ver.2 Supplementary Manual
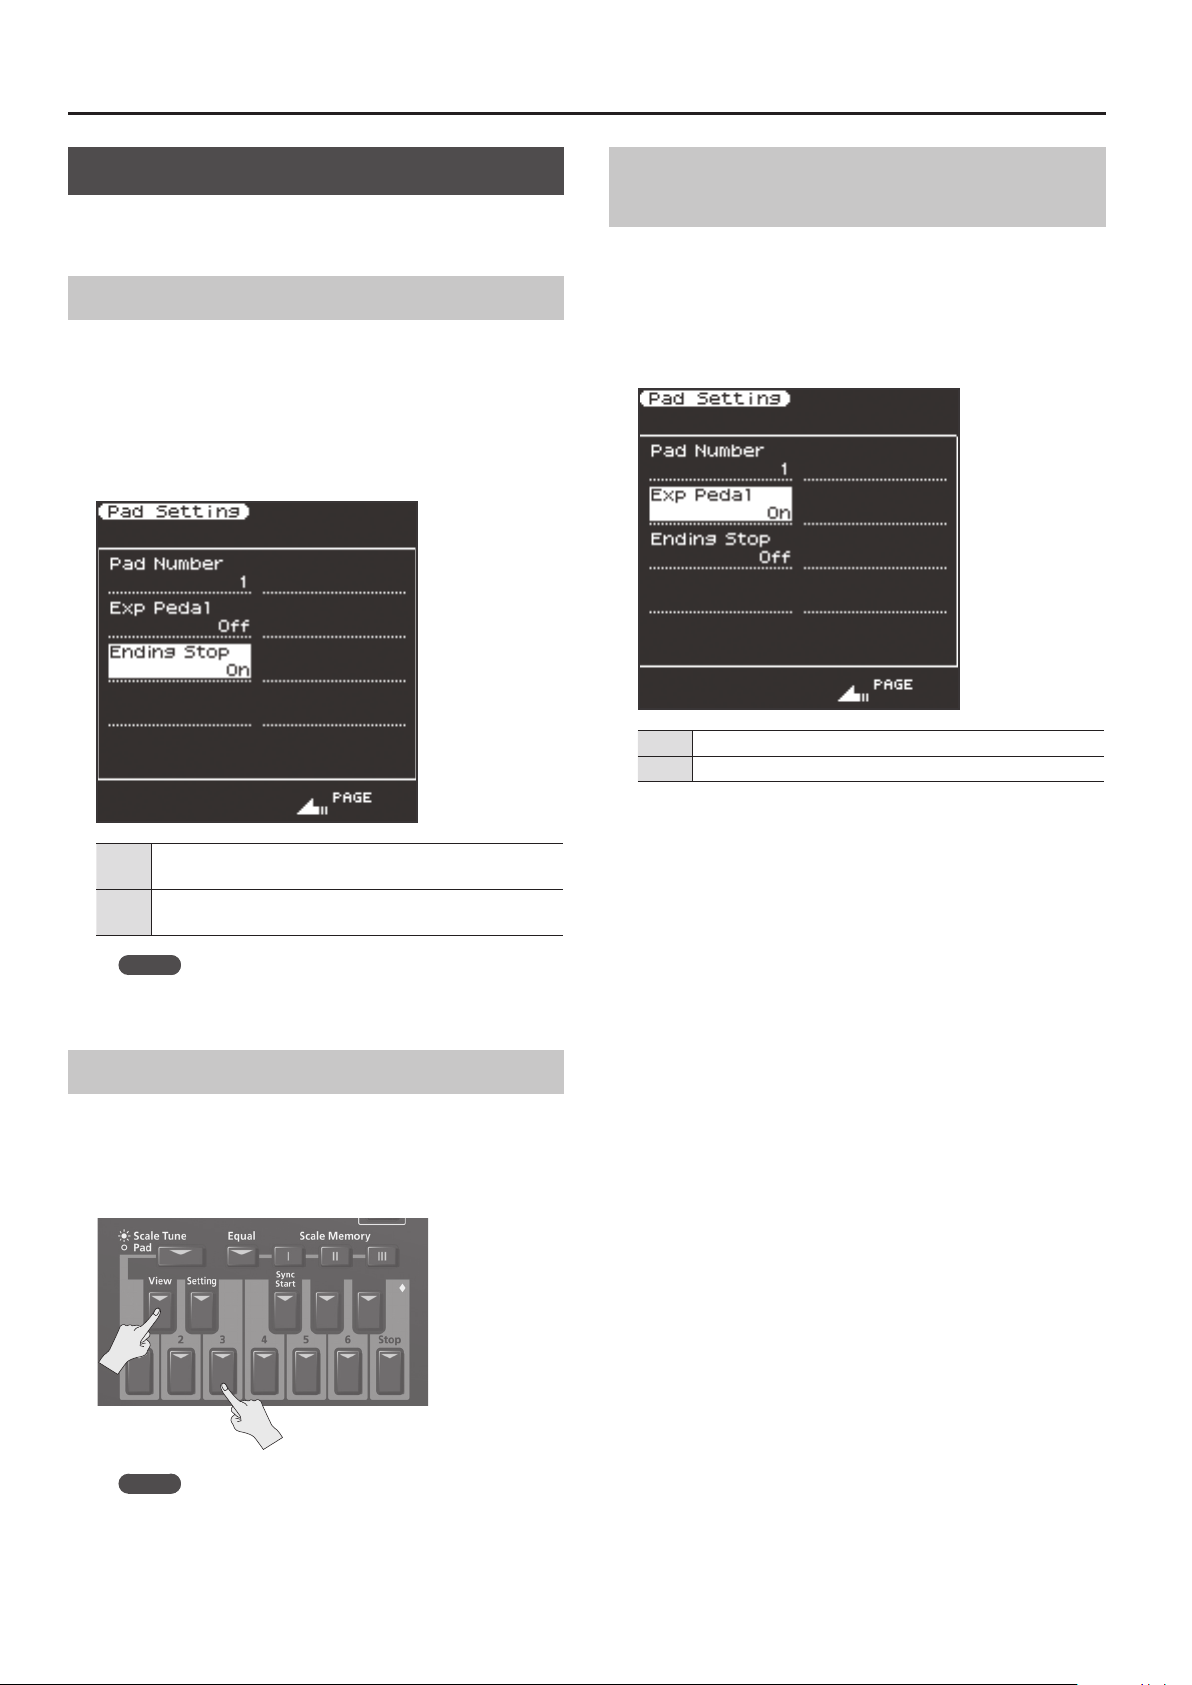
Pad
When the Scale Tune/Pad select button is set to [Pad] mode, you
can now perform the following operations.
Automatically Stop the Phrase
If a Style and a Pad (Phrase) are playing simultaneously, you can
now specify that the Phrase stops automatically when the Style
switches to the Ending.
1. Press the Pad [Setting] button to select “Ending
Stop.”
2. Use the Value [-][+] buttons to change the setting.
Using an Expression Pedal to Control a Pad’s
Volume
If an expression pedal is connected, you can now use the
expression pedal to control the pad’s volume.
1. Press the Pad [Setting] button, and choose “Exp
Pedal.”
2. Use the Value [-][+] buttons to change the setting.
On The Pad volume is also aected by the expression pedal.
O The Pad volume is not aected by the expression pedal.
When the Style switches to the Ending, the Phrase stops
On
automatically.
Even when the Style switches to the Ending, the Phrase
O
continues playing.
MEMO
This item is not shown for a Pad whose Pad Type is set to
“Tone.”
Shortcut in the Phrase Screen
A shortcut has been added to the Phrase select screen of each
Pad.
1. While holding down the Pad [View] button, press
one of the [1]–[6] buttons.
MEMO
This shortcut does not work for a Pad whose Pad Type is set
to “Tone.”
2
Page 3

User Tone/Drum Kit
Directly Specifying a Value as a Number
In the User Sample Tone/Drum Kit Edit screen, you can now
specify a value directly as a number.
1. In the UST/UDK Edit screen, select the parameter
that you want to specify as a number.
MEMO
When you select a parameter that can be specied directly
as a number, the [Numeric] button is lit.
2. Press the [Numeric] button.
The value of the setting blinks.
E-A7 Ver.2 Supplementary Manual
2. Select the UST/UDK items that you want to export,
and press [Enter].
3. Use the Tone [0]–[9] buttons to specify the value,
use the Value [-][+] buttons to specify the sign, and
then press [Enter].
MEMO
In the UST/UDK Edit screen, you can’t select the Tone
Category by pressing the Tone [0]–[9] buttons.
Exporting/Importing the User Sample Tones/
Drum Kits Collectively
MEMO
5 Each time you press <Select All>, you’ll alternate between
selecting and de-selecting all items.
5 Each time you press <UST/UDK>, you’ll switch between UST
and UDK.
3. Enter a le name and choose “Exec.”
The selected UST/UDK are exported together as a single le.
MEMO
The exported les are saved in the “My Sound” folder of the
USB ash drive with the name *.EAL.
To import
1. In the “My Sound” folder of the USB ash drive,
place the *.EAL le that you want to import.
2. Press the [Menu] button, and choose
“Utility”0“Import.”
The les that can be imported are shown.
3. Select the le that you want to import.
Now you can export or import multiple User Sample Tones or
Drum Kits as a single le.
To export
1. Press the [Menu] button, and choose
“Utility”0“Export.”
The UST/UDK select screen appears.
MEMO
Files that were exported as a collection of UST/UDK items
are shown with an “EAL” symbol.
3
Page 4

E-A7 Ver.2 Supplementary Manual
4. Select the UST/UDK items that you want to import,
and press [Enter].
5. Select the location into which you want to import
the items.
Sample
Importing a Sample from a Sub-Folder
Now you can also perform Sample Import from a sub-folder
within the IMPORT folder of the USB ash drive
1. Select a sub-folder within the IMPORT folder.
sub-folders
MEMO
5 The import locations are selected automatically, starting
with the smallest unused number. If you want to change the
location, temporarily clear the selection, and then re-select
it.
5 If you press <Reset>, all specied locations are cleared.
6. When you press [Enter], a conrmation message
appears; choose “ Ye s” if you want to execute, or
“No” if you want to go back.
2. Select a sample le within the sub-folder, and press
[Enter] to import it.
Specifying a Sample’s Fine Tune
Now you can use Fine Tune to make a detailed pitch adjustment
to individual samples.
Making settings from the Sample Edit screen
1. In the Sample Edit screen, choose “Fine Tune.”
2. Use the Value [-][+] buttons to adjust the value.
Value Explanations
-50–+50
Sample pitch (units of one cent = 1/100th of a
semitone)
3. Press the [Write] button to save the sample.
4
Page 5

E-A7 Ver.2 Supplementary Manual
Making settings from the Multisample Edit screen
1. In the Multisample Edit screen, select a key to
which a sample is assigned.
Use the E-A7’s keyboard to specify a key.
2. Choose “*Edit”
MIDI
Transmitting or Receiving Scale Tune Settings
Now you can transmit or receive the settings as MIDI data when
you press the Scale Tune button. This allows MIDI data containing
Scale Tune changes to be recorded and played back correctly.
1. Press the [Menu] button, and choose
“MIDI”0“Edit System”0“Parameters”0“Tx
Scale Dat.”
2. Use the Value [-][+] buttons to change the setting.
3. Use the Cursor [
and use the Value [-][+] buttons to change the
setting.
A
] button to select “Fine Tune,”
4. Press the [Write] button to save the multisample.
Samples for which you specied Fine Tune are saved at the same
time.
MEMO
In the Multisample Edit screen, you can also set Original Key
by choosing “*Edit”.
On Scale Tune settings are transmitted via MIDI.
O Scale Tune settings are not transmitted via MIDI.
MEMO
When MIDI data is played back, the Scale Tune settings
are reected correctly, but the status of the various button
indicators does not change.
5
 Loading...