

Page 1

Page 2

Contact Rockwell
Customer Support Telephone — 1.440.646.3434
Online Support — http://www.rockwellautomation.com/support/
Copyright Notice
© 2011 Rockwell Automation Technologies, Inc. All rights reserved. Printed in USA.
This document and any accompanying Rockwell Software products are copyrighted by
Rockwell Automation Technologies, Inc. Any reproduction and/or distribution without
prior written consent from Rockwell Automation Technologies, Inc. is strictly
prohibited. Please refer to the license agreement for details.
Trademark Notices
Allen-Bradley, Arena, ControlLogix, Datapac, FactoryTalk, Rockwell Automation,
Rockwell Software and the Rockwell Software logo are registered trademarks of
Rockwell Automation, Inc.
The following logos and products are trademarks of Rockwell Automation, Inc.:
RSLogix
Logix5000
Other Trademarks
ActiveX, Microsoft, Microsoft Access, SQL Server, Visual Basic, Visual C++, Visual
SourceSafe, Internet Explorer, Windows, Windows ME, Windows NT, Windows 2000,
Windows Server 2003, and Windows XP are either registered trademarks or
trademarks of Microsoft Corporation in the United States and/or other countries.
Ethernet is a registered trademark of Digital Equipment Corporation, Intel, and Xerox
Corporation.
All other trademarks are the property of their respective holders and are hereby
acknowledged.
Warranty
This product is warranted in accordance with the product license. The product’s
performance may be affected by system configuration, the application being
performed, operator control, maintenance, and other related factors. Rockwell
Automation is not responsible for these intervening factors. The instructions in this
document do not cover all the details or variations in the equipment, procedure, or
process described, nor do they provide directions for meeting every possible
contingency during installation, operation, or maintenance. This product’s
implementation may vary among users.
This document is current as of the time of release of the product; however, the
accompanying software may have changed since the release. Rockwell Automation,
Inc. reserves the right to change any information contained in this document or the
software at anytime without prior notice. It is your responsibility to obtain the most
current information available from Rockwell when installing or using this product.
Last Revised: January 17, 2011 15:54:52
Page 3

CONTENTS
FactoryTalk Historian Machine Edition Overview...............1
FactoryTalk Historian ME System Requirements...............3
System Requirements . . . . . . . . . . . . . . . . . . . . . . . . . . . . . . . . . . . 3
Software Requirements. . . . . . . . . . . . . . . . . . . . . . . . . . . . . . . . . . 3
Internet Options . . . . . . . . . . . . . . . . . . . . . . . . . . . . . . . . . . . . . . . 4
Hardware Requirements . . . . . . . . . . . . . . . . . . . . . . . . . . . . . . . . . 5
Client Tools Software (CD)....................................................5
Setting up Your ControlLogix Environment........................6
Installing the FactoryTalk Historian ME Module .................6
Installing FactoryTalk Historian ME Components ..............7
Installing FactoryTalk Services Platform . . . . . . . . . . . . . . . . . . . . 9
Installing FactoryTalk Historian ME Management . . . . . . . . . . . 10
Installing FactoryTalk Historian ME Rule Editor . . . . . . . . . . . . 10
Installing FactoryTalk Historian ME RSLogix 5000 Module Profile
(AOP) . . . . . . . . . . . . . . . . . . . . . . . . . . . . . . . . . . . . . . . . . . . . . . 10
Installing the FactoryTalk Historian SE Patch ..................11
Logging into FactoryTalk Historian ME.............................11
Setting Time in FactoryTalk Historian ME.........................13
• • •
Naming the FactoryTalk Historian ME Module..................15
Collecting Data.....................................................................16
Manage Points with the Add Points Wizard. . . . . . . . . . . . . . . . . 16
Discover Tags . . . . . . . . . . . . . . . . . . . . . . . . . . . . . . . . . . . . . . . . 17
Create Points . . . . . . . . . . . . . . . . . . . . . . . . . . . . . . . . . . . . . . . . . 19
Review Results . . . . . . . . . . . . . . . . . . . . . . . . . . . . . . . . . . . . . . . 21
Starting and Stopping Data Collection . . . . . . . . . . . . . . . . . . . . . 21
Viewing Data.........................................................................22
Current Data . . . . . . . . . . . . . . . . . . . . . . . . . . . . . . . . . . . . . . . . . 22
Archive Data . . . . . . . . . . . . . . . . . . . . . . . . . . . . . . . . . . . . . . . . . 23
Trends . . . . . . . . . . . . . . . . . . . . . . . . . . . . . . . . . . . . . . . . . . . . . . 24
Page 4

FACTORYTALK HISTORIAN ME QUICK ST ART GUIDE
• • •
Transferring Data.................................................................25
Adding Trusts to Your FactoryTalk Historian SE or PI Server . . 25
Time Synchronization. . . . . . . . . . . . . . . . . . . . . . . . . . . . . . . . . . 35
Transferring Data . . . . . . . . . . . . . . . . . . . . . . . . . . . . . . . . . . . . . 35
Data Transfer Points . . . . . . . . . . . . . . . . . . . . . . . . . . . . . . . . . . . 38
Selecting Points to Transfer . . . . . . . . . . . . . . . . . . . . . . . . . . . . . 38
Starting and Stopping Data Transfer . . . . . . . . . . . . . . . . . . . . . . 42
Page 5

FactoryTalk Historian Machine Edition Overview
FactoryTalk® Historian Machine Edition (ME) provides a
completely contained system for data storage and data collection.
The FactoryTalk Historian ME Module is inserted into a chassis
with one or more ControlLogix
Historian ME Module collects data across the backplane from the
ControlLogix controllers in the local chassis and stores it in a local
archive. System and data information can be viewed through the
FactoryTalk Historian ME web pages and standard Historian
clients.
The Factory Talk Historian ME Module can be integrated with the
following Rockwell Automation applications:
FactoryTalk VantagePoint: By integrating FactoryTalk Historian
ME with FactoryTalk VantagePoint and FactoryTalk VantagePoint
EMI, you can view your process data from the FactoryTalk
Historian ME in VantagePointExcel reports, dashboards, and
portals, and integrate the FactoryTalk Historian ME data into the
VantagePoint model. This allows you to correlate the data with
various other data sources.
FactoryTalk Historian ProcessBook: By integrating FactoryTalk
Historian ME with FactoryTalk Historian ProcessBook, you can
view your process data from FactoryTalk Historian ME as well as
in FactoryTalk Historian ProcessBook. This allows you to visualize
the data in trends and other graphical components.
FactoryTalk Historian DataLink: By integrating FactoryTalk
Historian ME with the Excel add-in FactoryTalk Historian
DataLink, you can develop Excel reports based on the data in
FactoryTalk Historian ME.
FactoryTalk Services Platform: By integrating FactoryTalk
Historian ME with FactoryTalk Security, all users and groups can
be maintained from a central location.
Note: FactoryTalk Historian ME can be integrated with FactoryTalk
Services Platform CPR9 SR2. If you are using FactoryTalk Services
Platform CPR9 SR1, you must upgrade to FactoryTalk Services Platform
CPR9 SR2 by installing the FactoryTalk Services Platform CPR9 SR2
provided on the FactoryTalk Historian ME Client Tools CD that was
shipped with your FactoryTalk Historian ME Module. You must use the
®
controllers. The FactoryTalk
1
Page 6

FACTORYTALK HISTORIAN ME QUICK ST ART GUIDE
• • •
custom install and select the web services (for details, refer to the
FactoryTalk Services Platform release notes. You must also have Internet
Integration Services (IIS) installed on the FactoryTalk Directory computer.
FactoryTalk Historian SE: By integrating FactoryTalk Historian
ME with FactoryTalk Historian SE, you can transfer the data logged
by FactoryTalk Historian ME to FactoryTalk Historian SE for long
term storage and analysis.
PI Server: By integrating FactoryTalk Historian ME with a PI
server, you can transfer the data logged by FactoryTalk Historian
ME to a PI server for long term storage and analysis. FactoryTalk
Historian ME supports Open PI Server versions 3.4.375.80 and
3.4.380.36.
Note: FactoryTalk Historian ME can be integrated with FactoryTalk
Historian SE 2.1 and above or a PI server. If you choose to install
FactoryTalk Historian SE 2.1 or higher, a patch must be installed on the
FactoryTalk Historian SE systems in your network that will be used with
FactoryTalk Historian ME. See page 11 for more information.
FactoryTalk View SE: You can use the FactoryTalk View SE
Trending object to trend data logged in FactoryTalk Historian ME.
This document describes:
“FactoryTalk Historian ME System Requirements”
“Client Tools Software (CD)”
“Setting up Your ControlLogix Environment”
“Installing the FactoryTalk Historian ME Module”
“Installing FactoryTalk Historian ME Components”
“Installing the FactoryTalk Historian SE Patch”
“Logging into FactoryTalk Historian ME”
“Setting Time in FactoryTalk Historian ME”
“Naming the FactoryTalk Historian ME Module”
“Collecting Data”
“Viewing Data”
“Transferring Data”
2
Page 7

FACTORYTALK HISTORIAN ME SYSTEM REQUIREM ENTS
FactoryTalk Historian ME System Requirements
Before installing FactoryTalk Historian ME, determine your
platform requirements and configuration environment. The
following information offers some guidelines as you begin
planning.
System Requirements
The hardware and software requirements for FactoryTalk Historian
ME depend on the demands an application places on the system.
The greater the demand, the more powerful a system must be to
support this demand. For large or complex applications, use
computers with faster CPUs and more RAM. In addition to this,
there should always be sufficient disk space to provide virtual
memory that is at least twice the size of the physical RAM.
Software Requirements
Windows Vista SP1 or Windows XP SP2 or SP3
Microsoft Excel 2003 or newer for FactoryTalk Historian
DataLink
Note: Windows Vista is only supported for the FactoryTalk Historian ME
web browser and FactoryTalk Historian ME VantagePoint. It is not
supported for DataLink and ProcessBook.
• • •
Windows Server 2003 SP2
Microsoft Internet Explorer (IE) 6.0, 7.0, or 8.0 (in
compatibility mode). There are no specific requirements for IE
7.0. For IE 6.0, the requirements are as follows:
Windows XP SP2
If the \windows\system32\mshtml.dll file has a version
that is less than or equal to 6.0.2900.2180 or a date that is
before or equal to 08/03/2004, apply this patch:
KB974455 (10/12/09) http://www.microsoft.com/
downloads/
details.aspx?displaylang=en&FamilyID=8101625dee93-46e5-aec2-3bdbf2d86472.
3
Page 8

FACTORYTALK HISTORIAN ME QUICK ST ART GUIDE
• • •
After the patch has been applied, the
\windows\system32\mshtml.dll file will have a version of
6.0.2900.3627 and a date of 09/24/2009.
Windows XP SP3
If the \windows\system32\mshtml.dll file has a version
that is less than 6.0.2900.5512 or a date that is before 04/
14/2008, apply this patch: KB974455 (10/12/09) http://
www.microsoft.com/downloads/
details.aspx?displaylang=en&FamilyID=8101625dee93-46e5-aec2-3bdbf2d86472.
After the patch has been applied, the
\windows\system32\mshtml.dll file will have a version of
6.0.2900.5880 and a date 09/24/2009.
Windows Server 2003 SP2
The minimum supported version is 6.0.3790.3959.
If the IE 6.0 version is less than the minimum supported
version, apply the following patch: KB974455 SP2 (10/
12/09) http://www.microsoft.com/downloads/
details.aspx?displaylang=en&FamilyID=8101625dee93-46e5-aec2-3bdbf2d86472.
If you want to view any of the installation videos included on
the Client Tools CD, you must have Adobe Flash Player
installed on your system.
Internet Options
The location of your Internet Options settings may very according
to which operating system you are using. However, in general, you
should:
Disable any popup blocks to view online help.
Select the Local Intranet icon (generally located under
Security settings), and click [Sites] to use the default setting,
“Automatically detect internet network”.
Use the default Security level for this zone. In general, the
settings should remain at the default level and the setting
should not be changed. Use the medium-low default setting.
4
Page 9

CLIENT TOOLS SOFTWARE (CD)
Enable the following settings
Binary and script behaviors
Run ActiveX controls and plug-ins
Script ActiveX controls marked safe for scripting
If you are using Internet Explorer 8.0 in compatibility mode,
you must enable the security setting for Include local directory
path when uploading files to a server.
Hardware Requirements
ControlLogix Chassis Requirements
1756-HIST1G Module or 1756-HIST2G Module
ControlLogix 55xx (1756-Lxx) version 13 or higher
RSLogix 5000
ENBT/EN2T Module
Chassis
Client Computer Requirements
Power supply
Intel Pentium III, 600MHz, 512MB RAM (minimum) or Intel
Celeron, 3 GHz or higher, (recommended), 1GB of RAM or
more
Mouse or compatible pointing device
• • •
Client Tools Software (CD)
Your FactoryTalk Historian ME module package includes a client
tools software CD that contains the following components:
Acrobat Reader
FactoryTalk Historian ME Management CRP9 SR2 (Admin
Console)
FactoryTalk Services Platform CPR9
Getting Started Videos
FactoryTalk Historian ME RSLogix 5000 Module Profile
(AOP)
FactoryTalk Historian ME Rule Editor
5
Page 10

FACTORYTALK HISTORIAN ME QUICK ST ART GUIDE
• • •
RSLinx Classic
RSLogix 5000 Clock Update Tool
User Documentation
Setting up Your ControlLogix Environment
Perform the following steps to set up your ControlLogix
environment before installing FactoryTalk Historian ME.
1. Set up the ControlLogix chassis.
2. Insert the ControlLogix controller(s) into the chassis.
3. Power on the system.
4. Configure the ControlLogix device(s).
Refer to your ControlLogix Chassis and ControlLogix Controller
documentation for more detailed information.
Installing the FactoryTalk Historian ME Module
FactoryTalk Historian ME has two part numbers:
1756-HIST1G
1756-HIST2G
The 1G or 2G in the part number indicates how much data storage
is associated with the FactoryTalk Historian ME Module.
Unpack the FactoryTalk Historian ME Module and insert it into the
chassis.
Refer to your FactoryTalk Historian ME Installation Instructions for
more detailed information.
6
Page 11

INSTALLING FACTORYTALK HISTORIAN ME COM PONENTS
Installing FactoryTalk Historian ME Components
If you plan to use FactoryTalk Historian ME Client Tools, such as
the FactoryTalk Historian ME Rule Editor, FactoryTalk Directory,
and/or FactoryTalk Security, then these components must be
installed before you continue. If you do not plan to use FactoryTalk
Historian Client Tools, then skip to “Logging into FactoryTalk
Historian ME” on page 11.
After you have selected the platform that best suits your needs and
have installed the FactoryTalk Historian ME Module into the
chassis, you must determine the configuration environment for the
FactoryTalk Historian ME components. These components, or
FactoryTalk Historian Client Tools, can be found on the CD that
was shipped with the FactoryTalk Historian ME Module.
Insert the CD into your computer’s CD drive. If autoplay is turned
on, the FactoryTalk Historian ME installation screen will
automatically launch and display the FactoryTalk Historian ME
installation options. If the screen does not automatically launch,
click Start > Run and type D:\setup, where D is the letter of your
CD drive.
• • •
7
Page 12
FACTORYTALK HISTORIAN ME QUICK ST ART GUIDE
• • •
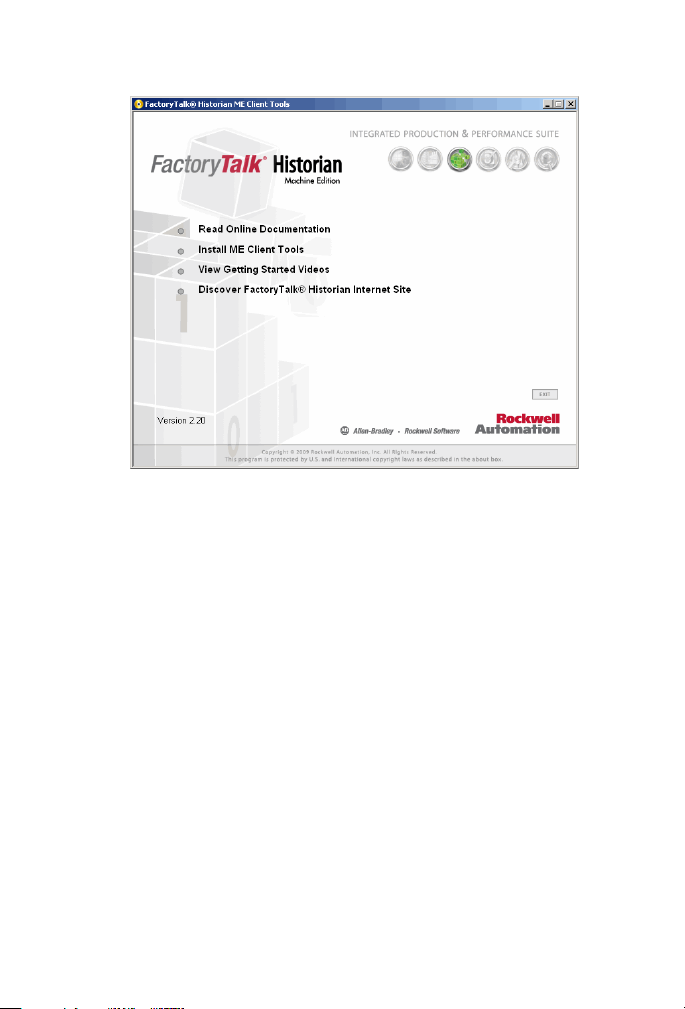
To access the FactoryTalk Historian ME Client Tools, click Install
ME Client Tools from the main menu. This takes you to the
Installation menu. This menu allows you to perform the following
tasks:
“Installing FactoryTalk Services Platform”
“Installing FactoryTalk Historian ME Management”
“Installing FactoryTalk Historian ME Rule Editor”
“Installing FactoryTalk Historian ME RSLogix 5000 Module
Profile (AOP)”
8
Page 13

INSTALLING FACTORYTALK HISTORIAN ME COM PONENTS
In addition to these FactoryTalk Historian ME components, the
FactoryTalk Historian ME online documentation, release notes,
user documentation, and Getting Started videos are also available
on the CD.
• • •
Installing FactoryTalk Services Platform
This option installs FactoryTalk Services Platform (FTSP) CPR9
(Service Release 2). FTSP is an underlying architecture and set of
common services that Rockwell Automation products build upon.
FTSP must be installed on the computer that hosts the FactoryTalk
Directory Server and all computers that are part of the FactoryTalk
directory, including the FactoryTalk Historian SE and all clients.
FTSP is also required if you plan to use FactoryTalk Security.
However, it is optional if you plan to use native security.
The following components and services are installed as part of the
platform:
FactoryTalk Directory organizes project information from
multiple FactoryTalk products across multiple computers on a
network. It allows products to share a common address book,
which finds and provides access to plant-floor resources, such
9
Page 14

FACTORYTALK HISTORIAN ME QUICK ST ART GUIDE
• • •
as data tags and graphic displays. FactoryTalk Historian ME
supports a network directory only.
FactoryTalk Security can be used to secure your FactoryTalk
network after installing FTSP SR2. Select the “custom” option
to install the FTSP Web Services component. Microsoft’s
Internet Information Server (IIS) must be installed and
configured before you install FTSP. Please refer to the
FactoryTalk Security System Configuration Guide for more
information about IIS. This must be installed on the computer
that hosts the FactoryTalk Directory Server and on the
secondary server configured for the FactoryTalk Historian SE
module. Please refer to the FTSP online help for more
information.
Installing FactoryTalk Historian ME Management
The Management option installs the FactoryTalk Administration
Console add-on. It provides a method of configuring, managing,
and securing applications.
Installing FactoryTalk Historian ME Rule Editor
The Rule Editor allows you to create and edit user-defined rules for
the point discovery process. The selections you make in the dialog
box are automatically written to this file. The data points matching
these rules are found and added to the FactoryTalk Historian ME
module. You can upload the Rule File to the FactoryTalk Historian
ME Module using the FactoryTalk Historian ME Upload Manager
feature.
See Using the FactoryTalk Historian ME Rule Editor in the
FactoryTalk Historian ME User’s Guide for more information.
Installing FactoryTalk Historian ME RSLogix 5000 Module Profile (AOP)
The RSLogix 5000 Add-on Profile (AOP) enables integration
between a ControlLogix controller and the FactoryTalk Historian
ME module. Please refer toRSLogix 5000 Add-on Profile in the
10
Page 15

INSTALLING THE FACTORYTALK HISTORIAN SE PATCH
FactoryTalk Historian ME User’s Guide for information on
installing the FactoryTalk Historian AOP component.
Installing the FactoryTalk Historian SE Patch
FactoryTalk Historian ME can be integrated with FactoryTalk
Historian SE 2.1 or 2.2 after you have installed the FactoryTalk
Historian SE patch. Once installed, FactoryTalk Historian ME can
work with FactoryTalk Historian SE to collect, store, analyze, and
visualize data using reporting tools such as time-series trends, bar
charts, pie charts, pareto, and tabular trends.
The FactoryTalk Historian SE patch must be installed on the
FTDirectory and any other computer that will be administering the
FactoryTalk Historian ME module through the FactoryTalk
Administrative Console. The patch is not necessary for machines
with FactoryTalk Historian SE 2.2.
You can download the FactoryTalk Historian SE patch from http://
www.support. rockwellautomation.com, KnowledgeBase answer
ID 63530.
Logging into FactoryTalk Historian ME
• • •
Access the FactoryTalk Historian ME module through Microsoft
Internet Explorer.
1. Start Internet Explorer.
2. Enter the IP address of the FactoryTalk Historian ME Module
in the Address field. The IP address scrolls across the LED
display on the front panel of the FactoryTalk Historian ME
Module.
11
Page 16

FACTORYTALK HISTORIAN ME QUICK ST ART GUIDE
• • •
3. Click [Go] to the right of the Address field, or click [Enter].
This opens the login page.
4. Enter the default user name “piadmin” and leave the password
field blank.
5. Click [Login]. The FactoryTalk Historian ME home page
appears.
12
Page 17

SETTING TIME IN FACTORYTALK HISTORIAN ME
After logging in, it is highly recommended that you change the
password for the default “piadmin” user. See the FactoryTalk
Historian ME User’s Guide or online help for more information.
If you are using FactoryTalk Security in your network environment,
see the FactoryTalk Historian ME User’s Guide for information on
setting up FactoryTalk Security before continuing.
• • •
To prevent unauthorized access, click Logout before closing the
browser. If you just close the browser without clicking Logout, then
another user can access FactoryTalk Historian ME if the cookie
has not expired. The credential times out after twenty minutes of
inactivity. Do not have multiple users accessing FactoryTalk Historian ME
from the same client computer.
Setting Time in FactoryTalk Historian ME
It is very important that all components are set to a synchronized
time. Depending on your environment, you may need to
synchronize the following components:
13
Page 18

FACTORYTALK HISTORIAN ME QUICK ST ART GUIDE
• • •
FactoryTalk Historian SE or PI server computer
FactoryTalk Historian client computers
FactoryTalk Historian ME modules
Logix controller
Before you begin collecting data with FactoryTalk Historian ME, it
is important that you set the correct time. Follow these steps to set
the time in FactoryTalk Historian ME.
1. Click on Advanced in the top navigation bar.
2. Click on Time Management in the left-hand navigation bar.
The Module’s Current Time field displays the FactoryTalk
Historian ME Module’s current time when you opened the
page. To update the time, click [Refresh] on your browser’s
toolbar.
The FactoryTalk Historian ME Module’s current time cannot be
edited in the Module’s Current Time field. To edit the FactoryTalk
Historian ME Module's current time, select the Manual Set option
and enter a date and time in the data field. When you click [Save],
the Module's Current time field is updated.
3. Select one of the following time settings:
14
Time Source Description
Controller Time Click the radio button next to Controller
Time and select a controller from the dropdown menu.
NTP Server Click the radio button next to NTP Server
and enter the IP address or host name of
the NTP Server. If you choose this option,
FactoryTalk Historian ME will
periodically check the NTP Server to
synchronize the time setting.
Page 19

NAMING THE FACTORYTALK HISTORI AN ME MODULE
Time Source Description
• • •
FactoryTalk
Historian SE/PI
Server
Manual Set Click the radio button next to Manual Set
Click the radio button next to Historian
SE/PI Server to synchronize the
FactoryTalk Historian ME Module time
with the FactoryTalk Historian SE or PI
Server time. The FactoryTalk Historian
server must be configured as an NTP
server for this to work.
to set the date and time of the FactoryTalk
Historian ME Module manually. By
default, the current date and time of the
browser client is displayed in the data
field. Note: Manual Set does not
synchronize with another time source.
4. Set the time zone by choosing a region and city from the dropdown menu.
5. Click [Save] to set the entered time data.
Note: You will see a dialog to notify you that the module will be rebooted
automatically. Click [OK].
Naming the FactoryTalk Historian ME Module
The default module name is prepended to the FactoryTalk Historian
ME module serial number. This guarantees a unique name. This is
especially important when performing data transfer to a
FactoryTalk Historian SE or PI server. The FactoryTalk Historian
ME module name is prepended to the FactoryTalk Historian ME tag
name to create the FactoryTalk Historian SE or PI server tag name.
This provides uniqueness and context to the tag. The module name
is also used as the DNS host name of the module and should be
unique on the network.
1. Click on Advanced in the top navigation bar.
15
Page 20

FACTORYTALK HISTORIAN ME QUICK ST ART GUIDE
• • •
2. Click on System Settings in the left-hand navigation bar.
3. Enter a name in the Module Name field. The name should be
descriptive enough to make it easily identifiable. This is
especially useful when transferring data to a FactoryTalk
Historian SE or PI server. The module name is limited by the
following:
Maximum of 64 alpha numeric characters in the name.
No special characters (e.g., !, @, #, $, %, ^, &, *) are
allowed.
Must be unique in relation to other FactoryTalk Historian
ME Modules on the same network.
4. After entering a new FactoryTalk Historian ME Module name,
click [Save]. A dialog appears asking you to confirm that you
want to change the module name. If you are sure, click [OK].
After the name change takes effect, an informational message
appears at the top of the screen informing you that the
module's name has been changed and that you must now stop
and restart data transfer.
Collecting Data
FactoryTalk Historian ME is integrated with the FactoryTalk suite
of products and ControlLogix devices. The integration with
ControlLogix hardware and software provides easy and secure
access to resources (data, status, and configuration) within the
ControlLogix processors.
Before the FactoryTalk Historian ME module can collect data from
the ControlLogix processors, points must first be created in the
FactoryTalk Historian ME module. The Add Points Wizard allows
you to create points in FactoryTalk Historian ME corresponding to
tags in the ControlLogix processors. It displays the results of this
search in a table contained within the Create Points page.
Manage Points with the Add Points Wizard
The Add Points Wizard guides you through the process of
discovering tags in ControlLogix processors and using these tags to
16
Page 21

COLLECTING DATA
create corresponding points in FactoryTalk Historian ME. There are
three main steps involved in the Add Points Wizard process:
Main Steps Description
1. Discover Tags In this step you set the parameters for
discovering tags.
2. Create Points In this step you decide which tags you
want to use to create points.
3. Review Results In this step you review the number of
points created, the number of points not
created, and the total number of points in
FactoryTalk Historian ME.
To open the Add Points Wizard, click on Manage Points in the top
navigation bar. The Add Points Wizard opens automatically.
• • •
Discover Tags
The Add Points Wizard feature searches the ControlLogix
processors for tag information.
17
Page 22

FACTORYTALK HISTORIAN ME QUICK ST ART GUIDE
• • •
Follow these steps to set the search parameters for the Add Points
Wiz ard and begin searching for tags.
1. Select a Rule File.
This file determines which points will be discovered by the
Add Points Wizard. You can view the Rule File by clicking the
icon to the right of the Rule File data field. Rule Files are
managed through the Discovery Rule Editor (one of several
optional tools available on the Client Tools CD that was
shipped with your FactoryTalk Historian ME Module). Use the
Discovery Rule Editor to create and edit Rule Files that you
can upload to the module. See Discovery Rule Editor in the
FactoryTalk Historian ME User’s Guide for more information.
2. Select a Tag File.
This file determines the attributes of the points to be created.
You can view the tag attributes by clicking the icon to the right
of the file name. Tag attribute files are managed through the
Rule Editor. Use the Rule Editor to create and edit tag attribute
files. See Discovery Rule Editor in the FactoryTalk Historian
ME User’s Guide for more information.
Note: If you are using the custom Tag file, select Default so that the scan
rate is pulled from the Tag file and is not overwritten by this setting.
18
3. Set the Scan Rate.
This is the rate (in seconds) at which the data will be collected.
See Scan Class in the FactoryTalk Historian ME User’s Guide
for more information.
4. Choose which processors to search. To include a ControlLogix
processor in the tag search, click the checkbox next to its
name.
Under Start Search In, all online ControlLogix processors are
displayed. FactoryTalk Historian ME supports data collection
from a maximum of four ControlLogix processors.
5. Click [Show Tags] to search for tags in the selected
processor(s).
Page 23

COLLECTING DATA
Note: If a large amount of data is being transferred from the Controller to
the module when the module is going through an initial bootup, please
wait about five to ten minutes before trying to access the FactoryTalk
Historian ME web interface.
• • •
Create Points
After the Add Points Wizard searches the ControlLogix processors
and successfully retrieves the matching tags based on the criteria set
in the Discover Tags operation, you can then use the generated tags
to create the corresponding points in FactoryTalk Historian ME.
The Search Results table contains the following information.
Column Name Column Description
Select This column displays checkboxes that
allow you to select or clear tags. Click the
All/None checkbox below the table to
select or clear all tags.
19
Page 24

FACTORYTALK HISTORIAN ME QUICK ST ART GUIDE
• • •
Column Name Column Description
Name This column displays the name of the tag
found in the ControlLogix Controller. The
tag name is a combination of the
ControlLogix project name added as the
prefix to the controller tag name.
Typ e This column displays the ControlLogix
datatypes for the tags. See Datatypes in the
FactoryTalk Historian ME User’s Guide
for more information.
Rate (sec) This column displays the current scan rate
in seconds for each tag. To change the scan
rate, click the Select checkbox next to the
tag(s). The Change Scan Rate button at the
bottom of the page becomes active.
Choose a new scan rate from the dropdown menu located next to the Change
Scan Rate button. All selected tags will
change to the new scan rate.
Path This column displays the path to each tag
in the device. The path is a combination of
the ControlLogix Project name and its slot
location (CIP path).
Note: You can create a maximum of 2500 data points per FactoryTalk
Historian ME Module. If you exceed 2500 data points, the Create button
will automatically become deactivated. The Create button will
automatically become reactivated when the point count is less than 2500
data points.
Follow these steps to create points in FactoryTalk Historian ME:
1. Select the tags from which you want to create points.
Select the tags you want to create by checking the box next to
the tag name. To select all tags in the list, Check the All/None
checkbox.
2. Click [Create].
20
Page 25

COLLECTING DATA
Review Results
After point creation is complete, the Review Results page opens.
The information here allows you to quickly see the success (or
failure) of the Create Points operation.
The Review Results page displays the following information:
Result Result Description
• • •
Number of Points
Created
Number of Points
Not Created
Total Number of
Points in Module
Data Collection
Status
This is the number of points created based
on the points selected in the Create Points
operation. Only points that do not yet exist
are created.
This is the number of selected points that
were not created in the Create Points
operation. Either the points already exist in
the archive and do not need to be created,
or an error occurred in FactoryTalk
Historian ME. See the System Log for error
details. (Click on Advanced in the top
navigation bar. The System Log page is
displayed. Use default settings or enter
time parameters in the data fields and click
[Search].)
This is the total number of points in the
FactoryTalk Historian ME Module,
including the newly created points.
This is the status of the Data Collection
process. If Data Collection is running, then
Running will appear next to [Stop Data
Collection]. If data collection is stopped,
then Stopped will appear next to [Start
Data Collection].
Starting and Stopping Data Collection
You must have administrator privileges to start or stop data
collection in the FactoryTalk Historian ME module. To start the
Data Collection interface, perform the following steps:
21
Page 26

FACTORYTALK HISTORIAN ME QUICK ST ART GUIDE
• • •
1. Click Configure Historian in the top navigation pane. The
Data Collection page opens.
2. Click [Start]. Data collection begins.
To stop the Data Collection interface, perform the following steps:
1. Click Configure Historian in the top navigation pane. The
Data Collection page opens.
2. Click [Stop]. Data collection stops.
Viewing Data
The View Data page allows you to view data trends, archive data,
and current data collected by FactoryTalk Historian ME. These
features are located under View Data in the top navigation bar.
Current Data
Click on Current Data in the left-hand navigation bar to view the
name, value, timestamp, and type of data being collected by
FactoryTalk Historian ME.
Use the following parameters to search or export data:
22
Property Name Property Description
Point Name Enter a point name or use an asterisk (*) to
search data with all point names.
Point Source Enter a point source or use an asterisk (*)
to search data with all point sources.
Point Type Select a point type from the drop-down
menu or use an asterisk (*) to search data
with all point types.
Scan Rate Select a scan rate from the drop-down
menu or use an asterisk (*) to search data
with all scan rates.
Page 27

VIEWING DATA
Property Name Property Description
Archiving Select On or Off from the drop-down menu
or use an asterisk (*) to search data with
archiving set to On and Off.
Scan Select On or Off from the drop-down menu
or use an asterisk (*) to search data with
scan set to On and Off.
Click [Search]. The search results are displayed with the name,
value, timestamp, and type of data being collected listed in table
format.
Click [Export] to export the current data.
Archive Data
Click Archive Data in the left-hand navigation bar to view the
name, value, timestamp, and type of archived data stored in
FactoryTalk Historian ME.
Use the parameters described in “Current Data” to search archived
data. Click [Search]. The search results are displayed with the
name, value, timestamp, and type of archived data listed in table
format.
To view archived data for a specified time period:
1. Highlight a row in the generated Archive Data table.
2. Enter a start time and end time to view a specified time period
for the selected archived data.
3. Click [View].
The value and timestamp of the specified archived data is
displayed.
Once you have viewed the archived data for a specified time period,
you can export that data. To do so:
1. Highlight the point you want to export, set the start and end
times, click [View], and then click [Export].
2. In the dialog that appears, select a location for your data on
your client computer.
• • •
23
Page 28

FACTORYTALK HISTORIAN ME QUICK ST ART GUIDE
• • •
3. Either accept the default file name or enter a name of your
choice. The default file name is the name of the point whose
data is being exported, with _ArchiveInfo.csv appended to the
end. If you change the file name, you must retain .csv as the
file extension.
4. Accept the default values for the following fields and click
[Save].
Save as type: The default type is HTML File.
Language: The default language is Unicode.
You can only export one row of data at a time.
Trends
Trends can be used to view data graphically for selected points over
a specified time period.
Click on Trends in the left-hand navigation bar to search and select
points for a trend chart.
Use the parameters described in “Current Data” to search for
points. Click [Search]. The search results are displayed with the
name, value, timestamp, and type of data listed in table format.
To create a trend of points for a specified time period:
1. In the generated Points table, check the Select box for each
point you want to include in the trend chart.
2. In the Trend Chart portion of the window, enter a start time
and end time to specify a time period for the selected points.
Note: If you want to enable auto refresh, you must set the end time to “*”.
3. Check the Show Points box to display the selected points in the
trend chart. The points will show as small circles attached to
the end points of colored vertical bars. Each bar corresponds
with a data point contained in a list below the trend chart.
4. Click the Show Vertical Bar box to display a moveable vertical
bar that you can click on and drag across the trend chart to
capture values for a specified time period.
5. Click on the green arrow to create a trend for the selected
points within the specified time period.
24
Page 29

TRANSFERRING DATA
6. Click the red square to stop the trend. The [Reset] button
becomes active. Click [Reset] to reset the trend.
Transferring Data
The Data Transfer subsystem works with the Data Storage and Data
Collection subsystems to transfer historical data to a FactoryTalk
Historian SE or PI server. The Data Transfer subsystem can only
transfer data to one FactoryTalk Historian SE or PI server.
Before you set up data transfer in the FactoryTalk Historian ME
module, you must connect the FactoryTalk Historian ME module to
the FactoryTalk Historian SE or PI server through the System
Management Tools (SMT) and configure trusts within the
FactoryTalk Historian SE or PI server. For FactoryTalk Historian
SE, you must also assign FactoryTalk Activation licenses to support
the FTMS point source.
Adding Trusts to Your FactoryTalk Historian SE or PI Server
In order to successfully transfer data between FactoryTalk Historian
ME and a FactoryTalk Historian SE or PI server, you must create
two trusts on the FactoryTalk Historian SE or PI server:
datatransfer and webs. First, depending on whether you will be
using FactoryTalk Historian SE or PI server as your data transfer
server, login to the FactoryTalk Historian SE or PI System
Management tools (SMT) application and set up two trust
connections in the FactoryTalk Historian SE server or PI server:
datatransfer trust
webs trust
Then go to the module web interface and test the module
connection to the FactoryTalk Historian SE or PI server. Depending
on what type of data transfer server you are configuring, perform
the steps in either “Application Trusts (FactoryTalk Historian SE)”
on page 26 or “Application Trusts (PI Server)” on page 31.
• • •
25
Page 30

FACTORYTALK HISTORIAN ME QUICK ST ART GUIDE
• • •
Assigning FT Activation Licenses to Support the FTMS Point Source (FactoryTalk Historian SE)
Before adding trusts to FactoryTalk Historian SE, you must assign
activation licenses to support the FTMS point source in order to
successfully transfer data between FactoryTalk Historian ME and
FactoryTalk Historian SE. Activation licenses are assigned for
FactoryTalk Historian SE in the FactoryTalk Administration
Console (on the Client Tools CD shipped with your FactoryTalk
Historian ME module).
Application Trusts (FactoryTalk Historian SE)
To successfully transfer data between FactoryTalk Historian ME
and FactoryTalk Historian SE, you must create two application
trusts on the FactoryTalk Historian SE server: webs and
datatransfer. To do so, perform the following steps:
1. Launch the FactoryTalk Historian SE SMT application. From
the Windows Start menu run Programs > Rockwell Software >
FactoryTalk Historian SE > System Management Tools.
2. After SMT launches, go to the left-side System Management
pane and click [+] next to the [Security] item.
3. From the list of Security plug-ins, click the Trus ts option.
4. From the Trust menu bar in the main window, select the dropdown menu on the [New] option. The Wizard option is
checked by default.
5. The Add Trust Wizard window is launched. The Trust Wizard
will ask for various pieces of information to create a trust on
26
Page 31

TRANSFERRING DATA
the FactoryTalk Historian SE module that is currently
connected.
6. Select your FactoryTalk Historian SE module from the dropdown menu in the PI server field.
You must create a trust for Data Transfer (datatransfer) and a
trust for web applications (webs). This procedure describes
• • •
27
Page 32

FACTORYTALK HISTORIAN ME QUICK ST ART GUIDE
• • •
creating a Data Transfer trust first. Use this procedure to create
a web application trust after you create the Data Transfer trust.
7. Enter a name for the datatransfer trust in the Trust Name field.
Click [Next]. The trust description is optional.
8. Select PI-API application for the trust type. Click [Next].
9. Enter datatransfer for the application name in the Application
Name field.
10. Specify client connection information such as the network
path, IP address, and NetMask for the datatransfer trust. Click
[Next].
11. Select a PI user from the drop-down menu.
28
Page 33

TRANSFERRING DATA
12. Click [Finish]. The trust displays in the list of trusts as shown
in the following image.
13. Repeat steps 3-12 to create a webs trust. Replace datatransfer
with webs and add the appropriate information.
14. Select File > Exit from the drop-down menu to exit the SMT
application.
If you are configuring Data Transfer in the FactoryTalk Historian
ME web interface next, you must ensure that your FactoryTalk
Historian SE is configured for Data Transfer. For example, the
FactoryTalk Activation licenses that support the FTMS point source
should be installed for the FactoryTalk Historian SE server within
the FactoryTalk Administration Console. The FactoryTalk
Historian SE patch enables the FTMS point source support.
See “Installing FactoryTalk View SE Patch” in the FactoryTalk
Historian ME 2.2 User Guide for more information about the patch
that enables FTMS point source support.
• • •
29
Page 34

FACTORYTALK HISTORIAN ME QUICK ST ART GUIDE
• • •
Open the FactoryTalk Historian ME web interface in your browser.
Click Configure Historian and go to the Data Transfer page.
30
To test the module’s connection to the FactoryTalk Historian SE
server where the web applications and data transfer trusts you just
created reside, perform the following steps.
1. Go to the FT Historian SE/PI Server Parameters section.
2. Enter the host name or IP address of your FactoryTalk
Historian SE server in the Host Server field.
If you use a host name, be sure that your network administrator
has already set up the relationship between the host name and
the IP address in the DNS server.
3. Click [Test Connection].
Page 35

TRANSFERRING DATA
An informational message that states that the connection to SE
was established displays at the top of the page if the
connection is successful. In addition, a green checkmark
displays next to the [Test Connection] button. This indicates
that the module can establish a connection to your FactoryTalk
Historian SE server. If this checkmark and message do not
appear, check your work and try again.
4. Click [Save].
You have completed the trust configuration process.
Application Trusts (PI Server)
To successfully transfer data between FactoryTalk Historian ME
and the PI server, you must create two application trusts on the PI
server: webs and datatransfer. To do so, perform the following
steps:
1. Launch the OSIsoft SMT application from where you installed
it. Navigate to System Management Tools.
2. After SMT launches, go to the Collectives and Servers pane
and click the checkbox next to the PI server you want to create
a trust for.
3. Under the System Management pane, click [+] next to Security
and then select Mappings and Trusts.
4. In the Trusts tab in the main window, select the drop-down
menu on the New option. The Wizard option is checked by
default.
The Add Trust Wizard window is launched. The Trust Wizard
creates a trust on the PI server that is currently selected.
• • •
31
Page 36

FACTORYTALK HISTORIAN ME QUICK ST ART GUIDE
Trusts
option
Trust menu bar
Wizard option
• • •
5. Select your PI server from the drop-down menu in the PI
Server field.
32
Page 37

TRANSFERRING DATA
6. Enter a name for the datatransfer trust in the Trust Name:
field. Click [Next].
7. The trust description is optional.
8. Select PI-API application for the trust type. Click [Next].
9. Enter datatransfer for the application name in the Application
Name field.
10. Specify client connection information such as the network
path, IP address, and NetMask for the data transfer trust. Click
[Next].
11. Select a PI user from the drop-down menu.
12. Click [Finish]. The trust displays in the list of trusts as shown
in the following image.
• • •
13. Repeat steps 3-12 to create a webs trust. Replace datatransfer
with webs and add the appropriate information.
33
Page 38

FACTORYTALK HISTORIAN ME QUICK ST ART GUIDE
• • •
14. Select File > Exit from the drop-down menu to exit the SMT
application. You have completed the trust configuration
process.
E
NSURE THAT
RANSFER
T
If you are configuring Data Transfer in the FactoryTalk Historian
ME web interface next, you must ensure that your PI Server is
configured for Data Transfer.
Open the FactoryTalk Historian ME web interface in your browser.
Click Configure Historian and go to the Data Transfer page.
PI S
ERVER IS CONFIGURED FOR DATA
34
1. Under the FT Historian Site Edition/PI Server Parameters
section, enter the host name or IP address of your PI server in
the Host Server field.
Page 39

TRANSFERRING DATA
If you use a host name, be sure that your network administrator
has already set up the relationship between the host name and
the IP address in the DNS server.
2. Click [Test Connection].
If the connection is successful, an informational message
displays at the top of the page indicating this. In addition, a
green checkmark displays next to the [Test Connection]
button. This indicates that the module can establish a
connection to your PI server. If this checkmark and message
do not appear, check your work and try again.
3. Click [Save].
You have completed the trust configuration process.
Time Synchronization
The FactoryTalk Historian ME and FactoryTalk Historian SE or PI
server systems must be synchronized prior to transferring data. In
the FactoryTalk Historian ME Web, click on the Advanced tab and
select Time Management from the left-hand column of the
FactoryTalk Historian ME Web. Time Synchronization options
include Controller Time, NTP Server, Historian SE or PI server and
manual Set. To set time, please see “Setting Time in FactoryTalk
Historian ME” on page 13.
• • •
Transferring Data
Follow these steps to set up Data Transfer.
1. Click on Configure Historian in the top navigation bar.
35
Page 40

FACTORYTALK HISTORIAN ME QUICK ST ART GUIDE
• • •
2. Click on Data Transfer in the left-hand navigation bar. This
opens the Data Transfer page.
3.
Under
FT Historian Site Edition/ PI Server Parameters
the host name or IP address of the
or PI server in the Host Server Name data field.
4. Click [Test Connection] to confirm that the specified host
server can be accessed.
If the connection is successful, the following information is
returned:
FactoryTalk Historian
, e
nter
SE
36
Property Name Property Description
Current Time This is the current time of the FactoryTalk
Historian SE or PI server. It is a read-only
property.
Time Offset This is the time difference between the
FactoryTalk Historian SE or PI server and
the time setting on FactoryTalk Historian
ME.
FTHSE Licensed
Points (FactoryTalk
Historian SE)
This is the total number of points that have
been granted based on the currently active
license for FactoryTalk Historian SE. See
Licensing in the FactoryTalk Historian ME
User’s Guide for more information.
Page 41

Property Name Property Description
TRANSFERRING DATA
• • •
Total Licensed
Points (PI server)
“FTMS” Points
Ava il able
(FactoryTalk
Historian SE)/
Available License
Points (PI server)
Under
Data Transfer Parameters
This is the number of points that have been
assigned to the PI server. It is an indication
of the number of FactoryTalk Historian
ME points that can be transferred to the PI
server.
This represents the total number of points
granted by the license minus the number of
points that are already being transferred to
the FactoryTalk Historian SE or PI server.
, the
Status field displays the
current Data Transfer status (started or stopped). If necessary, click
[Start] or [Stopped] to start or stop Data Transfer.
5. Set the following Data Transfer properties:
Property Name Property Description
Maximum Events
Per Transfer
This is the maximum number of events that
can be transferred to the FactoryTalk
Historian SE or PI server per transfer
session. The range is 5,000 to 150,000. The
default setting is 50,000.
Check the Enable Auto Transfer box if you want to have
FactoryTalk Historian ME transfer data automatically for newly
created points.
6. Click [Save].
The Data Transfer process records performance statistics that
determine the connection reliability. These statistics can be used to
The
refine the settings in the configuration subsystem.
Data
37
Page 42

FACTORYTALK HISTORIAN ME QUICK ST ART GUIDE
• • •
Transfer Statistics section of the Data Transfer page contains the
following information:
Property Name Property Description
Transfer Rate This is the total number of retrieved events
sent to FactoryTalk Historian SE or the PI
server, divided by the time spent retrieving
events sent to FactoryTalk Historian SE or
the PI server (in events per minute).
Successful Attempt
Rate
This is the number of successful data
transfers from FactoryTalk Historian ME
to FactoryTalk Historian SE or the PI
server per hour.
Data Transfer Points
After you have set up the connection to the FactoryTalk Historian
SE or PI server, you must specify which points you want to transfer.
The Data Transfer Points page allows you to search for points in
the FactoryTalk Historian ME database and assign them for transfer
to the selected FactoryTalk Historian SE or PI server.
To open the Data Transfer Points page, click on Configure
Historian in the top navigation bar, and then click on Data Transfer
Points in the left-hand navigation bar.
Selecting Points to Transfer
Follow these steps to select points to transfer:
1. Enter search criteria in the data fields using the following
information:
Property Name Property Description
Point Name Enter a point name or use an asterisk (*) to
search data with all point names.
38
Page 43

TRANSFERRING DATA
Property Name Property Description
Point Source Select a point source from the drop-down
menu or use an asterisk (*) to search data
with all point sources.
Point Type Select a point type from the drop-down
menu or use an asterisk (*) to search data
with all point types.
Scan Rate Select a scan rate from the drop-down
menu or use an asterisk (*) to search data
with all scan rates.
Tra ns fer Indicates whether or not data has been
transferred from FactoryTalk Historian ME
to FactoryTalk Historian SE or a PI server.
Select Ye s from the drop-down menu to
search for data points that have already
been transferred or select No to search for
data points that have not been transferred.
Use an asterisk (*) to search for all data
points.
2. Click [Search].
The following FT Historian Site Edition / PI Server Parameters
Information is displayed:
• • •
Property Name Property Description
FTHSE Licensed
Points (FactoryTalk
Historian SE)
Total Licensed
Points (PI server)
This is the total number of points that have
been granted based on the currently active
license for FactoryTalk Historian SE. See
Licensing in the FactoryTalk Historian ME
User’s Guide for more information.
This is the number of points that have been
assigned to the PI server. It is an indication
of the number of FactoryTalk Historian
ME points that can be transferred to the PI
server.
39
Page 44

FACTORYTALK HISTORIAN ME QUICK ST ART GUIDE
• • •
Property Name Property Description
“FTMS” Points
Ava il able
(FactoryTalk
Historian SE)/
Available License
Points (PI server)
Note: It takes approximately fifteen minutes to update the FactoryTalk
Historian SE or PI server, so the “FTMS” Points Available (FactoryTalk
Historian SE)/Available License Points value may not update immediately.
This represents the total number of points
granted by the license minus the number of
points that are already being transferred to
the FactoryTalk Historian SE or PI server.
The following FactoryTalk Historian ME Information is displayed:
Property Name Property Description
Point Selected This represents the total number of points
already created in the FactoryTalk
Historian SE or PI server.
Auto Transfer
Mode
Newly Added
Points
This displays whether Auto Transfer is on
or off. If Auto Transfer is “On”, then
FactoryTalk Historian ME is set to
automatically transfer data based on the
settings on the Data Transfer page.
This represents the total number of points
recently selected for transfer to
FactoryTalk Historian SE or a PI server.
40
In addition to information about the FactoryTalk Historian SE or PI
server and FactoryTalk Historian ME information, the file
information for the searched data points is displayed in table
format. The table lists all data points that fit the search criteria. If
the point has been created in the FactoryTalk Historian SE or PI
server, then this is indicated in the table. All “checked” points are
tagged for transfer to the FactoryTalk Historian SE or PI server.
Page 45

TRANSFERRING DATA
File information includes the following fields:
Column Name Column Description
Selected This indicates whether or not the point has
been added to Data Transfer. Check the
box under Selected to add the point to data
transfer.
Name This is the name of the data point in
FactoryTalk Historian ME.
Typ e This is the data type of the point. See Data
Typ es in the FactoryTalk Historian ME
User’s Guide or online help for a detailed
description of the data types.
Source This indicates which ControlLogix
processor the data point is coming from.
• • •
Created in SE/PI
Server
This indicates whether or not the point has
already been matched to the FactoryTalk
Historian SE
already been matched, then this is
indicated by a “Y” in the Created in SE/PI
Server column. If not, then this is indicated
by an “N.”
or PI server. If the point has
3. Check the box for each point under Selected to add it to Data
Transfer.
4. Click [Save].
5. To confirm the points have been mapped to FactoryTalk
Historian SE or the PI server, click [Search]. The points you
selected for mapping should have a “Y” in the Created in SE/
PI server column.
Once the points have been created on the SE or PI server, they
appear in the following format:
<ME_module_name>.<point_name>
41
Page 46

FACTORYTALK HISTORIAN ME QUICK ST ART GUIDE
• • •
Note: You can also run a search in FactoryTalk Historian SE to verify the
points have been mapped to FactoryTalk Historian SE. See the
FactoryTalk Historian SE User’s Guide for more information.
Starting and Stopping Data Transfer
The Data Transfer service status is either started or stopped. Click
on the appropriate button on the Data Transfer page to either start or
stop Data Transfer. Clicking the Enable Auto Transfer checkbox
provides immediate data transfer. Clicking [Save] is not required.
42
Page 47

TRANSFERRING DATA
• • •
43
Page 48

FACTORYTALK HISTORIAN ME QUICK ST ART GUIDE
• • •
44
 Loading...