

Page 1

Pitney Bowes
GDI Printing System
For Windows® 3.1x, 95, 98 and NT 4.0
Printer Driver
User’s Guide
Page 2

The following trademarks and registered trademarks are used throughout this manual:
Microsoft, MS-DOS, Windows and Windows NT are registered trademarks of Microsoft
Corporation in the USA and other countries.
i386, i486 and Pentium are trademarks of Intel Corporation.
All other trademarks identified herein are the property of their respective owners.
Copyright© 1999 by Pitney Bowes, Inc. All rights reserved. Unauthorized copying and
distribution is a violation of the law. Printed in the U.S.A.
Page 3

TABLE OF CONTENTS
SECTION PAGE
1. INTRODUCTION...................................................................................................4
1.1 Precautions.........................................................................................................4
1.2 Restrictions ........................................................................................................5
2. SYSTEM REQUIREMENTS................................................................................5
3. MEMORY REQUIREMENTS..............................................................................6
4. SETTING UP YOUR FAX MACHINE AS A PRINTER...................................6
4.1 Setting the 9820 or 9830 as a Printer.................................................................6
4.2 Setting the 9910 as a Printer ..............................................................................7
4.3.1 Setting the 9920 or 9930 as a Printer..............................................................8
4.3.2 Setting the 9920 or 9930 Print Resolution......................................................9
4.4 Setting the 1530 or 2030 as a Printer...............................................................10
4.5 Setting the 2050 as a Printer ............................................................................10
5. PRINTER DRIVER INSTALLATION..............................................................11
5.1 Before Installation.............................................................................................11
5.2 Installation for Windows 3.1 and 3.11 (9800/9900 Series Only) .....................11
5.3 Installation for Windows 95/98.........................................................................12
5.4 Installation for Windows NT 4.0 ......................................................................16
6. CONFIGURING THE PRINTER DRIVER......................................................17
6.1 Changing the Port Assignment ........................................................................17
6.1.1 For Windows 3.1 and 3.11 (9800/9900 Series Only) ............................17
6.1.2 For Windows 95/98................................................................................17
6.1.3 For Windows NT 4.0 .............................................................................18
6.2 Changing the Printer Driver Default Settings..................................................18
6.2.1 For Windows 3.1 and 3.11 (9800/9900 Series Only) ............................19
6.2.2 For Windows 95/98................................................................................19
6.2.3 For Windows NT 4.0 .............................................................................20
7. PRINTING ............................................................................................................20
8. TROUBLESHOOTING.......................................................................................21
8.1 Facsimile Display Error Message ...................................................................21
8.2 Colored Text May Not Print Correctly ...........................................................21
8.3 Not Enough RAM Capacity............................................................................21
8.4 Port Connection ..............................................................................................21
8.5 Software Installation – Copying Files.............................................................22
9. REMOVING THE PITNEY BOWES PRINTER DRIVER.............................22
9.1 For Windows 3.1 and 3.11 (9800/9900 Series Only) ......................................22
Page 4

1. INTRODUCTION
Welcome to the Pitney Bowes Printing System, a state of the art GDI Printer for Microsoft
Windows 95, 98 and NT 4.0 (Windows 3.1x available for 9800/9900 Series models).
The software included with the Printer Driver Option enhances the usefulness of your Model
9800/9900/2000/1500 Series facsimile machine by providing a standard Windows interface that
controls the printing function.
By installing the Pitney Bowes Printer Driver under Windows on your PC, the printer system
allows documents and graphics you have created using Windows-based applications to be printed
on the Model 9800/9900/2000/1500 Series facsimile machine, provided it is equipped with this
Parallel Printer Interface Option. (However, printing cannot be accomplished from the MS-DOS
level.) The following settings are available:
1. Multiple paper sizes (letter, legal or A4)
2. Portrait or Landscape printing
3. Selectable print quality (high resolution) may require optional memory
4. Choice of grayscale or black/white printing
1.1 Precautions
Before printing, make sure the facsimile is ON.
• The Model 9800/9900/2000/1500 Series will accept the print job from the PC in
either Standby or Waiting to redial mode.
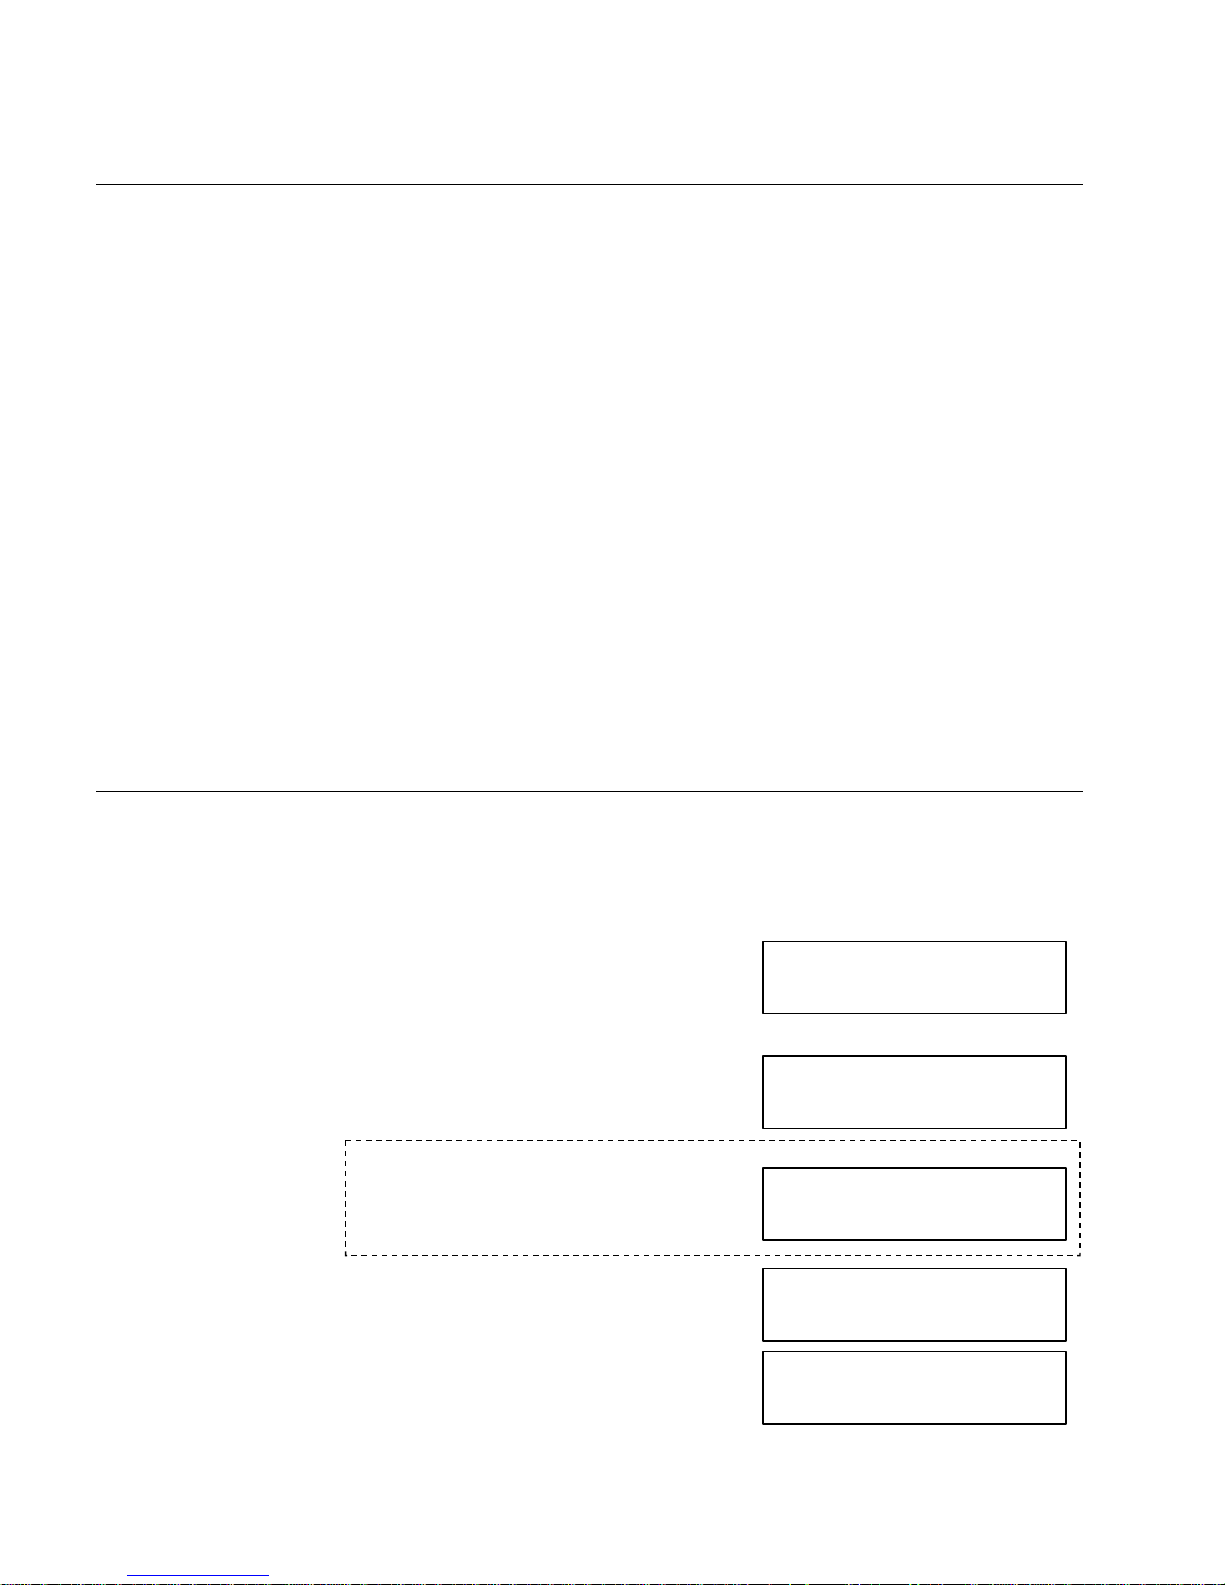
• The Model 1530, 2030 and 9800 or 9900 Series facsimile machines will not accept
key operations from its panel while the display reads:
• If the PC’s power or printer cable is disconnected while the print job is in progress,
print data will be deleted from the Model 9800/9900/2000/1500 Series’ memory.
• The Model 9800/9900/2000/1500 Series’ printing area varies slightly from that of
the document being printed. The printed image is expanded by approximately 2%
vertically and is reduced by approximately 1% horizontally.
• Areas in a document where text, color images and shading overlap one another
may be difficult to define. Adjusting the settings for Intensity Control and
Dithering on the printer driver options menu may improve clarity.
(Current Date/Time)
PC PRINT MODE
Page 5

1.2 Restrictions
• When a print job is in progress, the Model 9800/9900/2000/1500 Series will not
answer an incoming fax call.
• If the data to be printed exceeds the Model 9800/9900/2000/1500 Series’ memory
capacity, the data will not be printed.
• If the specified document paper size exceeds the size actually loaded in the cassette,
the excess portion of the page will not print and will be discarded; the next page
will start at its beginning.
• If the paper becomes depleted during the print job, the printing will stop; replenish
the paper and reprint from the start of the document.
• If a paper jam occurs, the print data will be discarded. Correct the cause and reprint
from the start of the document.
2. SYSTEM REQUIREMENTS
Make sure an English edition of Microsoft Windows 3.1x, 95, 98 or NT 4.0 is installed on your
computer before installing the Pitney Bowes Printer Driver software.
You should also be familiar with Microsoft Windows basic terminology such as click, double-
click, choose, dialog box, window, open, close, scroll, minimize, group window, icon and select.
If not, please refer to the Microsoft Windows User’s Guide.
The Windows Printer Driver is installed automatically during the software installation process
and loaded automatically each time the user starts Windows. The Printer Driver can be selected
as a printer from within either the Windows Control Panel, Printers, or an application’s Print
Setup or a similar command. Once selected all print jobs from within that application will be
sent to the Model 9800/9900/2000/1500 Series as if it were a dedicated PC printer.
To use the Model 9800/9900/2000/1500 Series Printer Driver, your system must meet the
following minimum requirements:
1. A Model 9800/9900/2000/1500 Series facsimile machine with Parallel Printer
Interface installed.
2. The Pitney Bowes Printer Driver software program diskette.
3. IBM-compatible 486DX 66MHz or higher PC with:
• Windows 3.1x , 95, 98 or NT 4.0 (Pitney Bowes 1500 or 2000 Series require 95,
98 or NT 4.0)
• At least 16 MB RAM (32 MB recommended)
• At least 5 MB free hard disk space
• A 3.5” floppy disk drive
Page 6
3. MEMORY REQUIREMENTS
• Model 9820
Standard memory provides 200 x 200 dpi print resolution. To print 400 x 400 on A4 and
letter-size paper, a 1MB memory option is required. To print 400 x 400 dpi on legal-size
paper, a 2MB memory option is required.
• Models 9830, and 9900 Series
Standard memory provides 200 x 200 dpi print resolution. To print 400 x 400 dpi, a 2MB
memory option is required.
• Model 2030
Standard memory provides 300 x 300 dpi print resolution. To print 600 x 600 dpi, a 4MB
“DRAM” memory option must be installed. An 8MB “DRAM” option will provide
improved print speed.
• Model 2050
Standard memory provides 300 x 300 dpi print resolution. To print 600 x 600 dpi, a 4MB
“DRAM” memory option is required. An 8MB “DRAM” option will provide improved
print speed.
• Model 1530
Standard memory provides 300 x 300 dpi and 600 x 600 dpi print resolution.
4. SETTING UP YOUR FAX MACHINE AS A PRINTER
To print from your PC, the following settings are required. It is important to set them correctly.
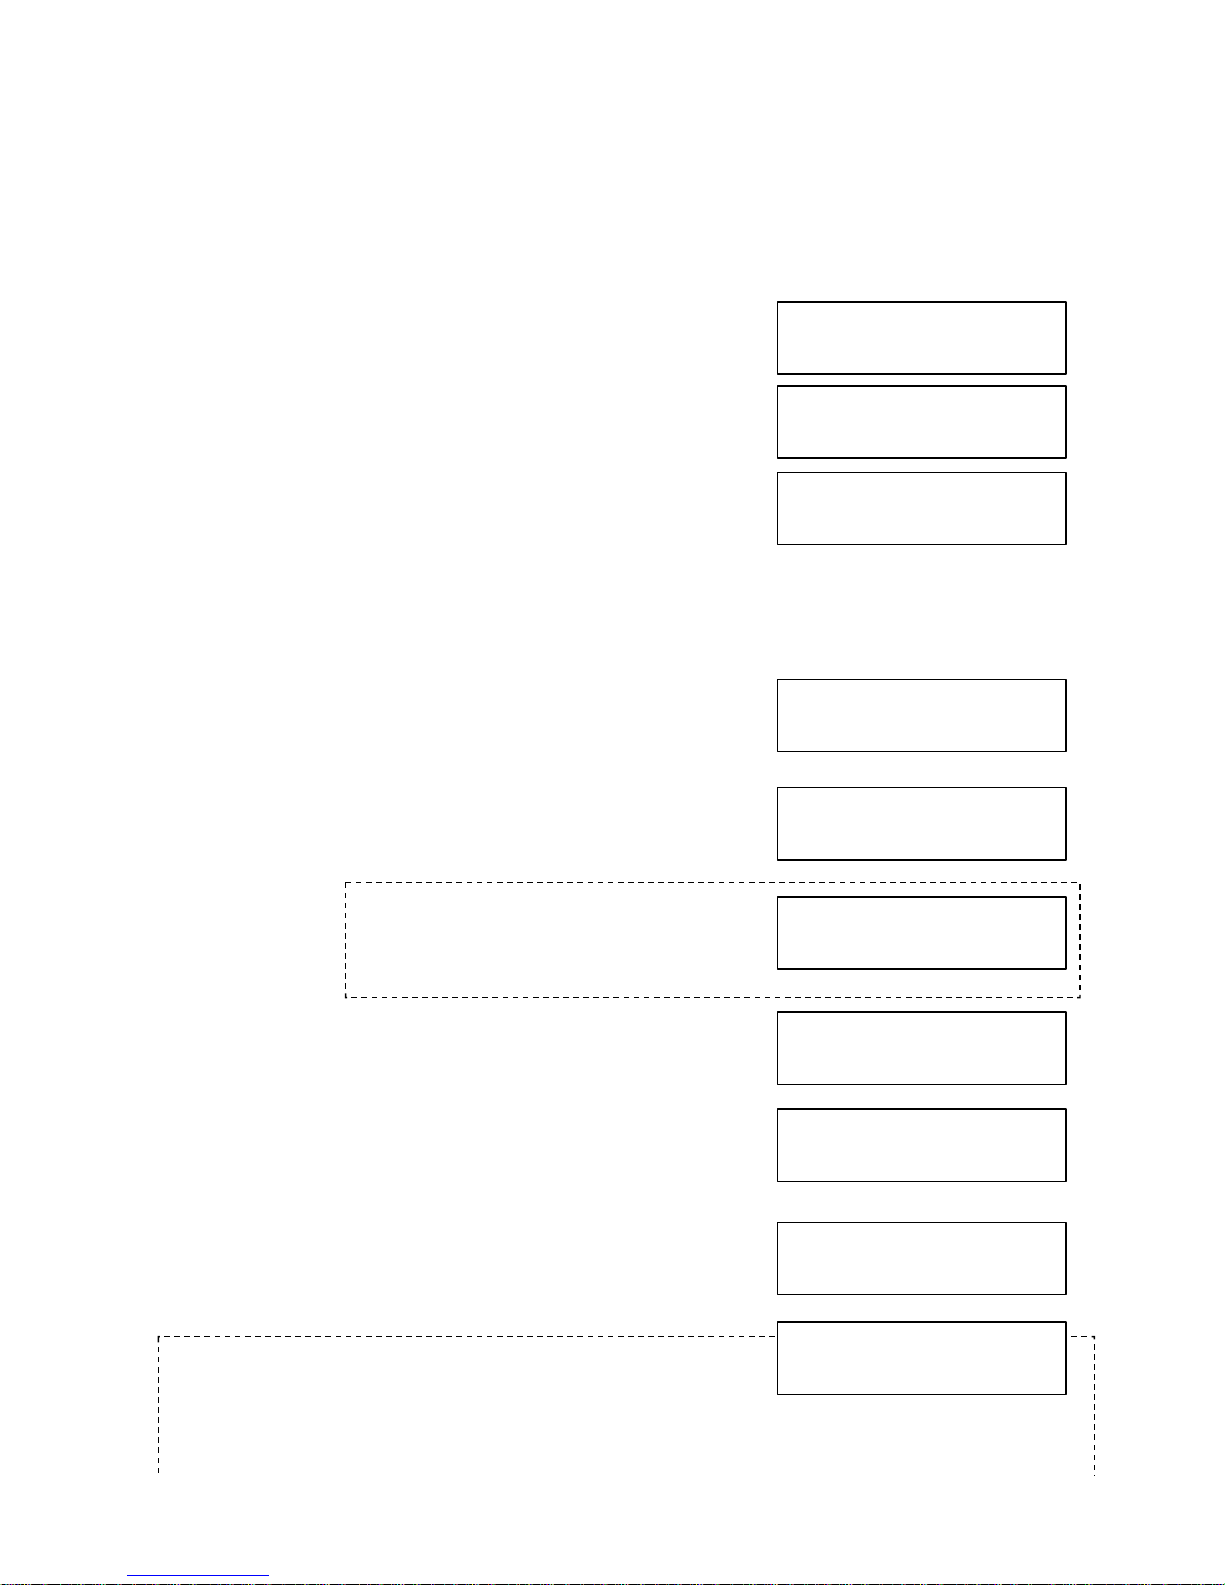
4.1 Setting the 9820 or 9830 as a Printer.
1. Press FUNCTION.
2. Press 9 and then YES.
3. Press YES.
4. Press NO.
FUNCTION SELECT
ENTER FUNCTION #
SET OPTIONS?
ENTER YES OR NO
PC PRINT RESOLUTION?
ENTER YES OR NO
AUTOMATIC REPORTS?
ENTER YES OR NO
Note: The “Enter Passcode” prompt may not
appear. If it does, enter our Model number,
e.g., 9820 (or current Set-up Passcode) then
press YES to continue.
ENTER PASSCODE
_ _ _ _
Page 7

5. Press YES.
Proceed with instructions for your particular Pitney Bowes
facsimile model.
Model 9820
6a. Select the preferred resolution as
follows:
Press 1 = 200 DPI LTR & LGL or
*Press 2 = 400 DPI LETTER (allows
200 DPI Legal) or
*Press 3 = 400 DPI LTR & LGL
Model 9830
6b. Select the preferred resolution as
follows:
Press 1 = 200 DPI LTR & LGL or
*Press 2 = 400 DPI LTR & LGL
*Note: These resolutions require an optional DRAM memory card and will not be displayed
without the required option installed. Refer to Section 3, “Memory Requirements.”
7. Press YES.
Selecting “1” displays:
8. Press STOP. Model 9820/9830 printer setup is complete.
4.2 Setting the 9910 as a Printer.
1. Press FUNCTION.
2. Via Numeric Keypad, press 7 and then 4. Press SET.
3. Via Numeric Keypad, press 5 and then 9. Press SET.
4. Press 2, to select Printer I/F. Press SET.
Note: This display may not appear. If it does, press
SET. The printer will be enabled after reboot. If this
display does not appear, the printer is already
enabled. You can continued with Step 5 to
set the resolution or press STOP to exit.
PC PRINT RESOLUTION
1=200 DPI LTR & LGL
FAX PARAMETER (01-99)
NO.=
59 PARALLEL PORT I/F
1:INVALID
* SETTING UP *
1=200 DPI LTR & LGL
I/F SETTING CHANGE
PRESS SET TO REBOOT
FUNCTION (1-9)
ENTER NO. OR δχ
Page 8
Changing the Resolution
At least 2MB of optional DRAM memory is required for 400 dpi resolution, 1.5MB of this
(approximately 110 pages) must be allocated for the printer. To change the resolution, please
repeat Steps 1 and 2, then press 6, then 0. Continue with Step 5 to set the resolution.
5. To enable 400 dpi printing, press 2. Press SET or…
to change from 400 dpi to 200 dpi, press 1, then SET.
6. Press STOP. Model 9910 printer setup is complete.
4.3.1 Setting the 9920 or 9930 as a Printer
1. Press FUNCTION.
2. Press 9 and then YES.
3. Press YES.
4. Press NO.
5. Press YES.
6. Press 1 and then YES.
60 OPT. PAGE MEMORY
2: 1.5MB
SET OPTIONS?
ENTER YES OR NO
FUNCTION SELECT
ENTER FUNCTION #
PARALLEL I/F SET UP?
ENTER YES OR NO
PARALLEL I/F TYPE
1=PRINTER 2=PC
Note: If the screen to the right appears, press YES to
enable the printer feature and reset the system. If you
press NO at this display, the printer feature will not be enable. If this screen doesn’t appear,
the printer is already enabled so you can press STOP. Or...you can proceed with the printer
I/F SETTING CHANGE?
ENTER YES OR NO
Note: The “Enter Passcode” prompt may not
appear. If it does, enter our Model number,
e.g., 9920 (or current Set-up Passcode) then
press YES to continue.
ENTER PASSCODE
_ _ _ _
AUTOMATIC REPORTS?
ENTER YES OR NO
* SETTING *
OPT MEM PAGE
65 PRINT COLLATION
2:VALID
Page 9

4.3.2 Setting the 9920 or 9930 Print Resolution
1. Press FUNCTION.
2. Press 9 and then YES.
3. Press YES.
4. Press NO.
5. Press NO.
6. Press YES.
Select the preferred resolution:
Press 1=200 DPI/FINE or…*Press 2=400 DPI/EX-FINE
*Note: This resolution requires an optional DRAM memory card and will not be
displayed without the required option installed. Refer to Section 3, “Memory
Requirements.”
7. Press YES. Selecting “1” displays:
8. When the “SETTING UP” display goes away (about 2 seconds), and “SET SECURE
ACCESS” appears, press STOP. Printer resolution setup is complete.
FUNCTION SELECTION
ENTER FUNCTION #
SET OPTIONS?
ENTER YES OR NO
Note: The “Enter Passcode” prompt may not
appear. If it does, enter our Model number,
e.g., 9920 (or current Set-up Passcode) then
press YES to continue.
ENTER PASSCODE
_ _ _ _
AUTOMATIC REPORTS?
ENTER YES OR NO
PARALLEL I/F SET UP?
ENTER YES OR NO
PRNT/RCV RESOLUTION?
ENTER YES OR NO
PRNT/RCV RESOLUTION
1=200 DPI/FINE
* SETTING UP *
1=200 DPI/FINE
Page 10

4.4 Setting the 1530 or 2030 as a Printer
1. Press FEATURES.
2. Press FEATURES (or δ cursor) until display reads:
3. Press YES.
4. Press NO (or δ cursor) until display reads:
5. Press YES and then press NO until display reads:
6. Press YES. Display reads:
7. Press 2 and then press YES.
A System Set Up Report prints automatically.
4.5 Setting the 2050 as a Printer
1. Touch System Setup, with no document in
ADF.
2. Touch PC Options.
3. Touch GDI Printer or Bi-dir Parallel.
4. Touch OK to return to System Setup screen.
5. Touch System Status to return to System
Ready Screen.
FEATURE SELECTIONS
PRESS YES, NO OR δχ
SYSTEM SET UP?
PRESS YES, NO OR δχ
MACHINE SETTINGS?
ENTER YES OR NO
OPTION SETTINGS?
ENTER YES OR NO
PC OPTIONS
PRESS YES, NO OR δχ
PARALLEL I/F TYPE
1=NONE 2=GDI/BI-DIR
SYSTEM SET UP REPORT
PRINTING NOW
Page 11

5. PRINTER DRIVER INSTALLATION
5.1 Before Installation
Make sure that all other software applications are closed before attempting to install the Pitney
Bowes Printer Driver. Also make sure to close the Control Panel after each “ADD” or
“DELETE” execution of the driver, in order to avoid an error message or data corruption.
Installation of more than one Pitney Bowes GDI Printer Driver will cause conflicts. Please
remove any previously installed Pitney Bowes GDI Printer Driver from the Control Panel
Printers dialog box before attempting to install this driver. See page 22 for instructions on
removing Printer Drivers.
5.2 Installation for Windows 3.1 and 3.11 (9800/9900 Series Only)
1. Start Microsoft Windows 3.1 or 3.11.
2. Double click the Main Group icon.
3. In the Main group of the Program Manager double-click the Control Panel icon. The
Control Panel window appears.
4. In the Control Panel window, double-click the Printers icon. The Printers dialog box
appears.
5. Click the Add button. The dialog box expands to display a list of printers supported by
the printer driver files supplied by Windows.
6. In the List of Printers box, select (highlight) “Install Unlisted Or Updated Printer.”
7. Click the Install button. A dialog box appears, instructing you to insert the disk that has
the printer driver file on it.
8. Insert the floppy disk that contains the Pitney Bowes Printer Driver file in the diskette
drive.
9. Click the OK button. Another dialog box appears, with the Pitney Bowes Facsimile
Model(s) highlighted.
10. Click the OK button. The Printers dialog box will appear and the new Model 9800/9900
Series facsimile unit is added to the Installed Printers list. (By default, the LPT1 port is
assigned to the new Model 9800/9900 Series. If it is not connected to LPT1, you need to
change the port assignment, see Section 6.1 (Changing Port Assignment on page 17).
11. To choose the Pitney Bowes Printer Driver as your Default Printer, select the Model
Page 12

12. Click the Set As Default Printer button. The Model 9800/9900 Series unit’s name
appears in the Default Printer area of the Printers dialog box.
13. Click the Close button to complete the Pitney Bowes Printer Driver installation.
NOTE: The Printer Driver can be used in various applications without selecting it as the
Windows Default Printer. Simply select it as the default printer within the desired application.
5.3 Installation for Windows 95/98
To install the Pitney Bowes Printer Driver software, please follow the steps below:
Note: Please have your original Windows 95/98 program diskettes or CD-ROM available
before beginning installation. It may be required by Windows during the installation of the
Pitney Bowes Printer Driver.
1. Start Microsoft Windows 95/98.
2. Click the Start button, point to Settings and then click Printers.
3. Insert the Pitney Bowes Printer Driver diskette into the appropriate disk drive, most
often drive A.
4. In the Printers window, double-click Add
Printer. The Add Printer Wizard dialog box
appears.
Click the Next > button.
5. Click the Next > button to choose Local Printer
Page 13

6. A list of printers that are supported by the
printer driver files supplied with Windows
95/98 appears.
Click the Have Disk… button.
7. The Install From Disk dialog box should read
A:\ . Type the correct drive letter, if other
than A.
Click the Browse button.
8. Double-click on the win9x folder and click the
OK button.
9. Click the OK button.
Page 14

10. The list of Printer Devices should display your
Pitney Bowes facsimile model. From the list,
select the Pitney Bowes unit you want.
Click the Next > button.
11. A list of Printer Ports appears.
Click the Next > button, to use the default
LPT1 PORT.
12. A Print Name box appears.
• Select whether the printer will be your
Windows default printer, if necessary.
• Click the Finish button to use the default
printer name.
Page 15

13. You will be asked to install the original
Windows 95/98 program, either on CD-ROM
or diskette. Do so and…
Click the OK button.
Note: If you encounter a dialog box indicating
that “ICONLIB.DLL” could not be found, please
refer to Troubleshooting, page 21.
14. You have now completed the Pitney Bowes
Printer Driver installation. The icon for your
Pitney Bowes unit appears in the Printers
folder.
Page 16

5.4 Installation for Windows NT 4.0
1. Start Microsoft Windows NT 4.0 and log onto the computer/network with an account that
can add or change printer configurations (i.e., Administrator).
2. Click the Start button, point to Settings and then click Printers.
3. Insert the Pitney Bowes Printer Driver diskette into the appropriate disk drive, most
often drive A.
4. In the Printers window, double-click Add Printer. The Add Printer Wizard dialog box
appears. Click the Next > button.
5. Click the Next > button to choose Local Printer.
6. A list of printers that are supported by the printer driver files supplied with Windows NT
4.0 appears.
7. Click the Have Disk… button.
8. The Install from Disk dialog box should read A:\. Type the correct drive, if other than A.
9. Click the Browse button.
10. Double-click the WinNT4 folder and click the OK button.
11. Click the OK button.
12. The list of Printer Devices should display your Pitney Bowes facsimile model. From the
list, select the Pitney Bowes unit you want.
13. A list of Printer Ports appears. Click the Next > button, to use the default LPT1 Port.
14. Click on “Yes” or “No” to using this printer as your default Windows printer.
15. Select (click) the Finish button. A test page will print if the driver was successfully
installed. This completes the installation.
Page 17

6. CONFIGURING THE PRINTER DRIVER
6.1 Changing the Port Assignment
By default, the installation program uses LPT1 as the port for the Pitney Bowes Printer
Driver. If your Model 9800/9900/2000 Series unit is connected to a different port, you will
need to re-configure the port assignment.
6.1.1 For Windows 3.1 and 3.11 (9800/9900 Series Only)
1. In the Main group, double-click the Control Panel icon. The Control Panel window
appears.
2. In the Control Panel window, click the Printers icon.
3. Select the Model 9800/9900 Series unit in the Installed Printers box.
4. Click the Connect button. The Connect dialog box appears.
5. Select the port that your Model 9800/9900 Series is connected to.
6. Click the OK button to lock-in your selection. The Printers dialog box appears with the
selected port next to the Model 9800/9900 Series in the Installed Printers box.
7. Click the Close button.
6.1.2 For Windows 95/98
1. Start Microsoft Windows 95/98.
2. Click the Start button, point to Settings, and then
click Printers.
3. In the Printers folder, point to the Pitney Bowes
facsimile unit (e.g., 2050) you want to change and
click on the “right” mouse button.
4. Click on Properties. Select the Details tab.
5. Click on “Print to the following port” drop down
menu to display the available ports.
6. Click on the port that the 9800/9900/2000 Series
printer is connected to.
Page 18

6.1.3 For Windows NT 4.0
1. Start Microsoft Windows NT 4.0 and log onto the computer/network with the account that
can add or change printer configurations (i.e., Administrator).
2. Click the Start button, point to Settings, and then click Printers.
3. In the Printers folder, point to the Pitney Bowes facsimile unit (e.g., 2050) you want to
change and click on the “right” mouse button.
4. Click on Properties.
5. Select the Details tab.
6. Click on “Print to the following port” drop down menu to display the available ports.
7. Click on the port that the 9800/9900/2000 Series printer is connected to.
8. Click the OK button , then close the Printers box.
6.2 Changing the Printer Driver Default Settings
Printing Options are printer-specific settings, such as resolution, paper size, paper source,
orientation, choice of grayscale or black and white printing. The following describes the
printing options found in the Model 9800/9900/2000 Series setup dialog box:
Resolution: Specify the resolution you want to use for printing. Resolution is listed in
dots per inch (dpi), The more dots per inch, the higher the resolution.
Higher resolutions print more slowly but produce higher-quality graphics,
whereas lower resolution print faster but may produce lower-quality
graphics. Higher resolutions require optional page memory installed on
some Model 9800/9900/2000 Series machines.
Paper Size: Specify the paper size you are using.
Paper Source: This is defaulted to the Auto Tray Selection but you can select a specific
cassette if optional cassette(s) is installed. If a legal cassette is also
installed, the unit will automatically choose between the letter and legal
cassette.
Orientation: Specify portrait or landscape orientation. Portrait means the page is taller
than it is wide when you view the text upright. Landscape means the page
is wider that it is tall when you view the print text upright.
Page 19

Changing the Printer Driver Default Settings Continued…
Options: Display the Options dialog box that lists additional Windows printing
options specific to the Model 9800/9900/2000/1500 Series.
Note: When printing to the Model 2050, selection of “Reverse print
order” means the document will print in reverse page sequence, i.e., page
one will be on the bottom. To print in correct page sequence, page one on
top, be sure this box is not selected.
6.2.1 For Windows 3.1 and 3.11 (9800/9900 Series Only)
1. In the Main group, double-click the Control Panel icon. The Control Panel window
appears.
2. In the Control Panel window, click the Printers icon. The Printers window appears.
3. Select the Model 9800/9900 Series in the Installed Printers box.
4. Click on the Setup button. A printer dialog box appears, displaying the settings for the
Model 9800/9900 Series.
5. Make any necessary changes to the Resolution, Paper Size, or Orientation. Click on the
Options button if Dithering or Intensity Control need to be changed and go to next step
otherwise click on the OK button and jump to Step #7. The Printers dialog box appears.
6. Change Intensity Control or Dithering. If you change the resolution, Dithering will return
to default setting (Coarse). Click the OK button to return to Printers dialog box. Click
OK.
7. Click the Close button to enter the selected settings.
6.2.2 For Windows 95/98
1. Start Microsoft Windows 95/98.
2. Click the Start button, point to Settings, then click on Printers.
3. In the Printers window, point to the Pitney Bowes facsimile unit you wish to change, then
“right” click the mouse button.
4. Click on Properties, then make any necessary changes to: Details (Port/Spool settings),
Paper (Size/Orientation), or Graphics (Resolution/Dithering). If you change the
resolution (dpi), the dithering will return to the default setting of “Coarse”.
Page 20

6.2.3 For Windows NT 4.0
1. Start Microsoft Windows NT 4.0 and log onto the computer/network with an account that
can add or change printer configurations (i.e., Administrator).
2. Click the Start button, point to Settings, then click on Printers.
3. In the Printers window, point to the Pitney Bowes facsimile unit you wish to change, then
“right” click the mouse button.
4. Click on Properties, then make any necessary changes to: Details (Port/Spool settings),
Paper (Size/Orientation), or Graphics (Resolution/Dithering). If you change the resolution
(dpi), the dithering will return to the default setting of “Coarse”.
5. Close the Printers box when finished.
7. PRINTING
This section provides detailed information on the features available from within Windows
applications. The Windows printer driver is installed automatically during the software
installation process and loaded automatically when you start Windows.
The following assumes that that the Pitney Bowes Printer Driver has been installed properly
and that it is the currently selected default printer for Windows applications. If this is not the
case, refer to Section 5 for installation instructions before proceeding.
The way you print documents depends on the application you are using. Most Windows
applications include a Print Command located in the File Menu or a Printer icon that you can
use to print the current document. You can also use the File Manager to print documents.
(For more information about printing, refer to the Microsoft Windows User’s Guide or your
particular Application’s User’s Guide.)
If your application provides a printer dialog box (for selecting printing options, such as the
print range, print quality, number of copies, orientation, paper size, etc.,) it will be displayed
after you select “Print.” For some applications, you must select the Print command, choose
the Printer button on the Print dialog box, then choose the Options button on the Print Setup
dialog to display these options. Confirm that the options are set correctly, then select the OK
button to start printing.
Page 21

8. TROUBLESHOOTING
8.1 Facsimile Display Error Message
or for 9910 only
Cause: This error message is displayed if the amount of data received
exceeds the page memory with the printing resolution set to
400 x 400 dpi in the Pitney Bowes Printer Driver.
Solution: Install an Option Memory Card in the Facsimile
unit and/or reduce the Print Resolution to 200 x 200 dpi.
Verify resolution setting on Fax unit is set to 400 x 400 dpi. This
requires additional memory in most cases.
8.2 Colored text may not print correctly in the 400 x 400 dpi printing
resolution
Cause: This is a common symptom when using Windows Universal
Printer Driver and printing colored text with a monochrome
printer.
Solution: Print the document in the 200 x 200 dpi printing resolution, or set
the Font color to “AUTO” in your application.
8.3 PC Display (Not Enough RAM Capacity or Not Enough Free Hard
Disk Space)
Sometimes these messages may not be visible as they could be hiding behind a foreground
application window. In this case, switch to the application you are printing from, to display
the error message.
When “Not Enough RAM Capacity” occurs, close any other application or restart
Windows, then retry printing. If this reoccurs, it is recommended that you increase the level
of Virtual Memory in the Control Panel, or add additional RAM to your PC.
8.4 Port Connection
If you encounter a “The Printer on LPT1 is not Responding” message (depending on your
type of PC) while attempting to print when the Fax is not ready, do the following: (The fax
Ready mode=Stand-by, Waiting to Dial or Printer Mode):
a. Verify that the bi-directional parallel (IEEE-1284) cable is properly connected.
Insufficient Memory
for Print Job
* Printer Mode *
Memory Overflow
Page 22

b. Click to select “Use Print Manager” in the Printers dialog box of the Control Panel
window.
c. Increase the time (seconds) of Transmission Retry and Timeouts. Do this by
clicking on the Connect button in the Printers dialog box of the Control Panel
window. (When the time is changed, the Resolution, Paper Size and Paper
Orientation settings may return to default settings. Be sure to readjust them to your
specific needs).
8.5 Software Installation – Copying Files
If you encounter a dialog box, similar to the one
shown to the right, during the printer driver software
installation, you can direct Windows to retrieve the
ICONLIB.DLL file, along with two other required
files (UNIDRV.DLL and UNIDRV.HLP), using the
“Browse” button. In some cases , when Windows
was loaded onto your PC when delivered (especially
if the Windows 95, 98 or NT 4.0 disks were not
provided), these files may be located on your hard drive, in a “win95,” “win98” or “winNT4”
directory. Browse to this directory, click on OK and the files should be loaded automatically.
9. REMOVING THE PITNEY BOWES PRINTER DRIVER
This section describes how to remove the Pitney Bowes Printer Driver from the Control Panel.
9.1 For Windows 3.1 and 3.11 (9800/9900 Series Only)
1. In the Main Group, double click the Control Panel icon. The Control Panel window
appears.
2. In the Control Panel window, double click the Printers icon. The Printer dialog box
appears.
3. In the Installed Printers box, click on the Pitney Bowes Model 9800/9900 Series printer
to be removed.
4. Click the Remove button. A message box will appear, asking you to confirm the removal.
5. If you are certain that you want to remove it, click the Yes button.
6. Click the Close button to exit to the Control Panel window.
Page 23

9.2 For Windows 95/98
1. Start Microsoft Windows 95/98.
2. Click the Start button, point to Settings, then click on Printers.
3. In the Printers folder, point to the Pitney Bowes facsimile unit (e.g., 2050) you want to
remove, then click the “right” mouse button.
4. Click on Delete.
5. If you are sure you wish to delete the selected Pitney Bowes Printer Driver, click on Yes.
6. Windows will ask if you wish to delete files that were used only for this printer. Click on
Yes, unless you wish to keep these files on your hard drive.
7. Close the Printers box.
NOTE: The Pitney Bowes facsimile unit will be removed from the Installed Printers list and
the printer driver will be removed from your hard disk. However, since it is possible other
printers may use some components installed during its installation, in some cases not all
components will be removed.
9.3 For Windows NT 4.0
1. Start Microsoft Windows NT 4.0 and log onto the computer/network with an account that
can add or change printer configurations (i.e., Administrator).
2. Click the Start button, point to Settings, then click on Printers.
3. In the Printers folder, point to the Pitney Bowes facsimile unit (e.g., 2050) you want to
remove, then click on the “right” mouse button.
4. Click on Delete.
5. If you are sure you wish to delete the selected Pitney Bowes Printer Driver, click the Yes
button.
6. Windows will ask if you wish to delete files that were used only for this printer. Click on
Yes, unless you wish to keep these files on your hard drive.
7. Close the Printers box.
NOTE: The selected Pitney Bowes facsimile unit will be removed from the Installed Printers
list and the printer driver will be removed from your hard disk. However, since it is possible
other printers may use some components installed during its installation, in some cases not all
Page 24

United States:
100 Oakview Drive
Trumbull, Connecticut 06611
Canada:
1595-16th Avenue, 2nd Floor
Richmond Hill, Ontario
L4B 3V3
United Kingdom:
The Barrows Roydon Road
Harlow, Essex
CM19 5B1
Australia:
Level 3, Unit 3, 14 Aquatic Drive
Frenchs Forest
NSW 2086
FX 30020 10/99 © Pitney Bowes, Inc. All Rights Reserved. Printed in U.S.A.
 Loading...