

Pitney Bowes DL460, DL550 Quick Reference Manual

Quick Reference GuideQuick Reference Guide
DL460/550DL460/550


This machine allows the user to perform various functions when it is equipped with
different options.
This booklet gives you a quick overview of the procedures to follow to use some of
the basic functions the machine offers.
For greater details, see Operator’s Manual, available separately.
Contents
◆It’s Easy!
Making a Copy Set/Stack of One Size .................................. 2
Using Z-Fold ......................................................................... 4
Making Stapled Copy Sets/Stacks ........................................ 6
Stamping an Image on Copies.............................................. 8
Storing an Image................................................................. 10
◆What To Do?
Making Copies on Post Cards............................................. 12
Making Copies from a Book ................................................ 14
◆Ecology
Making a Booklet ................................................................ 16
Saving Paper ....................................................................... 18
Saving Power Consumption ................................................ 20
◆Trouble!
Running out of Paper .......................................................... 22
Paper Misfeed ..................................................................... 24

2
Printing a letter size
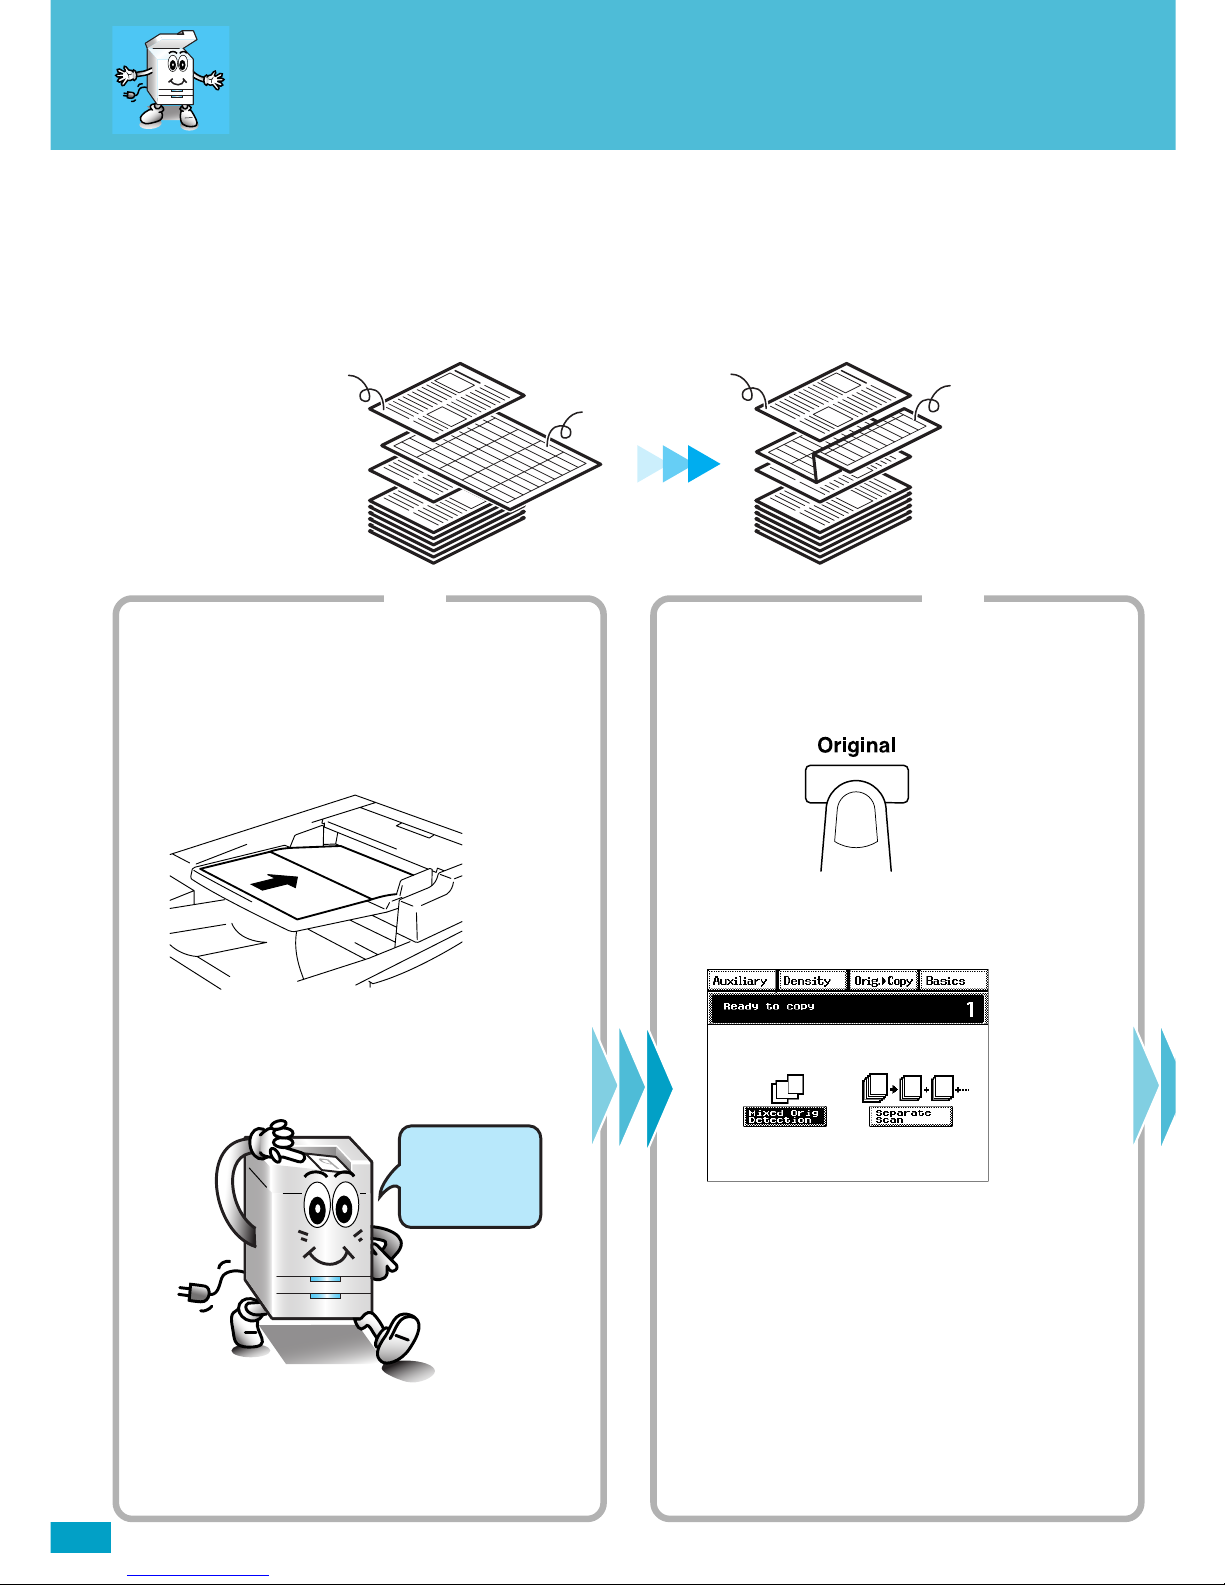
Suppose you have an orignal document of varying page sizes and would like to create an
8.5” x 11” copy set. The DL460/550 can do just that.
4002O081AA
Originals
Letter
11x17
Letter
Letter
Step 1
Loading the originals
1. Load your originals.
You can load originals of varying sizes at one
time.
4002O147AD
4002O092AA
Load your
originals
here!
Step 2
Setting the Mixed Orig. Detection function
1. Press the Original key.
4002O294CA
2. Touch [Mixed Orig. Detection].
4003P117CA
Copies

3
copy of a mixed original
❏ NOTE
· You will need an Electronic Document Handler mounted on your
machine.
✍Useful Tip
· The machine can also automatically select the appropriate size of paper,
according to each original, and make full-size copies.
Operator’s Manual
Reference Pages:
Auto Paper☞p.3-9
Selecting the Zoom
☞p.3-14
Auto Size☞p.3-14
Mixed Orig. Detection
☞p.3-66
Step 3 Step 4
Making the Touch Panel settings
1. Touch [Zoom].
4003P001CA
2. Touch [Auto Size].
4003P316EA
3. Select the paper size.
4003P306EA
Starting the copy cycle
1. Press the Start key.
4002O280CB
4
Using Z-Fold
4002O323AA
Originals
Letter
11x17
Letter
11x17 Z-folded
Step 1
Loading the originals
1. Load your originals.
You can load originals of varying sizes at one
time.
4002O147AD
4002O092AA
Load your
originals
here!
Step 2
Setting the Mixed Orig. Detection function
1. Press the Original key.
4002O294CA
2. Touch [Mixed Orig. Detection].
4003P117CA
Copies
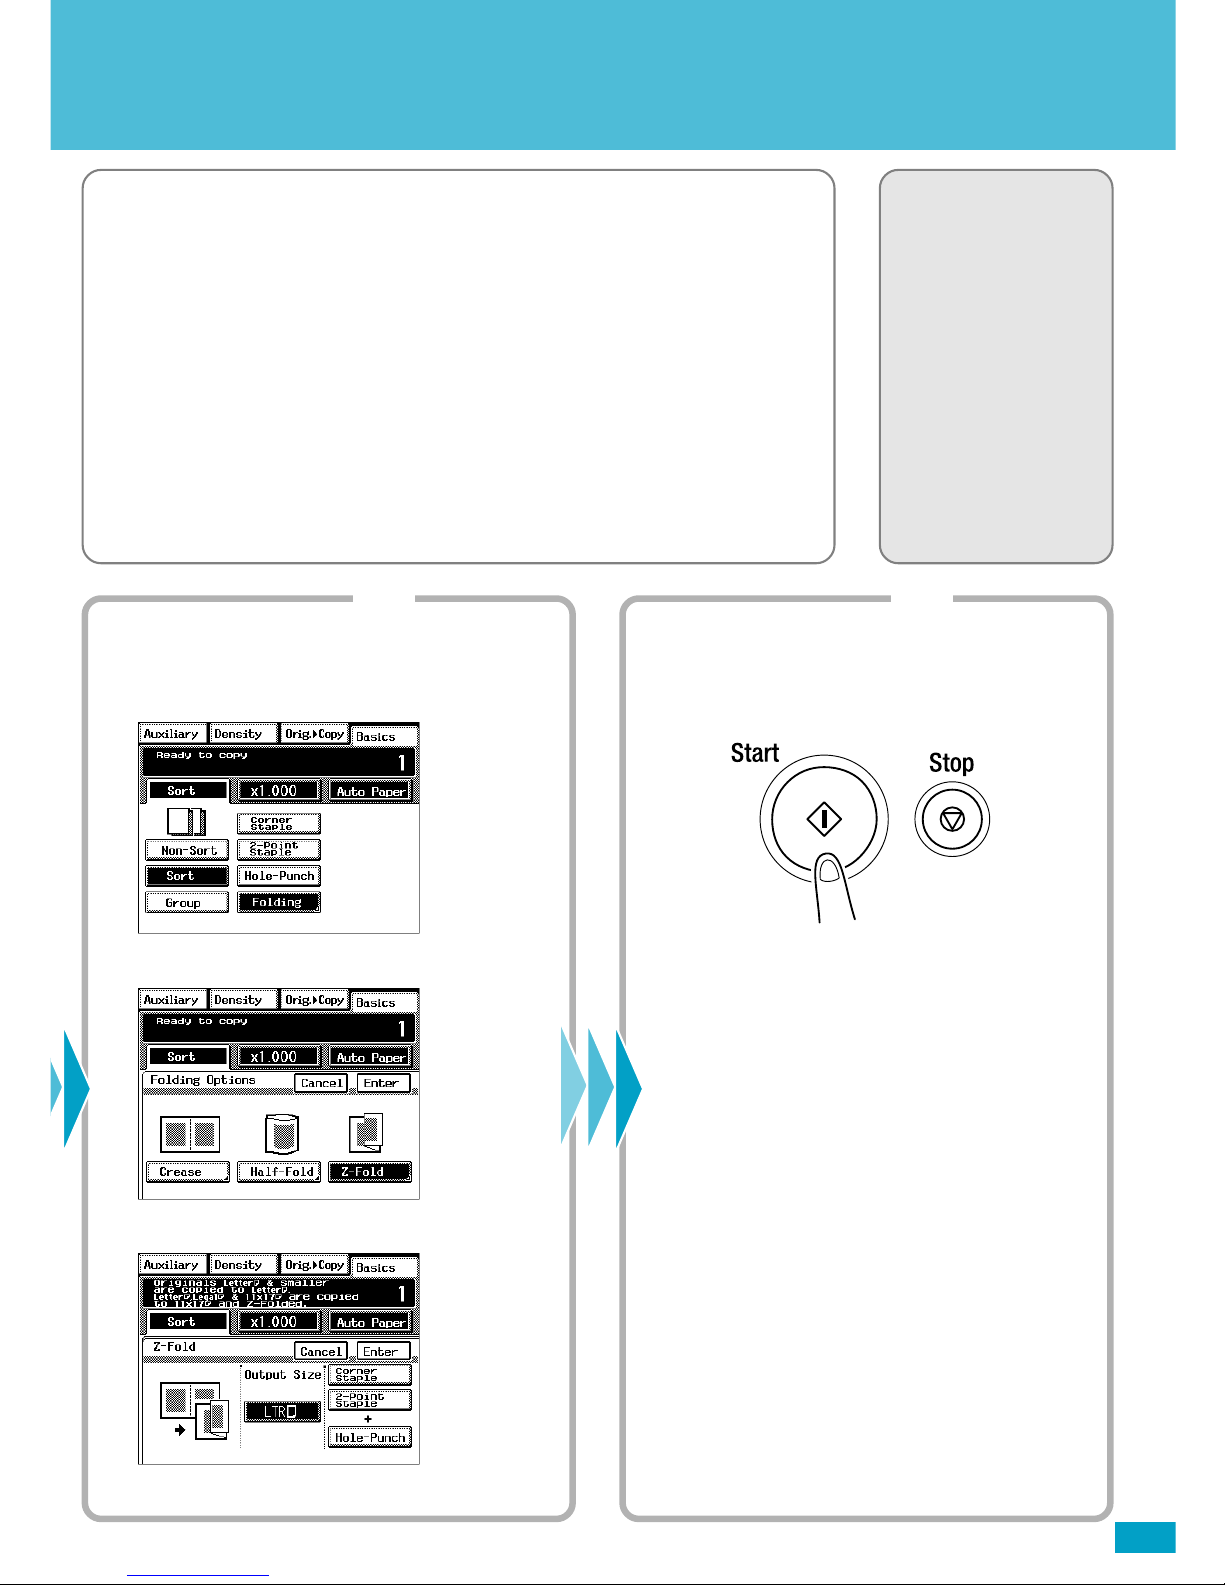
Make your 11”x17” pages fit neatly into an 8.5”x11” Letter size document without changing
the actual page size by using Z-Fold.
5
❏ NOTES
· You will need an Electronic Document Handler and a 9708 Finisher
mounted on your machine.
· Make sure that [Auto Paper] is selected. If [Auto Paper] is not selected,
touch [Auto Paper] to highlight it.
✍ Useful Tip
· You can also combine this function with Staple or Hole Punch.
Operator’s Manual
Reference Pages:
Auto Paper☞p.3-9
Hole Punch☞p.3-23
Staple☞p.3-24
Folding☞p.3-28
Mixed Orig. Detection
☞p.3-66
Step 3 Step 4
Making the Touch Panel settings
1. Touch [Finishing] and then [Folding].
4003P039CA
2. Touch [Z-Fold].
4003P045CA
3. Touch [LTR] of Output Size.
4003P346EA
Starting the copy cycle
1. Press the Start key.
4002O280CB
6
Machine Sort and Sta
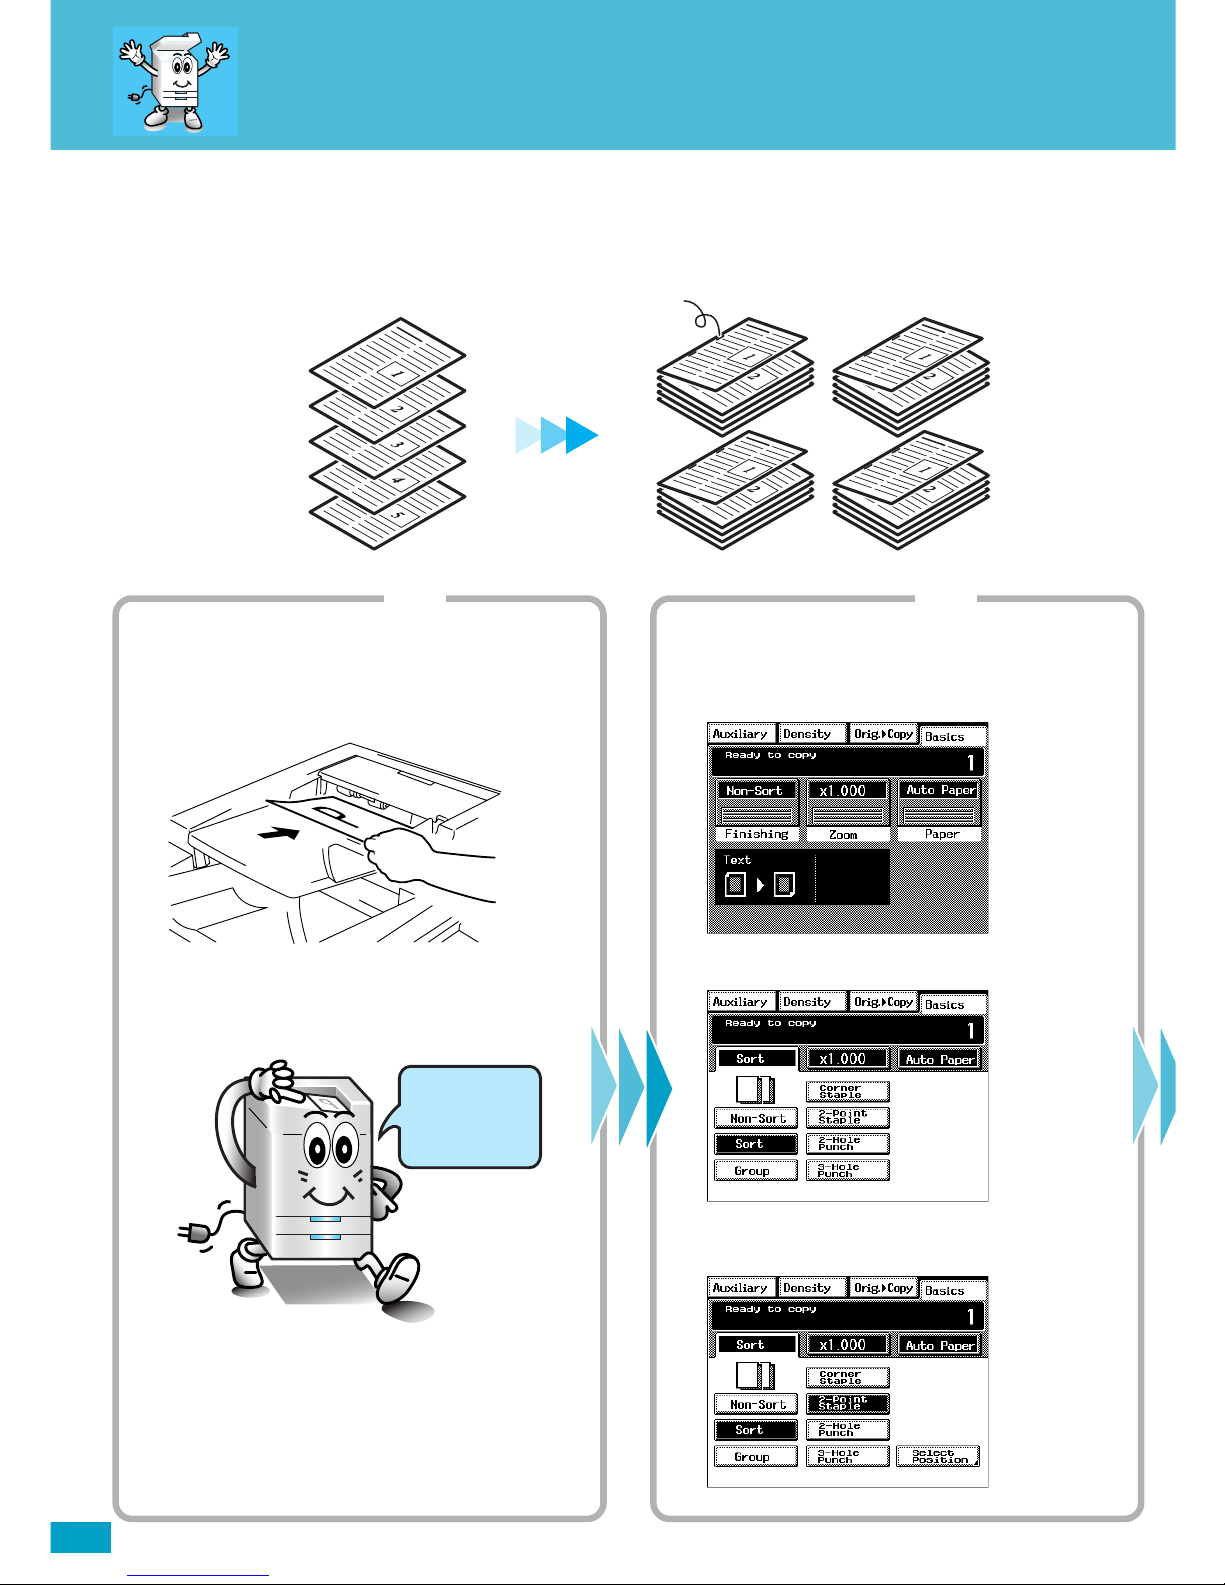
You may find it troublesome to sort and/or staple copy sets or stacks.
Let the machine take care of these chores.
4002O082AA
Copy SetsOriginals
Stapled
Step 1 Step 2
Loading the originals
1. Load your originals.
4002O122AC
4002O092AA
Load your
originals
here!
Making the Touch Panel settings
1. Touch [Finishing].
4003P001CA
2. Touch [Sort].
4003P330EA
3. Touch [Corner Staple] or [2-Point Staple].
4003P334EA
7
❏ NOTE
· You will need an Electronic Document Handler and a Finisher or Mailbin
Finisher mounted on your machine.
✍Useful Tips
· The machine can also staple a copy set or stack which has previously
been removed from it.
· Holes can also be punched in your copy sets or stacks.
Operator’s Manual
Reference Pages:
Finishing Function
☞p.3-20
Sort☞p.3-22
Hole Punch☞p.3-23
Staple☞p.3-24
Manual Staple☞p.3-26
4002O077AB
4002O305CA
Hole Punch
Step 3
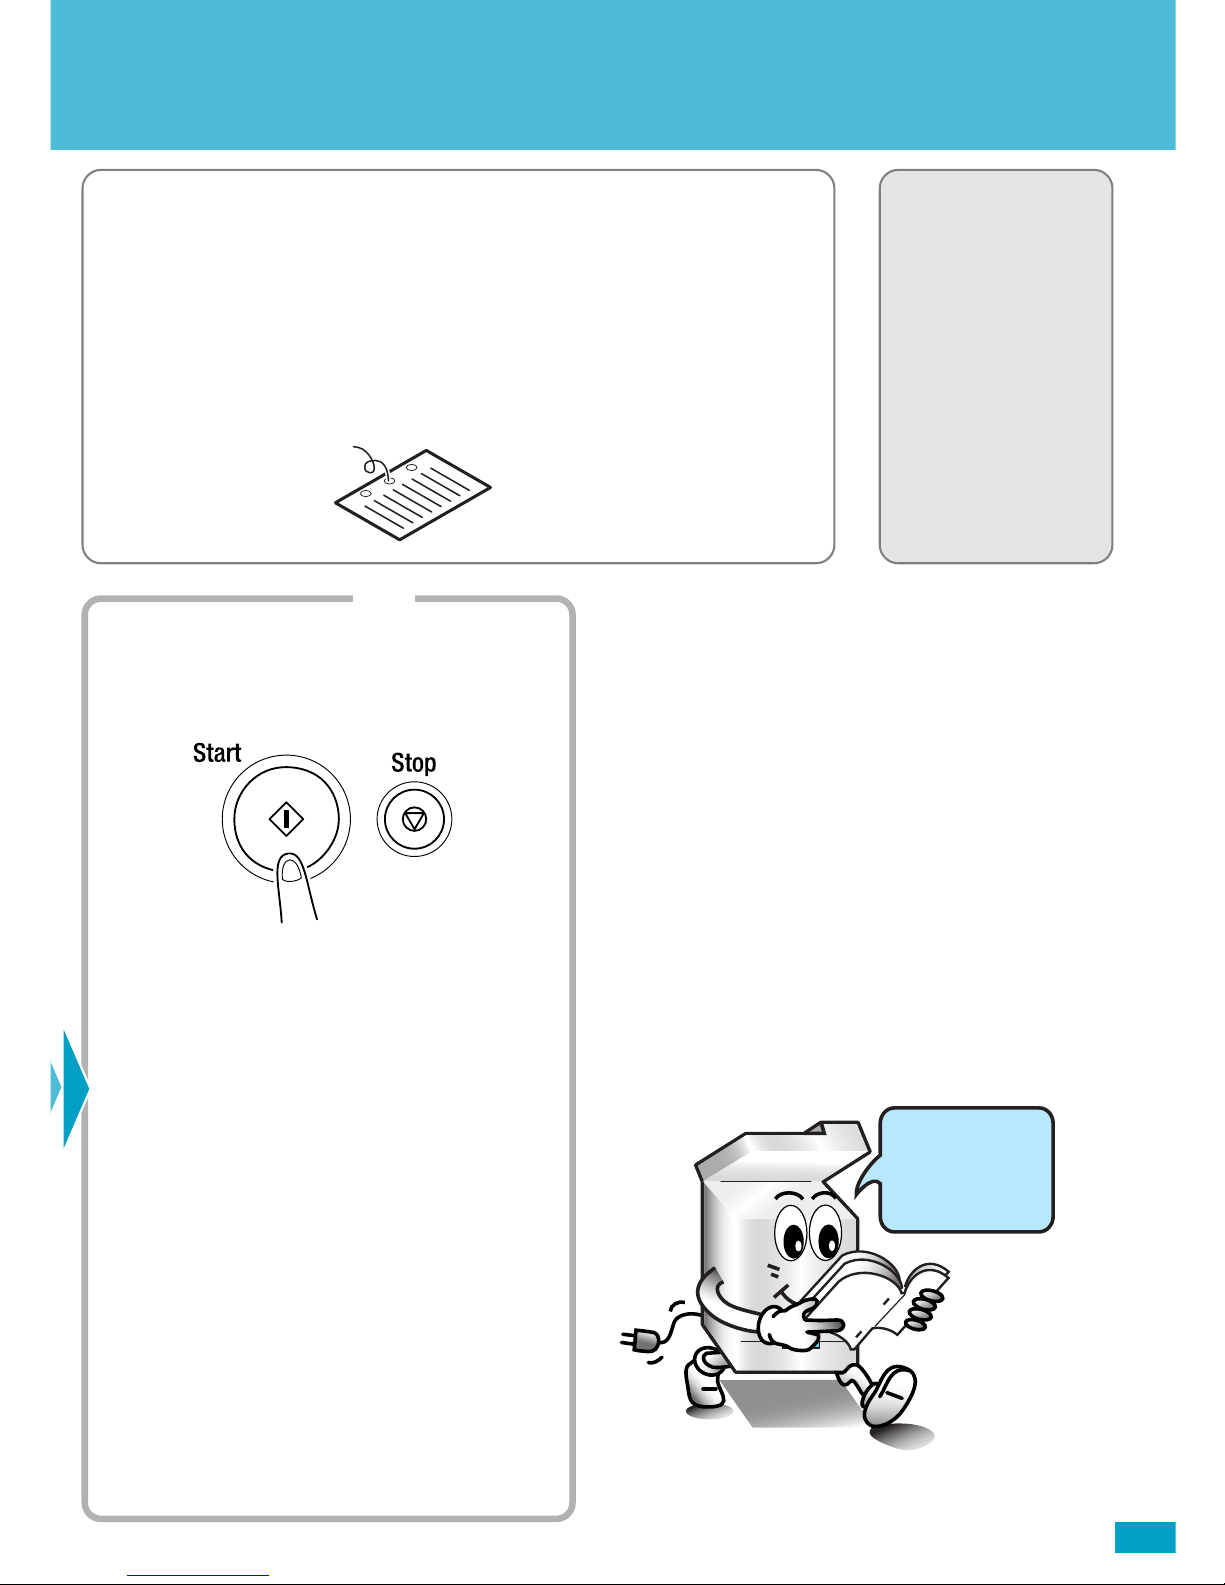
Starting the copy cycle
1. Press the Start key.
4002O280CB
Looking good!
 Loading...