

Philips Intelia Deluxe HD8902, Intelia Deluxe HD8900 User Manual

Always here to help you
Register your product and get support at
www.saeco.com/welcome
HD8902, HD8900


English 5
Čeština 24
Deutsch 43
Español 63
Français 83
Italiano 103
Magyar 123
Nederlands 143
Polski 163
Português 183
Slovensky 203
ESPRES SO
ESPRES SO LU NGO
STEAM
A
R
O
M
A
S
T
R
E
N
G
T
H
MENU
HOT WATER
1
2
4
13
14
15
26 25
16
19
20
18
17
21 22
24
23
3
8
9
6
5
10
11
7
12
2728

English
Contents
Introduction 5
Important 6
Warning 6
Caution 6
Electromagnetic fields (EMF) 7
Machine overview (Fig. 1) 7
The display 8
First installation 8
Manual rinsing cycle 10
AquaClean filter 11
AquaClean filter installation 11
Replacing the AquaClean filter 12
Using the machine 12
Brewing coffee with beans 12
Adjusting the coffee quantity 12
Adjusting the grind setting 12
Frothing milk 13
Hot water 13
Cleaning and maintenance 13
Weekly cleaning of the brew group 13
Lubrication 14
Classic milk frother cleaning (daily) 15
Classic milk frother and steam wand cleaning (weekly) 15
Descaling 15
Descaling procedure 16
Interruption of the descaling cycle 17
Warning icons and error codes 17
Meaning of error codes 18
Ordering accessories Saeco 19
Guarantee and support 19
Recycling 20
Troubleshooting 20
5
Introduction
Congratulations on buying this Intelia/Intelia Deluxe full automatic espresso
machine! To fully benefit from the support that Saeco offers, please register
your product at www.saeco.com/welcome. This user manual applies to all
Intelia/Intelia Deluxe models with classic milk frother. The machine is
suitable for preparing espresso coffee using whole coffee beans.
English

6
English
Important
Warning
-
Connect the machine to a wall socket with a voltage matching the
technical specifications of the machine.
-
Connect the machine to an earthed wall socket.
-
Do not let the power cord hang over the edge of a table or counter, or
touch hot surfaces.
-
Never immerse the machine, mains plug or power cord in water (danger
of electrical shock).
-
Do not pour liquids on the power cord connector.
-
Never direct the hot water jet towards body parts: danger of burns.
-
Do not touch hot surfaces. Use handles and knobs.
-
Switch off the machine with the main switch located on the back and
remove the mains plug from the socket:
-
If a malfunction occurs.
-
If the machine will not be used for a long time.
-
Before cleaning the machine.
-
Pull on the plug, not on the power cord.
-
Do not touch the mains plug with wet hands.
-
Do not use the machine if the mains plug, the power cord or the machine
itself is damaged.
-
Do not make any modifications to the machine or its power cord.
-
Only have repairs carried out by a service center authorized by Philips to
avoid a hazard.
-
The machine should not be used by children younger than 8 years old.
-
This machine can be used by children aged from 8 years and above and
by persons with reduced physical, sensory or mental capabilities or lack
of experience and knowledge if they have been given supervision or
instruction concerning use of the machine in a safe way and if they
understand the hazards involved.
-
Cleaning and user maintenance shall not be made by children unless
they are older than 8 and supervised.
-
Keep the machine and its cord out of the reach of children aged less than
8 years.
-
Children should be supervised to ensure that they do not play with the
machine.
-
Never insert fingers or other objects in the coffee grinder.
Caution
-
This machine is intended for normal household use only. It is not
intended for use in environments such as staff kitchens of shops, offices,
farms or other work environments.
-
Always put the machine on a flat and stable surface. Keep it in upright
position, also during transport.
-
Do not place the machine on a hotplate or directly next to a hot oven,
heater or similar source of heat.

-
Only put roasted coffee beans in the bean hopper. If ground coffee,
instant coffee, raw coffee beans or any other substance is put in the
coffee bean hopper, it may cause damage to the machine.
-
Let the machine cool down before inserting or removing any parts. The
heating surfaces may retain residual heat after use.
-
Never fill the water tank with warm, hot or sparkling water, as this may
cause damage to the water tank and the machine.
-
Never use souring pads, abrasive cleaning agents or aggressive liquids
such as petrol or acetone to clean the machine. Simply use a soft cloth
dampened with water.
-
Descale your machine regularly. The machine indicates when descaling is
needed. Not doing this will make your appliance stop working properly.
In this case repair is not covered under your guarantee.
-
Do not keep the machine at temperatures below 0°C.Water left in the
heating system may freeze and cause damage.
-
Do not leave water in the water tank when the machine is not used over
a long period of time. The water can be contaminated. Use fresh water
every time you use the machine.
Electromagnetic fields (EMF)
This Philips appliance complies with all applicable standards and
regulations regarding exposure to electromagnetic fields.
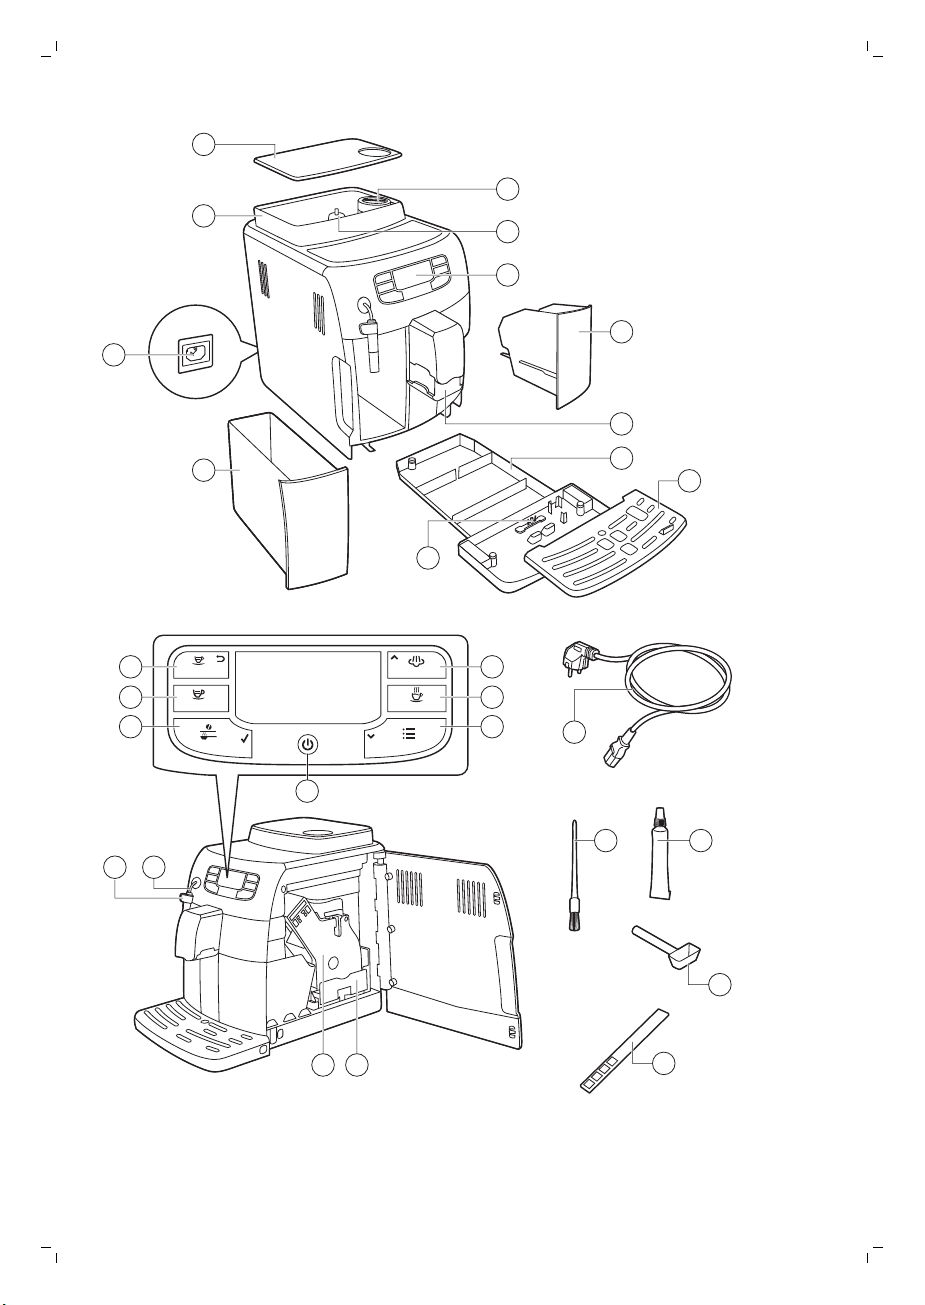
Machine overview (Fig. 1)
1 Lid of the bean hopper
2 Coffee bean hopper
3 Socket for cord
4 Water tank
5 Pre-ground coffee compartment
6 Grinder adjustment knob
7 Control panel
8 Coffee grounds container
9 Coffee dispensing spout
10 Drip tray
11 Drip tray cover
12 Drip tray full indicator
13 ESPRESSO button
14 ESPRESSO LUNGO button
15 AROMA STRENGTH button
16 Standby button
17 MENU button
18 HOT WATER button
19 STEAM button
20 Cord
21 Cleaning brush (for specific types only)
22 Grease (for specific types only)
23 Pre-ground coffee measuring spoon
24 Water hardness tester
25 Coffee residues drawer
26 Brew group
27 Hot water/steam wand
English
7

ESP RESS O
A
R
O
M
A
S
T
R
E
N
G
T
H
ST EAM
MEN U
8
English
The display
28 Classic milk frother
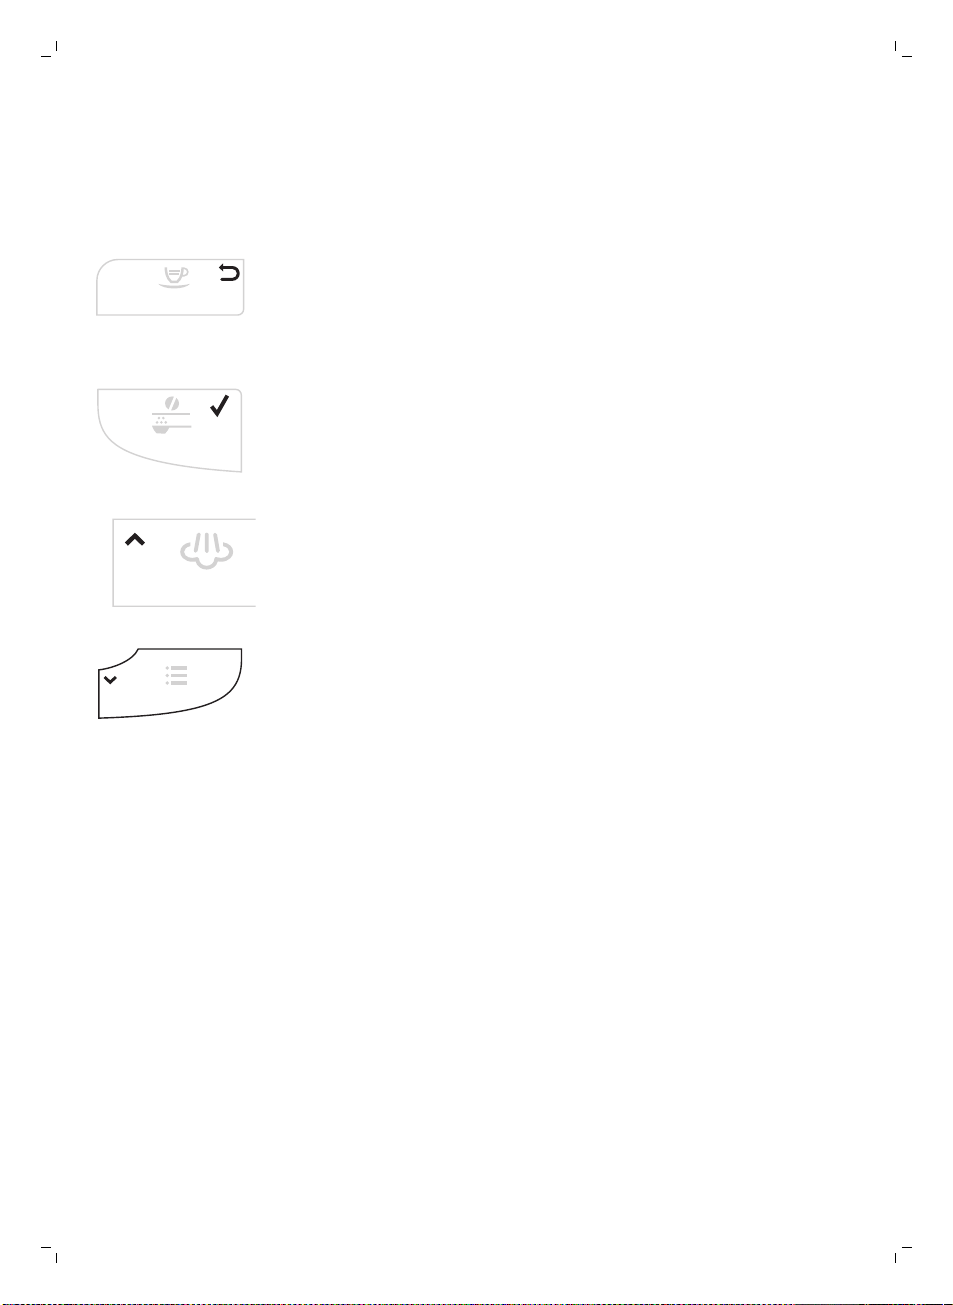
Some buttons can be used to navigate through the menus:
-
ESPRESSO button = ESC button: you can press this button to return to
the main menu.The ESC button takes you back one level.You may have
to press the ESC button. several times to get back to the main menu.
-
AROMA STRENGTH button = OK button: you can press this button to
select, confirm or stop a function.
-
STEAM button = UP button: press this button to scroll up through the
display menu
-
MENU button = DOWN button: press this button to scroll down through
the display menu.
First installation
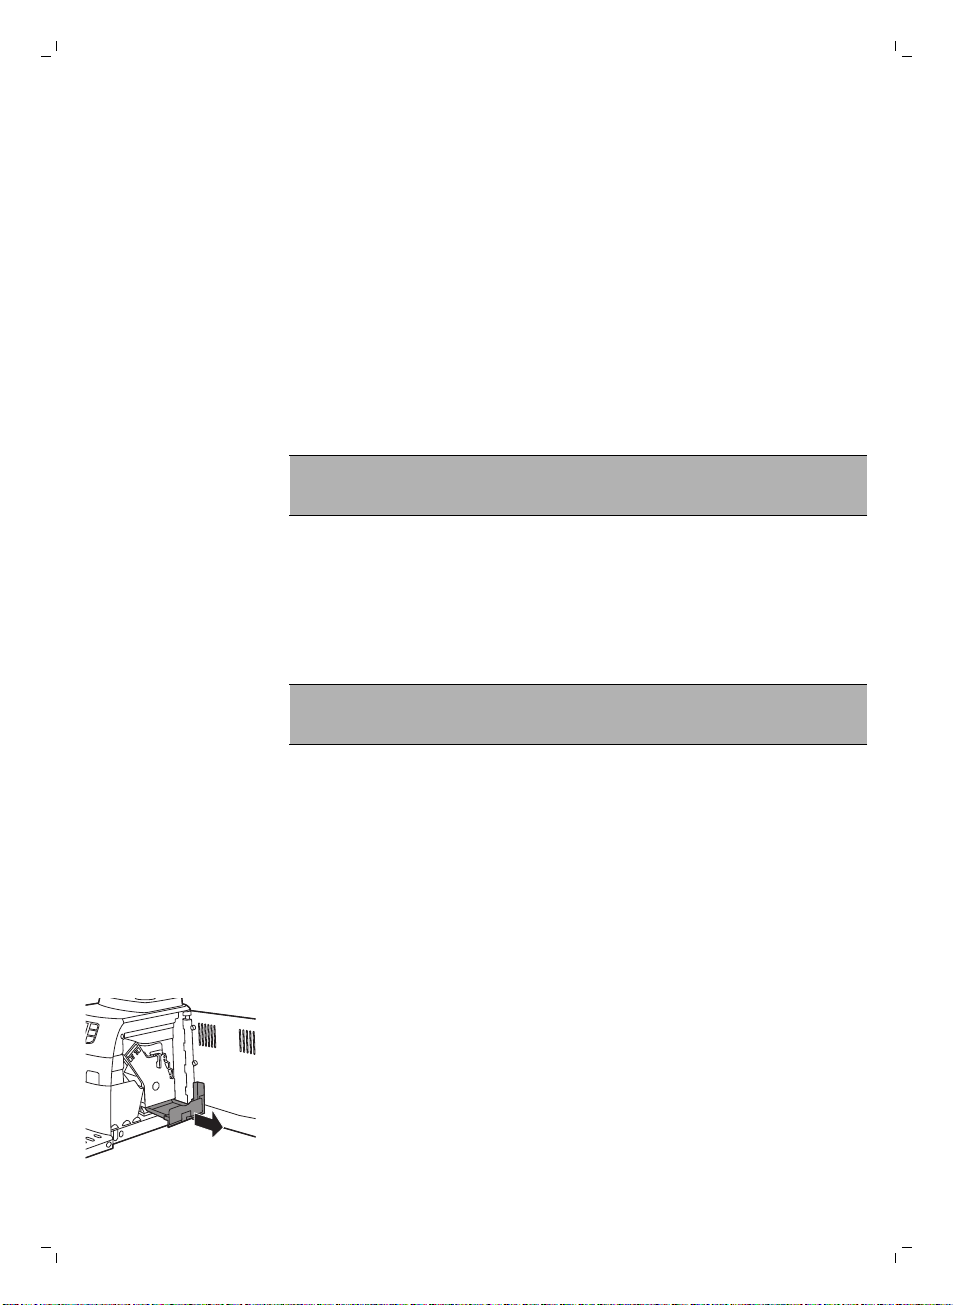
1 Slide the drip tray with drip tray cover into the machine.
2 Remove the water tank.
3 Fill the water tank to the MAX level with fresh water.
4 Fill the coffee bean hopper with coffee beans.
5 Insert the small plug into the socket located on the back of the machine.
Insert the mains plug into the wall socket.
6 Attach the classic milk frother to the hot water/steam dispensing spout.
7 Place a container under the classic milk frother.
8 Press the STANDBY button to switch on the machine.
9 Press the OK button to start the automatic circuit priming cycle.
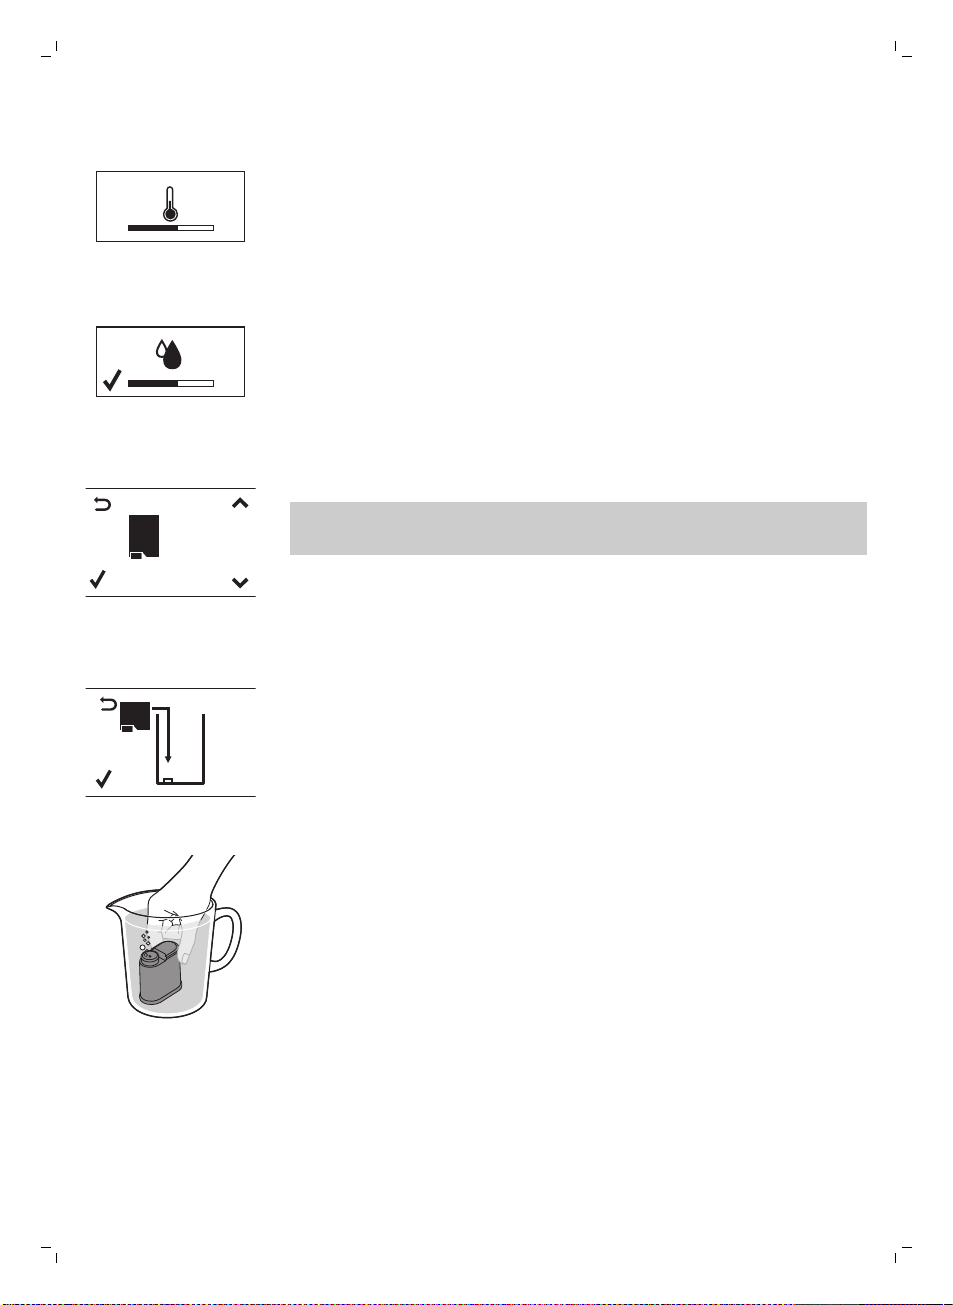
10 The display shows the following icon to indicate that the machine is
heating up.

AQUA
CLEA N
AQUA CLE AN
FILTE R?
AQUA
CLEA N
INS TALL
FILTE R
English
-
The machine performs an automatic rinsing cycle.
11 The display shows the following icon to indicate you have to install the
AquaClean filter.
If you want to install the AquaClean filter afterwards, press the ESC
button and continue with the manual rinsing cycle. For installation, see
chapter ‘AquaClean filter’.
12 Press the OK button. The display shows the following icon.
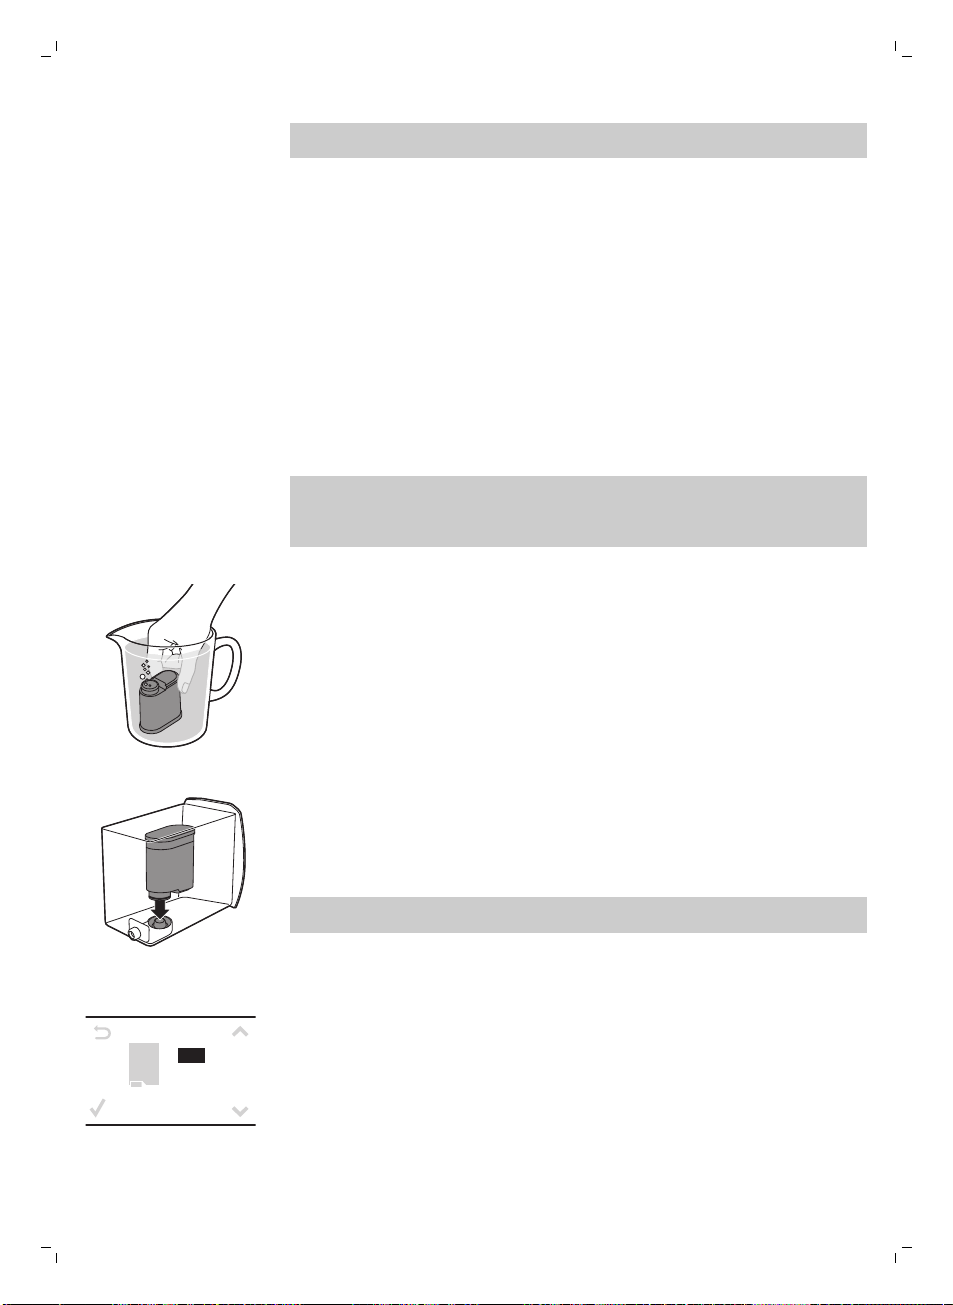
13 Remove the AquaClean filter from its packaging. Shake the filter for about
5 seconds.
9
14 Immerse the filter upside down in a jug with cold water and wait until no
more air bubbles come out.
15 Remove the water tank from the machine, empty it and insert the filter
vertically onto the filter connection.
16 Fill the water tank with fresh water and slide it back into the machine.
17 Press the OK button.
AQ U A
CLEA N
0/8
ON
OFF
AQUA
CLEA N
10 0%
10
English
18 Select ON on the display and confirm the activation by pressing the OK
button.
The display shows a tick icon to confirm the activation.
Manual rinsing cycle
19 The display shows the filter ready icon to indicate the AquaClean filter
has been installed correctly.
20To rinse the filter, press the HOT WATER button and let half a litre of
water flow out from the hot water/steam dispensing spout. Discard this
water.
It can take a while until water comes out of the hot water dispensing
spout. The filter needs to be fully filled and rinsed with water.
The machine is ready for use.
After installing the AquaClean filter, you do not have to perform the manual
rinsing cycle.
1 Place a container under the coffee dispensing spout.
2 Press the AROMA STRENGTH button to select pre-ground coffee. Do not
add pre-ground coffee.
3 Press the ESPRESSO LUNGO button. The machine starts dispensing
water.
4 When the machine stops dispensing, empty the container. Repeat steps
1-3 twice.
5 Place a container under the classic milk frother.
6 Press the HOT WATER button. Hot water dispensing starts automatically.
AQ U A
CLEA N
0/8
ON
OFF
Dispense water until the display shows the no water icon.
7 Fill the water tank with fresh water up to the MAX level and remove the
container.
The machine is ready for use.
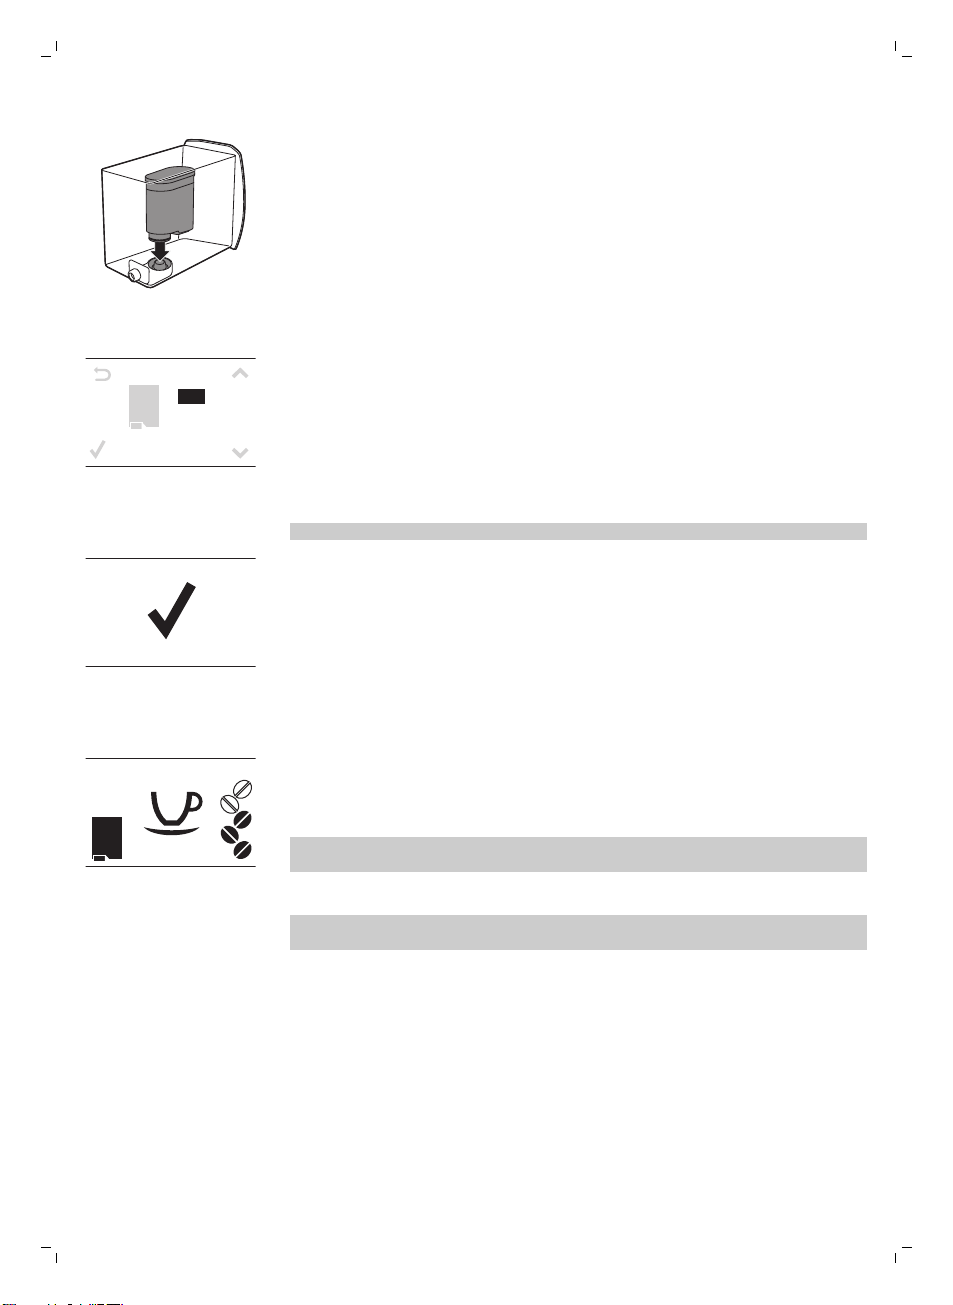
AquaClean filter
The AquaClean filter is designed to reduce limescale deposits in your coffee
machine and provide filtered water to preserve the aroma and flavor of each
cup of coffee. If you use a series of 8 Aquaclean filters as indicated in this
user manual, you don't have to descale your machine for 5000 cups (with a
capacity of 100 ml).
AquaClean filter installation
Your machine has to be completely limescale-free before you start to use
the AquaClean filter. If you did not activate the filter upon first use and
brewed more than 50 cups (with 100 ml capacity), you need to descale the
machine before you activate the filter.
1 Remove the AquaClean filter from its packaging. Shake the filter for about
5 seconds.
2 Immerse the filter upside down in a jug with cold water and wait until no
more air bubbles come out.
English
11
3 Remove the water tank from the machine and insert the filter vertically
onto the filter connection.
4 Fill the water tank with fresh water and slide it back into the machine.
5 Press the MENU button and scroll to the AquaClean filter option. Then
press the OK button to select the AquaClean filter option.
If you are installing the filter at first time use, follow the steps in chapter
‘First installation’.
6 Select ON on the display and confirm the activation by pressing the OK
button.
12
English
Note: The display shows a tick icon to confirm the activation.
7 To rinse the filter, press the HOT WATER button and let half a litre water
flow out from the hot water/steam dispensing spout. Discard this water.
Note: It can take a while until water comes out of the hot water
dispensing spout. The filter needs to be fully filled and rinsed with water.
8 Use the sticker attached to the plastic packaging of the AquaClean filter
to write down the date of the next filter replacement (after 3 months).
Place the sticker on the water tank.
The filter and machine are now ready for use.
Replacing the AquaClean filter
Replace the filter every 3 months or at machine request.
Display icon AquaClean filter
10% + icon flashes The performance of this filter is decreasing. It is
What to do
recommended to remove the old filter and place the
new filter as described in section 'AquaClean filter
installation’ to retain proper filter performance.
0% + icon flashes Remove the old filter immediately and place the new
0% and icon disappears from display You first need to descale the machine before you can
After 8 filter replacements you need to descale the machine chapter
‘Descaling’, section ‘Descaling procedure’.
filter as described in section ‘AquaClean filter
installation’. When you activate a new filter, the display
shows the word NEW. Press the OK button to confirm
the activation.
place and activate a new filter.
Using the machine
Brewing coffee with beans
1 Adjust the coffee dispensing spout to suit the size of your cup.
2 Press the AROMA STRENGTH button to select the desired coffee
strength from 1-5 beans.
3 Press the ESPRESSO button to brew an espresso or press the ESPRESSO
LUNGO button to brew a coffee.
Adjusting the coffee quantity
1 Press and hold the ESPRESSO button or ESPRESSO LUNGO button until
the display shows the word MEMO.
2 When the cup contains the desired amount of coffee, press the OK
button to save the selected quantity.
Adjusting the grind setting
Note: You can only adjust the grinder settings when the machine is grinding
coffee beans.
Frothing milk
Hot water
English
1 Open the lid of the bean hopper.
2 Place a cup under the coffee dispensing spout.
3 Press the ESPRESSO button.
4 While the machine grinds the coffee, place the end of the measuring
spoon handle on the grinder adjustment knob in the coffee bean hopper.
Use the spoon to press and turn the knob to the left or to the right one
notch a time.
5 There are 10 different grinding degree settings you can choose from. The
smaller the dot, the stronger the coffee.
-
Coarse grind: lighter taste, for dark roasted coffee blends.
-
Fine grind: bolder taste, for light roasted coffee blends.
6 Brew 2-3 coffees to taste the difference.
Warning: Danger of scalding. Only grab the steam wand by its
protective handle. Dispensing may be preceded by small jets of
hot water.
1 Fill 1/3 of a jug with cold milk.
2 Immerse the classic milk frother in milk. Press the STEAM button.
3 Froth the milk by gently swirling the jug and moving it up and down.
4 Press the OK button to stop frothing.
13
Warning: Danger of scalding. Only grab the steam wand by its
protective handle. Dispensing may be preceded by small jets of
hot water.
1 Place a jug under the classic milk frother.
2 Press the HOT WATER button. Hot water dispensing starts automatically.
3 Press the OK button to stop hot water dispensing. Remove the container.
Cleaning and maintenance
Weekly cleaning of the brew group
Clean the brew group once per week.
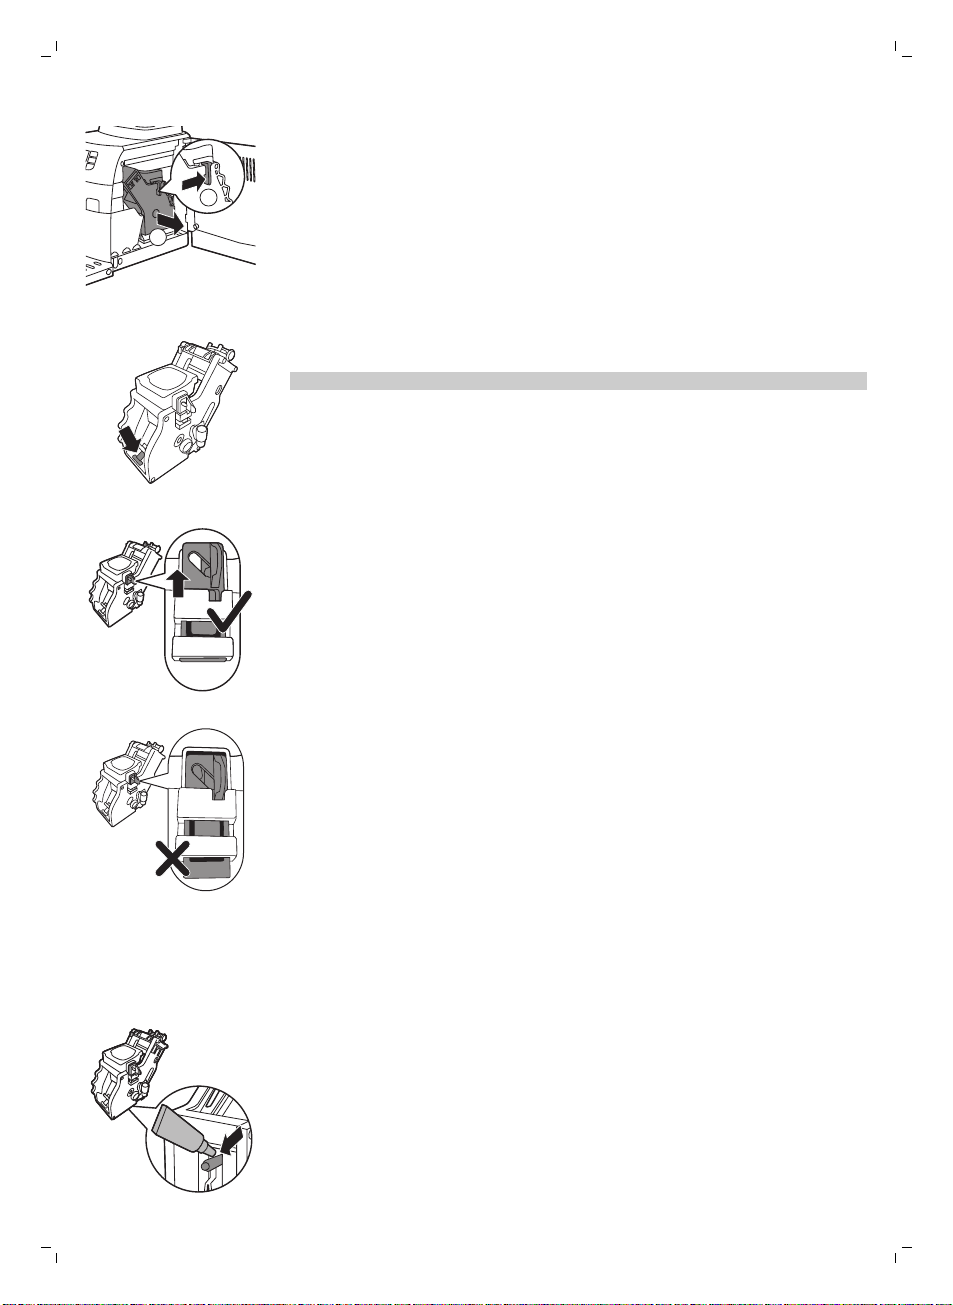
1 Remove the coffee grounds container and open the service door.
2 Remove the coffee residues drawer.
1
2
14
English
3 To remove the brew group, press the lever and pull the brew group out of
the machine.
4 Rinse the brew group with fresh water and let it air dry.
5 To place the brew group back, make sure that the lever is in contact with
the base of the brewing unit.
Note: If it is not in contact with the base, push it down.
6 Make sure the locking hook of the brew group is in the correct position.
To position the hook correctly, push it upwards until it is in uppermost
position.
Lubrication
7 The hook is not correctly positioned if it is still in bottommost position.
8 Slide the brew group back into the machine along the guiding rails on the
sides until it clicks into position. Then place the coffee residues drawer
back in the machine.
Lubricate the brew group after approximately 500 cups of coffee or once a
month.
1 Apply some lubricant around the shaft in the bottom of the brewing unit.
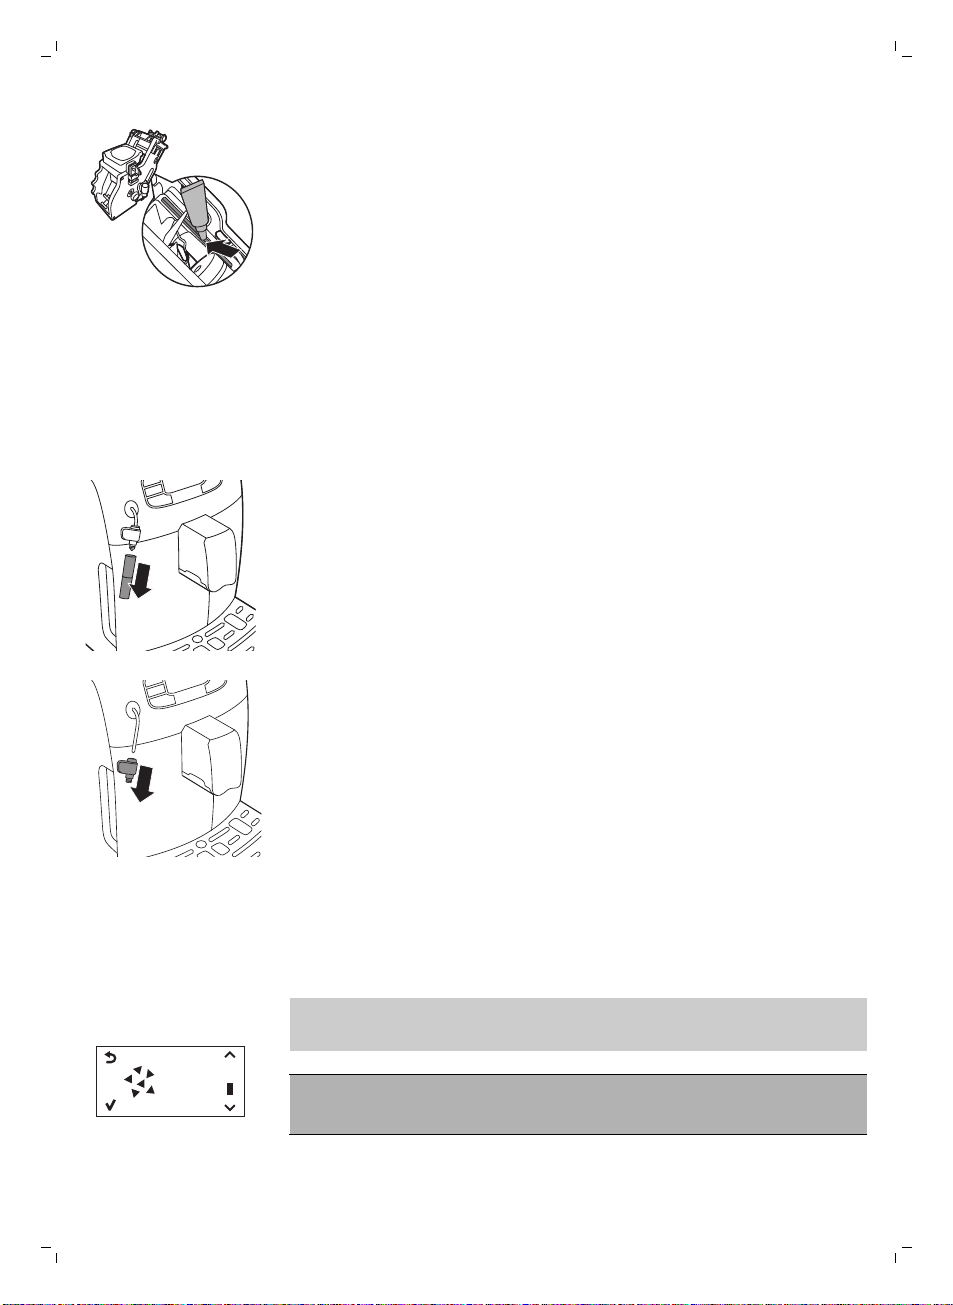
START
CALC
CLEAN
English
2 Apply lubricant to the rails on both sides, as shown in the illustration.
3 Slide the brew group back into the machine along the guiding rails on the
sides until it clicks into position. Then place the coffee residues drawer
back in the machine.
Classic milk frother cleaning (daily)
Remove the external part of the classic milk frother and rinse it with fresh
water.
Classic milk frother and steam wand cleaning (weekly)
1 Remove the external part of the classic milk frother and rinse it with fresh
water.
15
Descaling
2 Remove the upper part of the classic milk frother from the steam wand
and rinse it with fresh water.
3 Clean the steam wand with a wet cloth.
4 Reassamble all the classic milk frother parts.
You have to descale the machine when the display shows the CALC CLEAN
icon or after 8 AquaClean filter replacements.
If you do not descale when the display shows the CALC CLEAN icon or after
8 AquaClean filter replacements, the machine may stop working properly. In
this case, repairs are not covered by the guarantee).
Never drink the water with descaling mixture that you pour into
the water tank or any water with residues that comes out of the
machine during the descaling procedure.
The descaling procedure lasts approximately 30 minutes.
CA LC
CLE AN
CALC
CLEAN
16
English
Only use Saeco descaling solution to descale the machine. Saeco descaling
solution is designed to ensure optimal performance of the machine. The use
of other products may damage the machine and leave residues in the water.
You can buy Saeco descaling solution in the online shop at
www.shop.philips.com/service.
Descaling procedure
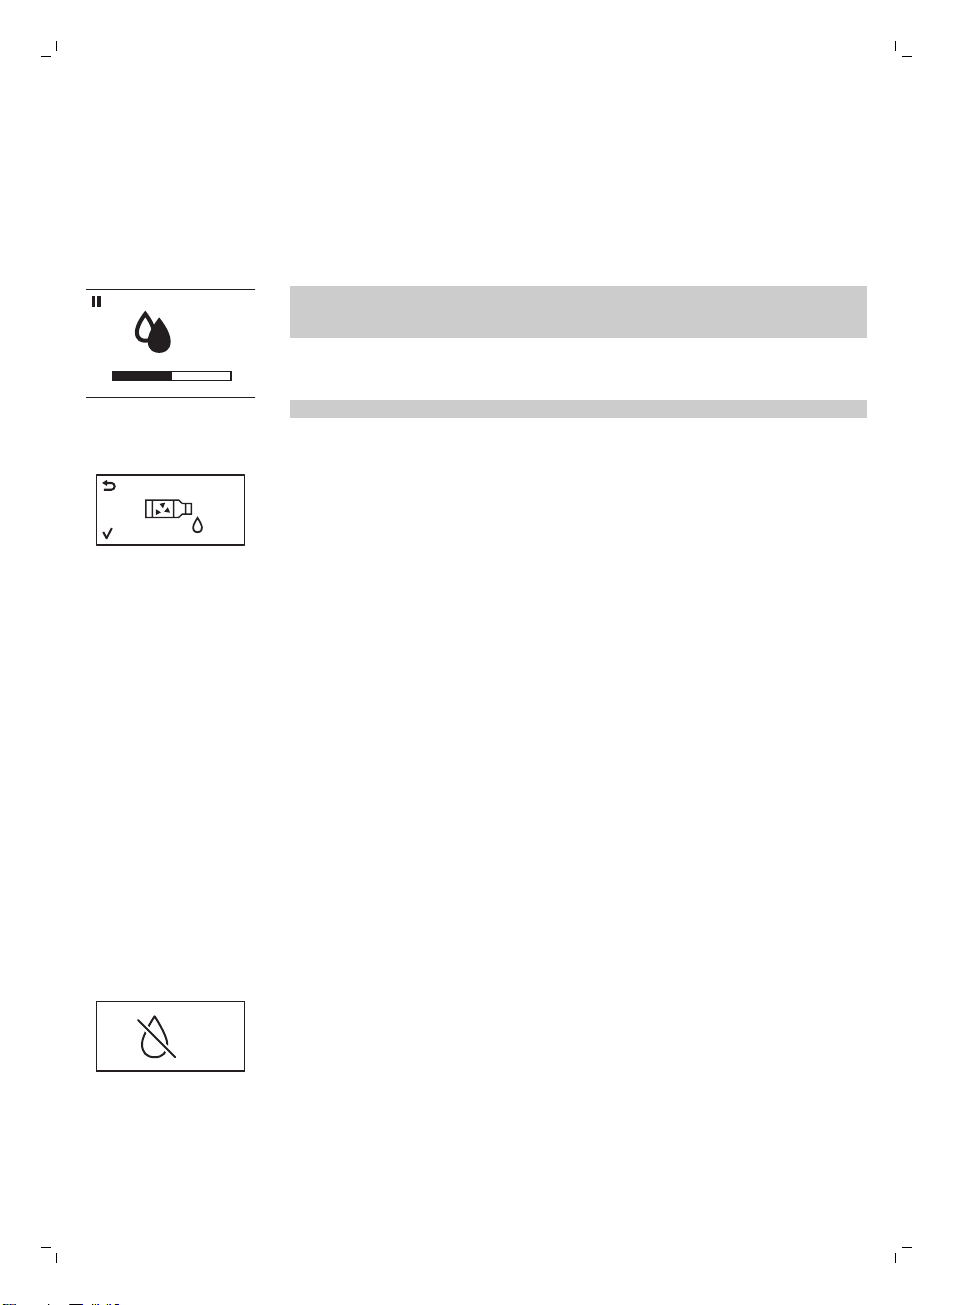
You can pause the descaling or rinsing cycle by pressing the ESC button.
The display will show the following icon. To continue the descaling or rinsing
cycle, press the OK button.
1 Remove and empty the drip tray. Slide the drip tray back into the
machine.
Note: Remove the AquaClean water filter from the water tank (if present).
2 Remove the classic milk frother from the steam wand.
3 Press the OK button.
4 The display shows the following icon to indicate that the machine enters
the descaling cycle. If you want to exit the descaling cycle, press the ESC
button.
5 Pour the entire bottle of Saeco descaling solution (250ml) into the water
tank.
6 Add water to the descaling solution in the water tank up to the CALC
CLEAN indication.
7 Place a large container (1.5 l) under the steam wand and dispensing
spout.
8 Press the OK button to start the descaling cycle.
-
The machine dispenses the entire descaling solution at regular intervals
through the steam wand and dispensing spout (this takes approximately
25 minutes).
9 Wait until all of the descaling solution has been dispensed. Remove and
empty the container.
10 Remove and empty the drip tray. Slide the drip tray back into the
machine.
11 Rinse the water tank and fill it with fresh water up to the CALC CLEAN
indication. Slide the water tank back into the machine.
12 Place the container back under the steam wand and dispensing spout.
13 Press the OK button to start the rinsing cycle (this takes approximately 4
minutes).
-
The display shows the following icon to indicate that the rinsing cycle is
finished.
14 The display shows a tick icon.
15 Rinse the water tank and fill it with fresh water up to the MAX level. Slide
the water tank back into the machine.
16 Press the OK button to end the descaling cycle.
17 Place a container under the steam wand and dispensing spout.
18 The display shows the following icon to indicate that the machine is
heating up.
-
The machine performs an automatic rinsing cycle.
19 Remove the container. Remove and empty the drip tray. SLide the drip
tray back into the machine.
20Place the AquaClean filter back in the water tank. Reinsert the classic milk
frother.
21 Remove and rinse the brew group see chapter ‘Cleaning and
maintenance’, section ‘Clean the brew group’.
The machine is now ready for use.
Interruption of the descaling cycle
Once the descaling cycle has started, you must complete it till the very end
without turning off the machine. In case you get stuck during the cycle or in
case of power failure or accidental disconnection of the power cord, you
can exit by pressing the standby button. If this occurs, empty and rinse
carefully the water tank, then fill it up to the CALC CLEAN level. Follow the
instructions in chapter ‘First installation’, section ‘Manual rinsing cycle’
before brewing any beverage. If the cycle was not completed, the machine
will require another descaling cycle to be performed at your earliest
convenience.
Warning icons and error codes
Warning signals are displayed in red. Below you find a list of the
warnings that may appear on the display and their meaning.
-
Fill the water tank with fresh water to the MAX level indication.
English
17
-
The bean hopper is empty. Put new coffee beans in the bean hopper.
-
The brew group is not in the machine. Insert the group.
18
English
-
Close the service door.
-
Remove the coffee grounds container and empty it.
-
There is too much powder in the brew group. Clean the brew group.
-
If an error code is triggered, check the section 'Meaning of error codes' to
see what the code on the display means and what you can do. The
machine cannot be used when this icon is on the display.
-
You forgot to place the lid on the pre-ground coffee compartment. If you
do not place it back within 30 seconds the display will return to the main
menu and the brewing cycle will be stopped.
Meaning of error codes
Error code
1 Coffee grinder blocked Coffee exit duct
Problem Cause Possible solution
clogged
Clean the coffee exit
duct thoroughly with
the handle of the
multifunctional tool or a
spoon handle.
English
19
3 - 4 The brew group cannot
be removed.
5 Water circuit problem There is air in the water
Other error codes Switch the machine off
If the above solutions do not help to remove the error code icon from the
display and bring the machine back to normal working order, contact the
Philips Saeco hotline. Contact details can be found in the warranty booklet
or on www.saeco.com/support.
The brew group is not
positioned correctly.
circuit.
Close the maintenance
door. Switch the
machine off and back
on again. Wait for the
‘machine ready’ icon on
the display and then
remove the brew group.
Remove and place back
the water tank a couple
of times. Make sure you
insert it into the
machine properly.
Check if the water tank
compartment is clean.
and switch it back on
again after 30 seconds.
Try this 2 or 3 times.
Ordering accessories Saeco
To clean and descale the machine, only use the Saeco maintenance
products. These products can be purchased in the Philips online shop (if
available in your country) at www.shop.philips.com/service, from your local
reseller or from the authorized service centers.
Ordering maintenance products:
Typenumber
CA6700 Descaling solution
Product
CA6903 AquaClean filter
HD5061 Brew group grease
CA6704 Degreasing tablets
CA6705 Milk circuit cleaner
Guarantee and support
If you need information or support, please visit www.saeco.com/support or
read the separate guarantee leaflet.
If you need information or support, please contact the Philips Saeco hotline
in your country. Contacts are included in the warranty booklet supplied
separately or visit www.saeco.com/support.

20
English
Recycling
-
This symbol means that this product shall not be disposed of with normal
household waste (2012/19/EU).
-
Follow your country's rules for the separate collection of electrical and
electronic products. Correct disposal helps prevent negative
consequences for the environment and human health.
Troubleshooting
Problem
The machine does not
switch on
Cause Solution
The machine is disconnected or
the main switch is in the OFF
position.
Check if the mains cord is inserted
correctly
Make sure the main switch is set in ON
position.
The machine is in DEMO
mode.
The drip tray is quickly
filled.
The coffee grounds
container full icon remains
displayed.
The brew group cannot
be removed.
The standby button has been
pressed for more than 8 seconds.
This is normal. The machine uses
water to rinse the internal circuit
and brew group. Some water
flows through the internal system
directly into the drip tray.
The coffee grounds container
was emptied while the machine
was switched off.
The coffee grounds container
was placed back too fast.
The brew group is not positioned
correctly.
The coffee grounds container is
not removed.
Switch the machine off and then on
again using the main switch on the
back of the machine.
Empty the drip tray when the 'drip tray
full' full indicator pops up through the
drip tray cover.
Place a cup under the dispensing
spout to collect rinsing water.
Always empty the coffee grounds
container while the machine is ON. If
the coffee grounds container is
emptied while the machine is switched
off, the coffee cycle counter is not
reset. In that case, the 'empty coffee
grounds container' message will stay
on the display even though the
container is not full.
Do not place back the coffee grounds
container until the screen message
prompts you to put it back
Close the maintenance door. Switch
the machine off and back on again.
Wait for the machine ready screen to
appear and then remove the brew
group.
Remove the coffee grounds container
before removing the brew group.
The machine is still in the
descaling process.
You cannot remove the brew group
when the descaling process is active.
First complete the descaling process
and then remove the brew group.
English
21
The brew group cannot
be inserted.
The coffee has too little
cream or is watery.
The coffee is not hot
enough.
The brew group is not in the
correct position.
The grinder is set to a coarse
setting.
The brew group is dirty. Clean the brew group. For thorough
The coffee exit duct is dirty. Clean the coffee exit duct thoroughly
The coffee blend is not the
correct one.
The machine is performing its
self-adjustment.
The cups you use are cold. Preheat the cups by rinsing them with
The brew group was not put in rest
position before it was placed back.
Make sure that the lever is in contact
with the base of the brew group and
that the hook of the brew group is in
the correct position.
Reset the machine by switching it on
and off. Place the drip tray and the
coffee grounds container back. Leave
the brew group out. Close the
maintenance door and switch the
machine on and off. Then try to
reinsert the brew group.
Adjust the grinder to a finer setting.
cleaning, follow the monthly cleaning
procedure with the degreasing tablet.
with the handle of the multifunctional
tool or a spoon handle.
Try another coffee blend.
Brew a few cups of coffee.
hot water.
The machine grinds the
coffee beans, but coffee
does not come out.
The coffee comes out
slowly.
The temperature is set too low.
Check the menu settings.
You added milk. Whether the milk you add is warm or
The grind is set too fine. Adjust the grinder to a coarser setting.
The brew group is dirty. Clean the brew group.
The coffee dispensing spout is
dirty.
The coffee exit duct is blocked. Clean the coffee exit duct with the
The grind is ground too finely. Change the grinder to a coarser
The brew group is dirty. Clean the brew group.
Set the temperature to high in the
menu.
cold, it will always decrease the
temperature of the coffee to some
extent.
Clean the coffee dispensing spout and
its holes with a pipe cleaner.
handle of the multifunctional tool or a
spoon handle.
setting.

22
English
The coffee exit duct is blocked. Clean the coffee exit duct with the
The machine circuit is blocked by
limescale.
The milk does not froth. The automatic milk frother is
The AquaClean filter
cannot be activated as
the tick does not appear
on the display.
The filter cannot be
activated and the
machine asks for
descaling.
dirty or not assembled or
installed correctly.
The type of milk used is not
suitable for frothing.
A filter has just been activated. You have to dispense at least 10 cups
You have already replaced 8
AquaClean filters. After 8 filter
replacements you need to
descale the machine.
The filter has not been replaced
in time after the AquaClean
water filter signal started
flashing.
The filter has not been installed
during first installation but after
having brewed approx.50
coffees (based on 100ml cups).
The machine has to be
completely limescale-free
before installing the AquaClean
filter.
handle of the multifunctional tool or a
spoon handle.
Descale the machine.
Clean the automatic milk frother and
make sure it is correctly assembled or
installed.
Different types of milk result in
different amounts of froth and
different froth qualities. Semi-skimmed
or full-fat cow's milk give good results.
(of 100ml each) before you can
activate a new filter. Be careful as you
activate a new filter, the filter counter
will increase automatically.
Descale your machine first and install
the filter.
Descale your machine first and install
the filter.
First descale the machine and then
install a new AquaClean filter. After
descaling, the filter counter is reset to
0/8. Always confirm filter activation in
the machine menu, also after filter
replacement
The AquaClean filter is
installed, but the
descaling message
appears.
The descaling message
appears before 8 filters
were replaced.
The AquaClean filter was not
correctly activated during first
installation.
After 8 filter replacements, you
need to descale the machine
You did not activate the
AquaClean filter correctly during
first installation.
You placed the AquaClean filter
after having used the machine
for a while.
You did not activate the
replacement filter in the machine
menu.
Follow the instructions on the display
until you receive confirmation that the
filter has been activated.
First descale the machine and then
install a new AquaClean filter. This will
reset the filter counter to 0/8. Always
confirm filter activation in the machine
menu, also after filter replacement.
First descale the machine and then
install a new AquaClean filter. Always
activate the filter in the machine menu.

You did not replace the filter
when the filter symbol started
flashing.
English
23
The filter does not fit. You need to remove air from the
There is water under the
machine.
The machine is not placed on a
filter.
There is still water in the water
tank.
You try to install another filter
than the AquaClean filter.
The drip tray is too full and
overflowed.
horizontal surface.
Note: If you are unable to solve the problem with the information in this
table, contact the Philips Saeco hotline.
Let air bubbles come out of the filter.
Empty the water tank before you
install the filter.
Only the AquaClean filter will fit.
Empty the drip tray when the drip tray
full indicator pops up through the drip
tray. Always empty the drip tray before
you start descaling the machine.
Place the machine on a horizontal
surface so that the drop iray full
indicator works properly.

24
Čeština
Obsah
Úvod 24
Důležité 25
Varování 25
Upozornění 25
Elektromagnetická pole (EMP) 26
Přehled přístroje (obr. 1) 26
Displej 27
První instalace 27
Manuální vyplachovací cyklus 29
Filtr AquaClean 30
Vložení filtru AquaClean 30
Výměna filtru AquaClean 31
Používání přístroje 31
Vaření kávy z kávových zrn 31
Nastavení množství kávy 31
Úprava nastavení mlýnku 32
Napěnění mléka 32
Horká voda 32
Čištění a údržba 32
Týdenní čištění varné sestavy 32
Mazání 34
Čištění klasického napěňovače mléka (každodenní) 34
Čištění klasického pěnítka na mléko a trysky na páru (týdenní) 34
Odstraňování vodního kamene 35
Proces odstranění vodního kamene 35
Přerušení cyklu odstraňování vodního kamene 36
Varovné ikony a chybové kódy 36
Význam chybových kódů 38
Objednávání příslušenství značky Saeco 38
Záruka a podpora 39
Recyklace 39
Řešení problémů 39
Úvod
Gratulujeme vám ke koupi plně automatického espresovače Intelia / Intelia
Deluxe. Chcete-li plně využívat výhod, které nabízí společnost Saeco,
zaregistrujte výrobek na adrese www.saeco.com/welcome. Tato uživatelská
příručka se vztahuje na všechny modely modely Intelia / Intelia Deluxe s
klasickým pěnítkem na mléko. Přístroj je vhodný k přípravě kávy espresso
z celých kávových zrn.
Čeština

Důležité
Varování
Čeština
-
Připojte přístroj do síťové zásuvky s napětím odpovídajícím technické
specifikaci přístroje.
-
Přístroj připojujte do řádně uzemněných zásuvek.
-
Nenechávejte napájecí kabel viset přes hranu stolu nebo pultu ani se
dotýkat horkých povrchů.
-
Nikdy neponořujte přístroj, elektrickou zástrčku ani síťový kabel do vody
(nebezpečí úrazu elektrickým proudem).
-
Vyvarujte se polití konektoru napájecího kabelu.
-
Nikdy nesměřujte proud horké vody na části těla: nebezpečí popálení.
-
Nedotýkejte se horkých předmětů. Používejte rukojeti a knoflíky.
-
Položte žehličku zpět na žehlicí plochu, vypněte ji a vytáhněte síťovou
zástrčku ze zásuvky ve zdi:
-
Pokud dojde k závadě.
-
Pokud nebudete přístroj dlouhou dobu používat.
-
Před čištěním přístroje.
-
Tahejte za konektor, nikoli za napájecí kabel.
-
Nedotýkejte se síťové zástrčky mokrýma rukama.
-
Pokud byste zjistili závadu na zástrčce, napájecím kabelu nebo na
přístroji, dále jej nepoužívejte..
-
Neprovádějte žádné úpravy přístroje ani jeho napájecího kabelu.
-
Opravy vždy svěřte servisnímu středisku autorizovanému společností
Philips, vyhnete se tak nebezpečí..
-
Přístroj by neměly používat děti mladší 8 let věku.
-
Děti od 8 let věku a osoby s omezenými fyzickými, smyslovými nebo
duševními schopnostmi nebo nedostatkem zkušeností a znalostí mohou
tento přístroj používat v případě, že jsou pod dohledem nebo byly
poučeny o bezpečném používání přístroje a že chápou rizika, která
mohou hrozit.
-
Děti starší 8 let nesmí provádět čištění a uživatelskou údržbu, pokud jsou
bez dozoru.
-
Přístroj a jeho kabel udržujte mimo dosah dětí mladších 8 let.
-
Dohlédněte na to, aby si s přístrojem nehrály děti.
-
Do mlýnku na kávu nikdy nestrkejte prsty ani jiné předměty.
25
Upozornění
-
Tento přístroj je určen výhradně do běžné domácnosti. Není určen
k použití v prostředí, jako jsou kuchyně pro zaměstnance v rámci
obchodů, kanceláří, farem či jiných pracovišť.
-
Přístroj vždy umístěte na rovnou stabilní podložku. Udržujte jej ve
vzpřímené poloze, a to i při přemisťování..
-
Nepokládejte přístroj na plotýnku ani přímo vedle horké trouby, topení
nebo podobného zdroje tepla.

26
Čeština
-
Násypku na kávová zrna plňte výhradně praženou kávou. Pokud byste
do násypky na kávová zrna vsypali mletou kávu, instantní kávu,
nepražená kávová zrna nebo jakoukoli jinou hmotu, mohl by se přístroj
poškodit.
-
Před vložením nebo vyjmutím jakékoli součásti nechte přístroj
vychladnout. Topné plochy mohou po použití zůstat zahřáté.
-
Nikdy neplňte nádržku na vodu teplou, horkou ani perlivou vodou,
protože může dojít k poškození nádržky i přístroje.
-
K čištění přístroje nikdy nepoužívejte kovové žínky, abrazivní čisticí
prostředky ani agresivní čisticí prostředky, jako je například benzín nebo
aceton. Použijte pouze měkký hadřík navlhčený ve vodě.
-
Pravidelně z přístroje odstraňujte vodní kámen. Přístroj signalizuje, pokud
je třeba odstranit vodní kámen. Pokud tak neučiníte, přístroj přestane
správně fungovat. V takovém případě jeho oprava není kryta zárukou.
-
Nevystavujte přístroj teplotám nižším než 0°C. Zbylá voda v zahřívacím
systému může zmrznout a způsobit poškození.
-
Neponechávejte vodu v nádržce na vodu, pokud přístroj delší dobu
nepoužíváte. Voda se může kontaminovat. Při každém použití přístroje
vždy použijte čerstvou vodu.
Elektromagnetická pole (EMP)
Tento přístroj Philips odpovídá všem platným normám a předpisům
týkajícím se elektromagnetických polí.
Přehled přístroje (obr. 1)
1 Víko násypky na kávová zrna
2 Násypka na kávová zrna
3 Zásuvka pro kabel
4 Nádržka na vodu
5 Přihrádka na mletou kávu
6 Tlačítko pro nastavení mlýnku
7 Ovládací panel
8 Nádoba na mletou kávu
9 Hubice dávkovače kávy
10 Tácek na odkapávání
11 Kryt tácku na odkapávání
12 Indikátor plného tácku na odkapávání
13 Tlačítko ESPRESSO
14 Tlačítko ESPRESSO LUNGO
15 Tlačítko AROMA STRENGTH (Síla aromatu)
16 Tlačítko pohotovost
17 Tlačítko MENU (Nabídka)
18 Tlačítko HOT WATER (horká voda)
19 Tlačítko STEAM (pára)
20 Kabel
21 Čisticí kartáč (pouze u některých typů)
22 Tuk (pouze u některých typů)
23 Odměrka na mletou kávu
24 Prostředek k testování tvrdosti vody
25 Zásuvka na zbytky kávy
26 Varná sestava
Displej
ESP RE SS O
A
R
O
M
A
S
T
R
E
N
G
T
H
ST EA M
MEN U
Čeština
27 Tryska pro horkou vodu / páru
28 Klasické pěnítko na mléko
Některá tlačítka lze použít k procházení nabídkou:
-
Tlačítko ESPRESSO = tlačítko ESC: stisknutím tohoto tlačítka se vrátíte do
hlavní nabídky. Tlačítkem ESC se dostanete o krok zpět. Abyste se dostali
zpět do hlavní nabídky, může být třeba stisknout tlačítko ESC několikrát.
-
Tlačítko AROMA STRENGTH = tlačítko OK: stisknutím tohoto tlačítka
vyberete, potvrdíte nebo ukončíte funkci.
-
Tlačítko STEAM = tlačítko NAHORU: stisknutím tohoto tlačítka procházíte
zobrazenou nabídkou směrem nahoru.
-
Tlačítko MENU = tlačítko DOLŮ: tímto tlačítkem procházíte zobrazenou
nabídkou směrem dolů.
27
První instalace
1 Do přístroje vložte odkapávací misku s krytem.
2 Sejměte nádržku na vodu.
3 Naplňte nádržku na vodu čerstvou vodou až po značku MAX.
4 Naplňte násypku na kávová zrna kávovými zrny.
5 Malou zástrčku vložte do zdířky na zadní straně přístroje. Zasuňte síťovou
zástrčku přístroje do zásuvky.
6 K dávkovací hubici horké vody / páry připojte klasické pěnítko na mléko.
7 Pod klasické pěnítko na mléko umístěte vhodnou nádobu.
8 Stisknutím tlačítka STANDBY přístroj zapněte.
9 Stisknutím tlačítka OK spusťte automatický cyklus přípravy vody.
10 Na displeji se zobrazí následující ikona signalizující, že přístroj se zahřívá.
AQUA
CLEA N
AQUA CLE AN
FILTE R?
AQUA
CLEA N
INS TALL
FILTE R
28
Čeština
-
Přístroj provede automatický vyplachovací cyklus.
11 Na displeji se zobrazí následující ikona signalizující, že je třeba vložit
filtrAquaClean.
Pokud chcete filtr AquaClean vložit později, stiskněte tlačítko ESC
a pokračujte manuálním vyplachovacím cyklem. Pokyny k vložení jsou
uvedeny v kapitole Filtr AquaClean.
12 Stiskněte tlačítko OK. Na displeji se zobrazí následující ikona.
13 Vyjměte filtr AquaClean z obalu. Poté filtrem zhruba 5 sekund třepejte.
14 Ponořte filtr vzhůru nohama do konvice se studenou vodou a vyčkejte,
dokud se nepřestanou uvolňovat vzduchové bublinky.
15 Vyjměte z přístroje nádržku na vodu, vyprázdněte ji a do přípojky pro filtr
vložte svisle filtr.
16 Naplňte nádržku na vodu čerstvou vodou a vložte ji zpět do přístroje.
17 Stiskněte tlačítko OK.
AQ U A
CLEA N
0/8
ON
OFF
AQUA
CLEA N
10 0%
Čeština
29
18 Vyberte na displeji položku ON a aktivaci potvrďte stisknutím tlačítka OK.
Na displeji se zobrazí ikona zatržítka potvrzující aktivaci.
19 Na displeji se zobrazí ikona připraveného filtru. To signalizuje, že filtr
AquaClean byl vložen správně.
20Filtr propláchněte: Stiskněte tlačítko HOT WATER a nechte z dávkovací
hubice horké vody / páry vytéct půl litru vody. Tuto vodu vylijte.
Může chvíli trvat, než z dávkovací hubice horké vody vyteče voda. Filtr je
třeba zcela naplnit a propláchnout vodou.
Přístroj je připraven k použití.
Po vložení filtru AquaClean není třeba provádět manuální vyplachovací
cyklus.
Manuální vyplachovací cyklus
1 Pod hubici dávkovače kávy umístěte vhodnou nádobu.
2 Stiskněte tlačítko AROMA STRENGTH a vyberte položku Pre-ground
coffee. Nevkládejte mletou kávu.
3 Stiskněte tlačítko ESPRESSO LUNGO. Přístroj začne vypouštět vodu.
4 Až přístroj přestane vypouštět vodu, nádobu vylijte. Kroky 1 až 3 dvakrát
opakujte.
5 Pod klasické pěnítko na mléko umístěte vhodnou nádobu.
6 Stiskněte tlačítko HOT WATER. Přístroj začne automaticky vypouštět
horkou vodu.
AQ U A
CLEA N
0/8
ON
OFF
30
Čeština
Nechte přístroj dávkovat vodu, dokud se na displeji nezobrazí ikona
signalizující nepřítomnost vody.
7 Nádržku na vodu naplňte pitnou vodou až po ukazatel hladiny MAX a
nádobu odeberte.
Přístroj je připraven k použití.
Filtr AquaClean
Konstrukce filtru AquaClean omezuje usazování vápence v espresovači a
zajišťuje filtrovanou vodu, která uchová stále stejné aroma a chuť každého
šálku kávy. Pokud používáte sadu 8 filtrů AquaClean, jak je uvedeno v tomto
návodu k použití, není třeba z přístroje odstraňovat vodní kámen po
5000 šálků (o objemu 100 ml).
Vložení filtru AquaClean
Přístroj musí být před zahájením používání filtru AquaClean zcela zbaven
vodního kamene. Pokud jste při prvním použití filtr neaktivovali a připravili
více než 50 šálků (o objemu 100 ml), je třeba před aktivací filtru zbavit
přístroj vodního kamene.
1 Vyjměte filtr AquaClean z obalu. Poté filtrem zhruba 5 sekund třepejte.
2 Ponořte filtr vzhůru nohama do konvice se studenou vodou a vyčkejte,
dokud se nepřestanou uvolňovat vzduchové bublinky.
3 Vyjměte z kávovaru nádržku na vodu a filtr vložte svisle do přípojky pro
filtr.
4 Naplňte nádržku na vodu čerstvou vodou a vložte ji zpět do přístroje.
5 Stiskněte tlačítko MENU a posuňte se dolů na možnost AquaClean filter.
Poté stisknutím tlačítka OK potvrďte výběr filtru AquaClean.
Pokud instalujete filtr při prvním použití, řiďte se postupem uvedeným
v kapitole První instalace.
6 Vyberte na displeji položku ON a aktivaci potvrďte stisknutím tlačítka OK.
 Loading...