Philips FC8920, FC8910 User Manual

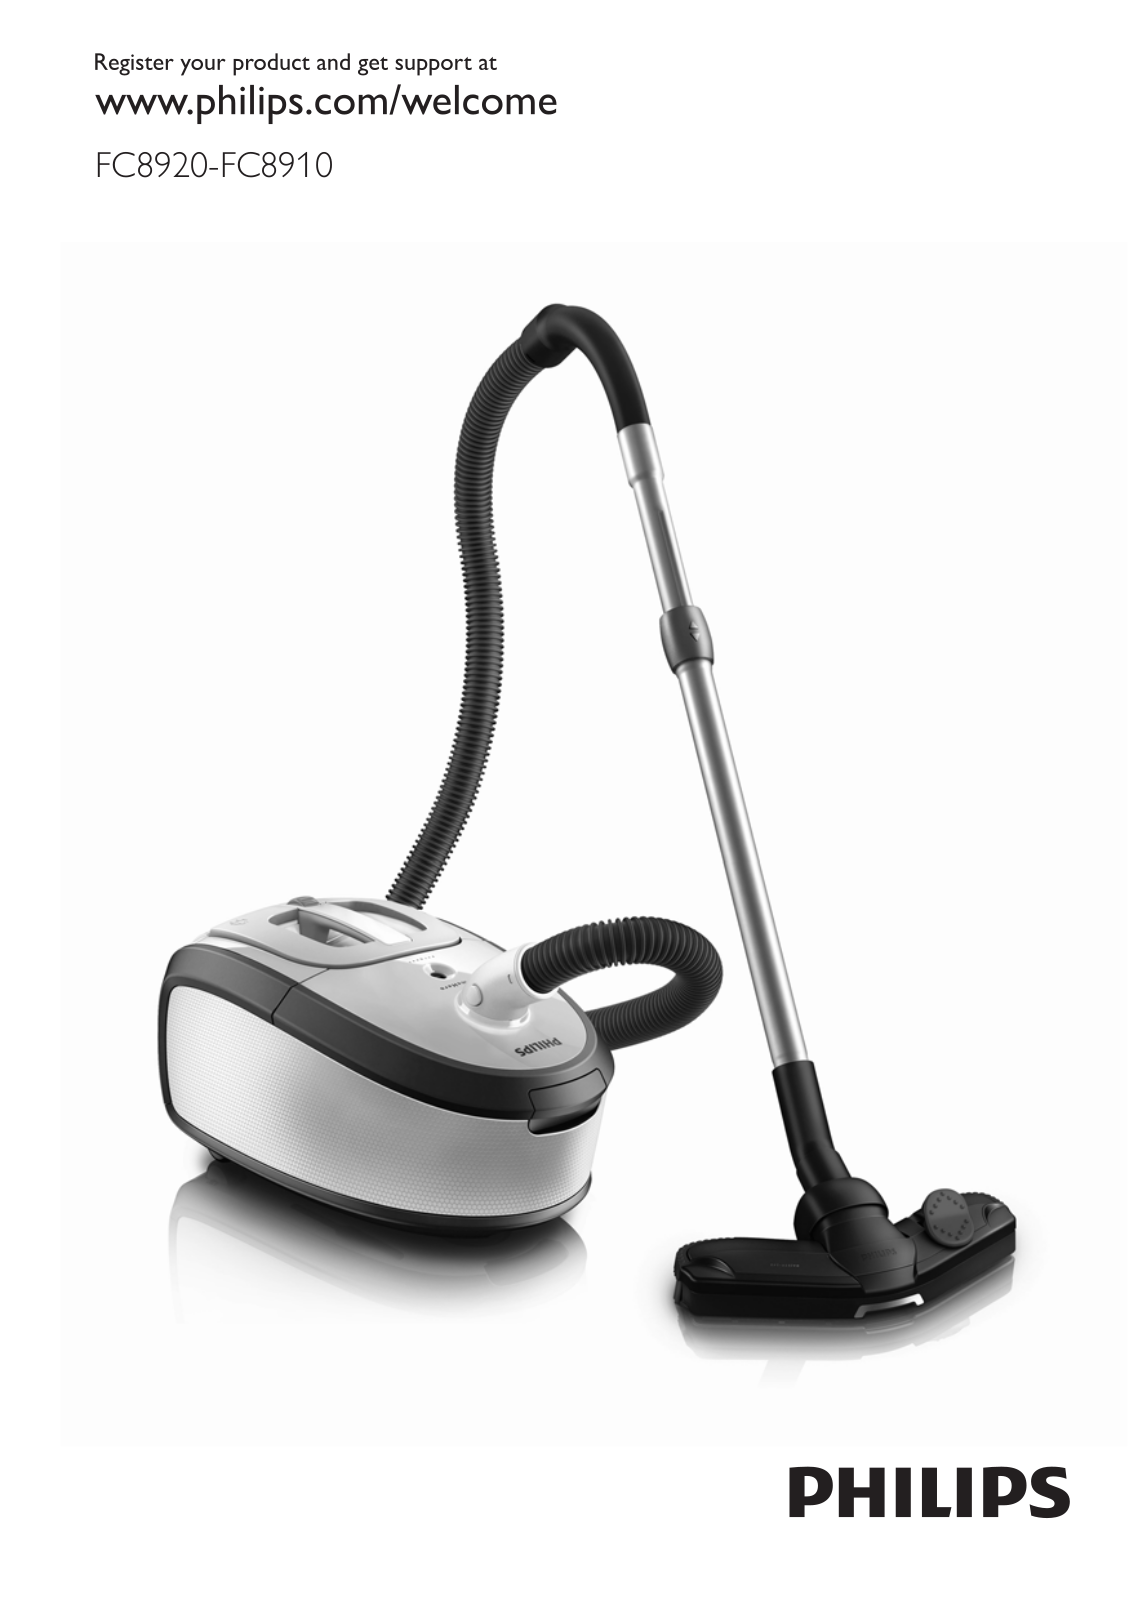
FC8920-FC8910

2

Philips FC8920, FC8910 User Manual

3

2


1

1


3


4

6


7


5


8


9


10

11

26


24

14


16

23


15


12 13


18

17


16

28


20


19

32

29


33

30

34


31

35

22

25

27


21

36

4

English 6 Indonesia 13

20

Bahasa Melayu 27

35

TiếngViệt 41

48

54

FC8920-FC8910

6English

Introduction

Congratulations on your purchase and welcome to Philips!To fully benefit from the support that Philips offers, register your product at www.philips.com/welcome.

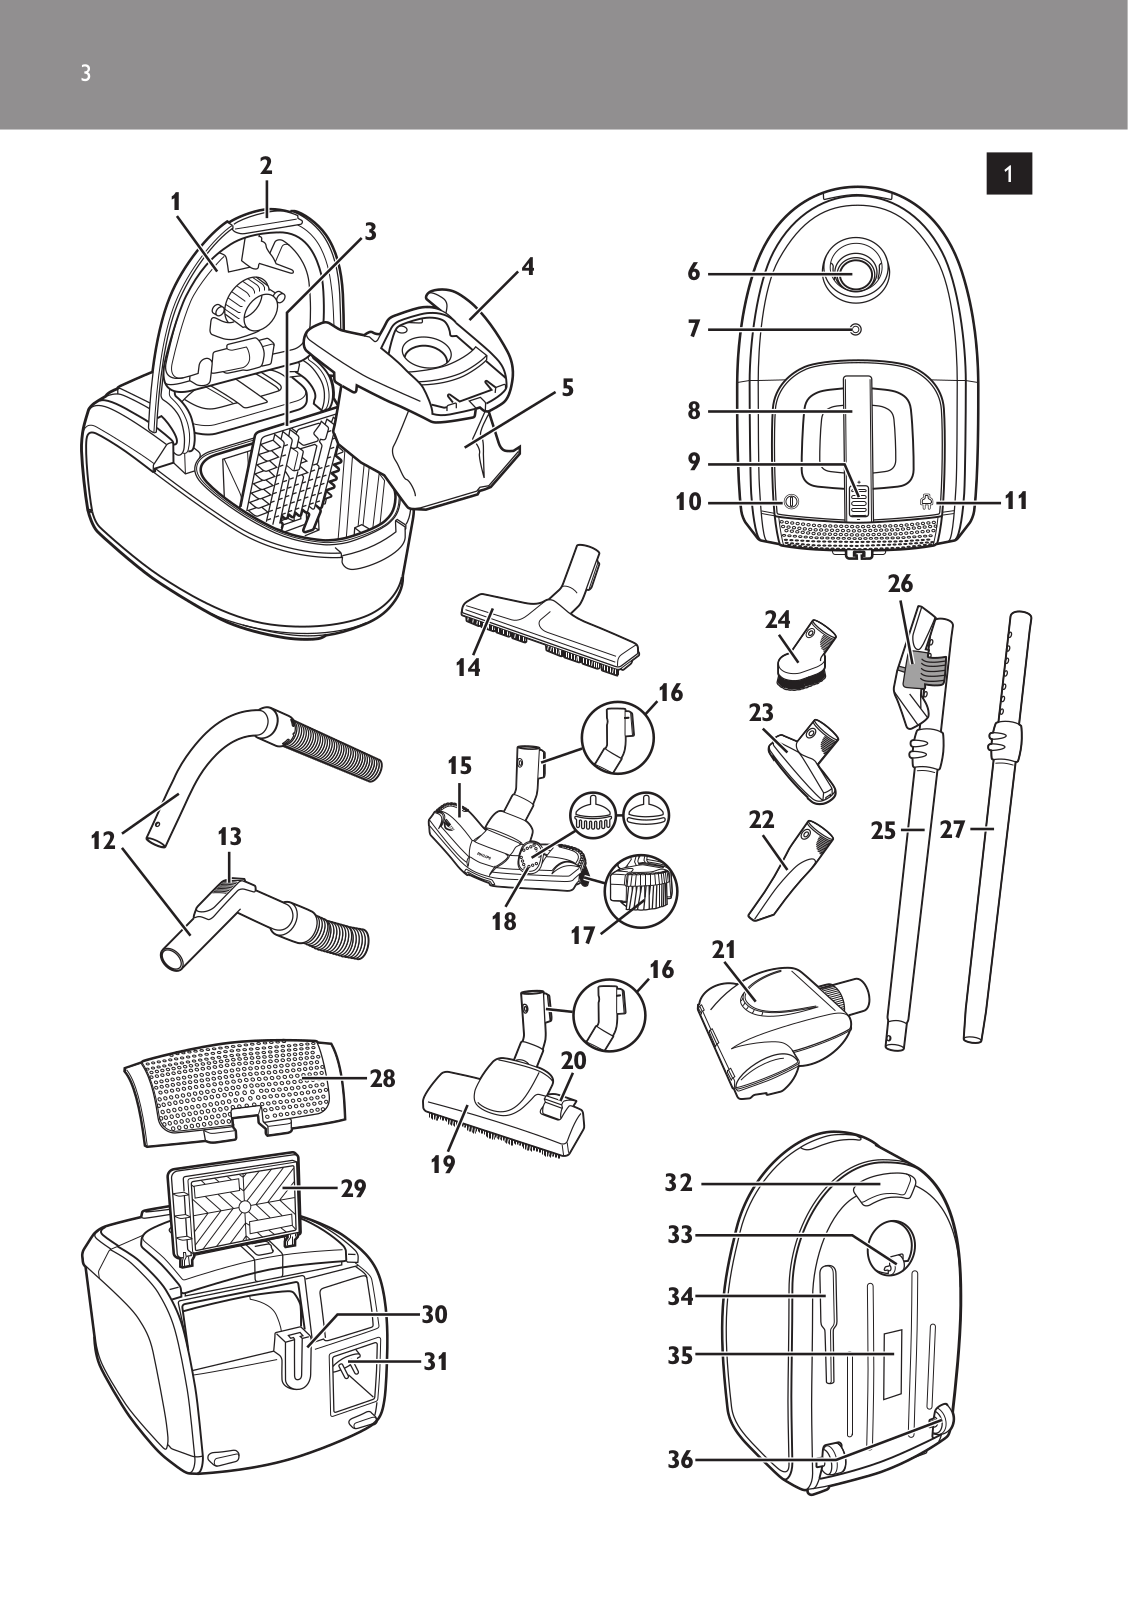
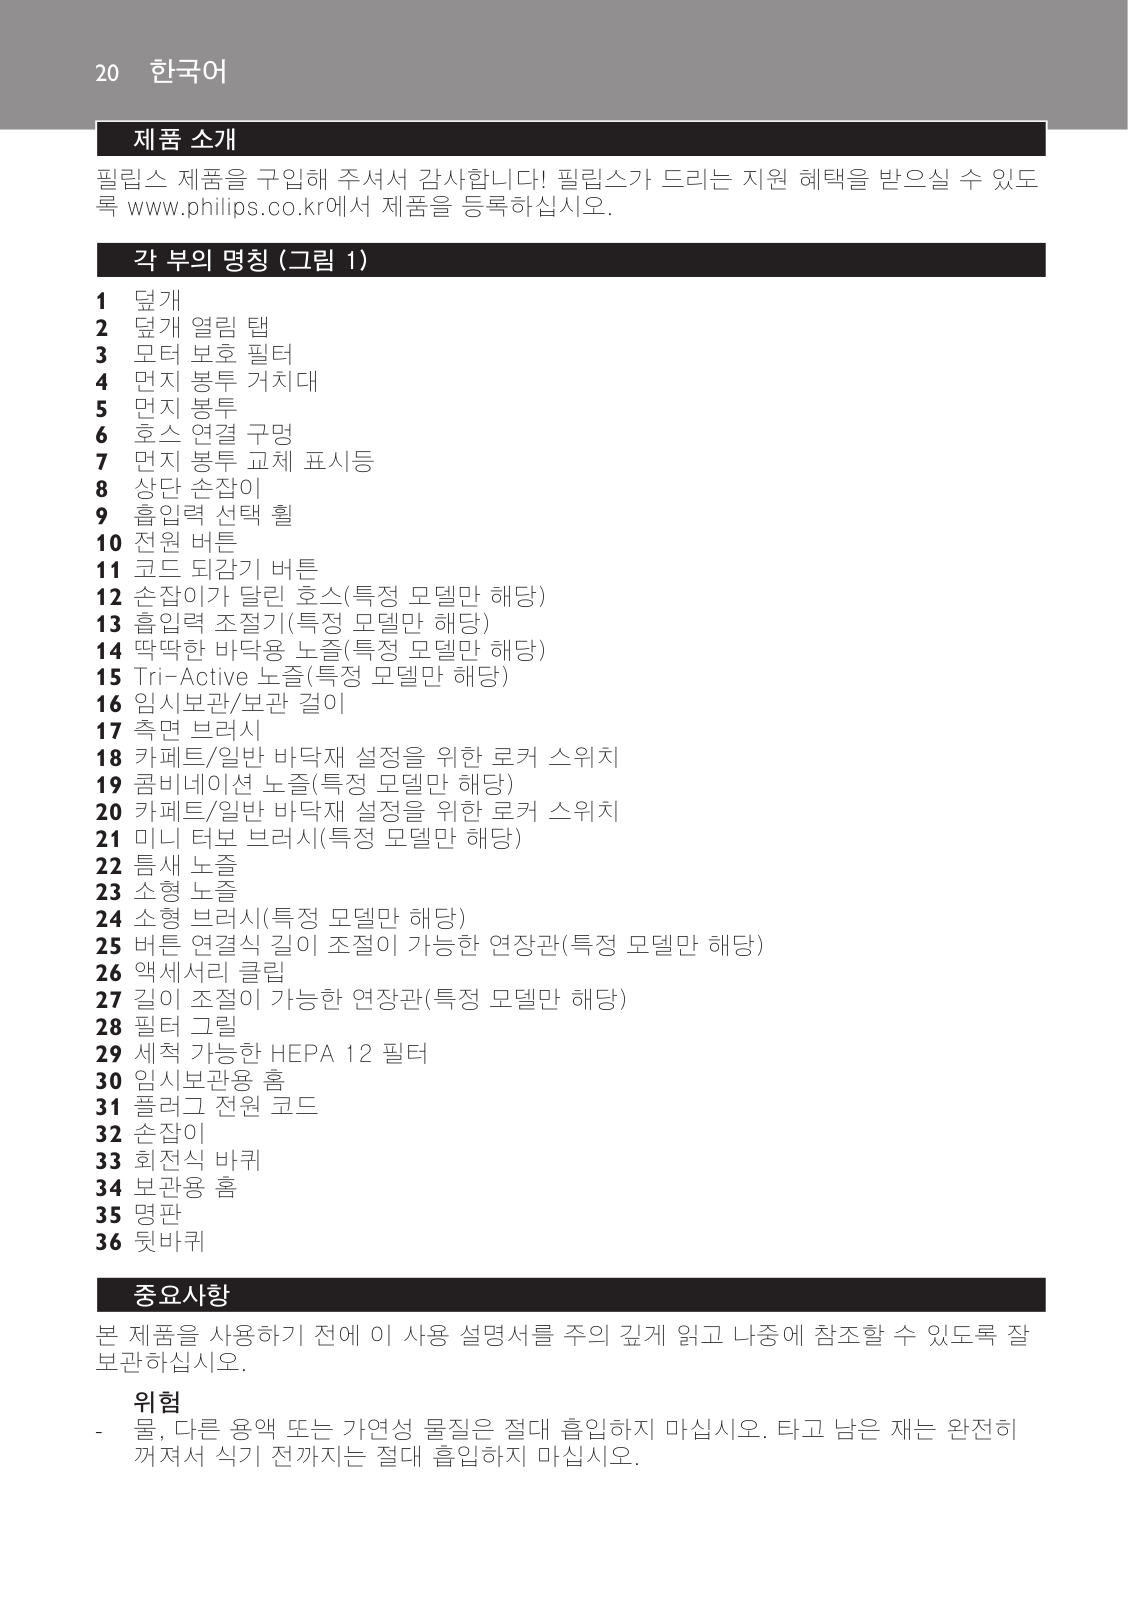
General description (Fig. 1)

1Cover

2Cover release tab

3 Motor protection filter

4 Dustbag holder

5Dustbag

6 Hose connection opening

7 Dustbag-full indicator

8Top handle

9 Suction power selection wheel

10On/off button

11Cord rewind button

12Handgrip with hose (specific types only)

13Suction power control slide (specific types only)

14Hard-floor nozzle (specific types only)

15Tri-Active nozzle (specific types only)

16Parking/storage ridge

17Side brush

18Rocker switch for carpet/hard floor settings

19Combination nozzle (specific types only)

20Rocker switch for carpet/hard floor settings

21Mini turbo brush (specific types only)

22Crevice tool

23Small nozzle

24Small brush (specific types only)

25Telescopic tube with button connection (specific types only)

26Accessory clip

27Telescopic tube (specific types only)  

28Filter grille

29Washable HEPA 12 filter

30Parking slot

31Mains cord with plug

32Handgrip

33Swivel wheel

34Storage slot

35Type plate

36Rear wheels

Important

Read this user manual carefully before you use the appliance and save it for future reference.

Danger

-- Never suck up water or any other liquid. Never suck up flammable substances and do not suck up ashes until they are cold.

Warning

-- Check if the voltage indicated on the appliance corresponds to the local mains voltage before you connect the appliance.

English 7

-- Do not use the appliance if the plug, the mains cord or the appliance itself is damaged.

-- If the mains cord is damaged, you must have it replaced by Philips, a service centre authorised by Philips or similarly qualified persons in order to avoid a hazard.

-- This appliance is not intended for use by persons (including children) with reduced physical, sensory or mental capabilities, or lack of experience and knowledge, unless they have been given supervision or instruction concerning use of the appliance by a person responsible for their safety.

-- Children should be supervised to ensure that they do not play with the appliance.

-- Do not point the hose, the tube or any other accessory at the eyes or ears nor put it in your mouth when it is connected to the vacuum cleaner and the vacuum cleaner is switched on.

Caution

-- When you use the vacuum cleaner to vacuum ashes, fine sand, lime, cement dust and similar substances, the pores of the dustbag become clogged.As a result, the dustbag-full indicator will indicate that the dustbag is full. Replace the disposable dustbag or empty the reusable dustbag, even if it is not full yet (see chapter‘Replacing/emptying the dustbag’).

-- Never use the appliance without the motor protection filter.This could damage the motor and shorten the life of the appliance.

-- Only use Philips s-bag ` synthetic dustbags or the reusable dustbag provided (some countries only).

Electromagnetic fields (EMF)

This Philips appliance complies with all standards regarding electromagnetic fields (EMF). If handled properly and according to the instructions in this user manual, the appliance is safe to use based on scientific evidence available today.

Before first use

1 Take the appliance and its accessories out of the box.

2 Remove any sticker,protective foil or plastic from the appliance.

Preparing for use

Connecting the hose

1To connect the hose,push it firmly into the appliance (‘click’).Make sure the recess in the hose connector fits exactly on the projection on the housing of the appliance (Fig. 2).

2To disconnect the hose,press the buttons (1) and pull the hose out of the appliance (2) (Fig. 3).

Connecting the telescopic tube

1 To connect the telescopic tube to the handgrip:

-- Telescopic tube with conical connection (specific types only): Insert the handgrip into the telescopic tube and turn a little (Fig. 4).

-- Telescopic tube with button connection (specific types only): Press the spring-loaded lock button on the handgrip and insert the handgrip into the telescopic tube. Fit the spring-loaded lock button into the opening in the tube (‘click’) (Fig. 5).

2 To disconnect the telescopic tube from the handgrip:

-- Telescopic tube with conical connection (specific types only): Pull the handgrip out of the telescopic tube while turning it a little.

-- Telescopic tube with button connection (specific types only): Press the spring-loaded lock button and pull the handgrip out of the tube.

3 Adjust the telescopic tube to the length you find most comfortable during vacuuming. (Fig. 6)

8English

Hold the collar with one hand and pull the tube part above the collar upwards or push it downwards with the other hand.

Connecting the accessories 

1 To connect the tube to one of the accessories: (Fig. 7)

-- Telescopic tube with conical connection (specific types only): Insert the telescopic tube into the accessory while turning it a little.

-- Telescopic tube with button connection (specific types only): Press the spring-loaded lock button on the telescopic tube and insert the tube into the accessory. Fit the spring-loaded lock button into the opening in the accessory (‘click’).

2 To disconnect the telescopic tube from one of the accessories:

-- Telescopic tube with conical connection (specific types only): Pull the telescopic tube out of the accessory while turning it a little.

-- Telescopic tube with button connection (specific types only): Press the spring-loaded lock button and pull the tube out of the accessory.

Tip:The small nozzle,crevice tool and small brush (specific types only) can also be connected to the handgrip of the hose.

Accessory clip

1 Insert the crevice tool and the small nozzle into the clip. 2 Snap the accessory clip onto the tube (Fig. 8).

3Pull the accessory clip from the tube to remove it.

Tri-Active nozzle (specific types only)

TheTri-Active nozzle is a multi-purpose nozzle for carpets and hard floors.

-- The side brushes catch more dust and dirt at the sides of the nozzle and allow you to clean better along furniture and other obstacles (Fig. 9).

-- The opening at the front of the nozzle allows you to suck up larger particles (Fig. 10).

1Use the hard floor setting to clean hard floors (for instance tiled,parqueted,laminated and linoleumed flooring):push the rocker switch on top of the nozzle with your foot to make the brush strip come out of the housing.At the same time,the wheel is lifted to prevent scratching and to increase manoeuvrability (Fig. 11).

2Use the carpet setting to clean carpets:push the rocker switch again to make the brush strip disappear into the nozzle housing.The wheel is lowered automatically (Fig. 12).

Combination nozzle (specific types only)

The combination nozzle can be used on either carpets or hard floors.

1 To clean hard floors,push the rocker switch on top of the nozzle with your foot (Fig. 13). ,, The brush strip for cleaning hard floors comes out of the nozzle housing.

2 To clean carpets,push the rocker switch again (Fig. 14). ,, The brush strip disappears into the nozzle housing.

Hard-floor nozzle (specific types only)

-- The hard-floor nozzle is designed for gentle cleaning of hard floors (Fig. 15).

Mini turbo brush (specific types only)

The mini turbo brush is specially designed for effectively picking up animal hairs and fluff from furniture and mattresses.The unique brush inside the mini turbo brush loosens the hair from the fabric.Then the hair is picked up by the vacuum cleaner.

English 9

The mini turbo brush can be attached to the handgrip of the hose or to the telescopic tube.

1To attach the mini turbo brush,insert it into the handgrip or the telescopic tube and turn a little.

2To detach the mini turbo brush,pull it out of the handgrip or the telescopic tube while turning it a little.

Using the appliance

1 Pull the cord out of the appliance and put the mains plug in the wall socket.

2 Press the on/off button on top of the appliance to switch on the appliance (Fig. 16).

Tip:To avoid bending your back,press the on/off button with your foot.

3If you want to park the tube for a moment during vacuum cleaning,insert the ridge on the nozzle into the parking slot (Fig. 17).

4 To ensure stable parking of the telescopic tube,adjust the tube to the shortest length.

5To switch off the appliance,press the on/off button on top of the appliance.

Adjusting suction power

1 During vacuum cleaning,you can adjust the suction power with the selection wheel on top of the appliance (Fig. 18).

-- Use maximum suction (+) power to vacuum very dirty carpets and hard floors. -- Use minimum suction power (-) to vacuum curtains, tablecloths etc.

2Specific types only:You can also adjust the suction power with the suction power slide on the handgrip (Fig. 19).

Storage

1 Switch off the appliance and remove the mains plug from the wall socket. 2 Press the cord rewind button to rewind the mains cord (Fig. 20).

3Specific types only:Always put theTri-Active nozzle in the carpet setting when you store it. This prevents the side brushes from becoming bent (Fig. 12).

4Put the appliance in upright position.To attach the nozzle to the appliance, insert the ridge on the nozzle into the storage slot (Fig. 21).

To ensure stable storage of the telescopic tube, adjust the tube to the shortest length.

Replacing/emptying the dustbag

Always unplug the appliance before you replace the disposable dustbag or empty the reusable dustbag.

Replacing the disposable dustbag

-- Replace the dustbag as soon as the dustbag-full indicator has changed colour permanently, i.e. even when the nozzle is not placed on the floor (Fig. 22).

1 Pull the cover upwards to open it (Fig. 23).

2 Lift the dustbag holder out of the appliance (Fig. 24).

Make sure you hold the dustbag upright when you lift it out of the appliance.

3 Pull at the cardboard tag to remove the full dustbag from the holder  (Fig. 25). ,, When you do this,the dustbag is sealed automatically.

10 English

4Slide the cardboard front of the new dustbag into the two grooves of the dustbag holder as far as possible. (Fig. 26)

5 Put the dustbag holder back into the vacuum cleaner (Fig. 27).

Note:If no dustbag has been inserted,you cannot close the cover.

6 Push the cover downwards to close it (‘click’).

Emptying the reusable dustbag (some countries only)

In some countries, this vacuum cleaner also comes with a reusable dustbag that can be used and emptied repeatedly. You can use the reusable dustbag instead of disposable dustbags.

To remove and insert the reusable dustbag, simply follow the instructions in ‘Replacing the disposable dustbag’.

To empty the reusable dustbag:

1 Slide the clip off the dustbag sideways.

2 Shake out the contents into a dustbin.

3 To close the dustbag, slide the clip back onto the bottom edge of the dustbag.

Cleaning and maintenance

Always unplug the appliance before you clean or replace the filters.

Cleaning the permanent motor protection filter

Clean the permanent motor protection filter every time you empty the reusable dustbag or replace the disposable dustbag.

1 Remove the dustbag holder with the dustbag (Fig. 24).

2 Press the tab at the top of the motor protection filter holder down to release it (Fig. 28).

3Pull the top of the motor protection filter holder towards you (1) and lift the filter holder out of the dustbag compartment (2). (Fig. 29)

4 Shake the filter over a dustbin to clean it.

5 Put the clean filter back into the filter holder.

6Fit the two lugs of the filter holder behind the ridge at the bottom to ensure that it fits properly at the top (1).Then press the filter holder home (‘click’) (2) (Fig. 30).

7Place the dustbag holder with the dustbag back into the appliance and close the cover.

Cleaning the washable HEPA 12 filter

The washable HEPA 12 filter is able to remove 99.5% of all particles down to 0.0003mm in size from the outlet air.This not only includes normal house dust, but also harmful microscopic vermin such as dust mites and their excrements, which are well-known causes of respiratory allergies.

Note:To guarantee optimal dust retention and performance of the vacuum cleaner,always replace the HEPA filter with an original Philips filter of the correct type (see chapter‘Ordering accessories’).

Clean the washable HEPA 12 filter every 6 months.You can clean the washable HEPA 12 filter max. 4 times. Replace the filter after it has been cleaned 4 times.

1 To open the HEPA filter grille,grab the tabs and pull it upwards (Fig. 31). 2 Take the HEPA 12 filter out of the appliance (Fig. 32).

3 Rinse the pleated side of the HEPA 12 filter under a hot slow-running tap.

English 11

-- Hold the filter in such a way that the pleated side points upwards and the water flows parallel to the pleats. Hold the filter at an angle so that the water washes away the dirt inside the pleats (Fig. 33).

-- Turn the filter 180° and let the water flow along the pleats in opposite direction (Fig. 34). -- Continue this process until the filter is clean.

Never clean the washable filter with a brush (Fig. 35).

Note:Cleaning does not restore the original colour of the filter,but does restore its filtration power.

4Carefully shake the water from the surface of the filter.Let the filter dry at least 2 hours before you put it back into the vacuum cleaner.

Note:Make sure that the filter is completely dry before you put it back into the appliance.

5 Put the filter back into the appliance (Fig. 36).

Note:Make sure that the two lugs of the HEPA filter point downwards. 

6To close the HEPA filter grille,first align the top of the grille with the appliance (1).Then press the tabs downwards until the grille locks into place (2) (‘click’) (Fig. 37).

Cleaning the mini turbo brush

To clean the brush inside the mini turbo brush, follow the steps below:

1 Turn the mini turbo brush upside down.

2To unlock the mini turbo brush,turn the ring anticlockwise (1) and pull it towards you (2) (Fig. 38).

3 Separate  the two housing halves (Fig. 39).

4 Remove the hairs and dirt entangled around the brush. (Fig. 40) Do not detach the brush and the parts inside the mini turbo brush.

5 Slide the three ridges of the bottom part into the three slots of the top part (Fig. 41). 6 Lower the bottom part onto the top part to close the turbo brush (Fig. 42).

7To lock the mini turbo brush,slide the ring towards the housing (1) and turn it clockwise to fix it (2) (Fig. 43).

Ordering accessories

To purchase dustbags, filters or other accessories for this appliance, please visit www.philips.com, consult the worldwide guarantee leaflet or contact the Philips Consumer Care Centre in your country.

Ordering dustbags

-- Philips Classic s-bag ` synthetic dustbags are available under type number FC8021.

-- Philips Clinic s-bag ` high filtration synthetic dustbags are available under type number FC8022. -- Philips Anti-odour s-bag ` synthetic dustbags are available under type number FC8023.

-- Reusable dustbags (some countries only) are available under code number 4322 004 93370.

Note:Please visit www.s-bag.com for more information about the s-bag.

Ordering filters

-- Washable HEPA 12 filters are available under type number FC8044.

12 English

Environment

-- Do not throw away the appliance with the normal household waste at the end of its life, but hand it in at an official collection point for recycling. By doing this, you help to preserve the environment (Fig. 44).

Guarantee and service

If you need service or information or if you have a problem, please visit the Philips website at www.philips.com or contact the Philips Consumer Care Centre in your country (you find its phone number in the worldwide guarantee leaflet). If there is no Consumer Care Centre in your country, go to your local Philips dealer.

Troubleshooting

This chapter summarises the most common problems you could encounter with the appliance. If you are unable to solve the problem with the information below, contact the Consumer Care Centre in your country.

1 The suction power is insufficient.

A Check if the dustbag is full.

If necessary, replace the disposable dustbag or empty the reusable dustbag (some countries only). B Check if the filters need to be cleaned or replaced.

If necessary, clean or replace the filters.

C Check if the suction power selection wheel is in maximum position. D Check if the nozzle, tube or hose is blocked up.

-- To remove the obstruction, disconnect the blocked-up item and connect it (as far as possible) the other way around. Switch on the vacuum cleaner to force the air through the blocked-up item in opposite direction (Fig. 45).

2 Specific types only: hairs are entangled around the brush inside the mini turbo brush.

AClean the mini turbo brush. See chapter‘Cleaning’, section‘Cleaning the mini turbo brush’.  (Fig. 46)

Indonesia 13

Pendahuluan

Selamat atas pembelian Anda dan selamat datang di Philips! Untuk memanfaatkan sepenuhnya dukungan yang ditawarkan Philips, daftarkan produk Anda di www.philips.com/welcome.

Gambaran umum (Gbr. 1)

1Penutup

2Tab pelepas tutup

3 Filter pelindung motor

4 Penahan kantong debu

5Kantong debu

6Lubang sambungan selang

7 Indikator kantong debu penuh

8Pegangan atas

9 Tombol pilihan daya isap

10Tombol on/off

11Tombol penggulung kabel

12Pegangan dengan selang (hanya tipe tertentu)

13Tombol kontrol daya isap (hanya tipe tertentu)

14Nozel lantai keras (hanya tipe tertentu)

15NozelTri-Aktif (hanya tipe tertentu)

16Tonjolan untuk meletakkan/menyimpan

17Sikat samping

18Sakelar untuk setelan karpet/lantai keras

19Nozel kombinasi (hanya tipe tertentu)

20Sakelar untuk setelan karpet/lantai keras

21Sikat turbo mini (hanya tipe tertentu)

22Alat celah

23Nozel kecil

24Sikat kecil (hanya tipe tertentu)

25Pipa teleskopik dengan koneksi tombol (hanya tipe tertentu)

26Klip aksesori

27Pipa teleskopik (hanya tipe tertentu)

28Kisi filter

29Filter HEPA 12 yang dapat dicuci

30Slot penahan

31Kabel listrik dengan steker

32Pegangan

33Roda putar

34Slot penyimpanan

35Pelat jenis

36Roda belakang

Penting

Bacalah petunjuk pengguna ini secara saksama sebelum Anda menggunakan alat dan simpan untuk referensi di kemudian hari.

Bahaya

-- Jangan sekali-kali menyedot air atau cairan lain apa pun. Jangan sekali-kali menyedot bahan yang mudah menyala dan jangan menyedot abu rokok sampai abu dingin.

14 Indonesia

Peringatan

-- Periksalah apakah voltase pada alat sesuai dengan voltase listrik di rumah Anda, sebelum menghubungkan alat.

-- Jangan gunakan alat ini jika steker, kabel listrik atau alatnya sendiri rusak.

-- Jika kabel listrik rusak, maka harus diganti oleh Philips, pusat layanan resmi Philips atau orang yang mempunyai keahlian sejenis agar terhindar dari bahaya.

-- Alat ini tidak dimaksudkan untuk digunakan oleh orang (termasuk anak-anak) dengan cacat fisik, indera atau kecakapan mental yang kurang, atau kurang pengalaman dan pengetahuan, kecuali jika mereka diberikan pengawasan atau petunjuk mengenai penggunaan alat oleh orang yang bertanggung jawab bagi keselamatan mereka.

-- Anak kecil harus diawasi untuk memastikan mereka tidak bermain-main dengan alat ini. -- Jangan mengarahkan selang, pipa atau aksesori manapun ke mata atau telinga atau

memasukkannya ke dalam mulut sewaktu terhubung ke penyedot debu dan penyedot debu dalam keadaan menyala.

Perhatian

-- Bila Anda menggunakan penyedot debu untuk menyedot abu, pasir halus, kapur cat tembok, debu semen dan bahan sejenisnya, pori-pori kantong debu menjadi tersumbat. Akibatnya indikator kantong debu penuh akan menunjukkan bahwa kantong debu sudah penuh. Ganti kantong debu sekali-pakai tersebut atau kosongkan kantong debu pakai-ulang, sekalipun jika belum penuh (lihat bab‘Mengganti/mengosongkan kantong debu’).

-- Jangan sekali-kali menggunakan alat tanpa filter pelindung motor. Ini dapat merusak motor dan memperpendek masa pakai alat.

-- Gunakan hanya kantong debu kantong-s ` sintetis Philips atau kantong debu pakai-ulang, yang telah disediakan (hanya untuk beberapa negara).

Medan elektromagnet (EMF)

Alat Philips ini mematuhi semua standar yang berkenaan dengan medan elektromagnet (EMF). Jika ditangani dengan benar dan sesuai dengan instruksi petunjuk pengguna ini, alat tersebut aman digunakan berdasarkan pada bukti ilmiah yang kini tersedia.

Sebelum menggunakan pertama kali

1 Keluarkan alat dan aksesorinya dari kotak.

2 Cabut semua stiker,lapisan atau plastik pelindung dari alat.

Menyiapkan penggunaan

Menghubungkan selang

1Untuk menghubungkan selang,masukkan dengan kuat ke alat (hingga berbunyi‘klik’).Pastikan ceruk di sambungan selang benar-benar pas dengan sambungan pada rumah alat (Gbr. 2).

2Untuk melepas selang,tekan tombol (1) dan tarik selang hingga lepas dari alat (2) (Gbr. 3).

Menghubungkan tabung teleskopik

1 Untuk menghubungkan tabung teleskopik ke pegangan:

-- Tabung teleskopik dengan koneksi kerucut (hanya tipe tertentu): Masukkan pegangan ke tabung teleskopik dan putar sedikit (Gbr. 4).

-- Tabung teleskopik dengan koneksi tombol (hanya tipe tertentu):Tekan tombol kunci berpegas pada pegangan dan masukkan pegangan ke tabung teleskopik. Pasang tombol kunci berpegas ke dalam lubang pipa (hingga berbunyi‘klik’) (Gbr. 5).

2 Untuk melepaskan tabung teleskopik dari pegangan:

Indonesia 15

-- Tabung teleskopik dengan koneksi kerucut (hanya tipe tertentu):Tarik pegangan keluar dari tabung teleskopik sambil diputar sedikit.

-- Tabung teleskopik dengan koneksi tombol (hanya tipe tertentu):Tekan tombol kunci berpegas dan tarik pegangan keluar dari tabung.

3 Atur panjang tabung teleskopik agarAnda dapat nyaman menggunakannya. (Gbr. 6)

Pegang bagian kerahnya dengan satu tangan dan tarik bagian tabung di atas kerah atau dorong ke bawah dengan tangan Anda yang satunya.

Menghubungkan aksesori 

1 Untuk menghubungkan tabung ke salah satu aksesori: (Gbr. 7)

-- Tabung teleskopik dengan koneksi kerucut (hanya tipe tertentu): Masukkan tabung teleskopik ke aksesori sambil memutarnya sedikit.

-- Tabung teleskopik dengan koneksi tombol (hanya tipe tertentu):Tekan tombol kunci berpegas pada tabung teleskopik dan masukkan tabung ke aksesori. Pasang tombol kunci berpegas ke dalam lubang aksesori (hingga berbunyi‘klik’).

2 Untuk melepaskan tabung teleskopik dari aksesori:

-- Tabung teleskopik dengan koneksi kerucut (hanya tipe tertentu):Tarik tabung teleskopik keluar dari aksesori sambil memutarnya sedikit.

-- Tabung teleskopik dengan koneksi tombol (hanya tipe tertentu):Tekan tombol kunci berpegas dan tarik tabung keluar dari aksesori.

Tip:Nozel kecil,alat celah,dan sikat kecil (hanya tipe tertentu) dapat juga dihubungkan ke pegangan selang.

Klip aksesori

1 Pasang alat celah dan nozel kecil ke dalam klip.

2 Pasang klip aksesori pada pipa (Gbr. 8).

3Tarik klip aksesori dari pipa untuk melepasnya.

NozelTri-Aktif (hanya tipe tertentu)

NozelTri-Aktif adalah nozel serba-guna untuk karpet dan lantai keras.

-- Sikat samping menyedot lebih banyak debu dan kotoran di samping nozel dan Anda dapat membersihkan perabotan dan lainnya dengan lebih baik (Gbr. 9).

-- Lubang di bagian depan nozel memungkinkan Anda menyedot partikel yang lebih besar (Gbr. 10).

1Gunakan setelan lantai keras untuk membersihkan lantai keras (misalnya untuk lantai tegel, parkit,lantai laminasi dan lantai linolium):tekan sakelar di atas nozel dengan kaki untuk mengeluarkan strip sikat dari rumahnya.Saat bersamaan,rodanya akan naik untuk mencegah goresan dan untuk menambah daya manuvernya (Gbr. 11).

2Gunakan setelan karpet untuk membersihkan karpet:tekan lagi sakelarnya untuk memasukkan strip sikat ke rumah nozel.Roda akan turun secara otomatis (Gbr. 12).

Nozel kombinasi (hanya tipe tertentu)

Nozel kombinasi dapat digunakan pada karpet atau lantai keras.

1Untuk membersihkan lantai keras,tekan tombol di bagian atas nozel dengan kaki Anda (Gbr. 13).

,, Strip sikat untuk membersihkan lantai keras menjadi keluar dari rumah nozel.

2 Untuk membersihkan karpet,tekan lagi tombol tersebut (Gbr. 14). ,, Strip sikat masuk ke dalam rumah nozel.

16 Indonesia

Nozel lantai keras (hanya tipe tertentu)

-- Nozel lantai keras dirancang untuk membersihkan lantai keras dengan lembut (Gbr. 15).

Sikat turbo mini (hanya tipe tertentu)

Sikat turbo mini dirancang khusus untuk memungut bulu binatang dan kapas dari perabotan dan kasur secara efektif. Sikat unik yang berada di dalam sikat turbo mini akan mengangkat bulu dari kain. Kemudian bulu dipungut oleh penyedot debu.

Sikat turbo mini dapat dipasang pada pegangan selang atau tabung teleskopik.

1Untuk memasang sikat turbo mini,masukkan sikat ke pegangan atau tabung teleskopik dan putar sedikit.

2Untuk melepaskan sikat turbo mini,tarik keluar dari pegangan atau tabung mini sambil memutarnya sedikit.

Menggunakan alat

1 Tarik keluar kabel alat dan tancapkan steker listrik pada stopkontak dinding. 2 Tekan tombol on/off di bagian atas alat untuk menghidupkan alat (Gbr. 16).

Tip:Agar tidak perlu membungkukkan punggung Anda,tekan tombol on/off dengan kaki Anda.

3JikaAnda ingin memarkir pipanya sejenak sewaktu menyedot,masukkan tonjolan pada nozel ke slot penahan (Gbr. 17).

4Untuk memastikan pipa teleskopik diparkir dengan stabil,sesuaikan pipa dengan panjang terpendeknya.

5Untuk mematikan alat,tekan tombol on/off pada bagian atas alat.

Menyesuaikan daya isap

1 Selama menyedot,Anda dapat menyesuaikan daya isap dengan putaran pemilih di bagian atas alat (Gbr. 18).

-- Gunakan daya isap maksimum (+) untuk menyedot karpet dan lantai keras yang sangat kotor. -- Gunakan daya isap minimum (-) untuk menyedot debu pada gorden, taplak meja, dsb.

2Hanya tipe tertentu:Anda juga dapat mengatur daya isap dengan sakelar daya isap pada pegangan (Gbr. 19).

Penyimpanan

1 Matikan alat dan lepaskan steker listrik dari stopkontak dinding.

2 Tekan tombol penggulung kabel untuk menggulung kabel listrik (Gbr. 20).

3Hanya tipe tertentu:Selalu atur nozelTri-Active dalam pengaturan karpet bilaAnda menyimpannya.Ini akan mencegah sikat samping menjadi bengkok (Gbr. 12).

4Letakkan alat dalam posisi tegak.Untuk memasang nozel ke alat, masukkan tonjolan pada nozel ke slot penyimpanan (Gbr. 21).

Untuk memastikan penyimpanan tabung teleskopik yang stabil, atur tabung ke panjang terpendeknya.

Mengganti/mengosongkan kantong debu

Lepaslah selalu steker alat sebelumAnda mengganti kantong debu sekali-pakai atau mengosongkan kantong debu pakai-ulang.

Indonesia 17

Mengganti kantong debu sekali-pakai

-- Gantilah kantong debu bila indikator kantong debu penuh telah berubah warna secara permanen, misalnya, sekalipun nozel tidak diletakkan di lantai (Gbr. 22).

1 Tarik tutupnya ke atas untuk membukanya (Gbr. 23).

2 Angkat penahan kantong debu dari alat (Gbr. 24).

PastikanAnda memegang kantong debu tegak lurus bila Anda mengangkatnya dari alat.

3Tarik pada tag karton untuk melepas kantong debu yang sudah penuh dari penahannya (Gbr. 25).

,, BilaAnda melakukannya,kantong debu akan tersegel secara otomatis.

4Selipkan karton di bagian depan kantong debu yang baru pada kedua alur di penahan kantong debu sejauh mungkin. (Gbr. 26)

5 masukkan kembali penahan kantong debu ke dalam penyedot debu (Gbr. 27).

Catatan:Jika tidak ada kantong debu yang dimasukkan,Anda tidak dapat menutupnya.

6Tekan penutupnya ke bawah untuk menutupnya (hingga terdengar bunyi‘klik’).

Mengosongkan kantong debu pakai-ulang (hanya untuk beberapa negara)

Di beberapa negara, penyedot debu ini juga hadir dengan sebuah kantong debu pakai-ulang yang dapat digunakan dan dikosongkan berulang-kali. Anda dapat menggunakan kantong debu pakaiulang sebagai ganti kantong debu sekali-pakai.

Untuk mengeluarkan dan memasukkan kantong debu pakai-ulang, ikuti saja instruksi dalam ‘Mengganti kantong debu sekali-pakai’.

Untuk mengosongkan kantong debu pakai-ulang:

1 Geser penjepit kantong debu ke samping.

2 Kocok isinya ke dalam tempat sampah.

3 Untuk menutup kantong debu, selipkan kembali jepitannya pada tepi bawah kantong debu.

Membersihkan dan pemeliharaan

Selalu cabut steker alat sebelumAnda membersihkan filter.

Membersihkan filter pelindung motor permanen

Bersihkan filter pelindung motor permanen setiap kali Anda mengosongkan kantong debu pakaiulang atau mengganti kantong debu sekali-pakai.

1 Keluarkan kantong debu bersama penahannya (Gbr. 24).

2 Tekan ke bawah tab di bagian atas penahan filter pelindung motor untuk melepasnya (Gbr. 28).

3Tarik bagian atas penahan filter pelindung motor ke arahAnda (1) dan angkat penahan filter dari kompartemen kantong debu (2). (Gbr. 29)

4 Kocoklah filter di atas tempat sampah untuk membersihkannya. 5 Masukkan kembali filter yang telah bersih ke penahan filter.

6Paskan kedua cuping penahan filter di belakang tonjolan pada bagian bawah untuk memastikannya benar-benar pas di bagian atas (1).Kemudian tekan rumah penahan filter (hingga berbunyi‘klik’) (2) (Gbr. 30).

7 Pasang kembali kantong debu bersama penahannya ke alat dan rapatkan tutupnya.

18 Indonesia

Membersihkan filter HEPA 12 yang dapat dicuci

Filter HEPA 12 yang dapat dicuci ini mampu menyingkirkan 99,5% dari semua partikel hingga seukuran 0,0003 mm dari udara saluran.Tidak hanya debu rumah biasa, tetapi juga kutu mikroskopik berbahaya seperti tungau debu rumah dan kotorannya, yang diketahui menjadi penyebab alergi pernafasan.

Catatan:Untuk menjaga agar kinerja penyedot debu dan kemampuan menahan debu tetap optimal, gantilah selalu filter HEPA dengan filter asli Philips dengan jenis yang tepat (lihat bab‘Memesan aksesori’).

Bersihkan filter HEPA 12 yang dapat dicuci ini setiap 6 bulan.Anda dapat membersihkan filter HEPA 12 yang dapat dicuci ini maks. 4 kali. Ganti filter setelah 4 kali dibersihkan.

1 Untuk membuka kisi filter HEPA,pegang tab dan tarik ke atas (Gbr. 31). 2 Keluarkan filter HEPA 12 dari alat (Gbr. 32).

3 Bilas sisi yang dilipat pada filter HEPA 12 di bawah keran air panas yang mengalir perlahan.

-- Pegang filter sedemikian rupa sehingga sisi yang dilipat menghadap ke atas dan air mengalir sejajar dengan lipatannya. Pegang filter pada suatu sudut agar air membilas kotoran di dalam lipatannya (Gbr. 33).

-- Putar filter 180° dan biarkan air mengaliri lipatannya dalam arah berlawanan (Gbr. 34). -- Lanjutkan proses ini sampai filter bersih.

Jangan bersihkan filter dengan sikat (Gbr. 35).

Catatan:Pembersihan tidak akan mengembalikan warna filter semula,melainkan mengembalikan daya saringnya.

4Dengan hati-hati goyangkan air dari permukaan filter.Biarkan filter kering sendiri sekurangnya selama 2 jam sebelumAnda memasangnya kembali ke penyedot debu.

Catatan:Pastikan bahwa filter benar-benar kering sebelum Anda memasukkannya kembali ke alat.

5 Letakkan kembali filter ke dalam alat (Gbr. 36).

Catatan:Pastikan dua bagian filter HEPA mengarah ke bawah.

6Untuk menutup kisi filter HEPA,pertama sejajarkan bagian atas kisi dengan alat (1).Kemudian tekan tab ke bawah sampai kisi terkunci pada tempatnya (2) (hingga terdengar bunyi ‘klik’) (Gbr. 37).

Membersihkan sikat turbo mini

Untuk membersihkan sikat di dalam sikat turbo mini, ikuti langkah-langkah berikut:

1 Putar sikat turbo mini ke arah bawah.

2Untuk membuka sikat turbo mini,putar cincin ke arah berlawanan jarum jam (1) dan tarik ke arahAnda (2) (Gbr. 38).

3 Pisahkan kedua belahan rumah (Gbr. 39).

4 Singkirkan bulu dan debu yang berada pada sikat. (Gbr. 40) Jangan lepaskan sikat dan bagian dalam sikat turbo mini.

5 Geser tiga tonjolan pada bagian bawah ke dalam tiga slot bagian atas (Gbr. 41). 6 Turunkan bagian bawah ke atas bagian atas untuk menutup sikat turbo (Gbr. 42).

7Untuk mengunci sikat turbo mini,geser cincin ke arah rumah (1) dan putar searah jarum jam untuk mengencangkan (2) (Gbr. 43).

Indonesia 19

Memesan aksesori

Untuk membeli  kantong debu, filter, atau aksesori lain untuk alat ini, harap kunjungi www.philips.com, baca leaflet jaminan seluruh dunia, atau hubungi Pusat Layanan Konsumen Philips di negara Anda.

Memesan kantong debu

-- Kantong debu kantong-s sintetis Philips Classic ` tersedia dengan nomor tipe FC8021.

-- Kantong debu kantong-s sintetis berdaya saring tinggi Philips Classic ` tersedia dengan nomor tipe FC8022.

-- Kantong debu kantong-s sintetis Philips Anti-odour ` tersedia dengan nomor tipe FC8023. -- Kantong debu pakai-ulang (hanya di beberapa negara) tersedia dengan nomor kode 4322 004

93370.

Catatan:Harap kunjungi www.s-bag.com untuk informasi lebih lanjut tentang kantong-s.

Memesan filter

-- Filter HEPA 12 yang dapat dicuci tersedia dengan nomor tipe FC8044.

Lingkungan

-- Jangan membuang alat bersama limbah rumah tangga biasa jika alat sudah tidak bisa dipakai lagi, tetapi serahkan ke tempat pengumpulan barang bekas yang resmi untuk didaur ulang. Dengan melakukan ini, berarti Anda ikut membantu melestarikan lingkungan (Gbr. 44).

Garansi dan layanan

Jika Anda butuh servis atau informasi atau mengalami masalah, harap kunjungi situs web Philips di www.philips.com atau hubungi Pusat Layanan Pelanggan Philips di negara Anda (Anda dapat menemukan nomor teleponnya dalam leaflet garansi internasional). Jika tidak ada Pusat Layanan Pelanggan di negara Anda, kunjungi dealer Philips setempat.

Pemecahan Masalah

Bab ini merangkum masalah-masalah paling umum yang mungkin Anda temui pada alat. Jika Anda tidak mampu mengatasi masalah dengan informasi di bawah, hubungi Pusat Layanan Konsumen di negara Anda.

1 Daya isap tidak memadai.

A Periksa apakah kantong debu sudah penuh.

Jika perlu, gantilah kantong debu sekali-pakai atau kosongkan kantong debu pakai-ulang (hanya untuk beberapa negara).

B Periksa apakah filter perlu dibersihkan atau diganti. Jika perlu, bersihkan atau ganti filternya.

C Periksa apakah putaran pemilih daya isap dalam posisi maksimum. D Periksa apakah nozel, pipa atau selang tidak tersumbat.

-- Untuk menyingkirkan penghalang tersebut, lepaskan item yang tersumbat dan pasanglah (sejauh memungkinkan) dengan cara lain. Hidupkan penyedot debu untuk memaksa udara melalui item yang tersumbat dalam arah berlawanan (Gbr. 45).

2 Hanya tipe tertentu: bulu terlilit di sekitar sikat di dalam sikat turbo mini.

ABersihkan sikat turbo mini. Lihat bab‘Membersihkan’, bagian‘Membersihkan sikat turbo mini’.  (Gbr. 46)

20

!www.philips.co.kr .

 (  1)

2

3

4

7

9

12( )

13( )

14( )

15Tri-Active ( )

16/

18/

19( )

20/

21( )

24( )

25( )

27( )

29HEPA 12

보관하십시오.

-- , ..

Loading...
+ 44 hidden pages