

Page 1
PFAFF® HD screen
Page 2
PFAFF® HD screen
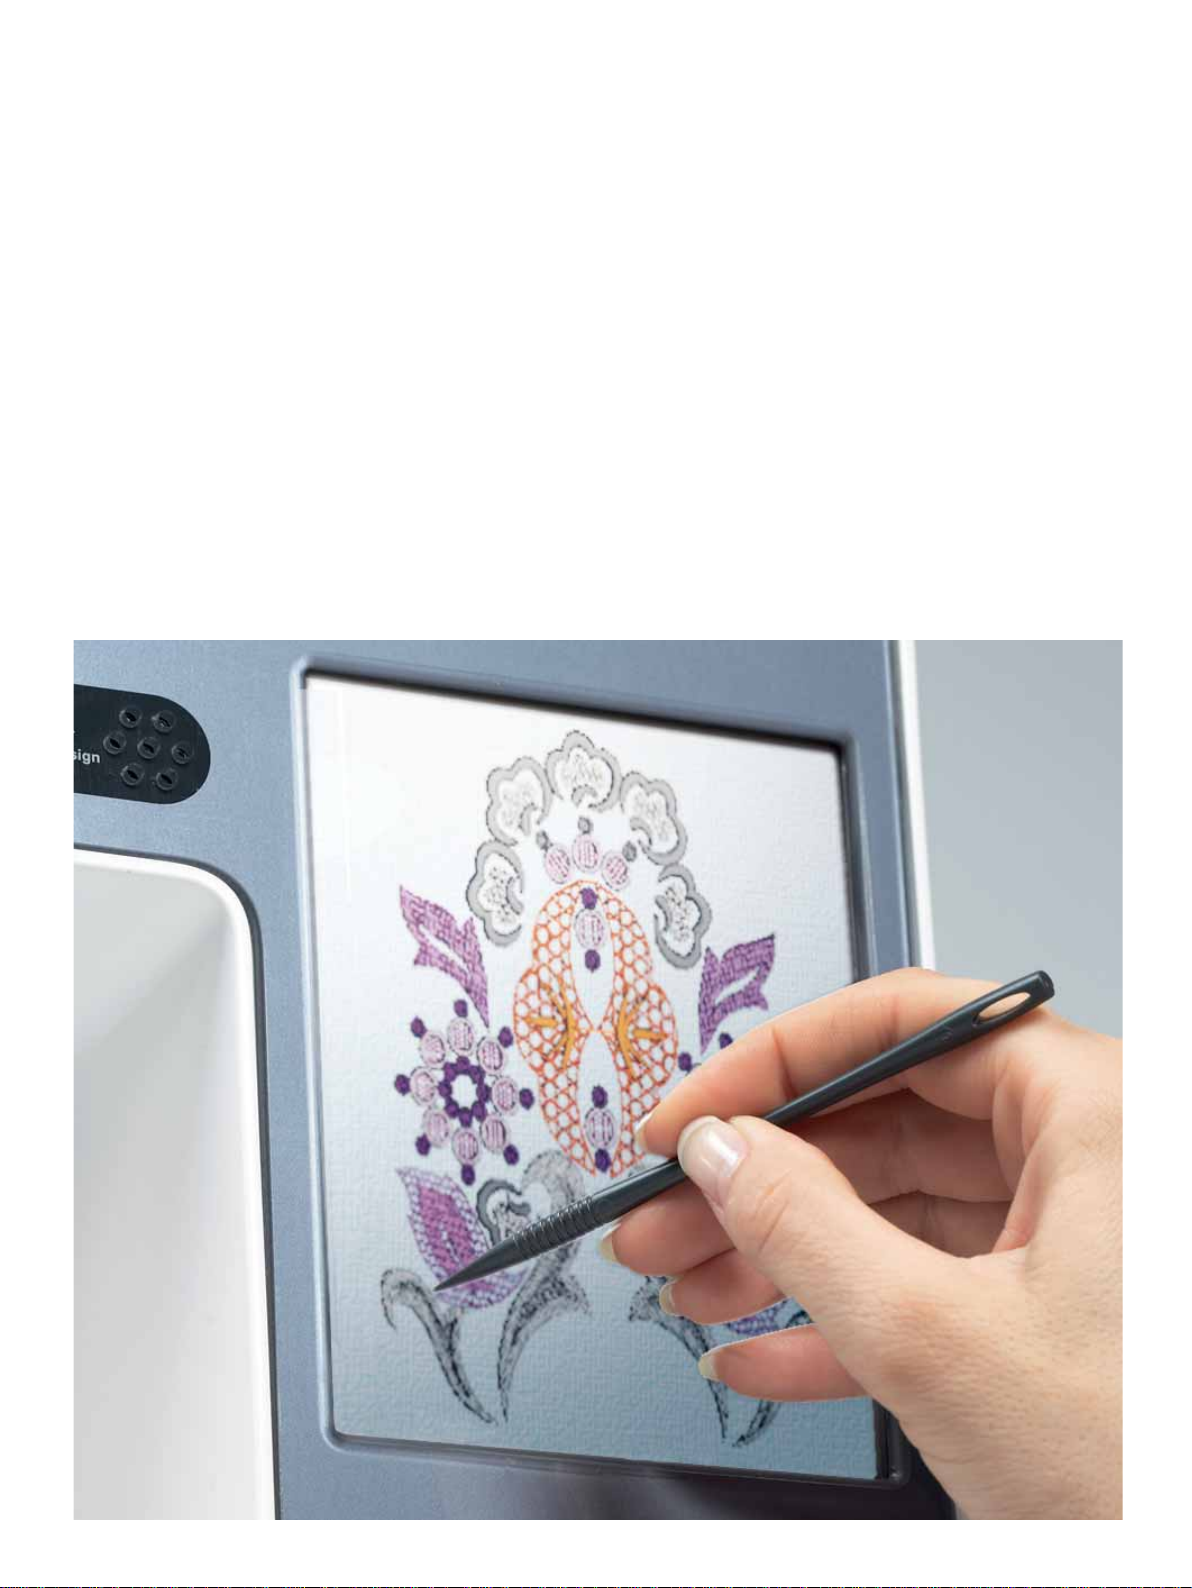
Your machine features a PFAFF® HD screen. This
technology provides great resolution and color.
The screen is very easy to work with - just touch it with
your stylus or your fi nger tip to make your choices. The
task bar at the bottom of the screen includes the main
functions and help.
Every mode entered will have its own color, to make it
easier to use the machine.
Start view
When turned on, a welcome screen is shown fi rst,
then the sewing mode. If the embroidery unit is
connected, the embroidery mode appears. When
turned off, the screen is dark grey.
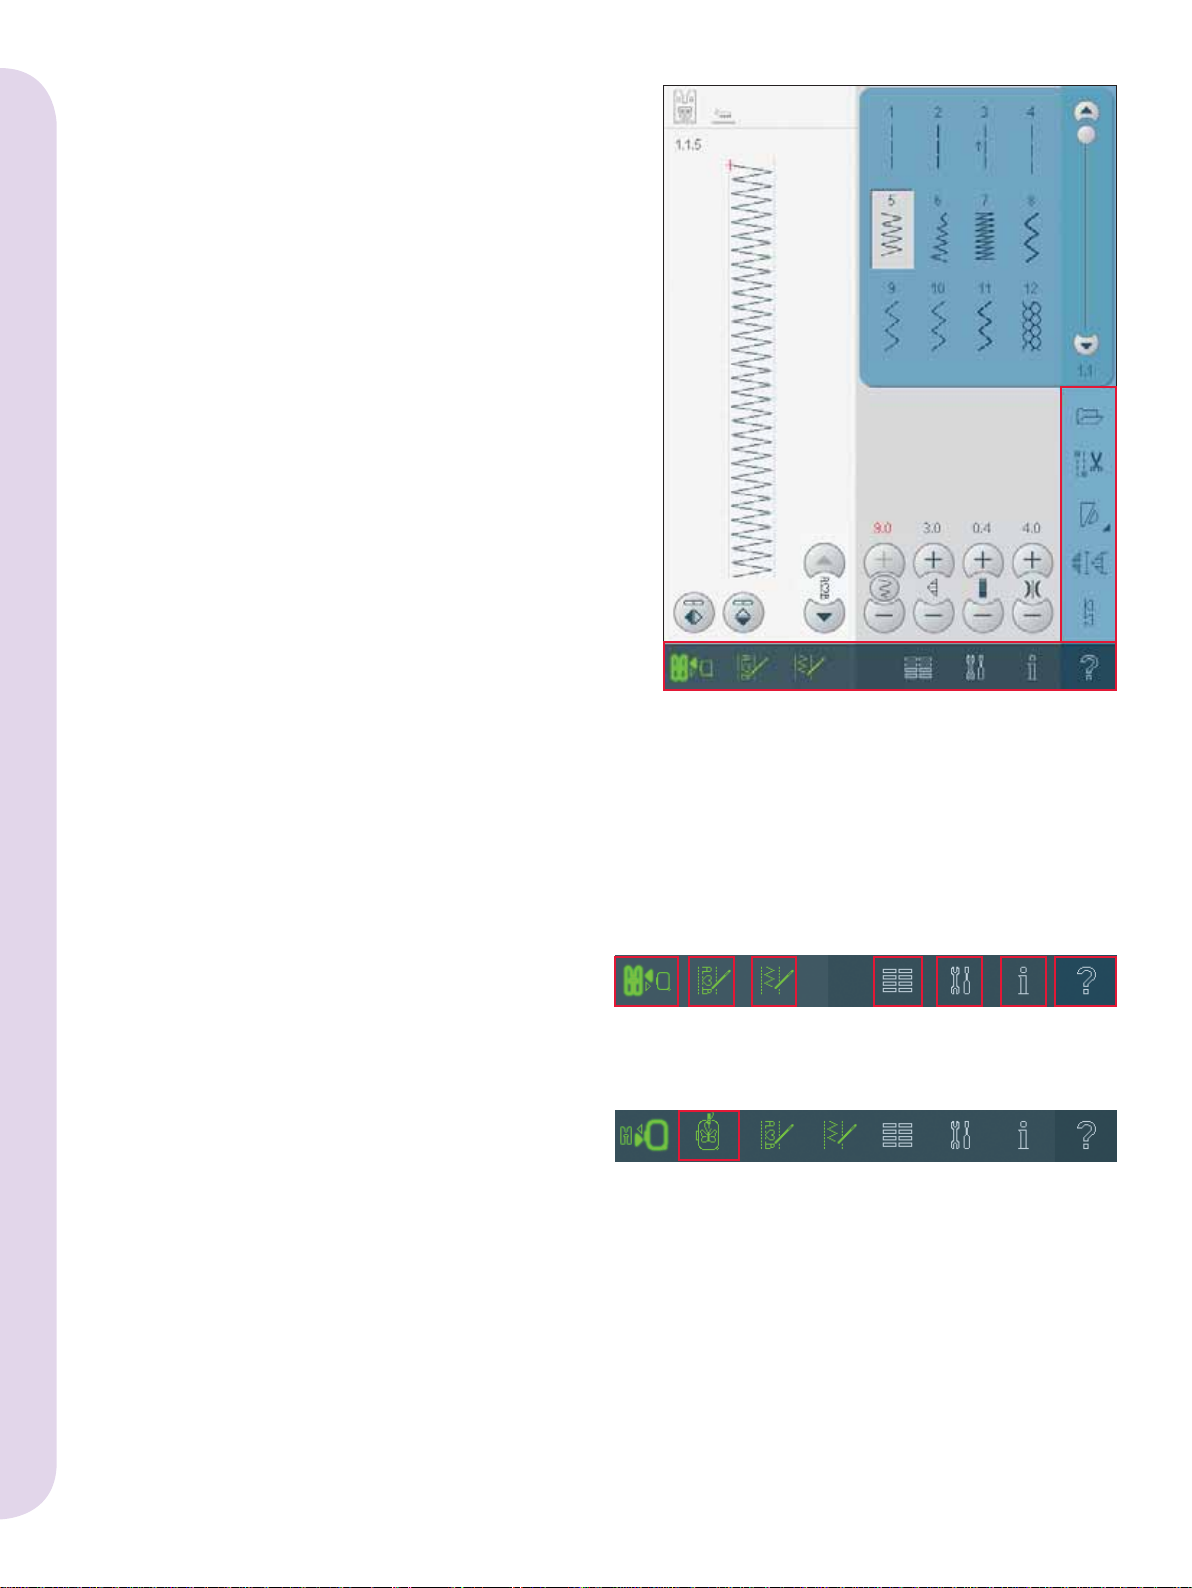
Main parts
The task bar (A) is used for selecting and activating
different functions. The look of the task bar will
change depending on whether sewing mode or
embroidery mode is active. Change mode by
touching the Sewing/embroidery toggle icon (1).
The task bar will always be located at the bottom of
the screen.
The option bar (B) will be visible in almost every
view, on the right hand side of the screen. The
option bar has different options depending on
which mode is active.
B
A
Task bar
Pfaff HD screen
Main functions in task bar
1. Sewing/embroidery toggle icon
2. Sequencing/embroidery text editor
3. Stitch Creator
4. Selection menu
5. Settings menu
6. Info menu
7. Quick help
Sequencing/embroidery text editor (2) will open
different windows depending on what mode
is active, and if you are using stitch fonts or
embroidery fonts.
In embroidery mode
8. Embroidery toggle icon
The embroidery toggle icon switches between
embroidery edit and embroidery stitch-out. Since
embroidery edit and embroidery stitch-out are only
available if embroidery mode is active, this icon (8)
will be hidden when sewing mode is active.
3412 567
Main functions in task bar
8
Task bar in embroidery mode
3:2
Page 3
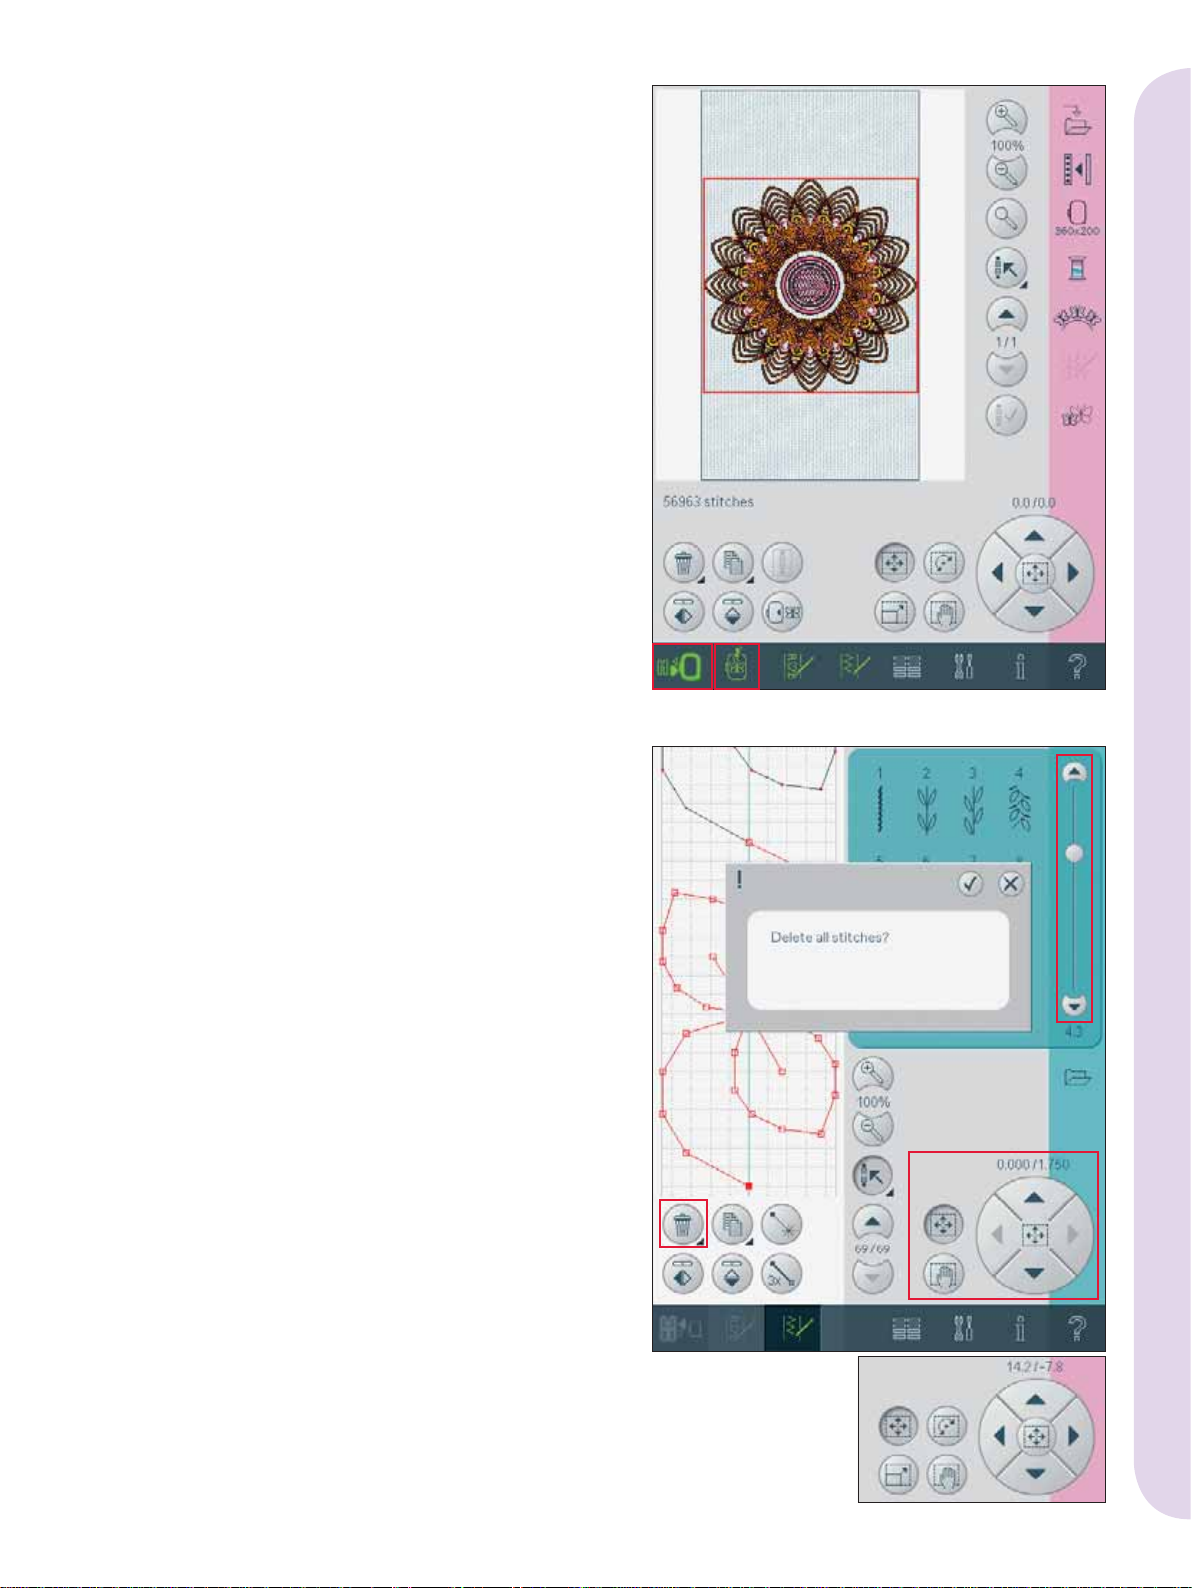
Use the task bar
Toggle between the sewing mode and the
embroidery mode by using the toggle icon (1).
The icon for the active mode is highlighted and
enlarged.
To activate any function, touch the icon on the task
bar. When a function is activated, the icon will
be selected and you can make your adjustments.
When you are fi nished, close the view by touching
the icon again.
When you want to move from embroidery edit to
embroidery stitch-out, just touch the embroidery
toggle icon (8).
Common icons
There are some icons and functions that are
frequently used on the screen. The most common
are described below.
Scroll bar (A)
Use the scroll bar to scroll down the fi eld. The
scroll bar is only visible if all items do not fi t in the
fi eld.
OK (B) and cancel (C)
The OK (B) and cancel (C) icons are used to
confi rm your settings and selections. They are also
used to close full screen windows.
To abort an actual process, touch cancel. To
continue, touch OK.
Long touch (D)
Some icons have increased functions, marked
with an arrow at the lower right corner. To access
these functions, touch and hold the icon for a few
seconds.
Touch functions (E)
The touch functions will be used to make
adjustments. There are up to four functions to use;
move (F), rotate (G), scale (H) and pan (I).
When a function is selected, you can make
adjustments by touching the arrows in the wheel,
or by touching your stylus on the screen. The
appearance of the wheel will change depending on
which function is selected. In most cases, the center
icon has a function but when pan is selected, it will
just show the pan symbol.
1
Embroidery mode - edit
8
D
Pfaff HD screen
A
BC
E
FG
HI
3:3
Page 4

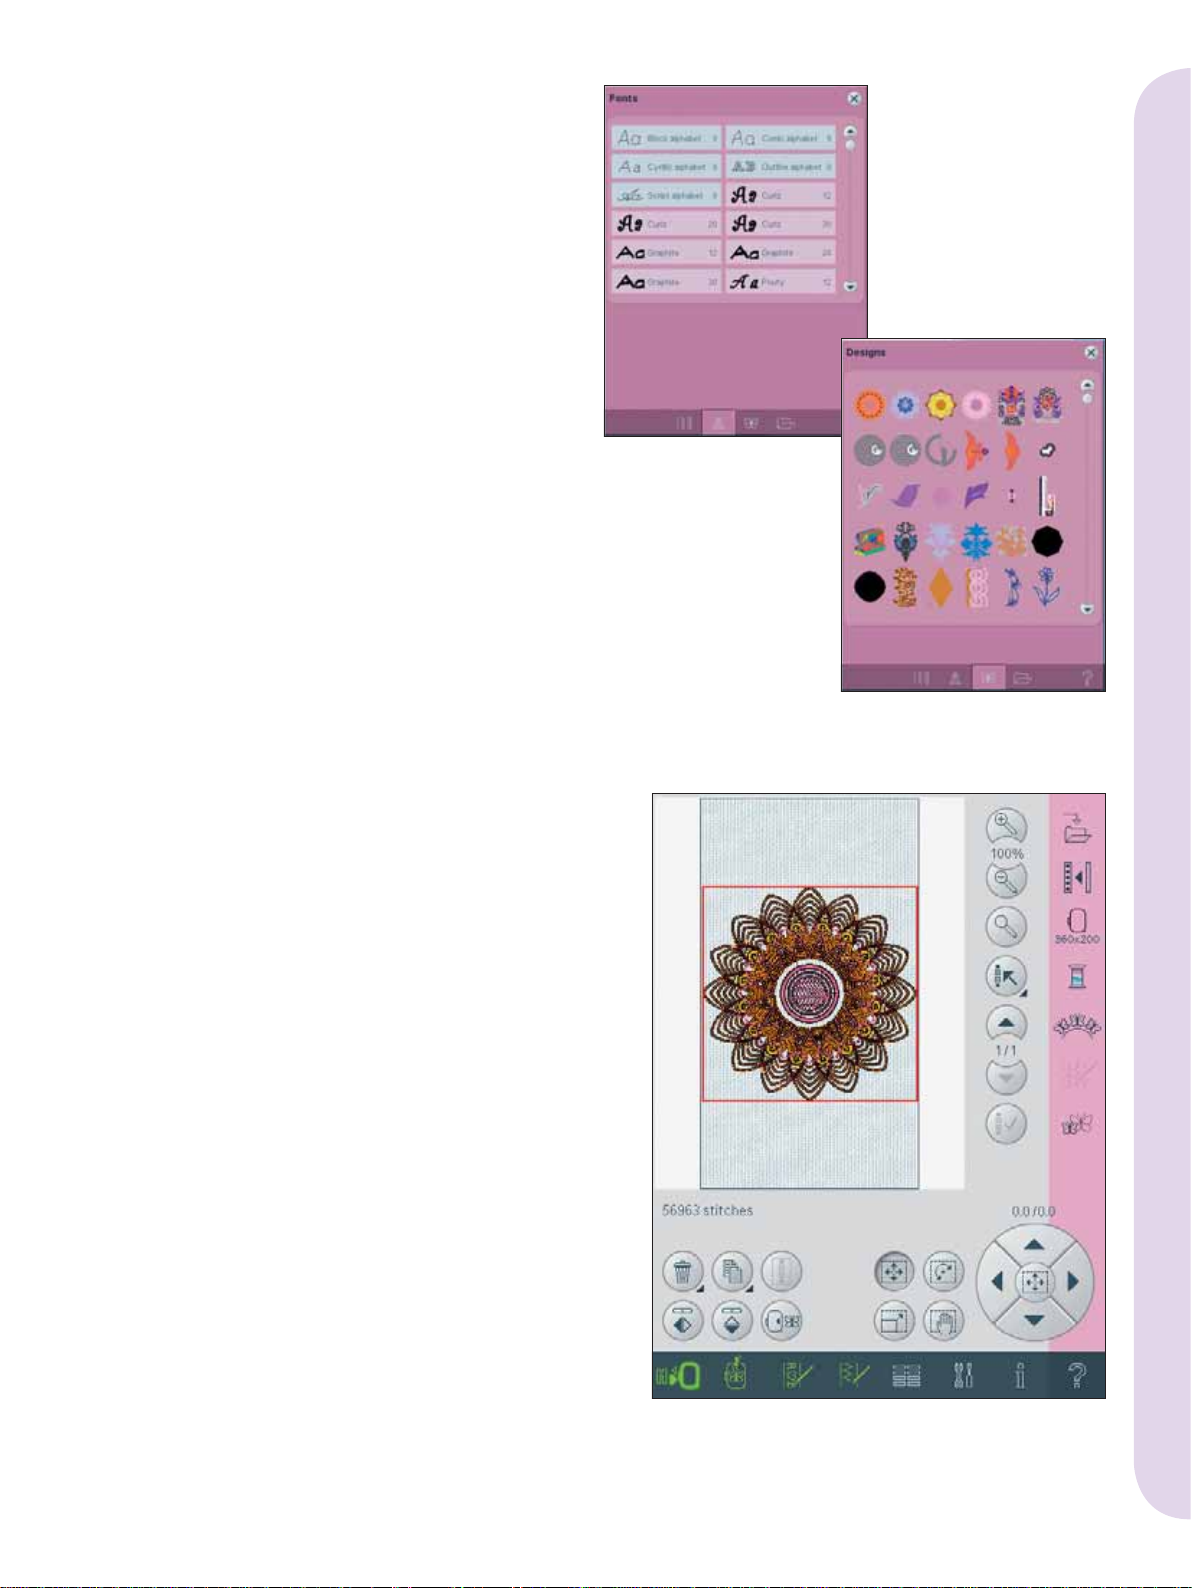
Selection menu
The selection menu contains a selection bar at the
bottom with icons for stitches, fonts, designs and
Files & Folders. Read more about Files & Folders in
chapter 10.
Select one of the icons in the selection bar to access
the menus. When a stitch, font or design is selected,
the selection menu will close automatically. To
return to previous view, close by touching cancel.
Selection menu - overview
1. Selection bar
a) Stitches
b) Fonts
c) Designs
d) Files & Folders
2. Stitch categories
a) Utility stitches
b) Quilt stitches
c) Needle art stitches
d) Decorative stitches
e) Maxi stitches
f) Sewing techniques
g) Personal menu
3. Stitch subcategories
4. Stitches
5. Clear personal menu (only visible if personal
menu is selected)
Pfaff HD screen
Selecting a stitch
To select a stitch, fi rst select a category at the top
(2). For each category, there are one or more
subcategories (3). For each subcategory a list of
stitches is shown (4). Select a stitch by touching it.
2
2a 2b 2c 2d 2e 2f 2g
3
4
1
1a 1b 1c 1d
Personal menu
To fi nd your personal saved stitches, open personal
menu (2g). Each subcategory in the personal
menu has 32 positions to save your own stitches
or sequences. Scroll through the stitches in the
selected subcategory. Select a stitch by touching it.
If you want to delete one stitch, fi rst touch the
delete icon (5), and then touch the stitch. The
positon will be emptied. To abort the deletion
before selecting a stitch, deselect the delete icon.
A long touch of the delete icon (5) will empty the
whole subcategory selected.
Note: All stitches in the subcategory will be deleted,
even though they are not visible in the screen.
3:4
5
Page 5
Selecting a font
Stitch fonts are indicated with a grey background
and embroidery fonts have a pink background.
Select a font by touching it. Use the scroll bar to see
additional fonts.
When an embroidery font is selected, the
embroidery text editor will open automatically.
You can select different sizes for each font.
Note: Embroidery fonts are only visible if the embroidery
mode is active and neither sequencing nor Stitch Creator
is active.
Selecting a design
Select an embroidery design by touching it. Use the
scroll bar to browse through additional designs.
Note: When a design is selected, the machine will
automatically switch to embroidery mode and the design
will be loaded into embroidery edit.
Embroidery edit
In embroidery edit you can change colors, size,
shape, position and rotation of your designs. You
can also combine, save, restore and delete. The
designs are shown in 3D in the embroidery fi eld.
You can edit your designs with or without the
embroidery unit attached.
Pfaff HD screen
3:5
Page 6

Embroidery text editor
Used to create or adjust text written by embroidery
fonts.
To open, select an embroidery font in the selection
menu. You can also select an existing text in
embroidery edit and then touch sequencing/
embroidery text editor on the task bar.
Embroidery stitch-out
To embroider your design, change from
embroidery edit to embroidery stitch-out by
Pfaff HD screen
touching the embroidery toggle icon on the task
bar.
In embroidery stitch-out you can see functions that
are useful when embroidering.
3:6
Page 7

Sequencing
With sequencing you can combine various stitches
and adjust them. You can use built-in stitches,
load stitches from external devices or use stitches
you have created. You can program tie-offs, stops
and thread snips into your sequence. Connection
stitches can be inserted to create endless variations.
Stitch Creator
Stitch Creator allows you to create your own 9mm
stitch or edit built in stitches. Add, delete, move
and adjust your stitch right on screen. Every single
stitch point, marked with an outlined square, can
be edited.
Start with an empty stitch fi eld and build your
stitch or insert a stitch for further adjustments.
Pfaff HD screen
3:7
Page 8

Settings menu
In the Settings menu, you can override automatic
settings and make manual adjustments to the
machine settings (A), sound settings (B) and screen
and light settings (C).
Touch the icons to activate a function or open a
list of choices. The settings are saved even after
turning off the machine.
Machine settings (A)
Owner’s name
Touch the icon to get a pop-up where you can enter
your name.
Twin needle
Touch the icon to open a list for twin needle width
selections. When a twin needle size is selected, the
width of all stitches is limited for that needle size to
prevent needle breakage. The setting is kept until
you deselect the twin needle width.
When a twin needle size is selected, a pop-up is
shown when turning on your machine. Another
warning pop-up is shown when selecting a stitch
that is too wide for the set twin needle size. The
stitch width of those stitches is automatically
adjusted to fi t the twin needle. Deselect twin needle
to go back to normal sewing.
ABC
Stitch width safety
Select this function when using a straight stitch
Pfaff HD screen
needle plate or a straight stitch presser foot to lock
the center needle position for all stitches to prevent
damage to the needle, presser foot or needle plate.
When turning on the machine with this setting
activated and for every stitch selection that is not
a straight stitch, a pop-up informs you that it is set
to straight stitch. Deselect stitch width safety to go
back to normal sewing.
Note: Twin needle and stitch width safety cannot be
used at the same time.
AutoSave current state
When AutoSave current state is selected, the
machine will save current state periodically
while embroidering and also when you stop
embroidering.
The information about the embroidery will be
saved even after switching the machine off.
Note: If AutoSave current state is selected it can take
longer to go from Embroidery edit to Embroidery stitchout.
Pop-up for twin
needle selection.
3:8
Page 9

Cut jump stitches
Your machine features the automatic function
Cut jump stitches. This function saves you time
trimming after the embroidery is completed.
When Cut jump stitches is selected your machine
will trim the top jump stitch thread and pull the
thread end to the underside of the fabric as you
embroider.
Note: Your machine will also cut the thread after you
have changed to a new color. Hold the thread end when
you start embroidering again, so that you can easily
remove the thread end when cut.
Designs marked with this symbol are
programmed for Cut jump stitches. Jump stitch
trim commands can be added to any design
using the 4D™ Organizer Software, included
with your machine.
Timer
Displays the total sewing and embroidery time of
your machine. Touch the icon to reset the timer.
Automatic thread snips
When selected, the automatic thread snips is
activated. The threads are cut automatically and
the presser foot raises at color changes or when
an embroidery is fi nished. When deselected, no
automatic thread snips will be performed.
ABC
Pfaff HD screen
Automatic presser foot lift
When selected, the automatic presser foot lift is
activated. The presser foot will raise to pivot height
for example when stopping with the needle in the
down position. When deselected, the presser foot
will stay lowered even if the machine stops with
the needle in down position.
Defragment machine memory
To optimize the sewing and embroidery
performance you sometimes need to do a
defragmentation. When that needs to be done a
pop-up message appears. To defragment your
machine fi rst remove unneccesary fi les then go
to the Machine Settings in the Settings menu and
select Defragment machine memory.
The defragmentation can take up to 45 minutes.
3:9
Page 10

Sensormatic free-motion
Activate to set the machine in Sensormatic freemotion mode for presser foot 6A. The feed dogs
will lower automatically.
When sewing free-motion at low speed the presser
foot will raise and lower with each stitch to hold
the fabric on the needle plate while the stitch is
being formed. At higher speed, the presser foot
fl oats over the fabric while sewing. The fabric must
be moved manually.
To adjust the presser foot height in Sensormatic
free-motion mode, long touch the icon (D) and
make adjustments in the pop-up.
Note: Make sure that the IDT is disengaged.
Spring foot free-motion
Activate to set the machine in Spring foot
free-motion mode. The feed dogs will lower
automatically. A spring foot will raise and lower
with each stitch to hold the fabric on the needle
plate while the stitch is being formed.
Note: Make sure that the IDT is disengaged.
The open-toe free-motion feet are optional and can be
purchased at your local authorized PFAFF® dealer. Do
not use if Sensormatic free-motion is activated, since the
needle might damage the presser foot.
The open-toe free-motion feet, or any spring foot
with light grey plastic housing, can also be used for
embroidery.
Pfaff HD screen
Presser foot pressure (E)
In most cases, you do not need to adjust the presser
foot pressure. Specialty techniques may require
an adjustment. The higher the number the more
pressure on the fabric.
D
EF
ABC
Presser foot height embroidery (F)
Adjust the height of the presser foot in embroidery
stitch-out mode.
3:10
Pop-up for set
presser foot height in
Sensormatic freemotion.
Page 11

Sound settings (B)
You can change the sound settings on your
machine for different situations. First select from
the list (G) which sound event you want to change.
Then select the sound (H) you want to play by
touching the button. You will be able to hear the
sound when you touch the sound button. Each
event can have a different sound.
User defi ned sound
If you want to import your own sound fi les, use
the user defi ned icon (I) at the bottom of the list. A
long touch of this icon will open Files & Folders.
Find your sound fi le and touch the OK icon. The
name of the loaded sound fi le is shown next to the
button.
The sound length for icon acknowledge, button/
icon disabled and for warning or attention popups is maximum 5 seconds. For starting up and
embroidery fi nished, the maximum sound length
is 30 seconds. The sound fi les must be stored either
on your machine or, if connected, an external
device or your PC.
Note: You can only play PCM encoded WAVE-fi les. For
optimal result the fi le should be 8-bit mono. The machine
will not support compressed sound fi les.
We recommend always storing your sound fi les on your
machine before importing them into user defi ned sound.
GH
I
ABC
Pfaff HD screen
Audio repeat
When active, the signal for some warning or
attention pop-ups is repeated in intervals until it is
cancelled.
Volume
You can change the volume using the slider.
3:11
Page 12

Screen and light settings (C)
Language
Touch the icon to view the available languages.
Select your desired language from the list by
touching it.
Calibrate
When touching the icons on the screen, the screen
might need a calibration to adjust to your touch.
Touch the calibrate icon to open a special screen
for PFAFF® HD screen calibration. Follow the
instructions on the screen to calibrate.
Lock screen
If needed, you can easily lock the screen while
sewing or embroidering.
When activated, the screen is locked everytime it is
inactive for ten seconds. The screen will be locked
until you unlock it by touching OK.
Screen saver
When activated, the screen turns off ten minutes
after the last touch. Touch the screen or press any
button to light the screen again.
ABC
Alert light
When activated, you will get a fl ashing light at
some warning pop-ups. When not activated, only
the sound will be played.
Adjust Custom LED lights
Pfaff HD screen
Adjust the brightness and the color temperature
of the Custom LED lights on your machine to
make it perfect for all types of fabric and the light
conditions in your sewing room. Simply move the
button right or left on the slides.
3:12
Page 13

Info menu
Use the info system to easily get help topics and
information. The Info menu is a built-in shortened
version of the Owner’s manual.
When you touch the info menu icon on the task
bar, you have four options to select from - category
(J), index (K), personal info (L) and notes (M).
Browse through the topics using your stylus.
The left arrow at the top of the screen opens the
previous page. The right arrow takes you back to
the current page.
Category
Category shows the help topics divided into
categories following the structure of the Owner’s
manual.
Index
Index shows the help topics in alphabetical order.
Personal info
Personal info contains the owner’s name, machine’s
software information and serial number.
Notes
You can open and read text and HTML-fi les on
your machine. The note view shows these text fi les
which are opened from Files & Folders.
Use the left and right arrow buttons at the top of
the screen to browse through HTML-fi les.
J
K
Pfaff HD screen
L
Quick help
Your machine has a built-in Quick help, which
gives you instant information about everything
you see on the screen. Touch the Quick help icon
on the lower right corner of the screen. It starts
fl ashing indicating that Quick help is active.
Touch the icon or the part of the screen you
want information about. A pop-up gives a short
explanation. Touch OK to close the pop-up and exit
Quick help.
When a USB mouse is connected, it is even easier
to use the built-in Quick help. Place the cursor over
the icon and right click on the mouse and Quick
help will pop-up instantly.
M
3:13
Page 14

Pfaff HD screen
3:14
 Loading...