

Page 1
e001_kb474_qg_pc_7.fm Page 1 Thursday, May 28, 2009 9:41 AM
SLR Digital Camera
PC Connect
Page 2
e001_kb474_qg_pc_7.fm Page 2 Thursday, May 28, 2009 9:41 AM
Thank you for purchasing the PENTAX Q Digital Camera.
Refer to the separately supplied “Operating Manual” for further explanation of functions
and advanced operations of the camera.
Regarding copyrights
Images taken using the Q that are for anything other than personal enjoyment cannot
be used without permission according to the rights as specified in the Copyright Act.
Please take care, as there are cases where limitations are placed on taking pictures
even for personal enjoyment during demonstrations, performances or of items on
display. Images taken with the purpose of obtaining copyrights also cannot be used
outside the scope of use of the copyright as laid out in the Copyright Act, and care
should be taken here also.
Regarding trademarks
PENTAX, Q and smc PENTAX are trademarks of HOYA CORPORATION.
PENTAX Digital Camera Utility and SDM are trademarks of HOYA CORPORATION.
Microsoft and Windows are registered trademarks of Microsoft Corporation in the
United States and other countries. Windows Vista is either a registered trademark
or trademark of Microsoft Corporation in the United States and/or other countries.
Macintosh and Mac OS are trademarks of Apple Inc., registered in the U.S. and other
countries.
SDHC logo is a trademark.
This product includes DNG technology under license by Adobe Systems Incorporated.
The DNG logo is either registered trademarks or trademarks of Adobe Systems
Incorporated in the United States and/or other countries.
HDMI, the HDMI logo and High-Definition Multimedia Interface are trademarks or
registered trademarks of HDMI Licensing LLC.
All other brands or product names are trademarks or registered trademarks of their
respective companies.
Disclaimer
• HOYA is not responsible for any damages resulting from the direct or indirect use of
this software or repercussive damages, damage to data, programs or other intangible
property, loss of profit or anticipated profit, or dispute with a third party resulting from
the use of this software.
• The specifications of this software are subject to change without notice.
Page 3
e001_kb474_qg_pc_7.fm Page 3 Thursday, May 28, 2009 9:41 AM
Table of content
Connecting the Camera
to Your Computer 4
Using Captured Images on a Computer ............................. 4
Saving Images on Your Computer ...................................... 5
Using the Provided Software .............................................. 6
3
Page 4
e001_kb474_qg_pc_7.fm Page 4 Thursday, May 28, 2009 9:41 AM
Connecting the Camera
to Your Computer
Using Captured Images on a Computer
The captured still pictures and movies can be transferred to a computer
by connecting the Q using a USB cable and can be managed using
the provided software.
We recommend the following system requirements to connect your camera
to a computer or to use the software “PENTAX Digital Camera Utility 4”
included in the provided CD-ROM (S-SW90).
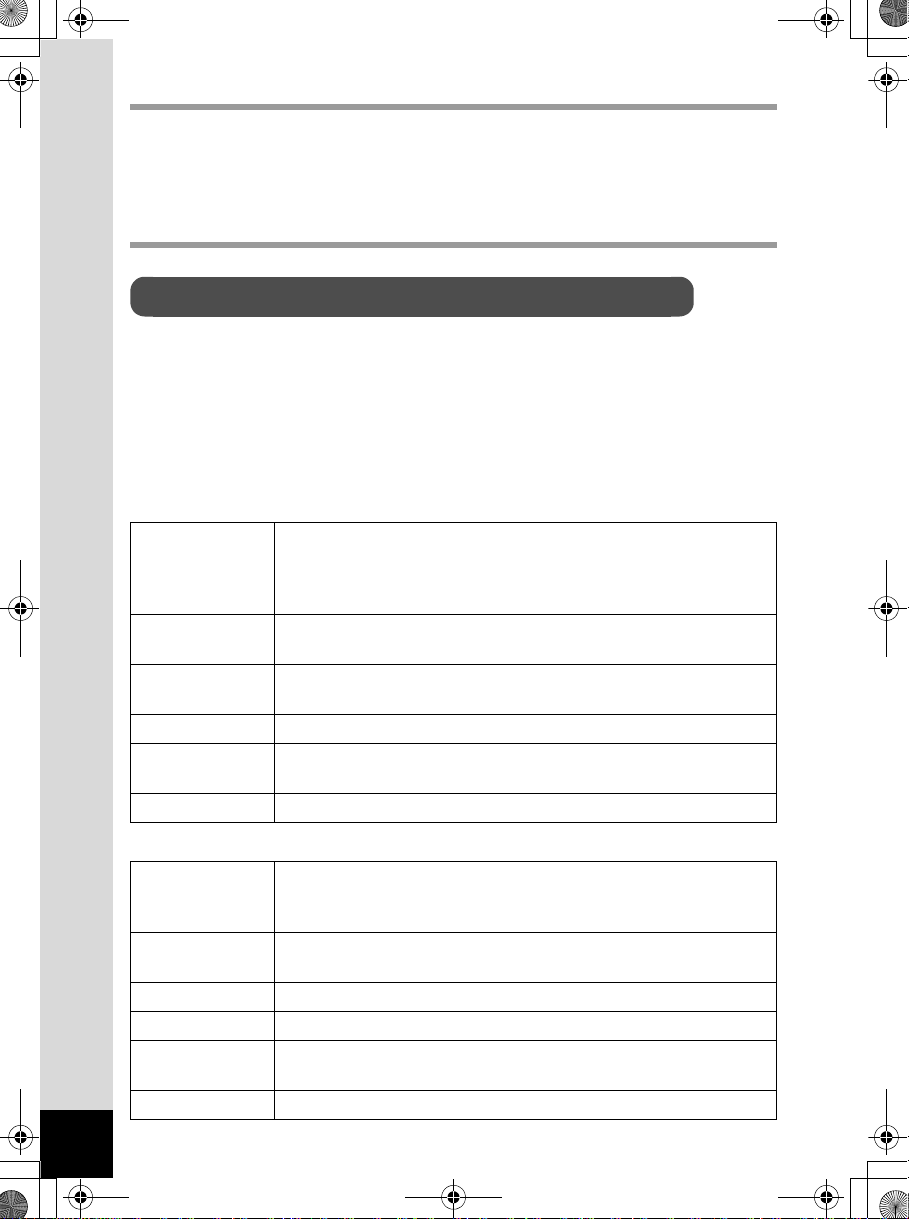
Windows
Computer with Windows XP (Home Edition/Professional/x64
OS
CPU
RAM
Free Disk Space 1.0 GB or more (2.0 GB or more recommended)
Monitor
Others USB 2.0 port must be standard equipment
Edition) SP2 or later, or Windows Vista preinstalled
* With Windows 2000, you can only transfer images from your
camera using a USB cable.
Pentium 4 or higher (Intel Core Processor or higher
recommended)
1.0 GB or more (2.0 GB or more recommended. For Windows
Vista, 3.0 GB or more recommended)
1280×1024 pixels or more with 24-bit full color (approximately
16.77 million colors)
Macintosh
Macintosh with Mac OS X 10.3.9, 10.4, or 10.5 preinstalled
OS
CPU
RAM 1.0 GB or more (2.0 GB or more recommended)
Free Disk Space 1.0 GB or more (2.0 GB or more recommended)
Monitor
Others
* With Mac OS X 10.2, you can only transfer images from your
camera using a USB cable.
PowerPC G5 or higher (Dual CPU or Intel Core processor
recommended. Universal Binary format)
1280×1024 pixels or more with 24-bit full color (approximately
16.77 million colors)
USB 2.0 port must be standard equipment, QuickTime 7.0 or later
4
Page 5

e001_kb474_qg_pc_7.fm Page 5 Thursday, May 28, 2009 9:41 AM
Saving Images on Your Computer
Setting USB Connection Mode
Set the USB Connection mode to [MSC]
(Mass storage class).
Brightness Level
LCD Color Tuning
Video Out
HDMI Out
USB Connection
Folder Name
File Name
MENU
Cancel
1 234
±0
NTSC
Auto
MSC
PTP
IMGP
OK
Saving Images by Connecting Your Camera
and Your Computer
1 Turn your computer on.
2 Turn off your camera and use the provided USB cable
to connect your camera and your computer.
OK
3 Turn the camera on.
The camera is recognized as a [Removable Disk] in [My Computer]
for Windows.
For Macintosh, an icon for the SD Memory Card appears on the desktop.
5
Page 6

e001_kb474_qg_pc_7.fm Page 6 Thursday, May 28, 2009 9:41 AM
• If the [Removable Disk Drive] dialog appears when the camera is turned on,
select [Open folder to view files using Windows Explorer] and click the OK
button.
• When using Windows XP, if the SD Memory Card has a volume label, the
volume label name appears instead of [Removable Disk]. A new unformatted
SD Memory Card may show the manufacturer name or model number.
4 Save the captured images to your computer.
Drag and drop the image file in your camera or the folder containing
the image files to the hard disk of your computer or the desktop.
5 Disconnect your camera from your computer.
Using the Provided Software
“PENTAX Digital Camera Utility 4” is included in the provided CD-ROM
(S-SW90). Using the PENTAX Digital Camera Utility 4, you can manage
images saved on your computer and develop (process) and adjust the
color of RAW files taken with the Q.
Compatible file formats: .bmp (BMP)/.jpg (JPEG)/.pef (files recorded
in PENTAX’s exclusive digital-camera RAW
format)/.pct (PICT)/.png (PNG)/.tif (TIFF)/
.dng (DNG)
Installing the Software
You can install the software from the provided CD-ROM.
When multiple accounts have been setup on your computer, log on with
an account that has administrative rights before installing the software.
1 Turn your computer on.
Close any other software that is open.
6
Page 7

e001_kb474_qg_pc_7.fm Page 7 Thursday, May 28, 2009 9:41 AM
2 Place the CD-ROM (S-SW90) into the CD-ROM drive
on your computer.
The [PENTAX Software Installer] screen appears.
If the [PENTAX Software Installer] screen does not appear
• For Windows
1) Click [My Computer] from the Start menu.
2) Double-click the [CD-ROM drive (S-SW90)] icon.
3) Double-click the [Setup.exe] icon.
• For Macintosh
1) Double-click the CD-ROM (S-SW90) icon on the desktop.
2) Double-click the [PENTAX Installer] icon.
3 Click [PENTAX Digital Camera
Utility 4].
For Windows, proceed to step 4.
For Macintosh, follow the instructions
on the screen to perform subsequent
steps.
4 Select the desired language in
the [Choose Setup Language]
screen and click [OK].
5
When the [InstallShield Wizard]
screen appears in the selected
language, click the [Next]
button.
Follow the instructions on the screen
to perform subsequent steps.
7
Page 8

e001_kb474_qg_pc_7.fm Page 8 Thursday, May 28, 2009 9:41 AM
The PENTAX Digital Camera Utility 4 Screen
When PENTAX Digital Camera Utility 4 is launched, the following screen
(browser) appears.
• The screenshots used in this explanation are for Windows.
The Browser tab set (default setting)
You can perform the file management functions such as viewing
and managing the images.
1
2
1Menu Bar
This executes functions or sets various settings.
For Macintosh, the Menu bar appears at the top of the desktop.
2Tool Bar
Frequently used functions are provided as Tool bar buttons.
8
343
5
Page 9

e001_kb474_qg_pc_7.fm Page 9 Thursday, May 28, 2009 9:41 AM
3Control Panel
The shooting information and settings for the selected image appear in
this panel. You can switch the panel tab sets by pressing the Browser,
Laboratory and Custom buttons on the Tool bar.
4File Display Pane
File list or the images in the selected folder appear here.
5Status Bar
Information on the selected item appears.
The Laboratory tab set (default setting)
The control panel for adjusting the image appears here.
9
Page 10

e001_kb474_qg_pc_7.fm Page 10 Thursday, May 28, 2009 9:41 AM
The Custom tab set (default setting)
The screen display can be customized here. The [Custom] tab sets
enable you to customize whether to show/hide the various tab pages
in accordance with your needs. With the default settings, all control
panels are displayed.
10
Page 11

e001_kb474_qg_pc_7.fm Page 11 Thursday, May 28, 2009 9:41 AM
Viewing Detailed Information on the Software
Refer to Help for details on using each software program.
Press the button on the
Tool bar.
Or, select [PENTAX Digital Camera
Utility Help] from the [Help] menu.
Regarding Product Registration
To better serve you, please take a moment to register your software.
Click [Product Registration] on the
screen in step 3 on page 7.
A world map for Internet Product
Registration is displayed. If your
computer is connected to the Internet,
click the displayed country or region
and then follow the instructions
to register your software.
11
Page 12

e001_kb474_qg_pc_7.fm Page 12 Thursday, May 28, 2009 9:41 AM
HOYA CORPORATION
PENTAX Imaging Systems Division
2-36-9, Maeno-cho, Itabashi-ku, Tokyo 174-8639, JAPAN
(http://www.pentax.jp)
PENTAX Europe GmbH
(European
Headquarters)
Julius-Vosseler-Strasse, 104, 22527 Hamburg, GERMANY
(HQ - http://www.pentaxeurope.com)
(Germany - http://www.pentax.de)
Hotline: 0180 5 736829 / 0180 5 PENTAX
Austria Hotline: 0820 820 255 (http://www.pentax.at)
PENTAX U.K. Limited PENTAX House,
Heron Drive, Langley, Slough, Berks SL3 8PN, U.K.
(http://www.pentax.co.uk) Hotline: 0870 736 8299
PENTAX France S.A.S.
112 Quai de Bezons - BP 204, 95106 Argenteuil Cedex, FRANCE
(http://www.pentax.fr)
Hotline: 0826 103 163 (0,15€ la minute) Fax: 01 30 25 75 76
Email: http://www.pentax.fr/_fr/photo/contact.php?photo&contact
PENTAX Imaging Company
A Division of PENTAX of America, Inc.
(Headquarters)
600 12th Street, Suite 300 Golden, Colorado 80401, U.S.A.
(PENTAX Service Department)
12061 Tejon St. STE 600
Westminster, Colorado 80234, U.S.A.
(http://www.pentaximaging.com)
PENTAX Canada Inc. 1770 Argentia Road Mississauga, Ontario L5N 3S7, CANADA
(http://www.pentax.ca)
PENTAX Trading
(SHANGHAI) Limited
23D, Jun Yao International Plaza, 789 Zhaojiabang Road,
Xu Hui District, Shanghai, 200032 CHINA
(http://www.pentax.com.cn)
Specifications and external dimensions are subject to change without notice.
AP028341/ENG Copyright © HOYA CORPORATION 2009
FOM 01.05.2009 Printed in Europe
 Loading...