


 Loading...
PT780 Legacy® Series |
Pan/Tilts |
Installation/ |
Operation Manual |
C342M-D (8/05) |
Pelco • 3500 Pelco Way, Clovis • CA 93612-5699 USA • www.pelco.com |
In North America and Canada: Tel (800) 289-9100 or FAX (800) 289-9150 |
International Customers: Tel (1-559) 292-1981 or FAX (1-559) 348-1120 |

CONTENTS
Section |
|
Page |
|
1.0 |
GENERAL .................................................................................................. |
5 |
|
|
1.1 |
IMPORTANT SAFEGUARDS AND WARNINGS ............................... |
5 |
2.0 |
DESCRIPTION .......................................................................................... |
6 |
|
|
2.1 |
MODELS ............................................................................................ |
6 |
3.0 |
INSTALLATION .......................................................................................... |
7 |
|
|
3.1 |
MOUNTING ....................................................................................... |
7 |
|
3.2 |
PAN AND TILT LIMIT STOP ADJUSTMENTS ................................... |
8 |
|
3.3 |
ENCLOSURE INSTALLATION ......................................................... |
10 |
|
3.4 |
ELECTRICAL INSTALLATION .......................................................... |
10 |
|
|
3.4.1 LRD41 Series Legacy® Receiver/Drivers .............................. |
10 |
3.4.2All Control Equipment Except LRD41 Series
|
Legacy® Receiver/Drivers ..................................................... |
10 |
4.0 |
OPERATION ............................................................................................. |
19 |
5.0 |
MAINTENANCE ........................................................................................ |
20 |
|
5.1 SERVICE MANUAL .......................................................................... |
21 |
6.0 |
SPECIFICATIONS .................................................................................... |
22 |
7.0 |
WARRANTY AND RETURN INFORMATION ........................................... |
24 |
2 |
Pelco Manual C342M-D (8/05) |

LIST OF ILLUSTRATIONS
Figure |
|
Page |
1 |
Removing the Screws ........................................................................ |
8 |
2 |
Releasing the Covers ........................................................................ |
8 |
3 |
Removing the Covers ........................................................................ |
8 |
4 |
Hooking Cover Halves ....................................................................... |
8 |
5 |
Tilt Limit Adjustment ........................................................................... |
9 |
6 |
Pan Limit Adjustment ......................................................................... |
9 |
7 |
Replacing the Cover Halves .............................................................. |
9 |
8 |
Securing the Cover Halves ................................................................ |
9 |
9 |
Connector Assembly ......................................................................... |
11 |
10 |
Wiper On/Off Connection .................................................................. |
12 |
11 |
Pan/Tilt Adjustments ......................................................................... |
20 |
12 |
PT780 Series Dimension Drawing .................................................... |
23 |
LIST OF TABLES
|
|
Table |
|
Page |
|
|
|
|
A-1 |
37-Position Connector Pin Designations for Pan/Tilts with |
|
|
|
|
|
EH4700L and EH5700L Enclosures ................................................. |
13 |
|
|
|
A-2 |
37-Position Connector Pin Designations for Pan/Tilts with |
|
|
|
|
|
EH8106L Enclosures ........................................................................ |
14 |
|
|
|
B |
Requirements to Wire Power to Pan and Tilt Motors ........................ |
15 |
|
|
|
C |
Maximum Cable Distances Using RB24 or RB115 Relay Boxes ...... |
16 |
|
|
|
D |
Requirements to Wire Power to Camera Enclosure ......................... |
17 |
|
|
|
E |
Requirements to Wire Power for Optional Heater Blanket ............... |
17 |
|
|
|
F |
24 VAC Wiring Distances Chart ........................................................ |
18 |
|
|||||
REVISION HISTORY |
|
||||
Manual |
Date |
Comments |
C342M |
1991 |
Original version. |
C342M-A |
4/96 |
Consolidated C344M and C345M manuals into C342M-A |
|
|
manual. Revised installation instructions. Created |
|
|
manual history and updated to new manual style. |
|
4/96 |
Updated wiring instructions for EH8106L enclosures. |
C342M-B |
6/97 |
Put into new format. Revised exploded assembly |
|
|
diagrams in Figures 12, 13, 14 and 15 to show |
|
|
movement of the wire clamp and grommet from the side |
|
|
to the bottom of the pan spindle per ECO #96-352. Pan |
|
|
spindle nut (part # 9004004COMP) replaced by snap |
|
|
ring (part # 80010019) per ECO #97-194. Figure 4 |
|
|
revised. |
C342M-C |
11/98 |
Revised Section 5.0, Maintenance. Moved Section 6.0, |
|
|
Exploded Assembly Diagrams, to new service manual |
|
|
(C342SM). Repaginated manual. |
C342M-D |
8/05 |
Added ratings per ECO 05-10441. Added WEEE |
|
|
statement. |
Pelco Manual C342M-D (8/05) |
3 |

(This page intentionally left blank.)
4 |
Pelco Manual C342M-D (8/05) |
1.0 GENERAL
1.1 IMPORTANT SAFEGUARDS AND WARNINGS
Prior to installation and use of this product, the following WARNINGS should be observed.
1.Installation and servicing should only be done by qualified service personnel and conform to all local codes.
2.The weight of the camera/lens and enclosure shall not exceed 40 lb (18.14 kg) with 12VDC pan/tilts or 52 lb (23.59 kg) with 24 VAC or 120 VAC pan/tilts.
3.Only use replacement parts recommended by Pelco.
4.After replacement/repair of this unit’s electrical components, conduct a resistance measurement between line and exposed parts to verify the exposed parts have not been connected to line circuitry.
5.The installation method and materials should be capable of supporting four times the weight of the enclosure, pan/tilt, camera and lens combination.
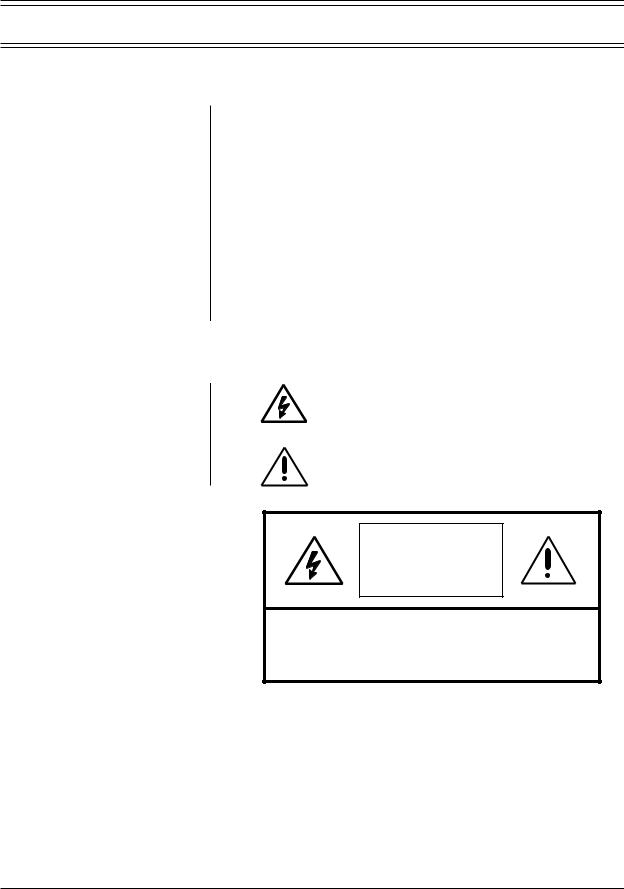
The product and/or product manual may bear the following marks:
This symbol indicates that dangerous voltage constituting a risk of electric shock is present within this unit.
This symbol indicates that there are important operating and maintenance instructions in the literature accompanying this unit.
CAUTION: |
RISK OF |
ELECTRIC SHOCK. |
DO NOT OPEN. |
CAUTION: |
TO REDUCE THE RISK OF ELECTRICAL SHOCK, |
DO NOT REMOVE COVER. NO USER- |
SERVICEABLE PARTS INSIDE. REFER SERVICING |
TO QUALIFIED SERVICE PERSONNEL. |
Please thoroughly familiarize yourself with the information in this manual prior to installation and operation.
Pelco Manual C342M-D (8/05) |
5 |

2.0 DESCRIPTION
The PT780 Legacy® Series pan/tilt units are designed for medium, indoor/outdoor use.
Only Legacy Series enclosures can be mounted on the pan/tilt units. These enclosures are the EH4700L and EH5700L environmental enclosures and the EH8106L pressurized enclosure. Pelco’s RediLINKTM connector makes it simple and quick for you to install an enclosure. The weight of the enclosure with camera and lens must not exceed 40 pounds (18.14 kg) with the 12 VDC pan/tilt units or 52 pounds (23.56 kg) with the 24 VAC or 120 VAC pan/tilt units.
You can easily remove the clamshell covers from the sides of the pan/tilt units to access all internal parts without having to remove the camera enclosure. This makes it easy to service the units and to adjust the pan and tilt limit stops.
2.1 MODELS
The PT780 Series consists of the following models:
PT780P |
Heavy-duty, indoor/outdoor pan/tilt, 120 VAC. |
PT780P/PP |
PT780P with preset positioning capabilities. |
PT780SL |
PT780P with 360° pan rotation. |
PT780SL/PP |
PT780SL with preset positioning capabilities. |
PT780-VS |
Heavy-duty, indoor/outdoor, variable-speed pan/tilt, 12 |
|
VDC. |
PT780-VS/PP |
PT780VS with preset positioning capabilities. |
PT780-VSSL |
PT780VS with 360° pan rotation. |
PT780-VSSL/PP |
PT780-VSSL with preset positioning capabilities. |
PT780-24P |
Heavy-duty, indoor/outdoor pan/tilt, 24 VAC. |
PT780-24P/PP |
PT780-24P with preset positioning capabilities. |
PT780-24SL |
PT780-24P with 360° pan rotation. |
PT780-24SL/PP |
PT780-24SL with preset positioning capabilities. |
6 |
Pelco Manual C342M-D (8/05) |

3.0 INSTALLATION
3.1 MOUNTING
NOTE: To insure proper wiring and operation of your equipment, it is recommended that you test the pan/tilt unit and associated equipment in your facility before installing it in the field. Refer to Sections 3.2 through 3.4.
CAUTION: The PT780 pan/tilt units are designed for upright or inverted (base up) operation. Never mount the pan/tilt horizontally.
NOTE: If you mount your pan/tilt unit in the inverted position, you must install a rain cover (part number 90010018).
Attach the pan/tilt unit to a wall or ceiling mount. Follow the instructions that are provided with the mount. Make sure the mounting surface and the selected mount can support four times the combined weight of the pan/tilt unit and the camera enclosure (including the camera and lens). The pan/tilt unit weighs approximately
21.5 pounds (9.68 kg). Refer to the manuals for your enclosure, camera, and lens for the weights of those items.
Pelco Manual C342M-D (8/05) |
7 |

3.2PAN AND TILT LIMIT STOP ADJUSTMENTS
1.Remove the covers.
a.Refer to Figure 1 and remove the Phillips screw on each side of the pan/ tilt unit.
b.Refer to Figure 2 and place your hands under the cover halves. Exert a strong, upward force to release the covers from their internal latching devices.
c.Refer to Figure 3 and pull the cover halves away from the pan/tilt unit.
d.Set the covers down or hang them by the eyelets inside the covers (refer to Figure 4). The wire and hook on which to hang the covers is not provided.
Figure 1. Removing the Screws
Figure 2. Releasing the Covers
Figure 3. Removing the Covers |
Figure 4. Hooking Cover Halves |
8 |
Pelco Manual C342M-D (8/05) |
Loading...