

Panasonic UF-322 User Manual
Facsimile
Panafax® UF-322
Model No. UF-322
User’s Guide
Panasonic
®
— IMPORTANT INFORMATION -------------------------------------------------------------------------------------------
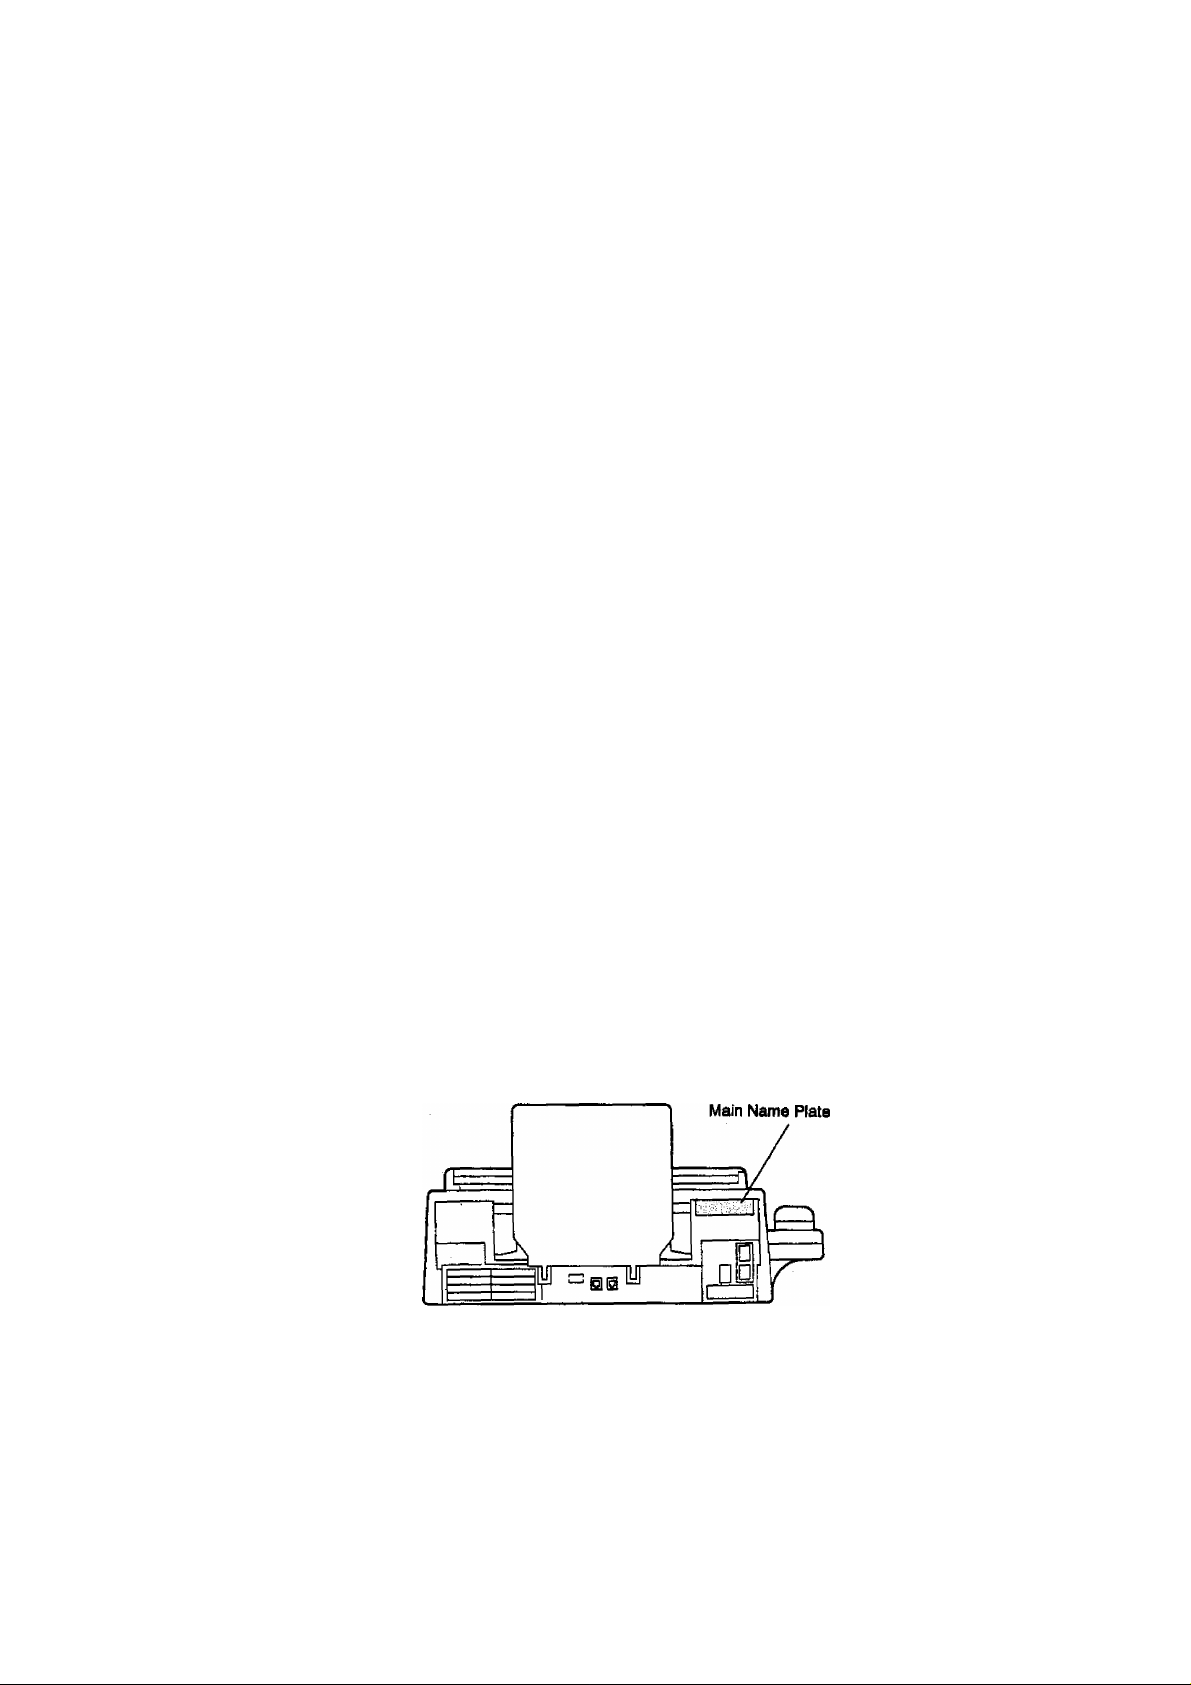
When requesting information, supplies, or service always refer to the model and serial number of your
machine. The model and serial number’s plate (Main Name Plate) Is located on the machine as shown below.
For your convenience, space is provided below to record the information you may need in the future.
Model No. UF-322
Date of Purchase
Dealer
Address
Telephone Number
i )
Supplies Telephone Number
( )
Service Telephone Number
( )
Serial No.
Copyright ® 1993 by Matsushita Graphic Communication Systems, Inc.
All rights reserved. Printed in Japan.
The contents of this User’s Guide are subject to change without notice.

Table of Contents
1 GETTING TO KNOW YOUR MACHINE
Introduction ....................................................................................................... 5
External View..................................................................................................... 7
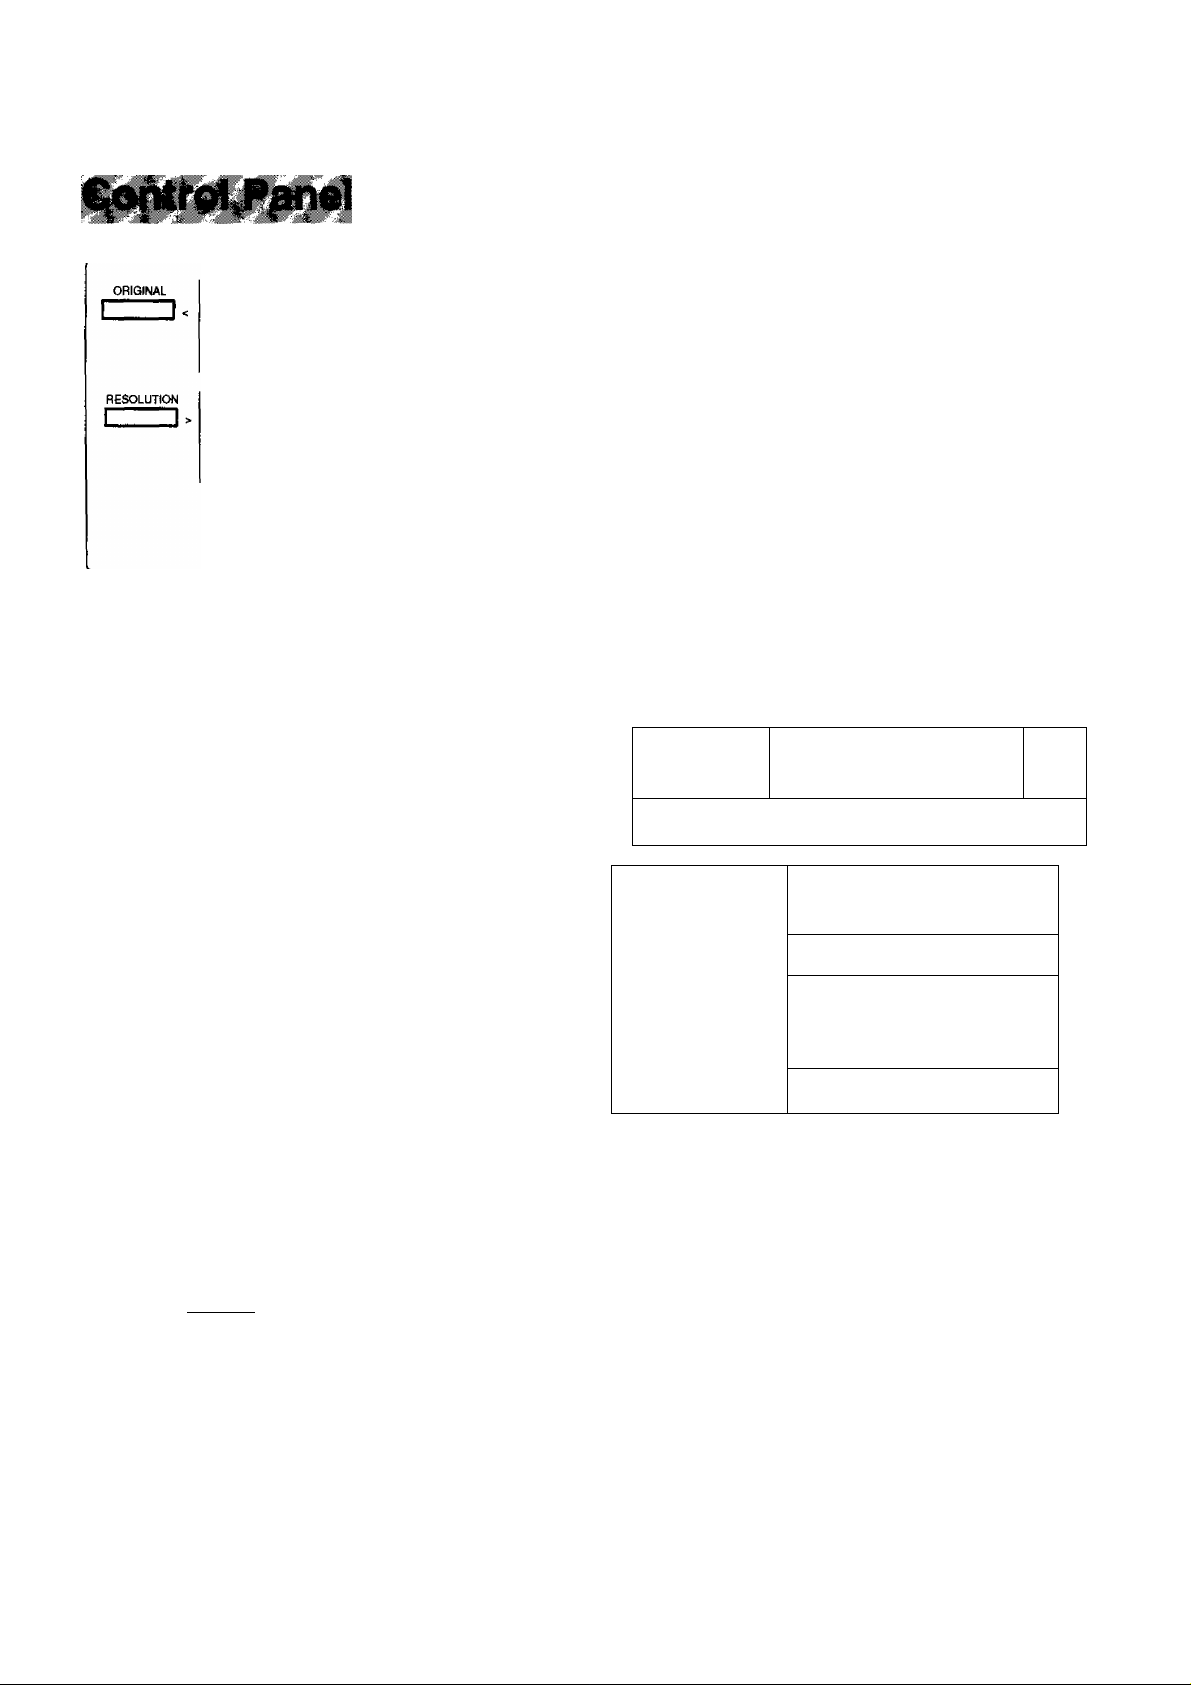
Control Panel.................................................................................................... 8
Function Key ............................................................................................... 10
2 INSTALLING YOUR MACHINE
Safety Information......................................................................................... 11
Main Unit and Accessories........................................................................... 13
Installing Accessories
Installing Print Cartridge................................................................................ 15
Loading Recording Paper............................................................................ 17
Paper Specifications.................................................................................................... 17
How to Load Recording Paper
Connecting the Telephone Line Cord and Power Cord
Setting the Dialling Method (Tone or Puise) ..
Adjusting Volume ......................................................................................... 21
Setting Monitor Volume .............................................................................................. 21
Setting Ringer Volume ............................................................................................... 21
User Parameters ............................................................................................ 22
Setting the Date and Time........................................................................................... 22
Setting Your LOGO...................................................................................................... 23
Setting Your Character ID
Setting Your ID Number (Fax Telephone Number) .................................................... 25
................................................................................... 14
...................................................................................
..........................................................................................
17
............................
18
............................................ 20
24
3 PROGRAMMING YOUR MACHINE
One-Touch/Abbreviated Dialling Numbers
Entering One-Touch/Abbreviated Diaiiing Numbers .................................................. 27
Changing or Erasing One-Touch/Abbreviated Dialling Numbers
Printing Out a Directory Sheet...................................................................................... 31
Customizing Your Machine.......................................................................... 32
Setting Fax Parameters .............................................................................................. 32
Fax Parameter Table................................................................................................... 33
4 BASIC OPERATIONS
Loading Documents ..
Documents You Can Send............................................................................................ 37
Documents You Cannot Send...................................................................................... 37
How to Load Documents .............................................................................................. 38
...................................................................................
Basic Transmission Settings......................................................................... 39
Original (Contrast)
Resolution...................................................................................................................... 39
Haiftone......................................................................................................................... 49
Verification Stamp......................................................................................................... 40
Communication Journal (COMM. JOURNAL) ............................................................. 41
.........................................-...........................................................
.................................................
..............................
27
29
37
39

Relayed Transmission.................................................................................... 101
General Description ..................................................................................................101
Compatibility with Other Machines
Relay Network............................................................................................................102
Setting Up Your Machine for Relayed Transmission.................................................104
Sending a Document by Relayed Transmission .......................................................108
Printouts and Reports.................................................................................................109
7 PRINTOUT JOURNALS AND LISTS
Journais and Lists
32 Transaction Journal..............................................................................................
Individual Transmission Journal (IND. XMT JOURNAL).......................................... 111
Communication Journal (COMM. JOURNAL) ........................................................... 114
One-Touch/Abbreviated List ...................................................................................... 115
Program List............................................................................................................... 118
FAX Parameter List.................................................................................................... 119
Power Failure Report .................................................................................................120
Directory Sheet (see page 31)
Memory File List (see page 78)
............................................................................................ Ill
8 PROBLEM SOLVING
Troubleshooting
If You Have Any of These Problems ......................................................................... 121
Information Codes......................................................................................................124
Clearing Recording Paper Jam..................................................................................126
Clearing a Document Jam
Replacing the Print Cartridge ....................................................................................128
Cleaning the Print Cartridge Contact..........................................................................129
Removing Dried Ink from the Print Cartridge Contact
Cleaning the Drain Pan ............................................................................................. 130
Cleaning the Document Scanning Area ...................................................................
Adjusting the Automatic Document Feeder (ADF)
Verification Stamp.......................................................................................................133
Checking the Telephone Line ....................................................................................134
........................................................................................... 121
.........................................................................................
............................................................................
...............................................
.....................................................
101
Ill
127
130
131
132
9 APPENDIX
Specifications
Recording Paper Specifications
Options and Supplies
Giossary.......................................................................................................
Index.......................................................................................................... 145
QUICK GUIDE
...
.........................................................................................
.....................................................................
.................................................................................
Installing Memory Card...............................................................................................139
135
137
138
140

Introductioii
Thank you very much for purchasing the Panafax UF-322.
The UF-322 is one of the most advanced models in the Panafax family of G3 compatible, desktop facsimile
machines.
Some of its many features are
1. Plain Paper Printing
2. Easy Maintenance
3. Memory Function
4. Fax / Telephone Auto
Switch
Plain paper printing means you can easily write on received documents
with a pen or pencil. Documents do not curl, making filing easier. In
addition, plain paper does not fade, making it ideal for long term storage
of important documents.
Maintenance requires only changing a print cartridge, making it quicker
and easier than with other types of plain paper fax machines.
A standard image memory feature allows you to store up to 28 standard
pages into the document memory. After the UF-322 stores your
documents, it can send them to selected station(s) automatically. You do
not have to wait until the transmission ends before retrieving your
originals.
The UF-322 differentiates between an incoming fax or voice call and
automatically switches the circuit to either receive a document or to ring
until you pick up the telephone. With the UF-322 you do not require a
separate telephone line for your fax.
[ Note : For some countries, this feature is not available because of the
country’s regulation. ]
1
5. TAM Interface
6.64 level Panasonic
Super Gray Scale
7. Panasonic Super
Smoothing
8. Selective Reception
A Telephone Answering Machine (TAM) can be connected to the UF-322.
The UF-322 determines whether the signal from the calling side is a fax
or voice call. If it is a fax, the UF-322 will switch the telephone line to start
the fax communication. If a fax signal is not detected, the UF-322 will stay
in the TAM mode and the caller can leave a message.
[ Note : For some countries, this feature is not available because of the
country’s regulation. ]
The UF-322 offers a 64-level Super Gray Scale using Error Diffusion
technology. Switching to this mode assures clear, realistic reproduction
of photographs and text, brochures, and illustrations.
The UF-322 Incorporate’s a new sophisticated Image processing
technology to enhance the print quality of an ordinary received fax Image
by smoothing out the curving edge of a character to reproduce a high
quality document.
To prevent unwanted faxes being received by comparing the ID Number
of the transmitting machine with the telephone number stored in the built-in
automatic telephone dialer.
With a little practice, anyone can learn how to use the most popular
features of the UF-322.
This User’s Guide will help you to use your UF-322 quickly and easily.
The Table of Contents shows where to find information on each feature.
Although we recommend that you review each section briefly, it will only
be necessary to read the sections that contain the feature(s) you will be
using.

This page is intentionally left blank.

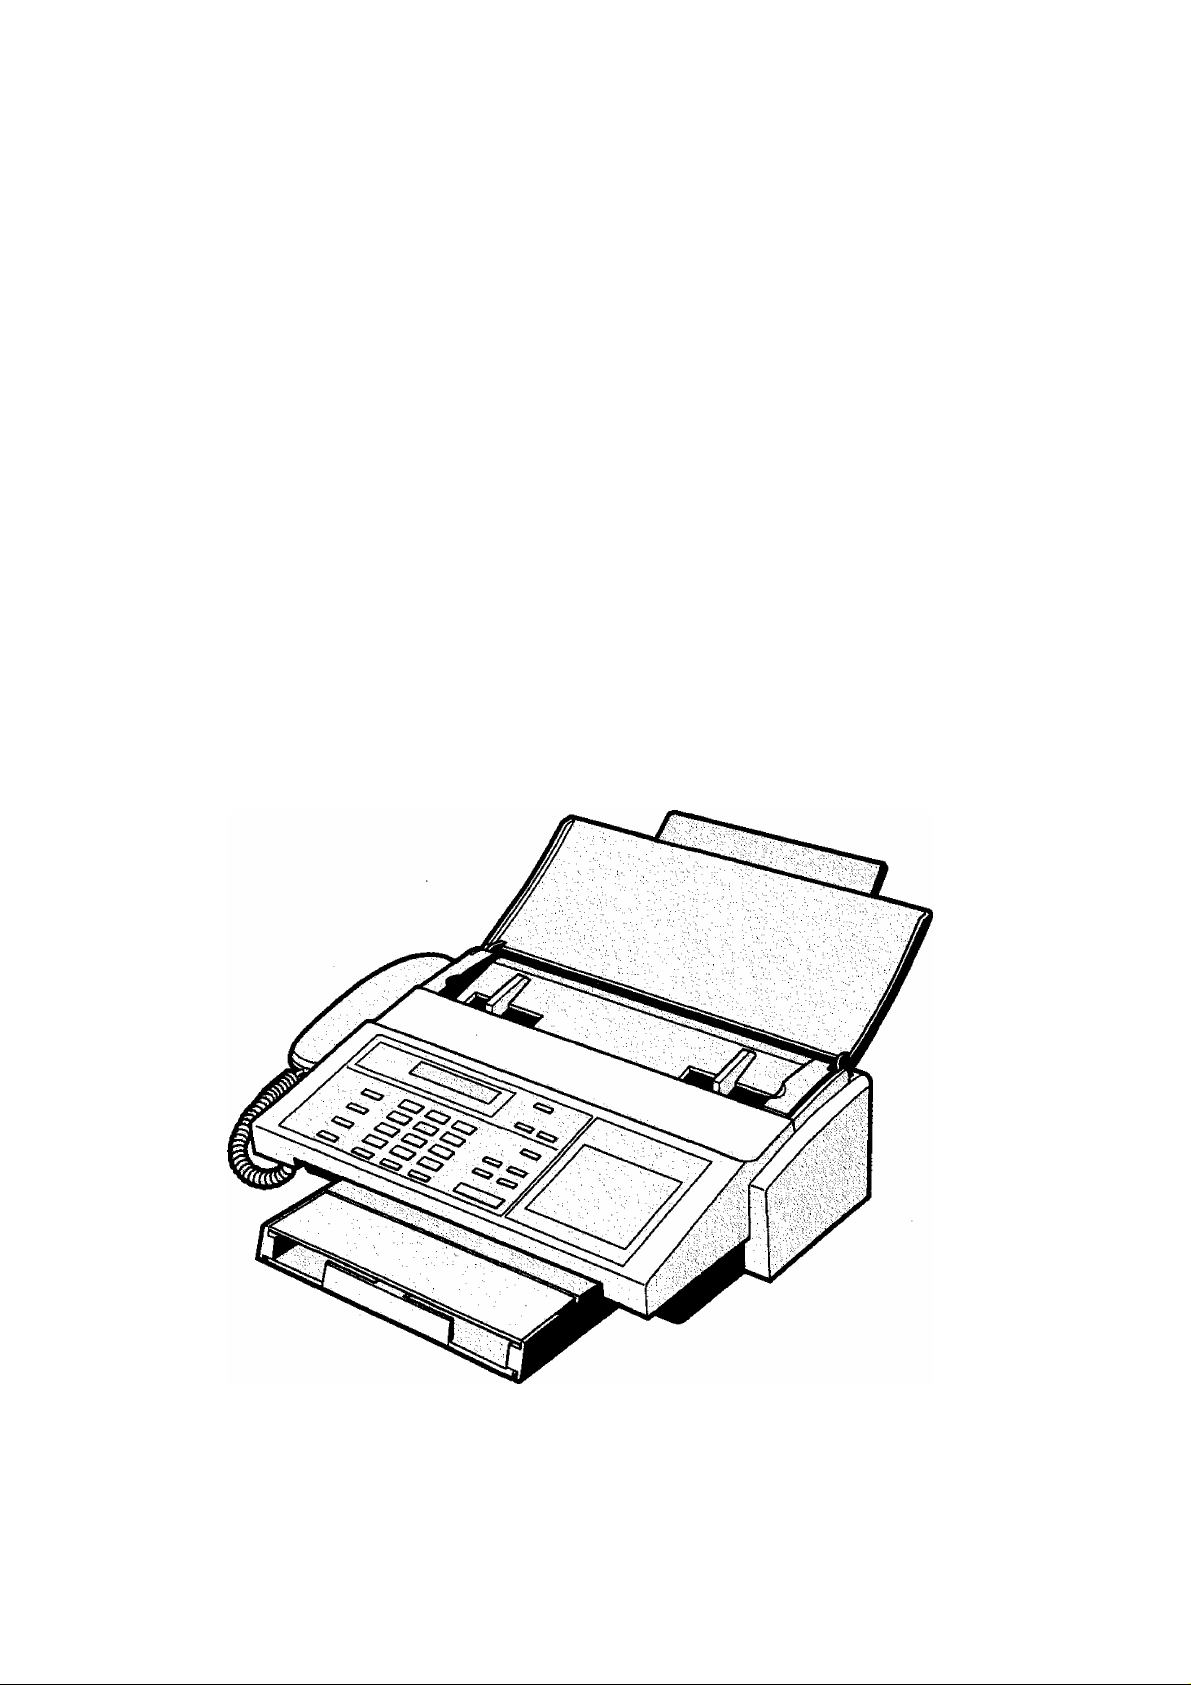
External view
Recording Paper Tray
1
U]
Note. For some countries, the handset is not attached because of the country's regulation or specification.
=5 V
4.
■.V Ì-. ■i-
Used to set Normal, Light, or Dark,
{see page 39) Also serves as an
arrow key (<) to move the cursor
over recorded numbers and
characters.
Used to set Standard, Fine, Super-
Fine. (see page 39) Also serves as
an arrow key (>) to move the cursor
over recorded numbers and
characters.
HALFTONE
STAMP
Provides OFF, QUALITY or FAST settings
for halftone documents (see page 40). Also
used for followings.
•Confirm entered station for multi-station
communication.
•Select functions.
Used to turn the verification stamp ON or
OFF (see page 40). Also used for
followings.
•Confirm entered station for multi-station
communication.
•Select functions.
LCD Display
Indicates date and time,
or the current operation.
Panasonic
□□ □□ CZ3
m m m
m cn m
cz] czi m
TONE
and
PAUSE^EDIAL
I
--------
ABBR
FLASH
Used for Manual Number Dialling,
recording phone numbers, and
selecting functions.
Used to temporarily change
Dialling Mode to Tone when
Pulse mode is set.
Used to confirm current
communication modes (e.g. Page
number, ID, Dialed Telephone
number) when unit is on line.
Used to enter a pause when
recording or dialling a telephone
1
number, or to redial the last dialed
number, (see page 55)
Used to start Abbreviated Dialling,
(see page 46 and 50)
Used to access some features of
your PBX.
' .puiaii«.
TEiyOtAL
ililTOPMONITOR
VOL
CLEAR
> i -1
'tara da
iij‘cà-ca
ca da.
tSB'dara
Used to cancel operations. When it is
pressed, the machine will return to
standby.
Used to start On-Hook Dialling or to
make voice contact request, (see
page 43 and 65)
Used to erase the previously entered
input. Also used to adjust monitor
volume, (see page 21)
8
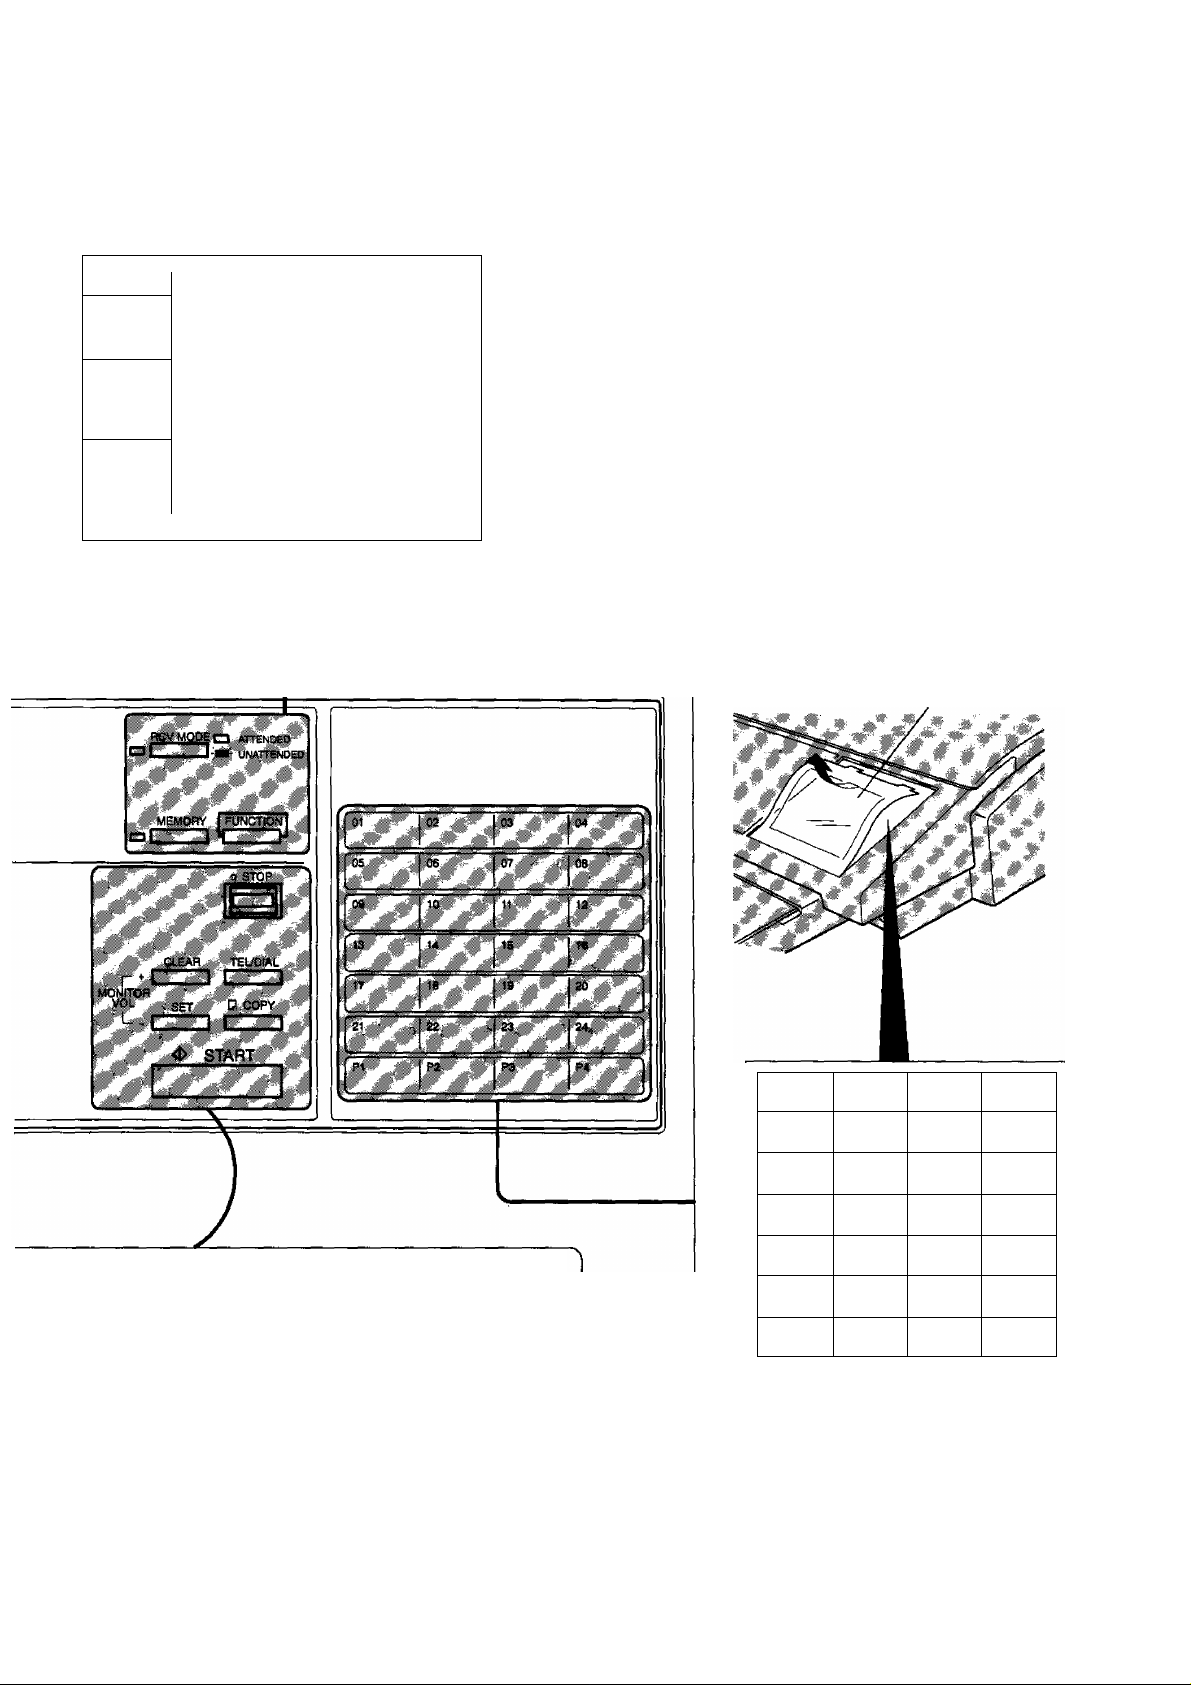
RCV MODE
1_____1
MEMORY
1_____I
1 FUNCTION
\_J
\
________
Used to select either attended mode
or unattended mode, (see page 56)
Used to select either memory or
direct ADF communication, (see
page 42 to 52)
Used to start or select the function
and sub-functions. These functions
are explained in detail on the next
page.
'V
1
One-Touch Keys (01-24)
Used for One-Touch Dialling, (see page 45
and 49)
Program Keys (P1-P4)
Used to record long dialling procedures or
Group Dialling Number keys, (see page 72 to
77)
Character Keys
The One-Touch Keys and Program Keys also
j
serve as character and symbol input keys
which are used to record your LOGO and
station name. The character key template is
printed on the panel under the directory sheet
cover.
Directory Sheet
Cover
MONITOR
VOL SET
>--czz:
Used to set operations. Also used
to adjust monitor volume, {see
page 21)
□ COPY I Used to make photo copies, {see
I t page 64)
START
Used to start operations.
L /A
(°“/e
09 /
/1
13 /
17&/
L VQ
21 > /
02 A/
10 /
/M
"/v
14 /
’“/r ”/s
/u
03 0/
/B
07 1 /
11 /
/J
/N
/ K
15 +/
23 , /
P3
SPACE
/G
/ W
04 0/
/c
/o
/D
08/E/
/H
Vl 1
"/p 1
“/x ■
P4UPPER„
"LOWER
Note; Whenever One-Touch keys are changed
to the character key mode (to record your
LOGO and station names), use the
UPPER/LOWER key to switch between upper
and lower character set.

Function Key
Any function can be started by first pressing I FUNCTION] and then enter the function number, or by pressing
0 or E scroll key repeatedly until the desired function appears on the display.
Deferred Communication
1 = XMT
2 = Polling
Relayed Transmission
(see Note)
Polling
1 = Polling
2 = Polled
Confidential Communication
1 =XMT
2 = Polling
3 = Polled
4 = Print
5 = Delete
Printout
1 = Journal
2 = One-Touch/Abbrevlated List
3 = Program List
4 = Fax Parameter List
5 = Not used
6 = Individual XMT Journal
7 = Directory Sheet
Set Mode
1 = User parameters
• Date & Time
• Logo
• Character ID
• ID Number (Fax Telephone Number)
2 = One-Touch/Abbreviated Numbers
3 = Program Keys
4 = Fax Parameters
5 = Relayed XMT & Conf. Comm. Parameters (see Note)
Select Mode
1 = Communication Journal = OFF/ON/INC
2 = Not used
3 = Not used
4 = Password-XMT = OFF/ON (see Note)
5 = RCV to Memory = OFF/ON (see Note)
Edit File Mode
1 = Print File List
2 = Change Time/Station
3 = Delete File
4 = Print Fiie
Note: If Fax Parameter is not preset to Valid position, which enables you to use the function, the display will not
show the function.
10

'
..
i
¿^WARNING
• TO PREVENT FIRE OR SHOCK, DO NOT EXPOSE THIS PRODUCT TO RAIN OR ANY TYPE OF
MOISTURE.
• TO MINIMIZE THE POSSIBILITY OF SHOCK OR DAMAGE TO THE MACHINE, IT MUST BE
PROPERLY GROUNDED.
• WHEN YOU OPERATE THIS EQUIPMENT, THE SOCKET-OUTLET SHOULD BE NEAR THE
EQUIPMENT AND BE EASILY ACCESSIBLE.
• PLUG POWER SUPPLY CORD INTO ORDINARY AC OUTLET BEFORE CONNECTING TELEPHONE LINE
CORD. DISCONNECT TELEPHONE LINE CORD BEFORE UNPLUGGING POWER SUPPLY CORD FROM
AC OUTLET.
• DISCONNECT THE EQUIPMENT IMMEDIATELY SHOULD IT EVER SUFFER PHISICAL DAMAGE WHICH
RESULTS IN THE INTERNAL PARTS BECOMING ACCESSIBLE IN NORMAL USE. IN THIS INSTANCE
USERS SHOULD HAVE THE EQUIPMENT REPAIRED OR DISPOSE OF.
• IF THE POWER SUPPLY CORD AND/OR TELEPHONE LINE CORD OF THIS EQUIPMENT ARE
DAMAGED, THEY MUST BE REPLACED BY THE SPECIAL CORDS SUPPLIED BY AN AUTHORIZED
PANASONIC SERVICE CENTRE.
denotes a potential hazard that could result in serious injury or death.
¿^CAUTION
1 When you know that a thunderstorm is coming, we recommend that you:
(1) Unplug the telephone line cord from the phone jack.
(2) Turn off the power and unplug the power supply cord from the AC outlet.
2 This equipment may not necessarily provide for the effective hand-over of a call to or from a telephone
connected to the same line.
3The operation of this equipment on the same line asteiephonesor other equipment with audible warning devices
or automatic ring detectors will give rise to bell tinkle or noise and may cause false tripping of the ring detector.
Should such problems occur, the user is not to contact telecom (telephone company) faults service.
11
<>rt v: \ \ \ >> ■< 'i \ -,
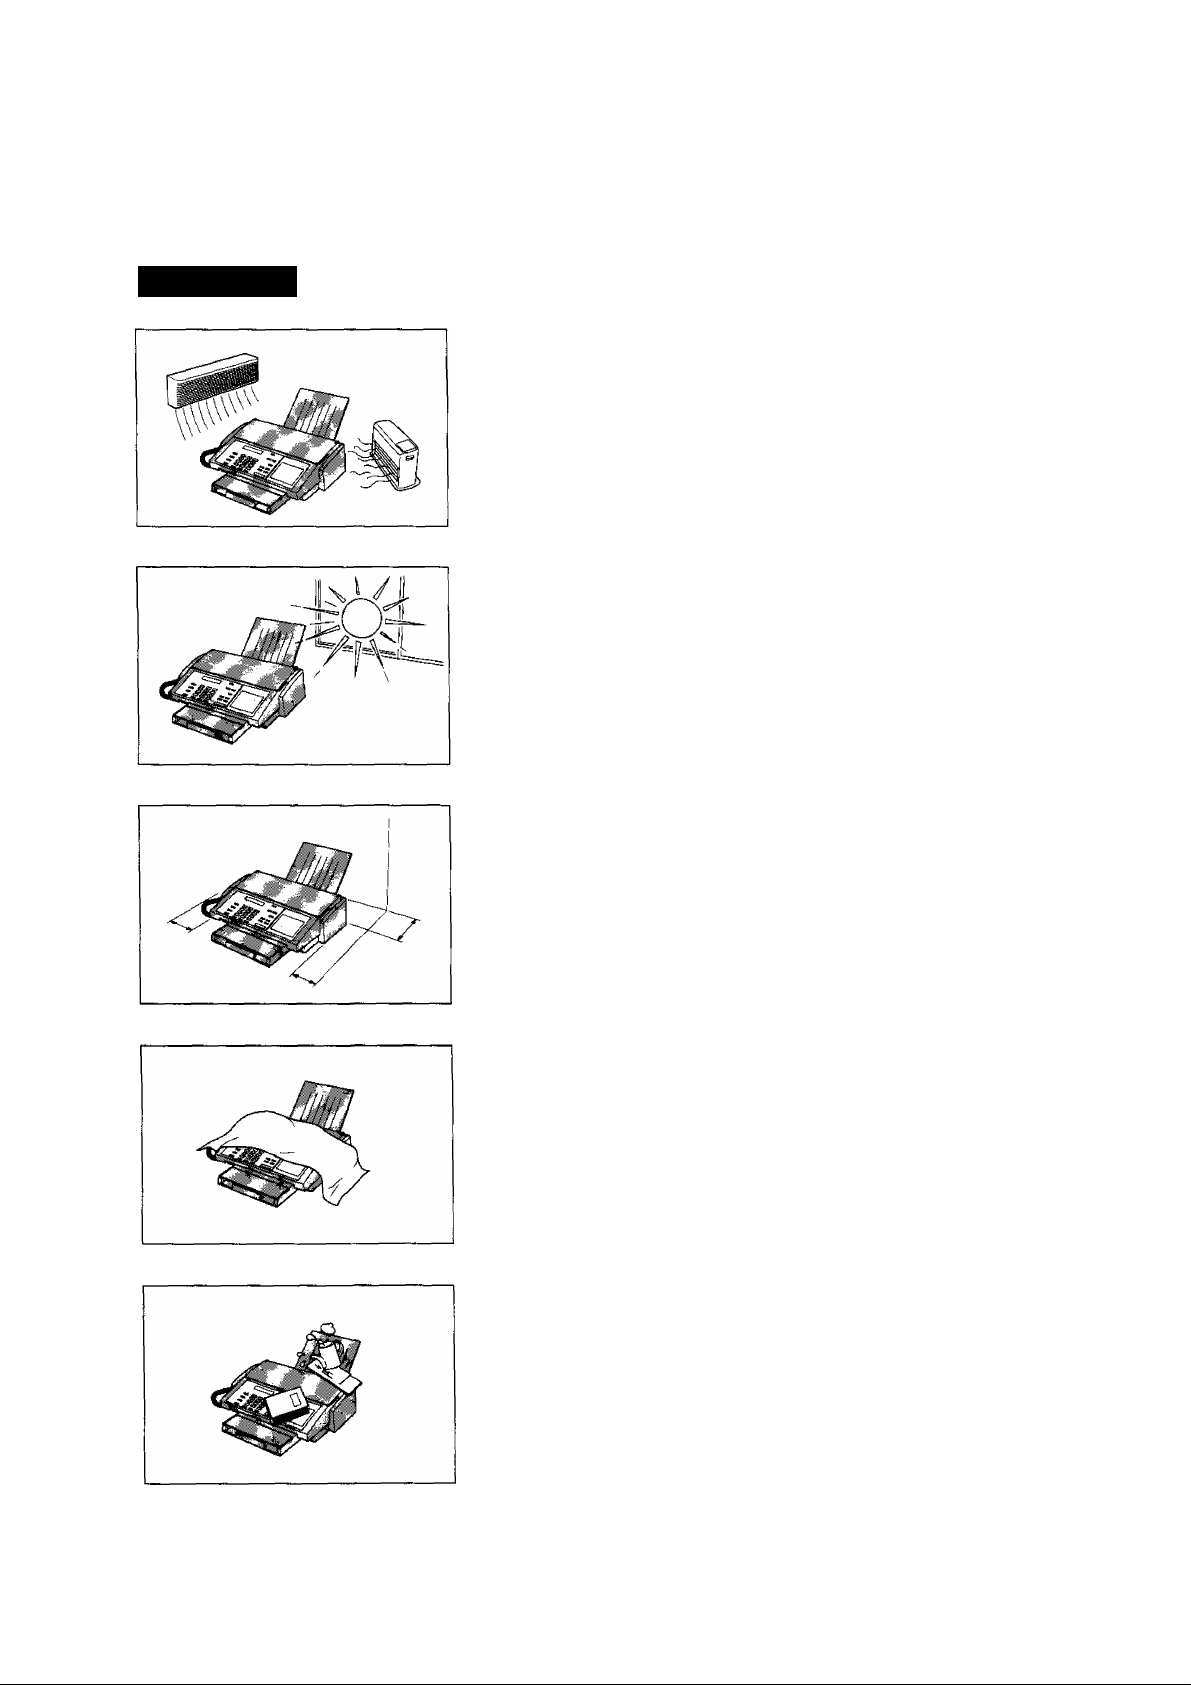
A CAUTION
denotes hazards that could result in minor injury or damage to the machine.
Do not install the machine near heating or air conditioning unit.
Avoid exposure to direct sunlight.
install the machine on a flat surface, leave at least 10 cm of space
between the machine and other objects.
12
Do not block the ventilation openings.
Do not place heavy objects, or spilt liquids on the machine.
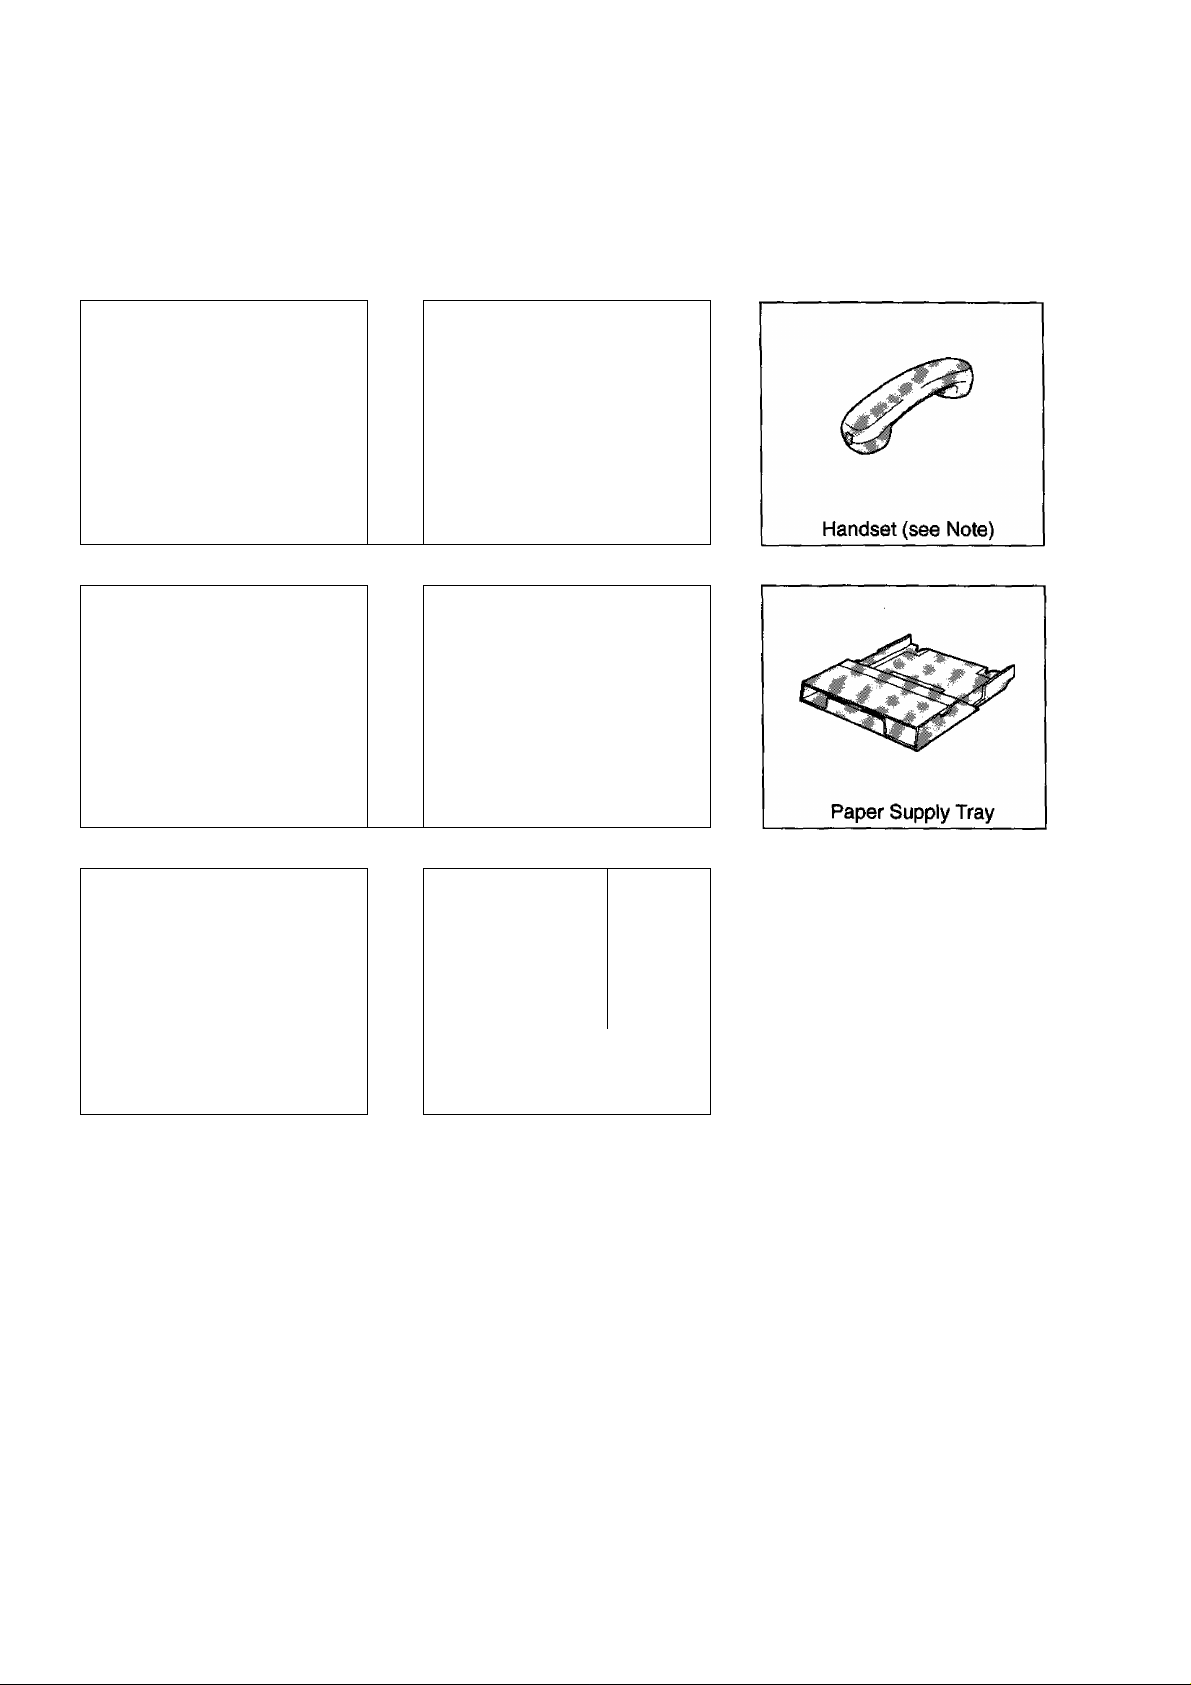
Iilain United Accessories
Unpack the carton and check that you have all accessories illustrated.
Machine
Handset Cable (see Note)
<5^
User’s Guide
Recording Paper Tray
Telephone Line Cord
I j
Print Cartridge
Note: For some countries, these accessories are not attached tjecause of the country’s regulation or
in
specification.
13
IfiftallingiAccetspriM
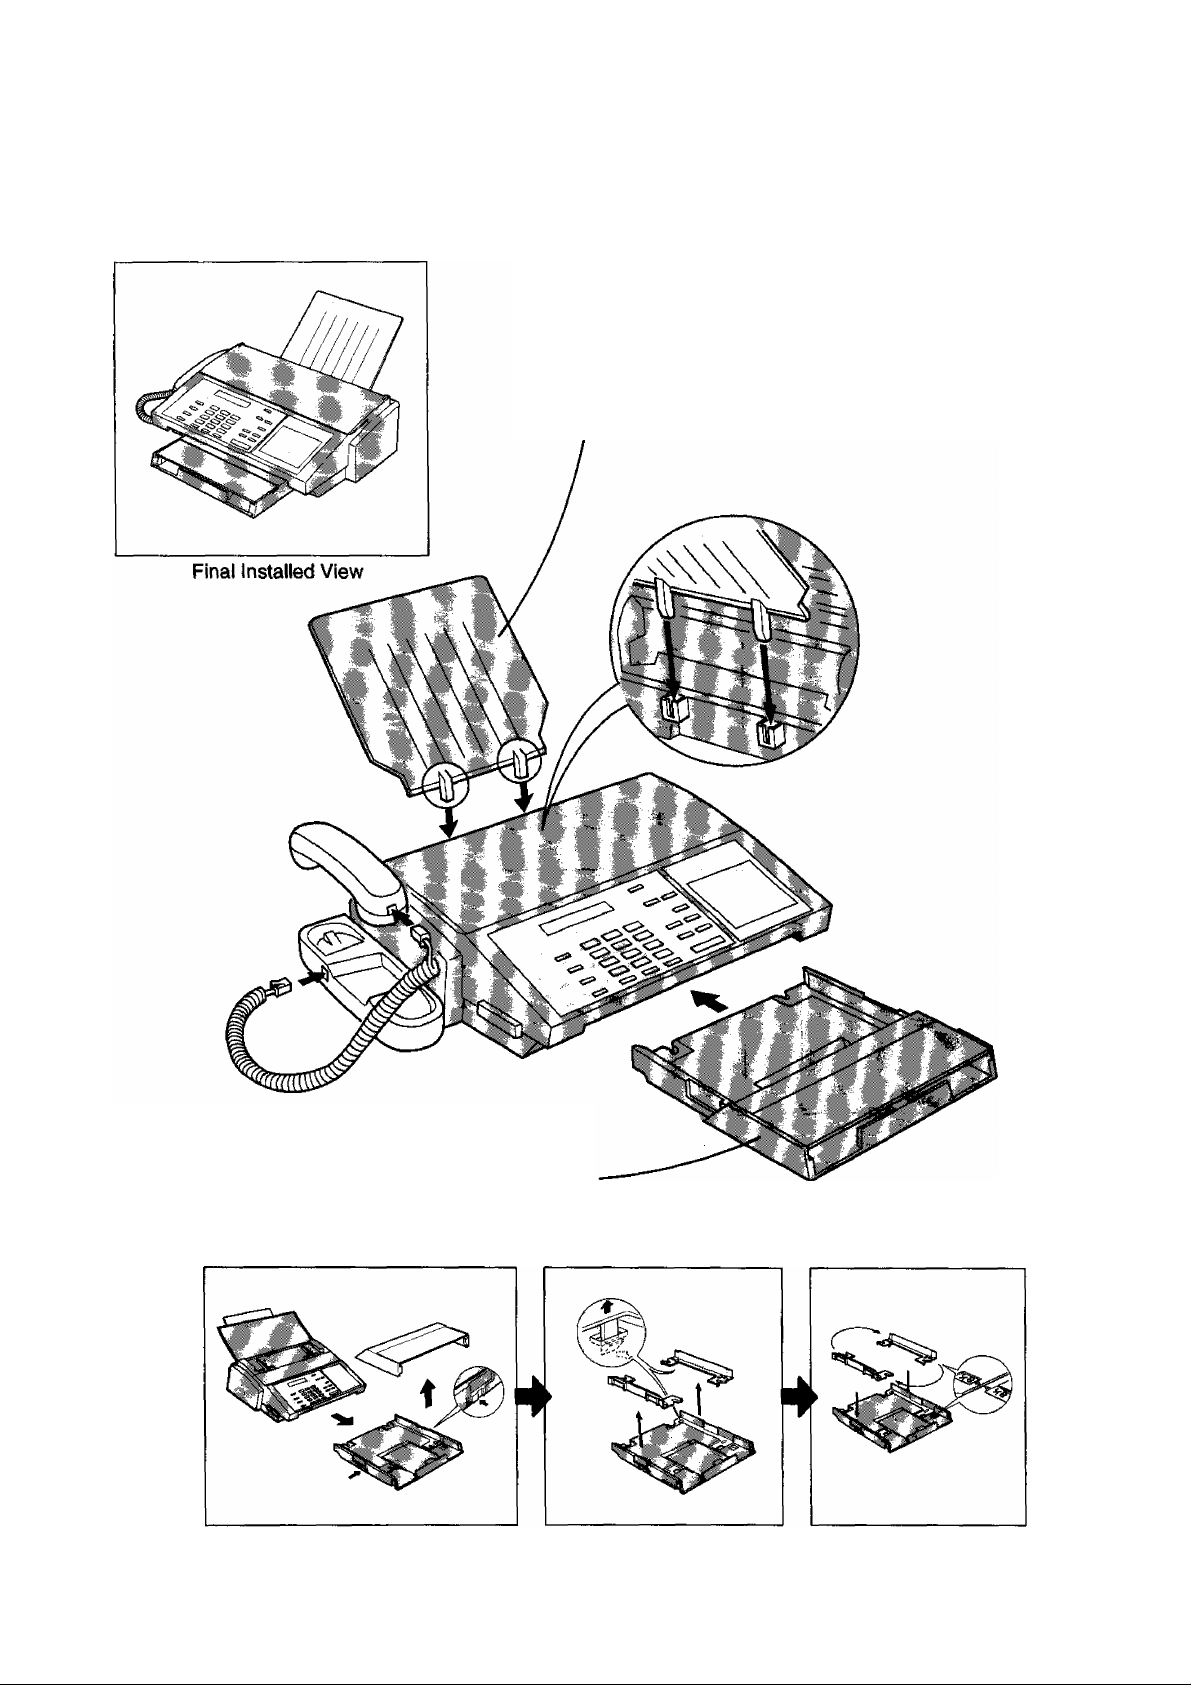
■S!:
Recording Paper Tray
Hook the projections of the Recording
Paper Tray into the square holes on the
rear of the machine.
Mi
Paper Supply Tray
Insert the Paper Supply Tray to the front
of the machine.
m
Not0: If you wish to use Letter/Legal size paper, change the position of paper width guide as shown below.
14

Installing Print C^pMdga
0 Open the Document Tray.
(D Open the Printer Cover.
Open the Print Cartridge Container. Grasp the
Print Cartridge by the green part and remove it
from its container.
Take care not to touch the copper ’’Ribbon”
located on the front edge of the Print
Cartridge. Also be sure that the copper
’’Ribbon” does not come in contact with
any surface.
¿^CAUTION
Gently remove the protective tapes from the
front of the Print Cartridge.
The Ink in the Print Cartridge may be harmful to children if swallowed. Keep new or
used cartridges out of the reach of children and immediately discard used cartridge.
15
0 Slide the Print Cartridge Cradle all the way
to the right of the machine.
(D Insert the Print Cartridge into the cradle with
the green arrow on the cartridge top pointing
to the green dot on the top of the cradle.
Push the cartridge into the cradle, snapping the
cartridge into place.
16
0 Close the Printer Cover.
0 Ciose the Document Tray.

Paper Specifications
In general, most bond papers will produce excellent results. Most photocopy papers will also work very well.
There are many "name” and ’’generic" brands of paper available. We recommend that you test various papers
until you obtain the results you are looking for. For detailed recommended paper specifications, see page
137.
How to Load Recording Paper
Pull out the Paper Tray Extender.
Insert a stack of paper about 12 mm thick
{approximately 100 sheets of paper) sequarely
into the Paper Supply Tray.
Caution: Make sure that the paper does not
exceed over the clip of the paper tray extender.
Slide the Paper Tray Extender in toward the
paper to hold the paper against the printer.
Note: 1. The setting of Fax Parameter No. 23 (Recording Paper Size) must be set according to the paper you
ffl
have loaded, (see page 34)
2. Do not add the recording paper while machine is printing a document.
17
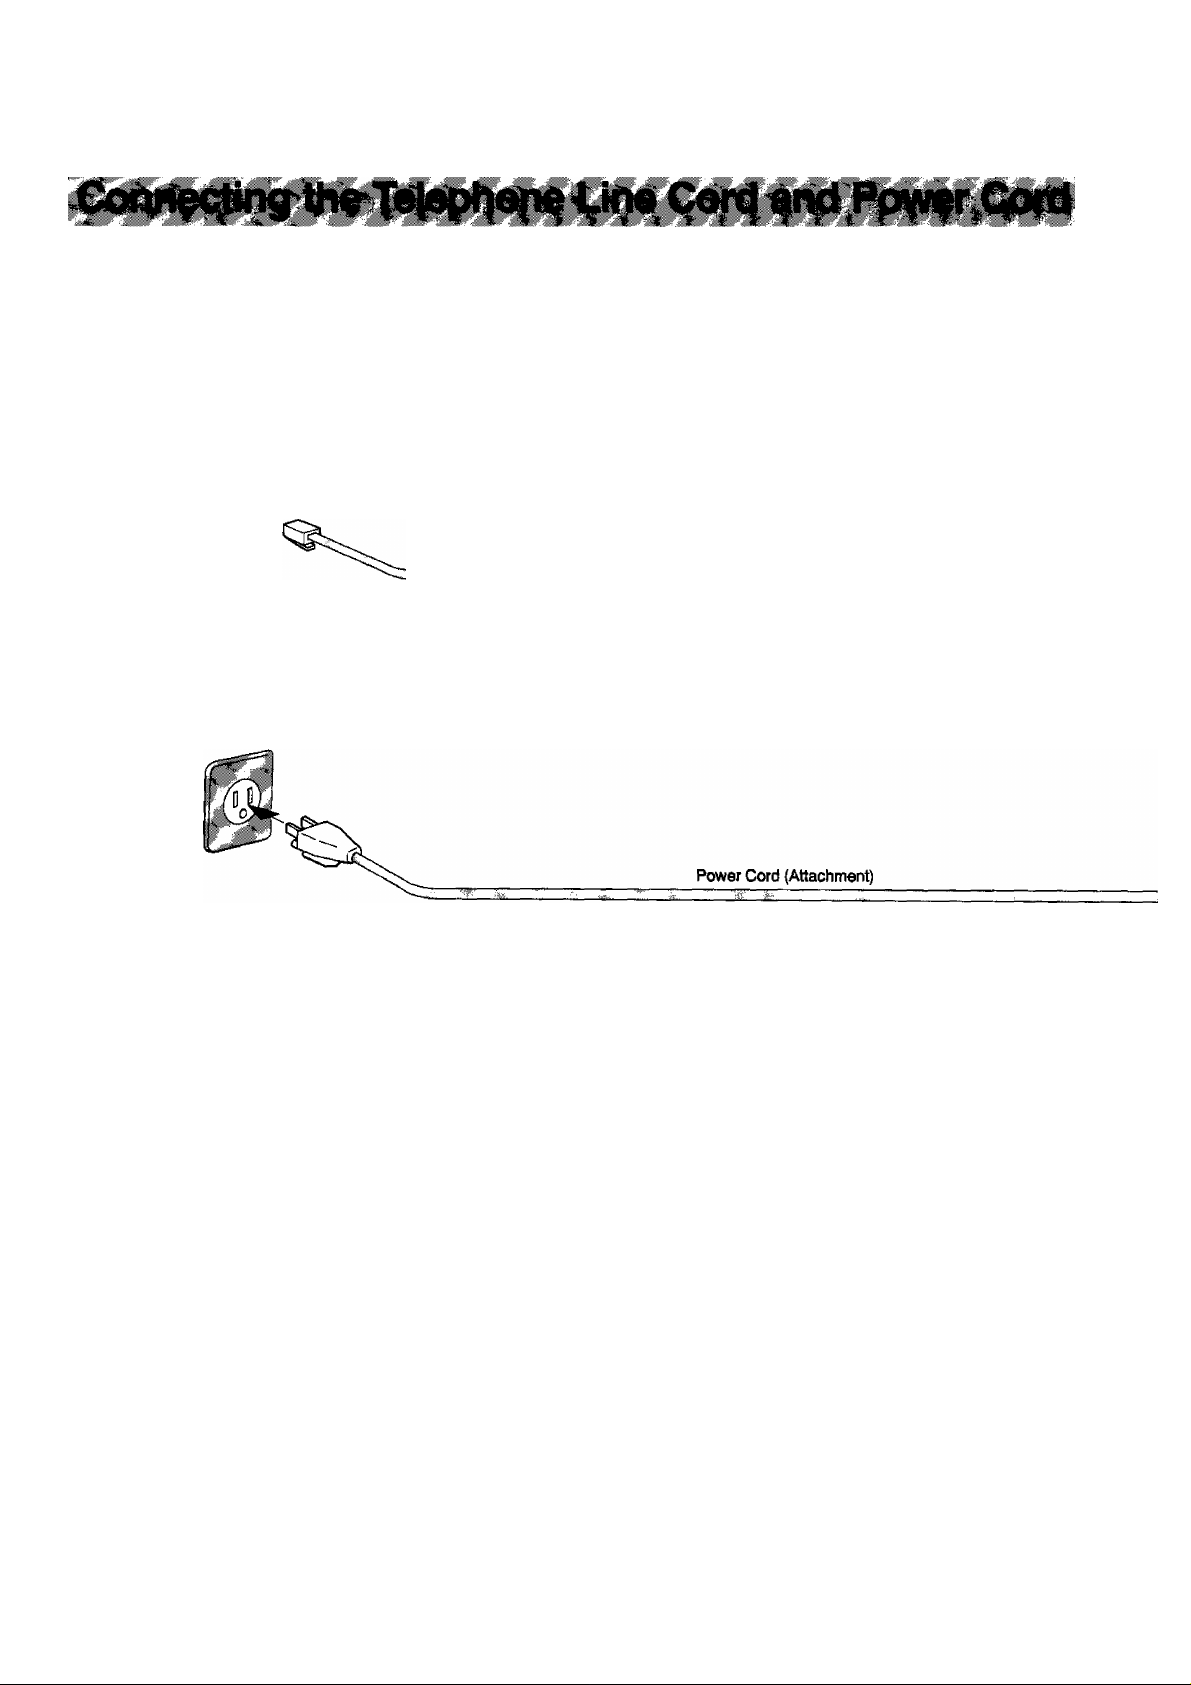
Telephone Line Cord
Plug one end of the telephone line cord into the telephone jack supplied by the telephone company and
the other end into the LINE jack on the rear of the machine.
Telephone Line Cord (Attachment)
Power Cord
Plug the Power Cord into an ordinary AC outlet.
Warning : This apparatus must be properly grounded.
ffl Note: 1. When you turn the power switch ON, the ADF Protective Sheet will be ejected automatically.
2. Your machine uses little power and you should keep it ON at all times. If the power is turned OFF for too
long, the contents of the memory will be lost.
3. Your machine has 2 separate rechargeable batteries to preserve the memory contents in case of a short
term power failure. One for the machine parameters (such as LOGO, ID Number, Auto-dialer Telephone
Number, etc.) vt^ich can back up for 10 days and the other one for the document memory, which can back
up for 1 hour when fully charged.
4. The built-in rechargeable batteries requires 48 hours to be fully charged in the machine.
18
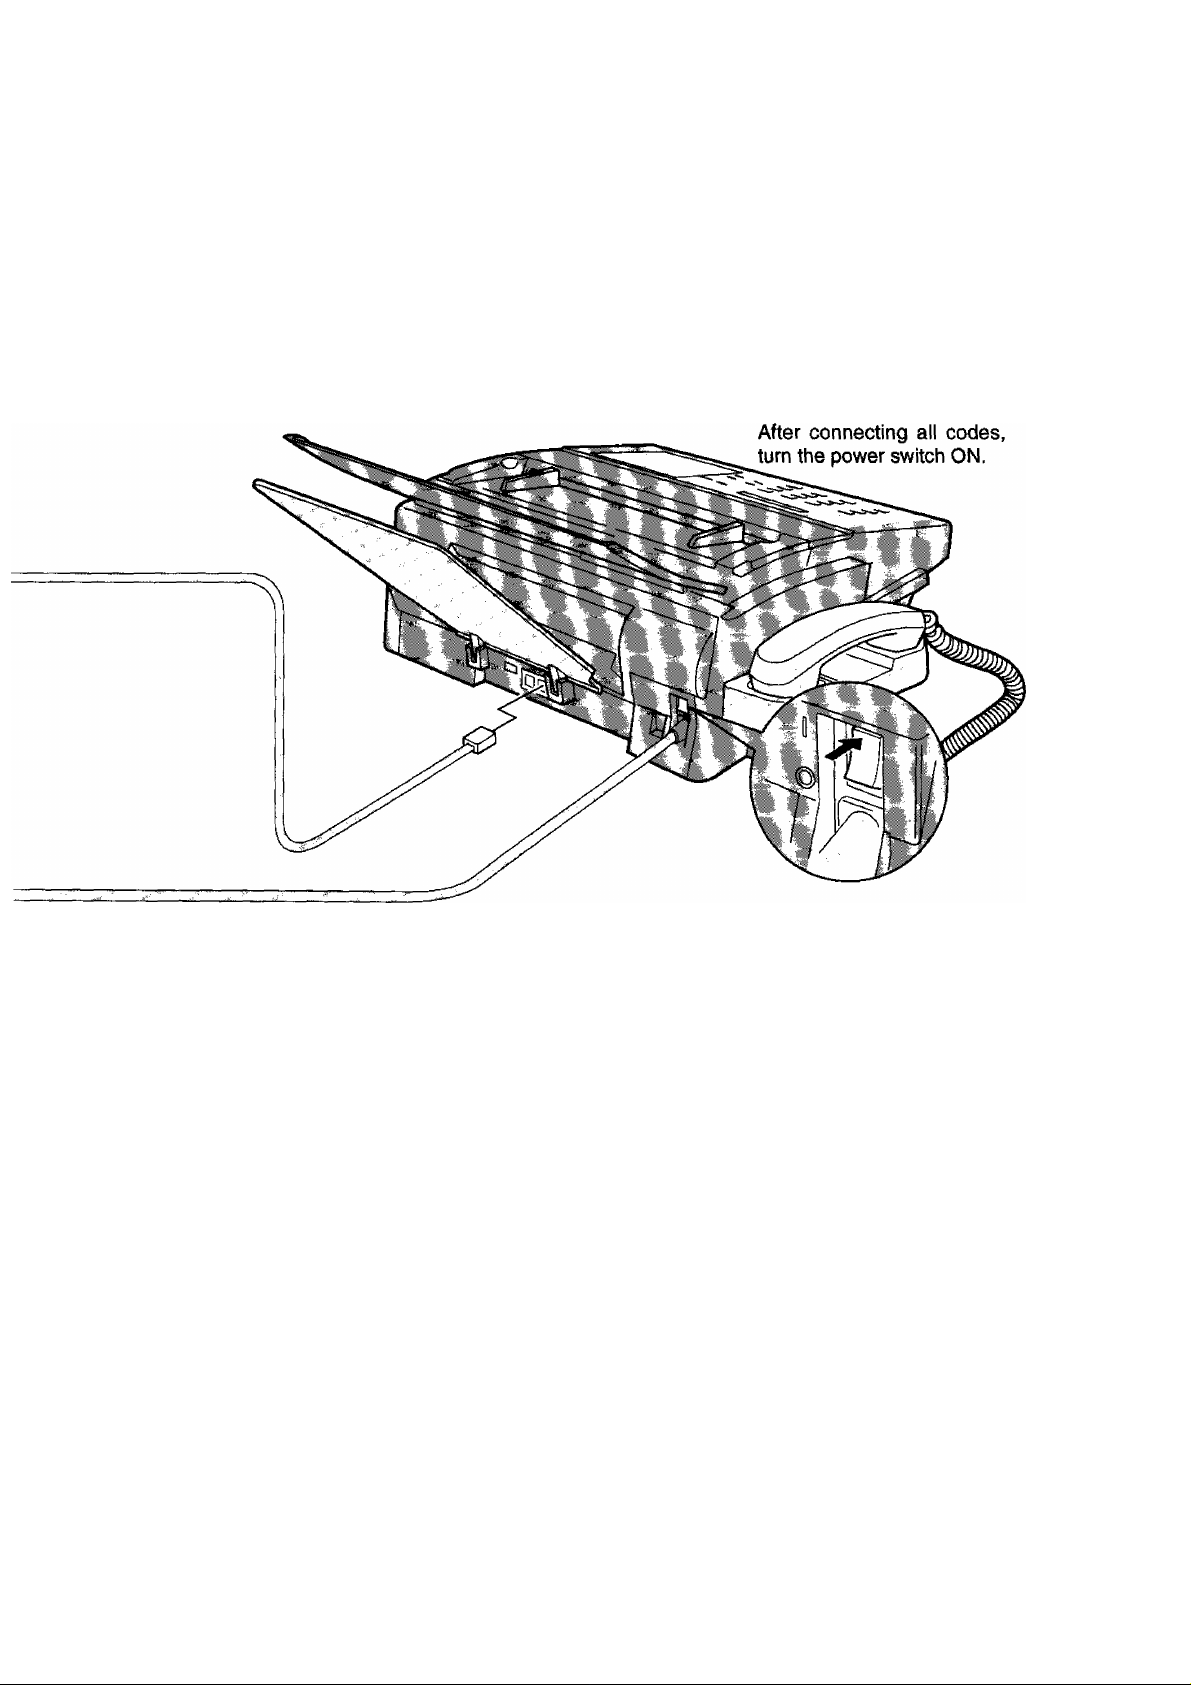
Cpiyi$ct(n0 Power ^)oiti
Power Switch
19

Your machine can operate with either of two diaiiing methods (Tone or Pulse), depending on the type of telephone
line you are connected to. If you need to change the dialling method to Tone or Pulse, follow the procedure below.
I FUNCTION I
I
2
3 ^
or
for Pulse.
for Tone.
SET
SET MODE
ENTER NO.
FAX PARAMETER(01-53)
06 DIALLING METHOD
2:TONE
06 DIALLING METHOD
1;PULSE
06 DIALLING METHOD
2 :TONE
OR Л V
NO.=|
or
(1-5)
20
® STOP
5
A^usttogV^lipai«
You can adjust the monitor volume and ringer volume on your machine. The built-in speaker enables you to hear
the dial tone, dialling signals, and busy tone. The ringer sounds when your machine receives a call.
Setting Monitor Volume
You can adjust the volume by using both 1 CLEAR I and I SET I.
The following describes the method of using I CLEAR I and 1 SET
TEUDIAL
1
You will hear the dial tone through the speaker.
MnuiTno f------<
MONITOR
VOL
or
MONITOR
VOL
L_
® STOP
3
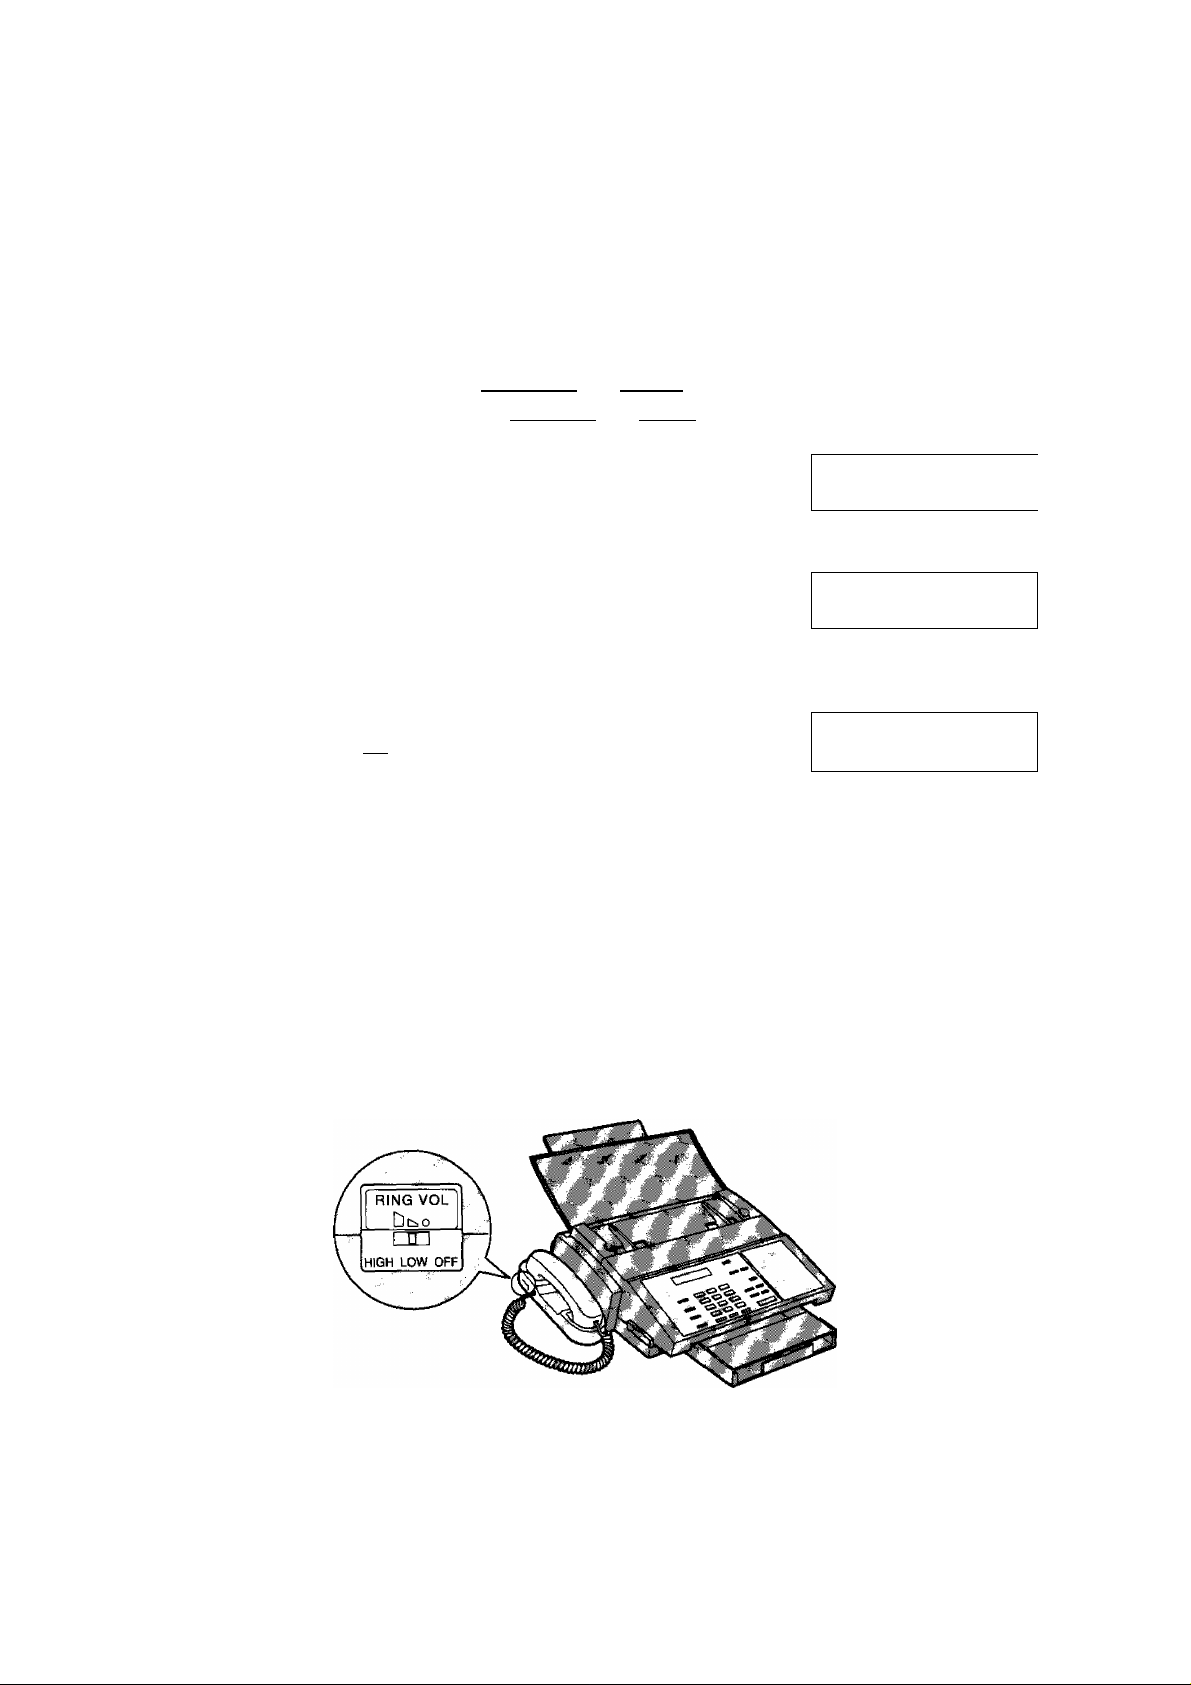
Setting Ringer Volume
CLEAR
SET
repeatedly to raise the volume.
repeatedly to lower the volume.
* DIALLING *
1
MONITOR VOLUME
LOW IMIIII
MONITOR VOLUME
LOW HIGH
HIGH
The ringer volume is located on the upper left of the handset cradle.
Move the switch to a desired position, either high, low or off.
iJ Note: You can also adjust the volume of the key touch tone and the volume of the buzzer in Fax Parameter
m
No. 10 (KEY/BUZZER VOLUME), (see page 33)
21

i ^ < S ^ % a Ï, - v ■■*.,. V- '*•■ ■ • \
't ''( 'Ï t Ï 'll, ^-; '■-- ■''■
Your facsimile machine has several basic settings (User Parameters) to help you keep records of the documents
you send or receive. For example, the built-in clock keeps the current date and time, and your LOGO and ID
Number help to identify you when you send or receive documents.
If a power failure occurs, a built-in battery will back up this information for up to 10 days when it is fully charged.
Setting the Date and Time
At standby the display will show the date and time. Once the standby display is set, it will automatically be
updated.
I
^FUNCTIONJ
1
SET
n
Enter the new date and time.
Ex:®®
m(2]
mil] [US]
fflEISE]
Date : 08th
Month : December
Year :1993
Time : 3:00 PM
SET MODE
ENTER NO.
1:USER PARAMETERS?
PRESS SET TO SELECT
DATE & TIME
DATE & TIME
OR A V
ll-Ol-OOOO 00:00
08-12-1993 15:00
(1-5)
22
if you make a mistake, use the < IORIGINAG and
> I RESOLUTION I to move the cursor to the incorrect
number and enter the new number over it.
® STOP
SET
5
t5'

Us•^
Setting Your LOGO
When you send a document, your LOGO appears on the top of the copy printed out at the other station. 2
The LOGO heips to identify you to someone who receives your document. —
SET MODE (1-5)
ENTER NO. OR A V
1
SET
repeatedly until display shows;
Enter your LOGO (max. 25 characters and digits) by
using the Character keys (see page 9).
Ex: E [A] [N] [A] [S] S [N] [D [S
if you make a mistake, use < I ORIGINAL I and
> I RESOLUTION I to move the cursor to the incorrect
character and enter the new character over it.
If more than 19 characters are entered, the left side
characters will scroll off the display.
1:USER PARAMETERS?
PRESS SET TO SELECT
LOGO I
I
_______________
LOGO
PANASONICI
SET
t5r
STOP
23

i-
~ z.
hh 'A*. .
^ fr!-.
Setting Your Character ID
If the remote machine has a Character ID capabilities, when you are sending or receiving, your Character
ID will appear on the remote machine’s display and the remote machine’s Character ID will appear on your
display.
1 ^
3
1
SET
repeatedly until display shows;
Enter your Character ID (max. 16 characters) by using
the Character keys (see page 9).
Ex:[H][E]fA]rD]l SPACE ISirBiFimi^iE]
If you make a mistake, use < lORIGINAG and
> I RESOLUTION I to move the cursor to the incorrect
character and enter the new character over it.
SET MODE (1-5)
ENTER NO. OR A V
1:USER PARAMETERS?
PRESS SET TO SELECT
CHARACTER ID
I
CHARACTER ID
.HEAD office!
24
rn
® STOP
5
The special characters of A, A, O, 0, /E, e arid d cannot be used for Character ID.

User Parameters
Setting Your ID Number (Fax Telephone Number)
If the remote machine does not have a Character ID but it has an ID Number, when sending or receiving, your
ID Number will appear on the remote machine’s display and their ID Number will appear on your display.
We suggest you use your facsimile telephone number as your ID number for up to 20 digits long.
j^nJNCTlONj
I
2
3 ^
Enter your ID (max. 20 digits) by using the key pad and
I
SPACE I.
Ex:[2][0]m[$PACE][5l[Jir^
If you make a mistake, press I CLEAR [ to erase the
number then reenter the correct number.
3
repeatedly until display shows;
ISPACEimi^mr^
SET MODE (1-5)
ENTER NO. OR A V
1:USER PARAMETERS?
PRESS SET TO SELECT
ID NO.
2
ID NO.
201 555 1212
■HP
Nots: 1. You may use ® to enter a character at the beginning of the ID number to indicate the following
ffl
digit(s) for your country code.
Ex: +1 201 555 1212 +1 for U.S.A. country code.
2. For some countries, this feature is not available depending on the country's regulation.
The display may not show this feature.
® STOP
+81 3 111 2345 +81 for Japan country code.
25

This page is intentionally left blank.
26

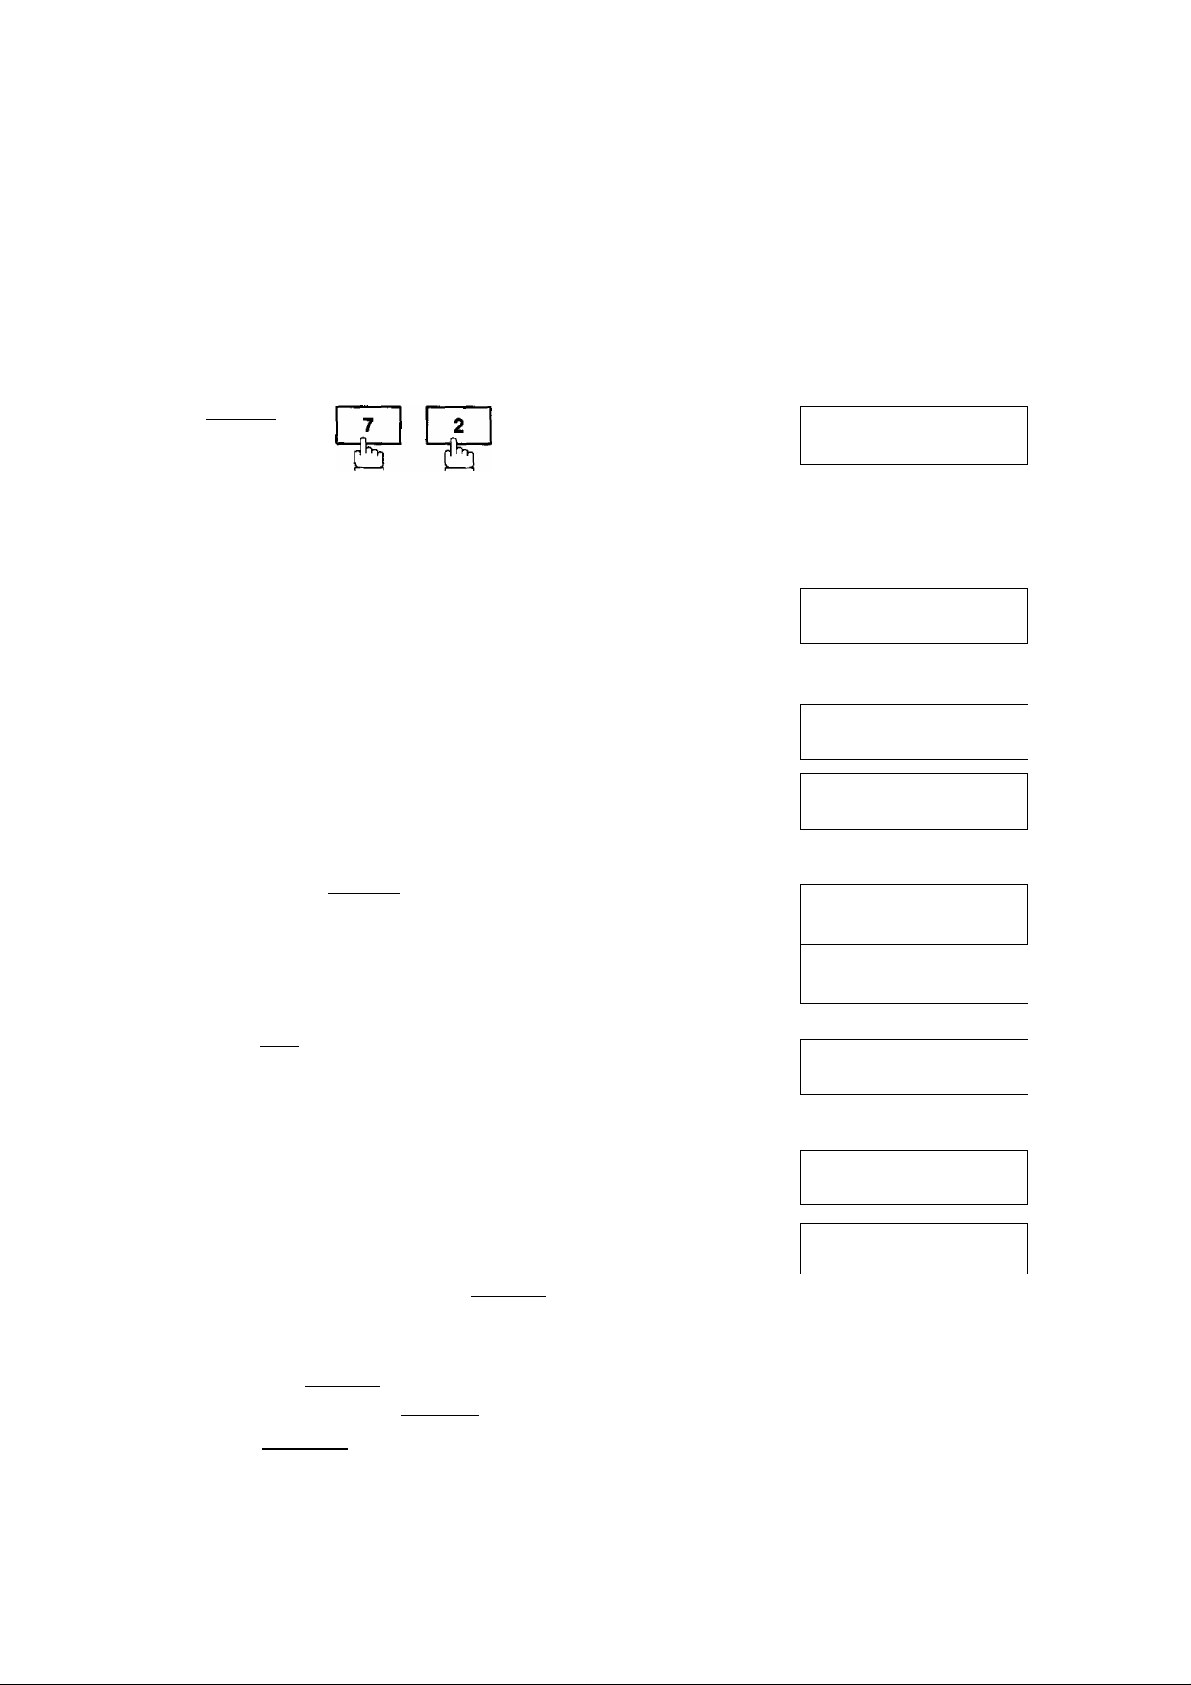
Oi^TTaiic^AI)bfByiated OiaHing Nunfibers
Entering One-Touch/Abbreviated Dialling Numbers
One-Touch and Abbreviated Dialling are two fast ways of dialling full telephone numbers. To use these dialling
methods, you must first store the telephone number using the following procedure.
To enter a One-Touch key, follow these steps below
I
3
I FUNCTION t
SET
01
Ex:
Enter the telephone number.
(up to 36 digits including pauses and spaces)
Ex: i9ll PAUSE If5lrail SPACeimmrsim
SET MODE
ENTER NO, OR A V
1;ONE-TOUCH
2:ABBR. NO.
ONE-TOUCH< >
PRESS ONE-TOUCH KEY
ONE-TOUCH< 01> TEL.
ONE-TOUCH<01>
9-555 12341
(1-5)
TEL.
6
8
8gT
Enter the station name using character keys
(up to 15 characters).
Ex:i^iAin:irEirsirspACE ifpiiEirpimr
SET
To record another number, repeat step 4 to 8.
To return to standby, press I STOP I,
ONE-TOUCH<01>
1
ONE-TOUCH<01>
SALES DEPT.I
ONE-TOUCH< >
PRESS ONE-TOUCH
NAME
name|
KEY 1
27

To set an Abbreviated Dialling Number, follow these steps below
I^FONCTIOMJ
I
2
tr ^
L
3
Ex: EEl (01 to 72)
4
Enter the telephone number.
5
6
(up to 36 digits including pauses and spaces)
Ex: [9ll PAUSE li^rsirsll SPACE
9E I
SET
SET MODE
ENTER NO.
2
SET
1:ONE-TOUCH
2:ABBR. NO.
ABBR[| ]
ENTER ABBR. NO.
ABBR[22]
OR A V
(1-5)
TEL,
I
ABBR[22]
9-555 23451
ABBR[22]
1
TEL.
NAME
Enter the station name using character keys
(up to 15 characters).
Ex:fAireirCl[OirDliNimmrNir61l6PACE'
[a HI [Em
SET
8
To record another number, repeat step 4 to 8.
To return to standby, press [ STOP I.
LLJ Note: 1. If you require a special access number to get an outside line, enter it first and then press I PAUSE I.
A hyphen is dispiayed for pause.
2. Use 1 SPACE I to enter a space between the numbers to make it easier to read,
3. The buiit-in battery can back up One-Touch/ABBR. Numbers up to 10 days when a power failure
occurs.
4. If you are using Pulse dialling and you wish to change to Tone dialling in the middle of dialling, press
I TONE I (represented by aT). The dialling method will be changed from Pulse to Tone after
dialling the digit T.
5. You can search an unused One-Touch key or ABBR. number by pressing 0 in step 3 or 4.
ABBR[22] NAMeI
ACCOUNTING DEPTI |
ABBR[I ]
ENTER ABBR. NO.
28
OnerTouch/Ab|)^vlat«cl Dialling. Numbars
Changing or Erasing One-Touch/Abbreviated Dialling Numbers
If you have to change or erase any of the One-Touch/Abbreviated dialling numbers, follow the steps below.
To change the setting of a One-Touch/ABBR. dialling number
I
3
5
I^FUHCTIOHJ
Select 1 for One-Touch Dialling number.
Select 2 for ABBR. Dialling Number.
Ex:m
Enter the station you wish to change.
07
Ex:
CLEAR
then enter a new telephone number.{see Note 1 and 2)
Ex;r9lf9ir9ir5PACEir3ir4ir5lf6l
SET
SET
1 : ONE-TOUCH
2:ABBR. NO.
ONE-TOUCH< >
PRESS ONE-TOUCH KEY
ONE-TOUCH<07>
9-555 1234
ONE-TOUCH<07>
1
ONE-TOUCH<07>
999 34561
ONE-TOUCH<07>
PANASONIC
»
TEL.
TEL.
naheI
CLEAR
6
w
then enter a new station name.(see Note 1 and 3)
ex:\E[E\\E[E\E[E\\E\
SET
To return to standby, press I STOP I.
LlJ Note: 1. Use [<] or 0 to move the cursor, then enter the correct number over the incorrect number.
2. Use I COPY I to insert a space between the numbers you set. If the telephone number has full
digit (36 digits), I COPY I cannot be used to insert a space.
3.1 COPY I cannot be used to insert a space in setting of the station name.
4. If the One-Touch/Abbreviated dialling number has been used for a communication reservation, the
settings cannot be changed or erased until the communication has ends.
To change or erase the settings, cancel the communication first by File Edit Mode (see page 78).
ONE-TOUCH<07>
1
ONE-TOUCH<07>
PANAFAXi
ONE-TOUCH< >
PRESS ONE-TOUCH
naheI
NAME
KEY
29

To erase the setting of One-Touch/ABBR. Dialling number
■ V
1
3
CLEAR
4
FUNCTION 1
Select 1 for One-Touch Dialling number.
Select 2 for ABBR. Dialling Number.
Ex:[T]
Enter the station you wish to erase.
Ex:
7
L?_
SET
L
1;ONE-TOUCH
2:ABBR. NO.
ONE-TOUCH< >
PRESS ONE-TOUCH KEY
ONE-TOUCH<01> TEL.
9-555 4567
ONE-TOUCH< 01> TEL.
5 ^
To return to standby, press I ¿TOP
ONE-TOUCH< >
PRESS ONE-TOUCH KEY
30
 Loading...