

Page 1
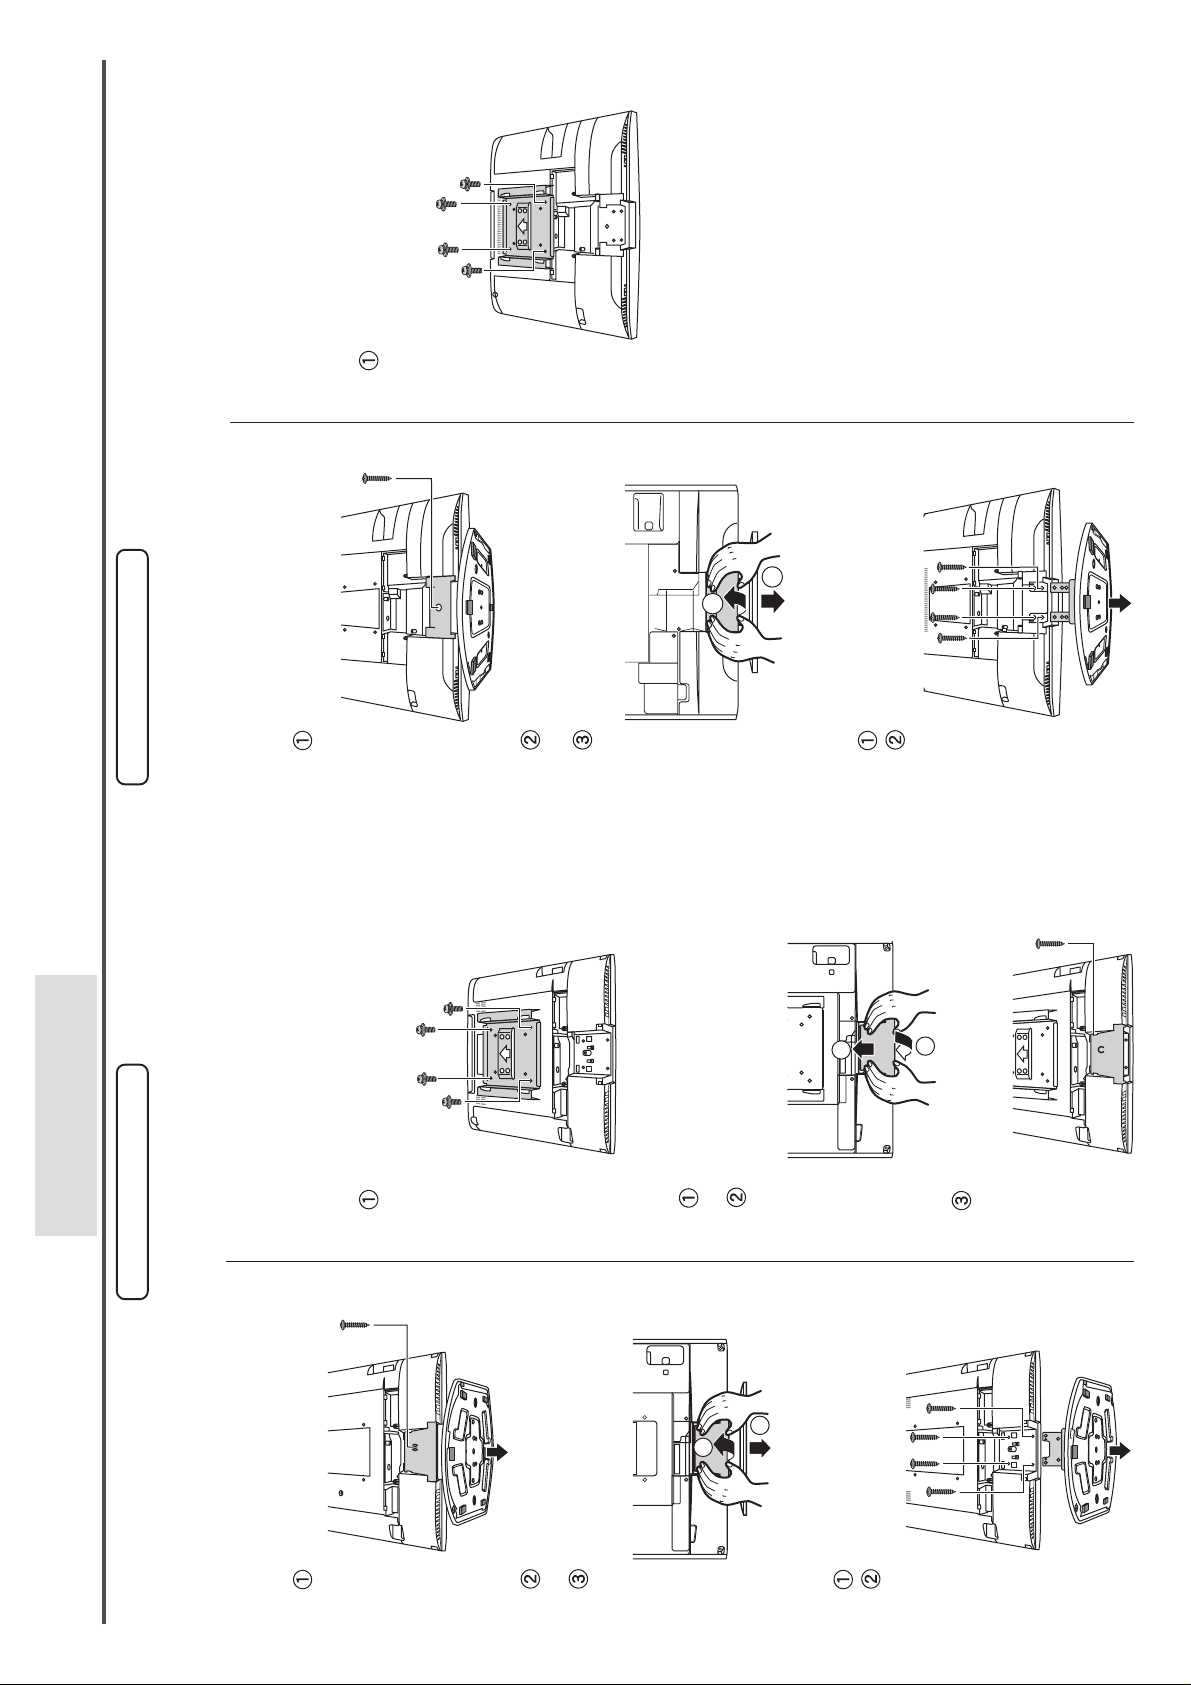
bracket fitting screws A (M4 × 12
mm).
Securely fasten with the four
Align the holes in wall hanging
bracket A with the screw holes in the
LCD TV.
3 Fit wall hanging bracket A.
Remove the screw.
Raise the lower part of the stand
Note:
The stand cover is not used with the
wall hanging bracket. Store care-
2
cover toward yourself.
direction.
Slowly slide off in the downward
fully, along with its screw, in case it
is required in future.
3
Remove the 4 screws.
Remove the TV stand.
TQZH537
For the TX-20LA1
Before starting the fitting procedure, remove the AC adapter and connection cable
attached to the LCD TV. Be sure to perform fitting correctly and securely.
TX-17LA1 / TX-20LA1
TX-22LT3 / TC-22LH1
1 Remove the stand cover.
3 Fit wall hanging bracket A.
For the TX-17LA1
bracket fitting screws A (M4 × 12
mm).
Securely fasten with the four
Align the holes in wall hanging
bracket A with the screw holes in the
LCD TV.
2 Remove the TV stand.
1
the stand cover.
stand cover.
Press in the lower part of the
Insert the two claws at the top of
4 Refit the stand cover .
2
in Step 1.
Fasten with the screw removed
Unit preparation
4
Before starting the fitting procedure, remove the AC adapter and connection cable
Fitting procedure
attached to the LCD TV. Be sure to perform fitting correctly and securely.
Remove the screw.
1 Remove the stand cover.
3
2
cover toward yourself.
Raise the lower part of the stand
direction.
Slowly slide off in the downward
2 Remove the TV stand.
Remove the 4 screws.
Remove the TV stand.
Page 2
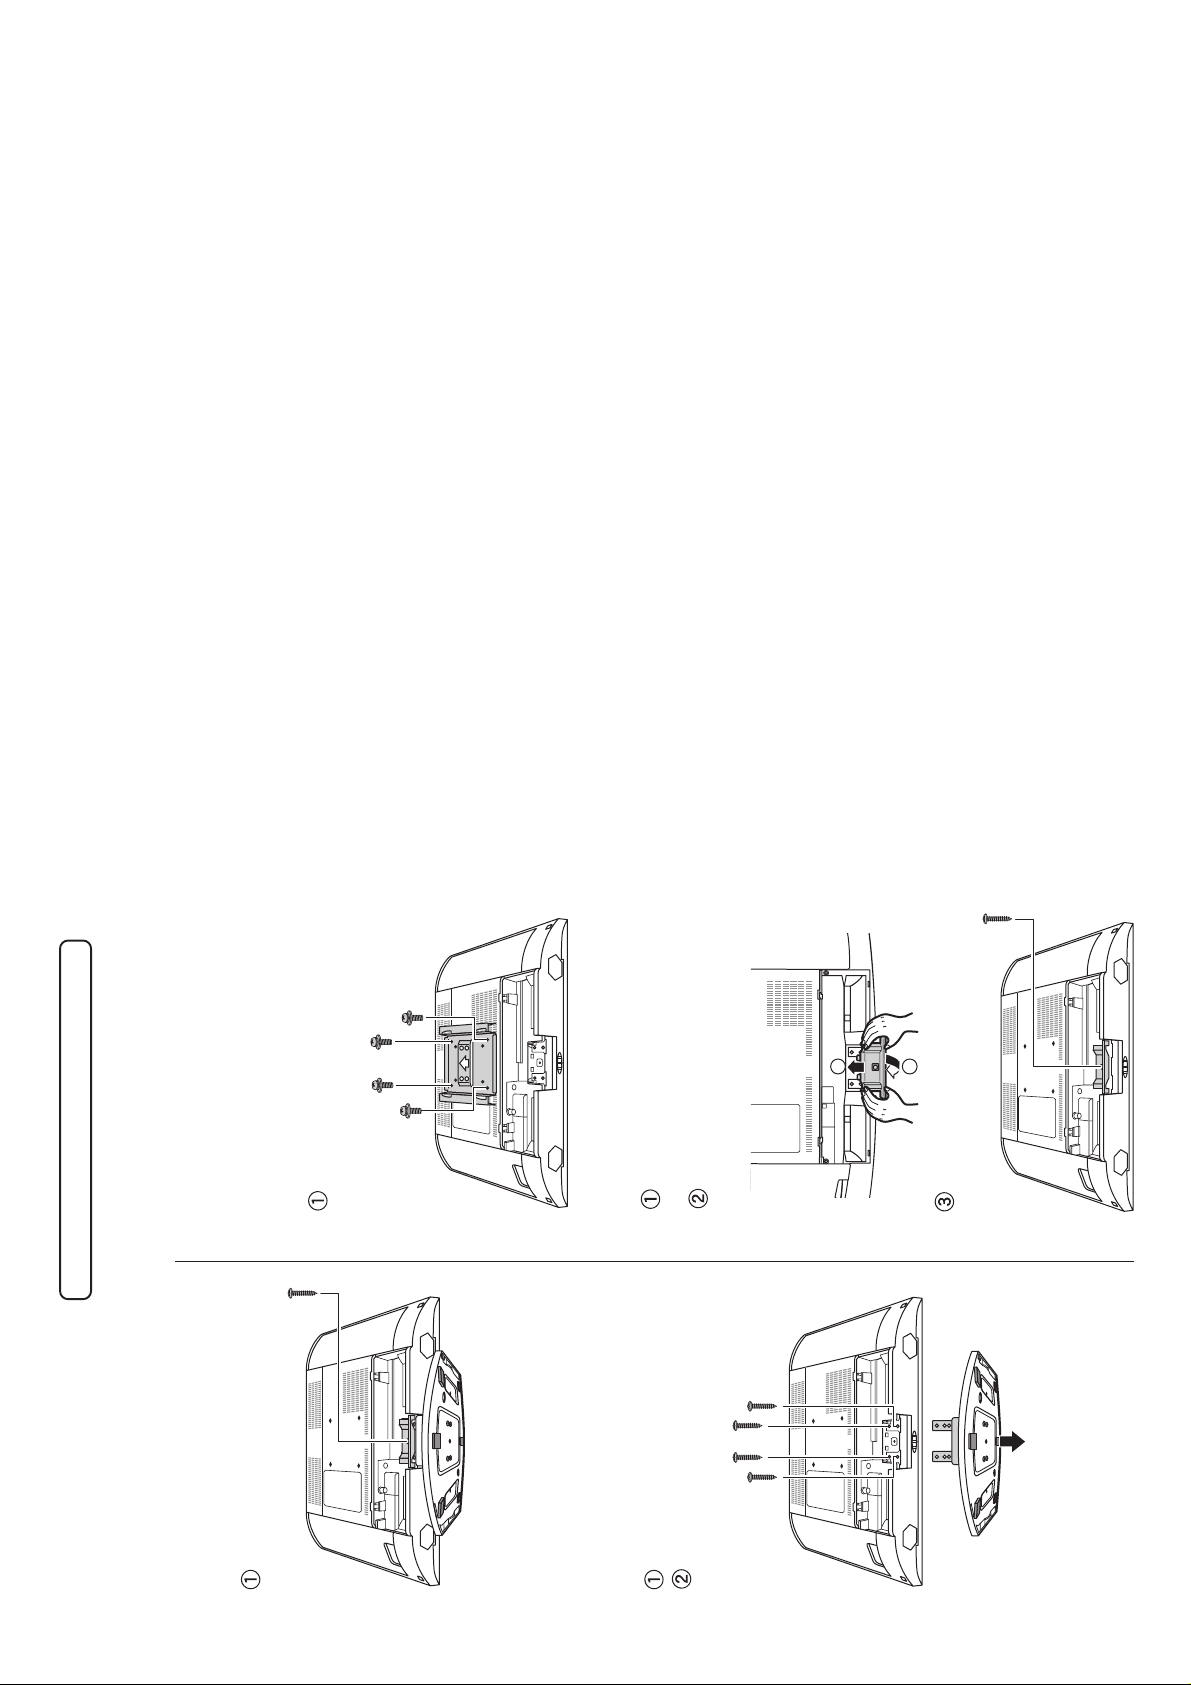
3 Fit wall hanging bracket A.
For the TX-22LT3 / TC-22LH1
bracket fitting screws A (M4 × 12
mm).
Securely fasten with the four
Align the holes in wall hanging
bracket A with the screw holes in the
LCD TV.
1
the stand cover.
stand cover.
Press in the lower part of the
Insert the two claws at the top of
4 Refit the stand cover .
2
in Step 1.
Fasten with the screw removed
Unit preparation
Before starting the fitting procedure, remove the AC adapter and connection cable
attached to the LCD TV. Be sure to perform fitting correctly and securely.
4
Remove the screw.
1 Remove the stand cover.
Remove the 4 screws.
Remove the TV stand.
2 Remove the TV stand.
 Loading...