

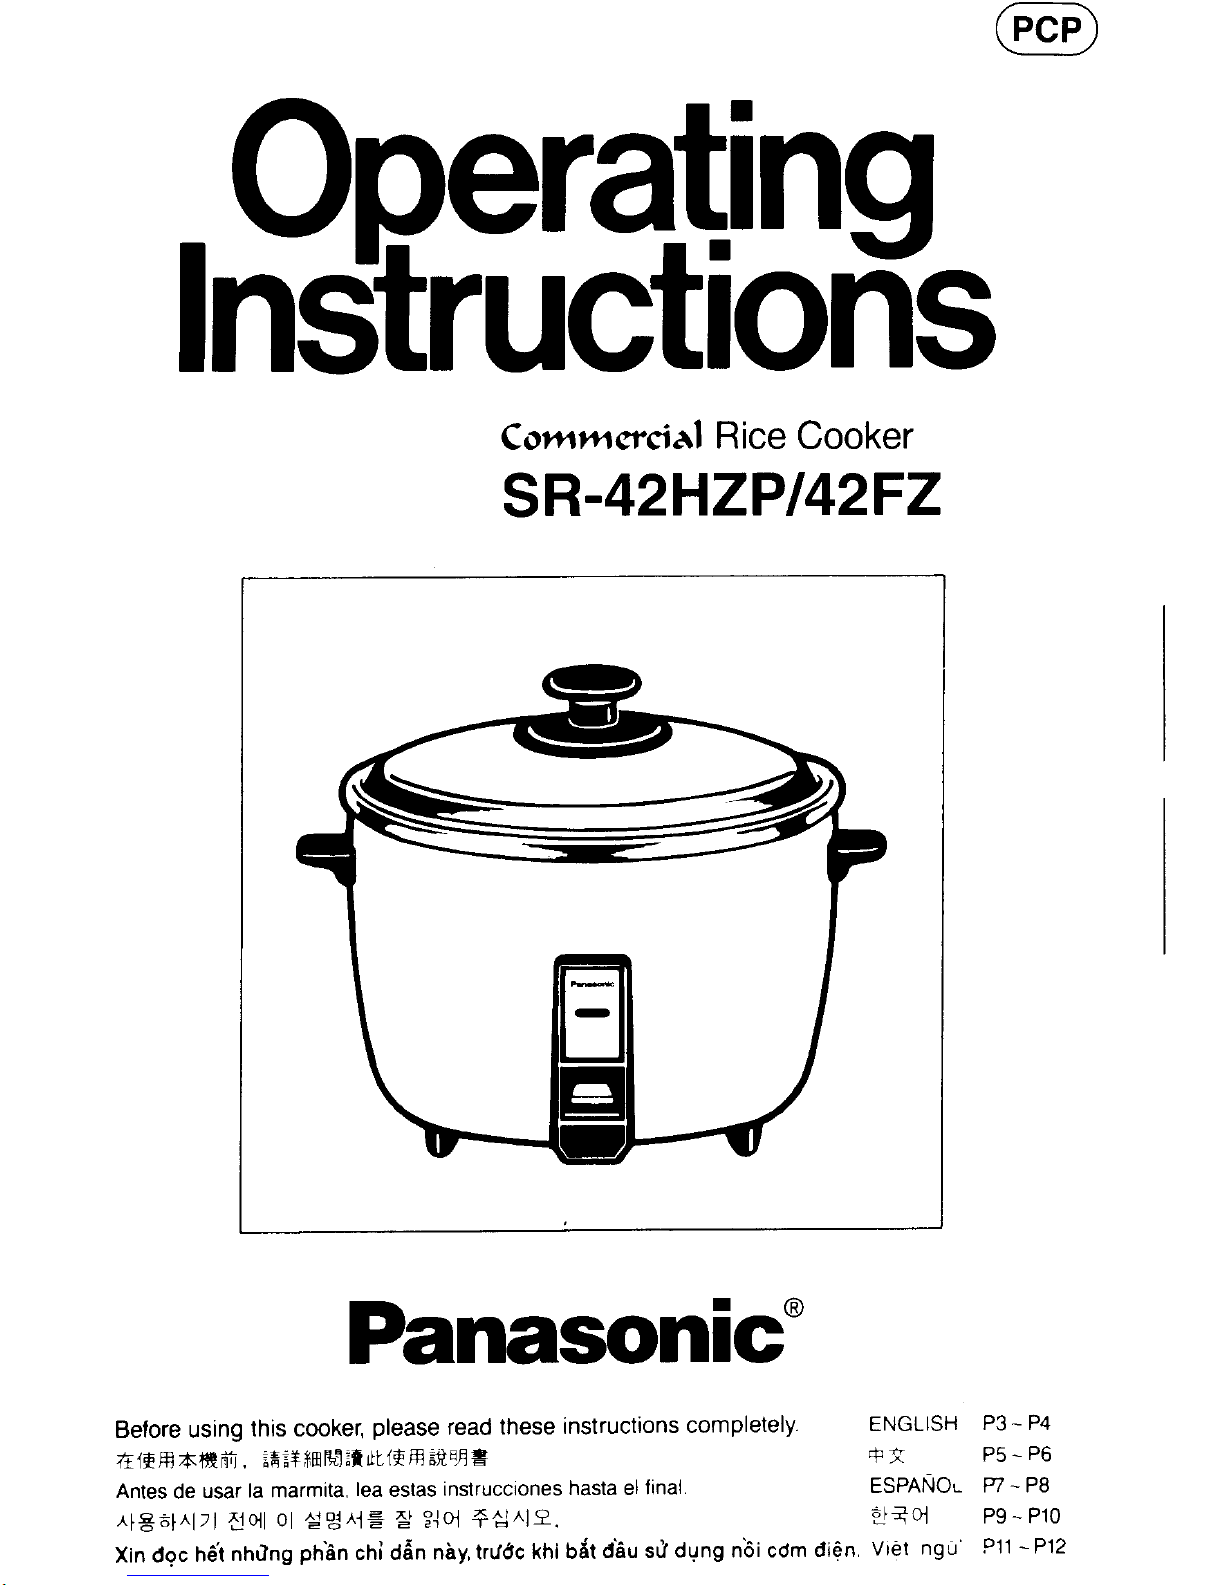
Panasonic SR-42HZP, NSR42HZ - RICE COOKER MULTI-LANG, SR42FZLVA - RICE COOKER - MULTI-LANG, SR42HZP-S/PCP - RICE COOKER - MULTI-LANG Operating Manual
.Operdng
In$ructiorTs
Cotntrqgal
Rice
Cooker
sR-42HZPl42FZ
PanasoniC
Before using
this cooker,
please
read
these
instructions
completely.
E1*,ffi Altfr m",
;E;+fimB8;n
tL{*ffi
;t8i =
Antes
de
usar
la marmlta,
lea
estas
instrucciones
hasta el
final
^f
E6t^l7l
aloll
0l
€g^iE
A'
3lq +d^19.
Xin
doc
h6i
nntlng
phhn
chi d6n
nby,trrl6c
fni Uiit
obu srl
dgng nbi com
di6n
ENGLISH
P3 - P4
+a
P5-P6
ESPnttO.
gZ
-
Pg
-af
+q
P9
--
P10
Vi€l
ngu
P11
-P12
IMPORTANT
SAFEGUARDS
When using
electrical
appliances,
basic safety
precautions
should
always
be observed
including the
following:
1. Read
all instructions.
2.
Do not touch
hot surfaces.
Use
handles
or knobs.
3.
To
protect
against
electrical shock,
do
not
immerse cord,
plugs,
and
Flice
Cooker,
except
lid and
pan,
in water or other
liquid.
4. Close
supervision
is necessary
when any appliance
is
used
by or
near children.
5. Unplug
from outlet
when
not in use and
before
cleaning. Allow
to cool
before
putting
on
or taking
off
parts.
6. Do
not operate
any appliance
with a damaged
cord or
plug
or after
the appliance
malfunctions
or
has been damaged
in any manner.
Feturn
appliance
to
the nearest authorized
service
facility for
examination,
repair,
or adjustment.
7.
The use of accessory
attachments
not recommended
by the appliance
manufacturer
may
cause
injuries.
8.
Do
not use outdoors.
9.
Do
not let cord
hang
over edge of
table or counter,
or
touch
hot
surfaces.
10. Do not
place
on
or near a
hot
gas
or
electric burner,
or in a
heated oven
11 . Extreme
caution
must be used
when movtng
an appliance
containing
hot oil or other
hot
liquids.
12. Do
not use appliance
for other
than intended use.
13. SAVE
THESE
INSTRUCTIONS
NOTE
A. A short
power
supply
cord set
is
provided
to reduce
the
risk
resulting
from
becoming
entangled
in or
tripping over a
longer cord.
B. Longer
cord set
or extension
cords
are available
and
may
be
used
if
care
is
exercised
in their use.
C. lf a
longer cord
set or
extension
cord is used,
(1)
the
marked
electrical
rating of the cord
set or extension
cord
should be
at
least as
great
as
the electrical
rating of
the appliance,
(2)
the longer
cord
should be arranged
so
that
it will not drape over
the
countertop
or tabletop
where it can be
pulled
on by children
or tripped
over unintentionallv.
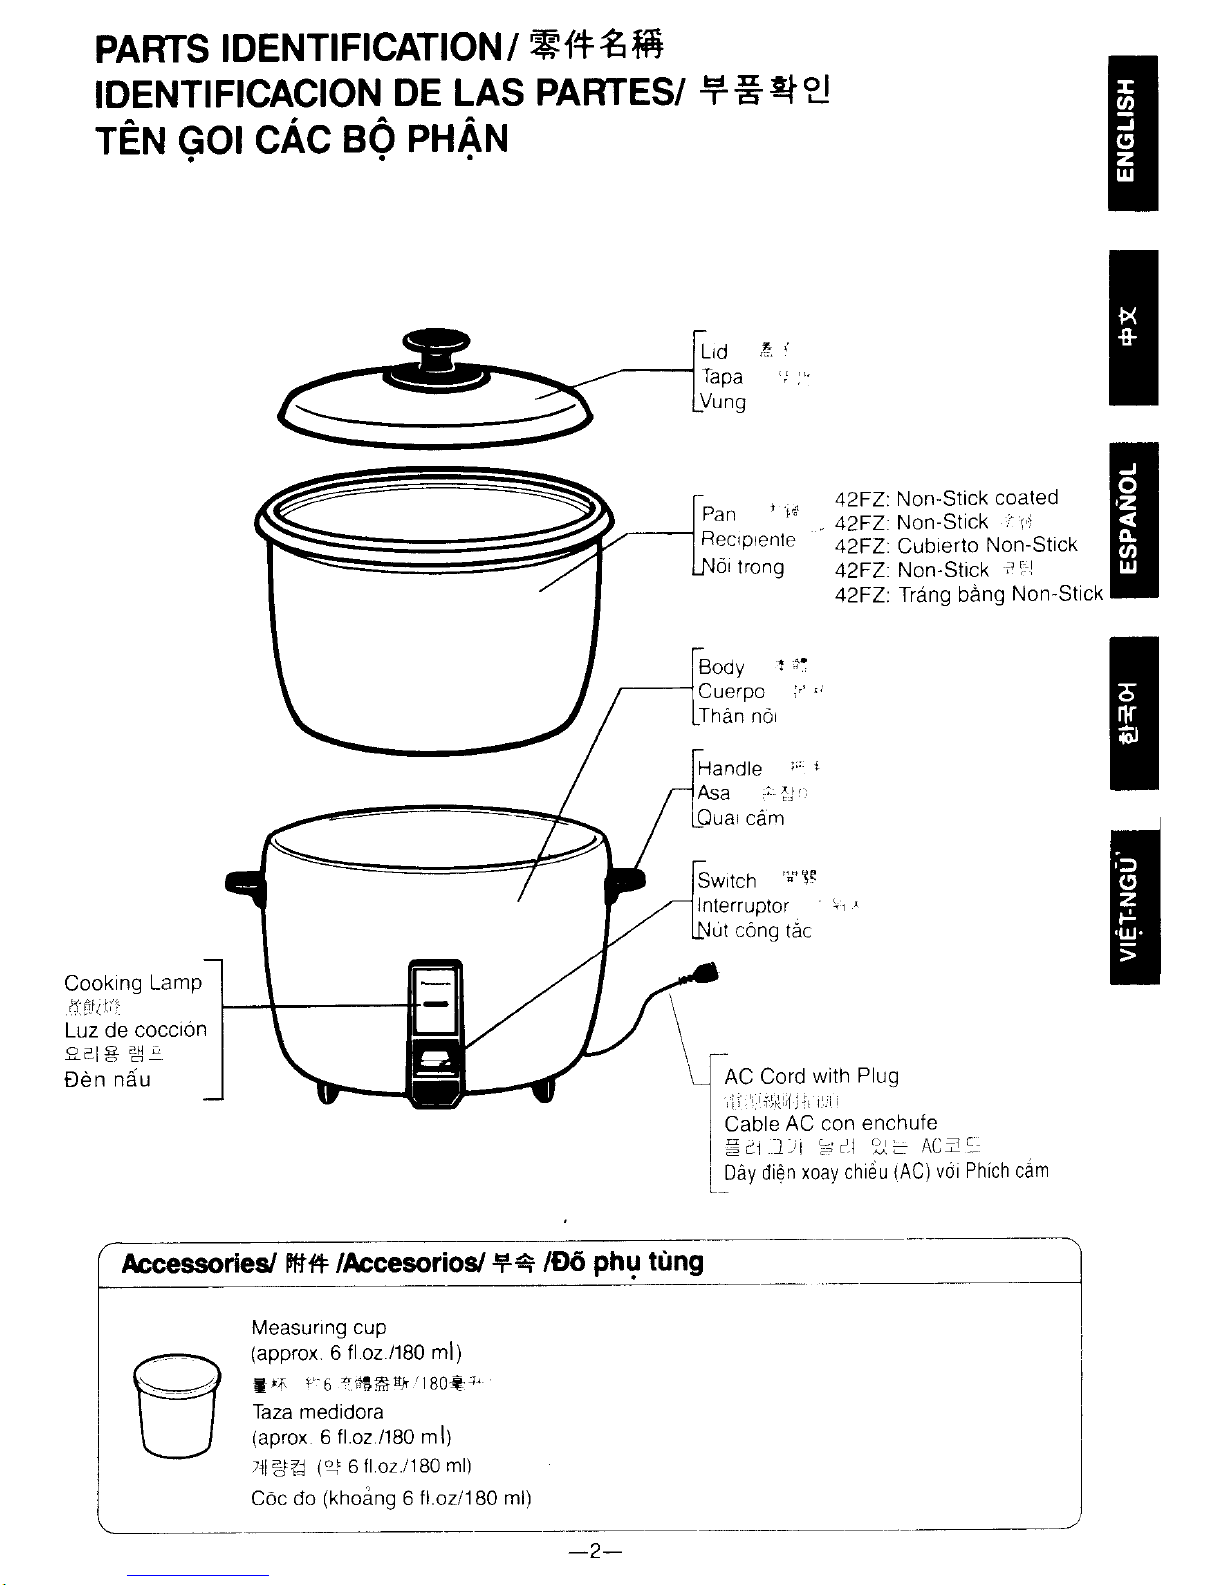
PARTS
IDENTIFICATION
I
F.'ft
4ffi
IDENTIFICACION
DE LAS
PARTES/
+Eq?J
TEN GOI
CAC
AO PFIAN
H
E
H
E
E
Pan
'
t4
Recrprenle
trong
Body
t
:1:
Cuerpo i/
ThAn
nor
Handle
Asa
Swllcn
g
r-
Interruptor
!r
42FZ:
Non-Stick
coaled
42F2.
Non-Stick
'"
tl
42F2.
Cubierlo
Non-Stick
42FZ
Non-Stick
;r:l
42FZ:
TrAng bang
Non-Stick
Cooking
Lamp
d.tiii iii
Luz de coccion
uen nau
Accessories/ Fff?f /Accesoriod 94
/D6
phu
t0ng
Measunng
cup
(approx
6 fl oz./180
ml)
E
in.
l"
6 icaf;
d,i
'
r
80+
r,
Taza
medidora
(aprox 6 fl
oz /180
ml)
rll
-Ja
('+ 6 fl
oz
i
180 ml)
C6c do
(khodng
6
fl.ozl180 ml)
-2-
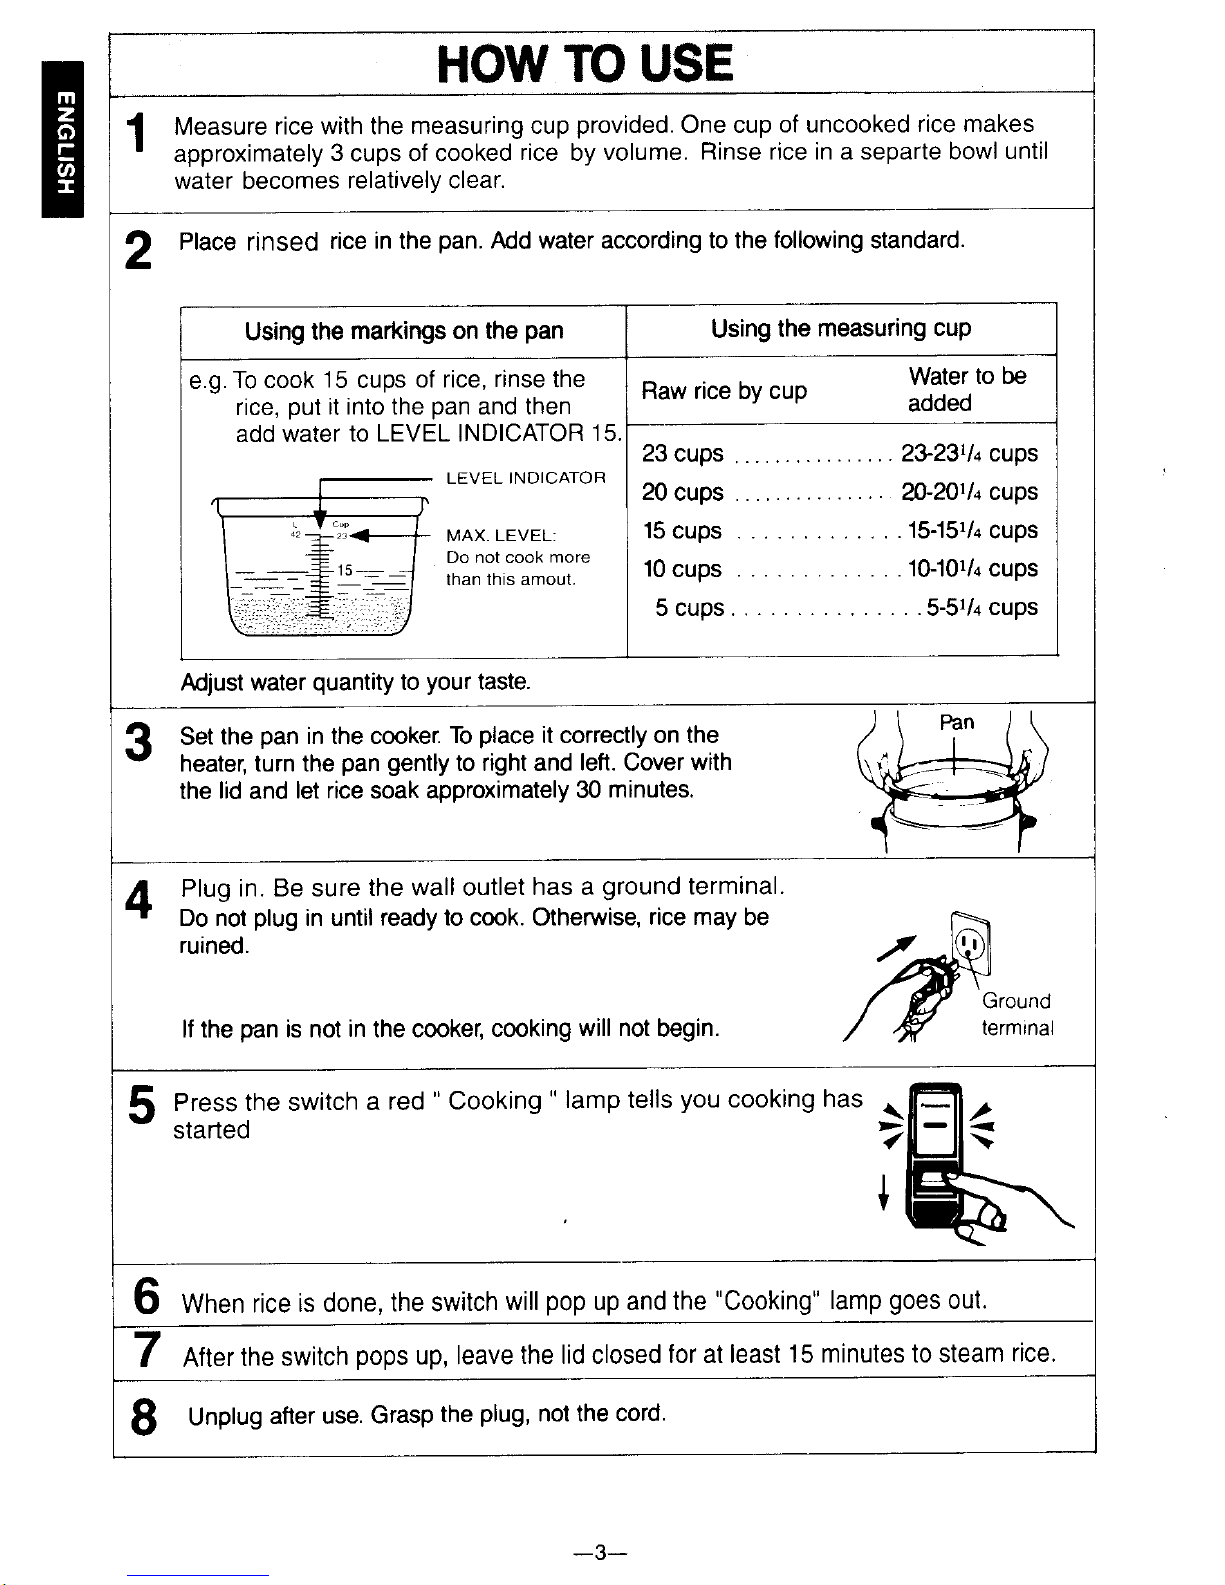
E
HOW
TO USE
1
Measure
rice with the
measuring cup
provided.
One cup
of uncooked
rice makes
approximately
3
cups of cooked
rice
by
volume.
Rinse rice in a separte bowl
until
water becomes
relatively clear.
2
Place
rinsed
rice in the
pan.
Add water according to the
following
standard.
Using
the
markings on the
pan
Using
the
measuring
cup
e.g.
To cook
15
cups
of rice,
rinse
the
rice,
put
it into the
pan
and then
Add WAtCr
tO LEVEL INDICATOR
15.
LEVEL
INDICATOR
MAX.
LEVEL:
Do not cook
more
than this amout.
Raw rice by cup
water
to be
23
cups
2*23tla cups
20
cups
....
. .
.
&2orla
cupS
15 cups
.15-151/a
cups
10
cups
.'1G101/a cups
5 cups .
. .5-5rL cups
Must
water
quantity
to
your
taste.
Set
the
pan
in the cooker.
To
place
it correctly on the
heater, turn the
pan gently
to right and
lett.
Cover
with
the
lid
and
let rice soak approximately
30
minutes.
3
Plug
in. Be sure
the wall outlet
has a
ground
terminal.
Do not
plug
in until
ready to
cook. Otherwise,
rice may
be
ruined.
lf the
pan
is not
in
the cooker,
cooking
will not
begin.
4
5
Press the switch
a
red " Cooking
"
lamp tells
you
cooking
has
affi,
started
TElls
'ft-\
ttr
O
When
rice is done,
the switch
will
pop
up and the
'Cooking"
lamp
goes
out.
I After
the
switch
pops
up, leave
the lid closed
for at least
15 minutes to steam
rice.
8
Unplug
after use.
Grasp
the
plug,
not the cord
-3-
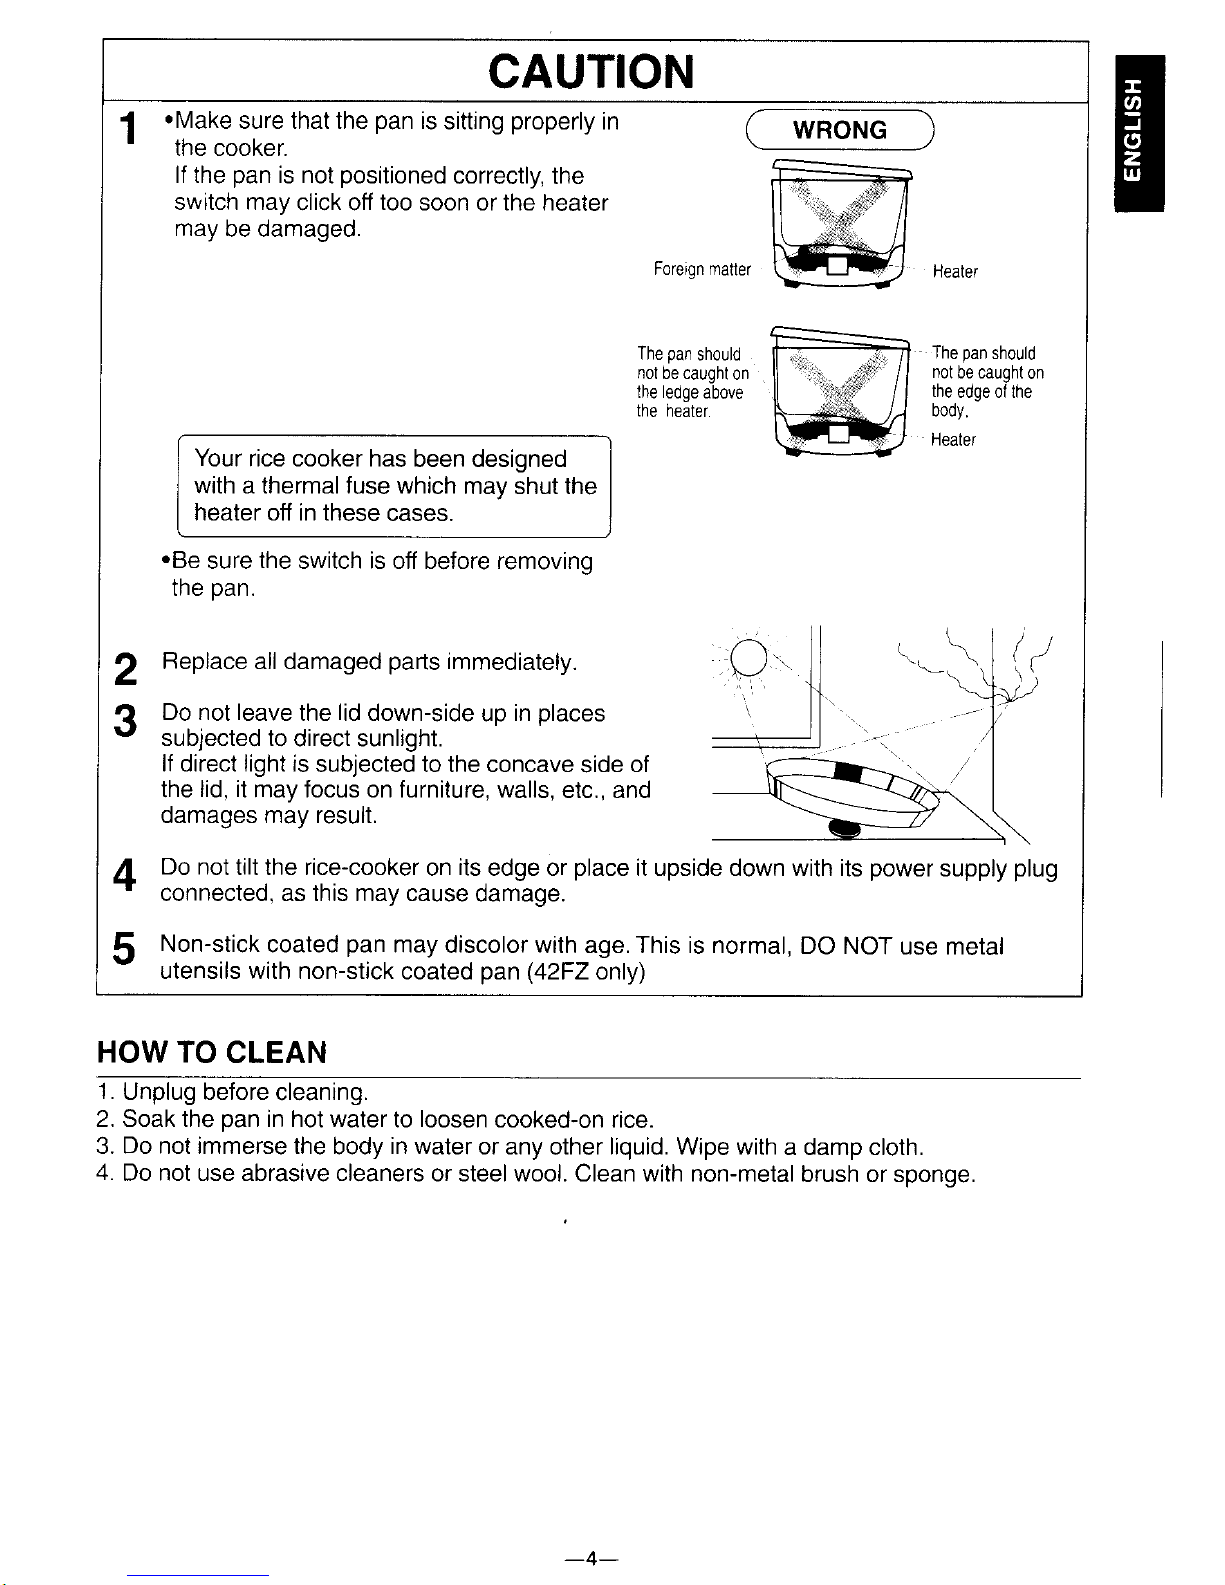
CAUTION
.Make
sure that the
pan
is
sitting
properly
in
the cooker.
lf the
pan
is not
positioned
correctly, the
switch may
click off
too
soon or the heater
may
be damaged.
Foreign matter
The
pan
should
not
be caught
on
the ledge
above
the
heater.
Heater
The
pan
should
not
be caught
on
the
edge ol the
000y.
Heater
Your
rice cooker has
been designed
with a thermal fuse which
mav shut the
heater off in these
cases.
.Be
sure
the
switch is off before removinq
tne
pan.
2
Beplace all damaged
pafis
immediately.
?
Do not leave
the
lid
down-side
up
in
places
tv
sub.jected to
direct sunlight.
lf direct light is
subjected to the concave
side
of
the
lid, it
may focus on furniture, walls,
etc., and
damages may result.
Do not
tilt the rice-cooker
on
its
edge or
place
it upside down with its
power
supply
plug
connected, as this may cause
damage.
Non-stick
coated
pan
may
discolor with age. This is normal,
DO NOT
use metal
utensils with non-stick
coated
pan (42F2
only)
4
5
HOW TO
CLEAN
1.
Unplug before
cleanrng.
2. Soak the
pan
in hot water
to
loosen
cooked-on rice.
3. Do not immerse the
body
in water
or any
other
liquid. Wipe with
a damp cloth.
4.
Do not use abrasive cleaners
or steel wool. Clean with non-metal
brush or sponge.
 Loading...