

Panasonic SCAK321 User Manual [en, es]
CD Stereo System
Operating Instructions
Model No. SC-AK321
Before connecting, operating or adjusting this product, please read these
instructions completely.
Please keep this manual for future reference.
: For areas using power supply of 120 V.
PL
: For areas using power supply of 110/127/220-230/240 V.
GCP
GCPPL
RQT7340-1M
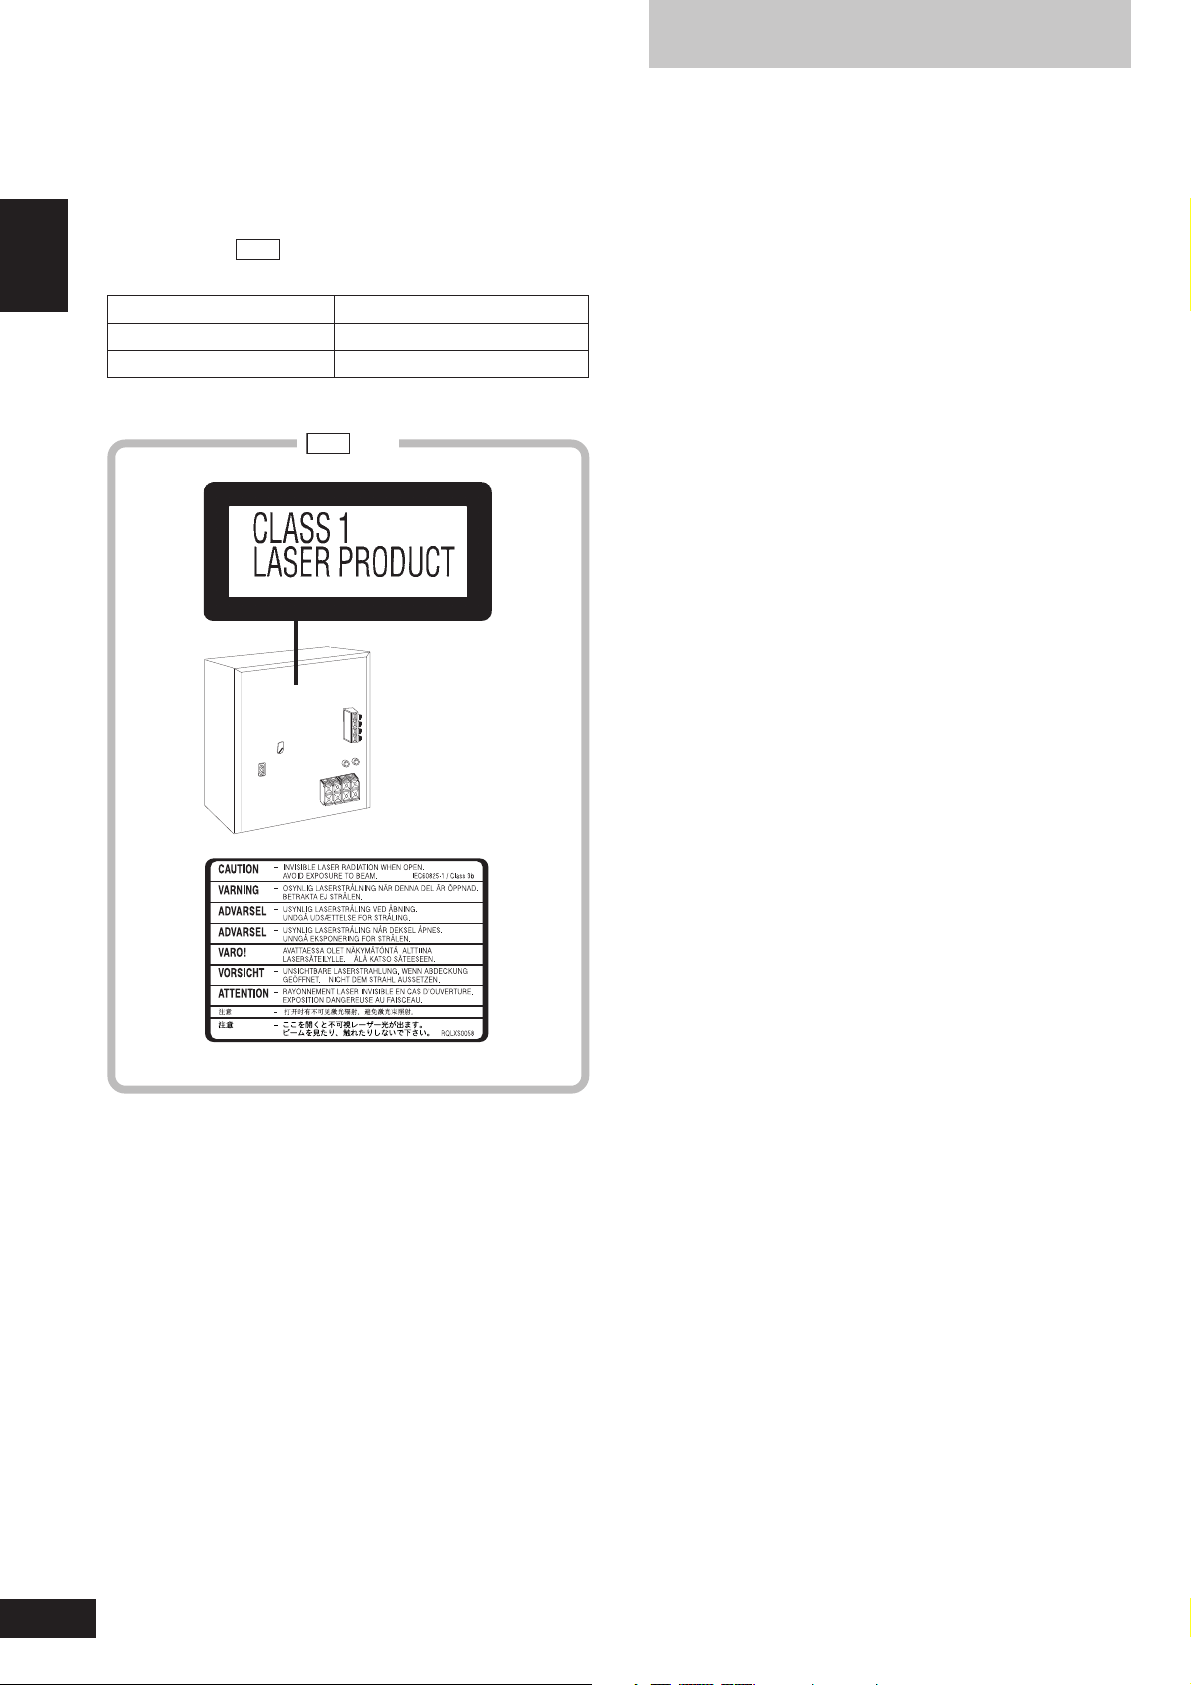
Table of contents
Dear customer
Thank you for purchasing this product.
For optimum performance and safety, please read these instructions
carefully.
These operating instructions are applicable to the following systems.
Unless otherwise indicated, illustrations in these operating instructions
are of SC-AK321:
ENGLISH
System SC-AK321
Main unit SA-AK321
Speakers SB-AK320
GCP
.
GCP only
IMPORTANT SAFETY INSTRUCTIONS ............................. 3
Supplied accessories ........................................................ 4
Placement of speakers ...................................................... 4
The remote control ............................................................ 4
Disc information ................................................................ 5
Set-up ................................................................................. 6
Front panel controls .......................................................... 7
CDs ..................................................................................... 8
How discs with MP3 differ from CDs ............................... 9
CD Play Mode function for MP3 ....................................... 9
Album skip play .............................................................. 10
Track skip play ............................................................... 10
INTRO function (Album scan) ........................................ 10
Program play for MP3 .................................................... 10
Starting play from a desired track in a desired album .... 11
Title search function ....................................................... 11
CD display for MP3 ........................................................ 12
Marking a track .............................................................. 13
Radio ................................................................................ 13
Cassettes .......................................................................... 14
Sound quality/sound field ............................................... 15
KARAOKE ........................................................................ 15
Other functions ................................................................ 16
Optional antenna connections ........................................ 16
External unit connections ............................................... 16
Using an external unit .................................................... 17
Using headphones (not included) ................................... 17
Turning the demo function on/off .................................... 17
Convenient functions ...................................................... 17
Auto-off function ............................................................. 17
Setting the time .............................................................. 17
Timers............................................................................... 18
Troubleshooting guide .................................................... 19
Maintenance ..................................................................... 19
Specifications .................................................................. 20
2
RQT7340
Inside of product
IMPORTANT SAFETY
CAUTION!
THIS PRODUCT UTILIZES A LASER.
USE OF CONTROLS OR ADJUSTMENTS OR PERFORMANCE OF PROCEDURES OTHER THAN THOSE SPECIFIED HEREIN MAY RESULT IN HAZARDOUS RADIATION
EXPOSURE.
DO NOT OPEN COVERS AND DO NOT REPAIR YOURSELF. REFER SERVICING TO QUALIFIED PERSONNEL.
CAUTION!
DO NOT INSTALL OR PLACE THIS UNIT IN A
•
BOOKCASE, BUILT-IN CABINET OR IN ANOTHER
CONFINED SPACE. ENSURE THE UNIT IS WELL
VENTILATED. TO PREVENT RISK OF ELECTRIC
SHOCK OR FIRE HAZARD DUE TO OVERHEATING,
ENSURE THAT CURTAINS AND ANY OTHER
MATERIALS DO NOT OBSTRUCT THE VENTILATION
VENTS.
DO NOT OBSTRUCT THE UNIT’S VENTILATION
•
OPENINGS WITH NEWSPAPERS, TABLECLOTHS,
CURTAINS, AND SIMILAR ITEMS.
DO NOT PLACE SOURCES OF NAKED FLAMES, SUCH
•
AS LIGHTED CANDLES, ON THE UNIT.
DISPOSE OF BATTERIES IN AN ENVIRONMENTALLY
•
FRIENDLY MANNER.
WARNING:
TO REDUCE THE RISK OF FIRE, ELECTRIC SHOCK
OR PRODUCT DAMAGE, DO NOT EXPOSE THIS
APPARATUS TO RAIN, MOISTURE, DRIPPING OR
SPLASHING AND THAT NO OBJECTS FILLED WITH
LIQUIDS, SUCH AS VASES, SHALL BE PLACED
ON THE APPARATUS.
This product may receive radio interference caused by mobile telephones during use. If such interference is apparent, please increase
separation between the product and the mobile telephone.
The socket outlet shall be installed near the equipment and
easily accessible or the mains plug or an appliance coupler
shall remain readily operable.
INSTRUCTIONS
Read these operating instructions carefully before using the unit. Follow
the safety instructions on the unit and the applicable safety instructions
listed below. Keep these operating instructions handy for future
reference.
1) Read these instructions.
2) Keep these instructions.
3) Heed all warnings.
4) Follow all instructions.
5) Do not use this apparatus near water.
6) Clean only with dry cloth.
7) Do not block any ventilation openings. Install in accordance with
the manufacturer’s instructions.
8) Do not install near any heat sources such as radiators, heat
registers, stoves, or other apparatus (including amplifiers) that
produce heat.
9)
PL
only
Do not defeat the safety purpose of the polarized or groundingtype plug. A polarized plug has two blades with one wider than
the other. A grounding-type plug has two blades and a third
grounding prong. The wide blade or the third prong are provided
for your safety. If the provided plug does not fit into your outlet,
consult an electrician for replacement of the obsolete outlet.
10) Protect the power cord from being walked on or pinched
particularly at plugs, convenience receptacles, and the point where
they exit from the apparatus.
11) Only use attachments/accessories specified by the manufacturer.
12) Use only with the cart, stand, tripod, bracket, or
table specified by the manufacturer, or sold with
the apparatus. When a cart is used, use caution
when moving the cart/apparatus combination to
avoid injury from tip-over.
ENGLISH
GCP only
THIS UNIT IS INTENDED FOR USE IN TROPICAL
CLIMATES.
CAUTION:
Change the voltage setting to suit the AC voltage
in your area. See page 6.
Note that the unit will be seriously damaged or fail
to operate correctly if this setting is not made
correctly.
13) Unplug this apparatus during lightning storms or when unused
for long periods of time.
14) Refer all servicing to qualified service personnel. Servicing is
required when the apparatus has been damaged in any way,
such as power-supply cord or plug is damaged, liquid has been
spilled or objects have fallen into the apparatus, the apparatus
has been exposed to rain or moisture, does not operate normally,
or has been dropped.
3
RQT7340
The remote control
ENGLISH
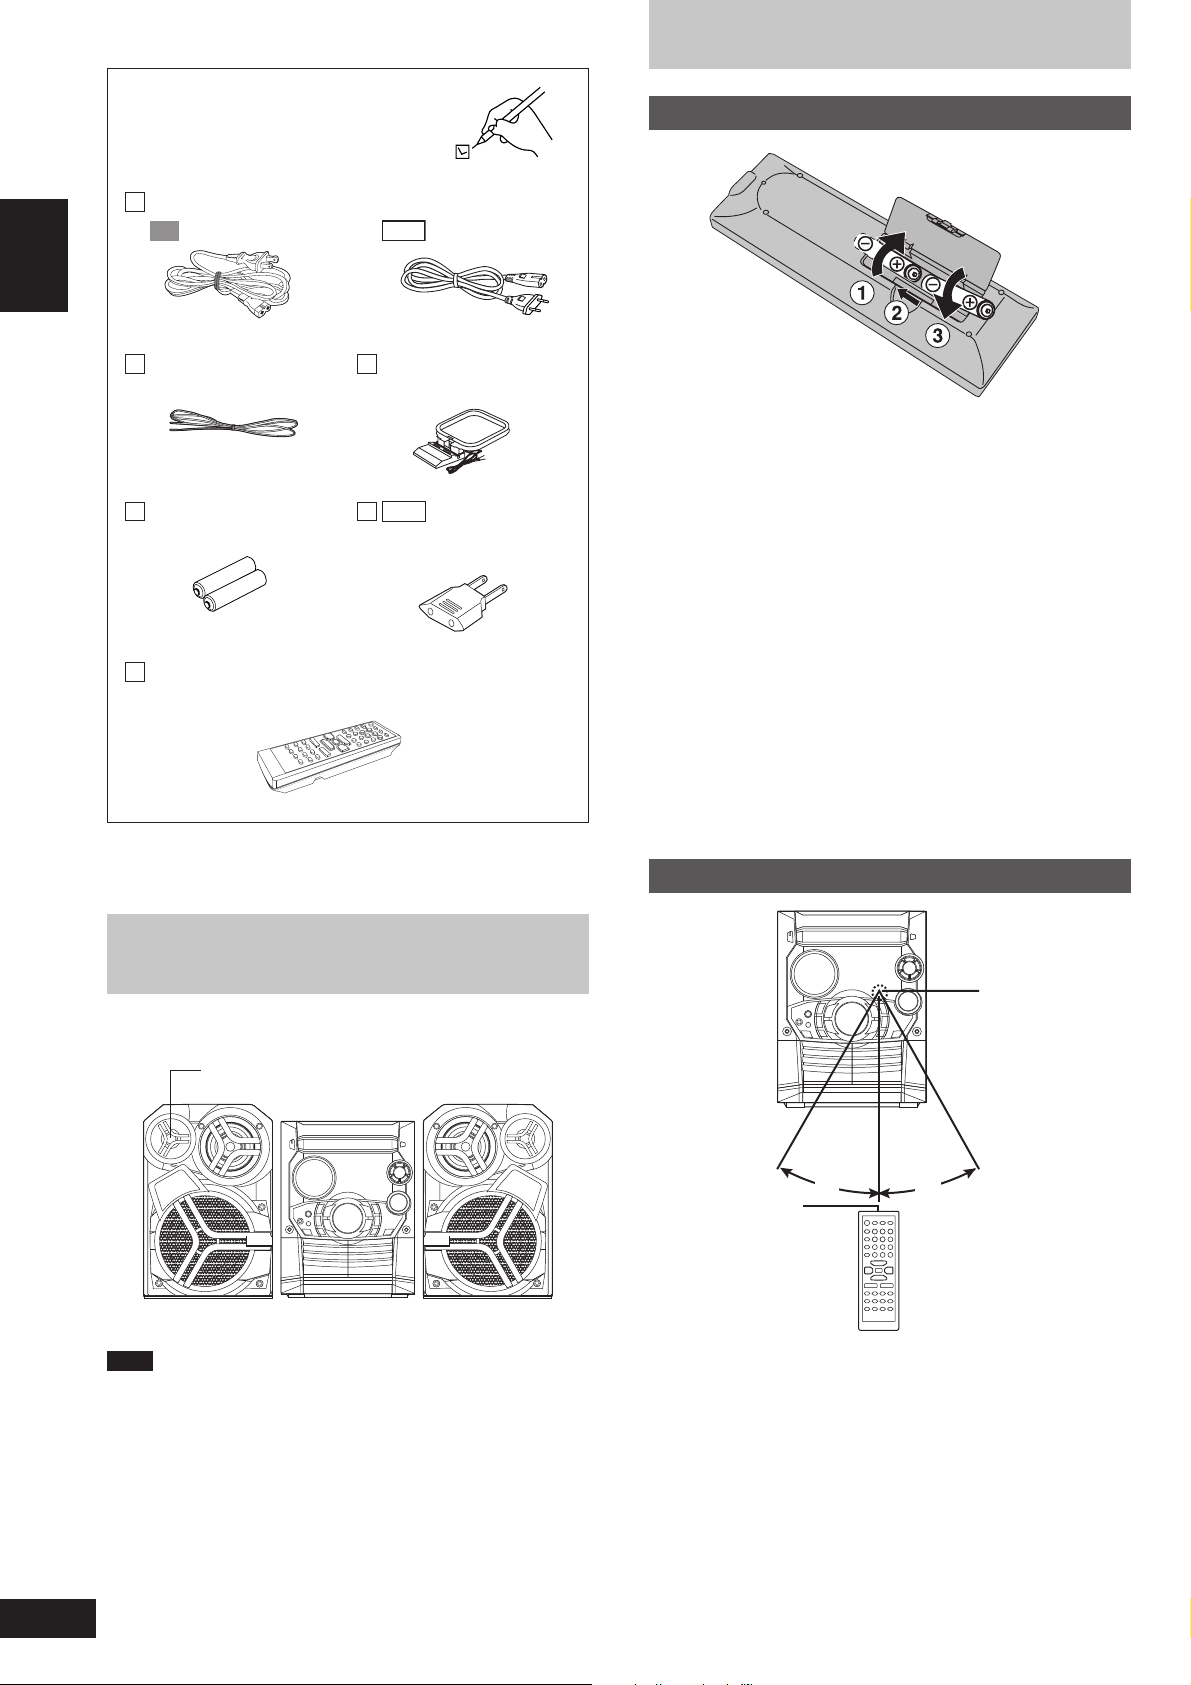
Supplied accessories
Please check and identity the
supplied accessories.
AC power supply cord ..................................... 1 pc.
PL
FM indoor
antenna ................
Batteries for
remote control .. 2 pcs.
Remote control transmitter .............................. 1 pc.
(N2QAHB000037)
1 pc.
GCP
AM loop
antenna ................
GCP
only
Power plug
adaptor ................ 1 pc.
1 pc.
Batteries
R6 / LR6, AA, UM-3
Insert so the poles (+ and –) match those in the remote control.
•
Do not use rechargeable type batteries.
•
Do not:
mix old and new batteries.
•
use different types at the same time.
•
heat or expose to flame.
•
take apart or short-circuit.
•
attempt to recharge alkaline or manganese batteries.
•
use batteries if the covering has been peeled off.
•
keep together with metallic objects such as necklaces.
•
Mishandling of batteries can cause electrolyte leakage which can
damage items the fluid contacts and may cause a fire.
If electrolyte leaks from the batteries, consult your dealer.
Wash thoroughly with water if electrolyte comes in contact with any
part of your body.
Placement of speakers
Place the speakers so that the super tweeter is on the outside.
Super tweeter
Remove if the remote control is not going to be used for a long
period of time. Store in a cool, dark place.
Replace if the unit does not respond to the remote control even
when held close to the front panel.
Use
Remote control
signal sensor
30
˚
About 7 meters in front of
the signal sensor
Transmission
window
30
˚
4
RQT7340
Note
• Keep your speakers at least 10 mm away from the system for
proper ventilation.
• These speakers do not have magnetic shielding. Do not place them
near televisions, personal computers or other devices easily
influenced by magnetism.
• You cannot take the front net off the speakers.
Aim at the sensor, avoiding obstacles, at a maximum range of 7
meters directly in front of the unit.
Keep the transmission window and the unit’s sensor free from dust.
•
Operation can be affected by strong light sources, such as direct
•
sunlight, and the glass doors on cabinets.
Do not:
put heavy objects on the remote control.
•
take the remote control apart.
•
spill liquids onto the remote control.
•
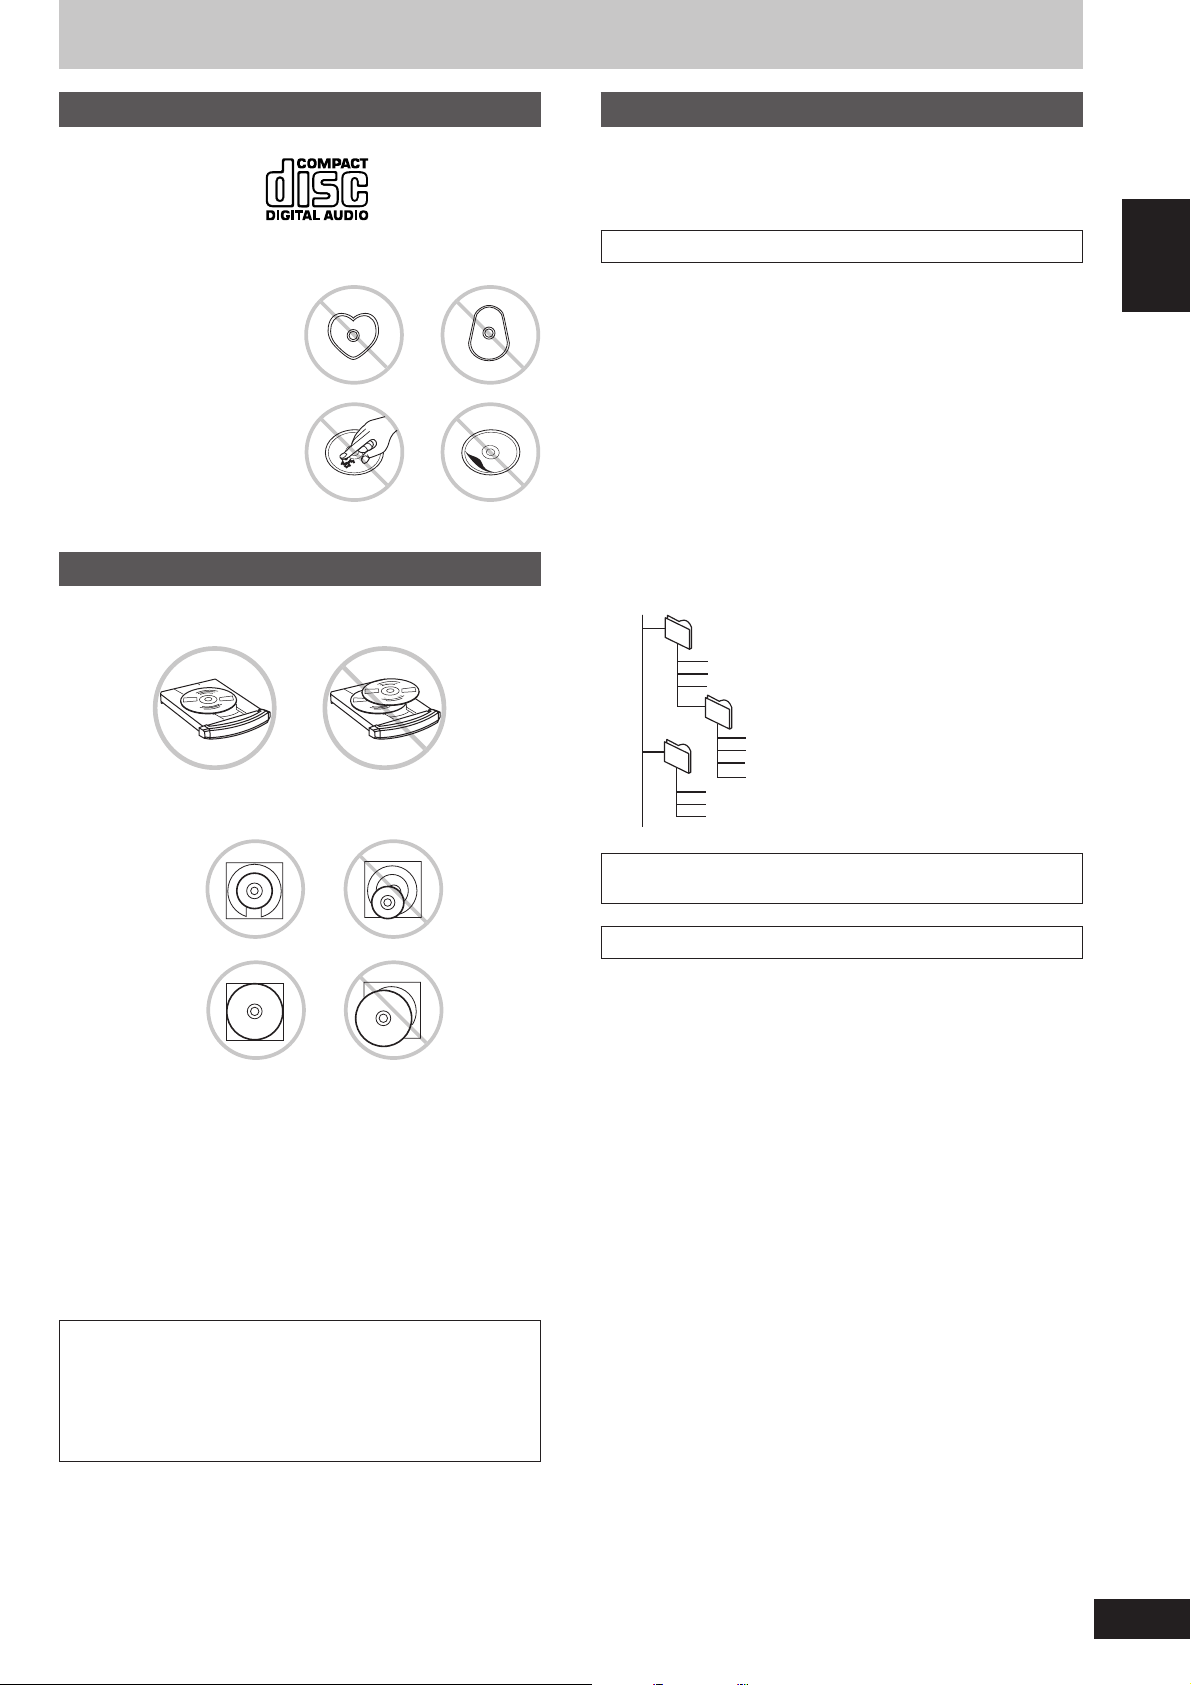
Disc information
CD selection
Choose CDs with this mark:
Do not:
use irregularly shaped CDs.
•
attach extra labels and stickers.
•
use CDs with labels and stickers
•
that are coming off or with
adhesive exuding from under
labels and stickers.
attach scratch proof covers or
•
any other kind of accessory.
write anything on the CD.
•
clean CDs with liquids. (Wipe
•
with a soft, dry cloth.)
use CDs printed with label
•
printers available on the market.
XXXX XXXX XXXXX XXXX XX
XXXX XXXX XXXXX
XXXX XXXX XXXXX
XXXX XXXX
To prevent damage
Always observe the following points:
Load only 1 CD on the tray.
•
Load CDs as shown in the figure.
•
An adaptor is not needed with 8 cm CDs (singles).
MP3 information
This unit can play MP3 files recorded on CD-R/RW with a computer.
Files are treated as tracks and folders are treated as albums.
This unit can access up to 999 tracks, 255 albums and 20 sessions.
When making MP3 files to play on this unit
Disc format
Discs must conform to ISO9660 level 1 or 2 (except for extended
x
x
x
x
x
x
x
x
x
x
x
x
x
x
x
x
x
x
x
x
x
x
x
x
x
x
x
x
x
x
x
x
x
x
x
x
x
x
x
x
x
x
x
x
x
x
x
x
x
x
x
x
x
x
formats).
File format
MP3 files must have the extension “.MP3” or “.mp3”.
To play in a certain order
Prefix the folder and file names with 3-digit numbers in the order you
want to play them.
Files may not be recorded in numbered order if the prefixes have
different numbers of digits. For example: 1????.mp3, 2????.mp3,
10????.mp3.
However, some writing software may also cause recording to occur in
a different order.
root
001
001.mp3
002.mp3
003.mp3
002
001.mp3
001.mp3
002.mp3
003.mp3
002.mp3
003.mp3
004.mp3
003
ENGLISH
X
X
X
X
X
X
X
X
X
X
X
X
X
X
X
X
X
X
X
X
X
XXXX XX XXXXX
XXXX XXXX XXXXX
X
XXX XXX XXXXX
XXXXXXXX XXXX
XXXXXX XXX XXXXXXX
X
X
X
X
X
X
XX
X
X
X
X
X
XXXX XX XXXXX
XXXX XX XXXXX
XXXX XXXX XXXXX
XXXX
X
X
XXXX
X
XXX
X
X
X
X
X
X
X
X
X
X
X
X
X
X
X
X
X
X
X
X
X
X
X
X
X
X
X
X
X
X
X
X
XXXX
X
XXXX
XXX
XXXXXX
XXX XXXXXXX
XXXX XX
XXXXX
XXXX XX
XXXXX
XXXX
XX XXXXX
XXXX XXXX
XXXXX
XXXX XXXX XXXXX
8 cm CD
12 cm CD
Set the system on a flat, level surface.
•
Always unload all CDs before moving the unit.
•
Do not:
set the unit on top of magazines, inclined surfaces, etc.
•
move the unit while a tray is opening/closing, or when loaded.
•
put anything except a CD in the tray.
•
use cleaning CDs or CDs which are badly warped or cracked.
•
disconnect the AC power supply cord from the household AC outlet
•
during disc changing operation.
This unit can play MP3 and CD-DA (digital audio) format audio
CD-R and CD-RW that have been finalized (a process that enables
CD-R/CD-RW players to play audio CD-R and CD-RW) upon
completion of recording.
It may not be able to play some CD-R or CD-RW due to the
condition of the recording.
MPEG Layer-3 audio decoding technology licensed from Fraunhofer
IIS and Thomson multimedia.
Limitations on MP3 play
This unit is not compatible with packet-write format.
•
When both MP3 and CD-DA data is recorded on the disc over a
•
number of sessions:
If the first session contains MP3 recordings, the unit will play
•
from the MP3 made in that session till the session before the first
CD-DA recordings.
If the first session contains CD-DA recordings, the unit will play
•
only the recordings made in that session. The subsequent
sessions will be ignored.
Some MP3 may not be played due to the condition of the disc or
•
recording.
Recordings will not necessarily be played in the order you recorded
•
them.
Lower case letters will be displayed as upper case.
•
5
RQT7340
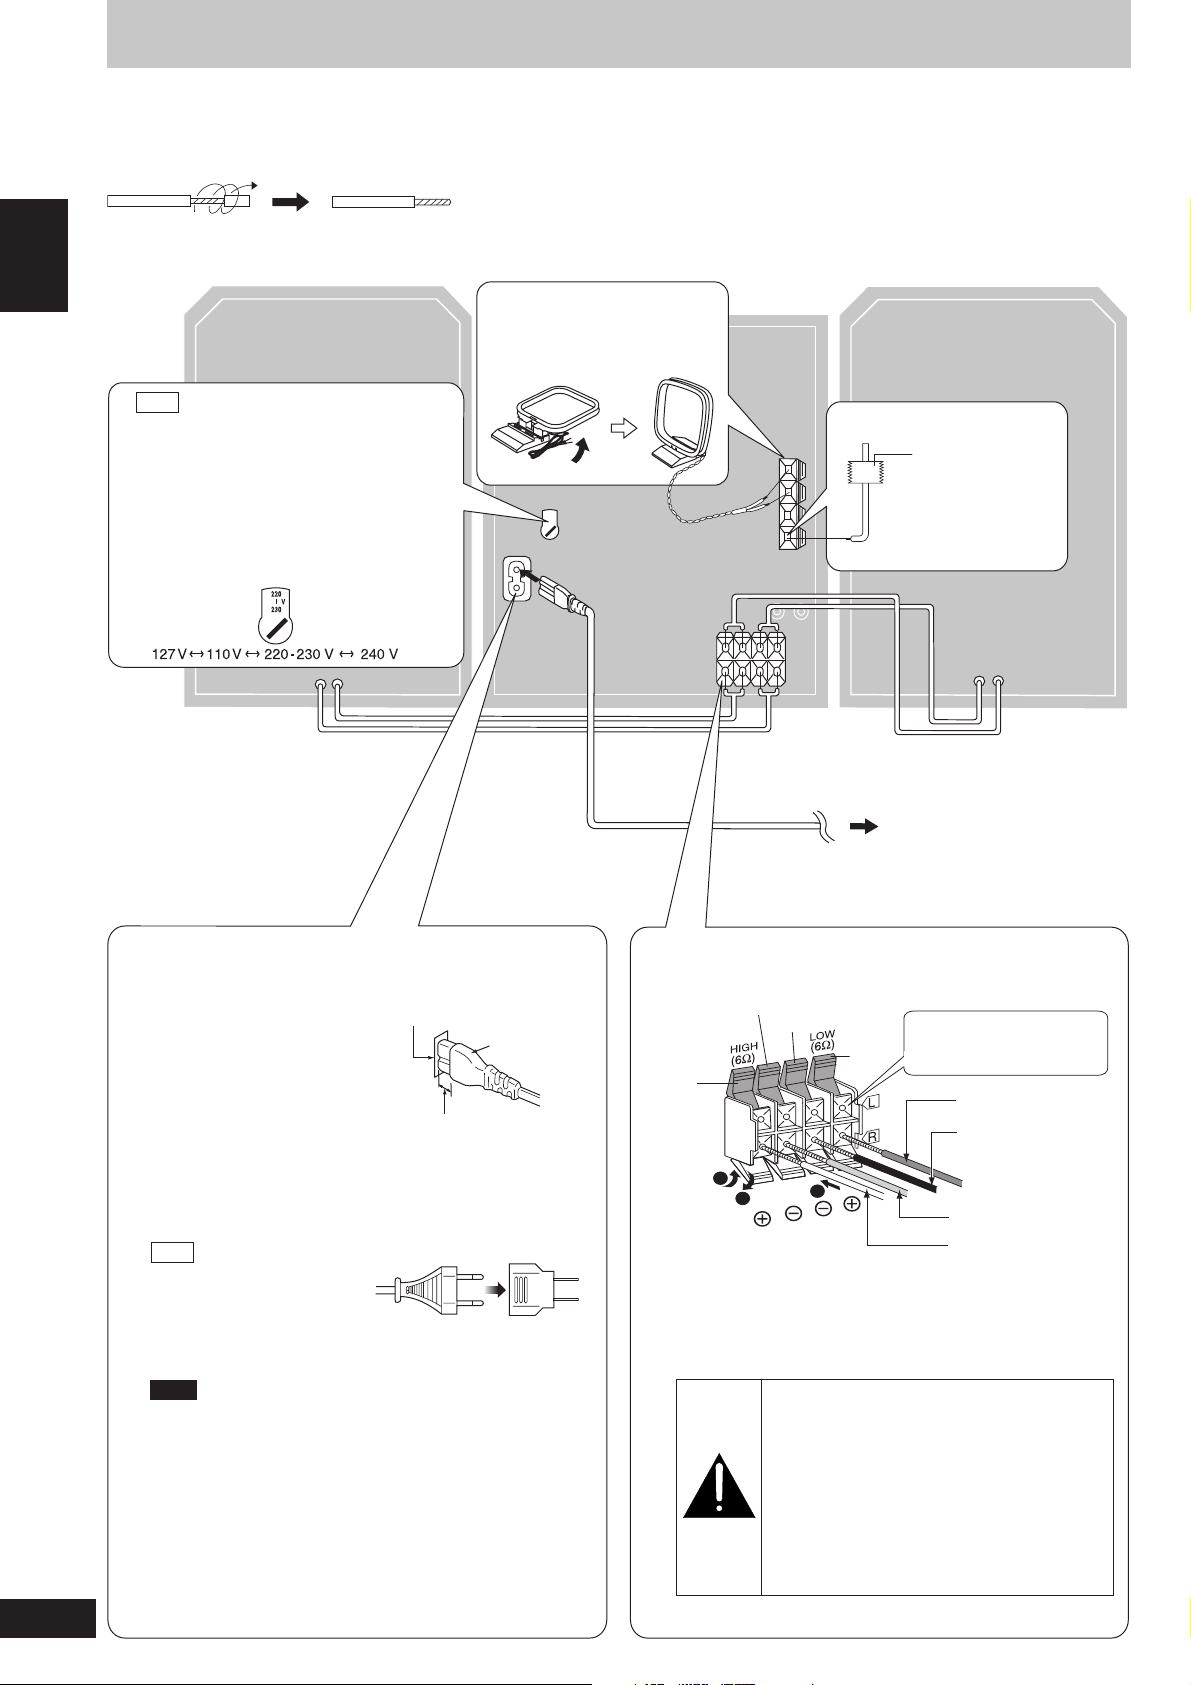
Set-up
Connect the AC power supply cord only after all other connections have been made.
Preparation
Twist and pull off the vinyl tip of the antenna wires and speaker cords.
ENGLISH
2
AM loop antenna
Stand the antenna up
(R)
GCP
4
only
Voltage selector
Use a flat-head screwdriver to turn the voltage
selector on the rear panel to the appropriate
position for the area in which this system is
used. If the power supply in your area is
115 V or 120 V, please set the voltage
selector as follows:
For 115 V: Set to 110 V.
•
For 120 V: Set to 127 V.
•
VOLT ADJ
on its base.
(L)
1
FM indoor antenna
Adhesive tape
Affix where
reception is best.
5 AC power supply cord
Insertion of connector
Even when the connector
is perfectly inserted,
depending on the type of
inlet used, the front part
of the connector may jut
out as shown in the
drawing.
However there is no
problem using the unit.
GCP
only
If the power plug does not fit
your socket, use the power
plug adaptor (included).
Note
The included AC power supply cord is for use with this unit
only. Do not use it with other equipment.
For your reference
Information you enter into the unit’s memory, except for time,
remains intact for up to a week after the AC power supply cord
is disconnected.
Appliance inlet
Connector
Approx. 6 mm
To household
AC outlet
3 Speaker cords
Blue
Black
Red
Grey
3
1
Use only the supplied speakers.
The combination of the main unit and speakers provide the best
sound. Using other speakers can damage the unit and sound
quality will be negatively affected.
2
Caution
Use the speakers only with the
•
recommended system. Failure to do so
may lead to damage to the amplifier and/
or the speakers, and may result in the risk
of fire. Consult a qualified service person
if damage has occurred or if you
experience a sudden change in
performance.
Do not attach these speakers to walls or
•
ceilings.
Connect the left (L)
side in the same way.
Red (+)
Black (–)
Blue (–)
Grey (+)
6
RQT7340
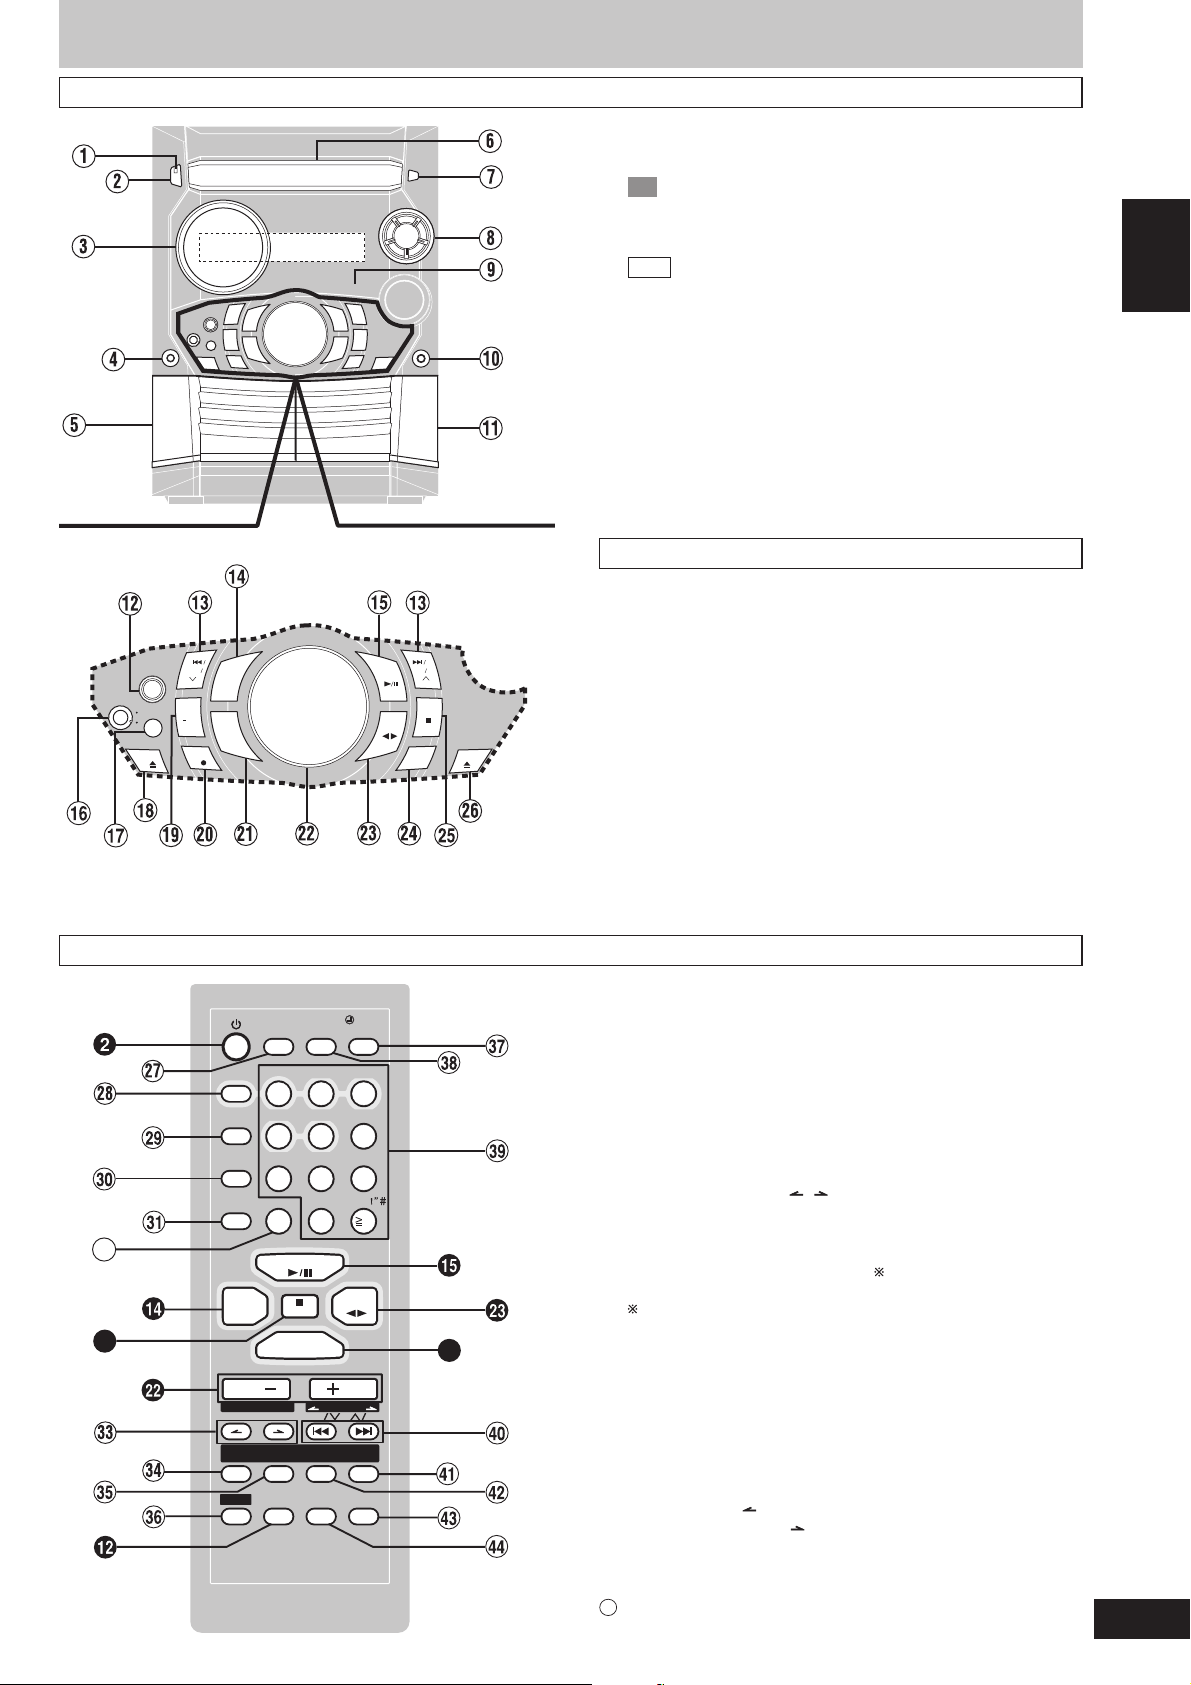
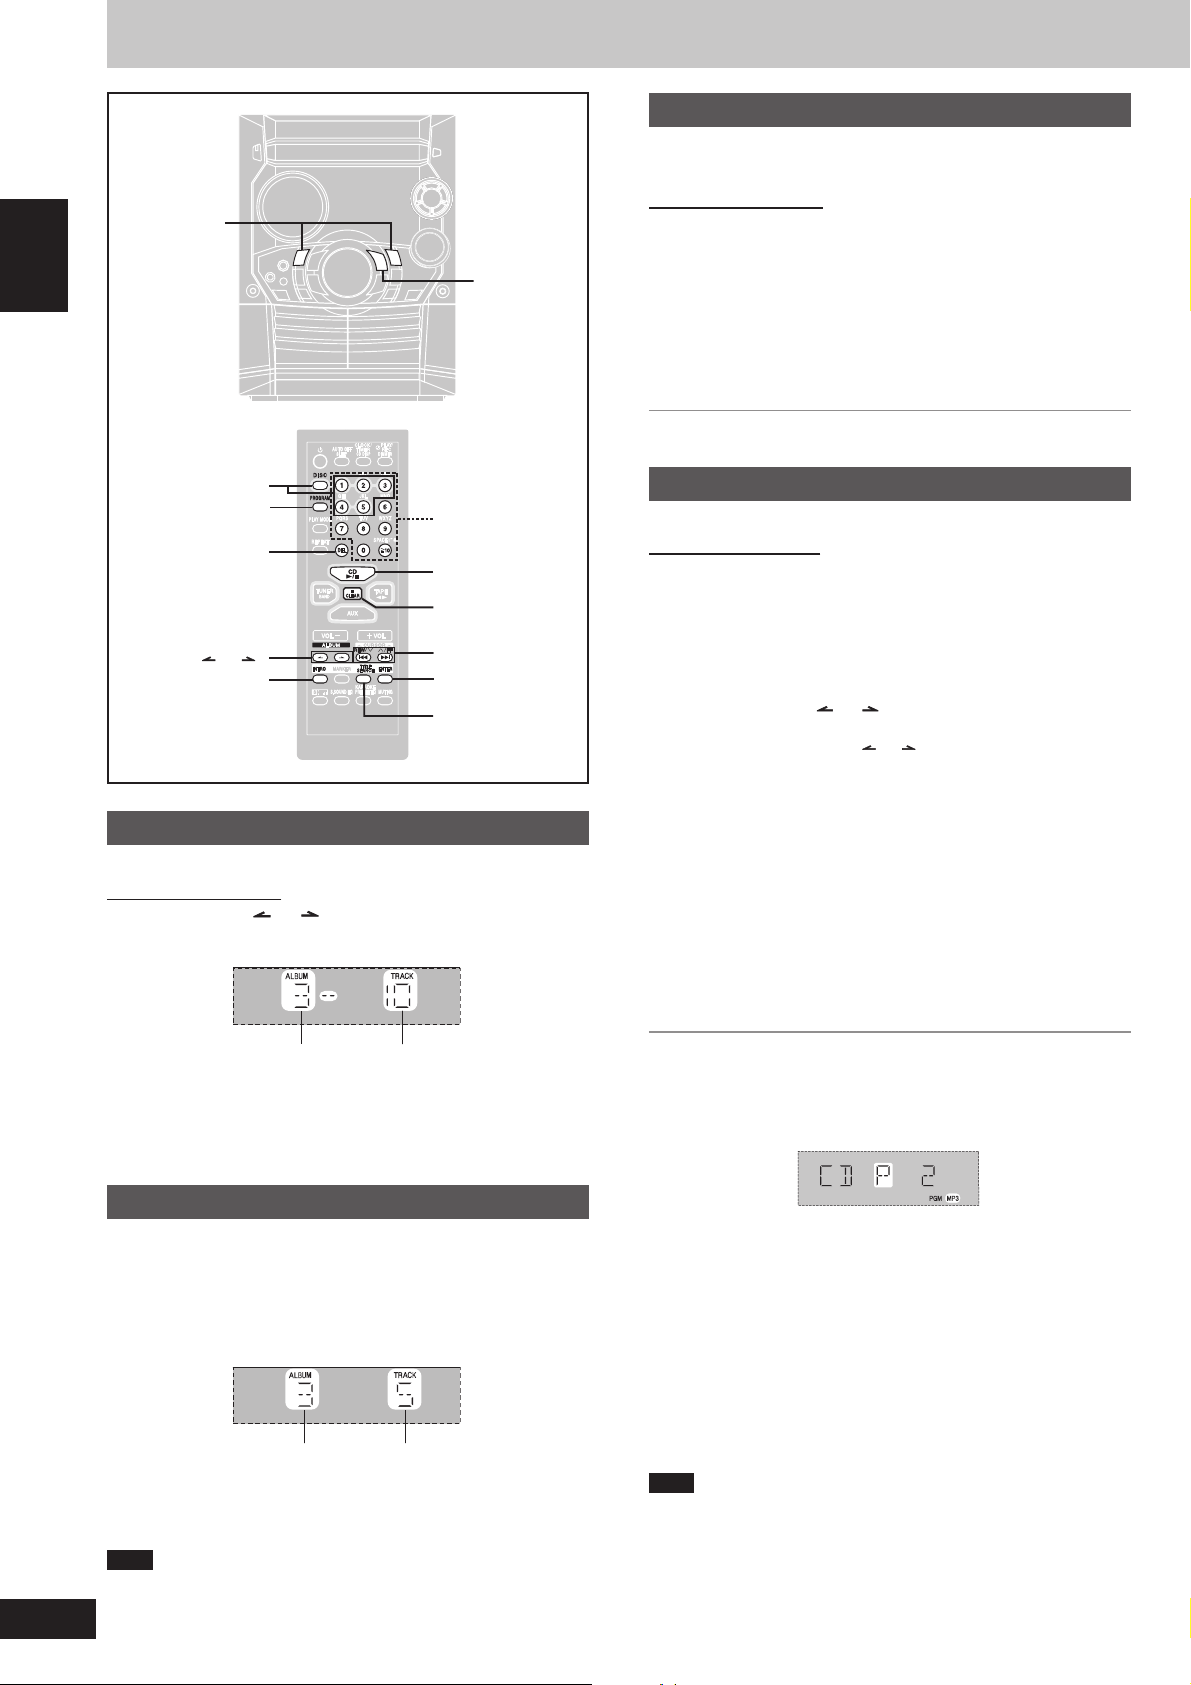
Front panel controls
VOL
VOL
SH I
CL OCK
T IME R
RE C
O OFF
IN TRO
UND E Q
T EQ
ING
EN TER
MA RKE R
TI TLE
SE ARCH
PR OG
AM
RE P
AT
AY MO DE
DI SC
SP AC E
AB C
DE F
GH I
TU V
W XY
PQ RS
JK L
MN O
EE P
CD DI SP
DI MME R
BUM
CUR SOR
DE L
TAPE
CD
AUX
LE AR
TUNER
ND
K AR A OK E
Main unit
MIC VOL
SUPER SOUND EQ
MAX
PRESET EQ
MIN
DECK 1
DISP
DEMO
TUNER
BAND
AUX
REC
1 AC supply indicator [AC IN]
This indicator lights when the unit is connected to the AC mains
supply.
2
PL
Standby/on switch [
ff
f/I, POWER]
ff
Press to switch the unit from on to standby mode or vice versa. In
standby mode, the unit is still consuming a small amount of power.
GCP
Standby/on switch [
ff
f/I]
ff
ENGLISH
Press to switch the unit from on to standby mode or vice versa. In
standby mode, the unit is still consuming a small amount of power.
3 Display
4 Microphone jack [MIC] ........................................................... 15
5 Deck 1 cassette holder ......................................................... 14
6 Disc tray
7 CD tray open/close button [c, OPEN/CLOSE] ...................... 8
8 CD direct play buttons [1 ~ 5] ................................................ 8
9 Remote control signal sensor ................................................ 4
! Headphones jack [PHONES] ................................................ 17
!
Deck 2 cassette holder ......................................................... 14
Center console
# Super sound EQ button [SUPER SOUND EQ] .................... 15
$ CD skip/search, tape fast-forward/rewind,
tune/preset channel select, time adjust buttons
[g/REW/3, f/FF/4] ................................ 8-11, 13, 14, 17
FFREW
CD
STOP
TAPE
DECK
DECK 2
1/2
% Tuner/band select button [TUNER, BAND] .......................... 13
& CD play/pause button [:/ J, CD] ........................................... 8
( Microphone volume control [MIC VOL] ............................... 15
) Preset EQ select button [PRESET EQ] ................................. 15
~ Deck 1 open button [c, DECK 1] ......................................... 14
+ Display, demonstration button [DISP, –DEMO] ........ 8, 12, 17
, Record button [a, REC] ......................................................... 14
- AUX button [AUX] ..................................................................17
. Volume control [VOLUME DOWN, UP] .................................15
/ Tape play/direction button [;:, TAPE] .............................. 14
: Deck select button [DECK 1/2] .............................................. 14
; Stop/program clear button [L, STOP] ........................ 8-10, 14
< Deck 2 open button [c, DECK 2] ......................................... 14
Remote control
32
25
DISC
PROG
R AM
PL AY MO DE
REP
E AT
TUNER
BAND
VOL
AL BUM
INTRO
SHI
FT
CLOCK
AU TO OFF
TIMER
SL EEP
CD DISP
ABC
S.S.SOSOUND EQ
2
1
GHI
JKL
5
4
TUV
789
DEL
0
CD
CLEAR
AUX
CURSOR
RE W FF
TITLE
MARKER
SEARCH
KARAOKE
PRERESET EQ
/
SPACE
TAP E
VOL
/
PLPLAY
REC
DIMMER
DEF
3
MNO
6
WXY
ZPQRS
10
ENTER
MUTUTING
21
Buttons such as 2 function in exactly the same way as the
buttons on the main unit.
= Sleep timer + Auto off button [SLEEP, AUTO OFF] ...... 17, 18
> Disc button [DISC] .................................................................. 8
? Program button [PROGRAM] ..................................... 9, 10, 13
@ Play mode select button [PLAY MODE] .................... 8, 9, 13, 14
Use this for selecting CD play mode, tune mode, FM mode, AM
beat proof, tape reverse mode and deck select.
[ Repeat button [REPEAT] ........................................................ 8
\ Delete button [DEL] ..................................................... 9, 10, 12
] Album skip buttons [ , , ALBUM] .................................... 9
^ Intro button [INTRO] ............................................................. 10
_ Marker memory/recall button [MARKER] ............................ 13
{ Shift button [SHIFT]
To use functions labeled in orange :
While pressing [SHIFT], press the corresponding button.
For buttons [AUTO OFF], [CLOCK/TIMER], [rPLAY/REC] and
[KARAOKE]
| Dimmer + Play timer/record timer button
[DIMMER, rPLAY/REC] ...................................................17, 18
} CD display + Clock/timer button
[CD DISP, CLOCK/TIMER] .................................... 8, 12, 17, 18
V Numbered, character buttons
XX
[
X
10, 1–9, 0, A-Z, SPACE!”#] ................................. 8-10, 12, 13
XX
0 CD skip/search, tape fast-forward/rewind,
tune/preset channel select, time adjust, cursor buttons
[g, REW/3, CURSOR,
f, 4/FF, CURSOR ] ............................................ 8-14, 17
1 Enter button [ENTER] ...................................................... 10, 11
2 Title search mode select button [TITLE SEARCH] .................11
3 Muting button [MUTING] ....................................................... 17
44
Preset EQ select + karaoke button
[PRESET EQ, KARAOKE] ..................................................... 15
7
RQT7340

ENGLISH
CDs
g
/REW/3,
f
/FF/4
DISP, –DEMO
DISC 1-5
PROGRAM
PLAY MODE
REPEAT
ALBUM ( or )
DEL
c, OPEN/CLOSE
CD direct
play 1~5
L, STOP
-/J, CD
CD DISP
Numbered
buttons
-/J, CD
L, CLEAR
g
, REW/3,
f
, 4/FF
Note
During 1-RANDOM or A-RANDOM play (A see below), you cannot
•
skip to tracks already played.
During program play (A page 9), 1-RANDOM or A-RANDOM play,
•
you can search only within the track.
You cannot use search function for MP3 files.
•
Always stop the changer before loading or changing CDs. You
•
cannot change CDs while a disc is playing.
CD display
You can display the remaining play time of the current track.
Press [DISP, –DEMO] (remote control: Press [CD DISP])
during play or pause.
Every time you press the button:
Elapsed play time ↔ Remaining play time
Note
When track number 25 or greater is playing, remaining play time
display shows “– –:– –”.
Repeat play
Remote control only
Press [REPEAT] during play.
“ ” is displayed.
To cancel repeat play
Press [REPEAT] to clear “ ” .
To listen to specific CDs and tracks
(CD Play Mode function)
8
RQT7340
Basic play
1 Press [c, OPEN/CLOSE] to open the tray.
The unit comes on.
2 Set a CD in the tray. (Label must face upward.)
To continue loading CDs in the other trays
Press [1]–[5] to select the required tray and press [c, OPEN/
CLOSE] to open the tray.
Press [c, OPEN/CLOSE] to close the tray.
3 Press [1]–[5] to play your desired disc.
Current disc indicator
1
2
5
3
4
(Alternatively, you can press [:/J, CD] if the current disc is your
desired CD.)
The track number and its elapsed playing time are shown.
Use the CD Play Mode function’s ALL-DISC mode to play CDs in
succession. (A see right)
To stop the disc play
Press [L, STOP].
The total number of tracks and total playing time are shown.
One touch play
During standby mode and when a CD is loaded, press [:/J, CD] or
[1] – [5].
The unit comes on and play starts.
To pause Press [:/J, CD] during play.
To search forward/ Hold down [g/REW/3] (backward)
backward or [f/FF/4] (forward) during play or pause.
To skip forward/ Press [g/REW/3] (backward) or
backward [f/FF/4] (forward) during play or pause.
Press again to resume play.
Remote control only
Preparation: Press [:/J, CD] and then [L, CLEAR].
1 Press [PLAY MODE] to select the desired mode.
Every time you press the button:
ALL-DISC 1-RANDOM1-SONG
1-DISC
ALL-DISC: Plays all loaded discs in succession from the
selected disc to the final disc .
1-SONG: Plays one selected track on the selected disc.
1-RANDOM: Plays one selected disc in random order.
A-RANDOM: Plays all loaded discs in random order.
1-DISC: Plays one selected disc.
(The original display is restored in about 2 seconds.)
Proceed to step 4 when you selected A-RANDOM in step 1.
A-RANDOM
2 Press [DISC] and (within 10 seconds) [1] –[5] to select the
disc.
The CD starts.
3 Only when you selected “1-SONG” in step 1
Select the track with the numbered buttons.
To select a track 10 or over, press [X10] then the two digits.
Play starts from the selected track.
4 Only when you selected “A-RANDOM” in step 1
Press [:/J, CD] to start play.
To stop play
Press [L, CLEAR].
When playback ends
The current play mode will be retained in memory until it is changed
even if the unit is turned off.
Final disc
For example, if play starts from disc 4, disc 3 will be the “final disc”.
Order of progression: Disc 4z5z1z2z3
Note
You can use repeat mode with CD Play Mode function.
•
You cannot use program mode together with CD Play Mode function.
•
CDs
How discs with MP3 differ from CDs
Starting play from a specific track
Remote control only
1 Press [DISC] and (within 10 seconds) [1] –[5] to select the
disc.
2 Select the track with the numbered buttons.
To select track 10 or over, press [X10] then the two digits.
Play starts from the selected track.
Note
You cannot use this function with 1-RANDOM or A-RANDOM mode.
Program play
You can program up to 24 tracks.
Remote control only
::
Preparation: Press [
1
Press [PROGRAM].
“PGM” appears.
2
Press [DISC] and (within 10 seconds) [1]–[5] to select the
disc.
3
Select the tracks with the numbered buttons.
To select track 10 or over, press [X10] then the two digits.
Repeat steps 2 and 3 to program other tracks.
4
Press [:/J, CD] to start play.
To exit program mode
Press [PROGRAM] in the stop mode. (You can replay your program
by pressing [PROGRAM] then [:/J, CD].)
You can do the following while “P” is displayed
JJ
:/
J, CD] and then [L, CLEAR].
::
JJ
CD Play Mode function for MP3
Remote control only
Preparation: Press [:/J, CD] and then [ L, CLEAR].
1 Press [PLAY MODE] to select the desired mode.
Every time you press the button:
ALL-DISC 1-ALBUM1-SONG
1-DISC
ALL-DISC: Plays all loaded discs in succession from the
selected disc to the final disc .
1-SONG: Plays one selected track on the selected disc.
1-ALBUM: Plays one selected album on the selected disc.
1-DISC: Plays one selected disc.
(The original display is restored in about 2 seconds.)
2 Press [DISC] and (within 10 seconds) [1] –[5] to select the
disc.
The CD starts.
3 When you selected “1-ALBUM” or “1-SONG” in step 1
Press [ALBUM ( or )] to select the album.
Play starts from the first track of the selected album.
4 When you selected “1-SONG” in step 1
Press the numbered buttons to select the track in the
current album.
To select track 10 or over, press [X10] once then the two digits.
To select track 100 or over, press [X10] twice then the three digits.
Play starts from the selected track.
To stop play
Press [L, CLEAR].
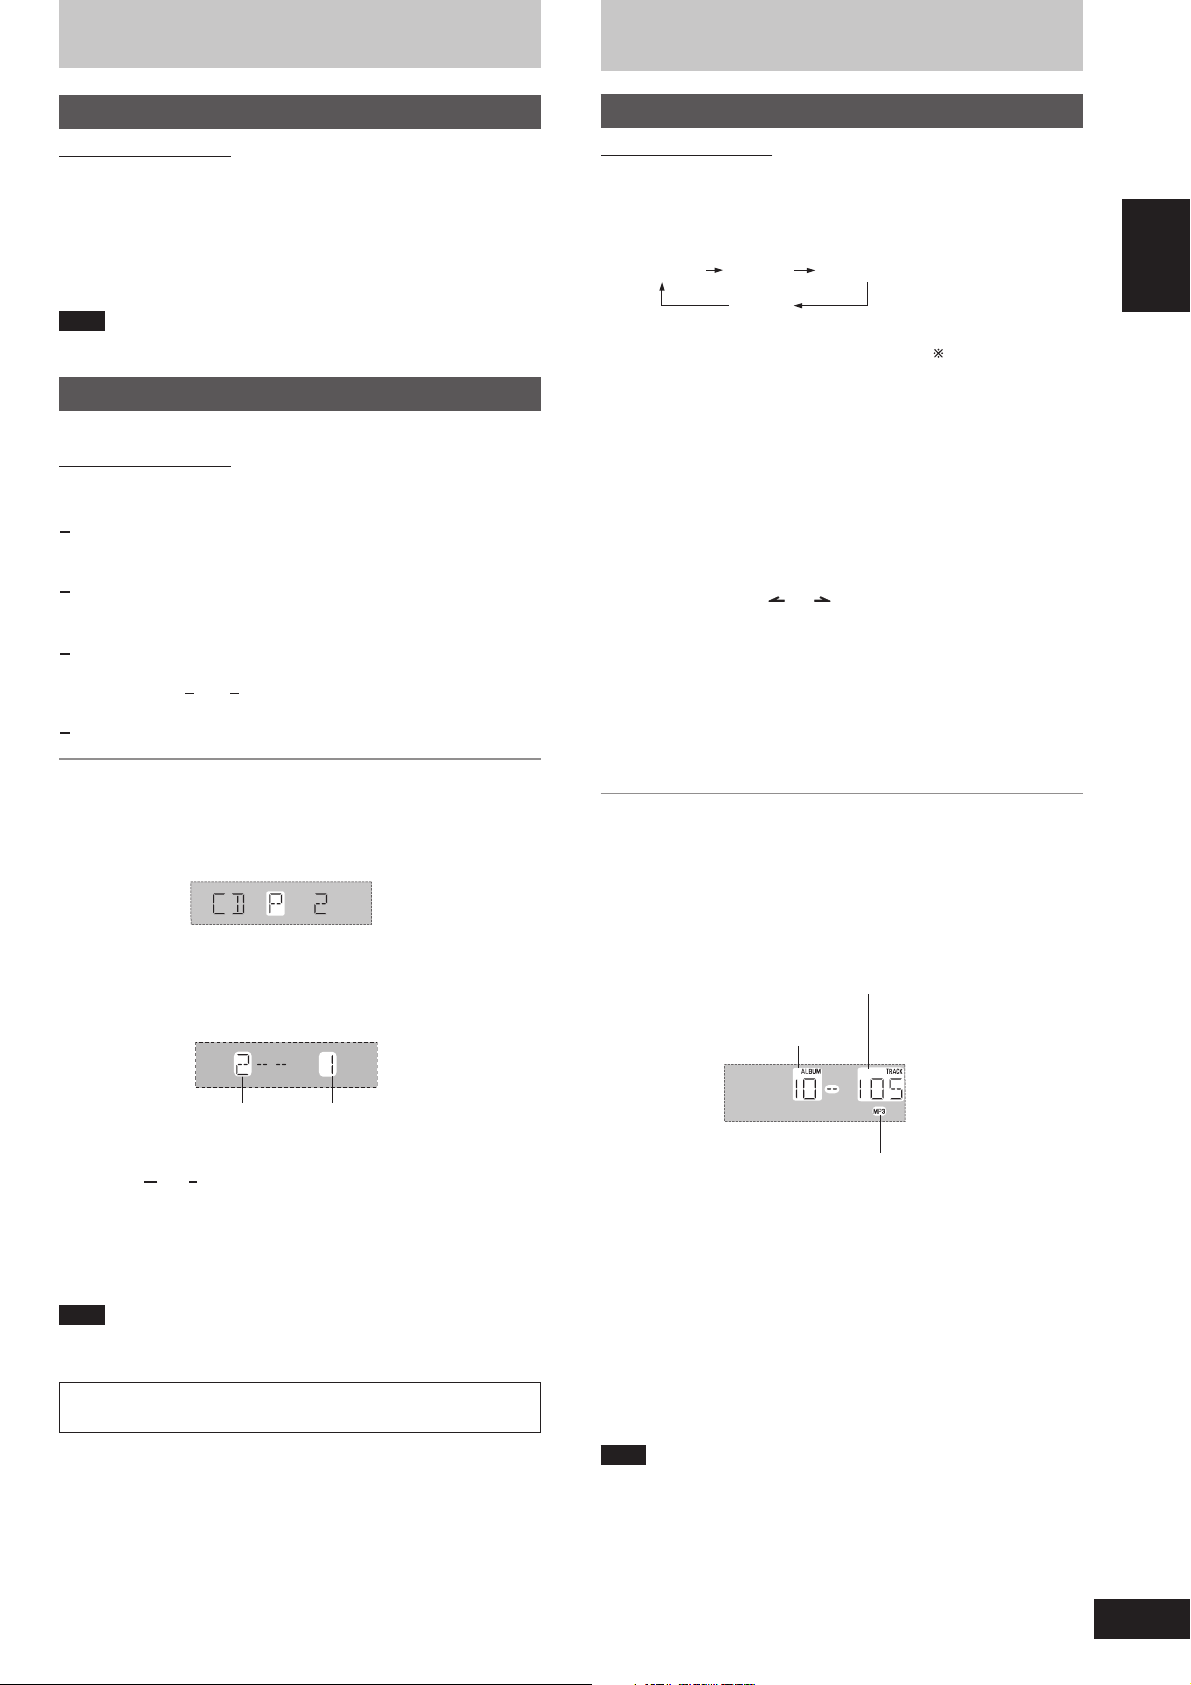
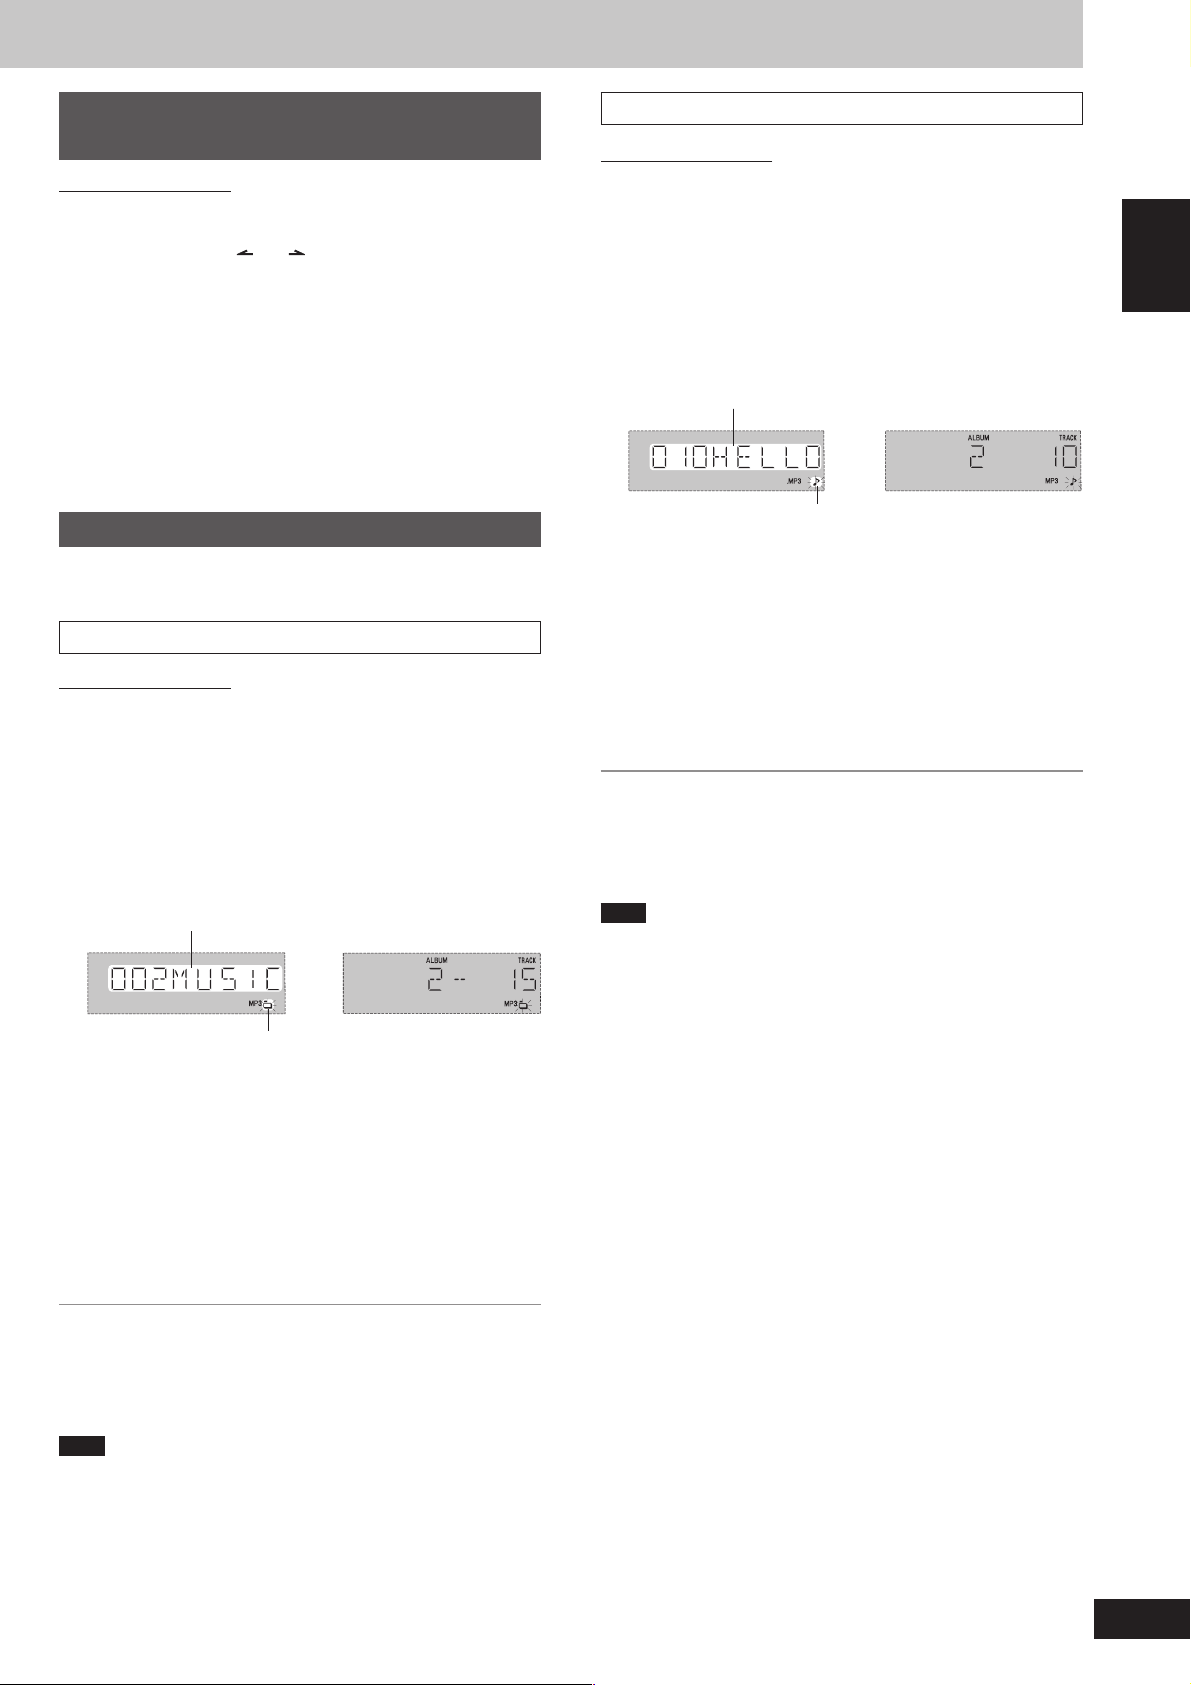
L Display when in the stop mode (example)
File format indicator
“MP3”: Indicates the disc contains MP3 files
ENGLISH
To check program contents
•
Press [g, REW/3] or [f, 4/FF].
Every time you press the button, the track number and program
order are displayed.
Track number Program order
To add to the program
•
Do steps 2 and 3.
To clear the last track
•
Press [DEL].
To clear all tracks
•
Press [L, CLEAR].
While “CLEAR ALL” is blinking, press the button again to clear all tracks.
Note
You can use repeat mode with program play.
•
You cannot program CD-DA together with MP3 tracks.
•
To mark a track
See page 13.
Total number of tracks
(on the current disc)
Total number of albums
(on the current disc)
File format indicator
When playback ends
The current play mode will be retained in memory until it is changed
even if the unit is turned off.
\
Final disc
For example, if play starts from disc 4, disc 3 will be the “final disc”.
Order of progression: Disc 4z5z1z2z3
L When “NOT MP3/ERROR1” appears on the display
An unsupported MP3 format is being played. The unit will skip that
track and play the next one.
Note
You can use repeat mode (A page 8) with CD Play Mode function.
•
You cannot use program mode together with CD Play Mode function.
•
9
RQT7340
ENGLISH
How discs with MP3 differ from CDs
g
/REW/3,
f
/FF/4
-/J, CD
INTRO function (Album scan)
You can find an album by listening to the first track of all albums in the
current disc for 10 seconds each.
Remote control only
Preparation: Press [:/J, CD] and then [L, CLEAR].
1 Press [INTRO].
INTRO function starts.
(INTRO function is cancelled after playing the first track in the
last album on the current disc.)
DISC 1-5
PROGRAM
DEL
ALBUM ( or )
INTRO
Numbered
buttons
-/J, CD
L, CLEAR
g
, REW/3,
f
, 4/FF
ENTER
TITLE SEARCH
Album skip play
During play or stop
Remote control only
Press [ALBUM ( or )] to select the desired album
When selecting in the stop mode:
2 While your desired album is playing, press [
Play continues from the first track of the album.
To stop during the process, press [INTRO] or [L, CLEAR].
::
:/J, CD].
::
Program play for MP3
You can program up to 24 tracks.
Remote control only
Preparation:
1. Press [DISC] and (within 10 seconds) [1]–[5] to select the disc.
2. Press [L, CLEAR].
1 Press [PROGRAM].
“PGM” appears.
2 Press [ALBUM ( or )] to select the album.
To select an album directly, press the numbered buttons
after pressing [ALBUM ( or )].
To select album 10 or over, press [>10] once then the two digits.
To select album 100 or over, press [>10] twice then the three digits.
3 Press [ g, REW/3] or [f, 4/FF] to select the track.
To select a track directly, press the numbered buttons after
pressing [ g, REW/3] or [f, 4/FF].
To select track 10 or over, press [>10] once then the two digits.
.
To select track 100 or over, press [>10] twice then the three digits.
4 Press [ENTER].
Repeat steps 2~4 to program other tracks.
10
RQT7340
Current album
Press [:/J, CD] to start play.
Play starts from the first track of the selected album.
To play from another track, refer to “Track skip play” below.
Number of tracks
in current album
Track skip play
During play or stop
Press [g/REW/3] or [f/FF/4] (remote control:
Press [g, REW/3] or [f, 4/FF]) to select the
desired track.
When selecting in the stop mode:
Current album Current track
Press [:/J, CD] to start play.
Play starts from the selected track.
To play from another album, refer to “Album skip play” above.
Note
During 1-ALBUM mode, track skipping can only be done within the
current album.
5 Press [:/J, CD] to start play.
To exit program mode
Press [PROGRAM] in the stop mode. (You can replay your program
by pressing [PROGRAM] then [:/J, CD].)
You can do the following while “P” is displayed
To check program contents
•
Press [g, REW/3] or [f, 4/FF].
Every time you press the button, program order is displayed then
album number and track number.
To add to the program
•
Do steps 2~4.
To clear the last track
•
Press [DEL].
To clear all tracks
•
Press [L, CLEAR].
While “CLEAR ALL” is blinking, press the button again to clear all
tracks.
Note
You can use repeat mode (A page 8) with program play.
•
You cannot program more than one CD for MP3.
•
You cannot program CD-DA together with MP3 tracks.
•
The program memory is cleared when you change a disc or open
•
the CD tray.
Starting play from a desired track in a
desired album
Remote control only
Preparation: Press [:/J, CD] and then [ L, CLEAR].
1 Press [ALBUM ( or )] and then the numbered
buttons to select the album.
To select album 10 or over, press [>10] once then the two digits.
To select album 100 or over, press [>10] twice then the three
digits.
Play starts from the first track of the selected album.
2 Press the numbered buttons to select the track in the
current album.
To select track 10 or over, press [>10] once then the two digits.
To select track 100 or over, press [>10] twice then the three digits.
Play starts from the selected track.
rack title search
T
Remote control only
Preparation: Press [:/J, CD] and then [L, CLEAR].
1 Press [TITLE SEARCH]
twice.
2 Enter the characters of the keyword for the track title.
(A page 12: “Entering characters”)
3 Press [ENTER].
Track title search starts.
Matched track title
=
ENGLISH
Title search function
You can search for your desired album/track with its keyword (part of
the title).
Album title search
Remote control only
Preparation: Press [:/J, CD] and then [L, CLEAR].
1 Press [TITLE SEARCH]
once.
2 Enter the characters of the keyword for the album
title. (A page 12: “Entering characters”)
3 Press [ENTER].
Album title search starts.
Matched album title
=
Blinks to indicate album title
search mode
Blinks to indicate track title
search mode
To show the matched track title again
Press [ENTER].
To show the next/previous track title search result
Press [f, 4/FF] (next) or [ g, REW/3]
Press [:/J, CD] to start play from the track found.
(Title search mode is cancelled.)
To cancel partway through
Press [L, CLEAR].
When there is no match for the searched keyword, the display shows
“NOT FOUND”.
Note
You cannot use title search function in program mode.
(previous).
To show the matched album title again
Press [ENTER].
To show the next/previous album title search result
Press [f, 4/FF] (next) or [ g, REW/3]
Press [:/J, CD] to start play from the album found.
Play starts from the first track of the album.
(Title search mode is cancelled.)
To cancel partway through
Press [L, CLEAR].
When there is no match for the searched keyword, the display shows
“NOT FOUND”.
Note
You cannot use title search function in program mode.
(previous)
.
(Continued on next page)
11
RQT7340
ENGLISH
How discs with MP3 differ from CDs
g
/REW/3,
f
/FF/4
DISP, –DEMO
TUNER, BAND
L Editing keywords
To move the cursor
Press [CURSOR ( or )].
Deleting a character
1. Move the cursor over the character to be deleted.
2. Press [DEL].
Editing a character
1. Move the cursor over the character to be edited.
2. Enter the correct character.
CD display for MP3
CD DISP
PROGRAM
PLAY MODE
DEL
TUNER, BAND
MARKER
Numbered
buttons
CURSOR ( or )
g
, REW/3,
f
, 4/FF
Title search function
Entering characters
You can enter keyword of up to 8 characters for album/track title
search. You can only enter upper case letters but the unit also searches
for lower case.
Remote control only
11
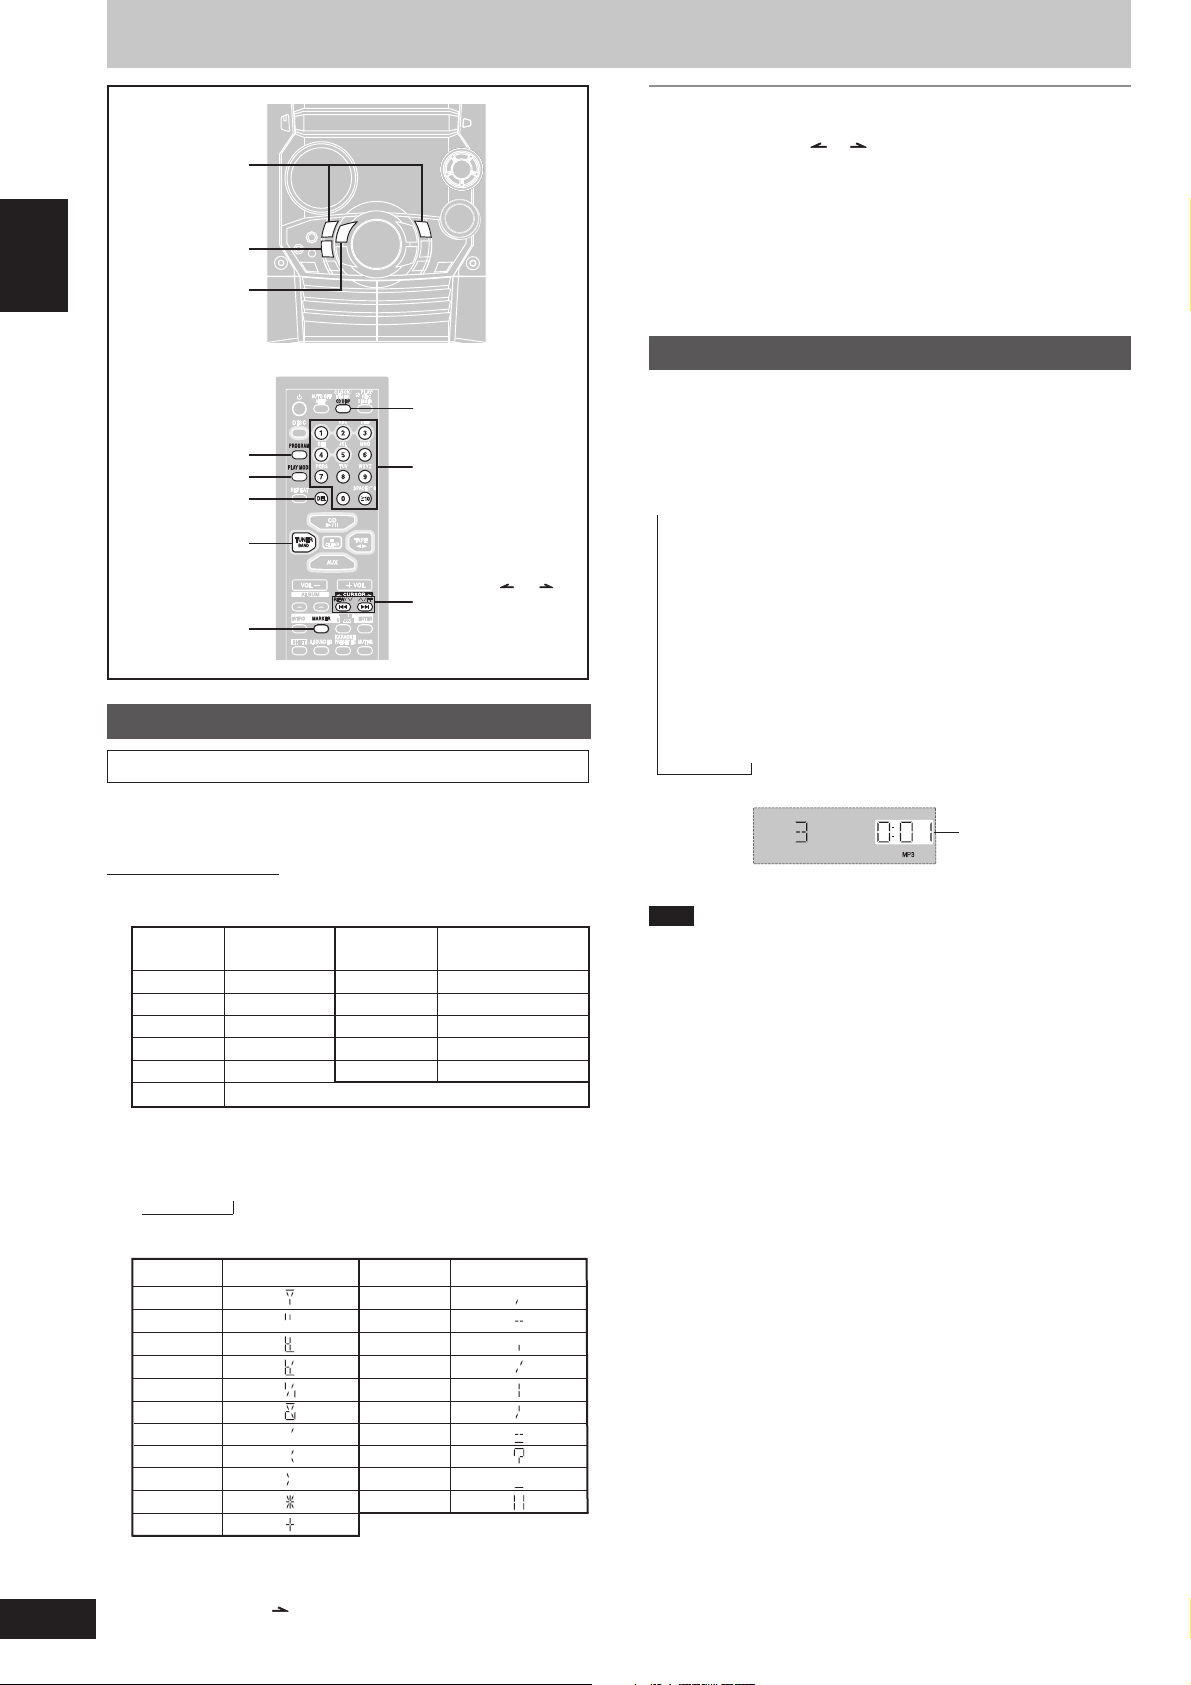
1 Press the numbered button to select the required character.
11
Characters allocated to the numbered buttons:
Numbered Characters Numbered Characters
buttons buttons
1 1 6 M N O 6
2 A B C 2 7 P Q R S 7
3 D E F 3 8 T U V 8
4 G H I 4 9 W X Y Z 9
5 J K L 5 0 0
>10
You can search for “ < ” or “ > ” by entering “ ( ” or “ ) ”.
The characters change each time a numbered button is pressed.
For example, every time you press [2]:
A → B → C → 2
→
For the special characters, they will be displayed as below:
space
!”#$ %&’()∗+,– ./:;= ?_ `
During play or pause
Press [DISP, –DEMO] (remote control: Press [CD DISP]) to
select a desired CD display mode.
Every time you press the button:
→
a Remaining play time
b Album title
c Track title
d ID3 album name
e ID3 title name
f ID3 artist name
g Elapsed play time
Example:
g
Note
When a title is longer than 8 characters, it will scroll across the
•
display. If you selected a mode from b - f (see above), the
scrolling will start again after every 3 seconds.
“NO ID3” is displayed if titles with ID3 tags haven’t been entered.
•
Maximum number of displayable characters:
•
Album/track title: 31
ID3 album/title/artist name: 30
(ID3 is a tag embedded in MP3 track to provide information about
the track.)
This unit can display album and track titles with ID3 tags (version
•
1.0 and 1.1). Titles containing text data that the unit doesn’t support
cannot be displayed.
Titles entered with 2-byte code cannot be displayed correctly on this
•
unit.
→
→→→→→
Elapsed play time
12
RQT7340
Characters Main unit display Characters Main unit display
!
”–
#.
$/
%:
&;
’=
(?
)_
∗ `
+
Some characters may not be displayed correctly due to the
recording format/software used.
22
2 Press [CURSOR ] to enter the character.
22
Repeat steps 1~2 to complete the keyword.
,
 Loading...