

Page 1
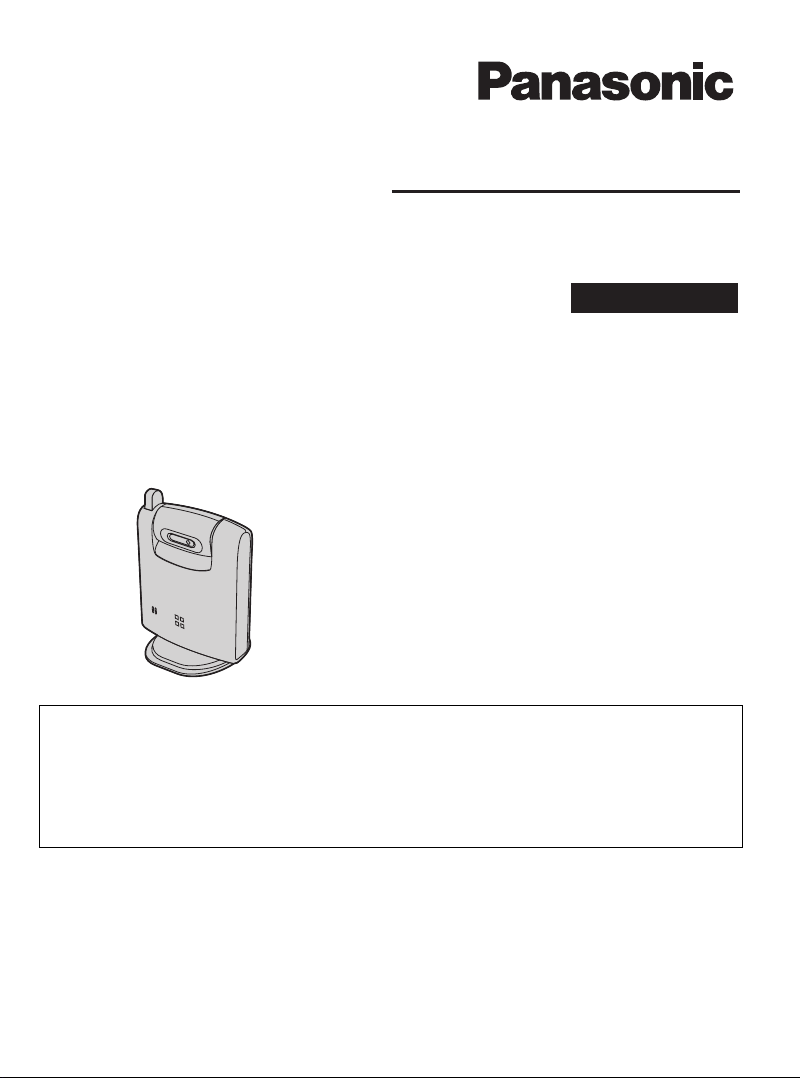
Operating Instructions
5.8 GHz Expandable Digital Cordless Camera
Model No.
This cordless camera is an accessory unit for use with Panasonic
base units KX-TG5961AL/KX-TG5971AL/KX-TG5976AL. You must
register this cordless camera with your base unit before it can be used.
Camera monitoring requires a colour display handset (KXTGA591AL).
KX-TGA593AL
Indoor Use Only
Please read these Operating Instructions before using the unit and save
for future reference.
Page 2

Table of Contents
Introduction
Introduction. . . . . . . . . . . . . . . . . . . . . . . 3
Accessory information . . . . . . . . . . . . . . 4
Important safety instructions . . . . . . . . . 5
For best performance . . . . . . . . . . . . . . . 6
Preparation
Controls . . . . . . . . . . . . . . . . . . . . . . . . . 8
Setting up the cordless camera . . . . . . . 9
Symbols used in these operating
instructions . . . . . . . . . . . . . . . . . . . . . . 12
Registering the cordless camera . . . . . 13
Camera Monitoring
Camera monitoring using a handset . . 14
Useful Information
Wall mounting. . . . . . . . . . . . . . . . . . . . 18
Troubleshooting . . . . . . . . . . . . . . . . . . 21
Specifications . . . . . . . . . . . . . . . . . . . . 23
Index
Index. . . . . . . . . . . . . . . . . . . . . . . . . . . 24
2
Page 3

Introduction
Introduction
Thank you for purchasing the Panasonic 5.8 GHz expandable digital
cordless camera.
We recommend keeping a record of the following information for future reference.
Serial No. Date of purchase
(found on the bottom of the unit)
Name and address of dealer
Attach your purchase receipt here.
Feature highlight
Camera monitoring using the colour display handset
Important:
L This unit is compatible only with the 5.8 GHz Expandable digital cordless handset KX-
TGA591AL (colour display type). For further information or to order the handset, visit
http://www.panasonic.com.
L In these operating instructions, the term “handset” is used to refer to the colour display
handset (KX-TGA591AL).
You can monitor the room where the cordless camera is located when:
– you access the cordless camera using the handset (page 14).
– the cordless camera pages the handset when it detects sound (page 15).
– the cordless camera user pages the handset using the call button (page 16).
3
Page 4
Introduction
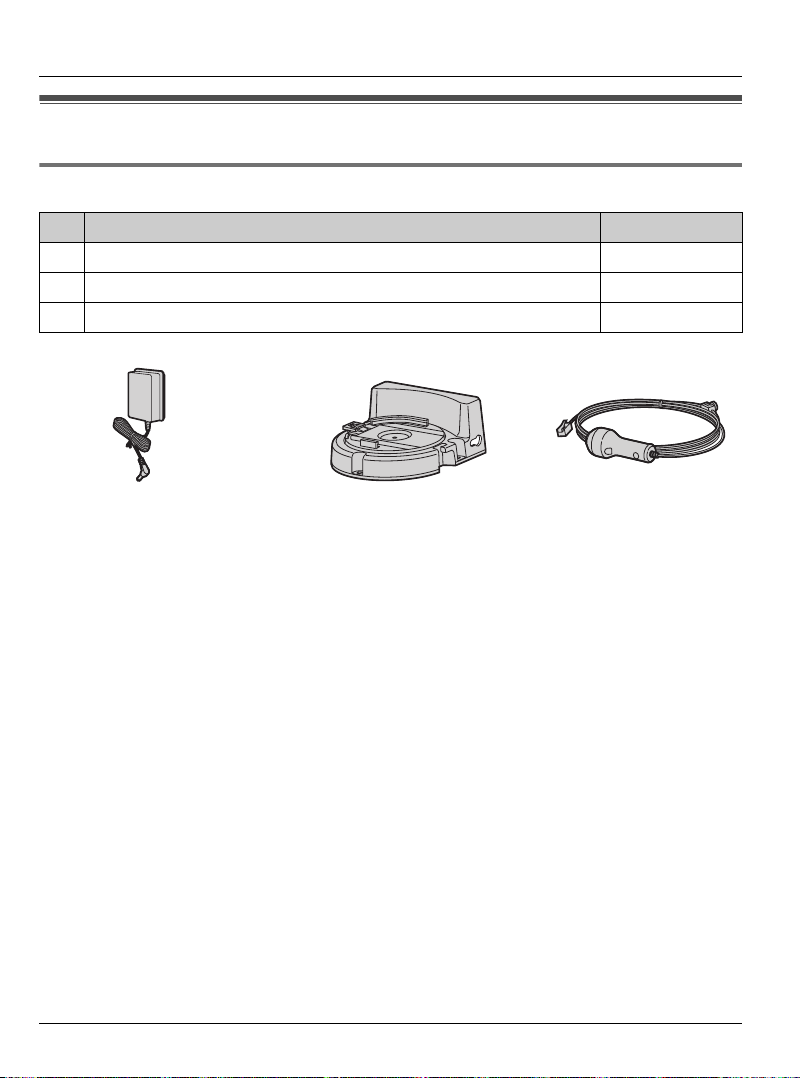
Accessory information
Included accessories
No. Accessory item Quantity
1 AC adaptor for cordless camera 1
2 Wall-mounting adaptor for cordless camera 1
3 Call button for cordless camera 1
123
4
Page 5

Important safety
instructions
When using the product, basic safety
precautions should always be followed to
reduce the risk of fire, electric shock, or
personal injury.
1. Read and understand all instructions.
2. Keep these instructions.
3. Heed all warnings.
4. Follow all instructions.
5. After cleaning away the dust on the
lens, wipe the lens with a cotton bud.
6. Do not install near any heat sources
such as radiators, heat registers,
stoves, or other devices (including
amplifiers) that produce heat.
7. Protect the AC adaptor cord from being
walked on or pinched particularly at
plugs, receptacles, and the point
where they exit from the unit.
8. Do not touch the unit or the AC adaptor
during lightning storms.
9. Unplug the unit when unused for long
periods of time.
10. Refer all servicing to qualified service
personnel. Servicing is required when
the unit has been damaged in any way,
such as the AC adaptor cord or plug is
damaged, the unit does not operate
normally, or has been dropped.
SAVE THESE
INSTRUCTIONS
Introduction
CAUTION:
Installation
L Do not touch the plug with wet hands.
L The AC adaptor is used as the main
disconnect device. Ensure that the AC
outlet is installed near the product and is
easily accessible.
WARNING:
L To prevent the risk of fire or electrical
shock, do not expose the product to rain
or any type of moisture.
L Unplug the product from power outlets if
it emits smoke, an abnormal smell, or
makes an unusual noise. These
conditions can cause fire or electric
shock. Confirm that smoke has stopped
emitting and contact an authorised
service centre.
L This cordless telephone system does
not incorporate provision for secrecy of
conversations. Appropriately tuned
radio equipment and other cordless
telephone systems in close proximity
may be used by a third party to monitor
and possibly interrupt conversations in
progress when this system is on radio
operation.
Medical
L Consult the manufacturer of any
personal medical devices, such as
pacemakers or hearing aids, to
determine if they are adequately
shielded from external RF (radio
frequency) energy. (The product
operates in the frequency range of 5.76
GHz to 5.84 GHz, and the power output
is 200 mW (max.).) Do not use the
product in health care facilities if any
5
Page 6

Introduction
regulations posted in the area instruct
you not to do so. Hospitals or health care
facilities may be using equipment that
could be sensitive to external RF energy.
Notice
L Please ensure that a separate
telephone, not dependent on local
power, is available for emergency use.
L When a failure occurs which results in
the internal parts becoming accessible,
disconnect the power supply cord
immediately and return the product to an
authorised service centre.
L To minimise the possibility of lightning
damage, when you know that a
thunderstorm is coming, we recommend
that you unplug the AC adaptor from the
AC power outlet.
L This equipment has been tested and
found to comply with AS/NZS 3548:
1995 limits for electromagnetic
interference. Any modifications to any
part of the system or to any peripherals
may void the EMC compliance of the
system or the peripherals.
For best performance
Avoiding noise
This unit communicates using radio
waves.
For maximum distance and noise-free
operation, we recommend placing the
product away from electrical appliances.
Environment
L Keep the product away from electrical
noise generating devices, such as
fluorescent lamps and motors.
L The product should be kept free from
excessive smoke, dust, high
temperature, and vibration.
L The product should not be exposed to
direct sunlight.
L Do not place heavy objects on top of the
product.
L The product should be kept away from
heat sources such as heaters, kitchen
stoves, etc. It should not be placed in
rooms where the temperature is less
than 5 °C or greater than 40 °C. Damp
basements should also be avoided.
L Operating the product near 5.8 GHz
electrical appliances may cause
interference. Move away from the
electrical appliances.
Routine care
L Wipe the outer surface of the product
with a soft moist cloth. Do not use
benzine, thinner, or any abrasive
powder.
6
Page 7

Conditions for using the cordless
camera
L The cordless camera is intended for
indoor use only. Prolonged exposure to
direct sunlight or halogen light may
damage the camera lens.
L Use the cordless camera in a bright
place such as under daylight or a well-lit
room.
L Do not use the cordless camera in the
following places:
– near incandescent lamps.
– near any electrical appliance that
emits a strong radio signal.
– where the subject of the picture is
against a light source or in front of a
mirror.
– in places where temperature varies
greatly, such as near an air
conditioner or heater.
– any place exposed to oil or steam
such as a kitchen.
– where an object such as glass can
cause temperature change due to
reflection.
L When using the cordless camera,
please take into consideration the rights
of others with regard to privacy.
Introduction
7
Page 8

Preparation
Controls
A
B
C
D
E
F
G
H
A Antenna
B Camera lens
C MIC (Microphone)
D {Call button}
E Indicator
F DIP switches
G Speaker
H PROG. (Programme)
Understanding the cordless camera indicator
The cordless camera indicator shows the status as follows.
Status Description
Red (flashing rapidly) L The cordless camera is not registered. Register the
cordless camera (page 13).
L The cordless camera is out of range. Locate the cordless
camera near the base unit.
Yellow-green L The cordless camera is registered and in standby mode.
Yellow-green (flashing) L The camera sensor is responding and the cordless
camera is paging the handset.
L The cordless camera is connected and sending live
images to the handset.
8
Page 9

Preparation
Setting up the cordless camera
Connecting the AC adaptor and the call button
Connect the AC adaptor cord by pressing the plug firmly (A). Connect the call button cord
until it clicks into the unit (B).
L Use only the included Panasonic AC adaptor PQLV235AL.
B
A
Note:
L When the AC adaptor is connected, the indicator lights in red then starts flashing.
L The AC adaptor must remain connected at all times. (It is normal for the adaptor to feel
warm during use.)
L The AC adaptor should be connected to a vertically oriented or floor-mounted AC outlet.
Do not connect the AC adaptor to a ceiling-mounted AC outlet, as the weight of the
adaptor may cause it to become disconnected.
Hooks
(230–240 V AC,
50/60 Hz)
9
Page 10

Preparation
Adjusting the cordless camera lens angle
Aim the camera lens by pushing the tab (A) and rotating the lens forward or backward.
L Using the handset, confirm that the area you want to monitor from the cordless camera
is displayed (page 14).
Approx.
40°
Approx.
40°
Note:
L Do not touch the camera lens (page 8).
A
10
Page 11

Preparation
Setting the DIP switches
DIP switches
(Default position: ON)
1ON23
OFF*1
You can set the following functions by using the DIP switch 1 to 3.
Slide each switch with a pointed object such as a pen as necessary.
After repositioning the DIP switches to your preferred settings, unplug the AC adaptor then
reconnect it. The cordless camera is reset to these settings.
DIP switch Function ON (default) OFF
1 Image orientation Standard Upside down
2 Image quality Standard quality mode Enhanced motion
3 Speaker volume Standard Low
*1 Slide the switch to down.
*1
mode
Displaying the image upside down (DIP switch 1)
To turn the camera image upside down, set to OFF. This feature is useful when you mount
the cordless camera upside down (page 19).
Selecting image quality (standard quality mode/enhanced motion mode)
(DIP switch 2)
If you want enhanced motion, set to OFF (Enhanced motion mode). The image clarity
decreases.
If you want to improve the image clarity, leave at ON (Standard quality mode). The motion
becomes less enhanced.
Selecting the cordless camera speaker volume (DIP switch 3)
If you want to lower the speaker volume, set to OFF (LOW).
11
Page 12

Preparation
Symbols used in these operating instructions
Symbol Meaning
{ }: button name/soft key name
Example:
Unit keys: {INTERCOM}, {OFF}
Soft keys: {CALL}
Example:
The words in the brackets indicate button names/
soft key names on the handset and base unit.
1 {INTERCOM}
2 Select the desired cordless
camera. i {CALL}
3 {MUTE}
4 {OFF}
{^} {V} Push the joystick up or down.
1 Press {INTERCOM}.
2 Push the joystick up or down to select the desired
cordless camera, then press {CALL}.
3 Press {MUTE}.
4 Press {OFF}.
12
Page 13

Preparation
Registering the cordless
camera
Register the cordless camera to a KXTG5961AL/KX-TG5971AL/KX-TG5976AL
base unit.
1 Base unit:
Press and hold {INTERCOM} until the
IN USE indicator flashes.
L After the IN USE indicator starts
flashing, the rest of the procedure
must be completed within 90
seconds.
2 Cordless camera:
Press PROG. (programme) on the back
side of the cordless camera with a
pointed object such as a pen until a
beep sounds.
L When registration is completed
successfully, the cordless camera
beeps and the indicator stops
flashing red but remains lit in yellowgreen (page 8).
Deregistering the cordless
camera
The base unit can cancel the registration
of a registered cordless camera.
Important:
L Before deregistering, confirm the
cordless camera’s extension number
from the handset (colour display models
only: KX-TGA591AL).
Press {INTERCOM} on the handset to
display its extension.
Base unit
1 Press and hold {INTERCOM} until the
IN USE indicator flashes.
2 Press and hold the cordless camera's
extension number ({1} – {8}) until a
beep sounds.
Note:
L The indicator colour on the camera
remains the same.
13
Page 14

Camera Monitoring
Camera monitoring
using a handset
L While monitoring you cannot place the
handset on the base unit or charger. The
monitoring connection will be cancelled.
L The cordless camera may not page
handsets in the following conditions:
– when other users are on an intercom
or conference call.
– when electrical interference is emitted
from electrical devices.
– while you are on a call with the
handset. (In this case you will hear 2
tones and z will flash on the
handset.)
With a colour display handset (KXTGA591AL), you can monitor the image
and sound of the room where the cordless
camera is located. The monitored camera
does not ring, allowing you to easily
monitor a baby’s room, for example, from
different areas of the house.
Important:
L Before you start monitoring, confirm that
the camera lens of the cordless camera
has been adjusted to the correct angle.
L Only 1 person can access the cordless
camera at a time.
L A refreshed image taken by the cordless
camera is displayed every few seconds.
The displayed image is not a moving
picture. Selecting enhanced motion
mode shortens the interval (page 11).
L While monitoring a cordless camera,
other users cannot make an intercom
call or transfer a call.
L The monitoring connection is
automatically cancelled after 10
minutes.
Monitoring the cordless camera
from a handset
Handset
1 {INTERCOM}
2 Select the desired cordless camera.
i {CALL}
3 Speak to the cordless camera user if
necessary.
OR
To mute your sound output, press
{MUTE} if necessary.
4 When you finish monitoring, press
{OFF} or place the handset on the base
unit or charger.
Adjusting receiver/speaker volume
Push {^} or {V} while monitoring.
Talking to the paged party using the
cordless camera
When the cordless camera is paged from a
handset, the cordless camera does not
ring and the speakerphone is turned on.
14
Page 15

Camera Monitoring
You can talk to the handset user. Speak
clearly into the MIC.
Handset display item for camera
monitoring
Displayed
item
Example:zThe handset is connected
Meaning
to the cordless camera.
When flashing:
The cordless camera is
paging the handset. (It
detects sound or its {Call
button} is pressed.)
Paging the handsets from the
cordless camera
The cordless camera can page colour
display handsets (KX-TGA591AL) when it
detects sound or by pressing its {Call
button}. Then the answering handset
user can monitor live images from the
cordless camera.
Important:
L Only registered colour display handsets
(KX-TGA591AL) can be paged from the
cordless camera. The base unit and
monochrome display handsets (KXTGA590AL) cannot be paged.
L If a handset is paged by the cordless
camera during a call, 2 tones sound and
z flashes on the handset. To monitor
the cordless camera from the handset,
press {OFF}, then press {s}.
L Auto intercom feature cannot be used
when paged by a cordless camera.
Paging using the cordless camera
audio sensor
Important:
L You can adjust the audio detection
sensitivity (page 17).
1 Cordless camera:
The cordless camera detects sound.
L The cordless camera produces a
camera tone and pages the handsets
for 1 minute.
2 Handset:
Press {s} to answer the page.
L You can monitor the room where the
cordless camera is located.
3 Handset:
To mute your sound output, press
{MUTE} if necessary.
4 Handset:
When you finish monitoring, press
{OFF} or place the handset on the base
unit or charger.
15
Page 16

Camera Monitoring
Paging using the cordless camera call
button
1 Cordless camera:
Press {Call button}.
L The cordless camera produces a
camera tone and pages the handsets
for 1 minute.
2 Handset:
Press {s} to answer the page.
L You can monitor the room where the
cordless camera is located.
Useful settings while camera
monitoring
With a colour display handset (KXTGA591AL), you can set the camera
settings while monitoring.
Important:
L Each time you press {OPTION}, the
right soft key switches between
{BRIGHT}, {ZOOM}, and {SENSOR}.
Adjusting the display brightness
There are 6 levels.
1 Start monitoring (page 14).
2 Press {OPTION} repeatedly until
{BRIGHT} is displayed.
3 Press {BRIGHT} repeatedly to adjust
the brightness.
Note:
L When you finish monitoring, the setting
is reset to the default.
Selecting image zoom
3 Cordless camera:
When the handset user answers, speak
clearly into the MIC.
4 Handset:
When you finish monitoring, press
{OFF} or place the handset on the base
unit or charger.
16
1 Start monitoring (page 14).
2 Press {OPTION} repeatedly until
{ZOOM} is displayed.
3 Press {ZOOM} to zoom in on the
image.
L To return to the original view, press
{ZOOM} again.
Page 17

Setting the audio detection sensitivity
The cordless camera features a sensor
that detects human voices such as a baby
cry. Sounds other than human voices may
be difficult to detect. To use this feature,
confirm that the cordless camera is located
in a place where it can easily detect
voices. Once the sensor has detected
sound, the cordless camera pages the
handset.
To use the audio detection feature of the
cordless camera, turn the audio detection
sensitivity to on.
There are 3 levels. The default setting is
“off”.
1 Start monitoring (page 14).
2 Press {OPTION} repeatedly until
{SENSOR} is displayed.
3 {SENSOR}
4 To turn the feature on, push {^}.
Push {^} or {V} to select the desired
sensitivity.
L To turn this feature off, push {V}
repeatedly.
Camera Monitoring
5 {SAVE}
Note:
L When you turn this feature off, the
cordless camera cannot detect sound
(page 15).
L To set the appropriate level, test the
sensor of the camera from the handset
beforehand.
17
Page 18

Useful Information
Wall mounting
The cordless camera can be mounted by the standard mounting or upside down
mounting.
CAUTION:
L Mount the cordless camera on the stable location where the unit can be adequately
supported when installing.
L The AC adaptor should be connected to a vertically oriented or floor-mounted AC outlet.
Do not connect the AC adaptor to a ceiling-mounted AC outlet, as the weight of the
adaptor may cause it to become disconnected.
L Do not mount the cordless camera on a soft material. It may fall down, break or
cause injury.
L Do not mount the cordless camera on the following places: plaster board, ALC
(autoclaved lightweight cellular concrete), concrete block, plywood less than 25 mm
thick, and etc.
L Do not pull the call button wire after you mount the cordless camera on the wall.
L After mounting the cordless camera on the wall, speak loudly and clearly into the MIC
when talking with the handset user.
Connecting the wall-mounting adaptor
A Slide the cordless camera into the wall-mounting adaptor in the direction of the arrow
until it clicks into the place.
B Tuck the call button wire into the hole on the side of the wall-mounting adaptor by
plugging the small wire fixture into the hole.
C Turning it slightly and sliding it in place.
D Fasten the call button wire to the hook of the wall-mounting adaptor.
18
Page 19

Mounting the cordless camera on the wall
Standard mounting
1 Drive the screws (not included) into the
wall at a recommended height of 1.8 m
or below using the wall mount template
as a guide (page 20).
2 Mount the cordless camera (A), then
slide it down (B) and to the right (C)
until it is secure.
L To aim the camera lens, see page
10.
Useful Information
50.8 mm
Screws
(230–240 V AC, 50/60 Hz)
Upside down mounting
L The image may be seen upside down when mounting upside down. To compensate for
this, change the cordless camera setting to display images upside down (page 11).
1 Drive the screws (not included) into the
wall at a recommended height of 1.8 m
or below using the wall mount template
as a guide (page 20).
50.8 mm
Screws
2 Mount the cordless camera (A), then
slide it down (B) and to the left (C)
until it is secure.
A
A
B
C
B
C
(230–240 V AC,
50/60 Hz)
19
Page 20

Useful Information
About the screws for wall mounting
L Use the recommended screw size below.
L Drive the mounting screws leaving enough length from the wall to hook the cordless
camera.
Space
Max. 9.3 mm
Max. 4.5 mm
Removing the wall-mounting adaptor
Press and hold the hold button (A) on the left side of the wall-mounting plate. Slide the
cordless camera to the right (B).
A
B
20
Wall mount template for the cordless camera
50.8 mm
Page 21

Useful Information
Troubleshooting
Problem Cause & solution
The cordless camera
does not work.
The cordless camera’s
indicator is flashing red.
The image is faint. L The camera lens is dirty. Clean it with a soft dry cloth.
The image sent from the
cordless camera is poor
on the handset display.
The image sent from the
cordless camera is dark
and difficult to see on the
handset display.
I cannot connect to the
cordless camera, the
image distorts, or the
image is slow.
The camera sensor does
not respond.
L Check the connections (page 9).
L The cordless camera is not registered to the base unit.
Register the cordless camera to the base unit (page
13).
L The cordless camera is not registered to the base unit.
Register the cordless camera to the base unit (page
13).
L The cordless camera is out of range. Locate the
cordless camera near the base unit.
L Do not touch the lens directly. Fingerprint may cause an
unclear image.
L Adjust the display brightness setting (page 16).
L Select standard quality mode instead of enhanced
motion mode (page 11).
L The place where the cordless camera is located is dark.
Improve lighting.
L Adjust the display brightness setting (page 16).
L There is a strong sunlight or a backlight in the place
where the cordless camera is located. Try shading the
camera’s location.
L The cordless camera has lost communications with the
base unit. Move the cordless camera closer to the base
unit, and try again.
L There is an obstacle such as concrete wall. Move the
cordless camera to the place without an obstacle.
L A microwave appliance is in use. Move the cordless
camera closer to the base unit or use the cordless
camera away from that appliance, and try again.
L If you set the audio detection sensitivity to off, the
camera sensor does not respond. Turn this feature on
(page 17).
L While a handset is monitoring the cordless camera, the
cordless camera stops detecting sound.
21
Page 22

Useful Information
Problem Cause & solution
I pressed {Call button}
but the cordless camera
does not page the
handsets.
The handset speaker
and/or the cordless
camera emit a howling
noise while monitoring.
When using the handset
speakerphone to have an
intercom call with the
cordless camera, sound
cuts in and out and you
have difficulty hearing the
other party.
L While the image of the cordless camera is being
monitored by a handset, {Call button} will not have
response.
L Move the handset away from the cordless camera.
L Lower the speaker volume by pushing {V}.
22
Page 23

Useful Information
Specifications
Operating environment 5 °C – 40 °C
Frequency 5.76 GHz – 5.84 GHz
Dimensions Approx. height 124 mm x width 86 mm x depth 68 mm
Mass (Weight) Approx. 150 g
Power consumption Standby: Approx. 1.5 W
Maximum: Approx. 2.8 W
Power output 200 mW (max.)
Power supply AC adaptor (230–240 V AC, 50/60 Hz)
Number of pixels 11,776 pixels
Illuminance 10 lux (min.)
Focus Fixed 0.25 m – Infinity
Photograph angle Vertical angle: Approx. 35°
Horizontal angle: Approx. 45°
Note:
L Design and specifications are subject to change without notice.
L The illustrations in these instructions may vary slightly from the actual product.
23
Page 24

Index
Index
A Answering the page: 16
Audio detection sensitivity: 17
C Call button: 9, 16
Camera angle: 10
Camera indicator: 8
Camera monitoring: 14
Camera tone: 15
Connection
AC adaptor: 9
Wall-mounting adaptor: 18
Cordless Camera Settings
Audio detection sensitivity: 17
Brightness: 16
Image orientation (Upside down): 11
Image quality: 11
Image zoom: 16
Speaker volume: 11
D Deregistration: 13
DIP switches: 11
I Image orientation: 11
Image quality: 11
P Paging handsets: 16
R Registering the cordless camera: 13
S Speaker volume: 11
Specifications: 23
T Troubleshooting: 21
W Wall mounting: 18
Wall-mounting adaptor: 18
24
Page 25

Notes
25
Page 26

Notes
26
Page 27

Notes
27
Page 28

Customer Support Centre Tel. No.: 132600 or website www.panasonic.com.au
N52
Sales Department:
Panasonic Australia Pty. Limited
Austlink Corporate Park, 1 Garigal Road, Belrose NSW 2085, Australia
Manufacturer:
Panasonic Communications Co., Ltd.
1-62, 4-chome, Minoshima, Hakata-ku, Fukuoka 812-8531, Japan
Copyright:
This material is copyrighted by Panasonic Communications Co., Ltd., and may be
reproduced for internal use only. All other reproduction, in whole or in part, is prohibited
without the written consent of Panasonic Communications Co., Ltd.
© 2006 Panasonic Communications Co., Ltd. All Rights Reserved.
PQQX15455ZA DM0506SH0
 Loading...