


Panasonic KX-HNS103FX Operating Instructions
Installation Guide
Home Network System
Water Leak Sensor
Model No. KX-HNS103FX
Thank you for purchasing a Panasonic product.
This document explains how to install the water leak sensor properly.
For details about how to use the system, refer to the User’s Guide
(page 19).
Please read this document before using the unit and save it for future
reference.

Table of Contents
Introduction
Accessory information ...............3
Important Information
About this system ......................4
For your safety ...........................4
Important safety instructions ......5
For best performance ................5
Other information .......................6
Setup
Part names and functions ..........8
LED indicator .............................8
Setup overview ..........................8
Inserting the battery ...................9
Registering the sensor ...............9
Confirming the usage area ......10
Installation ...............................11
Appendix
Testing the sensor ...................19
Features available when using the
[Home Network] app ................19
Accessing the User’s Guide ....19
Specifications ..........................20
2
Introduction
Accessory information
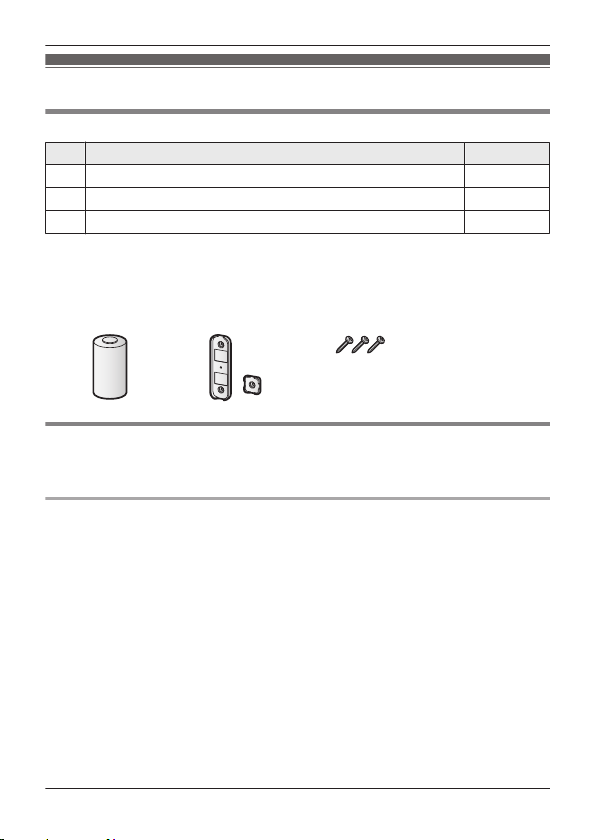
Supplied accessories
No. Accessory item/Part number Quantity
A
B
C
*1 When replacing the battery, see “Power source” of “Specifications”, page 20
for battery information.
*2 1 adaptor for the main unit
1 adaptor for the probe unit
*3 2 screws for the main unit and 1 screw for the probe unit
A B C
Other information
R Design and specifications are subject to change without notice.
R The illustrations in these instructions may vary slightly from the actual product.
Trademarks
R iPhone and iPad are trademarks of Apple Inc., registered in the U.S. and other
countries.
R Android is a trademark of Google Inc.
R Microsoft, Windows, and Internet Explorer are either registered trademarks or
trademarks of Microsoft Corporation in the United States and/or other countries.
R All other trademarks identified herein are the property of their respective owners.
*1
Battery
Wall mounting adaptors
Wall mounting screws (25 mm)
*2
1
2
*3
3
3
Important Information
About this system
R This system is an auxiliary system; it
is not designed to provide complete
protection from property loss.
Panasonic will not be held
responsible in the event that
property loss occurs while this
system is in operation.
R The system’s wireless features are
subject to interference, therefore
functionality in all situations cannot
be guaranteed. Panasonic will not
be held responsible for injury or
damage to property that occurs in
the event of wireless communication
error or failure.
For your safety
To prevent severe injury and loss of life/
property, read this section carefully
before using the product to ensure
proper and safe operation of your
product.
WARNING
Power connection
R Use only the power source marked
on the product.
R Do not connect non-specified
devices.
Installation
R To prevent the risk of fire or
electrical shock, do not expose the
product to rain.
R Do not place or use this product
near automatically controlled
devices such as automatic doors
and fire alarms. Radio waves
emitted from this product may cause
such devices to malfunction
resulting in an accident.
R Do not allow the cable to be
excessively pulled, bent or placed
under heavy objects. Keep the main
unit upright at all times.
R Do not allow the probe unit to make
contact with a battery or an electric
outlet. The product could become
damaged.
R Keep small parts (screws, etc.) out
of the reach of children. There is a
risk of swallowing. In the event they
are swallowed, seek medical advice
immediately.
Operating safeguards
R Do not disassemble the product.
Medical
R Consult the manufacturer of any
personal medical devices, such as
pacemakers or hearing aids, to
determine if they are adequately
shielded from external RF (radio
frequency) energy. DECT features
operate between 1.88 GHz and
1.90 GHz with a peak transmission
power of 250 mW.
R Do not use the product in health
care facilities if any regulations
posted in the area instruct you not to
do so. Hospitals or health care
facilities may be using equipment
that could be sensitive to external
RF energy.
CR Lithium battery
R Do not recharge, disassemble,
remodel, heat or throw it into fire.
4

R Do not touch the terminals and
with metal objects.
R Risk of explosion if battery is
replaced by an incorrect type.
Dispose of used battery according to
local regulations.
R If any electrolyte should come into
contact with your hands or clothes,
wash it off thoroughly with water.
R If any electrolyte should come into
contact with your eyes, never rub
your eyes. Rinse your eyes
thoroughly with water, and then
consult a doctor.
CAUTION
CR Lithium battery
R Use only the battery noted on
page 3.
R Insert the battery correctly.
R Do not leave the battery in an
automobile exposed to direct
sunlight for a long period of time with
the doors and windows closed.
R Remove the battery if you do not
use the product for a long period of
time. Keep it in a cool, dark area.
R Do not replace a battery with wet
hands.
R Keep out of the reach of small
children. There is a risk of
swallowing. If the battery is
swallowed, seek medical attention
immediately.
R Remove the battery if it becomes
unusable. There is a risk of leakage,
overheating, and rupture. Do not
attempt to use a battery if it is
leaking.
R Exercise care when handling the
batteries. Do not allow conductive
materials such as rings, bracelets, or
keys to touch the batteries,
Important Information
otherwise a short circuit may cause
the batteries and/or the conductive
material to overheat and cause
burns.
Important safety instructions
When using your product, basic safety
precautions should always be followed
to reduce the risk of fire, electric shock,
and injury to persons, including the
following:
1. Use only the batteries indicated in
this document. Do not dispose of
batteries in a fire. They may
explode. Check with local codes for
possible special disposal
instructions.
SAVE THESE INSTRUCTIONS
For best performance
Hub location/avoiding noise
The hub and other compatible
Panasonic devices use radio waves to
communicate with each other.
R For maximum coverage and
noise-free communications, place
your hub:
– at a convenient, high, and central
location with no obstructions
between the product and hub in
an indoor environment.
– away from electronic appliances
such as TVs, radios, personal
computers, wireless devices, or
other phones.
– facing away from radio frequency
transmitters, such as external
5
1
2
Important Information
antennas of mobile phone cell
stations. (Avoid putting the hub
on a bay window or near a
window.)
R If the reception for a hub location is
not satisfactory, move the hub to
another location for better reception.
Environment
R Keep the product away from
electrical noise generating devices,
such as fluorescent lamps and
motors.
R The product should be kept free
from excessive smoke, dust, high
temperature, and vibration.
R The product should not be exposed
to direct sunlight.
R Do not place heavy objects on top of
the product.
R The product should be kept away
from heat sources such as radiators,
cookers, etc. It should not be placed
in rooms where the temperature is
less than 0 °C or greater than 40 °C.
R Operating the product near electrical
appliances may cause interference.
Move away from the electrical
appliances.
R Do not allow the probe unit’s metal
probes to make contact with metal
objects. This may reduce the battery
life.
Routine care
R Wipe the outer surface of the
product with a soft moist cloth.
R Do not use benzine, thinner, or any
abrasive powder.
R If the probe unit’s metal probes
come into contact with a foreign
material (oil, detergent, etc.), the
probes may repel water and
therefore will not be able to properly
detect a water leak. Periodically
check the metal probes and wipe
away any water or foreign material
that has become adhered to the
probes.
R If the probes come into contact with
water, wipe the probe unit dry. Do
not allow the probes to remain in
contact with water for an extended
period of time, as the probes may
begin to turn black. (This will not
affect the product’s ability to detect a
water leak.)
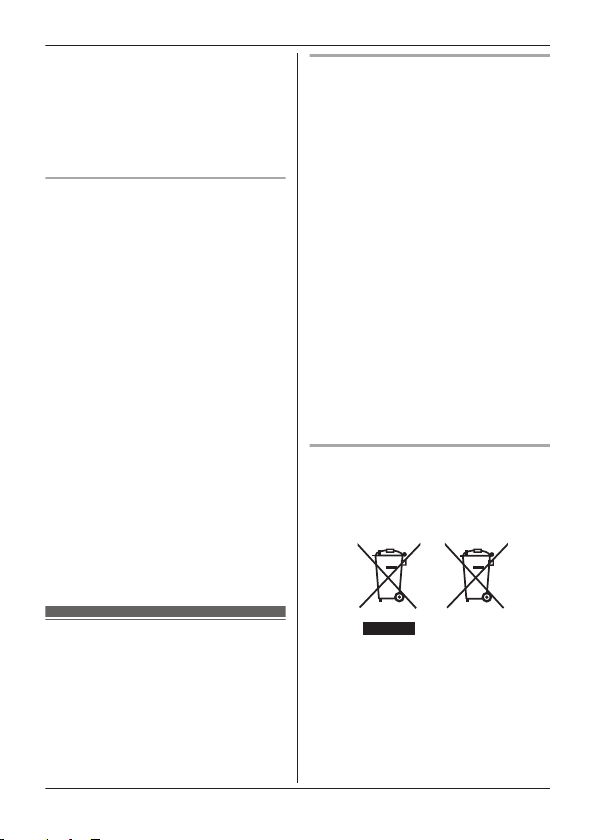
Disposal of Old Equipment and
Batteries (Only for European Union
and countries with recycling
systems)
Other information
CAUTION: Risk of explosion if battery
is replaced by an incorrect type.
Dispose of used batteries according to
the instructions.
6
These symbols (A, B) on the
products, packaging, and/or
accompanying documents mean that
used electrical and electronic products
and batteries must not be mixed with
general household waste.
For proper treatment, recovery and
recycling of old products and used

batteries, please take them to
applicable collection points in
accordance with your national
legislation.
By disposing of them correctly, you will
help to save valuable resources and
prevent any potential negative effects
on human health and the environment.
For more information about collection
and recycling, please contact your local
municipality.
Penalties may be applicable for
incorrect disposal of this waste, in
accordance with national legislation.
For business users in the European
Union
If you wish to discard electrical and
electronic equipment, please contact
your dealer or supplier for further
information.
Information on Disposal in other
Countries outside the European
Union
These symbols (A, B) are only valid
in the European Union. If you wish to
discard these items, please contact
your local authorities or dealer and ask
for the correct method of disposal.
Note for the battery symbol
This symbol (B) might be used in
combination with a chemical symbol. In
this case it complies with the
requirement set by the Directive for the
chemical involved.
Note for the battery removal
procedure
Refer to “Inserting the battery” on
page 9.
Important Information
7
C
D
A
B
E
F
G
Setup
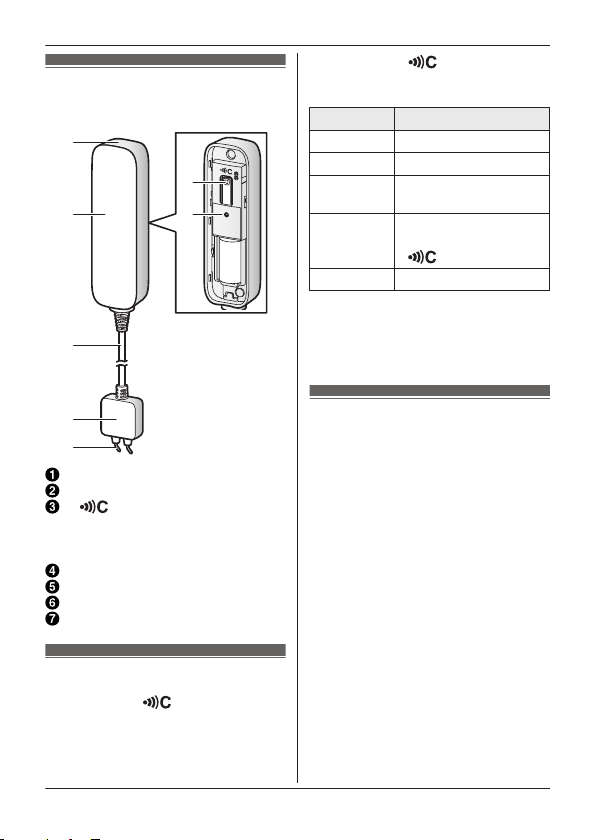
Part names and functions
Main unit
Main unit cover
M N
Used to confirm the status of the
sensor or register the sensor to
the hub.
LED indicator
Cable
Probe unit
Probes
LED indicator
You can press M N and check the
LED indicator to confirm the sensor’s
status.
After confirming the sensor’s status, we
recommend turning the LED indicator
8
off by pressing M N again as soon
as possible, otherwise battery life may
be reduced.
Indicator Status
Green, lit No water detected
Red, lit Water detected
Red,
blinking
Green,
blinking
slowly
Off No battery power
Note:
R The LED indicator does not indicate
sensor status if the sensor has not
been registered (page 9).
Sensor is out of range
of the hub
Registration mode
(You pressed and held
M N)
Setup overview
1 Initial setup
Make sure you can access the
system using your mobile device.
For details, refer to the System
Setup Guide included with your
hub.
2 Insert the battery
The sensor is battery powered.
3 Registration
Required only if the sensor was
purchased separately (i.e., not as
part of a bundle).
4 Confirm the usage area
Read the information in this
document to confirm that the
desired installation area is suitable
to proper operation.
5 Installation
Install the sensor in the desired
location.