

Page 1
∫ Advanced Operations
DVD
TV
INPUT SELECT
ShowView
DIRECT TV REC
AV
DVD TV
SKIP
DIRECT NAVIGATOR
PLAY LIST
TOP MENU
ENTER
MENU
FUNCTIONS
RETURN
STOP
PAUSE
PLAY/x1.3
SLOW/SEARCH
0 -/--
FRAME
MANUAL SKIP
TIME SLIP
3, 4, 2, 1
ENTER
1
RETURN
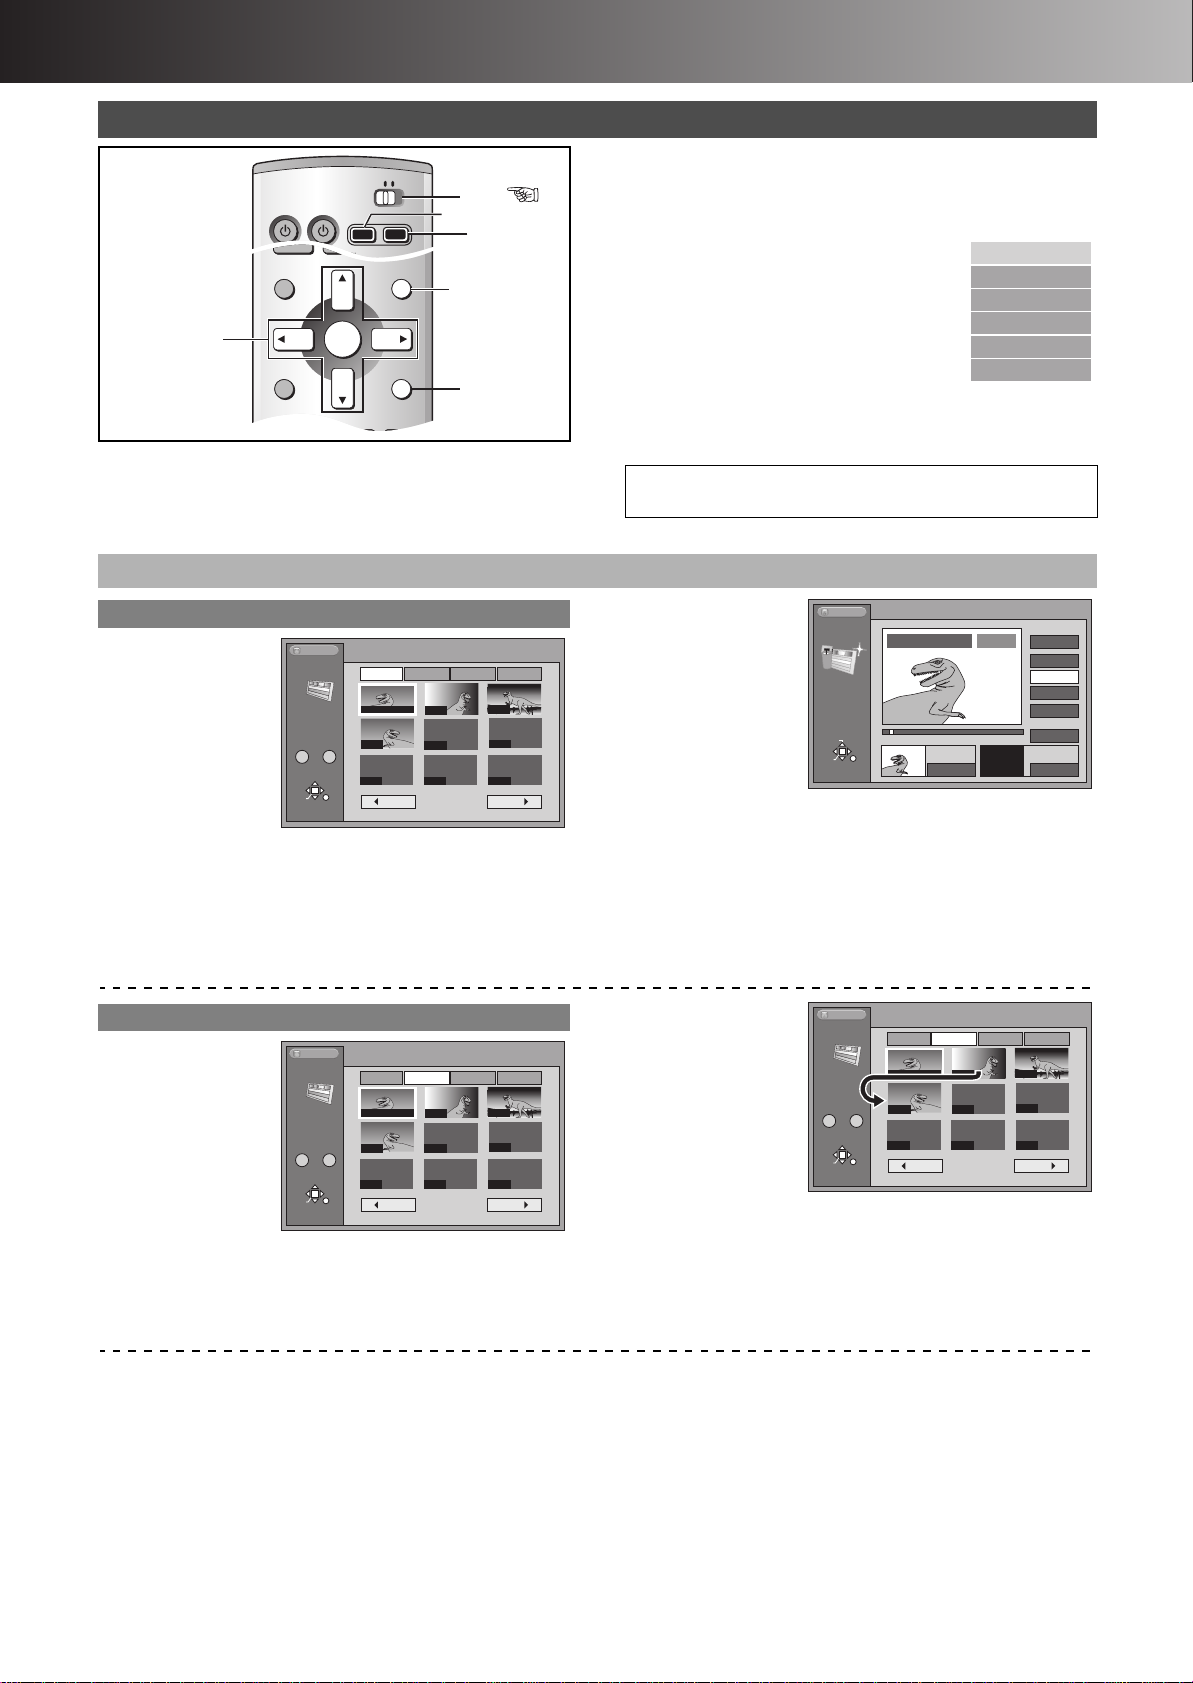
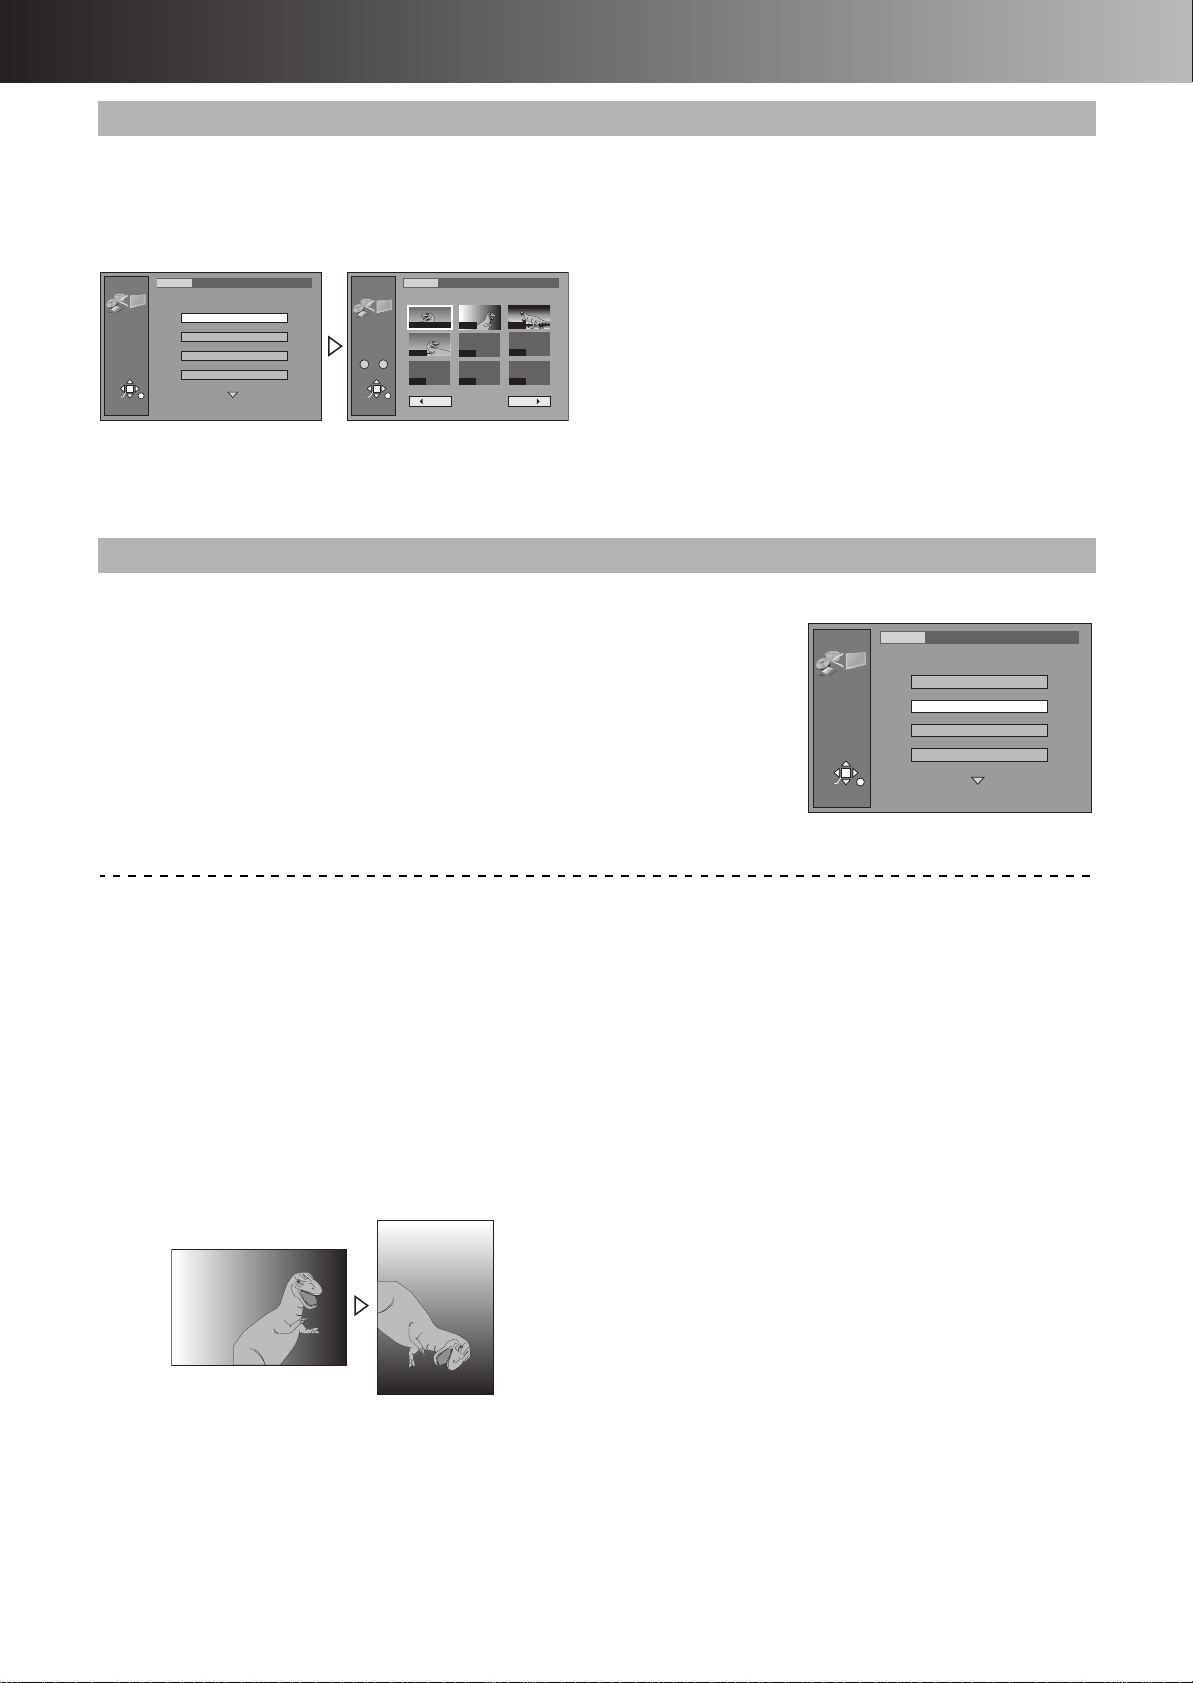
DIRECT NAVIGATOR
DVD
HDD
DVD
HDD DVD
DIRECT NAVIGATOR
≥When the programme is protected (page 40), you can only
access “Properties” and “Protection”. Release the protection to
access other items. [HDD] [RAM]
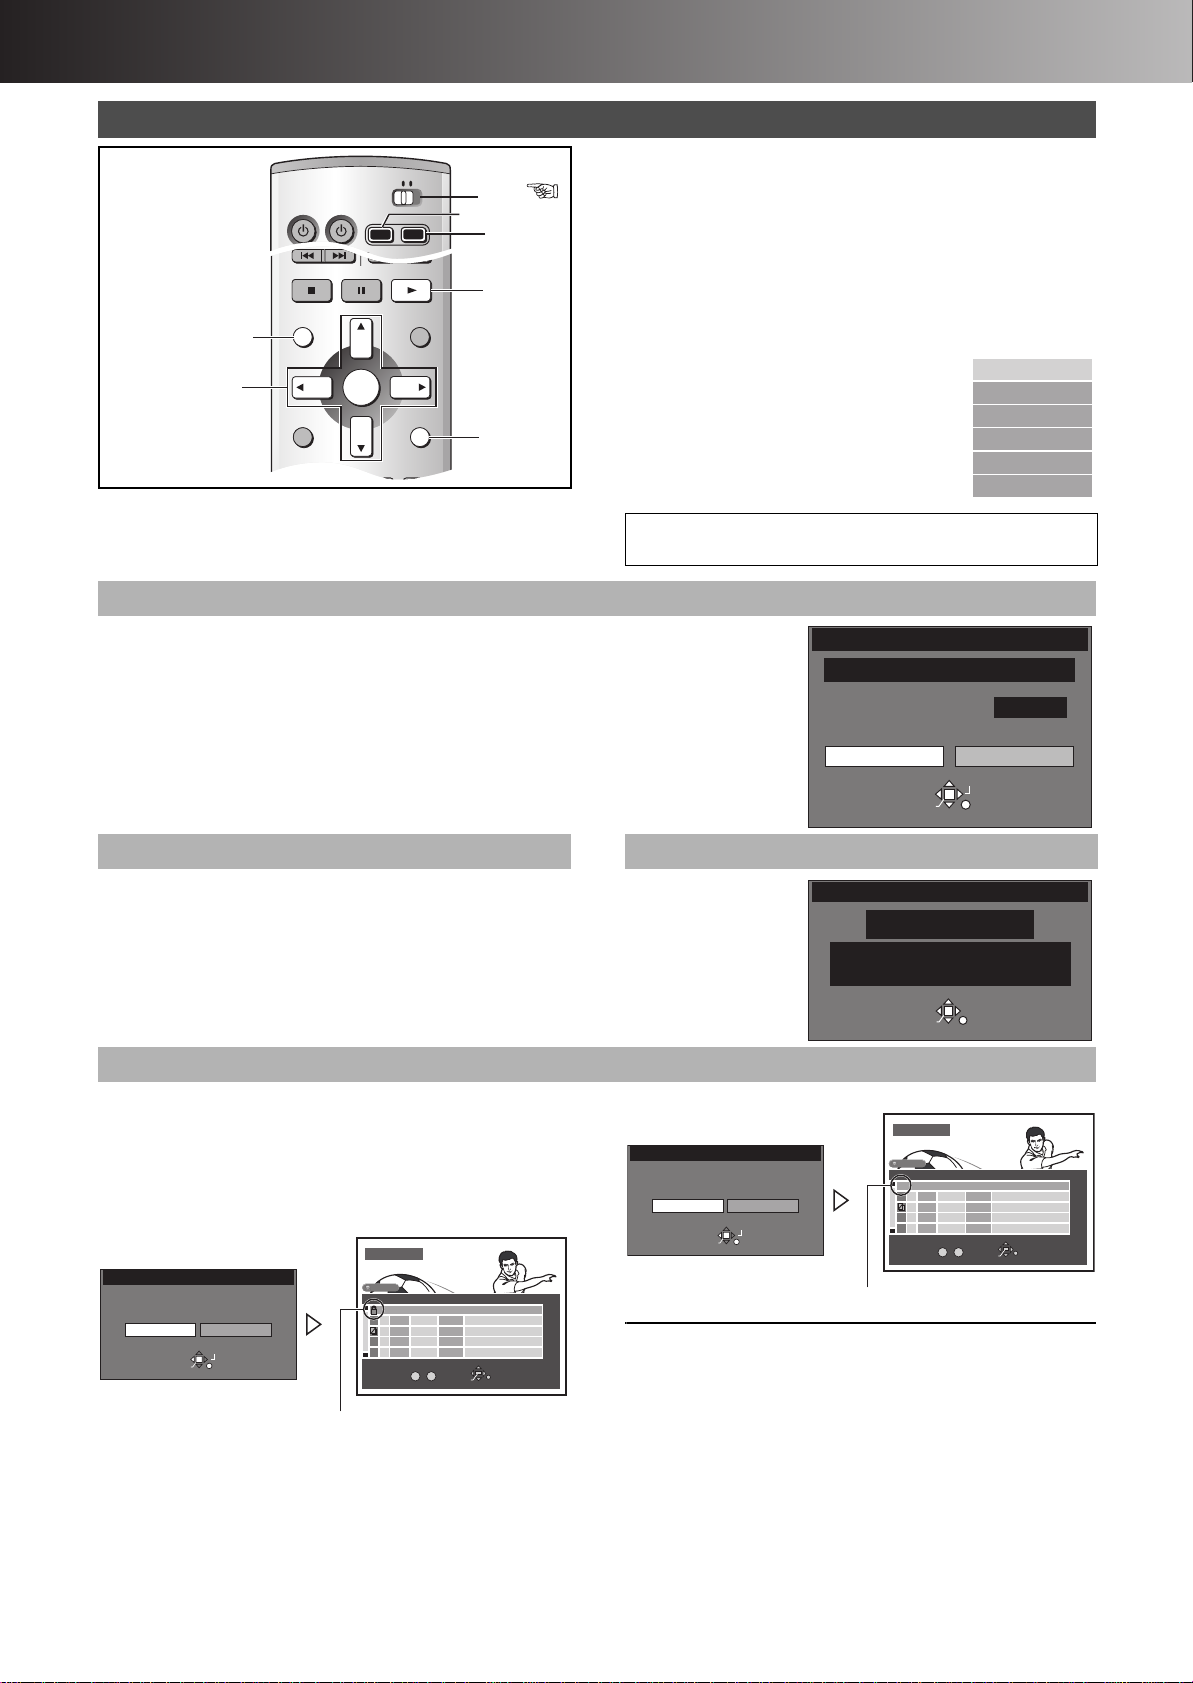
[1] Press [HDD] or [DVD] to select the
playback drive.
[2] Press [DIRECT NAVIGATOR].
[3] Use [3, 4] to select desired
programme.
[4] Use [1] so the submenu
appears.
[5] Use [3, 4] to select
desired item and press
[ENTER].
For your reference
≥When using DVD-R, “Protection”, “Partial Erase” and “Divide” are
not displayed in the submenu.
≥Release protection (disc # page 37, cartridge # page 69). [RAM]
1 Erase
[HDD] [RAM] [DVD-R]
The programme is irretrievably erased when you use this procedure and cannot be retrieved. Check
the programme carefully before erasing to ensure it isn’t one you want to keep.
[6] Select “Erase” with [2] and press [ENTER].
For your reference
≥The disc’s available recording time may not increase after erasing short programmes.
≥The available recording time on DVD-R does not increase when you erase programmes.
ªTo stop partway
Press [RETURN].
(page 19)
Erase
Enter Title
Properties
Protection
Partial Erase
Divide
Erase Programme
Remaining Time
Corresponding PLAY LIST will also be erased.
0 : 58 SP
Erase Cancel
SELECT
ENTER
RETURN
1 Enter Title 1 Properties
[HDD] [RAM] [DVD-R]
[6] Enter or edit the title. (page 36)
For your reference
≥The full title is shown in the “Properties” screen, but if you enter a
long title, only part of it is shown in the programme list.
1 Protection
[HDD] [RAM]
You can prevent accidental erasure of programmes by writeprotecting them.
[6] Select “Yes” with [2] and press
[ENTER].
≥To protect
Set Up Programme Protection ?
Protection
Yes
ENTER
No
SELECT
RETURN
The padlock mark appears.
DIRECT NAVIGATOR
HDD
No. DateName Time EditTitle
3
01
4
13/ 8 WED
10:00
9:00
6
02
13/ 8 WED
11:00
13
03
13/ 8 WED
3
TOTAL 3
No.
0 – 9
SELECT
ENTER
Soccer
Dinosaur
USJ
RETURN
[HDD] [RAM] [DVD-R]
You can check the
contents of a selected
programme.
No.
Date
Name
Properties
Football
3
15/ 7/2003 TUE
12
ENTER
1:02
On
Time 0:01(SP
RETURN
)
≥To quit protection
DIRECT NAVIGATOR
Protection
Cancel Programme Protection ?
Yes
1
1
1
1
1
For your reference
Programmes will be erased even if they are protected if you format
No
SELECT
RETURN
ENTER
The padlock mark disappears.
HDD
No. DateName Time EditTitle
3
3
TOTAL 3
01
4
02
6
13
03
13/ 8 WED
10:00
9:00
13/ 8 WED
11:00
13/ 8 WED
No.
0 – 9
SELECT
ENTER
Soccer
Dinosaur
USJ
RETURN
1
1
1
1
1
the disc with DISC INFORMATION (page 38).
40
Page 2
∫ Advanced Operations
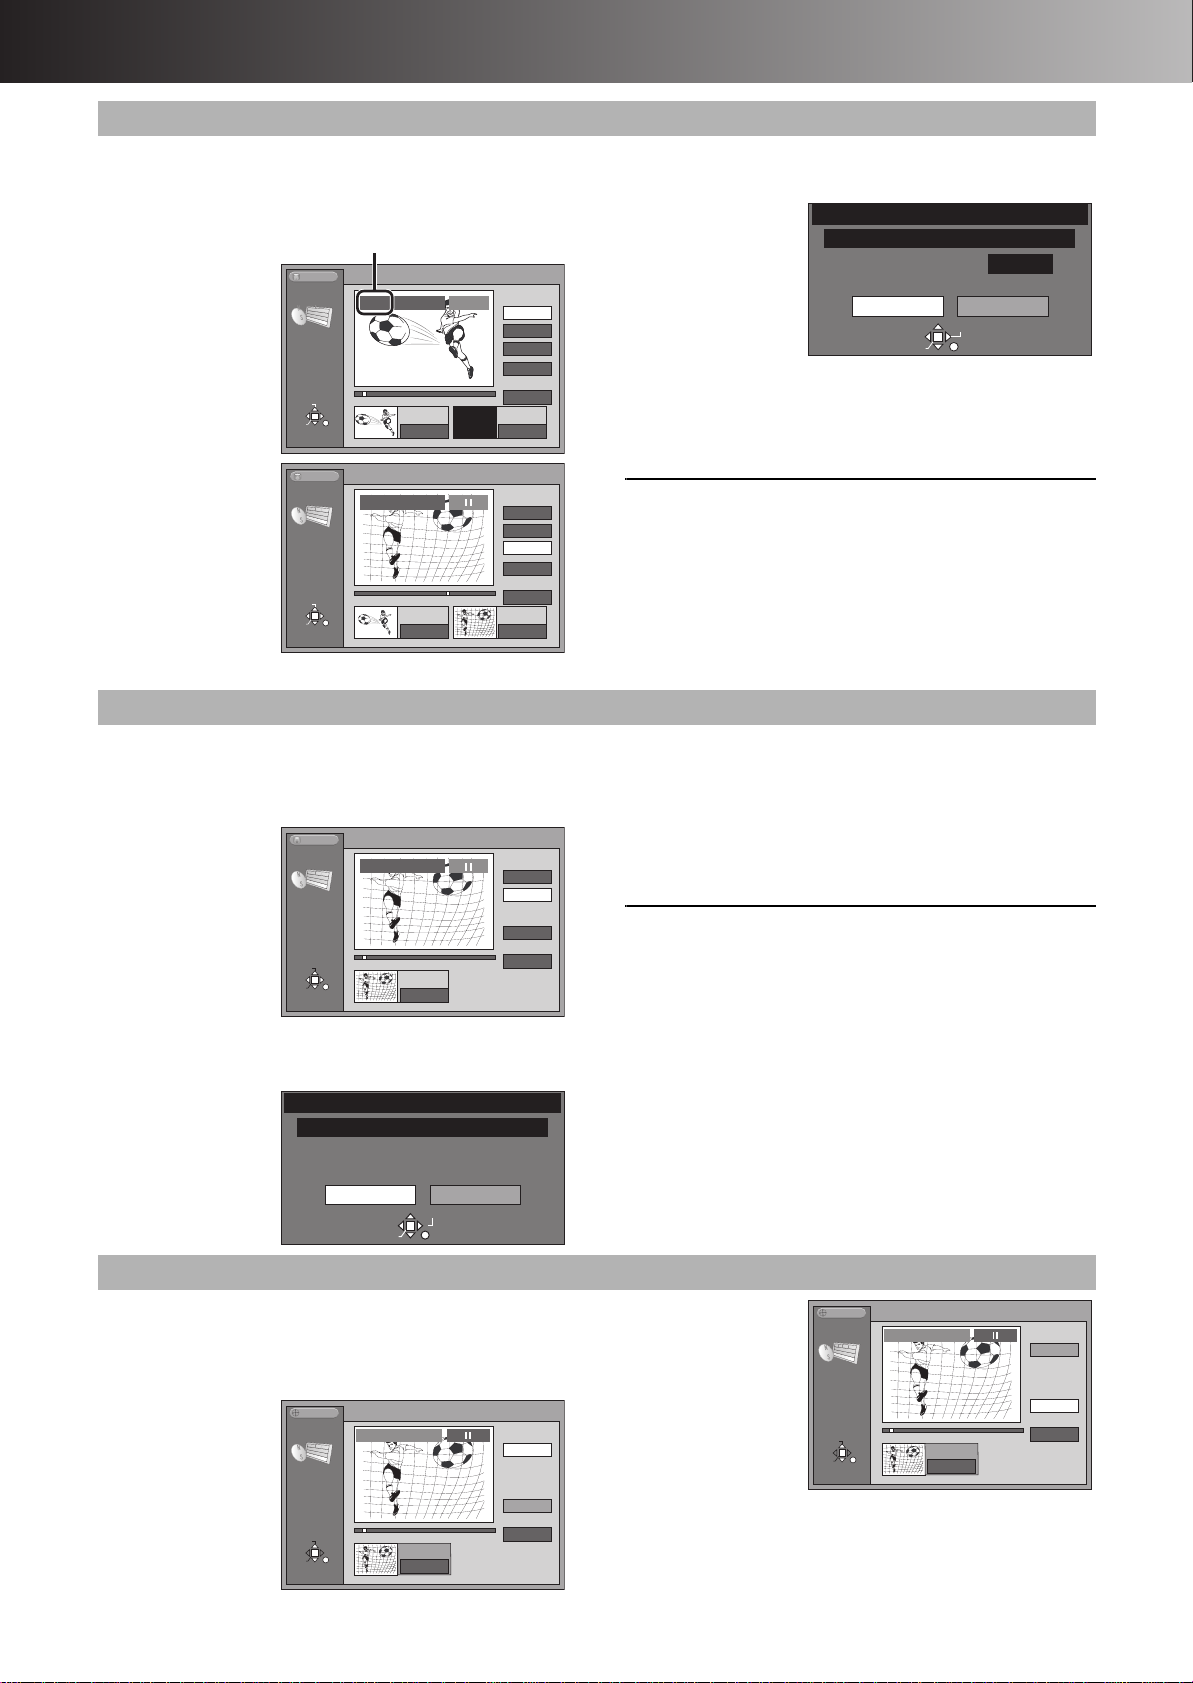
Current programme number
Divide
3
Preview
Divide
Exit
0 : 00 . 05
RETURN
ENTER
SELECT
0 : 00 . 05
003
Divide
Programme
HDD
1 Partial Erase
[HDD] [RAM]
The specified parts of the programme are erased irretrievably
when you use this procedure.
Check the programme carefully before erasing.
[6] Press
[ENTER] at
the start
point of the
part you
want to
erase. (“To find
the desired points”,
page 42)
[7] Press
[ENTER] at
the end
point of the
part you
want to
erase.
Partial
Erase
SELECT
ENTER
Partial
Erase
SELECT
ENTER
HDD
RETURN
HDD
RETURN
003
3
Start
0 : 00 . 05
003
3
Start End
0 : 00 . 05
PLAY
Start
End
Next
Exit
0 : 00 . 05
End
– : – – . – –
Start
End
Next
Exit
3
0 : 10 . 15
0 : 10 . 15
[8] Select “Exit” with [3, 4] and press
[ENTER].
[9] Select
Partial erase
“Erase” with
[2] and
press
[ENTER].
≥Play lists created
Corresponding PLAY LIST will also be erased.
Remaining Time
Erase Cancel
ENTER
with the erased
part are also erased.
ªTo erase another part of the same programme
After storing the point in “Start” and “End”, select “Next” in step 8
and perform step 9, then repeat steps 6–9.
For your reference
≥Use search and slow-motion to find the points.
≥You may not be able to specify start and end points within
3 seconds of each other.
≥You cannot specify start and end points if the picture recorded is
stilled.
≥The unit pauses when the programme reached to the end during
this procedure.
≥The disc’s available recording time may not increase after
erasing short parts of programmes.
0:19 SP
SELECT
RETURN
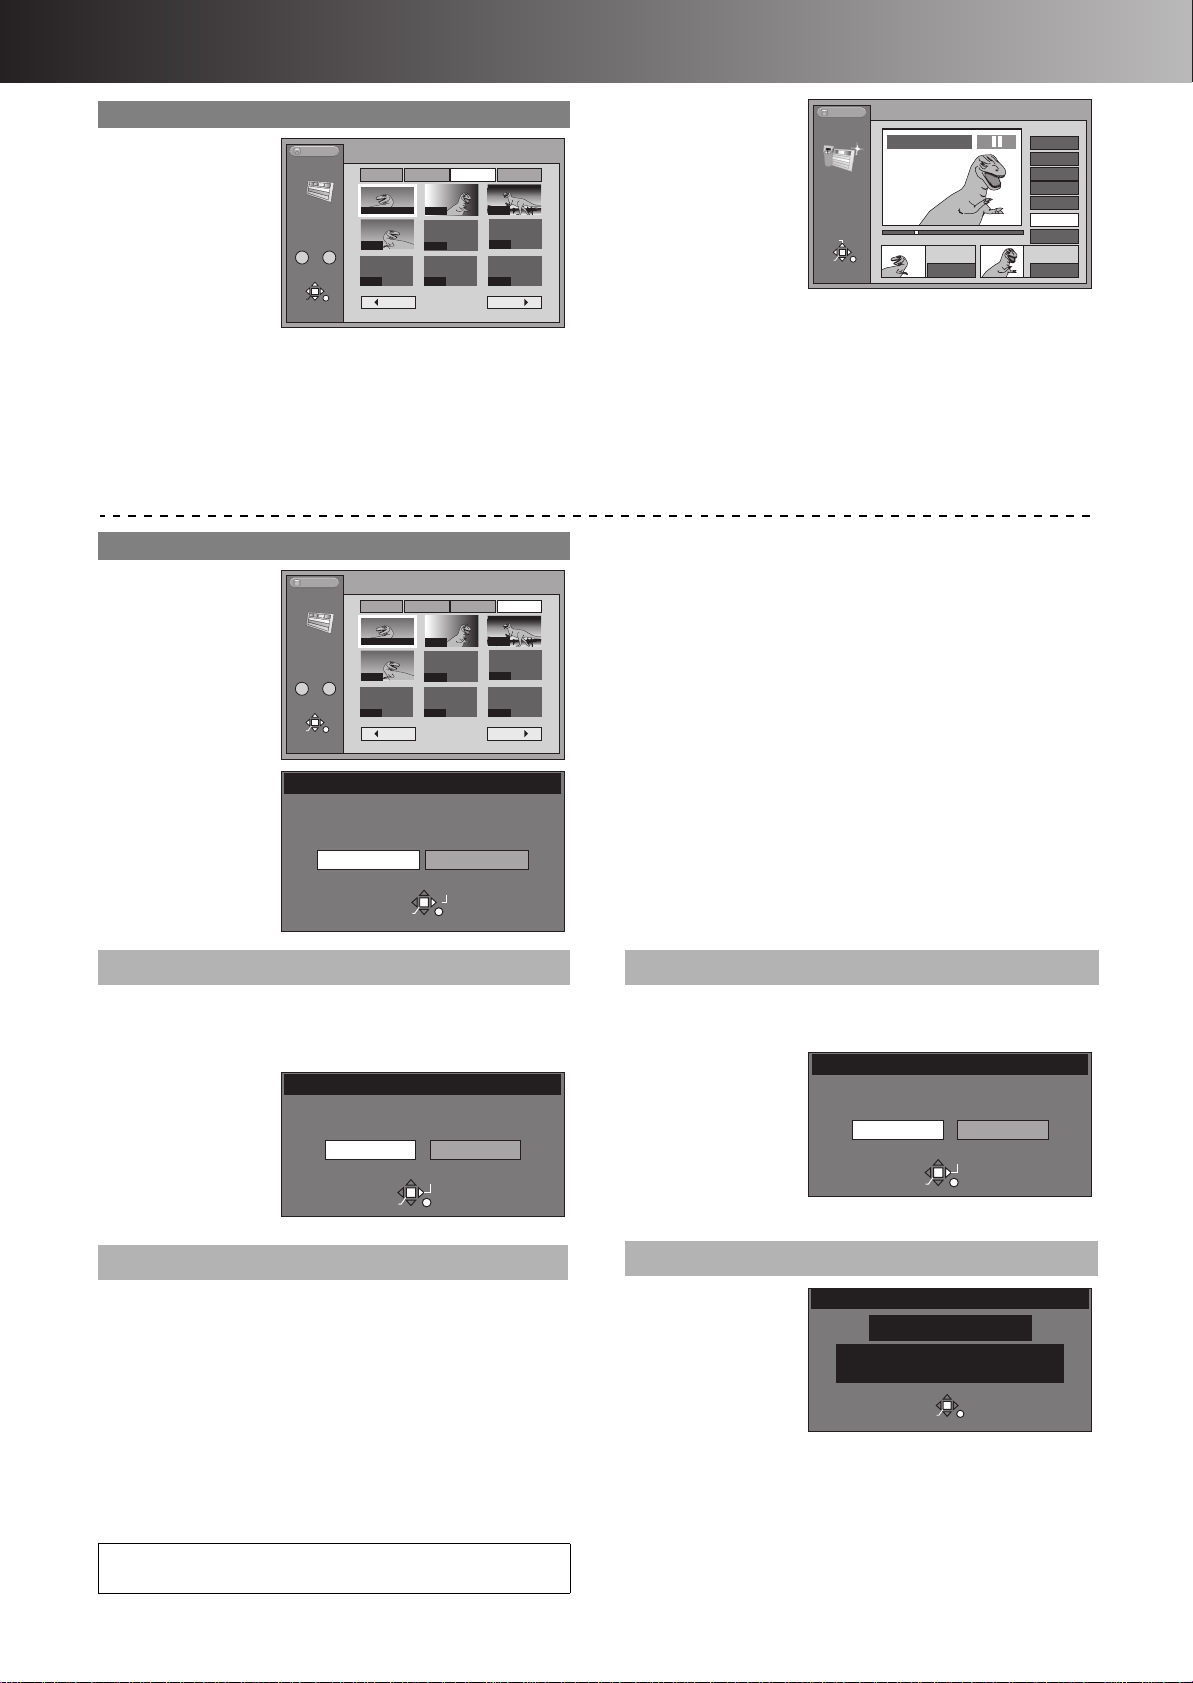
1 Divide
[HDD] [RAM]
You can divide a selected programme into two.
You must make sure of dividing a programme because it
cannot be recovered after the procedure.
[6] Press
[ENTER] at
the point you
want to
divide the
programme.
(“To find the desired
points”, page 42)
[7] Select “Exit” with [3, 4] and press
[ENTER].
[8]
Select
“Divide” with
[2] and press
[ENTER].
≥The programme is
divided at the point.
1 Change thumbnail
[DVD-R]
You can select the still picture to be displayed after finalizing.
Usually, the top scene of the programme (scene of 1 second after
starting) appears. However, you can select your favourite scene in
the programme.
[6]
Press [PLAY/
t
1.3] to play.
[7] Press
[ENTER] at
the point you
want to
display.
(“To find the desired points”, page 42)
Divide Programme
Once divided, this programme cannot be
re-combined.
Divide Cancel
SELECT
RETURN
ENTER
DVD
Change tumbnail
Change
thumbnail
SELECT
ENTER
RETURN
01 Soccer
3
Change
0 : 00 . 01
Change
Exit
0 : 00 . 01
ªTo change the point to divide
Select “Divide” in step 6, then repeat steps 6–8.
ªTo check the division point
By selecting “Preview” in step 6 and pressing [ENTER], play will
begin from 10 seconds prior to the division point to 10 seconds
after the division point.
You can make sure that the division point is appropriate.
Note
≥A little portion of the recording directly preceding the division
point may be lost.
For your reference
≥The divided programmes retain the title of the original
programme. They also remain CPRM property (page 10) of the
original.
≥Use search and slow-motion to find the points.
≥It is not possible to carry out “Divide” in the following cases:
- When the resulting part(s) are extremely short.
- When the total number of programme is more than 250 (HDD)/
99 (DVD-RAM).
[8] Press
[ENTER] to
DVD
Change
thumbnail
Change tumbnail
01 Soccer
change.
≥A scene of display
is changed at the
point.
≥You cannot select the
top and end of the
programme.
41
SELECT
ENTER
RETURN
3
Change
0 : 00 . 08
Change
Exit
0 : 00 . 08
Page 3
∫ Advanced Operations
DVD
TV
INPUT SELECT
ShowView
DIRECT TV REC
AV
DVD TV
HDD DVD
INPUT SELECT
ShowView
DIRECT TV REC
AV
CH
VOLUME
SKIP
DIRECT NAVIGATOR
PLAY LIST
TOP MENU
ENTER
MENU
FUNCTIONS
RETURN
STOP
PAUSE
PLAY/x1.3
SLOW/SEARCH
CANCEL
123
4
5
6
789
0 -/--
FRAME
MANUAL SKIP
TIME SLIP
ERASE
REC
PROG/CHECK
TIMER
DUBBING
REC MODE
STATUS
MARKER
3, 4, 2, 1
ENTER
∫
RETURN
PLAY LIST
ERASE
FUNCTIONS
2;, ;1
DVD
HDD
DVD
6, 5
:, 9
HDD DVD
;
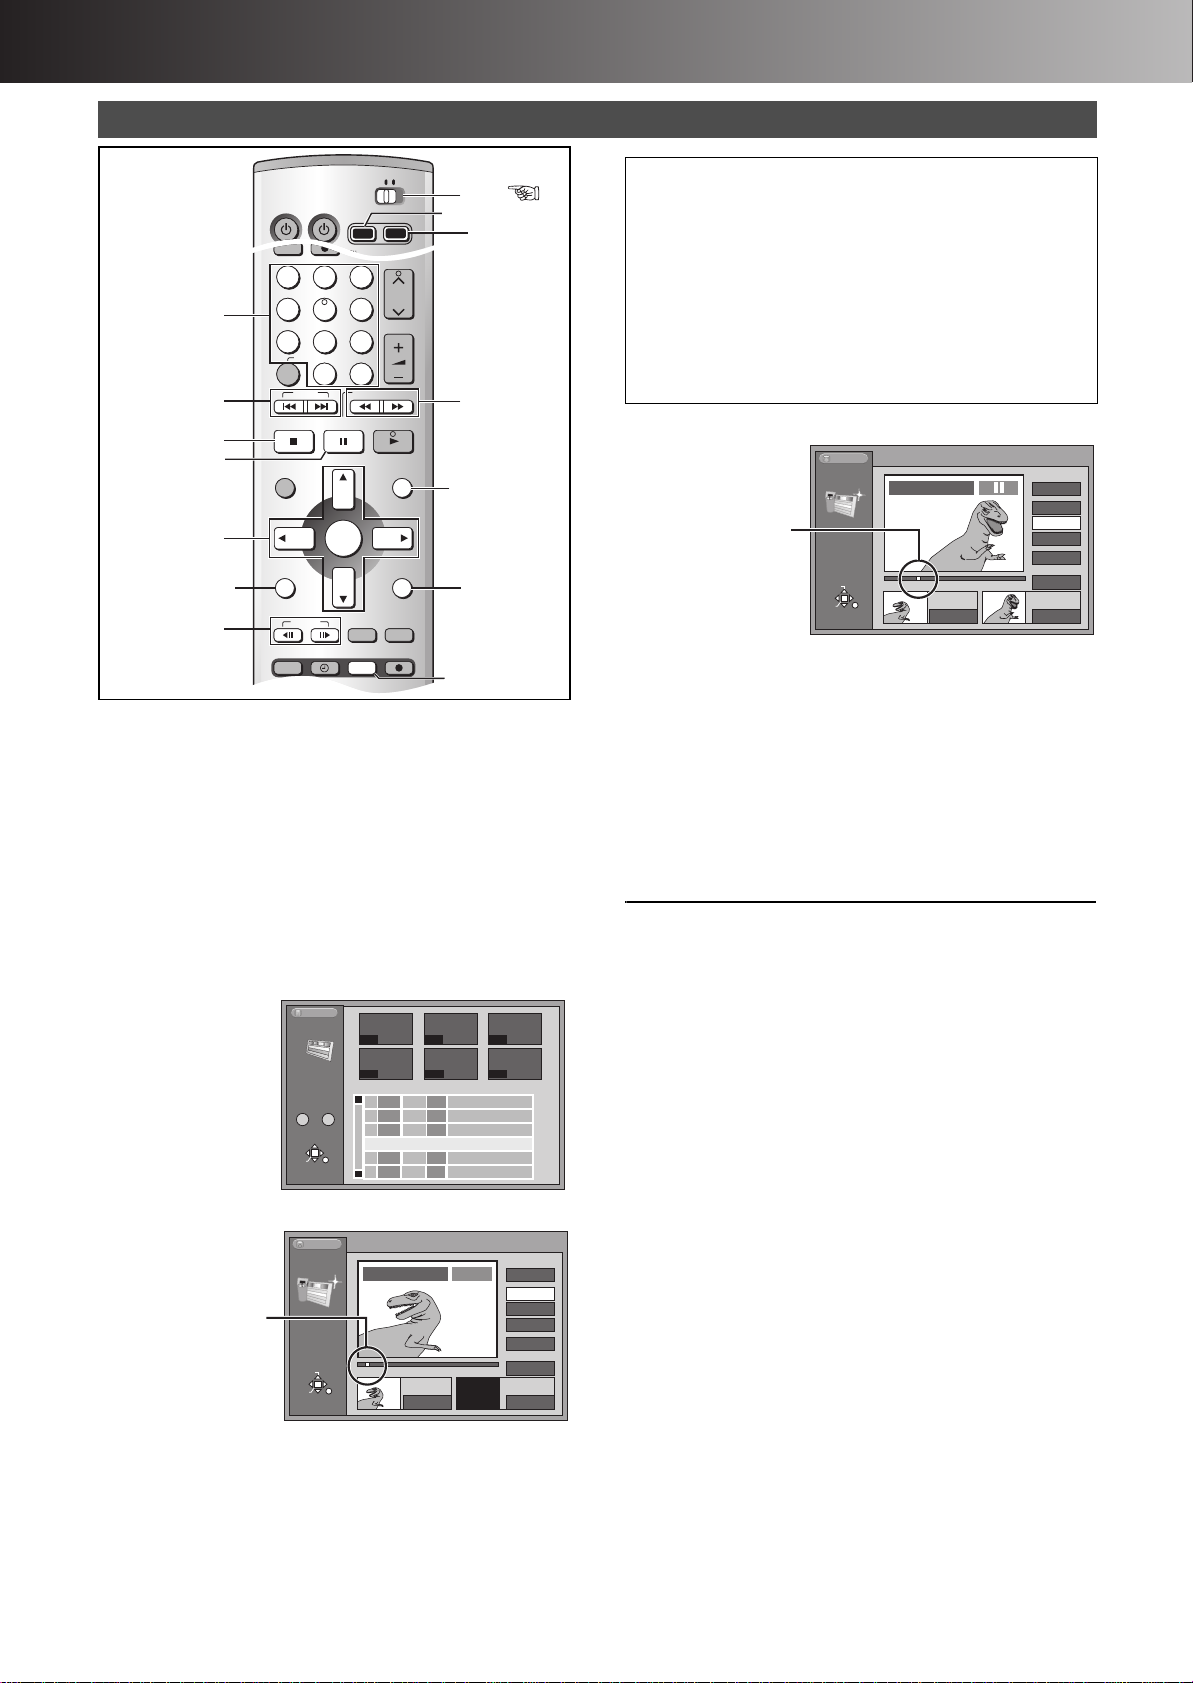
Numeric
Buttons
HDD:
The location of the
whole programme’s
start point
DVD-RAM:
The location of the
whole disc’s start point
End point of scene
Creating play lists
To find the desired points
You can take the following operation.
≥Playback – Press [PLAY/k1.3].
≥Cue/review – Press [6, SLOW/SEARCH], [5, SLOW/
SEARCH] while playing.
≥Slow-motion – Press [;, PAUSE] and then [6, SLOW/
SEARCH], [5, SLOW/SEARCH].
≥Frame step – Press [;, PAUSE] and then [2;, FRAME],
[;1, FRAME] or [2], [1] (Cursor).
≥You can select other programmes with [:, SKIP] and
[9, SKIP].
[4] Press [ENTER] at the end point.
HDD
Creation
RETURN
PLAY LIST No.3
001
33
Start End
0 : 00 . 05
PLAY LIST
SELECT
ENTER
Scene No.
1
Start
End
Next
Exit
0 : 35 . 20
0 : 35 . 20
[HDD] [RAM]
You can create a play list by gathering your favorite scenes from
your recordings. You can also edit the created play lists.
Preparation
≥The lists of programmes recorded in the HDD and the DVD are
displayed separately. It is necessary to select the playback drive
(HDD/DVD) you wish. (page 19)
≥Release protection (disc # page 37, cartridge # page 69). [RAM]
[1] While stopped
Press [PLAY LIST].
[2] Press [3, 4] to select “Create Play
List” and press [ENTER].
[3] Press [ENTER] at the start point.
[5] Select “Exit” with [3, 4] and press
[ENTER].
The play list screen appears.
ªTo stop partway through
Press [RETURN].
ªTo clear the play list screen
Press [RETURN].
ªTo specify other scene
After storing the point in “Start” and “End”, select “Next” after
step 4 and press [ENTER], then repeat steps 3 and 4.
For your reference
≥One disc can have a maximum of 99 play lists and 999 scenes.
These numbers may be reduced under some conditions.
≥Play lists must be made in accordance with the encoding system
HDD
PLAY LIST
0 – 9
SELECT
ENTER
No.
RETURN
001
---
004
---
No.
Date
3
01 13/ 8 006
02 13/ 8 0:07
03 13/ 8 0040:06
3
002
--- ---
--- ---
Total Scene
0:03
Auto action
006
USJ
Dinosaur
Create Play List
003
EditTitle
1
1
1
1
1
1
PLAY LIST
SELECT
ENTER
HDD
Creation
RETURN
PLAY LIST No.3
001
3
0 : 00 . 05
Scene No.
PLAY
Start
End
Next
Exit
Start End
0 : 00 . 05
--:--.--
1
currently selected in “TV System”, i.e. either PAL or NTSC
(page 61).
≥You may not be able to specify start and end points if the material
is still pictures recorded on other equipment.
≥The play list created from the programmes recorded with setting
“DVD-R Rec for High Speed mode” (page 59) to “On” can be
dubbed in High Speed mode. However, you cannot dub the play
lists created from the following materials.
- The play list which has different scenes in recording mode
- The play list including scenes created by multiple programmes
(recorded by “FR” recording mode)
- The play list including multiple audio (e.g. Dolby Digital and
LPCM is mixed.)
42
Page 4
∫ Advanced Operations
The play list you
select is played.
Edit
PL Copy
PL Erase
Enter Title
Properties
Play Scenes
SELECT PAGE
001 / 001
3 13/ 8 0:02 004 Dinosaur
Back Next
RETURN
ENTER
SELECT
--- --- ---
---
002
003
004
---
001 00:00.19
0 – 9
HDD
PLAY LIST
Play Scenes
(a)
(b)
(c)
(d)
Using PLAY LIST
[HDD] [RAM]
Preparation
Create play lists first (page 42).
[1] Press [HDD] or [DVD] to select the playback drive. (page 19)
[2] Press [PLAY LIST].
Scenes are not displayed if you have not yet created a play list with the disc.
ªTo clear the play list screen
Press [RETURN].
1 Playing play lists
[3] Use [3, 4] to select the desired play
list and press [ENTER].
HDD
PLAY LIST
0 – 9
SELECT
ENTER
No.
RETURN
001
004
No.
Date
Total Scene
3
01 13/ 8 006
0:03
02 13/ 8 0:07
03 13/ 8 0040:06
Create Play LIst
3
002
--- ---
Auto action
006
USJ
Dinosaur
003
EditTitle
1
1
1
1
1
1
ªTo stop play list play
Press [∫, STOP]. (The play list appears.)
For your reference
≥You can also select play lists from the list in step 3 by entering a
2-digit number with the numeric buttons.
e.g.: “5”: [0] )[5]
“15”: [1] )[5]
≥If you enter a number larger than the total number of play lists,
the last play list is selected.
HDD
PLAY LIST
No.
0 – 9
SELECT
ENTER
RETURN
001
004
No.
Date
3
01
13/ 8
13/ 8
02
03
13/ 8
3
002
--- ---
Total Scene
006
0:03
Auto action
0:07
006
USJ
0040:06
Dinosaur
Create Play LIst
003
EditTitle
1
1
1
1
1
1
1 Playing Scenes
[3] Use [3, 4] to select the
play list containing
desired scenes and press
[1].
[4] Select “Play
Scenes”
with [3, 4]
and press
[ENTER].
[5] Use [3, 4,
2, 1] to
HDD
PLAY LIST
Play Scenes
SELECT PAGE
0 – 9
SELECT
ENTER
RETURN
3 13/ 8 0:02 004 Dinosaur
001 00:00.19
004
--- --- ---
002
---
001 / 001
Back Next
003
---
select
desired scenes and press [ENTER].
≥The scene you select is played.
ªTo stop scene play
Press [∫, STOP]. (The scene list appears.)
ªTo erase a play list or a play list scene during play
1) Press [ERASE].
≥A confirmation message will be displayed.
2) Use [2] to select “Yes” and press [ENTER].
About the play list scene screen
(a) Play list
information
This shows the
play list
number, date of
creation (date/
month), total
play time, and
the number of
scenes it
contains and
title (if entered).
(b) Scenes
(c)
This picture illustration may be shown in the play list scene
display on the HDD. This indicates pictures that are permitted
to be recorded only once.
(d) Turning pages
If there are more than 9 scenes, use [3, 4, 2, 1] to select
“2 Back” or “Next 1” and press [ENTER] to move to the
previous page or next page. You can also enter the 3-digit
number with the numeric buttons.
e.g.: “5”: [0] )[0] )[5]
“15”: [0] )[1] )[5]
43
Page 5
∫ Advanced Operations
DVD
TV
INPUT SELECT
ShowView
DIRECT TV REC
AV
DVD TV
DIRECT NAVIGATOR
PLAY LIST
TOP MENU
ENTER
MENU
FUNCTIONS
RETURN
STOP
PAUSE
PLAY/x1.3
FRAME
MANUAL SKIP
TIME SLIP
3, 4, 2, 1
ENTER
RETURN
PLAY LIST
DVD
HDD
DVD
HDD DVD
Using PLAY LIST to edit programmes
[HDD] [RAM]
For your reference
≥You can fast-forward, rewind, pause, and slow-motion while
playing scenes just as you can during normal play.
≥Release protection (disc # page 37, cartridge # page 69). [RAM]
1 Edit
[1] Press [HDD] or [DVD] to select the
playback drive.
(page 19)
[2] Press [PLAY LIST].
[3] Use [3, 4] to select the
play list you want to edit
and press [1].
[4] Use [3, 4] to select
desired item and press
Play Scenes
Edit
PL Copy
PL Erase
Enter Title
Properties
[ENTER].
ªTo stop partway
Press [RETURN].
1 Add
[5] Use [2, 1]
to select
“Add” and
press
[ENTER].
[6] Use [3, 4,
2, 1] to
HDD
PLAY LIST
Edit
SELECT PAGE
0 – 9
SELECT
ENTER
RETURN
3 13/ 8 0:02 004 Dinosaur
Add Move Re-edit Erase
001 00:00.19
004
--- --- ---
002
---
001 / 001
Back Next
003
---
select one
scene after the position to add another
and press [ENTER].
1 Move
[5] Select
“Move” with
[2, 1] and
press
[ENTER].
[6] Use [3, 4,
2, 1] to
HDD
PLAY LIST
Edit
SELECT PAGE
0 – 9
SELECT
ENTER
RETURN
3 13/ 8 0:02 004 Dinosaur
Add Move Re-edit Erase
001 00:00.19
004
--- --- ---
002
---
001 / 001
Back Next
003
---
select the
scene to be moved and press
[ENTER].
[7] Press
[ENTER] at
the start
point of the
scene. (“To find
the desired points”,
page 42)
HDD
PLAY LIST
Add
SELECT
ENTER
RETURN
PLAY LIST No.3 Dinosaur
001
3
PLAY
Start End
0 : 00 . 05
Scene No.
1
Start
End
Next
Exit
0 : 00 . 05
--:--.--
[8] Press
[ENTER] at the end point of the scene.
[9] Select “Exit” with [3, 4] and press
[ENTER].
The new scene is inserted before the highlighted scene.
ªTo add other scenes
1) Use [3, 4] after step 8 to select “Next” and press [ENTER].
2) Repeat steps 7, and 8.
[7] Use [3, 4,
2, 1] to
select the
scene
currently in
the position
to which
HDD
PLAY LIST
Edit
SELECT PAGE
0 – 9
SELECT
ENTER
RETURN
3 13/ 8 0:02 004 Dinosaur
Add Move Re-edit Erase
001 00:00.19
004
--- --- ---
002
---
001 / 001
Back Next
003
---
you want to
move the scene and press [ENTER].
≥The scene is moved and inserted before the highlighted
scene.
ªTo move another scenes
Repeat steps 6 and 7.
44
Page 6
∫ Advanced Operations
Erase Scenes
Yes
No
Erase this Scene ?
RETURN
ENTER
SELECT
1 Re-edit
[5] Select “Re-
edit” with
[2, 1] and
press
[ENTER].
[6] Use [3, 4,
2, 1] to
HDD
PLAY LIST
Edit
SELECT PAGE
0 – 9
SELECT
ENTER
RETURN
3 13/ 8 0:02 004 Dinosaur
Add Move Re-edit Erase
001 00:00.19
004
--- --- ---
002
---
001 / 001
Back Next
003
---
select the
scene you want to re-edit and press
[ENTER].
[7] Press [ENTER] at the start point of the
scene.
1 Erase
[5] Select
“Erase” with
[2, 1] and
press
[ENTER].
[6] Use [3, 4,
2, 1] to
(“To find the desired points”, page 42)
HDD
PLAY LIST
SELECT PAGE
0 – 9
SELECT
ENTER
3 13/ 8 0:02 004 Dinosaur
Edit
Add Move Re-edit Erase
001 00:00.19
004
--- --- ---
RETURN
002
---
001 / 001
Back Next
003
---
select the
scene to be
erased and
press
[ENTER].
[8] Press
[ENTER] at
the end
point of the
scene.
[9] Select “Exit”
with [3, 4]
HDD
PLAY LIST
Re-edit
SELECT
ENTER
RETURN
PLAY LIST No.3
001
33
0 : 00 . 05
Scene No.
Back
Start
End
Next
Exit
Start End
0 : 35 . 20
0 : 35 . 20
and press
[ENTER].
The re-edit scene replaces the old one.
ªTo re-edit another scenes
(1) Select “Next” or “Back” with [3, 4] after step 8 and press
[ENTER] until you find the scene you want to re-edit.
(2) Repeat steps 7 to 8 to continue re-editing other scenes.
For your reference
≥You cannot specify an end point before a start point.
[7] Select “Yes” with [2] and press
[ENTER].
The selected scene is erased from the play list.
≥Once a scene has been erased, it is irretrievable. Check
carefully before proceeding.
ªTo erase other scenes
Repeat steps 6 and 7.
Note
The play list itself is erased if you erase all the scenes in it.
1
1 PL Copy
[5] Select “Yes” with [2] and press
[ENTER].
The copied play list appears at the bottom of the list.
1 Enter Title
[5] Enter the title. (page 36)
For your reference
≥The full title is shown in the Properties screen, but if you enter a
long title, only part of it is shown in the play list screen.
≥Even if you erase the play lists or the scenes, the original
programme is not erased.
Copy PLAY LIST
Copy this PLAY LIST ?
Yes
ENTER
No
SELECT
RETURN
1 PL Erase
[5] Select “Yes” with [2] and press
[ENTER].
The play list is
erased.
≥Once a play list
has been erased,
it is irretrievable.
Check carefully
before
proceeding.
1 Properties
Play list information
(e.g., time and date is
shown.)
45
Erase PLAY LIST
Erase this PLAY LIST ?
Yes
ENTER
Properties
Dinosaur
No.
Scenes 0:05.51
3
004
ENTER
Date
Total
No
SELECT
RETURN
25/ 7/2003 FRI
RETURN
Page 7
∫ Advanced Operations
DVD
TV
INPUT SELECT
VIDEO Plus+
DIRECT TV REC
AV
CH
VOLUME
SKIP
STOP
PAUSE
PLAY/x1.3
SLOW/SEARCH
CANCEL
123
DVD TV
4
5
6
789
0 -/--
DIRECT NAVIGATOR
PLAY LIST
TOP MENU
ENTER
MENU
FUNCTIONS
RETURN
STOP
PAUSE
PLAY/x1.3
FRAME
MANUAL SKIP
TIME SLIP
ERASE
REC
PROG/CHECK
TIMER
DUBBING
REC MODE
STATUS
MARKER
AUDI O
DISPLAY
POSITION
MEMORY
A B C D
DISPLAY
DVD
HDD DVD
3, 4, 2, 1
ENTER
Numeric
Buttons
ItemMenu Setting
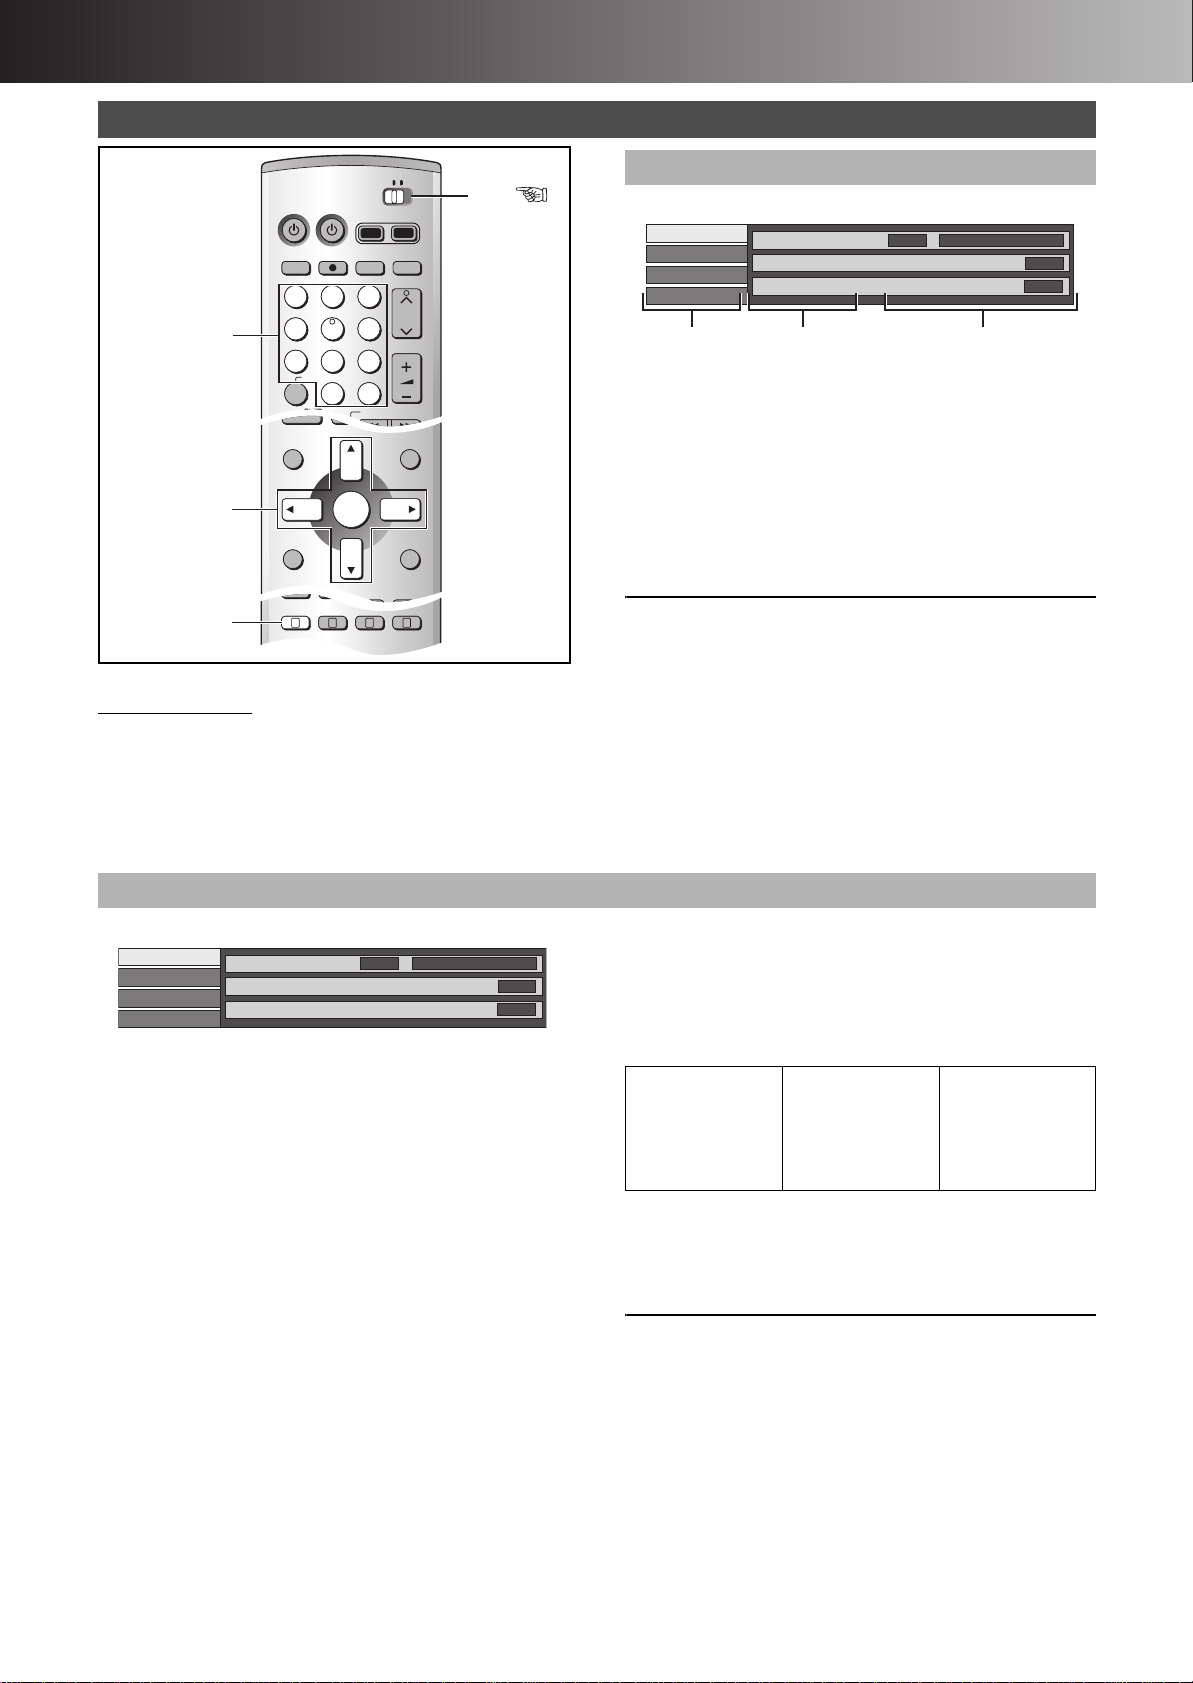
Using DISPLAY menus
[HDD] [RAM] [DVD-R] [DVD-A] [DVD-V] [CD] [VCD] [MP3]
Remote control only
DISPLAY menus contain information about the disc or unit. These
menus allow you to perform following operations:
≥You can change the subtitle and the angle when using
DVD -Video.
≥You can enjoy the repeat play.
≥You can change the setting of picture and sound when playing
back on the HDD or the DVD.
Common procedures
[1] Press [DISPLAY].
Disc
Play
Picture
Sound
Soundtrack
Subtitle
Audio channel
1
Î Digital 2/0ch
OFF
L R
[2] Select the menu with [3, 4] and press
[1].
[3] Select the item with [3, 4] and press
[1].
[4] Select the setting with [3, 4].
≥Some options require different operations. Follow the on-
screen instructions and the instructions described later.
ªWhen you are finished
Press [DISPLAY].
For your reference
≥The screens depend on the disc contents.
≥Depending on the condition of the unit (playing, stopped, etc.)
and the type of software you are playing, there are some items
that you cannot select or change.
1 Disc menu
[HDD] [RAM] [DVD-R] [DVD-A] [DVD-V] [VCD]
Disc
Play
Picture
Sound
Soundtrack
Subtitle
Audio channel
Soundtrack
Soundtrack language [DVD-A] [DVD-V]
(See [A] Soundtrack/Subtitle language)
Change the number to select a soundtrack.
Audio attribute [HDD] [RAM] [DVD-R] [DVD-A] [DVD-V]
(See [B] Audio attributes)
Karaoke vocals, on and off (Karaoke [DVD-V] only)
Solo: ON()OFF
Duet: OFF()V1iV2()V1()V2()OFF...
Subtitle
Subtitle language [DVD-A] [DVD-V]
(See [A] Soundtrack/Subtitle language)
Change the number to select a subtitle language.
Subtitles on/off [HDD] [RAM] [DVD-R] [DVD-A] [DVD-V]
Turn the subtitles on or off.
Angle
[DVD-A] [DVD-V]
Change the number to select an angle.
STILL-P
[DVD-A]
Page
Slide show (Display only)
Still picture number
≥ When “Return” is displayed, select it and press [ENTER] to
return to the default page.
≥ When “RANDOM” is displayed, select it and press
[ENTER], the picture changes randomly each time you
press [ENTER].
1
Î Digital 2/0ch
OFF
L R
Audio channel
[HDD] [RAM] [VCD]
Select the audio channel. (page 22)
PBC
[VCD]
Playback control on/off
Indicates whether menu play (playback control) is on or off.
[A] Soundtrack/Subtitle language
ENG:
FRA:
DEU:
ITA:
ESP:
NLD:
English
French
German
Italian
Spanish
Dutch
SVE:
NOR:
DAN:
POR:
RUS:
JPN:
Swedish
Norwegian
Danish
Portuguese
Russian
Japanese
CHI:
KOR:
MAL:
VIE:
THA:
¢:
Chinese
Korean
Malay
Vietnamese
Thai
Others
[B] Audio attributes
LPCM/PPCM/
Î Digital/DTS/MPEG: Signal type
k (kHz): Sampling frequency
b (bit): Number of bits
ch (channel): Number of channels
For your reference
≥When playing back recordings of bilingual broadcasts, “1+1 ch”
will be displayed.
≥You can only select subtitles, soundtracks, and angles if they are
recorded on the disc.
≥Some discs allow changes to soundtracks, subtitles, and angles
only by the disc’s menus.
≥If the subtitles overlap closed captions recorded on discs, turn
the subtitles off.
46
Page 8

∫ Advanced Operations
Disc
Picture
Sound
Play
MODE
DNR
ON
Normal
1 Play menu
[HDD] [RAM] [DVD-R] [DVD-A] [DVD-V] [CD] [VCD] [MP3]
Disc
Play
Picture
Sound
Repeat Play
Marker
1s10
††††††††††
OFF
Repeat play
You can play a programme, play list, chapter, title, or track
repeatedly.
Marker
You can mark points on a disc to return to later.
(See below)
(page 23)
ªRepeat play
[HDD] [RAM] [DVD-R] [DVD-A] [DVD-V] [CD] [VCD] [MP3]
During play
Use [3, 4].
Disc
Play
Picture
Sound
The display changes as illustrated.
[HDD] [RAM] [DVD-R]
PRG (PROGRAMME),.ALL,.OFF
^-------------------------------------------------J
[DVD-V]
Chapter,.Title,.OFF
^--------------------------J
[CD] [VCD]
Track,.ALL,.OFF
^---------------------J
[DVD-A] [MP3]
Track,.Group,.OFF
^-------------------------J
1 Picture menu
[HDD] [RAM] [DVD-R] [DVD-A] [DVD-V] [VCD]
Repeat Play
Marker
1s10
††††††††††
OFF
While playing a play list
[HDD] [RAM]
PL (PLAY LIST),.OFF
^---------------------------------J
If the Video CD has playback control
1) While stopped (the screen saver is on the
TV), press the numeric buttons to select a
track. (page 21)
2) Do the above operation.
Note
≥Repeat play may not work as desired with some discs.
≥Repeat play does not work if the disc’s elapsed play time is not
shown on the unit’s display.
≥You cannot use repeat play to an entire DVD-Audio, DVD-Video,
MP3 discs or all the play lists on a DVD-RAM.
≥While playing back, you can set the repeat play. When stopped,
the repeat play operation is cancelled.
≥[DUBBING] or [ERASE] does not work while in repeat play mode.
MODE
To select the picture mode during play
Normal: Normal mode
Soft:Soft mode
Fine: Fine mode
Cinema: Cinema mode (mellows movie, enhances detail in
dark scenes.)
DNR
You can turn on and off the recommended settings for DNR.
ON()OFF
1 Sound menu
[HDD] [RAM] [DVD-R] [DVD-A] [DVD-V]
Disc
Play
Picture
Sound
V.S.S.
[HDD] [RAM] [DVD-R] [DVD-V]
(Only for Dolby Digital with 2 or more channels)
Enjoy a surround-like effect if you are using 2 front speakers
only. The effect is broadened and sound seems to come from
virtual speakers on either side if the disc has surround signals
recorded on it.
Natural()Emphasis()OFF()Natural...
V. S. S.
Dialog Enhancer
OFF
OFF
Note
≥V.S.S. will not work, or will have less effect, with some discs,
even if you select “Natural” or “Emphasis”.
≥Turn V.S.S. off if it causes distortion.
Dialog Enhancer
[DVD-A] [DVD-V]
(Dolby Digital, 3-channel or over only, including a center
channel)
The volume of the center channel is raised to make dialog
easier to hear.
ON()OFF
47
Page 9
∫ Advanced Operations
Card
Insert label up with the notch facing in.
2 Align to match the
mark.
Terminal connections
facing into the unit.
The labelled side facing upwards.
1 Push 2 [EJECT] comes
out
3 Push again
INPUT SELECT
ShowView
DIRECT TV REC
AV
CH
VOLUME
SKIP
DIRECT NAVIGATOR
PLAY LIST
TOP MENU
ENTER
MENU
FUNCTIONS
RETURN
STOP
PAUSE
PLAY/x1.3
SLOW/SEARCH
CANCEL
123
4
5
6
789
0 -/--
FRAME
MANUAL SKIP
TIME SLIP
ERASE
REC
PROG/CHECK
TIMER
DUBBING
REC MODE
STATUS
MARKER
3, 4, 2, 1
ENTER
:, 9
ERASE
RETURN
FUNCTIONS
Numeric
Buttons
JPEG
Input
PC CARD 100CDPFP
1/2
Album
Slide Show
Copy
Playing still pictures
Inserting/Removing the SD/PC Card
[SD] [CARD]
Only insert or remove the SD/PC card after turning the
unit off.
≥When the card indicator in the unit display is flashing, the card is
being read from or written to. Do not turn off the power or
remove the card. Such action may result in malfunction or
loss of the card’s contents.
≥It is not possible to open the disc tray while the still pictures
screen is displayed.
ªSD card slot
Inserting the card
1 Press down.
2 Turn the label up with the notch facing in.
3 Lift the tab until it clicks into place flush with card.
Removing the card
1 Press down.
2 Press on the center of the card.
≥Raise the guard after removing the
card.
ªPC card slot
Inserting the card
Hold the edge of the card and insert until it fits into place.
≥Some cards need the adaptor. (page 11)
≥When using the adaptor, do not press the card directly.
Removing the card
≥If using the adaptor, remove the adaptor and card together.
≥If the eject button does not come out, press the card in once
more and then repeat steps 1
–
3 to remove the PC card.
Selecting the folder (Input)
[SD] [CARD] [HDD] [RAM]
[1] While stopped
Press [FUNCTIONS]. (page 29)
[2] Select “JPEG” with [3, 4, 2, 1] and
press [ENTER].
[3] Check if
“Input” is
selected
and press
[ENTER].
≥A list of the valid folders in the drive appears.
(a) Folder name
(b) Folder
number
(c) Numbers° of
scenes (still
pictures)
and files in
the selected
folder
° They don’t
JPEG
Input
SD CARD
PC CARD
DVD
HDD
0 – 9
ENTER
No.
RETURN
PC CARD 100CDPFP
\DCIM\100CDPFP
3
001 100CDPFP
3
include
numbers in the folders lower than the folder selected
currently.
[4] Press [2] and [3, 4] to select the
drive (SD CARD/PC CARD/DVD/HDD)
and press [1].
[5] Use [3, 4] to select the still picture
folder.
≥If there are folders other than displayed, you can move to
them with [:, SKIP] or [9, SKIP].
(“Folder structure”, page 12)
[6] Press [ENTER].
48
Scene 0046
File 0046
1
1
1
(a)
1
(b)
1
1
1
1
(c)
Page 10
∫ Advanced Operations
1 Displaying still pictures (Album)
[SD] [CARD] [HDD] [RAM]
You can display a list of the still pictures or display pictures one by
one from any folder existing on the card, HDD or DVD-RAM.
[7] Select “Album” with [3, 4] and press
[ENTER].
Input
JPEG
SELECT
ENTER
RETURN
PC CARD 100CDPFP
Album
Slide Show
Copy
Copy all of card
1/2
SELECT
ENTER
1 To display still pictures one by one with constant interval (Slide Show)
[SD] [CARD] [HDD] [RAM]
The still pictures in the folder selected will be displayed one by one with a constant interval.
JPEG
Album
Select Page
0 – 9
RETURN
Input
PC CARD 100CDPFP
0002
0001
0004
----
---- ---- ----
1 / 1
Back Next
0003
----
[7] Select “Slide Show” with [3, 4] and press [ENTER].
≥The still pictures in the folder selected are displayed in numerical order.
ªTo change the display interval (page 52)
ªTo select the next or previous still picture
While in still picture display, use [2, 1].
[1] : next still picture
[2] : previous still picture
The still picture changes every time the button is pressed.
ªTo stop slide show
Press [RETURN]. (Menu screen appears.)
ªTo display still pictures one by one
Use [3, 4, 2, 1] to select a still picture and press [ENTER].
≥The selected still picture is displayed in full size.
≥You can also select a page of still pictures with the numeric
buttons.
e.g.: “2”: [0] )[0] )[2]
“12”: [0] )[1] )[2]
≥If there are more than 9 still pictures, select “Next 1” with [3, 4,
2, 1] and press [ENTER]. Select “2 Back” to move back.
≥While in the Slide Show, it is possible to perform this function.
ªTo select the next or previous still picture
While in still picture display, use [2, 1].
[1] : next still picture
[2] : previous still picture
The still picture changes every time the button is pressed.
ªTo stop still picture display
Press [RETURN]. (The still picture list containing the picture you
first selected will be displayed.)
JPEG
SELECT
ENTER
RETURN
Input
PC CARD 100CDPFP
Album
Slide Show
Copy
Copy all of card
1/2
To erase still pictures
(Still pictures are erased irretrievably by this procedure.)
While in still picture display
1) Press [ERASE].
2) Select “Erase” with [2, 1] and press [ENTER].
Note
≥While in the Slide Show, it is possible to perform this function.
[SD] [CARD] [RAM]
≥When the card is protected (page 11) or the disc is protected
(pages 37, 69), it is not possible to erase the still pictures.
To rotate still picture
While in still picture display
1) Press [ENTER].
2) Select “ROTATE RIGHT” or “ROTATE LEFT” with [3, 4]
and press [ENTER].
≥Whole of the still picture is rotated and displayed.
≥Rotation information will not be stored.
Note
≥While in the Slide Show, it is possible to perform this function.
To display information about the still pictures
While in still picture display, press [ENTER].
(Date, folder number, file number and number of pages are
displayed.)
Note
≥While in the Slide Show, it is possible to perform this function.
To give a folder a title
It is possible to enter up to 36 characters.
After selecting the still picture folder for display (step 5 of
“Selecting the folder (Input)”, page 48),
1) Select “Folder title” with [1] and press [ENTER].
2) Enter the title. (page 36)
Note
≥Titles inputted using this unit will not be displayed on other
equipment.
≥Folder titles entered using this unit will only be displayed using
this unit. Folders entered using this unit are written to the
TITLE.DVD file.
≥If there is not enough space for the entry or if the limit for the
number of files has been exceeded (page 12), the title cannot be
entered.
[SD] [CARD] [RAM]
≥When the card is protected (page 11) or the disc is protected
(pages 37, 69), it is not possible to erase the still pictures.
49
Page 11
∫ Advanced Operations
DIRECT NAVIGATOR
PLAY LIST
TOP MENU
ENTER
MENU
FUNCTIONS
RETURN
FRAME
MANUAL SKIP
TIME SLIP
3, 4, 2, 1
ENTER
RETURN
Editing still pictures
Common procedures
[1] Select the still picture folder for edit
(step 1–6 of “Selecting the folder
(Input)”, page 48).
[2] Use [3, 4] to select desired item and
press [ENTER].
Input
JPEG
You cannot access “Copy”, “Copy all of card”, “Erase”, “Protect”,
“Print (DPOF)” and “Format” when the card is write-protected
(page 11) or the disc is protected (pages 37, 69). Release the
protection to use these functions.
SELECT
ENTER
RETURN
(a) Folder that is selected currently
ªTo stop partway
Press [RETURN].
Select a desired folder or still pictures
ªTo select still pictures one by one
Use [3, 4, 2, 1] to select a still picture and press [ENTER]. (A check mark appears on the still picture.)
≥Repeat this if you copy more than one still picture.
ªTo select all the still pictures in the folder
Select “Folder” or “Whole” with [3, 4, 2, 1] and press [ENTER].
(A check mark appears on the folder’s name; check marks inputted separately will be erased.)
To cancel check marks:
Use [3, 4, 2, 1] to select the folder or still picture with the check mark and press [ENTER].
PC CARD 100CDPFP
Album
Slide Show
Copy
Copy all of card
1/2
(a)
JPEG
SELECT
ENTER
RETURN
PC CARD 100CDPFP
Erase
Protect
Print (DPOF)
Others
2/2
1 Copy
[SD] [CARD] [HDD] [RAM]
You can copy the whole folder or selected still pictures to PC card,
HDD or DVD-RAM. (maximum 300 folders, 3000 files)
[3] Select a
desired
folder or still
pictures.
(“Select a desired
folder or still
pictures”, See
above)
JPEG
Copy
Select Page
0 – 9
SELECT
ENTER
Input
Folder
0001
0004
---- ---- ----
RETURN
Back Next
PC CARD 100CDPFP
0002
0003
----
----
1 / 1
Copy
[4] Select
“Copy” with [3, 4, 2, 1] and press
[ENTER].
≥The confirmation screen appears.
[5] Select the destination drive.
While the
confirmation screen
is displayed,
(1) Select
“Destination”
with [3, 4] and
press [ENTER].
(2) Use [2, 3, 4]
to select the
drive.
ENTER
(3) Use [1, 3, 4]
to select the folder and press [ENTER].
≥Some folders (§ of page 12) cannot be copied to.
[6] Select “Copy” with [4,2, 1] and
press [ENTER].
≥Copying still pictures begins.
JPEG
Copy
RETURN
Input
PC CARD 100CDPFP
Destination
Copy Cancel
Copy
DVD 101_DVD
\JPEG\DCIM001\101_DVD
Begin copy?
For your reference
≥When there is no folder in the destination drive, a new folder will
be created.
≥When there is a folder in the destination drive, copying will
continue from the last of the existing still pictures.
≥When copying a folder, any files in the folder besides the still
pictures are also copied.
≥Folders lower than the folder to be copied will not be copied.
≥If the space on the destination drive runs out or the number of
files/folders to be copied exceeds the maximum, copying will stop
partway through.
≥If no title has been entered for the folder at the destination drive,
the title from the copying source will be entered. It is
recommended entering the title at the copying source.
≥After copying, it may take some time to download the copying
source information.
≥Print (DPOF) number setting (page 51) is not transferred.
50
Page 12
∫ Advanced Operations
1 Copy all of card
[SD] [CARD]
You can copy the all
contents of the card to
HDD or DVD-RAM.
(maximum of 300
folders, 3000 files)
[3] Confirm that
“Copy from”
is selected
and [2, 1] use to select “SD CARD”
or “PC CARD”
[4] Confirm that “Copy to” is selected and
use [2, 1] to select “HDD” or “DVD”.
[5] Select “Copy all” with [4, 2, 1] and
press [ENTER].
1 Erase
[SD] [CARD] [HDD] [RAM]
You can erase the whole folders or selected still pictures.
Once activated, materials including protected still pictures
cannot be recovered. Check it carefully before proceeding.
[3] Select a desired folder or still pictures.
(“Select a desired folder or still pictures”, page 50)
[4] Select “Erase” with [3, 4, 2, 1] and
press [ENTER].
≥The confirmation screen appears.
JPEG
Copy all
RETURN
Copy all of card
Copy from
PC CARD
Copy to
\JPEG\DCIM001
Copy all JPEG from the card.
Copy all Cancel
PC CARD
DVD
≥All still pictures are copied, and the screen shown in step 4
reappears.
For your reference
≥A new folder will be created in the destination drive.
≥All compatible files in the folder are copied even if not still
pictures.
≥Folders lower than the folder to be copied will not be copied.
≥If the space on the destination drive runs out or the number of
files/folders to be copied exceeds the maximum, copying will stop
partway through.
≥After copying, it may take some time to download the copying
source information.
≥Print (DPOF) number setting (page 51) is not transferred.
Note
≥Still pictures are copied, but invalid files and folders will not
copied. (page 12)
[5] Select “Erase” with [2] and press
[ENTER].
≥Selected still pictures are erased, and the still picture select
screen reappears.
For your reference
≥When you erase folders, files other than still pictures in the folder
are also erased.
≥Folders lower than the folder to be erased will not be erased.
≥To erase files other than still pictures, select the folder containing
the file and erase.
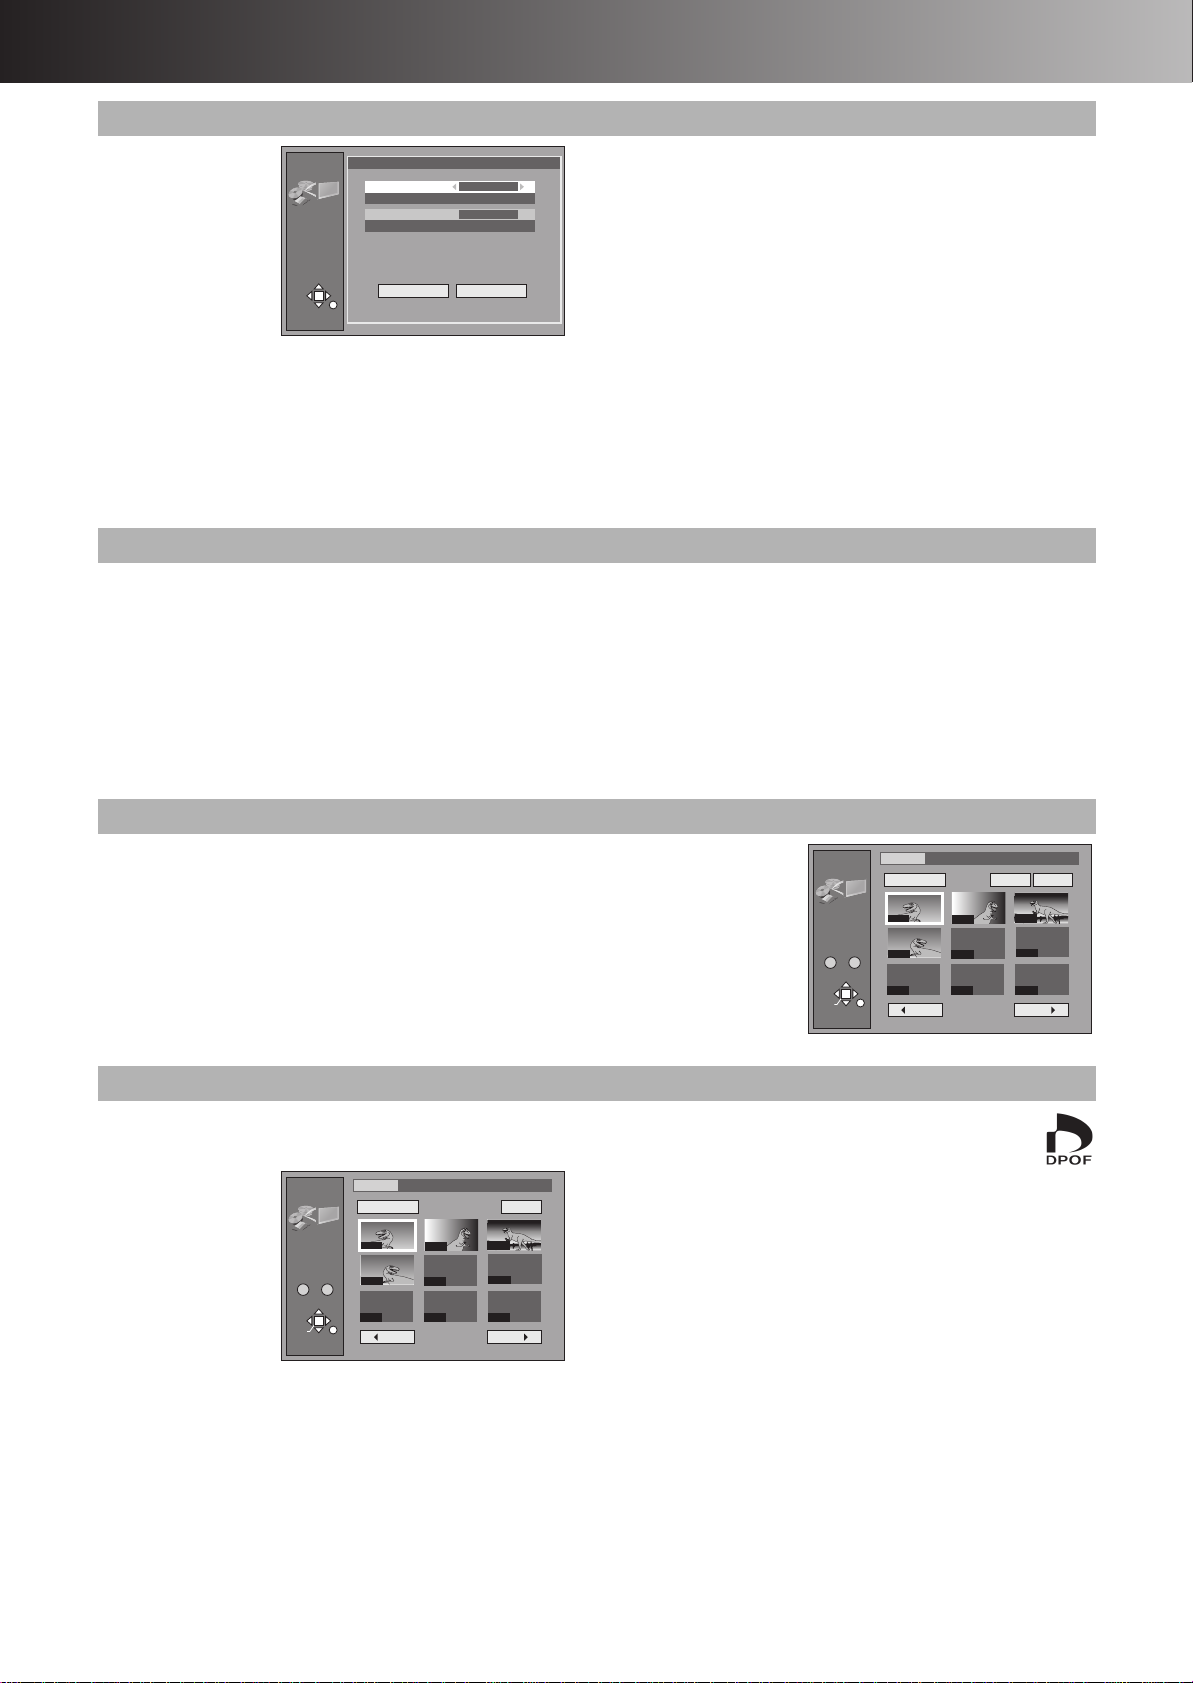
1 Protect
[SD] [CARD] [HDD] [RAM]
You can set/release protection for whole folders or for individual still pictures.
[3] Select a desired folder or still pictures. (“Select a desired folder or still
pictures”, page 50)
[4] Use [3, 4, 2, 1] to select “Protect”/“Cancel” and press
[ENTER].
≥The confirmation screen appears.
[5] Use [2] to select “Yes” and press [ENTER].
≥The padlock mark appears/disappears on the selected folder or still picture.
1 Print (DPOF)
[SD] [CARD]
You can select a whole folder or individual pictures for printing and
specify the number of prints to be made (maximum 999 files).
Input
[3] Select a
desired
folder or still
pictures.
(“Select a desired
folder or still
pictures”, page 50)
JPEG
DPOF
Select Page
0 – 9
SELECT
ENTER
RETURN
PC CARD 100CDPFP
Whole
0001
0004
---- ---- ----
0002
----
Back Next
1 / 1
DPOF
0003
----
[4] Select
“DPOF” with [3, 4, 2, 1] and press
[ENTER].
≥The confirmation screen appears.
[5] Confirm that “Number of prints” is
selected and use [2, 1] to set number
of pages (0 to 9).
≥The DPOF mark appears if you set one or more
pictures to print.
ªTo change print (DPOF) settings
While the JPEG DPOF screen is displayed.
1) Use [3, 4, 2, 1] to select “Whole” or a still picture with
DPOF mark and press [ENTER].
2) Select “DPOF” with [3, 4, 2, 1] and press [ENTER].
3) Use [2, 1] to change the print setting
≥The print setting will be cancelled if you set number of pages
to “0”.
4) Select “Set” with [3, 4, 2, 1] and press [ENTER].
For your reference
≥Settings cannot be made for folders and files not in accordance
with DCF standards.
≥Print settings (DPOF) made here may not be viewable on other
equipment.
≥Settings cannot be made if there is no remaining space on the
SD/PC Card.
≥All settings made on other equipment will be cancelled except the
number of prints.
[6] Select “Set” with [3, 4, 2, 1] and
press [ENTER].
JPEG
Protect
Select Page
0 – 9
SELECT
ENTER
Input
Folder
0001
0004
---- ---- ----
RETURN
Back Next
PC CARD 100CDPFP
ProtectCancel
0002
----
0003
----
1 / 1
51
Page 13

∫ Advanced Operations
DVD
TV
INPUT SELECT
ShowView
DIRECT TV REC
AV
DVD TV
HDD DVD
INPUT SELECT
ShowView
DIRECT TV REC
AV
CH
VOLUME
SKIP
DIRECT NAVIGATOR
PLAY LIST
TOP MENU
ENTER
MENU
FUNCTIONS
RETURN
STOP
PAUSE
PLAY/x1.3
SLOW/SEARCH
CANCEL
123
4
5
6
789
0 -/--
FRAME
MANUAL SKIP
TIME SLIP
ERASE
REC
PROG/CHECK
TIMER
DUBBING
REC MODE
STATUS
MARKER
AUDI O
DISPLAY
POSITION
MEMORY
3, 4, 2, 1
ENTER
∫
RETURN
MANUAL SKIP
FUNCTIONS
DVD
HDD
DVD
6, 5
:, 9
HDD DVD
;
STATUS
Numeric
Buttons
JPEG
Others
Others
Slide Show Intervals
5 sec.
Format
SD CARD
JPEG
Others
Others
Slide Show Intervals
5 sec.
Format
SD CARD
Others
[1] While stopped
Press [FUNCTIONS]. (page 29)
[2] Select “JPEG” with [3, 4, 2, 1] and
press [ENTER].
[3] Select
“Others”
with [4] and
press
[ENTER].
JPEG
SELECT
ENTER
RETURN
PC CARD 100CDPFP
2/2
Erase
Protect
Print (DPOF)
Others
1 Slide Show Intervals
[SD] [CARD] [HDD] [RAM]
You can set the display interval of slide show. (page 49)
1 Format
[SD] [CARD]
You can erase all still
pictures in the SD/PC
cards.
Once activated,
recorded contents
(including protected
still pictures and
computer data) will be completely erased. Check it carefully
before proceeding.
[4] Select “Format” with [3, 4] and use
[2, 1] to select “SD CARD” or “PC
CARD” and then press [ENTER].
≥The confirmation screen appears.
[4] Confirm that “Slide Show Intervals” is
selected and use [2, 1] to select the
desired timing between still pictures
(0–30 seconds) (in units of 1 second).
[5] Press [ENTER].
[5] Select “Yes” with [2] and press
[ENTER].
≥The confirmation screen appears.
[6] Select “Start” with [2] and press
[ENTER].
Format begins.
[7] Press [ENTER] to complete the
procedure.
Note
≥The cards formatted on this unit may not be usable on other
equipment.
52
Page 14

∫ Advanced Operations
≥You can turn on and off the indication
on the upper right of the screen by
[STATUS].
Editing SD VIDEO (MPEG4) programmes
You can organize the recorded programme by erasing or other
operation.
≥Check available cards (page 11).
Preparation
≥Release protection (disc # page 37, cartridge # page 69,
card # page 11).
≥Inset a disc or card (pages 19, 48)
[1] While stopped,
Press [FUNCTIONS]. (page 29)
[2] Select “SD
VIDEO
(MPEG4)”
with [3, 4,
2, 1] and
press
[ENTER].
1 Play
[SD] [CARD] [HDD] [RAM]
[6] Use [3, 4]
to select the
HDD
SD VIEDEO
(MPEG4)
SELECT
ENTER
RETURN
SD Card
SD VIEDEO
(MPEG4)
Input
HDD
Play
Erase all programmes
Format SD CARD
desired
programme.
[7] Press
[ENTER] to
play.
≥The picture is enlarged
according to the display frame in this unit (320k240). Therefore,
the aspect ratio may differ from that of the original picture.
≥You can also select the programme by entering a 3-digit number
with the numeric buttons.
≥When there are many folders on Mobile hard disk other than
displayed, you can move to them with [:, SKIP] or
[9, SKIP].
≥The recording date may differ from that of the original data.
≥In case of a TV station with Teletext information, the title of the
TV programme is entered automatically, provided the “Title page”
is correctly set. (page 64)
≥In case of a TV station with Teletext information, it may take over
30 minutes to get the title or may fail to get.
Icon explanation
The programme is not allowed to record by copy-guard.
t The programme cannot be played.
The audio cannot be output in this programme.
The title cannot be entered on this programme.
No.
0 – 9
SELECT
ENTER
No. DateName Start EditTitle
3
001
6
002
RETURN
3
13/ 8 WED410:00
13/ 8 WED
9:00
Dinosaur
Auto action
[3] Check if “Input” is selected and press
[ENTER].
[4] Select the drive (HDD/DVD/SD CARD/
PC CARD) with [3, 4] and press
[ENTER].
[5] Use [3, 4] to select a desired item
and press [ENTER].
ªTo stop it halfway
Press [RETURN].
The following
operation is possible
on the SD VIDEO
(MPEG4) playback
screen.
≥To stop: Press
[∫,STOP].
≥To pause: Press
[;,PAUSE].
≥For Fast forward or
rewind (SEARCH):
Press [6, SLOW/
SEARCH] or [5,
SLOW/SEARCH].
- When pressing these buttons, only the time display goes
forward or backward while a part of the SD VIDEO (MPEG4)
is displayed as a still picture.
- There are 3 search speeds. Each press increases the search
speed.
≥To skip: Press [:, SKIP] or [9, SKIP]. (page21)
≥For manual skip: Press [MANUAL SKIP]. (page22)
≥To erase: Press [ERASE], then select “Erase” with [2] and
press [ENTER].
≥To dub: “One Touch Dubbing”, page 33.
For your reference
When playing back SD VIDEO (MPEG4), the recording mode
cannot be displayed because the bit rate is changed according to
the picture quality. You can check the bit rate of the recorded
programme in “Properties” (page 54).
HDD
PLAY
PRG 1
0:00.36
1 Erase all programmes 1 Format SD CARD
[SD] [HDD] [RAM]
[6] Select “Yes” with [2] and press
[ENTER].
[7] Select “Start” with [2] and press
[ENTER].
All MPEG4 programmes are erased.
For your reference
≥Keep pressing [RETURN] for 3 seconds or more to cancel. (The
programmes are erased until this unit recognizes the
cancellation.)
≥When All erase is carried out, the files which are not compatible
with this unit may be erased.
[SD]
To erase all of contents of the card or to use unformatted
card.
[6] Select “Yes” with [2] and press
[ENTER].
[7] Select “Start” with [2] and press
[ENTER].
≥Formatting starts.
For your reference
≥Do not turn the unit off or disconnect the AC mains lead
until the ending message (only in All Erase and SD Card
format) appears. The card may be disabled.
≥Once erasing and formatting are carried out, materials including
the data from a computer cannot be recovered. Check them
carefully before proceeding. (When formatting in SD Card format
programme protect is set on them, all programmes are erased
even if they are protected.)
53
Page 15

∫ Advanced Operations
DVD
TV
INPUT SELECT
VIDEO Plus+
DIRECT TV REC
AV
CH
VOLUME
SKIP
DIRECT NAVIGATOR
PLAY LIST
TOP MENU
ENTER
MENU
FUNCTIONS
RETURN
STOP
PAUSE
PLAY/x1.3
SLOW/SEARCH
CANCEL
123
DVD TV
4
5
6
789
0 -/--
FRAME
MANUAL SKIP
TIME SLIP
ERASE
REC
PROG/CHECK
TIMER
DUBBING
REC MODE
STATUS
MARKER
AUDI O
DISPLAY
POSITION
MEMORY
HDD DVD
3, 4, 2, 1
ENTER
RETURN
CH, W, X
DVD
FUNCTIONS
HDD
DVD
INPUT SELECT
REC MODE
µ
;
∫
Numeric
Buttons
Using Play to edit programmes
[1] Select the desired
programme for edit (step
1–6 of “Play”, page 53).
[2] Press [1] so the submenu
Erase
Enter Title
Properties
Protection
appears.
[3] Use [3, 4] to select desired item and
press [ENTER].
1 Erase
[SD] [HDD] [RAM]
[4] Select “Erase” with [2] and press
[ENTER].
≥When erase is carried out, the files which are not compatible with
this unit may be erased.
1 Enter Title
[SD] [HDD] [RAM]
[4] Enter or edit the title. (page 36)
1 Properties
[SD] [CARD] [HDD] [RAM]
You can check the
contents of a selected
programme.
Dinosaur
No. 1
Date 13/ 8/2003 WED
Name ARD
Time 10:00
Properties
Rec time 1:00
Bit Rate 472Kbps
File Size 55MB
File Name M0L001
ENTER
RETURN
1 Protection
[SD] [HDD] [RAM]
You can prevent accidental erasure of programmes by writeprotecting them.
[4] Select “Yes” with [2] and press
[ENTER].
≥To protection
SD Card
SD Card
SD VIEDEO
SD VIEDEO
(MPEG4)
Protection
Set Up Programme Protection ?
Yes
SELECT
ENTER
No
RETURN
The padlock mark appears.
Child Lock
The child lock deactivates all buttons on the unit and remote control. Use it to prevent other people from operating the unit.
To activate the child lock
Hold down [ENTER] and [RETURN] simultaneously until “t HOLD” appears on the display.
≥If you press a button while the child lock is on, “t HOLD” appears on the display and operation is disabled.
To cancel the child lock
Hold down [ENTER] and [RETURN] simultaneously until “t HOLD” disappears.
≥If you cannot cancel the Child Lock, press [RETURN] and then operate this unit.
(MPEG4)
No.
No.
0 – 9
0 – 9
No. DateName Start EditTitle
No. DateName Start EditTitle
3
3
13/ 8 WED410:00
001
13/ 8 WED410:00
RETURN
RETURN
001
13/ 8 WED
6
002
13/ 8 WED
6
002
3
3
SELECT
SELECT
ENTER
ENTER
9:00
9:00
Dinosaur
Dinosaur
Auto action
Auto action
≥To release protection
Protection
Cancel Programme Protection ?
Yes
SELECT
ENTER
No
RETURN
The padlock mark disappears.
SD Card
SD Card
SD VIEDEO
SD VIEDEO
(MPEG4)
(MPEG4)
No.
No.
0 – 9
0 – 9
SELECT
SELECT
ENTER
ENTER
RETURN
RETURN
No. DateName Start EditTitle
No. DateName Start EditTitle
3
3
001
001
002
002
3
3
13/ 8 WED410:00
13/ 8 WED410:00
13/ 8 WED
6
13/ 8 WED
6
9:00
9:00
Dinosaur
Dinosaur
Auto action
Auto action
54
Page 16

∫ Advanced Operations
Recording from an external device
Preparation
≥Press [HDD] or [DVD] to select the recording drive. (page 19)
≥Release protection (disc # page 37, cartridge # page 69). [RAM]
≥Confirm there is sufficient empty space for recording on the HDD.
(page 26)
Manual Recording
[HDD] [RAM] [DVD-R]
When connected to DV equipment/non-DV equipment
Connect the other equipment to this unit’s input terminals
(page 57).
≥Use a DV cable to connect the DV equipment.
[1] Press [REC MODE] to select the
recording mode. (page 26)
≥It is also possible to perform the flexible recording (FR).
(page 27)
[2] While stopped
Press [CH, W, X] or [INPUT SELECT] to
select the input channel.
≥Select AV1, AV2, AV3, AV4 or DV.
[3] Start play on the other equipment.
[4] Press [¥, REC] at the point you want
to start recording.
For your reference
≥Select the “TV System” (PAL/NTSC) of the programme you wish
to record (page 61).
≥About recording from DV equipment
- We recommend connecting one piece of DV equipment at a
time.
- When recording from DV equipment, you can determine the
audio setting at “Audio Mode for DV Input”. (page 60)
ªTo skip unwanted parts
Press [;, PAUSE] to pause recording. (Press again to restart
recording.)
Note
≥Stop play on the other equipment as well.
≥This unit does not support recording the signal from a personal
computer.
≥When recording bilingual programmes
- When “M1” and “M2” is selected on the connected equipment,
you can choose the audio mode in playback. However, when
you record SD VIDEO (MPEG4) to HDD simultaneously, select
“M1” or “M2” on the connected equipment. [HDD] [RAM]
- Select “M1” or “M2” on the connected equipment. (You cannot
select the audio mode in playback.) [DVD-R]
For your reference
≥Almost all videos and DVD software on sale have been treated to
prevent illegal copying. These software cannot be recorded.
DV Automatic Recording (DV AUTO REC)
[HDD] [RAM]
Preparation
≥Connect the DV equipment to the DV input terminal on the front
panel. (page 57)
≥Pause play of the DV equipment at the point you want recording
to start.
[1] Press [REC MODE] to select the
recording mode. (page 26)
[2] While stopped
Press [FUNCTIONS]. (page 29)
[3] Use [3, 4, 2, 1] to select “DV AUTO
REC” and press [ENTER].
[4] Use [2, 1] to select “Rec” and press
[ENTER].
DV AUTO REC screen appears.
≥Recording starts.
ªWhen recording finishes
The confirmation screen appears. Press [ENTER] to finish DV auto
recording.
For your reference
≥Do not operate the DV equipment during recording since this will
cause recording to stop.
≥When this unit detect the parts recorded by the DV equipment.
- Play lists are automatically created.
- The recording is divided into scenes.
- The date of the first recording will be the programme’s title.
- The marker is automatically registered.
≥You cannot record and play simultaneously.
≥The date and time information on the tape of the DV equipment
will not be recorded.
≥SD VIDEO (MPEG4) programmes cannot be recorded despite
setting “MPEG4 Rec Mode” (page 59) to “SF”, “F”, “N” or “E”.
≥You can connect only 1 DV equipment to this unit.
≥Depending on the connected DV equipment, video or audio may
not be input properly.
Note
≥You cannot control this unit from the digital video equipment even
if using the DV cable.
≥The DV input on this unit is for use with DV cameras only.
≥When the “DV AUTO REC” does not work:
- Check the connection and the setting.
- Turn the power off.
- Turn the power on again.
- When the problem still persists, follow the “Manual Recording”
above.
≥The DV equipment name may not be shown correctly.
ªTo stop recording
Press [∫, STOP].
55
Page 17

∫ Advanced Operations
OPTICAL
DIGITAL AUDIO OUT
(PCM/BIT STREAM)
R - AUDIO
R - AUDIO
IN
~
OPTICAL
DIGITAL AUDIO OUT
(PCM/BIT STREAM)
R - AUDIO - L VIDEO S-VIDEO
(L1)
R - AUDIO - L VIDEO S-VIDEO
(L3)
IN2IN1
Connecting external equipments
First of all, please disconnect AC mains leads of all units which you are going to connect with before connecting and disconnecting
cables.
ªEnjoying more powerful sound
Refer to the relevant pages for details.
Enjoying 5.1-channel surround
sound with Dolby Digital and DTS
Digital connection
Connect to an amplifier with
built-in decoders.
See below
[A]
SET UP—Sound
≥Set “PCM Down Conversion” to “On”.
≥Set “Dolby Digital” and “DTS” to suit
the equipment.
Change speaker settings on the
amplifier.
Page 60
—
To enjoy stereo
Analog connection
Connect to an analog amplifier
or system component.
Digital connection
Connect to a digital amplifier or
system component.
See below
[B]
See below
[A]
SET UP—Sound
≥Set “PCM Down Conversion” to “Off”. Page 60
SET UP—Sound
≥Set “PCM Down Conversion” to “On”.
≥Set “Dolby Digital” to “PCM”.
≥Set “DTS” to “Off”.
ªOther uses
Record to digital recording equipment or cassette deck (See blow [A] [B])
Record from a video cassette recorder (page 57)
Use connection [B] to enjoy discs recorded with a sampling frequency of 96 kHz. (page 58)
Note
You can enjoy Dolby Digital in stereo with this unit alone. (This unit does not have a DTS decoder.)
[DVD-A]
Even if using this connection, output will be only 2 channels.
Connecting a digital amplifier or
system component [A]
(1) Rear panel of this unit
(2) Insert fully, with this side
facing up. (Do not bend when
connecting.)
(3) Optical digital audio cable (not
supplied)
(4) To optical digital input
(5) Amplifier or system
component (with or without
decoders) (not supplied)
(6) Speakers (not supplied)
≥Example: 6 speakers
For your reference
≥The DTS decoder must be
compatible with the signals
recorded on DVD.
≥During Quick View, the Digital
Audio Output will change to
PCM Output.
You can record the digital signal directly onto digital recording
equipment.
The signals on DVDs will be converted to 48 kHz/16 bit linear
PCM.
When recording DVDs, ensure the following conditions are met.
≥There is no copy guard recorded on the disc.
≥The recording equipment can handle a sampling frequency of
48 kHz/16 bit.
≥You cannot record MP3.
(1)
(2)
(3)
(4)
(5)
(6)
Connecting an analog amplifier or
system component [B]
(1)
(3)
(1) Rear panel of this unit
(2) To AUDIO OUT (L/R)
(3) Audio cable (not supplied)
A Red (R)
B White (L)
(4) Audio input (L/R)
(5) 2-channel analog amplifier or system component
(not supplied)
Page 60
(2)
(4)
(5)
56
Page 18

∫ Advanced Operations
AV3
(1) (3)
(4)
(2)
(1) S video cable (not supplied)
(2) Audio/Video cable (not supplied)
A Yellow (VIDEO)
B White (L)
C Red (R)
(3) 4-pin DV cable (not supplied)
(4) Other playback equipment
Connecting a decoder, satellite receiver or digital receiver
Connect the mains lead of decoder, satellite receiver or
digital receiver to an AC mains socket.
≥If you connect an other equipment with RGB output capability to
the AV2 socket on this unit, the output signal of the equipment
must be set to RGB when you have set “AV2 Input” to “RGB (PAL
(1)
(3)
(2)
(1) Decoder, satellite receiver or digital receiver (not supplied)
(2) 21-pin Scart socket
(3) 21-pin Scart cable (not supplied)
Connect a 21-pin Scart cable (not supplied) to the AV2
21-pin Scart socket on this unit and to the 21-pin Scart
socket on the decoder, satellite receiver or digital receiver.
Connecting an external device
When connecting to the AV3/DV input terminals on the
front of the unit
≥You can also connect to the AV4 input terminals on the rear of the
unit.
only)”.
Note for decoder
≥Decoder here means the device used to decode scrambled
broadcasts (Pay TV).
≥Set “AV2 Connection” to “DECODER”. (page 61)
≥[RGB] means separate Red/Green/Blue colour signals. If you
connect a TV equipped with RGB input capability to the AV1
socket on this unit, and a decoder equipped with RGB output
capability to the AV2 socket, the TV can receive RGB signal input
from the decoder via the unit.
Note for satellite receiver and digital receiver
≥Set “AV2 Connection” to “Ext Link 1” or “Ext Link 2”. (page 61)
Before connecting any cables, first make sure that the power for
both units is off. Then after connecting any cable, turn on the
both units.
Note
≥If the audio output of the other equipment is monaural, connect to L/
MONO. (Both left and right channels are recorded when connected
through L/MONO.)
≥The DV input on this unit is for use with DV cameras only.
57
Page 19

∫ Various Setting
DVD
TV
INPUT SELECT
VIDEO Plus+
DIRECT TV REC
AV
CH
VOLUME
SKIP
DIRECT NAVIGATOR
PLAY LIST
TOP MENU
ENTER
MENU
FUNCTIONS
RETURN
STOP
PAUSE
PLAY/x1.3
SLOW/SEARCH
CANCEL
123
DVD TV
4
5
6
789
0 -/--
FRAME
MANUAL SKIP
TIME SLIP
3, 4, 2, 1
ENTER
RETURN
FUNCTIONS
DVD
HDD DVD
Numeric
Buttons
(1) Menus
(2) Items
(3) Options
Changing the unit’s settings
Common procedures
Use the following procedure to change the settings if necessary.
[1] While stopped
Press [FUNCTIONS]. (page 29)
[2] Select “SETUP” with [3, 4, 2, 1] and
press [ENTER].
(2)(1)
SETUP
Tuning
Settings
Disc
Picture
Sound
Display
Connection
[3] Use [3, 4] to select the menu’s tab
and press [2] or [1].
[4] Use [3, 4] to select the item to be
changed and press [ENTER].
[5] Use [3, 4] to select an option and
press [ENTER].
≥Some options require different operations. Follow the
displayed instructions.
ªTo return to the previous screen
Press [RETURN]. Even if you have changed an option, the change
is cancelled unless you press [ENTER].
ªWhen you are finished
Press [FUNCTIONS].
For your reference
≥The unit retains these settings.
Remote
Clock
Owner ID
Shipping Condition
TAB
SELECT
RETURN
(3)
DVD 1
Entering a password (Ratings)
You can limit play of DVDs unsuitable for some audiences,
children, for example. Play and changes to the settings are not
possible unless you enter a password. (page 59)
When setting ratings
The password screen is shown when you select levels 0 to 7.
1) Input a 4-digit password with the numeric buttons.
≥If you enter a wrong number, press [2] to erase it before you
press [ENTER].
≥Do not forget your password.
2) Press [ENTER].
3) Press [ENTER].
The password is entered and the unit is locked.
Now, when you insert a DVD-Video that exceeds the ratings limit
you set, a message appears on the TV.
Follow the on-screen instructions.
When changing ratings
The password screen is shown when you select “Ratings”.
1) Input a 4-digit password with the numeric buttons and press
[ENTER].
Unlock Recorder: To unlock the unit and return the rating to 8
Change Password: To change your password
Change Level: To change the rating level
Temporary Unlock: To temporarily unlock the unit (the unit
locks again if you switch it to standby or
open the disc tray)
2) Select the item with [3, 4] and press [ENTER].
Actual screens depend on the operation. Follow the on-screen
instructions.
Digital output
Change these settings when you have connected equipment
through this unit’s OPTICAL DIGITAL AUDIO OUT terminal.
PCM Down Conversion
Off (Factory preset):
When you have used audio cables to connect the unit to other
equipment (analog connection [B] page 56).
On:
When you have used an optical digital cable to connect the unit to
other equipment (digital connection [A] page 56). Output is limited
to 48 kHz/16 bit.
Output of audio with a sampling frequency of 96 kHz
Audio is output as follows in accordance with the connections and
settings you make.
Setting Connection
[A] (digital) [B] (analog)
Off No output° Output as 96 kHz
On Converted and output
as 48 kHz/16 bit
° Audio is output at 96 kHz if the DVD is unprotected, but the
connected equipment must be able to handle such signals in
order to play them.
Converted and output
as 48 kHz
58
Page 20

∫ Various Setting
Summary of settings
This description shows the initial settings for this unit. See
page 58 for details on menu operation.
≥Underlined items are the factory presets.
ªTuning (pages 64, 65)
Manual
Auto-Setup Restart
Download
ªSettings
Remote (page 62)
Clock (page 63)
Owner ID
[PIN number] [Name] [House No.] [Postcode]
Shipping Condition
All settings in the SETUP screen return to the factory settings.
(except for the ratings level and the password, and owner ID
settings)
[Yes] [No
ªDisc [DVD-A] [DVD-V]
Setting the language of disc menu, audio and subtitle for playing
the DVD-Video.
≥Some discs are designed to start in a certain language despite
any changes made here.
≥If a language which is not recorded is selected, or if languages
are already fixed in the disc, the language set as the default in
the disc will be played instead.
Soundtrack
Choose the audio language.
[English
[Other ¢¢¢¢]
Subtitle
Choose the subtitle language.
[Automatic
[Spanish] [Other ¢¢¢¢]
Menus
Choose the language for disc menus.
[English
[Other ¢¢¢¢]
Original
The original language of each disc will be selected.
Other ¢¢¢¢
This is the language code setting.
Input a code number with the numeric buttons. (See below,
“Language code list”.)
Automatic
If the language selected for “Soundtrack” is not available,
subtitles of that language will automatically appear if available
on that disc.
]
] [French] [German] [Italian] [Spanish] [Original]
] [English] [French] [German] [Italian]
] [French] [German] [Italian] [Spanish]
Ratings (page 58)
You can set a limit on DVDs unsuitable for some audiences
(e.g. children). You cannot change the settings and play the limited
DVDs unless you enter a password.
Setting ratings (When level 8 is selected)
[8 No Limit]
: All DVD-Video can be played.
[1] to [7]: Prohibits play of DVD-Video with corresponding
ratings recorded on them.
[0 Lock All]: Prohibits play of all DVD-Video.
Changing ratings (When level 0 –7 is selected)
[Unlock Recorder] [Change Level]
[Change Password] [Temporary Unlock]
DVD-Video Mode
Select how to play pictures contained on some DVD-Audio.
The setting returns to “Off” when you change the disc or turn the
unit off.
[On]: You can play DVD-Video content on DVD-Audio.
]: DVD-Audio are played as DVD-Audio.
[Off
DVD-R Rec for High Speed mode
You can dub discs to DVD-R in High Speed by setting this to “On”
before recording to HDD.
[On] [Off
]
On
“ ” is indicated on the dubbing list (page 34)
When setting to “On”, will use settings below.
≥“Bilingual Audio Selection” [M1] or [M2]
≥“Hybrid VBR Resolution” [Fixed]
≥“TV Aspect” [Norm (4:3)]
MPEG4 Rec
MPEG4 Rec Mode
You can select the recording mode to record SD VIDEO
(MPEG4) to HDD.
[SF (Super Fine)] [F (Fine)] [N (Normal)]
[E (Economy)] [Off
≥The picture quality becomes better in the order of “E”, “N”, “F”,
and “SF”.
≥When “SF” is selected, you cannot dub on MultiMediaCard.
≥When setting auto renewal recording (page 32), you cannot
select “SF/F/N/E”.
SD CARD capacity
Select the proper item according to the capacity of the card.
Programmes are divided according to this setting and then
recorded on HDD. Therefore, you can dub them to the SD
Memory Card exactly without extra operation.
[8 MB] [16 MB] [32 MB] [64 MB] [128 MB
[256 MB] [512 MB)] [1 GB] [2 GB]
]
]
Language code list
Abkhazian: 6566
Afar: 6565
Afrikaans: 6570
Albanian: 8381
Ameharic: 6577
Arabic: 6582
Armenian: 7289
Assamese: 6583
Aymara: 6588
Azerbaijani: 6590
Bashkir: 6665
Basque: 6985
Bengali, Bangla: 6678
Bhutani: 6890
Bihari: 6672
Breton: 6682
Bulgarian: 6671
Burmese: 7789
Byelorussian: 6669
Cambodian: 7577
Catalan: 6765
Chinese: 9072
Corsican: 6779
Croatian: 7282
Czech: 6783
Danish: 6865
Dutch: 7876
English: 6978
Esperanto: 6979
Estonian: 6984
Faroese: 7079
Fiji: 7074
Finnish: 7073
French: 7082
Frisian: 7089
Galician: 7176
Georgian: 7565
German: 6869
Greek: 6976
Greenlandic: 7576
Guarani: 7178
Gujarati: 7185
Hausa: 7265
Hebrew: 7387
Hindi: 7273
Hungarian: 7285
Icelandic: 7383
Indonesian: 7378
Interlingua: 7365
Irish: 7165
Italian: 7384
Japanese: 7465
Javanese: 7487
Kannada: 7578
Kashmiri: 7583
Kazakh: 7575
Kirghiz: 7589
Korean: 7579
Kurdish: 7585
Laotian: 7679
Latin: 7665
Latvian, Lettish: 7686
Lingala: 7678
Lithuanian: 7684
Macedonian: 7775
Malagasy: 7771
Malay: 7783
Malayalam: 7776
Maltese: 7784
Maori: 7773
Marathi: 7782
Moldavian: 7779
Mongolian: 7778
Nauru: 7865
Nepali: 7869
Norwegian: 7879
Oriya: 7982
Pashto, Pushto: 8083
Persian: 7065
Polish: 8076
Portuguese: 8084
Punjabi: 8065
Quechua: 8185
Rhaeto-Romance: 8277
59
Romanian: 8279
Russian: 8285
Samoan: 8377
Sanskrit: 8365
Scots Gaelic: 7168
Serbian: 8382
Serbo-Croatian: 8372
Shona: 8378
Sindhi: 8368
Singhalese: 8373
Slovak: 8375
Slovenian: 8376
Somali: 8379
Spanish: 6983
Sundanese: 8385
Swahili: 8387
Swedish: 8386
Tagalog: 8476
Tajik: 8471
Tamil: 8465
Tatar: 8484
Telugu: 8469
Thai: 8472
Tibetan: 6679
Tigrinya: 8473
Tonga: 8479
Turkish: 8482
Turkmen: 8475
Twi: 8487
Ukrainian: 8575
Urdu: 8582
Uzbek: 8590
Vietnamese: 8673
Volapük: 8679
Welsh: 6789
Wolof: 8779
Xhosa: 8872
Yiddish: 7473
Yoruba: 8979
Zulu: 9085
Page 21

∫ Various Setting
Underlined items are the factory presets.
ªPicture
Rec Resolution
Select the picture sharpness when recording.
[Fine
][Normal]
Fine Pictures become clear and vivid. Normally, use this
Normal Select it when recording noisy pictures.
≥This setting is fixed with “Fine” if you set “TV System” to “NTSC”.
Hybrid VBR Resolution
Switch between automatic and fixed hybrid VBR resolution when
recording.
[Automatic
Automatic The unit automatically switches resolution during
Fixed The resolution is fixed to ensure the resolution rate
Still Mode
Select the type of picture shown when you pause play.
[Automatic
Field Still pictures are less blurred. Select if jittering
Frame Sharper frame stills are obtained. Select if small text
Seamless Play
You can select the picture quality on the seams of the scenes in
the play list.
[On
On The scenes in play lists created with this unit are
Off The points where scenes in play lists are played
ªSound
PLAY t1.3 & Audio during Search
[HDD] [RAM] [DVD-R] [DVD-A] [DVD-V] [VCD] (page 21)
Choose whether to operate the Quick View (Play k1.3) or not and
whether to have sound during search.
[On
[DVD-A]
≥You may hear sound regardless of this setting with some discs.
Dynamic Range Compression
[DVD-V] (Dolby Digital only)
Change the dynamic range for late night viewing.
[On] [Off
setting.
] [Fixed]
recording according to the image. The unit reduces
block noise, which occurs during MPEG
compression, by selecting the optimum rate.
is not reduced.
] [Field] [Frame]
occurs when “Automatic” is selected.
or fine patterns cannot be seen clearly when
“Automatic” is selected.
] [Off]
played seamlessly. This may cause shifting of the
points where scenes change. Some play lists
cannot be played seamlessly.
≥Seamless Play does not work with programmes
recorded in different audio or when using Quick
View.
accurately, but this may cause the picture to freeze
for a moment when scenes change.
] [Off]
]
Bilingual Audio Selection
Select the type of audio in bilingual broadcasting. (page 27)
≥When recording/dubbing to DVD-R
≥When recording/dubbing in LPCM or MPEG4
][M2]
[M1
≥The bilingual audio cannot be switched in this unit in the following
cases.
- When recording audio from an external input to DVD-R.
- When SD VIDEO (MPEG4) is simultaneously recorded from the
external input.
Digital Audio Output
(Press [ENTER] to show the following settings. To return to the
previous screen, press [RETURN].)
PCM Down Conversion (page 58)
Choose whether to convert 96 kHz LPCM signals to 48 kHz/16
bit.
[On] [Off
≥Select “On” when using a copyright protected disc, since the
audio output does not work.
Dolby Digital
Choose whether to output Dolby Digital bitstream signals for
decoding on other equipment or to convert them to PCM
signals for 2-channel output.
[Bitstream
Bitstream When you have connected a unit with a built-in
PCM When you have connected a unit that doesn’t have
DTS
Choose whether to output DTS bitstream signals for decoding
on other equipment or to not.
[Bitstream] [Off
Off When you have connected a unit that doesn’t have
Bitstream When you have connected a unit with a built-in DTS
MPEG
Choose whether to output MPEG bitstream signals for
decoding on other equipment or to convert them to PCM
signals for 2-channel output.
[Bitstream] [PCM]
Bitstream When you have connected a unit with a built-in
PCM When you have connected a unit that doesn’t have
° Set “Dolby Digital” to “PCM”, “DTS” to “Off” and “MPEG” to
“PCM” if the other equipment doesn’t have decoders. Incorrect
settings can cause noise to be output which can be harmful to
your ears and speakers, and audio will not be recorded properly
to digital recording equipment.
]
][PCM]
Dolby Digital decoder.
a built-in Dolby Digital decoder.°
]
a built-in DTS decoder.°
decoder.
MPEG decoder.
a built-in MPEG decoder.°
Audio Mode for XP Recording
Choose the audio type when recording with XP mode.
[Dolby Digital
≥Even if “LPCM” is set, sound becomes “Dolby Digital” in
recording mode other than XP mode.
][LPCM]
Audio Mode for DV Input
You can select the kind of sound when recording from the unit’s DV
terminal. (page 55)
[Stereo 1
Stereo 1 Records sound (L1, R1) when DV recording is
Stereo 2 Records added sound such as narration (L2, R2)
Mix Records both Stereo 1 and Stereo 2.
] [Stereo 2] [Mix]
taking place.
subsequent to original recording.
≥L1iL2 are recorded in L and R1iR2 are
recorded in R. In the case of bilingual broadcast,
Stereo 1 is recorded when recording to DVD-R or
if recording in LPCM. Details of recording are
given in “Bilingual Audio Selection” (See above).
60
Page 22

∫ Various Setting
Underlined items are the factory presets.
ªDisplay
On-Screen Messages
Choose whether to show on-screen messages automatically or
not.
[Automatic
Grey Background
Select whether to show the grey background, normally shown
when TV reception is poor.
[On
Channel Guide
[On] [Off]
On The Channel Guide will appear for a few seconds
Off The Channel Guide will not appear.
FL Display
Changes the brightness of the unit’s display.
[Bright
ªConnection
TV Aspect
Choose the setting to suit your TV and preference.
[Norm (4:3)
TV System
[PAL][NTSC]
PAL Select when connecting to a PAL or Multi-system
NTSC Select when connecting to a NTSC TV.
≥To change the TV system (PAL/NTSC) setting:
While stopped, keep pressing [∫, STOP] and [<, OPEN/CLOSE]
on the main unit for 5 or more seconds.
≥If the playback picture on the TV screen from a Video CD isn’t
shown correctly:
- When connecting to Multi-system TV, select “NTSC”. (After
viewing the disc, return the setting to “PAL”.)
- When connecting to PAL TV, the lower part of the picture cannot
be displayed correctly during the fast forward and rewind.
] [Off]
] [Off]
when time the channel is changed with [CH, X, W].
] [Dim]
] [Wide (16:9)]
TV.
Programmes recorded using NTSC are played as
PAL60.
Select to record TV programmes and PAL input
from other equipment.
≥[HDD] : Select this when playing a PAL input
programme recorded on the HDD.
Select to record NTSC input from other equipment.
TV programmes cannot be recorded properly.
≥[HDD] : Select this when playing a NTSC input
programme recorded on the HDD.
Norm (4:3) TV Settings (DVD-Video)
You can select how to reflect the image on the TV, when you
watch 16:9 images (DVD-Video) on 4:3 TV.
[Pan & Scan
Pan & Scan Video recorded for a widescreen is played
Letterbox Video recorded for a widescreen is played in
] [Letterbox]
with the sides cut off if the pan & scan was
specified by the producer of the disc. 16:9
software prohibited pan & scan style will
appear in the letterbox style (with black bands
above and below the picture) despite the
setting here.
the letterbox style.
Norm (4:3) TV Settings (DVD-RAM)
You can select how to reflect the image on the TV, when you
watch 16:9 images (DVD-RAM) on 4:3 TV.
[Norm (4:3)
Norm (4:3) Programmes played as recorded.
Pan &
Scan
Letterbox Video recorded for a widescreen is played in the
] [Pan & Scan] [Letterbox]
Video recorded for a widescreen is played with the
sides cut off if the pan & scan format is specified at
the time of recording.
letterbox style.
AV1/AV2 Settings
(Press [ENTER] to show the following settings. To return to the
previous screen, press [RETURN].)
AV1 Output
] [S-Video] [RGB] (page 57)
[Video
AV2 Input
[Video
] [S-Video] [RGB (PAL only)]
AV2 Connection
[NORMAL
NORMAL When the VCR or a satellite receiver is connected.
DECODER When a decoder is connected.
Ext Link 1 When a digital receiver which transmits a special
Ext Link 2 When an external equipment with a timer function is
≥If you connect an other equipment with RGB output capability to
the AV2 socket on this unit, the output signal of the equipment
must be set to RGB when you have set “AV2 Input” to “RGB (PAL
only)”.
≥This setting is fixed with “NORMAL” if you set “TV System” to
“NTSC”.
] [DECODER] [Ext Link 1] [Ext Link 2]
control signal recordings via the 21-pin Scart cable
(e.g. F.U.N. receiver (TU-DSF30/S3)) is connected
for the linked timer recordings.
connected for the linked timer recordings.
61
Page 23

∫ Various Setting
DIRECT NAVIGATOR
PLAY LIST
TOP MENU
ENTER
MENU
FUNCTIONS
RETURN
STOP
PAUSE
PLAY/x1.3
FRAME
MANUAL SKIP
TIME SLIP
ERASE
REC
PROG/CHECK
TIMER
DVD
TV
INPUT SELECT
VIDEO Plus+
DIRECT TV REC
AV
CH
VOLUME
SKIP
STOP
PAUSE
PLAY/x1.3
SLOW/SEARCH
CANCEL
123
DVD TV
4
5
6
789
0 -/--
DUBBING
REC MODE
STATUS
MARKER
AUDI O
DISPLAY
POSITION
MEMORY
A B C D
3, 4, 2, 1
ENTER
RETURN
FUNCTIONS
DVD
AUDIO
HDD DVD
Numeric
Buttons
Example:
When the left (L)
channel is selected.
The unit’s remote control code
To Manually Adjust the Audio
Recording Level
The unit adjusts the recording level automatically to prevent sound
distortion due to excessive peaks.
You can adjust manually the audio recording level.
[1] Before recording, keep pressing
[AUDIO] for 3 or more seconds.
Remote Setting
Panasonic DVD players and recorders use the same remote
control system so they may respond unintentionally to a command
from this remote control. Change the code on this unit and its
remote control (the two must match) if you place equipment close
together.
≥Use “1”, the factory set code, under normal circumstances.
[1] While stopped
Press [FUNCTIONS]. (page 29)
[2] Select “SETUP” with [3, 4, 2, 1] and
press [ENTER].
≥The SETUP screen appears.
[3] Select “Settings” tab with [3, 4] and
press [2] or [1].
[4] Select “Remote” with [3, 4] and
press [ENTER].
[5] Select “DVD 1”, “DVD 2” or “DVD 3”
with [3, 4] and press [ENTER].
The remote control code on the unit has been set.
[6] While pressing [ENTER] on the remote
control, press the numeric buttons
([1], [2], or [3]) corresponding to the
code you selected in step 5.
The remote control code on the remote control has been set.
[7] Press [RETURN].
The following display appears when you use a remote control with
a different code.
To adjust the left (L) and right (R) channels simultaneously:
[2] Confirm that “L/R” is selected and use
[3] Press [ENTER] to exit the On Screen
To adjust the left (L) and right (R) channels individually:
[2] Use [3, 4] to select either the left (L)
[3] Press [ENTER] to exit the On Screen
For your reference
≥It is not possible to adjust the audio recording level when
recording from DV equipment.
[2, 1] to adjust the audio recording
level.
Display.
or right (R) channel and individually
adjust their audio recording level with
[2, 1].
Audio REC Level
L
+8
L/R
R
L
-6
R
CH SELECT
ENTER
30 20 15 10 5 0 OVER
ADJUST
RETURN
Display.
If you are trying to use this unit’s remote control, change its code to
match the unit’s (# step 6).
62
Page 24

∫ Various Setting
Clock Settings
Usually, the units Auto Setup or Download function automatically
adjusts the clock to correct time.
Under some reception conditions, however, the clock cannot be
set automatically.
In this case, follow the operation steps below to manually set the
clock.
[1] While stopped
Press [FUNCTIONS]. (page 29)
[2] Select “SETUP” with [3, 4, 2, 1] and
press [ENTER].
1 Manual Clock Setting
[3] Select
“Settings”
tab with [3,
4] and
press [2,
1].
[4] Select
SETUP
Tuning
Settings
Disc
Picture
Sound
Display
Connection
Remote
Clock
Owner ID
Shipping Condition
TAB
SELECT
RETURN
“Clock” with
[3, 4] and press [ENTER].
Note
≥In case of a power failure, an automatic back-up system
automatically maintains the operation of the clock for
approximate 120 minutes.
DVD 1
[5] Select “Off”
of
“Automatic”
with [3, 4]
and press
[ENTER].
[6] Use [2, 1]
No.
0 9
CHANGE
ENTER
SELECT
RETURN
Clock
Automatic Off
Time: Date:
15 : 45 : 39
Please set clock manually.
ENTER : store RETURN : leave
1
. 8
.
2003
to select the
item to be changed.
≥The items change as follows:
Hour,.Minute,.Second,.Day,.Month,.Year,.Hour...
1 Auto Clock Setting
If a TV station transmits a signal for time setting, the Automatic
time correction function is activated and time is corrected
automatically.
[5] Select “On” of “Automatic” with [3,
4] and press [ENTER].
≥Auto clock setting starts.
≥Under adverse reception conditions, etc., the automatic time
correction function may not work. In this case, the indication
for “Automatic” is automatically reset to “Off”. If the reception
conditions improve later on, it may be possible to activate this
function.
CHANGE
ENTER
RETURN
Clock
Time:
15 : 45 : 39
Automatic clock setting...
Please wait.
RETURN : to abort
1
Automatic
Date:
. 8
On
.
2003
CHANGE
ENTER
RETURN
Clock
Automatic
Time:
15 : 45 : 39
Automatic clock setting completed
ENTER : access , RETURN : leave
Date:
1
. 8
.
[6] Press [RETURN].
2003
[7] Use [3, 4]
to change
the setting
and press
Clock
Automatic Off
Time: Date:
15 : 45 : 39
1
. 8
.
2003
[ENTER].
≥You can also use
the numeric
buttons for setting.
CHANGE
ENTER
If clock setting has been completed,
then please push RETURN Key.
ENTER : access RETURN : leave
RETURN
[8] Press
[RETURN].
≥The SETUP screen reappears and the clock starts.
ªTo stop auto clock setting
Press [RETURN].
Note
≥When “Automatic” on the Clock setting menu is set to “On”, the
automatic time correction function checks and if necessary
adjusts the time several times every day.
On
63
Page 25

∫ Various Setting
DVD
TV
HDD DVD
DVD TV
HDD DVD
INPUT SELECT
ShowView
DIRECT TV REC
AV
CH
VOLUME
SKIP
STOP
PAUSE
PLAY/x1.3
SLOW/SEARCH
CANCEL
123
4
5
6
789
0 -/--
DIRECT NAVIGATOR
PLAY LIST
TOP MENU
ENTER
MENU
FUNCTIONS
RETURN
STOP
PAUSE
PLAY/x1.3
FRAME
MANUAL SKIP
TIME SLIP
ERASE
REC
PROG/CHECK
TIMER
DUBBING
REC MODE
STATUS
MARKER
AUDI O
DISPLAY
POSITION
MEMORY
A B C D
A
B
C
3, 4, 2, 1
ENTER
RETURN
FUNCTIONS
DVD
Numeric
Buttons
Manual Tuning
Pos
Name
Ch
ENTER
RETURN
SELECT
Pos
Name
Ch
B C D
A
Delete
Add
Move
1 BBC 1 22
2 BBC 2 23
3 ITV 24
4 CH4 25
5 CH5 26
6
7
8
9
10
11
12
13
14
15
16
17
18
19
20
Pos
Name
Channel
NICAM
Title Page
1
601
22
Auto
RETURN : leave
ENTER : store
Manual
Tuning
BBC 1
ENTER
RETURN
CHANGE
0 9
[4] Select “Manual” with [3, 4] and press
[5] Use [3, 4] to select the desired TV
ªHandling the TUNING BOX screen
Use [3, 4, 2, 1] to select the desired
field and press [ENTER].
Pos:
To change the order in which the TV stations are assigned to the
programme positions.
Press the numeric buttons to enter the number of the desired
programme position.
Name:
To enter or change the name of a TV station.
[4] Select
[5] Use [3, 4,
To delete a programme position “Delete”:
Press [A].
Channel Settings
1 Selecting the manual tuning
[ENTER].
station and press [ENTER].
≥The TUNING BOX screen appears.
SELECT
ENTER
Delete
A
RETURN
Move
Add
B C D
Pos
Manual Tuning
Name
Ch
1 BBC 1 22
2 BBC 2 23
3 ITV 24
4 CH4
25
5 CH5 26
6
7
8
9
10
Pos
Name
Ch
11
12
13
14
15
16
17
18
19
20
1 Adding, deleting, and moving channels
“Manual”
with [3, 4]
and press
[ENTER].
2, 1] to
select the
desired TV station and use the [A], [B],
[C] buttons to select “Delete”, “Add”,
“Move”.
[1] While stopped
Press [FUNCTIONS]. (page 29)
[2] Select “SETUP” with [3, 4, 2, 1] and
press [ENTER].
[3] Select “Tuning” tab with [3, 4] and
press [2, 1].
SETUP
Tuning
Settings
Disc
Picture
Sound
Display
Connection
Use [3, 4, 2, 1] to enter station name and press [ENTER].
≥If the station name needs a blank space, select the blank
between [Z] and [¢].
Channel:
To enter newly available TV stations or change the channel
number of an already tuned TV station.
Press the numeric buttons to enter the channel number of the
desired TV station.
≥Wait a few moments until the desired TV station has been tuned.
≥After the desired TV station is tuned, press [ENTER].
NICAM:
To select the type of sound to be recorded.
Use [3, 4] to select “Auto”.
≥Select “Off” if you want to record the normal (mono) sound during
a stereo, bilingual or NICAM broadcast, or if the stereo sound is
distorted due to inferior reception conditions.
Title Page:
To select the title extraction from TV guide of broadcaster.
Use [3, 4] to select the number between 100 and 899.
≥In case of a TV station with Teletext information, the title of the
TV programme is entered automatically, provided the “Title page”
is correctly set.
≥In case of a TV station with Teletext information, the name of the
TV station is recorded automatically.
≥In case of a TV station with Teletext information, it may take over
30 minutes to get the title or may fail to get (pages 36, 40).
Manual
Auto-Setup Restart
Download
SELECT
TAB
ENTER
RETURN
[6] Press [RETURN].
To insert a blank programme position “Add”:
Press [B].
To move a TV station to another programme position “Move”:
Press [C], and then use [3, 4] to select the new programme
position to which you want to assign the TV station. Press
[ENTER].
[6] Press [RETURN].
Note
≥If downloading of the setup data has been performed, only the
instruction indication “Delete” appears.
Hint
≥If you have performed Manual Tuning to enter TV stations, the
“jj” indication may appear under [Pos/Name] on the display
when programming a VIDEO Plus+ timer recording.
64
Page 26

∫ Various Setting
π
Remain 2:34 XP+E10:15:00 6.8
π PRG5 1:12.12 XP
π PRG1 0:00.04 SP
0 . . . . 5 . . . . 10
Bit Rate
π REC 1.2Mbps EP
π PLAY 1.2Mbps EP
REC
PLAY
L R
TRAY OPEN
HDD
NICAM
REC
PLAY
L R
TRAY OPEN
HDD
NICAM
REC
PLAY
L R
TRAY OPEN
HDD
NICAM
No display
1 Auto-Setup Restart, Download
You can use the SETUP menus to start Auto Channel setting.
[4] Select “Auto-Setup Restart” or
“Download” with [3, 4] and press
[ENTER].
≥The confirmation screen appears.
Status displays
Changing the information displayed
Displays appear on the TV when operating the unit to show you
what operation was performed and what condition the unit is in.
Press [STATUS] to change the
information displayed.
The display changes each time you press the button.
For example, HDD
[5] Select “Yes” with [2] and press
[ENTER].
1 Auto-Setup Restart
- Auto Setup restarts.
1 Download
- Download starts.
Indicates the status of the disc tray when the HDD drive is
selected.
(6)
π
(7)
(8)
(6) Available recording time and recording mode
(e.g.: “2:34 XP” indicates 2 hours and 34 minutes in XP mode)
(7) The current date and time
(8) Recording time
≥Shows recording time, recording mode and a rough guide to
how much space has been used for recording on the disc.
(9) Elapsed play time
(10)Play position
(11)Amount of recording space used
π PRG5 1:12.12 XP
(9)
π PRG1 0:00.04 SP
(10)
Remain 2:34 XP+E10:15:00 6.8
(11)
Display examples
(1) Currently selected drive (HDD/Disc
Indication Display)
(2) Current recording or play status,
input channel
≥Shows the current state of the unit
and the input channel.
REC: Recording
DV AUTO REC: Recording DV AUTO REC
PAU S E: Recording paused
PLAY: Playing
PLAY t1.3: Quick Viewing (Play k1.3)
;: Playing Paused
5: Fast forwarding (5 speeds)
6: Rewinding (5 speeds)
F: Slow-motion (5 speeds)
G: Reverse slow-motion (5 speeds)
(3) Audio type
≥Automatic indication of the type of sound system which the
programme being watched (NICAM/MONO) is broadcast.
(4) Sound mode
LR, L, R:
when you have changed the audio with the remote control’s
[AUDIO]
(5) Status of other, currently unselected drive
HDD recording/DVD recording :
the recording drive is indicated
TRAY OPEN/TRAY CLOSE :
(1)
(2)
(3)
(4)
(5)
HDD
REC
PLAY
NICAM
L R
TRAY OPEN
Bit Rate
(12)
π REC 1.2Mbps EP
(13)
π PLAY 1.2Mbps EP
(14)
(12)Video bit-rate when recording
(13)Video bit-rate when playing
(14)Bit-rate display
≥Shows as Mbps (Mega-bit(s) per second) during play and
recording, or kbit (kilo bit(s)) while paused.
≥The method of calculating bit-rate for recording and playing is
different so there may be differences in the figures displayed.
(Values are approximate.)
For your reference
≥These displays may not be shown if “On-Screen Messages” in
the “Display” menu is set to “Off” (page 61). If set to “Automatic”,
displays (1), (2), (3), (4) and (5) appear for 5 seconds and then
disappear.
0 . . . . 5 . . . . 10
65
Page 27

∫ Helpful Hints
Maintenance and Handling
Maintenance
To clean this unit, wipe with a soft, dry cloth.
≥Never use alcohol, paint thinner or benzine to clean this unit.
≥Before using chemically treated cloth, read the instructions of the
cloth carefully.
Dust and dirt may adhere to the unit’s lenses over time, possibly
making it impossible to record or play discs.
Use the recommended DVD-RAM/PD lens cleaner
(LF-K123LCA1) about once every year, depending on frequency
of use and the operating environment.
Disc handling
Do not use irregularly shaped discs such as heart-shaped.
(These can damage the unit.)
Read the lens cleaner’s instructions carefully before use.
≥The lens cleaner may sound during use, but this does not mean a
malfunction.
≥“NO READ” appears on the unit’s display when cleaning finishes.
The precision parts in this unit are readily affected by the
environment, especially temperature, humidity, and dust.
Observe the following points to ensure continued listening and
viewing pleasure.
DVD-Audio, DVD-Video, Video CD and CD
Wipe with a damp cloth and then wipe dry.
ªHow to hold a disc
Do not touch the recorded surface.
ªIf there is dirt or condensation on the disc
If the disc is dirty, wipe with a damp cloth and then wipe dry.
Moisture may condense on discs after they are brought inside from
the cold.
DVD-RAM and DVD-R
≥Clean and dry with an optional DVD-RAM/PD disc cleaner
(LF-K200DCA1, where available). Do not use other cleaners or
clothes to clean DVD-RAM and DVD-R.
≥Never use cloths or cleaners for CDs, etc.
Glossary
Bitstream
This is the compressed form of digital signals. A decoder decodes
these signals into 5.1 surround and multi-channel signals.
Channel (when referring to DVD)
Sound is divided into channels based on the sound’s role.
For example, 5.1 channel
≥Front speakers —1 left channel and 1 right channel
≥Center speaker —1 channel
≥Surround speakers— 1 left channel and 1 right channel
≥Subwoofer —1 channelk0.1 (the ratio of bass to the total amount
of sound output)
Examples as shown in the status display
3/2 .1 ch
(1)
(2)
(3)
(1) 1: Subwoofer signal
(not displayed if there is no subwoofer signal)
(2) 0: No surround
1: Mono surround
2: Stereo surround (left/right)
(3) 1: Center
2: Front leftiFront right
3: Front leftiFront rightiCenter
ªHandling precautions
≥Do not write on the label side with a ball-point pen or other writing
instrument.
≥Do not use record cleaning sprays, benzine, thinner, static
electricity prevention liquids or any other solvent.
≥Do not attach labels or stickers to discs. (Do not use discs with
exposed adhesive from tape or left over peeled-off stickers.)
≥Do not use scratch-proof protectors or covers.
≥Do not use discs printed with label printers except the product by
Panasonic.
≥Do not use discs that are badly warped or cracked.
ªDo not place or store discs in the following places
≥Locations exposed to direct sunlight
≥Humid or dusty locations
≥Locations directly exposed to a heat vent or heating appliance
Dolby Digital
This is a method of coding digital signals developed by Dolby
Laboratories. Not only stereo (2 channel) audio, these signals can
also be 5.1-channel audio. A large amount of audio information
can be recorded on one disc by this method.
DPOF (Digital Print Order Format)
DPOF is the standard printing format for still picture data. It is used
at a photo studio to print out the still picture data taken with a digital
camera etc. or when you print out using a domestic printer.
Drive
In this instruction, drive means the hard disk (HDD) and DVD.
These perform the reading and writing of data. Select them by
pressing [HDD] and [DVD].
DTS Digital Surround
This surround system is used in many movie theaters around the
world. The separation between channels is good and the
compression ratio is low, so realistic sound effects are possible.
DTS soundtracks are produced with the assumption that all
channels will be used.
Finalize
This process allows DVD-R to be played on compatible equipment.
66
Page 28

∫ Helpful Hints
=
+
Frame and field
Frames are the still pictures that go together to make a moving
picture. A frame consists of 2 fields.
Frame Field Field
≥A frame still is consists of 2 alternating fields, so the picture may
appear blurred, but overall quality is high.
≥A field still is not blurred, but it has only half the information of a
frame still so picture quality is lower.
Hard disk (HDD)
This is a mass data storage device used in computers etc. It spins
a disk which has a surface treated with magnetic fluid and reads/
writes large amounts of data at high speed by bringing magnetic
head close to the disk.
JPEG (Joint Photographic Experts Group)
This is a system used for compressing/decoding colour still
pictures.
If you select JPEG as the storage system on digital cameras etc.,
the data will be compressed to 1/10 —1/100 of its original size.
The feature of JPEG is less deterioration in picture quality
considering the degree of compression.
MPEG2/MPEG4 (Moving Picture Experts Group)
They are standards for colour motion pictures to be effectively
compressed or expanded.
MPEG2 is a compression technology used for DVD, etc. This unit
adopts MPEG2 when recording programmes.
MPEG4 is a compression technology designed for use on mobile
devices and network. It can record pictures with high efficiency
even in low bit rate.
Pan&Scan/Letterbox
In general, DVD-Video are produced with the intention to be
viewed on a widescreen TV with an aspect ratio of 16:9.
This means you can view most of material with the intended aspect
ratio on a widescreen TV.
Material with this ratio will not fit onto a standard TV with an aspect
ratio of 4:3. 2 styles of picture, “Pan&Scan” and “Letterbox”, deal
with this problem.
Pan&Scan: The sides are cut off so the picture fills the screen.
Letterbox: Black bands appear at the top and bottom of the
screen so the picture appears in an aspect ratio of
16:9.
Linear PCM
These are uncompressed digital signals. CDs are recorded with
44.1 kHz/16 bit PCM, while DVDs use PCM between 48 kHz/16 bit
and 96 kHz/24 bit, allowing playback with greater quality sound.
The linear PCM signals output from the DIGITAL AUDIO OUT,
OPTICAL terminal are stereo (2 channel).
LPCM sound is available when recording in XP mode.
Q Link
This function works only if the unit is connected via a fully-wired
21-pin Scart cable to a TV featuring the Q Link or similar function.
Q Link offers the following functions:
1) Download from the TV°
When you connect the unit to a TV, the station list data is
automatically copied from the TV to the unit, and the TV
stations are assigned to the programme positions on the unit in
the same order as on the TV.
2) Direct TV Recording
By simply pressing [DIRECT TV REC], you can at once record
the same programme that you are watching.
3) TV/DVD Auto On°
Even if the TV and the unit are off (standby mode), pressing
[1, PLAY/k1.3], [TOP MENU, DIRECT NAVIGATOR],
[VIDEO Plus+] or [PROG/CHECK] automatically turns on both
the TV and the unit.
If the TV is off and the unit is on, when you press the
[FUNCTION] or the [1, PLAY/k1.3], or insert the disc (except
DVD-RAM and DVD-R), the TV automatically is turned on.
4) DVD Auto Standby°
When you turn the TV off, the unit is also turned off. However,
this function works in the stop mode.
This function does not work during the following operations:
Preset Download, Auto Setup, Auto Clock Setting and Manual
Tuning.
This function does also not work when the DVD drive is
selected and an audio CD is in the disc tray.
Playback control (PBC)
This is a method of playing Video CDs. You can select parts to
play by using menus recorded on the disc.
Play list
This is a collection of scenes. It enables you to play these scenes
in succession or to select specific ones.
TIFF (Tag Image File Format)
A still picture data standard.
A common format for storing high quality images on digital
camera’s and other devices.
5) On-screen Messages°
When you are watching a TV programme, the following
messages appear on the TV screen to inform you of the unit’s
condition:
Message Message appears when:
This programme has
already started
Set DVD to timer
standby mode
DVD is in timer
recording mode
≥Depending on the type of TV used, the above messages may not
appear correctly.
° The operations marked with asterisk are only available if the unit
is connected to a TV featuring the Q Link function.
A timer recording has just started.
The unit is not in the timer standby mode
10 minutes before the programmed start
time of a timer recording (message
appears every minute during the
10 minutes).
[¥, REC] or [VIDEO Plus+] was pressed
while the unit is in the timer recording
mode.
67
Page 29

∫ Helpful Hints
PDC
PDC (Programme Delivery Control)
Programme Delivery Control adjusts the start and stop time of a
timer recording automatically to ensure the recording starts and
finishes in line with the programme broadcast. This is useful when
a programme over-runs the published times.
The station must be transmitting PDC and the exact time must be
set for PDC to work.
Title/Chapter (DVD-Video)
DVD-Video are divided into large sections (titles) and smaller
sections (chapters). The numbers allocated to these sections are
called title numbers and chapter numbers.
Example
(3)
(2)
(4)(5)
(1) Title 1
(2) Title 2
(3) Chapter 1
(4) Chapter 2
(5) Chapter 3
(3)
(1)
(4)
The unit detects whether a station is transmitting PDC only during
the tuning process.
If PDC is introduced or discontinued by a station you will need to
re-tune the unit before it becomes aware of this.
PDC transmissions are not currently nation-wide so please check
with your local broadcaster for more information.
The beginnings of recordings may not be recorded correctly in
some cases.
Track
This is the smallest division on CD, and Video CD.
Example
(1) (2) (3) (4) (5)
(1) Track 1
(2) Track 2
(3) Track 3
(4) Track 4
(5) Track 5
Error messages
On the unit’s display
Indications Unit status Solutions Page
NO READ The disc is dirty or badly scratched. ≥Follow the instructions in “Maintenance and Handling” to clean the disc if it is
It can not be read for the disc which
doesn’t cope with it.
The DVD-RAM/PD lens cleaner
has finished cleaning.
UNSUPPORT You have inserted a disc the unit
U14 The unit is hot. ≥The unit switches to standby automatically for safety reasons and cannot be
U99 The unit fails to operate properly. ≥Press [Í/I] to switch the unit to standby. Now press [Í/I] again to turn the
REMOTE
DVD
SELF
CHECK
HDD SLEEP The HDD is paused to extend its
cannot play or record on.
The remote control and main unit
are using different codes.
A power failure occurred or the AC
mains plug was disconnected while
the power was ON. However, self
check is also activated when this
unit is normally turned on.
lifetime.
dirty.
≥The disc is not available if it is scratched and this display doesn’t disappear.66–
≥Exchange a disc.
≥Take the cleaner out of the unit.
≥Insert a disc the unit can play or record on.
operated. Wait for about 30 minutes for the service number to disappear.
≥Select a position with good ventilation when installing the unit.
≥Do not block the cooling fan on the rear of the unit.
unit on.
≥Change the code on the remote control or main unit.
≥The unit is carrying out its recovery process. Wait until the message
disappears.
≥Press [HDD] to start.
–
–
9
–
–
–
–
62
–
–
68
Page 30

∫ Helpful Hints
On the TV
Error messages Causes and solutions Page
No disc. ≥You haven’t inserted a disc. Correctly insert a disc that this unit can play.
This is a non-recordable disc. Cannot
record.
This disc is not properly formatted.
Formatting is necessary using DISC
INFORMATION.
Cannot write into this card ≥You cannot format a Microdrive or Mobile hard disk on this unit. –
This disc cannot be read. ≥You inserted an incompatible disc. 9
Please check write protect tab on the disc.
Cannot record.
≥The disc is upside down. If it is a single-sided disc, insert it so the label is facing
up.
≥The unit cannot record on the disc you inserted. The unit cannot record onto
finalized DVD-R, DVD-Audio, DVD-Video, CDs, or Video CDs. Insert a DVD-RAM
or unfinalized DVD-R.
≥You inserted an unformatted DVD-RAM. Format the disc with this unit.
≥The write protect tab on the cartridge is set to
“PROTECT”.
Use a ballpoint pen or similar to release the write
protection.
PROTECT
19
19
9
38
–
Cannot playback this programme.
TV system is different from the setting.
To playback this programme, please
change the TV System in SETUP.
Cannot edit with recording. ≥You tried to erase a programme when you were carrying out simultaneous
Contents of this disc are protected. ≥The programme is write-protected. Release the protection.
Cannot finish recording completely. ≥The programme was copy-protected.
Cannot record on the disc. ≥The disc is scratched. Use another disc.
HDD is full.
Disc is full.
This disc may not be played in your region. ≥You tried to play a disc with a region number different from this unit’s region
Your selection exceeds the recorder’s
rating limit.
Cannot dub from the disc. ≥Dubbing prohibited disc in tray. #Dubbing is not possible. –
No PC card.
No valid PC card.
No SD card.
No valid SD card.
Please check write protect tab. ≥Release the protection on the card.
Error has occurred.
Please press ENTER.
Please check the disc. ≥Check the discs for dirt or scratches. 66
Please change the disc. ≥You can operate the unit using the [<, OPEN/CLOSE] only.
Finalizing is necessary for compatible
playback.
No folder ≥There is no compatible folder in this unit. 12
Cannot write. ≥The card is currently protected. > Release the write protection.
≥You tried to play a programme recorded using a different encoding system from
that of the TV system currently selected on the unit.
)Alter the TV system setting on this unit to suit.
recording and play.
It is not possible to erase a programme that is in the process of recording.
)Stop recording.
≥The disc is write-protected. Release the disc protection.
≥No space left on HDD or the disc.
)Create space by erasing any unwanted programmes. [HDD] [RAM]
)Use a new disc. [RAM] [DVD-R]
≥Recording was not completed for some other reason.
≥The disc is dirty. Clean the disc as described in these operating instructions.
)You inserted an incompatible disc.
≥No space left on HDD or the disc.
)Create space by erasing any unwanted programmes. [HDD] [RAM]
)Use a new disc. [RAM] [DVD-R]
number. This unit can only play discs with the region numbers compatible with
this unit.
≥A ratings level has been set for DVD-Video with this unit. Temporarily unlock the
unit with “Ratings” in the disc menu.
≥The card is not inserted. If this message is displayed with a compatible card
already inserted, turn off the power, remove and then re-insert the card.
≥The card format does not match.
≥The card inserted is not compatible.
≥Mobile hard disk is not inserted.
≥Just finish the format of Mobile hard disk.
≥Release the protection on the DVD-RAM.
≥You can operate the unit using the [ENTER] only.
≥After you press the [ENTER], turn off the unit and then turn it on. Recovery starts.––
≥Press [<, OPEN/CLOSE] to open the tray and eject a disc, the unit becomes off.
≥To continue play or recording, insert an another disc.
≥To enable playback of your DVD-R on compatible equipment, it is necessary to
finalize it.
≥There is no space remaining. > Erase any unwanted files (still pictures).
20, 40
20, 40
61
25
40
37
66
10
58
48
11
11
11
38
11
51
–
–
–
–
–
–
–
–
–
–
–
69
Page 31

∫ Helpful Hints
Troubleshooting guide
Before requesting service, check the below items. If you have doubt about the check points, or if the remedies indicated in the chart do not
solve the problem, consult your dealer.
Power
No power ≥Insert the AC mains lead securely into the household AC outlet.
The unit is on but cannot be
operated.
The unit switches to standby
automatically.
≥The unit is hot (“U14” appears on the display).
Wait until “U14” disappears.
≥Recording drive or playback drive have not been selected properly.
≥One of the unit’s safety devices may have activated.
Reset the unit as follows:
(1) Press [Í/I] on the main unit to switch to standby.
If the unit doesn’t switch to standby, press and hold [Í/I] for about 10 seconds. The unit is
forcibly switched to standby.
Alternatively, disconnect the AC mains lead, wait one minute, then reconnect it.
(2) Press [Í/I] to turn the unit on.
≥One of the unit’s safety devices may have activated.
Press [Í/I] to turn the unit on.
Cannot eject a disc. ≥Press [Í/I] to turn the unit off. Hold down [∫, STOP] and [CH, W] on the main unit simultaneously
for about 5 seconds.
Picture Page
TV reception worsens after
connecting the unit.
Screen size is wrong. ≥Check the settings on your TV.
The picture flickers. ≥Adjust the TV’s vertical frequency. Read the TV’s operating instructions or consult your
On-screen messages do not
appear.
The grey background does not
appear.
≥This can occur because the signals are being divided between the unit and the TV.
It can be solved by using a signal booster, available from audio-visual suppliers.
Consult your dealer if reception does not improve.
≥Due to inherent characteristics of the HDD, the picture may occasionally be disturbed.
This is normal.
≥Check the settings for “TV Aspect”, “Norm (4:3) TV Settings (DVD-Video)” or “Norm (4:3)
TV Settings (DVD-RAM)” in the Connection menu.
dealer.
≥Go to Display in the SETUP menus and select “Automatic” for “On-Screen Messages”.
Press [STATUS] to show the on-screen messages constantly.
≥Go to Display in the SETUP menus and select “On” for “Grey Background”.
–
–
–
61
–
61
61
Sound Page
No sound.
Low volume.
Distorted sound.
Cannot hear the desired audio type. ≥Press [AUDIO] on the remote control to select the desired audio type.
Cannot switch audio during stereo
or NICAM broadcasts.
≥Check the connections.
≥Check the input mode on the amplifier if you have connected it.
≥Turn V.S.S. OFF.
[DVD-R]
≥Go to Sound in the SETUP menus and choose the correct setting with “Bilingual Audio
Selection”.
≥If “D.MIX” does not appear in the display when playing multi-channel DVD-Audio, audio
output will be the front two speakers only.
≥You cannot change the DVD-Audio audio type if the software producer has restricted play
in stereo.
≥The audio cannot be switched (The audio can be selected in “Bilingual Audio Selection”
before recording.)
- When a DVD-R disc is inserted in the disc tray while DVD drive is selected.
- When the recording mode is set to “XP” and “Audio Mode for XP Recording” is set to
“LPCM”.
- When “DVD-R Rec for High Speed mode” is set to “On”.
≥You have used digital connection. Connect to other equipment using audio cables
(analog connection).
≥The audio may not be changed in some discs due to the control by the producer of the
material.
≥The audio for the SD VIDEO (MPEG4) is monaural.
13–15
56
47
22
60
7
–
60
–
60
59
15, 56
–
–
70
Page 32

∫ Helpful Hints
Displays Page
The display is dim. ≥Go to Display in the SETUP menus and change the display’s brightness with “FL
The recording time display, the
dubbing process display and the
displayed recording time of MP3
are different from the actual time.
The actual remaining capacity is
less than the value on the display
or the screen.
Display”.
≥The time on the unit’s display and the remaining recording time on the screen may be
indicated less or more than actual value.
≥The time during fast forward and rewind, or the process during dubbing may not be
displayed accurately.
≥When recording still pictures or SD VIDEO (MPEG4), the remaining capacity becomes
less than when recording other materials.
≥In DVD-R, the remaining capacity does not increase even if programmes are erased.
≥When dubbing pictures with less motions in “MPEG2#4”, they may be dubbed within
small amount of capacity.
Play Page
Play fails to start even when [1] is
pressed.
Play starts but then stops
immediately.
“NO READ”, “UNSUPPORT”,
“NO DISC”, or “NO PLAY” appears
on the unit’s display.
No response when buttons
pressed.
A title or chapter doesn’t play when
it is selected.
Picture distorted during search. ≥Some distortion is normal. –
Alternative soundtrack and
subtitles cannot be selected.
Soundtrack/subtitle language is
different from the one selected with
the SETUP menus.
No subtitles. ≥Subtitles are not recorded on the disc.
Angle cannot be changed. ≥This function depends on software availability. Angles can only be changed during
You have forgotten your ratings
password.
≥Insert the disc correctly with the label facing up.
≥This unit cannot play discs other than DVD-RAM, DVD-R, DVD-Audio, DVD-Video, Video
CD, CD and MP3 disc.
≥The disc is dirty. Clean it.
≥The disc may be badly scratched.
≥You inserted a blank DVD-RAM or DVD-R.
≥If “ ” appears on the TV, the operation is prohibited by the unit or disc.
≥If the unit is not operating at all, press [ , TIMER] to switch the unit to standby, then
press [ , TIMER] again to turn the unit on. The unit may not be operating correctly due
to lightning, static electricity, or some other external factor.
≥The Child Lock function is activated.
≥Some titles and chapters on DVD-Video are not played when you have changed the
ratings level.
≥The languages are not recorded on the disc.
≥You may have to use the disc’s own menus to select languages.
≥The language is not recorded on the disc.
≥Turn the subtitles on.
scenes where different angles are recorded.
≥Return the unit's settings to the initial state (factory setting).
With the tray open, keep pressing [:/6] and [5/9] on the main unit
simultaneously for 5 or more seconds.
Remote control Page
The remote control doesn’t work.
Cannot operate the TV. ≥The remote control code is wrong. Change to the correct code. Some TVs cannot be
≥The unit is on standby to make a timer recording (“ ” on the unit’s display is on).
≥[DVD, TV] is not switched to “DVD”.
Switch to “DVD” when operating this unit.
≥The remote control code is wrong.
Change to the correct code.
≥The batteries are depleted. Replace them with new ones.
≥Point the remote control at the remote control sensor on the main unit.
≥Remove obstacles between the remote control and main unit.
≥The Child Lock function is activated.
≥If you repeat inserting of discs or turning this unit on and off 50 times or more, the
recording or editing of DVD-R may be disabled.
operated even if you change the code.
≥[DVD, TV] is not switched to “TV”. Switch to “TV” when operating the TV.
MPEG4
Can not operate with other
equipment.
≥If the card dubbed by this unit is played back by other equipment, it may not be played back
depending on the equipment.
61
–
–
–
–
–
19
9
66
66
–
–
–
54
58
–
–
59
–
46
–
–
30, 31
6
62
6
6
–
54
–
8
8
71
Page 33

∫ Helpful Hints
Recording, timer recording and dubbing Page
Cannot record. ≥You haven’t inserted a disc or the inserted disc is not compatible. Insert a disc the unit
VIDEO Plus+ programming does
not work properly.
Timer recording does not work
properly.
The unit switches to standby while
making a timer recording.
The timer programme remains even
after recording finishes.
The available recording time
doesn’t increase even after erasing
all recordings on the disc.
A part or whole of a recorded
programme has been lost.
It takes too much time when
dubbing to DVD-R in High Speed
mode.
Cannot dub to DVD-R in High
Speed mode.
The birl of DVD-R is loud. ≥When recording to DVD-R or dubbing in High Speed mode, the birl of the disc may be
Can we dub DVD-R with t24
speed?
can record onto.
≥The disc is unformatted.
Format the disc so this unit can record on it.
≥The write protect tab on the cartridge is set to “PROTECT”.
Use a ballpoint pen or similar to release the write protection.
≥Recording is not possible unless you set “Disc Protection” in “DISC INFORMATION” to
“Off”.
≥HDD or the disc is full or nearly full.
Delete unneeded programmes or use another disc.
≥The material you are trying to record is copy-guarded.
≥Tried to record to a DVD-R that has already been finalized.
≥Timer recording will not be activated when in editing or dubbing. Timer recording will
begin after the editing/dubbing is finished.
≥If you repeat recording or editing 200 times or more, the remaining capacity of the DVD-R
is reduced and then the recording or editing may be disabled.
≥The clock is wrong.
Go to “Settings” in the “SETUP” menus and correct the clock with “Clock”.
≥The timer programme is incorrect.
Correct the programme and check them when you are finished.
≥The unit is not on standby for timer recording. (“ ” on the unit’s display is not on.)
≥Different timer programme times overlap.
≥The clock is wrong.
Go to “Settings” in the “SETUP” menus and correct the clock with “Clock”.
≥Timer recording will not be activated during formatting, dubbing, editing of still pictures
and other such operations which are not suitable for interruption when they are being
carried out.
≥The unit switches to standby while making a timer recording if the disc runs out of space.
Use a disc that has enough space to record the programme.
≥The programme remains if you select weekly or daily setting.
≥The available recording time does not increase if you erase data written by the DVD-RAM
drive of a computer.
Format the disc if necessary.
≥If the disc is dirty, wipe with the DVD-RAM/PD lens cleaner (optional) before formatting.
≥Available recording space on the DVD-R does not increase even after erasing previously
recorded programming.
≥If the power breaks down or the plug is disconnected from the household AC outlet while
recording or editing, the programme may be lost or the disc may become unusable.
)We cannot offer any guarantee regarding lost programmes or discs. You will have to
format the HDD/disc or use a new disc.
≥It takes more time to dub many files or files including LPCM than usual.
≥The disc is not compatible with high speed recording.
≥“DVD-R Rec for High Speed mode” is not set to “On”.
≥Dubbing to DVD-R in High Speed mode is possible only when the DVD-R is compatible
with dubbing in high speed.
louder than usual.
≥When the programme is recorded in EP mode, and it is dubbed in High Speed mode on
DVD-R which is compatible with high speed recording, the dubbing speed is 24 times
faster than usual (e.g. When the recording is 6 hours long, it is dubbed in 15 minutes.).
Still pictures
The contents of the card cannot be
read.
Copying, erasing and setting
protection takes a long time.
The tray won’t open/close. ≥The tray cannot be opened or closed while playing back the still pictures or displaying the editing
The PC card cannot be removed. ≥Make sure the PC card has been slotted home firmly before attempting to remove.
Timer recording began in the
middle of editing a still picture.
≥The memory card format is not valid with the unit.
)Format using FAT 12 or FAT 16 with other equipment or format the memory card with this unit.
(Mobile hard disk is also FAT 32 compatible.)
≥The unit tried to display still picture files that were in a folder level that is not valid.
≥The still picture file is not JPEG or TIFF.
)This unit displays still pictures (JPEG and TIFF) that comply with DCF standard.
≥Turn off and then turn on the unit again.
≥When there are a lot of folders and files, it may sometimes take a few hours.
≥When repeating copying or erasing, it may sometimes take a long time. Format the disc or memory
card.
screen. Press [RETURN] for a while to clear the screen.
≥If it comes to the time scheduled for timer recording, the recording may start even though you are
editing.
9
38
69
37
40
–
–
–
–
63
30, 32
–
32
63
–
–
30, 32
38
–
–
–
35
–
59
–
–
–
Discs make sounds as they rotate. This does not mean a malfunction.
72
Page 34

∫ Helpful Hints
Specifications
Power supply: AC 220–240 V, 50 Hz
Power consumption: 48 W
Recording System: DVD Video Recording Standards (DVD-RAM)
Recordable discs: DVD-RAM: 12 cm 4.7 GB,
Recording Time: Maximum 6 hours (with 4.7 GB disc)
Playable discs: DVD-RAM: 12 cm 4.7 GB,
Built-in HDD Capacity: 80 GB
Drive Unit High Speed Drive (correspond to 4 times
LASER Specification
Class 1 LASER Product
Wave Length: 779– 791 nm, 653–662 nm
Laser Power: No hazardous radiation is emitted with the
Audio
Recording System: Dolby Digital 2ch,
Audio In: AV1/AV2 (21 pin) AV3/AV4 (pin jack)
Input Level: Standard: 0.5 Vrms,
Input Impedance: More than 10 kohm
Audio Out: AV1/AV2 (21 pin) Audio Out (pin jack)
Output Level: Standard: 0.5 Vrms,
Output Impedance: less than 1 kohm
Digital Audio Out: Optical terminal
Television System
Tuner System: PAL–I
Channel Coverage UHF: CH21–68
RF Converter Output: UHF: CH21–68 71d3dBµ
Video
Video System: PAL colour signal, 625 lines, 50 fields
Recording System: MPEG2 (Hybrid VBR), MPEG4 (VBR)
Video In: AV1/AV2 (21 pin), AV3/AV4 (pin jack)
S-Video In: AV2 (21 pin), AV3/AV4 (S terminal)
RGB In: AV2 (21 pin)
Video Out: AV1/AV2 (21 pin), Video Out (pin jack)
S-Video Out: AV1 (21 pin), S-Video Out (S terminal)
RGB Out:
DV-Input: 4-pin
SD/PC Card Slot
SD Card Slot: SD Memory Card Slot
PC Card Slot: PC Card Type II
Still Picture (JPEG, TIFF)
Compatible Media
(SD Card Slot): SD Memory Card, MultiMediaCard
DVD Video Standards (DVD-R)
12 cm 9.4 GB,
DVD-R: 12 cm 4.7 GB, 8 cm 1.4 GB
XP: Approx. 1 hour SP: Approx. 2 hours
LP: Approx. 4 hours EP: Approx. 6 hours
Maximum 106 hours (with built-in 80 GB HDD)
XP: Approx. 17 hours SP: Approx. 34 hours
LP: Approx. 68 hours EP: Approx. 106 hours
DVD-R: 12 cm 4.7 GB, 8 cm 1.4 GB
DVD-Video, DVD-Audio, Video CD,
CD-Audio (CD-DA), CD-R/RW (MP3, CD-DA,
Video CD formatted discs)
speed with DVD-R disc)
safety protection
Linear PCM 2ch (XP mode), G.726 (MPEG4)
Full scale: 2 Vrms at 1 kHz
Full scale: 2 Vrms at 1 kHz
(PCM, Dolby Digital, DTS, MPEG)
NTSC colour signal, 525 lines, 60 fields
1 Vp-p 75 ohm, termination
1 Vp-p 75 ohm, termination
0.7 Vp-p (PAL) 75 ohm,
1 Vp-p 75 ohm, termination
1 Vp-p 75 ohm, termination
AV1 (21 pin)
0.7 Vp-p (PAL) 75 ohm,
8 cm 2.8 GB
(for General Ver.2.0)
12 cm 4.7 GB
(for General Ver.2.0/4k-SPEED
DVD-R Revision 1.0)
12 cm 9.4 GB,
8 cm 2.8 GB
(for General Ver.2.0)
12 cm 4.7 GB
(for General Ver.2.0/4k-SPEED
DVD-R Revision 1.0)
termination
termination
Compatible Media
(PC Card Slot): A PC Card adaptor conforming to PC Card
Format: FAT12, FAT 16
Image File Format: JPEG conforming to DCF
Number of pixels: 320k240 to 6144k4096
Thawing Time: Approx. 7 sec. (2 M pixels)
SD Video (MPEG4, MPEG2)
Compatible Media
(SD Card Slot): SD Memory Card, MultiMediaCard (restricted
Compatible Media
(PC Card Slot): Mobile hard disk (Only read)
MPEG4
Codec: Video: MPEG4 conforming,
Number of pixels: super fine/fine: 320k240 (QVGA),
Recording rate (max.): super fine: 1050 kbps,
File format: SD-Video format conforming (ASF)
MPEG2 Video Recording conversion and transfer is
Codec: MPEG2
File format: SD-Video format conforming
Others
Dimensions (W)t(H)t(D): Approx. 430k79k296 mm
Mass: Approx. 5.5 kg
Operating Temperature: 5oC–40oC
Operating Humidity range: 10%– 80% RH (no condensation)
Standards, ATA Flash PC Card, PC Card
Adaptor (SD Memory Card, xD-Picture Card,
Microdrive, MultiMediaCard, CompactFlash,
SmartMedia, M
(Design rule for Camera File system),
(Sub sampling 4:2:2 or 4:2:0)
TIFF (Uncompressed RGB chunky),
DPOF Compatible
to fine, normal, economy of MPEG4)
Audio: G.726 conforming
normal/economy: 176k144 (QCIF)
fine: 430 kbps,
normal: 300 kbps,
economy: 100 kbps
(include Audio transfer rate as 32 kbps)
possible from card to HDD or DVD-RAM disc.
After Video Recording conversion and transfer
to HDD or DVD-RAM disc, the playback is
possible.
(SD-Video Entertainment Video Profile)
EMORY STICK), Mobile hard disk
Note
Mass and dimensions shown are approximate.
Specifications are subject to change without notice.
This product incorporates copyright protection technology that is
protected by U.S. patents and other intellectual property rights.
Use of this copyright protection technology must be authorized
by Macrovision, and is intended for home and other limited
consumer uses only unless otherwise authorized by
Macrovision. Reverse engineering or disassembly is prohibited.
73
Page 35

∫ Helpful Hints
Index
ªA
Audio .................................................................................... 22
Auto Renewal Recording
Auto Setup
............................................................. 16, 17, 65
ªC
Chasing play ........................................................................ 25
.................................................................................... 63
Clock
Connecting
CREATE PLAY LIST
........................................ 13, 14, 15, 56, 57, 61
ªD
DIRECT NAVIGATOR .......................................................... 39
Direct TV Recording
................................................................................. 9, 66
Disc
DISC INFORMATION
Dolby Digital
Download
DPOF
DTS
Dubbing
DV AUTO REC
DVD-R
........................................................... 10, 56, 66
............................................................................. 65
................................................................................... 51
........................................................................ 10, 56, 66
................................................................................ 34
..................................................................... 55
........................................................................... 10, 27
ªE
Erase ............................................................................. 20, 40
EXT LINK
............................................................................. 28
ªF
Finalize .......................................................................... 38, 66
Flexible recording mode
.................................................................................. 38
Format
Frame-by-frame
FUNCTIONS window
................................................................... 21
ªH
Hard disk (HDD) ................................................................... 11
HDD SLEEP
High Speed
......................................................................... 11
................................................................... 26, 35
ªJ
JPEG ...................................................................... 12, 48, 67
ªL
Language ............................................................................. 46
............................................................................ 60, 67
LPCM
..................................................... 32
............................................................ 42
............................................................. 28
.......................................................... 37
....................................................... 27
........................................................... 29
ªM
Manual tuning ....................................................................... 64
..................................................................................23
Marker
MENU
...................................................................................20
...................................................................................... 24
MP3
...................................................................................60
MPEG
MPEG2
.................................................................................67
.................................................................................67
MPEG4
ªO
Owner ID .......................................................................16, 59
ªP
PC card ..........................................................................11, 48
............................................................................... 31, 68
PDC
....................................................................................20
PLAY
PLAY LIST
..................................................................... 43, 67
ªQ
Q Link ............................................................................13, 67
Quick View (Play t1.3)
........................................................ 21
ªR
Ratings ..........................................................................58, 59
Recording
Recording modes
Relief Recording
Remaining time
Repeat play
RESUME PLAY
RGB
......................................................................26, 55
................................................................. 26
...................................................................31
.....................................................................65
..........................................................................47
....................................................................21
........................................................................ 15, 57, 61
ªS
SD card ..........................................................................11, 48
SD VIDEO (MPEG4)
.................................................................................. 21
Search
SELF CHECK
SETUP
.................................................................................. 58
Simultaneous recording and play
Slow-motion
Subtitle
..........................................................................21
...........................................................................46, 59
............................................................53
....................................................................... 68
......................................... 25
ªT
TIFF ...............................................................................12, 67
Time Slip
Timer recording
Title
TV Aspect
........................................................................22, 25
.................................................................... 30
.................................................................. 36, 37, 40, 68
............................................................................. 61
ªV
VIDEO Plus+ ........................................................................30
ªW
Watching the television while recording ............................... 25
Write protect tab
...................................................................69
74
Page 36

75
Page 37

Matsushita Electric Industrial Co., Ltd.
Web Site: http://www.panasonic.co.jp/global/
RQT7103-B
F0703Fa1083
 Loading...