

Panasonic DMP-B500 User Manual

Operating Instructions
2
4
1
ALL
1
PP
Portable Blu-ray Disc Player
Model No. DMP-B500
Dear cu s tomer
Thank yo u for pu r c ha si ng th is product.
For optimum performance and safety, pl ease read these instructions carefully.
Befor e connecting, operat ing or adjusting this product, please read the instructions completely. Please keep this manual for future
reference.
Region management information
BD-Video
This unit plays BD-Video marked with labels containing the region code “A”.
DVD-Video
This unit plays DVD-Video marked with labels containing the region number “1” or
“ALL”.
If you have any questions contact
[U.S.A.[and[Puerto[Rico]:1-800-211-PANA(7262)
[Canada]: 1-800- 561-5505
[U.S.A.[and[Puerto[Rico]:The warranty can be found on page 54.
[Canada]: The warranty can be found on page 55.
Example:
Example:
VQT2J81
Getting started
RISK OF ELECTRIC SHOCK
DO NOT OPEN
CAUTION
(Inside of product)
IMPORTANT SAFETY
INSTRUCTIONS
Read these operating instructions carefully before using the unit. Follow
the safety instructions on the unit and the applicable safety instructions
listed below. Keep these operating instructions handy for future
reference.
1) Read these instructions.
2) Keep these instructions.
3) Heed all warnings.
4) Follow all instr uctions .
5) Do not use this apparatus near water.
6) Clean only with dry cloth.
7) Do not block any ventilation openings.
Install in ac c or d an ce wi th the ma nu f ac tu r er’s instr u c tio ns.
8) Do not install near any heat sources such as radiators, heat
registers, sto ves, or other apparatus (including amplifiers)
that produce heat.
9) Do not defeat the s afety purpose of the polarized or
grounding-type plug. A polarized plug has two blades with
one wider than the other. A grounding-type plug has two
blade s and a third grounding prong. The wide blade or the
third prong are provided for your safety. If the provided plug
does no t fit into your outlet, consult an electrician for
replacement of the obsolete outlet.
10)Protect the power cord from being walked on or pinched
particularly at plugs, convenience receptacles, and the point
where they exit from the apparatus.
11 )Only use attachments/accessories specified by the
manufacturer.
12)Use only with t he cart, stand, tri pod, bracket,
or table specified by the manufacturer, or s old
with the appara tus. When a cart is used, use
caution when moving the cart/apparatus
combi na tio n t o av oi d inj ur y from ti p- ov er.
13)Unplug this apparatus during li ghtning s torms
or when unused for long periods of time.
14)Refer all servicing to qualified service personnel. Servicing
is required when the apparatus has been damaged in any
way, such as power-supply cord or plug is dama ged, liquid
has been spilled or objects have fallen into the apparatus,
the apparatus has been exposed to rain or moisture, does
not operate normally, or has been dropped.
The following mark and symbols are located on rear of the unit.
WARNING:
TO REDUCE THE RISK OF FIRE, ELECTRIC SHOCK
OR PRODUCT DAMAGE,
≥ DO NOT EXPOSE T HIS APPA RATUS TO RAIN,
MOISTURE, DRIPPING OR SPLASHING AND THAT
NO OBJECTS FILLED WITH LIQUIDS, SUCH AS
VASES, SHALL BE PLACED ON THE APPARATUS.
≥ USE ONLY THE RECOMMENDED ACCESSORIES.
≥ DO NOT REMOV E THE COV ER (O R BACK) ; THE RE
ARE NO USER SE RVICEABLE PARTS INSIDE.
REFER SERVICING TO QUALIFIED SERVICE
PERSONNEL.
CAUTION!
DO NOT INSTALL OR PLACE THIS UNIT IN A BOOKCASE,
BUILT-IN CABINET OR IN ANOTHER CONFINED SPACE.
ENSURE THE UNIT IS WELL VENTILATED. TO PREVENT RISK
OF ELECTRIC SHOCK OR FIRE HAZARD DUE TO
OVERHEATING, ENSURE THAT CURTAINS AND ANY OTHER
MATERIALS DO NOT OBSTRUCT THE VENTILATION VENTS.
CAUTION!
THIS PRODUCT UTILIZES A LASER.
USE OF CONTROLS OR ADJUSTMENTS OR PERFORMANCE
OF PROCEDURES OTHER THAN THOSE SPECIFIED HEREIN
MAY RESULT IN HAZARDOUS RADIATION EXPOSURE.
DO NOT OPEN COVERS AND DO NOT REPAIR YOURSELF.
REFER SERVICING TO QUALIFIED PERSONNEL.
CAUTION: TO REDUCE THE RISK OF ELECTRIC SHOCK, DO
The unit should be installed near an accessible AC power outlet, with
the power cord connected directly to it.
To completely disconnect power from the unit, unplug the power cord
from the AC power outlet.
VQT2J81
(ENG)
2
NOT REMOVE SCREWS.
NO USER-SERVICEABLE PARTS INSIDE.
REFER SERVICING TO QUALIFIED SERVICE PERSONNEL.
The lightning flash with arrowhead symbol, within an
equilateral triangle, is intended to alert the user to the
presence of uninsulated “dangerous voltage” within the
product’s enclosure that may be of sufficient magnitude
to constitute a risk of electric shock to persons.
The exclamation point within an equilateral triangle is
intended to alert the user to the presence of important
operating and maintenance (servicing) instructions in the
literature accompanying the appliance.
CAUTION
Danger of explosion if battery is incorrectly replaced. Replace only
with the same or equivalent type recommended by the manufacturer.
Dispose of used batteries according to the manufacturer’s
instructions.
For the battery pack (Lithium ion battery pack)
Warning
Risk of fire, explosion and burns. Do not disassemble, heat above
60 xC (140 xF) or incinerate.
Batteries
1 Battery pack (Lithium ion battery pack)
≥ Use the specified unit to recharge the battery pack.
≥ Do not use the battery pack with equipment other than the
specified unit.
≥ Do not use the player outside if it is snowing or raining. (The
battery pack is not waterproof.)
≥ Do not get dirt, sand, liquids, or other foreign matter on the
terminals.
≥ Do not touch the plug terminals (i and j) with metal objects.
≥ Do not disassemble, remodel, heat or throw into fire.
≥ Do not heat or expose to flame.
≥
Do not leave the battery(ies) in an automobile exposed to direct
sunlight for a l ong period of time with doors and windows closed.
2 Batteries (Alkaline or manganese batteries)
Mishandling of batteries can cause electrolyte leakage which can
damage items the fluid contacts and may cause a fire.
≥ Do not mix old and new batteries or different types at the same
time.
≥ Do not heat or expose to flame.
≥
Do not leave the battery(ies) in an automobile exposed to direct
sunlight for a l ong period of time with doors and windows closed.
≥ Do not take apart or short circuit.
≥ Do not attempt to recharge alkaline or manganese batteries.
≥ Do not use batteries if the covering has been peeled off.
Remove batteries if the remote control is not going to be used for a
long period of time. Store in a cool, dark place.
If any electrolyte should come into contact with your hands or clothes,
wash it off thoroughly with water.
If any electrolyte should come into contact with your eyes, never rub
the eyes.
Rinse eyes thoroughly with water, and then consult a doctor.
3 Disposing of the batteries
Check and follow your local regulations before disposal.
For the Unit
THE FOLLOWING APPLIES ONLY IN THE U.S.A.
FCC Note:
This equipment has been tested and found to comply with the limits
for a Class B digital device, pursuant to Part 15 of the FCC Rules.
These limits are designed to provide reasonable protection against
harmful interference in a residential installation. This equipment
generates, uses, and can radiate radio frequency energy and, if not
installed and used in accordance with the instructions, may cause
harmful interference to radio communications. However, there is no
guarantee that interference will not occur in a particular installation. If
this equipment does cause harmful interference to radio or television
reception, which can be determined by turning the equipment off and
on, the user is encouraged to try to correct the interference by one or
more of the following measures:
≥ Reorient or relocate the receiving antenna.
≥ Increase the separation between the equipment and receiver.
≥ Connect the equipment into an outlet on a circuit different from that
to which the receiver is connected.
≥ Consult the dealer or an experienced radio/TV technician for help.
FCC Caution: To assure continued compliance, follow the attached
installation instructions and use only shielded interface cables when
connecting to peripheral devices.
Any changes or modifications not expressly approved by the party
responsible for compliance could void the user’s authority to operate
this equipment.
This device complies with Part 15 of the FCC Rules. Operation is
subject to the following two conditions: (1) This device may not cause
harmful interference, and (2) this device must accept any interference
received, including interference that may cause undesired operation.
Responsible Party:
Panasonic Corporation of North America
One Panasonic Way
Secaucus, NJ 07094
Support Contact:
Panasonic Consumer Electronics Company
Telephone No.: 1-800-211-PANA (7262)
For the Wireless LAN Adaptor
THE FOLLOWING APPLIES IN THE U.S.A. AND CANADA.
This device complies with Part 15 of FCC Rules and RSS-Gen of IC
Rules.
Operation is subject to the following two conditions:
(1) This device may not cause interference, and (2) this device must
acc ept any interference, includin g interference that may cause
undesired operation of this device.
This transmitter must not be co-located or operated in conjunction with
any other antenna or transmitter.
This product is restricted to indoor use due to its operation in the 5.15
to 5.25 GHz frequency range.
FCC and IC require this product to be used indoors for the frequency
range 5.15 to 5.25 GHz to reduce the potential for harmful interference
to co-channel Mobile Satellite systems. High power radars are
allocated as primary users of the 5.25 to 5.35 GHz and 5.65 to 5.85
GHz bands. These radar stations can cause interference with and/or
damage this product.
The available scientific evidence does not show that any health
problems are associated with using low power wireless devices.
There is no proof, however, that these low power wireless devices are
absolutely safe.
Low power Wireless devices emit low levels of radio frequency energy
(RF) in the microwave range while being used.
Whereas high levels of RF can produce health effects (by heating
tissue), exposure to low-level RF that does not produce heating effects
causes no known adverse health effects.
Many studies of low-level RF exposures have not found any biological
effects. Some studies have suggested that some biological effects
might occur, but such findings have not been confirmed by additional
research.
Wireless LAN adaptor (DY-WL10) has been tested and found to
comply with FCC/IC radiation exposure limits set forth for an
uncontrolled equipment and meets the FCC radio frequency (RF)
Exposure Guidelines in Supplement C to OET65 and RSS-102 of the
IC radio frequency (RF) Exposure rules.
THE FOLLOWING APPLIES ONLY IN THE U.S.A.
FCC Note:
This equipment has been tested and found to comply with the limits for
a Class B digital device, pursuant to Part 15 of the FCC Rules.
These limits are designed to provide reasonable protection against
harmful interference in a residential installation. This equipment
generates, uses and can radiate radio frequency energy and, if not
installed and used in accordance with the instructions, may cause
harmful interference to radio communications.
However, there is no guarantee that interference will not occur in a
particular installation. If this equipment does cause harmful
interference to radio or television reception, which can be determined
by turning the equipment off and on, the user is encouraged to try to
correct the interference by one or more of the following measures:
≥ Reorient or relocate the receiving antenna.
≥ Increase the separation between the equipment and receiver.
≥ Connect the equipment into an outlet on a circuit different from that
to which the receiver is connected.
≥ Consult the dealer or an experienced radio/TV technician for help.
FCC caution: To maintain compliance with FCC regulations, shielded
interface cables must be used with this equipment. Operation with nonapproved equipment or unshielded cables may result in interference to
radio and TV reception. Any changes or modifications not approved by
the party responsible for compliance could void the user’s authority to
operate this equipment.
This device complies with Part 15 of the FCC Rules. Operation is
subject to the following two conditions:
(1) This device may not cause harmful interference, and
(2) this device must accept any interference received, including
interference that may cause undesired operation.
Responsible Party:
Panasonic Corporation of North America
One Panasonic Way
Secaucus, NJ 07094
Support Contact:
Panasonic Consumer Electronics Company
Telephone No.: 1-800-211-PANA (7262)
Getting started
THE FOLLOWING APPLIES ONLY IN CANADA.
This Class B digital apparatus complies with Canadian ICES-003.
VQT2J81
(ENG)
3
A lithium ion battery that is recyclable powers the
E
L
E
C
T
R
O
N
I
C
I
N
D
U
S
T
R
I
E
S
•
A
S
S
O
C
I
A
T
I
O
N
•
EST. 1924
Listening caut ion
product you have purchased. Please call 1-800-8BATTERY for information on how to recycle this battery.
Table of contents
Getting started
Product Identification Marking is located on the bottom of
AC adaptor and Wireless LAN Adaptor.
AC adaptor
This AC adaptor operates on AC between 100 V and 240 V.
But
≥ In the U.S.A. and Canada, the AC adaptor must be connected to
a 120 V AC power supply only.
≥ When connecting to an AC supply outside of the U.S.A. or
Canada, use a plug adaptor to suit the AC outlet configuration.
≥ When connecting to a supply of greater than AC 125 V, ensure
the cord you use is suited to the voltage of the AC supply and the
rated current of the AC adaptor.
≥ Contact an electrical parts distributor for assistance in selecting a
suitable AC plug adaptor or AC cord set.
WARNING
DRIVER MUST NOT OPERATE OR VIEW THIS UNIT WHILE
OPERATING THE VEHICLE.
Doing so will distract the driver and could cause a collision resulting
in serious injury or property damage.
Do not rest the unit on your lap for a long time while using it.
The unit can become hot and cause burns.
To prevent damage
Avoid the following:
≥ Spraying flammable insecticides near the unit.
≥ Pressing the LCD.
≥ Touching the lens and other parts of the laser pickup.
Do not use the unit in the following places:
≥ Sandy places such as beaches.
≥ On top of cushions, sofas, or hot equipment such as amplifiers.
Do not leave in an unventilated automobile or exposed to direct
sunlight and high temperatures.
IMPORTANT SAFETY INSTRUCTIONS ...................2
Accessories .............................................................. 5
Unit and me d ia ca r e .................. ................. ..............5
Media (Disc, card and USB devi ce) information ...6
Overview ................................................................... 8
Installation of the unit ............................................10
Preparing the Power Supply ............. .. .. ............... .10
Turning on/off the unit ........................ ...................11
Showin g th e FU N C TI O N M E N U ............................ 1 2
Adjusting the pictur es on the LCD screen ..........12
Loading the disc, SD card or USB device ...........13
Playback
Basic play (Playing video contents) .....................14
Enjoying BD-Live or BONUSVIEW
in BD-Video ............................................................18
Playing music .........................................................19
Playing back motion pi ctures
or still pictu r e s a s a Ph o to F ram e ............. ..........2 0
Playing still pictures ..............................................22
Playing DivX
®
videos .............................................24
Changing settings with the on-screen menu ......26
Using this unit with other equipment ...................28
Linked operations with the TV
(VIERA Link™ “H D AVI Contro l™”) .... ................. ..2 9
Network
Do not play your headphones or earphones at a high volume. Hearing
experts advise against continuous extended play.
If you experience a ringing in your ears, reduce volume or discontinue
use.
Do not use while operating a motorized vehicle. It may create a traffic
hazard and is illegal in many areas.
You should use extreme caution or temporarily discontinue use in
potentially hazardous situations.
Even if your headphones or earphones are the open-air type designed
to let you hear outside sounds, don’t turn up the volume so high that
you can’t hear what’s around you.
Sound can be deceiving. Over time your hearing “comfort level”
adapts to higher volumes of sound. So what sounds “normal” can
actually be loud and harmful to your hearing.
Guard against this by setting your equipment at a safe level BEFORE
your hearing adapts.
To establish a safe level:
≥ Start your volume control at a low setting.
≥ Slowly increase the sound until you can hear it comfortably and
clearly, and without distortion.
Once you have established a comfortable sound level:
≥ Leave it there.
Connecting to a broadband network ...................31
Network E a sy S et ti n g ................. ................. ..........32
Enjoying VIERA CAST™ .......................................34
Firmware updates ..................................................34
Settings
Changing the unit’s settings .................................36
Reference
Enjoying High Bit rate Audio and Vi deo ..............41
About MP3/JPEG/DivX/AVCHD/MPEG2 files .......42
Indicators and scr een m essages .........................44
T roubleshooting guide ...................... .. .............. ....46
Specific ations ...... ..... ....... ........ ....... ..... ....... ....... ..... 5 0
Licenses ..................................................................51
Glossar y ... ..... ..... .. ..... ..... .. ..... ..... ..... .. ..... ..... ..... .. .....52
Limited Warranty
(ONLY FOR U.S.A. AND PUERTO RICO) .............54
Limited Warranty (Only for Canada) .....................55
Index .........................................................Back cover
VQT2J81
(ENG)
4
Accessories
DO
DO NOT
Please check and identify the supplied
accessories. Use numbers indicated in
parentheses when asking for replacement parts.
(Product numbers correct as of March 2010.
These may be subject to change .)
(For U.S.A. and Puerto Rico) To order accessories, refer to
“Accessory Purchases (United States and Puer to Rico)”
on page 54.
(For Canada) To order accessories, call the dealer from
whom you have made your purchase.
Unit and media care
Disc and card handling
∫ Clean discs
Getting startedReference PlaybackSettings
Wipe with a damp cloth and then wipe dry.
∑ 1 Remote control (N2QAKB000086)
∑ 2 Batteries for remote control
(for replacement > 9)
∑ 1 AC adaptor (RFEA221W)
∑ 1 AC power supply cord (K2CB2CB00020)
≥ For use with this unit only. Do not use it with other
equipm ent. Also, do not us e cords for other equipment
with this unit.
∑ 1 Rechargeable battery pack
Included Optional
DY-DB30
DY-DB30
≥ Depending on the batter y pack, playback time may
differ. (> 11, “Appr o xi mate rech ar g in g an d pla y t im e s
(Hours)”)
∑ 1 Wireless LAN Adaptor (C5ZZZ0000048)
∑ 1 L-Shaped USB Connector (K9ZZ00002 12 5)
≥ Do not use AC po wer sup ply cor d an d Wir el es s LAN Adap to r
with oth er eq uipment. W ir ele ss LAN Adaptor is not des ig ne d
to use with PC.
≥ MAC address is stated on the bottom of Wireless LAN
Adaptor.
(ONLY FOR CANADA)
The enclosed Canadian French label sheet corresponds to
the English display on the unit.
DY-DB15
DY-DB100
∫ Disc and card handling precautions
≥ Handle discs by the edges to avoid inadver tent scrat ches or
fingerprints on the disc.
≥ Do not attach labels or stickers to discs (This may cause disc
warping, rendering it unusable) .
≥ Do not write on the label sid e with a ball-point pen or other
writin g ins trument.
≥ Do not use record cleaning sprays, benzine, thinn er, static
electricity prevention liquids or any other solvent.
≥ Do not use scratch-proof protectors or covers.
≥ Clean any dust, water, or foreign matter from the terminals on
the rear side of the card.
≥ Do not use the following discs:
jDiscs with exposed adhesive from removed stickers or
labels (rented discs etc).
jDiscs that are badly warped or cracked.
jIrregularly shaped discs, such as heart shapes.
Maintenance
∫ To clean this unit, wipe with a soft, dry
cloth.
≥ Use eyeglass cleaner to remove stubbor n dirt from the LCD.
≥ Do not use a microfiber dust cloth on the LCD screen. Follow
the caution when wiping the outer casing.
≥ Never use alcoho l, paint thinner or benzine t o clean this unit.
≥ Wiping the LCD and around the LCD with a hard cloth or
rubbing them strongly may scratch the surfaces.
∫ Maintenance of the lens
≥ Remove dust carefully with an air blower for camera lenses
(optional).
≥ Recomm ended product:
Lens cleaner kit (SZZP1038C) (Available from Panasonic
dealers.)
≥ Y ou cannot use a CD type lens cleaner.
≥ Be careful not to touch the lens with your fingers.
Network
To dispose or transfer this unit
The unit may keep the user settings information in the unit. If
you discard this unit either by disposal or transfer, then follow
the procedure to return all the settings to the factory presets to
delete the user se ttings . (> 46, “To return all settings to the
factory preset”)
≥ The ope ration history may be recorded in the memory of this
unit.
VQT2J81
(ENG)
5
Media (Disc, card and
USB device) information
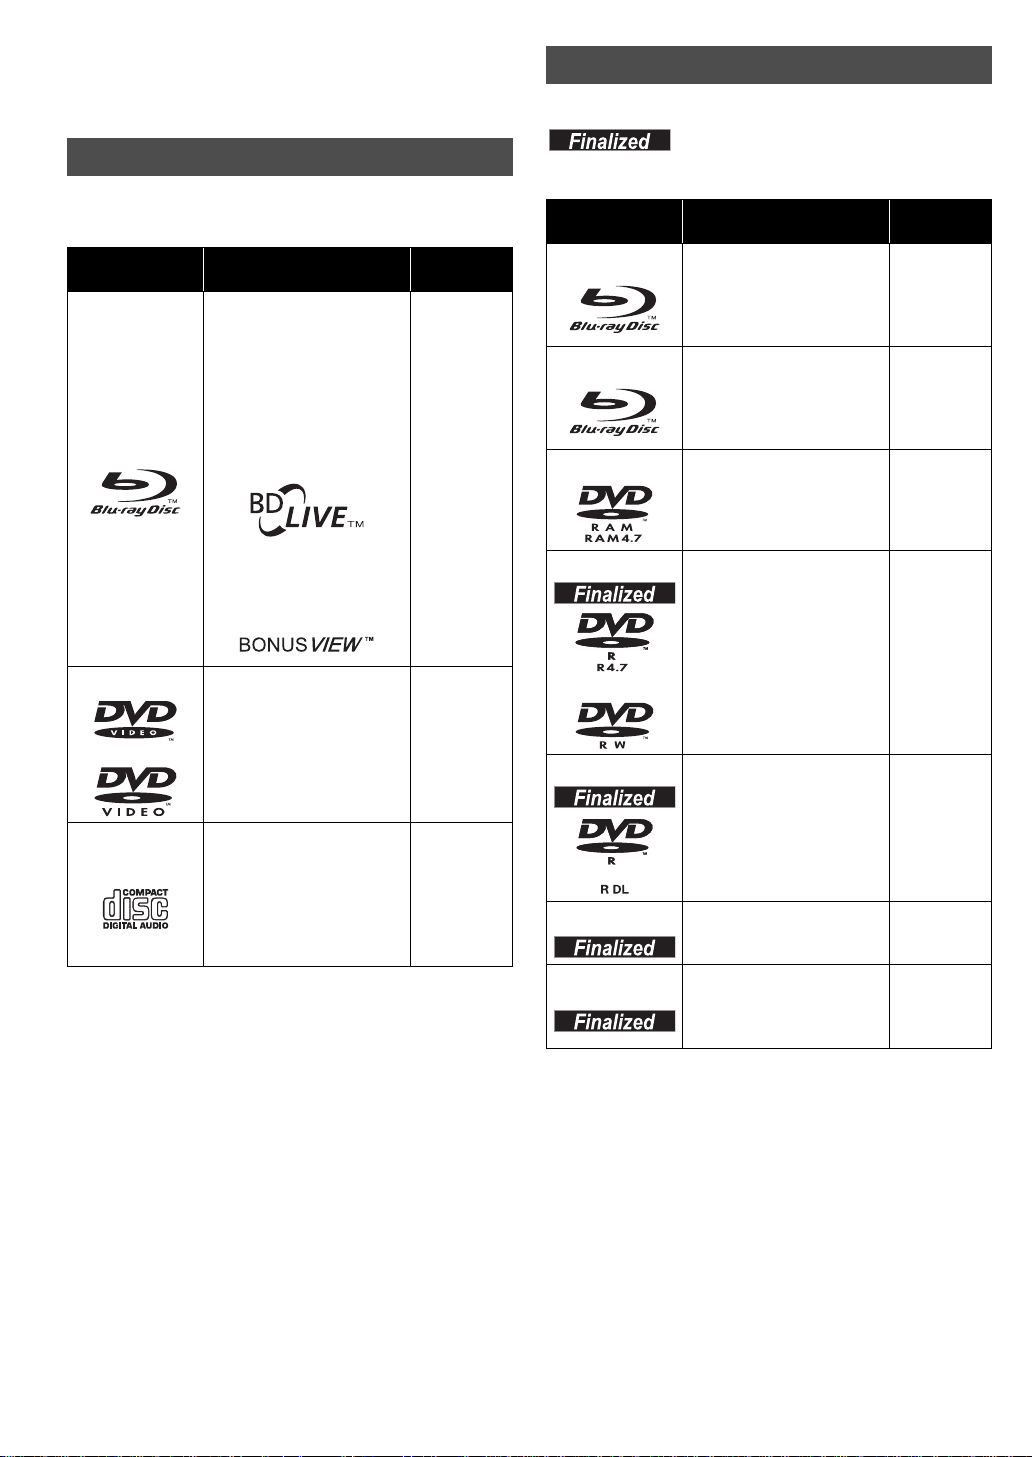
Commercially sold discs
This chart shows the different type of retail/commercial discs
you can u se, a nd al so incl ud es the i nd us try - st and ar d log os t ha t
should appear on the discs and/or packaging.
Type of media
and logo
BD-Video
Features
This format supports High
Definition video and audio
content including:
≥BD-Live (BD-ROM Profile
2). This format provides
interactive features when
this pl ayer is co nn ecte d to
the Inter n et via a
broadband connection.
Indicated
as
[BD-V]
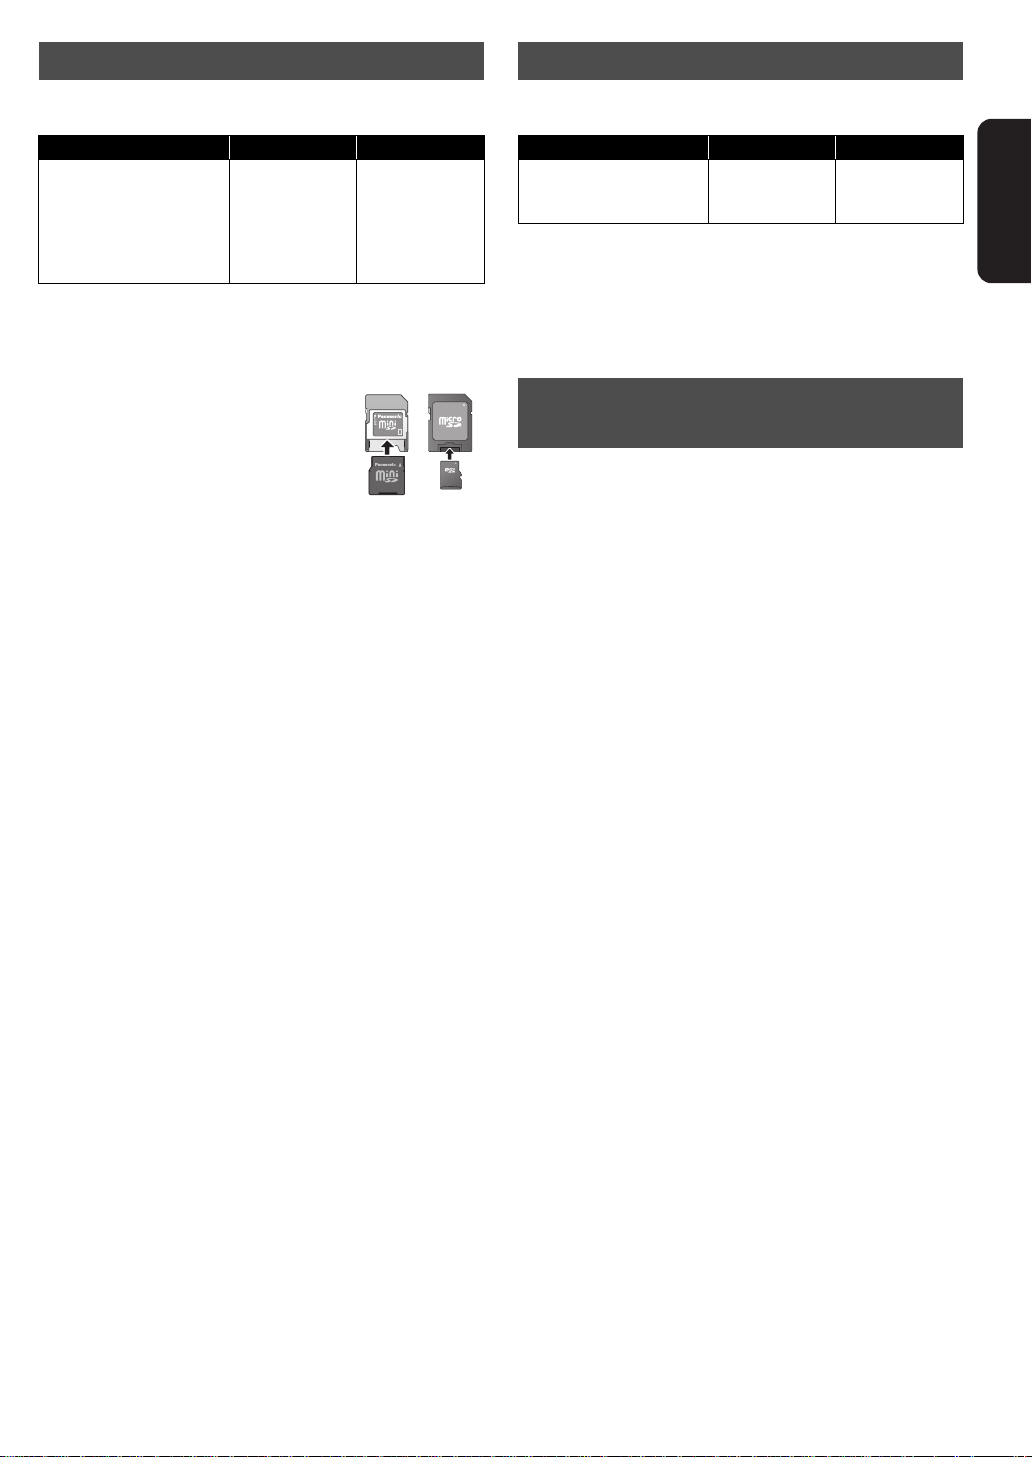
User recorded media
This chart shows the different type of discs recorded with other
device s that yo u ca n us e.
with the DVD recorder, etc. before playback. For details about
finalizing, refer to the operating instructions for your equipment.
Type of media
and logo
BD-RE ≥ V ersion 3 of the BD-RE
BD-R ≥ V ersion 2 of the BD-R
DVD-RAM ≥ V ersion 1.1 of the DVD
This mark means you must finalize the disc
Formats
Recording Format
≥ JPEG format
Recording Format
®
format
≥ DivX
Video Recording Form at
≥ JPEG format
≥ AVCHDformat
Indicated
as
[BD-V]
[JPEG]
[BD-V]
[DivX]
[DVD-VR]
[JPEG]
[AVCHD]
≥BONUSVIEW allows
picture-in-picture functions
to be viewed.
DVD-Video This format supports high
quali ty vide o an d audio
playback.
[DVD-V]
Compact Discs (CD’s) that
CD
contain audio and music
Operation and sound quality
≥
of CDs that do not conform
to CD-DA s pecif ications
(copy control CDs, etc.)
cannot be guaranteed.
[CD]
Note about using a DualDisc
≥The digital audio content side of a DualDisc does not meet
the technical specifications of the Compact Disc Digital Audio
(CD-DA) format so play may not be possible.
≥Do not use a DualDisc in this unit as it may not be po ssible to
insert it correctly and it may get scratched or scraped.
DVD-R/RW
DVD-R DL ≥ DVD-Video Format
rR/rRW/rRDL
CD-R/RW
≥ It may not be possible to play the above discs in some
cases due to the type of discs, the condition of the
recording, the recording method and how the files were
created.
≥ When a di sc re cord ed in th e AVCHDformat i s be in g p lay ed,
the video may be paused for a few seconds at portions
spliced, due to del etion or editing.
≥ DVD-Video Format
≥ V ersion 1.1 of the DVD
Video Recording Form at
≥ AVCHDformat
®
format (DVD-RW is
≥ DivX
not supported)
≥ MP3 format (DVD-RW is
not supported)
≥ JPEG format (DVD-RW is
not supported)
≥ V ersion 1.2 of the DVD
Video Recording Form at
≥ AVCHDformat
®
format
≥ DivX
≥ MP3 format
≥ JPEG format
≥rVR (rR/rRW Video
Recording) Format
≥ AVCHDformat
≥ CD-DA format
≥ MP3 format
≥ JPEG format
®
format
≥ DivX
[DVD-V]
[DVD-VR]
[AVCHD]
[DivX]
[MP3]
[JPEG]
[DVD-V]
[DVD-VR]
[AVCHD]
[DivX]
[MP3]
[JPEG]
[DVD-V]
[AVCHD]
[CD]
[MP3]
[JPEG]
[DivX]
VQT2J81
(ENG)
6
SD cards
ADAPTER
This cha rt sh ows th e di ff er ent t ype of c ard s rec or de d wi th othe r
devices that you can use.
USB devices
This unit ca n us e U S B dev ic e s contain ing data recorde d in t h e
following formats.
Type of media* Formats Indicated as
SD Memory Card
(from 8 MB to 2 GB)
SDHC Memory Card
(from 4 GB to 32 GB)
SDXC Memory Card
(48 GB, 64 GB)
* Includes miniSD Card, microSD Card, microSDHC Card and
microSDXC Card
The card types mentioned above will be referred to as “ SD
card” in th es e op erating instructio n s.
≥ MiniSD Card, microSD Card,
microSDHC Card and microSDXC Card
can be used, but must be used with an
adaptor card. These are usually supplied
with such card, or otherwise customer
provided.
≥ We recomm en d us in g a Panasonic SD
card.
Please confirm the latest informat ion on the following
website.
http://panasonic.jp/support/global/cs/
(This site is in English only.)
≥ This unit is compatible with SD Memory Cards that meet SD
Card Specifications FAT12 and FAT16 formats, as well as
SDHC Memory Cards in FAT32 format (Does not support
long file name.) and SDXC Memory Cards in exFAT.
≥ If the SD card is used with incompatible computers or
devices, recorded contents may be erased due to the card
being for ma t te d etc .
≥ When using cards from 4 GB to 32 GB, only SD cards using
the SDHC logo can be used.
≥ When using cards 48 GB and 64 GB, only SD cards using
the SDXC log o ca n be used.
≥ Useable memory may be slightly less than the card capacity.
≥ If the SD card you are attempting to use was formatted on a
PC, it is possible that the card may not work properly.
≥ Keep the Memory Card out of reach of children to prevent
swallowing.
≥ When a card recorded in the AVCHD format is being played,
the video may momentarily pause, especially where one
recording ends and the next one begins . This is normal and
does not indicat e a problem.
≥ SDHC Memory Cards and SDXC Memory Cards can be
used in equipment that is compatible with the appropriate
card or cards. (SDHC Memory Cards can also be used in
equipment compatible with SDXC Memory Cards)
Using either of these cards in a non-compatible PC or
non-co mpatible equipment may result in formatting etc.
and the loss of recorded content.
≥ To protect the card’s contents, move the record preventi on
tab (on the SD card) to “LOCK”.
≥ JPEG format
≥ AVCHDformat
≥ MPEG2 format
[JPEG]
[AVCHD]
[MPEG2]
Type of media Formats Indicated as
USB devices ≥ MP3 format
≥ JPEG format
®
format
≥ DivX
≥ This unit does not guarantee connection with all USB
devices.
≥ This unit does not support USB device charging.
≥ FAT12, FAT16 and FAT32 file systems are suppor ted.
≥ This unit suppor ts USB 2.0 H igh Speed.
[MP3]
[JPEG]
[DivX]
Discs that cannot be played in
this unit
≥ 2.6 GB and 5.2 GB DVD-RAM
≥ DVD-RAM that cannot be removed from cartridge
≥ 3.95 GB and 4.7 GB DVD-R (A uth oring)
≥ DVD-R, DVD-R DL, DVD-RW, +R, +R DL recorded on
another unit and not finalized
≥ BD-Video with a region code other than “A”
≥ DVD-Video with a region number other than “1” o r “ALL”
≥ Version 1.0 DVD-RW
≥ DVD-ROM, CD-ROM, CDV, CD-G, CVD, SACD, Photo CD,
MV-Disc and PD
≥ DVD-Audio
≥ Vide o CD and SVCD
≥ WMA discs
≥ PAL discs
≥ HD DVD
≥ BD-Video discs recorded at a rate of 50
≥ Any other disc that is not specifically supported
fields/sec
Getting started
VQT2J81
(ENG)
7

Overview
1
3
4
2
9 10
5
6
7
8
1 Pull out the
panel
2 Touch lightly
with a finger
Operation Panel
21
22
The Unit
Instructions for operations are generally described using the
remote control in these operating instructions.
Front View
1 LCD screen
When the screen is opened
Disc lid
[OPEN]
2 Speaker
3 [CHARGE] indicator (> 11)
While recharging the battery pack, this indicator lights up.
4 Remote control signal sensor (> 9)
5 Switch the drive to playback
It will switch every time it is pressed.
Rear Vie w
11
12
13
14
15
16
17
18
19
20
Side View
DISC SD
6 Playback (> 14)
7 Stop (> 16)
8 Skip title numbers, etc. (> 16)
9 Search/Slow-motion ( > 16)
10 Adjust the volume (> 14)
1 1 Tur n the unit on and off (> 11)
12 Return to previous screen
13 Selection/OK
To select:
Tilt up, down, left, or right
[
3, 4, 2, 1])
(
Example:
To select left item
14 Show the sub menu
15 USB port
16 Headphone terminal [Ë]
(‡ 3.5 mm stereo mini jack)
17 HD M I AV OUT term in a l (> 28)
18 LAN terminal (> 31)
19 DC IN term inal (> 10)
20 Stand (> 10)
21 SD card access indicator (> 13)
22 SD card slot (> 13)
USB
NETWORK PHOTO FRAME
To enter:
Press straight in
Example:
To enter the operati on
VQT2J81
(ENG)
8
Remote control
チ
24
20
25
27
26
18
14
17
21
22
23
19
16
15
1
3
6
7
5
4
11
12
8
9
2
R6/LR6, AA
(Alkaline or manganese
batteries)
1
2
Remote control
signal sensor
Within 30 degrees angle
either left or right
Within 20 degrees
angle ei the r up or
down
Remote control transmitter
Within 7 m (23 ft.) in front
1 Turn the unit on and off (> 11)
2 Show the Home screen of the VIERA CAST
(> 34)
3 Select ti tle numbers, etc./Enter numbers (> 17)
4 Cancel the values that were entered
5 Show on-screen menu (> 26)
6 Switch on/off Secondary Video (Picture-in-
Picture) (> 18)
7 Basic operations for playback (> 14 – 16)
8 Show Status messages (> 17)
9 Show Top Menu/Direct Navigator (> 14)
10 Show the Sub Menu
1 1 Use according to the instructions on the screen
12 Playback as a Photo Fra me (> 20)
13 Switch the display mode of Photo Frame (> 20)
14 Switch the drive to pl ayback (> 8)
15 Change the Setup of this unit (> 36)
16 Change the screen setti ngs (> 12)
17 Turn the u n it off aut o matically (> 11)
18 Adjust the volume (> 14)
19 Mute the sound
Press again to clear
20 Switch on/off Secon dary Audio (> 18)
21 Exit the m en u screen
22 Show Pop-up Menu (> 14)
23 Show FUNCTION MENU (> 12)
24 Selection/ OK, Frame-by-frame
≥ To select: Press up, down, left, or right ([3, 4, 2, 1])
≥ To enter: Press [OK]
≥ Frame forward / Frame backwa rd:
(While paused) press left or right ([2;][;1])
25 Return to previous screen
26 Select audio (> 17)
27 Switch the display design of Photo Frame (> 20)
Getting started
∫ Insert the batteries (included)
Insert so the poles (i and j) match those in the remote
control.
≥ After inserting the batteries, close the cover so it is as it was
by inserting the s (minus) side first.
∫ Range of use
The distance and angles are approximate.
VQT2J81
(ENG)
9
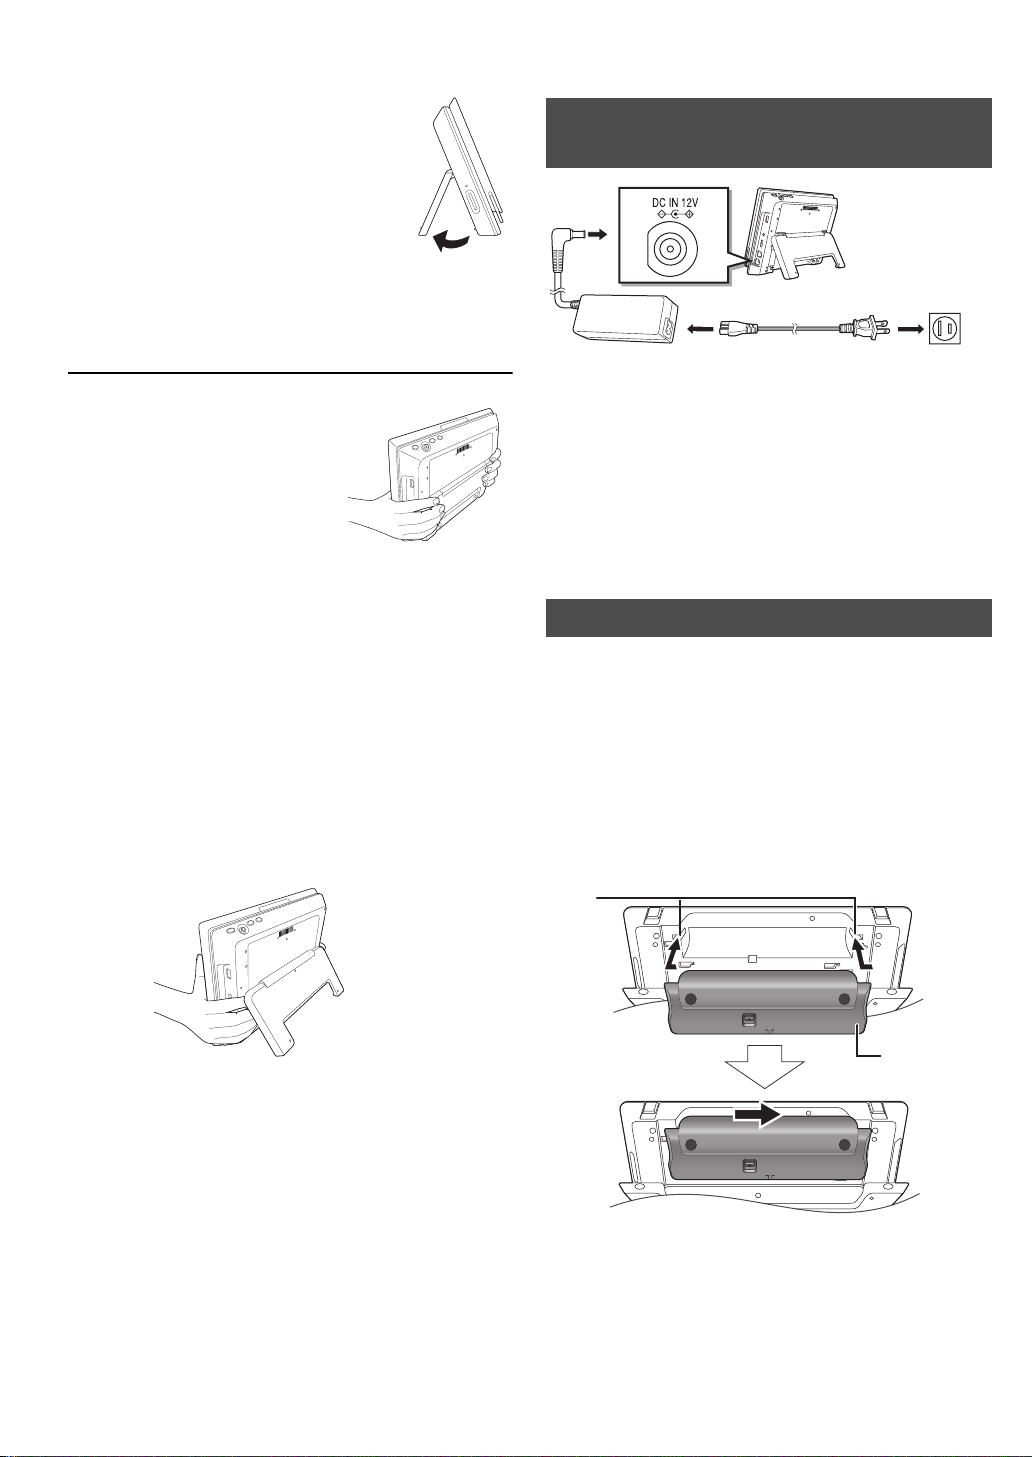
Installation of the unit
DO NOT
AC adap t or
(included)
T o a household
AC outlet
AC power supply cord
(included)
1
2
3
RELEASE
DETACH ATTACH
RELEASE
DETACH ATTACH
Bottom side of this unit
Batte ry pac k
(included)
Preparing the Power Supply
Open the stand and set the unit on a
horiz on t al an d sta ble l ev el surf ace.
≥ Use the stand in a fully opened state.
≥ The unit cannot be mounted in the car.
≥The unit does not have magnetic shielding.
Do not place the unit near televisions, personal computers or
other devices easily influenced by magnetism. Do not keep
this unit and magnetized cards (bank cards, commut er
passes, etc.) close together.
When holding the unit:
≥ Hold the unit with the stand
closed.
When moving the unit:
≥ Turn the unit off.
≥ Close the screen and the stand.
About the LCD screen
There may be 0.01 % or less chance of missing or constantly
turned on pixels, but this is not a malfunction.
Caution
≥ Do not place with the LCD screen down. Doing so may
scratch the surface of the LCD screen.
≥ Do not insert a finger between the main unit and the stand
when installing or moving this unit. Doing so may result in
fingers getting caught between the unit and the stand and
cause injuries. Especially keep an ey e on children.
Using the unit connected to the
AC adaptor
The unit is in the standby condition (the [CHARGE] indicator
lights) when the AC power supply cord is connected. The
primary circuit is always “live” as long as the AC adaptor is
connec te d to an electri ca l ou t le t.
T o conserve power
This unit consumes 0.4 W (Approximately 5 W when Quick
Start is set to “On”) of power even when turned off. When the
unit is not going to be used for a long time, disconnect the AC
power supply cord from the household AC outlet.
Using the battery pack
This unit can be used in places without an AC outlet, such as
outdoors , by atta ch ing the included bat te r y pack .
≥ The bat tery is not charged at the time of purchase. C harge
before initial use.
≥ The battery is designed only for use with this unit. It cannot
be used with other equipment.
∫ Attaching the battery pack
Turn the unit off before attaching or detaching the battery pack.
≥ Attach the battery pack after you open the stand.
VQT2J81
(ENG)
10
1 Bring in from the left, aligning the grooves.
2 Slide all the way t o the ri gh t until you hear a "c li ck " .
Check to make sure it is securely fastened.
∫ Detaching the battery pack
RELEASE
DETACH ATTACH
Bottom side of this unit
2 Slide.
1 Press and hold.
[CHARGE] indicator
(Orange light )
Recharge
(flashing)
Fully charged
Off Timer 0 : 30
e.g., 30 min.
Off
1:000:30 2:00 3:00 6:00
12:00
When not using for long periods of time
≥ Detach the battery pack (> above).
(Even when the unit is turned off, there is a small amount of
voltage running through the unit, and this may result in a
malfunction.)
≥ Recharge the battery for re-use.
∫ Recharging the battery pack
Attach the battery pack and connect the AC
adaptor (> 10).
≥ The [CHARGE] indicator lights while charging the battery,
and the [CHARGE] indicator turns off when battery charging
is finished.
Turning on/off the unit
Press [POWER Í] (approx. 0.5 sec.).
The un it is turned off wh en [POWER Í] is pressed again.
≥ When the “A uto P o wer Off” is s et t o “O n ” ( ini ti al l y set t o “O n” ),
the unit will be turned off automatically after 15 minutes
(5 minutes when the battery pack is used) when it is in
stopped status (> 40).
≥ The startup will take time. The operation related to startup of
the unit after turning on this unit can be quickened by setting
the initial se tu p “Q uick Start” (> 40) to “On”. (The power
consumption will increase)
≥ You may hear operational sounds when the uni t is turned on,
but this is due to the initialization of the pickup unit, and it is
not a malfunction.
Easy Setting
After install ation of the unit and pressing [PO WER Í] for the
1st time, a screen for the basic settings will appear.
Follow the on-screen instructions and make
the settings with [3, 4] and [OK].
“On-screen Language” (> 38), “Picture Quality Mode” (> 12),
“DST” (> 4 0), “Clock Adjustme nt” (> 40) and “Quick Start”
(> 40) are set.
Getting started
∫ Approximate rech a rgi ng a nd pl ay tim es
(Hours)
*2
Play
Battery pack Recharging
DY-DB30
(included/
optional)
DY-DB15
(optional)
DY-DB100
(optional)
*1
When the unit is off [at 20oC
*2
At room temp erature us in g he adphones [ at 20oC
≥ Play time indicated above may differ depending on the use.
≥ T o cha ng e the LC D br i ghtn es s (> 12, “Adjusting th e pictures
on the LCD screen”).
*1
LCD brightness level
j5 0 i5
5 3.5 3 2.75
4 2.75 2.5 2.25
7.5 5.5 5 4.5
(68 oF)
]
(68 oF)
]
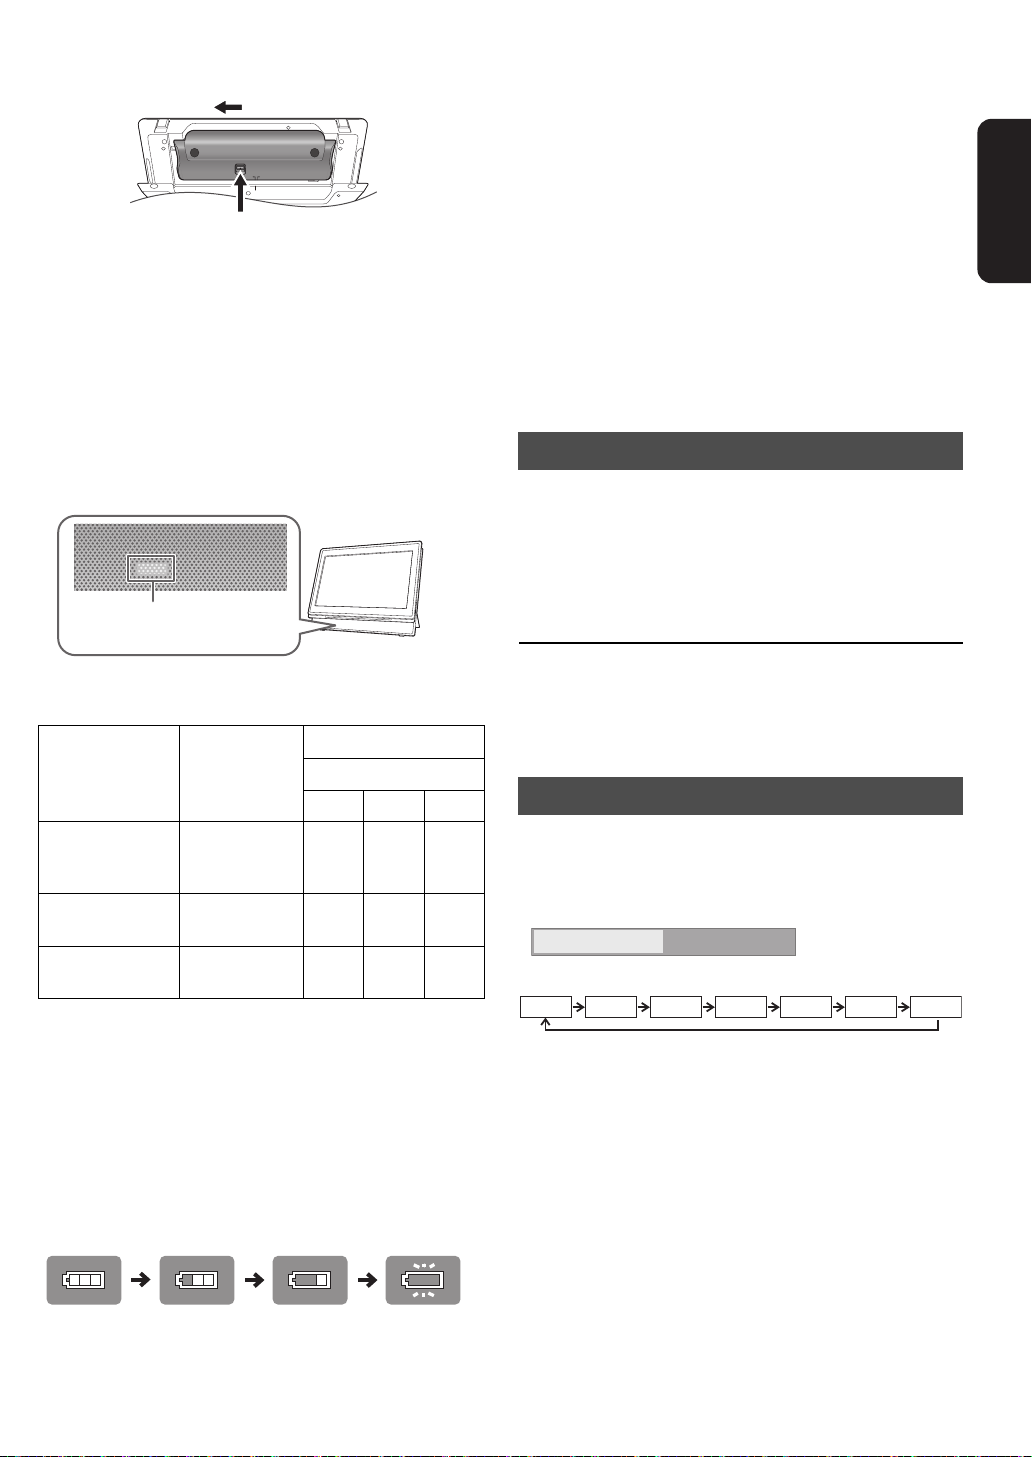
∫ Checking the remaining battery char ge
Not displayed w he n the AC adaptor is in use .
Press [SUB MENU] while the power is “On”
Remainin g ch arg e is dis pl ay ed for a few se conds at the bott om
right of the screen.
≥ After completing “E asy Setting”, you can continuously
perform “Network Easy Setting” (> 32).
≥ You can perform this setup anytime by selecting “Easy
Setting” in the Setup menu. (> 40)
≥ You can also change this setting individually.
Turn the unit off automatically
The unit is turned off automatically after set time has passed.
Switch by pressing the [OFF TIMER].
It will switch every time it is pressed.
Charge the battery pack when the display starts to flash.
≥ Appears automatically when there is only a few minutes of
charge remaining.
VQT2J81
(ENG)
11
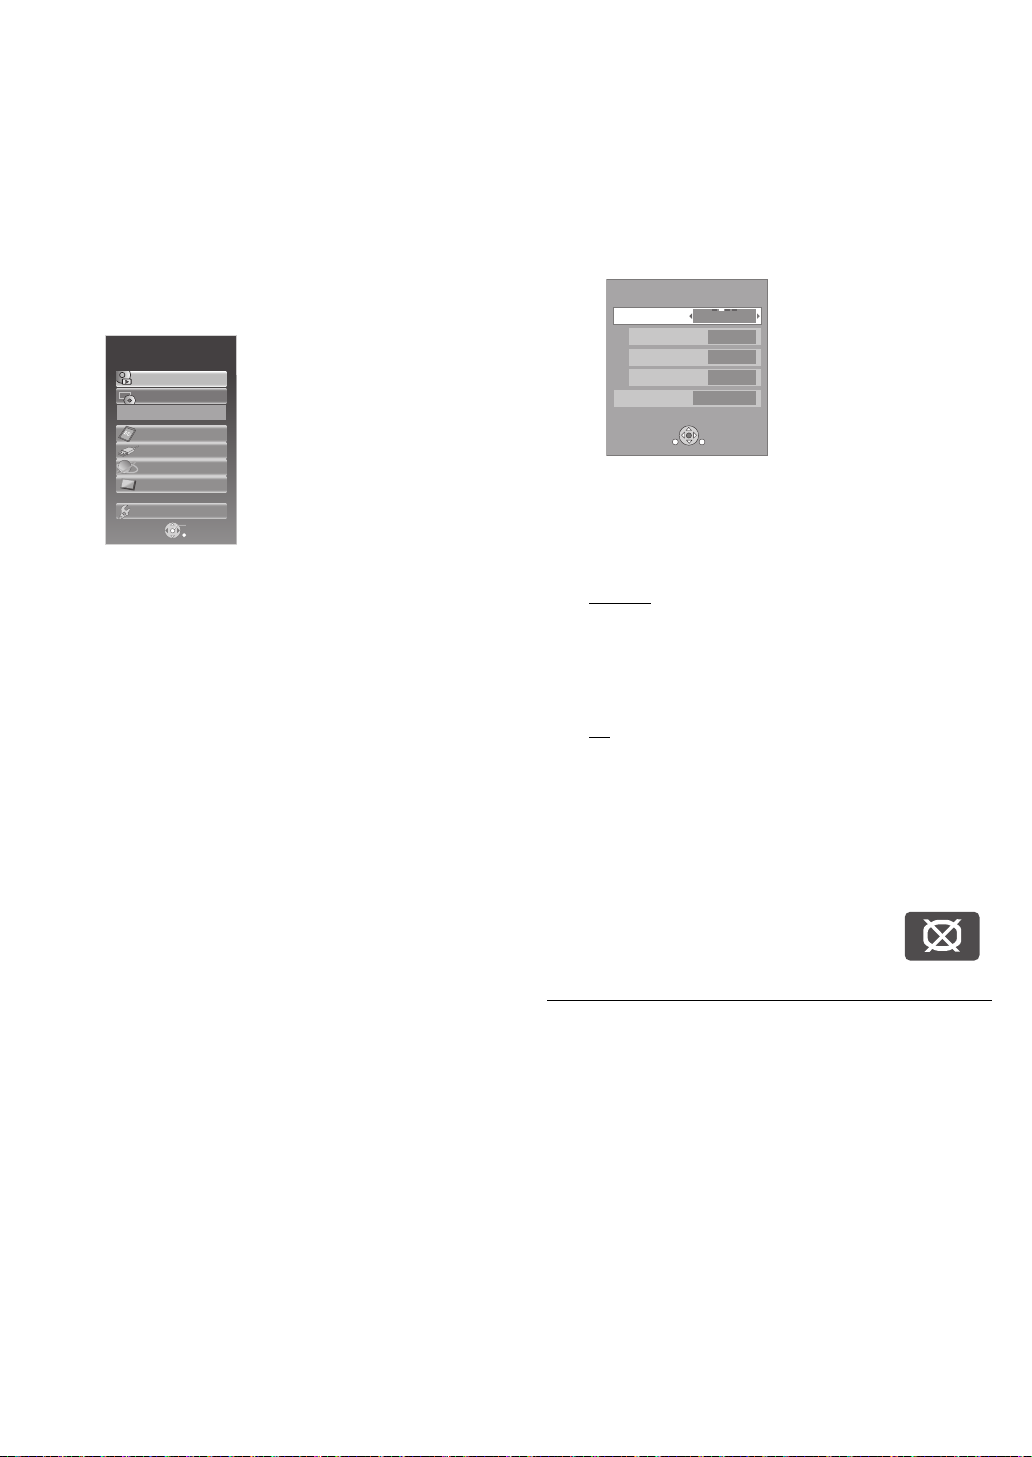
Showing the FUNCTION
OK
RETURN
Playback
Top Menu
Other Functions
SD card
DISC
Blu-ray Disc Player
USB device
Network
Photo Frame
e.g.,
LCD Menu
Picture
Dynamic
Monitor On
Brightness
Color
Tint
RETURN
SUB
MENU
Adjusting the pictures on
MENU
Some functions of this unit can be operat ed from the
FUNCTION MENU.
1 Press [FUNCTION MENU].
≥ Functions displayed depend on the media and operating
conditions.
2 Press [3, 4] to select the item and press
[OK].
! Playback (> 14)
Play back the contents.
! Top Menu (> 14)
! Menu (> 15, 19, 22, 24)
! Viewing Picture (> 22)
! Viewing Video (> 14, 24)
! Listening Music (> 19)
! Start Photo Frame (> 20)
! Photo Frame Settings (> 21)
! Disc (> 14)
Switches to the disc drive.
! SD card (> 14)
Switches to the S D drive.
! USB device (> 14)
Switches to the USB drive.
! Network (> 31)
Show the Home screen of the VIERA CAST.
! Photo Frame (> 20)
! Other Functions
“Playlists”:
You can play playlists created on D VD-VR.
3,4,2,1
Press [
“Setup” (> 36)
“Card Management” (> 18)
] to s e lect the playlist and press [OK].
the LCD screen
1 Press [LCD MENU].
≥ It is also possible to display with the following
procedures.
1 Press [SUB MENU].
2 Select “Other Functions” with [3, 4], and press [OK].
3 Select “LCD Menu” with [3, 4], and press [OK].
2 Select the item with [3, 4].
3 Change the setting with [3, 4, 2, 1].
Picture: Adjus ti ng image quality
! Standard: Standard
! Dynamic
! Night: Picture suitable for viewing in dark places
! User jBrightness: s5 to r5
Monitor: Displaying images
! On
! Off:
≥ When “Off” is selected, select “Yes” with [2, 1] and then
press [OK].
≥ Underlined items are the fa ctory presets.
≥ “Moni tor” is not displayed during Photo Frame playback
(> 20 ) . Also “Pictu r e” ca n be selected, bu t the de t ail s of
“User” cannot be changed.
≥ If you a re not using the LCD on this unit,
select “Off”. No image mark is displayed on
the lower left of the scree n whe n it is set to
“Off”.
T o exit the screen
Press [EXIT].
: Picture with high contrast
jColor: s5 to r5
jTint: s5 to r5
:
Image di splay
No image
VQT2J81
(ENG)
12
T o display images when the “Monitor” is set to “Off ”
Press [LCD MENU], [SUB MENU], [MODE] or [FUNCTION
MENU].
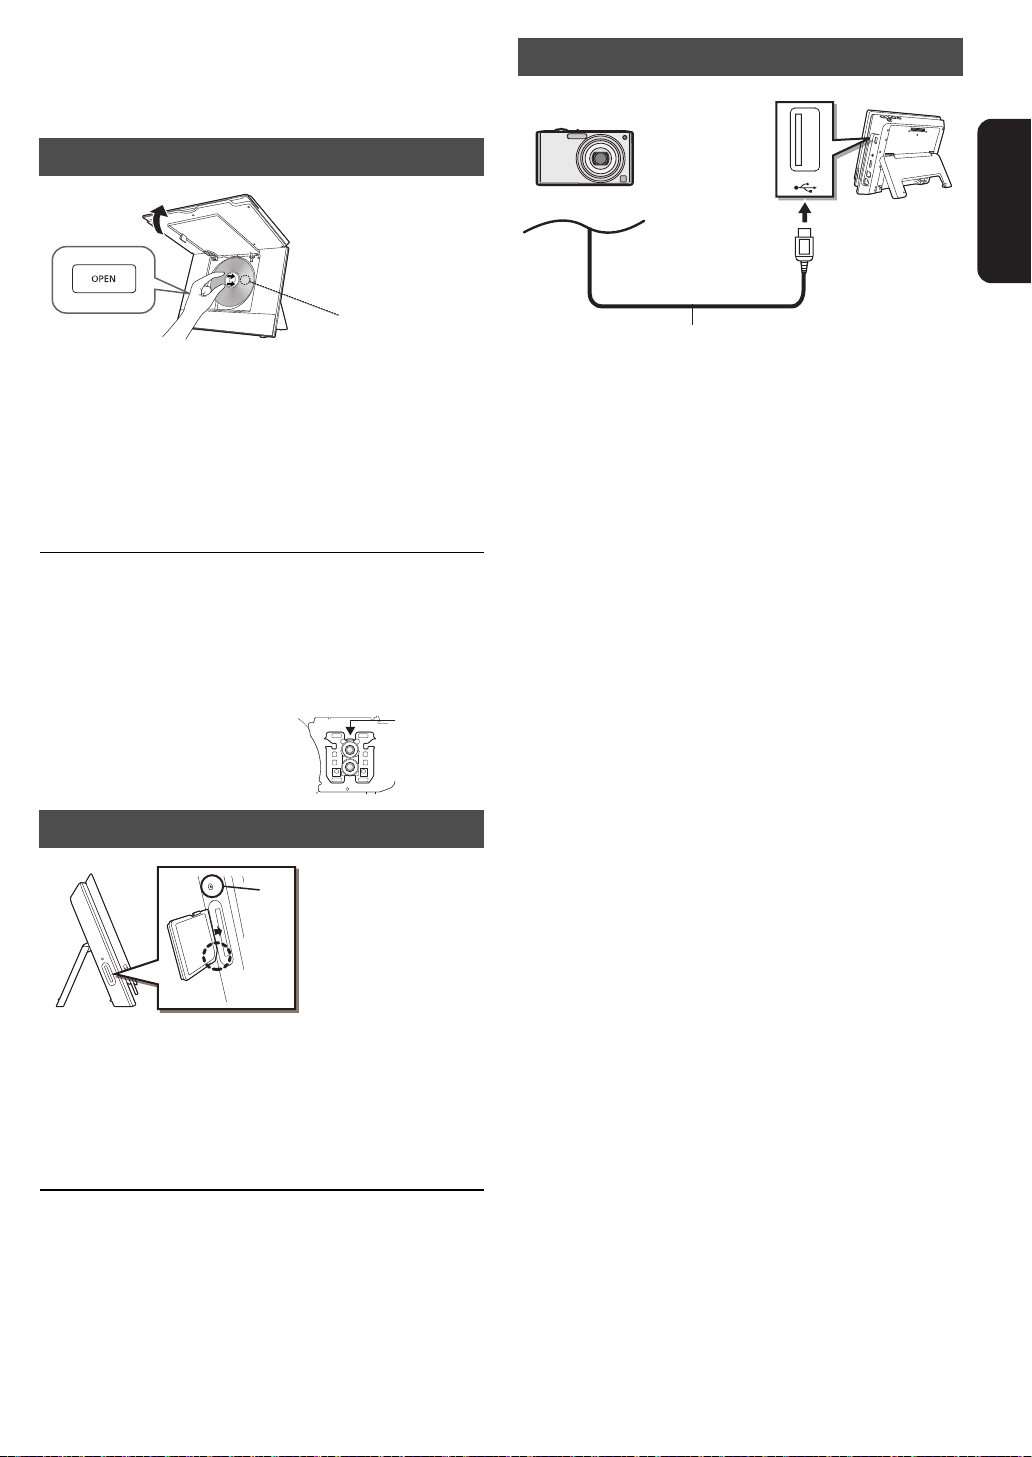
Loading the disc, SD card
Lens (A)
Panasonic digital camera, etc.
Connect to USB terminal
USB connection cable (not included)
Specified c able such as
accessory of the USB equipment
or USB device
Disc
1 O pen the screen and press [OPEN].
2 Set the disc holding the unit with your hand
and cl ose the lid.
≥ Set the disc securely until you hear a "click", with the
label side up. (Double-sided disc: place the label side up
that you w ant to play back)
3 Close the screen.
≥ Some di scs may star t playing when they ar e loaded with the
unit turned on.
≥ About discs with a cartridge
jDVD-RAM, DVD-R: Remove the disc from the cartridge
and set the disc in the tray. Cartri dge discs cannot be used.
jPlace the disc ba ck int o th e ca rtr i dge f or st o rage to pre ven t
dirt and scratches after us e.
≥ Do not touch the lens as it
may make it dirty.
USB device
Getting started
≥ Insert the media making sure it is oriented correc tly.
≥ Setup sc r ee n ma y display on th e co nn ec t e d Panasonic
device . Setup accor ding to the operating instructions of th e
connected device . (Depending on the device, you may need
to setup to a mode that connects to a PC)
≥ Refer to the operating instructions of the connecte d devices
regarding the connection/setup.
SD card
Insert the SD card into the SD card slot.
With the cut corner at the bottom, insert the card straight in the
direction shown in the figure, until you hear a sound.
B SD card access indica tor
≥ SD card ac ce s s ind ic a t or w il l flas h while the ca r d is bein g
read. Do not remove the SD card from this unit while the
indicator is fl ashing.
To remove the card
Press th e cen t er o f the car d unt il i t “ cl ick s”, a nd pu ll t he ca r d o ut
straight.
VQT2J81
(ENG)
13

Playback
e.g., DVD-RAM
SD Card
Play Video (AVCHD)
Select an action or press [RETURN].
Play Pictures (JPEG)
Play Video (MPEG-2)
Select Shooting Date
OK
RETURN
SUB
MENU
e.g.,
e.g.,
Basic play (Playing video
contents)
Instructions for operations are generally described using the
remote control in these operating instructions.
Insert the media (> 13).
Play starts.
≥ If play does not start, press [1](PLAY).
≥ If a media with data in different file formats is inserted, the file
selection menu is displayed. Press [3, 4] to select the
desired file format and press [OK].
≥ If the menu is displayed, press [3, 4, 2, 1] to select the
item and press [OK] .
≥If the screen prompting you to use the color buttons appear s,
continue to operate with the color buttons on the remote
control.
≥
The produc ers of the disc can co nt rol how discs are played, so you
may not alwa ys be abl e to cont rol play as de s cribed in these
operating instruc tions. Rea d th e dis c’s instruction s ca refully.
≥
When playing a set of two or more BD-Video discs, the menu
screen may continue to display even if the disc has been ejected.
≥ The start of pl ayback may take tim e dependi ng on the media.
≥ The sound of rotation may be audible during disc playback,
but this is not a malfunction.
To adjust the volume
Press [VOL `] or [VOL _].
≥
When usin g hea dp hones, turn down the volu m e be fore connection.
T o show Pop-up Menu
[BD-V]
The Pop-up Menu is a special feature available with some BDVideo discs. This menu may vary with discs. For the operating
method, refer to the instructions for the disc.
1 Press [POP-UP MENU].
2 Press [3, 4, 2, 1] to select the ite m an d pr e ss [OK ] .
≥ Pop-up Menu also appears by pressing [SUB MENU] and
selecting “Pop-up Menu”.
≥ Press [P O P-UP MENU] to exit the screen.
Playing HD Video or SD Video
[AVCHD] [MPEG2]
It is pos s ibl e t o p lay the H D ( Hig h-De fini t io n) vi de o re cor d ed on
the Panasonic High-definition Video Camera on the DVD-RAM/
R/RW/R DL/+R/+RW/+R DL or SD card, and SD (Standard
Definition) Video recorded on the Panasonic SD Video Camera
on the SD card.
1 Insert a disc or SD card (> 13).
≥ “Video (AVCHD)” or “Video (MPEG-2)” screen is
displayed.
≥ If a media containing data in different file formats is
inserted, the file selection menu may be displayed.
Press [3, 4] to select “Play Video (AVCHD)” or “Play
Video ( MP EG - 2) ” and press [OK] .
Switch the media to playback
Press [MODE] to select “DISC”, “SD” or
“USB”.
≥ If a media is inserted while the unit is stopped, the drive
switches automatically depending on the inserted media.
T o show menus
[BD-V] [AVCHD] [DVD-VR] [DVD-V] [DivX]
Press [DIRECT NAVIGATOR/TOP MENU].
≥ Total title number may not be displayed properly on +R/+RW.
DIRECT NAVIGATOR Title View
DVD-RAM(VR)
Date Day Channel
No.
9/ 5
01
9/ 5
02
9/ 5
03
Rec. Length
0:15 (SP)
04
9/ 6
9/ 6
05
9/ 6
06
9/ 7
07
9/ 7
08
9/ 7
09
9/ 7
10
Play
SUB
Video Picture
R G
MENU
RETURN
VQT2J81
(ENG)
14
Wed
Wed
Wed
Thu
Thu
Thu
Fri
Fri
Fri
Fri
Start
10:00AM
IN 2
11:30AM
IN 2
11:59PM
VHS
10:00AM
VHS
11:30AM
11:59PM
10:00AM
10:30AM
IN 2
11:30AM
IN 2
11:59PM
Previous Next
B Y
Video
Picture
Title Name
Page 01/02
2 Press [3, 4, 2, 1] to select the title and
press [OK].
≥ Total title number may not be displayed properly on +R/
+RW.
DIRECT NAVIGATOR
Rec. Length
T o return to the menu screen
Press [DIRECT NAVIGATOR/TOP MENU].
T o exit the menu screen
Press [EXIT].
SD CARD
SUB
MENU
Video (MPEG-2)
Date Day
No.
001
9/ 5
9/ 5
002
9/ 5
003
0:15.47
004
9/ 6
005
9/ 6
006
9/ 6
007
9/ 7
008
9/ 7
009
9/ 7
010
9/ 7
Play
RETURN
Wed
Wed
Wed
Thu
Thu
Thu
Fri
Fri
Fri
Fri
Start
10:00AM
11:30AM
11:59PM
10:00AM
11:30AM
11:59PM
10:00AM
10:30AM
11:30AM
11:59PM
Previous Next
Video
Title Name
Page 01/02

To switch from other menus to AVCHD or
DIRECT NAVIGATOR Shooting Date View
Jan 2009
Sun
Mon Tue Wed Thu Fri Sat
..
12345
6
789101112
13
14 15 16 17 18 19
20
21 22 23 24 25 26
27
28 29 30 31
SD card
SUB
MENU
Slideshow
Date
Picture
Video
( AVCHD )
00:00.00
3
1/14(Mon)
Slideshow
Page0006/0006
Next month
Previous month
RETURN
MPEG2 menu
(If the me dia contains data in differ ent file formats)
1 Press [FUNCTION MENU].
2 Press [3, 4] to select “Menu” and press [OK].
3 Press [3, 4] to select “Play Video (AVCHD)” or “Play
Video (MPEG-2)” and press [OK].
≥ It may pause for a few seconds on the break of images when
editing such as partial deletion is performed.
≥ High definition video (transfer rate of 18 Mbps or faster)
cannot be played back correct ly if it was recorded on a DVD
compatible to double speed or slower.
≥ It is not possible to playback AVCHD and MPEG2 video
which have been dragged and dropped, copied and pasted to
the medi a.
Continuously playing back HD
Video (AVCHD) or still pictures in
order of shooting date
(slideshow)
[AVCHD] [JPEG]
It is pos sible to continuously playback high definition motion
pictures (AVCHD) and still p ictures (JPEG) shot with Panasonic
digital high definition video cameras etc., recorded onto the SD
card, in order of shooting date.
1 In sert an SD card (> 13).
2 Select “Se lect Shooting Date” with [3, 4]
and then press [OK].
“Shooting Date View” screen is displayed.
Changing the slideshow settings
After performing ste p 2 (> left)
3 Press [SUB MENU].
4 Press [3, 4] to select “Slideshow
Settings” and press [OK].
5 Select the item to set with [3, 4]
(> below).
6 After the setup is completed, select “Set”
with [3, 4, 2, 1], and then press [OK].
Playback Mode
! Picture
! Picture & Video (AVCHD)
Display Interval
Press [2, 1] to select the interval (“Long”, “Normal” or
“Short”).
≥ When a still picture with a lar ge number of pixels is
played, the display interval may become longer. Even if
the setting is changed, the display interval may not
become shorter.
Repeat Play
Repeats the slideshow.
Press [2, 1] to select “On” or “Off”.
Soundtrack (Music CD)
The mus ic CD can be played back as Background Music
during the slideshow.
Press [2, 1] to select “On” or “Off”.
≥ You cannot search or skip the music.
≥ When the slideshow stops, the playback of the music
also stops.
≥ Background Music will not play while playing back motion
pictures.
Playback
3 Select the date with [3, 4, 2, 1], and then
press [OK].
≥ Select the month with [3, 4], and select the day with
[2, 1].
≥ It is also possibl e to playback by pressing [1] (PLAY).
To display the next still picture or motion pict ure
While playing, press [9].
To stop the playback
While playing, press [∫].
To display the screen listing the shooting dates
Press [DIRECT NAVIGATOR/TOP MENU].
≥ [AVCHD]: It may pause for a few seconds on the break of
images when editing such as partial deletion is performed.
T o switch from other menus to shooting
date
(If the me dia contains data in differ ent file formats)
1 Press [FUNCTION MENU].
2 Press [3, 4] to select “Menu” and press [OK].
3 Press [3, 4] to select “Select Shooting Date” and press
[OK].
VQT2J81
(ENG)
15

Chapter playback
Properties
View Chapters
To display the title properties
(recor din g da te , etc .)
To sele ct the chapter
e.g., [AVCHD]
DIRECT NAVIGATOR
Chapter View
SD CARD
Play
RETURN
2009.11.15
Video
Page 01/01
001
---------
------------
0:00.00
002 003 004
005
e.g., [AVCHD]
[DVD-VR] [AVCHD]
1 Insert a disc or SD card (> 13).
≥ If the menu is displayed, press [3, 4] to select the item
and press [OK].
2 Press [3, 4] to select the title and press
[SUB MENU].
3 Press [3, 4] to select “View Chapters” and
press [OK].
4 Press [3, 4, 2, 1] to select the chapter
and press [OK].
Other operations during play
These functions may not work depending on the media and
contents.
Stop
The stopped position is memorized.
Resume play function
Press [1] (PLAY) to restart from this position.
≥ The memorized position is cleared in the following instances:
j[∫] is pressed several times
jThe media is removed
jThe unit is tu rned off due to such occurrences as power
out age, the removal of the AC adaptor or waste of the
battery pack’s remaining power when the unit is turned on
≥ [BD-V]: On BD-Video discs including BD-J (> 52 ), the res ume
play fu nction do es not work.
≥ [DivX] [MPEG2]: The position is cleared if the unit is turned off.
Pause
≥ Press [;] again or [1] (P LAY) to rest art play.
To return to the previous s c reen
Press [RETURN].
To exit the screen
Pres s [EXIT].
Search/Slow-motion
The speed increases up to 5 step s.
≥ Press [1] (PLA Y) to revert to normal playback speed.
≥ For some discs, the speed may not change.
Search
While playing, press [6] or [5].
≥ [DVD-VR] [DVD-V]: Audio is heard during the first step of
forward search.
≥ [BD-V] [AVCHD] [DivX] [MPEG2]: Audio is not heard during all
steps of search .
≥ [CD] [MP3]: The speed is fixed to a single step.
Slow-motion
While paused, press [6] or [5].
≥ [BD-V] [AVCHD]: Forward direction [5] only.
≥ [DVD-VR]: If continued fo r app rox. 5 min ute s, slow-m otio n play
pauses automatically.
Skip
Skip to the title, chapter or track you want to play.
≥ Each press increases the number of skips.
≥ [DivX]: Backward direction [:] only.
VQT2J81
(ENG)
16

Direct Play
Play
BD-Video
T1 C1 0:05.14
0:20.52
T: Title
C: Chapter
PL: Playlist
Items change
depending on the
media played.
No display
Curre nt po si ti o n
Type of disc
Play status
Elapsed time in the title
e.g., [BD-V]
Depending on the kind of media or the playback status, this
displa y may not appear.
Total time
Soundtrack
1 ENG
Digital 3/2.1ch
Englis h is sel ec ted.
e.g., [DVD-V]
Play
DVD-RAM(VR)
AudioLR
“AudioLR”
is selected
e.g.,
During p layba ck , yo u ca n ac ces s speci f ic recor d in gs or scen es
throug h direct ent r y of th e num bered bu tto ns.
Play starts from the selected title or chapter.
[BD-V] [AVCHD]
e.g., 5: [0] B [0] B [5]
15: [0] B [1] B [5]
[DVD-V]
e.g., 5: [0] B [5]
15: [1] B [5]
≥ While stopped ( the image o n the right is
displayed on the sc reen), the title is
design ated. While playing, the chapter is
designated.
Frame-by-frame
Status messages
The status messages give you information about what is
currently being played. Each time yo u press [STATUS], the
informa tio n dis played w ill cha ng e.
≥ It is also possibl e to display with the following procedures:
1 Press [SUB MENU].
2 Select “Status” with [3, 4], and press [OK].
While paused, press [2] (2;) or [1] (;1).
Each press shows the next frame.
≥ Press and hold to change in for ward or backw ard
succession.
≥ Press [1] (PLAY) to revert to normal playback speed.
≥ [BD-V] [AVCHD] : Forward direction [1] (;1) on ly.
Screen Aspect
When black bars are shown at the top, bottom, left, and right
sides of the screen, you can enlarge the ima ge to fill the
screen.
1 Press [SUB MENU].
2 Press [3, 4] to select “Other Functions” and press [OK].
3 Press [3, 4] to select “Screen Aspect” and press [OK ].
4 Press [2, 1] to select “Sid e cut” or “Zoo m”.
! Norm al : Norma l ou tput
! Side cu t : Th e bl ac k ba r s on the r ig ht an d lef t side s of
! Zoom: The black bars on the top and bottom sides
≥ Pleas e note that the top, bo ttom and sides of the image will
be cut off in images with no bl ack bars.
Screen asp ect will return to “Normal” in the followin g instances:
≥
jThe drive is switched
jThe unit is turned on/off
≥ [BD-V] [DVD-V]: “Side cut” does not have any effect.
≥ When “TV Aspect” (> 38) is set to “4:3 Pan & Scan” or “4:3
Letterbox”, the “Zoom” effect is disabled.
the 16:9 im ag e di sappear and the im ag e is
enlarged. Please note that the righ t and left
sides of the image are cut off w hen the
black bar is not displayed.
of the 4:3 image disappear and the image is
enlarged. Please note that the top and
bottom sides of the image are cut off when
the black bar is not displayed.
Playback
Changing audio
≥ It is also possibl e to display with the following procedures:
1 Press [SUB MENU].
2 Select “Other Functions” with [3, 4], and press [OK].
3 Select “Audio” with [3, 4], and press [OK].
[BD-V] [DVD-V]
You can change the audio channe l number each time you
press [AUDIO] or [3, 4]. T hi s allo w s yo u to change th e
soundtrack language (> 26, “Soundtra ck ” ), et c.
[DVD-VR] [DivX] [MPEG2]
AudioLR>AudioL>Audio R
^---------------------------------}
You can change soundtracks each time you pres s [AUDIO].
VQT2J81
(ENG)
17
 Loading...