

Page 1
Panasonic
5.8 Color LCD Monitor
Écran couleur à cristaux liquides de 5,8 pouces
Monitor LCD en color de 5,8”
CY-VM5800U
n
—
■ ^
Operating Instructions
Manuel d’instructions
Manual de instrucciones
• Please read these instructions carefully before using this product and save this manual for future use.
• Prière de lire ces instructions attentivement avant d'utiliser le produit et garder ce manuel pour l'utilisation ultérieure.
• Lea con atención estas instrucciones antes de utilizar el producto y guarde este manual para poderlo consultar en el futuro.
Page 2
@
GO
®
0
©
CO
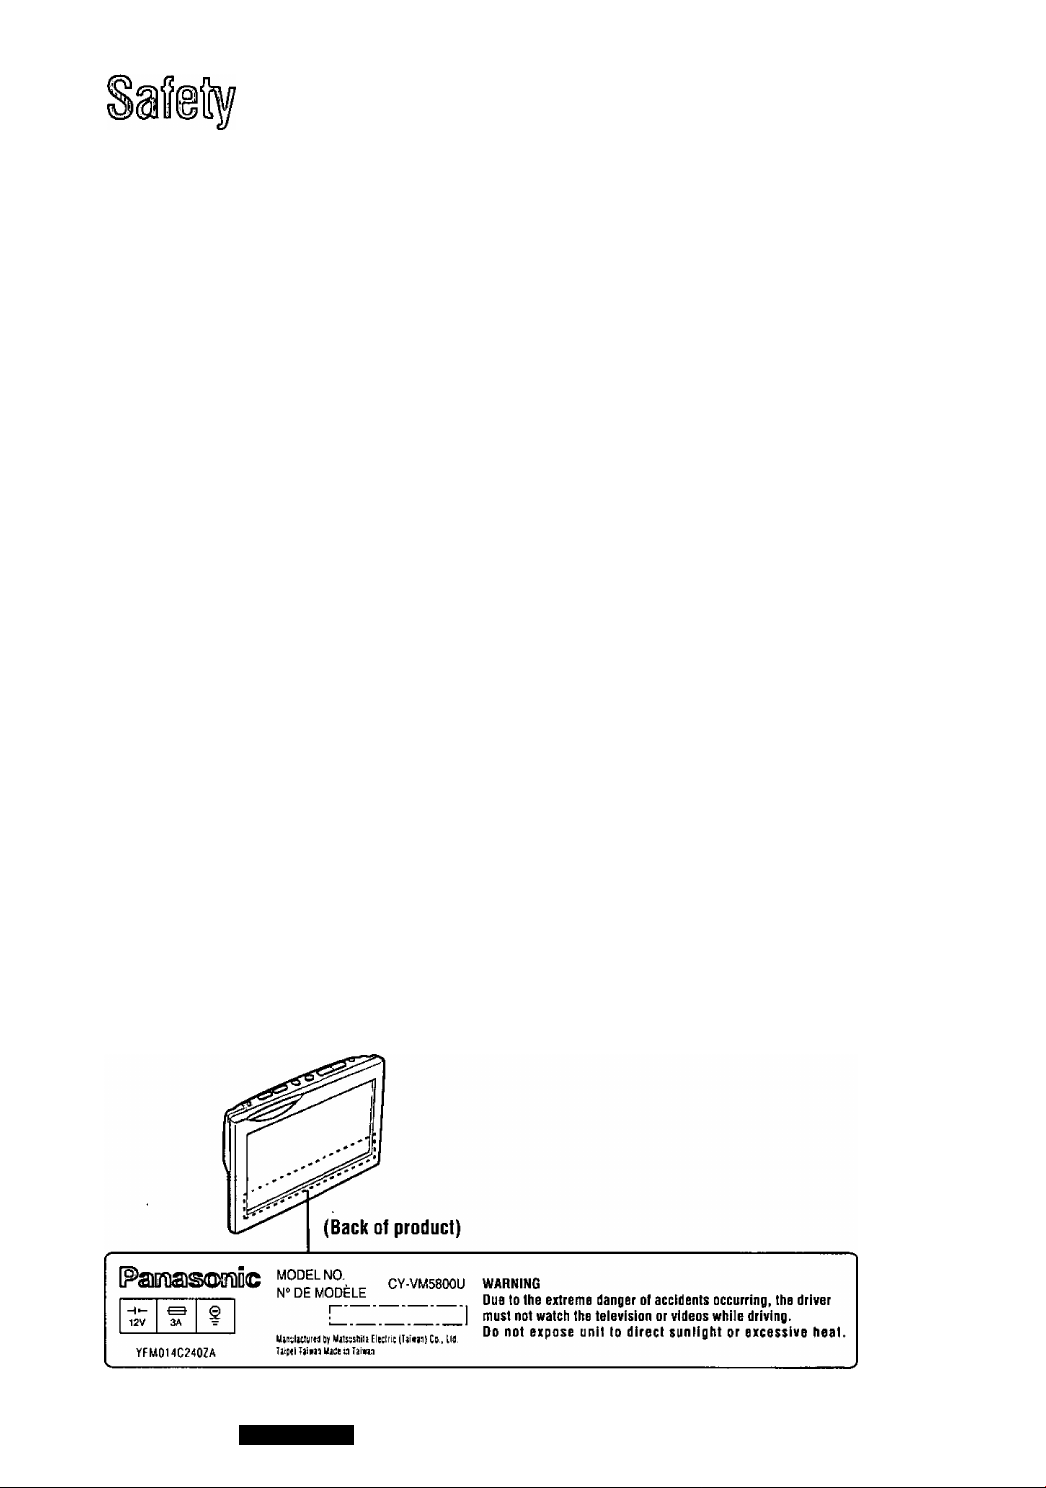
WARNING:
TO AVOID THE RISK OF SERIOUS INJURY OR
POSSIBLE VIOLATION OF UWS, NOT FOR USE
WHERE VISIBLE TO DRIVER FOR ANY PURPOSE
OTHER THAN NAVIGATION OR USE WITH REAR
VIEW CANIERA.
WARNING:
For safe driving, watching TV and video is
available only in stopped condition with the
parking brake pulled. “WARNING” will be dis
played while the parking brake is not engaged.
When Driving
©The driver must not operate the color LCD
monitor. Operating the color LCD monitor may
lead to distraction and cause an accident. Stop
you car in a safe location when operating the
unit.
© The driver must not watch videos while driving,
it may lead to distraction and cause an acci
dent.
• Keep the unit at an appropriate sound level.
Driving with the sound at a level that prevents
you from hearing sounds outside and around
the car may cause an accident.
CAUTION:
When Car Washing
Do not expose the product to water or excessive
moisture. This could cause electrical shorts, fire
or other damage.
WARNING:
© Due to the extreme danger of accidents
occurring, the driver must not watch the tele
vision or videos while driving,
o Do not expose unit to direct sunlight or exces
sive heat.
TO REDUCE THE RISK OF FIRE OR ELECTRIC
SHOCK, USE ONLY THE INCLUDED COMPO
NENTS.
The user should bear in mind that in some
areas there may be restrictions on how and
where this unit must be installed. Consult your
dealer for further details.
&Y1VM5800U
Page 3
Co ns i gn es d e s éc ur i té I nf o rm a ci ón p ar a s u s e gu r id a d
Avertissement
Pour éviter tout risque de blessures graves et toute
infraction au code juridique, l’appareil ne doit pas
être utilisé à un endroit où le conducteur puisse le
voir autrement que pour la navigation, ni avec une
caméra de rétrovision
Au volant
• Le conducteur ne doit jamais taire fonctionner ce
moniteur lorsqu’il conduit son véhicule Le fait d’utiliser le moniteur lorsqu’on est au volant réduit con
sidérablement la vigilance du conducteur et multiplie
les risques d’accident Arrêter le véhicule dans un
endroit sûr pour manipuler le moniteur
• Le conducteur n'est pas autorisé à regarder une
bande vidéo en conduisant, car ceci peut entraîner
une perte de vigilance et causer un accident
• Maintenir le moniteur à un niveau sonore approprié
afin de ne pas masquer les sons ambiants et éviter
ainsi tout risque d’accident
PRÉCAUTION
Lavage de la voiture
Afin de prévenir tout risque de court-circuit ou d’incendie, ne pas exposer l’équipement à l’eau ni à une
humidité excessive
ADVERTENCIA
PARA EVITAR EL RIESGO DE SUFRIR HERIDAS
GRAVES 0 INFRINGIR POSIBLEMENTE LAS LEYES.
EL APARATO NO DEBERÁ UTILIZARSE EN NINGÚN
LUGAR DONDE EL CONDUCTOR PUEDA VERLO CON
OTRA FINALIDAD QUE NO SEA LA NAVEGACIÓN 0 EL
USO CON UNA CÁMARA RETROVISORA
Al conducir
• El conductor no debe utilizar el monitor LCD en
color La utilización del monitor LCD en color puede
distraerlo y causar un accidente Detenga su
vehículo en un lugar seguro cuando manipule el
aparato
• El conductor no debe ver videos mientras conduce
Esto puede distraerlo y causar un accidente
• Mantenga el aparato con un nivel de sonido apropia
do Conducir con el sonido a un nivel que le impida
oír los sonidos del exterior y de alrededor de)
vehículo puede causar un accidente
PRECAUCIÓN
Al lavar el vehículo
No exponga el producto al agua o a una humedad exce
siva Esto puede causar descargas eléctricas, incen
dios u otros daños
^ pi
Ш||
AVERTISSEMENT
• Étant donné le risque élevé d'accident, le conduc
teur ne doit pas regarder ta télévision ou un vidéo
lorsqu'il est volant
• Ne pas exposer l'appareil directement aux rayons
du soleil ou à une chaleur excessive
AVERTISSEMENT
Pour une conduite sécuritaire, le visionnement de la
télévision ou d'un vidéo n'est possible que lorsque le
véhicule est immobilisé avec le frein à mam engagé
“WARNING” (avertissement) s'affiche lorsque le
frein à main n'est pas engagé
POUR RÉOUIRE LES RISQUES D'INCENDIE OU DE
CHOC ÉLECTRIQUE, N'UTILISER QUE LES COM
POSANTS FOURNIS
L'utilisateur doit garder à l'esprit que, dans cer
taines régions, Il peut y avoir des restrictions quant
au heu et à la lagon d'installer cet appareil
Contactez votre détaillant pour plus de détails
ADVERTENCIA
• Debido al gran nesgo de que se produzcan acci
dentes, el conductor no debe ver la televisión ni
vídeos mientras conduce
• No exponga el aparato a la luz solar directa ni a un
calor excesivo
ADVERTENCIA
Para conducir con segundad, la televisión y los
vídeos sólo pueden verse estando el vehículo parado
y con el freno de estacionamiento aplicado Si el
freno de estacionamiento no está aplicado se visual
iza la palabra "WARNING"
PARA REDUCIR EL RIESGO DE INCENDIOS 0
DESCARGAS ELÉCTRICAS, UTILICE SOLAMENTE LOS
COMPONENTES INCLUIDOS
El usuario deberá tener en cuenta que en algunas
zonas tal vez haya restricciones sobre cómo y dónde
puede ser instalado este aparato Consulte a su con
cesionario para conocer más detalles
CiY¿VM5800U
Page 4

[1
GO
®
0
©
00
Panasonic welcomes you to our ever growing family of electronic product owners. We know that this prod
uct will bring you many hours of enjoyment. Our reputation is built on precise electronic and mechanical
engineering, and our products are manufactured with carefully selected components and assembled by
people who take pride in their work. Once you discover the quality, reliability, and value we have built into
this product, you too will be proud to be a member of our family.
□ Features
o Wide-screen 16:9 aspect ratio is idea) for film
viewing.
o 280 800 pixels high-definition 5.8 inches large
LCD monitor.
o TFT {Thin Film Transistor) active matrix for accu
rate color reproduction.
oCan be connected to the DVD player (CX-
DV700U), color LCD monitor/CD, DVD player (CY-
VMD9000U), video deck and other devices.
□ Components
o Operating instruction........................................ 1 o Supplied hardware
o Remote control unit.......................................... 1 o Warranty card
o Battery (CR2025)
................................................
1
..............................
...............................................................
1 set (=» page 36)
1
□ Contents
Safety Information ................................................................................................. 2
Use this Product Safety........................................................................................... 5
Name of Controls
Remote Control Unit Preparation............................................................................ 11
Battery installation, battery notes, control reference guide
Before Using the Display Unit................................................................................ 12
......................................................................
.....................
. 10
Input Seiection .................................................................................................... 13
Aspect Setting..................................................................................................... 14
Brightness Setting................................................................................................ 15
Display Setting .................................................................................................... 16
Black level, contrast, color, tint
Installation Guide
Step-by-step procedures
.................................................................................................
18
Electrical Connections ......................................................................................... 21
Cautions, wiring diagram, basic system configuration, parking brake cord, advanced system configuration
Troubleshooting .................................................................................................. 24
Where to get service help, troubleshooting tips
Maintenance........................................................................................................ 26
To prevent damage to the system exterior, clean dirt by wiping lightly with a soft cloth
Specifications...................................................................................................... 27
C-1Y1UIVI5800U
Page 5
Use this Product Safety
When Parked
® Parking m direct sunlight can produce very high
temperatures inside your car Give the interior a
chance to cool down before switching the unit on
• Do not watch the monitor with the engine off It
will consume battery power and may prevent the
engine from starting
Use the Proper Power Supply
• This product IS designed to operate with a 12 V,
negative ground battery system (the normal sys
tem in a North American car)
Use Authorized Servicenters
• Do not attempt to disassemble or adjust this pre
cision product Please refer to the Servicenter list
included with this product for service assistance
For Installation
• Where and how this unit is installed differs
according to the car model concerned As
such, the information contained in this installa
tion guide IS designed for professional
installers and is not intended for non-technical
individuals
• Be sure to install the monitor in a position that
does not obstruct the driver’s vision
• If the monitor has been installed for the rear
seat passengers, they must be careful to pre
vent injury by hitting their heads on the monitor
in case of an accident
• Do not install the unit in an area where it would
obstruct the operation of an air bag
• Ask a trained technician to install the unit
Installation and wiring require training and
experience
To be safe, ask the sales outlet where you pur
chased the unit to perform the installation
When Operating
o Be sure not to let the unit fall or be strongly
impacted since this may cause a malfunction or
fire
G Cautions for the Liquid Crystal Panel
® Do not leave the liquid crystal panel surface facing
upwards
Storage temperature range -4 "F to 176 °F
(-20 X to 80 °C)
When the liquid crystal panel reaches high tem
peratures or low temperatures, chemical changes
occur within the liquid crystal panel which may
cause malfunctions
• Do not strongly impact the liquid crystal panel
o When the temperature is very cold or very hot, the
image may not appear clearly or may move slow
ly Also, movement of the image may seem to be
out of synchronization or the image quality may
decline in such environments Note that this is not
a malfunction or problem
Usage temperature range 32 "F to 104 ®F
(0 ‘’C to 40 X)
• There may be red spots, blue spots and green
spots on the panel surface This is a characteristic
of liquid crystal panels and is not a problem The
liquid crystal panel is built with very high precision
technology and has at least 99 99% effective
image pixels Be aware that on 0 01 % of the panel
there may be missing pixels or constantly light
pixels
Spots
I
Find the model number and serial number on
either the back or bottom of the unit Please
record them in the spaces below and retain this
booklet as a permanent record of your purchase
to help with identification in case of theft
MODEL NUMBER
SERIAL NUMBER
DATE PURCHASED
FROM
CY-VM5800U
COM5800U
Page 6

Panasonic est heureuse de vous compter parmi les utilisateurs de ses appareils électroniques Nous pouvons vous
assurer que cet appareil vous procurera de longues heures d'agrément Notre réputation est fondée sur une ingénierie
électronique et mécanique de haute précision, laquelle préside à la fabrication d’appareils ne comportant que des com
posants de choix assemblés par un personnel soucieux de la bonne réputation acquise par la qualité de son travail
Après avoir découvert la qualité, la valeur et la fiabilité de cet appareil, vous aussi serez fier d’être un client Panasonic
; P
I s
ri ;' û
CQ
©
□ Caractéristiques
O Le rapport de format d'écran large 16 9 est ideal pour le
visionnement des films
O Ecran à cristaux liquides de 5,8 pouces, a haute défini
tion de 280 800 pixels
O Matrice active TFT (transistor a couches minces) pour
une reproduction fidèle des couleurs
O Peut être raccordé au lecteur DVD {CX-DV700U), au
lecteur CD, DVD/écran couleur à cristaux liquides (CYVMD90Û0U), à une platine vidéo et a d'autres appareils
□ Éléments constitutifs
O Manuel d’instructions
O Télécommandé
O Plies (CR2025)
1 O Matériel d’installation
1 O Carte de garantie
1 ensemble {=
page 36)
□ Table des matières
Consignes de sécurité 3
Utiliser ce produit en respectant la sécurité 7
Noms de commandes 28
Préparation de la télécommande 29
Mise en place de la pile, remarques sur la pile, guide de référence sur les commandes
Avant d'utiliser l'unité d'affichage
1
30
Sélection de l'entrée 31
Réglage du format
Réglage de la luminosité
32
33
Réglage de l'affichage 34
Niveau du noir, contraste, couleur, nuance
Guide d'installation 36
Procédure étape par étape
Branchements électriques 39
Attention, schéma de câblage, configuration système de base, câble de connexion du frein de stationnement, configura
tion système évoluée
En cas de difficulté 42
Ou obtenir le service après-vente, conseils de dépannage
Entretien 44
Pour éviter des dégâts à l’extérieur de l’appareil. Nettoyer les souillures en frottant légèrement avec un linge doux
Données techniques 45
CiY2VM5800U
Page 7

^ am ^
utiliser ce produit en respectant la sé
Voiture stationnée
• L’habitacle d’une voiture immobile exposée au soleil
toutes Vitres fermées devient rapidement très chaud
Laisser rafraîchir l’intérieur du véhicule avant d'utiliser
l’appareil
• Ne pas regarder le moniteur lorsque le moteur est
arrêté Le fait de regarder le moniteur avec le contact
moteur coupé consomme beaucoup de batterie ce qui
pourrait empêcher le moteur de repartir
Source d’alimentation
• Cet appareil est conçu pour fonctionner sur un système
d’alimentation avec batterie de 12 V à masse négative
(système standard sur les voitures de construction
nordamericaine)
Réparation des centres de service agréés (Servicenters)
• Ne pas tenter de démonter ou d’aiuster l’appareil soi-
même Veuillez consulter la liste des Centres de service
agréés (Servicenter) qui accompagne ce produit en
qualité de moyen d'assistance de service après-vente
Installation
• L’endroit et la façon d’installer cet appareil different
selon le type de véhiculé dont il s’agit Les informa
tions de ce guide d’installation s’adressent en fait
aux installateurs qualifiés, elles ne sont pas fourmes
a l’intention des individus sans qualifications tech
niques
• Installer le moniteur vidéo de telle manière qu'il ne
gêne pas la visibilité du conducteur
• Si le moniteur a été installé pour les passagers
amère, ceux-ci doivent faire très attention de ne se
blesser a la tête en se cognant contre le moniteur en
cas d'accident
• Ne pas installer le moniteur à un emplacement qui
gênerait le déploiement du sac gonflable
• Demander a un technicien expérimenté d’installer le
moniteur
Pour plus de sûreté, demander au détaillant qui vous
a fourni le moniteur de procéder à son installation
Pendant l’utilisation de l’appareil
O Veiller à ne pas faire tomber l’appareil ni le heurter vio
lemment étant donné que cela peut provoquer des
pannes voire un incendie
□ Précautions à prendre avec le
panneau à cristaux liquides
® Ne pas laisser la surface du panneau à cristaux liquides
dirigée vers le haut
Limites de température de stockage -20 “C à 80 “C
(-4“Fà176*’F)
Lorsque le panneau a cristaux liquides atteint des
températures elevees ou basses, des changements
chimiques se produisent dans le panneau à cristaux
liquides même qui peuvent eventuellement engendrer
des pannes
• Le panneau à cristaux liquides ne doit jamais soumis à
des chocs violents
• Lorsque la température est particulièrement basse ou
élevée, l'image sur l'écran risque de ne pas être nette ou
encore une lente dérive de l'image peut se produire Par
ailleurs, le mouvement de l'image risque d'apparaître
comme étant en désynchronisation ou encore sa qualité
risque d'être affectée dans de telles conditions II faut
cependant noter qu'il ne s'agit pas d'un défaut du
panneau ni d'une anomalie
Limites de température en service 0 "C à 40 “C
(32 “F à 104 ^F)
® Des points rouges, bleus et verts peuvent apparaître sur
le panneau C'est une des caractéristiques du panneau à
cristaux liquides et ceci ne constitue pas une anomalie
Le panneau à cristaux liquides a été réalisé à partir
d'une technologie de très haute précision et possède au
minimum 99,99% de pixels d'image efficaces II con
vient de savoir que dans 0,01% du panneau, des pixels
peuvent manquer ou bien être constamment allumés
Points
(P
a
©
Il est recommande de noter, dans l’espace prévu cidessous, les numéros de modèle et de serie inscrits
soit à l'arnère soit sur le fond de l’appareil, et de con
server ce manuel comme mémorandum de l’achat afin
de permettre l’identification de l’appareil en cas de vol
NUMERO DE MODELE CY-VM5800U
NUMERO DE SERIE
DATE DE L’ACHAT
VENDEUR
CjCVJVI580aU
Page 8

Panasonic te da la bienvenida a la familia constantemente en aumento de poseedores de productos electrónicos. Nos
esforzamos en proporcionarle las ventajas de la ingeniería mecánica y electrónica de precisión, de una fabricación con
componentes cuidadosamente seleccionados, y de un montaje realizado por personas orgullosas de la reputación que
su trabajo ha cimentado para nuestra empresa. Estamos seguros de que este producto le proporcionará muchas horas
de distracción y, una vez comprobada la calidad, el valor y la fiabilidad incorporados, used también se sentirá orgulloso
de pertenecer a nuestra familia.
□ Características
o Pantalla panorámica con una relación de aspecto de
16:9 ideal para ver películas.
o Amplio monitor LCD de 5,8" con definición alta de
280 800 píxeles.
o Matriz activa TR (transistor de película fina) para
reproducir fielmente el color.
@
□ Componentes
©
o Se puede conectar al reproductor DVD {CX-DV700U),
monitor LCD en color/reproductor CD, DVD (CYVMD9000U), platina de vídeo y otros aparatos.
(?
o Manual de instrucciones.......................................... 1
è
o Mando a distancia
®
o Pila (CR2025)......................................................... 1
0=
...................................................
o Hardware suministrado
1
o Tarjeta de garantía
.........
1 juego (=* página 54)
............................................
□ Indice
Información para su seguridad.............................................................................. 3
Utiiización segura de este producto ...................................................................... 9
Nombre de los controles
Preparación del mando a distancia ..............................................
Instalación de la pila, notas sobre la pila, guía de referencia de los controles
Antes de utilizar la unidad de visualización ................................
Selección de entrada ..............................................................
.....................................................................................
....... ................
...........................
.........................
1
46
47
48
: 49
Ajuste del aspecto ..................................................................
Ajuste del brillo.......................................................................
Ajuste de la visualización
Nivel del negro, contraste, color, matiz
........................................................
.........................
...........................
...........................
50
51
52
Guía de instalación .............................................................................................. 54
Procedimientos paso a paso
Conexiones eléctricas .......................................................................................... 57
Precauciones, diagrama de cableado, configuración básica del sistema, cable del freno de estacionamiento, configuración
de sistemas avanzados
Solución de problemas.......................................................................................... 60
Dónde obtener la ayuda del servicio de reparaciones, consejos para solucionar problemas
Mantenimiento ..................................................................................................... 62
Prevención de daños en el exterior del sistema, limpieza pasando suavemente un paño blando
Especificaciones.................................................................................................. 63
8
©í?=
UM5800U
Page 9
utilización segura de este producto
Durante el estacionamiento
• El estacionamiento baio la luz solar directa puede pro
ducir temperaturas muy altas en e! interior del vehículo
Permita que se enfrie el interior del vehículo antes de
encender el aparato
• No utilice el monitor con el motor apagado Esto con
sume energía de la batería y puede impedir el arranque
del motor
Utilización de la alimentación apropiada
• Este producto ha sido diseñado para funcionar con un
sistema de batería de 12 V con puesta a masa negativa
(el sistema normal en un vehículo norteamericano)
Utilización de tos centros de servicio autorizados
• No intente desarmar ni ajustar este producto de alta
precisión Consulte la lista de centros de servicio sum
inistrada con este producto para solicitar el servicio
necesario
Instalación
• Dónde y cómo se instala este aparato cambia de
acuerdo con el modelo de vehículo pertinente Por lo
tanto, la información contenida en esta guia de insta
lación ha sido preparada para instaladores profe
sionales, no para personas que carezcan de los
debidos conocimientos técnicos
• Asegúrese de instalar el monitor en una posición
que no obstruya la visión del conductor
• Si el monitor ha sido instalado para los pasajeros de
los asientos traseros, estos deben tener cuidado de
que sus cabezas no golpeen el monitor en caso de
producirse un accidente
• No instale el aparato en un lugar donde pueda
obstruir el funcionamiento de una bolsa de aire
• Pida a un técnico cualificado que instale el aparato
La instalación y el cableado requieren preparación y
experiencia
Para su segundad, pida al comerciante a quien
adquirió el aparato que haga la instalación
Durante el funcionamiento
• Asegúrese de que el aparato no se caiga ni reciba
golpes fuertes porque esto puede causar un fun
cionamiento defectuoso o un incendio
□ Cuidados para el panel de cristal
líquido
• No deje la superficie del panel de cristal liquido mirando
hacia arriba
Gama de temperaturas para guardar el aparato
-4 »Fa 176 »F(-20 “Ca80 X)
Cuando el panel de cristal liquido alcanza temperaturas
altas o bajas, se producen en él cambios químicos que
pueden causar un funcionamiento defectuoso
• No golpee el panel de cristal liquido
• Cuando la temperatura sea muy fría o muy caliente, la
imagen tal vez no aparezca claramente o quiza se mueva
lentamente Ademas, en tales ambientes, el movimiento
de la imagen puede parecer que no esta sincronizado o
la calidad de la misma puede reducirse Tenga en cuen
ta que esto no es ningún funcionamiento defectuoso o
problema
Gama de temperaturas para utilizar el aparato
32 »Fa 104 “F (0 “Ca40 “C)
• En la superficie del panel puede haber puntos rojos,
azules y verdes Esto constituye una característica de
los paneles de cristal liquido y no supone ningún prob
lema El panel de cristal liquido se fabrica empleando
una tecnología de alta precisión, y dispone de un
99,99% de pixeles de imagen efectivos Tenga en cuen
ta que en un 0,01% de! panel podrá haber pixeles que
falten o que esten constantemente encendidos
Puntos
Encuentre el numero de modelo y el numero de sene
en la parte posterior o inferior de la unidad Anótelos en
el espacio de abajo y guarde este manual a modo de
prueba permanente de su compra, para que pueda uti
lizarlo en el caso de que le roben la unidad
NUMERO DE MODELO
NUMERO DE SERIE
FECHA DEADQUISICIC!)N
VENDEUR
CY-VM5800U
Î pw-
CiY¿VM5800U
Page 10
@
Kl
®
(k
©
00
0
Note:
o This unit does not contain any speakers.
10
№ UM5800U
Screw holes are provided for attaching the height adjuster fitting
(on the bottom side).
jV/' (6 mm) unify screw, maximum length of VVie" (4.5 mm)]
Page 11
Remote Contro! Unit Preparatio
Battery Installation (Inserting/Replacing the Batteries)
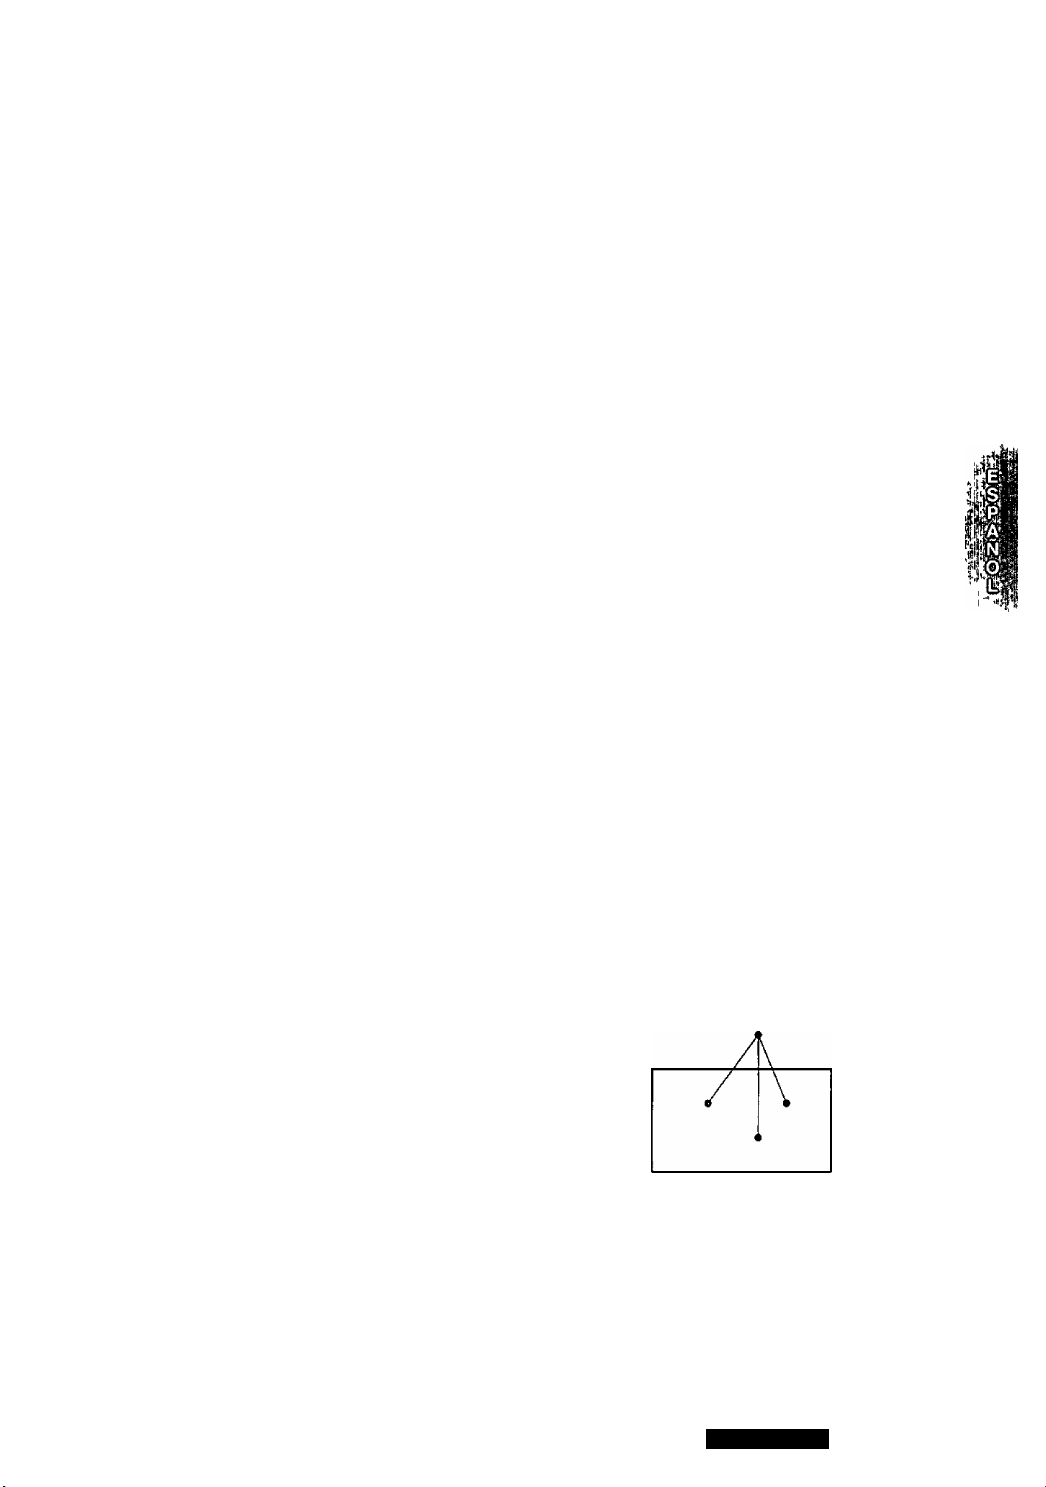
■i Remove the battery holder
Pull the holder by the position B while pushing position
A in the direction indicated by the arrow
p Install the battery on the battery holder
^ Set a new battery properly with its (+) side facing up as
shown m the figure
O Insert the battery holder
Push in the battery holder back into its original position
Battery Notes
Remove and dispose of an old battery immediately
Battery Information
• Battery type Panasonic lithium battery {CR2025) (included)
• Battery life Approximately 6 months with normal use (at room temperature)
Caution*
• Improper use of batteries may cause overheating, an explosion or ignition, resulting in injury or a fire
Battery leakage may damage the unit
Lithium battery
(included)
GO
®
0
©
CO
S
• Do not disassemble or short the battery Do not throw a battery into a fire
• Keep batteries away from children to avoid the risk of accidents
• Be careful to the local disposal rules when you dispose of batteries
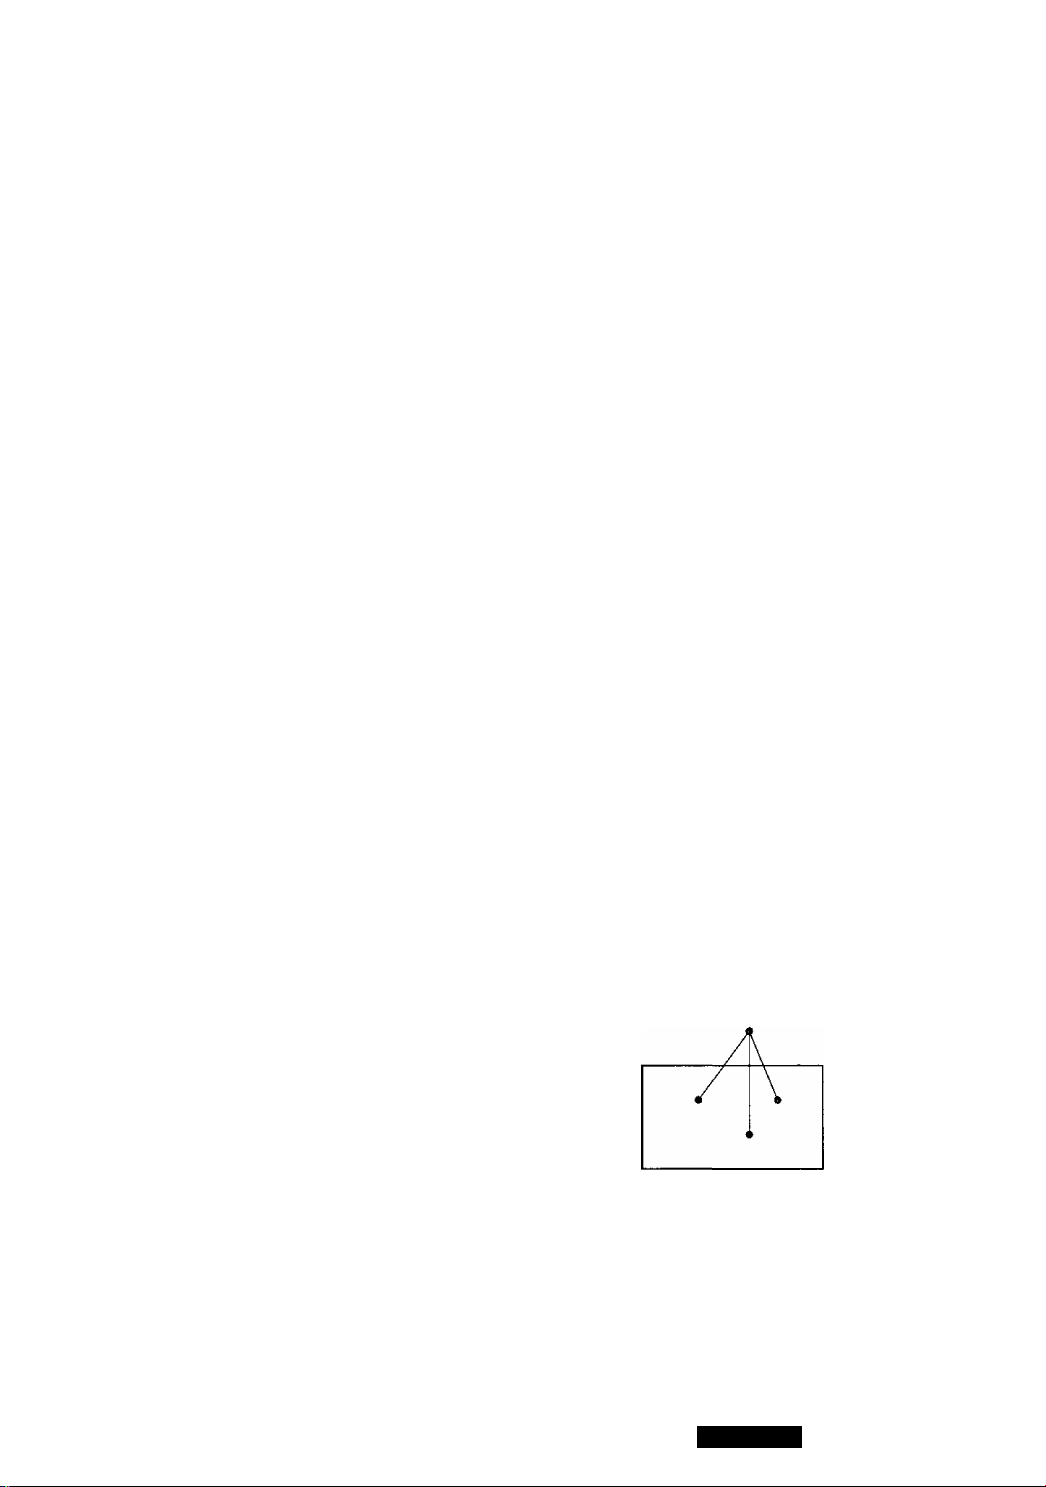
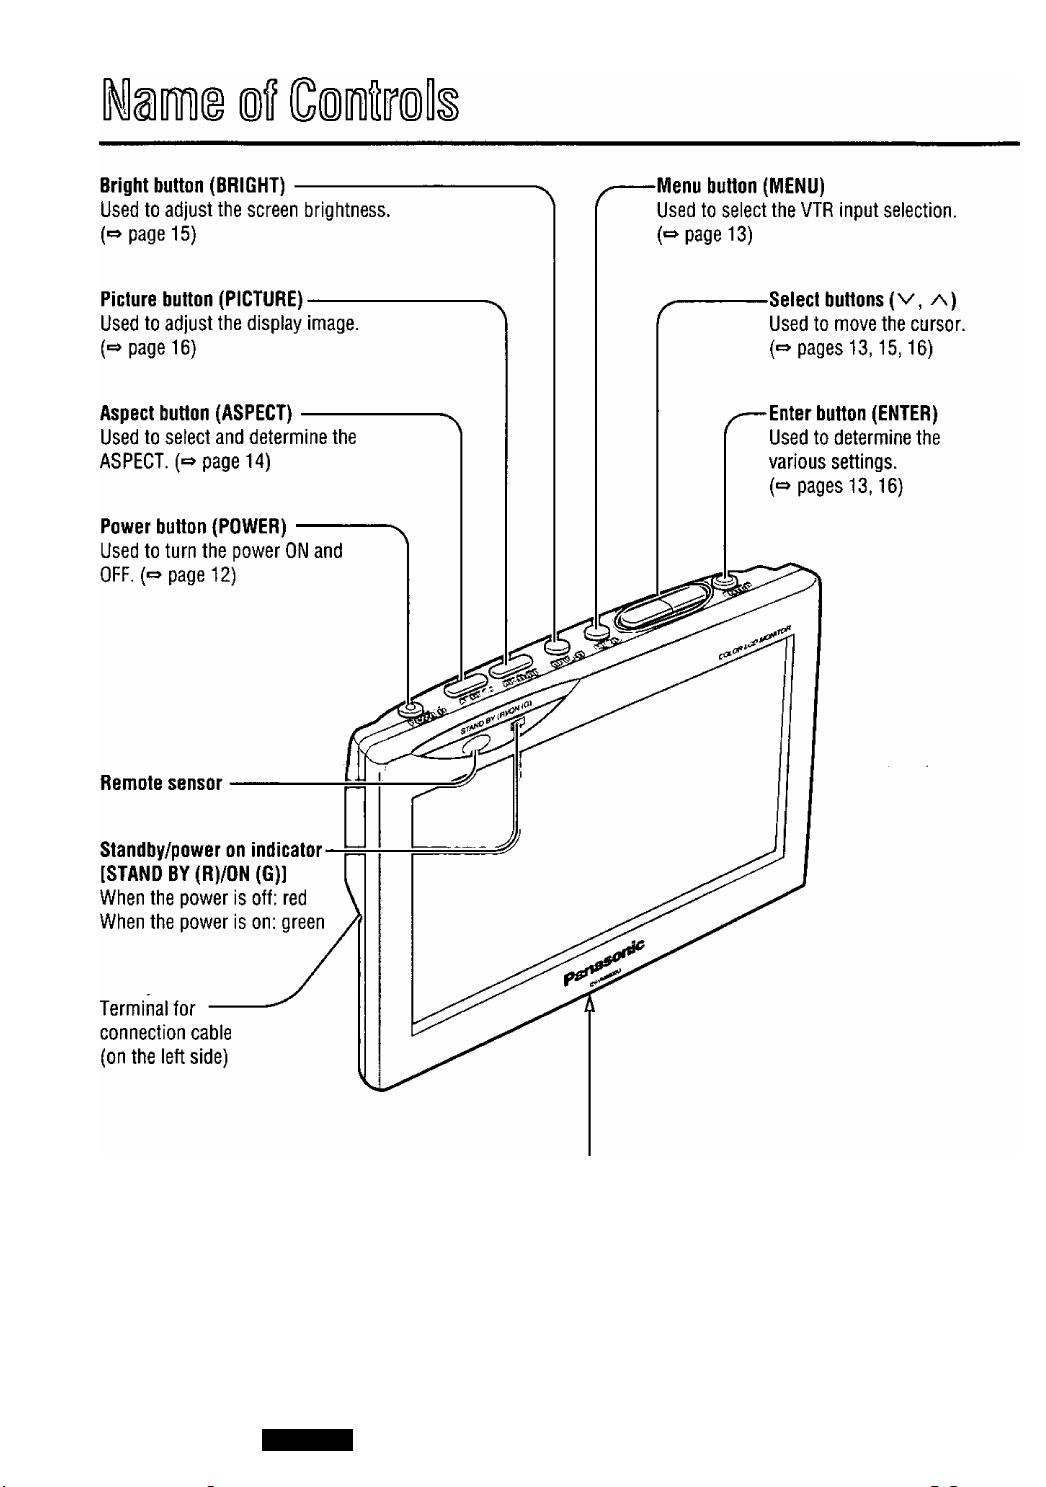
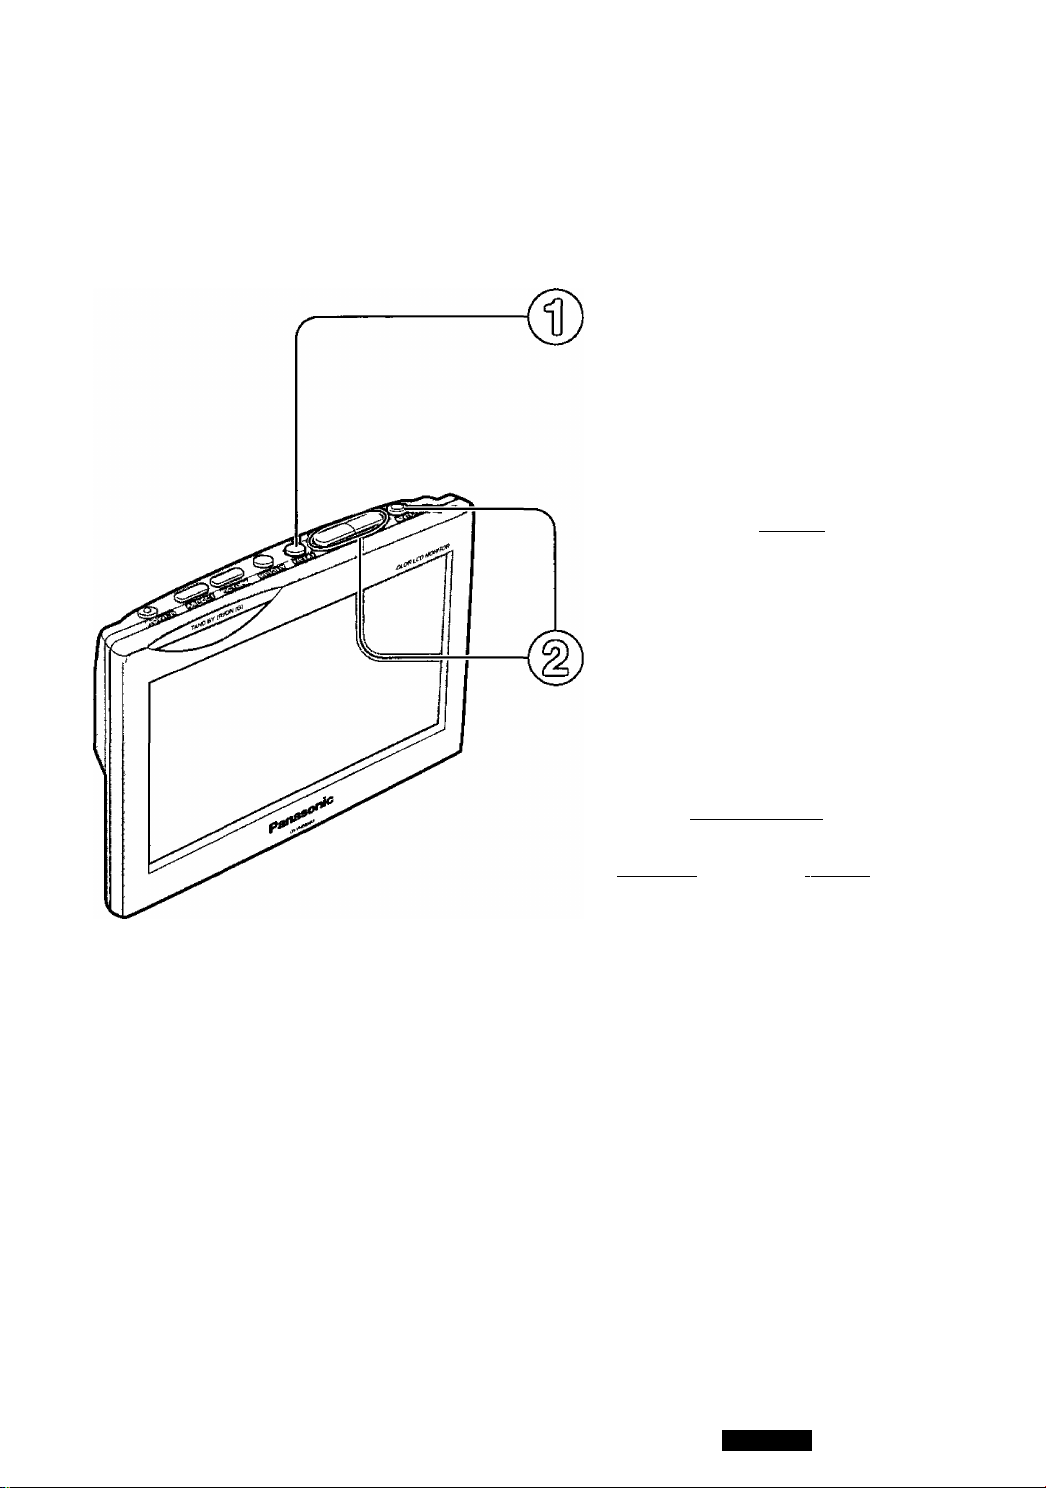
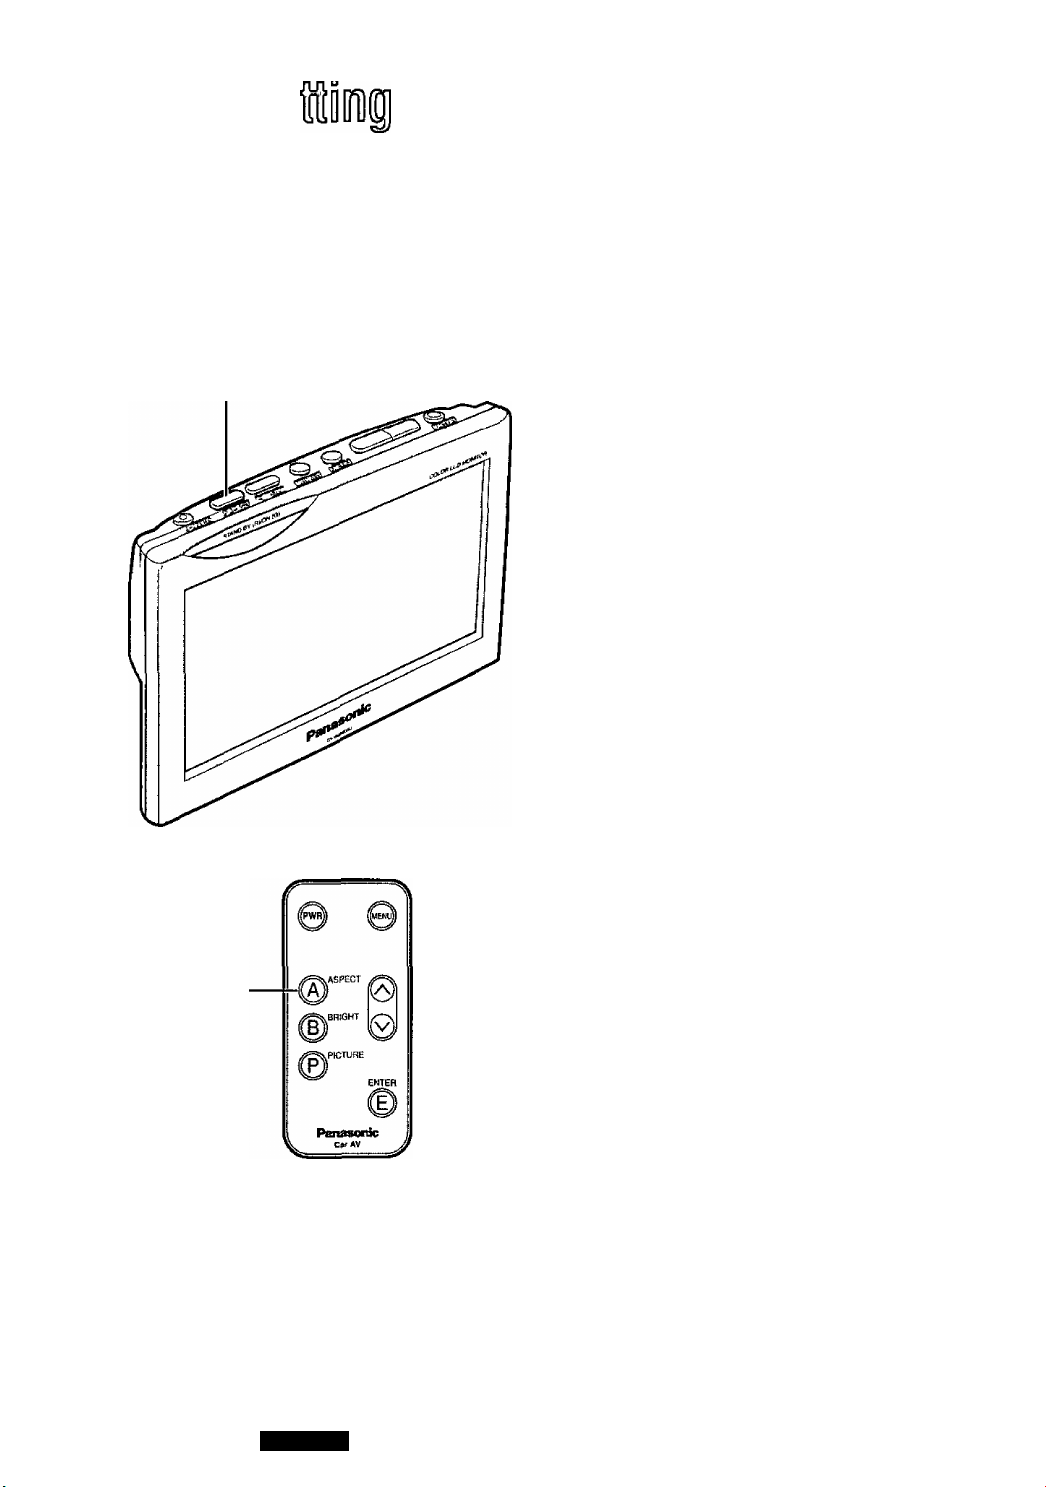
Control Reference Guide
Point the remote control unit at the remote sensor
r
Power button (PWR)
page 12)
Aspect button (ASPECT) -
(«=» page 14)
Bright button (BRIGHT) —
(=* page 15)
Picture button (PICTURE)
(=> page 16)
II Panasonic //
V J
.ASPECT
.BRIGHT
.PICTURE
ENTER
e:
Menu button (MENU)
(=> page 13)
Select buttons
(=» pages 13,15,16)
Enter button (ENTER)
{=> pages 13.16)
(^, v)
CiYilVM5800U
11
Page 12
@
C9
iefiire OsiBii the Display Unit
®
ik
0
©
03
9
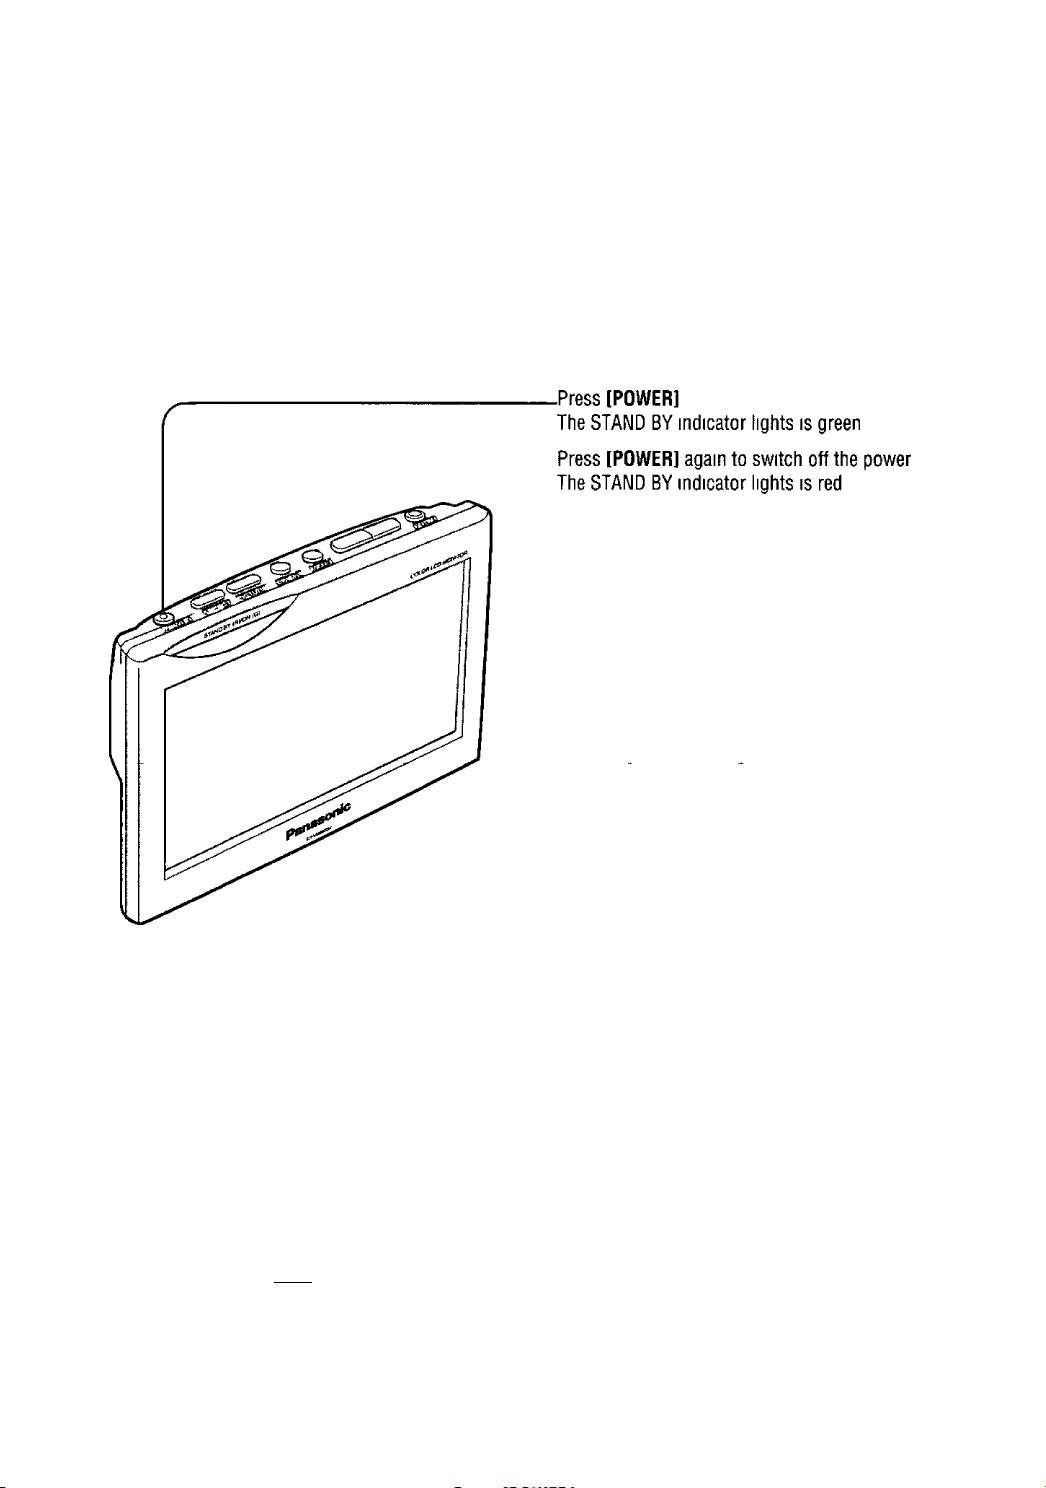
WARNING:
For safe driving, watching TV and video is available only in stopped condition with the
parking brake pulled. “WARNING” will be displayed while the parking brake is not
engaged.
12
[PWR]
r
^PICTURE
|i Panasonie
V
J
El^ER
©
Page 13
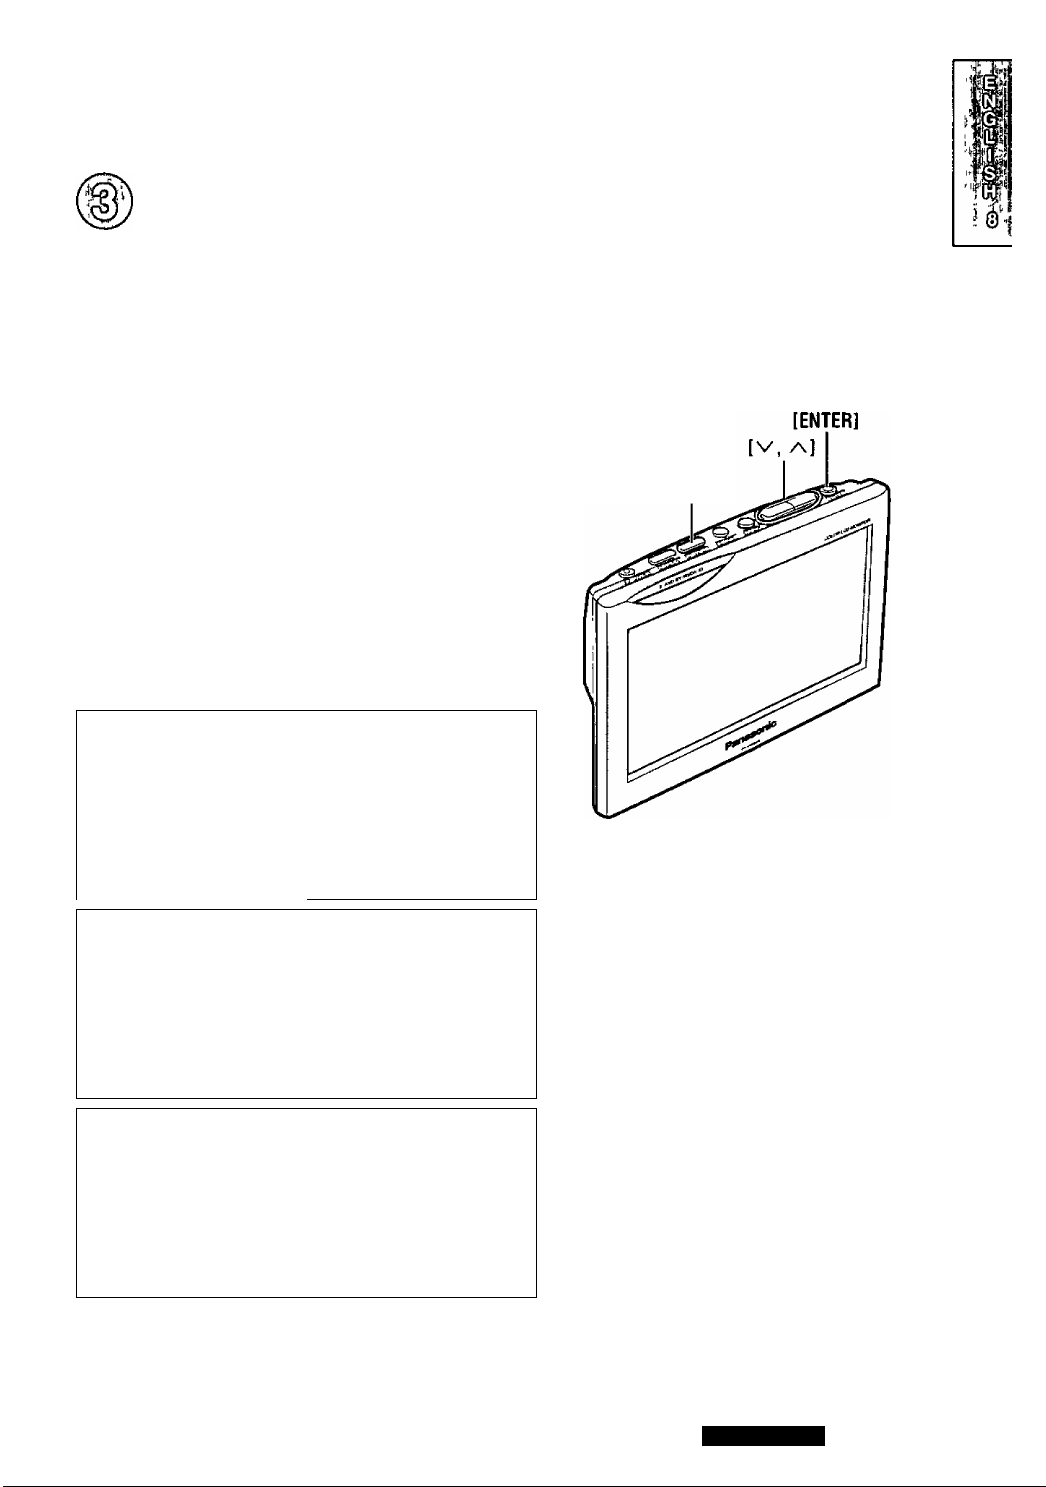
Input Selection
• Select “VIDEO” when a mobile video deck, video camera or mobile DVD player is connected
• Select “NAVIGATION” when a navigation system is connected
Press and hold [MENU] for more than
2 seconds
VTR INPUT SELECT
NAVIGATION
OOWN/UP [enter) select
Default VIDEO
© Press [A] or [V] to select an item
© Press [ENTER] to set
®
Q,
0
©
oa
6
fiPWR)} {MEWS
i^esiQKT
©
ENTER
[MENU]
— [A, V]
[ENTER]
VTR INPUT SELECT
VIDEO
HM0®^Tfl@li8 I
C T II A ) DOWN/UP [enter] select
Note
If no operation is performed for 10 seconds, the
menu display automatically disappears
UM5800U
13
Page 14
(i
co
®
a>
©
‘ K]
s g
0
Press
[ASPECT]
o Each time this button is pressed, the display size
changes as shown below
NORMAL FULL
ZOOM JUST
a
t ___________________
NORMAL (Default)
o The conventional display image has a 4 to 3 ratio
of horizontal to vertical
o In this case, a blank area remains on the right and
left sides of the display
FULL
o The screen is extended horizontally as a whole to
the aspect ratio of 16 to 9
o The extension ratio is the same at any point of the
screen
ZOOM
o The screen is fully extended at the normal aspect
ratio of 4 to 3
o The top and bottom of the screen are slightly cut
JUST
o The screen is extended horizontally to the aspect
ratio of 16 to 9
o The extension ratio increases toward the right and
[ASPECT]
left ends of the screen
Note
o In some cases, the picture looks different from the
original one due to your selection of aspect
Cautions
© This is to remind you that compression or extension of the screen using the aspect ratio (screen mode)
changing function of this product for commercial purpose or viewing/listening by the public could infringe
on the rights of the author protected by the copyright law
© If you expand a normal picture (4 to 3) by using “JUST", “ZOOM” or “FULL" aspect the full of the screen,
you might not see the periphery of the picture, or you might see deformed picture Therefore, use the
“NORMAL" mode to see the original picture as the author intended it
14
VM5800U
»
Page 15
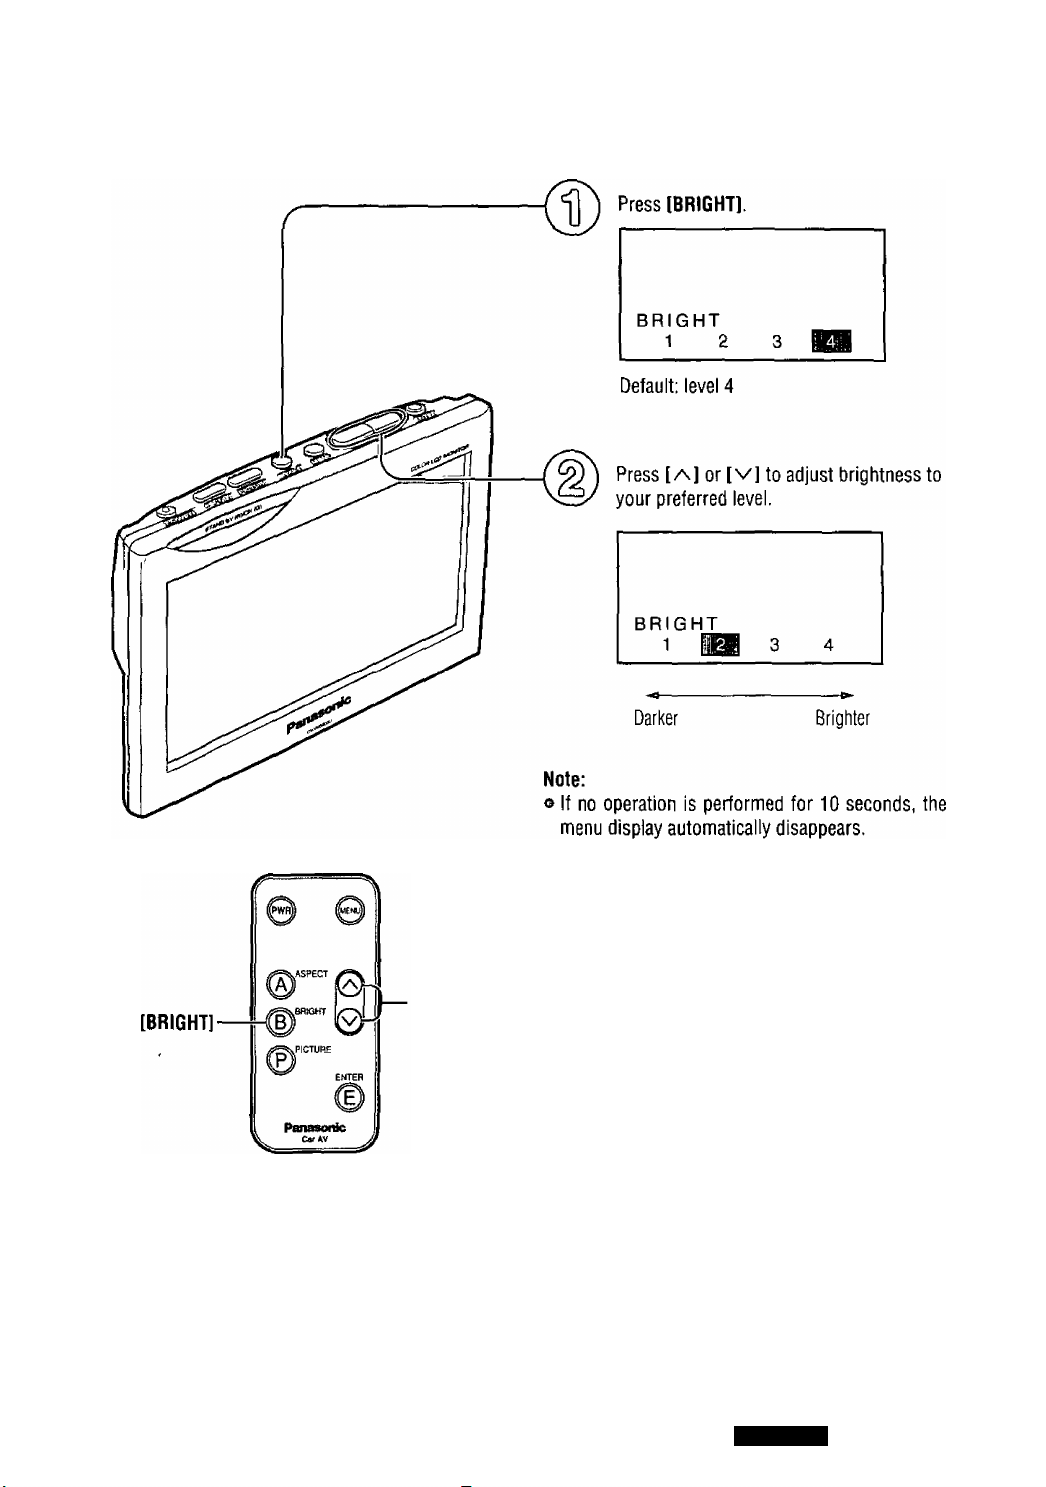
Brightness Setting
09
®
Q>
0
©
CO
©
-[y\, V]
VM58Q0U
m
15
Page 16

li'Stl
jr-
if
Display Setting
i
-W
Press [PICTURE]
gILiaigK (LiWBt
CONTRAST
COLOR COLOR
TINT
END
r V II A ) DOWN/UP [enter) select
Black Level
Default 0
Setting range -30 to +30
Contrast
© Press [A] or [V] to select an item
© Press [ENTER] to set
BLACK LEVEL
TINT
END
C V II A ) DOWN/UP (enter) select
Select
BLACK LEVEL
Select
Default 0
Setting range -30 to +30
Color
Default 0
Setting range -30 to +30
Tint
Default 0
Setting range -30 to +30
__
Select
V
__
CONTRAST
COLOR
—
j
>
j
16
VM5800U
r> I I I il-i’ Jli
Page 17
© Press [/v] or [V] to adjust
@ Press [ENTER] to set
CONTRAST
+ 15 iiiiiiiiiiiiiii|iiiiiii|iiiiiii
Adjust the black level if black and white are
reversed or the screen appears too white because
of the angle of viewing
/
-----------------------------------------
CONTRAST
+1 5 iiiiimiimii|iiiiiii|iimit
Notes
• To return to the regular mode, select “END” and
then press [ENTER]
• If no operation is performed for 10 seconds, the
menu display automatically disappears
[PICTURE]
-direction
Decrease the contrast
between black and white
________________________
COLOR
+ 15 iimiiiiiiiiii|imtM|iiiiiii
+direction
Increase the contrast
between black and white
______________________
—
-direction +direction
Lighten the depth of
Deepen the depth of color
color on the display on the display
______________________
r
--------------------------------------------
TINT
+ 15 iiiiiiiiiiiiiii|iiiiiii)iiimi
-direction +direction
Emphasize red in the Emphasize green in the
color image color image
^_____________
__________________________
>
j
\
J
[PICTURE]-
r
(iPWm) ((UENU)]
ENT^R
(e>
l rWRlSOrnV \
[A, V]
[ENTER]
& ■ . .
&YilVM5800U
17
Page 18
ça
®
0
©
00
©
mM
A wmmm
The installation information is designed for experienced installers and is not intended
for non-technical individuals. It does not contain warnings or cautions of the potential
dangers involved in attempting to install this product.
Any attempt to install this product in a motor car by anyone other than a qualified
installer could cause damage to the electrical system and could result in serious per
sonal injury or death.
□ Overviewf
This product should be installed by a professional
(Please refer to the “WARNING” statement
above )
o Identify and label the car wires
o Connect the car wires to the wires of the power
connector
o Check the operation of the unit
If you encounter problems, please consult your
nearest professional installer
Caution.
oThis unit operates with a 12 V DC negative
ground auto battery system only Do not
attempt to use it in any other system Doing
so could cause serious damage
Before you begin installation, look for the following
Items which are packed with your unit
o Warranty Card
o Panasonic Servicenter List for Service Directory
Keep for future reference in case the unit needs
servicing
o Installation Hardware
ting
Fill this out promptly
Needed for monitor set
□ Installation Hardware
No Item Diagram Q’ty
Connection cord
{Length 3 m)
Clamp connector
(D
1
1
18
VM5800U
№
Page 19
□ Before Installation
□ Required Toois
Warning
• Do not install the monitor in a location which
obstructs driving, visibility or which is prohibited
by applicable laws and regulations
If the monitor is installed in a location which
obstructs forward visibility or operation of the air
bag or other safety equipment or which interferes
with operation of the car, it may cause an acci
dent
• Never use bolts or nuts from the car’s safety
devices for installation
If bolts or nuts from the wheel, brakes or other
safety devices are used for installation of the mon
itor, It may cause an accident
• Attach the wires correctly
If the wiring is not correctly performed, it may
cause a fire or an accident In particular, be sure to
run and secure the lead wire so that it does not get
tangled with a screw or the moving portion of a
seat rail
• Use with 12 V DC negative ground car
This unit IS only for use with a 12 V DC negative
ground car It cannot be used in large trucks or
diesel cars which are 24 V DC car If it is used in
the wrong type of car, it may cause a fire or an
accident
Cautions.
• Use the specified fuse
Be sure to always use the specified fuse If a
fuse other than the specified fuse is used, it
may cause a fire or an accident
• Do not damage the cord by pinching or
pulling It
Do not pull or damage the cord If the cord is
not treated properly, it will short out or be
severed and may cause a fire or an accident
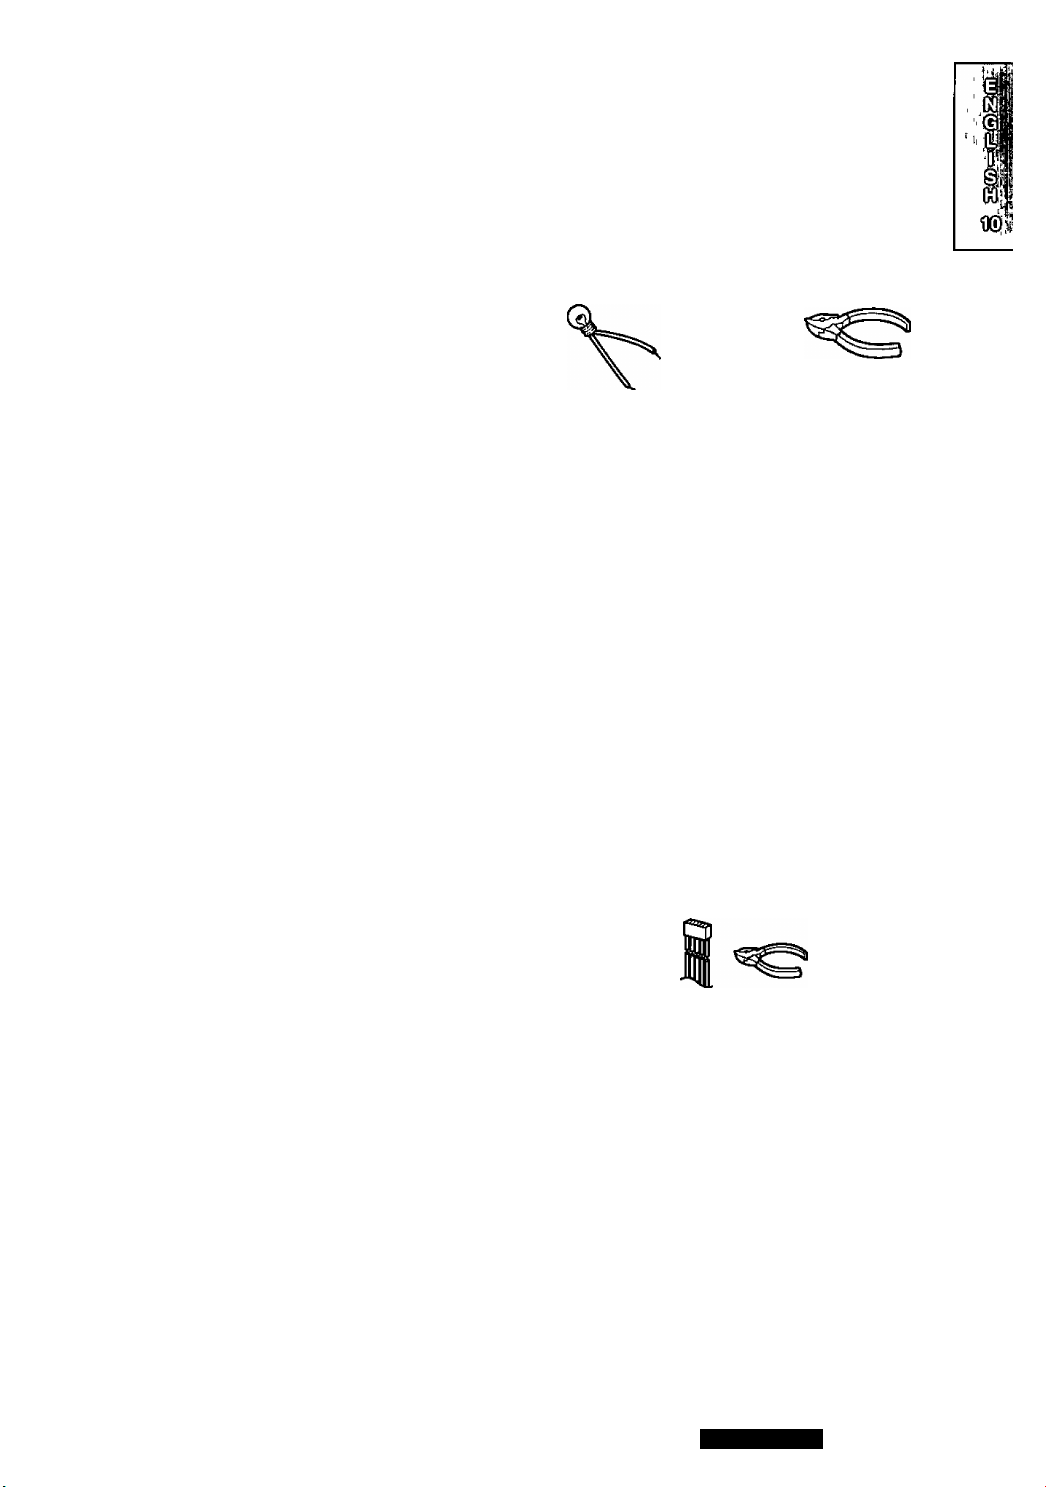
You’ll need the following
12 V DC test Electrical tape
bulb
Slide-cut
pliers
□ Identify Aii Leads
The first step in installation is to identify all the car
wires you’ll use when hooking up your LCD monitor
As you Identify each wire, we suggest that you label
It using masking tape and a permanent marker This
will help avoid confusion when making connections
later
Note.
• Do not connect the power connector until you
have made all connections If there are no plastic
caps on the hooking wires, insulate all exposed
leads with electrical tape until you are ready to use
them Identify the leads in the following order
Power Lead
If your car has a radio or is pre-wired for one
Cut the connector wires one at a time from the plug
(leaving the leads as long as possible) so that you
can work with individual leads
Turn on the ignition to the accessory position, and
ground one lead of the test bulb to the chassis
Touch the other lead of the test bulb to each of the
exposed wires from the radio connector plug Touch
one wire at a time until you find the outlet that caus
es the test bulb to light
Now turn the ignition off and then on If the bulb also
turns off and on, that outlet is the car power lead
If your car IS not wired for an audio unit
Go to the fuse block and find the fuse port for acces
sory (ACC), or ignition (IGN)
CiYilVM5800U
19
Page 20
@
co
®
(L
retai
0
©
□ Connect All Leads
CO
Now that you have identified all the wires in the car,
you're ready to begin connecting them to the con
troller unit wires. The connection diagram (» pages
21, 22) shows the proper connections and color
coding of the leads.
We strongly recommend that you test the unit
before making a final installation.
You can set the unit on the floor and make tempo
rary connections to test the unit. Use electrical tape
to cover all exposed wires.
Important:
o Connect the red power lead last, after you
have made and insulated all other connec
tions.
Ground
Connect the black ground lead of the power connec
tor to the metal car chassis.
(continued)
□ Final Installation
Lead Connections
Connect all wires, making sure that each connection
is insulated and secure. Bundle all loose wires and
fasten them with tape so they won’t fall down later.
Congratulations! After making a few final checks,
you are ready to enjoy your new auto LCD monitor.
a Final Checks
1. Make sure that all wires are properly connected
and insulated.
2. Turn on the ignition to check the unit for proper
operation.
If you have difficulties, consult your nearest autho
rized professional installer for assistance.
Power
Connect the red power lead to the correct car radio
wire or to the appropriate fuse port on the fuse
block.
If the LCD monitor functions properly with all these
connections made, disconnect the wires and pro
ceed to the final installation.
<lnstallation Example>
Warning
о Where and how this unit is installed differs according to the car model concerned. As such, the informa
tion contained in this installation guide is designed for professional installers and is not intended for non
technical individuals.
20
Page 21

Electrical Connections
Cautions:
• This product is designed to operate off a 12 V DC, negative ground battery system.
• To prevent damage to the unit, be sure to follow the connection diagram below.
• Remove approx. VT' (5 mm) of protective covering from the ends of the leads before connecting.
• Do not insert the power connector into the unit until the wiring is completed.
• Be sure to insulate any exposed wires from a possible short-circuit from the car chassis. Bundle all
cables and keep cable terminals free from touching any metal parts.
• Note that if your car has a driving computer or a navigation computer, disconnecting the battery cables
may cause the contents of memory for these computers to be lost.
• The parking brake connection should be connected by a professional installer. In case of difficulty,
please consult your nearest authorized Panasonic Servicenter.
• All other installation methods require the use of dedicated metal fittings. Consult with a qualified servic
ing engineer or your dealer if other methods are required.
□ Wiring Diagram
@
GO
®
\L
0
©
GO
tlS
Remote control signal receiver lead
To the REMOTE-IN terminal or remote
control signal receiver lead of the
Panasonic DVD player {CX-DV700U).
Video input lead
To the video output connector of the
Panasonic DVD player (CX-DV700U).
ACC power lead
To ACC power, -i-12 V DC.
Ground lead
To a clean, bare metallic part of the car chassis.
Side brake (parking brake) connection lead
Be sure to wire the side break (parking brake)
for safety and preventing accidents. page 23)
Notes:
• Be sure to fully plug in the connector.
• When game devices are connected, the image may be unstable.
C-iY£VIVI5800U
21
Page 22

wM
I’,0
if; DO,;.'
Eleotrioai Oonneotions (continued)
□ Basic system configuration
Example combination
O DVD player (CX-DV700U)
Note:
o Refer to the operating instructions for the connected
devices, in addition.
Caution:
® For safety, be sure to ask your nearest professional installer to do this connection.
Side brake
(parking brake)
Side brake (parking brake) switch
Side brake (parking brake)
connection lead
(Biue/yeiiow stripe)
Car chassis
Brake light (2) Ciamp connector
When the side brake (parking brake)
lever is pulled, this lead is grounded
by the car chassis,
-| Attach the clamp connector to the end of the
side brake (parking brake) connection lead.
2 The clamp connector is connected to the
power source side lead of the side brake (parking
The side brake (parking
brake) switch position varies
depending on the car model.
22
Side brake (parking brake) connection lead
(Blue/yellow stripe)
mmmm
Page 23

□ Advanced system configuration
Example combination
• AV selector {CA-LA20U)
• Color LCD monitor/CD, DVD player (CY-VMD9000U)
Notes:
• Refer to ttie operating instructions for the connected devices, in addition.
• The exterior design shown for the CA-LA20U differs from that of the actual product.
C9
®
(k
0
©
GO
D3
CY-VMD9000U
DISPLAY UNIT (REAR)
C~tYilVIVI5800U
23
Page 24

Troubleshooting
Preliminary Steps
Check and take steps as described in the tables on
the next page
If You Suspect Something Wrong
Immediately switch power off
Disconnect the power connector and check that
there IS neither smoke nor heat from the unit before
asking for repairs Never try to repair the unit your
self because it is dangerous to do so
Maintenance
Your product IS designed and manufactured to
ensure a minimum of maintenance Use a soft cloth
for routine exterior cleaning Never use benzine,
thinner or other solvents
Product Servicing
If the suggestions in the charts do not solve the
problem, we recommend that you take it to your
nearest authorized Panasonic Servicenter The prod
uct should be serviced only by a qualified technician
Cautions*
• Do not use the unit if it malfunctions or is
something wrong
• Do not use the unit in abnormal condition, for
example, without display, or with smoke or
foul smell, can cause ignition or electric
shock Immediately stop using it and call the
store where you purchased it
Replace the Fuse
Use fuses of the same specified rating {3 A) Using
different substitutes or fuses with higher ratings, or
connecting the product directly without a fuse, could
cause fire or damage to the unit
If the replacement fuse fails, contact your nearest
Panasonic Servicenter for service
24
CnYiUlVIsaoou
'iilsl.
Page 25

Troubleshooting Tips
-----
— _ _ _
Trouble Cause/Step
—
This IS a characteristic of liquid crystal panels and is not a problem
.CO
itó'
Page
%
There are red, blue and
green spots on the
screen
I
No picture
I The remote controller
' does not work.
The screen is dark
The screen black and
white portions are
reversed.
The screen is too white
The color
IS
pale
The tint IS off.
(The liquid crystal panel is built with very high precision technology
and has at least 99 99% effective image pixels Be aware that on
0 01% of the panel there may be missing pixels or constantly light
pixels)
V,
_____________________________________________________
/—----------------------------------------------------------------------------------------------
• Is the side brake (parking brake) connection lead (blue/yellow
stripe color) connected’
• Was the side brake [parking brake) lever engaged’
..............................................................................................................
• Has the battery run out’
• Is a strong light shining on the remote controller’
................................................................................................
[Brightness, Black Level and Contrast]
Are the settings properly adjusted’
>
____
___
______________________________________________
/
-----[Color and Tint]
Are the setting properly adjusted’
..............
__________
.23.. .
11
15,16
__________
-------16
J
s
N
J
^
______
j
k
_________________________________________________________
@M5@@S0B)
_____}
25
Page 26

@
GO
MaiDtenamGi
®
(L
0
@
To Prevent Damage to the System Exterior
DO
W
Do not apply pesticides, benzine, thinner or other volatile
substances to the unit
The cabinet surface primarily consists of plastic materials
Do not wipe with benzine, thinner or similar substances
because this will results in discoloration or removal of the
paint
When a cloth with a cleansing chemical is used, follow the
caution points
Do not leave the unit in contact with rubber or vinyl prod
ucts for long periods of time
Do not use cleansers which have polishing granules
because this could damage the surface of the unit
Clean Dirt by Wiping Lightly with a Sott Cloth
When the unit is dirty, wipe with a well-wrung cloth dipped
in a kitchen cleanser (neutral) diluted with water and then
go over the same surface with a dry cloth
(Since there is the possibility of water drops getting inside
of the unit, do not directly apply cleanser to the surface)
Wring well
Kitchen cleanser diluted with water
Wipe lightly
Go over the same surface
with a dry cloth
Caution
® If water drops or similar wet substances get inside the monitor via the liquid crystal panel surface, it may
cause a malfunction
26
VM5800U
Page 27

Specifications
□ Overaii System
Power supply
Current consumption
Usage temperature range
Storage temperature range
12 V DC {11 V-16V), test voltage 14 4 V, negative ground
Less than 1 0 A
32 “F to 104 (0 ‘’C to40*C)
-4^Fto 176 “F(-20 “C to 80 X)
□ Display Unit
Liquid crystal panel
Screen dimensions
Width
Height
Diagonal
Number of pixels
Display method
Drive method
Light source
Dimensions (WxHxD)
Weight
Above specifications comply with EIA standards
Note-
• Specifications and design are subject to modification without notice due to improvements in technology
5 8" Wide
5" (127 mm)
2%s" (74 mm)
5^V (147 mm)
280 800 pixels (234 verticalx400 horizontaIxS)
Transparent color filter format
TFT (Thin Film Transistor) active matrix format
Internal light (U-shaped, color cathode fluorescent light)
6Va"x4V2"xlVi6" (155x113x33 mm)
15oz (420 g)
&Y1VIVI580DU
27
Page 28

(?
(sï
û
C9
©
t]
Remarque:
O Cet appareil ne comprend aucun haut-parleur.
28
№ UM5B00.U
Des trous de vis sont fournis pour la fixation de l’accessoire d’ajustement de
la hauteur (sur la face d'en dessous).
[Vis à filet unifié de 6 mm (V4 po), longueur maximale de 4,5 mm (l’Vte po)]
Page 29

Préparation de la télécommande
Installation de la pile (Insertion/remplacement des piles)
1 Retirez le porte-pile
Tirez le porte-plie par la partie B en poussant la partie A dans
le sens indique par la flèche
2 Installez la pile sur le porte-plie
Mettez la pile neuve en place en vous assurant que le signe
(-I-) se trouve sur le dessus, tel qu’indiqué sur l’illustration
2 Réinsérez le porte-pile
Repoussez le porte-pile lusqu’à sa position d’ongine
Remarques sur la pile
Remplacez la pile des les premiers signes d’affaiblissement
Données techniques
• Type de pile Pile au lithium Panasonic (CR2025) (fourni)
• Durée de vie Environ 6 mois lors d’une utilisation normale
(a température ambiante normale)
Précaution
• Une utilisation inadéquate de la pile peut causer une surchauffe, une explosion ou une ignition d’allumage pouvant
provoquer des blessures ou un incendie Les fuites de la pile peuvent endommager l’appareil
• Ne démontez pas la pile ni provoquer de court-circuit Ne lettez pas la pile au feu
• Afin de prévenir tout risque d’accident, conserver les piles hors de portée des enfants
• Lors du rejet des piles, observer les règlements y afferents
Pile au lithium (fourni)
[?
(3
:(»
.0
©
s
Guide de référence des commandes
Orientez la télécommande vers le détecteur sur l’unité principale
r
Interrupteur (PWR) •
(® page 30)
Touche de format (ASPECT)
(«page32)
Touche de luminosité
(BRIGHT)
Touche d’image
(PICTURE)
{=* page 34)
-------------
page 33)
.ASPECT
.BRIGHT
â
.PICTURE
f
Panasonic
ENTER
Car AV //
Touche de menu (MENU)
{» page 31)
Touches de sélection (a, v)
(=» pages 31,33,34)
Touche de validation (ENTER)
(=» pages 31,34)
№
yM5800U
29
Page 30

Avant d’utiliser l’unité d’affichage
30
ÊY1VM5800U
Ji.
Page 31

Sélection de l’entrée
• Sélectionnez “VIDEO" si une platine vidéo portable, un caméscope ou un lecteur DVD portable est raccordé
• Sélectionnez “NAVIGATION" si un système de navigation est raccorde
P .
Maintenez enfoncée [MENU] pendant plus de
2 secondes
VTR INPUT SELECT
^0©§®
NAVIGATION
C ▼ Il A ) DOWN/UP (enter] select
Valeur par défaut VIDEO
® Appuyezsur[^]ou[v]poursélectionner
une option
@ Appuyez sur [ENTER] pour valider
VTR INPUT SELECT
VIDEO
Ca^^0©^f0®0!i]
( ▼ Il A ) DOWN/UP (enter] select
{59-
0 ^
H %
Remarque
• Si aucune operation n'est effectuée pendant 10 secon
des, l’affichage de menu disparaît automatiquement
CiYlUM5800U
31
Page 32

Réglage ito format
Appuyez sur [ASPECT]
O A chaque pression sur cette touche, la dimension de
l’affichage change de la façon indiquée ci-dessous
P
(Ài
■a
; (ï9
l 0
' ©
©
NORMAL
FULL
(Plein écran)
ZOOM
JUST
(Justification
-O
I
NORMAL (Valeur par défaut)
O L’image de l’affichage classique a un rapport horizon-
tal/vertical de A pour 3
O Dans ce cas, il y a une zone vide des côtes droit et
gauche de l’affichage
FULL (Plein écran)
O L’ensemble de l’écran est agrandi horizontalement au
rapport de format de 16 pour 9
O Le rapport d’agrandissement est le même en tout point
suri’ecran
ZOOM
O L'écran est complètement agrandi au rapport de format
normal de 4 pour 3
O Le haut et le bas de l'écran sont légèrement coupés
JUST (Justification)
O L’écran est agrandi horizontalement au rapport de for
mat de 16 pour 9
O Le rapport d’agrandissement augmente vers les extré
mités droite et gauche de l’écran
Remarque
O Dans certains cas, l’image obtenue est différente de
l’image originale suivant le format sélectionne
Attention
O Veuillez noter que la compression ou l’agrandissement de l’écran a l'aide de la fonction de modification du rapport de
format (mode d’écran) de cet appareil a des fins commerciales ou de visionnement/écoute par un public peut violer
un droit d’auteur protège par la loi sur le droit d’auteur
» Si vous agrandissez en plein écran l’image normale (4 pour 3) en utilisant le format “JUST (Justification)’’, “ZOOM"
ou “FULL (Plein écran)’’, il est possible que vous ne puissiez pas voir la périphérie de l’image ou que vous obteniez
une image déformée Veuillez ainsi utiliser le mode “NORMAL” lorsque vous visionnez l'image originale dans le
respect de l’obiectif dans lequel l’image a été fabriquée
32
mmmm
.Si «I '11.
Page 33

Réglage de la luminosité
©
[BRIGHT]
,:^iSiiS,:3r3j4riiiiiaittaî
VIVI580DU
33
Page 34

Réglage de l’affichage
P
û
GO
©
Appuyez sur ÎPICTURE]
CONTRAST
COLOR
TINT
END
C V II A ) DOWN/UP Ienter] select
Niveau du noir
Valeur par défaut 0
Plage de réglage -30 à+30
Contraste
(Lg^dtL
Sélectionnez
____
Sélectionnez
0 Appuyez sur [A] ou i V] pour sélectionner
une option
(D Appuyez sur [ENTERJ pour valider
BLACK LEVEL
COLOR
TINT
END
DOWN/UP (enter] select
N
BLACK LEVEL
______
^
----------\
Valeur par défaut 0
Plage de réglage -30 à+30
Couleur
Valeur par défaut 0
Plage de réglage -30 à +30
Nuance
Valeur par défaut 0
Plage de réglage -30 à+30
____
f
Sélectionnez
V —
(—
Sélectionnez
k
___
CONTRAST
COLOR
TINT
______
---------
____
----------
>
\
J
^
34
VJVI5800U
.,.4,,
Page 35

® Appuyez sur [A] ou [V] pourajuster
(g) Appuyez sur lENTER] pour valider
Remarques
• Pour retourner en mode normal, sélectionnez “END”
• Si aucune opération n’est effectuée pendant 10 secon
CONTRAST
+ 15 iiiiiiiiiiiiiii|iiiiiii|iiiiiii
Ajustez le niveau du noir si le blanc et le noir sont inversés ou
SI l’écran apparaît trop blanc à cause de l’angle de vision-
nement
—
------------------------------------------------\
CONTRAST
+1 5 imiimiiim|iiiiiii|iiiiiii
puis appuyez sur [ENTER]
des, l’affichage de menu disparaît automatiquement
P
(a I
09-
hO
©
0
Sens Diminue le contraste entre le Augmente le contraste entre
noir et le blanc
.
___________
Sens - Sens -IAtténue l’intensité de
couleur sur l’affichage couleur sur l’affichage
\
_______________________
—
Sens Amplifie le rouge dans la
couleur de l’image
^
____________________
____________________________
COLOR
+ 15 mumiiiiiii|iiiiiii|iiiiiii
TINT
+ 15
Sens +
le noir et le blanc
Augmente l’intensite de
mmmimii|imiii|mmi
Sens -t-
Amplifie le vert dans la
couleur de l’image
----
----
__
^
\
J
>
[PICTURE]-
/T
©r
—(A, V]
&
ENTER
[ENTER]
J
35
Page 36

Guide dlristalletìon
MISE EM GARDE
A
P
s
Gs
C3
©
©
Les informations relatives à l’installation sont prévues uniquement pour des techni
ciens qualifiés. Elles ne contiennent pas de mises en garde ou d’avis quant aux dan
gers potentiels pouvant être encourus lors de l’installation de cet appareil.
Toute tentative d’installation de cet appareil dans un véhicule motorisé par une per
sonne sans qualification peut causer des dommages au système électrique et des
blessures corporelles graves ou mortelles.
□ Généralités
Cet appareil devrait être installe par un technicien qua
lifié
(Voir la “MISE EN GARDE" ci-dessus )
O Identifier et étiqueter les fils du véhicule
O Raccorder les fils du véhicule à ceux du connecteur
d’alimentation
O Vérifier le fonctionnement de l’appareil
En cas de difficulté, ne pas hesiter à consulter un instal
lateur professionnel
Attention
• Cet appareil ne peut fonctionner que sur une bat
terie de 12 V c c avec négatif à la masse Afin de
prévenir tout risque de dommage, ne pas tenter de
l’utiliser avec une autre source d’alimentation
Avant de procéder à l’installation, vérifier le contenu de
l'emballage
O Liste des centres de service Panasonic agréés
Conserver cette liste pour consultation ultérieure
O Quincaillerie pour I’mstallation Nécessaire pour l’in
stallation dans le tableau de bord
O Quincaillerie d’installation Nécessaire pour le régla
ge de l’écran
□ Quincaillerie pour rinstallation
r Description Schéma
Câble de raccordement
{Longueur 3 m)
Connecteur a verrouillage
Qté
1
1
36
VM5800U
Page 37

a Avant rinstallation
Mise en garde
• Ne pas installer le moniteur dans un endroit qui gêne la
conduite, la visibilité ou qui est interdit par le code de la
route et les réglements
Si le moniteur était installé à un emplacement gênant la
visibilité avant, ou le déploiement du sac à air, et autres
dispositifs de sécurité, ou à un emplacement gênant
pour la conduite du véhicule, comme près du levier des
vitesses ou de la pédale du frein, cela risquerait de
provoquer des accidents
• Ne jamais utiliser, pour l’installation, des boulons ou
des écrous provenant des dispositifs de sécurité du
véhicule
Si des boulons et des écrous du volant, des freins ou
autres dispositifs de sécurité sont utilises cela risquerait
de provoquer des accidents
• Attacher les cordons correctement
Si le câblage n’est pas exécute correctement, cela
risque de provoquer un incendie ou autre accident
Veiller, en particulier, à tirer et attacher les fils de sorte
qu'ils ne s’accrochent pas a une vis ou ne se coincent
pas dans les parties mobiles des rails des sieges
• Utiliser sur les véhicules de 12 V c c avec négatif à la
masse
Ce moniteur ne peut être utilisé que sur les véhiculés de
12 V c c avec négatif à la masse II ne peut pas être
utilisé sur les gros camions ou les véhiculés diesel de
24 V cc S’il était utilise sur un type de véhiculé
inadéquat, cela risquerait de provoquer un incendie ou
autres accidents
Attention
• Utiliser les fusibles spécifies
Veiller à n’utiliser que les fusibles spécifiés Si des
fusibles autres que les fusibles specifies sont
utilisés, cela risquerait de provoquer un incendie
ou autres accidents
• Ne pas endommager les fils et cordons en les
ponçant ou en tes tirant
Ne pas endommager ni tirer sur le cordon d’atimentation, il pourrait court-circuiter, se sectionner
et risquer de causer un incendie ou autres acci
dents
□ Outils requis
Un tournevis, une pile AA de 1,5 V et les accessoires
suivants
Vérificateur de
continuité 12 V
Ruban
d’électncien
Pinces à
sectionner
(?
Eî
û
Kl
□ Identifier tous tes fits et câbles
La première étape consiste à identifier tous tes fils du
véhiculé nécessaires au raccordement de l’appareil
Après avoir identifié chacun des fils en cause, les éti
queter Cela évitera tout risque de confusion et d’erreur
Remarque
• Ne raccordez pas le connecteur d'alimentation avant
d’avoir effectué tous les raccordements S'il n'y a pas de
capuchons de plastique sur les fils de raccordement,
isoler tous les fils exposés avec du ruban d’électricien
Identifier les fils dans l’ordre suivant
Câble d'alimentation
Si une radio est déjà en place ou si le câblage à cet effet est
de|3 installe
Couper pour retirer le capuchon du connecteur (en
prenant soin de laisser les fils les plus longs possible) de
maniéré à permettre le raccordement individuel des fils
Mettre la clé de contact du véhicule à la position “ACC”,
puis relier un des fils du vérificateur de continuité au
châssis de l'automobile
Relier l’autre fil du vérificateur de continuité a chacun des
fils exposes du connecteur sectionné Toucher un fil à la
fois jusqu’à ce que le fil faisant allumer l’ampoule du vérifi
cateur ait été repéré
Ensuite, mettre la clé de contact à la position “OFF” puis à
la position “ON” Si l’ampoule s’éteint et se rallume, le fil
identifié est le fil d’alimentation du véhicule
Si le câblage pour l'installation d’une radio n’est pas déjà
en place
Ouvrir le couvercle du bloc-fusibles et trouver le récepta
cle du fusible des accessoires (ACC) ou du contact (IGN)
VIVI5800U
37
Page 38

Quids d’installation isuiiei
□ Raccorder tous les fils
Après avoir Identifié tous les câblages et fils, il est possi
ble d'effectuer les raccordements Le schéma de rac
(?
cordement (•=» Pages 39, 40) represente les raccorde
B
ments corrects et le code de couleur des fils
û
Il est fortement recommandé de vérifier le fonctionnement
G9
de l’appareil avant de procéder à l’installation finale
Il est possible de mettre l’appareil sur le plancher du
véhicule pour faire des raccordements provisoires afin de
©
vérifier le fonctionnement de l’appareil Recouvrir tous les
í)t)
fils exposés avec du ruban d’électricien
Important
O Raccorder le fil d’alimentation rouge en dernier
lieu seulement, après avoir fait tous les autres rac
cordements et isolé tous les fils
Mise à la terre
Raccorder le fil de mise à la terre noir du connecteur
d’alimentation au châssis du véhiculé
Alimentation
Raccorder le fil d’alimentation rouge au fil de radio déjà en
place ou au porte-fusibles approprié du bloc-fusibles
Si l’appareil fonctionne normalement avec tous les rac
cordements ainsi effectués, débrancher les fils et procéder
à l’installation finale
□ Installation tinale
Raccordement des fils
Raccorder tous les fils en prenant soin qu’ils soient tous
bien isolés et que les raccordements soient corrects
Enrouler toute longueur excessive de fil et la fixer en place
avec une bande adhésive
L’installation est maintenant terminée Effectuer toutefois
les vérifications finales suivantes
□ Vérifications finales
1 S’assurer que tous les fils sont bien raccordés et
isolés
2 Faire démarrer la voiture et vérifier le fonctionnement
de l’appareil
En cas de difficulté, consulter un installateur profes
sionnel
< Exemple d’installation >
Mise en garde
O L’endroit et la façon d’installer cet appareil different selon le type de véhicule dont il s'agit Les informations de ce
guide d’installation s'adressent en fait aux installateurs qualifiés, elles ne sont pas fourmes à l’intention des individus
sans qalifications techniques
38
№
UM5800U
Page 39

Branchements électriques
Précautions
• Cet appareil ne peut fonctionner que sur une batterie de 12 V c c avec négatif à la masse
• Toujours suivre le schéma de câblage ci-dessous pour éviter d’endommager l’appareil
• Avant de raccorder un câble, dénuder son extrémité d’environ 5 mm (V* po)
• Ne insérez pas le connecteur d’alimentation dans l'unité avant que (’installation électrique ne soit acheveé
• Toujours isolez les câbles exposés afin d’eviter un court-circuit possible avec le châssis de la voitre Rassemblez tous
les câbles et vérifier que les bornes de câbles ne touchent a aucune pièce métallique
• N’oubliez pas que si votre voiture est équipée d’un ordinateur de bord ou d’un ordinateur de radionavigation, les
données sauvegardées en mémoire risquent d’être effacées lorsque les bornes de batterie seront débranchées
• Le raccordement du frein à main doit être effectué par un technicien qualifié En cas de problème, veuillez contacter
votre centre de service apres-vente agrée Panasonic le plus près
• Toutes les autres méthodes d’installation nécessitent l’utilisation d’accessoires métalliques conçus à cet effet
Contactez un technicien de service apres-vente qualifié ou votre détaillant si d’autres méthodes d’installation sont
nécessaires
□ Schéma de câblage
Unité d’affichage
P
G)
û
QO
©
AS
(D Câble de raccordement
Fil du récepteur de signal de télécommandé
Vers la borne REMOTE-IN ou le fil du récepteur
de signal de télécommande du lecteur DVD video
Panasonic {CX-DV700U)
Cordon d'entrée vidéo
Vers la borne de sortie vidéo du lecteur DVD
vidéo Panasonic (CX-DV700U)
Fil d'alimentation
Vers ralimentation ACC, +^2 V C C
Fil de mise à la terre
Vers une partie métallique propre
et exposee du châssis du véhicule
Fil de raccordement du frein auxiliaire (frein à main)
(Blue rayé jaune)
Remarques
• Assurez-vous d’insérer le connecteur à fond
• Lorsque des périphériques de jeu sont raccordés, l’image peut être instable
Pour votre sécurité et pour la prévention des accidents,
assurez-vous d'avoir bien raccorde le frein à main
(->page41)
m
VM5800U
39
Page 40

Branchements électriques
□ Configuration système de base
(suite)
P
Êï
a
K)
©
Exemples de combinaison
O Lecteur DVD (CX-DV700U)
Remarque
O Référez-vous également au mode d’empioi des périphériques raccordes
0
Précaution
O Par mesure de sécurité, demander explicitement a un installateur de système professionnel te plus proche de votre
domicile d’effectuer ce branchement
-j Fixez le connecteur a verrouillage @ à l’extrémité du
fil de raccordement du frein à main
(Bleu rayé jaune)
40
. mmmm
tlJ ? î i I ,1s lit
P Le connecteur à verrouillage (2) est raccordé au fil du
côté de la source d’alimentation du bras de frein à
main
Page 41

□ Configuration système évoiuée
Exemples de combmaison
• Sélecteur AV {CA-LA20U)
• Lecteur CD, DVD/écran couleur a cristaux liquides (CY-VMD9000Ü)
Remarques
• Référez-vous également au mode d'emploi des périphériques raccordés
• La véritable apparence extérieure de l’appareil CA-LA20U diffère de celle presentee ici
(
UNITE D’AFFICHAGE
CY-VMD9000U (ARRIERE)
(?
©
90
ViV15800U
41
Page 42

En
os de doffioulté
Étapes préliminaires
Vérifiez et suivez les étapes décrites dans les tableaux de
la page suivante
P
P)
Lorsqu’on soupçonne que quelque
ÛS
K)
chose est défectueux
Coupez immédiatement l’alimentation
Débranchez le câble d’alimentation et vérifiez que l'ap
©
pareil ne dégage ni de la fumée ni de la chaleur avant d’e
xiger un dépannage N'essayez jamais de faire vous-même
t)6
des réparations parce que cela peut s’avérer dangereux
Entretien
Cet appareil est conçu et fabriqué de manière à n’exiger
qu’un minimum d’entretien Nettoyer périodiquement les
surfaces extérieures avec un chiffon doux Ne jamais
utiliser de solvant d’aucune sorte
Service après-vente
Si, après quelques tentatives, le problème persiste, il est
recommandé de confier l’appareil à un centre de service
Panasonic agréé Confier toute réparation à un technicien
qualifié
Remplacement du fusible
Utiliser un fusible de même ampérage (3 A) L’utilisation
de substituts, de fusibles d’un ampérage supérieur ou le
raccordement de l'appareil sans fusible en place peuvent
entraîner un risque d'incendie et endommager l’appareil
Si le fusible de remplacement saute, communiquer
avec un centre de service Panasonic agréé
Précautions
• N’utilisez pas l’appareil s’il ne fonctionne pas nor
malement ou SI quelque chose est défectueux
« Le fait d’utiliser l’appareil dans des conditions
anormales, par exemple lorsque aucun affichage
n’est delivre, s’il dégage de la fumée ou une odeur
anormale, peut favoriser un amorçage électrique
ou une électrocution Arrêtez-le immédiatement et
demandez au magasin gui vous l’a vendu de la
vérifier
\
42
UIVI5800U
Page 43

Guide de dépannage
Panne
Présence de points
rouges, bleus et verts
sur l'écran
Pas d’image
La télécommande sans fil ne fonctionne pas
L’écran est foncé
Les positions noires et
blanches sont inversées
sur l’écran
L’écran est trop clair
Ongine/Disposition à prendre
Il s’agit d’une particularité des panneaux à cristaux liquides et non pas
d’un problème
(Le panneau à cristaux liquides a été fabrique a l'aide de techniques de
haute précision et il comporte 99,99% pixels d’image effectifs Parmi les
0,01% restants, il peut y avoir des pixels manquants ou toujours allumés )
....
____
• Le fil de branchement du frein de stationnement (de couleur bleu rayé
jaune) est-il raccordé?
• Le levier du frein de stationnement est-il tire?
• La pile est-elle épuisee?
• Est-ceque le capteur de la télécommandé est expose à une forte
lumiere?
l__________________________________________________________
[Luminosité, Niveau du noir et Contraste]
Les paramètres sont-ils correctement ajustés?
—
Page
____
41
_____
29
_____
33
à
34
>
^
\
>
\
J
Les couleurs sont
faibles
Les teintes sont
absentes
[Couleur et nuance]
Les paramètres sont-ils correctement ajustés?
^_________________________________________________________
eiYlVM5800U
34
_____
>
43
Page 44

Pour éviter des dégâts à Textérieur de Tappareîl
Ne pas utiliser de pesticide, benzine, diluant pour peinture ou autre
substance volatile sur l’appareil
E?
La surtace du coffret est fabriquée essentiellement de matières plas
0
tiques Ne pas frotter l’extérieur de l’appareil avec de la benzine, un
û
diluant ou des substances comparables car ceci pourrait provoquer
(S
une décoloration ou une perte de la peinture
A remploi d’un chiffon à traitement chimique, respecter les
O
précautions qui s’y rapportent
©
Ne pas laisser l’appareil pendant longtemps en contact avec des pro
duits en caoutchouc ou en plastique
Sous peine d’endommager la suiiace de l’appareil, ne pas utiliser de
détergents contenant des granulés
Nettoyer les souillures en frottant légèrement avec un linge doux
Si l’appareil est très sale, le frotter avec un linge trempé dans un
detergent (neutre) de cuisine dilue dans de l’eau, puis bien essorer
Essuyez ensuite la surface avec un linge sec
(Pour que des gouttes d’eau ne s’infiltrent pas dans l’appareil, ne pas
appliquer directement de détergent sur sa surface )
Essorer
convenablement
Attention
O Une défaillance risque de se produire si des gouttes d’eau ou un liquide s’infiltrent à l’intérieur du moniteur par son
panneau à cristaux liquides
Frotter légèrement
Frotter la même surface
avec un linge sec
44
i <lila
,VIVI5800U
Ite 1 jL,!''- 'Il :
Page 45

Données techniques
□ Ensemble du système
Alimentation
Consommation du courant
Plage de temperature d'utilisation
Plage de température d’entreposage
□ Unité d’affichage
Panneau à cristaux liquides
Dimensions d’écran
Largeur
Hauteur
Diagonale
Nombre de pixels
Méthode d’affichage
Méthode d’entraînement
Source d’éclairage
Dimensions (LxHxP)
Poids
Remarque
• Les spécifications et la conception sont sujettes à des modification sans préavis pour des raisons d’améliorations technique
12VCC (11 V-16V)
Tension d’essai 14,4 V, masse négative
Moins de 1,0 A
De0“Ca40 “C(De 32"Fà104 “F)
De -20 “C à 80 X (De -4 “F a 176 “F)
5,8 pouces de large
127 mm (5 po)
74 mm (2’Vie po)
147 mm (5^Vie po)
280 800 pixels (234 verticauxx400 horizontauxxS)
Format a filtre couleur transparent
Format a matrice active TFT (transistor à pellicule mince)
Lampe interne (lampe fluorescente cathodique froide, en U)
155x113x33 mm (6Vb poxAV? poxIVie po)
420 g (15 oz)
(?
Kl
C-ÍCVJVI5800U
45
Page 46

Nombre de los controles
Botón de brillo (BRIGHI)
Se utiliza para ajustar el brillo de la pantalla.
{=» página 51)
Botón de imagen (PICTURE)
Se utiliza para ajustar la imagen visualizada.
(=» página 52)
Botón de aspecto (ASPECT)
Se utiiiza para seieccionar y determinar ei aspecto.
(=» página 50)
@
----------------------------
----------------------------------
©
P
Botón de la alimentación (POWER)
Se utiliza para conectar y desconectar
®
la alimentación.
(=» página 48)
Botón de menú (MENU)
Se utiliza para seieccionar ia
entrada de video página 49)
^Botonesdeseiección
Se utiiizan para mover ei
cursor. (» páginas 49,51,52)
(v,
Botón de Introducción
(ENTER)
Se utiliza para
determinar los diversos
ajustes.
(=» páginas 49,52)
Sensor de señales del mando a distancia
Indicador de alimentación
conectada/desconectada
[STANDBY (R)/ON (G)]
Cuando la alimentación está desconectada; Rojo
Cuando la alimentación está conectada: Verde
Terminal para cable
de conexión
(en el lado izquierdo)
Los agujeros roscados son para colocar el accesorio regulador de
altura (en el lado inferior).
[Tornillo de unión de W' (6 mm), longitud máxima de 1 'Vis" (4,5 mm)]
Nota;
o Este aparato no contiene ningún altavoz.
46
6YlViVI580aU
Page 47

Preparación del controlador remoto
Sustitución de la pila (Inserción/cambio de las pilas)
*1 Quite el sujetador de la pila
Tire del sujetador hacia la posición B a la vez que empuja la
posición A en la dirección indicada por la fecha
2 Instale la pila en el sujetador
Inserte una pila nueva de manera correcta, con el lado {+)
hacia arriba, como se muestra en la ilustración
0 Inserte el sujetador de la pila
Empuje el sujetador de la pila a la posición original
Notas sobre la pila
La pila vieja debe ser quitada y desechada inmediatamente
Información sobre la pila
• Tipo de la pila Pila de litio Panasonic (CR2025) (suministrado)
• Vida de la pila 6 meses bajo condiciones normales de uso
{a temperatura normal)
Precaución
• El uso incorrecto de la pila puede causar el sobrecalentamiento, explosión o ignición, resultando en herida o incen
dio La fuga del electrólito de la pila puede causar daños en el aparato
• No desmonte nt ponga en cortocircuito la pila No tire la pila al fuego
• Para evitar el nesgo de accidente, mantenga las pilas fuera del alcance de los niños
• Respete las normas vigentes para tirar las pilas
Pila de litio
®
b
Э
Guía de referencia de los controles
Dirija el controlador remoto hacia el sensor de la unidad principal
Botón de menú (MENU)
(=> página 49)
Botones de selección (A, v)
{=* páginas 49, 51, 52)
Botón de introducción (ENTER)
páginas 49, 52)
&Y1VIV15800U
47
Page 48

Antes de
ADVERTENCIA:
Para conducir con seguridad, la televisión y los vídeos sólo pueden verse estando el
vehículo parado y el treno de estacionamiento aplicado. Mientras el freno de esta
cionamiento no esté aplicado se visualizará la palabra “WARNING”.
utilizar
la
unidad de visualización
Presione [POWER].
El indicador STAND BY se enciende en verde.
Presione de nuevo [POWER] para desconectar la
alimentación.
Ei indicador STAND BY se enciende en rojo.
48
r
[PWR]
EtOER
lC J
\\ ftmaoonic ..
GÍOM580QU
Page 49

Selección de entrada
• Seleccione "VIDEO” cuando se conecte una platina de vídeo móvil, una videocámara o un reproductor DVD móvil.
• Seleccione “NAVIGATION” cuando se conecte un sistema de navegación.
Mantenga presionado [MENU] durante más de
2 segundos.
VTR INPUT SELECT
NAVIGATION
DOWN/UP [enter] select
Ajuste predeterminado: VIDEO
0 Presione [/\] o [v] para seleccionar un
elemento.
(D Presione [ENTER] para establecerlo.
VTR INPUT SELECT
VIDEO
C ▼ II A ) DOWN/UP [enter] select
Nota;
• Si no se realiza ninguna operación durante 10 segun
dos, la visualización de menú desaparecerá automática
mente.
ss '
GÍO.M5800U
49
Page 50

te del esp
Presione [ASPECT]
o Cada vez que se presiona este botón, el tamaño de la
visualizacion cambia como se muestra más abajo
NORMAL
NORMAL (Ajuste predeterminado)
FULL
ZOOM
JUST
o La imagen de visualización convencional tiene una
relación de aspecto de 4 a 3, de horizontal a vertical
(?
®
b
@
o En este caso en los lados derecho e izquierdo de la vi-
sualización queda un área en blanco
FULL
o La pantalla se extiende en su totalidad en sentido hori
zontal con una relación de aspecto de 16 a 9
o La relación de extensión es la misma en cualquier punto
de la pantalla
ZOOM
o La pantalla se extiende completamente con la relación
de aspecto normal de 4 a 3
o Las partes superior e inferior de la pantalla quedan lige
ramente cortadas
JUST
o La pantalla se extiende horizontalmente con una
relación de aspecto de 16 a 9
o La relación de extensión aumenta hacia los extremos
derecho e izquierdo de la pantalla
[ASPECT]-
Nota
o En algunos casos, la imagen parecerá diferente de la
original debido a la selección del aspecto que usted
haga
^5
Pcnasonlc ,¡
c«*v
Precauciones
o Esto es para recordarle que la compresión o la extensión de la pantalla, utilizando la función de cambio de la relación
de aspecto (modo de pantalla) de este producto, con fines comerciales o para que el publico vea/escuche programas,
puede infringir los derechos del autor protegidos por la ley del copyright
o Si expande una imagen normal (4 a 3) utilizando el aspecto “JUST", "ZOOM" о “FULL" a todo lo ancho de la pantalla,
puede que no vea la periferia de la imagen, o tal vez vea una imagen deformada Por lo tanto, utilice el modo
“NORMAL" para ver la imagen original como la concibió el autor
50
VJVISSOOU
Page 51

Ajuste del brillo
®
%
©
[BRIGHT]
•[A, V]
CiYlVM5800U
51
Page 52

Ajuste de
¡a
ïlsualizacién
@
@
p
a,
Presione [PICTURE]
CONTRAST
COLOR
TINT
END
C V [i A ) DOWN/UP [enter] select
Nivel del negro
Ajuste predeterminado 0
Gama de ajustes -30 a+30
Contraste
Ajuste predeterminado 0
Gama de ajustes -30 a+30
(Lg^g(L
—
Seleccione
^
___
—
Seleccione
© Presione [a] o [v] para seleccionar un
elemento
@ Presione [ENTER] para establecerlo
BLACK LEVEL
COLOR
TINT
END
DOWN/UP [enter] select
>
BLACK LEVEL
J
-i
CONTRAST
Color
Ajuste predeterminado 0
Gama de ajustes -30 a+30
Matiz
Ajuste predeterminado 0
Gama de ajustes -30 a+30
52
, Li . id '*
/—
Seleccione
».
__
r
Seleccione
____
COLOR
TINT
______
-i
j
✓
Page 53

© Presione [A] o t^] para aiustar
@ Presione [ENTER] para establecer el aiuste
Notas
• Para volver al modo normal, seleccione “END" y luego
presione [ENTER]
• Si no se realiza ninguna operación durante 10 segun
dos, la visualización de menu desaparecerá automática-
—
----------------------------------\
COLOR
+ 15 iiiiiiiiiiiiiii|Miiiii|mMM
Dirección Disminuye la profundidad
del coloren la visualización
V
______________________
TINT
+ 15
Dirección +
Aumenta la profundidad del
coloren la visualizacion
________________________/
-------------------------------------------
iiiimmiiiii|Miiiii|iiiiiii
Dirección - Dirección +
Realza el ro|o en la imagen
en color
_____________________
Realza el verde en la imagen
en color
__________________________/
N
[PICTURE]
.ài
GiY¿ViVI5800U
53
Page 54

¡uía de ipstaiación
ADVERTENCIA
La información de instalación va diripida a instaladores con experiencia, no a indi
viduos sin conocimientos técnicos. Esta no contiene advertencias ni precauciones
relacionadas con los posibles peligros causados al intentar instalar este producto.
Cualquier intento de instalar este producto en un vehículo motorizado por parte de una
persona que no sea un instalador cualificado podrá causar daños en el sistema
eléctrico y producir lesiones graves o incluso la muerte.
□ Perspectiva general
p
Este producto deberá ser instalado por un profesional.
(Consulte “ADVERTENCIA” más arriba.)
®
o Identifique y etiquete los cables del vehículo,
©
o Conecte los cables del vehículo a los cables del conec-
tor de alimentación.
o Compruebe ei funcionamiento del aparato.
Si encuentra problemas, consulte a su instalador profe
sional más cercano.
Precaución:
o Este aparato sólo funciona con un sistema de
batería de vehículo de 12 V CC con puesta a masa
negativa. No intente utilizarlo en cualquier otro sis
tema porque podrán producirse serios daños.
Antes de empezar la instalación, busque los elementos
siguientes que han sido empaquetados con su aparato.
o Tarjeta de garantía...Rellénela rápidamente,
o Lista de centros de servicia Panasonic para el direc
torio de servicios...Guárdela para consultarla en el
futuro en caso de que el aparato necesite ser reparado,
o Hardware de instalación...Necesario para instalar el
monitor.
□ Hardware de instalación
N." Elemento Diagrama Cantidad
Cable de conexión
(Longitud: 3 m)
Conector de abrazadera 1
1
54
©i?«*
Page 55

□ Antes de hacer la instalación
Advertencia
» No instale el monitor en un iugar que obstruya ei mane
jo, ia visibiiidad o que esté prohibido por ias leyes o los
reglamentos aplicables.
Si el monitor se instala en un lugar donde obstruye la
visibilidad hacia delante o el funcionamiento de la bolsa
de aire o de otro equipo de seguridad, o donde interfiere
con el funcionamiento del vehículo, esto puede causar
un accidente.
• Para hacer la instalación no utilice nunca pernos o tuer
cas de los dispositivos de seguridad dei vehículo.
Si utiliza pernos o tuercas de las ruedas, los frenos u
otros dispositivos de seguridad para instalar el monitor
esto podrá causar un accidente.
• Coloque correctamente los cables.
Si el cableado no se realiza correctamente, tal vez se
produzca un incendio o un accidente. Asegúrese de
instalar y asegurar los cables de forma que no queden
enredados con un tornillo o la parte móvil de un raíl del
asiento.
• Utilice el aparato con una batería de vehículo de 12 V CC
con conexión a masa negativa.
Este aparato sólo deberá utilizarse con una batería de
vehículo de 12 V CC con conexión a masa negativa. No
puede utilizarse en camiones grandes o vehículoes con
motor diesel que funcionan con una batería de vehículo
de 24 V CC. Si el aparato se utiliza en un tipo de vehículo
inadecuado se puede producir un incendio o un acci
dente.
Precauciones:
• Utilice el fusible especificado.
Asegúrese de utilizar siempre el fusible especifica
do. Si utiliza otro fusible, éste podrá causar un
incendio o un accidente.
• No estropee el cable pellizcándolo o tirando del
mismo.
No tire del cable ni lo estropee. Si no se cuida del
cable, éste se cortocircuitará o puede que sea cor
tado causando un incendio o un accidente.
□ Herramientas necesarias
Necesitará lo siguiente;
Bombilla de prueba Cinta aislante Alicates de
de 12 V CC para usos eléctricos corte lateral
a Identificación de todos los cables
El primer paso de la instalación consiste en identificar
todos los cables del vehículo que va a utilizar cuando
conecte su monitor LCD. Al identificar cada cable le suge
rimos que lo etiquete empleando la cinta de enmas
caramiento y un marcador permanente. Esto le ayudará a
no confundirse cuando haga conexiones posteriormente.
Nota:
o No conecte el conector de la alimentación hasta
después de haber hecho todas las conexiones. Si no
hay tapas de plástico en los cables de conexión, aísle
los cables expuestos con cinta aislante para usos
eléctricos hasta que esté listo para utilizarlos.
Identifique los cables en el orden slguente.
Cable de la alimentación
Si su vehículo tiene una radio o está precableado para
poder conectar una:
Corte los cables del conector uno a uno (dejándolos tan
largos como sea posible) para poder trabajar con ellos
individuamente.
Ponga la llave de contacto en la posición de accesorios y
conecte uno de los cables de la bombilla de prueba a masa
del chasis. Toque con el otro cable de la bombilla de prue
ba cada uno de los cables expuestos procedentes del
conector de la radio. Toque un cable cada vez hasta
encontrar el que encienda la bombilla.
Ahora ponga la llave de contacto en la posición de desac
tivación y luego en la de activación. Si la bombilla también
se enciende y se apaga, ese cable será el de la ali
mentación del vehículo.
Si su vehículo no está cableado para una unidad de audio:
Vaya al bloque de fusibles y encuentre el puerto de fusible
para los accesorios (ACC) o el encendido (IGN).
CfYilVMSSOOU
55
Page 56

Guía de iostaìagion
(continuación)
□ Conecte todos los cables
Ahora que ha identificado todos los cables del vehículo,
estara listo para conectarlos a los cables de la unidad con
troladora El diagrama de conexiones {«=> paginas 57, 58)
muestra las conexiones apropiadas y la codificación de
colores de los cables
Le recomendamos que haga pruebas con el aparato antes
de hacer la instalación final
Puede colocar el aparato en el suelo y hacer conexiones
temporales para probarlo Utilice cinta aislante para usos
eléctricos y cubrirtodos los cables expuestos
@
t
n
Importante
• Conecte el cable de alimentación rojo en ultimo
lugar, después de haber hecho y aislado todas las
demás conexiones
Masa
Conecte el cable de masa negro del conector de ali
mentación al chasis metálico del vehículo
Alimentación
Conecte el cable de alimentación rojo al cable correcto de
la radio del vehículo o al puerto de fusible apropiado ubi
cado en el bloque de fusibles
Si el monitor LCD funciona correctamente con todas estas
conexiones hechas, desconecte los cables y realice la
instalación final
□ Instalación final
Conexiones de los cables
Conecte todos los cables, asegurándose de que cada
conexión este aislada y segura Agrupe todos los cables
sueltos y apriételos con una cinta para que no se caigan
más adelante
lEnhorabuena' Después de hacer unas comprobaciones
finales estará listo para disfrutar de su nuevo monitor LCD
de vehículo
□ Comprobaciones finales
1 Asegúrese de que todos los cables estén conectados y
aislados correctamente
2 Active el encendido para comprobar si el aparato fun
ciona correctamente
Si tiene dificultades, consulte a su instalador profesional
autorizado más cercano para que le ayude
< Ejemplo de la instalación >
Advertencia
o Dónde y cómo se instala este aparato cambia de acuerdo con el modelo de vehículo pertinente Por lo tanto, la infor
mación contenida en esta guia de instalación ha sido preparada para instaladores profesionales, no para personas
que carezcan de los debidos conocimientos técnicos
56
(Mi5MífiED
Page 57

Conexiones eléctricas
Precauciones
• Este producto ha sido diseñado para funcionar con una batería de 12 V CC con masa negativa
• Para prevenir daños a la unidad asegúrese de seguir el diagrama del cableado de esta página
• Quite aproximadamente ’/V' (5 mm) de la extremidad del revestimiento de los conductores antes de hacer las conexiones
• No inserte el conector de alimentación en el aparato hasta que haya terminado el tendido eléctrico
• Asegúrese de aislar cualquier cable expuesto a un posible cortacircuito del chasis del automóvil Sujete todos los
cables y mantenga los terminales de los cables libres de roces con cualquier parte metálica
• Recuerde si su automóvil tiene una computadora de conducción o una computadora de navegación, los datos de su
memoria pueden quedar borrados cuando se desconectan los terminales de la batería
• La conexión del freno de estacionamiento deberá realizarla un instalador profesional En caso de dificultad, consulte
a su centro de servicio Panasonic autorizado más cercano
• Todos los demás métodos de instalación requieren la utilización de accesorios metálicos especiales Consulte a un
ingeniero de servicio cualificado o a su concesionario en caso de que resulten necesarios otros métodos
□ Diagrama de cabieado
Unidad de viduahzación
0 Cable de conexión
ik REMOTE OUT ]== Z ^
(Negro)
VTR IN
(Amarillo)
ACC ~H "aT ~
(Rojo) Fusible de 3 A
(Negro)
SIDE BRAKE
(Franjas azul/amarilla)
Notas
• Asegúrese de enchufar completamente el conector
• La imagen tal vez no sea estable cuando se conecten aparatos para jugar
Cable del receptor de señales procedentes del mando a distancia
Al terminal REMOTE-IN o al cable del receptor
de señales procedentes de! mando a distancia
del reproductor DVD Panasonic (CX-DV700U)
Cable de entrada de vídeo
Al conector de salida de video del reproductor
DVD Panasonic (CX-DV700U)
Cable de alimentación de accesorios
A la alimentación de accesorios, +12 V CC
Cable de masa
A una parte metálica desnuda del chasis del vehículo
Cable de conexión del freno de estacionamiento
Asegúrese de conectar el cable del freno de
estacionamiento por segundad y para evitar
accidentes (*=^ pagina 59)
CiY¿VM5800U
57
Page 58

Conexiones eléctricas
(continuación)
□ Configuración básica del sistema
Ejemplos de combinación
o Reproductor DVD (CX-DV700U)
Precaución
e Por razones de segundad, pida a su instalador profesional más cercano que !e haga esta conexión
Nota
o Consulte además los manuales de instrucciones de los aparatos conectados
Freno de estacionamiento
Luz del freno (I) Conector de abrazadera
Chasis del vehículo
-1 Coloque el conector de abrazadera (D en el extremo
del cable de conexión del freno de estacionamiento
Llega hasta este punto
Cable de conexión del freno de estacionamiento
(Franjas azut/amarilla)
La posición del interruptor
del freno de estacionamiento
depende del modelo del
vehículo
Interruptor del treno de estacionamiento
Cable de conexión del freno de
estacionamiento
(Fran)as azul/amarilla)
Cuando se tire de la palanca del freno
de estacionamiento, este cable se
conectará a masa en el chasis del
vehículo
p E! conector de abrazadera (g) se conecta al cable del
^ lado de alimentación de la palanca del treno de esta
cionamiento
58
Page 59

□ Configuración de sistemas avanzados
Ejemplos de combmaciórt
• Selector AV(CA-LA20U)
• Monitor LCD en col o r/rep reductor CD, DVD (CY-VMD9000U)
Notas
• Consulte además los manuales de instrucciones de los aparatos conectados
• El diseño exterior mostrado para el CA-LA20U es diferente del diseño exterior del producto real
UNIDAD DE VISUALIZACIÓN
CY-VMD9000U (PARTE TRASERA)
CiY¿VM5800U
59
Page 60

Solución de problemas
Pasos preliminares
Comprijebe y siga los pasos descritos en las tablas de la
página siguiente
Si cree que hay algo que no funciona
bien
Desconecte inmediatamente la alimentación
Desenchufe el cable de la alimentación y compruebe que
no haya humo ni calor procedentes del aparato antes de
solicitar la reparación No trate nunca de reparar usted
mismo el aparato, porque es peligroso
@
©
Mantenimiento
P
Su producto esta diseñado y fabricado para minimizar la
necesidad de mantenimiento Use un paño blando para
®
hacer la limpieza externa de rutina Nunca use bencina,
0=
diluyeme, u otros solventes
í)6
Mantenimiento del producto
Si las sugerencias de los cuadros no son suficientes para
solucionar el problema, recomendamos que lleve el apara
to para su Cento de Servicio Panasonic autorizado más
cercano El mantenimiento deberá ser hecho solamente
por un técnico calificado
Precauciónes
® No emplee el aparato si no funciona bien o si hay
algún problema
® No emplee el aparato en un estado anormal, por
ejemplo, sin visualización, o con humo o mal olor,
porque pueden producirse fuego o descargas
eléctricas Deje de utilizarlo inmediatamente y
llame a la tienda donde lo compró
Cambio defusibie
Utilice fusibles del mismo amperaje especificado {3 A) La
utilización de sustitutos diferentes o de un fusible de
mayor amperaje, o la conexión directa del producto sin
utilizar un fusible, podría causar un incendio o estropear el
aparato
Si talla el fusible de recambio, póngase en contacto con
el centro de servicio Panasonic más cercano para que le
hagan las reparaciones necesarias
60
CiY¿UM5800U
Page 61

Consejos para solucionar problemas
Problema
Hay puntas rojos, azules K
y verdes en la pantalla
No hay imagen
El mando a distancia no
funciona
La pantalla está oscura
Las partes blancas y
negras de la pantalla
están invertidas
La pantalla está
demasiado blanca
Causa/remedio Página
r
Esta es una característica de los paneles de cristal liquido, no es ningún
problema
(El panel de cristal liquido esta fabricado con una tecnología de muy alta
precisión y tiene un mínimo de! 99,99% de pixeles de imagen efectivos
Tenga en cuenta que en un 0,01 % del pane! podrá haber pixeles que falten
0 que estén constantemente encendidos )
• ¿Está conectado el cable de conexión de! freno de estacionamiento*?
(Cable con franjas azul/amarilla)
• ¿Está activada la palanca del freno de estacionamiento*?
• ¿Se ha agotado la pila*?
• ¿Ilumina una luz intensa al mando a distancia*?
{
[Brillo, nivel del negro y contraste]
¿Están bien hechos los ajustes*?
59
____
47
--------
51,
52
J
\
El color es pálido El matiz está apagado
[Color y matiz]
¿Están bien hechos los ajustes*?
52
61
(g№Mj)SOO
Page 62

Mantenimiento
Prevención de daños en el exterior del sistema
Evite aplicar pesticidas, bencina, diluyente u otras sustancias
volátiles al aparato
La superficie del aparato consiste principalmente en materiales de
plástico No la limpie con bencina, diluyente o sustancias similares
porque la superficie perderá el color o se desprenderá la pintura
Cuando se utilice un paño con un producto químico de limpieza, siga
las instrucciones de precaución que lo acompañan
No deie el aparato en contacto con productos de goma o vinilo
durante largos plazos de tiempo
No utilice productos de limpieza con gránulos de pulir porque podrían
estropear la superficie del aparato
@
©
P
w
Limpieza pasando suavemente un paño blando
Cuando el aparato esté sucio, limpíelo pasando un paño bien escurri
do que haya sido humedecido antes en un producto de limpieza para
vapllas (neutro) diluido en agua, y luego pase por la misma superficie
un paño seco
(Como existe la posibilidad de que entren gotas de agua en el interior
del aparato, no aplique directamente el producto de limpieza a la
superficie )
Escurra bien
Producto de limpieza para vajillas diluido en agua
Precaución
o Si entran gotas de agua o de sustancias liquidas similares en el monitor a través de la superficie del panel de cristal
liquido, es posible que se produzca un funcionamiento defectuoso
Pase el paño suavemente Pase un paño seco sobre la
misma superficie
62
i ' 11 il 1 i t J
VM5800U
.isj UiMïï aÉ
,1 i, í,
Page 63

Especificaciones
□ Sistema en generai
Alimentación
Consumo
Gama de temperaturas de utilización
Gama de temperaturas para guardar el aparato
a Unidad de visualización
Panel de cristal liquido
Dimensiones de la pantalla
Ancho
Alto
Diagonal
Numero de pixeles
Método de visualización
Método de excitación
Fuente de luz
Dimensiones (AnxAlxprof)
Peso
Nota
• Las especificaciones y el diseño están sujetos a cambios sin previo aviso debido a mejoras en tecnología
12 V CC (11 V-16 V) tensión de prueba de 14,4 V, masa negativa
Menos de 1,0 A
32“Fa104“F (0'’Ca40“C)
-4“Fa176"F (-20Xa80“C)
5,8"
5" (127 mm)
2’Vi6" (74 mm)
5'W (147 mm)
280 800 pixeles (234 verticalx400 horizontalxS)
Formato de filtro de color transparente
Formato de matriz activa TFT (transistor de película fina)
Luz interna (luz fluorescente de cátodo en color, forma de U)
6Va"X4Vz"x 15/i6" (155X113X33 mm)
15oz (420 g)
GiYíVIVISaOOU
w i’' II
63
Page 64

Panasonic Consumer Electronics
Company, Division of Matsushita
Electric Corporation of America
One Panasonic Way, Secaucus,
New Jersey 07094
http://www.panasonic.com
Panasonic Sales Company.
Division of Matsushita Electric of
Puerto Rico, Inc. (“PSC”)
Ave. 65 de infanteria, Km. 9.5
San Gabriel Industriai Park,
Carolina, Puerto Rico 00985
http://www.panasonic.com
YFM284C3472A TAMAC00201-1041 Printed in Taiwan
Panasonic Canada Inc.
5770 Ambler Drive,
Mississauga, Ontario
L4W 2T3
http://www.panasonic.ca
Imprimé à Taiwan
Impreso en Taiwan
 Loading...