

Page 1
Operating
Instructions
Panasonic.
High-sensitivity Card
Model No. AW-PB303
Bflfnr« iti^fnixtng to coo'>ect oi operai« tNs product
plee$e read these msttucbons
and fravO tNs manual tor future uM
Page 2

CAUTION
RISK OF ELECTRIC SHOCK
A
CAUTION:
TO REDUCE THE RISK OF ELECTRIC SHOCK, DO
NOT REMOVE COVER (OR BACK). NO USER SER*
VICEABLE PARTS INSIDE,
REFER SERVICING TO QUALIFIED SERVICE PER
SONNEL.
The lightning flash with arrowhead sym
bol, within an equilateral triangle, is
intended to alert the user to the pres
ence of uninsulated "dangerous voltage"
A
SA 1965
within the product's enclosure that may
be of sufficient magnitude to constitute a
risk of electric shock to persons.
The exclamation point within an equilat
eral triangle is intended to alert the user
to the presence of important operating
and maintenance (servicing) instructions
in the literature accompanying the appli
ance.
r
I---------------------------------------------------------------------------------------ForU.S.A-
NOTE: This equipment has been tested and found to com
ply with the limits for a Class A digital device, pursuant to
part 15 of the FCC Rules. These limits are designed to pro
vide reasonable protection against harmful interference
when the equipment is operated in a commercial environ
ment. This equipment generates, uses, and can radiate
radio frequency energy and, if not installed and used in
accordance with the instruction manual, may cause harmful
interference to radio communications. Operation of this
equipment in a residential area is likely to cause harmful
interference in which case the user will be required to cor
rect the interference at his own expense.
---------------------------------------------------------------------------------For CANADA
This Class A digital apparatus complies with Canadian \
ICES-003.
Cet appareil numérique de la classe A est conforme à la
norme NMB-003 du Canada.
The information marking of this product may be found on the
bottom of the unit.
The serial number of this product may be found on the bot
tom of the unit.
You should note the serial number of this unit in the space
provided and retain this book as a permanent record of your
purchase to aid identification in the event of theft.
Model No._________________________________________
Serial No.
-------------------------------------------------------------------
WARNING:
TO PREVENT FIRE OR SHOCK HAZARD, DO NOT EXPOSE THIS APPLIANCE TO RAIN OR MOISTURE.
-2-
Page 3

CONTENTS
WARNING/CAUTION FOR SAFETY....................................................................................................................................... 4
PREFACE ................................................................................................................................................................................ 5
PRECAUTIONS ....................................................................................................................................................................... 5
MAJOR OPERATING CONTROLS AND THEIR FUNCTIONS
MOUNTING ............................................................................
CONNECTION .......................................................................
OPERATING PROCEDURES ................................................
MENU ITEM SETTING
APPEARANCE .......................................................................
SPECIFICATIONS .................................................................
STANDARD ACCESSORIES
..........................................................
................................................
6
7
9
11
12
16
17
17
-3-
Page 4

WARNING/CAUTION FOR SAFETY
A
WARNING
Refer all servicing to qualified personnel
To reduce the risk of electric shock, don't remove
cover or back, unless you are a qualified personnel.
Refer all mountings, connections, servicing to quali
fied service personnel.
• No water or moisture inside
Do not let water or moisture into the product, or
expose it to moisture, to prevent a fire and electric
shock.
If you see smoke or smell an odor from the product,
if water or other foreign matter gets inside, if it is
damaged by dropping, or if you find anything
wrong with it, immediately stop using it.
Do not disassemble or modify the product to
prevent a fire and electric shock.
A
CAUTION
Do not drop the product, do not expose it to strong
shock, or do not step on it, to prevent a fire and
injuries.
Do not install the product at a place full of moisture
and dust, which may cause a fire and electric
shock.
Do not cover the port or otherwise block ventilation
during operation. Internal heat buildup can cause a
fire.
-4-
Page 5

PREFACE
Camera sensitivity can be increased by up to 100 times
by inserting the high-sensitivity card AW-PB303 into a
convertible camera, AW-E300, for example, because its
CCD storage (slow shutter) raises camera sensitivity.
PRECAUTIONS
• Power Off Before Connecting or Disconnecting
Cables
Before plugging or unplugging the cables, be sure
to switch power off.
• Handle Carefully.
Do not drop the product, or subject it to strong
shock or vibration. This is important to prevent trou
•
ble,
• Avoid Humidity and Dust.
Avoid using the product at a humid, dusty place
because much humidity and dust will cause dam
age to the parts inside.
The card also permits zoom and focus control from a
remote control box, WV-CB550, for example.
Operating Temperature Range
Avoid using the product at a cold place below
-10°C or at a hot place above +45°C because
extremely low or high temperature will adversely
affect the parts inside.
Cooling fan
There is a cooling fan in the card. It is an expend
able part, and should be replaced with a new one
about every 50,000 hours. (Whenever fan replace
ment is necessary, be sure to ask the store where
you purchased the card to do it for you.)
-5-
Page 6
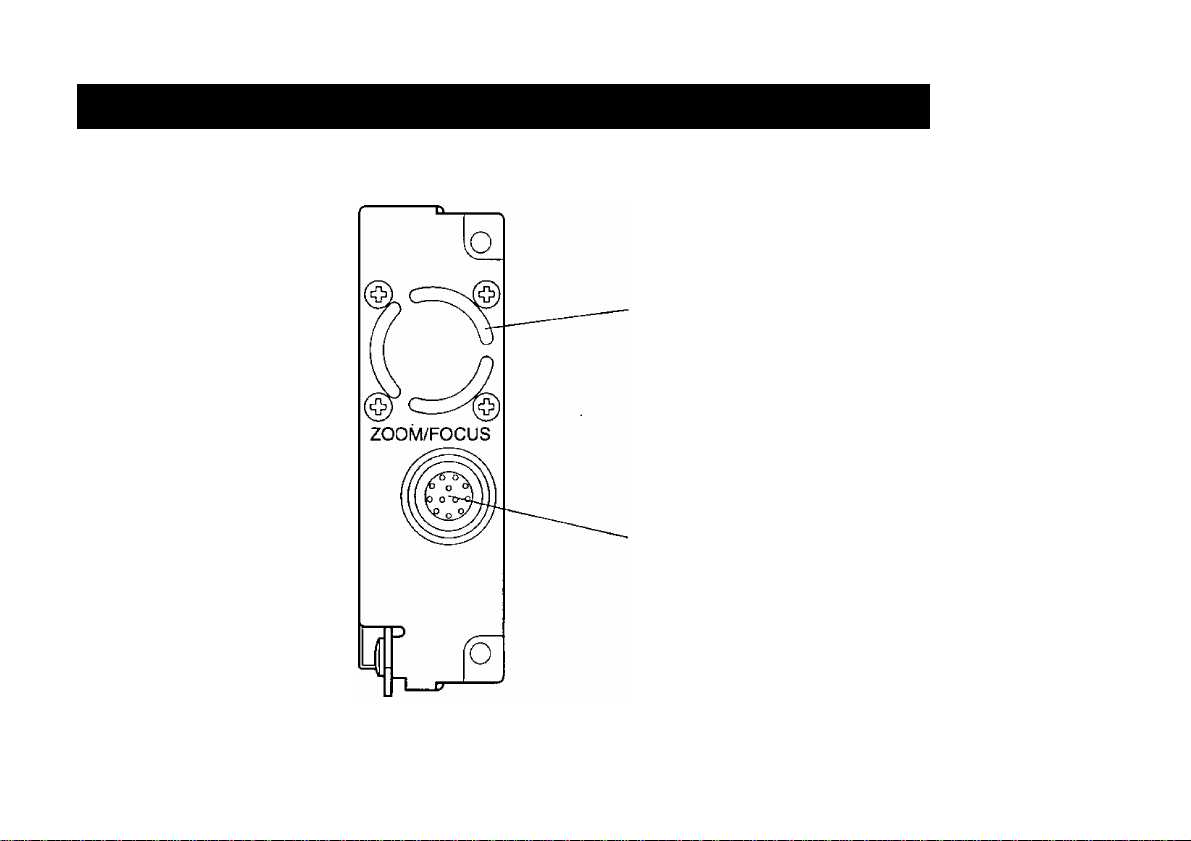
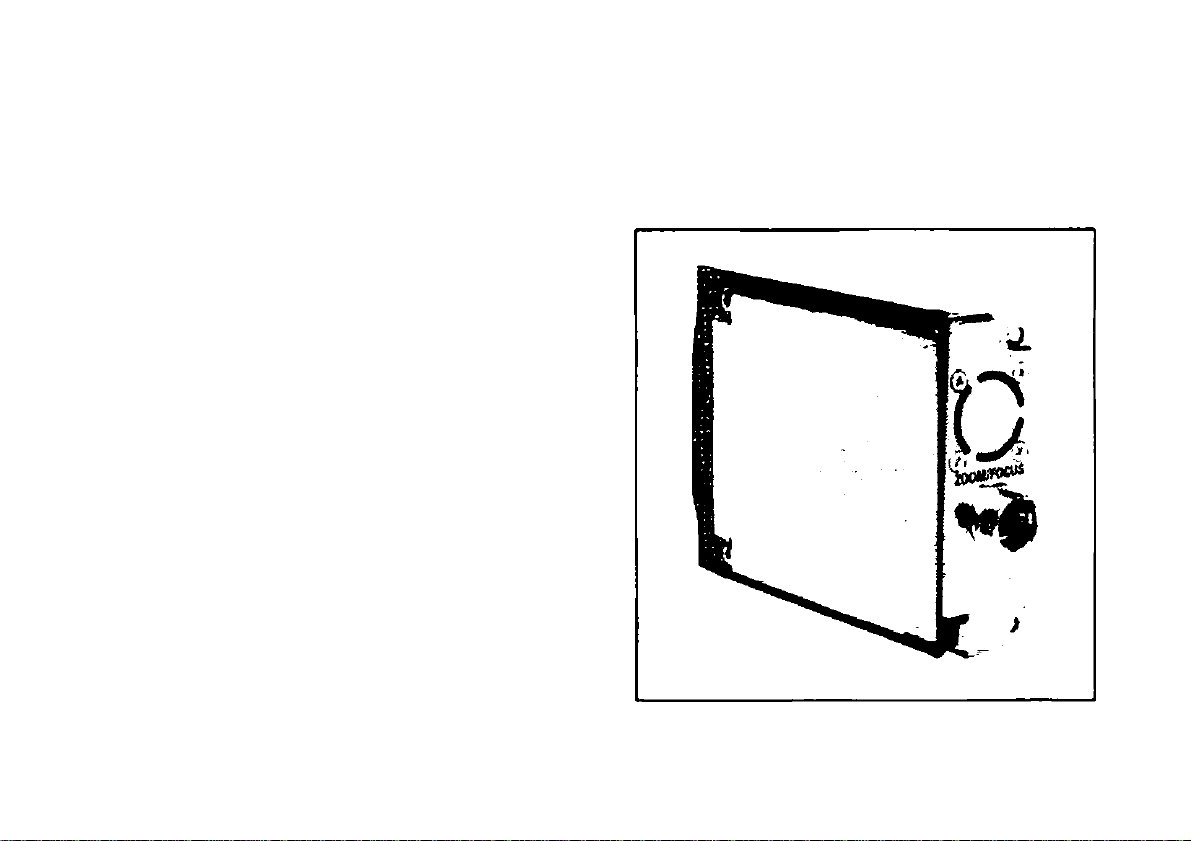
MAJOR OPERATING CONTROLS AND THEIR FUNCTIONS
-Cooling fan (interna!) ventilating port
Do not cover the port or otherwise block
ventilation during operation.
Internal heat buildup can cause a fire.
The fan has a service life of about 50,000 hours.
(at a room temperature of 25°C) Repiace the fan
that has come to the end of its service life.
(If the fan is used at a room temperature of 35°C,
repiace it about 30% sooner.)
Whenever fan replacement is necessary, be sure to
ask the store where you purchased the set.
■ ZOOM/FOC U S con nector
This is a standard iens input terminal with a zoom/tocus
remote function.
If you are using a Panasonic pan/tilt head (AW-PH300),
connect the remote cable to the LENS i/F connector on
the pan/tilt head, not to the ZOOM/FOC US connector.
-6-
Page 7

MOUNTING
CAUTION--------------------------------------------------------
' Be sure to ask your store, where you purchased
the product, for mounting.
' Disconnect the camera power connector before
mounting.
' Before handling the card, touch a metal part of
the camera to discharge the static from the
human body.
An anti-static wrist strap is recommended for
added safety.
If you touch the card while you are still charged
with static, it may cause trouble.
> Keep the metal parts of the card free of contact
with other metal parts.
(1) Switch the camera off, and disconnect the power
connector and other cables from the camera.
(2) Loosen the four screws on the rear of the camera
and remove the rear panel.
(3) Loosen the two screws for the option card slot and
remove the cover.
(4) Insert the High-sensitivity card along the guide rail
at the bottom of the camera and the tab above.
Insert it securely all the way.
(5) Tighten the two card setscrews securely.
If you have lost the screws, use the screws {6 mm
long) supplied as accessories.
(6) Fasten the rear panel with the four screws.
If you have lost the screws, use the screws {8 mm
long) supplied as accessories.
(7) Plug the cables back as necessary, connect the
power connector, then switch power on.
-7-
Page 8

Page 9

CONNECTION
• Before cable connection, switch power off.
• Use the AC adaptor AW-PS505 for power supply.
• For details on connecting individual devices, refer to the respective operating instructions.
Remote Cable {for 200M/F0CUS control)
120V AC
60Hz
Page 10

In case of using a remote control box WV-CB550
Connect the remote control box to the camera with three coaxial cables (video signal, G/L signal, control signal) (5C-2V
or equivalent, 300 m in maximum extension length).
60Hz
-10*
Page 11

OPERATING PROCEDURES
For details on operation and adjustment, refer to the
operating instructions for the camera.
(1) Switch on the individual devices.
(2) Adjust lens flange-back.
• Flange-back adjustment is necessary if you are
using the camera for the first time, or if the tens has
been changed.
• A long charge time makes adjustment difficult. It is
recommended, therefore, that you adjust it after set
ting the charge time to OFF in a bright place (See
page 13.).
(3) Set the charge time according to the intensity of
illumination of the object you are shooting.
(See page 13.)
(4) Adjust the lens iris and focus.
(5) Adjust the white balance.
• It is necessary if you are using the camera for the
first time, or if you haven’t used it for a long time.
• It is also necessary if a change has been made in
the lighting conditions or light intensity.
• Once adjusted, the white balance does not need to
be adjusted again unless the conditions of use are
changed.
(6) Adjust the black balance.
• It is necessary if you are using the camera for the
first time, or if you haven’t used it for a long time.
• It is also necessary if the ambient temperature has
considerably changed or at the turn of a season.
• Once adjusted, the black balance does not need to
be adjusted again unless the conditions of use are
changed.
• After inserting the card AW-PB303, it takes a longer
time for black balance adjustment because of the
black balance correction that takes place during
storage operation.
(7) Shoot the object.
(After using the camera, switch off the individual
devices.)
• To change the camera settings according to the use
and conditions, refer to the operating instructions for
the camera,
• To change the charge time set, see page 13.
-11-
Page 12

MENU ITiEM SETTING
A convertible camera, for example, AW-E300, can be
set using the menu as suited to the system and shooting
conditions. For details, refer to the operation manual for
the camera.
Setup Procedures
(1) Keep the MENU switch depressed for longer than 5
seconds to call the main menu.
(2) The setting item (flashing) changes each time the
MENU switch, ITEM switch, or NO switch is
pressed.
Select [Option Card Set] and press the YES switch
to display the (Option Card Set] submenu.
(3) Select an item to set using the MENU switch and
ITEM switch.
(4) Change the settings using the YES and NO switch
es.
(5) Select [Return] with the MENU switch and ITEM
switch, and press the YES switch to return to the
main menu.
(6) Return to be ready for shooting.
Select [End] with the MENU switch or ITEM switch,
and press the YES switch.
Then, the camera will operate as set.
CAMERA
1.
MENU Switch (t)
ITEM Switch (A)----
YES Switch (+)
NO Switch (-)----------
---
fTEM*wC
-------
-+0
ri%№C
■o
MENU
+0
L
CUniON CAPO
Main Menu of User Mode
**User Mode Set** --------
Iris, Shutter, Gain Set
Color Set
Q/h, Color Bar Set
Detail Setl Detail Set2
Color Matrix Set
Other J3et _,
,^tioii Card Set;
Initialize bate
End
_
Use mode shown
To return to be
ready for shooting
-12-
Page 13

Option Card Set Submenu
♦♦option Card Sot**
o
o
- Chargo Timo
- AOC Max.
Return
Auto
18dB
O Charge time setting (Set CCD storage time.)
• CCD reading field storage
Setting ! Auto—^OFF—^1/30—> 1/15—^1/8—^1/4—>
1/2->1-42
Auto ; Camera automatically adjusts light quantity
in the order of ALC-»AGC->Storage.
OFF : No storage. Ordinary read
1/30 : Storage for 1/30 second. Sensitivity is
about twice as high as that when OFF is
set.
1/15 : Storage for 1/15 second. Sensitivity is
about twice as high as that when 1/30 sec
ond is set.
1/8
Storage
twice as
for 1/8 second. Sensitivity is about
high as that when 1/15 second is
set.
1/4
Storage
twice as
for 1/4 second. Sensitivity is about
high as that when 1/8 second is
set.
1/2
Storage
twice as
for 1/2 second. Sensitivity is about
high as that when 1/4 second is
set.
Storage
twice as
for 1 second. Sensitivity is about
high as that when 1/2 second is
set.
Storage
twice as
for 2 second. Sensitivity is about
high as that when 1 second is set.
CCD reading frame storage
Setting: Auto^OFF->1/15-^1/8->1/4->1/2^1->2
Auto : Camera automatically adjusts light quantity
in the order of ALC^AGC-^Storage,
OFF
; No storage. Ordinary read
: Storage for 1/15 second. Sensitivity is
1/15
about twice as high as that when OFF is
set.
1/8
: Storage for 1/8 second. Sensitivity is about
twice as high as that when 1/15 second is
set.
-13-
Page 14

1/4 ; Storage for 1/4 second. Sensitivity is about
twice as high as that when 1/8 second is
set,
1/2 : Storage for 1/2 second. Sensitivity is about
twice as high as that when 1/4 second is
set.
1 : Storage for 1 second. Sensitivity is about
twice as high as that when 1/2 second is
set.
2 : Storage for 2 second. Sensitivity is about
twice as high as that when 1 second is set.
Note 1: Field storage and frame storage (For
details, refer to the operating instructions for the
camera.)
There are two ways of CCD read: field storage
read and frame storage read. In case of stor
age operation using the high-sensitivity card,
frame read increases the vertical resolution over
field read, and produces pictures of higher defi
nition, but lowers the sensitivity by half. If frame
read is set, therefore, the minimum intensity of
illumination will be about one half the specified
value.
Note 2: Electronic shutter operation (For details,
refer to the operating instructions for the cam
era.)
The electronic shutter does not work during
storage operation (other than when Auto or OFF
is set).
Under halogen lights or fluorescent lights, or in out
door mode
• [AUTO ND (ELC)] selection is inhibited.
(Unselectable)
• If [Fine] is chosen in [V Resolution] selection, the
electronic shutter only will be off.
In user mode
• [Shutter mode] selection is inhibited.
(Unselectable)
• If [Frame 2] is chosen in [Field/Frame] selection,
the electronic shutter only will be off. When
[Frame 1] or [Frame 2) is selected, display will
be in [Frame], Operation is the same as when
[Frame 1] is selected.
-14-
Page 15

* Neither step nor synchro scan is valid in Auto
mode.
The ELC (AUTO ND) function only can be turned on
or off.
When the ELC (AUTO ND) function is turned on,
light quantity is automatically adjusted in the order
of ELC—^ALC—^AGC—^Storage.
• Operation with this function turned OFF is the
same as normal camera operation.
O AGC Max. setting
The upper limit of AGC in Auto mode can be set as
follows:
With AW-E300
Setting: OFF—>6 dB—>12 dB—>18 dB—>24 dB—>
30 dB->Night eye
With AW-E600
Setting: OFF^6 dB^12 dB->18 dB->24 dB^
30 dB->Night eye L^Night eye H
-15-
Page 16

APPEARANCE
"TH
TO
Unit: mm (inch)
_____
-16-
Page 17

SPECIFICATIONS
Source voltage:
Power consumption:
Operating temperature:
Operating humidity:
Dimensions:
Weight:
Weight and dimensions indicated are approximate.
Specifications are subject to change without notice.
12 V DC (supplied from camera)
3.5 W
-10°C to +45“C (14“F to +113°F)
30 % to 90 %
21.5 (W) X 70 (H) X 98 (D) mm [27/32" x 2-3/4" x 3-7/8”]
80 g
STANDARD ACCESSORIES
Screw (6 mm long)
Screw (8 mm long)................................................4 pcs.
...............................................
2 pcs.
-17-
Page 18

Important! Combined Use of Convertible Camera and High-sensitivity
Card
The high-sensitivity card AW-PB303 can be combined only \with camera of the versions shown in the table below.
Check the compatibility of your high-sensitivity card and camera, referring to the table.
If your camera is not compatible with your high-sensitivity card, consult the store where you purchased it.
AW-PB303
AW-E300
AW-E600
The camera version is shown on the bottom of the camera.
Cameras of older than Ver. A have no seal showing their version
number.
Caution: There are restrictions as follows in using cameras that have a built-in high-sensitivity card.
• It may take about a minute to adjust Automatic White Balance Control (AWC) or Automatic Black Balance
Control (ABC).
• Black balance or white balance may not be able to be fully adjusted by the ABC, AWC, or Automatic Tracing
White Balance Control (ATW) function while sensitivity is being raised by CCD storage.
• Loss of some CCD pixels, not visible during ordinary operation, will be seen due to the high level of sensitivity
raised by the high-sensitivity card.
Compatible with Ver. A and later versions
Compatible with Ver. A and later versions
-18-
Page 19

Panasonic
PANASONIC BROADCAST & DIGITAL SYSTEMS COMPANY
DIVISION OF MATSUSHITA ELECTRIC CORPORATION OF AMERICA
Executive Office;
EASTERN ZONE:
Mid-Atlantic:
Southeast Region:
Central Region;
WESTERN ZONE:
Dallas Region:
Government Marketing Department:
PANASONIC CANADA INC.
5770 Ambler Drive. Mississauga, Ontario, L4W 2T3 (905)230-2115
PANASONIC SALES COMPANY
DIVISION OF MATSUSHITA ELECTRIC OF PUERTO RICO, INC.
San Gabriel Industrial Park. 65th Infantry Ave., KM9.6 Carolina, Puerto Rico 00630 (809) 750-4300
3330 Cahuenga Blvd W., Los Angeles, CA 90068
(323) 436-3500
One Panasonic Way 4E-7, Secaucus, NJ 07094 (201) 340-7621
One Panasonic Way 4E-7, Secaucus, NJ 07094 (201) 340-7621
1225 Northbrook Parkway, Ste 1-160 Suwanee. GA 30024
(770) 338-6045
1707 N Randall Road El-C-I. Elgin, IL 60123 (847) 460-5200
3330 Cahuenga Blvd W.. Los Angeles. CA 90068 (323) 436-3500
6226 Abington Way, Houston, TX 77008 (713) 802-2726
52 West Gude Drive, Rockville, MD 20850 (301) 738-3840
© 1999 Matsushita Communication Industrial Co.,Ltd.
NM0999-1119 7J1A378B Printed in Japan
 Loading...