

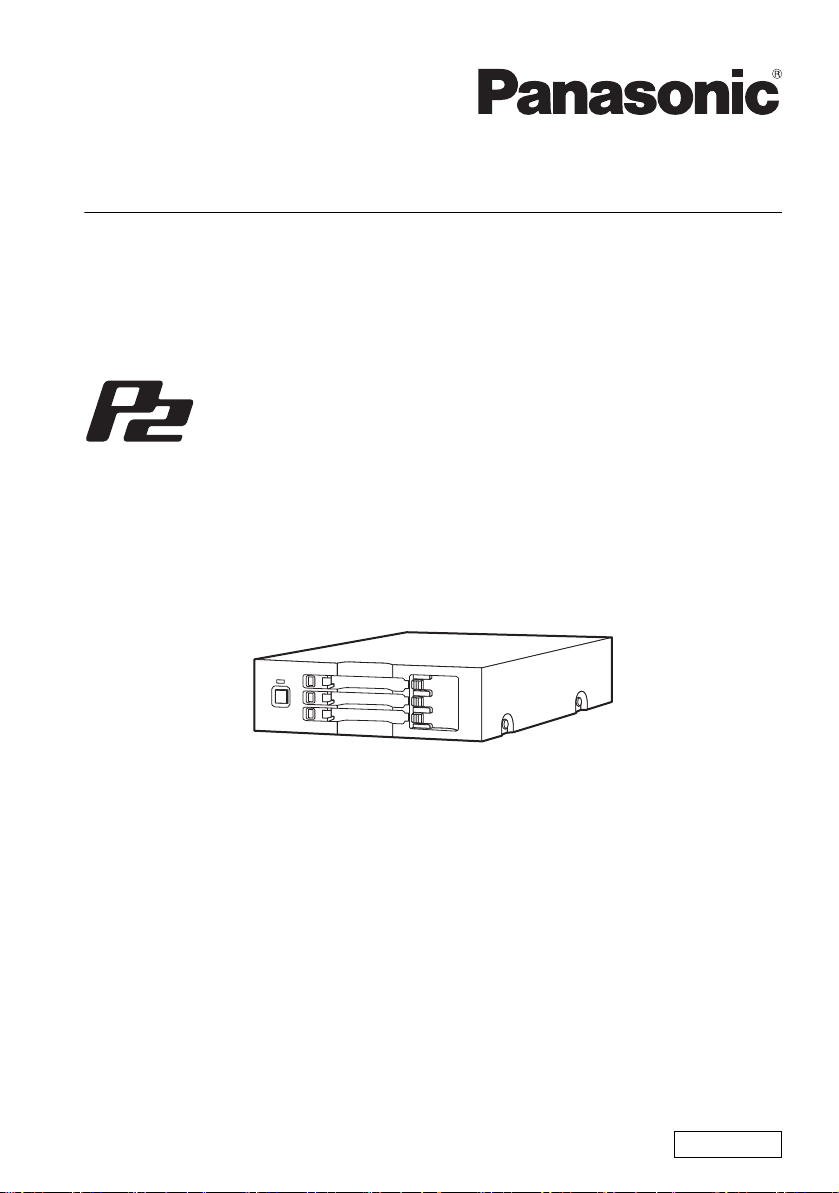
Operating Instructions
Memory Card Drive
Model No.AJ-PCD30P
Model No.AJ-PCD30E
Before operating this product, please read the instructions carefully, and save this
manual for future use.
SS0611AK1091 -FJ
Printed in Japan VQT3R23-1
ENGLISH
Read this first!
WARNING:
This apparatus must be earthed.
To ensure safe operation the three-pin plug must be inserted only into a standard three-pin
power point which is effectively earthed through the normal house-hold wiring.
Extension cords used with the equipment must be three-core and be correctly wired to provide
connection to earth. Wrongly wired extension cords are a major cause of fatalities.
The fact that the equipment operates satisfactorily does not imply that the power point is
earthed and that the installation is completely safe. For your safety, if in any doubt about the
effective earthing of the power point, consult a qualified electrician.
WARNING:
z To reduce the risk of fire or electric shock, do not expose this equipment to rain or moisture.
z To reduce the risk of fire or electric shock, keep this equipment away from all liquids. Use
and store only in locations which are not exposed to the risk of dripping or splashing liquids,
and do not place any liquid containers on top of the equipment.
WARNING:
Always keep accessories (rubber feet, mounting screws) out of the reach of babies and small
children.
CAUTION:
To reduce the risk of fire or electric shock and annoying interference, use the recommended
accessories only.
CAUTION:
The mains plug of the power supply cord shall remain readily operable.
The AC receptacle (mains socket outlet) shall be installed near the equipment and shall be
easily accessible.
To completely disconnect this equipment from the AC mains, disconnect the mains plug from
the AC receptacle.
For AJ-PCD30P and AJ-PCD30E
indicates safety information.
2
Read this first! (continue)
FCC NOTICE
NOTIFICATION (Canada)
Declaration of Conformity
Model Number: AJ-PCD30P
Trade Name: Panasonic
Responsible Party: Panasonic Corporation of North America One Panasonic Way, Secaucus,
NJ 07094
Support contact: 1-800-524-1448
This device complies with Part 15 of the FCC Rules. Operation is subject to the following two
conditions:
(1) This device may not cause harmful interference, and (2) this device must accept any
interference received, including interference that may cause undesired operation.
To assure continued compliance, follow the attached installation instructions and do not make
any unauthorized modifications.
CAUTION:
This equipment has been tested and found to comply with the limits for a Class B digital device,
pursuant to Part 15 of the FCC Rules. These limits are designed to provide reasonable
protection against harmful interference in a residential installation. This equipment generates,
uses and can radiate radio frequency energy and, if not installed and used in accordance with
the instructions, may cause harmful interference to radio communications. However, there is
no guarantee that interference will not occur in a particular installation. If this equipment does
cause harmful interference to radio or television reception, which can be determined by turning
the equipment off and on, the user is encouraged to try to correct the interference by one of
the following measures:
z Reorient or relocate the receiving antenna.
z Increase the separation between the equipment and receiver.
z Connect the equipment into an outlet on a circuit different from that to which the receiver is
connected.
z Consult the dealer or an experienced radio/TV technician for help.
The user may find the booklet “Something About Interference” available from FCC local
regional offices helpful.
FCC Warning: To assure continued FCC emission limit compliance, follow the attached
installation instructions and the user must use only shielded interface cables when connecting
to host computer or peripheral devices. Also, any unauthorized changes or modifications to
this equipment could void the user’s authority to operate this device.
This class B digital apparatus complies with Canadian ICES-003.
For AJ-PCD30P
indicates safety information.
Notice (U.S.A. only):
Disposal may be regulated in your community due to Environmental considerations.
For disposal or recycling information, please visit Panasonic website:
http://www.panasonic.com/environmental or call 1-888-769-0149.
3
Read this first! (continue)
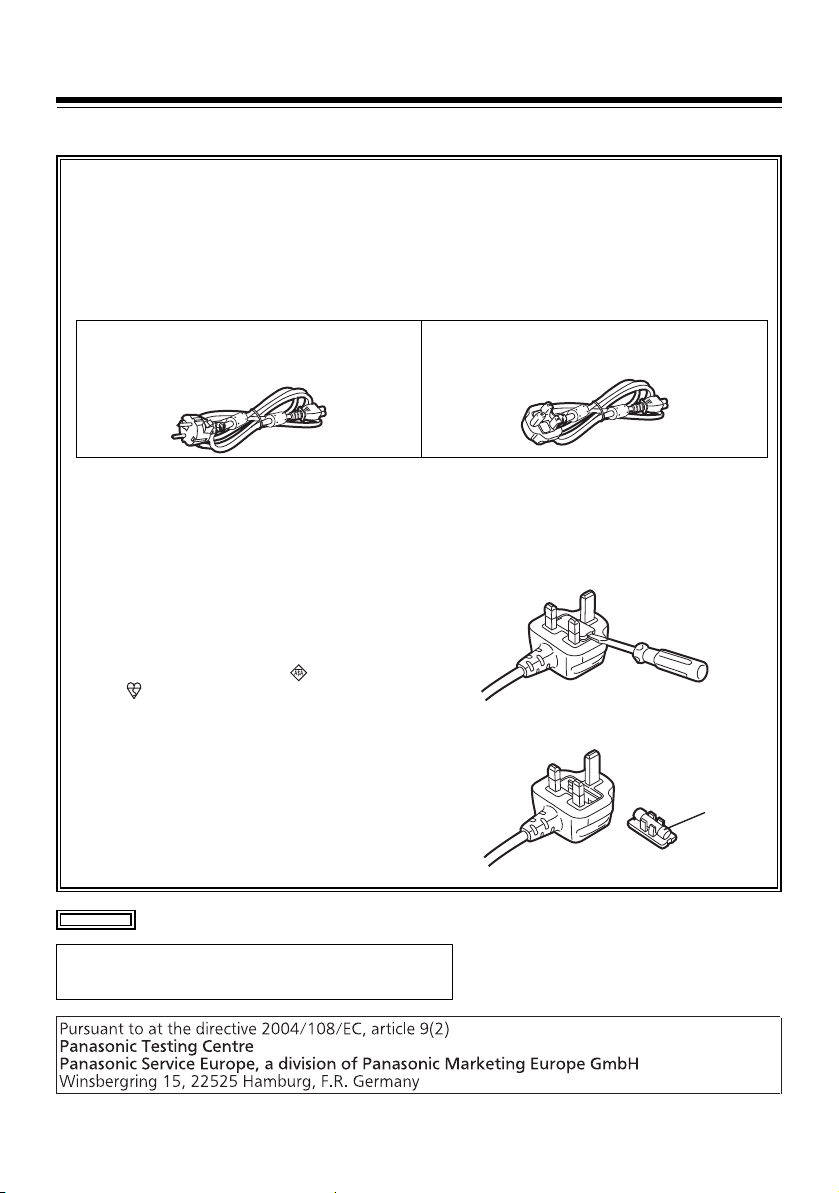
Caution for AC Mains Lead
FOR YOUR SAFETY PLEASE READ THE FOLLOWING TEXT CAREFULLY.
This product is equipped with 2 types of AC mains cable. One is for continental Europe, etc. and
the other one is only for U.K.
Appropriate mains cable must be used in each local area, since the other type of mains cable is
not suitable.
FOR CONTINENTAL EUROPE, ETC.
Not to be used in the U.K.
FOR U.K. ONLY
FOR U.K. ONLY
This appliance is supplied with a moulded
three pin mains plug for your safety and
convenience.
A 13 amp fuse is fitted in this plug.
Should the fuse need to be replaced
please ensure that the replacement fuse
has a rating of 13 amps and that it is
approved by ASTA or BSI to BS1362.
Check for the ASTA mark or the BSI
mark on the body of the fuse.
If the plug contains a removable fuse
cover you must ensure that it is refitted
when the fuse is replaced.
If you lose the fuse cover the plug must not
be used until a replacement cover is
obtained.
A replacement fuse cover can be
purchased from your local Panasonic
Dealer.
How to replace the fuse
1 Open the fuse compartment with a
screwdriver.
2 Replace the fuse.
Fuse
For AJ-PCD30E
EEE Yönetmeliğine Uygundur.
EEE Complies with Directive of Turkey.
4
indicates safety information.

Table of Contents
Read this first! . . . . . . . . . . . . . . . . . . 2
Before Use . . . . . . . . . . . . . . . . . . . . . . 6
Overview. . . . . . . . . . . . . . . . . . . . . . . . 6
Features . . . . . . . . . . . . . . . . . . . . . . . . 6
Supplied Accessories
(AJ-PCD30P/AJ-PCD30E) . . . . . . . . . . 7
Operating Environment
Required for Installation . . . . . . . . . . . 7
Parts and their Functions . . . . . . . . . . 8
Front Panel . . . . . . . . . . . . . . . . . . . . 8
Rear Panel . . . . . . . . . . . . . . . . . . . . 8
Inserting a P2 Card . . . . . . . . . . . . . . . 9
Removing a P2 Card . . . . . . . . . . . . . . 9
Write-protection of P2 Card . . . . . . . 10
Power management function
(automatic switch-off function) . . . . 10
Installation . . . . . . . . . . . . . . . . . . . . . 10
To Connect the device to a Personal
Computer for External Use . . . . . . . 11
Disconnect externally connected
P2 Driver . . . . . . . . . . . . . . . . . . . . . . 16
Installing a Windows P2 driver . . . . 16
Installing a Macintosh P2 driver . . . 16
Uninstallation . . . . . . . . . . . . . . . . . 16
Overview of dedicated software . . . 17
Power management setting
(Windows/Macintosh) . . . . . . . . . . . 17
Installation . . . . . . . . . . . . . . . . . . . 17
Uninstallation . . . . . . . . . . . . . . . . . 17
Starting up and shutting down
the Power Management Setting
Software . . . . . . . . . . . . . . . . . . . . . 17
Power Management Setting
Software window . . . . . . . . . . . . . . 18
P2 Drive internal setting
(Windows) . . . . . . . . . . . . . . . . . . . . 19
P2 Drive internal setting . . . . . . . . . 19
Canceling P2 drive internal setting . 19
Troubleshooting . . . . . . . . . . . . . . . . 20
Specifications . . . . . . . . . . . . . . . . . . 21
devices from your PC . . . . . . . . . . . 13
To Mount the device in a Personal
Computer 5-type Bay . . . . . . . . . . . 14
Microsoft, Windows and Windows Vista are trademarks of Microsoft Corporation of the United
States.
Macintosh, Mac and Mac OS are trademarks of Apple Inc. of the United States.
Other names of companies and products are trademarks or registered trademarks of the respective
companies.
z In these instructions, Microsoft
Business, Windows Vista
given as “Windows”, “Windows XP Professional”, “Windows Vista Business”, “Windows Vista
Ultimate”, “Windows 7 Professional” and “Windows 7 Ultimate”, respectively.
z Similarly, in these instructions, Macintosh
“Mac Pro” and “Mac OS X” respectively.
®
Windows®, Windows® XP Professional, Windows Vista®
®
Ultimate, Windows® 7 Professional, and Windows® 7 Ultimate, are
®
, Mac® Pro and Mac OS® X are given as “Macintosh”,
5
Before Use
z While AJ-PCD30 (referred to below as “the
device”) is connected to the personal
computer, install the required drivers from the
CD-ROM.
For details, refer to the installation manual and
“P2 Driver” (page 16) in this manual.
z The device may become warm during use, but
this is not a malfunction.
z When the device is used internally, it may be
necessary to connect the device with part of
the USB cable passing outside your PC. In this
case, be sure sufficient space behind the PC
that is to contain the device.
Overview
The device is a P2 card-dedicated data transfer device with a USB 3.0 interface and a 3 slot drive for
writing and reading P2 content to and from P2 cards using the USB 3.0/2.0 connection in a Windows
PC or Macintosh.
The device is capable of making high-speed transfers of clip data shot with a memory card camera
recorder for P2 cards to a personal computer (Windows/Macintosh).
This device supports not only the transferring and copying of clips recorded on P2 cards, but also direct
editing.
Features
z It is capable of high speed data transfer of
over 1.5 Gbps
z It can be used as either an external or an
internal drive. (only Windows)
z Supports both Windows and Macintosh
operating systems.
*1 This is the transfer speed using the multiple P2 card E series over the USB 3.0 connection.This will vary according
to conditions such as the type of file being transferred, the system, the application software, and the version and
the number of the P2 card.
*2 Connect the USB terminal of the device to your computer using the PC USB port. If the USB terminal of the device
is connected to a USB terminal hub then errors may occur, such as the computer not recognizing the device, or not
applying the necessary drivers. (We cannot guarantee proper operation of the device when connected to a USB
hub.)
*3 When using a Macintosh with 2 of the devices connected, or with the device and at least two other P2 drive
connected, avoid duplication among the volume labels of the P2 cards.
Correct operation cannot be guaranteed if the volume labels are duplicated or left without being set (
displayed).
*1
.
6
z The device can also be connected to a
USB 2.0 Windows PC/Macintosh.
z Up to 2 devices may be connected to a single
*2 *3
PC.
“NO NAME” is
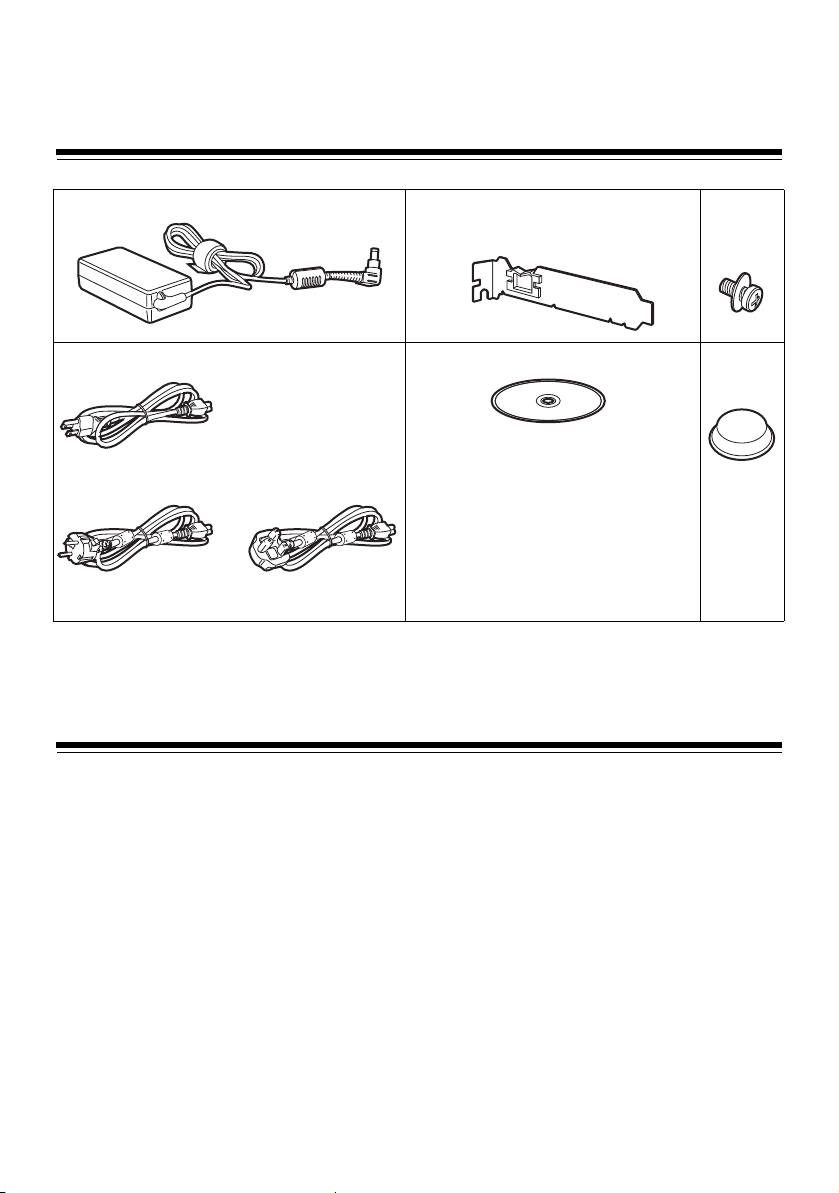
Supplied Accessories
For AJ-PCD30P
For AJ-PCD30E
(U.K.)
For AJ-PCD30E
(continental Europe,etc.)
(AJ-PCD30P/AJ-PCD30E)
AC adaptor Bracket
(page 14)
Power cable for AC adaptor CD-ROM
z Operating Instructions (PDF)
z P2 Software
z Power Management Setting Software
Operating Environment Required for Installation
To operate the device, the following environment is required on the host computer.
Mounting
screws
(8)
Rubber
feet (4)
z USB 3.0 port/USB 2.0 port
The device can be used with a host computer (Windows PC) that does not have a built in USB 3.0 port
by installing a USB 3.0 expansion interface port. Note, however, that Panasonic cannot guarantee
correct operation with all third-party USB 3.0 expansion interface ports.
Recommended USB 3.0 expansion interface ports are listed on the Panasonic website.
http://pro-av.panasonic.net/
The following environment is recommended for the host computer to make full use of the features of the
device.
z A striping configuration using 4 or more hard disk drives is recommended to attain sufficient transfer
speed when transferring data to the hard disk drive.
7

Parts and their Functions
(1)
(3) (4)
(2)
(5)
(1)(3) (2)(4)(5)
Front Panel
(1) Power button
Use this button to turn the unit ON and OFF.
When the power is OFF, pressing the power
button switches the power ON. When the
power is ON, pressing the power button for
two seconds or more switches the power
OFF.
<Note>
When the device is located internally, the
device power system is linked to the power
system of your PC and the power switches
on without pressing the power button on the
device.
Caution: Do not switch off the power while
the P2 card is being accessed.
(2) Power Indicator
This indicator lights up in green when the
device is running.
(3) Status Indicator
This indicator lights up in green during
access to a P2 card.
<Note>
Do not remove the P2 card during access of
the card, otherwise files may be corrupted, or
the P2 card may fail.
(4) Card Slots
The device is designed for P2 cards and
does not work with other cards.
(5) EJECT button
Press this button to remove a P2 card from
the device.
Rear Panel
The picture shows the rear panel with its cover
removed.
(1) USB 3.0 connector (Type B)
This connects a USB cable.
Use a USB cable (shielded) compliant with
USB 3.0/USB 2.0.
<Note>
The device is only compatible with USB 3.0/
USB 2.0. It is not compatible with USB 1.1.
If you have a Macintosh, connect using
USB 2.0.
(2) DC IN 12 V Socket
To use the device mounted in a personal
computer, connect one of the power supply
connectors inside the personal computer to
this socket. (page 15)
Do NOT supply power to both the DC IN
12 V socket and DC IN 16 V socket at the
same time.
(3) DC IN 16 V Socket
For external use of the device, connect an
AC adaptor to this socket.
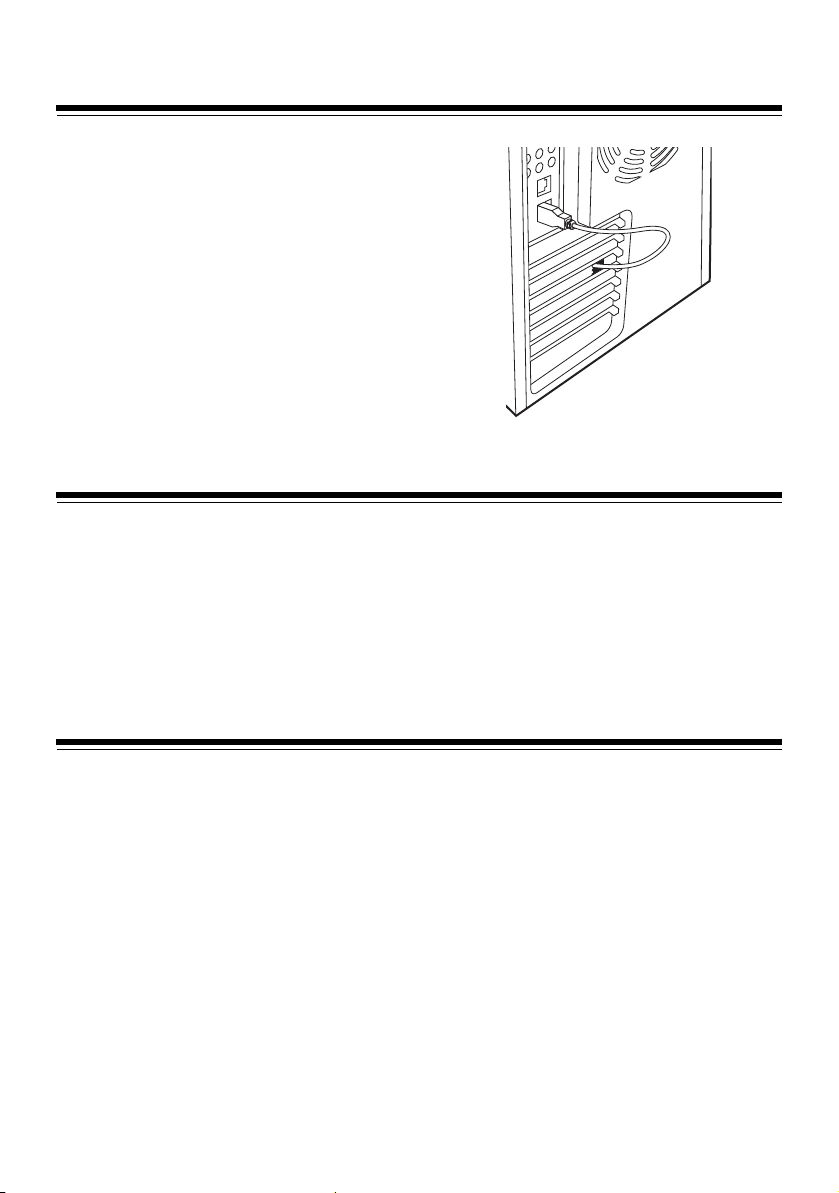
(4) Cable Clamp
Use this clamp to secure the AC adaptor
cable when connecting the device to a
personal computer for external use of the
Drive.
(5) Antitheft Lock
A commercially available antitheft cable can
be connected to this lock.
8
 Loading...