

Page 1
Setup Guide
Page 2

Every effort has been made to ensure that the information in
this document is complete, accurate, and up-to-date. Oki
assumes no responsibility for the results of errors beyond its
control. Oki also cannot guarantee that changes in software
and equipment made by other manufacturers and referred to in
this guide will not affect the applicability of the information in
it. Mention of software products manufactured by other
companies does not necessarily constitute endorsement by Oki.
Oki is a registered trademark of Oki Electric Industry Company,
Ltd.
Energy Star is a trademark of the United States Environmental
Protection Agency
Microsoft, MS-DOS and Windows are registered trademarks of
Microsoft Corporation.
First edition July 1999
Copyright 1999 by Oki. All rights reserved.
Written and produced by the Oki Documentation Dept.
2
HP, HP LaserJet and HP Colour LaserJet are registered
trademarks of Hewlett Packard.
TrueType is a registered trademark of Apple Computer.
Apple and Macintosh are registered trademarks of the Apple
Corporation.
OKIPAGE 8c Plus
Page 3

Contents
Safety ....................................................................................... 4
Symbols in this Book .............................................................. 5
Package Contents .................................................................... 6
Choosing a Location for Your Printer ..................................... 7
Locating the Printer & Optional Second Paper Tray ............. 7
Installing Waste Toner Box .................................................... 8
Preparing the Drum Cartridges ............................................... 8
Installing Toner Cartridges ................................................... 10
Installing Fuser Oil Roller .................................................... 11
Loading Paper ....................................................................... 12
Connecting Power to the Printer ........................................... 13
Built-in Print Samples ........................................................... 14
Demo Page ........................................................................ 14
Fonts Page ........................................................................ 14
Menu List ......................................................................... 15
Changing Display Language ................................................ 15
Colour Registration ..............................................................16
Connecting to the PC ............................................................ 17
Installing Windows Printer Drivers ....................................... 18
Index ......................................................................................19
English
Setup Guide 3
Page 4

Safety
Your Oki printer has been carefully designed to give you years
of safe, reliable performance. As with all electrical equipment,
however, there are a few basic precautions you should take to
avoid hurting yourself or damaging the printer:
• Read the set up instructions in this handbook carefully. Be
sure to save it for future reference.
• Read and follow all warning and instruction labels on the
printer itself.
• Unplug the printer before you clean it. Use only a damp
cloth; do not use liquid or aerosol cleaners.
• Place your printer on a firm, solid surface. If you put it on
something unsteady, it may fall and be damaged; if you
place it on a soft surface, such as a rug, sofa, or bed, the
vents may become blocked, causing the printer to overheat.
• To protect your printer from overheating, make sure all
openings on the printer are not blocked. Do not put the
printer on or near a heat source, such as a radiator or heat
register. Keep it out of direct sunlight. Allow enough room
around the printer for adequate ventilation and easy access
to the paper trays.
• Do not use your printer near water, or spill liquid of any
kind into it.
• Be certain that your power source matches the rating listed
on the back of the printer. If you are not sure, check with
your dealer or with your local power company.
• Your printer has an earthed, 3-pin plug as a safety feature,
and it will only fit into an earthed outlet. If you can not
plug it in, chances are you have an older, non-earthed
outlet; contact an electrician to have the outlet replaced.
Do not use an adapter to defeat the earthing.
• To avoid damaging the power cable, do not put anything
on it or place it where it will be walked on. If the cable
becomes damaged or frayed, replace it immediately.
• If you are using an extension cable or power strip with the
printer, make sure that the total of the amperes required by
all the equipment on the extension is less than the
extension’s rating. The total ratings of all equipment
plugged into the outlet should not exceed 13 amperes.
• The power outlet into which you plug your printer must
remain accessible at all times.
• Lifting the top cover exposes hot surfaces. These are clearly
labelled. Do NOT touch them.
• Do not poke anything into the ventilation slots on the
printer; you could get a shock or cause a fire.
4
OKIPAGE 8c Plus
Page 5
• Aside from the routine maintenance described in this
handbook, do not try to service the printer yourself;
opening the cover may expose you to shocks or other
hazards. Always contact your local dealer.
• Do not make any adjustments other than those outlined in
the handbook. You may cause damage requiring extensive
repair work.
If anything happens that indicates that your printer is not
working properly or has been damaged, unplug it immediately
and contact your dealer.
These are some of the things to look for:
• The power cable or plug is frayed or damaged.
• Liquid has been spilled into the printer, or it has been
exposed to water.
• The printer has been dropped, or the cabinet is damaged.
• The printer does not function normally when you are
following the operating instructions.
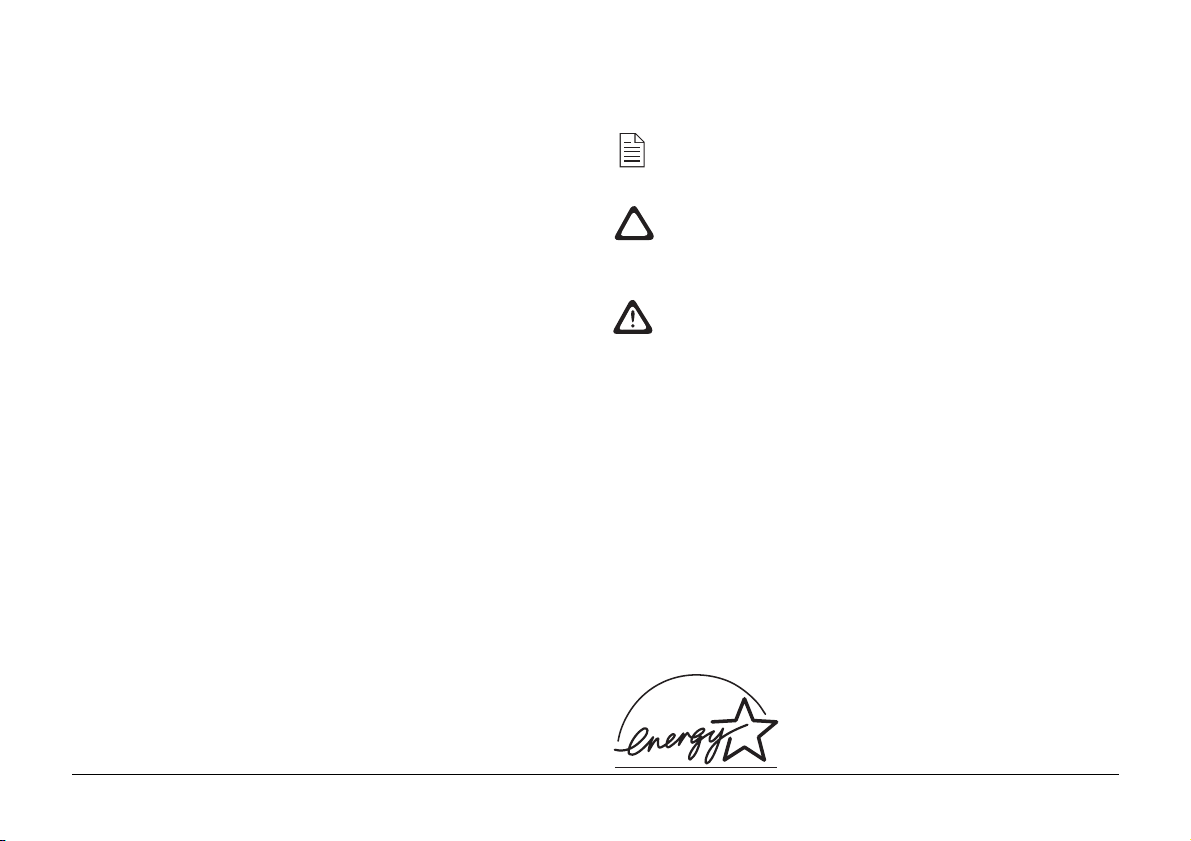
Symbols in this Book
This symbol marks a ‘note’. Notes are hints or tips which
offer additional information to help you.
This symbol marks a ‘caution’. Cautions are special
notices which you should read and follow carefully to
avoid possible damage to your equipment.
This symbol marks a ‘warning’. Warnings are special
notices which you should read and follow carefully to
avoid potential danger to yourself or others.
English
This product complies with the requirements of the Council
Directives 89/336/EEC and 73/23/EEC on the approximation
of the laws of the member states relating to electromagnetic
compatibility and low voltage.
Setup Guide 5
Energy Star
As an ENERGY STAR Partner, Oki has
determined that this product meets the
Energy Star guidelines for energy
efficiency.
Page 6

Package Contents
Your new printer comes in several packages specially designed
to preserve the various components during shipping. Before
installation, open each package and check the contents
carefully.
6
3
1. Printer.
2. Toner cartridges, 1 each cyan, magenta, yellow and black.
3. Waste toner collection box.
4. Fuser oil roller.
5. Image drum cartridges, 1 each cyan, magenta, yellow and
black (shipped inside printer).
Each cartridge is supplied with a black, lightproof plastic
bag. These should be kept near the printer in case you need
to remove the drum cartridges in strong light.
6. Transfer belt assembly (pre-installed).
7. Fuser assembly (pre-installed).
8. 2nd paper tray assembly (optional).
9. CD-ROM and setup guide.
Check the contents carefully. If anything appears to be missing
or damaged, contact your dealer as soon as possible.
6
1
2
5
8
4
7
9
OKIPAGE 8c Plus
Page 7

Choosing a Location for Your Printer
Your printer weighs approximately 52kg. It must be located
safely on a stable, flat, level surface, capable of supporting at
least this weight for an extended period.
If the optional second paper tray is installed, this weighs an
additional 20.5kg.
Locating the Printer & Optional Second Paper Tray
English
1. Lay the 2nd paper tray face up in the position where the
printer is to reside.
1
Do not attempt to lift the printer by yourself, ask
someone to help you.
Choose a location where the cables for power and computer
data can be installed safely without creating a trip hazard.
Ensure that there is adequate clearance on the left side (viewed
from the front), front, rear and above the printer to allow opening
of covers and rear exit, and for removal of paper trays.
For your safety, the AC power socket used to supply power to
your printer should ideally be switched, must be of the 3-pin
earthed type, and should remain easily accessible at all times.
The data cable used to connect your printer to the host computer
should be IEEE1284 bi-directional Centronics type printer
cable, no longer than about 1.8m.
Setup Guide 7
The two locating pins (1) should be towards the front as
illustrated.
2. Lift the printer, position it over the 2nd tray with the front
at the same end as the two locating pins on the tray.
3. Gently lower the printer onto the tray, so that the two pins
locate into two corresponding holes on the underside of
the printer.
4. Remove the strips of adhesive tape sealing the top and
front covers.
Page 8

Installing Waste Toner Box
When printing, some dispensed toner will remain behind. This
is removed by the internal cleaning system and deposited in
the waste toner box.
1. Locate the toner box as shown.
2. Press it downwards against spring pressure, then push the
top towards the printer until the box is fully upright.
3. Check that the small drive coupling (1) at the end of the
toner box is located below the drive lever on the printer, as
illustrated.
1
1
4. Raise the printer side cover and press it closed.
Preparing the Drum Cartridges
The image drum cartridges are shipped with protective sheets
of paper to protect the delicate green drum surfaces from transit
damage. There may also be foam seals inserted in the tops of
the cartridges to prevent toner leakage in transit.
Each drum cartridge is marked with a coloured label. The
colour corresponds with a similar coloured label at the
left side of the printer. It is essential that the four drum
cartridges are installed in their marked positions.
8
OKIPAGE 8c Plus
Page 9

1. Press the OPEN button and raise the printer top cover to its
fully upright position.
4. Peel off the eight white protective tapes from the belt gears.
English
2. Remove any plastic foam plugs from the tops of the four
image drum cartridges (1).
1
5. Pull the protective sheets of paper straight upwards out of
the cartridge.
3. Grip the top of an image drum cartridge and lift it straight
up and out of the printer.
6. Return the drum cartridge to the printer, locating the pins
at each end of the cartridge into their slots (2) at each side
of the printer.
2
Setup Guide 9
Page 10

Installing Toner Cartridges
There are four toner cartridges for your printer. Each is marked
(1) with its colour: black, cyan, magenta and yellow. You may
also identify each by looking into the end of the cartridge
through the white cap (2) at one end.
It is essential that each toner cartridge is installed onto
the correct image drum cartridge for its colour.
1. Remove a toner cartridge from its packaging.
2. Gently shake the cartridge from side to side to evenly
distribute the toner along its length.
3. Identify the toner colour by inspecting the coloured tab
(1) on the cartridge or by looking into the end of the
cartridge through the white cap (2) at one end.
1
2
3
4. Identify the position of the corresponding image drum
cartridge inside the printer.
10
5. Peel off the white adhesive tape seal from the underside of
the toner cartridge.
6. Holding the cartridge with the coloured lever (3) to the
right and the white end cap (2) to the left, lower the toner
cartridge into the top of the image drum cartridge, white
cap end first.
Press gently down on the other end to locate the cartridge
firmly onto the image drum cartridge.
Do not force the toner cartridge into position. It is fitted
with a lock-out mechanism to prevent insertion into the
wrong image drum cartridge.
OKIPAGE 8c Plus
Page 11

7. Push the coloured locking lever away from you (towards
the back of the printer) to lock the cartridge home and
release the toner supply.
1. Remove the oil roller assembly from its wrapping.
2. Remove the coloured spacer (1) from the new oil roller.
English
1
8. Repeat the installation process for the remaining three toner
cartridges.
Installing Fuser Oil Roller
The fuser oil roller assembly contains two rollers which bear
against the top fuser roller and clean any excess toner which
might otherwise be carried over onto successive pages.
It locates directly above the main fuser assembly, and is a user
replaceable part.
Setup Guide 11
3. Hold the assembly horizontally above the fuser, with the
yellow warning label (2) at the top and towards you.
2
4. Lower the left end of the oil roller assembly into the printer,
and locate the extreme left end under the locating tab (3)
on the end of the fuser.
3
Page 12

5. Ensure that the small coloured lever at the right end of the
fuser is pushed away from you (towards the rear of the
printer).
Loading Paper
Before starting your new printer, you can install a stack of paper
into one or both (if second tray installed) paper trays.
The User’s Guide contains more information on how to choose
and feed various kinds of paper and other print media. For the
moment, however, simply load the printer with plain copier or
laser printer paper so that you can check the basic operation
and make any adjustments which may be necessary.
6. Lower the right end of the oil roller assembly onto the
fuser and lock it home by pulling the small coloured lever
towards you.
12
Each paper tray cassette can hold up to about 500 sheets (1 ream)
of paper.
Tray 1 is the standard paper tray built into the printer. Tray 2 is
the optional second paper tray located under the printer.
1. Pull the paper tray all the way out of the machine.
OKIPAGE 8c Plus
Page 13

2. Adjust the rear paper guide (1) if necessary for the correct
paper length. Do this by squeezing the top of the guide
and sliding it gently in the required direction.
1
2
Connecting Power to the Printer
A suitable AC power cable was supplied with your printer,
terminated with the appropriate plug for connection to a
standard AC wall outlet.
For your safety the AC power must come from a suitably
rated 3-pin socket. This should ideally be switched and
must remain easily accessible at all times.
English
3. If necessary, slide the two side paper guides (2) out far
1. Ensure the printer on/off switch (1) is off.
enough to accomodate the width of the paper stock.
4. Place the stack of paper gently into the tray, then adjust
the side and rear guides to obtain a snug fit.
5. Reinsert the tray back into the printer and push it gently
all the way in.
Do not slam the tray in too hard. A full paper tray is heavy
and may cause internal damage.
2
1
2. Connect the cable to the 3-pin power socket (2) on the rear
of the printer.
Setup Guide 13
Page 14

3. Connect the other end of the power cable to a suitable
nearby AC power socket outlet.
It is not necessary at this stage to connect the printer to a
host computer.
4. Switch on the printer. The display panel will read
INITIALIZING for a few seconds, then will read ON LINE.
The READY light will be on, all others will be off. The
printer is now ready.
If the display tells you that one or more toner colours are
low, switch the printer off for a few seconds, then on again.
The mechanical cycling you hear will dispense some toner
into the image drum cartridges, and the display should
then read ON LINE. It may be necessary to repeat this two
or three times when the machine is new.
If the display says that one or more image drums are not
installed, switch off the printer, open the top cover and
check that all four image drum cartridges are properly seated
in their correct positions.
Built-in Print Samples
Your printer has a set of printable pages built in. These provide
useful information about the printer, and also serve to test the
printing function.
Demo Page
The demonstration page shows some of the features of your
new printer.
1. Press the ON LINE key on the operator panel to take the
printer OFF LINE.
2. Press and hold the Print Demo key for more than 2 seconds.
The display will read PRINT DEMO PAGE, and after a few
seconds (a little more if the printer has been in POWER
SAVING mode) a demo page will emerge face down into
the stacker tray on top of the printer.
Fonts Page
Your printer can produce a colour sample of all its built in
fonts.
14
1. Press the ON LINE key if necessary to ensure that the
display reads OFF LINE.
OKIPAGE 8c Plus
Page 15

2. Press and hold the Print Fonts key for more than 2 seconds.
Changing Display Language
The display will read PRINT FONTS, and after a few seconds
two pages will emerge face down from the top paper exit
showing all of the printer’s resident fonts.
Menu List
Your printer’s functions are controlled by means of the keys on
the operator panel and the LCD display panel. These functions
are arranged into a menu system for ease of use.
1. Press the ON LINE key if necessary to ensure that the
display reads OFF LINE.
2. Press and hold the Print Menu key for more than 2 seconds.
The display will read PRINT MENU, and after a few
seconds a page will emerge showing the factory default
and current user default settings for all menu items.
The functions shown on the menus and the use of the
operator panel are explained in the User’s Guide.
Your printer can display messages in any one of the following
12 languages:
English Norwegian
German Danish
French Dutch
Italian Turkish
Spanish Portuguese
Swedish Polish
To change the display language:
1. Press the ON LINE key if necessary to take the printer OFF
LINE.
2. Press and hold the MENU 1 / Menu 2 key for more than
2 seconds.
3. Momentarily press the MENU 1 / Menu 2 key repeatedly
until the display reads LANGUAGE.
4. Press the ENTER key to select this category and display
the current language setting.
English
5. Press the
backwards through the list of available languages.
Setup Guide 15
→→
→ key to cycle forwards or the
→→
←←
← key to cycle
←←
Page 16

6. When your preferred language is displayed, press the
ENTER key to select it. An asterisk (*) will appear next to
the language name.
7. Press the ON LINE key to return the printer to its ON LINE
condition ready for printing.
Colour Registration
Each of the four image drums is responsible for producing that
part of the printed image corresponding to its particular colour.
The three primary colours and black are mixed in various
proportions to obtain other colours.
Of course, it is essential that each image drum cartridge produces
its part of the printed image at exactly the right place on the
page relative to each of the others.
If one cartridge, for example yellow, is slightly misaligned you
will notice slight traces of yellow at the edges of other colours
where yellow should not appear. This very precise alignment is
known as colour registration.
Although the four image drums were very accurately aligned
during the manufacturing and testing of your printer, it is
possible that one or more of them may have become slightly
misaligned during shipping. If you notice any symptoms like
that described above, you can easily check and adjust colour
registration using the menus and operator panel controls on
your printer.
These adjustments align the three colour cartridges precisely
to the black cartridge. Your printer has a series of resident test
patterns to help you.
The User’s Guide supplied with your printer contains full
instructions for this and many other adjustments designed to
help you achieve the best possible results from your new colour
printer.
16
OKIPAGE 8c Plus
Page 17

Connecting to the PC
The printer comes with a standard high speed bidirectional
IBM Centronics compatible parallel data interface as standard.
This requires a IEEE1284 compliant parallel printer cable, not
more than 1.8m in length. Such a cable has a 36-pin Centronics
style plug at one end (the printer end) and a standard DB25
plug at the other (the PC end).
Two magnetic line filters (1) supplied with the equipment must
be attached to the parallel data cable before connecting the
printer to your host PC.
To attach the filters, position each filter as close as possible to
each end of the cable and snap the filter container shut.
The parallel data cable should be connected to the printer’s
data interface (2) and to the host PCs parallel data port (usually
designated as LPT1).
Optionally you may have a network interface card installed.
This connects directly to your network cable, following the
instructions supplied with the card.
English
Setup Guide 17
Page 18

Installing Windows Printer Drivers
A printer driver is a software program which runs on your PC. It
passes data from your applications suitably formatted for the
printer, and also controls a number of printer functions.
Your printer comes with printer drivers for Windows 3.1x,
Windows 95 and Windows NT4.
If using other operating systems, you could select a printer
driver designed for use with the HP LaserJet IV or HP LaserJet
5. If you have a suitable printer driver for the HP Colour LaserJet
5, this should be used instead.
Windows users should use the drivers supplied with the printer
for best results. These have been designed specially for this
printer, and will make the best use of its many features.
If installing on a network or other printer sharing system, each
PC user should install the appropriate driver for their system.
The CD may contain a README file, containing additional
information too late to be included in the published printer
guides.
The CD package contains instructions for installing the various
Windows drivers and for viewing and printing the on-line
manuals.
18
OKIPAGE 8c Plus
Page 19

Index
C
Cables
data ................................................. 7, 17
power .............................................. 7, 13
Colour
registration ........................................... 16
D
Demo page
printing ................................................ 14
Display
changing the language ......................... 15
F
Fonts
printing a list ........................................ 14
Fuser oil roller
installing .............................................. 11
I
Image drums
colour identification ............................... 8
installing ................................................ 8
M
Menus
printing current settings ....................... 15
P
Paper
capacity ................................................ 12
loading ................................................. 12
second tray ............................................ 7
Printer
access .................................................... 7
testing .................................................. 14
weight .................................................... 7
S
Software
other drivers ........................................ 18
Windows drivers ................................. 18
T
Toner
colour identification ............................. 10
installing .............................................. 10
waste toner box ..................................... 8
W
Waste toner box
installing ................................................ 8
English
Setup Guide 19
Page 20

Oki Systems (UK) Ltd.
Oki Systems (Ireland) Ltd.
550 Dundee Road
Slough SL1 4LE
Tel: 01753 819819
Fax: 01753 819899
The Square Industrial Complex Hawthorn Business Centre
Tallaght Adelaide Industrial Estate
Dublin 24 Belfast, BT12 6HP
Tel: 01 459 8666 Tel: 01232 572355
20
OKIPAGE 8c Plus
 Loading...