

Page 1
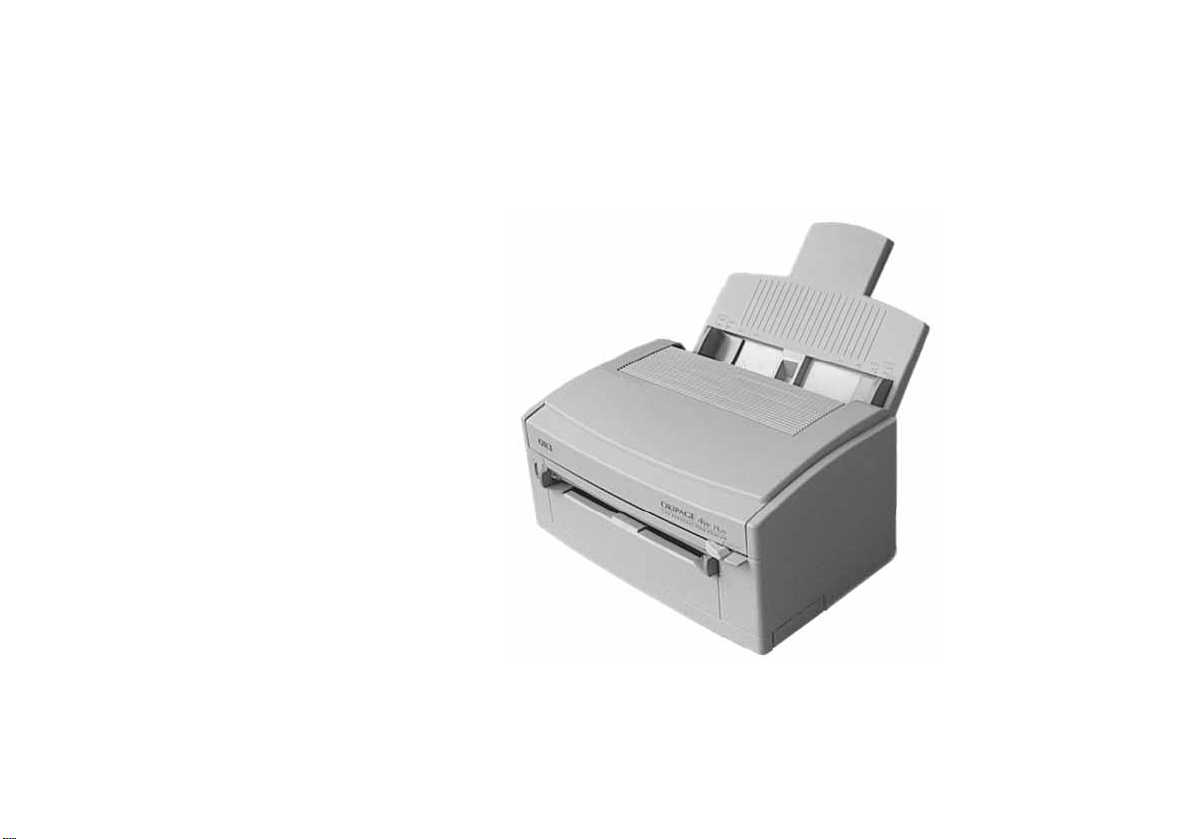
OKIPAGE 4m/4w+
Read Me First
Page 2

Every effort has been made to ensure that the information
in this document is complete, accurate, and up-to-date. Oki
assumes no responsibility for the results of errors beyond
its control. Oki also cannot guarantee that changes in
software and equipment made by other manufacturers and
referred to in this guide will not affect the applicability of
the information in it. Mention of software products
manufactured by other companies does not necessarily
constitute endorsement by Oki.
Copyright 1997 by Oki. All rights reserved.
Written and produced by the Oki Documentation Dept.
Oki is a registered trademark of Oki Electric Industry
Company, Ltd.
Energy Star is a trademark of the United States
Environmental Protection Agency
Microsoft, MS-DOS, W indows, Windows 95 and W indows
NT are registered trademarks of Microsoft Corporation.
Macintosh, Mac, MacOS and TrueType are trademarks of
Apple Computer Corporation.
2 OKIPAGE 4m/4w Plus
Page 3

Contents
Safety Instructions ...........................................................4
Features............................................................................6
Printer Components .........................................................7
Checking the Contents.....................................................8
Setting Up Your Printer ...................................................9
Installing Toner ..............................................................10
Connecting Your Printer to a PC ...................................12
Connecting Your Printer to a Macintosh Computer
(OKIPAGE 4m only)...................................................13
Installing the Windows Printer Driver...........................14
Installing the Macintosh Printer Driver
(OKIPAGE 4m only)...................................................15
Using Fonts....................................................................16
Choosing Paper .............................................................. 17
Paper Sizes ................................................................17
Paper W eight .............................................................17
Installing Paper.............................................................. 18
Paper Exit ..................................................................18
Manual Feed ..................................................................19
Transparencies/Adhesi ve Labels....................................19
Printing Envelopes.........................................................20
Choosing Envelopes ..................................................20
Index ..............................................................................21
English
3Read Me First
Page 4

Safety Instructions
Your Oki printer has been carefully designed to give you years
of safe, reliable performance. As with all electrical equipment,
however, there are a few basic precautions you should take to
avoid hurting yourself or damaging the printer:
• Read the setup instructions in this handbook carefully. Be
sure to save it for future reference.
• Read and follow all warning and instruction labels on the
printer itself.
• Unplug the printer before you clean it. Use only a damp
cloth; do not use liquid or aerosol cleaners.
• Place your printer on a firm, solid surface. If you put it on
something unsteady, it may fall and be damaged; if you
place it on a soft surface, such as a rug, sofa, or bed, the
vents may become blocked, causing the printer to overheat.
• To protect your printer from overheating, make sure all
openings on the printer are not blocked. Do not put the
printer on or near a heat source, such as a radiator or heat
register. Keep it out of direct sunlight. Allow enough room
around the printer for adequate ventilation and easy access
to the paper trays.
• Do not use your printer near water, or spill liquid of any
kind on it.
• Be certain that your power source matches the rating listed
on the back of the printer. If you are not sure, check with
your dealer or with your local power company.
• Your printer has an earthed, 3-pin plug as a safety feature,
and it will only fit into an earthed outlet. If you cannot plug
it in, chances are you have an older, non-earthed outlet;
contact an electrician to have the outlet replaced. Do not
use an adapter to defeat the earthing.
• To avoid damaging the power cable, do not put anything on
it or place it where it will be walked on or damaged. If the
cable becomes damaged or frayed, replace it immediately.
• If you are using an extension cable or power strip with the
printer, make sure that the total current (amperes) required
by all the equipment on the extension is less than the
extension’ s rating. T he total ratings of all equipment plugged
into the outlet should not exceed 15 amperes.
• This printer must be installed near to a power outlet switch
which shall remain easily accessible.
• Do not poke anything into the ventilation slots on the printer;
you could get a shock or cause a fire.
4 OKIPAGE 4m/4w Plus
Page 5

• Aside from the routine maintenance described in this
handbook, do not try to service the printer yourself; opening
the cover may expose you to shocks or other hazards.
• Lifting the top cover exposes hot surf aces. These are clearly
labelled. Do NOT touch them.
• Do not make any adjustments other than those outlined in
the handbook since you may cause damage requiring
extensive repair work.
If anything happens that indicates that your printer is not
working properly or has been damaged, unplug it immediately
and contact your dealer.
These are some of the things to look for:
• The power cable or plug is frayed or damaged.
• Liquid has been spilled into the printer, or it has been
exposed to water.
• The printer has been dropped, or the cabinet is damaged.
• The printer does not function normally when you are
following the operating instructions.
English
5Read Me First
Page 6

Features
Congratulations! You ha ve selected a Windo ws (OKIP A GE
4w) or Macintosh (OKIPA GE 4m) compatible printer with
easy operation, and high reliability.
Your printer’ s f eatures include:
• Outstanding print quality utilising a solid state LED
array.
• Easy paper handling with a universal paper feeder,
plus manual feed for en velopes and special documents.
• Windows compatible high-speed bi-directional
Centronics type parallel reception.
• Additional Macintosh compatible high speed serial
interface (OKIPAGE 4m only). Allows simultaneous
connection to PC running Windows and a Macintosh
running MacOS 7.1.1 or later.
• 600 DPI Class print quality.
• 4 pages per minute print speed.
• Oki proprietary “Hiper-W” driver for Windows.
• Hiper-W and RTSR (Real Time Synchronous
Rendering) driver for Macintosh (OKIPA GE 4m only).
• On-screen status monitor for printer setup and control.
• Energy efficient operation.
This product complies with the requirements of the Council
Directives 89/336/EEC and 73/23/EEC on the
approximation of the laws of the member states relating to
electromagnetic compatibility and low voltage.
Energy Star
As an Energy Star Partner, Oki has
determined that this product meets the
Energy Star guidelines for energy
efficiency.
6 OKIPAGE 4m/4w Plus
Page 7
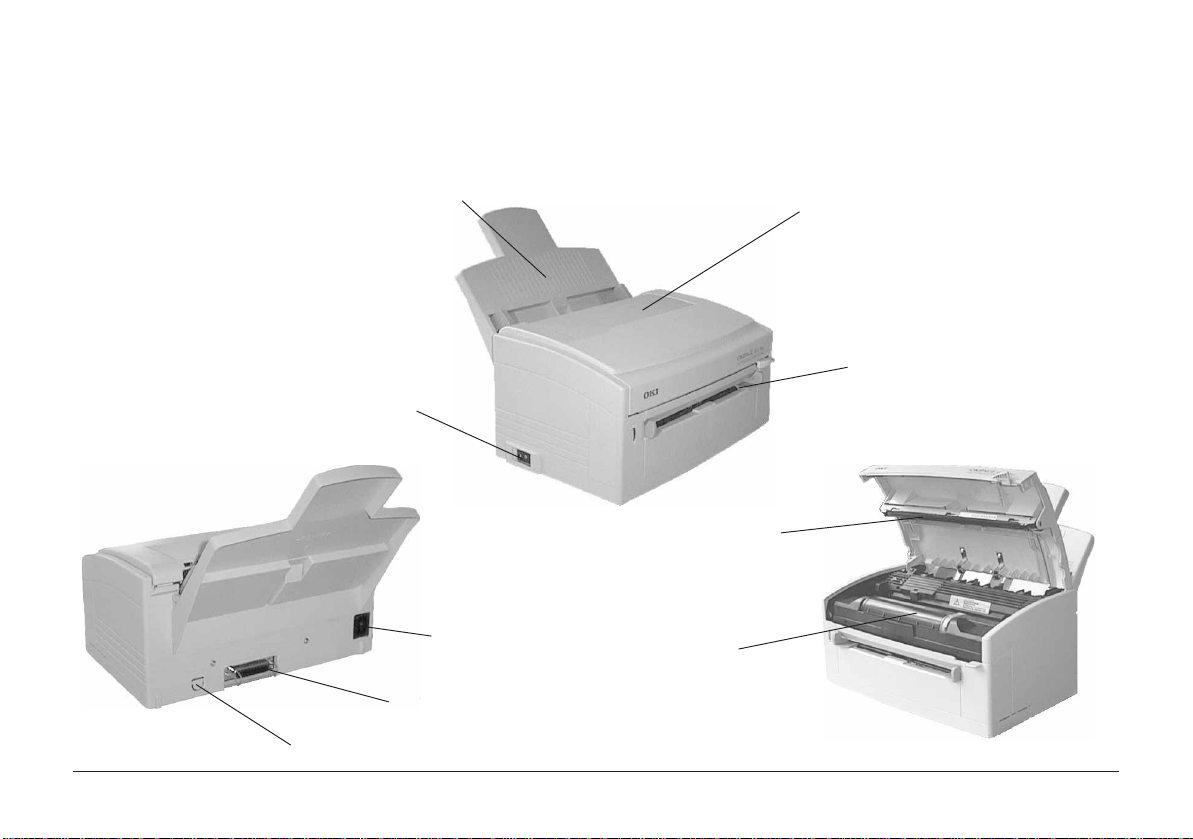
Printer Components
English
Paper Feeder
Power Switch
Power Cable Receptacle
Parallel Interface Connector
Serial Interface Connector
(OKIP AGE 4m only)
Paper Exit
Manual Feed Slot
LED Array
Image Drum Cartridge with
Toner Cartridge installed
7Read Me First
Page 8

Checking the Contents
Unpack your printer. You should have:
1. Printer (with Image Drum Cartridge installed but not
ready for use).
2. Driver Disks. (Floppy disk pack for OKIPA GE 4w and
CD-ROM for OKIPAGE 4m.)
3. Toner Cartridge.
4. Printer Handbook.
5. Power Cable.
6. Lightproof plastic bag (For storing image drum if printer
must be transported).
7. Printer interface cable for connection to Macintosh
(OKIPAGE 4m only).
If any item is missing, contact your dealer immediately.
8 OKIPAGE 4m/4w Plus
Page 9

Setting Up Your Printer
Removing the protective sheet
1. Lift open the cover.
2. Remove the image drum.
English
3. Remove the protective sheet by pulling it straight do wn.
Be careful not to tear the sheet, or it may become
difficult to remove.
! The Image Drum’s green surface is delicate. Do
not touch it and take care not to scratch it.
4. Replace the image drum.
9Read Me First
Page 10

Installing Toner
1. Remove the protective plastic co ver from the toner well
in the image drum unit.
2. Shake the toner cartridge gently to distribute toner
evenly.
Do not remove cartridge from packaging.
3. Unwrap the new cartridge.
4. Remove the tape.
10 OKIPAGE 4m/4w Plus
Page 11

5. Insert the toner cartridge.
6. Push the grey lever forward.
7. Close the printer cover.
English
11Read Me First
Page 12

Connecting Your Printer to a PC
Make sure your printer is not plugged in and your
computer is turned off.
The parallel cable must support bidirectional
communication and must be shielded.
1. Plug the interface cable from your computer into the
parallel socket in the printer.
2. Plug the power cable into the printer , then into a nearby
earthed outlet.
3. Switch the printer on.
The ready light comes on.
12 OKIPAGE 4m/4w Plus
Page 13

Connecting Your Printer to a Macintosh
Computer (OKIPAGE 4m only)
Make sure your printer is not plugged in and your
computer is turned off.
1. Plug the supplied serial interface cable from your
computer into the serial socket (1) in the printer.
1
2. Plug the other end of this cable into either the modem
port or the printer port on the Macintosh.
English
3. Plug the power cable into the printer , then into a nearby
earthed outlet.
4. Switch the printer on.
The ready light comes on.
13Read Me First
Page 14

Installing the Windows Printer Driver
Your OKIPAGE 4w Plus is supplied with a selection of
Windows printer drivers. These include a Status Monitor
application, which provides on-screen printer status
monitoring and control of your printer.
Windows 3.1 or 3.11
Insert the W indows 3.1 driver diskette into your disk driv e
(assumed to be drive A).
1. In Program Manager, choose File, Run…
2. Type a:setup in the Command Line box.
3. Click OK.
Follow the on screen instructions.
Windows 95
Insert the W indows 95 driver diskette into your disk dri v e.
1. Click Start, Settings, Printers.
2. Double-click the Add Printer icon.
3. Click the Next button.
4. Choose Local Printer, then click the Next button.
5. Click the Have Disk… button.
Follow the on screen instructions.
Windows NT 3.51
Insert the appropriate W indows NT 3.51 dr iver diskette into
your disk drive.
1. In Program Manager, choose File, Run…
2. Type a:install in the Command Line box.
3. Click OK.
Follow the on screen instructions.
14 OKIPAGE 4m/4w Plus
Page 15

Windows NT 4
Insert the appropriate Windows NT 4 driver diskette into
your disk drive.
1. From the Windows desktop, click Start, Run…
2. Type a:install in the Command Line box.
3. Click OK.
Follow the on screen instructions.
Installing the Macintosh Printer Driver
(OKIPAGE 4m only)
English
* The printer driver supplied with your Oki printer is
designed for use with Mac Operating System (MacOS)
version 7.1.1 or higher. It is not compatible with
QuickDrawGX.
1. Switch on the printer, then the Macintosh, and allow
the System and Finder to load in the normal way.
* Ensure any virus protection software is switched off
before running the installer.
2. Insert the printer driver into the CD-R OM driv e on your
Macintosh.
* If the disk contains a Read Me document, open this
document and read it before installing the drive r. It may
contain late breaking information released after this
book was published.
3. Double-click the Installer icon.
4. When the installer opening dialogue box appears, click
the Install button.
15Read Me First
Page 16

5. When installation is complete, click the End button in
the closing dialogue box, then restart the Macintosh.
6. Open the Chooser from the Macintosh File menu.
7. Click the OKIPAGE 4m icon.
8. Click modem port icon if your printer is connected to
the modem port, or the printer port icon if your printer
is connected to the printer port.
* If using the modem port on the Apple PowerBook,
ensure that the modem setting is set to External Modem.
9. Close the Chooser.
10. From the File menu, choose Page Setup.
11. Select the required page size and orientation from the
dialogue, then click OK.
* For detailed information see on-line help material.
Using Fonts
Any font you can display on your screen in Windo ws or on
the Macintosh (OKIPAGE 4m only) will print on your
printer. For best results, use TrueType fonts installed on
your system, or Adobe Type 1 fonts with Adobe Type
Manager.
Simply select a font in your software program, your
document will print in the font you have selected. For
detailed information on how to select fonts in your softwa re
package, refer to your software documentation.
Note: The toner fusing process in your printer g ener ates
a significant amount of heat, and the top cover will
feel quite warm. This is perfectly normal. If the
top cover becomes too hot to touch, switch the
printer off and call your dealer for advice.
16 OKIPAGE 4m/4w Plus
Page 17

Choosing Paper
Paper Sizes
• For best results, use smooth, high quality paper, such
as copier type paper or paper with a Sheffield rating of
250 or less.
• Store paper in its ream wrapper until you are ready to
use it. Keep it aw ay from moisture or other conditions
that can cause it to wrinkle or curl.
• Preprinted forms must not scorch, melt, offset, or
release hazardous emissions when heated to 200°C
(392°F).
• Avoid printing on both sides of the paper for more than
a few pages, or on pre printed documents that have been
in a photocopier.
• Try paper before you buy it in quantity.
Letter 8.5" x 11"
Legal 13 8.5" x 13"
Legal 14 8.5" x 14"
Executive 7.25" x 10.5"
A4 210mm x 297mm
A5 148mm x 210mm
B5 176mm x 250mm
A6 105mm x 148mm
Free size Width: 76.2 to 216mm
Length: 127 to 355.6mm
Paper Weight
Automatic Feed: 60.5 - 105.5 g/m² (16 - 28 lb.)
Manual Feed: 60.5 - 120.2 g/m² (16 - 32 lb.)
Envelopes: 75 - 90 g/m² (20 - 24 lb.)
English
17Read Me First
Page 18

Installing Paper
The paper feeder handles up to 100 sheets of 75 g/m² (20 lb .)
paper.
1. Set the left paper guide to the marker for the required
paper size and move the right guide to a position slightly
wider than your paper width.
2. Insert the paper so that it is up against the left paper
guide and check that it is not skewed.
3. Adjust the right paper guide to fit against the edge of
the paper . Do not move the left guide a gain as this may
cause the paper to be skewed as it is fed in.
4. Lift the paper up out of the tray again slightly (about 1
cm) and reinsert gently, allowing it to drop under its
own weight. Do not force it down.
Note: Insert letterhead paper face-down top of page
first.
Paper Exit
• Up to 30 sheets of 75 g/m² (20 lb.) paper can be stacked.
• P rinted pages exit face up.
18 OKIPAGE 4m/4w Plus
Page 19

Manual Feed
Transparencies/Adhesive Labels
Use manual feed for printing envelopes, transparencies, legal
and odd size paper.
1. Adjust guides.
2. Insert paper squarely into the guides.
• Always use manual feed.
• Feed one sheet at a time.
• Should be specifically made for laser printers or
photocopiers.
• Must be able to withstand 200°C for 0.1 second.
• Labels should cover the entire carrier sheet; carrier sheet
or adhesive must not be exposed to any part of the
printer.
English
Note: Insert letterhead paper face-up, top of page first.
19Read Me First
Page 20

Printing Envelopes
Choosing Envelopes
1. Adjust the guides.
2. Insert envelope flap side down and to the left.
• Use manual feed.
• No windows or metal clasps.
• Maximum Weight 90 g/m² (24 lb.)
• Smooth even surface.
• No self-sealing flaps.
• Seams down the sides, not across the middle.
• Squared-off flaps that do not cover the print area.
Use this type envelope.
20 OKIPAGE 4m/4w Plus
Page 21

Index
A
Adhesive labels ......................................... 19
C
Cable
parallel .................................................. 1 2
power .................................................. 4 , 8
serial ...................................................... 13
Connecting your printer
to a Macintosh ...................................... 13
to a PC................................................... 12
D
DPI (dots per inch) ..................................... 6
E
Energy Star .................................................. 6
Envelopes
choosing ................................................ 20
F
Features ....................................................... 6
M
Macintosh
software compatibility ......................... 1 5
software installation ............................. 1 5
P
Package contents ......................................... 8
Paper
choosing ................................................ 17
exit ........................................................ 1 8
installing ............................................... 1 8
manual feed .......................................... 19
sizes ....................................................... 17
Power
cable ........................................................ 4
rating ....................................................... 4
source ...................................................... 4
PPM (Pages per minute) ............................. 6
Protective sheet
removing ................................................. 9
S
Software
Macintosh ............................................. 15
Windows 3.1x ....................................... 1 4
Windows 95 .......................................... 14
Windows NT 3.51 ................................. 14
Windows NT 4 ...................................... 15
T
Toner
installing ............................................... 1 0
W
Windows
printer drivers ....................................... 14
21Read Me First
Page 22

Oki Systems Company
Oki Systems (UK) Limited
550 Dundee Road
Slough Trading Estate
Slough
Berks. SL1 4LE
Tel: 01753-819819
Fax: 01753-819899
22 OKIPAGE 4m/4w Plus
 Loading...