

Page 1

User guide
Manual de usuario
Page 2

Nokia 2610 User Guide
9250951
Issue 1a
Nota: La traducción en español de este manual inicia en la página 61.
1
Page 3

DECLARATION OF CONFORMITY
Hereby, NOKIA CORPORATION, declares that this RH-86 product is in
compliance with the essential requirements and other relevant
provisions of Directive 1999/5/EC.
A copy of the Declaration of Conformity can be found at
http://www.nokia.com/phones/declaration_of_conformity/
.
0434
PART NO. 9250951, Issue NO. 1a
Copyright © 2007 Nokia. All rights reserved.
Reproduction, t ransfer, distribution or storage of part or all of the con tents
in this document in any form without the prior written permission of
Nokia is prohibited.
Nokia, Nokia Connecting People, and Xpress-on are trademarks or
registered trademarks of Nokia Corporation. Other product and company
names mentioned herein may be trademarks or tradenames of their
respective owners.
Nokia tune is a sound mark of Nokia Corporation.
US Patent No 5818437 and other pending patents. T9 text input software
Copyright © 1997-2007. Tegic Communications, Inc. All rights reserved.
Includes RSA BSAFE cryptographic or security protocol
software from RSA Security.
Java is a trademark of Sun Microsystems, Inc.
2
Page 4

Nokia operates a policy of continuous development. Nokia reserves the
right to make changes and improvements to any of the products described
in this document without prior notice.
UNDER NO CIRCUMSTANCES SHALL NOKIA BE RESPONSIBLE FOR ANY
LOSS OF DATA OR INCOME OR ANY SPECIAL, INCIDENTAL, CONSEQUENTIAL
OR INDIRECT DAMAGES HOWSOEVER CAUSED.
THE CONTENTS OF THIS DOCUMENT ARE PROVIDED “AS IS”. EXCEPT AS
REQU IRED BY AP PLICAB LE LAW , NO W ARRANTIES OF ANY K IND, EI THE R
EXPRESS OR IMPLIED, INCLUDING, BUT NOT LIMITED TO, THE IMPLIED
WARRANTIES OF MERCHANTABILITY AND FITNESS FOR A PARTICULAR
PURPOSE, ARE MADE IN RELATION TO THE ACCURACY, RELIABILITY OR
CONTENTS OF THIS DOCUMENT. NOKIA RESERVES THE RIGHT TO REVISE
THIS DO CUME NT OR WITHD RAW I T AT A NY TI ME WIT HOUT PRIO R
NOTICE. THE AVAILABILITY OF PARTICULAR PRODUCTS MAY VARY BY
REGION. PLEASE CHECK WITH THE NOKIA DEALER NEAREST TO YOU.
EXPORT CONTROLS
This device may contain commodities, technology or software subject to
export laws and regulations from the US and other countries. Diversion
contrary to law is prohibited.
FCC/INDUSTRY CANADA NOTICE
Your device may cause TV or radio interference (for example, when using
a telephone in cl ose proximity to receiving eq uipment). The FCC or Indus try
Canada can require you to stop using your telephone if such interference
cannot be eliminated. If you require assistance, contact your local service
facility. This device complies with part 15 of the FCC rules. Operation is
subject to the following two conditions: (1) This device may not cause
harmful interference, and (2) this device must accept any interference
received, including interference that may cause undesired operation. Any
changes or modifications not expressly approved by Nokia could void the
user's authority to operate this equipment.
3
Page 5

Contents
Contents
For your safety.................... 5
General information .........10
Access codes...................................10
1. Get started .................... 11
Install the SIM card
and battery......................................11
Charge the battery........................13
Normal operating position..........14
2. Your phone ...................15
Keys and parts................................15
Standby mode.................................16
Demo mode.....................................17
Keypad lock.....................................17
3. Call functions ...............18
Make and answer a call...............18
Loudspeaker ....................................18
4. Write text .....................19
5. Menu functions ............20
Messaging........................................20
4
Contacts ...........................................26
Log .....................................................27
Settings.............................................28
Operator menu ...............................33
Gallery...............................................33
Media ................................................34
Organizer..........................................34
Applications.....................................37
Web....................................................38
SIM services ....................................41
6. Battery information .....42
Charging and discharging ...........42
Nokia battery
authentication guidelines ...........44
7. Enhancements ..............47
Care and maintenance...... 48
Additional safety
information .......................50
Index ..................................59
Page 6
For your safety
For your safety
Read these simple guidelines. Not following them may be
dangerous or illegal. Read the complete user guide for
further information.
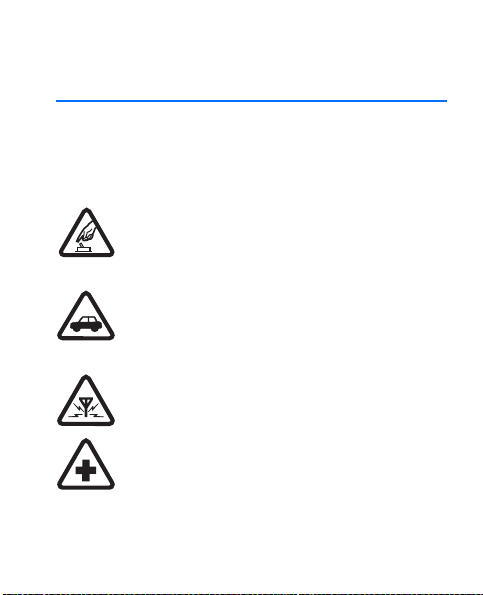
SWITCH ON SAFELY
Do not switch the phone on when wireless phone
use is prohibited or when it may cause interference
or danger.
ROAD SAFETY COMES FIRST
Obey all local laws. Always keep your hands free to
operate the vehicle while driving. Your first
consideration while driving should be road safety.
INTERFERENCE
All wireless phones may be susceptible to interference,
which could affect performance.
SWITCH OFF IN HOSPITALS
Follow any restrictions. Switch the phone off near
medical equipment.
5
Page 7
For your safety
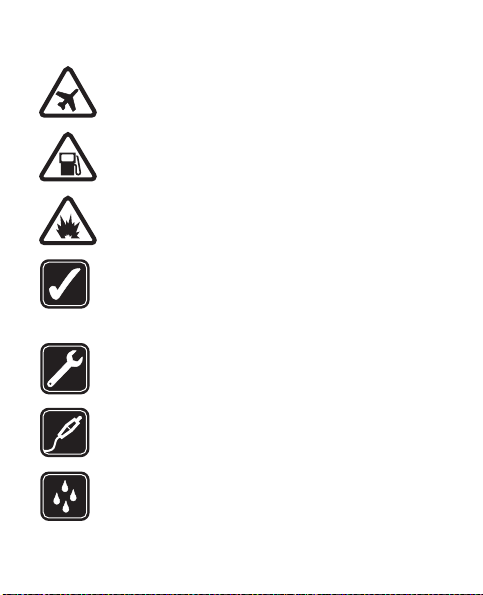
SWITCH OFF IN AIRCRAFT
Follow any restrictions. Wireless devices can cause
interference in aircraft.
SWITCH OFF WHEN REFUELING
Do not use the phone at a refueling point. Do not
use near fuel or chemicals.
SWITCH OFF NEAR BLASTING
Follow any restrictions. Do not use the phone where
blasting is in progress.
USE SENSIBLY
Use only in the normal position as explained in
the product documentation. Do not touch the
antenna unnecessarily.
QUALIFIED SERVICE
Only qualified personnel may install or repair
this product.
ENHANCEMENTS AND BATTERIES
Use only approved enhancements and batteries.
Do not connect incompatible products.
WATER-RESISTANCE
Your phone is not water-resistant. Keep it dry.
6
Page 8
For your safety
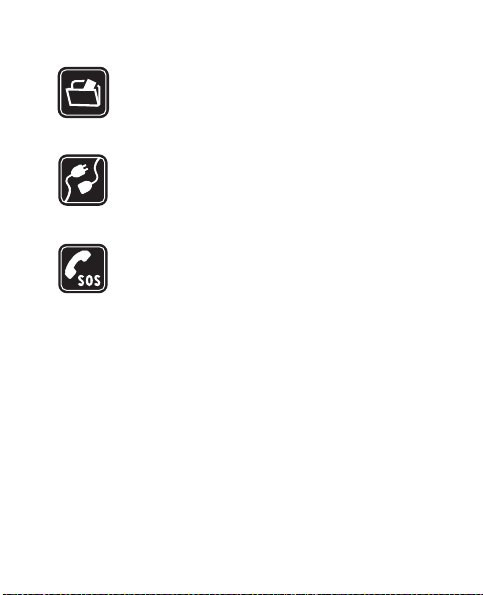
BACK-UP COPIES
Remember to make back-up copies or keep a
written record of all important information stored
in your phone.
CONNECTING TO OTHER DEVICES
When connecting to any other device, read its user
guide for detail ed safety instructions. Do not connec t
incompatible products.
EMERGENCY CALLS
Ensure the phone is switched on and in service.
Press the end key as many times as needed to clear
the display and return to the start screen. Enter the
emergency number, then press the call key. Give your
location. Do not end the call until given permission
to do so.
■ About your device
The wireless device described in this guide is approved for use
on the GSM 850 and 1900 network, and the GSM 900 and 1800
network. Contact your service provider for more information
about networks.
7
Page 9

For your safety
When using the features in this device, obey all laws and respect
privacy and legitimate rights of others.
Warning: To use any features in this device, other than
the alarm clock, the device must be switched on. Do not
switch the device on when wireless device use may cause
interference or danger.
■ Network services
To use the phone you must have service from a wireless service
provider. Many of the features in this device depend on features
in the wireless network to function. These network services may
no t b e av aila bl e on al l ne tw ork s or yo u ma y h ave to mak e s pec ific
arrangements with your service provider before you can utilize
network services. Your service provider may need to give you
additional instructions for their use and explain what charges
will apply. Some networks may have limitations that affect how
you can use network services. For instance, some networks may
not support all language-dependent characters and services.
8
Page 10

For your safety
Your service provider may have requested that certain features
be disabled or not activated in your device. If so, they will not
appear on your device menu. Your device may also have been
specially configured. This configuration may include changes in
menu names, menu order and icons. Contact your service
provider for more information.
This device supports WAP 2.0 protocols (HTTP and SSL) that run
on TCP/IP protocols. Some features of this device, such as text
messages, picture messages and content, and application
downloads require network support for these technologies.
9
Page 11

General information
General information
■ Access codes
The security code supplied with the phone protects your phone
against unauthorized use. The preset code is 12345.
The PIN code supplied with the SIM card, protects the card against
unauthorized use. The PIN2 code supplied with some SIM cards,
is required to access certain services. If you enter the PIN or PIN2
code incorrectly three times in succession, you are asked for the
PUK or PUK2 code. If you do not have them, contact your local
service provider.
The module PIN is required to access the info rmation in the security
module of your SIM card. The signing PIN may be required for
the digital signature. The restricting password is required when
using Call restrictions.
Select Menu > Settings > Security to set how your phone uses
the access codes and security settings.
10
Page 12

Get started
1. Get started
■ Install the SIM card and battery
Keep all SIM cards out of the reach of small children.
For availability and information on using SIM card services,
contact your SIM card vendor. This may be the service provider,
network operator, or other vendor.
Always switch the device off and disconnect the charger before
removing the battery.
Note: Always switch off the power and disconnect the
charger and any other device before removing the covers.
Avoid touching electronic components while changing
the covers. Always store and use the device with the
covers attached.
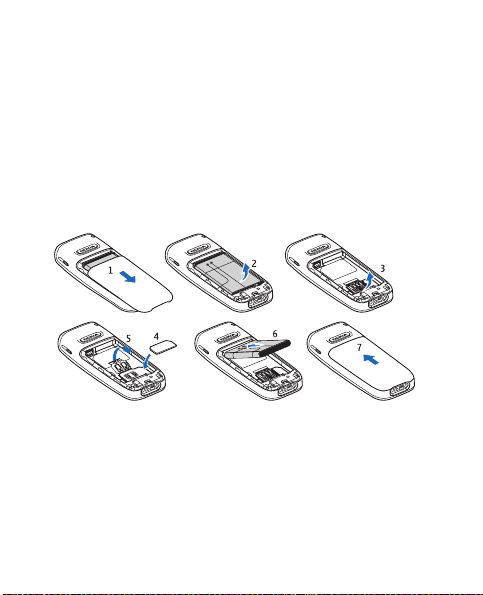
1. Press and slide the back cover toward the bottom of the
phone to remove the cover (1).
2. Remove the battery by lifting it as shown (2).
3. Carefully lift the SIM card holder from the finger grip of the
phone, and open the flip cover (3).
11
Page 13
Get started
4. Insert the SIM card, so that the bevelled corner is on the upper
right side and the gold-colored contact area downward (4).
Close the SIM card holder, and press it to lock it into place (5).
5. Insert the battery into the battery slot (6).
6. Align the back cover with the back of the phone, and slide it
upwards. Push the back cover up to the top of the phone to
lock it (7).
12
Page 14
Get started
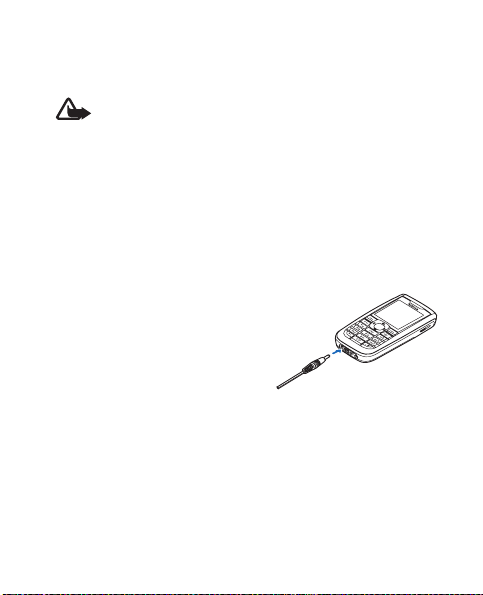
■ Charge the battery
Warning: Use only batteries, chargers, and enhancements
approved by Nokia for use with this particular model.
The use of any other types may invalidate any approval
or warranty, and may be dangerous.
Check the model number of any charger before use with this
device. This device is intended for use when supplied with
power from an ACP-7, ACP-12, or AC-2 charger. This device is
intended to use the BL-5C battery. For availability of approved
enhancements, please check with your dealer.
1. Connect the charger to a
wall outlet.
2. Connect the charger to
the phone.
13
Page 15
Get started
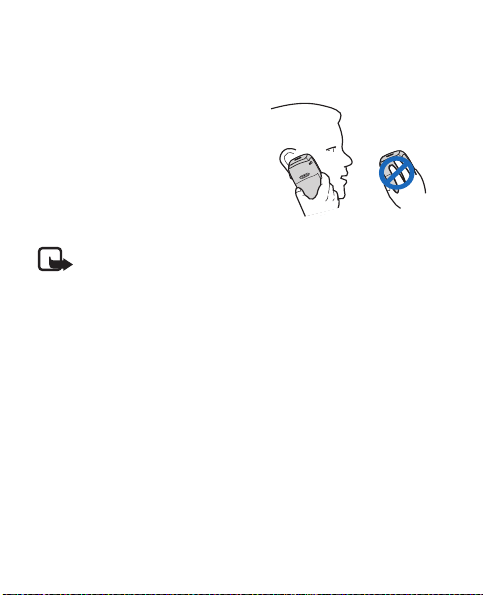
■ Normal operating position
Your device has an internal antenna.
Note: As with any other radio transmitting device, do
not touch the antenna unnecessarily when the device is
switched on. Contact with the antenna affects call quality
and may cause the device to operate at a higher power
level than otherwise needed. Avoiding contact with the
antenna area when operating the device optimizes the
antenna performance and the battery life.
14
Page 16
2. Your phone
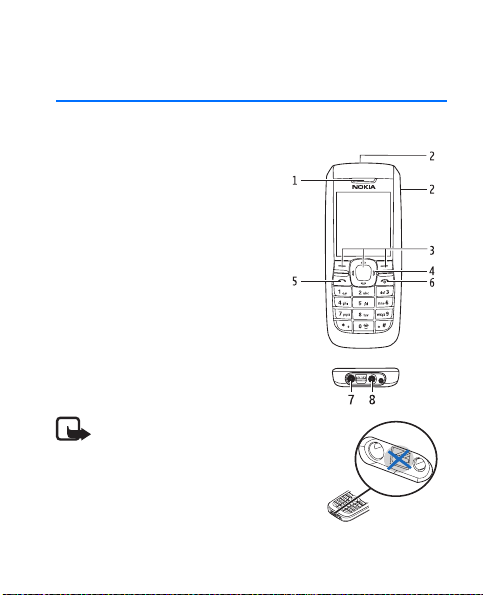
■ Keys and parts
• Earpiece (1)
• Loudspeaker (2)
• Selection keys (3)
• Scroll key (4)
• Call key (5)
• End key and power key (6)
• Charger connector (7)
• Headset connector (8)
Note: Do not touch this
connector as it is intended
for use by authorized service
personnel only.
Your phone
15
Page 17
Your phone
Warning: The scroll key in this device may contain nickel.
It is not intended to come into prolonged contact with
the skin. Continuous exposure to nickel on the skin may
lead to nickel allergy.
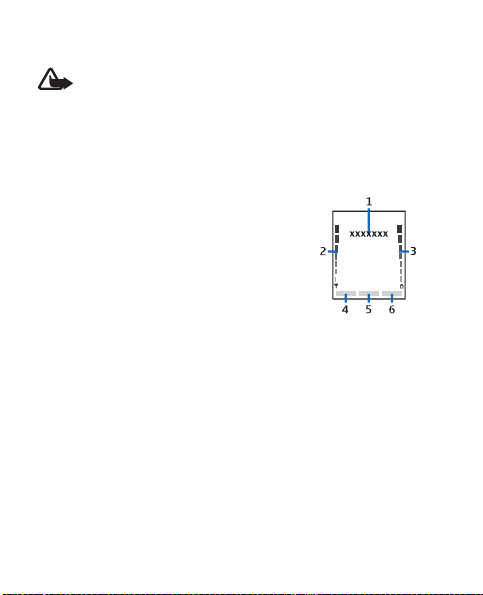
■ Standby mode
When the phone is ready for use,
before you enter any characters,
it is in the standby mode:
Network name or the operator logo (1)
Network signal strength (2)
Battery charge level (3)
Go to (4) — press the left selection key to view your personal
shortcut list. Select Options > Select options to view the list of
available functions that you can add. Select Organize > Move
and the location to rearrange your shortcut list.
Menu (5) — press scroll to display the main menu choices.
Audio (6) — press the right selection key to open the voice recorder.
16
Page 18

Your phone
■ Demo mode
To start the phone without the SIM card, accept Start up phone
without SIM card?. Then use those features of the phone that
do not require a SIM card.
■ Keypad lock
Select Menu and * quickly to lock or unlock the keypad to prevent
accidental keypresses. To answer a call when the keyguard is on,
press the call key. When you end or decline the call, the keypad
remains locked.
Select Menu > Settings > Phone > Automatic keyguard > On to set
the keypad to lock automatically after a preset time delay when
the phone is in the standby mode and no function has been used.
When the keypad lock is on, calls still may be possible to the
official emergency number programmed into your device.
17
Page 19

Call functions
3. Call functions
■ Make and answer a call
To make a call, enter the phone number including the area code
if necessary. The country code should be included, if necessary.
Press the call key to call the number. To increase or decrease the
volume of the earpiece or headset during a phone call, scroll
right or left.
To answer an incoming call, press the call key. To decline the call
without answering, press the end key.
■ Loudspeaker
If available, you may select Loudsp. or Normal to use the
loudspeaker or the earpiece of the phone during a call.
Warning: Do not hold the device near your ear when
the loudspeaker is in use, because the volume may be
extremely loud.
18
Page 20

Write text
4. Write text
You can enter text (refer to "Text messages," p. 21) by using
predictive text or traditional text input .
To use traditional text input, press the key repeatedly until the
letter appears. To use traditional text when writing, select
Options > Prediction off.
To use predictive text input when writing in a text field, select
Options > Prediction on. When using predictive text input to enter
the word you want, press each key once for a single letter, if the
displayed word is the one you want, press 0, and start writing the
next word. To change the word, press * repeatedly until the word
you want appears. If ? is displayed after the word, the word is not
in the dictionary. To add the word to the dictionary, select Spell,
enter the word (using traditional text input), and select Save.
Tips for writing text: to add a space, press 0. To quickly change
the text input method, press # repeatedly and check the indicator
at the top of the display. To add a number, press and hold the
desired number key. To get a list of special characters when using
traditional text input, press *; when using predictive text input,
press and hold *.
19
Page 21

Menu functions
5. Menu functions
The phone functions are grouped into menus. Not all menu
functions or option items are described here.
Select Menu and the desired menu and submenu. Select Exit or
Back to exit the current level of menu. Press the end key to
return to the standby mode directly. To change the menu view,
select Options > Main menu view > List or Grid.
■ Messaging
The message services can only be used if they
are supported by your network or service provider.
Contact your service provider to check for service
availability and rates, to subscribe, and for the
correct phone settings.
Text and message settings
Select Menu > Messaging > Message settings > Text messages >
Message centers. Your SIM card supports more than one message
center, select or add the one you want to use, you may need to
get the center number from your service provider.
20
Page 22

Menu functions
Select Menu > Messaging > Message settings > Picture messages
and the following settings:
Image size (picture msgs.) — to define the image size when you
insert the image into the picture message
Allow picture message rec eption > Yes , In home network, or No —
to use the multimedia service
Configuration settings — to select the default service provider for
retrieving picture messages. Scroll to Account to see the accounts
provided by the service provider and to select the one you want
to use. You may receive the settings as a configuration message
from the service provider.
Allow advertisements — to choose whether you want to receive
advertising messages. This setting is not displayed if Allow picture
message reception is set to No.
Text messages
Select Menu > Messaging > Create message >Text message.
The short message service (SMS) (network service) allows you to
send and receive multipart messages, which consist of several
ordinary text messages. Invoicing may be based on the number
of ordinary messages that are required for a multipart message.
Note that using special (Unicode) characters take up more space.
21
Page 23

Menu functions
The blinking indicates that the message memory is full. Before
you can receive new messages, delete some of your old messages.
Picture messages
Select Menu > Messaging > Create message > Picture msg.
Note: Only devices that have compatible features can
receive and display picture messages. The appearance of
a message may vary depending on the receiving device.
The multimedia messaging service (MMS) (network
service) allows you to send and receive messages that
can contain text, sound, and a picture. The wireless
network may limit the size of MMS messages. If the
inserted picture exceeds this limit, the device may make
it smaller so that it can be sent by MMS.
You cannot receive any picture messages if you have a call in
progress or a game or another Java application running. Because
delivery of picture messages can fail for a variety of reasons, do
not rely solely upon them for essential communications.
Copyright protections may prevent some images, music, ringing
tones, and other content from being copied, modified, transferred,
or forwarded.
22
Page 24

Menu functions
Your phone supports sending and receiving picture messages that
contain several pages (slides). To insert a slide in the message,
select Options > Insert > Slide. To set the interval between the
slides, select Options > Slide timing.
When you have a new picture message waiting and the memory
for the messages is full, blinks and Memory full. Unable to
receive msgs. is displayed. To receive the message, select OK >
Yes and the folder to delete old messages.
Flash messages
Flash messages (network) are text messages that are
instantly displayed.
Select Menu > Messaging > Create message > Flash message.
Note: Only devices that offer compatible flash message
features can receive and display blinking flash messages.
Audio message
You can use MMS (network service) to create and send a
voice message. MMS must be activated before you can use
audio messages.
23
Page 25

Menu functions
Select Menu > Messaging > Create message > Audio message.
The recorder opens. When you finish recording an audio message,
to send the message, enter the recipient’s phone number in the
To: field. To view the available options, select Options. To retrieve
a phone number from Contacts, select Add > Contact.
When your phone receives audio messages, 1 audio message
received or the number of messages and the text messages
received is displayed. To open the message, select Play; or if more
than one message is received, select Show > Play. To listen to the
message later, select Exit. Select Options to see the available
options. The audio message is played through the earpiece by
default. Select Options > Loudspeaker to choose loudspeaker to
play if you want.
Voice messages
The voice mailbox is a network service that you may need to
subscribe to it. Contact your service provider for voice mailbox
number and detailed information.
Select Menu > Messaging > Voice mail.
24
Page 26

Menu functions
E-mail application
The e-mail application (network service) allows you to access
your compatible e-mail account from your phone. Before you can
send and retrieve any e-mail, you may need to obtain an e-mail
account and the required settings. Contact your service provider
for the e-mail application availability, and if available, the rates
to subscribe and the correct phone settings. You may receive the
e-mail configuration settings as a configuration message.
To write and send an e-mail, select Menu > Messaging > E-mail >
Write new e-mail. If more than one e-mail account is defined,
select the account from which you want to send the e-mail.
To attach a file to the e-mail, select Options > Attach file and
the file in Gallery. When you finish entering the e-mail message,
select Send > Send now.
To download e-mail, select Menu > Messaging > E-mail > Check
new e-mail and the account. E-mail headers are downloaded.
To download a complete e-mail message, select Back > Inboxes,
the account, the new message header, and Retrieve.
Important: Exercise caution when opening messages.
E-mail messages may contain malicious software or
otherwise be harmful to your device or PC.
25
Page 27

Menu functions
Your phone saves e-mail that you have downloaded from your
e-mail account in the Inboxes folder. Other folders are Drafts
for saving unfinished e-mail, Archive for organizing and saving
your e-mail, Outbox for saving e-mail that has not been sent,
and Sent items for saving e-mail that has been sent. To manage
the folders and their e-mail content, select Options to view the
available options of each folder.
■ Contacts
You can save names and phone numbers in the
phone memory and in the SIM card memory.
The phone memory may save contacts with
numbers and text items. Names and numbers
saved in the SIM card memory are indicated by .
To find a contact, select Menu >Phonebook > Names > Options >
Find. Scroll through the list of contacts, or enter the first letter of
the name you want to find. To add a new contact, select Menu >
Phonebook > Names > Options > Add new contact. To add more
details to a contact, make sure that the memory in use is Phone or
Phone and SIM. Scroll to the name to which you want to add a new
number or text item, and select Details > Options > Add detail.
To copy a contact, select Options > Copy contact. You can copy
names and phone numbers between the phone contact memory
26
Page 28

Menu functions
and the SIM card memory. The SIM card memory can save names
with one phone number attached to them. To assign a number to a
dialing key, select Menu > Phonebook > 1-touch dialing, and scroll
to the dialing key number that you want to assign.
Select Menu > Phonebook > Settings and from the
following settings:
Memory in use — to select SIM card or phone memory for your
contacts. To recall names and number from both memories, select
Phone and SIM.
Phonebook view — to select how the names and numbers in
contacts are displayed
Memory status — to view the free and used memory capacity
■ Log
The phone logs the missed, received, and
dialed call numbers, and the approximate
length of your calls (network service).
The network must support these functions, and the phone must
be switched on and inside the network service area.
Select Menu > Log > Call timers, Packet data counter, or Packet
data conn. timer for approximate information on your recent
communications.
27
Page 29

Menu functions
Note: The actual invoice for calls and services from your
service provider may vary, depending upon network
features, rounding off for billing, taxes and so forth.
Select Menu > Log and the appropriate list:
Missed calls — to display a list of phone numbers from which
someone attempted to call you and the quantity of calls from
that caller
Received calls — to display a list of recently accepted or
declined calls
Dialed numbers — to display a list of recently called numbers
Clear log lists — to delete the recent calls lists. You cannot undo
this operation.
You can view the date and the time of the call, edit or delete the
phone number from the list, save the number in Phonebook, or
send a message to the number.
■ Settings
You can adjust various phone settings in
this menu. To reset some of the menu
settings to their original values, select
Menu > Settings > Restore settings. Enter your security code.
28
Page 30

Menu functions
Tone settings
Select Menu > Settings > Tones, and change any of the available
options. Your phone supports MP3 format ringing tones. You can
also set your recordings as ringing tones.
My shortcuts
With personal shortcuts, you get quick access to frequently used
phone functions.
Select Menu > Settings > My shortcuts > Right selection key to
allocate one phone function to the right selection key.
Select Menu > Settings > My shortcuts > Navigation key to set
shortcut functions for the scroll key. Scroll to the desired shortcut
key, and select Change and a function from the list. To remove a
shortcut function from the key, select (empty). To reassign a
function for the key, select Assign.
Call and phone settings
Select Menu > Settings > Call and one of the following options:
Call forwarding (network service) — to forward your incoming
calls. For details, contact your service provider
Automatic redial > On — to make 10 attempts to connect the
call after an unsuccessful attempt
29
Page 31

Menu functions
Call waiting > Activate — to be notified by the network of an
incoming call while you have a call in progress (network service).
Send my caller ID (network service) > Set by network, Yes or No
Select Menu >Settings > Phone > Language settings > Phone
language to set the display language of your phone. If you select
Automatic the phone selects the language according to the
information on the SIM card.
Display, time, and date settings
Select Menu > Settings > Display > Power saver > On to save
some battery pow er. A digital clock is displ ayed when no function
of the phone is used for a certain time.
Select Menu > Settings > Time and date and from the
following options:
Clock — To show the clock in the standby mode, adjust the clock,
and select the time zone and the time format.
Date — To show the date in the standby mode, set the date, and
select the date format and date separator.
Auto-update of date & time (network service) — Set the phone to
update the time and date automatically according to the current
time zone.
30
Page 32

Menu functions
GPRS connectivity
General packet radio service (GPRS) (network service) is a data
bearer that enables wireless access to data networks such as
the Internet. The applications that may use GPRS are MMS,
browsing, and Java application downloading.
Before you can use GPRS technology, contact your network
operator or service provider for availability of and subscription
to the GPRS service. Save the GPRS settings for each of the
applications used over GPRS. For information on pricing, contact
your network operator or service provider.
Select Menu > Settings > Connectivity > Packet data > Packet
data connection. Select Always online to set the phone to
automatically register to a GPRS network when you switch the
phone on. Select When needed to allow GPRS registration and
connection when needed, and closed when you end the application.
Enhancement settings
The compatible mobile enhancement item is displayed only if
the phone is or has been connected to it.
31
Page 33

Menu functions
Select Menu > Settings > Enhancements and the available
enhancement. For example, once you connect the headset to your
phone, you may select Automatic answer to set the phone to
answer an incoming call automatically when using a headset.
If the Incoming call alert is set to Beep once or Off, automatic
answer is not functional.
Configuration settings
Some of the network services need to have the correct configuration
settings on your phone. Get the settings from your SIM card, a
service provider as a configuration message, or enter your personal
settings manually.
Select Menu > Settings > Configuration and from the following:
Default configuration settings — to view the list of service provide rs
stored on the phone (the default service provider is highlighted)
or to select another service provider as default. Scroll to a provider
and select Details to view the list with supported applications
Activate default in all applications — to set the applications to
use the settings from the default service provider
Preferred access po int — to select another access point (normally
the access point from your preferred network operator is used)
32
Page 34

Menu functions
Connect to service provider support — to download the
configuration settings from your service provider
To enter, view, and edit the settings manually, select Menu >
Settings > Configuration > Personal configuration settings.
■ Operator menu
This menu lets you access a portal to services provided by your
network operator. This menu is operator specific. The name and
the icon depend on the operator. The operator can update this
menu with a service message. For more information, contact
your network operator.
■ Gallery
In this menu, you can manage themes,
graphics, recordings, and tones. These files
are arranged in folders.
Your phone supports a digital rights management (DRM) system
to protect acquired content. Always check the delivery terms of
any content and activation key before acquiring them, since they
may be subject to a fee.
Select Menu > Gallery. Themes, Graphics, Tones, Music files,
Recordings, and Receiv. files are the default folders.
33
Page 35

Menu functions
■ Media
Voice recorder
You can record pieces of speech, sound, or an
active call. This is useful for recording a name
and phone number to write them down later. The recorder
cannot be used when a data call or GPRS connection is active.
Select Menu > Media > Recorder, and start the recorder. To start
the recording during a call, select Options > Record. When you
record a call, hold the phone in the normal position near to your
ear. The recording is saved in Gallery > Recordings. To listen to
the latest recording, select Options > Play last recorded. To send
the last recording using MMS, select Options > Send last recorded.
■ Organizer
Alarm clock and calendar
You can set the phone to sound an alarm at a desired time. Select
Menu > Organizer > Alarm clock > Alarm time to set the time for
the alarm, Repeat alarm to set the phone to alert you on selected
days of the week, and Alarm tone to select or pe rsonalize the alarm
tone. To set the time out for the snooze alert, select Snooze
time-out and the time.
34
Page 36

Menu functions
The phone sounds an alert tone, and flashes Alarm! and the current
time on the display, even if the phone is switched off. Select Stop
to stop the alarm. If you let the phone continue to sound the
alarm for a minute or select Snooze, the alarm stops for about
10 minutes, then resumes.
If the alarm time is reached while the device is switched off, the
device switches itself on and starts sounding the alarm tone. If
you select Stop, the device asks whether you want to activate
the device for calls. Select No to switch off the device or Yes to
make and receive calls. Do not select Yes when wireless phone
use may cause interference or danger.
Select Menu > Organizer > Calendar. The current day is indicated
by a frame. If there are any notes set for the day, the day is in
bold type. To view the notes, select View. To delete all notes in
the calendar, select the month, and Options > Delete all notes.
Other options may be creating, deleting, editing, and moving a
note, copying a note to another day, or sending a note directly
to another compatible phone calendar as a text message or a
multimedia message.
35
Page 37

Menu functions
Calculator
The calculator in your phone adds, subtracts, multiplies,
divides, calculates the square and the square root, and
converts currency values.
Note: This calculator has limited accuracy and is
designed for simple calculations.
Select Menu > Organizer > Calculator. When 0 is displayed on
the screen, enter the first number in the calculation. Press # for
a decimal point. Select Options > Add, Subtract, Multiply, Divide,
Square, Square root, or Change sign. Enter the second number.
To get the answer, select Equals. To start a new calculation,
first press and hold Clear.
To perform a currency conversion, select Menu > Organizer >
Calculator. To save the exchange rate, select Options > Exchange
rate. Select either of the displayed options. Enter the exchange
rate, press # for a decimal point, and select OK. To perform the
currency conversion, enter the amount to be converted, and
select Options > To home or To foreign.
Note: When you change base currency, you must enter
new exchange rates because all previously set exchange
rates are cleared.
36
Page 38

Menu functions
■ Applications
Your phone software may include some games
and Java applications specially designed for
this Nokia phone.
To view the amount of memory available for game and
application installations, select Menu > Applications >
Options > Memory status. To launch a game or an application,
select Menu > Applications > Games, or Collection. Scroll to a
game or an application, and select Open. To download a game
or an application, select Menu > Applications > Options >
Downloads > Game downloads or App. downloads. Your phone
supports J2ME
is compatible with your phone before downloading it.
Note that when downloading an application, it may be saved in
the Games menu instead of the Applications menu.
TM
Java applications. Make sure t hat the application
Important: Only install applications from sources that
offer adequate protection against harmful software.
37
Page 39

Menu functions
■ Web
You can access various mobile Int ernet services
with your phone browser. Check the availability
of these services, pricing, and tariffs with your
network operator or the service provider.
Important: Use only services that you trust and
that offer adequate security and protection against
harmful software.
Service connection
Make sure that service settings are saved and activated.
To make a connection to the service from the standby mode,
select Menu > Web > Home, or press and hold 0.
To select a bookmark, select Menu > Web > Bookmarks. If the
bookmark does not work with the current active service settings,
activate another set of service settings and try again.
To select the last URL, select Menu > Web > Last web addr.
To enter the address of the service, select Menu > Web >
Go to address > OK.
To quit browsing and end the connection, select Options > Quit.
Alternatively, press the end key twice, or press and hold the end key.
38
Page 40

Menu functions
After you connect to the service, you can browse its pages.
The function of the phone keys may vary in different services.
Follow the text guides on the phone display.
If GPRS is selected as the data bearer, the indicator is displayed
on the top left of the display during browsing. If you receive a call or
a text message or make a call during a GPRS connection, the
indicator is displayed on the top left of the display to indicate
that the GPRS connection is suspended (on hold). After a call,
the phone tries to reconnect the GPRS connection.
While you are browsing, options such as Home and Bookmarks
may be available. The service provider may offer additional options.
Your device may have some bookmarks loaded for sites not
affiliated with Nokia. Nokia does not warrant or endorse these
sites. If you choose to access them, you should take the same
precautions, for security or content, as you would with any
Internet site.
Browser appearance settings
In the standby mode, select Menu > Web > Settings > Appearance
settings and from the following options:
Text wrapping > On — to allow the text to continue on the next
line. If you select Off, the text is abbreviated.
39
Page 41

Menu functions
Show images > No — to prevent any pictures appearing on the
page from being displayed
Alerts > Alert for unsecure connection > Yes — to set the phone
to alert when a secure connection changes to an insecure one
during browsing
Alert for unsecure items > Yes — to set the phone to alert when
a secure page contains an insecure item. These alerts do not
guarantee a secure connection.
Character encoding — to select the character set for showing
browser pages that does not include that information or to
select whether to always use UTF-8 encoding when sending a
Web address to a compatible phone
Cookies and cache memory
A cookie is data that a site saves in your phone browser cache
memory. The data can be your user information or your browsing
preferences. Cookies are saved until you clear the cache memory.
To allow or prevent the phone from receiving cookies, select
Menu > Web > Settings > Security settings > Cookies > Allow
or Reject.
If you have tried to access or have accessed confidential
information requiring passwords, empty the cache after each
use. To empty the cache, select Menu > Web > Clear the cache.
40
Page 42

Menu functions
Service inbox
The phone can receive service messages (network service) sent
by your service provider. To read this service message, select
Show. Select Exit to move the message to the Service inbox. To
set the phone to receive (or not to receive) service messages,
select Menu > Web > Settings > Service inbox settings >
Service messages > On (or Off).
Browser security
Security features may be required for some services, such as
banking services or online shopping. For these services, you
need security certificates and possibly a security module that
may be available on your SIM card. For more information,
contact your service provider.
■ SIM services
Your SIM card may provide additional
services. For information, contact your
service provider.
41
Page 43

Battery information
6. Battery information
■ Charging and discharging
Your device is powered by a rechargeable battery. The full
performance of a new battery is achieved only after two or
three complete charge and discharge cycles. The battery can be
charged and discharged hundreds of times, but it will eventually
wear out. When the talk and standby times are noticeably shorter
than normal, replace the battery. Use only Nokia approved
batteries, and recharge your battery only with Nokia approved
chargers designated for this device.
If a replacement battery is being used for the first time or if
the battery has not been used for a prolonged period, it may
be necessary to connect the charger and then disconnect and
reconnect it to start the charging.
Unplug the charger from the electrical plug and the device when
not in use. Do not leave fully charged battery connected to a
charger, since overcharging may shorten its lifetime. If left unused,
a fully charged battery will lose its charge over time.
42
Page 44

Battery information
If the battery is completely discharged, it may take a few minutes
before the charging indicator appears on the display or before
any calls can be made.
Use the battery only for its intended purpose. Never use any
charger or battery that is damaged.
Do not short-circuit the battery. Accidental short-circuiting can
occur when a metallic object such as a coin, clip, or pen causes
direct connection of the positive (+) and negative (-) terminals
of the battery. (These look like metal strips on the battery.) This
might happen, for example, when you carry a spare battery in
your pocket or purse. Short-circuiting the terminals may damage
the battery or the connecting object.
Leaving the battery in hot or cold places, such as in a closed car
in summer or winter conditions, will reduce the capacity and
lifetime of the battery. Always try to keep the battery between
15°C and 25°C (59°F and 77°F). A device with a hot or cold battery
may not work temporarily, even when the battery is fully charged.
Battery performance is particularly limited in temperatures well
below freezing.
Do not dispose of batteries in a fire as they may explode. Batteries
may also explode if damaged. Dispose of batteries according to
local regulations. Please recycle when possible. Do not dispose
as household waste.
43
Page 45

Battery information
■ Nokia battery authentication guidelines
Always use original Nokia batteries for your safety. To check that
you are getting an original Nokia battery, purchase it from an
authorized Nokia dealer, look for the Nokia Original Enhancements
logo on the packaging, and inspect the hologram label using
the following steps:
Successful completion of the four steps is not a total assu rance of
the authenticity of the battery. If you have any reason to believe
that your battery is not an authentic original Nokia battery, you
should refrain from using it and take it to the nearest authorized
Nokia service point or dealer for assistance. Your authorized Nokia
service point or dealer will inspect the battery for authenticity.
If authenticity cannot be verified, return the battery to the
place of purchase.
44
Page 46

Battery information
Authenticate hologram
1. When looking at the hologram on the
label, you should see the Nokia
connecting hands symbol from one angle
and the Nokia Original Enhancements
logo when looking from another angle.
2. When you angle the hologram left, right,
down, and up, you should see 1, 2, 3,
and 4 dots on each side respectively.
3. Scratch the side of the label to reveal a
20-digit code, for example,
12345678919876543210. Turn the
battery so that the numbers are facing
upwards. The 20-digit code reads
starting from the number at the top
row followed by the bottom row.
4. Confirm that the 20-digit code is valid by following the
instructions at www.nokia.com/batterycheck
.
45
Page 47

Battery information
What if your battery is not authentic?
If you cannot confirm that your Nokia battery with the hologram on
the label is an authentic Nokia battery, please do not use the
battery. Take it to the nearest authorized Nokia service point or
dealer for assistance. The use of a battery that is not approved
by the manufacturer may be dangerous and may result in poor
performance and damage to your device and its enhancements. It
may also invalidate any approval or warranty applying to the device.
To find out more about original Nokia batteries,
visit www.nokia.com/battery
.
46
Page 48

Enhancements
7. Enhancements
A few practical rules about accessories and enhancements:
• Keep all accessories and enhancements out of the reach of
small children.
• When you disconnect the power cord of any accessory or
enhancement, grasp and pull the plug, not the cord.
• Check regularly that enhancements installed in a vehicle are
mounted and are operating properly.
• Installation of any complex car enhancements must be
made by qualified personnel only.
47
Page 49

Care and maintenance
Care and maintenance
Your device is a product of superior design and craftsmanship and
should be treated with care. The suggestions below will help you
protect your warranty coverage.
• Keep the device dry. Precipitation, humidity and all types of
liquids or moisture can contain minerals that will corrode
electronic circuits. If your device does get wet, remove the
battery and allow the device to dry completely before
replacing it.
• Do not use or store the device in dusty, dirty areas. Its moving
parts and electronic components can be damaged.
• Do not store the device in hot areas. High temperatures can
shorten the life of electronic devices, damage batteries, and
warp or melt certain plastics.
• Do not store the device in cold areas. When the device returns
to its normal temperature, moisture can form inside the
device and damage electronic circuit boards.
• Do not attempt to open the device other than as instructed
in this guide.
48
Page 50

Care and maintenance
• Do not drop, knock, or shake the device. Rough handling can
break internal circuit boards and fine mechanics.
• Do not use harsh chemicals, cleaning solvents, or strong
detergents to clean the device.
• Do not paint the device. Paint can clog the moving parts and
prevent proper operation.
• Use only the supplied or an approved replacement antenna.
Unauthorized antennas, modifications, or attachments could
damage the device and may violate regulations governing
radio devices.
• Use chargers indoors.
• Always create a backup of data you want to keep (such as
contacts and calendar notes) before sending your device to
a service facility.
All of the above suggestions apply equally to your device, battery,
charger, or any enhancement. If any device is not working properly,
take it to the nearest authorized service facility for service.
49
Page 51

Additional safety information
Additional safety information
Your device and its enhancements may contain small parts.
Keep them out of the reach of small children.
■ Operating environment
Remember to follow any special regulations in force in any area,
and always switch off your device when its use is prohibited or
when it may cause interference or danger. Use the device only
in its normal operating positions. This device meets RF exposure
guidelines when used either in the normal use position against
the ear or when positioned at least 2.2 centimeters (7/8 inch)
from the body. When a carry case, belt clip or holder is used for
body-worn operation, it should not contain metal and should
position the device the above-stated distance from your body.
In order to transmit data files or messages, this device requires a
good quality connection to the network. In some cases, transmission
of data files or messages may be delayed until such a connection
is available. Ensure the above separation distance instructions
are followed until the transmission is completed.
50
Page 52

Additional safety information
Parts of the device are magnetic. Metallic materials may be
attracted to the device. Do not place credit cards or other magnetic
storage media near the device, because information stored on
them may be erased.
■ Medical devices
Operation of any radio transmitting equipment, including wireless
phones, may interfere with the functionality of inadequately
protected me dical devices. Consult a physician or the manufacturer
of the medical device to determine if they are adequately shielded
from external RF energy or if you have any questions. Switch off
your device in health care facilities when any regulations posted
in these areas instruct you to do so. Hospitals or health care
facilities may be using equipment that could be sensitive to
external RF energy.
Pacemakers
Pacemaker manufacturers recommend that a minimum separation
of 15.3 centimeters (6 inches) be maintained between a wireless
phone and a pacemaker to avoid potential interference with the
pacemaker. These recommendations are consistent with the
independent research by and recommendations of Wireless
Technology Research. Persons with pacemakers should:
51
Page 53

Additional safety information
• Always keep the device more than 15.3 centimeters
(6 inches) from the pacemaker
• Not carry the device in a breast pocket
• Hold the device to the ear opposite the pacemaker to minimize
the potential for interference.
If you suspect interference, switch off your device and move the
device away.
Hearing aids
Some digital wireless devices may interfere with some hearing
aids. If interference occurs, consult your service provider.
■ Vehicles
RF signals may affect improperly installed or inadequately shielded
electronic systems in motor vehicles such as electronic fuel
injection systems, electronic antiskid (antilock) braking systems,
electronic speed control systems, air bag systems. For more
information, check with the manufacturer or its representative of
your vehicle or any equipment that has been added.
Only qualified personnel should service the device, or install the
device in a vehicle. Faulty installation or service may be dangerous
and may invalidate any warranty that may apply to the device.
52
Page 54

Additional safety information
Check regularly that all wireless device equipment in your vehicle
is mounted and operating properly. Do not store or carry flammable
liquids, gases, or explosive materials in the same compartment
as the device, its parts, or enhancements. For vehicles equipped
with an air bag, remember that air bags inflate with great force.
Do not place objects, including installed or portable wireless
equipment in the area over the air bag or in the air bag deployment
area. If in-vehicle wireless equipment is improperly installed and
the air bag inflates, serious injury could result.
Using your device while flying in aircraft is prohibited. Switch
off your device before boarding an aircraft. The use of wireless
teledevices in an aircraft may be dangerous to the operation of the
aircraft, disrupt the wireless telephone network, and may be illegal.
■ Potentially explosive environments
Switch off your device when in any area with a potentially
explosive atmosphere and obey all signs and instructions.
Potentially explosive atmospheres include areas where you would
normally be advised to turn off your vehicle engine. Sparks in such
areas could cause an explosion or fire resulting in bodily injury
or even death. Switch off the device at refueling points such as
near gas pumps at service stations. Observe restrictions on the
use of radio equipment in fuel depots, storage, and distribution
53
Page 55

Additional safety information
areas, chemical plants or where blasting operations are in progress.
Areas with a potentially explosive atmosphere are often but not
always clearly marked. They include below deck on boats, chemical
transfer or storage facilities, vehicles using liquefied petroleum
gas (such as propane or butane), and areas where the air contains
chemicals or particles such as grain, dust, or metal powders.
■ Emergency calls
Important: Wireless phones, including this device, operate
using radio s ignals, wireless networks , landline networks,
and user-programmed functions. Because of this,
connections in all conditions cannot be guaranteed.
You should never rely solely on any wireless device for
essential communications like medical emergencies.
To make an emergency call:
1. If the device is not on, switch it on. Check for adequate
signal strength.
Some networks may require that a valid SIM card is properly
inserted in the device.
2. Press the end key as many times as needed to clear the
display and ready the device for calls.
54
Page 56

Additional safety information
3. Enter the official emergency number for your present
location. Emergency numbers vary by location.
4. Press the call key.
If certain features are in use, you may first need to turn those
features off before you can make an emergency call. If the
device is in the offline or flight mode, you must change the
profile to activate the phone function before you can make an
emergency call. Consult this guide or your service provider for
more information.
When making an emergency call, give all the necessary information
as accurately as possible. Your wireless device may be the only
means of communication at the scene of an accident. Do not
end the call until given permission to do so.
55
Page 57

Additional safety information
■ Certification information (SAR)
THIS MOBILE DEVLICE MEETS GUIDELINES FOR EXPOSURE TO
RADIO WAVES.
Your mobile device is a radio transmitter and receiver. It is
designed not to exceed the limits for exposure to radio waves
recommended by international guidelines. These guidelines were
developed by the independent scientific organization ICNIRP
and include safety margins designed to assure the protection of
all persons, regardless of age and health.
The exposure guidelines for mobile devices employ a unit of
measurement known as the Specific Absorption Rate or SAR.
The SAR limit stated in the ICNIRP guidelines is 2.0 watts/
kilogram (W/kg) averaged over 10 grams of tissue. Tests for SAR
are conducted using standard operating positions with the device
transmitting at its highest certified power level in all tested
frequency bands. The actual SAR level of an operating device
can be below the maximum value because the device is designed
to use only the power required to reach the network. That amount
changes depending on a number of factors such as how close you
are to a network base station. The highest SAR value under the
ICNIRP guidelines of device RH-86 for use at the ear is 0.56 W/kg
and of device RH-87 is 0.68 W/kg.
56
Page 58

Additional safety information
Use of device accessories and enhancements may result in
different SAR values. SAR values may vary depending on national
reporting and testing requirements and the network band.
Additional SAR information may be provided under product
information at www.nokia.com
.
Your mobile device is also designed to meet the requirements for
exposure to radio w aves established by the Federal Com munications
Commission (USA) and In dustry Canada. These requirements set a
SAR limit of 1.6 W/kg averaged over 1 gram of tissue. The highest
SAR value reported under this standard during product certification
for use at the ear for device type RH-87 is 1.10 W/kg and when
properly worn on the body is 0.84 W/kg. Information about this
device can be found at http://www.fcc.gov/oet/fccid
by
searching the equipment authorization system using FCC ID:
QTLRH-87.
57
Page 59

Additional safety information
■ Technical Information
Feature Specification
Weight 91 g (3.2 oz) with battery
Size
Frequency
range
Transmitter
output power
Battery
voltage
Operating times Standby time: up to 300 hours
Operating
temperature
Volume: 70 cm
Length: 104 mm (4.1 in)
Width: 43 mm (1.7 in)
Thickness: 18 mm (0.71 in)
RH-86
GSM 900
880–915 MHz (TX)
925–960 MHz (RX)
GSM 1800
1710–1785 MHz (TX)
1805–1865 MHz (RX)
Up to 2 W
3.7 V dc
BL-5C, 1020 mAh
Talk time: up to 4 hours
15°C to + 25°C
(59°F to + 77°F)
58
3
(4.3 in3)
RH-87
GSM 850
824–849 MHz (TX)
869–894 MHz (RX)
GSM 1900
1850–1910 MHz (TX)
1930–1990 MHz (RX)
Page 60

Index
Index
A
access codes 10
alarm clock 34
applications 37
audio messages 23
B
battery
authentication 44
charging 13, 42
discharging 42
installing 11
C
cache memory 40
calculator 36
calendar 34
call
functions 18
settings 29
charging the battery 13
codes, access 10
configuration settings 32
connectivity 31
contacts 26
cookies 40
E
e-mail 25
enhancements 31, 47
F
flash messages 23
G
gallery 33
K
keypad lock 17
keys 15
L
log 27
59
Page 61

Index
M
messages
audio 23
flash 23
picture 22
text 21
voice 24
MMS. See multimedia
message service.
multimedia message service 22
N
names 26
navigation. See scroll key.
network services 8
P
picture messages 22
S
scroll key 15
settings
call and phone 29
configuration 32
display, time, and date 30
60
enhancements 31
shortcuts 29
text and picture
messaging 20
tone 29
shortcuts 29
SIM card 11
standby mode 16
T
text
messages 20, 21
write 19
time and date settings 30
tone settings 29
V
voice
messages 24
recorder 34
volume, adjust 15, 18
W
Web 38
Page 62

Nokia 2610 Manual del Usuario
9250951
Edición 1a
61
Page 63

DECLARACIÓN DE CONFORMIDAD
Por este medio, NOKIA CORPORATION, declara que este producto RH-86
se adapta a las condiciones dispuestas y otras provisiones relevantes de
la Directiva 1999/5/EC.
Existe una copia de la Declaración de Conformidad disponible en la dirección
http://www.nokia.com/phones/declaration_of_conformity/
(en inglés).
0434
PARTE Nº 9250951, Edición Nº 1a
Copyright © 2007 Nokia. Todos los derechos reservados.
Se prohíbe la duplicación, desvío, distribución o almacenamiento parcial
o de todo el contenido de este documento en ninguna forma sin previo
permiso escrito por Nokia.
Nokia, Nokia Connecting People y Xpress-on son marcas, registradas o
no, de Nokia Corporation. Otros nombres de productos y compañías aquí
mencionados podrían ser marcas o nombres, registradas o no, de sus
respectivos propietarios.
Nokia Tune es una marca de sonido registrada de Nokia Corporation.
Nº Patente EE.UU. 5818437 y otras patentes pendientes. Software ingreso
de texto T9 Copyright © 1997-2007. Tegic Communications, Inc.
Todos los derechos reservados.
62
Page 64

Se incluye el software de protocolo de seguridad o criptográfico
RSA BSAFE de RSA Security.
Java es marca registrada de Sun Microsystems, Inc.
Nokia opera bajo un sistema de desarrollo continuo. Nokia se reserva el
derecho de hacer cambios y mejoras en cualquier producto descrito en
este manual sin previo aviso.
BAJO NINGÚN CONCEPTO NOKIA SERÁ RESPONSABLE POR CUALQUIER
PÉRDIDA DE DATOS O GANANCIAS O POR CUALQUIER OTRO DAÑO
ESPECIAL O INCIDENTAL, POR CUALQUIER CA USA DIRECTA O INDIRECTA.
EL CONTENIDO DE ESTE DOCUMENTO ESTÁ PROVISTO "TAL CUAL”.
ADEMÁS DE LAS EXIGIDAS POR LAS LEYES, NO SE EMITE NINGUNA OTRA
GARANTÍA DE NINGÚN TIPO, SEA EXPRESA O IMPLÍCITA, INCLUYENDO,
PERO SIN LIMITARSE A, GARANTÍAS IMPLÍCITAS DE MERCADEO Y DE
CAPACIDAD PARA UN PROPÓSITO PARTICULAR, EN CUANTO A LA
PRECISIÓN Y FIABILIDAD O CONTENIDO DE ESTE DOCUMENT O. NOKIA SE
RESERVA EL DERECHO DE REVISAR ESTE DOCUMENTO O DESCONTINUAR
SU USO EN CUALQUIER MOMENTO SIN PREVIO AVISO. LA
DISPONIBILIDAD DE CIERTOS PRODUCTOS PUEDE VARIAR POR REGIÓN.
CONSULTE A SU DISTRIBUIDOR LOCAL DE NOKIA MÁS CERCANO.
La disponibilidad de las funciones y productos puede variar dependiendo
del país y el operador, por favor consulte a su distribuidor local para
obtener mayor información.
63
Page 65

CONTROL DE EXPORTACIONES
Este dispositivo podría contener bienes, tecnología o software sujeto a las
leyes y regulaciones de exportación de los Estados Unidos y otros países.
Se prohíbe su desvío contraviniendo las leyes.
AVISO FCC/ INDUSTRIA CANADIENSE
Su dispositivo puede causar interferencias radioeléctricas y televisivas
(ej., cuando usted usa su dispositivo muy próximo a equipos receptores
electrónicos). La FCC/Industria Canadiense puede exigirle que deje de
usar su teléfono si tales interferencias no se pueden eliminar. Si necesita
ayuda, comuníquese con su centro de servicio local. Este aparato cumple
con la sección 15 de los reglamentos de la FCC. El funcionamiento de este
dispositivo está sujeto a las siguientes condiciones: (1) el dispositivo no
debe causar interferencia perjudicial, y (2) este dispositivo debe aceptar
cualquier interferencia recibida, incluso interferencia que pueda causar
un funcionamiento no deseado. Cualquier cambio o modificación que no
haya sido expresamente aprobado por Nokia puede anular la autoridad
del usuario para operar este equipo.
64
Page 66

Contenido
Contenido
Para su seguridad ..............66
Información general..........71
Códigos de acceso.........................71
1. Introducción..................72
Instalar la tarjeta SIM y
la batería .........................................72
Cargar la batería............................74
Posición normal
de funcionamiento........................75
2. Su teléfono....................76
Teclas y partes................................76
Modo standby ................................77
Modo de demostración................78
Bloqueo del teclado......................78
3. Funciones de llamada...79
Realizar y contestar
una llamada....................................79
Altavoz .............................................79
4. Escribir texto.................80
5. Funciones de menú.......82
Mensajería.......................................82
Contactos.........................................88
Registro............................................90
Configuraciones.............................91
Menú operador...............................96
Galería ..............................................97
Grabadora de voz ..........................97
Organizador.....................................98
Aplicaciones................................. 100
Web ................................................101
Servicios SIM ............................... 106
6. Información sobre
las baterías ................. 107
Carga y descarga ........................ 107
Normas para la autenticación de
baterías Nokia .............................109
7. Accesorios .................. 112
Cuidado y mantenimiento.113
Información adicional
de seguridad ................... 115
Índice .............................. 125
65
Page 67

Para su seguridad
Para su seguridad
Lea estas sencillas normas. El incumplimiento de ellas puede ser
peligroso o ilegal. Lea el manual del usuario completo para
obtener más información.
ENCIENDA EL TELÉFONO EN FORMA SEGURA
No encienda el teléfono donde el uso de teléfonos
móviles esté prohibido o pueda causar interferencia
o peligro.
LA SEGURIDAD VIAL ANTE TODO
Obedezca todas las leyes locales. Mantenga siempre
las manos libres para maniobrar el vehículo mientras
conduce. Su prioridad cuando conduce debe ser la
seguridad vial.
INTERFERENCIAS
Todos los teléfonos móviles pueden ser susceptibles a
interferencias que pueden afectar a su rendimiento.
APAGUE EL TELÉFONO EN LOS HOSPITALES
Respete todas las restricciones existentes. Apague el
teléfono cuando se encuentre cerca de equipo médico.
66
Page 68

Para su seguridad
APAGUE EL TELÉFONO EN LOS AVIONES
Respete todas las restricciones existentes. Los
dispositivos celulares pueden causar interferencias
en los aviones.
APAGUE EL TELÉFONO CUANDO CARGUE COMBUSTIBLE
No utilice el teléfono en las estaciones de servicio.
Tampoco cerca de combustibles ni elementos químicos.
APAGUE EL TELÉFONO CERCA DE DONDE SE
REALIZAN EXPLOSIONES
Respete todas las restricciones existentes. No utilice
su teléfono donde se estén realizando explosiones.
ÚSELO CORRECTAMENTE
Use el dispositivo sólo en la posición normal como
se explica en la documentación del producto. Evite
el contacto innecesario con la antena.
SERVICIO TÉCNICO CALIFICADO
Sólo personal de servicio técnico calificado puede
instalar o reparar este producto.
ACCESORIOS Y BATERÍAS
Utilice sólo baterías y accesorios aprobados.
No conecte productos incompatibles.
67
Page 69

Para su seguridad
NO MOJE EL TELÉFONO
Su teléfono no es resistente al agua. Manténgalo seco.
COPIAS DE SEGURIDAD
Recuerde hacer c opias de seguridad o llevar un registr o
por escrito de toda la información importante que
guarda en el teléfono.
CONEXIÓN CON OTROS DISPOSITIVOS
Antes de conectar el teléfono con otro dispositivo,
lea el manual del usuario para obtener
instrucciones detalladas de seguridad.
No conecte productos incompatibles.
LLAMADAS DE EMERGENCIA
Asegúrese de que el teléfono se encuentre encendido y
funcionando. Pulse la tecla Finalizar tantas veces
como sea necesario para borrar lo que aparece en
pantalla y regresar a la pantalla de inicio. Ingrese el
número de emergencia y luego pulse la tecla Llamar.
Indique su ubicación. No finalice la llamada hasta
que reciba instrucciones de hacerlo.
68
Page 70

Para su seguridad
■ Acerca de su dispositivo
El dispositivo móvil descrito en este manual está aprobado para
su uso en redes GSM 850 y 1900 y GSM 900 y 1800. Comuníquese
con su proveedor de servicios para obtener más información
sobre redes.
Cuando use las funciones de este dispositivo, obedezca todas las
leyes y respete la privacidad y los derechos legítimos de los demás.
Advertencia: Para poder usar cualquiera de las
funciones en este dispositivo, con la excepción de la
alarma, es preciso encender el dispositivo. No lo
encienda donde el uso de dispositivos celulares pueda
causar interferencia o peligro.
■ Servicios de red
Para usar el teléfono debe contratar los servicios de un proveedor
de servicios móviles. Muchas de las funciones de este dispositivo
dependen de las funciones de la red celular para su funcionamiento.
Es posible que estos servicios de red no estén disponibles en todas
las redes o bien deberá hacer arreglos específicos con su proveedor
de servicios antes de utilizar los servicios de red. Es posible que
el proveedor de servicios le entregue instrucciones adicionales
sobre cómo utilizarlos y le indique qué cargos son aplicables.
69
Page 71

Para su seguridad
Algunas redes pueden tener limitaciones que inciden en el uso de
los servicios de red. Por ejemplo, es posible que algunas redes no
admitan todos los servicios y caracteres que dependen del idioma.
Su proveedor de servicios puede haber pedido que ciertas
funciones de su dispositivo sean inhabilitadas o no activadas.
De ser así, éstas no aparecerán en el menú. Es posible que su
teléfono también haya sido configurado especialmente. Esta
configuración puede incluir cambios en nombres de menús,
orden del menú e iconos. Comuníquese con su proveedor de
servicios para obtener más información.
Este dispositivo admite los protocolos WAP 2.0 (HTTP y SSL) que
se ejecutan en los protocolos TCP/IP. Algunas funciones de este
dispositivo, como mensajes de texto, mensajes con imágenes y
contenido y descargas de aplicaciones, requieren soporte de la
red para estas tecnologías.
70
Page 72

Información general
Información general
■ Códigos de acceso
El código de seguridad proporcionado con el teléfono
protege su teléfono contra su uso no autorizado.
El código preconfigurado es 12345.
El código PIN proporcionado con su tarjeta SIM, protege la tarjeta
contra su uso no autorizado. El código PIN2 proporcionado con
algunas tarjetas SIM, es necesario para acceder a ciertos servicios.
Si ingresa el código PIN o PIN2 incorrectamente tres veces
sucesivas, se le solicita el código PUK o PUK2. Si no los tiene,
comuníquese con su proveedor de servicios local.
El PIN de módulo es necesario para acceder a la información en
el módulo de seguridad de su tarjeta SIM. El PIN de firma puede
ser necesario para la firma digital. La contraseña de restricción
es necesaria cuando usa Restricción de llamadas.
Seleccione Menú > Config. > Seguridad para configurar cómo
su teléfono utiliza los códigos de acceso y configuraciones
de seguridad.
71
Page 73

Introducción
1. Introducción
■ Instalar la tarjeta SIM y la batería
Mantenga las tarjetas SIM fuera del alcance de los niños.
Para obtener más información sobre disponibilidad y uso de los
servicios de las tarjetas SIM, comuníquese con el proveedor de
su tarjeta SIM. Puede ser su proveedor de servicios, operador de
red u otro proveedor.
Siempre apague el dispositivo y desconecte el cargador antes de
retirar la batería.
Nota: Siempre apague y desconecte el cargador y
cualquier otro dispositivo antes de retirar las cubiertas.
Evite tocar los componentes electrónicos mientras cambia
las cubiertas. Utilice y guarde siempre el dispositivo con
las cubiertas colocadas.
1. Presione y deslice la cubierta posterior hacia la parte
superior del teléfono para retirar la cubierta (1).
2. Retire la batería, levantándola como se muestra (2).
3. Cuidadosamente levante el soporte de la tarjeta SIM de la
ra nura de a garre del te léfono y a bra la tapa d e la cu biert a (3).
72
Page 74

Introducción
4. Inserte la tarjeta SIM, de manera que la esquina biselada se
encuentre en el lado superior derecho y el área de contacto
dorado hacia abajo (4). Cierre el soporte de la tarjeta SIM y
presione hasta que encaje en su sitio (5).
5. Inserte la batería en la ranura de la batería (6).
6. Alinee la cubierta posterior con la parte posterior del teléfono
y deslícela hacia arriba. Empuje la cubierta posterior hacia la
parte superior del teléfono para que encaje (7).
73
Page 75

Introducción
■ Cargar la batería
Advertencia: Utilice sólo baterías, cargadores y accesorios
aprobados por Nokia para este modelo particular de
teléfono. El uso de cualquier otro tipo de batería, cargador
o accesorio puede anular toda aprobación o garantía y
podría resultar peligroso.
Verifique el modelo del cargador antes de usarlo con su dispositivo.
Este dispositivo está diseñado para su uso con los cargadores
ACP-7, ACP-12 o AC-2. Este dispositivo está diseñado para su
uso con la batería BL-5C. Para obtener más información sobre
disponibilidad de accesorios aprobados, consulte a su proveedor.
1. Conecte el cargador a un
enchufe de pared.
2. Conecte el cargador
al teléfono.
74
Page 76

Introducción
■ Posición normal de funcionamiento
Su dispositivo tiene una
antena interior.
Nota: Al igual que al usar otros dispositivos de transmisión
por radio, no toque la antena si no es necesario mientras el
dispositivo esté encendido. El contacto del cuerpo con la
antena afecta la calidad de la llamada y puede hacer que
el dispositivo funcione con una potencia más alta de la
necesaria. No tocar el área que rodea la antena durante el
uso del dispositivo optimiza el rendimiento de la antena y
la vida útil de la batería.
75
Page 77

Su teléfono
2. Su teléfono
■ Teclas y partes
• Audífono (1)
•Altavoz (2)
• Teclas de selección (3)
• Tecla de desplazamiento (4)
• Tecla Llamar (5)
• Tecla Finalizar y Tecla
Encender/Apagar (6)
• Conector del cargador (7)
• Conector del auricular (8)
Nota: Evite tocar este
conector ya que su uso
es sólo para personal de
servicio autorizado.
76
Page 78

Su teléfono
Advertencia: La tecla de desplazamiento puede
contener níquel. Evite el contacto prolongado con la
piel. La exposición continua al níquel en la piel podría
ocasionar una alergia contra el níquel.
■ Modo standby
El teléfono está en modo standby, cuando
está encendido, listo y no se ha ingresado
ningún carácter:
Nombre de la red o el logotipo del
operador (1)
Intensidad de la señal de la red (2)
Nivel de carga de la batería (3)
Ir a (4): pulse la tecla de selección izquierda para ver su lista de
accesos directos personales. Seleccione Opc. > Selec. opciones
para ver la lista de funciones disponibles que puede agregar.
Seleccione Organizar > Mover y la ubicación para volver a
arreglar su lista de accesos directos.
Menú (5): pulse la tecla de desplazamiento para mostrar las
opciones del menú principal.
Msj. voz (6): pulse la tecla de selección derecha para abrir la
grabadora de voz.
77
Page 79

Su teléfono
■ Modo de demostración
Para iniciar el teléfono sin la tarjeta SIM, acepte ¿Iniciar teléfono
sin tarjeta SIM?. Luego, utilice las funciones del teléfono que no
requieren una tarjeta SIM.
■ Bloqueo del teclado
Seleccione Menú y la tecla * rápidamente para bloquear o
desbloquear el teclado para evitar la pulsación de teclas
accidentales. Para contestar una llamada cuando la función
de bloqueo del teclado se encuentra activada, pulse la tecla
Llamar. Cuando finaliza o rechaza la llamada, el teclado
continúa bloqueado.
Seleccione Menú > Config. > Teléfon o > Bloqueo automático >
Activar para que el teclado se bloquee automáticamente tras un
lapso de tiempo predeterminado cuando el teléfono está en el
modo standby y no se ha usado ninguna función.
Cuando el bloqueo del teclado está activado, pueden realizarse
llamadas al número de emergencia oficial programado en
el dispositivo.
78
Page 80

Funciones de llamada
3. Funciones de llamada
■ Realizar y contestar una llamada
Para realizar una llamada, ingrese el número telefónico incluyendo
el código de área si es necesario. El código del país debe incluirse, si
es necesario. Pulse la tecla Llamar para llamar al número. Para
aumentar o disminuir el volumen del audífono o auricular durante
una llamada, desplácese hacia la derecha o izquierda.
Para contestar una llamada entrante, pulse la tecla Llamar. Para
rechazar la llamada sin contestarla, pulse la tecla Finalizar.
■ Altavoz
Si está disponible, puede seleccionar Altavoz o Normal para
usar el altavoz o el audífono del teléfono durante una llamada.
Advertencia: No sostenga el dispositivo cerca a su oído
cuando esté utilizando el altavoz, ya que el volumen
puede resultar muy alto.
79
Page 81

Escribir texto
4. Escribir texto
Puede ingresar texto (consulte "Mensajes de texto", pág. 83)
usando el ingreso de texto predictivo o ingreso de
texto tradicional .
Para usar el ingreso de texto tradicional, pulse la tecla
repetidamente hasta que la letra aparezca. Para usar texto
tradicional cuando está escribiendo, seleccione Opc. >
Predicción desact.
Para usar el ingreso de texto predictivo cuando está escribiendo en
un campo de texto, seleccione Opc. > Predicción activad . Al usar
el ingreso de texto predictivo o al ingresar la palabra que desea,
pulse cada tecla una sola vez para cada letra, si la palabra que
aparece es la que desea, pulse 0 y continúe escribiendo la siguiente
palabra. Para cambiar la palabra, pulse la tecla * repetidamente
hasta que la palabra que desea aparezca. Si el signo ? aparece
después de la palabra, ésta no está en el diccionario. Para agregar
la palabra al diccionario, seleccione Deletreo, ingrese la palabra
(usando el ingreso de texto tradicional) y seleccione Guardar.
80
Page 82

Escribir texto
Sugerencias para escribir texto: para agregar un espacio, pulse la
tecla 0. Para cambiar rápidamente el método de ingreso de texto,
pulse # repetidamente y verifique el indicador en la parte superior
de la pantalla. Para agregar un número, mantenga pulsada la tecla
numérica deseada. Para obtener una lista de caracteres especiales
al usar el ingreso de texto tradicional, pulse la tecla *, al usar el
ingreso de texto predictivo, mantenga pulsada la tecla *.
81
Page 83

Funciones de menú
5. Funciones de menú
Las funciones del teléfono están agrupadas en menús. No todas
las funciones de menú o elementos de opción están aquí descritos.
Seleccione Menú y el menú y submenú deseado. Seleccione Salir o
Atrás para salir del nivel actual del menú. Pulse la tecla Finalizar
para regresar directamente al modo standby. Para cambiar la vista
del menú, seleccione Opc. > Vista menú princ. > Lista o Cuadrícula.
■ Mensajería
Los servicios de mensajes sólo se pueden usar si
su red o proveedor de servicios lo admite.
Comuníquese con su proveedor de servicios para
verificar la disponibilidad de servicios, tarifas, para suscribirse y
para obtener las configuraciones correctas del teléfono.
Configuraciones de texto y mensaje
Seleccione Menú > Mensajería > Config. mensajes > Mensajes de
texto > Centros de mensajes. Su tarjeta SIM admite más de un
centro de mensajes, seleccione o agregue el que desea utilizar,
es posible que necesite obtener el número del centro por parte
de su proveedor de servicios.
82
Page 84

Funciones de menú
Seleccione Menú > Mensajería > Config. mensajes > Mensajes
mult. y alguna de las siguientes opciones:
Tamaño de imagen (multimedia): para definir el tamaño de
imagen cuando inserta la imagen en el mensaje con imagen
Permitir recepción de multimedia > Sí, En red doméstica o No:
para usar el servicio multimedia
Ajustes de configuración: para seleccionar el proveedor de servicios
predeterminado para recuperar mensajes con imágenes.
Desplácese a Cuenta para ver las cuentas proporcionadas por el
proveedor de servicios y para seleccionar la que desea utilizar.
Es posible que reciba los ajustes como un mensaje de configuración
del proveedor de servicios.
Permitir publicidad: para seleccionar si desea recibir mensajes de
publicidad. Esta configuración no aparece si Permitir recepción
de multimedia está programada en No.
Mensajes de texto
Seleccione Menú > Mensajería > Crear mensaje > Mensaje texto.
El servicio de mensajes cortos (SMS) (servicio de red) le permite
enviar y recibir mensajes de varias partes compuestos por diversos
mensajes de texto comunes. Es posible que la facturación se base
en el número de mensajes comunes que se requieren para un
mensaje de varias partes.
83
Page 85

Funciones de menú
Tenga presente que el uso de caracteres especiales (Unicode)
toma más espacio.
El icono destellante indica que la memoria para mensajes
está llena. Antes de recibir nuevos mensajes, elimine algunos de
sus mensajes antiguos.
Mensajes con imágenes
Seleccione Menú > Mensajería > Crear mensaje > Multimedia.
Nota: Sólo los dispositivos con funciones compatibles
pueden recibir y mostrar mensajes con imágenes. La
apariencia de un mensaje puede variar según el dispositivo
receptor. El servicio de mensajería multimedia (MMS)
(servicio de red) le permite enviar y recibir mensajes que
contienen texto, sonido y una imagen. La red celular puede
limitar el tamaño de los mensajes MMS. Si la imagen
insertada excede este límite, el dispositivo puede reducir
el tamaño para poder enviarla por MMS.
Si tiene una llamada activa o un juego u otra aplicación Java
ejecutándose, no podrá recibir mensajes con imágenes. Debido
a que la entrega de mensajes multimedia puede no lograrse por
varias razones, no dependa solamente de dicha función para
comunicaciones importantes.
84
Page 86

Funciones de menú
Las protecciones de copyright pueden impedir la copia,
modificación, transferencia o desvío de imágenes,
música (incluyendo tonos de timbre) y otro contenido.
Su teléfono puede enviar y recibir mensajes con imágenes que
contienen varias páginas (diapositivas). Para insertar una
diapositiva en el mensaje, seleccione Opc. > Insertar > Diapositiva.
Para programar el intervalo entre las diapositivas, seleccione
Opc. > Duración de diapo.
Cuando tiene un nuevo mensaje multimedia nuevo en espera y
la memoria para mensajes está llena, destella y el mensaje
Memoria llena. Imposi ble recibir mensajes aparece en la pantalla.
Para recibir el mensaje, seleccione OK > Sí y la carpeta para
eliminar mensajes antiguos.
Mensajes flash
Los mensajes flash (red) son mensajes de texto que
aparecen instantáneamente.
Seleccione Menú > Mensajería > Crear mensaje > Mensaje Flash.
Nota: Sólo los dispositivos que ofrecen las funciones
compatibles de mensajes flash pueden recibir y mostrar
mensajes flash destellantes.
85
Page 87

Funciones de menú
Mensajes de audio
Puede usar MMS (servicio de red) para crear y enviar un mensaje
de voz. MMS debe activarse antes de usar mensajes de audio.
Seleccione Menú > Mensajería > Crear mensaje > Mensaje de voz.
Se abre la grabadora. Cuando termina de grabar un mensaje de
audio, para enviar el mensaje, ingrese el número telefónico del
destinatario en el campo Para:. Para ver las opciones disponibles,
seleccione Opc. Para recuperar un número telefónico desde
Contactos, seleccione Agregar > Contacto.
Cuando su teléfono recibe mensajes de audio, 1 mensaje de voz
recibido o el número de mensajes y el texto N mensajes recibidos
aparecen en la pantalla. Para abrir el mensaje, seleccione Reprod. o
si se recibió más de u n mensaje, seleccione Mostrar > Reprod. Para
escuchar el mensaje más tarde, seleccione Salir. Seleccione Opc.
para ver las opciones disponibles. El mensaje de audio se reproduce
mediante el audífono en forma predeterminada. Seleccione Opc. >
Altavoz para seleccionar el altavoz para reproducirlo si así lo desea.
Mensajes de voz
El buzón de voz es un servicio de red al cual podría tener que
suscribirse. Comuníquese con su proveedor de servicios para
obtener información detallada para el número del buzón de voz.
Seleccione Menú > Mensajería > Mensajes de voz.
86
Page 88

Funciones de menú
Aplicación e-mail
La aplicación de e-mail (servicio de red) le permite acceder a su
cuenta de e-mail compatible desde su teléfono. Antes de enviar y
recuperar cualquier e-mail, es posible que necesite obtener una
cuenta de e-mail y las configuraciones necesarias. Comuníquese
con su proveedor de servicios para obtener información sobre la
disponibilidad de la aplicación de e-mail, y si está disponible,
las tarifas para suscribirse y las configuraciones necesarias para
el teléfono. Puede recibir los ajustes de configuración de e-mail
como un mensaje de configuración.
Para escribir y enviar un e-mail, seleccione Menú > Mensajería >
E-mail > Escribir nvo . e-mail. Si se ha definido más de una cuenta
de e-mail, seleccione la cuanta desde la cual desea enviar el e-mail.
Para adjuntar un archivo al e-mail, seleccione Opc. > Adjuntar
archivo y el archivo en Galería. Cuando termine de escribir el
e-mail, seleccione Enviar > Enviar ahora.
Para descargar e-mail, seleccio ne Menú > Mensajería > E-mail >
Veri f. nu evo e -mai l y la cuenta. Los encabezados de e-mail se
descargan. Para descargar todo el mensaje de e-mail, seleccione
Volver > Buzones entrada, la cuenta, el nuevo encabezado del
mensaje y Recuper.
87
Page 89

Funciones de menú
Importante: Tenga precaución al abrir los mensajes.
Los mensajes de e-mail pueden contener virus o dañar
el dispositivo o la PC.
Su teléfono guar da el mensaje de e-mail descarg ado de su cuenta
de e-mail en la carpeta Buzones entrada. Otras carpetas son
Borradores para guardar los mensajes de e-mail sin terminar,
Archivo para organizar y guardar su e-mail, Buzón de salida
para guardar e-mail sin enviar y Elem. enviados para guardar
e-mail enviado. Para administrar las carpetas y su contenido de
e-mail, seleccione Opc. para ver las opciones disponibles para
cada carpeta.
■ Contactos
Puede guardar nombres y números telefónicos
en la memoria del teléfono y en la memoria de
la tarjeta SIM. La memoria del teléfono puede
guardar contactos con números y elementos
de texto. Los nombres y números guardados en la tarjeta SIM,
se indican con .
88
Page 90

Funciones de menú
Para buscar un contacto, seleccione Menú > Contactos >
Nombres > Opc. > Buscar. Desplácese por la lista de contactos o
ingrese la primera letra del nombre que desea buscar. Para agregar
un nuevo contacto, seleccione Menú > Contactos > Nombres >
Opc. > Agr. nvo. contacto. Para agregar más detalles a un contacto,
asegúrese de que la memoria en uso es Teléfono o Teléfono y SIM.
Desplácese al nombre al cual desea agregar un nuevo número o
elemento de texto y seleccione Detalles > Opc. > Agregar detalles.
Para copiar un contacto, seleccione Opc. > Copiar contacto. Puede
copiar nombres y números telefónicos entre la memoria del
teléfono y la memoria de la tarjeta SIM. La memoria de la tarjeta
SIM puede guardar nombres con un número telefónico adjunto a
los nombres. Para asignar un número a una tecla de marcación
rápida, seleccione Menú > Contactos > Marcación rápida y
desplácese al número de la tecla de marcación que desea asignar.
Seleccione Menú > Contactos > Configuraciones y alguna de
las siguientes configuraciones:
Memoria en uso: para seleccionar la memoria de la tarjeta SIM o
del teléfono para sus contactos. Para recuperar nombres y números
de ambas memorias, seleccione Teléfono y SIM.
Vista Contactos: para seleccionar cómo aparecen los nombres y
números en contactos.
89
Page 91

Funciones de menú
Estado de la memoria: para ver la capacidad de la memoria
libre y usada.
■ Registro
El teléfono registra los n úmeros de las llamadas
perdidas, recibidas y marcadas y la duración
aproximada de sus llamadas (servicio de red).
La red debe admitir estas funciones y el teléfono debe estar
encendido y dentro del área de servicio de la red.
Seleccione Menú > Registro > Duración de las llamadas, Contador
de paq. datos o Cron. conex. paq. datos para obtener información
aproximada sobre sus comunicaciones recientes.
Nota: El tiempo real facturado por su proveedor de
servicios para las llamadas y servicios puede variar, según
los servicios de la red, el redondeo de la facturación, los
impuestos, etc.
Seleccione Menú > Registro y la lista apropiada:
Llamadas perdidas: para mostrar una lista de números telefónicos
desde la cual alguien trató de llamarle y la cantidad de llamadas
que realizó el llamante
Llamadas recibidas: para mostrar una lista de las llamadas que
se aceptaron o rechazaron recientemente
90
Page 92

Funciones de menú
Números marcados: para mostrar una lista de los números a los
que se llamó recientemente
Borrar listas de registro: para borrar la lista de llamadas recientes.
No puede deshacer esta operación.
Puede ver la hora y fecha de la llamada, editar o eliminar el número
telefónico de la lista, guardar el número en Contactos o enviar
un mensaje al número.
■ Configuraciones
Puede ajustar diferentes configuraciones
para el teléfono en este menú. Para restaurar
algunas de las configuración del menú a sus
valores originales, seleccione Menú > Config. >
Restaurar config. fáb. Ingrese su código de seguridad.
Configuraciones de tonos
Seleccione Menú > Config. > Tonos y cambie cualquiera de las
opciones disponibles. Su teléfono admite tonos de timbre en
formato MP3. También puede configurar sus grabaciones como
tonos de timbre.
91
Page 93

Funciones de menú
Mis accesos directos
Con los accesos directos personales, puede obtener un rápido
acceso a funciones del teléfono de uso frecuente.
Seleccione Menú > Config. > Mis accesos d irectos > Tecla
selección derecha para destinar una función del teléfono a la
tecla de selección derecha.
Seleccione Menú > Config. > Mis accesos directos > Tecla de
navegación para configurar funciones de acceso directo para la
tecla de desplazamiento. Desplácese a la tecla de acceso directo
deseada y seleccione Cambiar y una función de la lista. Para
eliminar una función de acceso directo de la tecla, seleccione
(vacía). Para volver a asignar una función para la tecla,
seleccione Asignar.
Configuraciones de llamada y teléfono
Seleccione Menú > Config. > Llamada y alguna de las
siguientes opciones:
Desvío de llamadas (servicio de red): para desviar sus llamadas
entrantes. Para obtener más detalles, comuníquese con su
proveedor de servicios.
Remarcado automático > Activar: para que su teléfono intente
conectar la llamada hasta un máximo de diez veces después de
intentar sin haberlo logrado.
92
Page 94

Funciones de menú
Llamada en espera > Activar: para que la red le notifique de una
llamada entrante mientras tiene una llamada en curso (servicio
de red).
Enviar ID de llamante (servicio de red) > Definido por la red, Sí o No
Seleccione Menú >Config. > Teléfono > Configuraciones de
idioma > Idioma del teléfono para configurar e l idioma de pantalla
de su teléfono. Si selecciona Automático, el teléfono selecciona el
idioma de acuerdo a la información de la tarjeta SIM.
Configuraciones de pantalla, hora y fecha
Seleccione Menú > Config. > Pantalla > Ahorro de energía >
Activa r para ahorrar energía de la batería. Aparece un reloj digital
cuando no se usan las funciones del teléfono tras un período
de tiempo.
Seleccione Menú > Config. > Hora y fecha y alguna de las
siguientes opciones:
Reloj: para que el teléfono muestre el reloj en el modo standby,
ajustar el reloj y seleccionar la zona horaria y el formato de hora.
Fecha: para que el teléfono muestre la fecha en el modo
standby, fijar la fecha y seleccionar el formato de fecha y el
separador de fechas
93
Page 95

Funciones de menú
Actualización auto. de fecha y hora: (servicio de red): para que
el teléfono actualice automáticamente la hora y la fecha de
acuerdo al huso horario actual
Conectividad GPRS
El servicio general de radio por paquetes (GPRS) (servicio de red)
es un portador de datos que activa el acceso inalámbrico a redes
de datos como la Internet. Las aplicaciones que pueden usar
GPRS son MMS, exploración y descarga de aplicaciones Java.
Antes de usar la tecnología GPRS, comuníquese con su operador
de red o proveedor de servicios para conocer la disponibilidad y
suscribirse al servicio GPRS. Guarde las configuraciones GPRS
para cada una de las aplicaciones usadas por GPRS. Para obtener
información sobre costos, comuníquese con su operador de red
o proveedor de servicios.
Seleccione Menú > Config. > Conectividad > Paquete de datos >
Conexión de paquetes de datos. Seleccione Siempre en línea para
que el teléfono se registre automáticamente a una red GPRS
cuando encienda el teléfono. Seleccione Cuando necesario para
permitir el registro y conexión de GPRS cuando sea necesaria y
para cerrarla cuando finalice la aplicación.
94
Page 96

Funciones de menú
Configuraciones de accesorios
El elemento del accesorio móvil compatible aparece sólo si el
teléfono está o ha sido conectado a éste.
Seleccione Menú > Config. > Accesorios y el accesorio disponible.
Por ejemplo, una vez que conecte el auricular en su teléfono,
puede seleccionar Respuesta automática para que el teléfono
conteste una llamada entrante automáticamente cuando usa
un auricular. Si Aviso llam. entr. está configurada en Sonar una
vez o Desactivar, la respuesta automática se desactivará.
Ajustes de configuración
Algunos de los servicios de red necesitan los ajustes de
configuración correctos en su teléfono. Obtenga las
configuraciones de su tarjeta SIM, de un proveedor de
servicios como un mensaje de configuración o ingrese
sus configuraciones personales manualmente.
Seleccione Menú > Config. > Configuración y alguna de las
siguientes opciones:
Ajustes de config. predeterminados: para ver la lista de
proveedores de servicios guardados en el teléfono (el proveedor
de servicios preconfigurado está resaltado) o para seleccionar
otro proveedor de servicios en forma predeterminada.
95
Page 97

Funciones de menú
Desplácese hacia un proveedor y seleccione Detalles para ver la
lista con las aplicaciones que se admiten
Activar predeterm. en todas aplicac.: para configurar las
aplicaciones para usar las configuraciones del proveedor de
servicios predeterminado
Punto de acceso preferido: para seleccionar otro punto de
acceso (normalmente se usa el punto de acceso de su operador
de red preferido)
Conectar con soporte prov. serv.: para descargar los ajustes de
configuración de su proveedor de servicios
Para ingresar, ver o editar las configuraciones manualmente,
seleccione Menú > Config. > Configuración > Configuraciones
de ajuste personal.
■ Menú operador
Este menú le permite acceder a un portal de servicios que provee
su operador de red. Este menú es específico del operador. El nombre
e icono dependen del operador. El operador puede actualizar este
menú con un mensaje de servicio. Para obtener más información,
comuníquese con su operador de red.
96
Page 98

Funciones de menú
■ Galería
En este menú, puede administrar temas,
gráficos, grabaciones y tono s. Estos archivos
están organizados en carpetas.
Su teléfono admite el sistema de administración de derechos
digitales (DRM) para proteger el contenido adquirido. Siempre
revise los datos de entrega de cualquier contenido y clave de
activación antes de adquirirlos, puede que no sean gratis.
Seleccione Menú > Galería. Temas , Gráficos, Tonos, Arch. músi ca,
Grabaciones y Arch. recibi... son las carpetas predeterminadas.
■ Grabadora de voz
Puede grabar discursos, sonidos o una llamada
activa. Esto es útil cuando se graba un nombre
o número telefónico para escribirlo en otro
momento. No es posible utilizar la grabadora cuando hay una
llamada de datos o una conexión GPRS activa.
Seleccione Menú > Multimedia > Grabad. voz e inicie la grabación.
Para iniciar la grabación durante una llamada, seleccione Opc. >
Grabar. Mientras graba una llamada, sostenga el teléfono cerca
del oído en la posición normal de funcionamiento. La grabación
97
Page 99

Funciones de menú
se guarda en Galería > Grabaciones. Para escuchar la grabación
más reciente, seleccione Opc. > Repr. último grab.. Para enviar
la grabación más reciente usando MMS, seleccione Opc. >
Enviar último grab.
■ Organizador
Alarma y agenda
Puede configurar el teléfono para que emita una alarma a una
hora determinada. Seleccione Menú > Organizador > Alarma >
Hora de alarma para configurar la hora para la alarma, Repetir
alarma para que el teléfono le avise en ciertos días de la semana y
Tono de alarma para seleccionar o personalizar el tono de alarma.
Para programar el tiempo de pausa para la alarma, seleccione
Límite de tiempo de pausa y la hora.
El teléfono emite un tono de alerta y destella ¡Alarma! y la hora
actual aparecen en pantalla, aún si el teléfono está apagado.
Seleccione Parar para detener la alarma. Si deja que el teléfono
continúe sonando la alarma por un minuto o selecciona Pausa,
la alarma se detiene por diez minutos, luego vuelve a sonar.
98
Page 100

Funciones de menú
Si en la hora programada para la alarma el dispositivo está
apagado, éste se enciende automáticamente y empieza a emitir
el tono de alarma. Si selecciona Parar, el dispositivo le pregunta
si desea activar el dispositivo para las llamadas. Seleccione No
para apagar el dispositivo o Sí si desea realizar y recibir llamadas.
No seleccione Sí cuando el uso del teléfono móvil pueda causar
interferencia o peligro.
Seleccione Menú > Organizador > Agend a. La fecha actual aparece
enmarcada. Si hay notas programadas para el día, éste aparece
en negritas. Para ver las notas, seleccione Ver. Para elimina r todas
las notas en la agenda, seleccione el mes y Opc. > Elim. todas notas.
Entre otras opciones puede crear, eliminar, editar y transferir una
nota, copiar una nota a otro día o enviar una nota directamente
a la agenda de otro teléfono compatible como un mensaje de
texto o un mensaje multimedia.
Calculadora
La calculadora de su teléfono suma, resta, multiplica, divide,
calcula el cuadrado y la raíz cuadrada y convierte valores de divisas.
Nota: Esta calculadora tiene una precisión limitada y
está diseñada para cálculos sencillos.
99
 Loading...