

2018 MURANO
OWNER’S MANUAL
and MAINTENANCE INFORMATION
For your safety, read carefully and keep in this vehicle.
FOREWORD READ FIRST—THEN DRIVE SAFELY
This manual was prepared to help you understand the operation and maintenance
of yourvehicle so that you may enjoy many
miles (kilometers) of driving pleasure.
Please read through this manual before
operating your vehicle.
A separate Warranty Information Booklet explains details about the warranties
covering your vehicle. The “Maintenance
and schedules” section of this manual
explains details about maintaining and
servicing your vehicle. Additionally, a
separate Customer Care/Lemon Law
Booklet (U.S. only) will explain how to resolve any concerns you may have with
your vehicle, and clarif y your rights under your state’s lemon law.
When you require any service or have any
questions, a NISSAN dealer will be glad to
assist you with the extensive resources
available to them.
In addition to factory-installed options,
your vehicle may also be equipped with
additional accessories installed prior to delivery. It is recommended that you visit a
NISSAN dealer for details concerning the
particular accessories with which your vehicle is equipped. It is important that you
familiarize yourself with all disclosures,
warnings, cautions and instructions concerning proper use of such accessories
prior to operating the vehicle and/or accessory. It is recommended that you visit a
NISSAN dealer for details concerning the
particular accessories with which your vehicle is equipped.
Before driving your vehicle, please read this
Owner’s Manual carefully. This will ensure
familiarity with controls and maintenance
requirements, assisting you in the safe operation of your vehicle.
WARNING
IMPORTANT SAFETY INFORMATION
REMINDERS!
Follow these important driving rules to
help ensure a safe and comfortable trip
for you and your passengers!
∙ NEVER drive under the influence of al-
cohol or drugs.
∙ ALWAYS observe posted speed limits
and never drive too fast for
conditions.
∙ ALWAYS give your full attention to
driving and avoid using vehicle features or taking other actions that
could distract you.
∙ ALWAYS use your seat belts and ap-
propriate child restraint systems. Preteen children should be seated in the
rear seat.
∙ ALWAYS provide information about
the proper use of vehicle safety features to all occupants of the vehicle.
∙ ALWAYS review this Owner’s Manual
for important safety information.
For descriptions specified for all-wheel
drive models, an AWD mark is placed at the
beginning of the applicable sections/
items.
As with other vehicles with features for
off-road use, failure to operate all-wheel
drive models correctly may result in loss
of control or an accident. For additional
information, refer to “Driving safety precautions” in the “Starting and driving”
section of this manual.
ON-PAVEMENT AND OFF-ROAD DRIVING
This vehicle will handle and maneuver
differently from an ordinary passenger car because it has a higher center
of gravity for off-road use. As with
other vehicles with features of this
type, failure to operate this vehicle
correctly may result in loss of control
or an accident.
For additional information, refer to
“On-pavement and off-road driving
precautions”, “Avoiding collision and
rollover” and “Driving safety precautions” in the “Starting and driving”
section of this manual.
MODIFICATION OF YOUR VEHICLE
This vehicle should not be modified.
Modification could affect its
performance, safety, emissions or durability and may even violate governmental regulations. In addition, damage or performance problems
resulting from modifications may not
be covered under NISSAN warranties.
WARNING
Installing an aftermarket On-Board Diagnostic (OBD) plug-in device that uses
the port during normal driving, for example remote insurance company
monitoring, remote vehicle diagnostics,
telematics or engine reprogramming,
may cause interference or damage to
vehicle systems. We do not recommend
or endorse the use of any aftermarket
OBD plug-in devices, unless specifically
approved by NISSAN. The vehicle warranty may not cover damage caused by
any aftermarket plug-in device.
WHEN READING THE MANUAL
This manual includes information for all
features and equipment available on this
model. Features and equipment in your vehicle may vary depending on model, trim
level, options selected, order, date of production, region or availability. Therefore,
you may find information about features or
equipment that are not included or installed on your vehicle.
All information, specifications and illustrations in this manual are those in effect at
the time of printing. NISSAN reserves the
right to change specifications, performance, design or component suppliers
without notice and without obligation.
From time to time, NISSAN may update or
revise this manual to provide Owners with
the most accurate information currently
available. Please carefully read and retain
with this manual all revision updates sent
to you by NISSAN to ensure you have access to accurate and up-to-date information regarding your vehicle. Current versions of vehicle Owner’s Manuals and any
updates can also be found in the Owner
section of the NISSAN website at
https://owners.nissanusa.com/nowners/
navigation/manualsGuide
.
If you have questions concerning any information in your Owner’s Manual, contact
NISSAN Consumer Affairs. For contact information, refer to the NISSAN CUSTOMER
CARE PROGRAM page in this Owner’s
Manual.
IMPORTANT INFORMATION ABOUT
THIS MANUAL
Youwill see various symbols in this manual.
They are used in the following ways:
WARNING
This is used to indicate the presence of
a hazard that could cause death or serious personal injury. To avoid or reduce
the risk, the procedures must be followed precisely.
CAUTION
This is used to indicate the presence of
a hazard that could cause minor or
moderate personal injury or damage to
your vehicle. To avoid or reduce the risk,
the procedures must be followed
carefully.
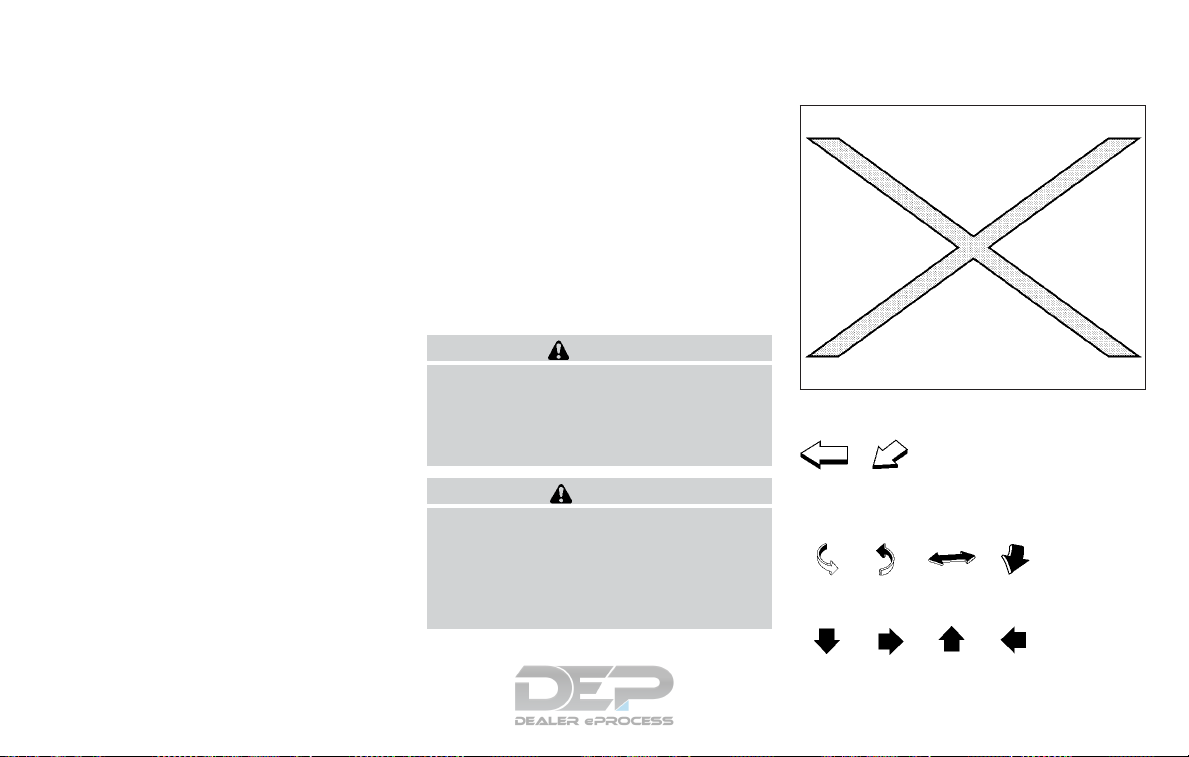
APD1005
If you see this symbol, it means “Do not do
this” or “Do not let this happen.”
If you see a symbol similar to these in an
illustration, it means the arrow points to
the front of the vehicle.
Arrows in an illustration that are similar to
these indicate movement or action.
Arrows in an illustration that are similar to these
call attention to an item in the illustration.
CALIFORNIA PROPOSITION 65
WARNING
WARNING
Engine exhaust, some of its constituents, and certain vehicle components
contain or emit chemicals known to the
State of California to cause cancer and
birth defects or other reproductive
harm. In addition, certain fluids contained in vehicles and certain products
of component wear contain or emit
chemicals known to the State of
California to cause cancer and birth defects or other reproductive harm.
Operating, servicing and maintaining a
passenger vehicle or off-road vehicle can
expose you to chemicals including engine exhaust, carbon monoxide, phthalates, and lead, which are known to the
State of California to cause cancer and
birth defects or other reproductive harm.
To minimize exposure, avoid breathing
exhaust, do not idle the engine except as
necessary, service your vehicle in a wellventilated area and wear gloves or wash
your hands frequently when servicing
your vehicle. For more information go to
www.P65Warnings.ca.gov.
CALIFORNIA PERCHLORATE
ADVISORY
Some vehicle parts, such as lithium batteries, may contain perchlorate material.
The following advisory is provided: “Perchlorate Material – special handling may
apply. For additional information, refer
to www.dtsc.ca.gov/hazardouswaste/
perchlorate/”.
© 2017 NISSAN NORTH AMERICA, INC.
All rights reserved. No part of this Owner’s
Manual may be reproduced or stored in a
retrieval system, or transmitted in any
form, or by any means, electronic, mechanical, photocopying, recording or otherwise, without the prior written permission of Nissan North America, Inc.

NISSAN CUSTOMER CARE PROGRAM
NISSAN CARES . . .
Both NISSAN and your NISSAN dealer are dedicated to serving all your automotive needs. Your satisfaction with your vehicle and your
NISSAN dealer are our primary concerns. Your NISSAN dealer is always available to assist you with all your automobile sales and service
needs.
However, if there is something that your
NISSAN dealer cannot assist you with or
you would like to provide NISSAN directly
with comments or questions, please contact the NISSAN Consumer Affairs Department using our toll-free number:
For U.S. customers
1-800-NISSAN-1
(1-800-647-7261)
For Canadian customers
1-800-387-0122
The Consumer Affairs Department will ask
for the following information:
– Your name, address, and telephone
number
– Vehicle identification number (attached
to the top of the instrument panel on the
driver’s side)
– Date of purchase
– Current odometer reading
– Your NISSAN dealer’s name
– Your comments or questions
OR
You can write to NISSAN with the information at:
For U.S. customers
Nissan North America, Inc.
Consumer Affairs Department
P.O. Box 685003
Franklin, TN 37068-5003
or via e-mail at:
nnaconsumeraffairs@nissan-usa.com
For Canadian customers
Nissan Canada Inc.
5290 Orbitor Drive
Mississauga, Ontario L4W 4Z5
or via e-mail at:
information.centre@nissancanada.com
If you prefer, visit us at:
www.nissanusa.com (for U.S. customers)
or
www.nissan.ca (for Canadian customers)
We appreciate your interest in NISSAN and thank you for buying a quality NISSAN vehicle.

Table of
Illustrated table of contents
0
Contents
Safety—Seats, seat belts and supplemental restraint system
Instruments and controls
Pre-driving checks and adjustments
Monitor, climate, audio, phone and voice recognition systems
Starting and driving
In case of emergency
Appearance and care
Do-it-yourself
Maintenance and schedules
Technical and consumer information
Index
1
2
3
4
5
6
7
8
9
10
11

0 Illustrated table of contents
Air bags, seat belts and child restraints ..........0-2
Exterior front ....................................0-3
Exterior rear .....................................0-4
Passenger compartment........................0-5
Instrument panel ................................0-6
Engine compartment check locations ...........0-8
Warning and indicator lights .....................0-9

AIR BAGS, SEAT BELTS AND CHILD
RESTRAINTS
1. Supplemental air bags (P. 1-48)
2. Occupant classification sensor
(weight sensor) (P. 1-48)
3. Head restraints/headrests (P. 1-9)
4. Front seat belt with pretensioner(s)
and shoulder height adjuster
(P. 1-13, 1-48)
5. Roof-mounted curtain side-impact
and rollover supplemental air bag
(P. 1-48)
6. Rear seat center seat belt
(located on ceiling) (P. 1-13)
7. Rear seat outboard seat top tether
strap anchor (located on bottom
of seatback) (P. 1-27)
8. LATCH (Lower Anchors and Tethers
for CHildren) system (P. 1-27)
9. Folding rear bench seat (P. 1-2)
10. Front seat-mounted side-impact
supplemental air bag (P. 1-48)
11. Front seats (P. 1-2)
12. Driver supplemental knee air bag
(P. 1-48)
Refer to the page number indicated in
parentheses for operating details.
0-2 Illustrated table of contents
LII2546

EXTERIOR FRONT
1. Front view camera (if so equipped)
(P. 4-11)
2. Engine hood (P. 3-22)
3. Wiper and washer switch (P. 2-33)
4. Windshield (P. 8-18)
5. Power windows (P. 2-55)
6. Door locks (P. 3-5)
NISSAN Intelligent Key® (P. 3-7)
Keys (P. 3-2)
7. Mirrors (P. 3-36)
Side view camera (if so equipped)
(P. 4-11)
8. Tire pressure (P. 8-28)
Flat tire (P. 6-3)
Tire chains (P. 8-28)
9. Fog light switch (if so equipped)
(P. 2-35)
10. Replacing bulbs (P. 8-25)
Headlight and turn signal switch
(P. 2-35)
Daytime Running Lights (DRL)
system (P. 2-35)
Refer to the page number indicated in
parentheses for operating details.
LII2371
Illustrated table of contents 0-3

EXTERIOR REAR
1. Rear wiper and washer switch
(P. 2-33)
2. Liftgate release (P. 3-22)
3. Rearview camera (P. 4-3)
4. Replacing bulbs (P. 8-25)
5. Fuel-filler door (P. 3-30)
Fuel recommendation (P. 10-2)
Fuel-filler cap (P. 3-30)
6. Child safety rear door lock (P. 3-5)
Refer to the page number indicated in
parentheses for operating details.
0-4 Illustrated table of contents
LII2388

PASSENGER COMPARTMENT
1. Glove box (P. 2-48)
2. Rearview mirror (P. 3-36)
3. Console box (P. 2-48)
4. Map lights (P. 2-60)
5. Power moonroof (if so equipped)
(P. 2-58)
6. Luggage hooks (P. 2-48)
7. Center armrest (P. 1-2)
8. Sun visors (P. 3-35)
9. Cup holders (P. 2-48)
Refer to the page number indicated in
parentheses for operating details.
LII2373
Illustrated table of contents 0-5

INSTRUMENT PANEL
0-6 Illustrated table of contents
LII2547
1. Vent (P. 4-26)
2. Headlight/fog light (if so
equipped)/turn signal switch
(P. 2-35)
3. Supplemental air bag (P. 1-48)
Horn (P. 2-40)
4. Meters and gauges (P. 2-4)
Warning and indicator lights (P. 2-8)
Vehicle information display (P. 2-16)
5. Wiper and washer switch (P. 2-33)
Rear window wiper and washer
switch (P. 2-33)
6. Audio system/Center display
controls (P. 4-2)
7. Hazard warning flasher switch
(P. 6-2)
8. Center display (P. 4-2)
Navigation display*
9. Front passenger supplemental
air bag (P. 1-48)
10. Glove box (P. 2-48)
11. Front passenger air bag status
light (P. 1-48)
12. Power outlet (P. 2-46)
13. USB port*
AUX jack*
14. Heater and air conditioning
controls (P. 4-28)
15. Shift lever (P. 5-16)

16. Push-button ignition switch
(P. 5-11)
17. Cruise control switches (if so
equipped) (P. 5-40)
Intelligent Cruise Control (ICC)
switches (if so equipped) (P. 5-42)
18. Driver supplemental knee air bag
(P. 1-48)
19. Bluetooth® Hands-Free Phone
System/Audio control switches
(P. 4-2)
20. Hood release (P. 3-22)
Fuel door release (P. 3-30)
Powered rear seatback switch
(P. 1-2)
21. Fuse box (P. 8-20)
22. Power liftgate main switch
(if so equipped) (P. 3-22)
Heated steering wheel switch
(if so equipped) (P. 2-44)
Vehicle Dynamic Control (VDC)
OFF switch (P. 2-45)
23. Instrument brightness control
(P. 2-35)
Twin trip odometer reset switch
(P. 2-4)
*: Refer to the separate NissanConnect
Owner’s Manual.
Refer to the page number indicated in
parentheses for operating details.
®
Illustrated table of contents 0-7
ENGINE COMPARTMENT CHECK
LOCATIONS
VQ35DE engine
1. Engine coolant reservoir (P. 8-5)
2. Drive belt location (P. 8-15)
3. Engine oil dipstick (P. 8-7)
4. Engine oil filler cap (P. 8-7)
5. Brake fluid reservoir (P. 8-11)
6. Air cleaner (P. 8-17)
7. Fuse box (P. 8-20)
8. Fuse/Fusible link box (P. 8-20)
9. Battery (P. 8-13)
10. Radiator cap (P. 8-5)
11. Power steering fluid reservoir
(P. 8-11)
12. Windshield-washer fluid reservoir
(P. 8-12)
Refer to the page number indicated in
parentheses for operating details.
0-8 Illustrated table of contents
LDI3154

WARNING AND INDICATOR LIGHTS
Warning
light
or
or
Name Page
Anti-lock Braking
System (ABS)
warning light
Automatic
Emergency
Braking (AEB)
system
warning light
Brake
warning light
Charge
warning light
Engine oil
pressure
warning light
Low tire pressure
warning light
2-9
2-9
2-9
2-10
2-10
2-10
Warning
light
Indicator
light
Name Page
Master
warning light
Power steering
warning light
Seat belt warning
light and chime
Supplemental air
bag warning light
Name Page
Front fog light
indicator light
(if so equipped)
Front passenger
air bag
status light
High beam
indicator light
(blue)
2-12
2-12
2-12
2-13
2-13
2-13
2-13
Indicator
light
Name Page
Malfunction
Indicator Light
(MIL)
Security indicator
light
Side light and
headlight
indicator light
(green)
Slip indicator light 2-15
Turn signal/
hazard indicator
lights
Vehicle Dynamic
Control (VDC) OFF
indicator light
2-14
2-14
2-14
2-15
2-15
Illustrated table of contents 0-9
MEMO
0-10 Illustrated table of contents
1 Safety—Seats, seat belts and
supplemental restraint system
Seats............................................ 1-2
Front manual seat adjustment
(if so equipped) ................................1-3
Front power seat adjustment
(if so equipped) ...............................1-4
Rear bench seat adjustment ................. 1-6
Armrests ..................................... 1-6
Flexible seating ................................1-7
Head restraints/headrests ......................1-9
Adjustable head restraint/headrest
components .................................1-10
Non-adjustable head restraint/
headrest components........................1-11
Remove......................................1-11
Install.........................................1-12
Adjust ........................................1-12
Seatbelts .......................................1-13
Precautions on seat belt usage...............1-13
Seat belt warning light........................1-16
Pregnant women.............................1-16
Injured persons...............................1-16
Three-point type seat belt with
retractor .....................................1-16
Seat belt extenders..........................1-24
Seat belt maintenance ......................1-24
Child safety.....................................1-25
Infants ......................................1-25
Small children ...............................1-26
Larger children ..............................1-26
Child restraints .................................1-27
Precautions on child restraints .............. 1-27
LATCH (Lower Anchors and Tethers for
CHildren) system ............................1-29
Rear-facing child restraint installation
using LATCH.................................1-32
Rear-facing child restraint installation
using the seat belts .........................1-34
Forward-facing child restraint
installation using LATCH ..................... 1-37
Forward-facing child restraint
installation using the seat belts..............1-40
Booster seats ...............................1-45
Supplemental Restraint System (SRS)...........1-48
Precautions on SRS..........................1-48
Supplemental air bag warning labels ........1-68
Supplemental
bag warning light..........1-69
air
SEATS
WARNING
∙ Do not ride in a moving vehicle when
the seatback is reclined. This can be
dangerous. The shoulder belt will not
be against your body. In an accident,
you could be thrown into it and receive neck or other serious injuries.
You could also slide under the lap belt
and receive serious internal injuries.
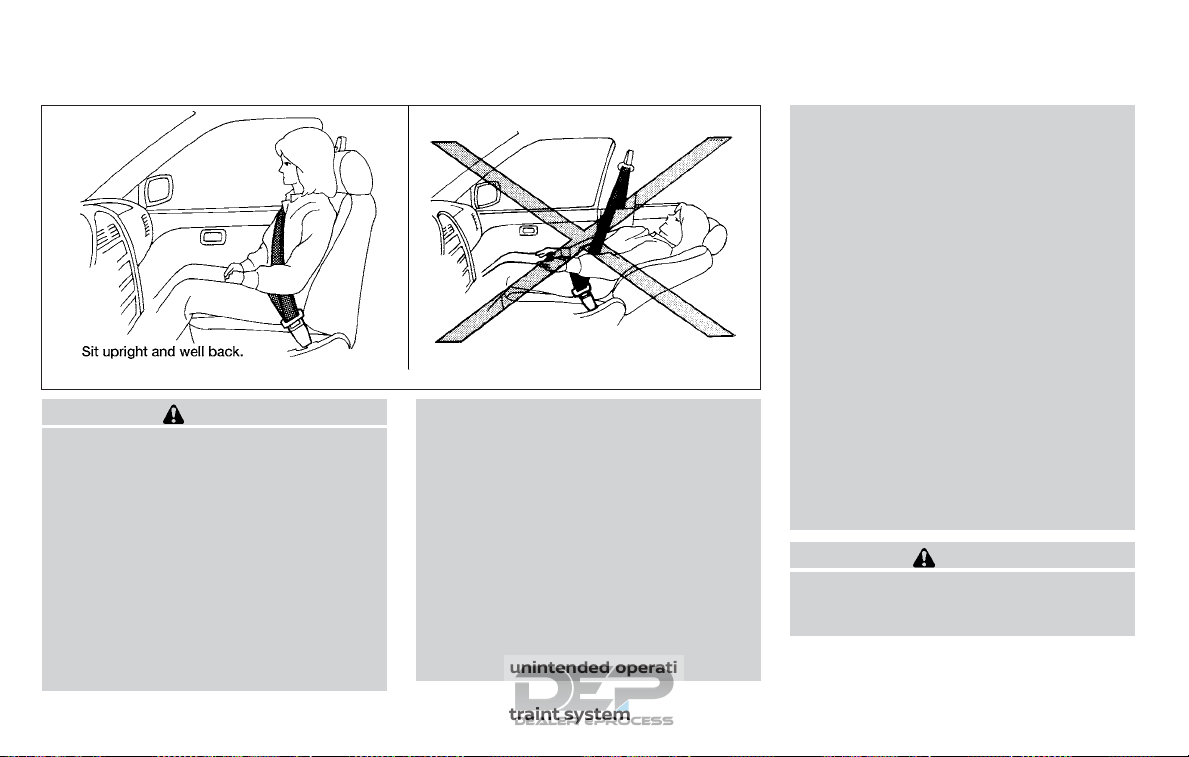
∙ For the most effective protection
when the vehicle is in motion, the seat
should be upright. Always sit well
back and upright in the seat with both
feet on the floor and adjust the seat
ARS1152
properly. For additional information,
refer to “Precautions on seat belt usage” in this section.
∙ Af ter adjustment, gently rock in the
seat to make sure it is securely locked.
∙ Do not leave children unattended in-
side the vehicle. They could unknowingly activate switches or controls or
make the vehicle move. Unattended
children could become involved in serious accidents.
∙ To help avoid risk of injury or death
through unintended operation of the
vehicle and/or its systems, do not
leave children, people who requirethe
assistance of others or pets unattended in your vehicle. Additionally,
the temperature inside a closed vehicle on a warm day can quickly become high enough to cause a significant risk of injury or death to people
and pets.
∙ Do not adjust the driver’s seat while
driving so full attention may be given
to vehicle operation. The seat may
move suddenly and could cause loss
of control of the vehicle.
∙ The seatback should not be reclined
any more than needed for comfort.
Seat belts are most effective when the
passenger sits well back and straight
up in the seat. If the seatback is reclined, the risk of sliding under the lap
belt and being injured is increased.
CAUTION
When adjusting the seat positions, be
sure not to contact any moving parts to
avoid possible injuries and/or damage.
1-2 Safety—Seats, seat belts and supplemental restraint system
FRONT MANUAL SEAT
ADJUSTMENT (if so equipped)
Your vehicle seats can be adjusted manually. For additional information about adjusting the seats, refer to the steps outlined
in this section.
LRS2160 LRS2161
Forward and backward
Pull the center of the bar up and hold it
while you slide the seat forward or backward to the desired position. Release the
bar to lock the seat in position.
Reclining
To recline the seatback, pull the lever up
and lean back. To bring the seatback forward, pull the lever up and lean your body
forward. Release the lever to lock the seatback in position.
The reclining feature allows adjustment of
the seatback for occupants of different
sizes for added comfort and to help obtain
proper seat belt fit. For additional information, refer to “Precautions on seat belt usage” in this section. Also, the seatback can
be reclined to allow occupants to rest
when the vehicle is stopped and the shift
lever is in the P (Park) position.
Safety—Seats, seat belts and supplemental restraint system 1-3
LRS2202 LRS2662
Seat lifter (driver’s seat)
Pull up or push down the adjusting lever to
adjust the seat height until the desired position is achieved.
FRONT POWER SEAT ADJUSTMENT
(if so equipped)
Operating tips
∙ The power seat motor has an auto-
reset overload protection circuit. If the
motor stops during operation, wait
30 seconds then reactivate the switch.
∙ Do not operate the power seat switch
for a long period of time when the engine is off. This will discharge the battery.
1-4 Safety—Seats, seat belts and supplemental restraint system
For additional information, refer to “Automatic drive positioner” in the “Pre-driving
checks and adjustments” section of this
manual.
Forward and backward
Moving the switch as shown will slide the
seat forward or backward to the desired
position.

Reclining
Move the recline switch as shown until the
desired angle is obtained.
The reclining feature allows adjustment of
the seatback for occupants of different
sizes for added comfort and to help obtain
proper seat belt fit. For additional information, refer to “Precautions on seat belt usage” in this section. Also, the seatback can
be reclined to allow occupants to rest
when the vehicle is stopped and the shift
lever is in P (Park).
LRS2636 LRS2270
Seat lifter (driver’s seat)
Move the switch as shown to adjust the
angle and height of the seat cushion.
Lumbar support (if so equipped
for driver’s seat)
The lumbar support feature provides adjustable lower back support to the driver.
Push the switch as shown to adjust the
seat lumbar area.
Safety—Seats, seat belts and supplemental restraint system 1-5
WARNING
∙ Af ter adjustment, check to be sure the
seat is securely locked.
∙ Do not ride in a moving vehicle when
the seatback is reclined. This can be
dangerous. The shoulder belt will not
be against your body. In an accident,
you could be thrown into it and receive neck or other serious injuries.
You could also slide under the lap belt
and receive serious internal injuries.
∙ For the most effective protection
LRS2635 LRS2588
REAR BENCH SEAT ADJUSTMENT
Reclining
Pull the reclining strap
seatback at the desired angle. Release the
reclining strap after positioning the seat at
the desired angle.
The reclining feature allows adjustment of
the seatback for occupants of different
sizes to help obtain proper seat belt fit. For
additional information, refer to “Precautions on the seat belt usage” in this section.
The seatback may also be reclined to allow
occupants to rest when the vehicle is
parked.
A
and position the
䊊
when the vehicle is in motion, the seat
should be upright. Always sit well
back and upright in the seat with both
feet on the floor and adjust the seat
belt properly. For additional information, refer to “Precautions on seat belt
usage” in this section.
1-6 Safety—Seats, seat belts and supplemental restraint system
ARMRESTS
The rear bench center armrest is locked in
the up position. To lower the armrest, pull
the armrest down as shown.
To return the armrest to the up position,
push up on the armrest until it is in the full
up position.
FLEXIBLE SEATING
WARNING
∙ Never allow anyone to ride in the
cargo area or on the rear seats when
they are in the fold-down position. In a
collision, people riding in these areas
without proper restraints are more
likely to be seriously injured or killed.
∙ Do not allow people to ride in any area
of your vehicle that is not equipped
with seats and seat belts. Be sure everyone in your vehicle is in a seat and
using a seat belt properly.
∙ Do not allow more than one person to
use the same seat belt.
∙ Do not fold down the rear seats when
occupants are in the rear seat area or
any luggage is on the rear seats.
– Make sure that the seat path is
clear before moving the seat.
– Be careful not to allow hands or
feet to get caught or pinched in the
seat.
∙ Head restraints/headrests should be
adjusted properly as they may provide significant protection against injury in an accident. Always replace
and adjust them properly if they have
been removed for any reason.
∙ If the head restraints/headrests are
removed for any reason, they should
be securely stored to prevent them
from causing injury to passengers or
damage to the vehicle in case of sudden braking or an accident.
∙ When returning rear row seatbacks to
the upright position, either by manual
operation or power operation (if so
equipped), the operator should always verify that the back is locked in
the upright position by gently rocking
the seatback before allowing passengers to occupy the rear seats. If they
are not completely secured, passengers may be injured in an accident or
sudden stop.
∙ Properly secure all cargo to help pre-
vent it from sliding or shifting. Do not
place cargo higher than the seatbacks. In a sudden stop or collision,
unsecured cargo could cause personal injury.
LRS2589
Folding the rear bench seat
Before folding the rear seats:
∙ Disconnect and secure the center seat
belt and tongue into the retractor base.
For additional information, refer to
“Stowing the rear center seat belt” in this
section.
∙ Secure the seat belts on the seat belt
hooks on the side wall. For additional
information, refer to “Seat belt hook” in
this section.
∙ Remove drink containers from the rear
cup holder.
Safety—Seats, seat belts and supplemental restraint system 1-7
LRS2590 LRS2591 LRS2777
To fold down the seatbacks:
1. Pull the strap on the rear seat.
or
2. Pull the lever beside the cargo area and
fold the seatback.
To return the seatbacks:
Manual operation:
1. Lif t up each seatback and push it to the
upright position until it is latched.
2. Always reconnect the center seat belt
when the seat is returned to the upright position.
1-8 Safety—Seats, seat belts and supplemental restraint system
A
Instrument panel switch
䊊
B
Cargo area switch
䊊
Power operation (if so equipped):
1. Push and hold the corresponding
switch located on the lower side of the
instrument panel or the right or lef t
side in the cargo area.
A beep sounds once and the seatback will
be returned automatically.
A beep sounds twice when the seatback is
fully returned to the seating position.
HEAD RESTRAINTS/HEADRESTS
If the control unit detects any obstacle or
malfunctions while in the power operation,
a beep sounds for 4 seconds and the seatback will return to the folded position automatically. Check if there are any obstacles
caught that prevent seats from returning
to the folded position. It is recommended
that you visit a NISSAN dealer for this service.
CAUTION
When operating the rear power seatback return, make sure that the vehicle
is stopped and the transmission is in
the P (Park) position.
WARNING
∙ When returning the seatbacks, be
sure to attach the rear center seat belt
connector.
∙ Do not unfasten the rear center seat
belt connector except when folding
down the rear seat.
∙ When attaching the rear center seat
belt connector, be certain that the
seatbacks are completely secured in
the latched position and the rear center seat belt connector is completely
secured.
∙ If the rear center seat belt connector
and the seatbacks are not secured in
the correct position, serious personal
injury may result in an accident or
sudden stop.
WARNING
Head restraints/headrests supplement
the other vehicle safety systems. They
may provide additional protection
against injury in certain rear end collisions. Adjustable head restraints/
headrests must be adjusted properly,
as specified in this section. Check the
adjustment after someone else uses
the seat. Do not attach anything to the
head restraint/headrest stalks or remove the head restraint/headrest. Do
not use the seat if the head restraint/
headrest has been removed. If the head
restraint/headrest was removed, reinstall and properly adjust the head
restraint/headrest before an occupant
uses the seating position. Failure to follow these instructions can reduce the
effectiveness of the head restraints/
headrests. This may increase the risk of
serious injury or death in a collision.
Safety—Seats, seat belts and supplemental restraint system 1-9
LRS2403 LRS2300
The illustration shows the seating positions equipped with head restraints/
headrests.
䉱 Indicates the seating position is
equipped with a head restraint.
䡲 Indicates the seating position is equipped
with a headrest.
+ Indicates the seating position is not
equipped with a head restraint or headrest
(if applicable).
∙ Your vehicle is equipped with a head
restraint/headrest that may be integrated, adjustable or non-adjustable.
∙ Adjustable head restraints/headrests
have multiple notches along the stalk(s)
to lock them in a desired adjustment
position.
∙ Proper Adjustment:
– For the adjustable type, align the
head restraint/headrest so the center of your ear is approximately level
with the center of the head
restraint/headrest.
– If your ear position is still higher than
the recommended alignment, place
the head restraint/headrest at the
highest position.
∙ If the head restraint/headrest has been
removed, ensure that it is reinstalled
and locked in place before riding in that
designated seating position.
ADJUSTABLE HEAD RESTRAINT/
HEADREST COMPONENTS
1. Removable head restraint/headrest
2. Multiple notches
3. Lock knob
4. Stalks
1-10 Safety—Seats, seat belts and supplemental restraint system
LRS2299 LRS2302
NON-ADJUSTABLE HEAD
RESTRAINT/HEADREST
COMPONENTS
1. Removable head restraint/headrest
2. Single notch
3. Lock knob
4. Stalks
5. Reinstall and properly adjust the head
restraint/headrest before an occupant
uses the seating position.
REMOVE
Use the following procedure to remove the
head restraint/headrest:
1. Pull the head restraint/headrest up to
the highest position.
2. Push and hold the lock knob.
3. Remove the head restraint/headrest
from the seat.
4. Store the head restraint/headrest
properly in a secure place so it is not
loose in the vehicle.
Safety—Seats, seat belts and supplemental restraint system 1-11

LRS2303 WRS0134 LRS2305
INSTALL
1. Align the head restraint/headrest
stalks with the holes in the seat. Make
sure that the head restraint/headrest is
facing the correct direction. The stalk
with the notch (notches)
installed in the hole with the lock knob
2. Push and hold the lock knob and push
the head restraint/headrest down.
3. Properly adjust the head restraint/
headrest before an occupant uses the
seating position.
䊊
1
must be
ADJUST
For adjustable head restraint/headrest
Adjust the head restraint/headrest so the
center is level with the center of your ears.If
your ear position is still higher than the
recommended alignment, place the head
2
.
䊊
restraint/headrest at the highest position.
1-12 Safety—Seats, seat belts and supplemental restraint system
Raise
To raise the head restraint/headrest, pull it
up.
Make sure the head restraint/headrest is
positioned so the lock knob is engaged in
the notch before riding in that designated
seating position.

LRS2306 SSS0136
Lower
To lower, push and hold the lock knob and
push the head restraint/headrest down.
Make sure the head restraint/headrest is
positioned so the lock knob is engaged in
the notch before riding in that designated
seating position.
SEAT BELTS
PRECAUTIONS ON SEAT BELT
USAGE
If you are wearing your seat belt properly
adjusted and you are sitting upright and
well back in your seat with both feet on the
floor,your chances of being injured or killed
in a collision and/or the severity of injury
may be greatly reduced. NISSAN strongly
encourages you and all of your passengers
to buckle up every time you drive, even if
your seating position includes a supplemental air bag.
Most U.S. states and Canadian provinces
or territories specify that seat belts be
worn at all times when a vehicle is being
driven.
Safety—Seats, seat belts and supplemental restraint system 1-13

WARNING
∙ Every person who drives or rides in
this vehicle should use a seat belt at
all times. Children should be in the
rear seats and in an appropriate
restraint.
1-14 Safety—Seats, seat belts and supplemental restraint system
SSS0134 SSS0016
WARNING
∙ The seat belt should be properly ad-
justed to a snug fit. Failure to do so
may reduce the effectiveness of the
entire restraint system and increase
the chance or severity of injury in an
accident. Serious injury or death can
occur if the seat belt is not worn
properly.

SSS0014
WARNING
∙ Always route the shoulder belt over
your shoulder and across your chest.
Never put the belt behind your back,
under your arm or across your neck.
The belt should be away from your
face and neck, but not falling off your
shoulder.
∙ Position the lap belt as low and snug
as possible AROUND THE HIPS, NOT
THE WAIST. A lap belt worn too high
could increase the risk of internal injuries in an accident.
∙ Be sure the seat belt tongue is se-
curely fastened to the proper buckle.
∙ Do not wear the seat belt inside out or
twisted. Doing so may reduce its
effectiveness.
∙ Do not allow more than one person to
use the same seat belt.
∙ Never carry more people in the vehicle
than there are seat belts.
∙ If the seat belt warning light glows
continuously while the ignition is
turned ON with all doors closed and all
seat belts fastened, it may indicate a
malfunction in the system. Have the
system checked. It is recommended
that you visit a NISSAN dealer for this
service.
∙ No changes should be made to the
seat belt system. For example, do not
modify the seat belt, add material, or
install devices that may change the
seat belt routing or tension. Doing so
may affect the operation of the seat
belt system. Modifying or tampering
with the seat belt system may result
in serious personal injury.
∙ Once seat belt pretensioner(s) have
activated, they cannot be reused and
must be replaced together with the
retractor. It is recommended that you
visit a NISSAN dealer for this service.
∙ All seat belt assemblies, including re-
tractors and attaching hardware,
should be inspected after any collision. It is recommended that you visit
a NISSAN dealer for this service.
NISSAN recommends that all seat belt
assemblies in use during a collision be
replaced unless the collision was minor and the belts show no damage
and continue to operate properly.
Seat belt assemblies not in use during
a collision should also be inspected
and replaced if either damage or improper operation is noted.
∙ All child restraints and attaching
hardware should be inspected after
any collision. Always follow the restraint manufacturer’s inspection instructions and replacement recommendations. The child restraints
should be replaced if they are
damaged.
Safety—Seats, seat belts and supplemental restraint system 1-15

LRS0786
SEAT BELT WARNING LIGHT
Both the driver’s and passenger’s front
seats are equipped with a seat belt warning light. The warning light, located on the
instrument panel, will show the status of
the driver and passenger seat belt.
NOTE:
The front passenger seat belt warning
light will not light up if the seat is not
occupied.
For additional information, refer to “Warning lights, indicator lights and audible reminders” in the “Instruments and controls”
section of this manual.
PREGNANT WOMEN
NISSAN recommends that pregnant
women use seat belts. The seat belt should
be worn snug and always position the lap
belt as low as possible around the hips, not
the waist. Place the shoulder belt over your
shoulder and across your chest. Never run
the lap/shoulder belt over your abdominal
area. Contact your doctor for specific recommendations.
INJURED PERSONS
NISSAN recommends that injured persons
use seat belts. Check with your doctor for
specific recommendations.
THREE-POINT TYPE SEAT BELT
WITH RETRACTOR
WARNING
∙ Every person who drives or rides in
this vehicle should use a seat belt at
all times. Children should be in the
rear seats and in an appropriate
restraint.
∙ Do not ride in a moving vehicle when
the seatback is reclined. This can be
dangerous. The shoulder belt will not
be against your body. In an accident,
you could be thrown into it and receive neck or other serious injuries.
You could also slide under the lap belt
and receive serious internal injuries.
∙ For the most effective protection
when the vehicle is in motion, the seat
should be upright. Always sit well
back and upright in the seat with both
feet on the floor and adjust the seat
belt properly.
1-16 Safety—Seats, seat belts and supplemental restraint system

∙ Do not allow children to play with the
seat belts. Most seating positions are
equipped with Automatic Locking Retractor (ALR) mode seat belts. If the
seat belt becomes wrapped around a
child’s neck with the ALR mode activated, the child can be seriously injured or killed if the seat belt retracts
and becomes tight. This can occur
even if the vehicle is parked. Unbuckle
the seat belt to release the child. If the
seat belt cannot be unbuckled or is
already unbuckled, release the child
by cutting the seat belt with a suitable
tool (such as a knife or scissors) to
release the seat belt.
LRS2160
Manual front seat shown (if so equipped)
Fastening the seat belts
1. Adjust the seat. For additional information, refer to “Seats” in this section.
Safety—Seats, seat belts and supplemental restraint system 1-17

Power front seat shown (if so equipped)
1-18 Safety—Seats, seat belts and supplemental restraint system
LRS2662
LRS2674
2. Slowly pull the seat belt out of the retractor and insert the tongue into the
buckle
latch engage.
∙ The retractor is designed to lock
∙ If the seat belt cannot be pulled
A
until you hear and feel the
䊊
during a sudden stop or on impact.
A slow pulling motion permits the
seat belt to move and allows you
some freedom of movement in the
seat.
from its fully retracted position,
firmly pull the belt and release it.
Then smoothly pull the belt out of
the retractor.

LRS2675
3. Position the lap belt portion low and
snug on the hips
4. Pull the shoulder belt portion toward
the retractor to take up extra slack
Be sure the shoulder belt is routed over
your shoulder and across your chest.
The front passenger seat and the rear
seating positions’ three-point seat belts
have two modes of operation:
∙ Emergency Locking Retractor (ELR)
∙ Automatic Locking Retractor (ALR)
B
as shown.
䊊
䊊
C
The ELR mode allows the seat belt to extend and retract to allow the driver and
passengers some freedom of movement
in the seat. The ELR locks the seat belt
when the vehicle slows down rapidly or
during certain impacts.
The ALR mode (child restraint mode) locks
the seat belt for child restraint installation.
When the ALR mode is activated, the seat
belt cannot be extended again until the
seat belt tongue is detached from the
buckle and fully retracted. The seat belt returns to the ELR mode after the seat belt
fully retracts. For additional information, refer to “Child restraints” in this section.
The ALR mode should be used only for
child restraint installation. During nor-
.
mal seat belt use by an occupant, the ALR
mode should not be activated. If it is activated, it may cause uncomfortable seat
belt tension. It can also change the operation of the front passenger air bag.
For additional information, refer to
“Front passenger air bag and status
light” in this section.
WARNING
When fastening the seat belts, be certain that the seatbacks are completely
secured in the latched position. If they
are not completely secured, passengers
may be injured in an accident or sudden
stop.
Safety—Seats, seat belts and supplemental restraint system 1-19

WRS0139 LRS2529
Unfastening the seat belts
To unfasten the seat belt, press the button
on the buckle
cally retracts.
1
. The seat belt automati-
䊊
Checking seat belt operation
Seat belt retractors are designed to lock
seat belt movement by two separate
methods:
∙ When the seat belt is pulled quickly from
the retractor
∙ When the vehicle slows down rapidly
To increase your confidence in the seat
belts, check the operation as follows:
∙ Grasp the shoulder belt and pull for-
ward quickly. The retractor should lock
and restrict further belt movement.
If the retractor does not lock during this
check, get the system checked. It is recommended that you visit a NISSAN dealer for
this service, or to learn more about seat
belt operation.
Rear center seat belt
The rear center seat belt has a connector
tongue
the connector tongue and the seat belt
tongue must be securely latched for
proper seat belt operation.
1
and a seat belt tongue
䊊
䊊
2
. Both
1-20 Safety—Seats, seat belts and supplemental restraint system

SSS0241
WARNING
∙ Always fasten the connector tongue
and the seat belt in the order shown.
∙ Always make sure both the connector
tongue and the seat belt tongue are
secured when using the seat belt or
installing a child restraint. Do not use
the seat belt or child restraint with
only the seat belt tongue attached.
This could result in serious personal
injury in case of an accident or a sudden stop.
LRS2793
Stowing the rear center seat belt
When folding down the rear seat, the rear
center seat belt can be retracted into a
stowed position as follows:
1
1. Hold the connector tongue
the seat belt does not retract suddenly
when the tongue is released from the
connector buckle. Release the connector tongue by inserting a suitable tool
such as a key
buckle.
2. Insert the seat belt tongue into the re-
tractor base first
3. Then secure the connector tongue into
the retractor base
A
into the connector
䊊
2
.
䊊
3
.
䊊
䊊
so that
WARNING
∙ Do not unfasten the rear center seat
belt connector except when folding
down the rear seat.
∙ When attaching the rear center seat
belt connector, be certain that the
seatbacks are completely secured in
the latched position and the rear center seat belt connector is completely
secured.
Safety—Seats, seat belts and supplemental restraint system 1-21

∙ If the rear center seat belt connector
and the seatbacks are not secured in
the correct position, serious personal
injury may result in an accident or
sudden stop.
1-22 Safety—Seats, seat belts and supplemental restraint system
LRS3023
Attaching the center seat belt
Always be sure the center seat belt connector tongue and connector buckle are
attached. Disconnect only when folding
down the rear seat.
To connect the buckle:
1. Pull out the connector tongue from the
retractor base
2. Pull out the seat belt tongue from the
retractor base
3. Pull the seat belt and secure the con-
nector buckle until it clicks
The center seat belt connector tongue can
be attached only into the rear center seat
belt connector buckle.
To fasten the seat belt, refer to "Fastening
the seat belts" in this section.
䊊
䊊
1
.
2
.
3
.
䊊
WARNING
∙ Do not unfasten the rear center seat
belt connector except when folding
down the rear seat.

∙ When attaching the rear center seat
belt connector, be certain that the
seatbacks are completely secured in
the latched position and the rear center seat belt connector is completely
secured.
∙ If the rear center seat belt connector
and the seatbacks are not secured in
the correct position, serious personal
injury may result in an accident or
sudden stop.
LRS0242
Shoulder belt height adjustment
(front seats)
The shoulder belt anchor height should be
adjusted to the position best for you. For
additional information, refer to “Precautions on seat belt usage” in this section. To
adjust, pull out the adjustment button
and move the shoulder belt anchor to the
desired position
the center of the shoulder. The belt should
be away from your face and neck, but not
falling off your shoulder. Release the adjustment button to lock the shoulder belt
anchor into position.
2
, so the belt passes over
䊊
䊊
WARNING
∙ Af ter adjustment, release the adjust-
ment button and try to move the
shoulder belt anchor up and down to
make sure it is securely fixed in
position.
∙ The shoulder belt anchor height
should be adjusted to the position
best for you. Failure to do so may reduce the effectiveness of the entire
restraint system and increase the
chance or severity of injury in an
accident.
1
Safety—Seats, seat belts and supplemental restraint system 1-23
LRS2851
Seat belt hook
When the seat belt is not in use and when
folding down the rear seats, hook the rear
seat belts on the seat belt hooks.
SEAT BELT EXTENDERS
If,because of body size or driving position, it
is not possible to properly fit the lap/
shoulder belt and fasten it, an extender
that is compatible with the installed seat
belts is available for purchase.
The extender adds approximately 8 in
(200 mm) of length and is available for the:
∙ Driver and front passenger seating
positions
It is recommended that you visit a NISSAN
dealer for assistance with purchasing an
extender if an extender is required.
WARNING
∙ Only NISSAN seat belt extenders,
made by the same company which
made the original equipment seat
belts, should be used with NISSAN
seat belts.
∙ Adults and children who can use the
standard seat belt should not use an
extender. Such unnecessary use
could result in serious personal injury
in the event of an accident.
∙ Never use seat belt extenders to in-
stall child restraints. If the child restraint is not secured properly, the
child could be seriously injured or
killed in a collision or a sudden stop.
SEAT BELT MAINTENANCE
∙ To clean the seat belt webbing, apply
a mild soap solution or any solution recommended for cleaning upholstery or
carpet. Then wipe with a cloth and allow
the seat belts to dry in the shade. Do not
allow the seat belts to retract until they
are completely dry.
∙ If dirt builds up in the shoulder belt
guide of the seat belt anchors, the
seat belts may retract slowly. Wipe the
shoulder belt guide with a clean, dry
cloth.
∙ Periodically check to see that the seat
belt and the metal components, such
as buckles, tongues, retractors, flexible
wires and anchors, work properly. If
loose parts, deterioration, cuts or other
damage on the webbing is found, the
entire seat belt assembly should be replaced.
1-24 Safety—Seats, seat belts and supplemental restraint system

CHILD SAFETY
WARNING
Do not allow children to play with the
seat belts. Most seating positions are
equipped with Automatic Locking Retractor (ALR) mode seat belts. If the seat
belt becomes wrapped around a child’s
neck with the ALR mode activated, the
child can be seriously injured or killed if
the seat belt retracts and becomes
tight. This can occur even if the vehicle
is parked. Unbuckle the seat belt to release the child. If the seat belt cannot be
unbuckled or is already unbuckled, release the child by cutting the seat belt
with a suitable tool (such as a knife or
scissors) to release the seat belt.
Children need adults to help protect them.
They need to be properly restrained.
In addition to the general information in
this manual, child safety information is
available from many other sources, including doctors, teachers, government traffic
safety offices, and community organizations. Every child is different, so be sure to
learn the best way to transport your child.
There are three basic types of child restraint systems:
∙ Rear-facing child restraints
∙ Forward-facing child restraints
∙ Booster seats
The proper restraint depends on the child’s
size. Generally, infants up to about 1 year
and less than 20 lbs. (9 kg) should be placed
in rear-facing child restraints. Forwardfacing child restraints are available for children who outgrow rear-facing child restraints and are at least 1 year old. Booster
seats are used to help position a vehicle
lap/shoulder belt on a child who can no
longer use a forward-facing child restraint.
WARNING
Infants and children need special protection. The vehicle’s seat belts may not
fit them properly. The shoulder belt may
come too close to the face or neck. The
lap belt may not fit over their small hip
bones. In an accident, an improperly fitting seat belt could cause serious or fatal injury. Always use appropriate child
restraints.
All U.S. states and Canadian provinces or
territories require the use of approved child
restraints for infants and small children.For
additional information, refer to “Child restraints” in this section.
Safety—Seats, seat belts and supplemental restraint system 1-25
A child restraint may be secured in the vehicle by using either the LATCH (Lower Anchors and Tethers for CHildren) system or
with the vehicle seat belt. For additional
information, refer to “Child restraints” in this
section.
NISSAN recommends that all pre-teens
and children be restrained in the rear
seat. Studies show that children are
safer when properly restrained in the
rear seat than in the front seat.
This is especially important because
your vehicle has a supplemental restraint system (air bag system) for the
front passenger. For additional information, refer to “Supplemental Restraint
System (SRS)” in this section.
INFANTS
Infants up to at least 1 year old should be
placed in a rear-facing child restraint.
NISSAN recommends that infants be
placed in child restraints that comply with
Federal Motor Vehicle Safety Standards or
Canadian Motor Vehicle Safety Standards.
Youshould choose a child restraint that fits
your vehicle and always follow the manufacturer’s instructions for installation and
use.

SMALL CHILDREN
Children that are over 1 year old and weigh
at least 20 lbs. (9 kg) should remain in a
rear-facing child restraint as long as possible up to the height or weight limit of the
child restraint. Children who outgrow the
height or weight limit of the rear-facing
child restraint and are at least 1 year old
should be secured in a forward-facing child
restraintwith a harness. Referto the manufacturer’s instructions for minimum and
maximum weight and height recommendations. NISSAN recommends that small
children be placed in child restraints that
comply with Federal Motor Vehicle Safety
Standards or Canadian Motor Vehicle
Safety Standards. You should choose a
child restraint that fits your vehicle and always follow the manufacturer’s instructions for installation and use.
LARGER CHILDREN
Children should remain in a forward-facing
child restraint with a harness until they
reach the maximum height or weight limit
allowed by the child restraint manufacturer.
Once a child outgrows the height or weight
limit of the harness-equipped forwardfacing child restraint, NISSAN recommends
that the child be placed in a commercially
available booster seat to obtain proper
seat belt fit.For a seat belt to fit properly, the
booster seat should raise the child so that
the shoulder belt is properly positioned
across the chest and the top, middle portion of the shoulder. The shoulder belt
should not cross the neck or face and
should not fall off the shoulder. The lap belt
should lie snugly across the lower hips or
upper thighs, not the abdomen. A booster
seat can only be used in seating positions
that have a three-point type seat belt. The
booster seat should fit the vehicle seat and
have a label certifying that it complies with
Federal Motor Vehicle Safety Standards or
Canadian Motor Vehicle Safety Standards.
A booster seat should be used until the
child can pass the seat belt fit test below:
∙ Are the child’s back and hips against the
vehicle seatback?
∙ Is the child able to sit without slouch-
ing?
∙ Do the child’s knees bend easily over
the front edge of the seat with feet flat
on the floor?
∙ Can the child safely wear the seat belt
(lap belt low and snug across the hips
and shoulder belt across mid-chest
and shoulder)?
∙ Is the child able to use the properly ad-
justed head restraint/headrest?
∙ Will the child be able to stay in position
for the entire ride?
1-26 Safety—Seats, seat belts and supplemental restraint system

LRS2690 ARS1098
If you answered no to any of these questions, the child should remain in a booster
seat using a three-point type seat belt.
NOTE:
Laws in some communities may follow
different guidelines. Check local and
state regulations to confirm your child is
using the correct restraintsystem before
traveling.
CHILD RESTRAINTS
WARNING
Never let a child stand or kneel on any
seat and do not allow a child in the
cargo area. The child could be seriously
injured or killed in a sudden stop or
collision.
PRECAUTIONS ON CHILD
RESTRAINTS
WARNING
∙ Failure to follow the warnings and in-
structions for proper use and installation of child restraints could result in
serious injury or death of a child or
other passengers in a sudden stop or
collision:
– The child restraint must be used
and installed properly. Always
follow all of the child restraint
Safety—Seats, seat belts and supplemental restraint system 1-27

seat. If you must install a forwardfacing child restraint in the front
seat, refer to “Forward-facing child
restraint installation using the seat
belts” in this section.
– Even with the NISSAN Advanced Air
Bag System, never install a rearfacing child restraint in the front
seat. An inflating air bag could seriously injure or kill a child. A rearfacing child restraint must only be
used in the rear seat.
WRS0256
manufacturer’s instructions for installation and use.
– Infants and children should never
be held on anyone’s lap. Even the
strongest adult cannot resist the
forces of a collision.
– Do not put a seat belt around both
a child and another passenger.
– NISSAN recommends that all child
restraints be installed in the rear
seat. Studies show that children
are safer when properly restrained
in the rear seat than in the front
– Be sure to purchase a child re-
straint that will fit the child and vehicle. Some child restraints may
not fit properly in your vehicle.
– Child restraint anchorages are
designed to withstand only those
loads imposed by correctly fitted
child restraints. Under no circumstances are they to be used to attach adult seat belts, or other items
or equipment to the vehicle. Doing
so could damage the child restraint
anchorages. The child restraint will
not be properly installed using the
damaged anchorage, and a child
could be seriously injured or killed in
a collision.
1-28 Safety—Seats, seat belts and supplemental restraint system
– Never use the anchor points for
adult seat belts, or other items.
– A child restraint with a top tether
strap should not be used in the
front passenger seat.
– Keep seatbacks as upright as pos-
sible after fitting the child
restraint.
– Infants and children should always
be placed in an appropriate child
restraint while in the vehicle.
∙ When the child restraint is not in use,
keep it secured with the LATCHsystem
or a seat belt. In a sudden stop or collision, loose objects can injure occupants or damage the vehicle.
CAUTION
A child restraint in a closed vehicle can
become very hot. Check the seating
surface and buckles before placing a
child in the child restraint.
This vehicle is equipped with a universal
child restraint anchor system, referred to
as the LATCH (Lower Anchors and Tethers
for CHildren) system. Some child restraints
include rigid or webbing-mounted attachments that can be connected to these an-

chors. For additional information, refer to
“LATCH (Lower Anchors and Tethers for
CHildren) system” in this section.
If you do not have a LATCH compatible
child restraint,the vehicle seat belts can be
used.
Several manufacturers offer child restraints for infants and children of various
sizes. When selecting any child restraint,
keep the following points in mind:
∙ Choose only a restraint with a label cer-
tifying that it complies with Federal Motor Vehicle Safety Standard213 or Canadian Motor Vehicle Safety Standard 213.
∙ Check the child restraint in your vehicle
to be sure it is compatible with the vehicle’s seat and seat belt system.
∙ If the child restraint is compatible with
your vehicle, place your child in the child
restraint and check the various adjustments to be sure the child restraint is
compatible with your child. Choose a
child restraint that is designed for your
child’s height and weight. Always follow
all recommended procedures.
∙ If the combined weight of the child and
child restraint is less than 65 lbs.
(29.5 kg), you may use either the LATCH
anchors or the seat belt to install the
child restraint (not both at the same
time).
∙ If the combined weight of the child and
child restraint is greater than 65 lbs.
(29.5 kg), use the vehicle’s seat belt (not
the lower anchors) to install the child
restraint.
∙ Be sure to follow the child restraint
manufacturer’s instructions for installation.
All U.S. states and Canadian provinces or
territories require that infants and small
children be restrained in an approved
child restraint at all times while the vehicle is being operated. Canadian law requires the top tether strap on forwardfacing child restraints be secured to the
designated anchor point on the vehicle.
Safety—Seats, seat belts and supplemental restraint system 1-29
LRS2871
LATCH system lower anchor locations -
bench seat
LATCH (Lower Anchors and
Tethers for CHildren) SYSTEM
Your vehicle is equipped with special anchor points that are used with LATCH system compatible child restraints. This system may also be referred to as the ISOFIX
or ISOFIX compatible system. With this system, you do not have to use a vehicle seat
belt to secure the child restraint unless the
combined weight of the child and child restraint exceeds 65 lbs. (29.5 kg). If the combined weight of the child and child restraint
is greater than 65 lbs. (29.5 kg), use the ve-

hicle’s seat belt (not the lower anchors) to
install the child restraint. Be sure to follow
the child restraint manufacturer’s instructions for installation.
The LATCH lower anchor points are provided to install child restraints in the following positions only:
∙ Rear bench seat – outboard seating po-
sitions
LATCH lower anchor
WARNING
Failure to follow the warnings and instructions for proper use and installation of child restraints could result in
serious injury or death of a child or
other passengers in a sudden stop or
collision:
– Attach LATCH system compatible
child restraints only at the locations shown in the illustration.
– Do not secure a child restraint in
the rear bench center position using the LATCH system anchors. The
child restraint will not be secured
properly.
– Inspect the lower anchors by in-
serting your fingers into the lower
anchor area. Feel to make sure
there are no obstructions over the
anchors such as seat belt webbing
or seat cushion material. The child
restraint will not be secured properly if the lower anchors are
obstructed.
– Child restraint anchorages are de-
signed to withstand only those
loads imposed by correctly fitted
child restraints. Under no circumstances are they to be used to attach adult seat belts, or other items
or equipment to the vehicle. Doing
so could damage the child restraint anchorages. The child restraint will not be properly installed using the damaged
anchorages, and a child could be
seriously injured or killed in a
collision.
WRS0700
LATCH lower anchor location
LATCH lower anchor location
The LATCH lower anchors are located as
shown. A label is attached to the seatback
to help you locate the LATCH lower anchors.
1-30 Safety—Seats, seat belts and supplemental restraint system

LRS2165
LATCH label locations rear bench
LRS0661
LATCH webbing-mounted attachment
Installing child restraint LATCH
lower anchor attachments
LATCH compatible child restraints include
two rigid or webbing-mounted attachments that can be connected to two anchors located at certain seating positions
in your vehicle. With this system, you do not
have to use a vehicle seat belt to secure the
child restraint. Check your child restraint for
a label stating that it is compatible with
LATCH. This information may also be in the
instructions provided by the child restraint
manufacturer.
Safety—Seats, seat belts and supplemental restraint system 1-31
LRS0662
LATCH rigid-mounted attachment
When installing a child restraint, carefully
read and follow the instructions in this
manual and those supplied with the child
restraint.

Top tether anchor
WARNING
∙ Do not allow cargo to contact the top
tether strap when it is attached to the
top tether anchor. Properly secure the
cargo so it does not contact the top
tether strap. Cargo that is not properly
secured or cargo that contacts the top
tether strap may damage it during a
collision. A child could be seriously injured or killed in a collision if the top
tether strap is damaged.
∙ Child restraint anchorages are de-
signed to withstand only those loads
imposed by correctly fitted child restraints. Under no circumstances are
they to be used to attach adult seat
belts, or other items or equipment to
the vehicle. Doing so could damage
the child restraint anchorages. The
child restraint will not be properly installed using the damaged anchorages, and a child could be seriously
injured or killed in a collision.
LRS2597
1
Top tether strap
䊊
2
Anchor point
䊊
Rear bench seat
Top tether anchor point locations
Anchor points are located in the following
locations:
∙ Rear bench seat on the back side of the
seatback in the seating positions
shown.
If you have any questions when installing a
top tether strap, it is recommended that
you visit a NISSAN dealer for this service.
REAR-FACING CHILD RESTRAINT
INSTALLATION USING LATCH
For additional information, referto all Warnings and Cautions in the “Child safety” and
“Child restraints” sections of this manual
before installing a child restraint.
Do not use the lower anchors if the combined weight of the child and the child restraint exceeds 65 lbs. (29.5 kg). If the combined weight of the child and the child
restraint is greater than 65 lbs. (29.5 kg), use
the vehicle’s seat belt (not the lower anchors) to install the child restraint. Be sure
to follow the child restraint manufacturer’s
instructions for installation.
Follow these steps to install a rear-facing
child restraint in the rear bench seats using
the LATCH system:
1. Position the child restraint on the seat.
Always follow the child restraint manufacturer’s instructions.
1-32 Safety—Seats, seat belts and supplemental restraint system

WRS0801
Rear-facing webbing-mounted – step 2
2. Secure the child restraint anchor attachments to the LATCH lower anchors. Check to make sure the LATCH
attachment is properly attached to the
lower anchors.
WRS0802
Rear-facing rigid-mounted – step 2
Safety—Seats, seat belts and supplemental restraint system 1-33
LRS0673
Rear-facing – step 3
3. For child restraints that are equipped
with webbing-mounted attachments,
remove any additional slack from the
anchor attachments. Press downward
and rearward firmly in the center of the
child restraint with your hand to compress the vehicle seat cushion and
seatback while tightening the webbing
of the anchor attachments.

You may need to try a different child
restraint or try installing by using the
vehicle seat belt (if applicable). Not all
child restraints fit in all types of vehicles.
5. Check to make sure the child restraint
is properly secured prior to each use. If
the child restraint is loose, repeat
steps 2 through 4.
REAR-FACING CHILD RESTRAINT
INSTALLATION USING THE SEAT
BELTS
Do not use the lower anchors if the combined weight of the child and the child restraint exceeds 65 lbs. (29.5 kg). If the combined weight of the child and the child
restraint is greater than 65 lbs. (29.5 kg), use
the vehicle’s seat belt (not the lower anchors) to install the child restraint. Be sure
to follow the child restraint manufacturer’s
instructions for installation.
Follow these steps to install a rear-facing
child restraint using the vehicle seat belts in
the rear seats:
LRS0674
Rear-facing – step 4
4. Af ter attaching the child restraint, test
it before you place the child in it. Push it
from side to side while holding the child
restraint near the LATCH attachment
path. The child restraint should not
move more than 1 inch (25 mm), from
side to side. Try to tug it forward and
check to see if the LATCH attachment
holds the restraint in place. If the restraint is not secure, tighten the LATCH
attachment as necessary, or put the
restraint in another seat and test it
again.
The three-point seat belt with Automatic Locking Retractor (ALR) must be
used when installing a child restraint.
Failureto use the ALR mode will result in
the child restraint not being properly
secured. The restraint could tip over or
be loose and cause injury to a child in a
sudden stop or collision.
For additional information, referto all Warnings and Cautions in the “Child safety” and
“Child restraints” sections of this manual
before installing a child restraint.
WARNING
1-34 Safety—Seats, seat belts and supplemental restraint system

Rear-facing – step 1
WRS0256
1. Child restraints for infants must be
used in the rear-facing direction and
therefore must not be used in the
front seat. Position the child restraint
on the seat. Always follow the child restraint manufacturer’s instructions.
WRS0761
Rear-facing – step 2
2. Route the seat belt tongue through the
child restraint and insert it into the
buckle until you hear and feel the latch
engage. Be sure to follow the child restraint manufacturer’s instructions for
belt routing.
Safety—Seats, seat belts and supplemental restraint system 1-35
LRS2395
Rear-facing – step 3
3. Pull the shoulder belt until the belt is
fully extended.At this time, the seat belt
retractor is in the ALR mode (child restraint mode). It reverts to the ELR
mode when the seat belt is fully retracted.

LRS2396
Rear-facing – step 4
4. Allow the seat belt to retract. Pull up on
the shoulder belt to remove any slack
in the belt.
5. Remove any additional slack from the
Rear-facing – step 5
seat belt; press downward and rearward firmly in the center of the child
restraint to compress the vehicle seat
cushion and seatback while pulling up
on the seat belt.
1-36 Safety—Seats, seat belts and supplemental restraint system
WRS0762
LRS2397
Rear-facing – step 6
6. After attaching the child restraint, test
it before you place the child in it. Push it
from side to side while holding the child
restraint near the seat belt path. The
child restraint should not move more
than 1 inch (25 mm), from side to side.
Try to tug it forward and check to see if
the belt holds the restraint in place. If
the restraint is not secure, tighten the
seat belt as necessary, or put the restraint in another seat and test it again.
You may need to try a different child
restraint. Not all child restraints fit in all
types of vehicles.

7. Check to make sure that the child restraint is properly secured prior to each
use. If the seat belt is not locked, repeat
steps 1 through 6.
After the child restraint is removed and the
seat belt fully retracted, the ALR mode
(child restraint mode) is canceled.
FORWARD-FACING CHILD
RESTRAINT INSTALLATION USING
LATCH
For additional information, referto all Warnings and Cautions in the “Child safety” and
“Child restraints” sections of this manual
before installing a child restraint.
Do not use the lower anchors if the combined weight of the child and the child restraint exceeds 65 lbs. (29.5 kg). If the combined weight of the child and the child
restraint is greater than 65 lbs. (29.5 kg), use
the vehicle’s seat belt (not the lower anchors) to install the child restraint. Be sure
to follow the child restraint manufacturer’s
instructions for installation.
Follow these steps to install a forwardfacing child restraint in the rear bench
seats using the LATCH system:
1. Position the child restraint on the seat.
Always follow the child restraint manufacturer’s instructions.
LRS2398
Forward-facing webbing-mounted –
step 2
2. Secure the child restraint anchor attachments to the LATCH lower anchors. Check to make sure the LATCH
attachment is properly attached to the
lower anchors.
If the child restraint is equipped with a
top tether strap, route the top tether
strap and secure the tether strap to
the tether anchor point. For additional
information, refer to “Installing top
tether strap” in this section.
Safety—Seats, seat belts and supplemental restraint system 1-37

LRS2399
Forward-facing rigid-mounted – step 2
Do not install child restraints that require the use of a top tether strap in
seating positions that do not have a
top tether anchor.
3. The back of the child restraint should
be secured against the vehicle seatback.
If necessary, adjust or removethe head
restraint/headrest to obtain the correct child restraint fit. If the head
restraint/headrest is removed, store it
in a secure place. Be sure to reinstall
the head restraint/headrest when
the child restraint is removed. For ad-
ditional information, refer to “Head
restraints/headrests” in this section.
If the seating position does not have
an adjustable head restraint/headrest
and it is interfering with the proper
child restraint fit, try another seating
position or a different child restraint.
LRS0671
Forward-facing – step 4
4. For child restraints that are equipped
with webbing-mounted attachments,
remove any additional slack from the
anchor attachments. Press downward
and rearward firmly in the center of the
child restraint with your knee to compress the vehicle seat cushion and
seatback while tightening the webbing
of the anchor attachments.
5. Tighten the tether strap according to
the manufacturer’s instructions to remove any slack.
1-38 Safety—Seats, seat belts and supplemental restraint system

7. Check to make sure the child restraint
is properly secured prior to each use. If
the child restraint is loose, repeat
steps 3 through 6.
WRS0697
Forward-facing – step 6
6. After attaching the child restraint, test
it before you place the child in it. Push it
from side to side while holding the child
restraint near the LATCH attachment
path. The child restraint should not
move more than 1 inch (25 mm), from
side to side. Try to tug it forward and
check to see if the LATCH attachment
holds the restraint in place. If the restraint is not secure, tighten the LATCH
attachment as necessary, or put the
restraint in another seat and test it
again. You may need to try a different
child restraint. Not all child restraints fit
in all types of vehicles.
LRS2597
1
Top tether strap
䊊
2
Anchor point
䊊
Rear bench seat
Installing top tether strap
The child restraint top tether strap must be
used when installing the child restraintwith
the LATCH lower anchor attachments.
First, secure the child restraint with the
LATCH lower anchors.
Safety—Seats, seat belts and supplemental restraint system 1-39

Rear bench seat
OUTBOARD SEATING POSITIONS
1. Remove the head restraint/headrest
and store it in a secure place. Be sure to
reinstall the head restraint/headrest
when the child restraint is removed. For
additional information, refer to “Head
restraints/headrests” in this section.
1
2. Position the top tether strap
shown.
3. Secure the tether strap to the tether
anchor point
4. Tighten the tether strap according to
the manufacturer’s instructions to remove any slack.
If you have any questions when installing a top tether strap, it is recommended
that you visit a NISSAN dealer for this
service.
2
as shown.
䊊
䊊
as
WARNING
Child restraint anchorages are designed to withstand only those loads
imposed by correctly fitted child restraints. Under no circumstances are
they to be used to attach adult seat
belts, or other items or equipment to
the vehicle. Doing so could damage the
child restraint anchorages.The child restraint will not be properly installed using the damaged anchorage, and a
child could be seriously injured or killed
in a collision.
FORWARD-FACING CHILD
RESTRAINT INSTALLATION USING
THE SEAT BELTS
WARNING
The three-point seat belt with Automatic Locking Retractor (ALR) must be
used when installing a child restraint.
Failureto use the ALR mode will result in
the child restraint not being properly
secured. The restraint could tip over or
be loose and cause injury to a child in a
sudden stop or collision. Also, it can
change the operation of the front passenger air bag. For additional information, refer to “Front passenger air bag
and status light” in this section.
1-40 Safety—Seats, seat belts and supplemental restraint system

WRS0699
Forward-facing (front passenger seat) –
step 1
For additional information, referto all Warnings and Cautions in the “Child safety” and
“Child restraints” sections of this manual
before installing a child restraint.
Do not use the lower anchors if the combined weight of the child and the child restraint exceeds 65 lbs. (29.5 kg). If the combined weight of the child and the child
restraint is greater than 65 lbs. (29.5 kg), use
the vehicle’s seat belt (not the lower anchors) to install the child restraint. Be sure
to follow the child restraint manufacturer’s
instructions for installation.
Follow these steps to install a forwardfacing child restraint using the vehicle seat
belt in the rear seats or in the front passenger seat:
1. If you must install a child restraint in
the front seat, it should be placed in a
forward-facing direction only. Move
the seat to the rearmost position.
Child restraints for infants must be
used in the rear-facing direction and,
therefore, must not be used in the
front seat.
2. Position the child restraint on the seat.
Always follow the child restraint manufacturer’s instructions.
The back of the child restraint should
be secured against the vehicle seatback.
If necessary, adjust or removethe head
restraint/headrest to obtain the correct child restraint fit. If the head
restraint/headrest is removed, store it
in a secure place. Be sure to reinstall
the head restraint/headrest when
the child restraint is removed. For ad-
ditional information, refer to “Head
restraints/headrests” in this section.
Safety—Seats, seat belts and supplemental restraint system 1-41
If the seating position does not have
an adjustable head restraint/headrest
and it is interfering with the proper
child restraint fit, try another seating
position or a different child restraint.

Do not install child restraints that require the use of a top tether strap in
seating positions that do not have a
top tether anchor.
WRS0680
Forward-facing – step 3
3. Route the seat belt tongue through the
child restraint and insert it into the
buckle until you hear and feel the latch
engage. Be sure to follow the child restraint manufacturer’s instructions for
belt routing.
If the child restraint is equipped with a
top tether strap, route the top tether
strap and secure the tether strap to
the tether anchor point. For additional
information, refer to “Installing top
tether strap” in this section.
1-42 Safety—Seats, seat belts and supplemental restraint system
LRS2394
Forward-facing – step 4
4. Pull the shoulder belt until the belt is
fully extended. At this time,the seat belt
retractor is in the ALR mode (child restraint mode). It reverts to ELR mode
when the seat belt is fully retracted.

LRS0668
Forward-facing – step 5
5. Allow the seat belt to retract. Pull up on
the shoulder belt to remove any slack
in the belt.
WRS0681
Forward-facing – step 6
6. Remove any additional slack from the
seat belt; press downward and rearward firmly in the center of the child
restraint with your knee to compress
the vehicle seat cushion and seatback
while pulling up on the seat belt.
7. Tighten the tether strap according to
the manufacturer’s instructions to remove any slack.
Safety—Seats, seat belts and supplemental restraint system 1-43
Forward-facing – step 8
WRS0698
8. Af ter attaching the child restraint, test
it before you place the child in it. Push it
from side to side while holding the child
restraint near the seat belt path. The
child restraint should not move more
than 1 inch (25 mm), from side to side.
Try to tug it forward and check to see if
the belt holds the restraint in place. If
the restraint is not secure, tighten the
seat belt as necessary, or put the restraint in another seat and test it again.
You may need to try a different child
restraint. Not all child restraints fit in all
types of vehicles.

9. Check to make sure the child restraint
is properly secured prior to each use. If
the seat belt is not locked, repeat
steps 2 through 8.
Forward-facing – step 10
10. If the child restraint is installed in the
front passenger seat, place the ignition
switch in the ON position. The front
passenger air bag status light
should illuminate. If this light is not illuminated refer to “Front passenger air
bag and status light” in this section.
Move the child restraint to another
seating position. Have the system
checked. It is recommended that you
visit a NISSAN dealer for this service.
After the child restraint is removed and the
seat belt is fully retracted, the ALR mode
(child restraint mode) is canceled.
1-44 Safety—Seats, seat belts and supplemental restraint system
LRS0865
LRS2597
Rear row bench seat
Top tether strap
Anchor point
䊊
䊊
1
2
Installing top tether strap
The child restraint top tether strap must be
used when installing the child restraintwith
seat belts.
First, secure the child restraint with the seat
belt.

Rear bench seat
OUTBOARD SEATING POSITIONS
1. Remove the head restraint/headrest
and store it in a secure place. Be sure to
reinstall the head restraint/headrest
when the child restraint is removed. For
additional information, refer to “Head
restraints/headrests” in this section.
2. Position the top tether strap
shown.
3. Secure the tether strap to the tether
anchor point
4. Tighten the tether strap according to
the manufacturer’s instructions to remove any slack.
CENTER SEATING POSITION
1. Remove the head restraint/headrest
and store it in a secure place. Be sure to
reinstall the head restraint/headrest
when the child restraint is removed. For
additional information, refer to “Head
restraints/headrests” in this section.
2. Position the top tether strap
shown.
3. Secure the tether strap to the tether
anchor point
2
as shown.
䊊
2
as shown.
䊊
䊊
䊊
1
1
4. Tighten the tether strap according to
the manufacturer’s instructions to remove any slack.
If you have any questions when installing a top tether strap, it is recommended
that you visit a NISSAN dealer for this
service.
WARNING
as
Child restraint anchorages are designed to withstand only those loads
imposed by correctly fitted child restraints. Under no circumstances are
they to be used to attach adult seat
belts, or other items or equipment to
the vehicle. Doing so could damage the
child restraint anchorages.The child restraint will not be properly installed using the damaged anchorage, and a
child could be seriously injured or killed
in a collision.
BOOSTER SEATS
For additional information on installing a
booster seat in your vehicle, follow the in-
as
structions outlined in this section.
Safety—Seats, seat belts and supplemental restraint system 1-45
Precautions on booster seats
WARNING
If a booster seat and seat belt are not
used properly, the risk of a child being
injured or killed in a sudden stop or collision greatly increases:
– Make sure the shoulder portion of
the belt is away from the child’s
face and neck and the lap portion
of the belt does not cross the
stomach.
– Make sure the shoulder belt is not
behind the child or under the
child’s arm.
– A booster seat must only be in-
stalled in a seating position that
has a lap/shoulder belt.

LRS2479 LRS0453 LRS0464
A. Low back booster seat
B. High back booster seat
Booster seats of various sizes are offered
by several manufacturers. When selecting
any booster seat, keep the following points
in mind:
∙ Choose only a booster seat with a label
certifying that it complies with Federal
Motor Vehicle Safety Standard 213 or
Canadian Motor Vehicle Safety Standard 213.
∙ Check the booster seat in your vehicle
to be sure it is compatible with the vehicle’s seat and seat belt system.
1-46 Safety—Seats, seat belts and supplemental restraint system
∙ Make sure the child’s head will be prop-
erly supported by the booster seat or
vehicle seat. The seatback must be at
or above the center of the child’s ears.
For example, if a low back booster seat
is chosen, the vehicle seatback must be
at or above the center of the child’s ears.
If the seatback is lower than the center
of the child’s ears, a high back booster
seat should be used.
∙ If the booster seat is compatible with
your vehicle, place the child in the
booster seat and check the various adjustments to be sure the booster seat is
compatible with the child. Always follow
all recommended procedures.

All U.S. states and Canadian provinces or
territories require that infants and small
children be restrained in an approved
child restraint at all times while the vehicle is being operated.
The instructions in this section apply to
booster seat installation in the rear seats
or the front passenger seat.
Booster seat installation
WARNING
To avoid injury to child, do not use the
lap/shoulder belt in the Automatic
Locking Retractor (ALR) mode when using a booster seat with the seat belts.
For additional information, referto all Warnings and Cautions in the “Child safety,”
“Child restraints” and “Booster seats” sections of this manual before installing a child
restraint.
Follow these steps to install a booster seat
in the rear bench seats or in the front passenger seat:
WRS0699
1. If you must install a booster seat in
the front seat, move the seat to the
rearmost position.
2. Position the booster seat on the seat.
Only place it in a front-facing direction.
Always follow the booster seat manufacturer’s instructions.
LRS0454
Front passenger position
3. The booster seat should be positioned
on the vehicle seat so that it is stable.
If necessary, adjust or removethe head
restraint/headrest to obtain the correct booster seat fit. If the head
restraint/headrest is removed, store it
in a secure place. Be sure to reinstall
the head restraint/headrest when
the booster seat is removed. For ad-
ditional information, refer to “Head
restraints/headrests” in this section.
Safety—Seats, seat belts and supplemental restraint system 1-47

SUPPLEMENTAL RESTRAINT SYSTEM
(SRS)
If the seating position does not have
an adjustable head restraint/headrest
and it is interfering with the proper
booster seat fit, try another seating
position or a different booster seat.
4. Position the lap portion of the seat belt
low and snug on the child’s hips. Be
sure to follow the booster seat manufacturer’s instructions for adjusting the
seat belt routing.
5. Pull the shoulder belt portion of the
seat belt toward the retractor to take
up extra slack. Be sure the shoulder
belt is positioned across the top,
middle portion of the child’s shoulder.
Be sure to follow the booster seat
manufacturer’s instructions for adjusting the seat belt routing.
6. Follow the warnings, cautions and instructions for properly fastening a seat
belt shown in “Three-point type seat
belt with retractor” in this section.
LRS0865
7. If the booster seat is installed in the
front passenger seat, place the ignition
switch in the ON position. The front pas-
senger air bag status light
may not illuminate, depending on the
size of the child and the type of booster
seat being used. For additional information, refer to “Front passenger air
bag and status light” in this section.
may or
PRECAUTIONS ON SRS
This SRS section contains important information concerning the following systems:
∙ Driver and front passenger
supplemental front-impact air bag
(NISSAN Advanced Air Bag System)
∙ Front seat-mounted side-impact
supplemental air bag
∙ Roof-mounted curtain side-impact and
rollover supplemental air bag
∙ Driver supplemental knee air bag
∙ Seat belt with pretensioner(s)
(front seats)
Supplemental front-impact air bag
system
The NISSAN Advanced Air Bag System can
help cushion the impact force to the head
and chest of the driver and front passenger
in certain frontal collisions.
1-48 Safety—Seats, seat belts and supplemental restraint system

Front seat-mounted side-impact
supplemental air bag system
This system can help cushion the impact
force to the chest area of the driver and
front passenger in certain side-impact collisions. The side air bags are designed to
inflate on the side where the vehicle is impacted.
Roof-mounted curtain side-impact and
rollover supplemental air bag system
This system can help cushion the impact
force to the head of occupants in front and
rear outboard seating positions in certain
side-impact or rollover collisions. In a side
impact, the curtain air bags are designed
to inflate on the side where the vehicle is
impacted. In a rollover, the curtain air bags
are designed to inflate and remain inflated
for a short time.
The SRS is designed to supplement the
crash protection provided by the driver and
front passenger seat belts and is not a
substitute for them. Seat belts should always be correctly worn and the occupant
seated a suitable distance away from the
steering wheel, instrument panel and door
finishers. For additional information, refer
to “Seat belts” in this section.
Driver supplemental knee air bag
This system can help cushion the impact
force to the driver’s knees in certain collisions.
The SRS is designed to supplement the
crash protection provided by the driver and
front passenger seat belts and is not a
substitute for them. Seat belts should always be correctly worn and the occupant
seated a suitable distance away from the
steering wheel, instrument panel and door
finishers. For additional information, refer
to “Seat belts” in this section.
The supplemental air bags operate only
when the ignition switch is placed in the
ON position.
After placing the ignition switch in the
ON position, the supplemental air bag
warning light illuminates. The supplemental air bag warning light will turn off
after about 7 seconds if the system is
operational.
Safety—Seats, seat belts and supplemental restraint system 1-49

WARNING
∙ The front air bags ordinarily will not
inflate in the event of a side impact,
rear impact, rollover, or lower severity
frontal collision. Always wear your
seat belts to help reduce the risk or
severity of injury in various kinds of
accidents.
∙ The front passenger air bag will not
inflate if the passenger air bag status
light is lit. For additional information,
refer to “Front passenger air bag and
status light” in this section.
WRS0031
∙ The seat belts and the front air bags
are most effective when you are sitting well back and upright in the seat.
The front air bags inflate with great
force. Even with the NISSAN Advanced
Air Bag System, if you are unrestrained,leaning forward, sitting sideways or out of position in any way, you
are at greater risk of injury or death in
a crash. You may also receive serious
or fatal injuries from the front air bag
if you areup against it when it inflates.
Always sit back against the seatback
and as far away as practical from the
steering wheel or instrument panel.
Always properly use the seat belts.
∙ The driver and front passenger seat
belt buckles are equipped with sensors that detect if the seat belts are
fastened. The NISSAN Advanced Air
Bag System monitors the severity of a
collision and seat belt usage, then inflates the air bags as needed. Failure
to properly wear seat belts can increase the risk or severity of injury in
an accident.
1-50 Safety—Seats, seat belts and supplemental restraint system

∙ The front passenger seat is equipped
with an occupant classification sensor (weight sensor) that turns the
front passenger air bag OFF under
some conditions. This sensor is only
used in this seat. Failureto be properly
seated and wearing the seat belt can
increase the risk or severity of injury in
an accident. For additional information, refer to “Front passenger air bag
and status light” in this section.
∙ Keep hands on the outside of the
steering wheel. Placing them inside
the steering wheel rim could increase
the risk that they are injured when the
front air bag inflates.
ARS1133
Safety—Seats, seat belts and supplemental restraint system 1-51
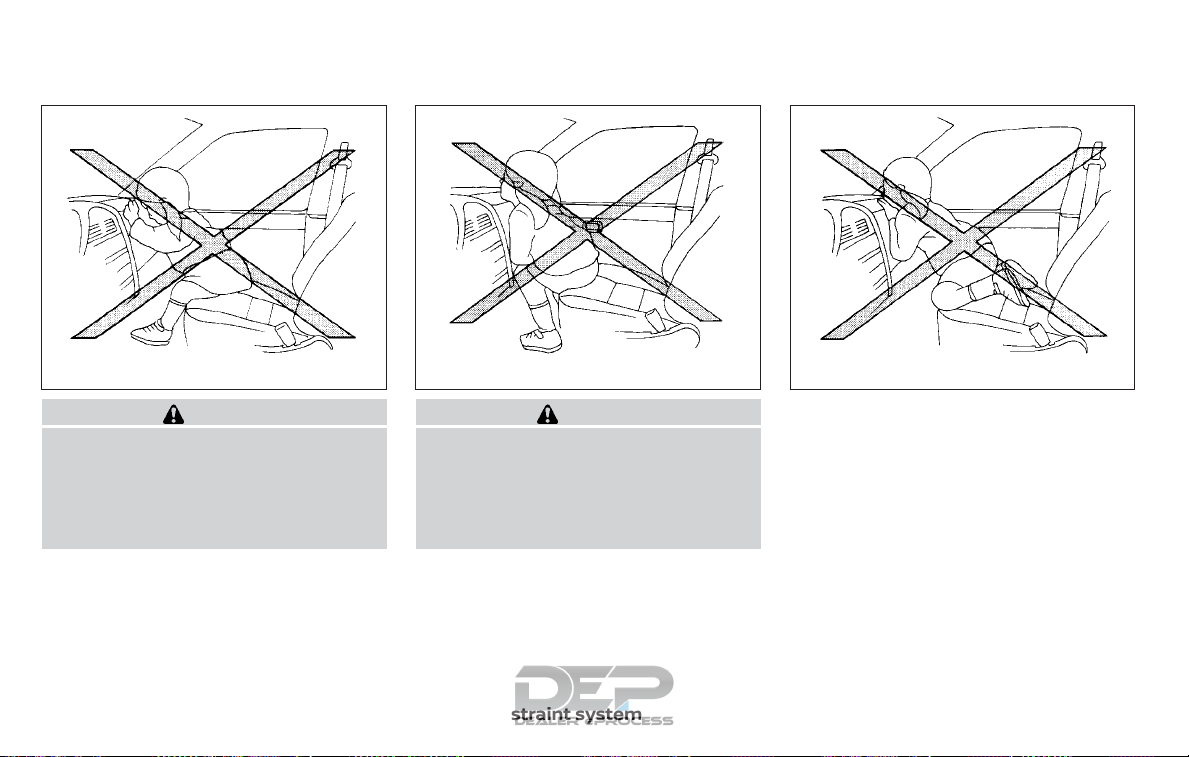
ARS1041 ARS1042 ARS1043
WARNING
∙ Never let children ride unrestrained or
extend their hands or face out of the
window. Do not attempt to hold them
in your lap or arms. Some examples of
dangerous riding positions are shown
in the illustrations.
∙ Children may be severely injured or
killed when the front air bags, side air
bags or curtain air bags inflate if they
are not properly restrained. Pre-teens
and children should be properly restrained in the rear seat, if possible.
WARNING
1-52 Safety—Seats, seat belts and supplemental restraint system

ARS1044 ARS1045 ARS1046
WARNING
∙ Even with the NISSAN Advanced Air
Bag System, never install a rearfacing child restraint in the front seat.
An inflating front air bag could seriously injure or kill your child. For additional information, refer to “Child restraints” in this section.
Safety—Seats, seat belts and supplemental restraint system 1-53

WRS0431 WRS0363
WARNING
Front seat-mounted side-impact
supplemental air bags and roofmounted curtain side-impact and rollover supplemental air bags:
∙ The side air bags and curtain air bags
ordinarily will not inflate in the event
of a frontal impact, rear impact, or
lower severity side collision. Always
wear your seat belts to help reduce
the risk or severity of injury in various
kinds of accidents.
WARNING
∙ The seat belts, the side air bags and
curtain air bags are most effective
when you are sitting well back and
upright in the seat with both feet on
the floor. The side air bag and curtain
air bag inflate with great force. Do not
allow anyone to place their hand, leg
or face near the side air bag on the
side of the seatback of the front seat
or near the side roof rails. Do not allow
anyone sitting in the front seats or
rear outboard seats to extend their
hand out of the window or lean
against the door. Some examples of
dangerous riding positions are shown
in the previous illustrations.
WARNING
∙ When sitting in the rear seat, do not
hold onto the seatback of the front
seat. If the side air bag inflates, you
may be seriously injured. Be especially careful with children, who
should always be properly restrained.
Some examples of dangerous riding
positions are shown in the
illustrations.
∙ Do not use seat covers on the front
seatbacks. They may interfere with
side air bag inflation.
1-54 Safety—Seats, seat belts and supplemental restraint system

SSS0162 SSS0159
Safety—Seats, seat belts and supplemental restraint system 1-55

1-56 Safety—Seats, seat belts and supplemental restraint system
NISSAN Advanced Air Bag System
(front seats)
1. Supplemental front-impact air bag
modules
2. Air bag Control Unit (ACU)
3. Occupant classification sensor
(weight sensor)
4. Front seat-mounted side-impact
supplemental air bag modules
5. Roof-mounted curtain side-impact
and rollover supplemental air bags
6. Roof-mounted curtain side-impact
and rollover supplemental air bag
inflators
7. Satellite sensors
8. Seat belt with pretensioner(s)
(front seats)
9. Pressure sensors in door (driver’s side
shown; front passenger side is similar)
10. Driver supplemental knee air bag
11. Crash zone sensor
LRS2598

WARNING
To ensure proper operation of the passenger’s NISSAN Advanced Air Bag System, please observe the following
items.
∙ Do not allow a passenger in the rear
bench seats to push or pull on the
seatback pocket.
∙ Do not place heavy loads heavier than
9.1 lbs. (4 kg) on the seatback, head
restraint/headrest or in the seatback
pocket.
∙ Make sure that there is nothing press-
ing against the rear of the seatback,
such as a child restraint installed in
the rear seat or an object stored on
the floor.
∙ Make sure that there is no object
placed under the front passenger
seat.
∙ Make sure that there is no object
placed between the seat cushion and
center console or between the seat
cushion and the door.
∙ If a forward-facing child restraint is
installed in the front passenger seat,
do not position the front passenger
seat so the child restraint contacts the
instrument panel. If the child restraint
does contact the instrument panel,
the system may determine the seat is
occupied and the passenger air bag
may deploy in a collision. Also the
front passenger air bag status light
may not illuminate. For additional information, refer to “Child restraints”in
this section.
∙ Confirm the operating condition with
the front passenger air bag status
light.
∙ If you notice that the front passenger
air bag status light is not operating as
described in this section, get the occupant classification system checked.
It is recommended that you visit a
NISSAN dealer for this service.
∙ Until you have confirmed with a
dealer that your passenger seat occupant classification system is working
properly, position the occupants in
the rear seating positions.
∙ Do not position the front passenger
seat so it contacts the rear seat. If the
front seat does contact the rear seat,
the air bag system may determine a
sensor malfunction has occurred and
the front passenger air bag status
light may illuminate and the supplemental air bag warning light may
flash.
This vehicle is equipped with the NISSAN
Advanced Air Bag System for the driver and
front passenger seats. This system is designed to meet certification requirements
under U.S. regulations. It is also permitted in
Canada. All of the information, cautions
and warnings in this manual still apply
and must be followed.
The driver supplemental front-impact air
bag is located in the center of the steering
wheel. The front passenger supplemental
front-impact air bag is mounted in the
dashboard above the glove box. The front
air bags are designed to inflate in higher
severity frontal collisions, although they
may inflate if the forces in another type of
collision are similar to those of a higher
severity frontal impact. They may not inflate in certain frontal collisions. Vehicle
Safety—Seats, seat belts and supplemental restraint system 1-57

damage (or lack of it) is not always an indication of proper front air bag system operation.
The NISSAN Advanced Air Bag System
monitors information from the crash zone
sensor, the Air bag Control Unit (ACU), seat
belt buckle sensors and occupation classification sensor (weight sensor). Inflator operation is based on the severity of a collision and seat belt usage for the driver. For
the front passenger, the occupant classification sensor is also monitored. Based on
information from the sensor, only one front
air bag may inflate in a crash, depending on
the crash severity and whether the front
occupants are belted or unbelted. Additionally,the front passenger air bag may be
automatically turned off under some conditions, depending on the weight detected
on the front passenger seat and how the
seat belt is used. If the front passenger air
bag is OFF, the front passenger air bag status light will be illuminated. For additional
information, refer to “Front passenger air
bag and status light” in this section. One
front air bag inflating does not indicate improper performance of the system.
If you have any questions about your air
bag system, it is recommended that you
visit a NISSAN dealer to obtain information
about the system. If you are considering
modification of your vehicle due to a disability, you may also contact NISSAN. Contact information is contained in the front of
this Owner’s Manual.
When a front air bag inflates, a fairly loud
noise may be heard, followed by the release of smoke. This smoke is not harmful
and does not indicate a fire. Care should be
taken to not inhale it, as it may cause irritation and choking. Those with a history of a
breathing condition should get fresh air
promptly.
Front air bags, along with the use of seat
belts, help to cushion the impact force on
the face and chest of the front occupants.
They can help save lives and reduce serious injuries. However, an inflating front air
bag may cause facial abrasions or other
injuries. Front air bags, other than the driver’s knee air bag, do not provide restraint to
the lower body.
Even with NISSAN Advanced Air Bags, seat
belts should be correctly worn and the
driver and front passenger seated upright
as far as practical away from the steering
wheel or instrument panel. The front air
bags inflate quickly in order to help protect
the front occupants. Because of this, the
1-58 Safety—Seats, seat belts and supplemental restraint system
force of the front air bag inflating can increase the risk of injury if the occupant is
too close to, or is against, the front air bag
module during inflation.
The front air bags deflate quickly after a
collision.
The front air bags operate only when the
ignition switch is in the ON position.
After placing the ignition switch in the
ON position, the supplemental air bag
warning light illuminates. The supplemental air bag warning light will turn off
after about 7 seconds if the system is
operational.

WARNING
The front passenger air bag is designed
to automatically turn OFF under some
conditions. Read this section carefully
to learn how it operates. Proper use of
the seat, seat belt and child restraints is
necessary for most effective protection. Failure to follow all instructions in
this manual concerning the use of
seats, seat belts and child restraintscan
increase the risk or severity of injury in
an accident.
Status light
The front passenger seat is equipped with
an occupant classification sensor (weight
sensor) that turns the front passenger air
bag on or off depending on the weight applied to the front passenger seat. The status of the front passenger air bag (ON or
OFF) is indicated by the front passenger air
bag status light
the instrument panel.
After the ignition switch is placed in the
"ON" position, the front passenger air bag
status light on the instrument panel illumi-
LRS0865
Front passenger air bag and status light
nates for about 7 seconds and then turns
off or remains illuminated depending on
the front passenger seat occupied status.
The light operates as follows:
CONDITION DESCRIPTION
Empty Empty front passenger seat ON (illuminated) INHIBITED
Nobody/Somebody
Adult Adult in the front passenger seat OFF (dark) ACTIVATED
Bag or Child or Child Restraint or
Small Adult in front passenger seat
PASSENGER AIR BAG
INDICATOR LIGHT (
ON (illuminated) INHIBITED
)
FRONT PASSENGER AIR BAG STATUS
which is located on
In addition to the above, certain objects
placed on the front passenger seat may
also cause the light to operate as described above depending on their weight.
For additional information related to the
normal operation and troubleshooting of
this occupant classification sensor system,
Safety—Seats, seat belts and supplemental restraint system 1-59
please refer to “Normal operation” and
“Troubleshooting” in this section.

Front passenger air bag
The front passenger air bag is designed to
automatically turn OFF when the vehicle is
operated under some conditions as described below in accordancewith U.S.regulations. If the front passenger air bag is OFF,
it will not inflate in a crash. The driver air bag
and other air bags in your vehicle are not
part of this system.
The purpose of the regulation is to help
reduce the risk of injury or death from an
inflating air bag to certain front passenger
seat occupants, such as children, by requiring the air bag to be automatically turned
OFF. Certain sensors are used to meet the
requirements.
The occupant classification sensor in this
vehicle is a weight sensor. It is designed to
detect an occupant and objects on the
seat by weight. For example, if a child is in
the front passenger seat, the NISSAN Advanced Air Bag System is designed to turn
the front passenger air bag OFF in accordance with the regulations. Also, if a child
restraint of the type specified in the regulations is on the seat, its weight and the
child’s weight can be detected and cause
the air bag to turn OFF.
Frontpassenger seat adult occupants who
are properly seated and using the seat belt
as outlined in this manual should not
cause the front passenger air bag to be
automatically turned OFF. For small adults
it may be turned OFF, however if the occupant takes his/her weight off the seat
cushion (for example, by not sitting upright,
by sitting on an edge of the seat, or by
otherwise being out of position), this could
cause the sensor to turn the air bag OFF.
Always be sure to be seated and wearing
the seat belt properly for the most effective
protection by the seat belt and supplemental air bag.
NISSAN recommends that pre-teens and
children be properly restrained in a rear
seat. NISSAN also recommends that appropriate child restraints and booster
seats be properly installed in a rear seat. If
this is not possible, the occupant classification sensor is designed to operate as described above to turn the front passenger
air bag OFF for specified child restraints as
required by the regulations. Failing to properly secure child restraints and to use the
ALR mode may allow the restraint to tip or
move in a collision or sudden stop. This can
also result in the passenger air bag inflating in a crash instead of being OFF. For
1-60 Safety—Seats, seat belts and supplemental restraint system
additional information, refer to “Child restraints” in this section.
If the front passenger seat is not occupied,
the front passenger air bag is designed not
to inflate in a crash. However, heavy objects
placed on the seat could result in air bag
inflation, because of the object’s weight detected by the occupant classification sensor. Other conditions could also result in air
bag inflation, such as if a child is standing
on the seat, or if two children are on the
seat, contrary to the instructions in this
manual. Always be sure that you and all
vehicle occupants are seated and restrained properly.
Using the front passenger air bag status
light, you can monitor when the front passenger air bag is automatically turned OFF.
If an adult occupant is in the seat but the
front passenger air bag status light is illuminated (indicating that the air bag is OFF),
it could be that the person is a small adult,
or is not sitting on the seat properly or not
using the seat belt properly.
If a child restraint must be used in the front
seat, the front passenger air bag status
light may or may not be illuminated, depending on the size of the child and the
type of child restraint being used. If the air

bag status light is not illuminated (indicating that the air bag might inflate in a crash),
it could be that the child restraint or seat
belt is not being used properly. Make sure
that the child restraint is installed properly,
the seat belt is used properly and the occupant is positioned properly. If the air bag
status light is still not illuminated, reposition the occupant or child restraint in a rear
seat.
If the front passenger air bag status light
will not illuminate even though you believe
that the child restraint, the seat belts and
the occupant are properly positioned, it is
recommended that you take your vehicle
to a NISSAN dealer. A NISSAN dealer can
check system status by using a special
tool. However, until you have confirmed
with a dealer that your air bag is working
properly, reposition the occupant or child
restraint in a rear seat.
The NISSAN Advanced Air Bag System and
front passenger air bag status light will
take a few seconds to register a change in
the front passenger seat status. This is normal system operation and does not indicate a malfunction.
If a malfunction occurs in the front passenger air bag system, the supplemental air
bag warning light
ter and gauges area of the instrument
panel, will be illuminated (blinking or
steadily lit). Have the system checked. It is
recommended that you visit a NISSAN
dealer for this service.
Normal operation
In order for the occupant classification
sensor system to classify the front passenger based on weight, please follow the precautions and steps outlined below:
Precautions
∙ Make sure that there are no objects
weighing over 9.1 lbs. (4 kg) hanging on
the seat or placed in the seatback
pocket.
∙ Make sure that a child restraint or other
object is not pressing against the rear
of the seatback.
∙ Make sure that a rear passenger is not
pushing or pulling on the back of the
front passenger seat.
∙ Make sure that the front passenger
seat or seatback is not forced back
against an object on the seat or floor
behind it.
, located in the me-
Safety—Seats, seat belts and supplemental restraint system 1-61
∙ Make sure that there is no object placed
under the front passenger seat.
Steps
1. Adjust the seat as outlined in the “Seats”
section of this manual. Sit upright, leaning against the seatback, and centered
on the seat cushion with your feet comfortably extended to the floor.
2. Make sure there are no objects on your
lap.
3. Fasten the seat belt as outlined in the
“Seat belts” section of this manual.
Front passenger seat belt buckle status is monitored by the occupant classification system, and is used as an input to determine occupancy status. So,
it is highly recommendedthat the front
passenger fasten their seat belt.
4. Remain in this position for 30 seconds
allowing the system to classif y the
front passenger before the vehicle is
put into motion.
5. Ensure proper classification by check-
ing the front passenger air bag status
light.

NOTE:
This vehicle’s occupant classification
sensor system generally keeps the classification locked during driving, so it is
important that you confirm that the
front passenger is properly classified
prior to driving. However, the occupant
classification sensor may recalculate the
weight of the occupant under some conditions (both while driving and when
stopped), so front passenger seat occupants should continue to remain seated
as outlined above.
Troubleshooting
If you think the front passenger air bag
status light is incorrect:
1. If the light is ON with an adult occupying
the front passenger seat:
∙ Occupant is a small adult — the air bag
light is functioning as intended. The
front passenger air bag is suppressed.
However, if the occupant is not a small
adult, then this may be due to the following
conditions that may be interfering with the
weight sensors:
∙ Occupant is not sitting upright, leaning
against the seatback, and centered on
the seat cushion with his/her feet comfortably extended to the floor.
∙ A child restraint or other object pressing
against the rear of the seatback.
∙ A rear passenger pushing or pulling on
the back of the front passenger seat.
∙ Forcing the front seat or seatback
against an object on the seat or floor
behind it.
∙ An object placed under the front pas-
senger seat.
∙ An object placed between the seat
cushion and center console or between
the seat cushion and the door.
If the vehicle is moving, please come to a
stop when it is safe to do so. Check and
correct any of the above conditions. Restart the vehicle and wait 1 minute.
1-62 Safety—Seats, seat belts and supplemental restraint system
NOTE:
A system check will be performed during
which the front passenger air bag status
light will remain lit for about 7 seconds
initially.
If the light is still ON after this, the person
should be advised not to ride in the front
passenger seat and the vehicle should be
checked as soon as possible. It is recommended that you visit a NISSAN dealer for
this service.
2. If the light is OFF with a small adult,
child or child restraint occupying the
front passenger seat.
This may be due to the following conditions that may be interfering with the
weight sensors:
∙ Small adult or child is not sitting upright,
leaning against the seatback, and centered on the seat cushion with his/her
feet comfortably extended to the floor.
∙ The child restraint is not properly in-
stalled, as outlined in the “Child restraints” section of this manual.
∙ An object weighing over 9.1 lbs. (4 kg)
hanging on the seat or placed in the
seatback pocket.

∙ A child restraint or other object pressing
against the rear of the seatback.
∙ A rear passenger pushing or pulling on
the back of the front passenger seat.
∙ Forcing the front seat or seatback
against an object on the seat or floor
behind it.
∙ An object placed under the front pas-
senger seat.
∙ An object placed between the seat
cushion and center console.
If the vehicle is moving, please come to a
stop when it is safe to do so. Check and
correct any of the above conditions. Restart the vehicle and wait 1 minute.
NOTE:
A system check will be performed during
which the front passenger air bag status
light will remain lit for about 7 seconds
initially.
If the light is still OFF after this, the small
adult, child or child restraint should be repositioned in the rear seat and the vehicle
should be checked as soon as possible. It is
recommended that you visit a NISSAN
dealer for this service.
3. If the light is OFF with no front passenger and no objects on the front passenger seat, the vehicle should be
checked. It is recommended that you
visit a NISSAN dealer as soon as possible.
Other supplemental front-impact air
bag precautions
WARNING
∙ Do not place any objects on the steer-
ing wheel pad or on the instrument
panel. Also, do not place any objects
between any occupant and the steering wheel or instrument panel. Such
objects may become dangerous projectiles and cause injury if the front air
bags inflate.
∙ Immediately after inflation, several
front air bag system components will
be hot. Do not touch them; you may
severely burn yourself.
∙ No unauthorized changes should be
made to any components or wiring of
the supplemental air bag system.This
is to prevent accidental inflation of
the supplemental air bag or damage
to the supplemental air bag system.
Safety—Seats, seat belts and supplemental restraint system 1-63
∙ Do not make unauthorized changes
to your vehicle’s electrical system,
suspension system or front end structure. This could affect proper operation of the front air bag system.
∙ Tampering with the front air bag sys-
tem may result in serious personal injury. Tampering includes changes to
the steering wheel and the instrument panel assembly by placing material over the steering wheel pad and
above the instrument panel or by installing additional trim material
around the air bag system.
∙ Removing or modif ying the front pas-
senger seat may affect the function of
the air bag system and result in serious personal injury.
∙ Modif ying or tampering with the front
passenger seat may result in serious
personal injury. For example, do not
change the front seats by placing material on the seat cushion or by installing additional trim material, such as
seat covers, on the seat that are not
specifically designed to assure proper
air bag operation. Additionally, do not
stow any objects under the front passenger seat or the seat cushion and

seatback. Such objects may interfere
with the proper operation of the occupant classification sensor (weight
sensor).
∙ No unauthorized changes should be
made to any components or wiring of
the seat belt system. This may affect
the front air bag system. Tampering
with the seat belt system may result
in serious personal injury.
∙ It is recommended that you visit a
NISSAN dealer for work on and around
the front air bag. It is also recommended that you visit a NISSAN dealer
for installation of electrical equipment. The Supplemental Restraint
System (SRS) wiring harnesses*
should not be modified or disconnected. Unauthorized electrical test
equipment and probing devices
should not be used on the air bag
system.
∙ A cracked windshield should be re-
placed immediately by a qualified repair facility. A cracked windshield
could affect the function of the
supplemental air bag system.
*The SRS wiring harness connectors are
yellow and orange for easy identification.
When selling your vehicle, we request that
you inform the buyer about the front air
bag system and guide the buyer to the
appropriate sections in this Owner’s
Manual.
1-64 Safety—Seats, seat belts and supplemental restraint system
LRS2501
Front seat-mounted side-impact
supplemental air bag and
roof-mounted curtain sideimpact and rollover supplemental
air bag systems
The side air bags are located in the outside
of the seatback of the front seats. The curtain air bags are located in the side roof
rails in both rows. All of the information,
cautions and warnings in this manual
apply and must be followed. The side air
bags and curtain air bags are designed to
inflate in higher severity side collisions, although they may inflate if the forces in an-

other type of collision are similar to those of
a higher severity impact. They are designed to inflate on the side where the vehicle is impacted. They may not inflate in
certain side collisions.
Curtain air bags are also designed to inflate
in certain types of rollover collisions or near
rollovers. As a result, certain vehicle movements (for example, during severe offroading) may cause the curtain air bags to
inflate.
Vehicle damage (or lack of it) is not always
an indication of proper side air bag and
curtain air bag operation.
When the side air bags and curtain air bags
inflate, a fairly loud noise may be heard,
followed by releaseof smoke. This smokeis
not harmful and does not indicate a fire.
Care should be taken not to inhale it, as it
may cause irritation and choking. Those
with a history of a breathing condition
should get fresh air promptly.
Side air bags, along with the use of seat
belts, help to cushion the impact force on
the chest of the front occupants. Curtain
air bags help to cushion the impact force to
the head of occupants in the front and rear
outboard seating positions in all rows. They
can help save lives and reduce serious in-
juries. However, an inflating side air bag or
curtain air bag may cause abrasions or
other injuries. Side air bags and curtain air
bags do not provide restraint to the lower
body.
The seat belts should be correctly worn
and the driver and front passenger seated
upright as far as practical away from the
side air bag. Rear seat passengers should
be seated as far away as practical from the
door finishers and side roof rails. The side
air bags and curtain air bags inflate quickly
in order to help protect the occupants. Because of this, the force of the side air bags
and curtain air bags inflating can increase
the risk of injury if the occupant is too close
to, or is against, these air bag modules during inflation. The side air bag will deflate
quickly after the collision is over.
The curtain air bag will remain inflated for a
short time.
The side air bags and curtain air bags
operate only when the ignition switch is
placed in the ON position.
After placing the ignition switch in the
ON position, the supplemental air bag
warning light illuminates. The supple-
Safety—Seats, seat belts and supplemental restraint system 1-65
mental air bag warning light will turn off
after about 7 seconds if the system is
operational.
WARNING
∙ Do not place any objects near the
seatback of the front seats. Also, do
not place any objects (an umbrella,
bag, etc.) between the front door finisher and the front seat. Such objects
may become dangerous projectiles
and cause injury if a side air bag
inflates.
∙ Right after inflation, several side air
bag and curtain air bag system components will be hot. Do not touch
them; you may severely burn yourself.
∙ No unauthorized changes should be
made to any components or wiring of
the side air bag and curtain air bag
systems. This is to prevent damage to
or accidental inflation of the side air
bag and curtain air bag systems.
∙ Do not make unauthorized changes
to your vehicle’s electrical system,
suspension system or side panel. This
could affect proper operation of the
curtain air bag systems.

∙ Tampering with the side air bag sys-
tem may result in serious personal injury. For example, do not change the
front seats by placing material near
the seatbacks or by installing additional trim material, such as seat covers, around the side air bag.
∙ It is recommended that you visit a
NISSAN dealer for work on and around
the side air bag and curtain air bag. It
is also recommended that you visit a
NISSAN dealer for installation of electrical equipment. The SRS wiring harnesses* should not be modified or disconnected. Unauthorized electrical
test equipment and probing devices
should not be used on the side air bag
or curtain air bag systems.
*The SRS wiring harness or connectors
are yellow or orange for easy identification.
When selling your vehicle, we request that
you inform the buyer about the side air
bags and curtain air bag system and guide
the buyer to the appropriate sections in
this Owner’s Manual.
Driver supplemental knee air bag
The knee air bag is located in the knee
bolster, on the driver’s side. The knee air
bag is located on the driver’s side of the
vehicle only. All of the information, cau-
tions and warnings in this manual apply
and must be followed. The knee air bag is
designed to inflate in higher severity frontal
collisions, although it may inflate if the
forces in another type of collision are similar to those of a higher severity frontal impact. It may not inflate in certain collisions.
1-66 Safety—Seats, seat belts and supplemental restraint system
LRS2599
Vehicle damage (or lack of it) is not always
an indication of proper knee air bag operation.
When the knee air bag inflates, a fairly loud
noise may be heard, followed by release of
smoke. This smoke is not harmful and
does not indicate a fire. Care should be
taken not to inhale it, as it may cause irritation and choking. Those with a history of a
breathing condition should get fresh air
promptly.
The knee air bag helps to cushion the impact force on the knees of the driver. It can
help reduce serious injuries. However, an
inflating knee air bag may cause abrasions
or other injuries. The knee air bag provides
restraint to the lower body.
The knee air bag inflates quickly in order to
help protect the occupants. Because of
this, the force of the knee air bag inflating
can increase the risk of injury if the occupant is too close to, or is against, this air bag
module during inflation. The knee air bag
will deflate quickly after the collision is over
OR the knee air bag will remain inflated for
a short time.
The knee air bag operates only when the
ignition switch is placed in the ON position.

After placing the ignition switch in the
ON position, the supplemental air bag
warning light illuminates. The supplemental air bag warning light will turn off
after about 7 seconds if the system is
operational.
WARNING
∙ Do not place any objects between the
knee bolster and the driver’s seat.
Such objects may become dangerous
projectiles and cause injury if a knee
air bag inflates.
∙ Right after inflation, the knee air bag
system components will be hot. Do
not touch them; you may severely
burn yourself.
∙ No unauthorized changes should be
made to any components or wiring of
the knee air bag system.This is to prevent damage to or accidental inflation
of the knee air bag system.
∙ Do not make unauthorized changes
to your vehicle’s electrical system or
suspension system. This could affect
proper operation of the knee air bag
system.
∙ Tampering with the knee air bag sys-
tem may result in serious personal injury. For example, do not change the
driver knee bolster or install additional trim material around the knee
air bag.
∙ It is recommended that you visit a
NISSAN dealer for work on and around
the knee air bag. It is also recommended that you visit a NISSAN dealer
for installation of electrical equipment. The SRS wiring harnesses*
should not be modified or disconnected. Unauthorized electrical test
equipment and probing devices
should not be used on the knee air
bag system.
*The SRS wiring harness or connectors
are yellow or orange for easy identification.
When selling your vehicle, we request that
you inform the buyer about the knee air
bag system and guide the buyer to the
appropriate sections in this manual.
Seat belt with pretensioner(s)
(front seats)
WARNING
∙ The pretensioner(s) cannot be reused
after activation. They must be replaced together with the retractor
and buckle as a unit.
∙ If the vehicle becomes involved in a
collision but pretensioner(s) are not
activated, be sure to have the pretensioner system checked and, if necessary,replaced.It is recommended that
you visit a NISSAN dealer for this
service.
∙ No unauthorized changes should be
made to any components or wiring of
the pretensioner system. This is to
prevent damage to or accidental activation of the pretensioner(s). Tampering with the pretensioner system may
result in serious personal injury.
Safety—Seats, seat belts and supplemental restraint system 1-67

∙ It is recommended that you visit a
NISSAN dealer for work on and around
the pretensioner system. It is also recommended that you visit a NISSAN
dealer for installation of electrical
equipment. Unauthorized electrical
test equipment and probing devices
should not be used on the pretensioner system.
∙ If you need to dispose of the preten-
sioner(s) or scrap the vehicle, it is recommended that you visit a NISSAN
dealer for this service. Incorrect disposal procedures could cause personal injury.
The pretensioner system may activate
with the supplemental air bag system in
certain types of collisions. Working with the
seat belt retractor, the pretensioner(s) help
tighten the seat belt when the vehicle becomes involved in certain types of collisions, helping to restrain front seat occupants.
The pretensioner(s) are encased within the
seat belt retractor and to the seat belt anchor affixed to the floor of the vehicle.
These seat belts are used the same way as
conventional seat belts.
When pretensioner(s) activate, smoke is released and a loud noise may be heard. This
smoke is not harmful and does not indicate a fire. Care should be taken not to
inhale it, as it may cause irritation and
choking. Those with a history of a breathing condition should get fresh air promptly.
After the pretensioner(s’) activation, load
limiters allow the seat belt to release webbing (if necessary) to reduce forces against
the chest.
The supplemental air bag warning
light
in the pretensioner system. For additional
information, refer to "Supplemental air bag
warning light" in this section. If the operation of the supplemental air bag warning
light indicates there is a malfunction, have
the system checked. It is recommended
that you visit a NISSAN dealer for this service.
When selling your vehicle, we request that
you inform the buyer about the pretensioner system and guide the buyer to the
appropriate sections in this Owner’s
Manual.
is used to indicate malfunctions
WRS0897
1. SRS Air bag warning labels
The warning labels are located on the
surface of the sun visor.
SUPPLEMENTAL AIR BAG
WARNING LABELS
Warning labels about the supplemental
front-impact air bag system are placed in
the vehicle as shown in the illustration.
WARNING
Do not use a rear-facing child restraint
on a seat protected by an air bag in
front of it. If the air bag deploys, it may
cause serious injury or death.
1-68 Safety—Seats, seat belts and supplemental restraint system

LRS0100
SUPPLEMENTAL AIR BAG
WARNING LIGHT
The supplemental air bag warning light,
displaying
monitors the circuits for the air bag systems, pretensioner(s) and all related wiring.
When the ignition switch is placed in the ON
position, the supplemental air bag warning
light illuminates for about 7 seconds and
then turns off. This means the system is
operational.
in the instrument panel,
If any of the following conditions occur, the
front air bag, side air bag, curtain air bag,
knee air bag and pretensioner systems
need servicing:
∙ The supplemental air bag warning light
remains on after approximately 7 seconds.
∙ The supplemental air bag warning light
flashes intermittently.
∙ The supplemental air bag warning light
does not come on at all.
Under these conditions, the front air bag,
side air bag, curtain air bag, knee air bag or
pretensioner systems may not operate
properly. They must be checked and repaired. It is recommended that you visit a
NISSAN dealer for this service.
WARNING
If the supplemental air bag warning
light is on, it could mean that the front
air bag, side air bag, curtain air bag,
knee air bag and/or pretensioner systems will not operate in an accident. To
help avoid injury to yourself or others,
have your vehicle checked as soon as
possible. It is recommended that you
visit a NISSAN dealer for this service.
Repair and replacement
procedure
The front air bags, side air bags, curtain air
bags, knee air bag and pretensioner(s) are
designed to inflate on a one-time-only basis. As a reminder, unless it is damaged, the
supplemental air bag warning light remains illuminated after inflation has occurred. These systems should be repaired
and/or replaced as soon as possible. It is
recommended that you visit a NISSAN
dealer for this service.
When maintenance work is required on the
vehicle, the front air bags, side air bags,
curtain air bags, knee air bag, pretensioner(s) and related parts should be pointed
out to the person performing the maintenance. The ignition switch should always
be in the LOCK position when working under the hood or inside the vehicle.
Safety—Seats, seat belts and supplemental restraint system 1-69

WARNING
∙ Once a front air bag, side air bag, cur-
tain air bag, or knee air bag has inflated, the air bag module will not
function again and must be replaced.
Additionally, the activated pretensioner(s) must also be replaced. The
air bag module and pretensioner(s)
should be replaced. It is recommended that you visit a NISSAN dealer
for this service. However, the air bag
module and pretensioner(s) cannot
be repaired.
∙ The front air bag, side air bag, curtain
air bag, knee air bag systems and the
pretensioner system should be inspected if there is any damage to the
front end or side portion of the vehicle. It is recommended that you visit
a NISSAN dealer for this service.
∙ If you need to dispose of a supple-
mental air bag or pretensioner systems or scrap the vehicle, it is recommended that you visit a NISSAN
dealer. Incorrect disposal procedures
could cause personal injury.
∙ If there is an impact to your vehicle
from any direction, your Occupant
Classification Sensor (OCS) should be
checked to verify it is still functioning
correctly. It is recommended that you
visit a NISSAN dealer for this service.
The OCS should be checked even if no
air bags deploy as a result of the impact. Failure to verify proper OCS
function may result in an improper air
bag deployment resulting in injury or
death.
1-70 Safety—Seats, seat belts and supplemental restraint system

MEMO
Safety—Seats, seat belts and supplemental restraint system 1-71

2 Instruments and controls
Instrument panel ................................2-2
Meters and gauges..............................2-4
Speedometer and odometer .................2-4
Tachometer ..................................2-6
Engine coolant temperature gauge ..........2-6
Fuel gauge ...................................2-7
Warning lights, indicator lights and audible
reminders .......................................2-8
Checking lights ...............................2-8
Warning lights ................................2-9
Indicator lights .............................. 2-13
Audible reminders...........................2-15
Vehicle information display .....................2-16
How to use the vehicle information
display ...................................... 2-17
Startup display .............................. 2-17
Settings ..................................... 2-17
Vehicle information display warnings
and indicators...............................2-26
Security systems ...............................2-30
Vehicle security system .....................2-30
NISSAN Vehicle Immobilizer System .........2-31
Wiper and washer switch .......................2-33
Switch operation ............................2-33
Rear switch operation .......................2-34
Rear window and outside mirror
(if so equipped) defroster switch................2-35
Headlight and turn signal switch ...............2-35
Headlight control switch.....................2-35
Daytime Running Lights (DRL) system
(Type A) (if so equipped) .....................2-38
LED Daytime Running Lights (DRL)
system (Type B) (if so equipped) .............2-38
Instrument brightness control...............2-38
Turn signal switch ...........................2-39
Fog light switch (if so equipped) .............2-39
Horn ...........................................2-40
Climate controlled seat switches
(if so equipped) .................................2-40
Heated seat switches (if so equipped) ..........2-42
Heated rear seat switches (if so equipped)......2-43
Heated steering wheel switch (if so equipped) . . 2-44
Vehicle Dynamic Control (VDC) OFF switch......2-45
E-c
(SOS) switch (if so equipped)..............2-45
all
Power outlets ..................................2-46
12v outlets...................................2-46
Extended storage switch .......................2-47
Storage ........................................2-48

Front-door pockets..........................2-48
Console side pockets (if so equipped)........2-48
Seatback pockets ...........................2-49
Storagetrays................................2-49
Glovebox....................................2-50
Console box .................................2-51
Overhead sunglasses storage...............2-51
Cup holders .................................2-52
Cargo area storage bin ......................2-53
Luggage hooks..............................2-54
Roof rack (if so equipped)....................2-54
Windows .......................................2-55
Power windows .............................2-55
Power moonroof (if so equipped) ...............2-58
Interior lights ...................................2-60
Console light (if so equipped) ................2-61
Map lights ...................................2-61
Personal lights ..............................2-61
Luggage compartment light ................2-62
HomeLink® Universal Transceiver
(if so equipped) .................................2-62
Programming HomeLink® ...................2-63
Programming HomeLink® for Canadian
customers and gate openers................2-64
Operating the HomeLink® Universal
Transceiver..................................2-65
Programming trouble-diagnosis ............2-65
Clearing the programmed information ......2-65
Reprogramming a single HomeLink®
button.......................................2-66
If your vehicle is stolen.......................2-66

INSTRUMENT PANEL
2-2 Instruments and controls
LII2547
1. Vent (P. 4-26)
2. Headlight/fog light (if so
equipped)/turn signal switch
(P. 2-35)
3. Supplemental air bag (P. 1-48)
Horn (P. 2-40)
4. Meters and gauges (P. 2-4)
Warning and indicator lights (P. 2-8)
Vehicle information display (P. 2-16)
5. Wiper and washer switch (P. 2-33)
Rear window wiper and washer
switch (P. 2-33)
6. Audio system/Center display
controls (P. 4-2)
7. Hazard warning flasher switch
(P. 6-2)
8. Center display (P. 4-2)
Navigation display*
9. Front passenger supplemental air
bag (P. 1-48)
10. Glove box (P. 2-48)
11. Front passenger air bag status
light (P. 1-48)
12. Power outlet (P. 2-46)
13. USB port*
AUX jack*
14. Heater and air conditioning
controls (P. 4-28)
15. Shift lever (P. 5-16)

16. Push-button ignition switch
(P. 5-11)
17. Cruise control switches
(if so equipped) (P. 5-40)
Intelligent Cruise Control (ICC)
switches (if so equipped) (P. 5-42)
18. Driver supplemental knee air bag
(P. 1-48)
19. Bluetooth® Hands-Free Phone
System/Audio control switches
(P. 4-2)
20. Hood release (P. 3-22)
Fuel door release (P. 3-30)
Powered rear seatback switch
(P. 1-2)
21. Fuse box (P. 8-20)
22. Power liftgate main switch
(if so equipped) (P. 3-22)
Heated steering wheel switch
(if so equipped) (P. 2-44)
Vehicle Dynamic Control (VDC)
OFF switch (P. 2-45)
23. Instrument brightness control
(P. 2-35)
Twin trip odometer reset switch
(P. 2-4)
*: Refer to the separate NissanConnect
Owner’s Manual.
Refer to the page number indicated in
parentheses for operating details.
®
Instruments and controls 2-3

METERS AND GAUGES
1. Tachometer
2. Warning and indicator lights
3. Vehicle information display
Odometer
Twin Trip Odometer
SPEEDOMETER AND ODOMETER
This vehicle is equipped with a speedometer and odometer. The speedometer is
located on the right side of the meter cluster. The odometer is located within the vehicle information display.
LIC2920
4. Speedometer
5. Fuel gauge
6. Engine coolant temperature gauge
2-4 Instruments and controls

Changing the display
2
Push the TRIP RESET switch
side of the instrument panel to change the
display as follows:
on the left
䊊
LIC2255 LIC2921
Speedometer
The speedometer indicates vehicle speed.
Odometer/Twin trip odometer
The odometer and the twin trip odometer
1
are displayed in the vehicle information
䊊
display when the ignition switch is placed
in the ON position.
The odometer records the total distance
the vehicle has been driven.
The twin trip odometer records the distance of individual trips.
Trip
Odometer Mileage → Trip
Resetting the trip odometer
Pushing the TRIP RESET switch
than 1 second resets the currently displayed trip odometer to zero.
→ Trip →
2
for more
䊊
Instruments and controls 2-5

LIC3780 LIC3538
TACHOMETER
The tachometer indicates engine speed in
revolutions per minute (rpm). Do not rev
engine into the red zone
CAUTION
When engine speed approaches the red
zone, reduce engine speed. Operating
the engine in the red zone may cause
serious engine damage.
䊊
1
.
ENGINE COOLANT
TEMPERATURE GAUGE
The gauge indicates the engine coolant
temperature.The engine coolant temperature is within the normal range
the gauge needle points within the zone
shown in the illustration.
The engine coolant temperature varies
with the outside air temperature and driving conditions.
䊊
1
when
CAUTION
If the gauge indicates coolant temperature near the hot (H) end of the normal
range,reducevehicle speed to decrease
temperature. If the gauge is over the
normal range, stop the vehicle as soon
as safely possible. If the engine is overheated, continued operation of the vehicle may seriously damage the engine.
For additional information, refer to “If
your vehicle overheats” in the “In case
of emergency” section of this manual
for immediate action required.
2-6 Instruments and controls

LIC2222
FUEL GAUGE
The gauge indicates the approximate fuel
level in the tank.
The gauge may move slightly during braking, turning, acceleration, or going up or
down hills.
The gauge needle returns to 0 (Empty) after the ignition switch is placed in the OFF
position.
The low fuel warning message shows in
the vehicle information display when the
amount of fuel in the tank is getting low.
Refill the fuel tank before the gauge registers 0 (Empty).
The
door is located on the driver’s side of the
vehicle.
indicates that the fuel-filler
CAUTION
∙ If the vehicle runs out of fuel, the
Malfunction Indicator Light (MIL) may
come on. Refuel as soon as possible.
After a few driving trips,the
should turn off. If the light remains on
after a few driving trips, have the vehicle inspected. It is recommended
that you visit a NISSAN dealer for this
service.
∙ For additional information, refer to
“Malfunction Indicator Light (MIL)” in
this section.
light
Instruments and controls 2-7

WARNING LIGHTS, INDICATOR LIGHTS
AND AUDIBLE REMINDERS
or Anti-lock Braking System (ABS)
warning light
Automatic Emergency Braking (AEB) system
warning light
or Brake warning light
Charge warning light Front fog light indicator light
Engine oil pressure warning light Front passenger air bag status light Vehicle Dynamic Control (VDC) OFF
Low tire pressure warning light High beam indicator light (blue)
Master warning light Malfunction Indicator Light (MIL)
CHECKING LIGHTS
With all doors closed, apply the parking
brake, fasten the seat belts and place the
ignition switch in the ON position without
starting the engine. The following lights (if
so equipped) will come on:
, or , ,
2-8 Instruments and controls
Power steering warning light Security indicator light
Seat belt warning light and chime Side light and headlight indicator light
Supplemental air bag warning light Slip indicator light
(if so equipped)
The following lights (if so equipped) come
on briefly and then go off:
or , , , ,
If any light fails to come on or operate in a
way other than described, it may indicate a
burned-out bulb and/or a system malfunction. Have the system checked.
(green)
Turn signal/hazard indicator lights
indicator light
It is recommended that you visit a NISSAN
dealer for this service.
Some indicators and warnings are also displayed in the vehicle information display
between the speedometer and tachometer. For additional information, refer to
“Vehicle information display” in this section.

WARNING LIGHTS
For additional information, refer to “Vehicle
information display” in this section.
or Anti-lock Braking
System (ABS)
warning light
When the ignition switch is placed in the ON
position, the ABS warning light illuminates
and then turns off. This indicates the ABS is
operational.
If the ABS warning light illuminates while
the engine is running or while driving, it
may indicate the ABS is not functioning
properly. Have the system checked. It is
recommended that you visit a NISSAN
dealer for this service.
If an ABS malfunction occurs, the anti-lock
function is turned off. The brake system
then operates normally but without antilock assistance. For additional information,
refer to “Brake system” in the “Starting and
driving” section of this manual.
Automatic Emergency
Braking (AEB) system
warning light
This light comes on when the ignition
switch is placed in the ON position. It turns
off after the engine is started.
This light illuminates when the AEB system
is set to OFF on the meter display or the
Vehicle Dynamic Control (VDC) system is
turned off.
If the light illuminates when the AEB system is on, it may indicate that the system is
unavailable. For additional information, refer to “Automatic Emergency Braking (AEB)”
in the “Starting and driving” section of this
manual.
or Brake warning
light
This light functions for both the parking
brake and the foot brake systems.
Low brake fluid warning light
When the ignition switch is placed in the ON
position, the light warns of a low brake fluid
level. If the light comes on while the engine
is running, with the parking brake not applied, stop the vehicle and perform the following:
1. Check the brake fluid level. Add brake
fluid as necessary. For additional information, refer to “Brake fluid” in the “Doit-yourself” section of this manual.
2. If the brake fluid level is correct, have
the warning system checked. It is recommended that you visit a NISSAN
dealer for this service.
WARNING
∙ Your brake system may not be work-
ing properly if the warning light is on.
Driving could be dangerous. If you
judge it to be safe, drive carefully to
the nearest service station for repairs.
Otherwise, have your vehicle towed
because driving it could be
dangerous.
∙ Pressing the brake pedal with the en-
gine stopped and/or a low brake fluid
level may increase your stopping distance and braking will require greater
pedal effort as well as pedal travel.
Instruments and controls 2-9
 Loading...