


Nikon AF-S DX NIKKOR 16-85mm f/3.5-5.6 ED VR Manual
AF-S DX NIKKOR
16-85mm f/3.5-5.6 ED VR
ED VR
User’s Manual Benutzerhandbuch Manuel de l’utilisateur Manual del Usuario Anvädarhandbok
Pykoводство пользoвaтеля
Gebruikshandleiding Manuale d’uso
P. 2-11 PP. 12-21 S. 22-31 P. 32-41 PP. 42-51 S. 52-61
СТР. 62-71 P. 72-81 PP. 82-91 P. 92-103 P. 104-113 P. 114-127
Jp
En
De
Fr
Es
Se
Ru
Nl
It
Ck
Ch
Kr


Jp |
|
|


2


カメラの電池を抜いて、販売店またはニコンサー

依頼を
いこと
使用禁止


Jp
ります。
があります。
ことがあります。
3
Jp
D 
M/A M
 ON
ON  OFF
OFF
 NORMALACTIVE
M/A M
A 
ON  OFF
OFF
B
NORMAL ACTIVE
C 
1P. 9
2P. 9
3P. 9
4P. 9
5P. 5
0 P. 6
P. 9
cCPU P. 9
dP. 6
eP. 7
fP. 7
4

DX DXD2 D40DX 35mm 1.5
VR II4
AFd AF MF
る機能を備え、3D
ED
5 Jp
などの影響により∞
5

A
|
|
|
|
|
M/A |
M |
|
|
|
||
|
|
|
|
AF-A/AF-S/ |
|
|
|
AF-C |
|
|
|
M |
|
|
|
M/A Jp
1 dM/A
2 ししたまま、あるいはAF
VR II


 NORMAL
ACTIVE
3AF NORMAL ACTIVEAF
|
|
||
|
NORMAL |
||
|
|
||
P. 11 |
|||
|
ACTIVE |
||
|
|
||
6

B
ON
OFF
C
NORMAL
ACTIVE
|
|
|
|
NORMAL |
|
NORMAL |
|
|
|
|
|
|
|
|
|
|
|
|
Jp |
|
OFFON
D300 D40
e OFFON
AF D2 D300AF
7

F
F 11/3F
Jp
レンズフード1
0.6
|
|
|
|
D300/D200 |
• 16mm |
|
• 16mm 1.0m |
D100 |
|
|
• 24mm |
|
• 16mm 2.0m |
D80/D50 |
|
|
• 24mm |
D70 / |
• 24mm |
D60/D40 |
D300/D200/D80/D50 18mmD10020mm16mm
8

HB-39
4 2 2 1D
 3
3
付近を持って回転させてください。
カメラ側から見て時計回りにフードを回転させて取り 外します。
CPU c |
|
|
|
b |
|
|
|
|
|
|
|
|
|
|
|
|
|
|
|
|
Jp |
|
NC 1
ド1
1
9
67mm LC-67
LF-1
HB-39
CL-1015
|
|
||
|
67mm |
||
|
|
||
|
|
||
Jp |
|||
PK |
|||
|
|||
|
K |
||
|
BR-4 |
||
|
|
||
|
SX-1 |
||
|
|
||
|
|
||
|
|
|
|
|
|
F CPU G |
|
|
|
AF-S DX |
|
|
|
|
|
|
|
DX |
|
|
|
16mm―85mm |
|
|
|
1 3.5―5.6 |
|
11 17 3 ED 2
83°―18°50′16 24 35 50 70 85mm
ズーミング
IF
VCM
∞0.38m0.38 m
7
16mm f 3.5―22 85mm f 5.6―36
67 mm P=0.75 mm
|
72 mm ×85 mm |
|
|
|
485 g |
10
E |
1. |
|
|
|
|
|
|
|
|
|
|
|
|
E |
|
|
|
|
|
|
|
|
|
|
|
|
Jp |
|
2. |
|
|
|
|
||
|
|
F |
|
|
|
|
|
|
|
|
|
F |
|
|
|
1 2 |
|
||
|
|
||
|
|
|
|
|
|
|
|
|
|
|
|
|
|
|
|
|
|
|
|
|
|
|
|
|
|
|
|
|
|
|
|
|
|
|
|
11
Notes on Safety Operations
 CAUTION
Do not disassemble
|
Touching the internal parts of the camera or lens could |
|
|
result in injury. Repairs should be performed only by |
|
|
qualified technicians. Should the camera or lens break |
|
|
open as the result of a fall or other accident, take the |
|
|
product to a Nikon-authorized service representative for |
|
|
inspection after unplugging the product and/or removing |
|
|
the battery. |
|
|
Turn off immediately in the event of malfunction |
|
|
Should you notice smoke or an unusual smell coming from |
|
En |
||
the camera or lens, remove the battery immediately, taking |
||
|
||
|
care to avoid burns. Continued operation could result in |
|
|
injury. |
|
|
After removing or disconnecting the power source, take |
|
|
the product to a Nikon-authorized service representative |
|
|
for inspection. |
|
|
Do not use the camera or lens in the presence of |
|
|
flammable gas |
|
|
Operating electronic equipment in the presence of |
|
|
flammable gas could result in an explosion or fire. |
|
|
Do not look at the sun through the lens or viewfinder |
|
|
Viewing the sun or other strong light sources through the |
|
|
lens or viewfinder could cause permanent visual |
|
|
impairment. |
Keep out of reach of children
Particular care should be taken to prevent infants from putting the batteries or other small parts into their mouths.
Observe the following precautions when handling the camera and lens
•Keep the camera or lens unit dry. Failure to do so could result in fire or electric shock.
•Do not handle or touch the camera or lens unit with wet hands. Failure to do so could result in electric shock.
•When shooting with back-lighting, keep the sun well out of the frame. Sunlight could be focused into the lens body and cause a fire. Sunlight not directly in the frame, but even near the frame, can also be the cause of fire.
•When the lens will not be used for an extended period of time, attach both front and rear lens caps and store the lens away from direct sunlight. Failure to do so could result in a fire, as the lens may focus sunlight onto a flammable object.
12
Nomenclature
M/A M
 ON
ON  OFF
OFF
 NORMALACTIVE
D 
M/A M
A 
ON  OFF
OFF
B
NORMAL ACTIVE
C 
( ) : reference page
1Lens hood (P. 18)
2Lens hood attachment index (P. 18)
3Lens hood setting index (P. 18)
4Lens hood mounting index (P. 18)
5Zoom ling (P. 15)
6Focal length scale
7 Focal length index |
En |
8Distance scale
9Distance index line
0Focus ring (P. 15) a Mounting index
b Lens mount rubber gasket
(P. 19)
c CPU contacts (P. 19)
d Focus mode switch (P. 15) e Vibration reduction ON/OFF
switch (P. 16)
f Vibration reduction mode switch (P. 16)
13

Thank you for purchasing the AF-S DX NIKKOR 16-85mm f/3.5-5.6G ED VR. DX Nikkor lenses are specially designed for use with Nikon digital-SLR (Nikon DX format) cameras, such as the D2-series and D40-series. When mounted on Nikon DX-format cameras, the lens’ picture angle is equivalent to approximately 1.5× the focal length in 35mm format. Before using this lens, please read these instructions and refer to your camera’s User’s Manual.
Major features
•Enabling vibration reduction (VR II) allows for shooting at shutter speeds approximately four stops* slower than when vibration reduction is disabled, thus expanding the range of effective shutter speed
options, and simplifying hand-held shooting at a variety of zoom positions. (*Based on results achieved
En under Nikon measurement conditions. The effects of vibration reduction may vary by individual and/or shooting conditions.)
•This lens employs a Silent Wave Motor to drive the focusing mechanism, making autofocusing smooth, silent and almost instantaneous. The focus mode switch dis provided for simple selection of autofocus (A) or manual focus (M) operation.
•More accurate exposure control is possible when this is mounted on a Nikon camera having 3D Matrix Metering capability, because subject distance information is transferred from the lens to the camera body.
•The use of three aspherical and two ED (extra-low dispersion) lens elements ensures sharp pictures virtually free of color fringing. Also, by utilizing a seven-blade diaphragm that results in a nearly circular aperture, out-of-focus objects in front of, or behind, the subject are rendered as pleasing blurs.
14
Focusing, zooming, and depth of field
Before focusing, rotate the zoom ring 5to adjust the focal length until the desired composition is framed in the viewfinder.
If your camera has a depth of field preview (stop-down) button or lever, depth of field can be previewed through the camera viewfinder.
•Due to the optical characteristics of this lens, as the lens is focused closer, the focal length slightly decreases.
•The distance scale does not indicate the precise distance between the subject and the camera. Values are approximate and should be used only as a general guide. When shooting distant landscapes, depth of field may influence operation so that the camera may focus at a position that is closer than infinity.
Focusing (Fig. A)
Set your camera’s focus mode selector according to this chart:
Camera’s |
Lens’ focus mode |
|
focus mode |
M/A |
M |
|
|
|
AF-A/AF-S/ |
Autofocus with |
Manual focus (Focus |
AF-C |
manual priority |
assist is available.) |
|
|
|
M |
Manual focus (Focus assist is available.) |
|
|
|
|
Autofocus with manual override (M/A mode)
1 |
|
|
Set the lens focus mode switch dto [M/A]. |
En |
|
2 |
Autofocus is provided, but you can manually |
|
override the focus by operating the separate focus ring while pressing the shutter-release button halfway or AF start (AF-ON) button on the camera body of cameras so equipped.
3Remove your finger then press the shutter-release button halfway or the AF start button once again to cancel manual focus and resume autofocus.
Getting good results with autofocus
Refer to “Notes on using wide or super-wide angle AF Nikkor lenses” (P. 21).
15
Vibration reduction mode (VR II)
Basic concept of vibration reduction
|
Number |
|
Camera shake |
|
|
when taking |
|
|
|
Camera shake |
picturesfroma |
|
|
moving |
|
|
of |
|
vehicle |
|
|
|
|
|
vibrations |
Panning shots |
|
|
|
|
|
En |
|
Strength of vibrations |
|
Set the vibration reduction mode switch to “NORMAL”.
Set the vibration reduction mode switch to “ACTIVE”.
When taking pictures
Set the vibration reduction mode switch to either “NORMAL” or “ACTIVE”.
When taking panning shots
Set the vibration reduction mode switch to “NORMAL”.
When taking pictures from a moving vehicle
Set the vibration reduction mode switch to “ACTIVE”.
Setting the vibration reduction ON/OFF switch (Fig. B)
ON: Vibration is reduced while the shutter release button is pressed halfway and also at the instant the shutter is released. Because vibration is reduced in the viewfinder, auto/manual focusing and exact framing of the subject are easier.
OFF: Vibration is not reduced.
Setting the vibration reduction mode switch (Fig. C)
NORMAL: The vibration reduction mechanism primarily reduces camera shake, making smooth panning shots possible.
ACTIVE: The vibration reduction mechanism reduces camera shake when taking pictures and those from a moving vehicle. In this mode, the lens does not automatically distinguish panning from camera shake.
16

Notes on using vibration reduction
•After pressing the shutter-release button halfway, wait until the image in the viewfinder stabilizes before pressing the shutter-release button the rest of the way down.
•When taking panning shots, be sure to set the vibration reduction mode switch to NORMAL.
•If the camera is panned in a wide arc, compensation for camera shake in the panning direction is not performed. For example, with horizontal panning only vertical camera shake is reduced, making smooth pans much easier.
•Due to the characteristics of the vibration reduction mechanism, the image in the viewfinder may be blurred after the shutter is released. This is not a malfunction.
•Do not turn the camera off or remove the lens from the camera while vibration reduction is operating. Failure to observe this note could result in the lens sounding and feeling as if an internal component is loose or broken when it is shaken. This is not a malfunction. Turn the camera on again to correct this.
•With cameras such as D300 and D40-series models, featuring a built-in flash, vibration reduction does not function while the built-in flash is charging.
•When the camera is mounted on a tripod, set the vibration reduction ON/OFF switch eto [OFF]. However, set the switch to [ON] when using a tripod without securing the tripod head, or when using a monopod.
•With autofocus cameras such as D2-series and D300 models, featuring an AF start (AF-ON) button, vibration reduction does not function even when the AF-ON button is pressed.
Setting the aperture
Use the camera to adjust the aperture setting.
En
Variable maximum apertures
Zooming the lens from 16mm to 85mm decreases the maximum aperture by 11/3 stop.
However, there is no need to adjust the aperture setting to achieve correct exposures because the camera automatically compensates for this variable.
17
Flash photography using cameras with a built-in flash
•To prevent vignetting, do not use the lens hood 1.
•It is not possible to shoot at distances shorter than 0.6 m (2.0 ft.) using the camera’s built-in flash.
|
|
Digital SLR |
Usable focal length/ |
|
|
cameras |
Shooting distance |
|
|
|
|
|
|
D300/D200 |
• 16mm or longer/No restriction |
|
|
|
|
|
|
D100 |
• 16mm/1 m (3.3 ft.) or greater |
|
|
• 24mm or longer/No restriction |
|
|
|
|
|
|
|
|
|
|
|
|
• 16mm/2 m (6.6 ft.) or greater |
En |
|
D80/D50 |
|
|
• 24mm or longer/No restriction |
||
|
|
|
|
|
|
|
|
|
|
D70-series/D60/ |
• 24mm or longer/No restriction |
|
|
D40-series |
|
Built-in flashes on the D300, D200, D80, and D50 have an angle of coverage suited to focal lengths of 18mm and greater, and the built-in flash on the D100 has an angle of coverage suited to focal lengths of 20mm and greater. Vignetting occurs at a focal length of 16mm.
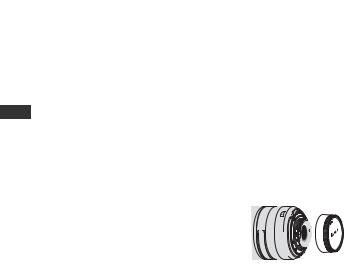
Using bayonet hood HB-39
Attaching the hood
Align the lens hood attachment index ( ) 2on the hood with the lens hood mounting index 4on the lens, and turn the hood 1counterclockwise (as viewed from the camera side) until it click stops. (Fig. D)
•Make sure that the lens hood mounting index aligns with the lens hood setting index (  ) 3.
) 3.
•If the lens hood is not correctly attached, vignetting can occur.
•To facilitate attachment or removal of the hood, hold it by its base (around the lens hood attachment index) rather than its outer edge.
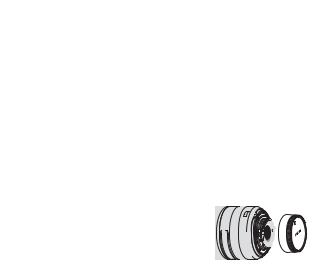
Detaching the hood
While holding its base (around the lens hood attachment index) rather than its outer edge, turn the hood clockwise as viewed from the camera side to detach.
18
Lens care
•Be careful not to soil or damage the CPU contacts c.
•If the lens mount rubber gasket bis damaged, be sure to visit the nearest Nikon authorized dealer or service center for repair.
•Clean lens surfaces with a blower brush. To remove dirt and smudges, use a soft, clean cotton cloth or lens tissue moistened with ethanol (alcohol) or lens cleaner. Wipe in a circular motion from the center to the outer edge, taking care not to leave traces or touch other parts of the lens.
•Never use thinner or benzene to clean the lens, as this could cause damage, result in a fire, or cause health problems.
•NC filters are available to protect the front lens element. The lens hood 1also helps to protect the front of the lens.
•When storing the lens in its flexible lens pouch, attach
both the front and rear lens caps. The lens can also be stored with the lens hood 1attached in the reverse position.
•When the lens is mounted on a camera, do not pick up or hold the camera and lens by the lens hood 1.
•When the lens will not be used for an extended period of time, store it in a cool, dry place to prevent mold. Be sure to store the lens away from direct sunlight or chemicals such as camphor or naphthalene.
•Do not get water on the lens or drop it in water as this will cause it to rust and malfunction.
•Reinforced plastic is used for certain parts of the lens. To avoid damage, never leave the lens in an excessively hot place.
Standard accessories
• 67 mm snap-on front lens cap LC-67
• Rear lens cap LF-1
• Bayonet hood HB-39
• Flexible lens pouch CL-1015
Optional accessories
• 67 mm screw-in filters |
En |
Incompatible accessories
•Teleconverters (all models)
•Auto Ring BR-4 and all models of Auto Extension Ring PK, K Ring and Bellows focusing attachment.
•Attachment Ring SX-1
Other accessories may not be suitable for use with this lens. For details, refer to the User’s Manual provided with accessories.
19

Specifications
|
Type of lens |
G-type AF-S DX Zoom-Nikkor lens |
|
|
|
with built-in CPU and Nikon bayonet |
|
|
|
mount (Specially designed for use |
|
|
|
with Nikon digital-SLR—Nikon DX- |
|
|
|
format—cameras) |
|
|
Focal length |
16mm–85mm |
|
|
Maximum |
f/3.5–5.6 |
|
|
aperture |
|
|
|
Lens |
17 elements in 11 groups |
|
|
construction |
(3 aspherical lens and 2 ED lens |
|
|
|
elements) |
|
En |
|
||
Picture angle |
83º–18º50’ |
||
|
|||
|
Focal length scale |
16, 24, 35, 50, 70, 85mm |
|
|
Distance |
Output to camera body |
|
|
information |
|
|
|
Zoom control |
Manually via separate zoom ring |
|
|
Focusing |
Nikon Internal Focusing (IF) system |
|
|
|
(utilizing an internal Silent Wave |
|
|
|
Motor); manually via separate focus |
|
|
|
ring |
|
|
Vibration |
Lens-shift method using voice coil |
|
|
reduction |
motors (VCMs) |
|
|
Shooting |
Graduated in meters and feet from |
|
|
distance scale |
0.38 m (1.5 ft.) to infinity ( ) |
Closest focus 0.38 m (1.3 ft.) at all zoom settings distance
No. of diaphragm 7 pcs. (rounded) blades
Diaphragm |
Fully automatic |
Aperture range |
f/3.5 to f/22 (at 16mm), f/5.6 to f/36 |
|
(at 85mm) |
Exposure |
Via full-aperture method |
measurement |
|
Attachment size 67 mm (P = 0.75 mm)
Dimensions Approximately 72 mm (dia.) × 85 mm (extension from the camera’s lensmount flange)
Weight |
Approximately 485 g (17.1 oz) |
Specifications and designs are subject to change without notice or obligation on the part of the manufacturer.
20
Notes on using wide or super-wide angle AF Nikkor lenses
In the following situations, autofocus may not perform as expected when shooting with wide or super-wide angle AF Nikkor lenses.
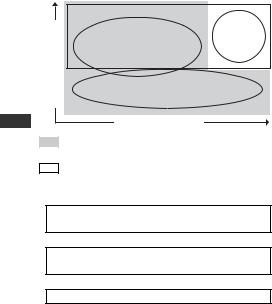
EA person standing in front of a distant background
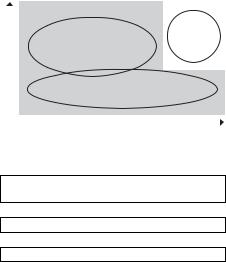
F A field filled with flowers
1.When the main subject in the focus brackets is relatively small
When a person standing in front of a distant background is placed within the focus brackets, as shown in Fig. E, the background may be in focus, while the subject is out of focus.
2.When the main subject is a finely
patterned subject or scene
When the subject is finely patterned or of low |
En |
contrast, such as a field filled with flowers, as shown |
|
in Fig. F, focus may be difficult to acquire using |
|
autofocus. |
|
Responses to these types of situations |
|
(1)Focus on a different subject located at the same distance from the camera, apply focus lock, recompose, and shoot.
(2)Set the camera focus mode selector to M (manual)
and focus manually on the subject.
Refer to “Getting Good Results with Autofocus” in the camera’s User’s Manual.
21

Hinweise für sicheren Betrieb
 ACHTUNG
Keinesfalls zerlegen.
Beim Berühren der Innenteile von Kamera oder Objektiv droht Verletzungsgefahr. Überlassen Sie Reparaturen unbedingt ausschließlich qualifizierten Technikern. Kommt es durch einen heftigen Stoß (z. B. Fall auf den Boden) zu einem Bruch von Kamera oder Objektiv, so trennen Sie zunächst das Produkt vom Stromnetz bzw. entnehmen die Batterie(n) und geben es dann an eine autorisierte Nikon-Servicestelle zur Überprüfung ab.
Bei einer Störung sofort die Stromversorgung ausschalten.
Bei Entwicklung von Rauch oder ungewöhnlichem Geruch durch Kamera oder Objektiv entnehmen Sie sofort die
De Batterie(n); dabei vorsichtig vorgehen, denn es besteht Verbrennungsgefahr. Bei einem Weiterbetrieb unter diesen Umständen droht Verletzungsgefahr.
Nach dem Abtrennen von der Stromversorgung geben Sie das Gerät an eine autorisierte Nikon-Servicestelle zur Überprüfung ab.
Kamera oder Objektiv keinesfalls bei Vorhandensein von brennbarem Gas einsetzen.
Wird elektronisches Gerät bei brennbarem Gas betrieben, so droht u. U. Explosionsoder Brandgefahr.
Keinesfalls durch Objektiv oder Sucher in die Sonne blicken.
Beim Betrachten der Sonne oder anderer starker Lichtquellen durch Objektiv oder Sucher droht eine permanente Schädigung des Sehvermögens.
Dem Zugriff von Kindern entziehen.
Es ist unbedingt dafür zu sorgen, dass Kleinkinder keine Batterien oder andere kleine Teile in den Mund nehmen können.
Beim Umgang mit Kamera und Objektiv unbedingt die folgenden Vorsichtmaßnahmen beachten:
•Halten Sie Kamera oder Objektiv stets trocken. Andernfalls droht Brandoder Stromschlaggefahr.
•Handhaben oder berühren Sie die Kamera bzw. das Objektiv keinesfalls mit nassen Händen. Andernfalls droht Stromschlaggefahr.
•Achten Sie bei Gegenlichtaufnahmen darauf, dass die Sonne auf keinen Fall in den Bildausschnitt gerät. Andernfalls könnte Sonnenlicht durch das Objektiv im Gehäuse fokussiert werden und einen Brand verursachen. Selbst wenn die Sonne nicht direkt in den Bildausschnitt gerät, sondern nur in dessen Nähe, droht Brandgefahr.
•Vor einem längeren Nichtgebrauch des Objektivs bringen Sie den vorderen und hinteren Deckel an und bewahren das Objektiv geschützt vor direkter Sonnenlichteinwirkung auf. Andernfalls droht Brandgefahr wegen möglicher Fokussierung von Sonnenlicht durch die Linse auf brennbare Gegenstände.
22

Bezeichnung der Bauteile
M/A M
 ON
ON  OFF
OFF
 NORMALACTIVE
D 
(): Seite mit weiteren Erläuterungen
M/A M
A 
ON  OFF
OFF
B
NORMAL ACTIVE
C 
1 Gegenlichtblende (S. 28)
2 Gegenlichtblende-
Anbringindex (S. 28)
3 Gegenlichtblende- |
|
Einstellindex (S. 28) |
|
4 Gegenlichtblende- |
|
Montageindex (S. 28) |
|
5 Zoomring (S. 25) |
|
6 Brennweitenskala |
|
7 Brennweiten-Index |
|
8 Entfernungsskala |
|
De |
|
9 Entfernungs Indexlinie |
|
0 Entfernungseinstellring (S. 25) |
|
a Objektivindex |
|
b Gummiring der |
|
Objektivfassung (S. 29) |
|
c CPU-Kontakte (S. 29) |
|
d Fokussierschalter (S. 25) |
|
e ON/OFF-Schalter zur |
|
Vibrationsreduktion (S. 26) |
|
f Schalter zur |
|
Vibrationsreduktion |
|
(VR-Schalter) (S. 26) |
|
23

Vielen Dank für Ihr Vertrauen in das AF-S DX NIKKOR 16-85mm f/3,5-5,6G ED VR. DX Nikkor-Objektive sind speziell für den Gebrauch mit Nikon Digital-SLR-Kameras (Nikon DX-Format) ausgelegt, wie etwa den Modellen der D2-Serie und der D40-Series. Wird das Objektiv an Kameras im Nikon DX-Format angebracht, so entspricht der Bildwinkel des Objektivs ca. dem 1,5-Fachen der Brennweite im 35-mm-Format. Machen Sie sich bitte vor dem Einsatz dieses Objektivs mit dem Inhalt dieser Bedienungsanleitung und dem Benutzerhandbuch Ihrer Kamera vertraut.
Hauptmerkmale
• Bei eingeschaltetem Bildstabilisator (VR II) kann mit etwa vier Stufen* längeren Belichtungszeiten aufgenommen werden als bei ausgeschaltetem Bildstabilisator, so dass letztlich mehr nutzbare Belichtungszeiten zur Verfügung stehen und Freihandaufnahmen in unterschiedlichen Zoompositionen einfacher auszuführen sind. (*Basierend auf Ergebnissen, die unter Nikon-
De Messbedingungen erzielt wurden. Die Wirkung des Bildstabilisators variiert allerdings je nach Einzelfall und/oder Aufnahmebedingungen.)
•Der Fokussiermechanismus des Objektivs wird von einem Silent Wave Motor angetrieben, so dass die Scharfeinstellung per Autofokus stufenlos, geräuscharm
und praktisch verzögerungsfrei erfolgt. Der FokusModusschalter ddient zum einfachen Auswählen von Autofokus (A) oder manuellem Fokus (M).
•Optimale Belichtungssteuerung in Verbindung mit Nikon-Kameras mit 3D-Matrix-Messung, weil die Aufnahmedistanz vom Objektiv an die Kamera übertragen wird.
•Das Objektiv ist mit drei asphärischen und zwei EDLinsenelementen (ED - extra-low dispersion) ausgestattet, die eine hohe Bildschärfe praktisch ohne Farbsaumeffekte ermöglichen. Dazu kommen die sieben Blendenlamellen, die für eine nahezu kreisrunde Blendenöffnung sorgen, was in den nicht scharf eingestellten Bildbereichen vor oder hinter dem eigentlichen Motiv einen besonders ansprechenden Unschärfeeffekt erlaubt.
24
Scharfeinstellung, Zoomen und Schärfentiefe
Vor der Scharfeinstellung verstellen Sie durch Drehen des Zoomrings 5die Brennweite so weit, bis der gewünschte Bildausschnitt im Sucher zu sehen ist. Hat Ihre Kamera eine Taste oder einen Hebel für Schärfentiefe-Voransicht (Abblenden), so lässt sich die Schärfentiefe beim Blick durch den Kamerasucher beurteilen.
•Aufgrund der optischen Eigenschaften dieses Objektivs ergibt sich bei Nahfokussierung eine leichte Verringerung der Brennweite.
•Die Entfernungsskala zeigt nicht den genauen Abstand zwischen Motiv und Kamera an. Die Werte sind Näherungswerte und können nur als Richtlinie dienen. Bei Landschaftsaufnahmen fokussiert die Kamera aufgrund der Schärfentiefe möglicherweise auf eine nähere Entfernung als unendlich.
Scharfeinstellung (Abb. A)
Wählen Sie den Fokussiermodus der Kamera anhand der folgenden Tabelle:
Fokussiermodus |
Fokussiermodus des Objektive |
||
der Kamera |
M/A |
M |
|
|
Autofokus-Modus |
Manuelles |
|
AF-A/AF-S/ |
Fokussieren |
||
AF-C |
mit manueller |
(Entfernungsmessung |
|
Einstellmöglichkeit |
|||
|
|
verfügbar) |
|
M |
Manuelles Fokussieren |
||
(Entfernungsmessung verfügbar) |
|||
|
|||
Autofokus-Modus mit manueller
Einstellmöglichkeit (M/A-Modus)
1 |
|
|
Stellen Sie den Fokussierschalter dam Objektiv |
De |
|
2 |
auf »M/A«. |
|
Bei dieser Einstellung ist der Autofokus-Modus |
|
zwar aktiviert, kann aber jederzeit durch Drehen des separaten Entfernungseinstellrings und gleichzeitiges Antippen des Auslösers oder der AF-Starttaste (AF-ON) an Kameras, die über ein solches Bedienteil verfügen, deaktiviert werden.
3Durch Freigabe und erneutes Antippen von Auslöser bzw. AF-Start-Taste wird die manuelle Scharfeinstellung deaktiviert und wieder in den Autofokus-Modus geschaltet.
Gute Ergebnisse mit dem Autofokus
Schlagen Sie bitte unter »Hinweise zum Gebrauch von AF NikkorWeitwinkeloder Super-Weitwinkelobjektiven« (S. 31) nach.
25
Bildstabilisator (VR II)
Grundlagen der Vibrationsreduktion
|
|
|
|
|
|
|
|
Kamera- |
|
|
|
|
Anzahl |
|
|
|
verwacklungen |
|
|
|
|
|
|
|
|
|
|
bei Aufnahmen |
|
|
|
|
|
|
|
Kameraverwacklungen |
aus einem |
|
|
|
|
|
der |
|
bewegten |
|
|||
|
|
|
|
|
|
Fahrzeug |
|
||
|
|
|
|
|
|
|
|
|
|
|
|
|
Vibrationen |
|
|
|
|
|
|
|
|
|
Kameraschwenks |
|
|
||||
|
|
|
|
|
|
|
|
|
|
|
|
|
|
|
|
|
|
|
|
|
|
|
|
|
|
|
|
|
|
|
|
|
|
|
|
|
Stärke der Vibrationen |
|
|
|
|
|
|
|
|
|
|
|
|
|
|
|
|
|
Einstellung des VR-Schalters auf »NORMAL« |
|
|||
De |
|
|
|
|
|
||||
|
|
|
|
|
|||||
|
|
|
|
|
Einstellung des VR-Schalters auf »ACTIVE« |
|
|||
Bei normalen Aufnahmen
Den VR-Schalter auf »NORMAL« oder »ACTIVE« stellen.
Bei Schwenkaufnahmen
Den VR-Schalter auf »NORMAL« stellen.
Bei Aufnahmen aus einem Fahrzeug in Bewegung
Den VR-Schalter auf »ACTIVE« stellen.
Stellungen des ON/OFF-Ringschalter für Vibrationsreduktion (Abb. B)
ON: Unmittelbar nach dem Auslösen sowie auch bei Antippen des Auslösers werden Vibrationen reduziert. Vibration wird im Sucher reduziert, erleichtert daher die Schärfeneinstellung (A und M) und die Wahl des Bildausschnitts.
OFF: Keine reduzierte Vibration.
Stellungen des VibrationsreduktionsSchalters (Abb. C)
NORMAL: Der Vibrationsreduktions-Mechanismus verringert Kameraverwacklungen und ermöglicht gleichmäßige Kameraschwenks.
ACTIVE: Der Vibrationsreduktions-Mechanismus reduziert das Verwackeln der Kamera beim Fotografieren aus einem Fahrzeug in Bewegung. In diesem Modus unterscheidet das Objektiv nicht automatisch zwischen Kameraschwenks und Verwacklungen.
26

Hinweise zum Bildstabilisator
•Tippen Sie den Auslöser an, warten Sie, bis sich das Bild im Sucher stabilisiert hat, und drücken Sie erst dann den Auslöser ganz.
•Bei Kameraschwenks muss der VibrationsreduktionsSchalter auf NORMAL gesetzt sein.
•Wenn Sie die Kamera bei einem Schwenk in einem weiten Bogen bewegen, so werden Kameravibrationen in Richtung dieser Bewegung nicht ausgeglichen. Wenn Sie die Kamera zum Beispiel horizontal schwenken, werden nur Kameravibrationen in vertikaler Richtung reduziert, so dass sich gleichmäßige Schwenks weitaus einfacher ausführen lassen.
•Aufgrund der Eigenschaften des Bildstabilisierungsmechanismus erscheint das Bild im Sucher nach dem Auslösen unter Umständen verschwommen. Dies ist jedoch keine Fehlfunktion.
•Schalten Sie die Kamera nicht aus und nehmen Sie auch nicht das Objektiv von der Kamera ab, solange der Bildstabilisator arbeitet. Andernfalls kann beim Schütteln des Objektivs ein Geräusch zu hören sein, als seien innere Bauteile lose oder gebrochen. Dies ist jedoch keine Fehlfunktion. Schalten Sie einfach die Kamera wieder ein, um das Problem zu beheben.
•Bei Kameras mit eingebautem Blitz, beispielsweise aus den D300 und D40-Serie, funktioniert der Bildstabilisator nicht, solange der eingebaute Blitz geladen wird.
•Wenn die Kamera auf einem Stativ montiert ist, stellen Sie den Bildstabilisator-Schalter ON/OFF eauf »OFF«. Wenn Sie allerdings ein Dreibeinstativ mit unverriegeltem Stativkopf oder ein Einbeinstativ (Monopod) verwenden, stellen Sie den Schalter auf »ON«.
•Bei Autofokus-Kameras, beispielsweise aus den Serien D2 und D300, die mit einer AF-Starttaste (AF-ON) ausgestattet sind, funktioniert der Bildstabilisator nicht, selbst wenn Sie die Taste AF-ON drücken.
Blendeneinstellung
Stellen Sie die Blende an der Kamera ein.
Variable maximale Blenden
Durch Zoomen des Objektivs von 16 bis 85mm wird die De maximale Blende um 11/3 Stufen abgeblendet.
Sie brauchen die Blendeneinstellung für eine korrekte Belichtung jedoch nicht zu korrigieren, weil die Kamera automatisch jede Verstellung kompensiert.
27
Blitzaufnahmen mit Kameras mit eingebautem Blitz
•Soll Vignettierung vermieden werden, so verwenden Sie einfach keine Gegenlichtblende 1.
•Aufnahmen aus Entfernungen unter 0,6 m mit dem eingebauten Kamerablitz sind nicht möglich.
|
|
Digitale SLR- |
Verwendbare Brennweite/ |
|
|
Kameras |
Aufnahmedistanz |
|
|
|
|
|
|
D300/D200 |
• 16mm oder länger/Keine |
|
|
Beschränkung |
|
|
|
|
|
|
|
|
|
|
|
|
• 16mm/1 m oder länger |
|
|
D100 |
• 24mm oder länger/Keine |
De |
|
|
Beschränkung |
|
|
|
|
|
|
|
• 16mm/2 m oder länger |
|
|
D80/D50 |
• 24mm oder länger/Keine |
|
|
|
Beschränkung |
|
|
|
|
|
|
D70-Serie/D60/ |
• 24mm oder länger/Keine |
|
|
D40-Serie |
Beschränkung |
|
|
|
|
Beim eingebauten Blitz bei Kameras der Serien D300, D200, D80 und D50 ist der Ausleuchtwinkel für Brennweiten von 18mm und mehr geeignet. Beim eingebauten Blitz bei Kameras der Serie D100 ist der Ausleuchtwinkel für Brennweiten von 20mm oder mehr geeignet. Bei einer Brennweite von 16mm kommt es zur Vignettierung.
Verwenden der BajonettGegenlichtblende HB-39
Anbringen der Gegenlichtblende
Richten Sie den Gegenlichtblende-Anbringindex ( ) 2an der Gegenlichtblende mit dem Gegenlichtblende-Montageindex 4am Objektiv aus, und drehen Sie die Gegenlichtblende 1gegen den Uhrzeigersinn (von der Kameraseite aus gesehen), bis sie einrastet (Abb. D).
•Stellen Sie sicher, dass der Gegenlichtblende-
Montageindex und der GegenlichtblendeEinstellindex (  ) 3aneinander ausgerichtet sind.
•Wurde die Gegenlichtblende nicht korrekt angebracht, können Randabschattungen auftreten.
•Zum Anbringen und Abnehmen der Gegenlichtblende halten Sie diese an ihrer Basis (am Gegenlichtblende-Anbringindex), nicht am Außenrand fest.
Abnehmen der Gegenlichtblende
Halten Sie die Gegenlichtblende an ihrer Basis (am Gegenlichtblende-Anbringindex) und nicht an ihrem Außenrand fest und lösen Sie sie durch Drehen im Uhrzeigersinn (von der Kameraseite aus gesehen).
28
Pflege des Objektivs
•Halten Sie die CPU-Kontakte cpeinlich sauber, und schützen Sie sie vor Beschädigung!
•Wenn der Gummiring der Objektivfassung b beschädigt ist, bringen Sie das Objektiv zum nächsten Nikon-Vertragshändler bzw. zu einer NikonReparaturwerkstatt.
•Säubern Sie Glasflächen mit einem Blasepinsel. Staub und Flecken entfernen Sie mit einem sauberen, weichen Baumwolltuch oder Optik-Reinigungspapier, das Sie mit Ethanol (Alkohol) oder Optik-Reinigungsflüssigkeit anfeuchten. Wischen Sie in kreisförmigen Bewegungen von der Mitte nach außen, ohne dass Wischspuren zurückbleiben oder Sie andere Teile des Objektivs berühren.
•Verwenden Sie keinesfalls Verdünnung oder Benzin zur Reinigung des Objektivs, da dieses zu Beschädigungen führen, ein Feuer auslösen oder Gesundheitsschäden verursachen könnte.
•Zum Schutz der Vorderlinse sind Filter des Typs NC erhältlich. Die Gegenlichtblende 1wirkt als zusätzlicher Frontlinsenschutz.
•Beim Verstauen des Objektivs in seinem flexiblen Etui müssen vorderer und hinterer Deckel aufgesetzt sein.
Das Objektiv lässt sich auch dann verstauen, wenn die Gegenlichtblende 1in der umgekehrten Position angebracht ist.
•Halten Sie die Kamera und das Objektiv nicht an der Gegenlichtblende 1, wenn das Objektiv an der Kamera angebracht ist.
•Bei längerer Nichtbenutzung sollte das Objektiv an einem kühlen, trockenen Ort aufbewahrt werden, um Schimmelbildung zu vermeiden. Halten Sie das Objektiv von direkter Sonneneinstrahlung oder Chemikalien wie Kampfer oder Naphthalin fern.
•Halten Sie das Objektiv von Wasser fern, das zur Korrosion und zu Betriebsstörungen führen kann.
•Einige Teile des Objektivs bestehen aus verstärktem Kunststoff. Lassen Sie das Objektiv deshalb nie an übermäßig heißen Orten liegen!
Serienmäßiges Zubehör
•Aufsteckbarer 67-mm-Frontobjektivdeckel LC-67
•Objektivrückdeckel LF-1
•Bajonett-Gegenlichtblende HB-39
• Objektivbeutel CL-1015 |
De |
Sonderzubehör
• 67-mm-Einschraubfilter
Nicht geeignetes Zubehör
•Telekonverter (alle Modelle)
•Auto-Ring BR-4 und alle Modelle von AutoZwischenring PK, K-Ring und Balgenvorsatz.
•Anschlussring SX-1
Auch anderes Zubehör ist möglicherweise für dieses Objektiv nicht geeignet. Lesen Sie sorgfältig die Bedienungsanleitungen zu Ihrem Zubehör.
29
Technische Daten
|
Objektivtyp |
AF-S DX Zoom-Nikkor-Objektiv Typ |
|
|
G mit integrierter CPU und Nikon- |
|
|
Bajonettfassung (speziell ausgelegt |
|
|
für den Gebrauch mit Nikon Digital- |
|
|
SLR-Kameras - Nikon DX-Format) |
|
Brennweite |
16–85mm |
|
Maximale |
f/3,5–5,6 |
|
Blendenöffnung |
|
|
Objektivaufbau |
17 Linsen in 11 Gruppen |
|
|
(3 asphärische und 2 ED- |
|
|
Linsenelemente) |
|
Bildwinkel |
83º–18º50’ |
De |
Brennweitenskala |
16, 24, 35, 50, 70, 85mm |
|
||
|
Entfernungsdaten Werden an Kameras übertragen |
|
|
Zoomen |
Manuell über separaten Zoomring |
|
Scharfeinstellung Innenfokussierung nach dem Nikon- |
|
|
|
IF-System (mittels integriertem Silent |
|
|
Wave-Motor); manuell über |
|
|
separaten Fokussierring |
|
Bildstabilisator |
Objektivverschiebung mit VCMs |
|
|
(Voice Coil Motors - |
|
|
Schwingspulenmotoren) |
Entfernungsskala Unterteilt in Meter und Fuß, und zwar von 0,38 m bis unendlich (  )
)
Kürzeste |
0,38 m bei allen Zoomeinstellungen |
Aufnahmedistanz |
|
Blende |
Irisblende mit 7 gerundeten |
|
Lamellen |
Blendenart |
Vollautomatisch |
Blendenbereich |
f/3,5 bis f/22 (bei 16mm), f/5,6 bis |
|
f/36 (bei 85mm) |
Belichtungsmessung Offenblendenmessung |
|
Befestigungsgröße |
67 mm (P = 0,75 mm) |
Abmessungen |
ca. 72 mm (Durchm.) × 85 mm (zum |
|
Objektivmontageflansch der Kamera) |
Gewicht |
ca. 485 g |
Änderungen von technischen Daten und Design durch den Hersteller ohne Ankündigung und ohne Verpflichtungen irgendeiner Art vorbehalten.
30
 Loading...