

Page 1

iCN 600 series
with Smart
TM
Version 3.0
User Manual
Europe / Australia / New Zealand Edition
Page 2

2
iCN 600 series | User Manual
Contents
1. Introduction .................................................................3
2. iCN Features ...............................................................
4
3. Memory Card ..............................................................
6
4. Turning your iCN On and Off .......................................
7
5. Position in a Vehicle ....................................................
8
6. Main Menu Screen .................................................... 10
7. Screen Keyboard ...................................................... 10
8. GPS Status ............................................................... 11
9. Setting your Destination ............................................12
10. Avoiding an Area .....................................................17
11. Viewing Your Route ................................................. 18
12. Map Screen Pop-up Menu .....................................21
13. Route Demonstrator ...............................................22
14. Favorites & Shortcuts .............................................. 23
15. Settings ...................................................................25
16. Smart
Desktop ....................................................30
17. Updating your iCN ..................................................31
18. Installing Maps Using Smart
Desktop .................32
19. Continuous Continental Navigation ......................... 33
20. Smart
Desktop Advanced Features ....................35
21. Accessories ............................................................ 38
Page 3

3
iCN 600 series | User Manual
1. Introduction
Whether you travel in your own country, or overseas, the iCN will direct you to your destination without the need for map
books and second-hand instructions.
The Global Positioning System is available free of charge, at any time, and is accurate to within 5 m (15 ft). Your iCN
map provides street level detail for door-to-door navigation, including Points Of Interest (POIs) such as accomodation,
railway stations and airports.
Use this guide to learn how to operate it effectively and safely, plus find out all of the different features available to you.
GPS and GPS Signals
The Global Positioning System (GPS) is a network of satellites that transmit accurate time and position information
worldwide. GPS receivers receive signals from these satellites, and use the information to determine an exact
location. Satellites orbit the Earth at around 12,000 miles. While a GPS receiver can detect signals from up to 12
satellites at anytime, only three are needed to provide a position or “fix” (latitude and longitude) for vehicle navigation
systems.
The iCN GPS antenna receives GPS signals. To receive GPS signals, ensure the iCN is outdoors, or in a vehicle
outdoors, and the GPS antenna has an unobstructed view of the sky. The iCN can operate in all weather types
except snowfall.
Safety Notice
In a vehicle, it is your sole responsibility to place, secure, and use the iCN in a manner that will not cause accidents,
personal injury or property damage. The user of this product is solely responsible for observing safe driving practices.
It is your sole responsibility that the vehicle mount installation instructions are read carefully, understood, and used
consistent with the laws of operation for each country in which the device is used.
It is your sole responsibility to adhere to the following safety instructions at all times:
• Do not operate the iCN while driving or place the iCN in a position that obstructs the driver’s view
• Do not mount in a way that interferes with airbags or other safety equipment
• Do not leave in view while your vehicle is unattended, especially in strong sunlight
• Do not use or handle the iCN when it is hot, leave it to cool out of direct sunlight
Navman disclaim all liability for use of this product in a way that may cause accidents, damage or may violate law.
Page 4

4
iCN 600 series | User Manual
2. iCN Features
It is recommended that you familiarize yourself with the basic operations of your iCN such as using the 8-way toggle and
volume control.
Front Components
Component Description
1 Screen Displays maps and menu options.
2 OK Select the highlighted menu option, text or command.
3 Zoom/Brightness
Change the amount of map area shown, or press and hold to adjust the
screen brightness.
4 ESC
Cancels an action, deletes the last text character, returns to the previous
screen or Map. Hold down to delete a line of text.
5 8-way Toggle Use to scroll up/down and move round a map to select a destination.
6 Page
Change map views, including 3D Map* view. Use to view further screens if
available.
7 Volume
Press to hear the very next instruction, or hold down to adjust the voice
guidance volume.
8 Menu/Power Press to return to the Main Menu or hold down to turn on/off.
* iCN 630, 635, 650 only
1
2 3
4
5
8
7
6
Page 5

5
iCN 600 series | User Manual
Back Components
Component Description
1 Speaker Outputs voice commands and warnings. Use Volume button to adjust.
2 Memory Card Slot Slot for memory card. Insert card with label facing the front of the iCN.
3 GPS Receiver Receives signals from GPS satellites when lifted out to the horizontal position.
4 Car Antenna Socket Connection socket for GPS car antenna (not included).
5 Power Socket Connection socket for power cable.
6 USB Socket Connection socket for USB cable to your computer.
Remote Control
Button functions are the same as the iCN control buttons. You cannot turn on the iCN using the
Remote Control.
Only included with the iCN 635 and 650. Available for the iCN 610 as an accessory.
1
2
3
4
5
6
Page 6

6
iCN 600 series | User Manual
3. Memory Card
iCN 610 and 635
Your iCN comes with a memory card contaning a preactivated map*. To navigate to your destination you will first
need to insert the memory card into your iCN.
To navigate in an area outside of the preactivated map, you must first purchase a Map Product Key from your
Navman supplier. Install Smart
Desktop, then use it to activate your Map Product Key and install the required map.
See Installing Maps Using Smart Desktop on page 30.
* If you purchased your iCN 635 in New Zealand, you will not receive a memory card as the preactivated map of New Zealand is contained in
internal memory.
Inserting Memory Card
Note: The first time you insert the memory card you will first need to remove the plastic space saver from the
SD/MMC slot.
To insert the memory card, first ensure that the iCN is turned off, then gently insert the card in the Memory Card
slot with the label facing the front of the iCN.
Removing Memory Card
To remove the memory card, first ensure that the iCN is turned off, then gently push the top edge of the card to
release it and pull it out of the slot.
iCN 650
The iCN 650 contains all preactivated maps for West Europe or US/Canada in internal memory and does not come
with a memory card.
Page 7

7
iCN 600 series | User Manual
4. Turning your iCN On and Off
Use the Menu/Power button to turn your iCN on and off.
Turn iCN On
1. Plug the power adapter into the socket on the left of the iCN and the other end into the vehicle lighter socket.
2. Gently pull the bottom of the GPS receiver away from the iCN. The receiver will lift out to a horizontal position
to allow it to obtain a GPS fix.
3. Press the Menu/Power button for one second.
Turn iCN Off
1. Gently push the GPS receiver back towards the iCN. The receiver will click in to place.
2. Complete one of the following:
• iCN 610, 650: Press the Menu/Power button for three seconds. When the confirmation message displays,
select Yes and press OK. The iCN will turn off.
• iCN 635: Press the Menu/Power button for three seconds until the iCN turns off.
Page 8

8
iCN 600 series | User Manual
5. Position in a Vehicle
Before you begin, check if your vehicle is fitted with a heat reflecting or heated windshield. If so, you will need to
purchase an external antenna for your iCN to receive GPS signals.
There are a number of ways to position an iCN in a vehicle. Follow these instructions carefully.
• For security and to avoid overheating, do not leave your iCN in an unattended vehicle, especially in strong sunlight.
• Do not use or handle the iCN when it is hot — leave it to cool out of direct sunlight. If your iCN is
too hot, you will be prompted to turn down the brightness (press and hold the Zoom button). If the
iCN continues to get hotter the screen will go blank, however voice instructions will continue.
Suction Mount
1. Slip the locking nut over the ball foot.
2. Snap the socket clip onto the ball foot and tighten the locking nut onto the thread of the socket clip.
3. Clean and dry the surfaces, hold the suction cup firmly against the glass and press down the lever.
4. Position the two locating slots on the underside of the iCN into the tabs on the socket clip. Push the iCN into the
clip.
5. Open the antenna outwards, so it has a clear view of the sky.
6. Plug the power adapter into the socket on the left of the iCN and the other end into the vehicle lighter socket.
Page 9

9
iCN 600 series | User Manual
Adhesive Tape and Screw Mount*
You can use the base plate, adhesive tape and screws supplied to mount the iCN directly into the vehicle dashboard.
Note: This is a permanent solution — the adhesive tape cannot be removed once fixed.
1. Choose a position on the dashboard where the iCN will be clearly visible by the driver and ensure all surfaces
are clean and dry.
2. Remove the protective layer from the tape and press down firmly for 30 seconds.
3. Press the suction cup firmly against the surface and press the lever down.
4. Use the base plate and screws supplied to fix the iCN base into the dashboard.
5. Slip the locking nut over the ball foot with the flat side facing upwards.
6. Snap the socket clip onto the ball foot.
7. Wind the locking nut onto the thread of the socket clip until firm.
8. Snap the iCN onto the socket clip. Position the two locating tabs on the underside of the iCN into the
corresponding slots on the socket clip. Then push the iCN into the clip.
9. Open the antenna outwards so the GPS antenna has a clear view of the sky.
10. Plug the power cable into the socket on the left side of the iCN and the other end into the vehicle lighter
socket.
*iCN 635, 650 only
Page 10
10
iCN 600 series | User Manual
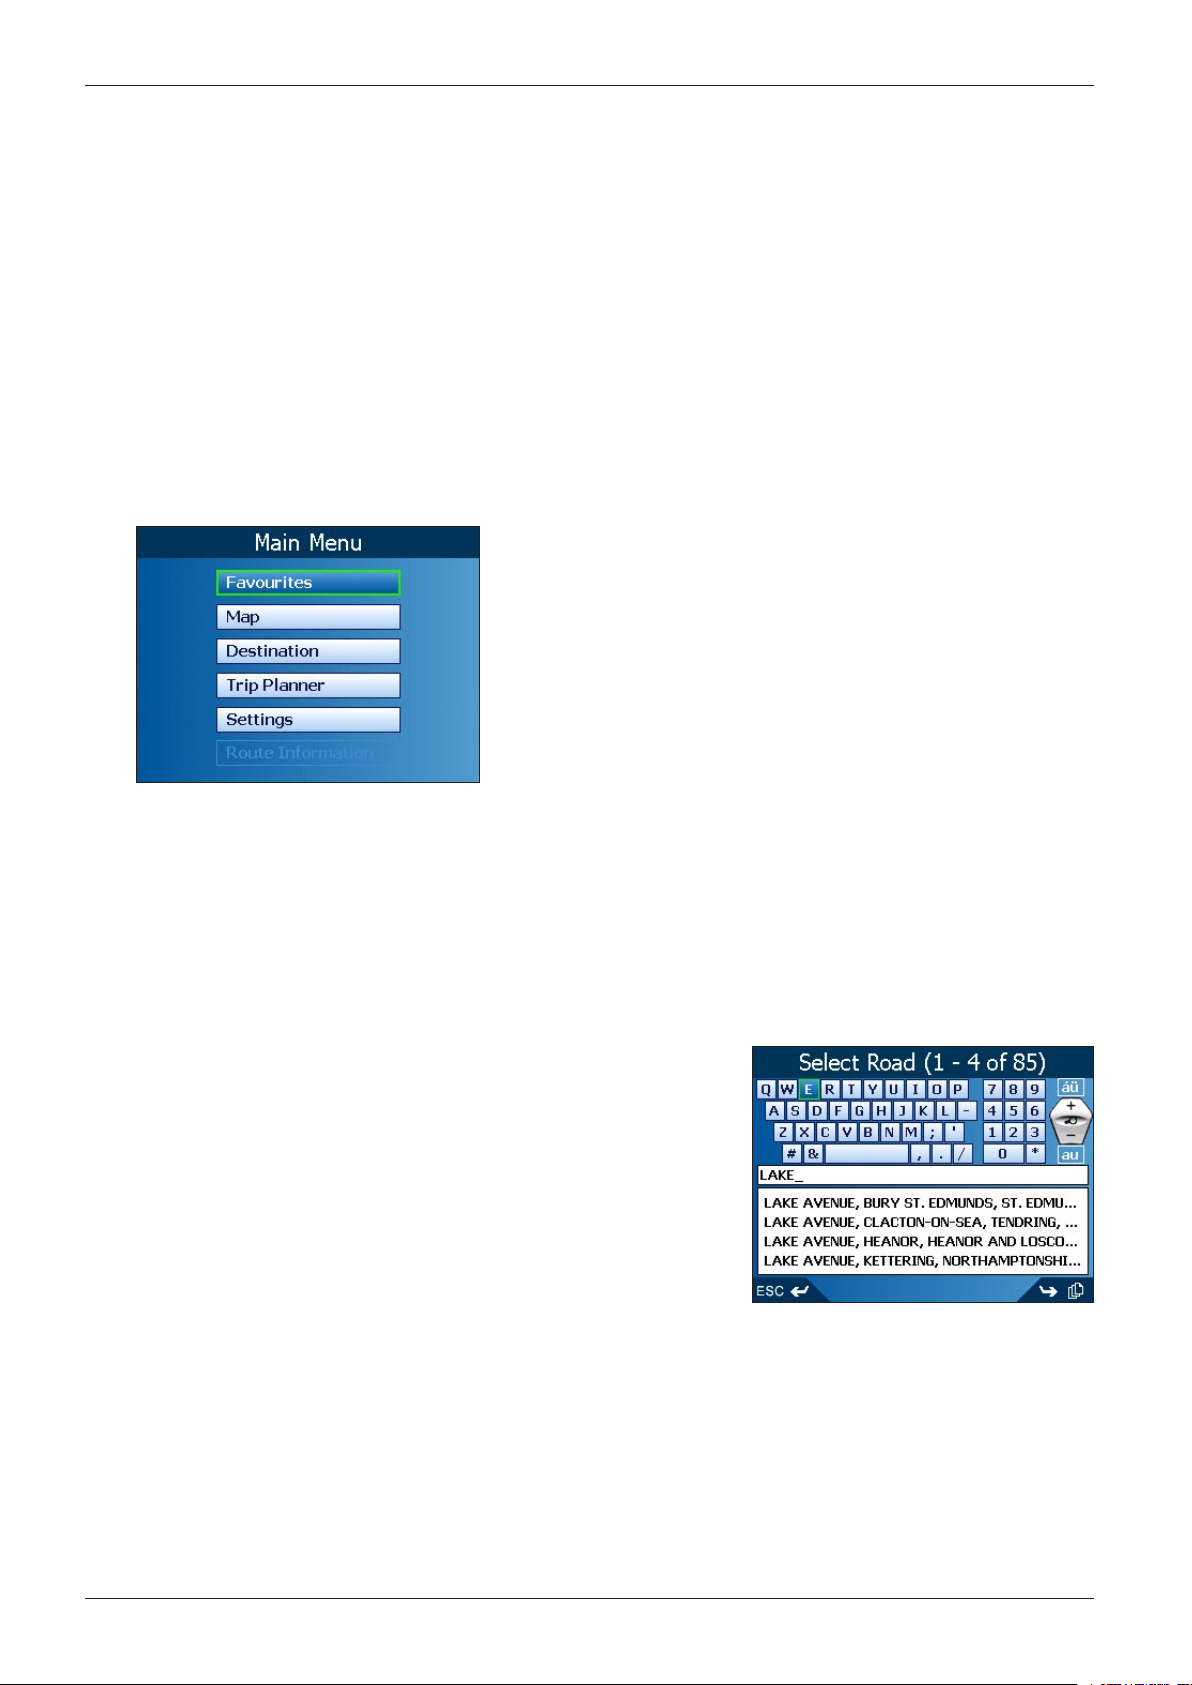
6. Main Menu Screen
The Main Menu screen gives you access to all of the iCN’s functions, including navigating to a destination.
1. Press the MENU/Power button for about one second.
2. The Language screen will display. Use the 8-way toggle to highlight your language choice and press OK
.
• You can stop the Language screen displaying on startup by selecting the Do not show on startup check box.
Press OK to confirm.
3. Press the Page button.
4. The Warning screen will display. Read the warning mesage and press OK to confirm that you understand.
5. The
Tutorial will display. Press the Page button to move through the screens.
• You can turn off the Tutorial on startup by using the 8-way toggle to highlight the Do not show Tutorial on
startup check box, press OK to confirm.
6. The Main Menu screen will display.
7. Use the 8-way toggle to highlight Main Menu options, confirm a selection by pressing OK
.
• Return to the Main Menu at any time by pressing the MENU/Power button.
7. Screen Keyboard
The screen keyboard will display when required to enter text, such as when entering a street name.
1. Use the 8-way toggle to move around the keyboard.
• Press OK to select a character.
• Press ESC to delete a character; Hold ESC to delete the line.
• Press Zoom up to display the Alternative keyboard.
• Press Zoom down to return to the Alphabetical keyboard.
• The list will reduce to match your search criteria. Press Page to
see more of the list.
2. Use the 8-way toggle to select a search result from the list. Press OK
.
Page 11

11
iCN 600 series | User Manual
8. GPS Status
Signals are transmitted by Global Positioning System (GPS) satellites orbiting the Earth. This screen provides a visual
representation of the information being received. Latitude and longitude are displayed, along with a North-pointing
compass, the heading in degrees and ground speed. Satellites available are shown as segments.
From the Main Menu, select Settings > More Settings
> GPS Status. The GPS Status screen will display.
• Yellow — a satellite is being tracked but is not being used
• Red — a satellite is being used to determine a two dimensional (2D) fix
• Green — the satellite is being used to determine your position.
The circle under the sattelite segments is green when there is a valid fix (2D or 3D), and red when there is no fix. While
a 2D fix is sufficient to maintain a valid fix, a 3D fix is more accurate.
Satellite Signal Strength
From the GPS Status screen, press the Page button to display the Satellite
Signal Strengths screen. The strength of each satellite is displayed on a bar
chart.
The circle on the right-hand side of the screen displays green when there is
a valid fix (2D or 3D), and red when no fix is available. The satellites available
from your current position are shown as bars.
• Grey — no signal at all
• Red — this signal is not being used to fix your position
• Green — this signal is being used to fix your position.
Satellite Position Indicators
From the Satellite Signal Strengths screen, press the Page button to
display the Satellite analysis screen. The position of each satellite is shown
in relation to Earth. You can view the status and performance of a satellite
by selecting it using the 8-way toggle. The satellite performance will
display.
Each satellite is represented by a small empty circle.
• Grey circle — no signal
• Red circle — a signal not being used to fix your position
• Green circle — a signal being used to fix your position
• Yellow satellite icon — shows the current satellite.
Latitude and longitude
of the current position
Local time
A green circle indicates a valid fix
Current heading in degrees and
ground speed
Each segment represents a satellite
Page 12
12
iCN 600 series | User Manual
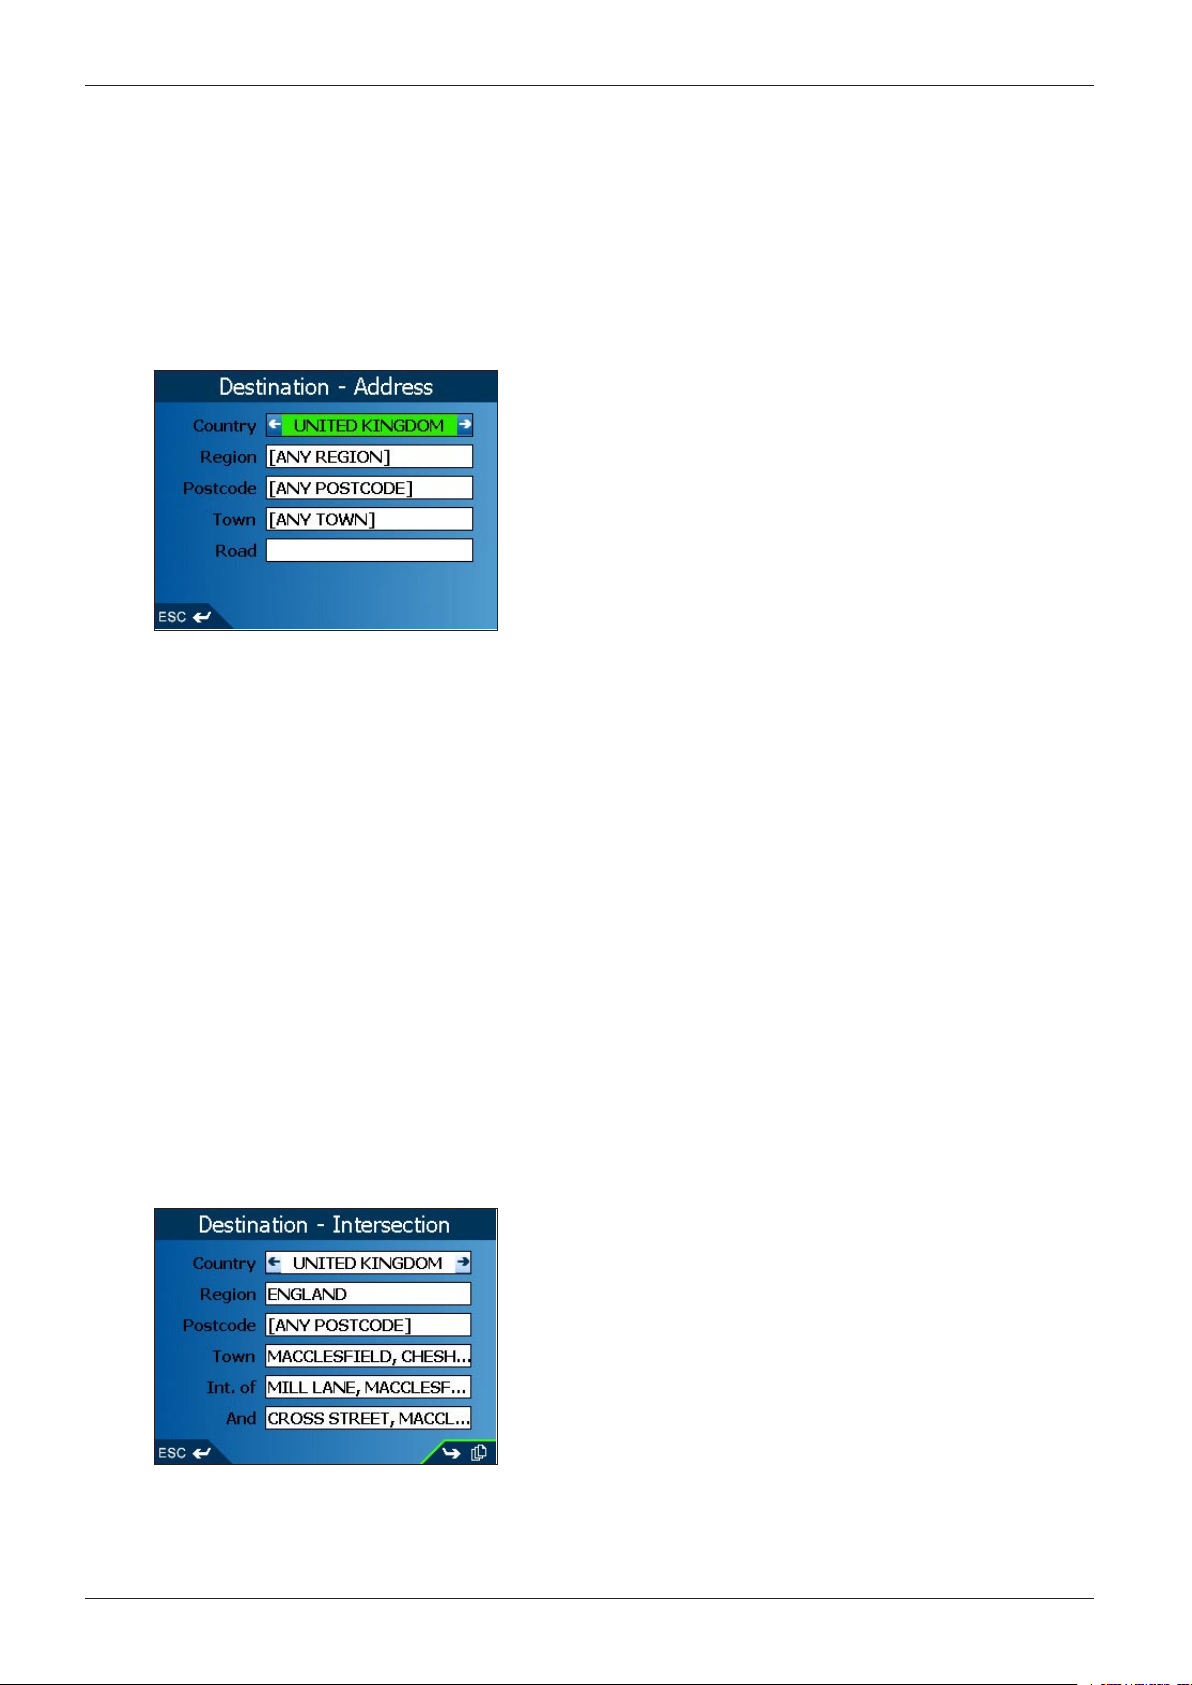
9. Setting your Destination
Before you travel, you must select a destination.
To a Street Address
1. From the Main Menu, select the Destination option.
2. From the Destination screen, select the Address option. The Destination-Address screen will display.
3. Select a Country using the 8-way toggle, press OK
.
4. To select a Regio
n or State press OK. Select a region. Press OK.
5. To select a Postcode or ZIP Code press OK. Select a postcode or ZIP code. Press OK.
6. To select a Town press OK. Select a city or town. Press OK
.
7. To select a Road press OK. Select a road. Press OK
.
8. Press the Page button to display the Address-Details screen.
9. Choose one of the following options:
• Add to Trip - Opens the Trip Planner screen and adds the destination to your trip
• Save - Saves the destination as a Shortcut or Favorite
• Show - Displays the address on the
Map screen
• Go - Calculates the route and displays it on the
Map or 3D Map screen.
To the Intersection of Two Streets
1. From the Main Menu, select the Destination option.
2. From the Destination screen, select the Intersection option. The Destination-Intersection screen will display.
3. Select a Country using the 8-way toggle, press OK
.
4. To select a Region or State press OK. Select a region. Press OK
.
Page 13

13
iCN 600 series | User Manual
5. To select a Postcode or ZIP Code press OK. Select a postcode or ZIP code. Press OK.
6. To select a City/Town press OK. Select a city or town. Press OK
.
7. To select the first intersecting street, press OK. A list of intersecting streets will display. Select a street. Press OK
.
8. Select And. A list of intersecting streets will display. Select a street. Press OK
.
9. Press the Page button, the Intersection-Details screen will display.
10. Choose one of the following options:
• Add to Trip - Opens the Trip Planner screen and adds the destination to your trip
• Save - Saves the destination as a Shortcut or Favorite
• Show - Displays the address on the
Map screen
• Go - Calculates the route and displays it on the
Map or 3D Map screen.
To a City or Town Centre
1. From the Main Menu, select the Destination option.
2. From the Destination screen, select the City/Town Centre option. The Destination - City/Town Center screen
will display.
3. Select a Country using the 8-way toggle, press OK
.
4. To select a Regio
n or State press OK. Select a region. Press OK.
5. To select a Postcode or ZIP Code press OK. Select a postcode or ZIP code. Press OK
.
6. To select a City/Town press OK. Select a city or town. Press OK
.
7. Press the Page button to display the Address Details screen.
8. Choose one of the following options:
• Add to Trip - Opens the Trip Planner screen and adds the destination to your trip
• Save - Saves the destination as a Shortcut or Favorite
• Show - Displays the address on the
Map screen
• Go - Calculates the route and displays it on the
Map or 3D Map screen.
Page 14

14
iCN 600 series | User Manual
To a Point-Of-Interest (POI)
A POI is a named site, feature, landmark or public venue. POI's are stored in Categories, such as parks and
museums. POI's can be displayed as icons on a map.
1. From the Main Menu, select the Destination option.The Destination screen will display.
2. From the Destination screen, select the Points of Interest option. The Destination-POI screen will display.
3. Select a Category using the 8-way toggle, press OK
4. Select a Type, press OK to narrow the search.
5. Select a Country, to confirm press OK
6. Select an Area by pressing Page. Enter a name and choose from the list. Press OK
7. The Select POI screen will display, press OK, the Select POI text entry screen will display a list.
8. Select a POI using the 8-way toggle. Press Page to view more. Press OK to select from the list.
9. The POI Detail screen will display. Choose one of the following options:
• Add to Trip - Opens the Trip Planner screen and adds the destination to your trip
• Save - Saves the destination as a Shortcut or Favorite
• Show - Displays the address on the Map screen
• Go - Calculates the route and displays it on the
Map or 3D Map screen.
To a Recent Destination
The last 30 routes are stored as Recent destinations.
1. From the Main Menu, select the Destination option.
2. From the Destination screen, select the Recent
option The Recent screen will display.
3. Select a destination from the list, press OK
4. Choose one of the following options:
• Add to Trip - Opens the Trip Planner screen and adds the destination to your trip
• Save - Saves the destination as a Shortcut or Favorite
• Show - Displays the address on the Map screen
• Go - Calculates the route and displays it on the
Map or 3D Map screen.
Page 15

15
iCN 600 series | User Manual
Multiple Destination Points with the Trip Planner
You can use the Trip Planner to set multiple destination points for your trip. Your route will be calculated to go
via each of these points in the specified order. Destination points can be added via the Trip Planner screen or by
selecting Show Details from the pop-up menu on the Map screen, then Add to Trip.
1. From the Main Menu, select the Trip Planner
option. The Trip Planner screen will display.
2. Select Add and press OK. The Destination screen will open.
3. Select Address and press OK. The Destination Address screen will open.
Note: You can also add destination points using intersections, Cities/Towns, Points of Interest and recent
destinations.
4. Select a Country using the 8-way toggle, press OK
.
5. To select a Regio
n or State press OK. Select a region. Press OK.
6. To select a Postcode or ZIP Code press OK. Select a postcode or ZIP code. Press OK
.
7. To select a Town press OK. Select a city or town. Press OK
.
8. To select a Road press OK. Select a road. Press OK
.
9. Press the Page button to display the Address-Details screen.
10. Select Add to Trip and press OK. The destination point is added to your trip. The Trip Planner screen will
display.
• To add another destination point, go to step 2.
11. To move a destination point up or down, select the point and press OK. The Address Details screen will
display.
• Select Move and press OK. The Trip Planner screen will display with the selected destination point highlighted.
• Use the 8-way toggle to move the destination point up or down the list.
• Press OK
.
12. To delete a destination point, select the point and press OK. The Address Details screen will display.
• Select Delete from Trip and press OK. The Trip Planner screen will display with the selected destination
deleted.
13. Choose one of the following options:
• Add - Opens the Destination screen to add a destination point.
• Clear - Deletes all destination points.
• Save - Opens the New Favorite screen to save the trip as a Shortcut or Favorite
• Go - Calculates the route and displays it on the
Map or 3D Map screen
Page 16

16
iCN 600 series | User Manual
Using the Map screen to Plan a Route
You can plan a route directly from the Map screen using the Popup menu.
1. From the Main Menu, select the Map option. The Map screen will display.
• Move round the Map screen using the 8-way toggle
• Zoom using + and - on the Zoom/Brightness button.
2. Press OK to display cross-hair on the Map screen
• To remove the cross-hair press ESC
3. Use the 8-way toggle to place the intersection of the cross-hair on a destination, the street name will display.
4. Press OK to select the street as your destination. The Pop-up menu will display
5. Select Navigate To. The route is calculated and displayed on the Map or 3D Map screen.
Page 17

17
iCN 600 series | User Manual
10. Avoiding an Area*
You can calculate a route that avoids a specified area on the map. Up to ten Avoid Areas can be added. Avoid Areas are
displayed as shaded areas. If no alternative route exists, you will be routed through an Avoid Area.
* iCN 635, 650 only
Adding an Avoid Area
1. From the Main Menu, select the Map option. The Map screen will display.
2. Press OK and place the intersection of the cross-hair over the area that you want to avoid using the 8-way
toggle
.
3. Press OK to display the Pop-up menu.
4. Select Add Avoid Area. Press OK. An Avoid Area is displayed.
5. Set the Avoid Area to the correct size and position using the 8-way toggle
.
6. Press OK to enable the Avoid Area.
Deleting an Avoid Area
1. From the Main Menu, select the Map option. The Map screen will display.
2. Press OK and place the intersection of the cross-hair over the Avoid Area that you want to delete using the 8-
way toggle
.
3. Press OK to display the Pop-up menu. Select Delete Avoid Area. Press OK. The Avoid Area is deleted.
Deleting All Avoid Areas
1. From the Main Menu, select the Settings option.
2. From the Settings screen, select the My Data option.
3. From the My Data screen, select the Clear Data option. The Settings - Clear Data screen will display.
4. Use the 8-way toggle to select the Clear Avoid Areas button.
• Select Yes and press OK to accept the Warning dialog box.
5. Press ESC repeatedly until the Map screen displays.
Page 18

18
iCN 600 series | User Manual
11. Viewing Your Route
Once a route has been calculated, there are a number of ways to view it. Cycle through the screens by pressing the
Page button. To cancel a route or stop the Route Demonstrator, return to the Main Menu, select the Route Information
option, then the Cancel Route option.
Back-On-Track™ Automatic Rerouting
Your route is re-directed if you make a wrong turn. The ? symbol will display upper left of the 3D Map and Next
Instruction screens while the route re-calculates.
Automatic rerouting is enabled on the Routing screen.
Map Screen
This screen displays north, with your current position and surrounding street names. If a route has been calculated,
the route and turns are highlighted.
From the Main Menu, select the Map option
• Zoom using + and - on the Zoom/Brightness button
• Press OK to display the cross-hair. Press again to display the Pop-up menu.
3D Map Screen - iCN 635, 650 only
Your route displays on a map oriented to the travelling direction, with an adjustable horizon.
1. From the Main Menu, select the Map option. The Map screen will display.
2. Press the Page button to display the 3D Map screen.
• Zoom using + and - on the Zoom/Brightness button
• Use the 8-way toggle up or down to adjust the viewing angle
• Press OK to display the
Destination Pop-up menu
GPS strength indicator
Your current location
Your next turn is high
lighted in a different
color to future turns.
The color will depend
on the theme you are
using.
Your current position is
marked with
.
GPS strength indicator
Your current location
North oriented compass
Additional information can display here.
Press the 8-way toggle left or right
to scroll the options. You must have a
route calculated to view these options.
• Current speed
• Current time
• Current bearing / heading (HDG)
• Distance to next turn
• Distance to go to destination (DTG)
• Expected time of arrival (ETA)
• Time to go to destination (TTG)
Page 19

19
iCN 600 series | User Manual
Next Turn Screen
Displays the turn direction, street name and the distance to the next turn. A route must have been calculated for this
screen to display. Access to this screen is set on the Settings - Display screen.
1. From the Main Menu, select the Map option The Map screen will display.
2. Press the Page button until the Next Turn screen displays.
Next Four Turns Screen
This screen displays the next four turns of your route, the turn direction, street name and the distance to the turn.
A route must have been calculated for this screen to display. Access to this screen is set on the Settings - Display
screen.
1. From the Main Menu, select the Map option. The Map screen will display.
2. Press the Page button until the Next Four Instructions screen displays.
Distance to the next turn
GPS strength indicator
Direction of the next turn
Your current location
The next instruction
Additional information can be displayed
here. Press the 8-way toggle left or
right to scroll the following options.
• Current speed
• Current time
• Current bearing / heading (HDG)
• Distance to next turn
• Distance to go to destination (DTG)
• Expected time of arrival (ETA)
• Time to go to destination (TTG)
Map of the next turn
The next turn is highlighted at the top of the list.
Your current location.
The distance to this turn.
Additional information can be displayed
here. Press the 8-way toggle left or
right to scroll the following options.
• Current speed
• Current time
• Current bearing / heading (HDG)
• Distance to next turn
• Distance to go to destination (DTG)
• Expected time of arrival (ETA)
• Time to go to destination (TTG)
GPS strength indicator.
Page 20

20
iCN 600 series | User Manual
Route Information
The Route Information screen provides information about your current route, and let's you skip a trip destination
point or cancel a route. The screen is only available from the Main Menu when you are navigating a route.
Show Route
Select to display your entire route on the Map screen.
Instruction List
Select to display the Instruction List screen. The Instruction List screen is similar to the Next Four Turns screen
except that it displays your entire route.
Use the Page button to page through the instruction list.
Summary
Select to display the Route Summary screen containing your From and To addresses, Estimated Time to
arrival and the Distance remaining to your destination.
If you are navigating a multiple destination trip, the information displayed will relate to your next destination point.
Skip Destination
Select to skip the next destination point of your trip. Only available when navigating a multiple destination trip.
Cancel Route
Select to cancel the route.
Page 21

21
iCN 600 series | User Manual
12. The Map Screen Pop-up Menu
The Pop-up menu allows you to access navigational functions from the Map screen.
1. Move round the Map screen using the 8-way toggle; Zoom using
+ and - on the Zoom/Brightness button.
2. Press OK to display the cross-hair on the Map screen.
• To remove the cross-hair press ESC
.
3. Position the intersection of the cross-hair on a destination using the 8-way toggle. Where the cross-hair
intersect on a street, the street name will display on the Map screen.
4. Press OK to select the street as your destination. The Pop-up menu will display.
5. You can choose one of the following options;
Navigate To Calculates a route from your current location
Set as Start Location Sets the location as your departure point
Add to Favorites Allows you to save your location as a Favorite or Shortcut
Show Details
Displays the Address Details screen
Add Avoid Area* Defines an area on the map that is avoided during your journey
Delete Avoid Area* Deletes an Avoid Area if enabled
Nearest POI
Displays the Destination-POI screen. Page displays the Select nearest POI
screen or further screens if available.
6. Press OK to confirm your selection
* iCN 635, 650 only
Page 22

22
iCN 600 series | User Manual
13. Route Demonstrator
The Route Demonstrator allows you to:
• Preview a route, or
• Plan and view a route without a GPS fix, such as when you are inside a building.
Step 1. Activate Route Demonstrator
1. From the Main Menu, select the Settings option.
2. From the Settings screen, select the Routes option. The Routing screen will display.
3. Press the Page button twice.
4. Select the Demonstrate Route check box, press OK
.
5. Press ESC repeatedly until the Map screen displays.
• Press OK to accept the Warning dialog box.
Step 2. Select Departure Point
If you have a GPS fix, you do not need to select a departure point unless the demonstrated route is to start eleswhere.
1. From the Main Menu, select the Map
option. The Map screen will display.
2. Press OK and place the intersection of the cross-hair over a departure point using the 8-way toggle
.
3. Press OK to display the Pop-up menu. Select Set as Start Location. Press OK
.
Step 3. Select Destination Point
1. Press OK and place the intersection of the cross-hair over your destination point using the 8-way toggle.
2. Press OK to display the Pop-up menu. Select Navigate To. Press OK. The 3D Map screen will display
and the Route Simulator starts your route.
• If you have selected the Repeat check box on the Routing (2/3) screen, the Route Demonstrator will
repeat until you stop it.
To Disable Route Demonstrator
• Press Menu/Power to return to the Main Menu screen
• Select the Route Information option, then the Cancel Route option
• Press OK to confirm. You will be returned to the Main Menu screen
Page 23

23
iCN 600 series | User Manual
14. Favorites & Shortcuts
You can save up to 200* destinations as Favorites, 10 of which can be Shortcuts.
*50 Favorites for iCN 610, 620
Saving Favorites and Shortcuts
1. From the Main Menu, select the Destination option.
2. From the Destination screen, select the Address option. The Destination-Address screen will display.
Note: You can also add a Favorite or Shortcut using intersections, Cities/Towns, Points of Interest and recent
destinations.
4. Select a Country using the 8-way toggle, press OK
.
5. To select a Regio
n, press OK. Select a region. Press OK.
6. To select a Postcode, or ZIP Code press OK. Select a postcode or ZIP code. Press OK
.
7. To select a Town press OK. Select a city or town. Press OK
.
8. To select a Road press OK. Select a road. Press OK
.
9. Press the Page button to display the Address-Details screen.
10. Select Save, press OK. The New Favorite screen will display.
11. Select the Name box and press OK. The Enter Name screen will
display
• Press and hold the ESC button to clear the text box if required.
• Enter a name for the Favorite.
• Select Enter and press OK. The New Favorite screen will display.
12. Select the Save As box and use the 8-way toggle to save as a
Favorite or Shortcut.
13. Select Save and press OK to return to the Map screen.
Note: If you save a Shortcut over a Shortcut, a warning message will display. Choose No to return to the Edit
Favorite or Edit Shortcut screen or Yes to return to the Shortcut list.
Saving Favorites and Shortcuts from the Map Screen
1. From the Main Menu, select the Map option. The Map screen will display.
2. Press OK to display the cross-hair.
3. Position the intersection of the cross-hair on a destination using the
8-way toggle. Where the cross-hair
intersect on a street, the street will highlight and the street name will display.
4. Press OK. The Pop-up menu will display.
5. Select Add to Favorites and press OK. The New Favorite screen will display.
6. Select the Name box and press OK. The Enter Name screen will display
• Press and hold the ESC button to clear the text box if required.
• Enter a name for the Favorite.
• Select Enter and press OK. The New Favorite screen will display.
10. Select the Save As box and use the 8-way toggle to save as a Favorite or Shortcut.
11. Select Save and press OK to return to the Map screen.
Note: If you save a Shortcut over a Shortcut, a warning message will display. Choose No to return to the Edit
Favorite or Edit Shortcut screen or Yes to return to the Shortcut list.
Page 24

24
iCN 600 series | User Manual
Editing Favorites and Shortcuts
Edit the name of the Favorite or Shortcut, or save a Favorite as a Shortcut.
1. From the Main Menu screen, select the Favorites option.
• If you have saved a Shortcut, the Shortcuts screen will display. To edit a Favorite, press the Page button to
display the Favorite screen.
2. Select from the list, press OK. The Edit Shortcut or Edit Favorite screen will display.
3. Select the Name box and press OK. The Enter Name screen will
display
• Press and hold the ESC button to clear the text box if required.
• Enter a name for the Favorite.
• Select Enter and press OK. The New Favorite screen will display.
4. To save a Favorite as a Shortcut, use the 8-way toggle in the Save
As box to select a Shortcut position.
5. Select Save, press OK
.
Note: If you save a Shortcut over a Shortcut, a warning message will
display. Choose No to return to the Edit Favorite or Edit Shortcut
screen or Yes to return to the Shortcut list.
Using Shortcuts
1. From the Main Menu, select the Favorites option. The Shortcuts screen will display.
2. Select from the list, and press OK. The Edit Shortcut screen will display.
3. Select one of the following options and press OK
:
• Save -
Saves the destination as a Shortcut
• Delete - Deletes the selected input
• Show - Displays the address on the Map screen
• Go - Calculates the route and displays it on the 3D Map screen
• Add to Trip - Opens the Trip Planner screen from where you can add the destination to your trip.
Using Favorites
1. From the Main Menu screen, select the Favorites option.
• If you have saved a Shortcut, the Shortcuts screen will display. Press the Page button to display the Favorite
screen.
2. Select from the list and press OK. The Edit Favorite screen will display.
3. Select one of the following options and press OK:
• Save -
Saves the destination as a Shortcut
• Delete - Deletes the selected input
• Show - Displays the address on the Map screen
• Go - Calculates the route and displays it on the 3D Map screen
• Add to Trip - Opens the Trip Planner screen from where you can add the destination to your trip.
Page 25

25
iCN 600 series | User Manual
15. Settings
You can modify the following settings to suit your preferences.
Screen Brightness
1. Press and hold the Zoom/Brightness button to display the brightness indicator bar.
2. Press + or - on the Zoom/Brightness button to adjust the brightness. The iCN can heat up when display
brightness is set at over 70%. Use low screen brightness when possible.
Volume
1. Press and hold the Volume button to display the Volume bar.
2. Press + or - on the Volume button to adjust the volume.
Route Settings
1. From the Main Menu, select the Settings option.
2. From the Settings screen, select the Routes option. The Routing screen will display.
3. Move the Route Type slider towards Shortest to give more weighting
to the shortest distance when calculating a route; Move the Route
Type slider towards Quickest to give more weighting to the fastest
time when calculating a route.
4. Move the Preference for Freeways slider towards Use Less to use
freeways less often when calculating a route; Move the Preference
for Freeways slider towards Use More to use freeways more often
when calculating a route.
5. Move the Preference for Urban Roads slider towards Use Less to
use urban roads often when calculating a route; Move the Preference
for Urban Roads slider towards Use More to use urban roads more
often when calculating a route.
6. Press the Page button.
7. Select the Avoid Toll Roads, Avoid Unsealed Roads and Avoid Ferries check boxes to avoid these areas
when your route is calculated.
8. Select the Warn when using Toll Roads, Warn when using
Unsurfaced Roads and Warn when using
Ferries check boxes to display a warning message at the start of your trip if your route will include these areas
9. To enable Back on Track™ automatic rerouting, select the Automatic Rerouting check box . Automatic
rerouting will update the calculated route if you take a wrong turn.
10. Press the Page button.
11. To enable the Route Demonstrator, allowing you to plan and view a route
without a GPS fix, select the Demonstrate Route check box.
12. To enable the route demonstrator to be repeatedly played, select the Repeat check box.
13. To enable the Smart
demonstration to be played, select the Smart Demonstration check box.
The demonstration will navigate between the first and second Favorite after a ten second delay.
14. To enable GPS datalogging, select Track Recording. The Data Logging Enabled screen will display.
Note: A memory card is required for datalogging.
• Select the Name of log file box and press OK. The Enter Text screen will display.
Page 26

26
iCN 600 series | User Manual
• Press and hold the ESC button to clear the text box if required.
• Enter a name for the log file.
• Select Enter and press OK. The Data Logging Enabled screen will display.
• Select Yes and press OK. The Routing screen will display.
15. Press ESC repeatedly until the Map screen displays.
• If you have made changes to the settings, press OK to accept the Warning dialog box.
Language Settings
1. From the Main Menu, select the Settings option.
2. From the Settings screen, select the Language option. The Settings
- Language screen will display.
3. To change the voice scheme used for voice guidance during
navigation, select your preferred voice scheme from the Language
box using the 8-way toggle.
4. To enable voice guidance during navigation, select the Enable check
box.
5. Press ESC repeatedly until the Map screen displays.
• If you have made changes to the settings, press OK to accept the
Warning dialog box.
Display Settings
1. From the Main Menu, select the Settings option.
2. From the Settings screen, select the Maps option.
3. From the Settings - Maps screen, select the Display option. The Settings - Display screen will display.
4. To enable auto-zoom when navigating to your destination, select the
Auto Zoom check box. If selected, the Map and 3D Map* screen
will automatically zoom in or out depending on your speed to allow
optimal view of your route.
5. To enable access to the Next Turn screen, select the Display Next
Turn Screen check box.
6. To enable access to the Next 4 Turns screen, select the Display Next
4 Turns Screen check box.
7. To change the color scheme, select your preferred scheme from the
Map Color Scheme box using the 8-way toggle
.
8. To improve screen contrast in light or dark conditions, select either Day or Night
.
9. To display a topographical map on the Map and 3D Map screens, select the Topographic Display check box.
10. Press the Page button.
11. To display grid lines on the Map and 3D Map screens, select the Display Map Grid check box.
12. To display a North pointing compass on the Map and 3D Map screens,
select the Display Compass on Map checkbox.
13. Press ESC repeatedly until the Map screen displays.
• If you have made changes to the settings, press OK to accept the Warning dialog box.
Page 27

27
iCN 600 series | User Manual
Internal Map Settings
1. From the Main Menu, select the Settings option.
2. From the Settings screen, select the Maps option.
3. From the Settings - Maps screen, select the Internal Maps option. The Maps (Internal) screen will display.
4. To activate a map, use the 8-way toggle to scroll to the map or maps you require. Press OK.
5. Press ESC repeatedly until the Map screen displays.
• If you have made changes to maps, select Yes and press OK to accept the Warning dialog box.
Memory Card Map Settings
1. From the Main Menu, select the Settings option.
2. From the Settings screen, select the Maps option.
3. From the Settings - Maps screen, select the Memory Card Maps option. The Maps (Memory Card
) screen will
display.
4. To activate a map, use the 8-way toggle to scroll to the map or maps you require. Press OK
.
5. Press ESC repeatedly until the Map screen displays.
• If you have made changes to maps, select Yes and press OK to accept the Warning dialog box.
Points Of Interest (POIs) Settings
Points Of Interest (POIs) in a region are grouped into Categories. This function allows you to select the categories
you need. For example, you may be interested in entertainment venues only, and want to disable other POI
categories such as schools.
1. From the Main Menu, select the Settings option.
2. From the Settings screen, select the Maps option.
3. From the Settings - Maps screen, select the Points of Interest option.
The Points of Interest screen will display.
4. To display POI icons on the Map and 3D Map screens, select the
Show Icons on Map check box.
5. Use the 8-way toggle to scroll to the category or categories you
require. Press OK
.
• Press the Page button to view additional categories.
6. Press ESC repeatedly until the Map screen displays.
• If you have made changes to the settings, press OK to accept the Warning dialog box.
My Points of Interest (POI) Settings
Custom Points Of Interest (POIs) are installed from the Smart Desktop POI Editor, and listed on the My POIs
screen.
1. From the Main Menu, select the Settings option.
2. From the Settings screen, select the My Data option.
3. From the My Data screen, select the My POI option. The My POI screen will display.
4. Use the 8-way toggle to scroll to the POI file or files you require. Press OK
.
Page 28

28
iCN 600 series | User Manual
• Press the Page button to view additional files.
5. Press ESC repeatedly until the Map screen displays.
• If you have made changes to the settings, press OK to accept the Warning dialog box.
Active Points Of Interest (POIs) Settings
Active POIs are custom POIs that are announced when in close proximity. Custom POIs are added from the Smart
Desktop POI Editor.
1. From the Main Menu, select the Settings option.
2. From the Settings screen, select the Alerts option.
3. From the Alert
s screen, select the Active POI option. The Select Active
POI screen will display.
4. Use the 8-way toggle to select a custom POI. Use the keyboard to
narrow your search if required.
5. Click OK. The POI Activation Settings screen will display.
6. Select the Active check box to activate the POI.
7. Modify the settings as required:
• To enable an audible chime when the POI is in close proximity, select
the Audio Warning check box.
• To enable a visual warning when the POI is in close proximity, select the Visual Warning check box.
• Move the Distance to POI slider to select the distance at which the warnings will activate.
8. Press ESC repeatedly until the Map screen displays.
• If you have made changes to the settings, press OK to accept the Warning dialog box.
Speed Alert Settings
1. From the Main Menu, select the Settings option.
2. From the Settings screen, select the Alerts option.
3. From the Alerts screen, select the Speed option. The Settings -
Speed screen will display.
4. To enable an audible warning when travelling over a specified speed, select the speed over which the warning is
to sound from the Speed box using the 8-way toggle.
Note: The GPS signal alert will be active when a Speed alert is selected.
5. Press ESC repeatedly until the Map screen displays.
• If you have made changes to the settings, press OK to accept the Warning dialog box.
Operation Settings
1. From the Main Menu, select the Settings option.
2. From the Settings screen, select the Alerts option.
3. From the Alerts screen, select the Operating option. The Operating screen will display.
4. To enable a warning dialog box to be displayed for the driver when a button is pressed while driving, select the
Warn driver when operating check box.
5. To enable an audible and visual alert when the GPS signal is lost, select the Warn when GPS lost check box.
Note: The GPS signal alert will be active when a Speed alert is selected.
Page 29

29
iCN 600 series | User Manual
6. Press ESC repeatedly until the Map screen displays.
• If you have made changes to the settings, press OK to accept the Warning dialog box.
Clear Data Settings
1. From the Main Menu, select the Settings option.
2. From the Settings screen, select the My Data option.
3. From the My Data screen, select the Clear Data option. The Settings - Clear Data screen will display.
4. To delete Recent destinations, Favorites, Shortcuts or Avoid Areas, scroll to the appropriate option and press
OK
.
• Select Yes and press OK to accept the Warning dialog box.
5. Press ESC repeatedly until the Map screen displays.
Measurement Settings
1. From the Main Menu, select the Settings option.
2. From the Settings screen, select the More Settings option.
3. From the General screen, select the Measurements option. The Measurements screen will display.
4. Select either the Decimal Degrees or Degrees, Minutes, Seconds option to indicate the position format to be
used.
5. To set the time, select the offset from Coordinated Universal Time (UTC) for your location from the Local Time
Offset box using the 8-way toggle.
6. Select either the 12 Hour or 24 Hour option to indicate the time format to be used.
7. Select either the kilometres or miles option to indicate the distance units to be used.
8. Press ESC repeatedly until the Map screen displays.
• If you have made changes to the settings, press OK to accept the Warning dialog box.
Start Up and Tutorial Settings
1. From the Main Menu, select the Settings option.
2. From the Settings screen, select the More Settings option.
3. From the General screen, select the Startup option. The Startup screen will display.
4. To display the Tutorial on startup, select the Tutorial Screen check
box.
5. To display the Language Selection screen on startup, select the
Language Selection Screen check box.
6. To display the Tutorial, select the Show Tutorial option and press OK
.
• The
Tutorial will display. Press the Page button to move through the
screens.
7. Press ESC repeatedly until the Map screen displays.
• If you have made changes to the settings, press OK to accept the
Warning dialog box.
Page 30

30
iCN 600 series | User Manual
16. Smart Desktop
Smart Desktop is used to download maps to your iCn, obtain software updates, manage Custom Points of Interest
(POIs) and install Basemaps.
Note: For Windows XP, install XP Service Pack 1 before you install Smart
Desktop.
Install Smart Desktop on your Computer
1. Close all open programs on your Computer.
2. Insert the Smart
CD into your computer CD-ROM drive. The Smart Desktop installer will start.
• If your computer does not automatically launch the CD, start the installation manually: Start > Run
.
Type d:\setup6xx_3.exe where d is the letter assigned to your CD-ROM drive. Click OK.
3. Follow the screen prompts to install Smart
Desktop.
• Select your preferred language for Smart
Desktop when prompted.
• Review and accept the License Agreement when prompted.
• Select a destination folder when prompted.
Smart
Desktop will open. You are now ready to install maps on your iCN.
To Open Smart Desktop
Once Smart Desktop has been installed, you can access it from the Start menu:
Start > Programs > Navman > Smart
Desktop
Information about the map.
Selected maps.
Download selected
maps to the iCN,
memory card or
memory card writer.
Maps are colored to indicate
whether they are:
• Selected,
• Installed,
• Available on CD
• Available from Navman, or
• Not available.
Page 31

31
iCN 600 series | User Manual
17. Updating your iCN
Updating from Previous Version of Smart
If a software update is available for your iCN, you will be prompted when you open Smart Desktop:
1. Open Smart
Desktop: Start > Programs > Navman > Smart Desktop
2. Follow the prompts to update your iCN software to the latest version of Smart
.
Updating your Version of Smart
It is recommended that you regularly check the Navman website for software updates to the version of Smart you
are using:
1. Open Smart
Desktop: Start > Programs > Navman > Smart Desktop
2. On the Setup menu, select Update software then Check for updates on the web
.
Your computer will connect to the Internet and display the Navman website.
3. Download the update for your region to your computer, if available.
4. On the Setup menu, select Update software then
Update software on iCN.
Follow the prompts to update your iCN software.
Page 32

32
iCN 600 series | User Manual
18. Installing Maps Using Smart Desktop
Your iCN comes with a pre-activated map. If you require an additional map, you must first purchase a Map Product Key
from your Navman supplier. Use Smart Desktop to activate your Map Product Key and install the required map.
Install and Activate Maps on your iCN
1. Open Smart Desktop: Start > Programs > Navman > Smart Desktop
2. Insert a Smart
Map CD into your Computer CD-ROM drive, the available maps will display.
3. Click the map you want to install to your ICN. Maps are of population areas and not of political areas such as
counties or states. You may need to install multiple maps to cover the desired geographical area.
• If you have already activated a Map Product Key, or your ICN came with a pre-activated Map Product Key, the
map will change colour to indicate it has been selected. Go to step 6.
4. Follow the prompts to activate the Map Product Key.
• Enter your Map Product Key.
• Your Computer will connect to the Internet and activate your Map Product Key.
• You will be prompted to enter or update your contact details so Navman can advise you when updates are
released.
5. Select a map to install. Maps are listed in the Selected section of the Desktop Selected Maps tab.
• If you have another Map Product Key to activate, go to step 3.
6. Click an Add to button to install all maps listed in the Selected section of the Desktop Selected Maps tab to
your iCN, memory card, or PC writer.
Remove Maps from your iCN
1. Open Smart Desktop: Start > Programs > Navman > Smart Desktop.
2. Open the Maps on iCN section: iCN tab > Maps on iCN.
3. Click the map to be removed and select Remove from iCN from the pop-up menu.
Page 33

33
iCN 600 series | User Manual
19. Continuous Continental Navigation*
You can seamlessly navigate between installed maps without the need for installing all maps en route. This is achieved
by using a Basemap. A Basemap is a map of a large area, such as West Europe or the United States, containing main
roads that connect cities and towns. You can select a road or POI on the Basemap as your start point or destination.
Basemaps:
• contain roads and ferry connections of high national and international importance
• use less memory than would be necessary to install all equivalent detailed maps
• do not include smaller roads and have a reduced level of geographical detail.
You can add and remove basemaps using the Basemap Installer.
* iCN 635 has basemap preinstalled.
iCN 650 does not require basemap as all detailed maps preinstalled
Navigating in Australia or New Zealand does not require a Basemap
Install Basemap
1. Connect the iCN to your computer.
• Connect the iCN to mains power supply using the adapter provided.
• Connect the USB cable to the iCN and to your computer USB port.
• Turn on the iCN by pressing the Menu/Power button. The iCN USB Connection screen will display when you
are connected.
2. Open Smart
Desktop if it is not already open: Start > Programs > Navman > Smart Desktop.
3. On the Map menu, click Basemaps. The Navman Basemap Utility window will open.
4. Click the appropriate Add button to install the Basemap to the iCN, memory card or memory card reader.
Activate Basemap
1. On your iCN, from the Main Menu, tap the Settings option.
2. From the Settings screen, tap Maps.
3. Complete one of the following:
• To activate a Basemap on the iCN, from the Maps screen, tap Internal Maps. The Settings - Maps (Internal)
screen will display.
• To activate a Basemap on the memory card, from the Maps screen, tap Memory Card Maps option. The
Settings - Maps (Memory Card
) screen will display.
5. Select the Basemap you require.
6. Press ESC repeatedly until the Map screen displays.
• Tap Yes to accept the Warning dialog box.
Page 34

34
iCN 600 series | User Manual
Remove Basemap
1. Connect the iCN to your computer.
• Connect the iCN to mains power supply using the adapter provided.
• Connect the USB cable to the iCN and to your computer USB port.
• Turn on the iCN by pressing the Menu/Power button. The iCN USB Connection screen will display when you
are connected.
2. Open Smart
Desktop if it is not already open: Start > Programs > Navman > Smart Desktop.
3. On the Map menu, click Basemaps. The Navman Basemap Utility window will open.
4. Select the Basemap to remove.
5. Click the appropriate Remove button to remove the Basemap from your iCN, memory card or memory card
reader.
Page 35

35
iCN 600 series | User Manual
20. Smart Desktop Advanced Features
Find a City or Town
To search for a City or Town to verify the map to be installed:
1. From the Map menu, click Find City. The Find City window will open.
2. Type the name of the City or Town in the City Name field. The list of available
Cities will reduce to match your search.
3. Double-click the name of the City or Town.
The Desktop Map will rotate to center on the selected City or Town.
Map Colors and Textures
To access the Desktop Colors section: Desktop tab > Settings > Colors.
Adjust the settings to change the look of the map type.
Color Settings Description
Controls map colors.
Displays the:
• map border color
• map color
• map border width
Adjusts the map border width
Controls the map display:
• solid color
• no color
• crosshatch texture
Controls geographic features displayed on the map. Features are only visible if the map has no
color or crosshatch texture.
Map Layers
To conserve space on your iCN and memory card, you can choose map layers to install.
The layers you can choose from are:
• Points of Interest (POIs)
• Water, parks
• Land contours (topography).
To access the Map Layers section: Desktop tab > Settings > Layers
.
Select or clear each checkbox to indicate the layers to install for each map.
Page 36

36
iCN 600 series | User Manual
Points of Interest (POI) Editor
You can add custom Points of Interest (POIs) using the POI Editor. A maximum of 25 Custom POIs can be saved on
your iCN. The Custom POI files are listed on the My POI screen. Custom POIs can be set to announce when in close
proximity at the Select Active POI screen.
Step 1. Create a Custom POI File
1. Create a New POI File.
• On the Map menu, click POIs. The POI Editor window will open.
• On the File menu of the POI Editor, click New Text File. The POI File Name window will open.
• Type a name for the file in the File Name box and click OK. The file name can be up to eight characters
with no spaces.
2. Add a POI to the POI File.
• On the Edit
menu, click New. The POI Details window will open.
• Type a description for the POI in the Description box.
• On the Degrees, Minutes, Seconds tab, type or select
the degree, minute and second of the POI latitude in the
Latitude boxes.
• On the Degrees, Minutes, Seconds tab, type or select
the degree, minute and second of the POI longitude in
the Longitude boxes.
3. Repeat step 2 until all POIs have been added to the POI file.
4. On the File menu, click Save. The POI file is saved.
Step 2. Save Custom POI File to your iCN
1. On the File menu, click Save to Device. The POI Options window will open.
2. Modify the POI settings as required:
• To activate the POI select the Active
check box. If you do
not activate the POI, you will only be able to configure the
Importance and Icon File settings.
• To enable a visual warning when the POI is in close proximity,
select the Visual Alert check box.
• To enable an audible chime when the POI is in close proximity,
select the Audio Alert check box.
• To change the units used to measure distance for this POI, select the
Metric or Imperial option.
• Select the distance from the POI at which the visual warning should display or the audible chime is
heard, from the Distance box.
• Move the POI Visibility Level slider left or right indicate the priority that the POI has where two or more
POIs are in the same locale.
• Type the path to the icon file to be used to represent the POI, in the Icon File box, or select the icon file
from your local or network drive clicking
, locating the file and clicking Open. The file must be a bitmap
(.BMP) graphic with a minimum of 6x6 pixels and a maximum of 32x32 pixels.
3. Click OK and follow the prompts. The POI file is saved to the iCN.
• If you want to change the name of the file, edit the name for the file in the File Name box of the POI File
Name window and click OK. The file name can be up to eight characters with no spaces.
Deleting a Custom POI File from your iCN
1. On the Device menu, click Manage POI Files. The Manage POI Files window will open, displaying a list
of custom POI files installed on your iCN.
2. Click the File Name or Size of the POI file to delete.
3. Click Delete. The file is removed from the list, but is not yet deleted.
4. If you want to delete more than one file, go to step 2.
5. Click
OK and accept the changes. The selected file or files are deleted.
Page 37

37
iCN 600 series | User Manual
Backups
You can save backups of your settings, Shortcuts and Favorites to your computer.
To Back up your Settings, Shortcuts and Favorites
1. From the File menu, click Backup. The Backup window will display.
2. Click New Backup. The New Backup window will display.
3. Click OK
.
To Delete a Backup
1. From the File menu, click Backup. The Backup window will display.
2. Select the backup from the list
3. Click Delete
.
To Restore a Backup
1. From the File menu, click Restore. The Restore window will display.
2. Select the backup from the list.
3. Click Restore
.
Page 38

38
iCN 600 series | User Manual
21. Accessories
The following accessories are available for your iCN:
External Antenna
Required for vehicles with heated windshields, and to boost GPS performance in weak signal areas.
Memory Card Writer
Connects to your computer and allows you to download maps to SD or MMC memory cards.
Remote Control*
Button functions are the same as the iCN control buttons. You cannot turn on the iCN using the Remote
Control.
* Only included with the iCN 635 and 650. Available for the iCN 610 as an accessory.
Page 39

39
iCN 600 series | User Manual
Software Product License
NAVMAN (THE LICENSOR) IS WILLING TO LICENSE THE iCN Smart SOFTWARE (THE SOFTWARE) TO YOU (THE CUSTOMER)
ONLY IF YOU ACCEPT ALL THE TERMS OF THIS LICENCE. PLEASE READ THE TERMS CAREFULLY, BECAUSE USING THIS
SOFTWARE WILL BE DEEMED TO BE YOUR ACCEPTANCE THAT YOU ARE USING IT ON THE FOLLOWING TERMS. IF YOU
DO NOT AGREE TO THE TERMS OF THIS LICENCE DO NOT INSTALL OR USE THE SOFTWARE AND RETURN THIS PRODUCT
PROMPTLY, INCLUDING ALL PACKAGING AND WRITTEN MATERIALS, TO THE LICENSOR’S REPRESENTATIVE AND ANY AMOUNT
YOU MAY HAVE PAID WILL BE REFUNDED (LESS DELIVERY AND HANDLING CHARGES).
1. The Licensor grants to the Customer a non-exclusive, non-transferable licence to use: (a) one copy of the Software on one of the
Customer’s handheld devices; and (b) the accompanying materials, including any manuals contained in the Software (the Materials), in
accordance with the terms and conditions of this Licence.
2. Where the Customer uses the Software on a handheld or any other device (the Device) in a vehicle, the Customer must not place,
secure or use the handheld device in a manner that may cause accidents, personal injury or property damage or in any way obstruct
the visibility of the Customer. The Customer is solely responsible for observing safe driving practices and will not operate the Software
while operating a vehicle.
3. The copyright and all other intellectual property rights in the Software and Materials (including any enhancements or modifications) are
vested in the Licensor. The Customer must not to rent, lease, reproduce, translate, adapt, vary, reverse-engineer or modify the Software
or Materials nor communicate the same to any person other than in accordance with the terms of this Licence.
4. The Customer may not copy the Software or Materials except that one copy of the Software may be made to the extent that such
copying is necessary for the Customer’s own backup purposes.
5. Except for the warranty provided by the Licensor for the product that includes the Software the Licensor expressly excludes to the
fullest extent permitted by law all representations or warranties, express or implied (except any which may not lawfully be excluded),
including the implied warranties of merchantability and fitness for a particular purpose.
6. The Licensor will not in any circumstances be liable under the law of tort, contract or otherwise for any indirect or consequential loss
or damage, including any loss of profits, however caused, arising in connection with the use of, or inability to use, the Software. If any
limitation or exclusion or liability contained in this Licence is held to be invalid for any reason and the Licensor becomes liable for loss
or damage that would otherwise have been excluded, that liability will be limited to the total amount actually paid by the Customer for
the Software.
7. The Licensor may terminate this Licence immediately if the Customer breaches any of its obligations under this Licence. Immediately
following termination of this Licence the Customer must deliver to the Licensor’s Representative, or destroy all copies of, the Software
and Materials in whatever form possessed by the Customer.
Limited Warranty Agreement
IMPORTANT: The following terms and conditions may vary from country to country.
Hardware Product
Navman warrants its products to be free from defects in materials or workmanship under normal use for one year from the date of
purchase (the Warranty Period) to the original owner (You). To claim under this warranty, You must return the product to the place of
purchase, or a service centre approved by Navman (Service Centre). You must produce an original sales receipt as proof of purchase.
You will be solely responsible for all shipping charges, freight, insurance and proper packaging to prevent breakage in transit. Navman
will, at its discretion, repair or replace any defective product or its components at no cost to You for parts and labour. The replacement
product or component takes on the warranty status of the original product or component. This is Your exclusive remedy for defective
products.
Limitations
This warranty does not apply to products that have been damaged or rendered defective: (a) as a result of incorrect installation, misuse,
mishandling, misapplication, accident, abuse, breakage or other external causes; (b) by operation outside the usage specifications
stated in the product documentation; (c) by modification or service other than by Navman or its approved Service Centres.
Software Product
Navman warrants that (a) the software will perform substantially in accordance with the accompanying written materials for a period
of 90 days from the date of purchase, and (b) any technical support provided by Navman or its approved Service Centres shall make
commercially reasonable efforts to solve any problem or issues. Some countries, states and jurisdictions do not allow limitations on
duration of an implied warranty, so the above limitation of 90 days may not apply
Limitation of Liability
To the fullest extent permitted by law, Navman will not be liable in any event, whether in tort (including negligence), contract or otherwise
for any damage including loss of profits, any consequential, indirect or special damage, loss or injury of any kind suffered by You or any
other person. Except as expressly set out in this warranty, Navman makes no other warranties, express or implied, including any implied
warranties of merchantability and fitness for a particular purpose. If any limitation or exclusion or liability contained in this warranty is held
to be invalid for any reason and Navman becomes liable for loss or damage that would otherwise have been excluded, such liability will
be limited to the total amount actually paid by You for the product.
Page 40

40
iCN 600 series | User Manual
Compliance
Operation is subject to the following two conditions: (1) this device may not cause interference, and (2) this device must accept any
interference, including interference that may cause undesired operation of the device.
Page 41

41
iCN 600 series | User Manual
Copyright
© 2004 Navman NZ Limited. Navman is a registered trademark of Navman NZ Limited. All rights reserved.
Microsoft® Windows® 98, ME, 2000 or XP, Microsoft® Internet Explorer are registered trademarks of Microsoft Corporation
SmartTM, Drive-AwayTM and Back-On-TrackTM are trademarks of Navman NZ Limited. All rights reserved..
Acrobat Reader® is a registered trademark of Adobe Systems Incorporated. All rights reserved.
All other trademarks and registrations are the property of their respective owners.
Published in New Zealand
MN000300A / LF000013A
Support for
New Zealand:
Navman NZ Ltd
13-17 Kawana Street
Northcote
Auckland
New Zealand
Phone: 0800 GONAVMAN
pcnsupport.nz@navman.com
www.navman.com
Support for
Europe:
Navman Europe Limited
4G Gatwick House
Peeks Brook Lane
Horley, Surrey RH6 9ST
United Kingdom
Phone: (44) 1293-780-500
support@navman-europe.com
www.navman-europe.com
Support for
the US and Canada:
Navman USA Limited
27142 Burbank
Foothill Ranch
CA 92610
United States of America
Phone: 866-9-NAVMAN
support@navmanusa.com
www.navmanusa.com
Support for
Australia:
Navman Australia Pty. Ltd
PO Box 479
Gladesville
NSW2111
Australia
Phone: (02) 9879 9000
pcnsupport.aus@navman.com
www.navman.com
Contact Us
 Loading...