

Page 1
Motorola Moto G 1st Generation Power and
Volume Buttons Replacement
This guide will show you how to replace broken or missing buttons on your Moto G.
Written By: Rebecca Montgomery
Motorola Moto G 1st Generation Power a…
Draft: 2018-02-08Guide ID: 30931 -
This document was generated on 2021-04-01 03:03:19 AM (MST).
© iFixit — CC BY-NC-SA www.iFixit.com Page 1 of 7
Page 2

INTRODUCTION
The buttons on the Moto G can sometimes get lost or misaligned. This guide will show you how to
replace them or fix them.
TOOLS:
iFixit Opening Tools (1)
Motorola Moto G 1st Generation Power a…
Draft: 2018-02-08Guide ID: 30931 -
This document was generated on 2021-04-01 03:03:19 AM (MST).
© iFixit — CC BY-NC-SA www.iFixit.com Page 2 of 7
Page 3
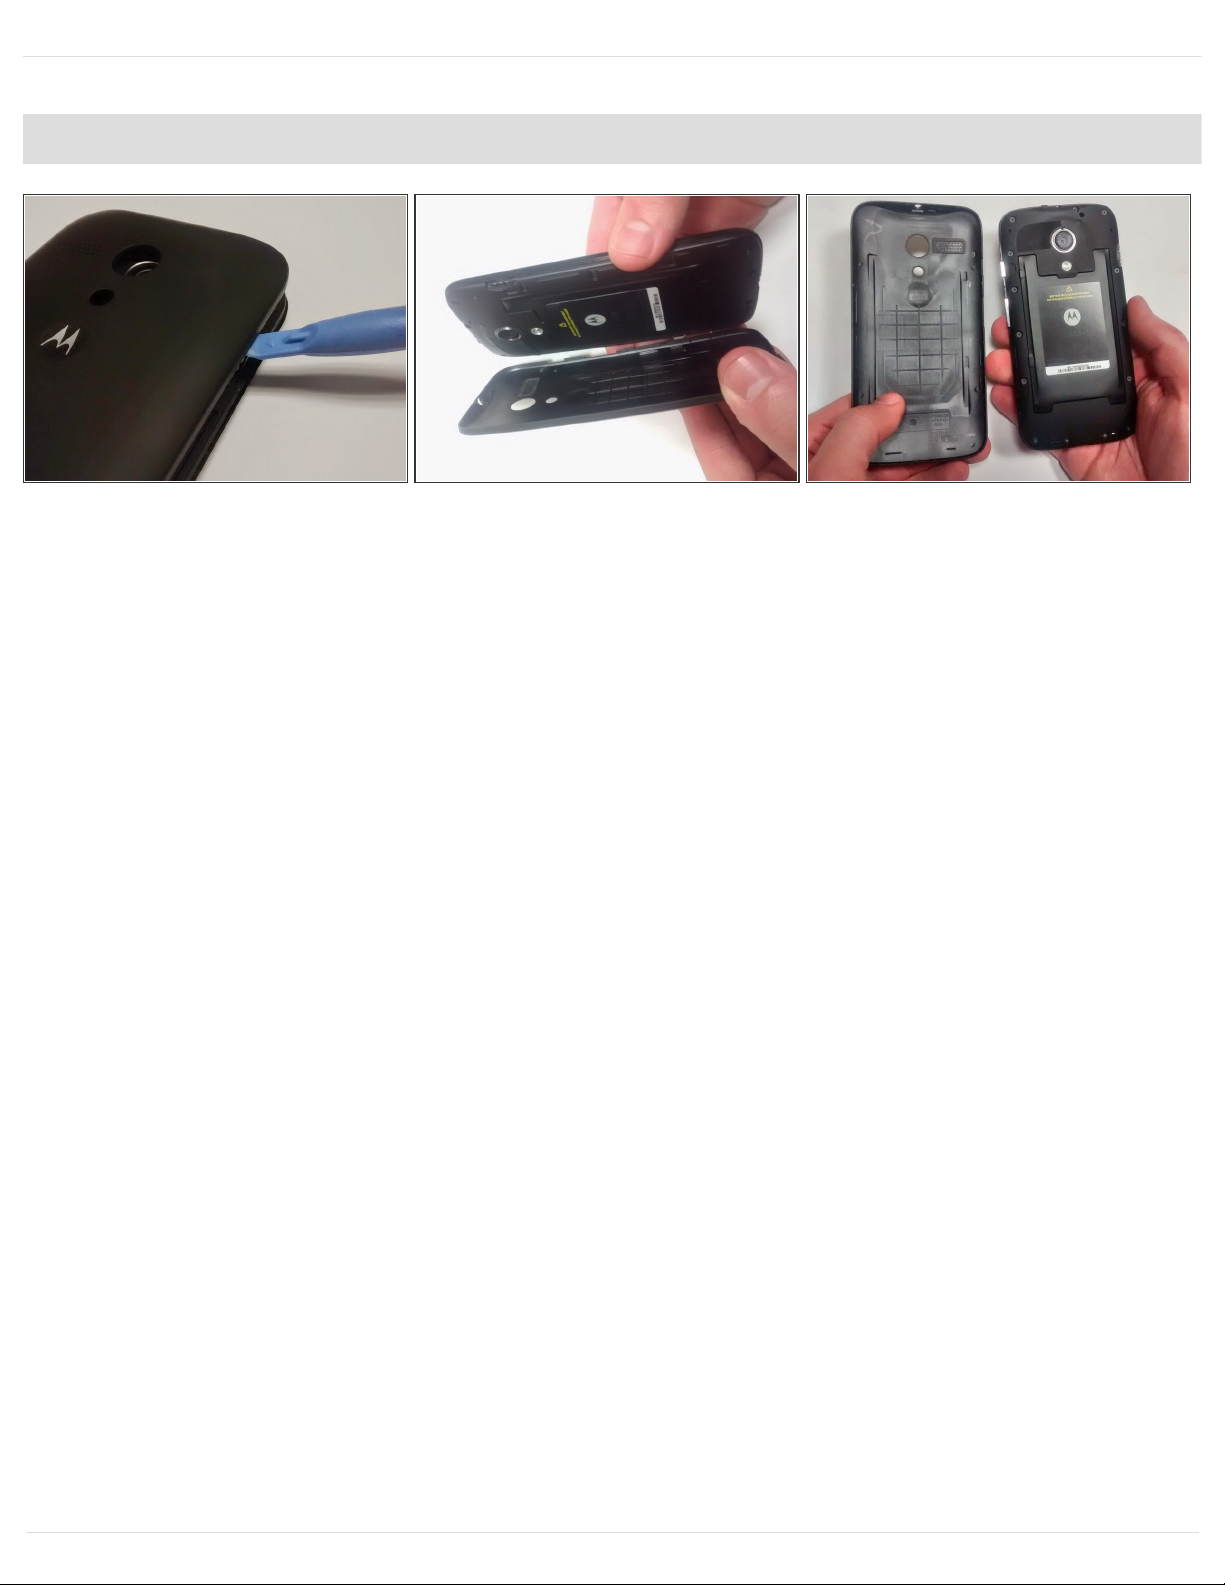
Step 1 — Removing the Cover
You can remove the outer cover on the back of the phone by using a plastic opening tool. After
removal the inner back cover will be exposed as shown.
This part is moderately difficult, especially if you've never taken the outer back cover off before this
point.
It may take you several tries, but please be patient. The cover is surprisingly flexible, but not
enough to withstand a lot of pressure.
Motorola Moto G 1st Generation Power a…
Draft: 2018-02-08Guide ID: 30931 -
This document was generated on 2021-04-01 03:03:19 AM (MST).
© iFixit — CC BY-NC-SA www.iFixit.com Page 3 of 7
Page 4
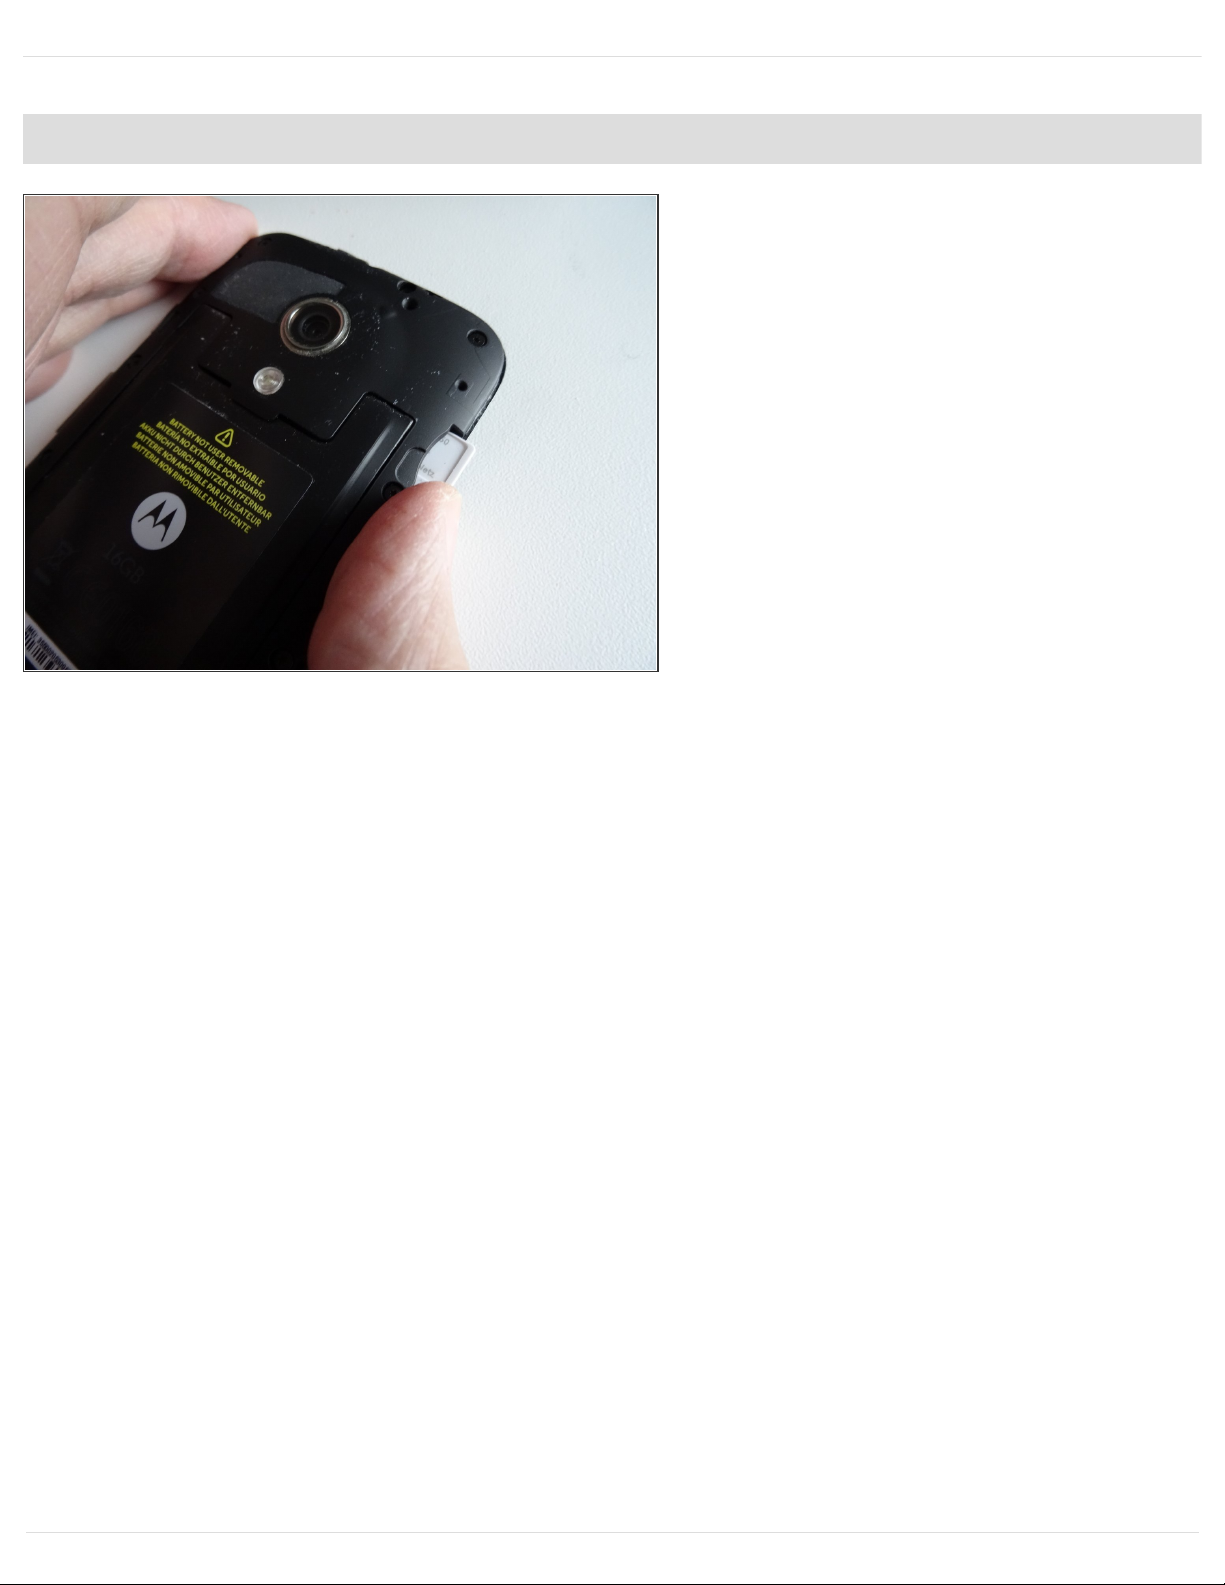
Step 2
Shut down the phone.
Push SIM card until it pops out.
Remove SIM card.
In some version of this phone, a
microSD memory card can be
installed. If so, you must also
remove these cards.
Be careful as to not damage the
microSD memory card. Unlike the
SIM card, pushing this in may not
spring release, as there may not
be an eject mechanism.
If there is no spring release eject
mechanism, hopefully your
microSD card has a ridge/raised
edge that you can push on with
your fingernail or plastic/rubber
tool to push the card out. This
may be difficult - be patient and
do not use excessive force/sharp
tools that could cause permanent
damage and permanent loss of
data.
Motorola Moto G 1st Generation Power a…
Draft: 2018-02-08Guide ID: 30931 -
This document was generated on 2021-04-01 03:03:19 AM (MST).
© iFixit — CC BY-NC-SA www.iFixit.com Page 4 of 7
Page 5

Step 3 — Removing the Back Plate
Using a T5 Torx screwdriver head, take out the 14 screws (3.5 mm diameter and 5 mm long) that
hold the back plate in place.
Make sure to keep all of the screws together, as they are very easily lost.
The magnetic project mat or a container is a great way to keep all the little metal screws as well as
other small metal pieces from being lost.
Step 4 — The Inside of your Phone
Use the plastic opening tool to take out the inner back cover after all the screws have been
removed.
This will expose the motherboard and the attached battery.
Take note that once the inner back cover is removed the volume and power buttons on the side
can easily fall out or be removed.
Motorola Moto G 1st Generation Power a…
Draft: 2018-02-08Guide ID: 30931 -
This document was generated on 2021-04-01 03:03:19 AM (MST).
© iFixit — CC BY-NC-SA www.iFixit.com Page 5 of 7
Page 6
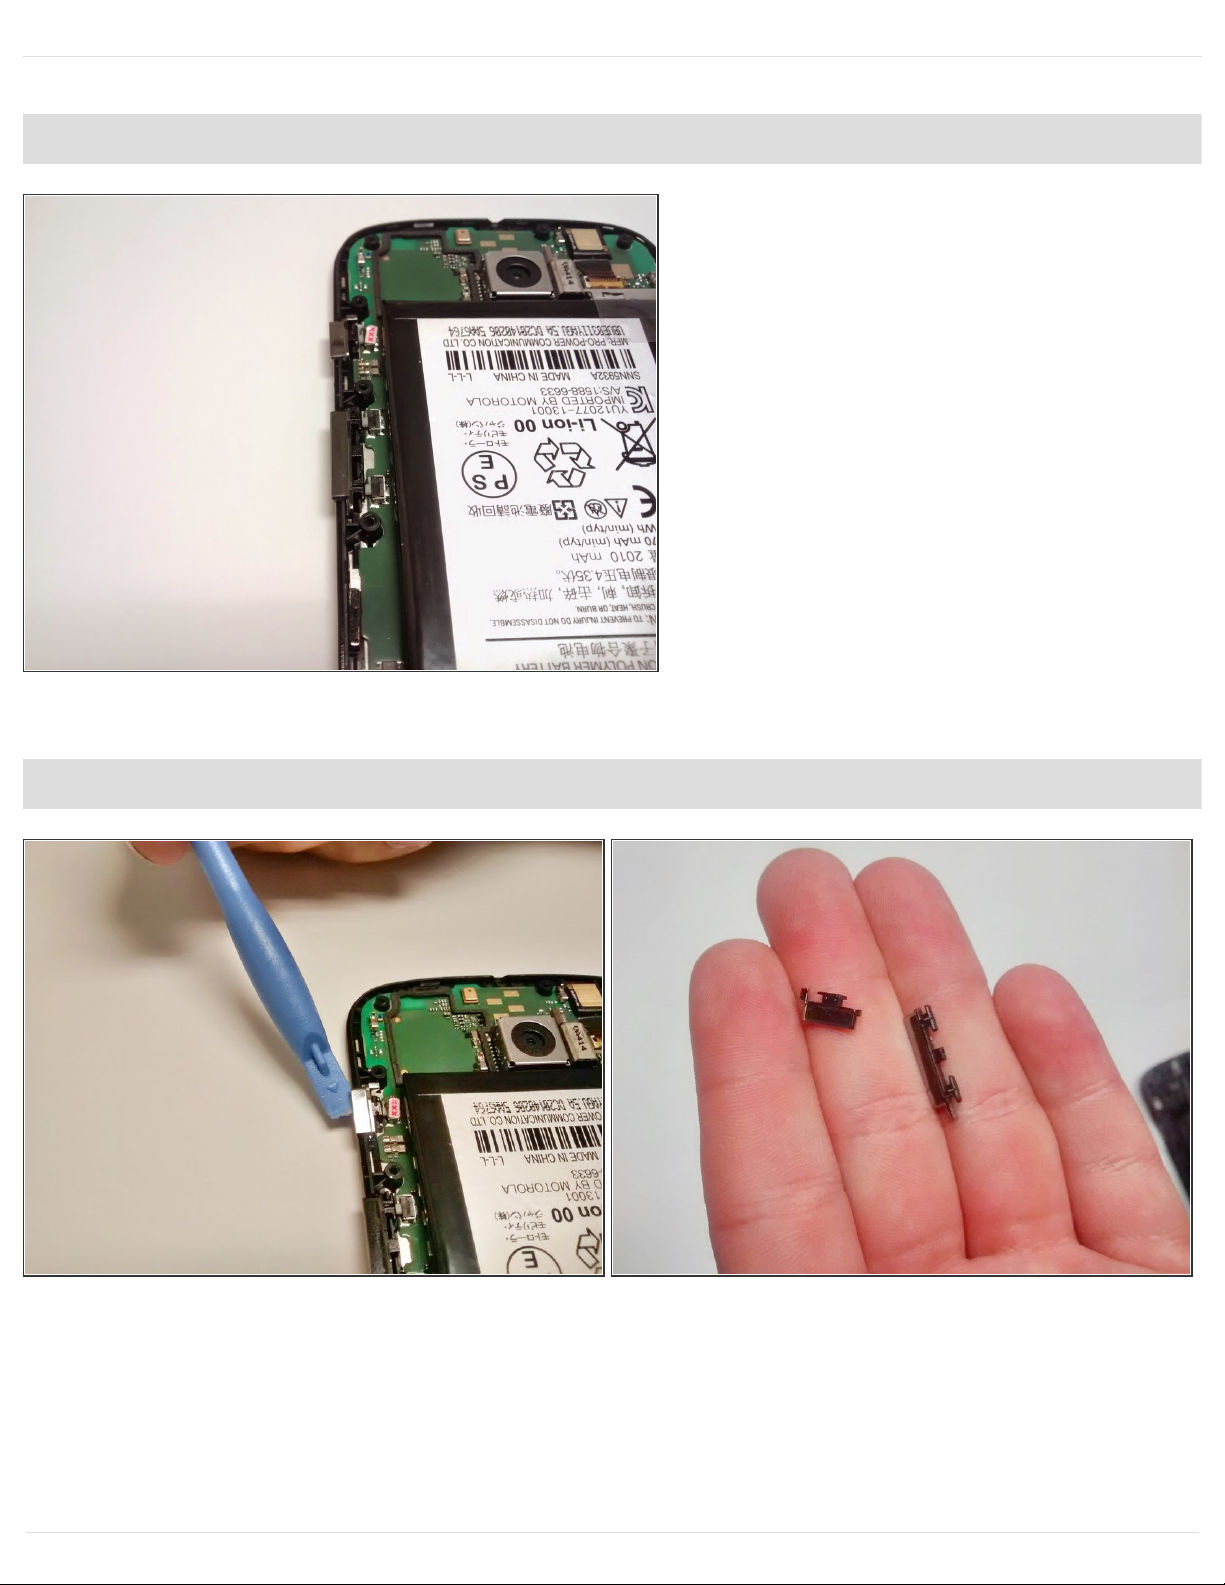
Step 5 — Locating the Buttons
The buttons are extremely easy to
replace and may fall out when
opening the phone.
They are located on the left side
when the front plate is facing down.
Step 6 — Removing the Buttons
Use a tool or your fingers to gently lift the button out of its socket.
To replace, line the new button up in the socket and press down.
The buttons are not secured in anyway, so securing the back inner cover before turning the device
over or jostling the device is a good idea. This will ensure buttons stay in place.
Motorola Moto G 1st Generation Power a…
Draft: 2018-02-08Guide ID: 30931 -
This document was generated on 2021-04-01 03:03:19 AM (MST).
© iFixit — CC BY-NC-SA www.iFixit.com Page 6 of 7
Page 7

To reassemble your device, follow these instructions in reverse order.
Motorola Moto G 1st Generation Power a…
Draft: 2018-02-08Guide ID: 30931 -
This document was generated on 2021-04-01 03:03:19 AM (MST).
© iFixit — CC BY-NC-SA www.iFixit.com Page 7 of 7
 Loading...