


W3985WPS
Operating instructions
for Washing machine
W 3985 WPS
To avoid the risk of accidents or
damage to the machine it is
essential to read these instructions
before it is installed and used for the
first time.
G
M.-Nr. 06 750 560

Caring for our environment
Disposal of the packing
material
The transport and protective packing
has been selected from materials which
are environmentally friendly for disposal
and can normally be recycled.
Ensure that any plastic wrappings,
bags etc. are disposed of safely and
kept out of the reach of babies and
young children. Danger of suffocation!
Rather than just throwing these
materials away, please ensure they are
offered for recycling.
Disposal of your old appliance
or machine
Electrical and electronic appliances /
machines often contain materials
which, if handled or disposed of
incorrectly, could be potentially
hazardous to human health and to the
environment. They are, however,
essential for the correct functioning of
your appliance or machine. Please do
not therefore dispose of your old
machine or appliance with your
household waste.
Please dispose of it at your local
community waste collection / recycling
centre and ensure that it presents no
danger to children while being stored
for disposal.
It should be unplugged or disconnected
from the mains electricity supply by a
competent person. The plug must be
rendered useless and the cable cut off
directly behind it to prevent misuse.
See the "Warning and Safety" section of
this booklet for further details.
2

Contents
Caring for our environment. . . . . . . . . . . . . . . . . . . . . . . . . . . . . . . . . . . . . . . . . . 2
Disposal of the packing material . . . . . . . . . . . . . . . . . . . . . . . . . . . . . . . . . . . . . . . 2
Disposal of your old appliance or machine . . . . . . . . . . . . . . . . . . . . . . . . . . . . . . . 2
Warning and Safety instructions . . . . . . . . . . . . . . . . . . . . . . . . . . . . . . . . . . . . . 6
Operating the washing machine. . . . . . . . . . . . . . . . . . . . . . . . . . . . . . . . . . . . . 10
Control panel . . . . . . . . . . . . . . . . . . . . . . . . . . . . . . . . . . . . . . . . . . . . . . . . . . . . . 10
Displays . . . . . . . . . . . . . . . . . . . . . . . . . . . . . . . . . . . . . . . . . . . . . . . . . . . . . . . . . 11
Before using for the first time. . . . . . . . . . . . . . . . . . . . . . . . . . . . . . . . . . . . . . . 13
Washing environmentally and economically. . . . . . . . . . . . . . . . . . . . . . . . . . . 16
Energy and water consumption . . . . . . . . . . . . . . . . . . . . . . . . . . . . . . . . . . . . 16
Detergent . . . . . . . . . . . . . . . . . . . . . . . . . . . . . . . . . . . . . . . . . . . . . . . . . . . . . 16
How to wash correctly. . . . . . . . . . . . . . . . . . . . . . . . . . . . . . . . . . . . . . . . . . . . . 17
Sort the laundry . . . . . . . . . . . . . . . . . . . . . . . . . . . . . . . . . . . . . . . . . . . . . . . . . . . 17
Select a programme . . . . . . . . . . . . . . . . . . . . . . . . . . . . . . . . . . . . . . . . . . . . . . . 18
Select a temperature/spin speed and extra option(s) . . . . . . . . . . . . . . . . . . . 18
Changing/saving a favourite programme . . . . . . . . . . . . . . . . . . . . . . . . . . . . . . . 19
Load the drum . . . . . . . . . . . . . . . . . . . . . . . . . . . . . . . . . . . . . . . . . . . . . . . . . . . . 20
Select the Timer (if required) . . . . . . . . . . . . . . . . . . . . . . . . . . . . . . . . . . . . . . . . . 21
Add detergent . . . . . . . . . . . . . . . . . . . . . . . . . . . . . . . . . . . . . . . . . . . . . . . . . . . . 22
Start the programme . . . . . . . . . . . . . . . . . . . . . . . . . . . . . . . . . . . . . . . . . . . . . . . 23
Remove the laundry when the programme has finished . . . . . . . . . . . . . . . . . . . . 23
Extra options . . . . . . . . . . . . . . . . . . . . . . . . . . . . . . . . . . . . . . . . . . . . . . . . . . . . 24
Short. . . . . . . . . . . . . . . . . . . . . . . . . . . . . . . . . . . . . . . . . . . . . . . . . . . . . . . . . . . . 24
Water plus . . . . . . . . . . . . . . . . . . . . . . . . . . . . . . . . . . . . . . . . . . . . . . . . . . . . . . . 24
Rinse hold . . . . . . . . . . . . . . . . . . . . . . . . . . . . . . . . . . . . . . . . . . . . . . . . . . . . . . . 24
Soak . . . . . . . . . . . . . . . . . . . . . . . . . . . . . . . . . . . . . . . . . . . . . . . . . . . . . . . . . . . . 24
Pre-wash . . . . . . . . . . . . . . . . . . . . . . . . . . . . . . . . . . . . . . . . . . . . . . . . . . . . . . . . 24
Spinning . . . . . . . . . . . . . . . . . . . . . . . . . . . . . . . . . . . . . . . . . . . . . . . . . . . . . . . . 25
Final spin speed . . . . . . . . . . . . . . . . . . . . . . . . . . . . . . . . . . . . . . . . . . . . . . . . . . 25
Rinse and interim spin . . . . . . . . . . . . . . . . . . . . . . . . . . . . . . . . . . . . . . . . . . . 25
To omit the final spin (Rinse hold). . . . . . . . . . . . . . . . . . . . . . . . . . . . . . . . . . . 25
To omit the spin between rinses and the final spin. . . . . . . . . . . . . . . . . . . . . . 25
Programme chart . . . . . . . . . . . . . . . . . . . . . . . . . . . . . . . . . . . . . . . . . . . . . . . . . 26
Programme sequence . . . . . . . . . . . . . . . . . . . . . . . . . . . . . . . . . . . . . . . . . . . . . 30
Garment care label symbols . . . . . . . . . . . . . . . . . . . . . . . . . . . . . . . . . . . . . . . . 32
3

Contents
Changing the programme sequence . . . . . . . . . . . . . . . . . . . . . . . . . . . . . . . . . 33
Cancelling a programme . . . . . . . . . . . . . . . . . . . . . . . . . . . . . . . . . . . . . . . . . . . . 33
Interrupting a programme . . . . . . . . . . . . . . . . . . . . . . . . . . . . . . . . . . . . . . . . . . . 33
Changing a programme. . . . . . . . . . . . . . . . . . . . . . . . . . . . . . . . . . . . . . . . . . . . . 33
Adding or removing laundry after a programme has started . . . . . . . . . . . . . . . . 34
Safety lock . . . . . . . . . . . . . . . . . . . . . . . . . . . . . . . . . . . . . . . . . . . . . . . . . . . . . . . 34
Detergent . . . . . . . . . . . . . . . . . . . . . . . . . . . . . . . . . . . . . . . . . . . . . . . . . . . . . . . 35
The correct detergent . . . . . . . . . . . . . . . . . . . . . . . . . . . . . . . . . . . . . . . . . . . . . . 35
Water softener . . . . . . . . . . . . . . . . . . . . . . . . . . . . . . . . . . . . . . . . . . . . . . . . . . . . 36
Washing with several components . . . . . . . . . . . . . . . . . . . . . . . . . . . . . . . . . . . . 36
Fabric conditioners and liquid starch . . . . . . . . . . . . . . . . . . . . . . . . . . . . . . . . . . 37
Automatic dispensing of fabric conditioner or liquid starch to laundry
at the end of a programme. . . . . . . . . . . . . . . . . . . . . . . . . . . . . . . . . . . . . . . . 37
Adding fabric conditioner or liquid starch separately . . . . . . . . . . . . . . . . . . . 37
Colour run and dye removers/dyes . . . . . . . . . . . . . . . . . . . . . . . . . . . . . . . . . . . . 37
Cleaning and care . . . . . . . . . . . . . . . . . . . . . . . . . . . . . . . . . . . . . . . . . . . . . . . . 38
External casing and fascia panel . . . . . . . . . . . . . . . . . . . . . . . . . . . . . . . . . . . . . 38
E-Cloth . . . . . . . . . . . . . . . . . . . . . . . . . . . . . . . . . . . . . . . . . . . . . . . . . . . . . . . 38
Extra cleaning. . . . . . . . . . . . . . . . . . . . . . . . . . . . . . . . . . . . . . . . . . . . . . . . . . 38
Cleaning the detergent dispenser drawer. . . . . . . . . . . . . . . . . . . . . . . . . . . . . . . 38
Cleaning the filter in the water inlet . . . . . . . . . . . . . . . . . . . . . . . . . . . . . . . . . . . . 40
Problem solving guide. . . . . . . . . . . . . . . . . . . . . . . . . . . . . . . . . . . . . . . . . . . . . 41
The programme does not start . . . . . . . . . . . . . . . . . . . . . . . . . . . . . . . . . . . . . . . 41
Problems with the load size indicator . . . . . . . . . . . . . . . . . . . . . . . . . . . . . . . . . . 42
General problems . . . . . . . . . . . . . . . . . . . . . . . . . . . . . . . . . . . . . . . . . . . . . . . . . 43
An unsatisfactory wash result . . . . . . . . . . . . . . . . . . . . . . . . . . . . . . . . . . . . . . . . 44
The drum door cannot be opened by pressing the a button . . . . . . . . . . . . . . . 45
Opening the drum door in the event of a blocked drain outlet and/or
power failure . . . . . . . . . . . . . . . . . . . . . . . . . . . . . . . . . . . . . . . . . . . . . . . . . . . . . 46
Blocked drain outlet . . . . . . . . . . . . . . . . . . . . . . . . . . . . . . . . . . . . . . . . . . . . . 46
After sales service . . . . . . . . . . . . . . . . . . . . . . . . . . . . . . . . . . . . . . . . . . . . . . . . 48
Future updates (PC) . . . . . . . . . . . . . . . . . . . . . . . . . . . . . . . . . . . . . . . . . . . . . 48
Appliance guarantee . . . . . . . . . . . . . . . . . . . . . . . . . . . . . . . . . . . . . . . . . . . . 48
Optional accessories . . . . . . . . . . . . . . . . . . . . . . . . . . . . . . . . . . . . . . . . . . . . 48
4

Contents
Installation and connection . . . . . . . . . . . . . . . . . . . . . . . . . . . . . . . . . . . . . . . . 49
Front view. . . . . . . . . . . . . . . . . . . . . . . . . . . . . . . . . . . . . . . . . . . . . . . . . . . . . . . . 49
Rear view . . . . . . . . . . . . . . . . . . . . . . . . . . . . . . . . . . . . . . . . . . . . . . . . . . . . . . . . 50
Installation surface. . . . . . . . . . . . . . . . . . . . . . . . . . . . . . . . . . . . . . . . . . . . . . . . . 51
Installing the washing machine . . . . . . . . . . . . . . . . . . . . . . . . . . . . . . . . . . . . . . . 51
Removing the transit bars . . . . . . . . . . . . . . . . . . . . . . . . . . . . . . . . . . . . . . . . . . . 51
Re-fitting the transit bars . . . . . . . . . . . . . . . . . . . . . . . . . . . . . . . . . . . . . . . . . . . . 53
Levelling the machine . . . . . . . . . . . . . . . . . . . . . . . . . . . . . . . . . . . . . . . . . . . . . . 54
Screwing out and adjusting the feet. . . . . . . . . . . . . . . . . . . . . . . . . . . . . . . . . 54
Building under a continuous worktop/in a kitchen run . . . . . . . . . . . . . . . . . . . 55
Washer and Dryer stack . . . . . . . . . . . . . . . . . . . . . . . . . . . . . . . . . . . . . . . . . . 55
The Miele Waterproof system . . . . . . . . . . . . . . . . . . . . . . . . . . . . . . . . . . . . . . . . 56
Connection to the water supply . . . . . . . . . . . . . . . . . . . . . . . . . . . . . . . . . . . . . . . 57
Connection to the drainage system. . . . . . . . . . . . . . . . . . . . . . . . . . . . . . . . . . . . 59
Electrical connection U.K. . . . . . . . . . . . . . . . . . . . . . . . . . . . . . . . . . . . . . . . . . . . 60
Consumption data . . . . . . . . . . . . . . . . . . . . . . . . . . . . . . . . . . . . . . . . . . . . . . . . 61
Notes for test institutes: . . . . . . . . . . . . . . . . . . . . . . . . . . . . . . . . . . . . . . . . . . 61
Technical data . . . . . . . . . . . . . . . . . . . . . . . . . . . . . . . . . . . . . . . . . . . . . . . . . . . 62
Settings menu . . . . . . . . . . . . . . . . . . . . . . . . . . . . . . . . . . . . . . . . . . . . . . . . . . . 64
To open the Settings menu . . . . . . . . . . . . . . . . . . . . . . . . . . . . . . . . . . . . . . . . . . 64
Language J . . . . . . . . . . . . . . . . . . . . . . . . . . . . . . . . . . . . . . . . . . . . . . . . . . . . . . 64
Time of day . . . . . . . . . . . . . . . . . . . . . . . . . . . . . . . . . . . . . . . . . . . . . . . . . . . . . . 65
Water plus . . . . . . . . . . . . . . . . . . . . . . . . . . . . . . . . . . . . . . . . . . . . . . . . . . . . . . . 66
Gentle action . . . . . . . . . . . . . . . . . . . . . . . . . . . . . . . . . . . . . . . . . . . . . . . . . . . . . 66
Suds cooling . . . . . . . . . . . . . . . . . . . . . . . . . . . . . . . . . . . . . . . . . . . . . . . . . . . . . 66
Code . . . . . . . . . . . . . . . . . . . . . . . . . . . . . . . . . . . . . . . . . . . . . . . . . . . . . . . . . . . 67
Temperature. . . . . . . . . . . . . . . . . . . . . . . . . . . . . . . . . . . . . . . . . . . . . . . . . . . . . . 69
Buzzer . . . . . . . . . . . . . . . . . . . . . . . . . . . . . . . . . . . . . . . . . . . . . . . . . . . . . . . . . . 69
Keypad tones. . . . . . . . . . . . . . . . . . . . . . . . . . . . . . . . . . . . . . . . . . . . . . . . . . . . . 69
Display contrast . . . . . . . . . . . . . . . . . . . . . . . . . . . . . . . . . . . . . . . . . . . . . . . . . . . 69
Standby . . . . . . . . . . . . . . . . . . . . . . . . . . . . . . . . . . . . . . . . . . . . . . . . . . . . . . . . . 70
Memory . . . . . . . . . . . . . . . . . . . . . . . . . . . . . . . . . . . . . . . . . . . . . . . . . . . . . . . . . 70
Miele{home . . . . . . . . . . . . . . . . . . . . . . . . . . . . . . . . . . . . . . . . . . . . . . . . . . . . . 71
Remote access . . . . . . . . . . . . . . . . . . . . . . . . . . . . . . . . . . . . . . . . . . . . . . . . . . . 73
5

Warning and Safety instructions
To avoid the risk of accidents and
damage to the machine please read
these instructions carefully before
using it for the first time. They
contain important information on its
safety, use and maintenance.
Keep these instructions in a safe
place and ensure that new users are
familiar with the content. Pass them
on to any future owner of the
machine.
Correct usage
Only use the washing machine to
wash items which are specified by
the manufacturer to be
machine-washable on the wash-care
label, and textiles composed of
hand-washable wool or wool blend
fabrics as well as satin, lace, silk and
other hand-washable garments. Any
other applications may be dangerous.
The manufacturer is not liable for
damage resulting from improper use or
operation.
Technical safety
Before setting up the machine,
check it for any externally visible
damage.
Do not install or use a damaged
machine.
the data plate match the mains
electricity supply. If in any doubt,
consult a qualified electrician.
when continuity is complete between
the machine and an effective earthing
system which complies with local and
national safety regulations. It is most
important that this basic safety
requirement is present and regularly
tested, and where there is any doubt
the household wiring system should be
inspected by a qualified electrician.
The manufacturer cannot be held liable
for the consequences of an inadequate
earthing system (e.g. electric shock).
extension lead. Extension leads do not
guarantee the required safety of the
machine (e.g. danger of overheating).
Unauthorised repairs could result in
unforeseen dangers for the user, for
which the manufacturer cannot accept
liability. Repairs should only be
undertaken by a Miele approved
technician.
Ensure current is not supplied to the
machine until after maintenance or
repair work has been carried out.
Before connecting the machine,
ensure that the connection data on
The electrical safety of this
machine can only be guaranteed
Do not connect the machine to the
mains electricity supply by an
The machine is built in accordance
with current safety requirements.
6

Warning and Safety instructions
The machine is only completely
isolated from the electricity supply
when:
it is switched off at the wall socket
–
and the plug is withdrawn, or
it is switched off at the mains, or
–
the mains fuse is disconnected, or
–
the screw-out fuse is removed (in
–
countries where this is applicable).
The Miele "Water protection
system" protects from water
damage provided the following
conditions have been met:
– the machine is correctly plumbed in
and connected to the electricity
supply.
– if a fault has been identified, the
machine must be examined by a
competent person before further use,
and repaired if necessary.
Faulty components must only be
replaced by genuine Miele original
spare parts. Only when these parts are
fitted can the safety standards of the
machine be guaranteed.
If the connection cable is faulty it
must only be replaced by a Miele
approved service technician to protect
the user from danger.
In countries where there are areas
which may be subject to infestation
by cockroaches and other vermin, pay
particular attention to keeping the
machine and its surroundings in a
clean condition at all times. Any
damage which may be caused by
cockroaches or other vermin will not be
covered by the guarantee.
Use
This equipment may only be used
in mobile installations such as
ships, caravans, aircraft etc. if a risk
assessment of the installation has been
carried out by a suitably qualified
engineer.
Do not install your washing
machine in rooms where
temperatures below freezing may
occur. Frozen hoses may burst or split.
The reliability of the electronic control
unit may be impaired at temperatures
below freezing point.
Before using the machine for the
first time, check that the transit
fittings at the rear of the machine have
been removed (see section on
"Installation"). During spinning, a transit
fitting which is still in place may result in
damage to both the machine and
adjacent furniture or appliances.
7

Warning and Safety instructions
Turn off the stopcock if the
machine is to be left for any length
of time (e.g. holiday), especially if there
is no floor drain (gully) in the immediate
vicinity.
Flooding danger.
If hooking the drain hose into a
wash basin, check that the water can
drain off quickly enough to prevent the
sink from overflowing. Make sure the
drain hose is secure, so that the force
of the water flowing out of the hose
does not dislodge it.
Take care to ensure that foreign
objects (e.g. nails, pins, coins,
paper clips) do not find their way into
the machine with the laundry. These
may damage components of the
machine (e.g. suds container, drum),
which in turn can result in damage to
the laundry.
If the correct amount of detergent
is dispensed, the machine should
not need to be descaled. If, however,
you do wish to descale the machine
only use proprietary non-corrosive
descaling agents and strictly observe
the instructions on the packaging. If in
doubt contact the Miele Customer
Service Dept. or your Miele Dealer.
Textiles which have been
pre-treated in solvent based
cleaning agents must be thoroughly
rinsed in clean water before being
washed in the machine.
Never use solvent based cleaning
agents, e.g. those containing
benzene, in this machine, as this may
result in damage to component parts
and create toxic fumes. Such agents
also pose a fire and explosion hazard.
Never use solvent based cleaning
agents, e.g. those containing
benzene, to clean the outside surfaces
of this machine. They can cause
damage to plastic surfaces.
Only use dyes specified by the
manufacturer as being suitable for
use in a domestic washing machine.
Always observe the manufacturer's
instructions carefully.
Colour run and dye removers
contain sulphur compounds which
can cause damage such as corrosion.
Do not use these products in this
machine.
Always make sure the drum is
stationary before reaching into it to
remove laundry. Reaching into a
moving drum is extremely dangerous.
8

Warning and Safety instructions
Safety with children
This machine is not a toy! To avoid
the risk of injury do not allow
children to play on or near it or to play
with the controls. Supervise its use by
the elderly or infirm, and supervise
children whilst you are operating the
machine.
For machines with a 'porthole'
door, remember that the porthole
glass will be hot when washing at very
high temperatures.
Do not let children touch it.
Accessories
Accessory parts may only be fitted
when expressly approved by Miele.
If other parts are used, guarantee,
performance and product liability
claims will be invalidated.
Disposal of your old machine
Before discarding an old machine,
switch it off at the wall socket and
unplug it. Render the plug useless. Cut
off the cable directly behind the
machine to prevent misuse. This should
be done by a competent person.
The manufacturer cannot be held
liable for damage caused by
non-compliance with these Warning
and Safety instructions.
9

Operating the washing machine
Control panel
a Display
See the following pages for more
information.
b Short cut buttons
For selecting an individual washing
programme quickly. These buttons
can be programmed to select your
own favourite wash programmes.
c Start button
d PC / Optical interface
This is used by service technicians
to run diagnostic checks on your
machine and can also be used to
update programming data in the
future.
e Multi-function selector
This is used to select menu options
(by turning it) and to confirm your
selection (by pressing it).
f s button
For switching the washing machine
on and off.
g a button
Opens the machine door.
10

Displays
Entry menu
Operating the washing machine
1 Cottons 60°C
2 Minimum iron 40°C Settings F...
3 Automatic 40°C
4 Woollens H 30°C 15:00
When the machine is switched on, the entry menu (with
default settings) appears and
highlighted.
Multi-function selector
Turning the multi-function selector moves the highlighting to
the next option.
Pressing the multi-function selector selects the highlighted
option.
Short cut buttons
Pressing a short cut button selects one of the four favourite
programmes shown on the left of the display. You can
customise the favourite programmes to suit your own
requirements.
The short cut buttons have different functions in the other
menus. Where this is the case, an arrow H will appear in the
display above the short cut button, together with a
description of its function.
Programme selection ...
Programme selection
is
Programme selection
There are two ways of selecting a programme:
–
–
Option 1:
Select the
Programme selection
menu in the
display and confirm your selection by pressing the
multi-function selector.
Option 2:
Press short cut button 1, 2, 3 or 4. This will
automatically take you into the main menu of that
programme.
11

Operating the washing machine
Programme selection menu
Programme Back A
selection
You can use the multi-function selector to select any
programme. The highlighting will move up or down
depending on the direction the multi-function selector is
turned in. The HV arrows on the right of the display, indicate
further options. Pressing the multi-function selector takes you
to the main menu of the wash programme selected.
Wash programme main menu
Cottons 60°C 1600 rpm
Extras: None
Duration 1:19 h
Detergent
+
Turn the multi-function selector to select and highlight the
programme, temperature, spin speed or extra options.
Pressing the multi-function selector selects the highlighted
option and opens the relevant sub-menu.
Timer Y
Cottons
Minimum iron
Delicates H
+
Save
+
Back A
+
Settings menu
12
The sub-menus
Detergent
and
Timer
can be opened by
pressing the short cut button directly below them.
You return to the entry menu by pressing short cut button 4
below the word
The
Settings
Back
.
menu is used to alter the washing machine's
electronics to suit different requirements. See "Settings menu"
for more details.

Before using the machine for the first time ensure that it is
correctly installed and connected. See "Installation and
connection". Also check that the drain filter is securely
tightened to prevent the risk of water leaks during use.
The washing machine has a sensor which measures the
amount of laundry in the drum. This determines the amount of
detergent required. To allow the load size indicator to function
correctly, you must first run a wash programme without any
laundry and without detergent.
Open the stopcock.
^
Press the s button in.
^
If the washing machine is being switched on for the first time,
the welcome screen will appear.
The welcome screen will appear in the display every time
the washing machine is switched on until a programme
lasting longer than 1 hour has been completed.
Setting the language
Before using for the first time
Einstellungen èeština
Sprache F dansk
deutsch
english H
^
If the language shown is not the one you want, select the
language you do want by turning the multi-function
selector. Confirm your selection by pressing the
multi-function selector.
13

Before using for the first time
Setting the time (of day)
12:00
Set the time
Turn the multi-function selector to select the hour and press
^
it to confirm your selection. Now set the minutes. Pressing
the multi-function selector again saves the time of day in
memory.
Reminder to remove transport struts
To avoid the risk of damage, the transport struts must be
removed before the machine is used for the first time. See
"Installation and connection" for instructions on how to do
this.
^ Remove the transport struts (if this has not already been
done by your fitter). Then confirm that you want to continue
by pressing short cut button 4. The display will change to
show the entry menu.
Running your first programme
1 Cottons 60°C
2 Minimum iron 40°C Settings F...
3 Automatic 40°C
4 Woollens H 30°C 15:00
^
Press short cut button 1.
14
Programme selection ...

Before using for the first time
The main menu for the Cottons programme appears
Cottons 60°C 1600 rpm
Extras: None
Duration 1:19 h
Detergent
+
Press the flashing
^
Switch the washing machine off at the end of the
^
programme.
Before you can use the washing machine, the load sensor
has to be calibrated to zero as you would with bathroom
scales.
Calibrating the load sensor to zero
^ Switch on the washing machine.
^ Open the drum door.
Timer Y
+
Start
Save
button.
+
Back A
+
^ Press short cut button 1. The main menu for the
programme appears.
^ Press short cut button 1
Detergent
in until the display
shows:
Zero setting OK
^
Switch off the washing machine.
The machine is now ready for use.
Cottons
15

Washing environmentally and economically
Energy and water consumption
Water consumption and energy
–
usage are determined by the size of
the load.
To make the most out of your
machine, load the maximum dry load
for the programme you are using.
Use the
–
programmes for small loads.
When smaller amounts of laundry are
–
washed using the
programme, the automatic load
recognition system will reduce the
amount of water, time and energy
used. This may mean that the time
left shown in the display is adjusted
during the course of the wash
programme.
– Using the
instead of the
programme will give energy savings
of between 35% and 45%. This is
sufficient for most levels of soiling.
For stubborn or old stains, use the
Soak
Automatic
Cottons 60°C
extra option.
and
Express
Cottons
programme
Cottons 95°C
Detergent
Do not exceed the amounts of
–
detergent recommended by the
manufacturer on the packaging.
Adjust the dosage to the degree of
–
soiling of the laundry.
Reduce the amount of detergent for
–
smaller loads. Use the
sub-menu.
Choosing the correct Extra option
(Short, Soak, Pre-wash)
Select:
– A wash programme together with the
Short
extra option for light to normal
soiling where there are no obvious
marks.
– A wash programme without any extra
options for normal to heavy soiling
with visible staining.
– A wash programme together with the
Soak
extra option for heavily soiled
laundry.
–
The
Pre-wash
with large amounts of dirt (e.g. dust,
sand).
extra option for laundry
Detergent
16
When drying with a tumble dryer
–
Selecting the highest possible spin
speed for the wash programme will
save energy when drying in a tumble
dryer afterwards.
Sort the laundry
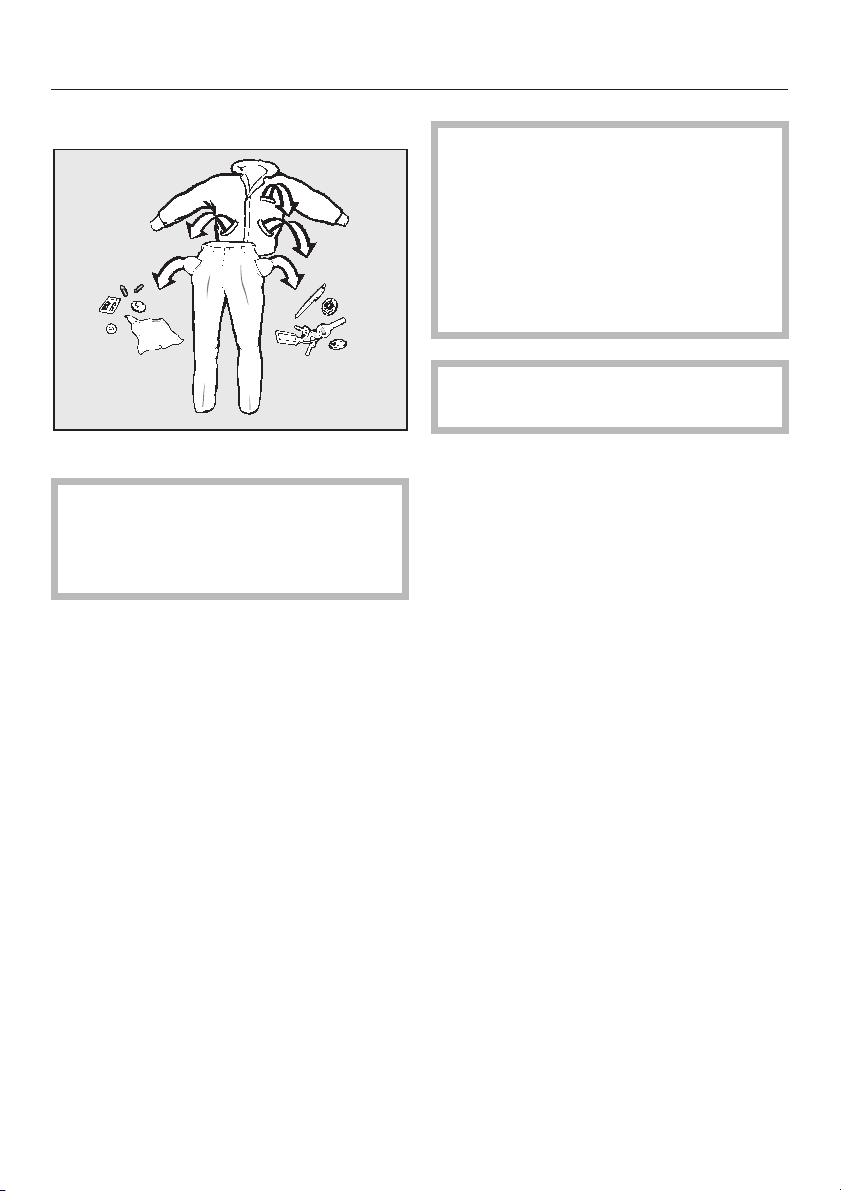
Empty all pockets.
^
Foreign objects (e.g. nails,
,
coins, paper clips, etc.) can cause
damage to garments and
components in the machine.
Removing marks
^ Badly soiled areas, stains etc. should
be cleaned as soon as possible,
preferably whilst still fresh. Spillages
should be carefully dabbed off using
a soft, colourfast cloth. Do not rub!
Badly soiled areas can be pre-treated
with liquid detergent, stain removers
etc. first, following the manufacturer's
instructions. With particularly stubborn
stains ask your dry cleaner for advice.
How to wash correctly
If you use a solvent-based
,
cleaning agent (e.g. one containing
benzene) to pre-treat a stain, make
sure that any plastic parts (e.g.
buttons) are protected, and that the
cleaning agent is rinsed off before
washing the garment in the
machine.
Do not use solvent-based
,
cleaning agents in this machine.
Sort the laundry by colour and by
^
care label. Most garments have a
textile care label in the collar or side
seam.
Dark textiles often contain excess dye
and should be washed separately
several times before being included in
a mixed load. Always wash whites and
coloureds separately.
– Curtains: Remove lead weights first
or place in a laundry bag.
–
Underwiring and collar stiffeners:
Any loose wiring in bras, shirt collar
stiffeners, etc. should be removed or
sewn in.
–
Close any zips, fasten hooks and
eyes etc before washing.
–
Fasten duvet covers etc. to prevent
small items from being rolled up
inside them.
Do not wash any items in this machine
which are specified by the
manufacturer as not washable on the
care label. (h symbol)
17

How to wash correctly
Switch on the washing machine
The interior drum lighting will come on.
Select a programme
You can select a programme either by:
using the appropriate short cut button to select one of the
–
four programmes listed in the display ("favourites"), or
going into the
–
Select a temperature/spin speed and extra option(s)
You can select these by turning the multi-function selector.
The option selected is then shown highlighted. Pressing the
multi-function selector selects the highlighted option and
opens the relevant sub-menu.
Temperature
Cottons 60°C 1600 rpm
Extras: None
Temperature from
Cold - 60°C
Spin speed
Cottons 60°C 1800 pm
Extras: None
Spin speed from
0 - 1800 rpm
Extra options
Programme selection
a
b
menu.
18
Cottons 60°C 1600 rpm
Extras
Short
Pre-wash Rinse hold
Soak Back A
Water plus

How to wash correctly
If you do not make a selection in the sub-menu within
approx. 20 seconds, the display will revert to the main
menu.
Your selection of temperature, spin speed and extra options
will now appear in the main menu.
Cottons 40°C 1200 rpm
Extras: Water plus
Duration 1:49 h
Detergent
+
Changing/saving a favourite programme
To save this programme as a favourite:
^ Press short cut button 3.
Cottons 40°C 1200 rpm
Previous: Cottons
Extras: None
Save to: 1 234
Timer Y
+
Save
+
Back A
+
60°C
1600 rpm
Back A
^
Use the multi-function selector to select the number you
want to save the programme to, and confirm your selection.
Your settings have now been saved and the favourite
programme will appear in the entry menu.
You can also save a programme as a favourite while it is
running.
19

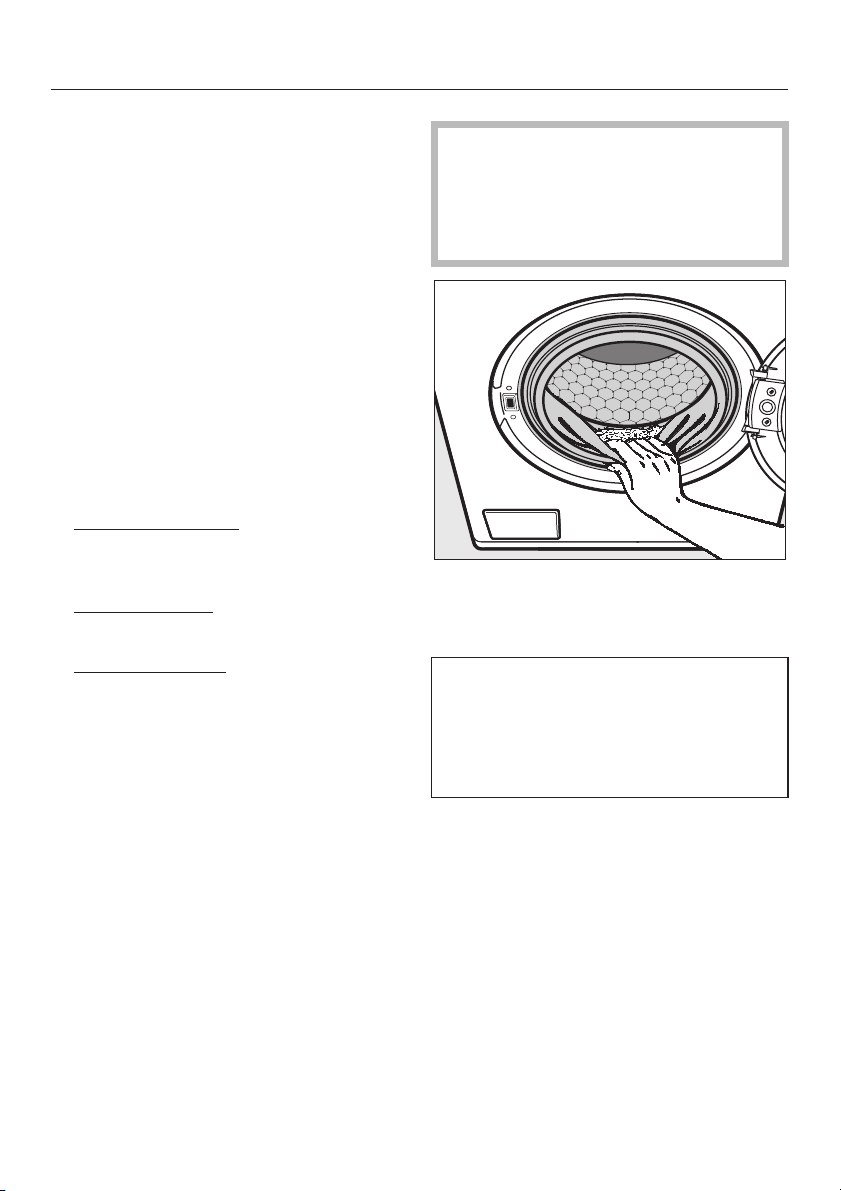
How to wash correctly
Load the drum
Press the a button to open the drum door.
^
The washing machine has a sensor which measures the
amount of laundry placed in the drum. The display shows
the percentage of the maximum load which has been
placed in the drum. The maximum load will depend on the
programme chosen.
In addition to the load size percentage, the amount of
detergent required is also shown as a % figure.
The Detergent sub-menu will appear.
Cottons 60°C 1600 rpm
Extras: None
Load Detergent
75% 75% A
The load is shown in the display in 25% steps. Loads of less
than 25% or an empty drum are shown as
amount of laundry exceeds the maximum load,
flash in the display. Note:
if you have overloaded a
<25%. If the
100% will
%
100% will not appear in the display
%
Cottons
programme.
20
The most efficient use of energy and water is achieved when
a full load is washed. However, do not overload as this
causes creases and reduces cleaning efficiency.
You can open the Detergent sub-menu at any time by
pressing short cut button 1.
^
Unfold the laundry and load loosely in the drum. Mixing
both large and small items gives better wash results and
also helps distribute the load evenly during spinning.
Make sure that no garments are caught between the drum
door and seal.
^
Shut the door with a gentle swing.

Select the Timer (if required)
You can use the timer to set the end time of a programme.
The start of a programme can be delayed from 30 minutes
up to a maximum of 24 hours, allowing you to make use of
night-time economy electricity rates, for example.
Press short cut button 2 to open the
^
Cottons 60°C 1600 rpm
Extras: None
15:03
^ Use the multi-function selector to select the programme
end time (when the first 30 minute stage is entered, the
programme end time will be adjusted to the next full or half
hour). Confirm your selection. The start of the programme
will now be delayed in parallel with the programme end
time you have selected.
To start the timer
Start at:
Finish:
How to wash correctly
Timer
sub-menu.
15:03
15:30
To cancel the timer
^ Press the
Start
button.
The delay start time will be shown counting down in minutes.
^
Press short cut button 4.
The actual load size can only be determined accurately by
the machine once the programme has started. The
programme end time may, therefore, be a bit later or
earlier than first indicated.
21

How to wash correctly
Add detergent
The percentage amounts in the display
will help you to add the correct
percentage amount of detergent
recommended by the manufacturer.
40% = Add slightly less than half
the amount recommended
50% = Add half the amount
recommended
60% = Add slightly more than half
the amount recommended
75% = Add three quarters of
the amount recommended
100% = the full amount of detergent
recommended
You also need to take the level of
soiling and water hardness into
account.
It is important to dispense the correct
amount, as . . .
. . . too little detergent results in:
–
Laundry not getting properly clean
and with time it may become grey
and hard to the touch.
–
Greasy particles clinging to the
laundry.
–
Limescale deposits on the heater
elements.
Pull out the detergent drawer and
^
add detergent to the compartments
as follows:
i
Detergent for the pre-wash (divide
the total recommended amount as
follows: add
2
and
/3to compartment j)
1
/3to compartment i
j
Detergent for the main wash,
including Soak if selected
§
Fabric conditioner or liquid starch
^
Close the detergent drawer.
See "Detergent" for further information.
. . . too much detergent results in:
–
Excessive foam which causes a low
level of agitation and poor wash,
rinse and spin results.
–
High water consumption (an
additional rinse cycle will
automatically switch in).
–
A burden to the environment.
22
Start the programme
Start
Press the flashing
^
The estimated programme duration and
the programme sequence will appear in
the display. During the first 10 minutes
the machine measures how much water
is being absorbed by the laundry. The
programme duration may be longer or
shorter depending on this absorbency
rate.
The drum lighting switches off once the
programme has started.
Once washing is in progress, you can
press the following short cut buttons:
button.
How to wash correctly
Check that all items have been
removed from the drum. Items left in
the drum could discolour other items
in the next wash or become
discoloured themselves.
– Button
current time of day and the estimated
end time of the programme.
– Button
programme as a favourite.
– Button
current programme. The suds are
pumped away immediately.
2
3
4
Timer
m: to call up the
Save
: to save the current
Cancel
: to cancel the
Remove the laundry when the
programme has finished
In the anti-crease phase after the
programme has finished, the following
will appear alternately in the display:
Anti-crease
and
Programme finished
Unload the drum before switching off
^
Press the a button to open the
drum door.
^
Remove the laundry.
^ Check the folds in the door seal for
any small articles, e.g. buttons, which
might be lodged there.
Important
Always remove the laundry before
switching the machine off. This is
important to ensure that the load size
indicator works correctly.
^
Switch the machine off with the
s button.
^
Close the drum door. Otherwise there
is the danger of objects being placed
inadvertently in the drum. If these
remained unnoticed and were
washed in the next load, they could
damage the laundry.
23
 Loading...