


KFN 14943 SD

Operating and Installation
Instructions
Fridge-Freezer Combination
KFN 14943 SD ed
To prevent accidents
and machine damage
read these instructions
before
installation or use.
en-CA
M.-Nr. 07 589 450
Avoid the risk of electrical shock
,
- Plug into a grounded 3-prong
outlet.
- Do not move the ground plug.
- Do not use an adapter.
- Do not use an extension cord.
Failure to follow these instructions
can result in death, fire, or electrical
shock.
Improper connection of the
equipment grounding conductor
may result in electric shock.
If you are in any doubt as to whether
the appliance has been properly
grounded, have the appliance
checked by a qualified electrician or
service technician.
Electrical information
The appliance is supplied with a
UL-listed, 3-wire power cord and
NEMA 5-15 P plug ready for connection
to a 120 V, 60 Hz supply.
The fuse rating is 15 amps.
The appliance requires a 3-wire
receptacle.
The receptacle must be installed by a
licened electrician only.
In the case of side-by-side installations,
a separate outlet must be used for each
appliance.
Ideally, the power outlet should be next
to the appliance and easily accessible.
Do not connect the appliance to the
power supply by an extension cord.
Extension cords do not guarantee the
required safety of the appliance
(danger of overheating).
Installation, repairs and other work
by unqualified persons could be
dangerous. The manufacturer will
not be held responsible for damage
or injury arising from unauthorized
work.
Before installing the appliance,
verify that the voltage, load and
circuit rating information found on
the data plate match the household
electrical supply.
If there are any questions regarding the
electrical connection of this appliance
to the power supply, please consult a
licensed electrician or call the Miele
Technical Service.
V 1-800-565-6435
If any changes are needed to the
household wiring or power supply, this
work must be performed by a qualified
electrician.
45
Installation information
Do not place any devices that
produce heat (such as a toaster or
microwave) on top of the appliance.
This would increase the energy
consumption of the appliance!
If the room is too cold, it will cause the
cooling system in the appliance to
switch off for too long. This may lead to
higher temperatures in the appliance
and the frozen food may even start
thawing!
This fridge/freezer should not be
placed side-by-side with a second
model.
Because the appliance does not
have heated side walls, a
side-by-side arrangement can lead
to the build-up of condensation
water.
Contact your dealer for advice.
Location
The appliance should not be installed
directly next to a heat source (such as
a kitchen range or a heater) or in direct
sunlight. The higher the ambient
temperature, the longer the appliance
will run and the higher the energy
consumption.
Choose a dry, well-ventilated room for
installation.
Climate range
The appliance is designed for use
within a certain climate range (room
temperature range) and should not be
used outside this range. The climate
range is stated on the data plate inside
the appliance.
Proper ventilation
The air behind the appliance gets
warm. In order to ensure adequate
ventilation, you must make sure that the
ventilation slits are not covered or
blocked in any way.
Also, the ventilation slits must be
dusted/cleaned on a regular basis.
Installation
^ First remove any cable clips from the
rear of the appliance.
^ Check that all the parts on the rear of
the appliance are free to move.
Remove any obstructions.
^ Gently slide the appliance into the
desired location.
^
The rear of the appliance can be
directly against the wall.
Climate range Room temperature
SN
N
ST
T
46
+10 °C to +32 °C
+16 °C to +32 °C
+16 °C to +38 °C
+16 °C to +43 °C
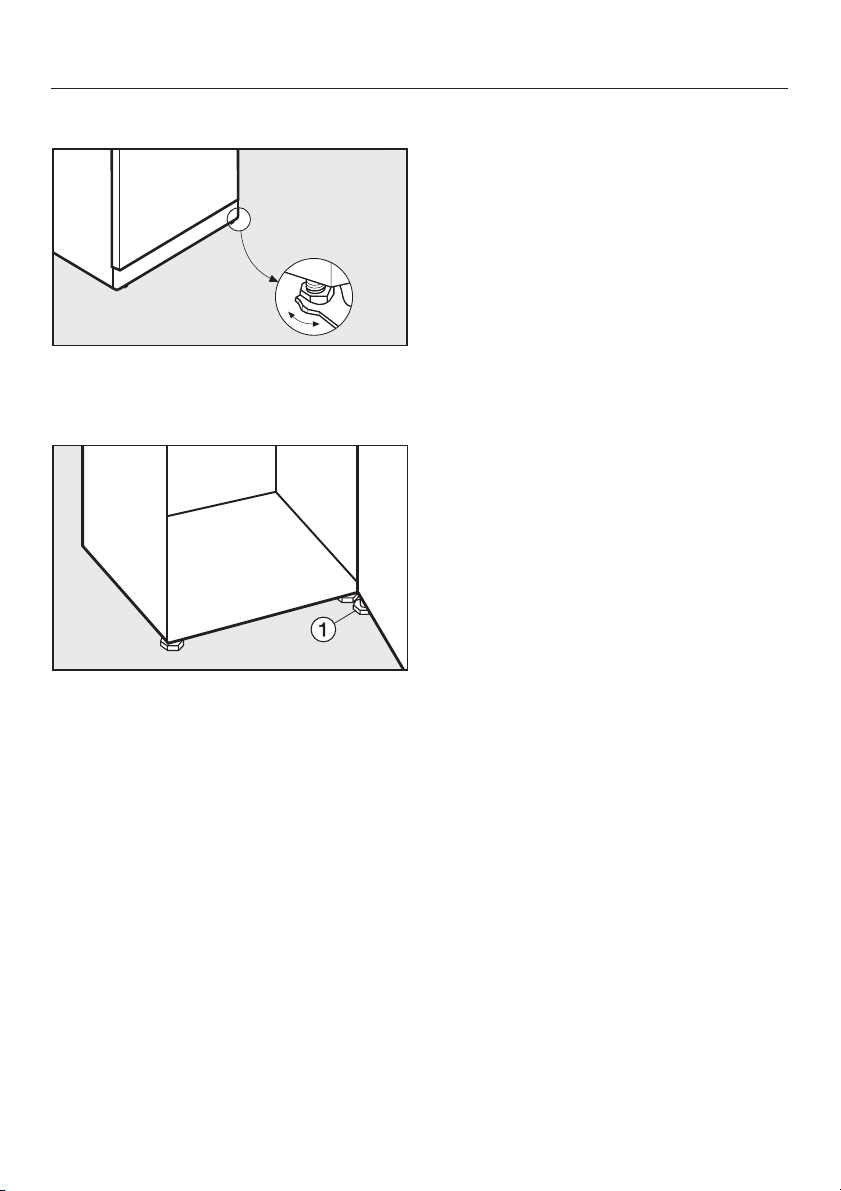
Adjustments
Use the wrench provided to adjust
^
the feet as needed, so that the
appliance is level.
Installation information
^ If necessary, unscrew the foot a
from the hinge bracket in order to
support the appliance door.
47
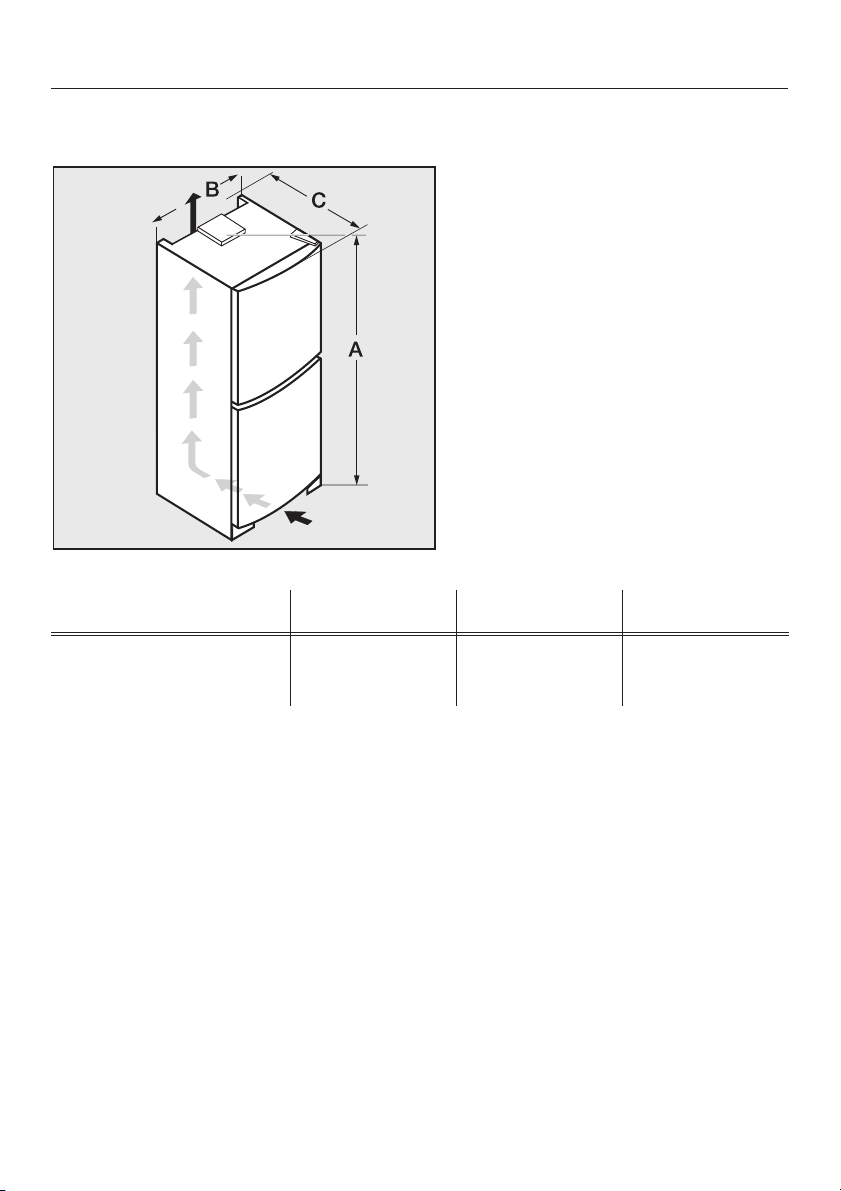
Installation information
Appliance dimensions
ABC
KFN 14943 SD ed 2020 750 630
48
The appliance comes with right-hand
hinging. If left-hand door hinging is
preferred, then follow these instructions
to change the door hinge:
You will need the following tools:
a crosstip screwdriver,
–
a flathead screwdriver,
–
various sizes of Torx screwdrivers,
–
a fork wrench.
–
Always change the door hinging
with the assistance of another
person.
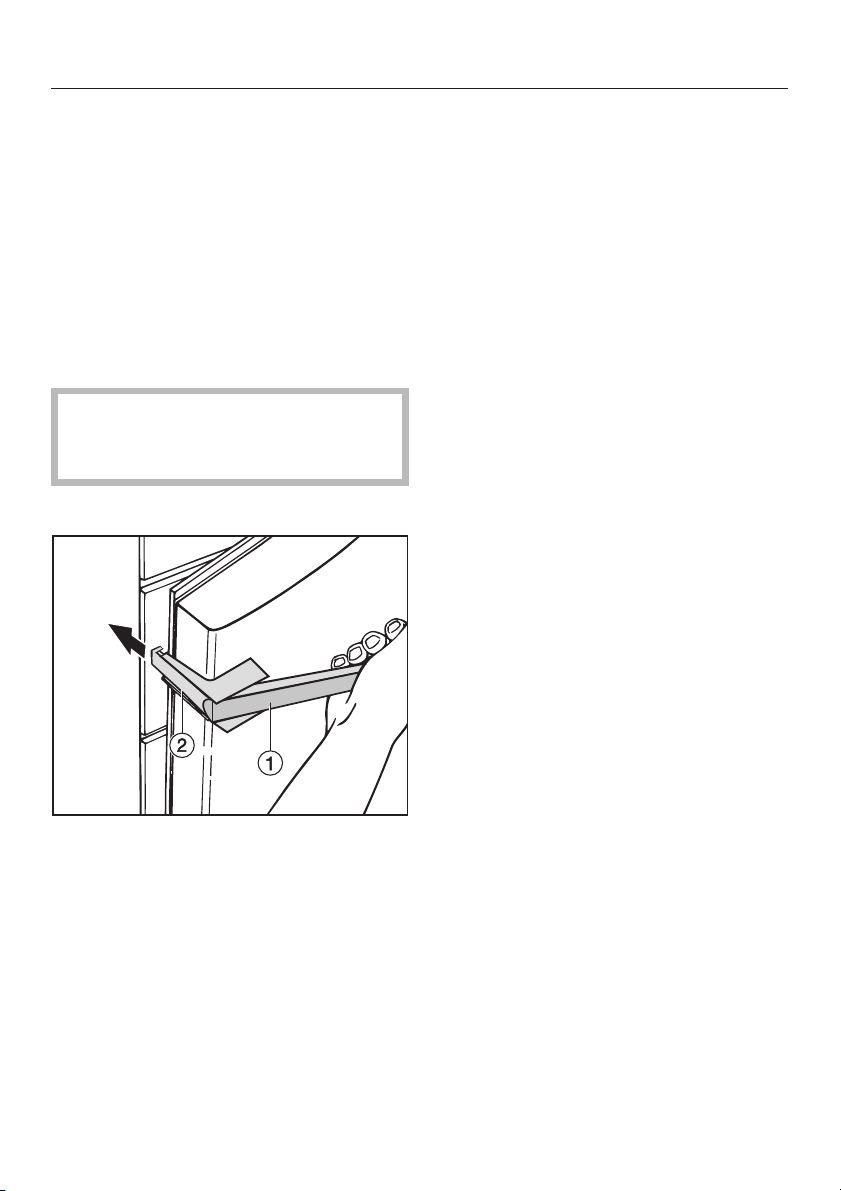
Removing the door handles:
Changing the door hinging
^
When you pull on the door handle a,
the sidebar b moves backwards.
^
Pull the sidebar b backwards out of
the track.
^
Now loosen the 4 screws (Torx 15) in
the mounting plate and remove the
handle.
^
Remove the covers from the opposite
side and place them on the holes that
are now vacant.
49
 Loading...